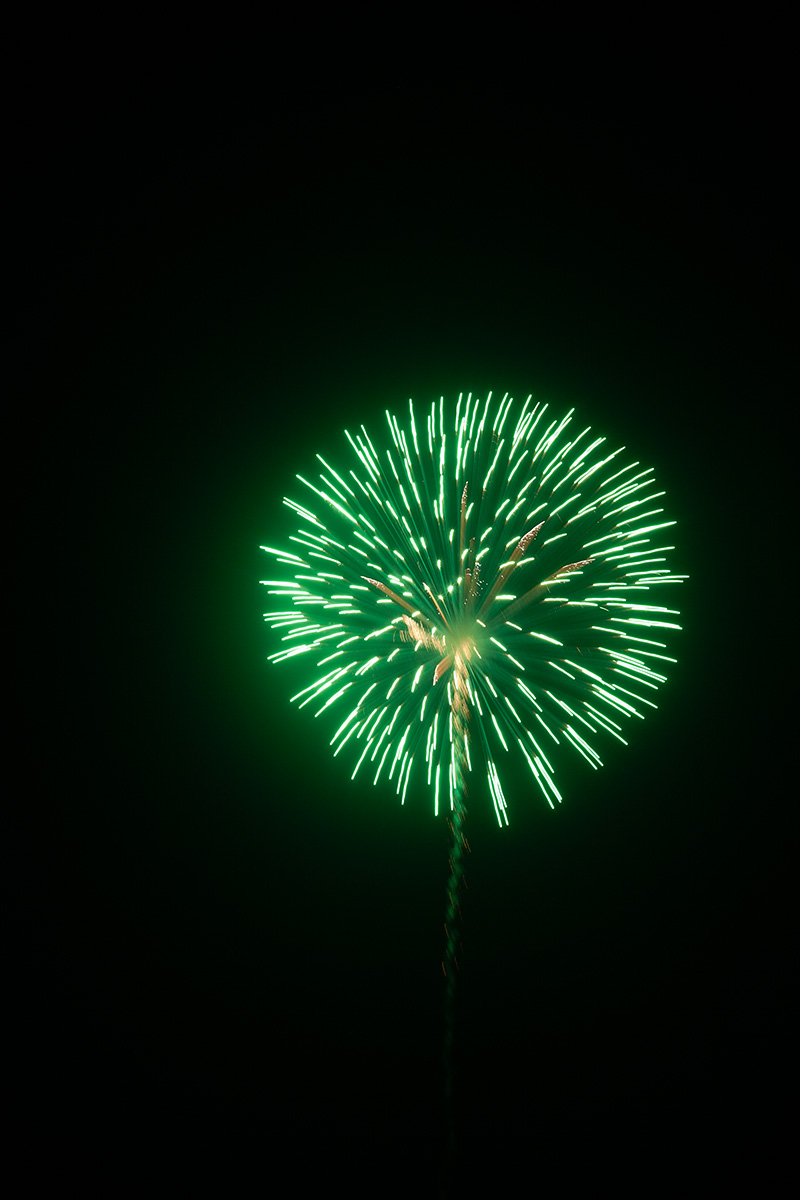
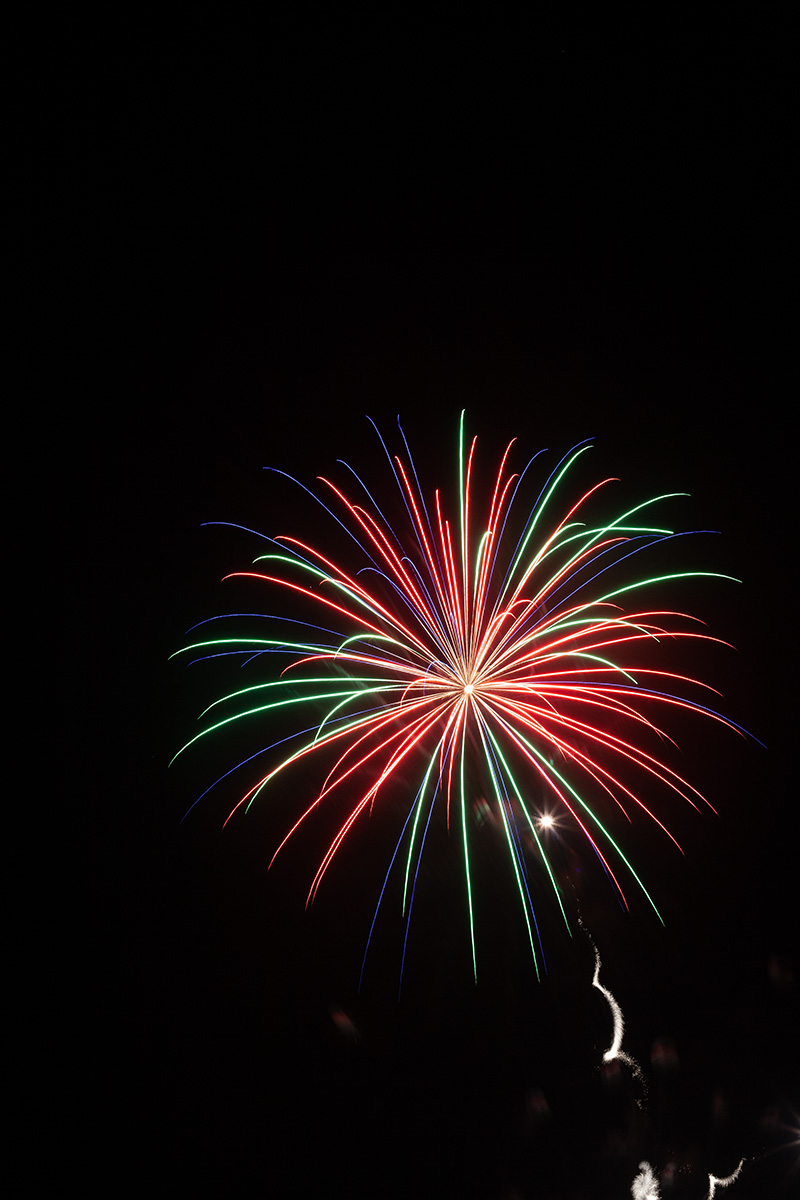
So, you know how to take photos of fireworks, but what can you do with them now? Maybe you have a great composition of a city, with fireworks lighting the sky above, or maybe, like me, you just got a few shots of fireworks alone in an empty sky.

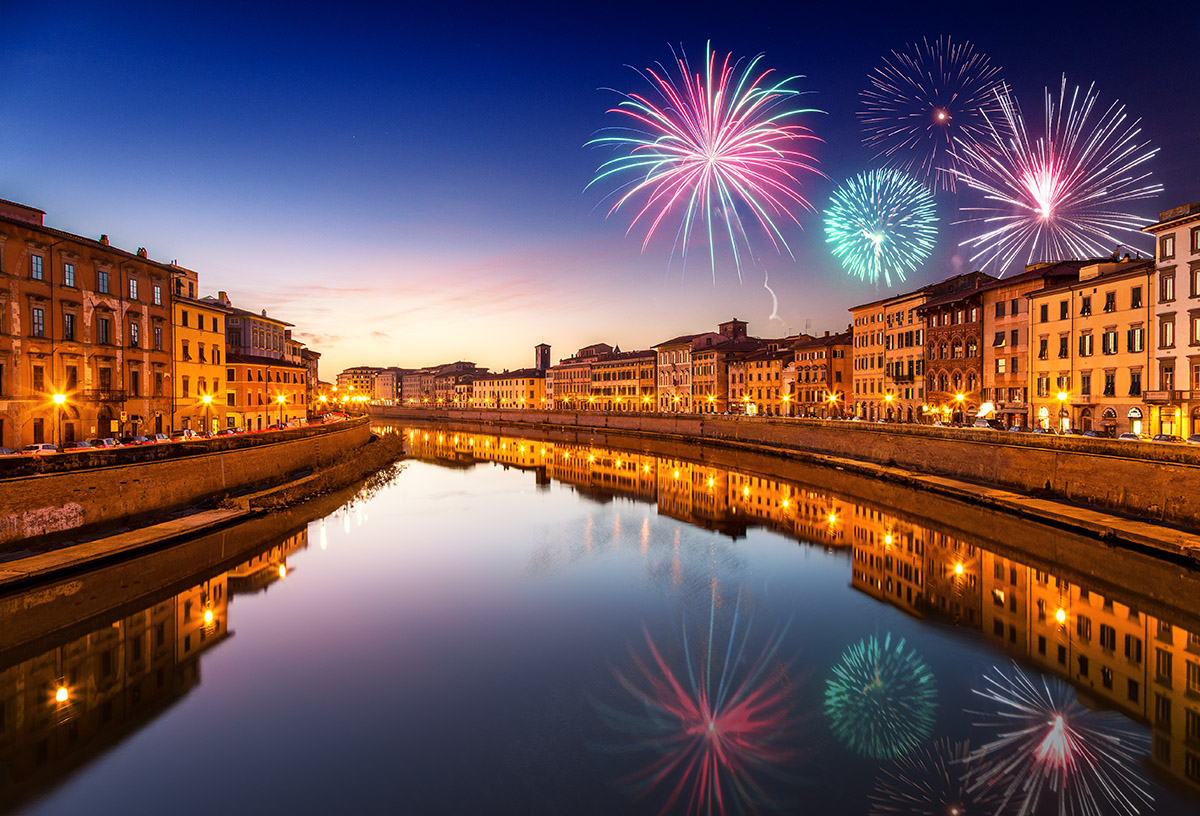
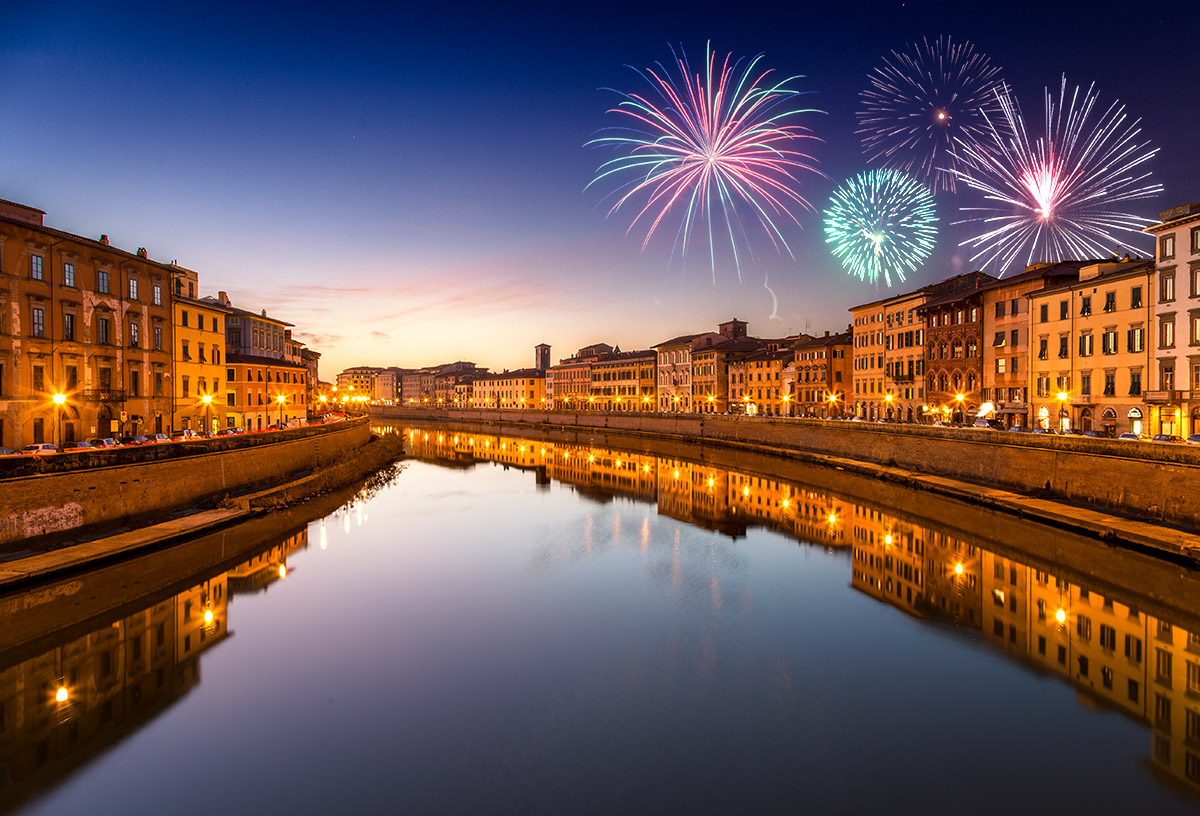
In this tutorial, you will learn how easy it is to blend these fireworks into your landscape and cityscape photos, so that you can transform an image from something like this:

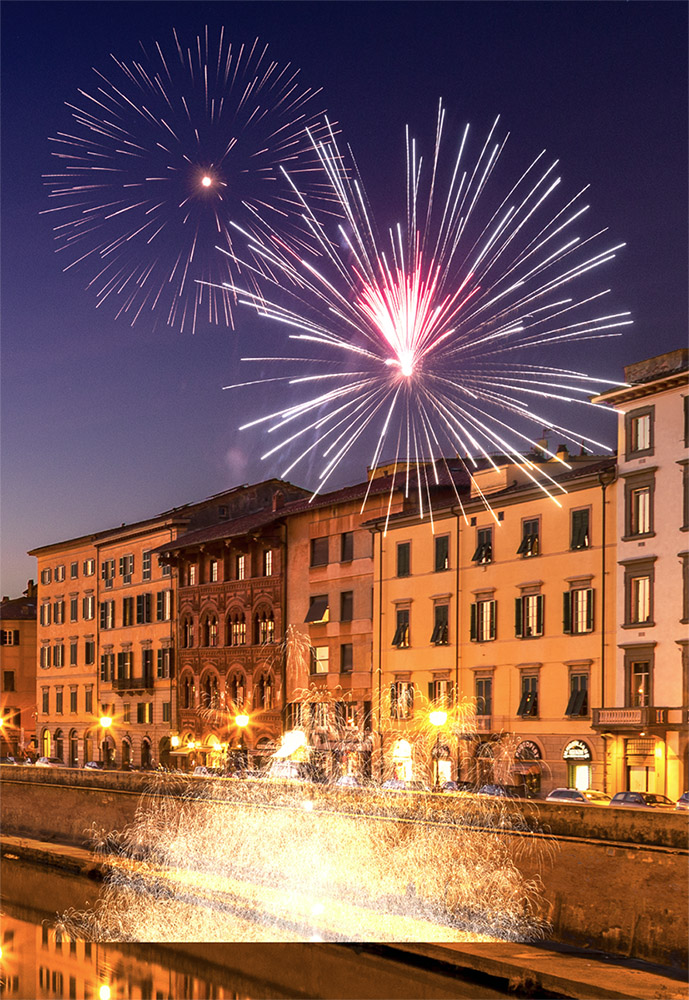
To this:
This tutorial will cover the basics of blending objects into your photos. But please remember that the goal of learning techniques like this one is not only so you can blend fireworks into your photos, but more generally so that you become comfortable with using certain tools and workflows in a way that you perhaps haven’t before. This will give you the skills and experience to tackle any post-processing roadblocks you hit in the future. If you want to see what’s possible beyond the basic blending of objects, there are also many articles that delve deeper into other types of blending, from blending multiple exposures of cityscapes, to creating realistic HDRs, and blending any landscape photos.
What You Need:
- One photo with plenty of empty sky.
- One (or more) photos of fireworks.
If you want to follow along with this tutorial, you can download the background photo plus the fireworks here.
The complete workflow is also in this video, if you would rather watch it:
Table of Contents
1. Positioning Your Fireworks
You can put the fireworks anywhere you like in your photo, although it helps to put them in the sky. Don’t worry if there are buildings or other objects partially blocking the sky. In fact, it will seem more natural to have the fireworks partially obscured like this.
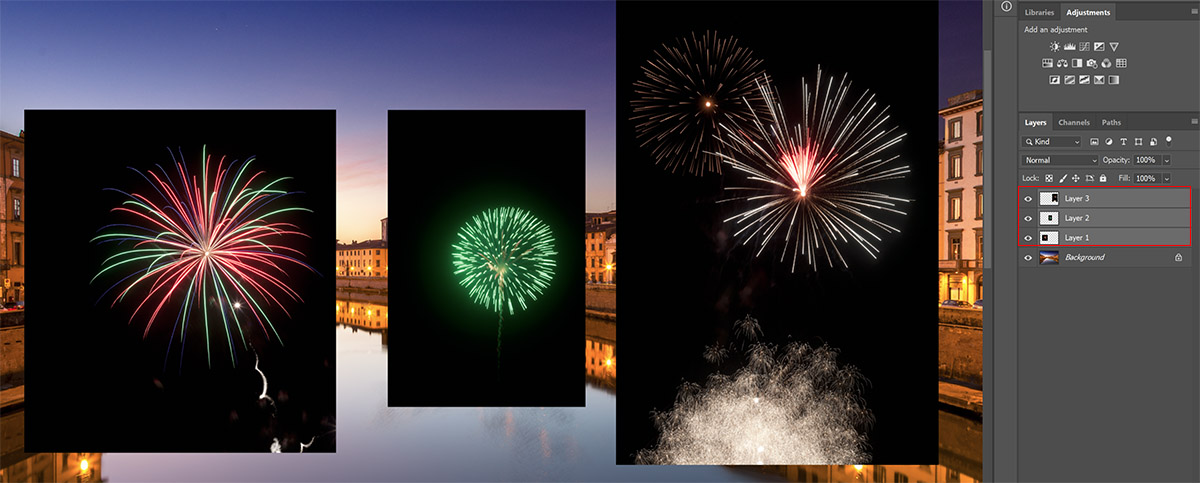
First, you should open your base landscape or cityscape photo into Photoshop, and add the fireworks photos as layers on top, by dragging them into the same workspace as the base layer. They will then sit on top of your base photo as layers.
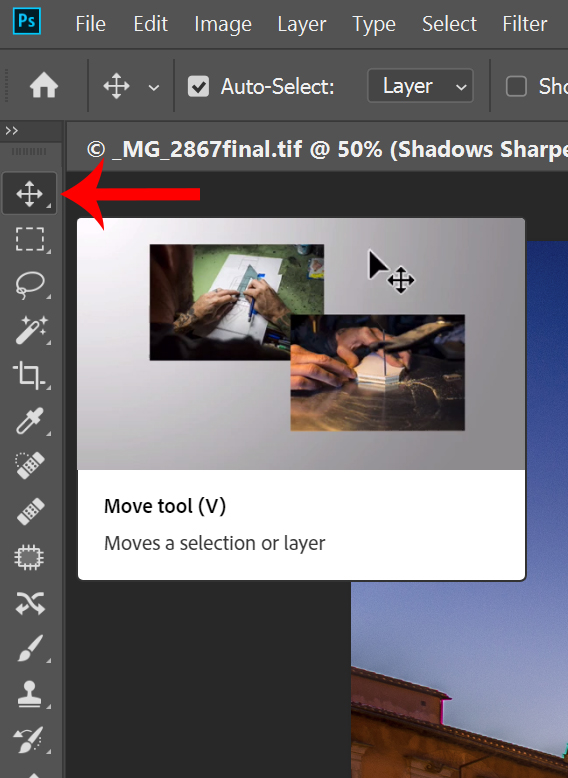
Select each fireworks layer individually, and use the ‘Move’ tool to position them somewhere in the sky.
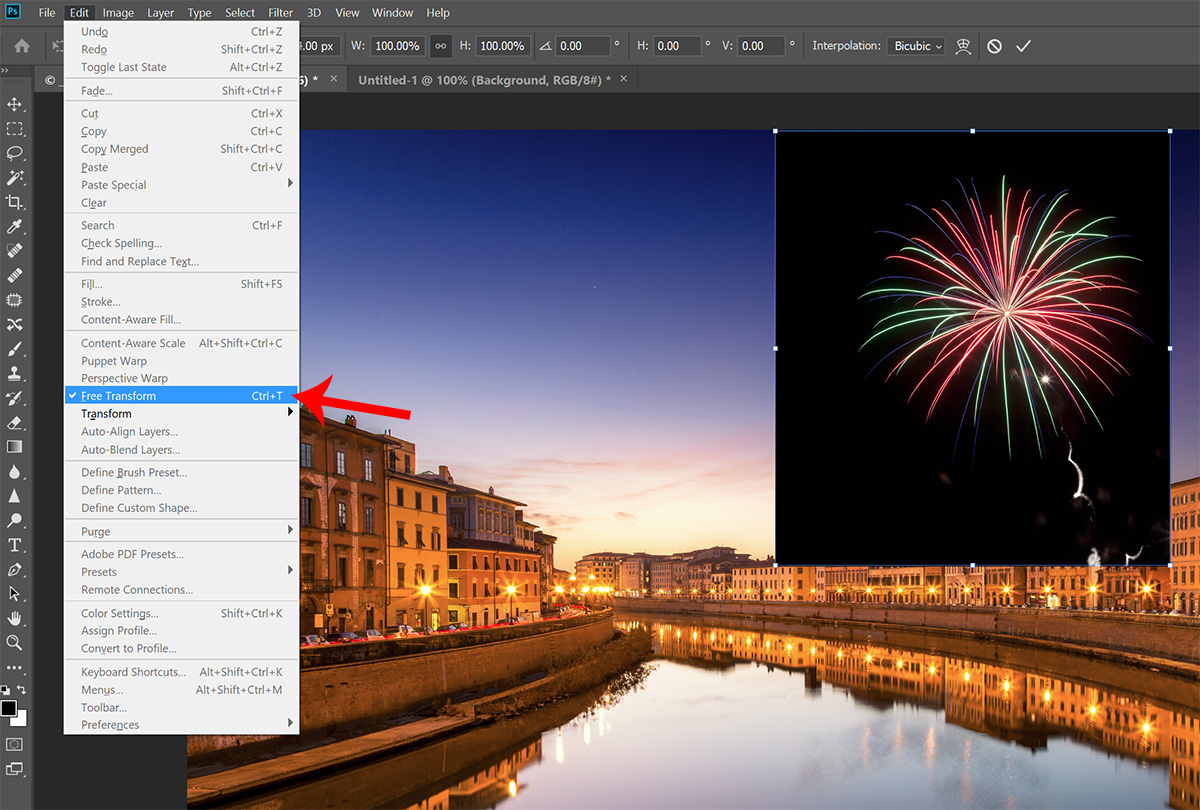
Then, use the “Free Transform” tool (Edit -> Free Transform) to resize your fireworks photos until they seem to fit naturally into the perspective of your photo.
2. Blending the Fireworks Into the Sky
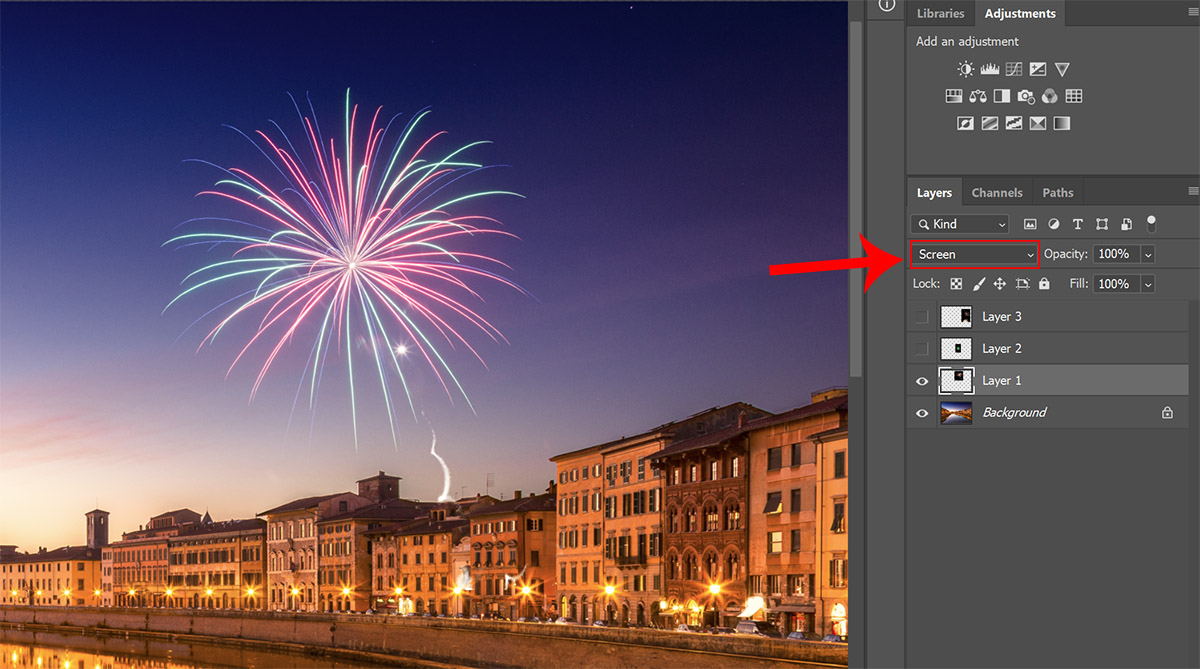
Now that you have the fireworks in position, all that is left to do is to blend them naturally into your base photo. But not all fireworks photos are created equal. The absolute easiest way to blend photos is to use blending modes. These are found in the top-left of the layers palette. If you have a photo with a totally black background, you can probably get away this. Otherwise, you might need to use layer masks.
Try changing the blending mode for your firework layer. ‘Screen’ usually works the best, as this mode keeps the lightest bits of your photo, and discards the darkest parts. In this case, that means the firework itself should show through, and the sky should be lost.
If this doesn’t work because you have buildings or other objects in your fireworks photo, then add a layer mask and try painting out the offending object with a large, soft brush, set to black. In this photo, there is a rocket trail that is showing in front of the waterfront buildings in my base layer. Using a layer mask, you can paint this out. If you are not familiar with layer masking, then take a look at this article.
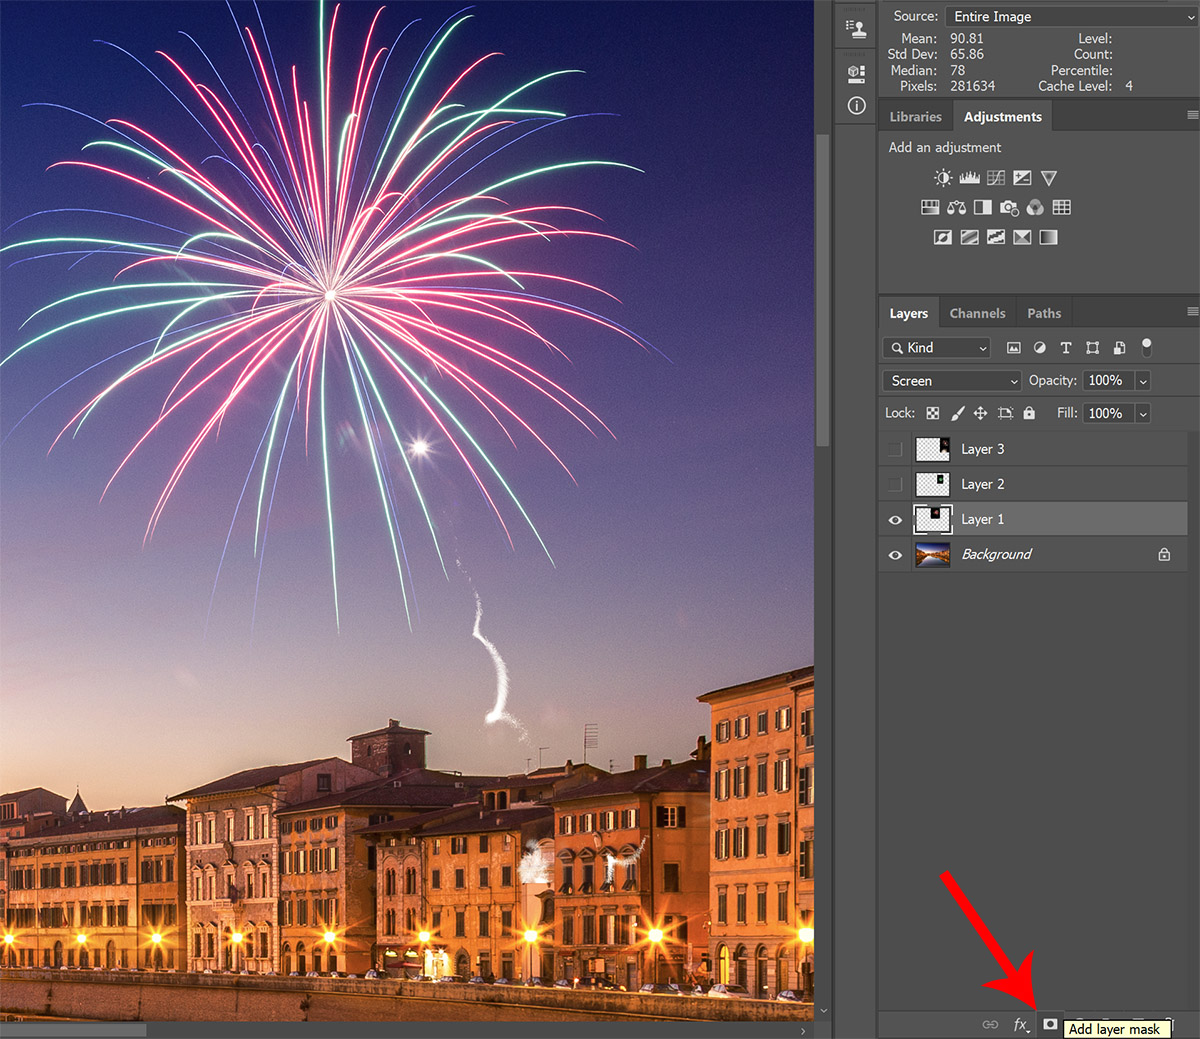
In the below screenshot, the area that has been painted out in the layer mask is highlighted in red. By painting over this area of the layer mask with a black brush, this part of the rocket trail will no longer show through, and will therefore not appear in front of the buildings.
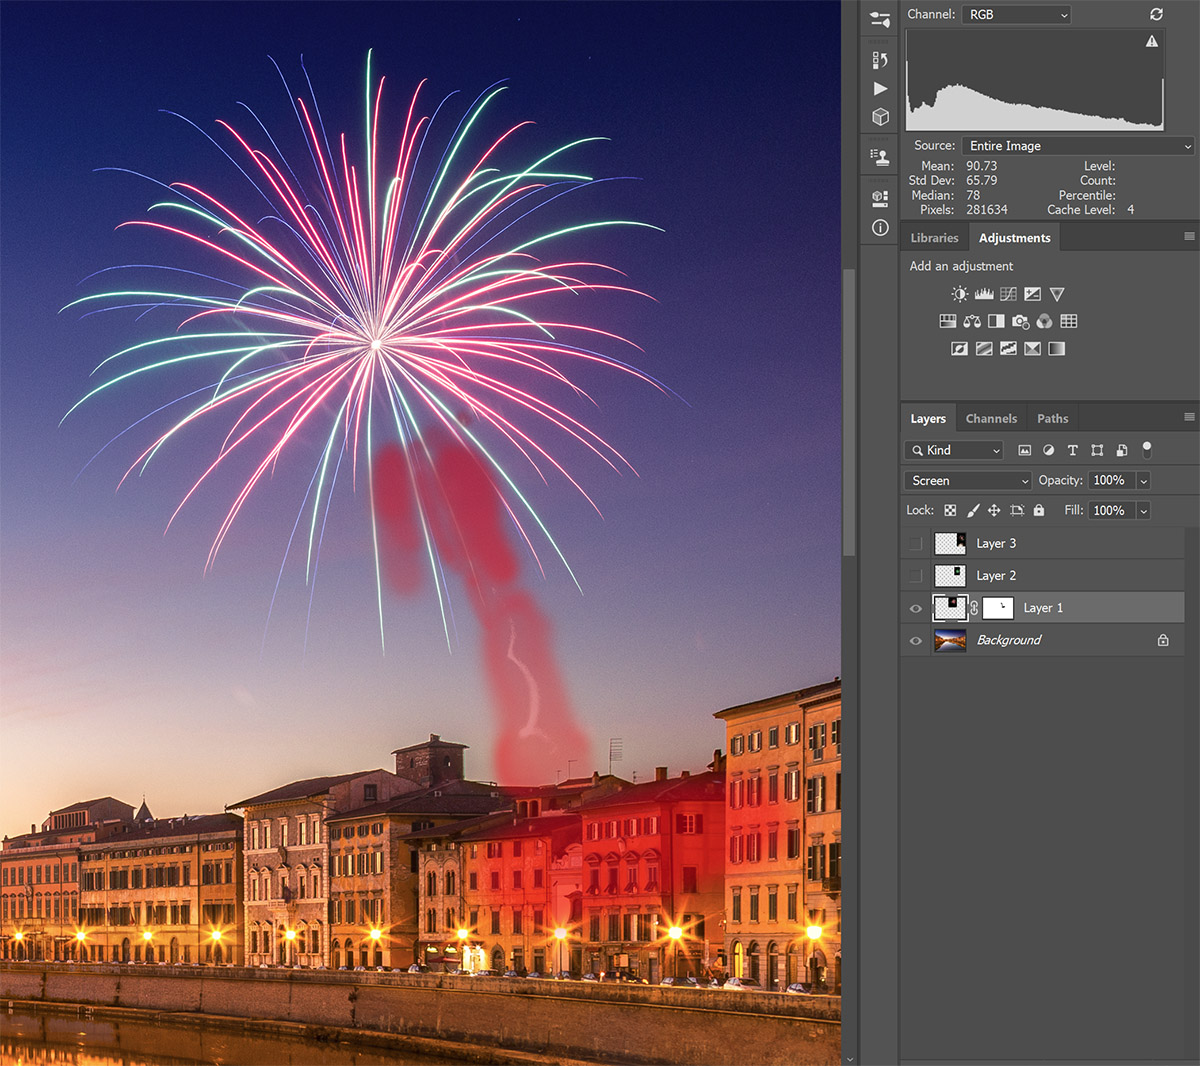
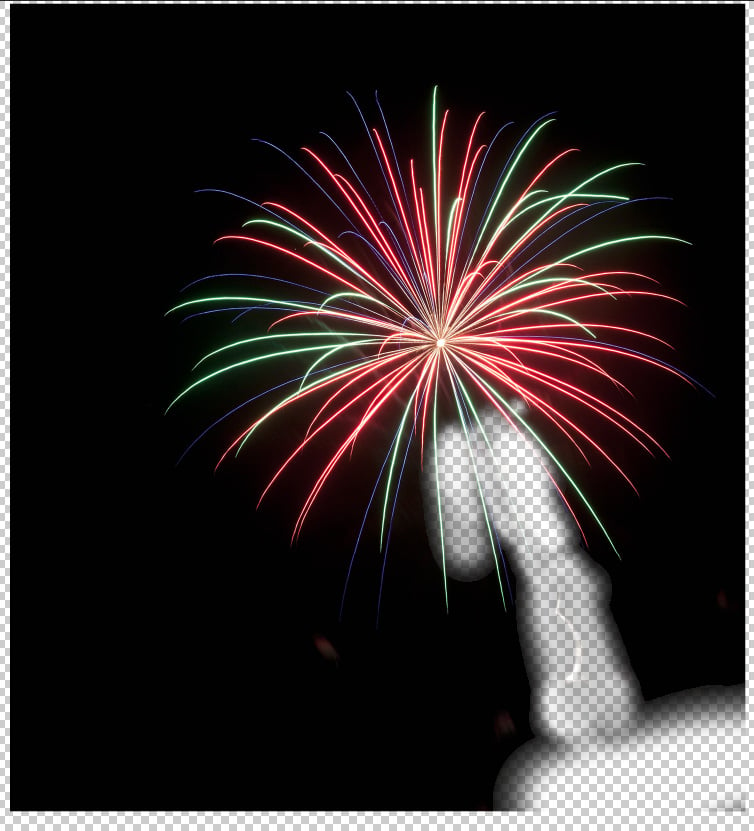
If I remove the base layer for a moment, you can see how much has been painted out.
3. Placing Fireworks Behind Buildings
You can add more fireworks by repeating the workflow above, but eventually it is likely that you will hit a problem when you want to position one half-behind a building.
You could hand-draw a layer mask, as you did it step 2, zooming into 100% and carefully cutting out the building from the firework with a hard brush. But there is a much simpler method: the ‘Quick Selection’ tool.
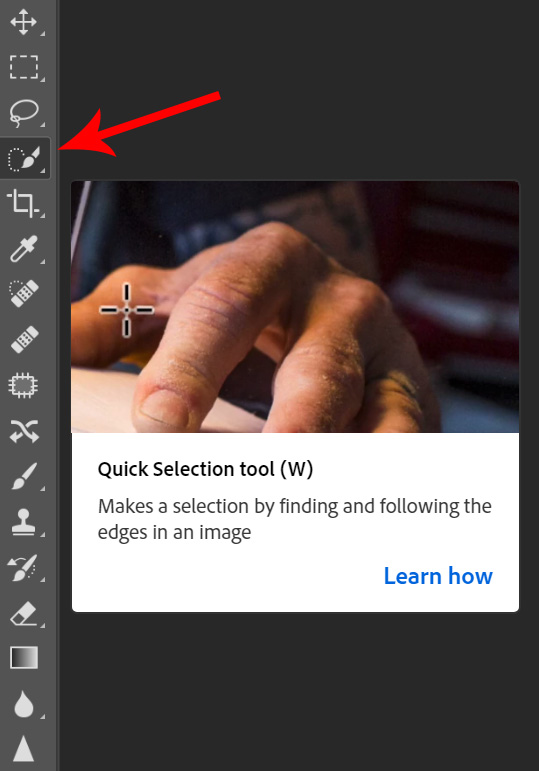
First, ensure that your background layer is selected, then paint this tool into the sky near any buildings or other objects. This will cause the tool to make a selection that snaps to any obvious boundaries in the photo, like the boundary between the building and the sky. Then, with the selection made, you simply have to select your firework layer and click the add layer mask button. This automatically adds the selection as a layer mask, and the building will get cut out from the firework.

4. Adding Reflections
So far it’s looking pretty good, but there’s a problem: no reflections in the water. This is a simple problem to fix.
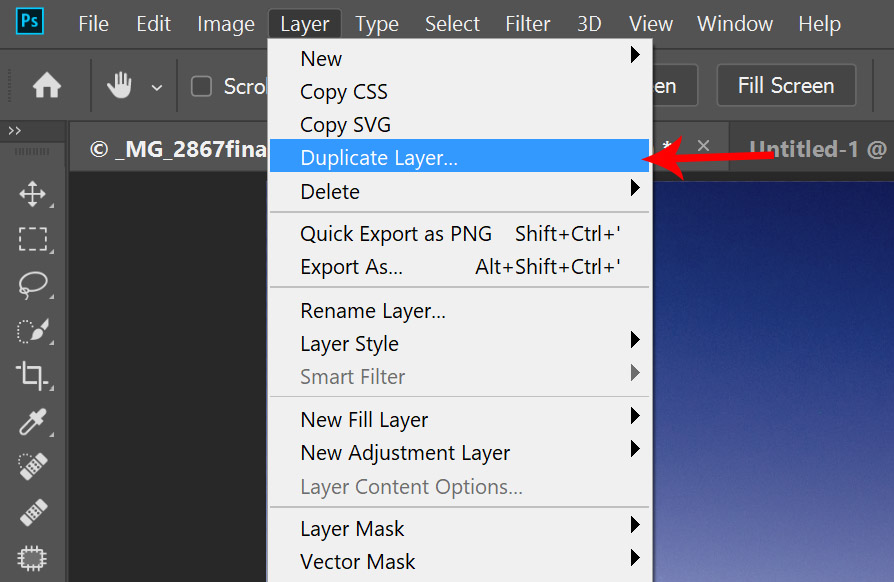
Start by duplicating your first fireworks layer (Layer -> Duplicate Layer).
Then, with this duplicate selected, open the ‘Free Transform’ tool once again (Edit -> Free Transform), right-click within the boundaries of the layer, and select Flip Vertical from the popup menu.

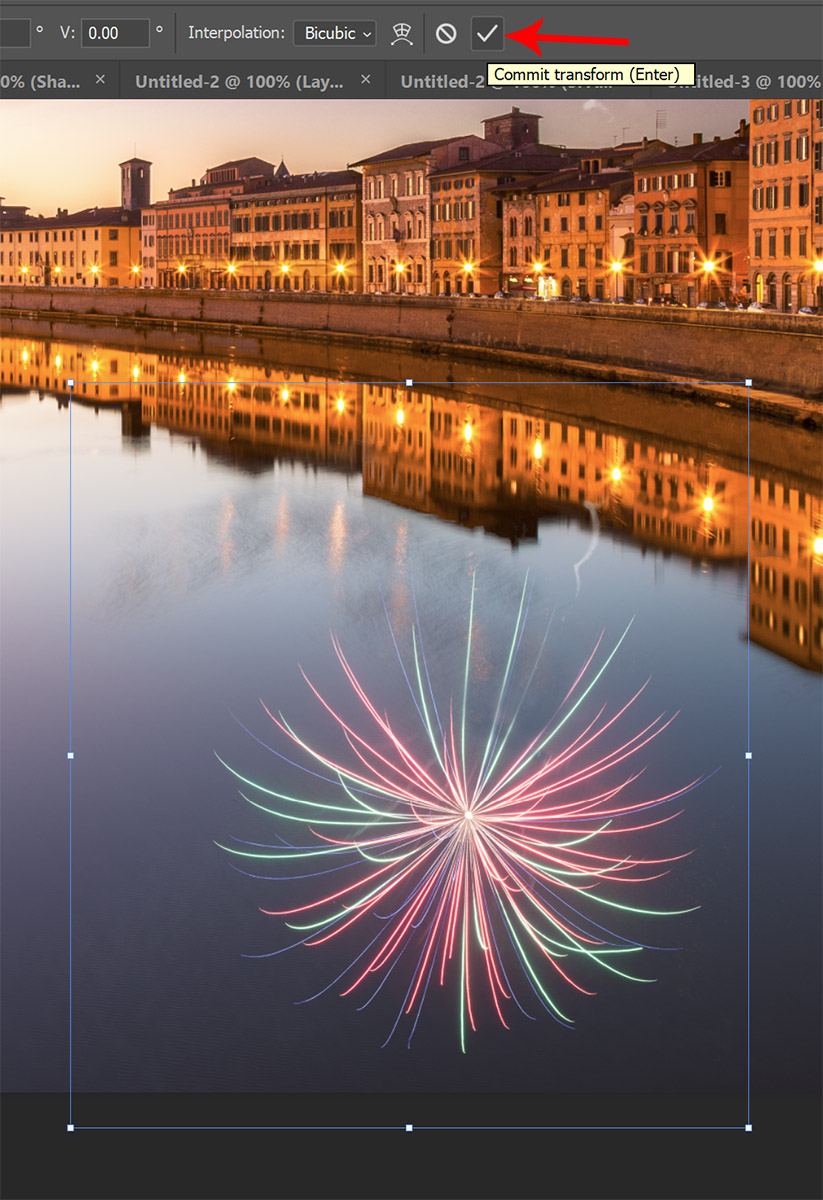
Now, re-position this duplicate layer into the water, somewhere below the firework. You might want to stretch it a little to match the perspective of your photo, or change the positioning, so it looks more natural. Hit enter or the tick box on the top bar to accept your transformation.
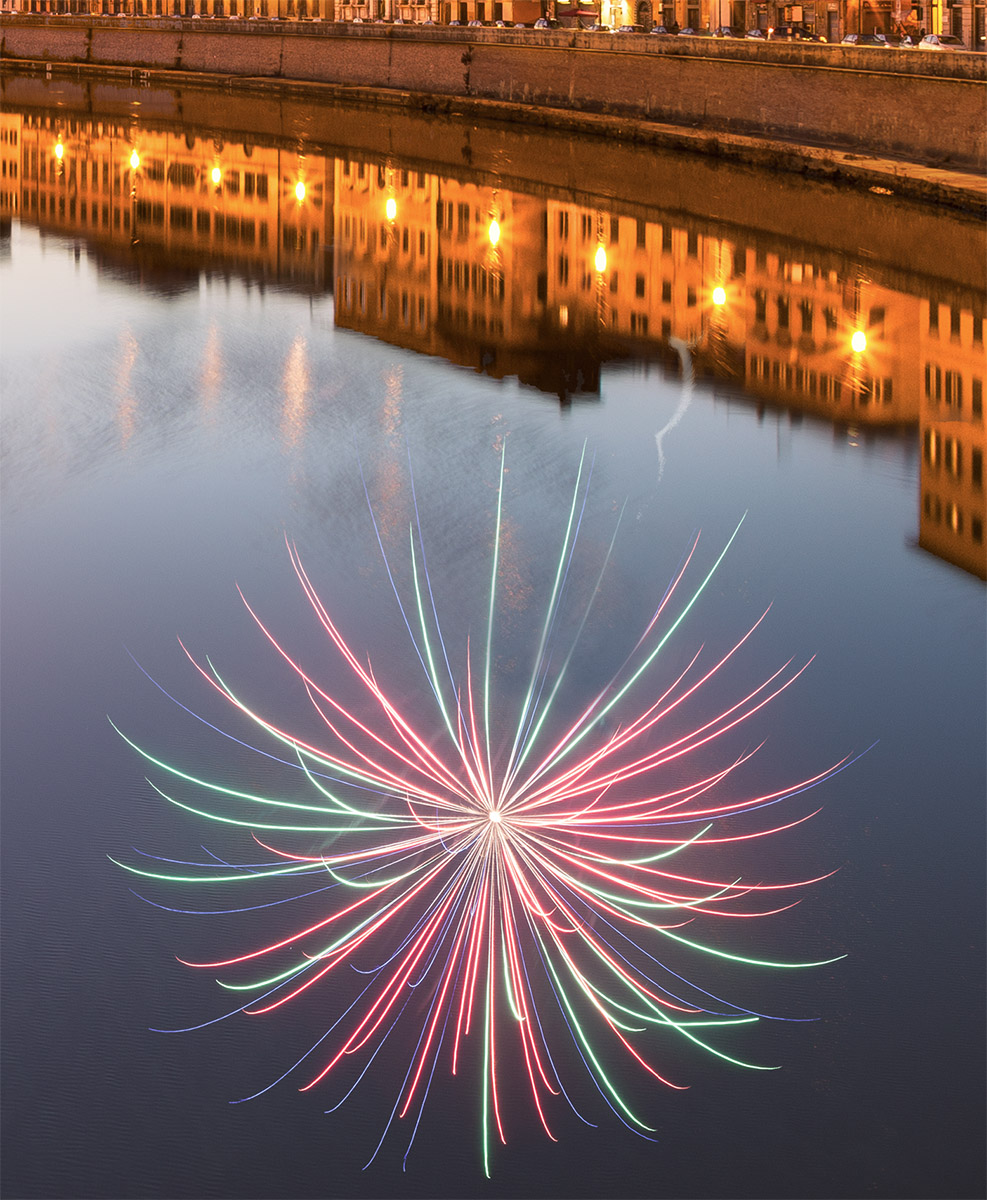
The final part left is to match the texture and blur of the reflection to the water. If you zoom in to 100%, you can see that the reflection obviously doesn’t fit in.
To fox this, you can go to Filter -> Blur -> Gaussian Blur.

Making sure preview is checked, move the radius within the Gaussian Blur filter until the reflection seems to naturally blend into the water, then hit ok.

Repeat this process with each firework layer in turn to add all the reflections. If you have used layer masks, particularly to place the fireworks behind buildings or other objects, you will probably have to redo these. But it’s easy enough to do them again by hand, or by using the ‘Quick Selection’ tool as in step 3.
Final Thoughts
With a few minutes of work, you can use these techniques to add fireworks or any similar object to your photos.


Hopefully, this tutorial has given you some ideas of how you can combine blending modes, layer masks and filters to modify your photos. Of course, you don’t have to use these techniques for blending fireworks, as there are many other potential applications. The use of understanding techniques like these, and how they combine, is that you then have a greater repertoire of tips and tricks that you can use to post-process your photos, in the future. The more techniques you understand, the more chance you have of creating photos that you are proud to exhibit. My teaching philosophy is based around giving you these techniques, and showing you how to use them for your own purposes. If you would like to see more of my tutorials, you can find them here.
This guest post was submitted by Tim Daniels. To see more of his work, please visit his website.
Can someone please explain to me what is a “Pure” image? Wow, so many people think that they have the right to tell an artist what is allowed in their image. Well guess what; the type of equipment, settings on your camera, and place you took the image are all up to the photographer. If photography is just snapping an image to get to the “Truth”, why do you even need all this software and why would people want to learn tips and tricks if you shouldn’t use them. There is no such thing as an unaltered image. Would you rip on someone who is a painter for the type of brushes, canvas, or type of paint they used because it somehow distorts the “Truth”. I only hope people are not as hypercritical as many seem to be about this magnificent article.
Wow. Not what I expected to see on this wonderful site. This article should be pulled.
I little more photography and a little less technique or how-to would be appreciated.
I saw this guy posting a bunch of spam on Reddit and nobody liked it there either.
I have always found LR to be refreshingly free from the unpleasantness that is evident over much of the rest of the internet, so some of the comments here are disappointing to me.
Anyone who imagines that this sort of image manipulation is a new phenomenon is incorrect. In the 1850s and 60s, photo-montage (cutting prints up that came from different originals, placing them together and re-photographing the result) was commonly used and thought by many to be highly artistic and revered.
From the first negatives on glass, then various types of film, it was standard practice to ‘retouch’, portraits, easing wrinkles and hair loss, usually using a soft graphite pencil directly onto the negative. Any commercial portrait photographer for most of the history of the photograph, would have gone out of business had they not done this!
As an advertising photographer, I often had parts of images altered by air-brushing, amongst many other tricks! This was standard practice. I have spent hours in darkrooms making composite images from different originals, including multi-printing several negatives onto one piece of paper using masks, mattes and various other techniques.
There is no truth in photography. There never has been. The ‘reality’ of the photojournalist image, for example, is only, at best, a part of the truth. If the photographer had framed a metre to the left, shot the image a second later, a different truth would have been told. There are many well known examples of this in the history of photojournalism and documentary photography. All of these variables and techniques have in the past been misused, sometimes in a benign or artistic way and at other times to tell malicious lies. Digital photography has just made the whole thing much easier, more accessible to (arguably) less serious photographers and sometimes more convincingly ‘real’ in the final image.
The images in the article are not particularly to my taste and I have little personal interest in this sort of manipulation. However, I can see that they are well executed and are certainly valid as a demonstration of the techniques involved. I do not understand why others feel they are entitled to be so insulting and would welcome a less petty and judgemental series of comments in future!
BRAVO
Good article. As long as we are not altering the photos for some sinister reasons, what is the issue in adding something? Like when our own Nasim took Solar Eclipse he put many suns in the same picture in a row to show the degradation. All new this is an enhancement and nobody cried foul there. Likewise lets take it in the right spirit. As long as we don’t alter the picture for criminal or tarnish someone I think it is okay. As long as it is just for fun or no evil agenda behind it, it is fine.
Else we must not enhance any pictures. Why add contrast or brighten images or adjust color? Just present the picture as it is
Kudos to the poor soul who got so much kicks. God bless all
Why would I want to learn that? Its FAKE!
Great article. Thanks!
I’m a bit late for the party but I’d just like to leave my input. Yes, when I first saw the title I was a bit taken aback; it’s not the kind of thing I do in my post processing but just by reading I actually couldn’t help but think of a couple of instances in which I would have liked to know this. Honestly, knowing more about software we regularly use never hurts, even if you won’t ever apply it to your own images.
And in truth, while I wouldn’t use this kind of thing with photos I use on my usual channels, I wouldn’t mind doing it to show a friend or just to use as a wallpaper, with the full knowledge that it isn’t real but without it really mattering because it simply looks lovely. Just my 2 cents anyway. Not everyone appreciates these kinds of tutotials but I for one don’t mind them in the slightest. Cheers.
Every so often in movies f.ex. moonset (likewise moonrise or sunrise and sunrise) is cheaply done only by playing moonrise in reverse order. It is disturbing due to a number of different kinds of unnatural details in that particular occasion – f.ex. diminishing crescent of moon sets only in daylight and so shouldn’t be used (in reverse play and thus wrong crescent with wrong morphology) as a setting moon on darkening evening sky.
I’m not taking side whether this painting is ok but what bothers is the wrong geometry in placing the reflections. In the demonstrated example imagine you are watching fireworks on that particular place where the reflection seems to come – and sure enough f.ex. the center of the rightmost explosion would be blocked by buildings and thus to the photography site there would not be any reflection either. One should more carefully consider the geometry!
You can easily check this issue by following heavenly body rising or setting behing a treeline or a mountain. Note how you can see the object while the reflection is still missing or has already gone – minutes-tens of minutes gap depending on your viewing geometry.