When searching through my photo library for a class I was teaching recently, I found myself turning to Adobe Lightroom’s metadata filter regularly to help me find the examples I needed. But what I discovered was a lot more useful to my own photography than just sample images for a class. It’s easy to mistake the metadata filter for a simple search function, but when you really start to look at the data it provides, it’s an amazing tool that can improve your photography in a lot of ways.
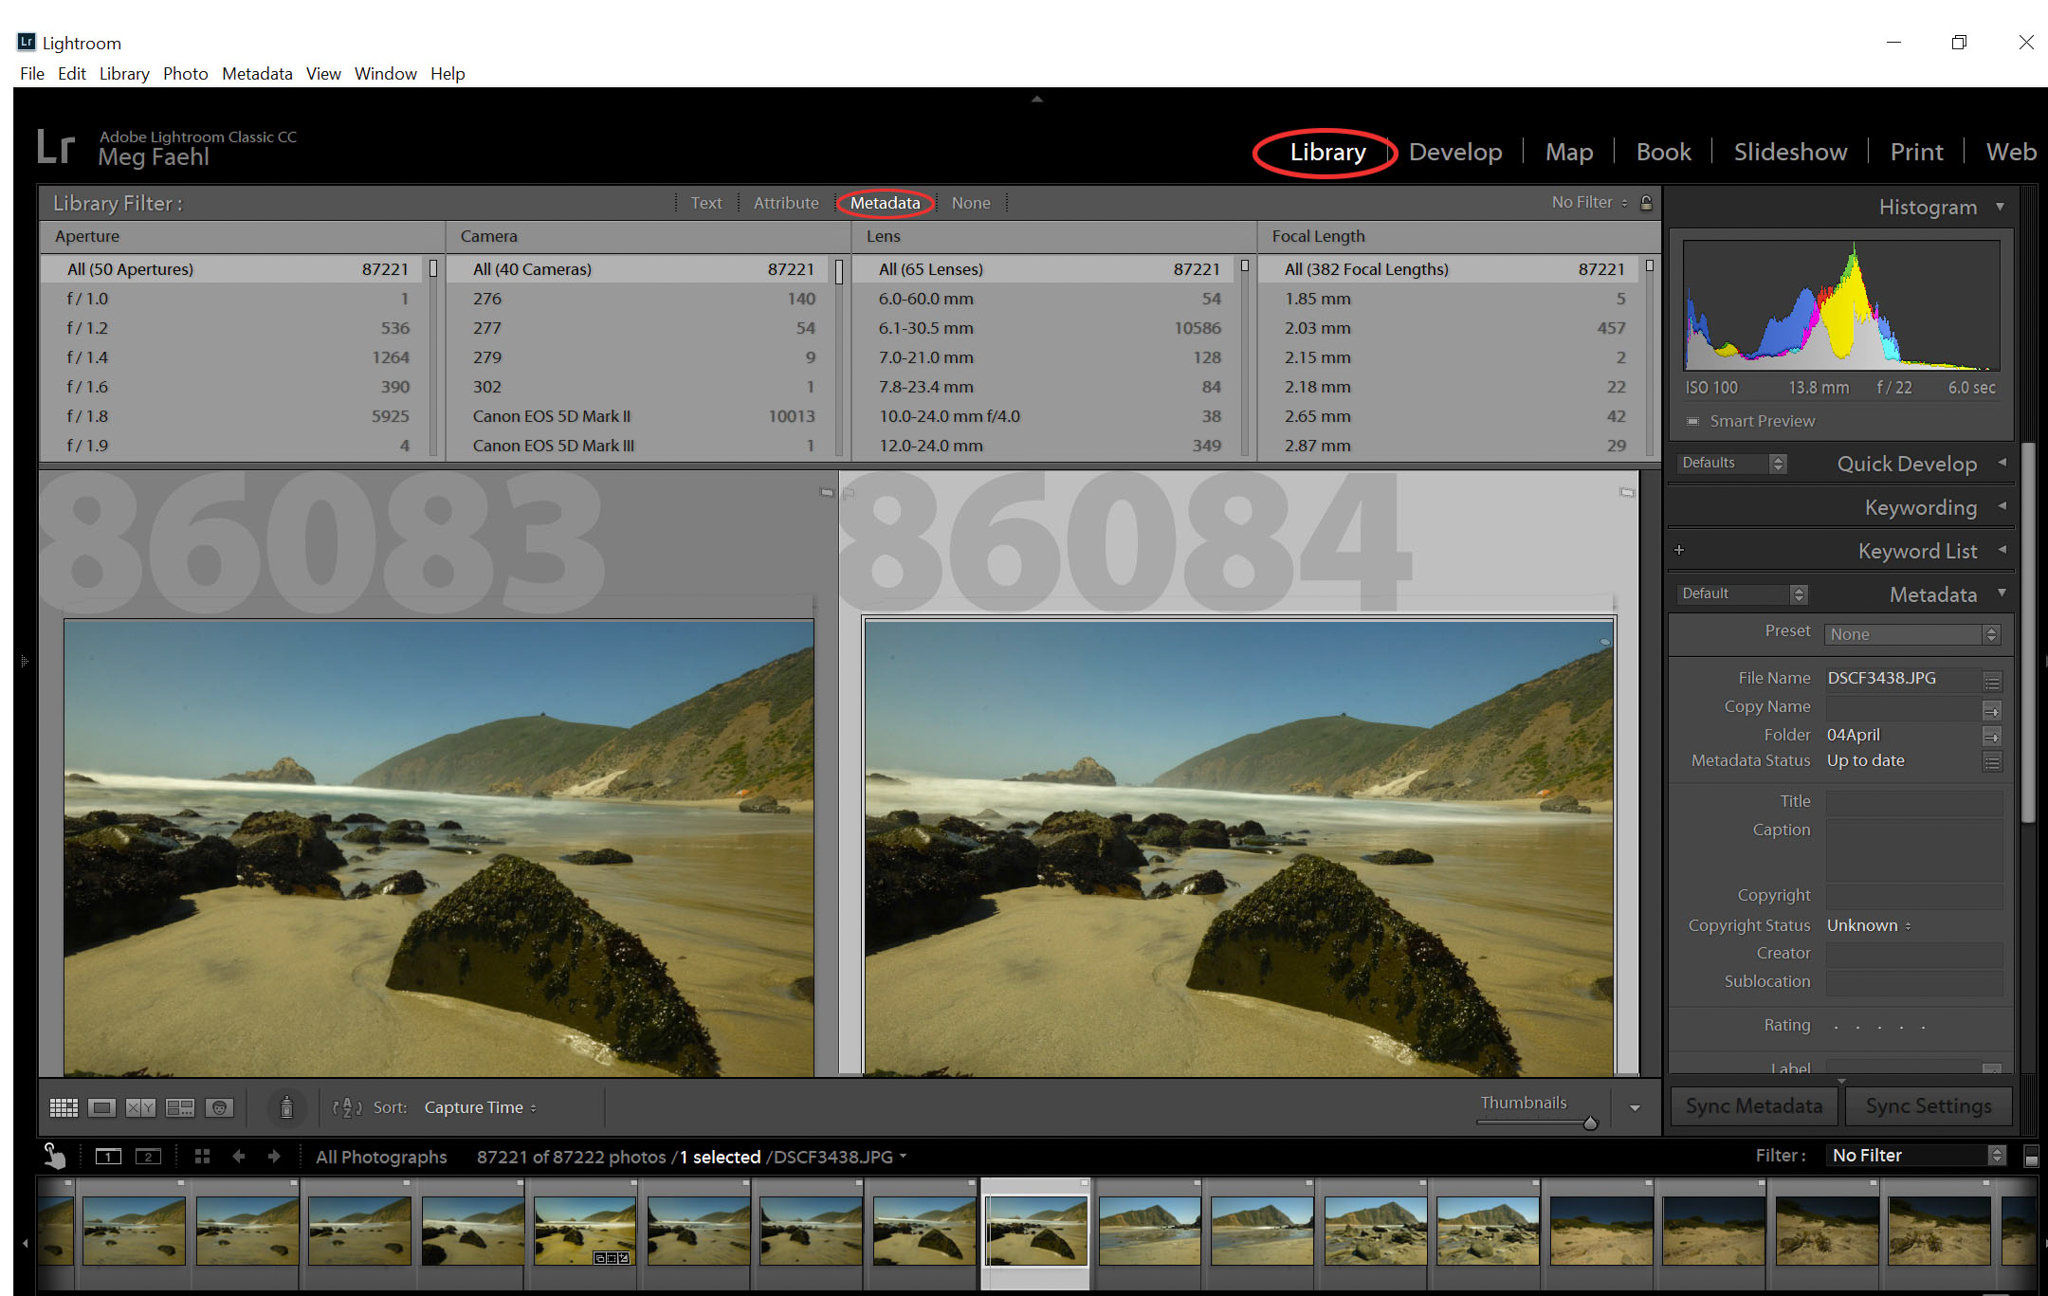
Table of Contents
What is the Metadata Panel?
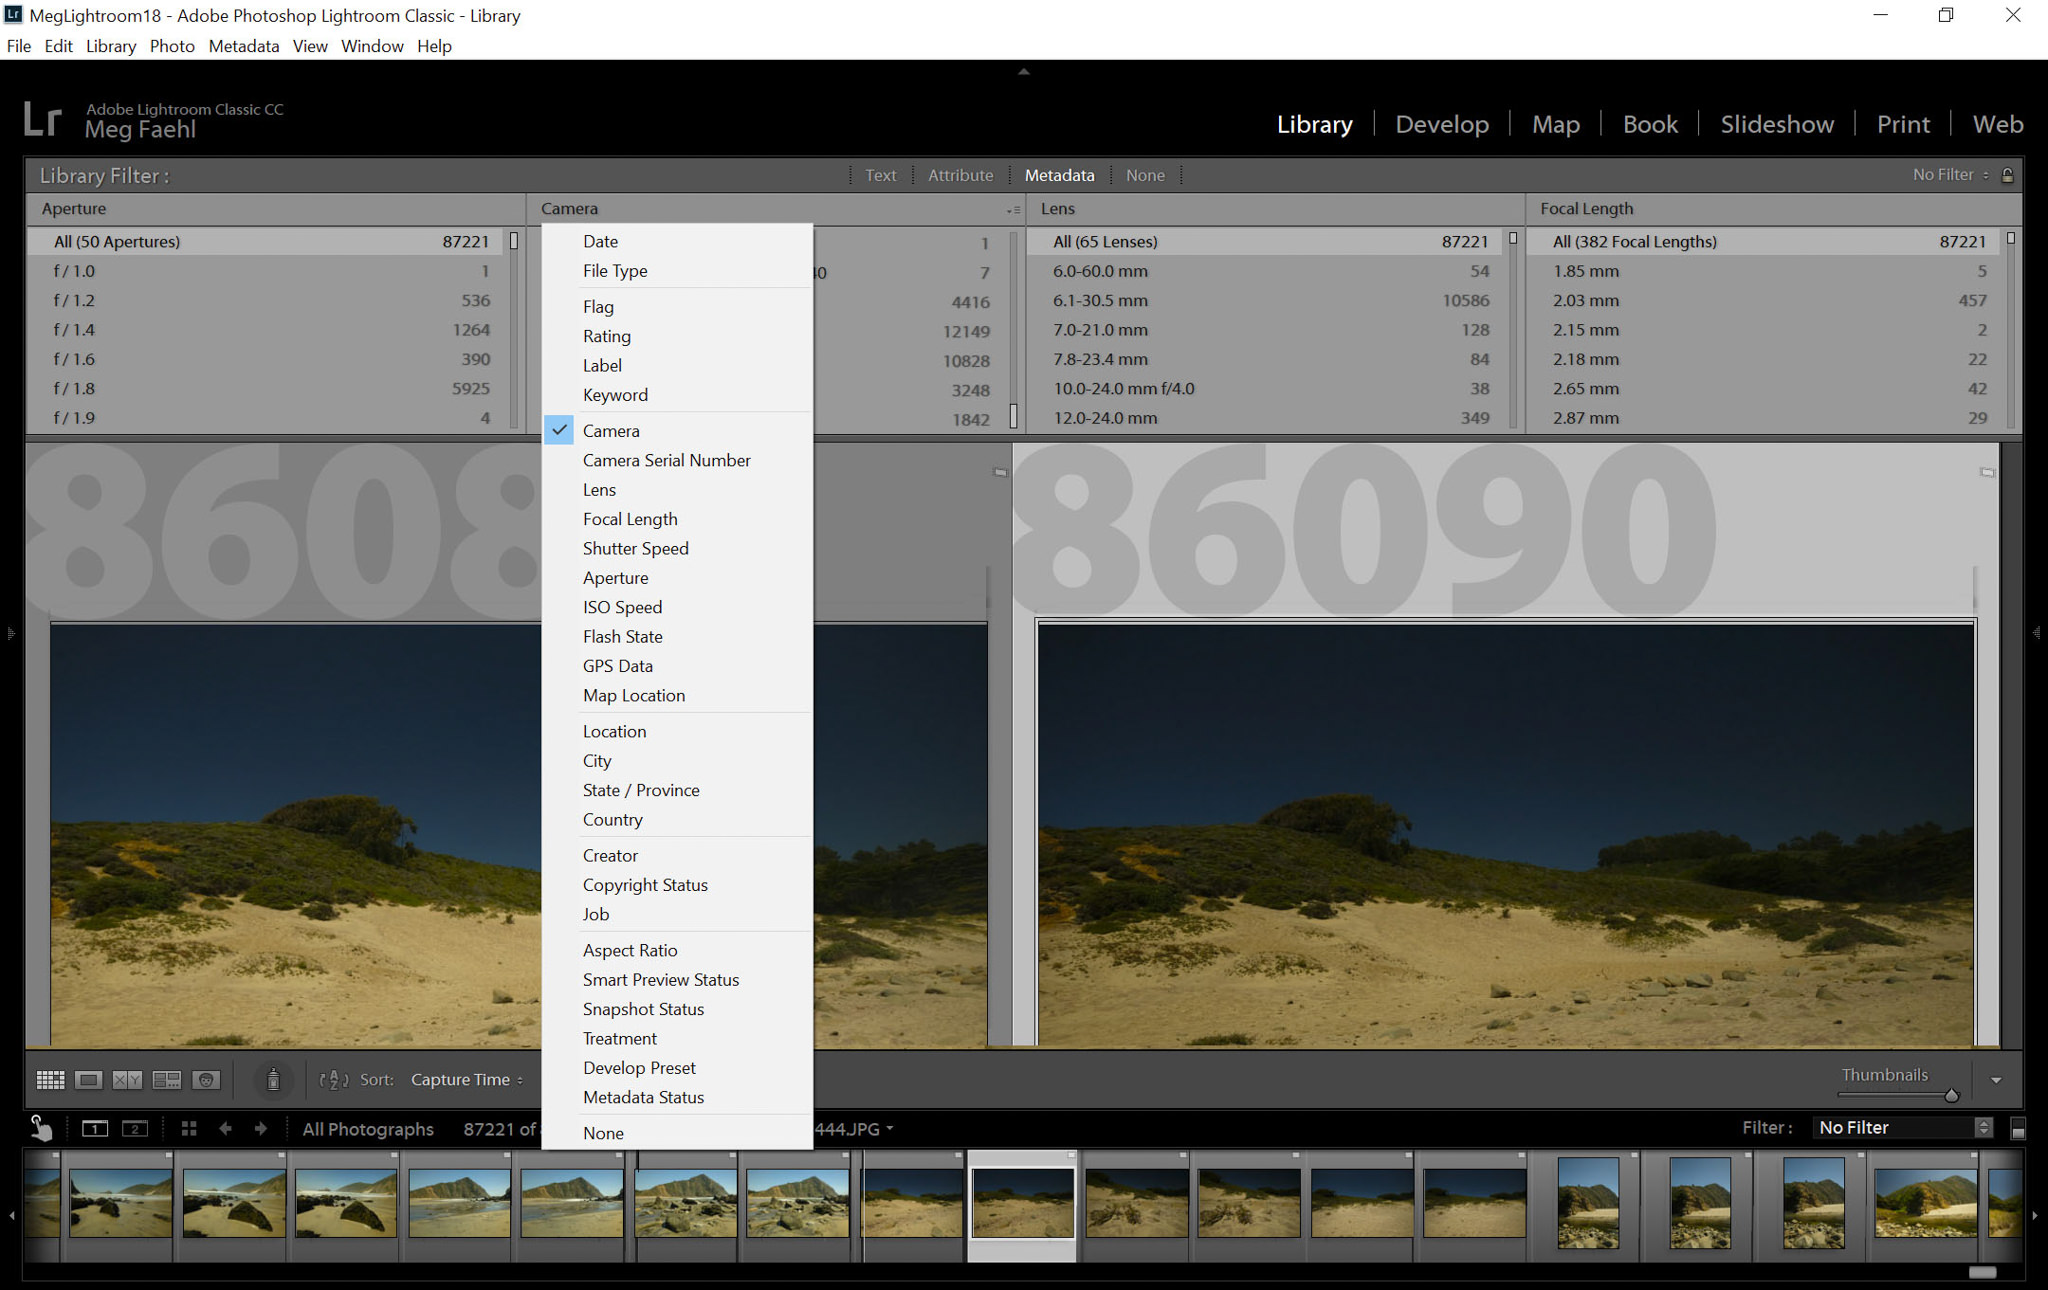
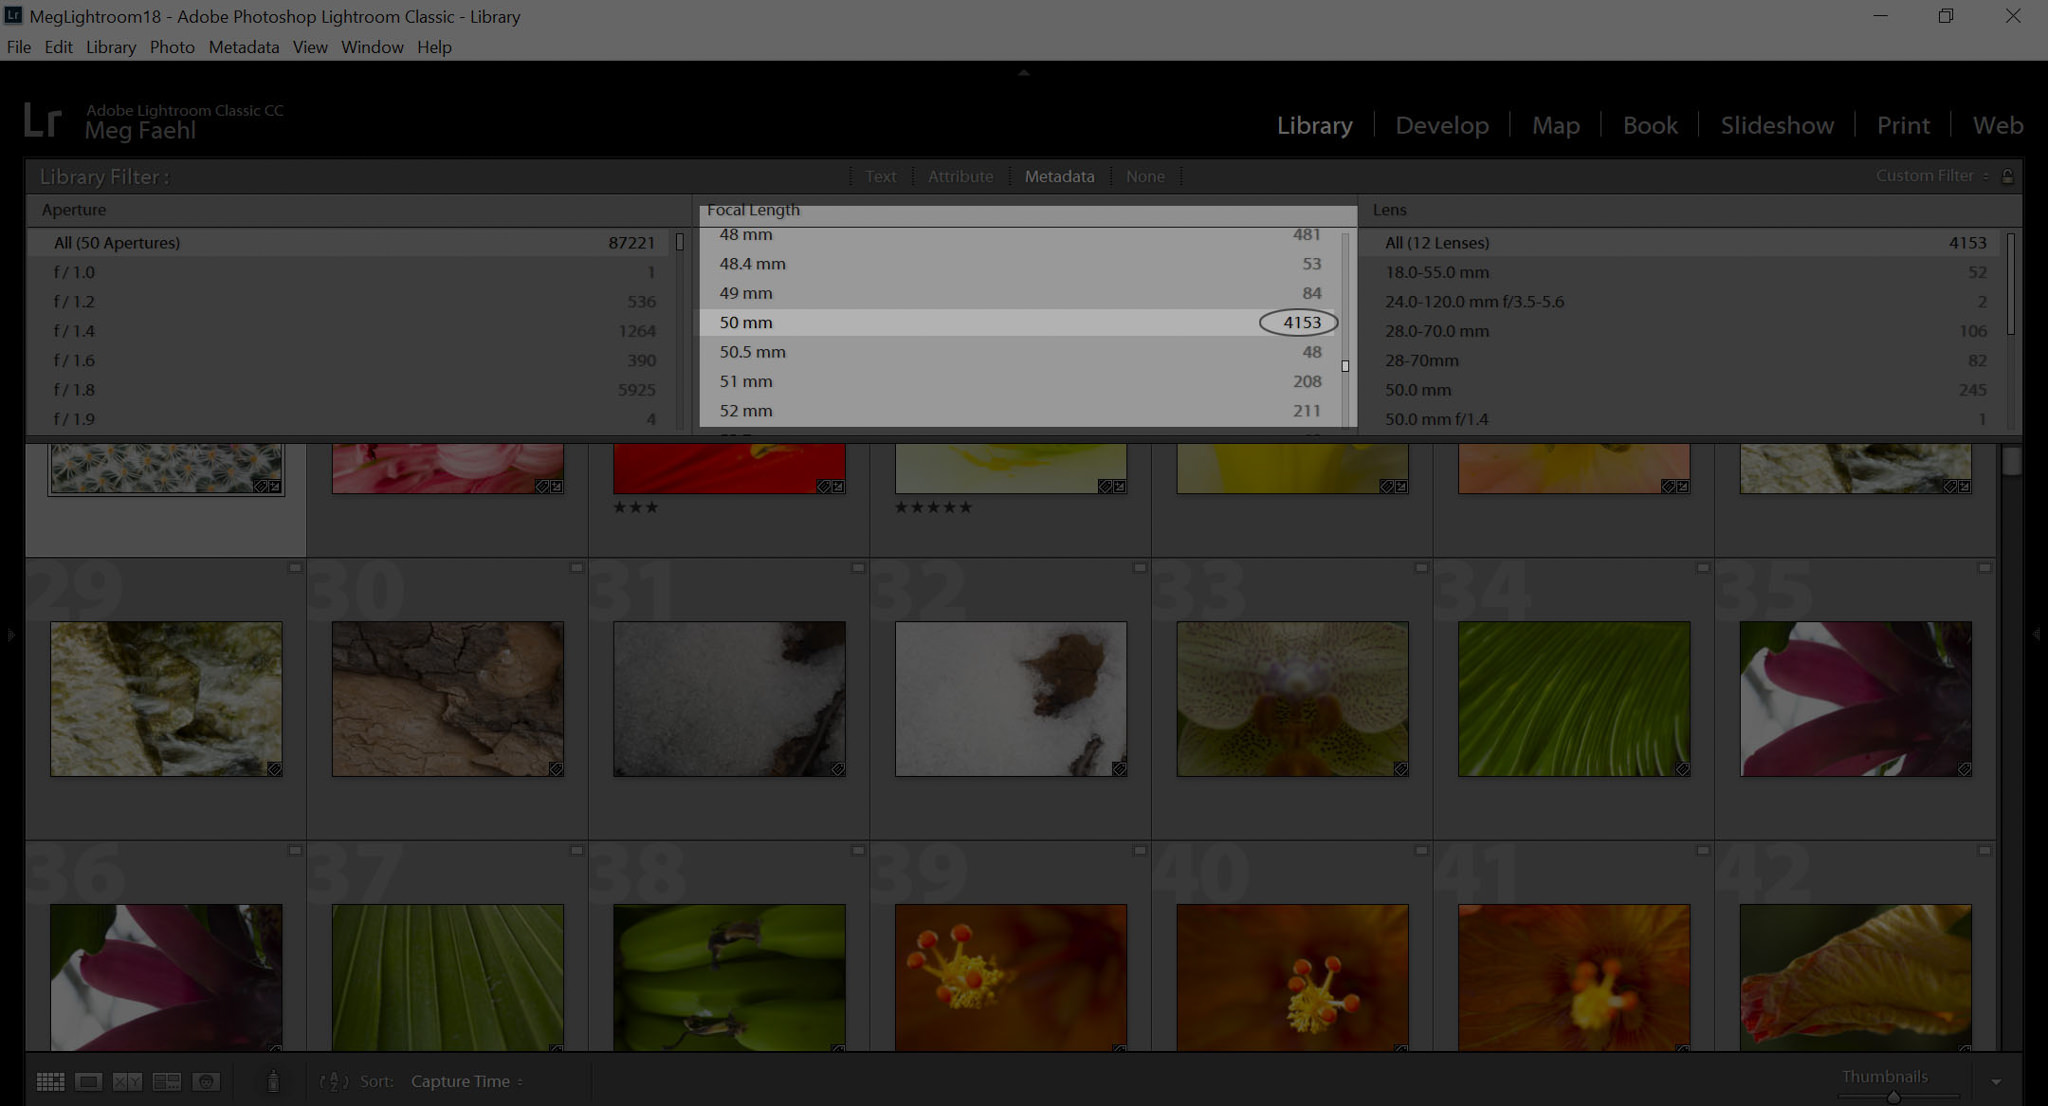
Buried in the Library panel of Adobe Lightroom, the metadata filter is an advanced search filter that will let you search your photo library by almost any information stored in your image files. The dropdown menu on the side provides some default search options, and you can add a new search column by simply clicking the top right-hand corner of an existing column and selecting “add column.”
You also can change the content of an existing column by clicking on the title of that column. This allows you to search for basic information, like the date an image was taken or the camera you used, and it also lets you search by things like lens, flash firing, focal length, iso, shutter speed, aperture, and so on. All the results are displayed in the column below, with the number of items that match each parameter on the righthand side. Clicking on any of the results (say, Canon EOS 5D Mark II under the “Camera” option”) will display all your images with that property in the library panel below.
Now that we know how to navigate this panel, let’s look at some ways we can use this information to improve our photography.
1) Help You Identify Things You Might Want to Try
A quick glance through the metadata panel will show you which shutter speeds and apertures you’ve used to take the images in your library – and, more importantly, how many images were shot at each setting. When looking through this data, I noticed right away that I have very few long exposure images, with the vast majority of my photos being shot at 1/125 or above. For the type of work I do, this makes sense, but it also means that long exposures are something I might want to spend some time experimenting with. Even more importantly, clicking on those longer shutter speeds in the metadata panel brings up all the images I’ve taken at those shutter speeds. I discovered that many my favorite images were taken at longer shutter speeds, which makes it all the more important to keep trying. While you certainly don’t need an even distribution of settings, looking for trends might give you ideas of things you could work on to expand your skillset.
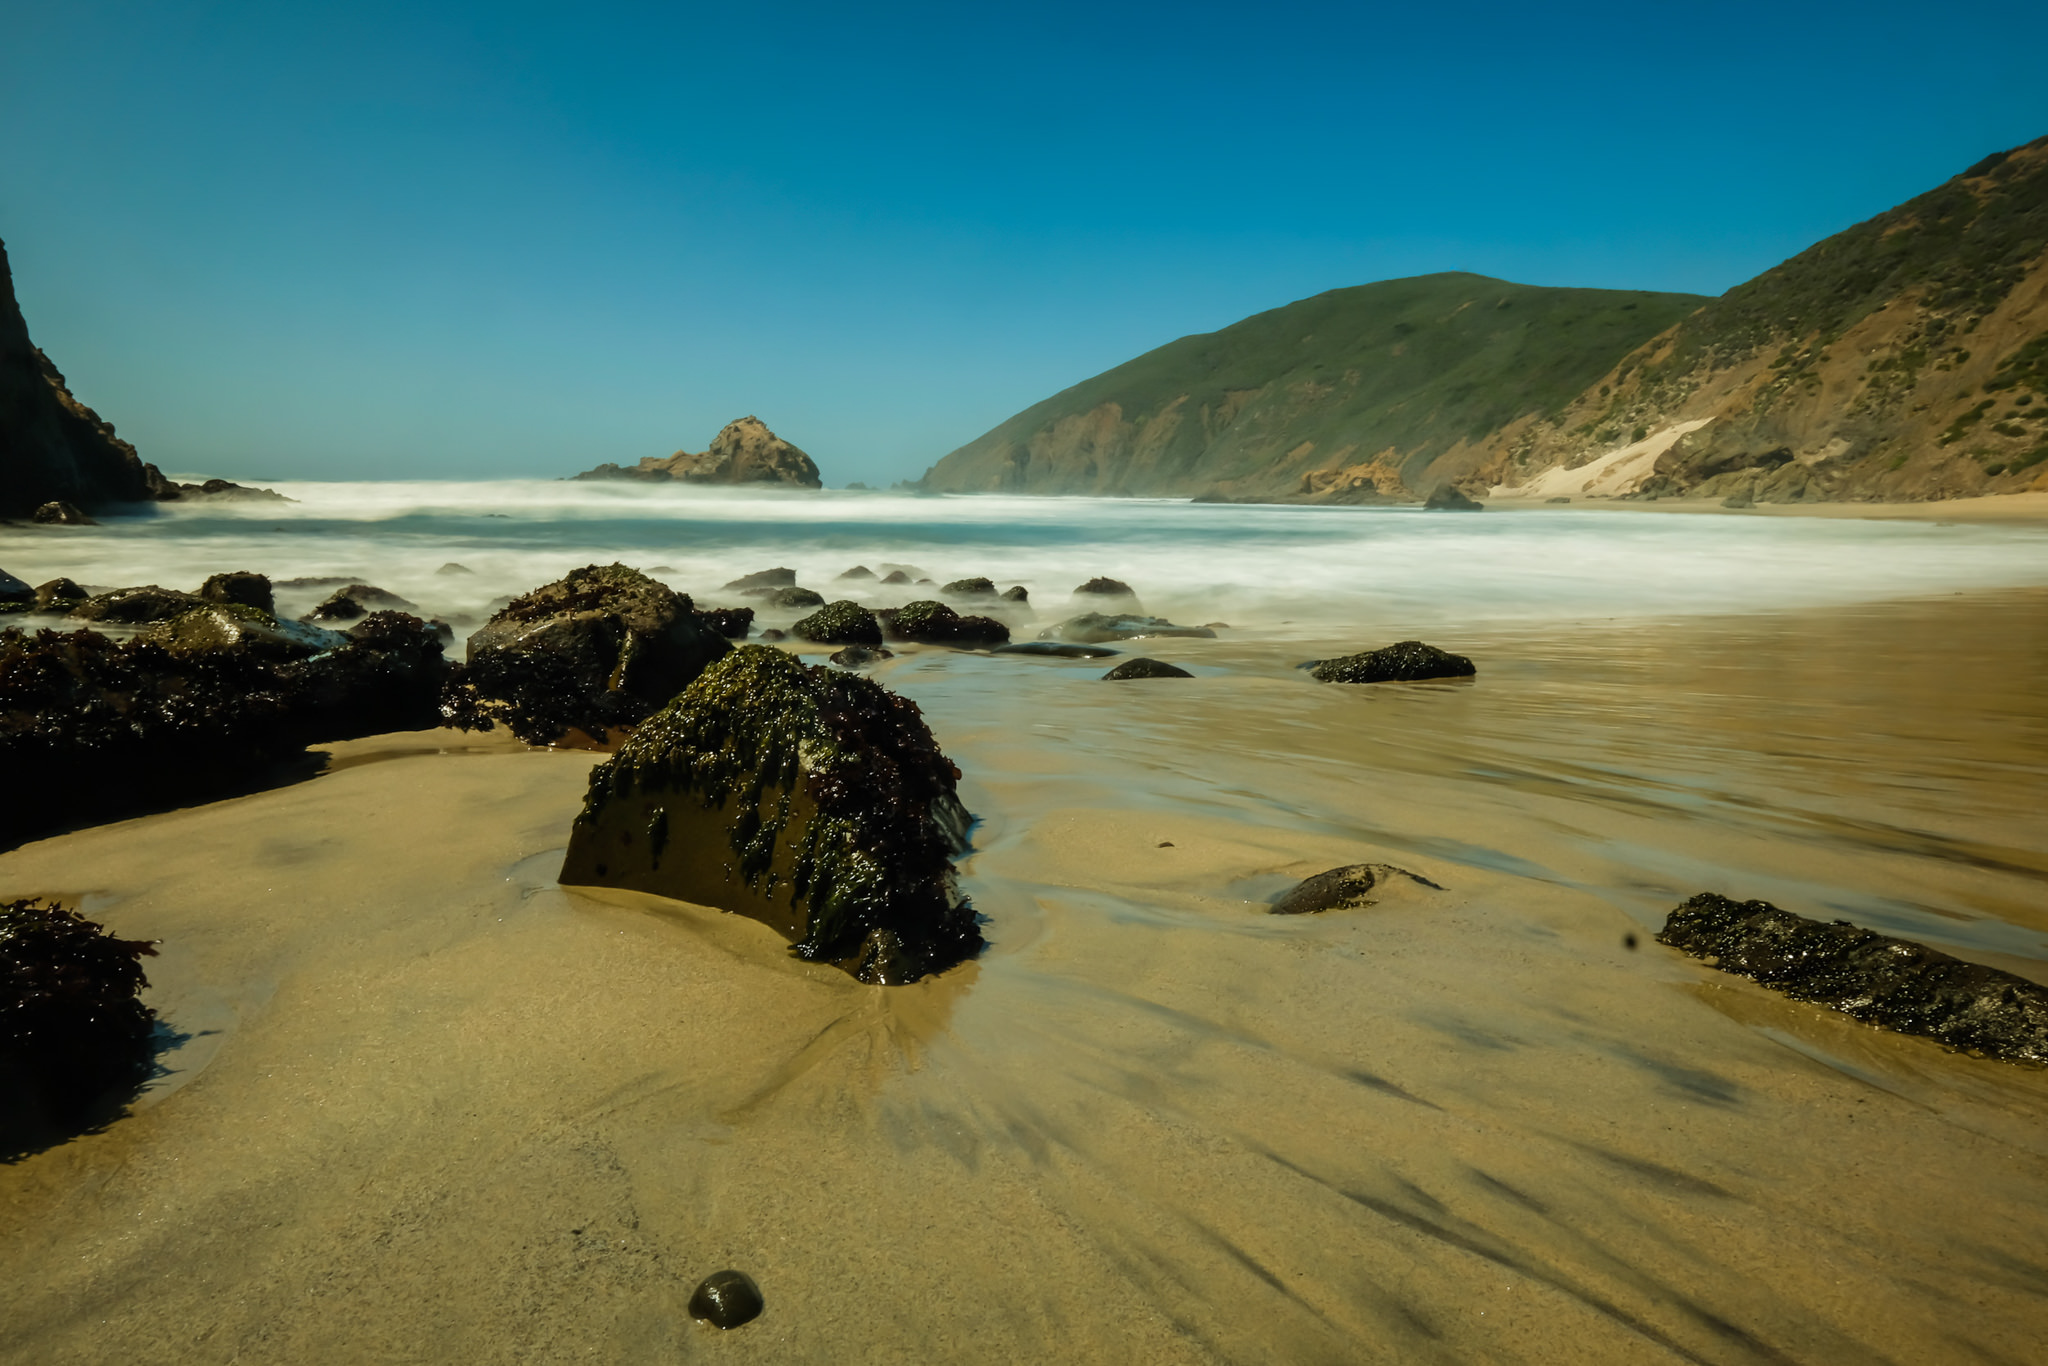
X-Pro2 + XF10-24mmF4 R OIS @ 13.8mm, ISO 100, 4 seconds, f/22.0
2) Help You Identify Possible Problems or “Crutches”
Looking at the aperture settings, it’s immediately apparent that I’ve shot most of my images wide open or close to it. It’s a tempting thing to do. I mean, I’ve spent money on those expensive fast lenses – why not use them at those fast speeds, right?
And while it’s hard not to love portraits shot at wide apertures, a quick look through my images (again, clicking on each data point in the list will bring up all the images shot at that setting) tells me that this is more out of habit than necessity. Finding patterns isn’t necessarily a problem – a catalog of portrait images, for example, should be skewed more towards those wide apertures, while landscape shooters will find most of their shots taken at smaller apertures. But taking some time to look at those numbers and the corresponding images may help you find things to watch for in the future.

Canon EOS 50D + EF70-200mm f/4L USM @ 75mm, ISO 400, 1/4000, f/4.0
3) Show You the Limitations of Your Gear
If the longest lens you own has a focal length of 70, and you have a significant number of images shot at that focal length, it might be a sign that it’s time for some longer glass. If your fastest glass shoots at f/2.8 wide open and you notice that you tend to shoot wide open, it might be time to try some faster primes. ISO is another spot where you might run into limitations. Are you constantly pushing those high ISOs? It takes just one click to see all of the images you’ve taken at iso 6400 and decide if the cameras you have are giving you acceptable noise levels. Better yet, you can click on ISO 6400 in the “ISO” column, then each individual camera you’ve used at that setting in the “Camera” column to see just how the quality compares.
4) Get Started Using Prime Lenses
Most photographers start out with zoom lenses, and sometimes making the jump to primes can seem intimidating. Sure, the fast glass is tempting, but will it be too limiting? When you’re getting started making the move to primes, it’s a good idea to start with a focal length you’re already comfortable using. Looking at the focal length column will quickly tell you how many images you’ve shot at each focal length, and you can use that information to identify a good starting point for your next prime lens purchase.
5) Look for Surprises
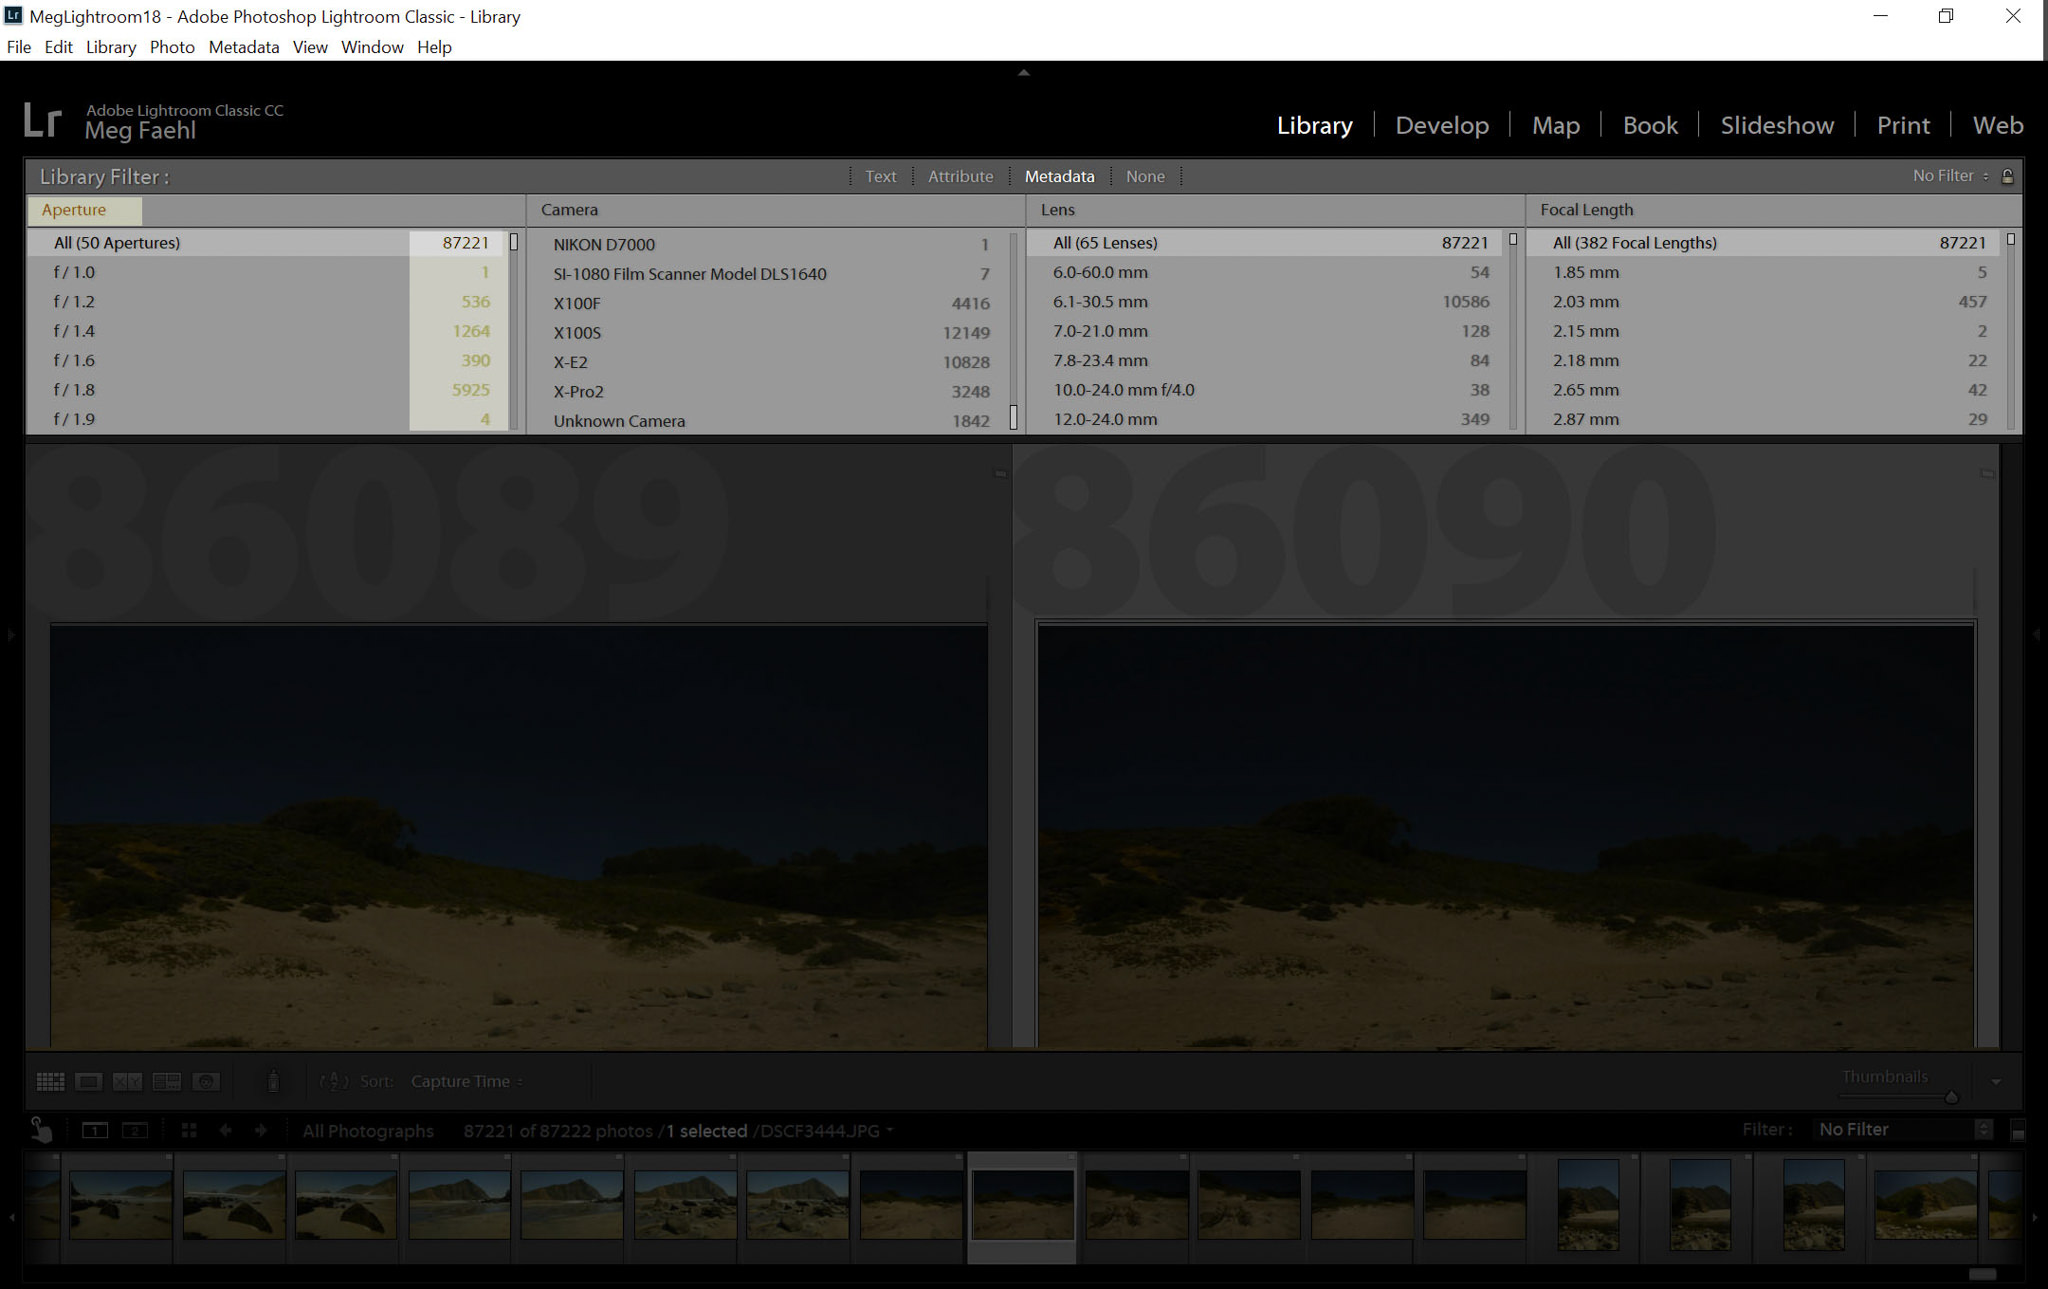
Sometimes, just scrolling through that data will help you uncover truths about your own work that were previously unnoticed. The first time I looked closely at the Camera data, I was shocked at just how many pictures I took on my iPhone. I guess it shouldn’t have been shocking because it’s always with me, but I never would have guessed that I’d come to rely quite so heavily on the convenience of my camera phone.
I made a point to keep my “good” cameras more accessible, moving them out of the camera bag in the closet and storing them more accessibly around the house. A quick look at the number of images shot with each camera in the years since I made the change show that it did in fact make a difference in how I shoot and what cameras I shoot with.
6) Identify Slow Periods and Times When You May Need More Inspiration
Looking through the Dates column gives you an easy way to see just how many pictures you’ve taken each year, and then each month of the year. While businesses have slower and busier seasons, what about our personal work? I’m a slow winter shooter, with February and March being my low points almost every year. Now that I know this, I’m going to go out of my way to schedule a trip, workshop, class, or even just challenge myself to a personal project next February and try to push through that creative boredom.
7) Prepare for a Trip
Packing gear for a trip can be a bit of a challenge – that constant push and pull between wanting to travel light without sacrificing everything you might want or need.
When I’m scouting a new location, I do take time to research (via Google, Flickr, etc.) the locations I’m traveling to, so I can get an idea of the type of shots I might want and plan my gear accordingly. But all of that research only tells me how other people handled that location. It doesn’t necessarily tell me how I’m going to want to photograph that same spot.
This is where the metadata filter comes in handy. I like to look through images I’ve taken in similar locations or circumstances (or even the same location if I’ve been there before), and look through the metadata filter to identify which cameras, lenses, and settings I relied upon to get those images. On a return trip to Big Sur, I looked through the metadata filter from a previous trip and noted that the vast majority of my images were taken super wide or super telephoto – I had very few images in between. This let me narrow down my lens selection and bring only the gear I really needed.
Lightroom’s metadata filter is so much more powerful than just a search tool. If you take the time to use it to really reflect on your own work and shooting habits, these are just some of the ways it can help you learn and grow as a photographer.
Thank you to Photography Life reader Meg Faehl for this tutorial! You can see more of Meg’s work on her website, and follow her on Instagram as well. This article was written as part of our 2018 guest post contest.
I’ve been wondering how to access that panel….I’m still wondering
If you look at the first photo in the article, you should be able to see where it is located. You go to the library panel and then just above the main section, above your photo grid, metadata is one of the filter options! Hope that helps.
Click ” view” in the top menu bar and make sure ” show filter bar” is selected
Looks like you have to be in Grid View to get that Library filter to show at the top of the screen.
Like my father used to say…. Now you can tell your grandmother you learned something else today. God rest their souls and Thank you for a great article. This has really stimulated my thinking.
I’ve found this tool helpful for taking the analysis a bit further:
www.lightroomdashboard.com
Wow- that looks awesome. I’m going to have to check that out!
Great article. I’ll be researching my metadata soon. Beautiful photos.