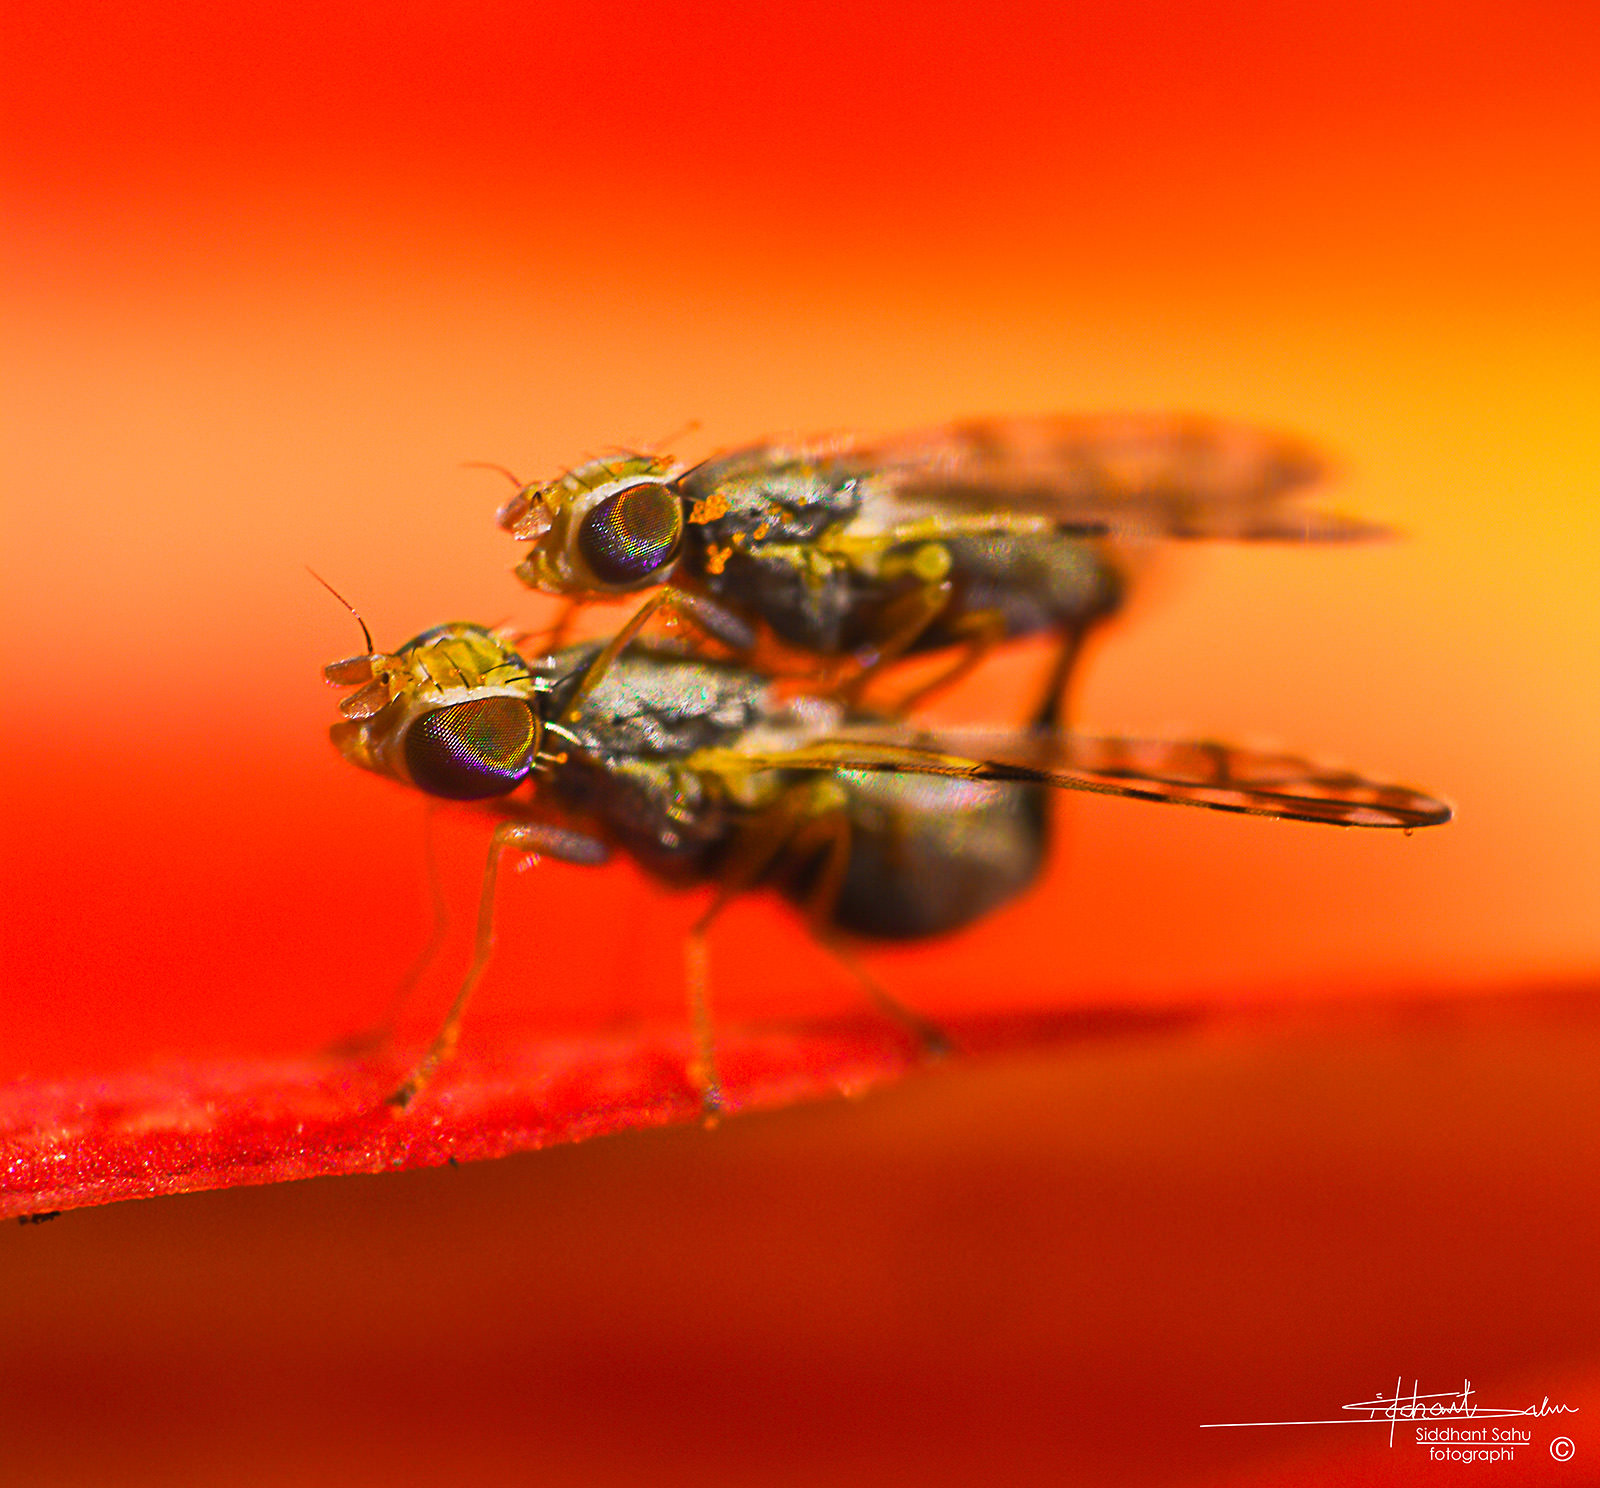
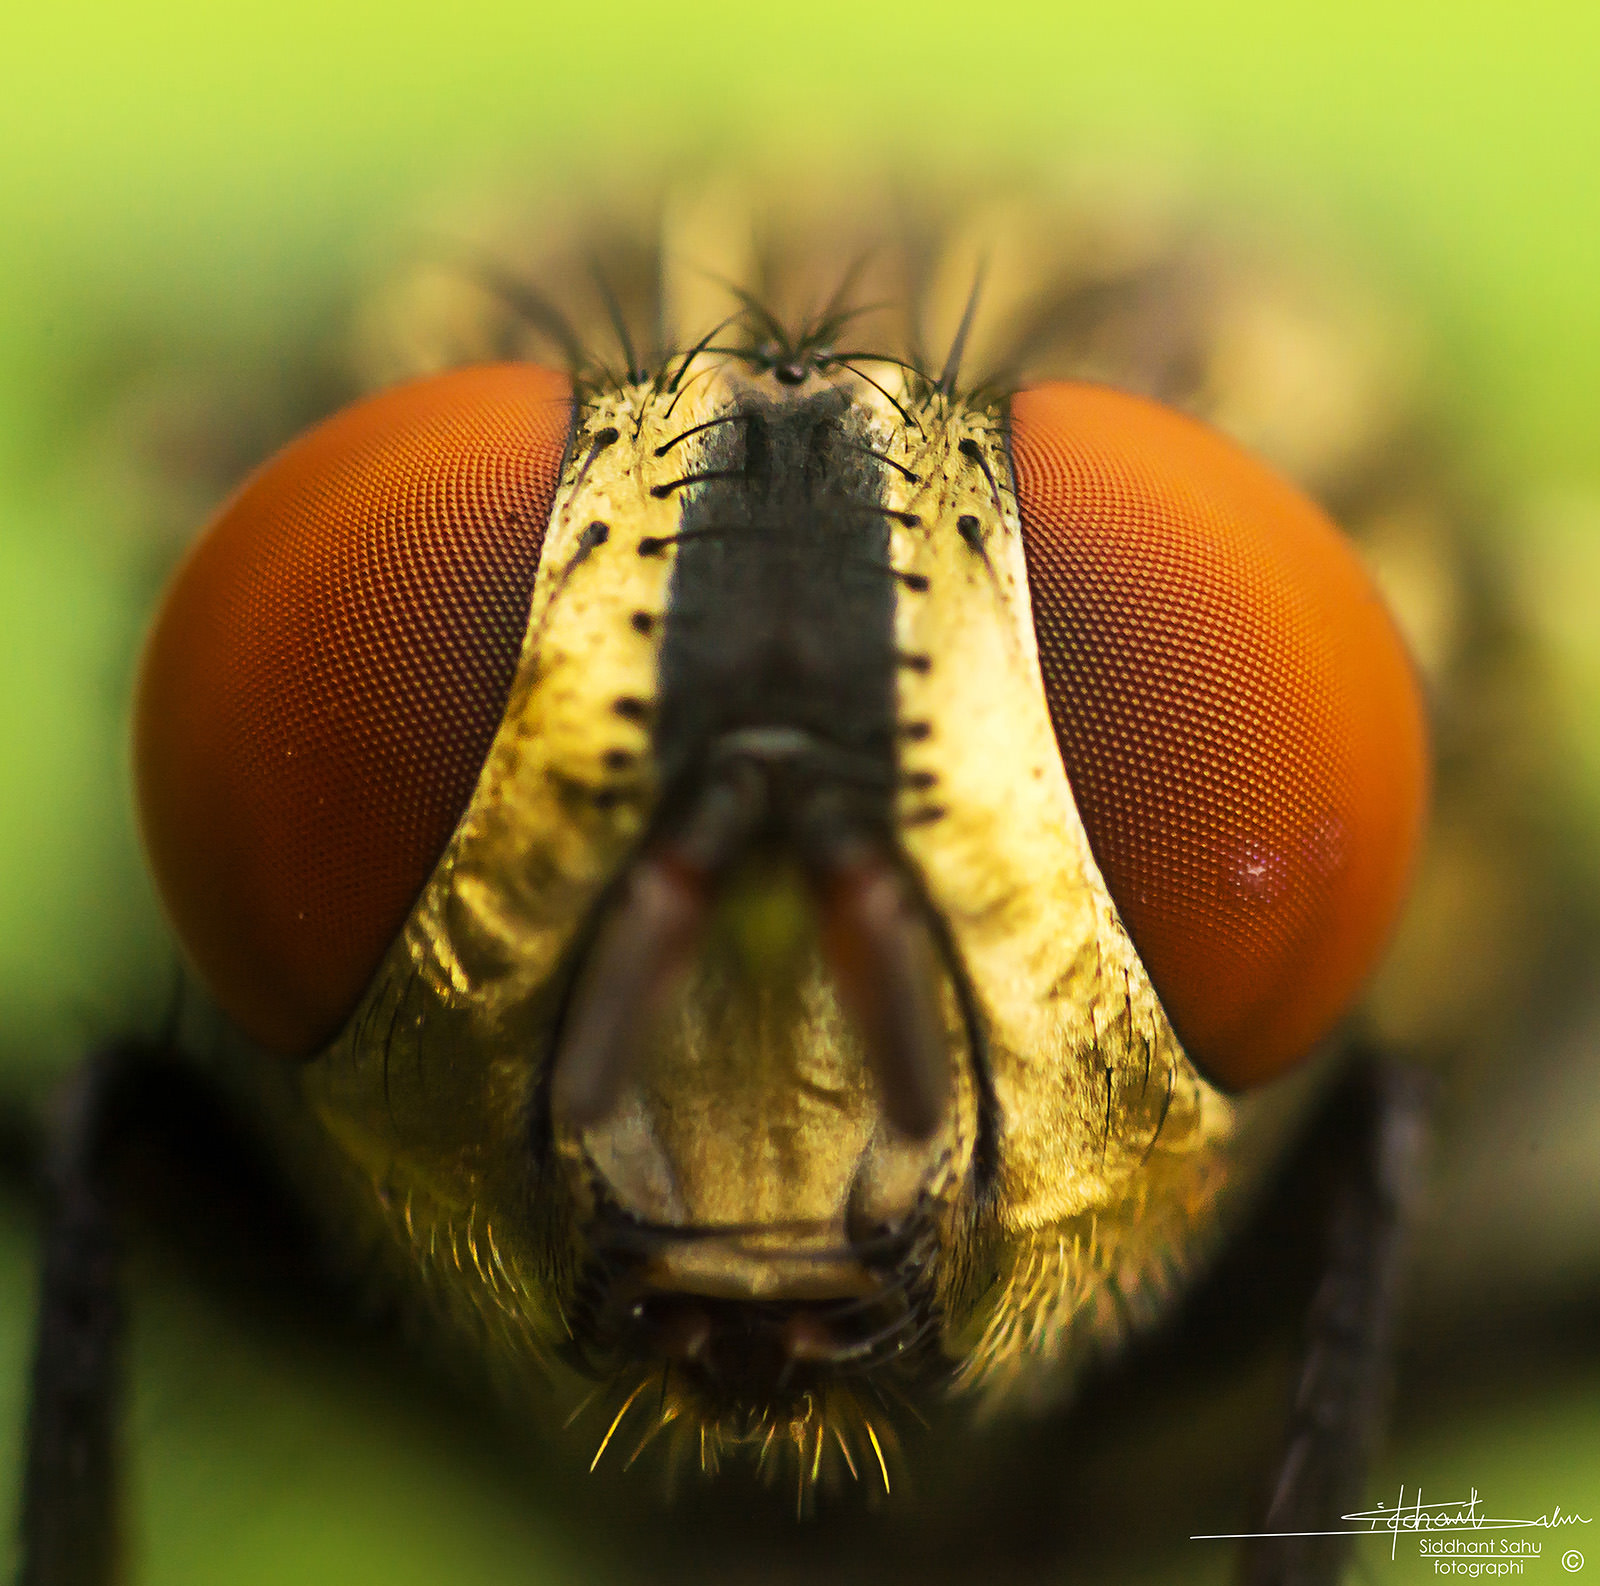
Hey folks, my name is Siddhant Sahu, I am a 16 years old aspiring photographer from India. I have been shooting macro photographs for about a year now and I would try to encapsulate all I have learnt along my way in this short article. I believe that macro photography has the power of entering in a whole new world of tiny creatures. In fact with only modest piece of equipment you can shoot high magnification macro photographs. It’s good to mark the behavior of insects and how close you can approach some of them, but then again these are wild animals and there is no way to predict how exactly they will behave, each subject can be different, each background can be different. But with digital photography there is no penalty to shoot thousands and thousands of photos, and eventually someday among those thousands photos one particular would be usable enough. Anyone is capable of doing this, you don’t need the greatest lens or the newest camera out there. Macro photography is physically exhausting, challenging and requires a lot of patience and time consuming but you can get amazing results with fair piece of equipment.

Table of Contents
The Gear I Use
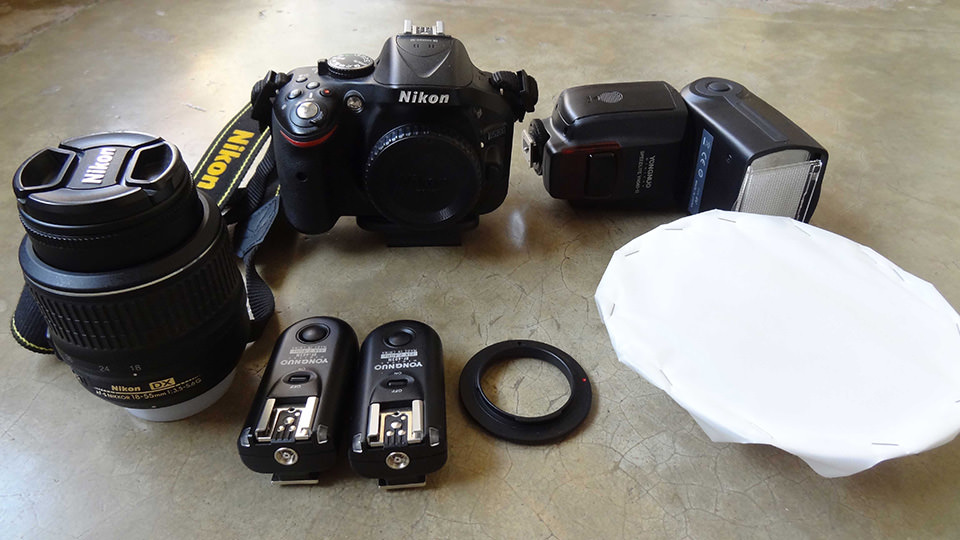
- Nikon D5200
- Nikon 18-55mm f/3.5-5.6G DX kit lens
- Yongnuo YN560 II Speedlight
- Yongnuo RF-603N Flash Triggers
- Homemade flash diffuser
- Nikon 52mm Filter Reverse Ring
First, we need to attach the reversal ring onto the filter thread of the lens and then after that attach it to the camera body itself. Since we are fixing the lens reversed, we lose electronic connection from the body, so we need to adjust our aperture and focus it manually. You have to manually adjust the aperture with your fingers while shooting. As the lens is reverse-mounted, depth of field is also going to get shallower – the wider you are, the shallower the depth of field. With such a setup at the widest aperture, depth of field is literally less than a millimeter! There are different ways to keep the aperture lever in place on Nikon lenses, but my personal method employs using a piece of paper to keep the aperture narrower, as shown below:
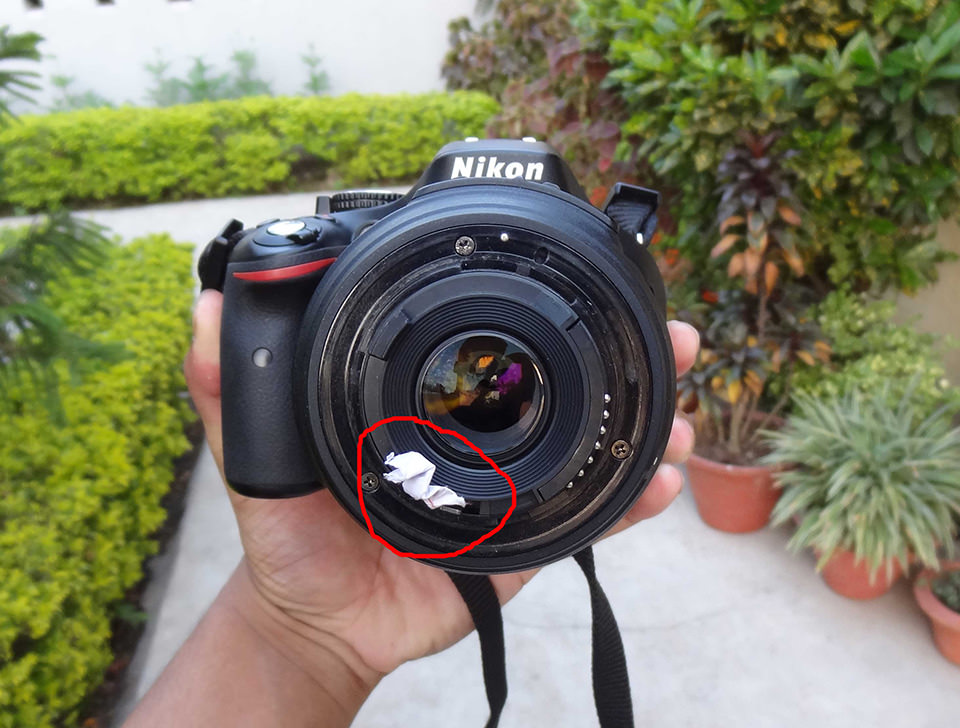
Not the best looking setup, but it works!
Next is connecting the flash trigger to your speedlight and a transmitter on the camera hot shoe. A homemade flash diffuser from any type of translucent material works great and that’s what I use, but you can find plenty of ready diffusers that achieve the same result. There are many guides on making DIY flash diffusers that you can find online. Flash definitely helps in freezing motion in macro photography and is an important aspect to consider. The next step is to decide on whether you want to hand-hold your camera and the flash like I do, or mount those on a bracket and tripod to get more stability. I would recommend the latter, since you can control your setup better.

Focal Length in Macro
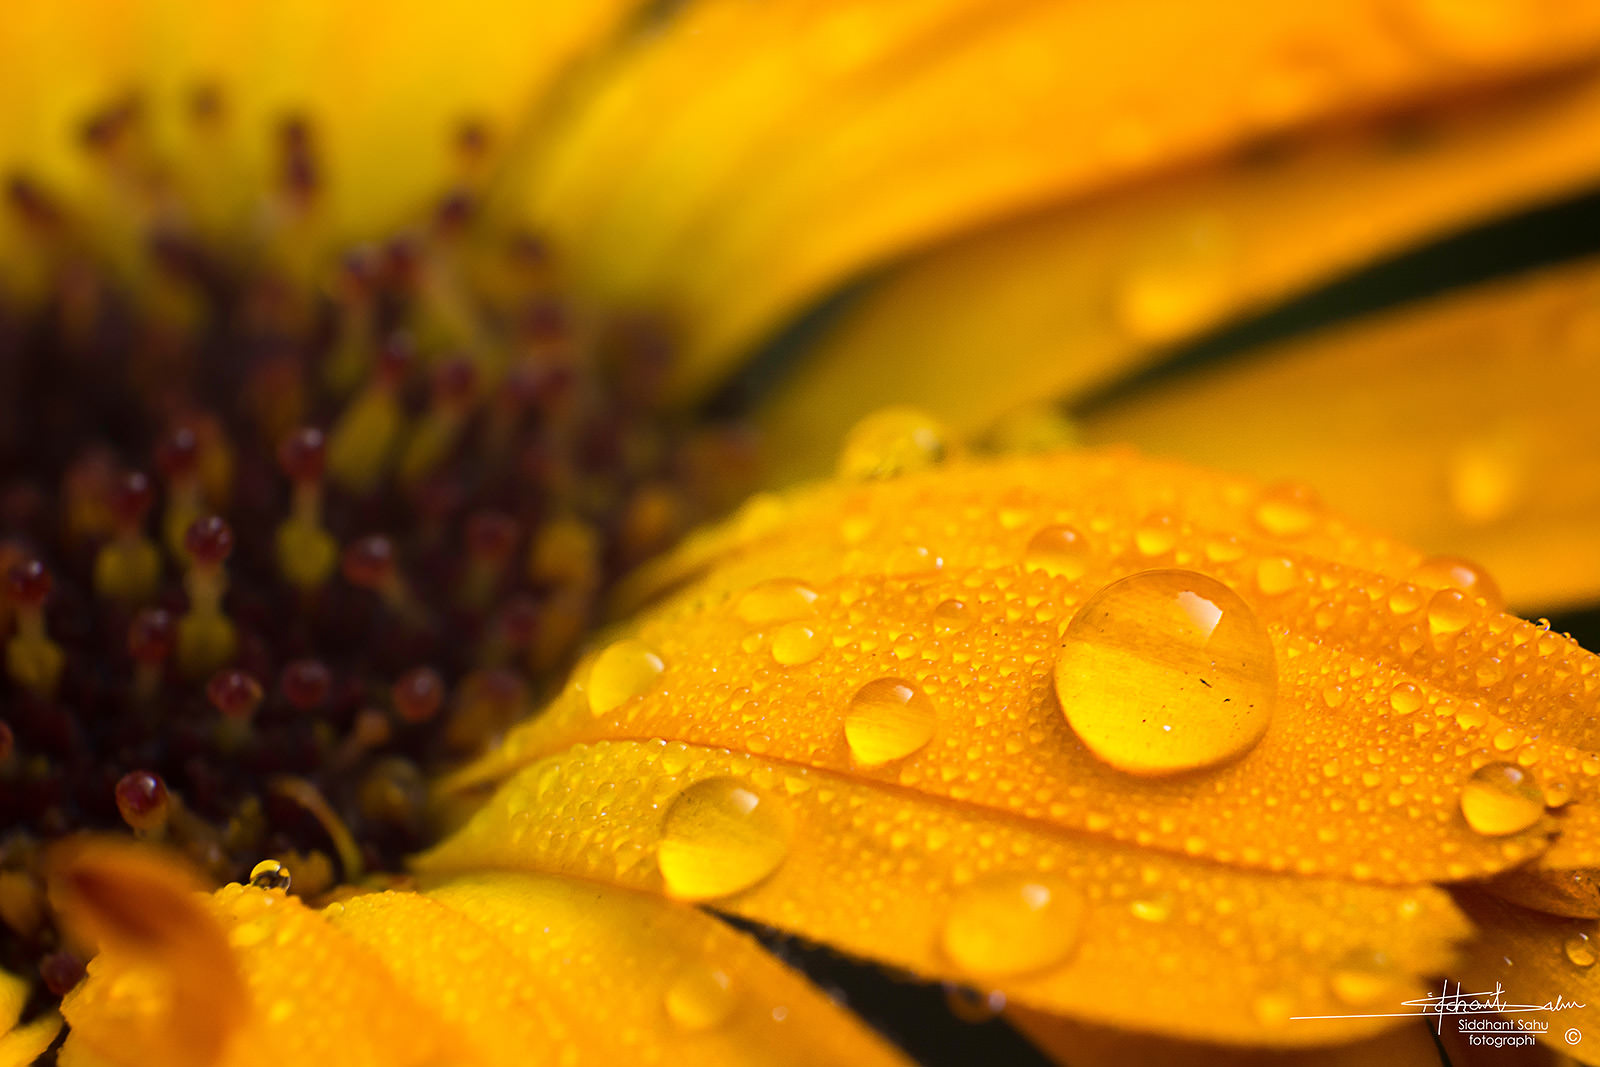
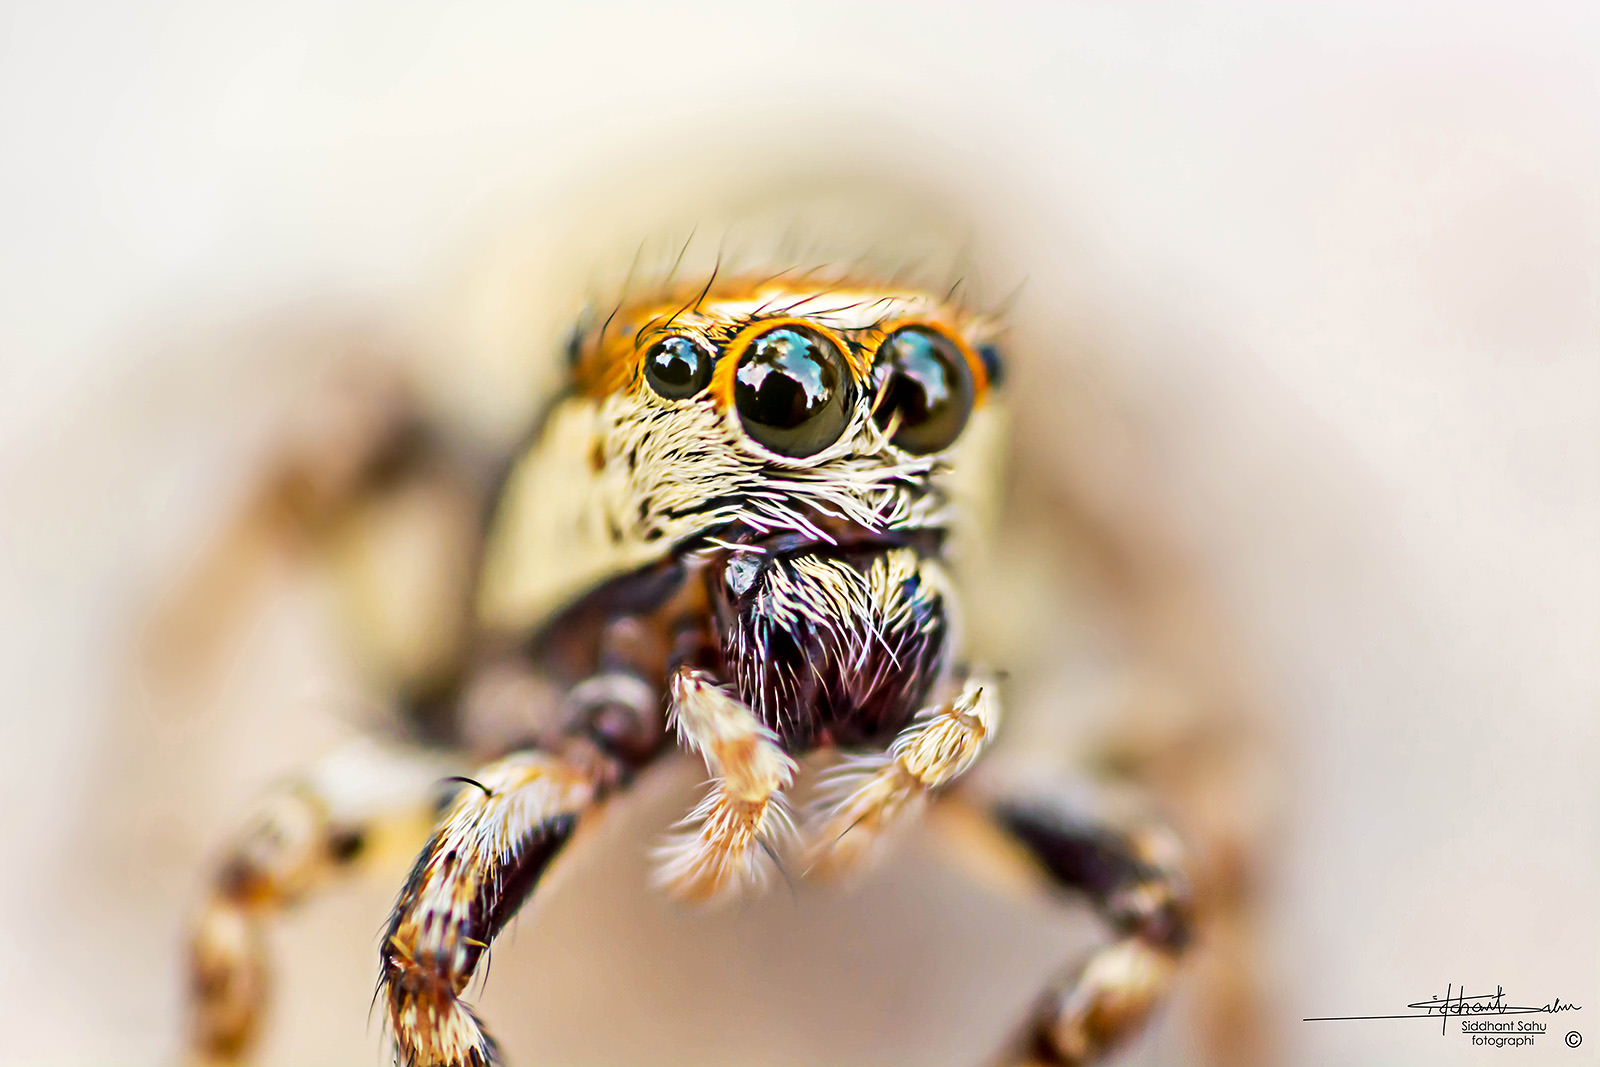
Due to the fact that the lens in reversed, focal length is also going to be working in reversed manner. This means that shorter focal length on the lens will give you more magnification than longer focal length. For flower shots, a 55mm reversed focal length can be used, whereas if you need higher magnification, you should consider using shorter focal lengths – around 24mm for insects, spiders, flies, bugs and all. When you look through the viewfinder at these focal lengths or use live view on the camera, such high magnifications will look really cool and exciting! Also, the shorter the focal length, the closer you need to physically get to your subject!
Camera Settings
Your camera settings will differ depending on what you are doing, but there are some points to keep in mind. With your aperture already moderately stopped down for more depth of field, shutter speed should be around 1/120 – 1/60 of a second to minimize camera shake and should be less than your flash sync speed (1/200s), or part of your image will be dark. Because we are shooting macro, every bit of movement would get highly magnified, so pay attention to camera shake, wind and other factors that could introduce blur to your images. It might be a good idea to adjust your ISO to keep your shutter speed fast enough and try to be as stable as you can, specially if you are hand-holding your camera. For the speedlight, I use power of 1/128, 1/64 or 1/32, not more than that, just to add a little more light, freeze the motion and to prevent images from looking too “flashy”. Now you are pretty much done – go find some bugs or flies in your garden and the possibilities are endless! Oh and lastly, shoot early in the morning, while the bugs are still half asleep and the light is soft and beautiful.
Post Processing
Post processing is very important for any kind of photography, so don’t just stop your process after capturing images. Although you wouldn’t be dealing with heavy editing in macro photography, there are still some steps you should take to ensure that your images look good. You can start by importing your photos to Photoshop, Lightroom or any other post-processing software and following these simple steps:
- Adjust Exposure: I tend to shoot macro photos a bit underexposed by around 1 or 2 stops just to be able to yield higher shutter speeds. Remember, freezing motion in more important than getting optimal exposure, since you can recover quite a bit when shooting RAW. If light conditions are good, don’t underexpose – instead, try to “shoot to the right” of the histogram to get optimal exposure in order to yield noise-free images. But if your shutter speed suffers badly, don’t feel bad about exposing to the left to keep up with the shutter speed.
- Contrast: Just grab the curves adjustment and create a slightly S shaped graph in RGB, or just increase the whites and the darks values.
- Cropping: Crop your image to your liking for better composition, but be weary of cropping too much, or you will lose a lot of resolution.
- Sharpening: I save full size images without applying aggressive sharpening and only sharpen images when uploading smaller versions to Facebook, Google+, my website or any other web use. See this excellent article by Nasim on proper way to resize images in Lightroom, then see the second article on proper sharpening techniques in Lightroom
That’s essentially it! Hope this guide helps you with getting some amazing shots without spending a lot of money.
would you still recommend this setup in 2024? or is there a better camera for a beginner on a budget you would recommend? i see the nikon 3300 is recommended alot too.
Magnificent shots and excellent information!
good job Siddhant. Nice work with creative settings. kudos.
Use Nikon BR-6 with a clear filter to control aperture and prevent damage to rear element. Its available in ebay.com and ships to india for abt 2$
HI, thanks so much for a great article!! I’ve just bought a D3300 and been told that if I buy a reverse mount ring adaptor, the camera won’t take pictures because it won’t pick up a lens mounted. Is this true? Thanks Mike
Yes with reverse lens technique you would loose the electronic contacts of the lens from the body. But you may be able to take photos. At least with my Nikon D5200, it allows me to use the shutter when no lens in mounted.
Wow! Amazing, high quality and professional looking image with such humble equipment. Your patience and persistence is truly paying off. Very well explained tutorial. Thank you so much. Your images are inspiring and truly beautiful!
Thanks Donna !
Amazing work there! The results you’ve got with budget equipment is really cool. But can you tell me which would be better for insect macros, reversal ring or an extension tube (Auto or manual)? I’m not getting enough confidence with reversal rings since I use Canon 1D Mk III which comes without a kit lens, and hence catching dust is a problem on using it with a 28-105mm lens.
With reverse lens technique you always have the risk of getting dust in your mirror or sensor. With moderate automatic extension tubes your life is very easy and your very get very consistent results and much better quality photos.
Very useful brother.
Thanks Chandada !
hello,
Do we have different reversal rings for different lens or same ring can be used for different lens?
Hello Grishma,
The reversal rings screw in front of the lens just like a filter. The compatibility of the reversal rings depends on the diameter of the front of the lens which is usually written in front. There are different reversal rings available of different diameter. Be sure to get one that fits your lens.
Thank You !
I’m really overloading you with questions, sorry! Do I need a flash for this?
Yes JC previously even I didn’t have a flash but it’s quite handy in freezing the motion :)