In this post the value of using high dynamic range (HDR) photography for landscape and particularly panorama photography will be examined. This combination of two fairly widely used photographic techniques, the making of panoramas with HDR photographs is described in books dedicated to HDR techniques. This discussion will provide the reader with some methodological starting points and provide examples showing why the extra effort is worthwhile. Previous Photography Life posts are excellent reference primers for landscape photography and should definitely be consulted for their insights. In this post the term “panoramic” is used to indicate that two or more adjacent photographs covering overlapping parts of the same scene have been combined to make the single final image. “Landscape” is used to describe final photographs produced from a single image. All of the photographs in this post are panoramas by these definitions.
Table of Contents
1) Rationale for using HDR in landscape/panorama photography
First, what is a High Dynamic Range photograph and what are its advantages? Modern digital cameras can capture a fairly wide range of exposure values between “black” on the dark end to “white” on the light end. They are not capable of reproducing the full range of exposure values that the human eye can see, however. The purpose of HDR then is to expand the exposure range that the camera can capture to more closely approximate what we see. This is done by combining a group of photographs of the same scene that have been intentionally both under and over exposed. These multiple exposures are combined using dedicated software to produce an image with a greater exposure range than the original single image can contain. The number of different exposures taken can vary, but for our purposes at least 3 are needed.
It should be noted that newer cameras, including cell phones, frequently have an HDR mode. This feature does allow an expansion of the range of exposure values the camera can record. Since this is done entirely within the camera, the output is a single image recorded in a compressed jpeg format. The advantage is obvious; it is simple and does not require additional post processing. But the result is different from the RAW data and has lost much of the information the camera can record. If one works routinely with jpeg images, in-camera HDR seems to be an improvement over a single image particularly for recording higher contrast scenes. It might be considered as a substitute for creating a panorama with improved dynamic range, but in-camera HDR results also substantially limit what can be achieved. Clearly the technology of cameras is continuing to improve and may eventually improve enough to make what follows in this post obsolete. The goal here is to produce the highest quality final image, which retains the greatest inherent detail in the scene. For now then this means starting with RAW images and using post processing steps.
Why is HDR advantageous for a landscape/panorama? Frequently there is a greater range of exposure values within a landscape/panorama than the modern DSLR camera can capture. For example, even in properly exposed images, detail in the darker areas of the picture may appear “black” and more subtle detail is lost. Similarly the sky and particularly clouds may be over exposed. By increasing the exposure range, HDR methods allow a more complete representation of the dynamic range and detail inherent in these complex images. While there is a legitimate resistance to the “HDR look” by many photographers, the extended dynamic exposure range does have clear advantages. By resisting the urge to “over process” during the creation of the HDR image, the more artificial look frequently associated with HDR images can be minimized while the enhanced dynamic range can be exploited. With care the final HDR image can be a more complete representation of what we see without introducing an apparent artificial enhancement.
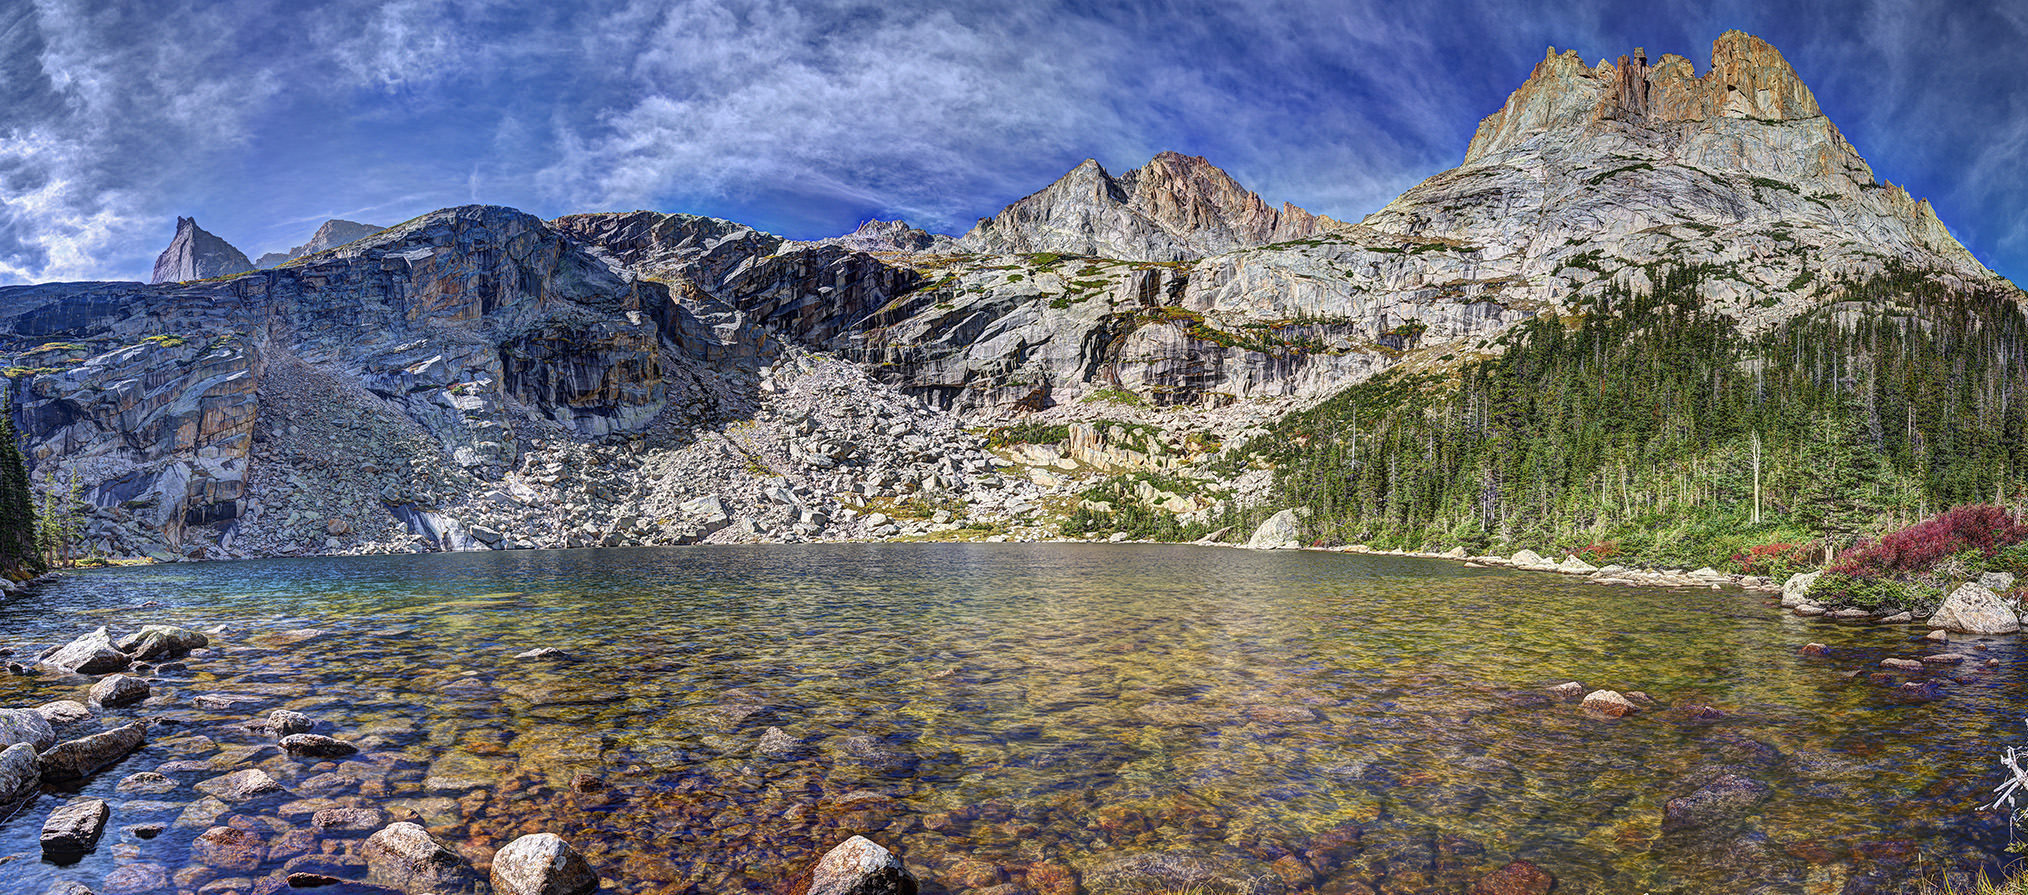
What sort of differences might be expected from applying HDR to a panoramic scene? Plate 1 is a panorama of Blue Lake near Rocky Mountain National Park (RMNP) and is a combination of a group of HDR images. For comparison the same panorama was made by more conventional methods. In Plate 2 the same correctly exposed non-HDR images have been used to create a similar Blue Lake panorama. Obviously, this is not quite a fair comparison as the image in Plate 2 could have been further manipulated in Lightroom, Photoshop or any number of other similar programs. It should be emphasized, however, that in the single image-based panorama some detail is permanently lost and can’t be recovered. For example, the patches of snow are just “white”; there is no detail to enhance nor can it be recovered as it is permanently lost. The HDR version captures these more subtle details.
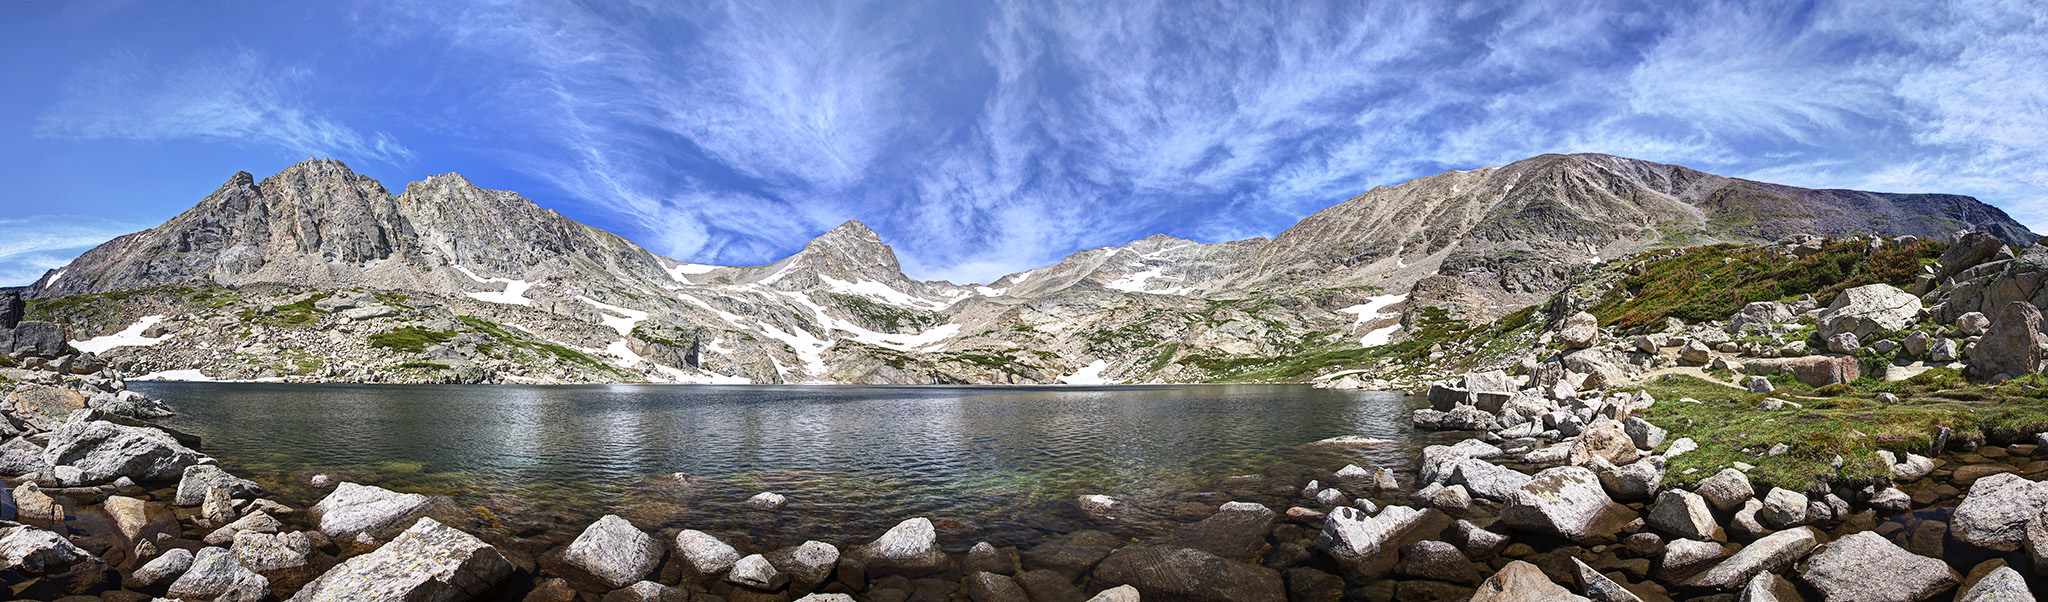
NIKON D7000 @ 16mm, ISO 100, f/11.0
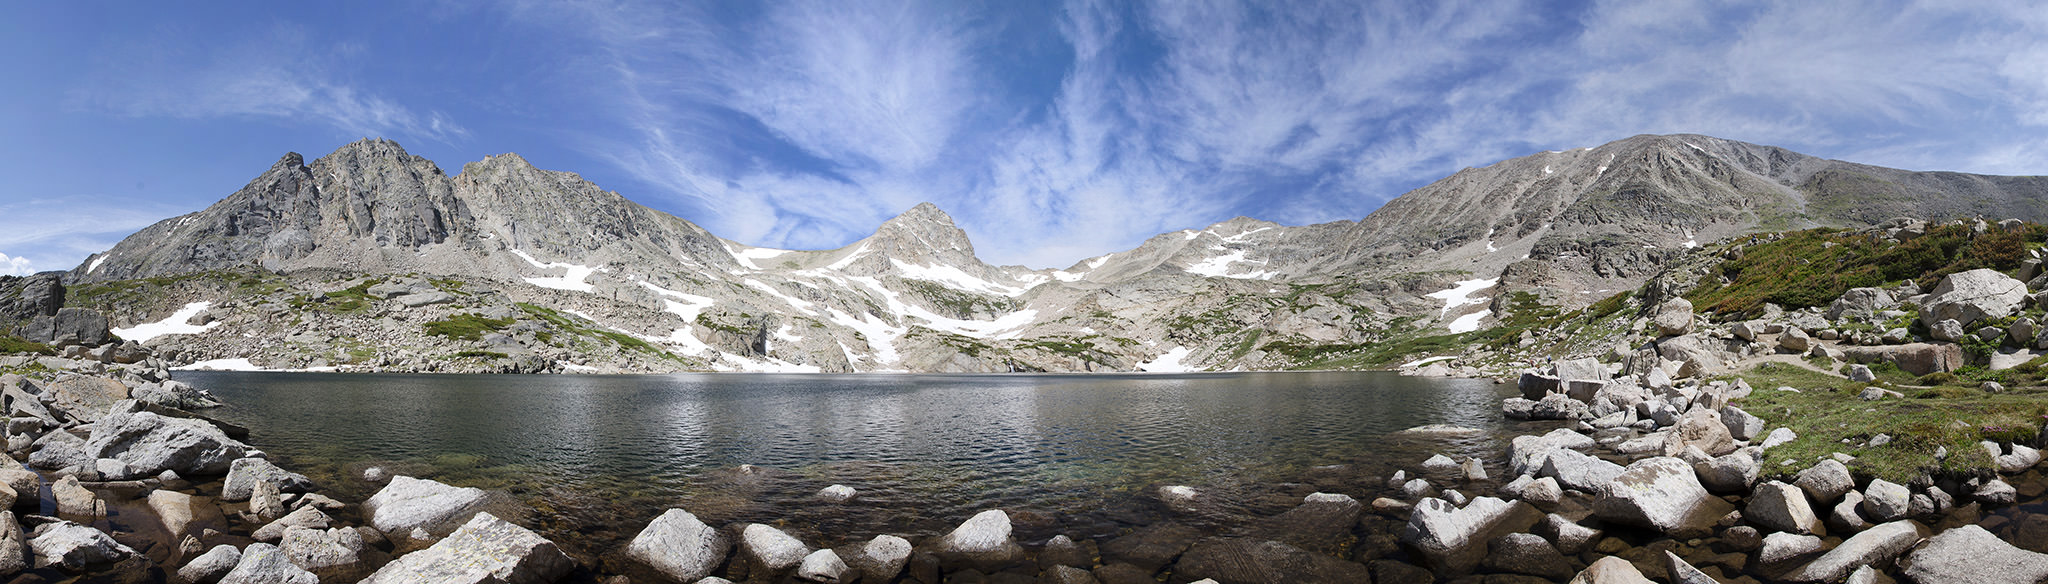
NIKON D7000 + 16-85mm f/3.5-5.6 @ 16mm, ISO 100, 1/50, f/11.0
As usual, care in the field is rewarded many times over by minimizing the post production effort/time involved in getting to the desired final result. Let’s begin then by considering some suggestions for equipment, followed by some technique guidelines that may be helpful. Probably the best advice here is to state the obvious: these suggestions are starting points that you may find can be readily improved upon to better suit your needs and the scenes you are trying to capture. First some considerations which outline useful/essential equipment features for successful HDR images.
2) Photographic Equipment
- Digital camera: An essential requirement is to use a camera which allows exposure settings to be readily adjusted. You don’t need a particularly “feature rich” modern camera to get started. The photograph in Plate 3 was taken with a Nikon D40x, a camera that requires a manual adjustment for each change in the exposure required to make an HDR image. While this is neither the easiest nor the recommended method to do HDR, it can be done. A much more convenient alternative is to use a camera that has a bracketing function.
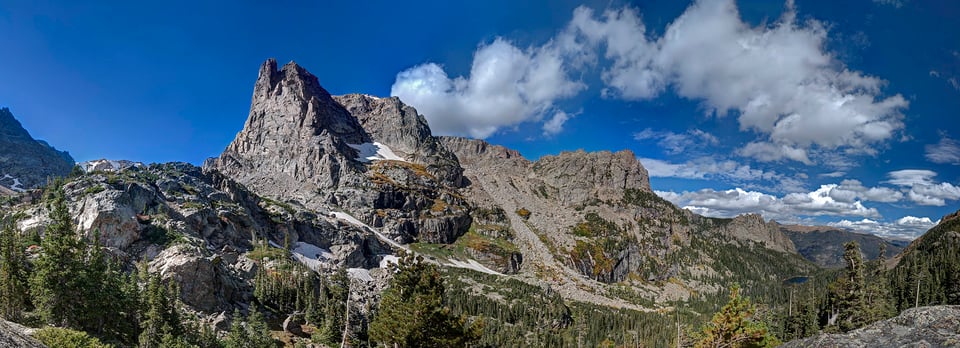
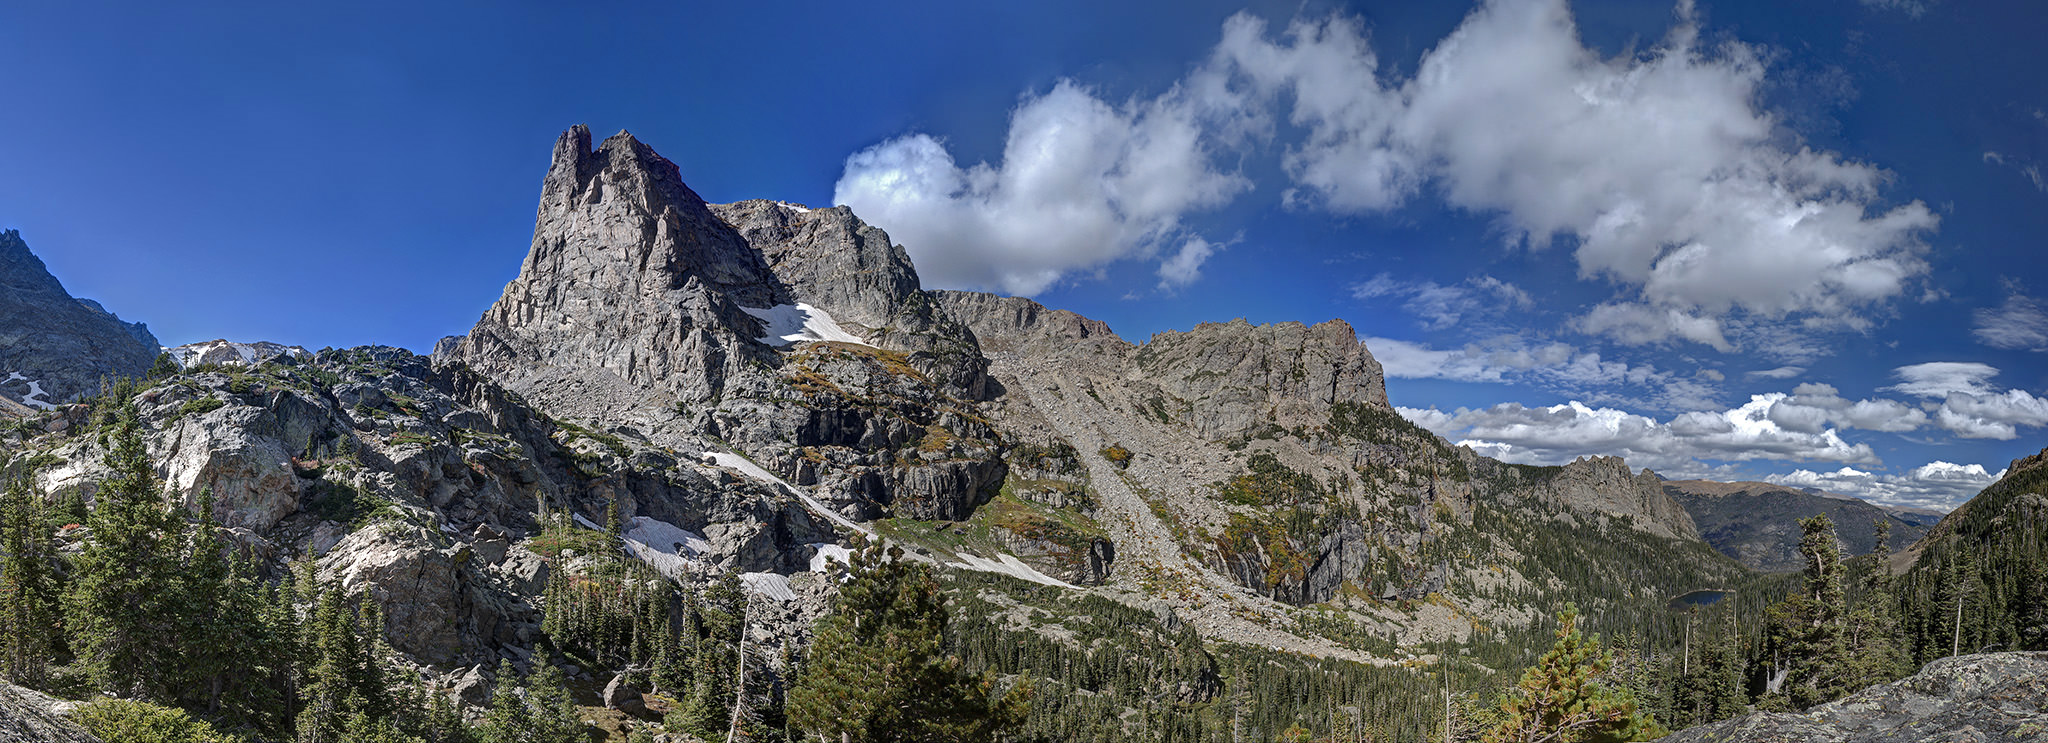
Plate 3. Little Matterhorn
NIKON D40x + 16-85mm f/3.5-5.6 @ 16mm, ISO 100, f/18In addition to having a bracketing function it is also quite helpful to be able to save a group preferred settings as a User-defined setting. This allows the camera to be switched quickly and repeatedly to desired settings for exposure bracketing, ISO settings, preferred f-stop, white balance, etc. I find there is usually (at least) one important step that is nearly overlooked in getting all the steps completed to make the composite images for the final HDR panorama. Having ready access to the desired camera settings greatly increases the chances of success by helping to minimizing what can go wrong at this early stage.
Another useful feature is the ability to add a view finder display grid in the view finder. These small unobtrusive lines can be used to level the camera if the scene has horizontal (or vertical) line within it, such as the water line of a lake or the ocean.
- Tripod: A sturdy tripod is highly recommended and is essential for achieving optimal results. A ball head that also allows the camera to be independently rotated without use of the ball is necessary for panoramic work. Most of the photographs that accompany this post were shot using a Manfrotto (190CX3) carbon fiber tripod. It is sufficiently strong and, perhaps equally important, light enough to be carried into the field. It is possible to “cheat” on this tripod requirement as will be shown in several of the accompanying example photographs, but the sharpest resultant images are always obtained using a good-quality sturdy tripod.
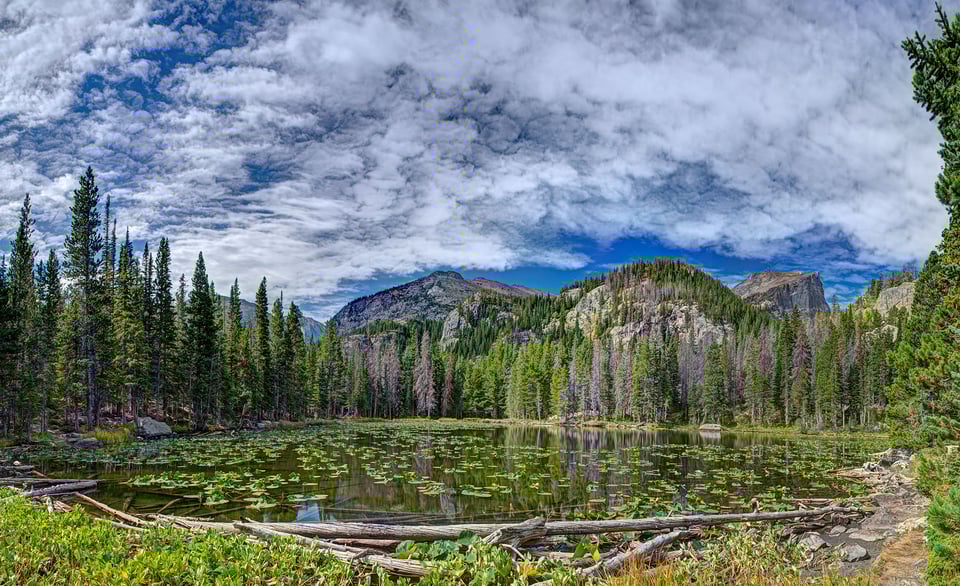
Plate 4. Nymph Lake
NIKON D7000 @ 16mm, ISO 100, 1/13, f/16.0 - Remote release: While it is possible to create an image without touching a camera on a tripod, a remote is again essential for making the sharpest images to be used for an HDR panorama. Working quickly but carefully is a significant advantage in creating panoramas. Since HDR requires multiple exposures, it introduces a further impediment to working quickly. Perhaps the best example of the time-dependent aspect of landscape photography is cloud motion or possibly changes in the light. The need for timely completion of all the shots needed to produce the HDR panorama also argues against using the camera’s exposure delay mode to minimize vibrations associated with the mirror motion. While using an exposure delay mode definitely improves image sharpness and is therefore helpful in single image HDR landscape photography, it seems to be less useful when a larger number of images are needed for the final panorama. The mirror lockup/exposure delay function was not used in any of the images in this post.
- Filters: There are many discussions regarding filters and their usefulness for landscape photography included excellent ones on Photography Life. Read them and try different filters to see which appeal to you and your particular requirements. The present photographs were all taken with a circular polarizing filter. Generally circular polarizers are not viewed as a “good idea” in situations where the field of view is wide and includes the sky as a major element. Circular polarizers in these circumstances can result in unnatural artifacts in which part of the sky is rendered much darker than the lighter areas. This can certainly be an issue, but the circular polarizer’s other advantages may outweigh this disadvantage. Improved color saturation, better contrast, reduced water-reflection artifacts, improved foliage colors and general sharpening of the image all argue that the rewards are greater than the risks. Further the sky issue is minimized if you are fortunate enough to have some interesting clouds in the picture. The panorama of Blue Lake (Plates 1 and 2) shows a field of view of more than 180 degrees wide so would be an obvious candidate for a distracting sky darkening. Thus use of a circular polarizer may be a problem, and then again maybe not. As always it’s your choice, but at least have a circular polarizer available and give it a try.
To summarize, the camera you have may be more than adequate but having some more advanced features available can make the technical parts of the process much easier and your chances of producing the desired image that much better.
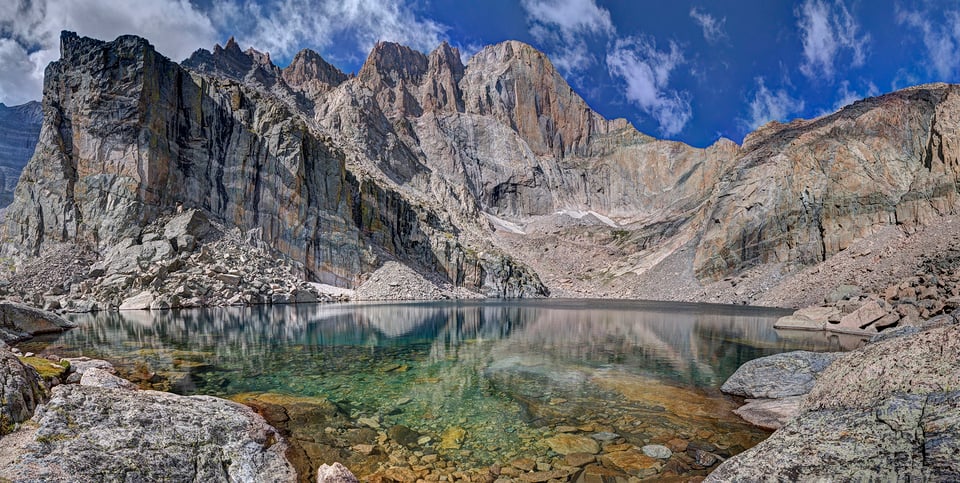
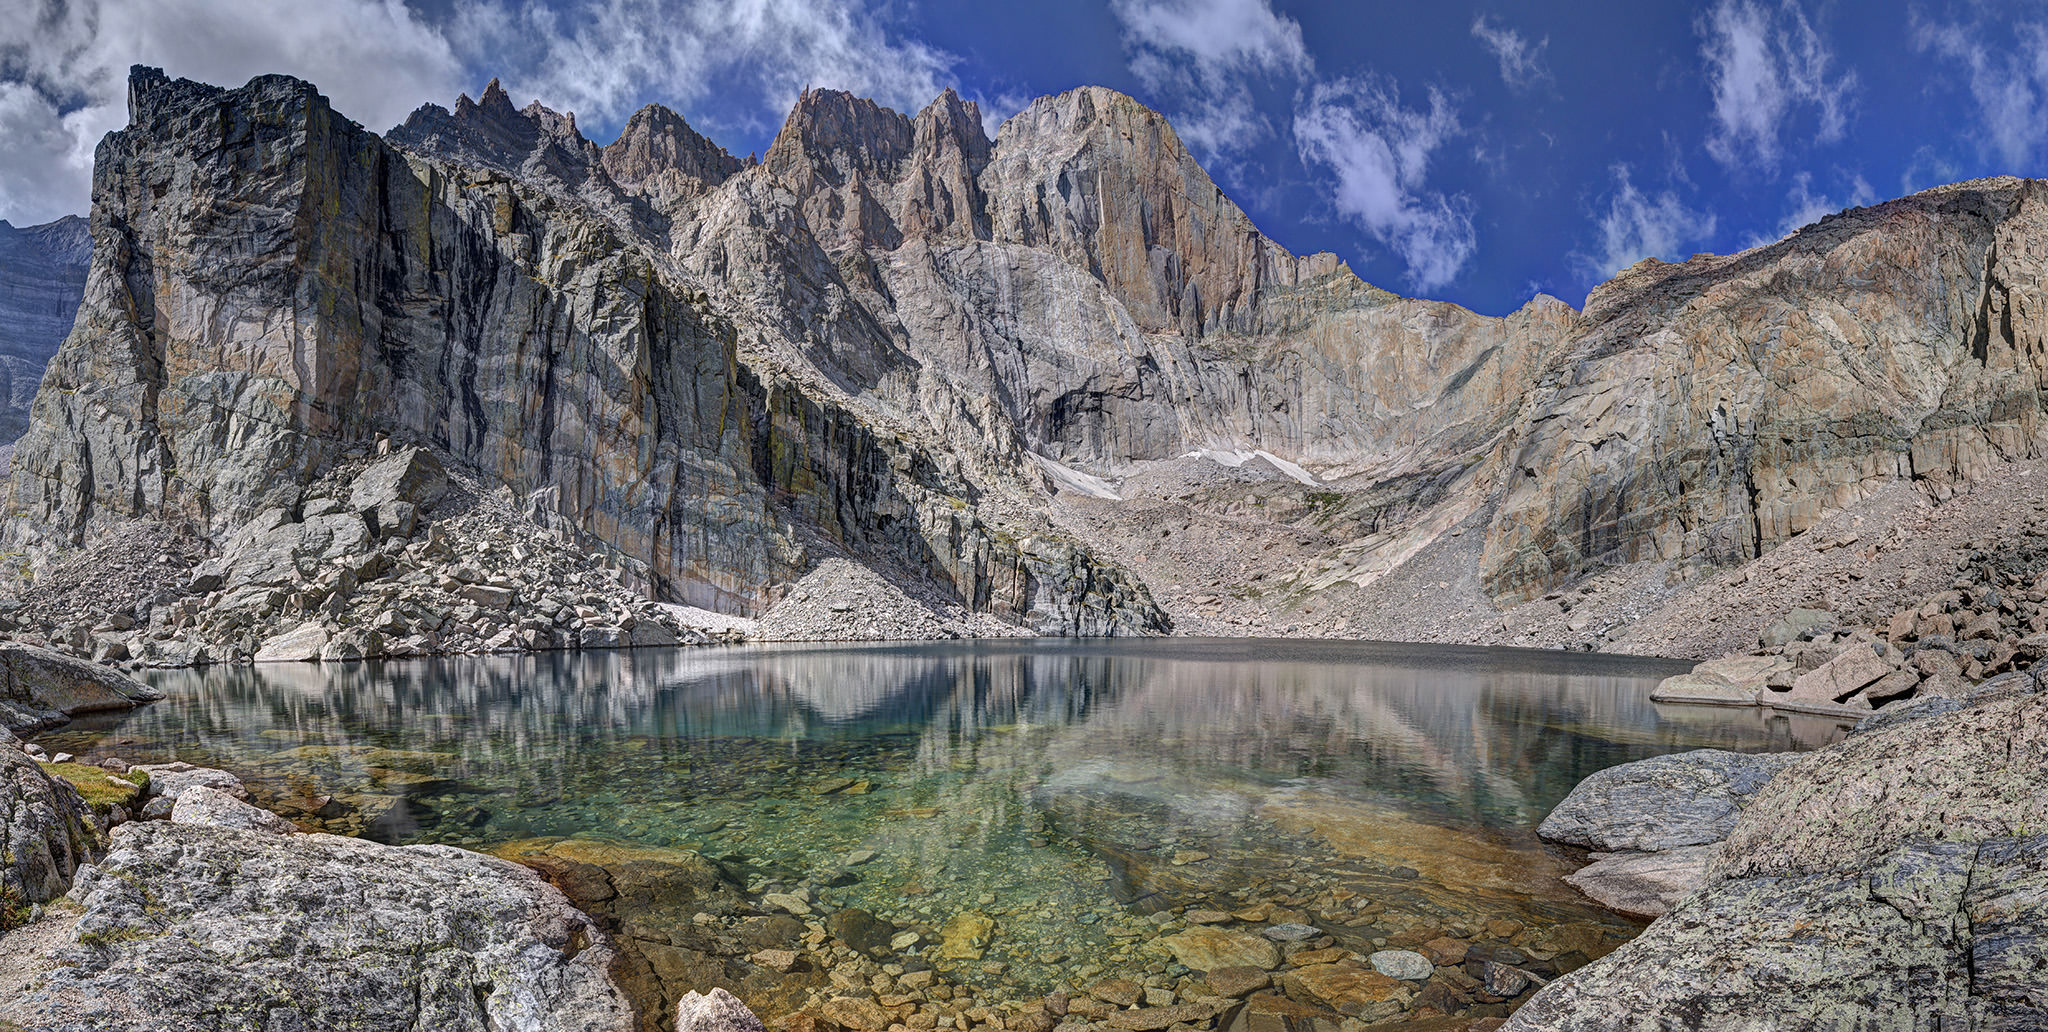
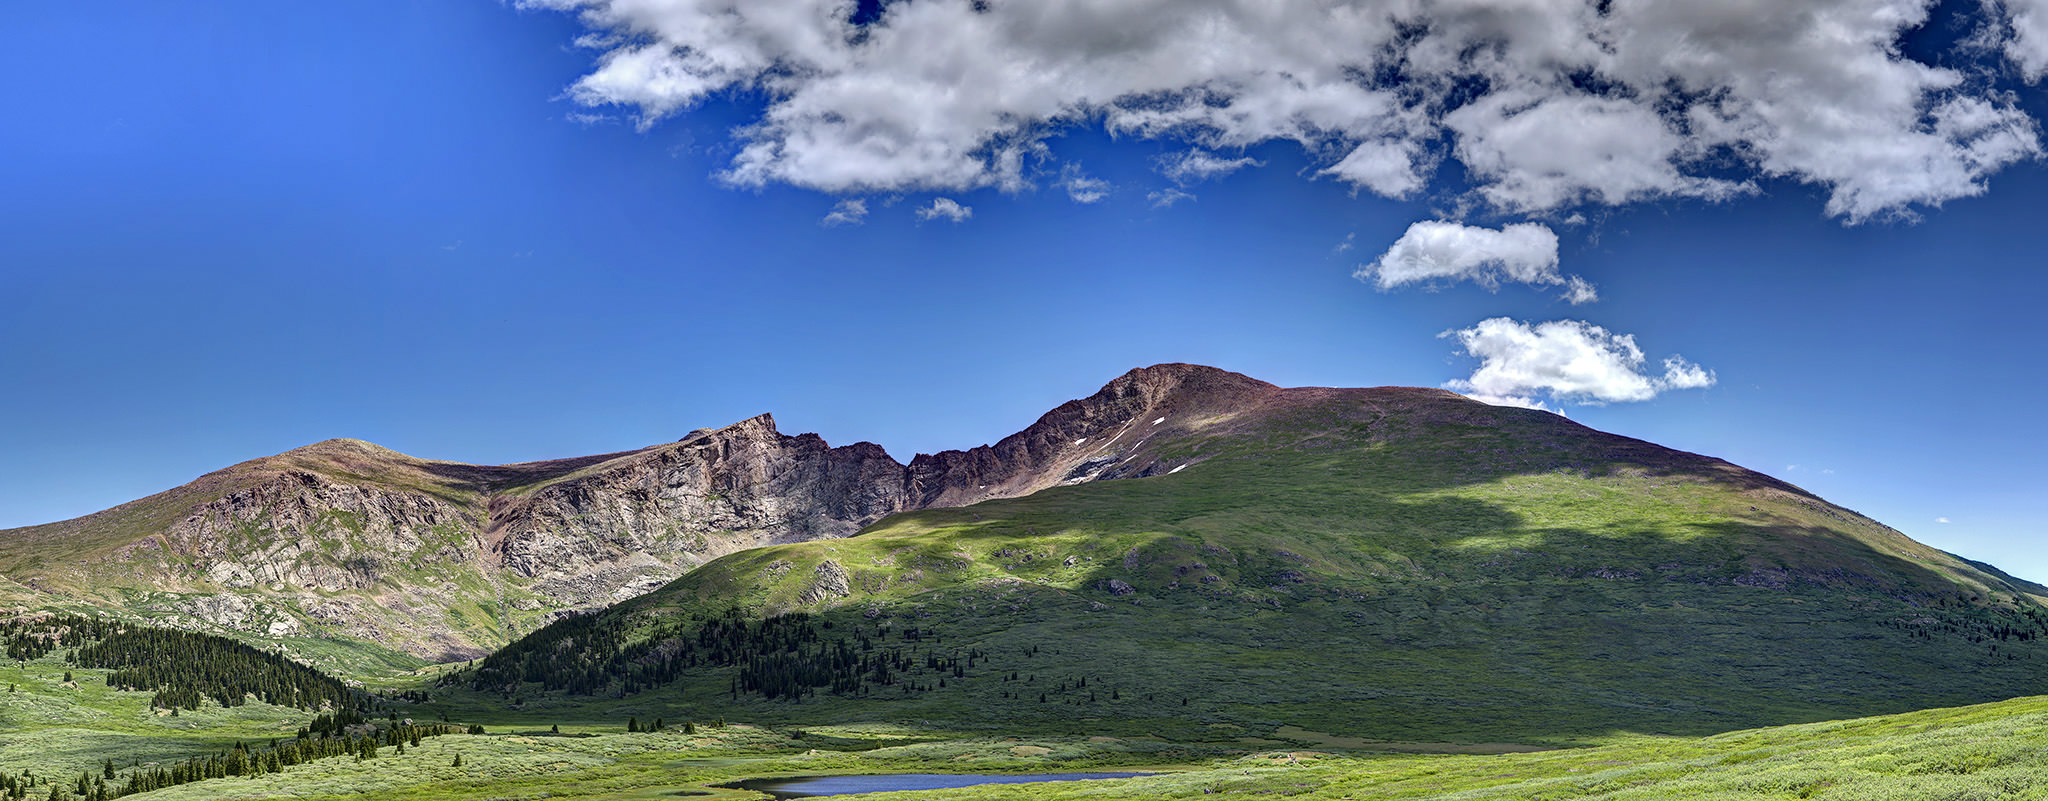
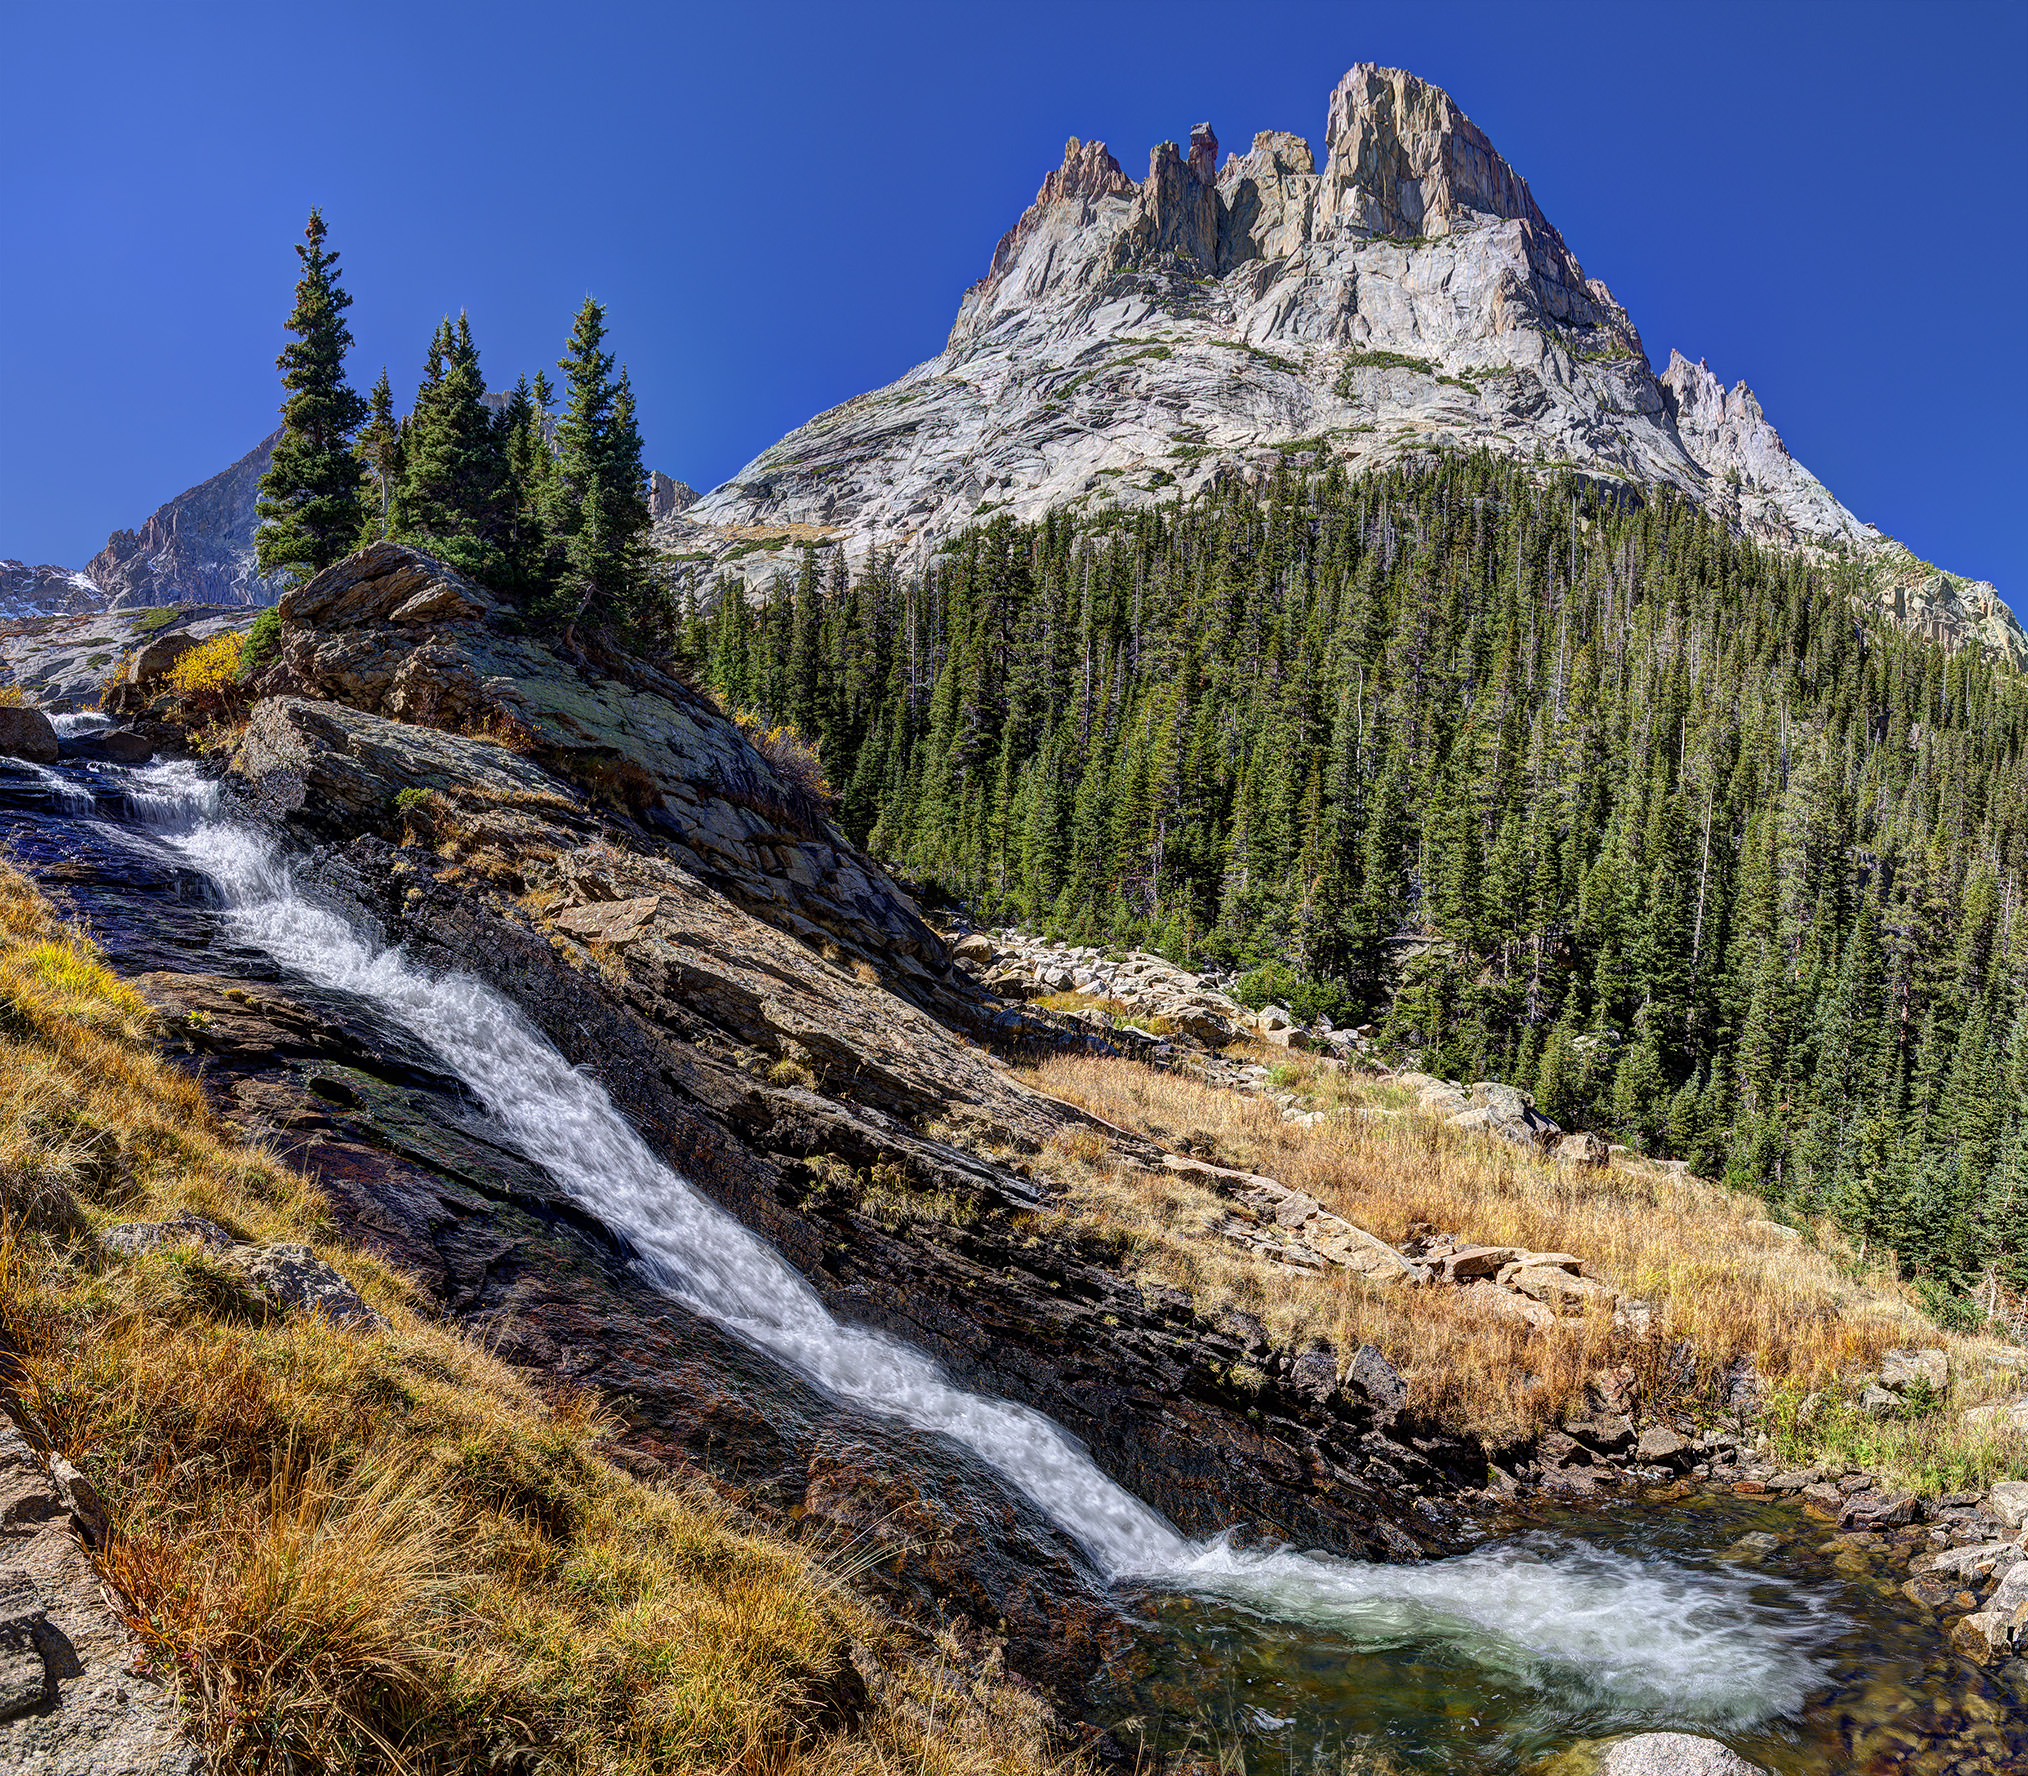
Plate 5. Chasm Lake
NIKON D7000 @ 16mm, ISO 100, 2500/100000, f/16.0

3) What to do in the Field
- HDR photography essentials for panoramas: In order to produce a true HDR image, a minimum of three exposures of the each view are needed. Here the three desired images are one that is a “properly exposed”; a second that is over exposed and a third that is under exposed. In general, HDR images can be made from exposures that differ in 1 EV increments. Most commonly instead of using changes of 1 EV, the three images differ in exposure by 2 EV. Thus the minimal number of images includes a properly exposed image along with one exposed at +2 EV and another exposed at -2 EV from the properly exposed image. For example, if the properly exposed image was taken at 1/60 sec, the under exposed image was taken at 1/250 and the third over exposed image was taken at 1/15 sec while maintaining the other exposure parameters (lens f-stop and ISO values) unchanged. It should be noted that this is not always an adequate exposure range and in the case of a “high contrast” scene, a greater number of images at a wider range of exposures may be required. All the HDR panoramas shown in this post were made using the basic +/-2 EV three-exposure group.
Since it is essential that all images that comprise a single HDR image are taken using the same camera settings except for changes in the exposure time, either Aperture preferred or Manual camera setting modes can be used. Either way the ISO is set to a constant value rather than using Auto ISO, and the aperture f-stop is not changed. In the images in this post the White balance was also not changed within the group of images used to create the panorama. In addition, in order to make the duplicate images the same except for their exposure, they must overlap as accurately as possible therefore the use of a tripod is very helpful.An additional requirement for creating an HDR panorama is that the group of HDR images to be stitched into the panorama all need to be done using the same camera setting. Thus, the use of manual exposure mode is greatly preferred over the use of the aperture preferred mode for creating panoramas. This assures the edges of the adjacent images to be stitched will have the same exposure.
Summary of preferred camera settings for HDR panoramas:
- Manual exposure
- ISO 100 or a low value and NOT on Auto ISO
- Lens stopped down to f/8 and smaller
- Use a Constant White balance setting and not Auto White balance
- Image quality RAW
- Panorama Best Practices – Use a Tripod: The tripod should be on stable ground and set up so the head is vertical. The closer to vertical the tripod is set, the easier time you will have getting the camera to rotate horizontally. A bit of time spent here is time well spent. If there is a reliable horizontal plane in the scene, the use of the view finder display grid can be used to check that the camera is also horizontal. My experience with bubble levels on the tripod has been fairly dismal, but you may find them helpful.
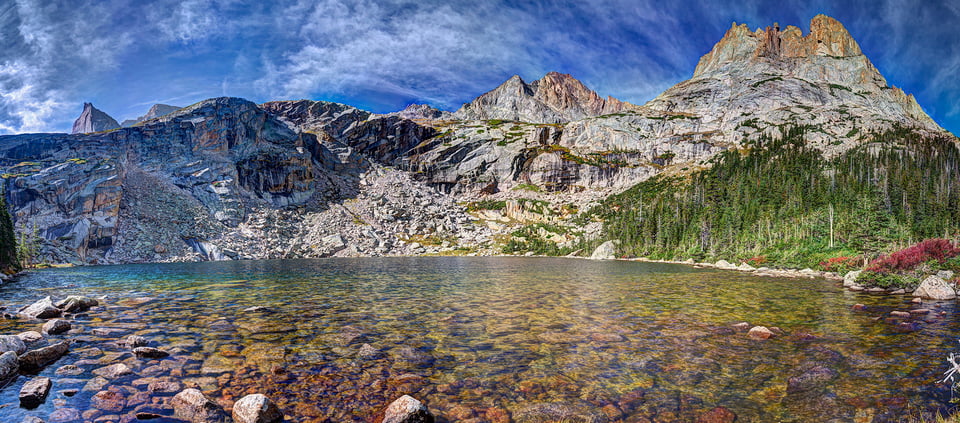
Plate 6. Black Lake
NIKON D7000 @ 16mm, ISO 100, 3999/100000, f/11.0Check one side of the eventual panorama and then rotate the camera through the full width of the scene keeping one of the horizontal lines at/near the water line if one is available. In situations where there is no water, observe that as the camera is rotated past a particular point the view finder display grid continues to pass over the same spot. This is an important step and easily the most time consuming. If the camera does not rotate along a horizontal plane, the resultant panorama will be tipped and a little, or perhaps a lot, of it will be lost when the final image is cropped. Also if a lake/ocean is present, the photographic water line in the final panorama will not be level; a highly unlikely event in nature.
While not essential, if the camera is closer to being directed horizontally toward the scene, rather than being tilted up or down, it is frequently easier to get the resultant component images to align properly when making the final panorama. Further, if the camera is tipped, say, more vertically to include more sky in the image, additional care needs to be taken to make sure there is adequate overlap between the adjacent images for the panorama stitching software to make the final image. An overlap of something like 25% of the adjacent images seems to be adequate for most situations where there is an adequate amount of earth detail for the stitching program to align.
Naturally the usual suggestions for improving landscape photography results apply here as well. For example, a lower perspective adds depth to the scene by including foreground detail. The use of HDR may be particularly helpful in this regard as the foreground may include darker objects than the rest of the scene. Enhancing their detail gives added texture to the final result.
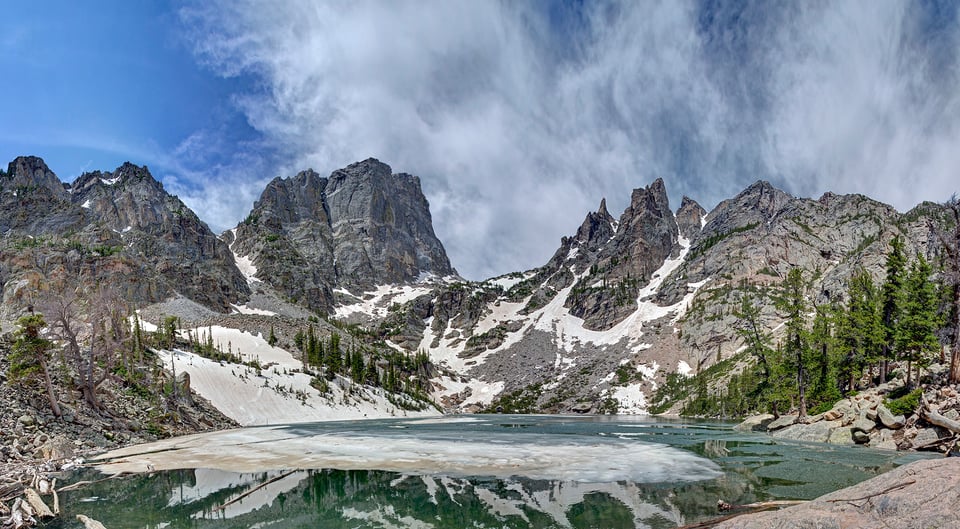
Plate 7. Emerald Lake
NIKON D7000 + 16-85mm f/3.5-5.6 @ 16mm, ISO 160, 1/500sec, f/11.0 - Use the camera in the portrait mode: This allows capturing the maximum desired vertical exposure more easily while the required horizontal range of the final picture is obtained by adding more overlapping images. The greatest distortion/vignette artifacts occur in the outer edges of the image. By using the camera in the vertical portrait orientation, these effects are minimized along the center of the final panorama.
- Keep the camera settings the same for all the images that will be used to make the panorama: This can (almost) be done using Aperture priority mode on the camera. Aperture mode usually will result in a group of images that are close enough in exposure to allow a seamless stitching into a panorama, but not always. Much better is to use the Manual mode setting on the camera. This produces a group of images that do not have variation in their basic exposure values at the points where adjacent images overlap. Choose a point in the panorama that is “most typical” or most important, usually the center of the final image, to set the basic exposure value for the entire panorama. This setting is used for all the images that will make up the finished panorama. This step is somewhat less important when using HDR images for the panorama stitching than for single-exposure-image-based panoramas as there is more exposure leeway in the HDR images. A trial image is an excellent idea at this point to check the histogram/preview to see if the exposure appears to be what is desired. The reader will note that the photos included in this post have not been shot when the light is optimal, that is early morning or evening. An advantage of HDR images with their wider exposure latitude is that panoramas made during the middle of the day when the light is typically harsher have a better chance of success.
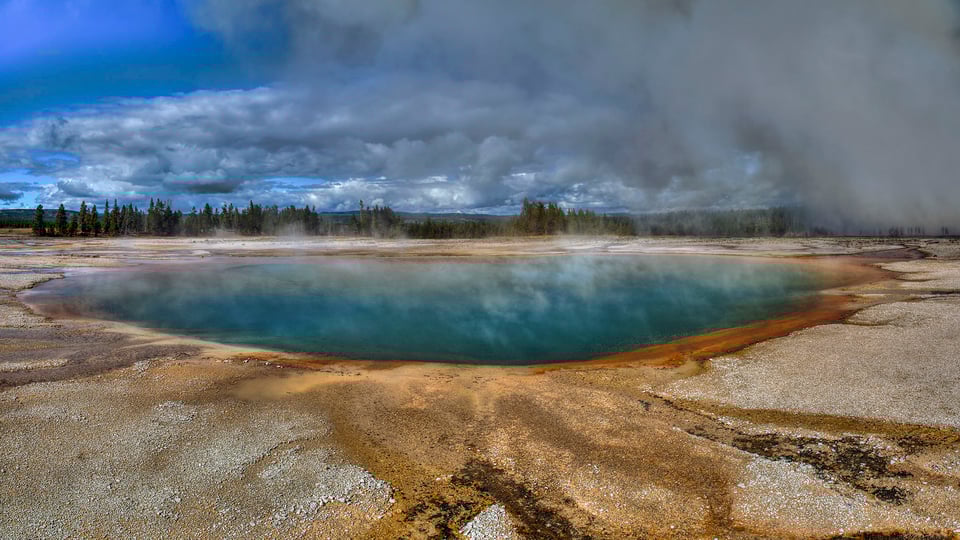
Plate 8. Mammoth Hot Springs
NIKON D600 + 24-120mm f/4 @ 24mm, ISO 100, 1/160, f/8.0Note: Typical access/camera gear problems were encountered in creating the picture shown in Plate 8. First the available lens was not of sufficiently wide angle to show the entire width of the spring. It was not possible to move further backward while staying on the only access point, a board walk, which was close to the pictured spring. The HDR panorama approach overcame these limitations.
- Use a remote release to minimize camera shake and to also help minimize touching/moving the camera between the component exposures needed for the HDR images. Did I mention that it is best to use a good sturdy tripod? You will, right?
- Finally, it is frequently best to choose a focal point within the scene that is closer than infinity or the farthest point of interest in the image. By using a point nearer than infinity as the focal point it is possible to make maximal use of the available depth of field. Once the desired focal point has been determined, turn off the auto focus function as all the images should be shot at a constant focal distance. Higher f-stop values do increase the depth of field, but at higher values there is an accompanying increase in diffraction-related noise. Most camera/lens combinations are sharpest around f/8 to f/11 with noise increasingly an issue above these f-stop values. Trial pictures help evaluate an acceptable trade-off between the increasing depth of field at higher f-stop values and the increasing diffraction-related noise that is also associated with higher f-stop values. The goal generally for landscapes and panoramas is the sharpest images with the most detail possible.
- Oops. We are almost ready to finally begin taking pictures and here are a couple of items that for an important category: “things to lose track of”. If using a tripod, did you remember to turn off the vibration reduction feature of the camera/lens? All tripod adjustments tightened? Did you remember to optimize the circular polarizer rotation/setting? Did you remember to set the proper exposure before taking the first image? (This last one might be likely to be forgotten if you don’t normally use the manual exposure mode on your camera). Remote doesn’t work? (Check the release mode dial setting). Did you carefully focus the camera and then switch off the autofocus function? These are several of my favorite things to overlook before actually taking the pictures. Another one is to remember to retighten the lock screw after rotating the camera to its next position to take the next adjacent image for the panorama. Also remember to turn back on autofocus AFTER you complete taking all the images to be used for the panorama (reengage image stabilization and normal release function if returning to handheld camera use).


Checklist for the preferred camera/equipment parameters for HDR panoramas:
- Assure the tripod is level and on a stable surface
- Use the camera in the vertical portrait orientation
- Assure the camera is level throughout the full range of the panorama
- Adjust the circular polarizer (if used)
- Focus the camera properly focused then disable the auto focus function
- Make sure the camera has the proper settings (manual exposure, bracketing set selected and properly set, manual low ISO value selected, manual White balance)
- Turn off any vibration reduction feature on the lens/camera
- Make sure to set the correct exposure before you start creating the panorama group by adjusting the shutter speed after choosing the f-stop/ISO values to be used for all the images
- Set the camera for remote release
- Relax, the rest is easy
- Take the multiple exposures for each HDR image then rotate the camera to the next adjacent position. Tighten tripod rotation lock screw. Repeat. (Take images slightly beyond what you think you want as there will be some loss on the ends).
- Pay attention that the adjacent images overlap adequately
NIKON D600 @ 44mm, ISO 200, 1/200, f/5.6
What to do when you can’t do Panorama Best Practices. Plan A. It is not always possible to use best practices, so how might one “cheat” and hope to get away with it? A good fallback position when you have not included a tripod in your travel plans is to use the monopod you did bring. Monopods along with something to “lean” against can result in images of very adequate quality. As examples, the HDR panoramas shown in Plates 9 through 12 were taken using this method. Plate 11, taken with a 50mm normal lens, and Plate 12, taken with a short telephoto zoom, demonstrate another virtue of panoramic stitching. In both cases, orientating the camera in the portrait mode resulted in adequately covering the foreground and the sky while the desired horizontal sweep was then obtained by the series of overlapping HDR exposures. In the monopod scenario, not surprisingly, the remote is not used and available vibration reduction functions are turned on. Keep in mind that one of the exposures you are going to take is at an exposure time 2 EV LONGER than what is shown in the viewfinder. This is the overexposed image. The initial “correct” exposure, therefore, will need to use a shorter exposure time than what might normally be considered “handholdable”. A lower f-stop value or a higher ISO value may be essential in these situations.

NIKON D600 @ 34mm, ISO 200, 1/800, f/8.0
It is worth noting here that when you are trying to make HDR images handheld, the use of a continuous release mode is highly recommended to minimize the number of times the shutter release button needs to be pressed. Besides proceeding faster, the continuous release function minimizes any change in camera alignment between the exposures. This improves the alignment of the images that will be used for each for each final HDR image. A continuous slow release mode set at 3 frames/sec works well. As usual good technique is well rewarded. Feet apart, hold breath, lean against something solid. Whatever you can do to stabilize the camera is good.
NIKON D600 @ 50mm, ISO 400, 1/1250, f/8.0
NIKON D600 @ 70mm, ISO 200, 1/400, f/8.0
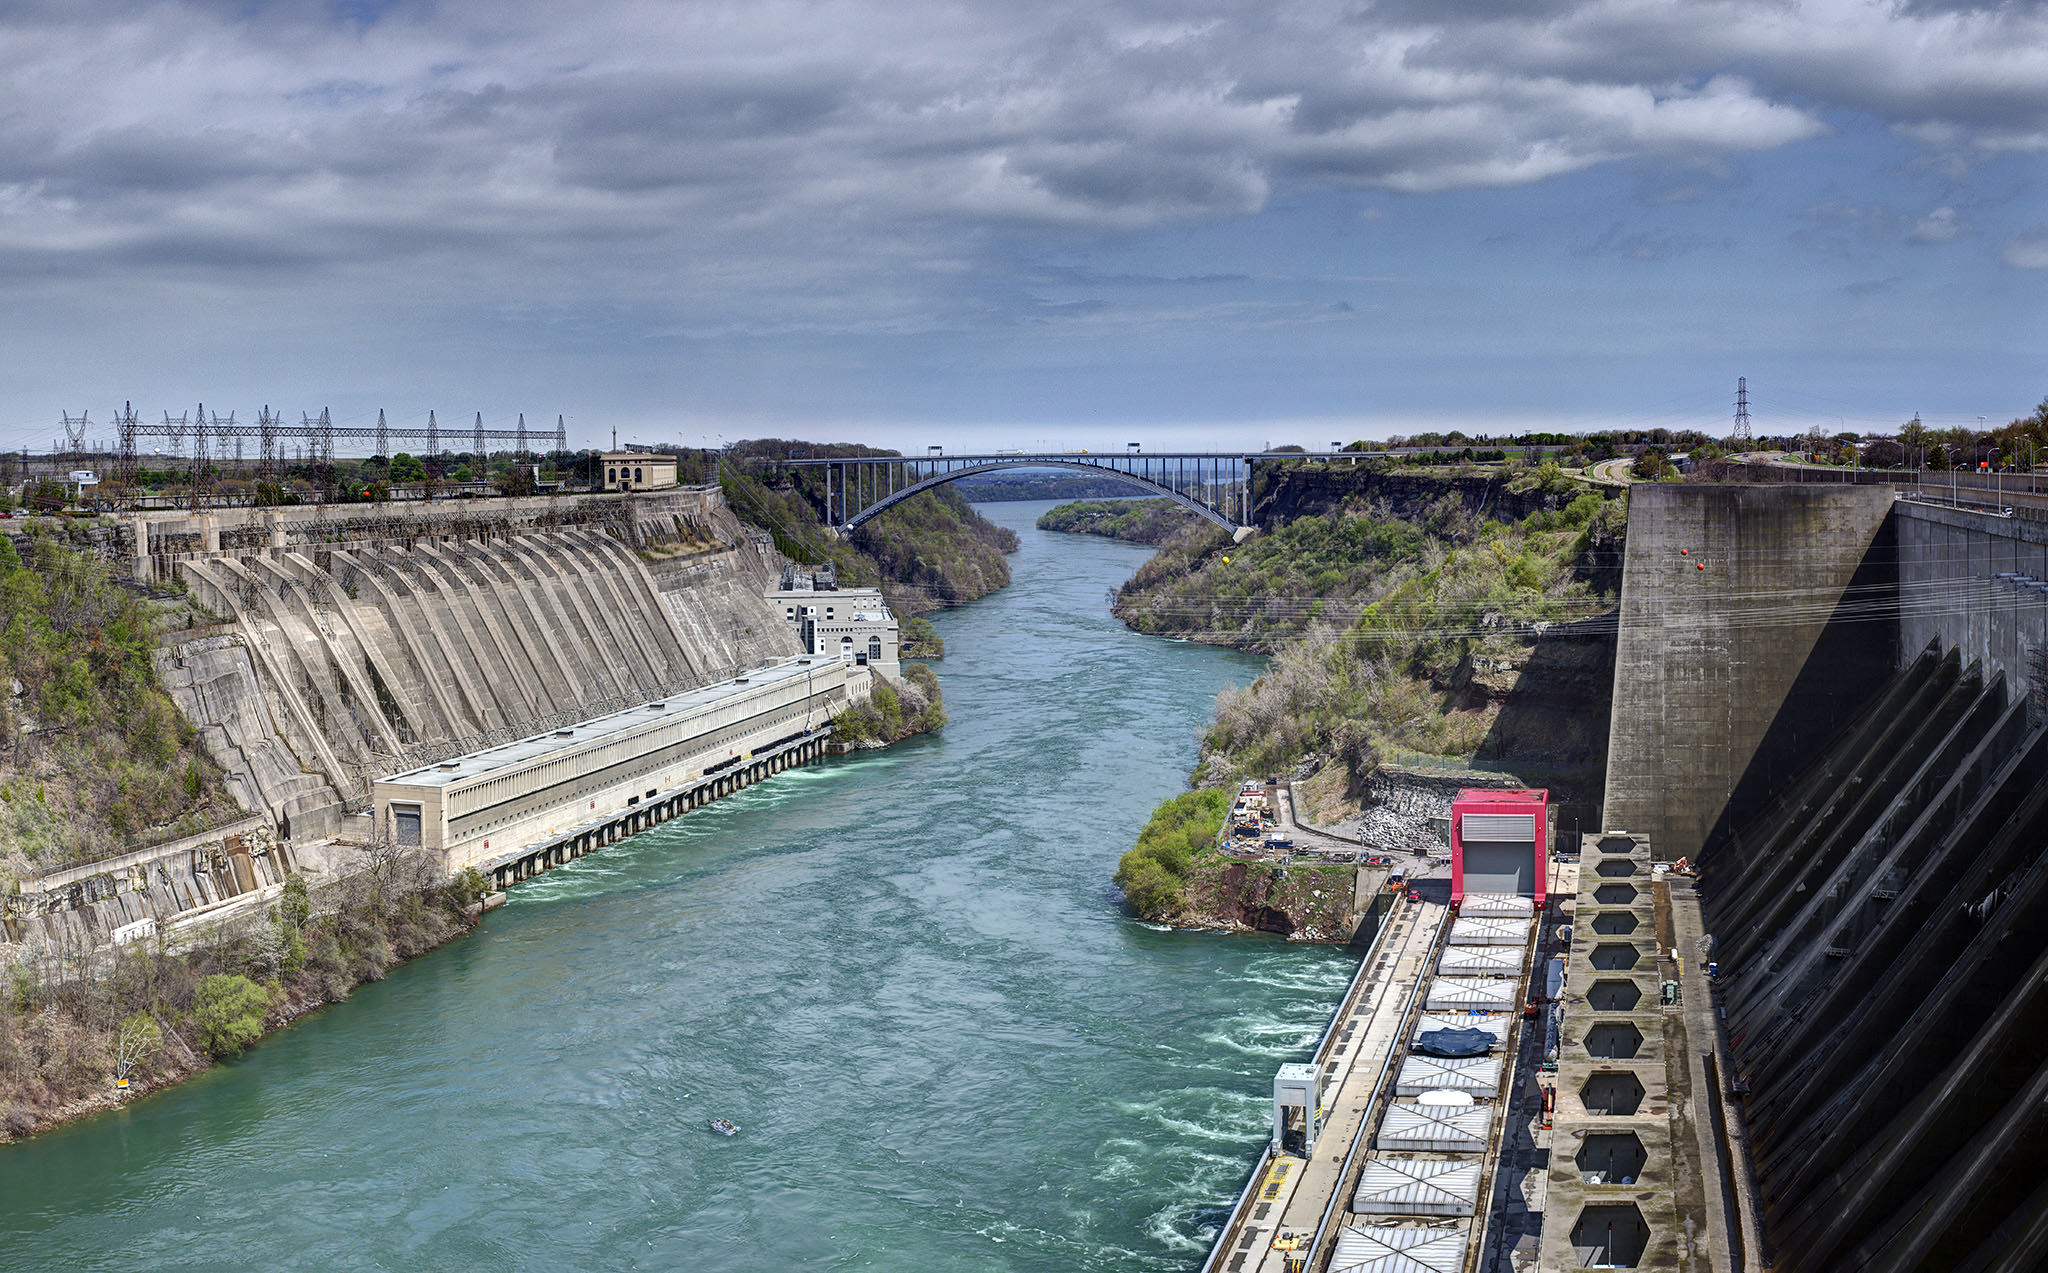
Plan B. If you have forgotten most everything needed for an HDR panorama except the camera, why not try to create it anyway? What could possibly go wrong? The worst case scenario is that it may not be possible to create the desired HDR images or the resultant images may not line up for stitching into a panorama. In the first case, the basic properly exposed images should still be fine and may be useful in creating a non-HDR panorama. On the other hand, you may get lucky. The HDR panorama shown in Plate 13 was taken handheld from a (very slowly) moving boat without any support other than leaning against the structure of the boat. There was an obvious advantage in this particular situation in that there was a water line useful in keeping the camera horizontal for the four HDR images that make up this panorama. It is clearly possible to take major shortcuts from using proper technique but the chances for some sort of quality or complete failure are much greater.
NIKON D7000 + 16-85mm f/3.5-5.6 @ 31mm, ISO 100, 1/250, f/8.0
4) Post Processing Steps
The approach at this point is pretty simple and relatively pain-free. Import the files from the camera into Lightroom. Separate out any images that are NOT part of potential HDR sets. This leaves only the images that are part of groups of (in this case three) images that only vary in their exposure. Apply a low level of sharpening to all of these remaining images (this is NOT necessarily recommended by the HDR gurus, but substantially sharper final HDR images result if this easy up-front sharpening step is included). Do not make other changes at this stage (for example changing the Tone or Presence settings as this can inadvertently alter exposure values, which need to remain constant and ”as-shot”).
Export the sharpened images. From these image sets choose what is expected to be the part of the final panorama that is “average” or “most important”, almost invariably the center of the image. Make a trial HDR image using a dedicated HDR program (Photomatix Pro has been used here. There are alternatives, but this program is incredible versatile, easy to use, reasonably priced, and very popular. All good reasons to use this great program). Process the first chosen image set. When satisfied with the results the parameters from this image are applied to the rest of the panorama component images. Finally once the individual HDR images are made and saved, they are stitched into the panorama using conventional software (Photoshop or Photoshop Elements). The Cylindrical algorithm option works well for this type of panorama. There are dedicated stitching software programs that get very good reviews. For simple panoramas, like those here, the more general purpose software appears to be adequate. After merging, any final desired adjustments to the completed panorama are made.
There are suggestions in the HDR literature that HDR panoramas can be made by changing the order of processing. For example, one could first create over exposed, correctly exposed and under exposed complete panoramas and then use them to make the final HDR. Experience teaches that these alternative orders of steps are not very successful.
The primary goal in making an HDR image-based panorama is to improve the overall quality and detail present in the final image. Since there are several steps involved in the overall process, starting with the highest quality images at the beginning is important. Thus RAW files have been used exclusively as the starting points for the panoramas shown here. Further, any intermediate-stage images were saved in TIFF format. There is noticeable degradation of the image quality when using jpeg format. This is true both at the beginning and/or in intermediate steps, and particularly if images are resaved several times. For these reasons this format has been avoided until the final panorama was completed.
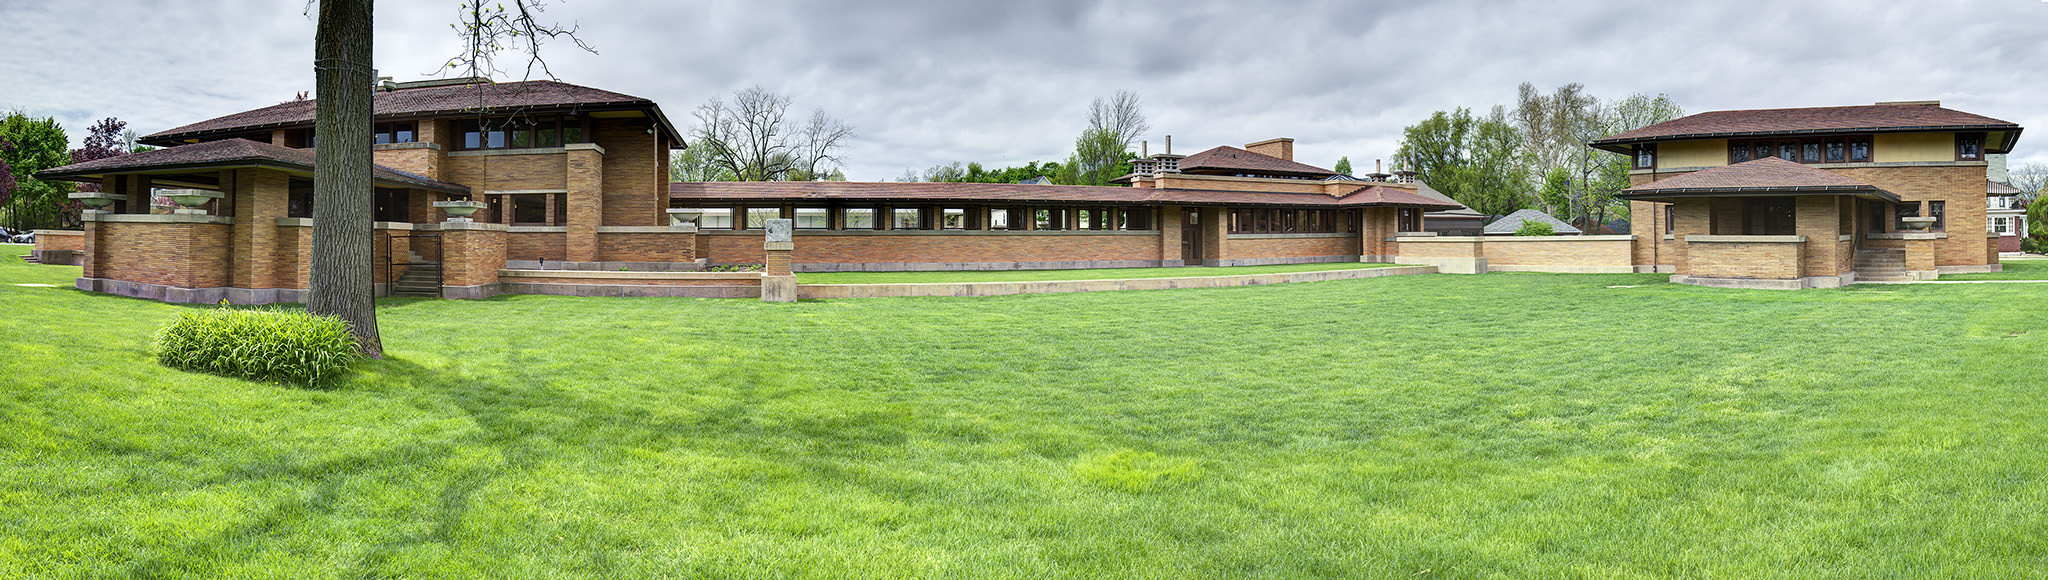
Additional uses for HDR panorama-based techniques. While the usual concept of a panorama is to produce a horizontally wide expansive view of a (frequently) large wide open space, it is possible to use the method to produce images otherwise difficult to obtain. A recent Photography Life post used the stitching method of panorama photography to enhance the utility of prime lenses by allowing them to produce images that have a wider field of view than the lens might be expected to cover. Plates 8 and 14 through 17 are several additional examples of HDR panorama techniques used in a similar manner. These images don’t have the typical panorama shape and orientation, but are still created by stitching together several HDR images. This approach may be useful to create images that under the circumstances might otherwise be difficult to get. This is a recurring theme of these photographs. Brought/don’t have the “right” lens, difficult access, can’t move far enough back to get the desired width of the scene, and other technical problems.
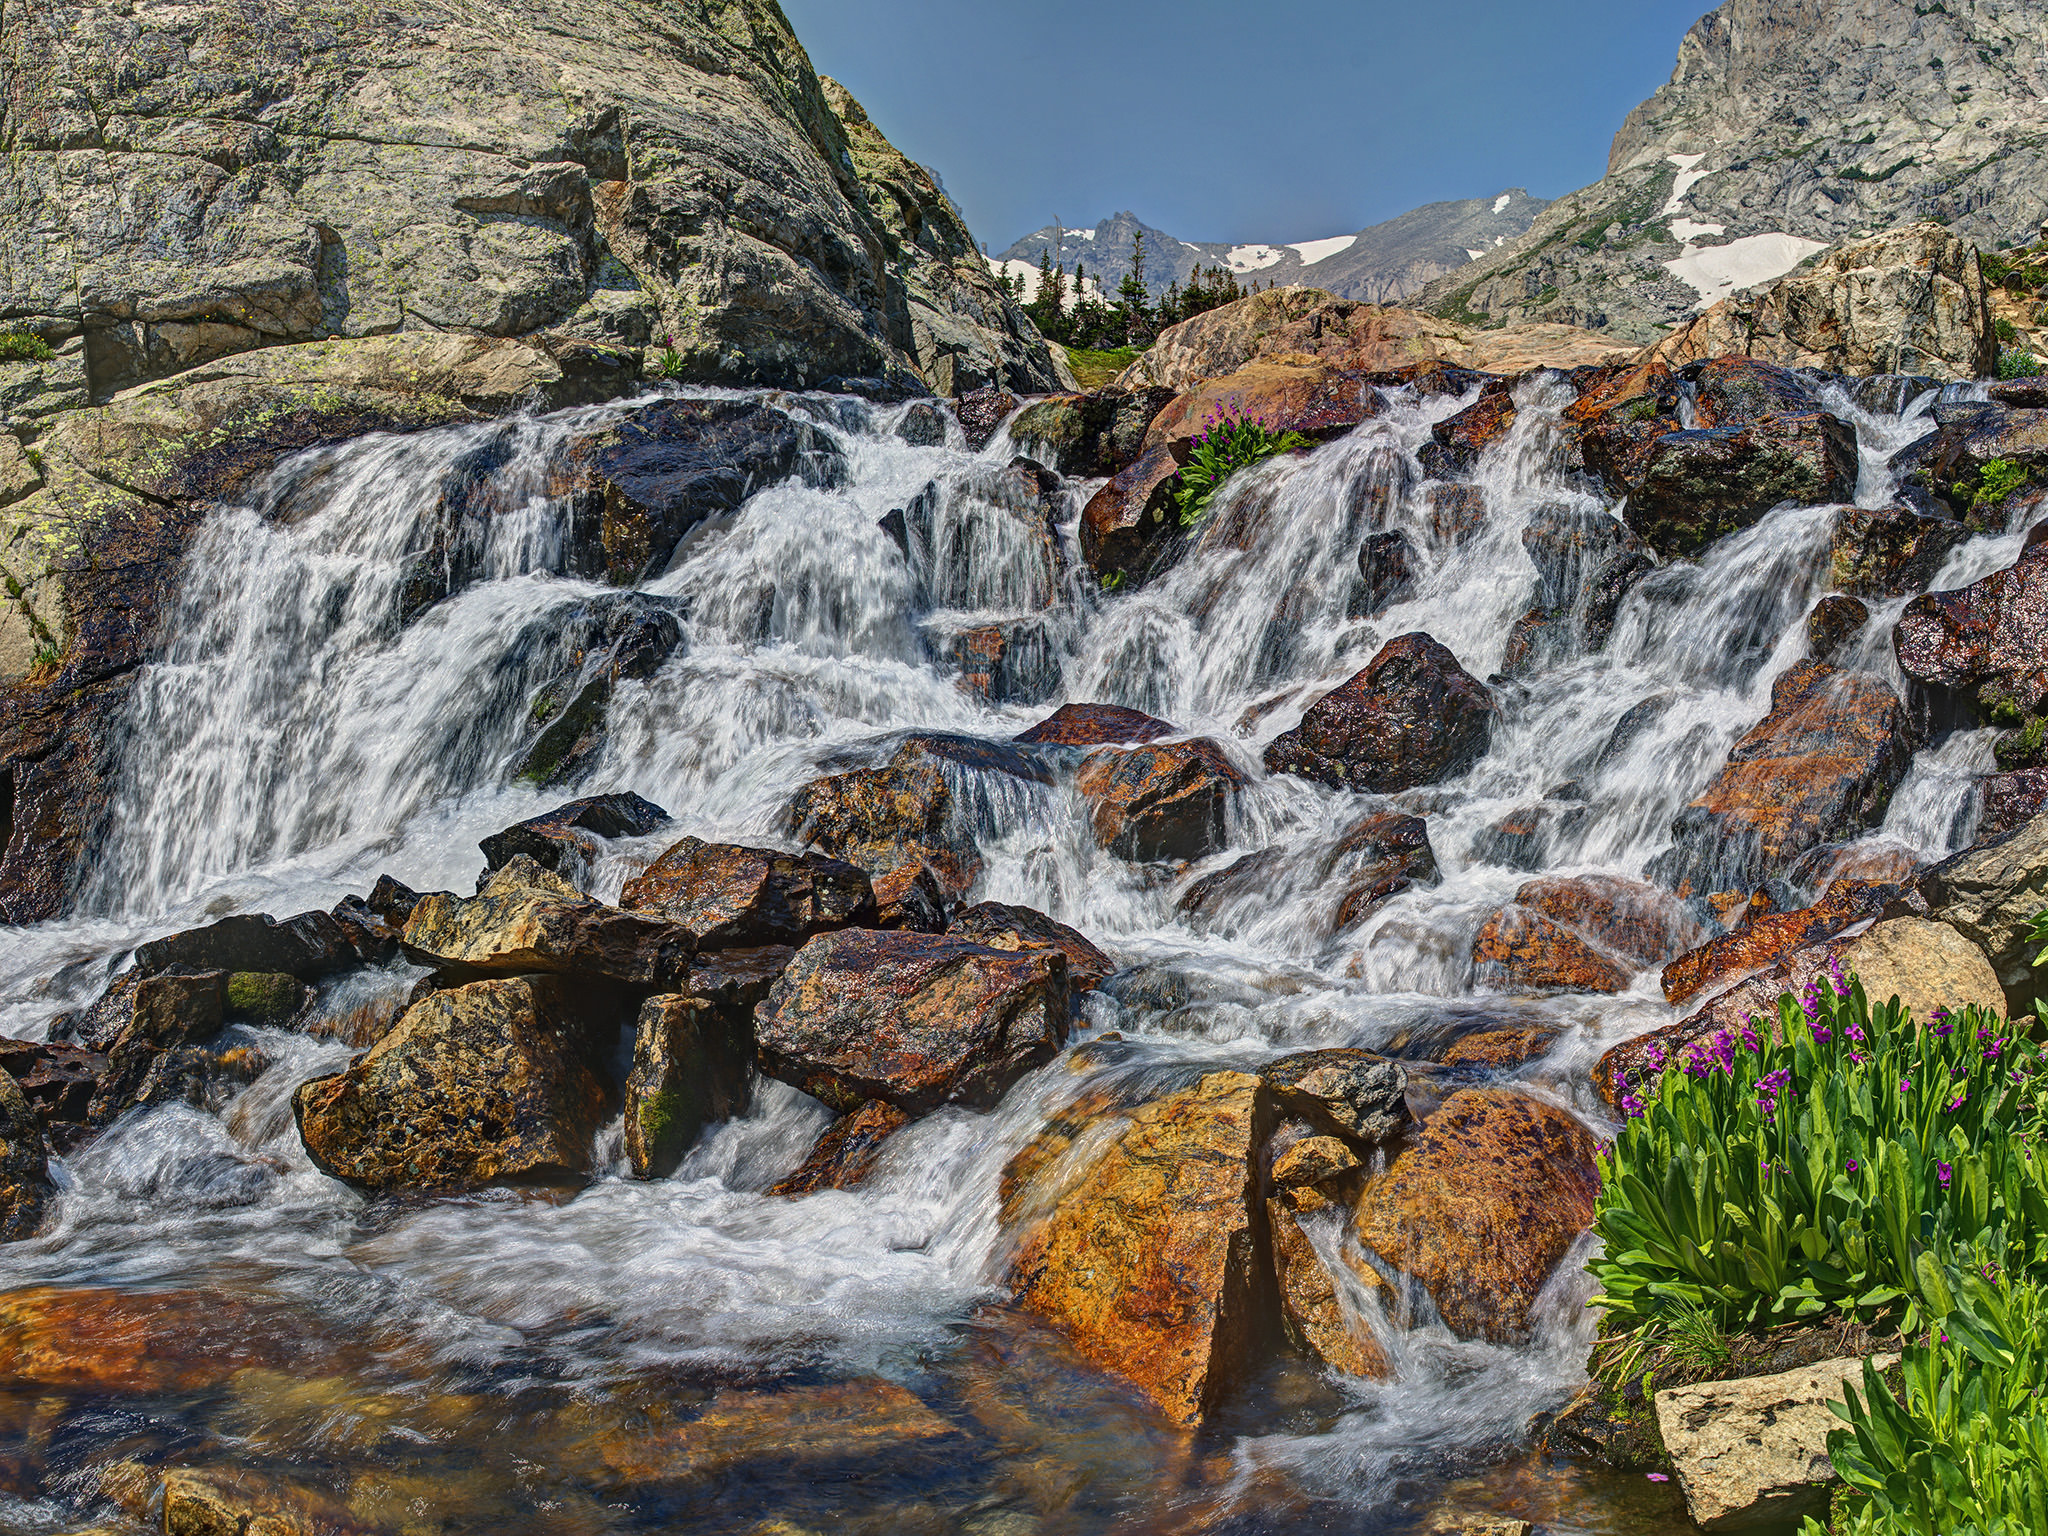
NIKON D7000 @ 25mm, ISO 100, f/11.0
Note: The trail near this falls is narrow and the access down to the point closer to the water where the picture was taken is less than ideal. Combination of two images helped resolve these access difficulties while still capturing the full width of the falls and the flowers near its base.
Notice how the moving water in rendered in the falls in Plate 14 and Plate 15. Since the HDR composite images are taken slightly apart in time, the result is a variation of the effect produced using long exposure times where moving water can be (intentional) very blurred. These examples are fairly typical of what can be expected in these situations. It may be considered a good result/effect or not, but does point out an HDR “fact” that any motion (moving water, windblown leaves, moving clouds, etc) can be a problem (or an opportunity?). Dedicated HDR software offers ways to remove these artifacts, but motion within the scene may still be an issue with any HDR photographs.
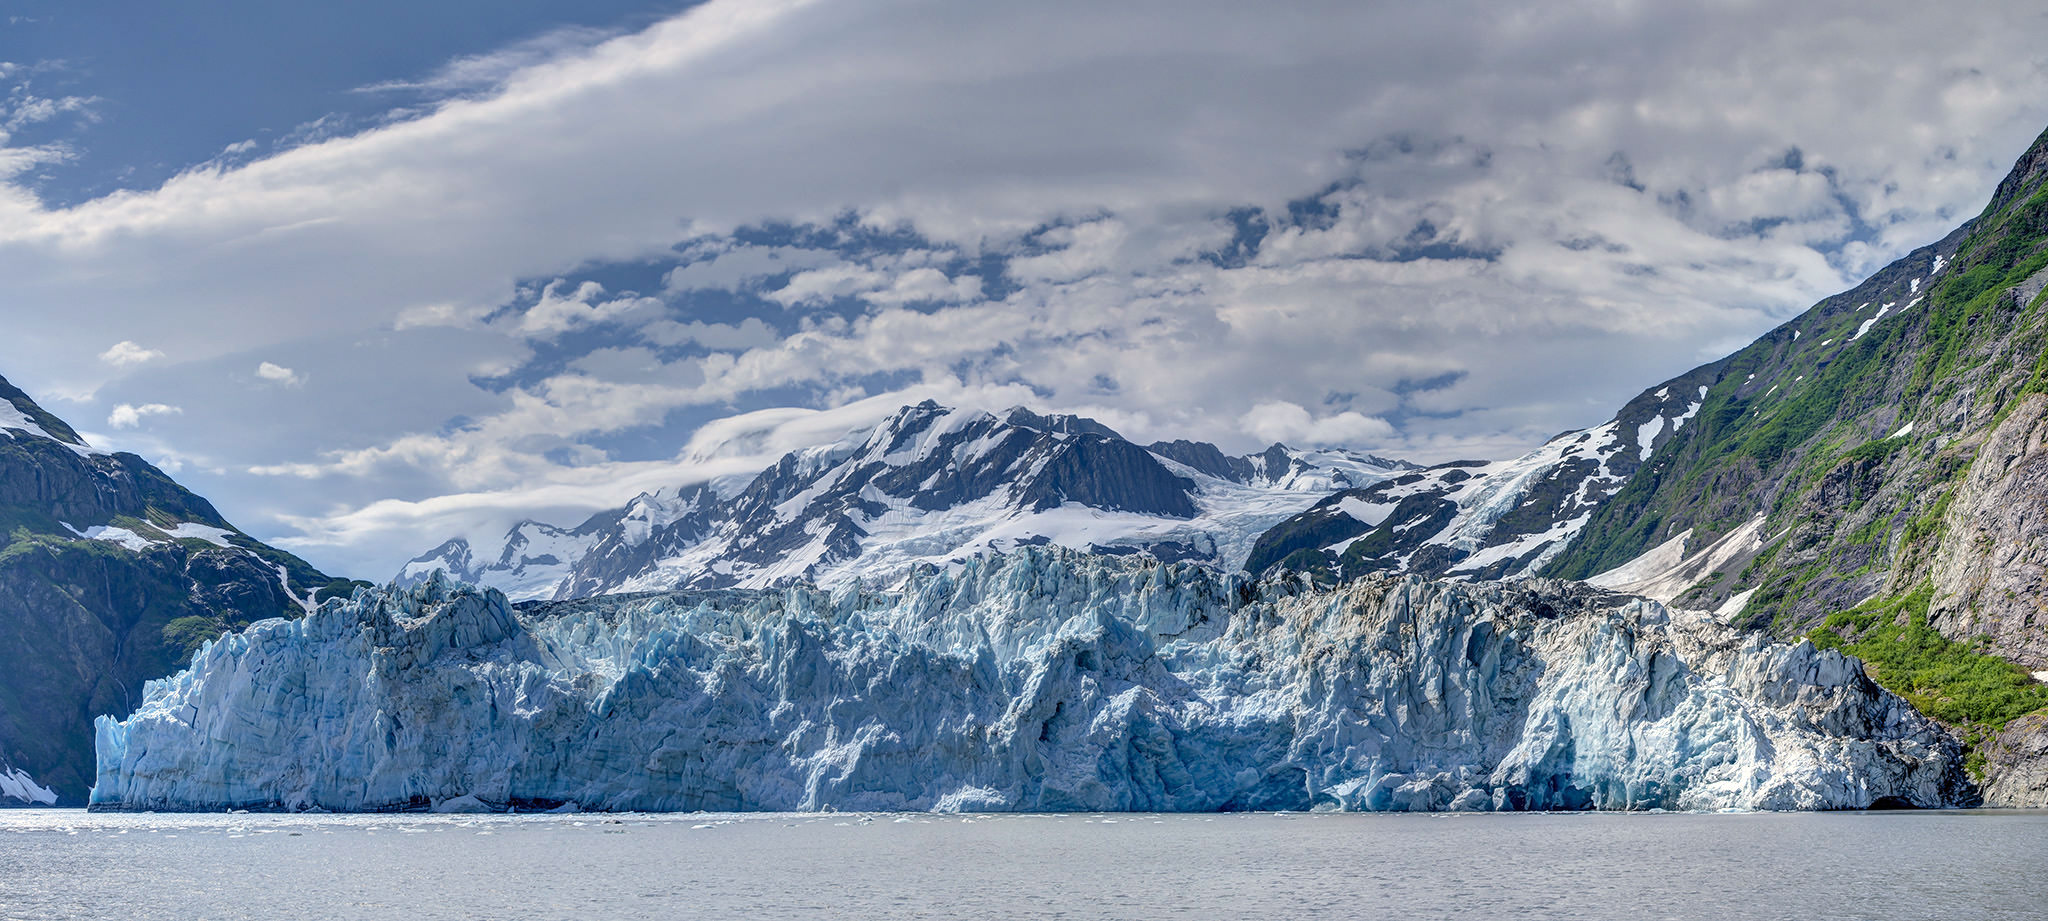
NIKON D7000 @ 16mm, ISO 100, 3999/100000, f/11.0
Note: Here access to the point where this picture was taken was again slightly difficult to reach. With the lens available it was not possible to include both the top of the mountain and the complete width of this beautiful waterfall; a problem solved by combining two adjacent overlapping images.
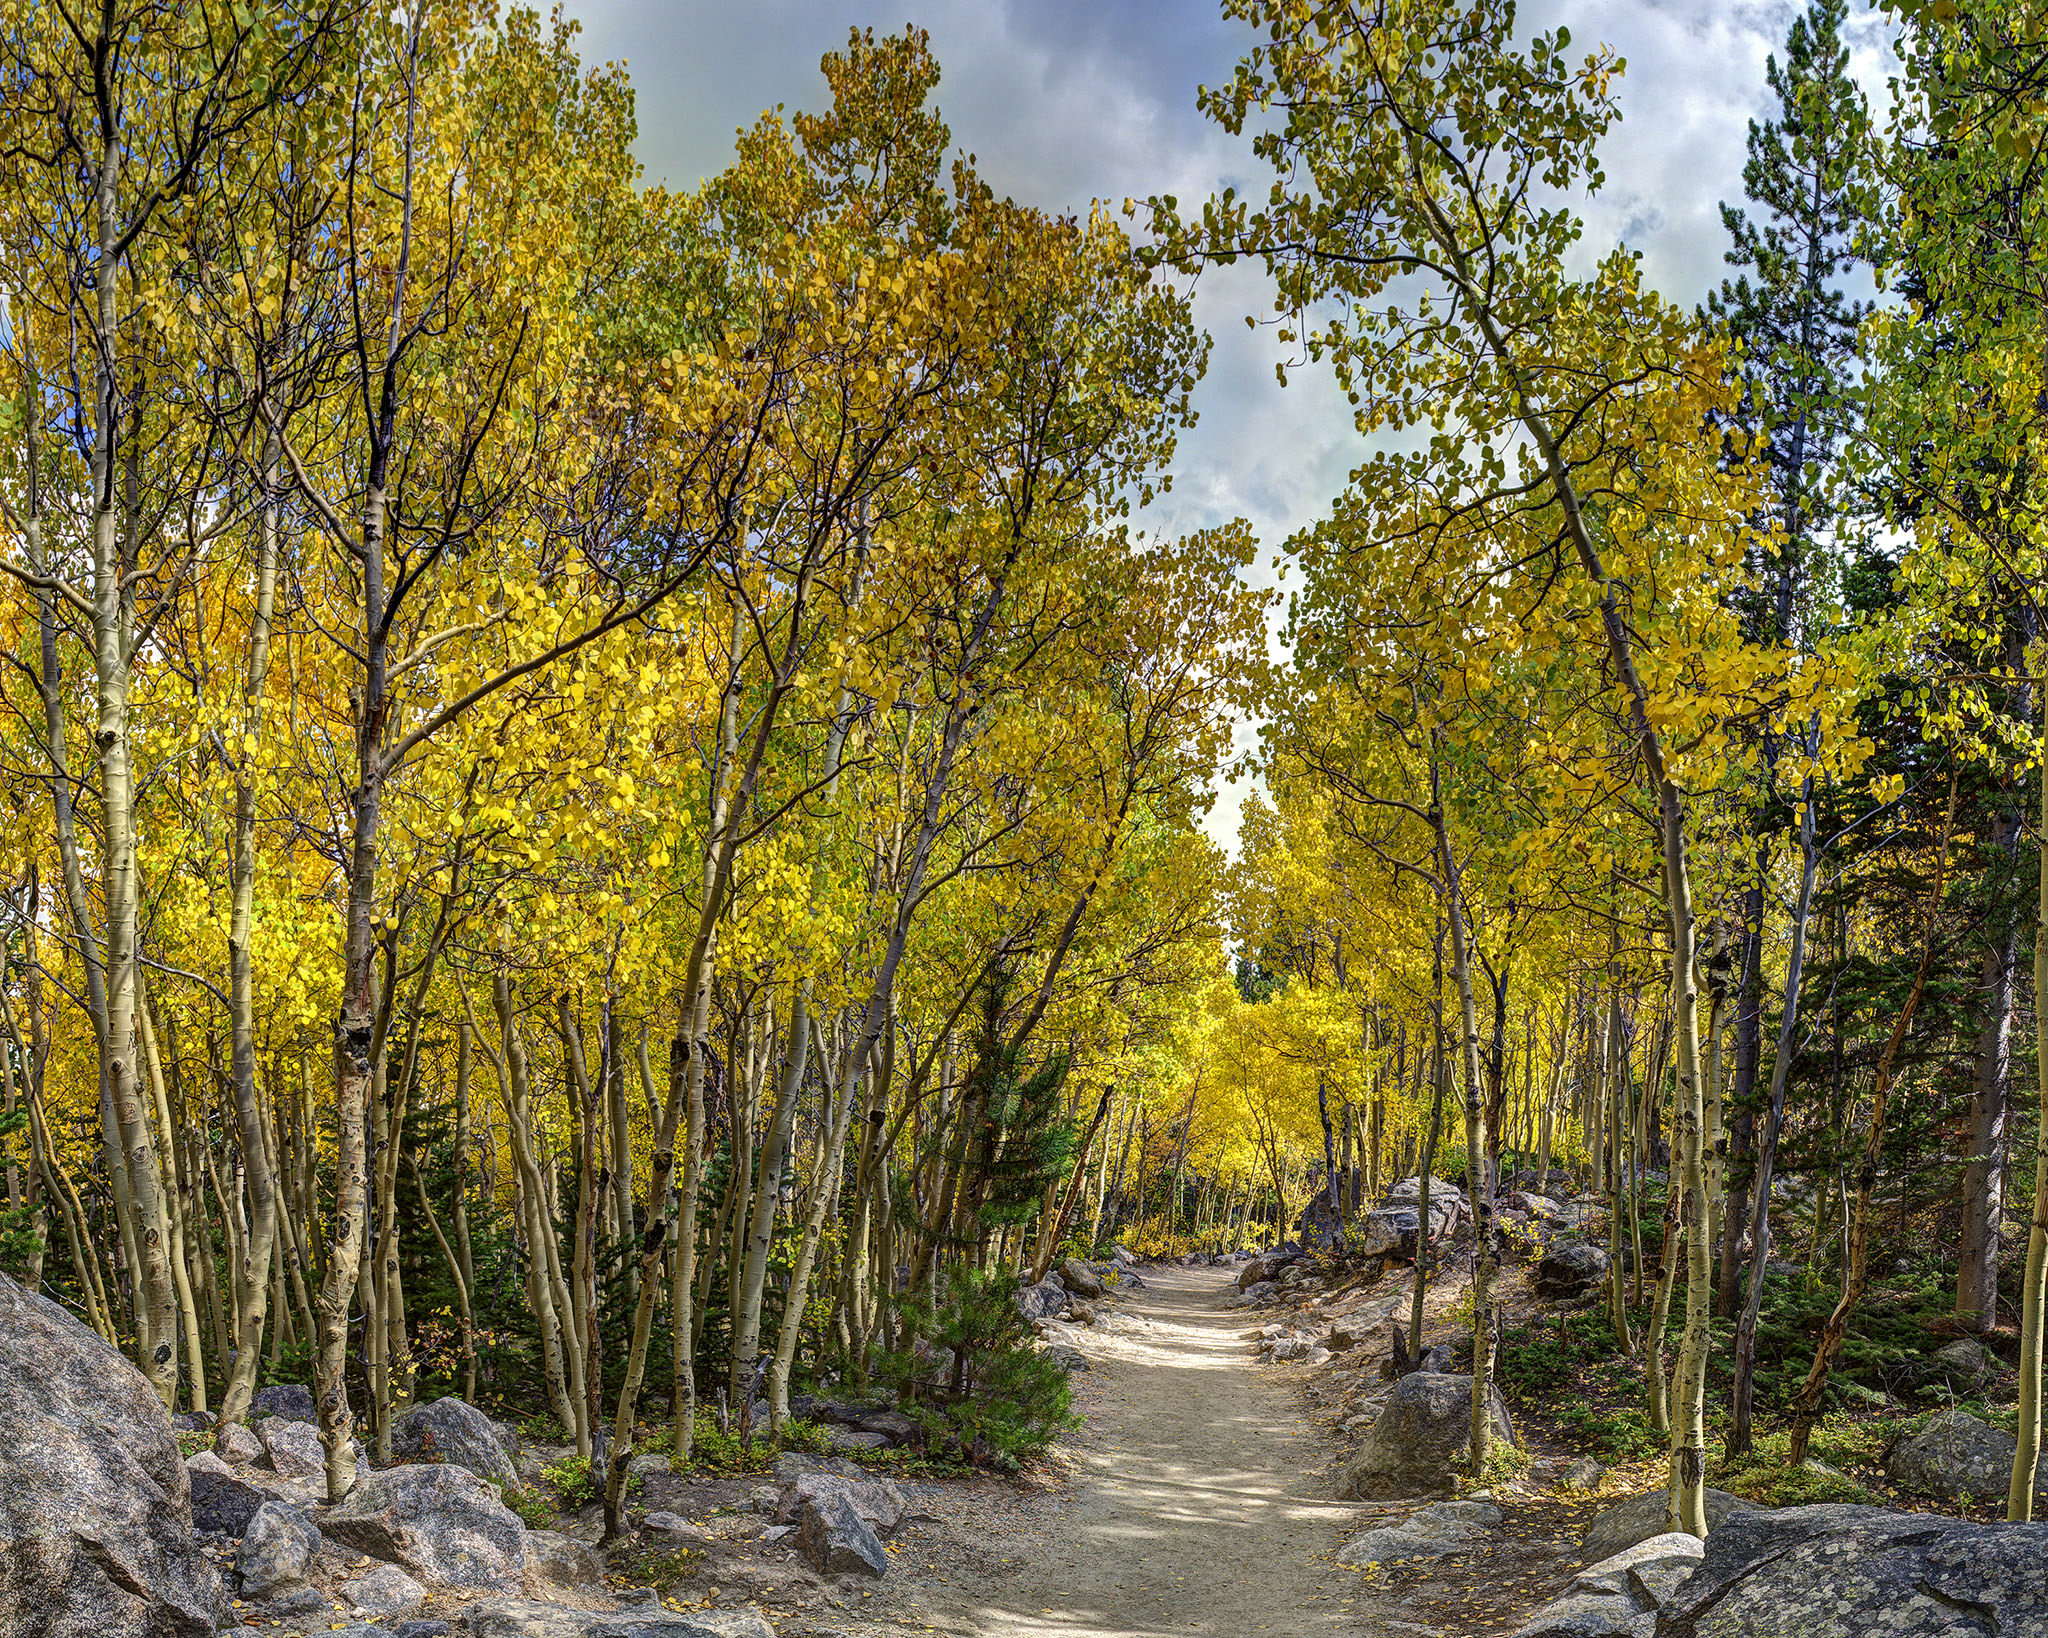
NIKON D7000 @ 16mm, ISO 100, 7692/100000, f/11.0
Note: Trying to capture the width of the forest surrounding this part of the trail was not possible by moving backward. Combining two images solved this physical limitation. Inclusion of some closer rocks and more of the trees in the image allowed their evocative color and texture to play a greater role.
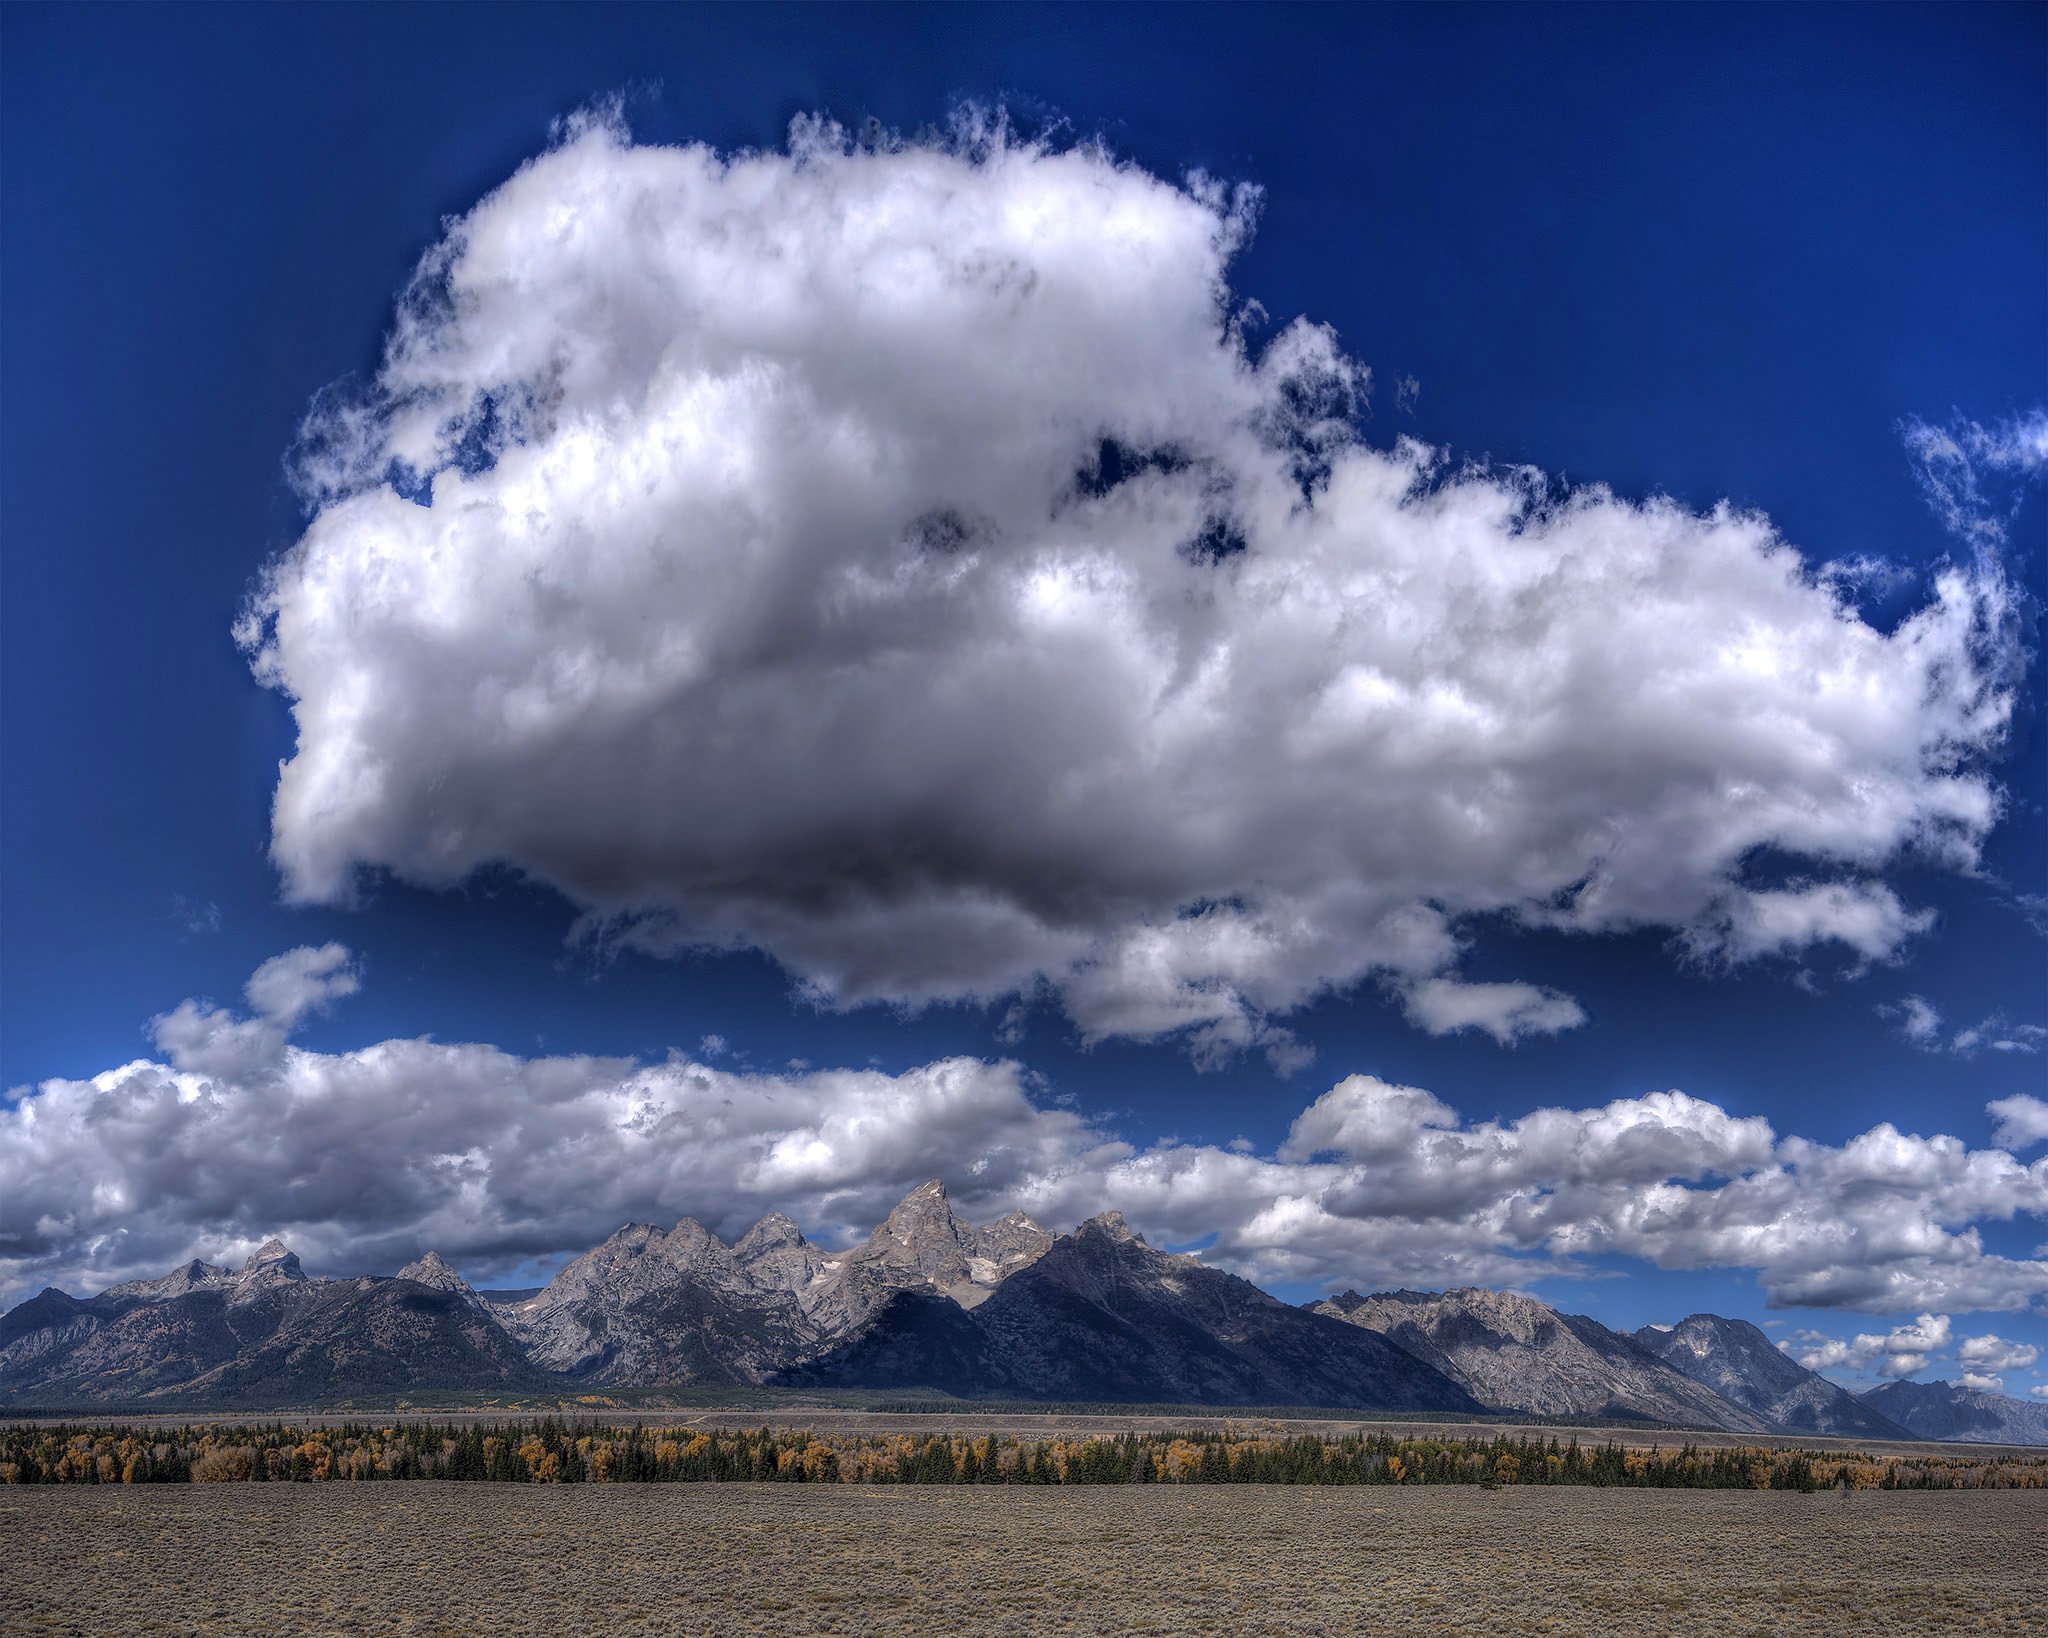
NIKON D600 + 16-35mm f/4 @ 26mm, ISO 100, 1/125, f/8.0
Note: By using the camera in the portrait orientation and combining two images, the Grand Teton image in Plate 17 has a greater pixels density than if the picture had been taken at a wider angle of view setting of the zoom lens (16mm in this case) and a more conventional horizontal camera orientation. By combining multiple images and having a final image with a greater pixel density, larger prints can be made. Note too here there is substantial darkening of the sky even though a large cloud is present. This may represent a “problem” associated with the use of a circular polarizer, or it may just make the sky more dramatic.
Finally Plate 18 reminds the reader that panoramas need not be horizontal. It is also incidentally another example that poor technique is not necessarily an impediment creating an HDR “panorama”. The Black Canyon of the Gunnison is quite narrow and very deep. This handheld HDR panorama is included here to inspire you to try something out of the ordinary. Who knows when something of interest may result that helps to convey the astonishing beauty and uniqueness of our world.
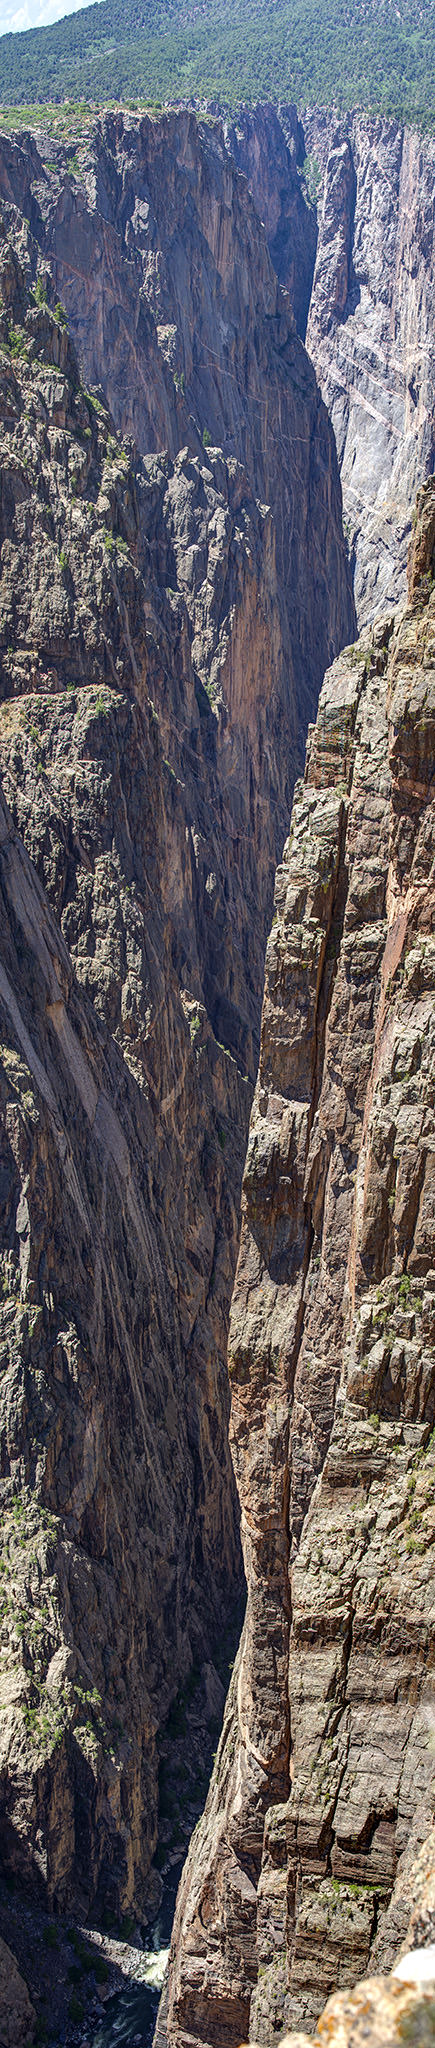
NIKON D600 + 70-200mm f/4 @ 70mm, ISO 400, 1/500, f/8.0
5) Resources
I have found a couple of the many books describing HDR in greater detail of value. The Handbook is VERY comprehensive. So much so that it almost makes one think that it can’t be done by mere mortals. There is, however, a very useful section on how to process a landscape image using Photomatix Pro, which by itself is almost worth the price of the book.
– Complete Guide to High Dynamic Range Digital Photography by Ferrell McCollough, Lark Photography, 2008.
– The HDR Handbook 2.0 by Christian Bloch, rocknook, 2012.
This guest post was provided by Jim Maynard, a retired and a recent resident of Colorado. He has a long time interest in photography, but does not currently have a web site.
No matter what we do, the camera never captures a scene the way our eyes (and brain) actually see it. I think HDR, tastefully applied, best conveys to the viewer what made you actually WANT to capture that scene.
Excellent article Jim, I learnt a huge amount in a very short space of time, and broadened my horizons!
Has anyone had a chance to compare Aurora Pro to Photomatix Pro? I know it’s only been released for Mac but that’s actually what I own.
Hi J Russell
I must admit to agreeing with much of what you say in the first half of your comment. I started dabbling with HDR at least two years ago, and some of the resulting images sit on my hard drive today. When I revisit them, they do indeed look a little gaudy, and overdone, no matter how careful I was with the HDR software – the truth is, the controls are not fine-tuned enough in the software to get the level of control, thus the sometimes distasteful end results.
I do also dislike the flat – or flatter – result you get when you ACR an image and reduce contrast. One thing I have found when working directly on images in ACR is a hit of ‘fill light’ and a reduction in ‘brightness’ and an ever so slight reduction (and I do mean very slight) in contrast. More often than not this approach yeilds a far more pleasing, and accurate comprehension, of the scene that was originally shot.
As to the second half of your posting, I am not totally clear what you meant. Is it that the use of a telephoto excludes a wider landscape, and thus wider tonality, which is at the root of this rush to HDR so much these days? Expand on that if you will, also the collage concept you mention. I am tiring of pure HDR processing, and try to avoid it – and manage without it for most of the time. In fact, my mindset has altered over time, and I see HDR not as a tonality recovery tool at all, but really, an artistic interpretation tool, as the results I get are almost invariably not the results I was looking for.
It would be nice to hear a more expanded version of your ideas, as I am like minded. Do you also tend to post-process in ACR (via lightroom or photoshop) or do you use other software?
Over saturated landscapes, trees and rocks may look good for awhile. You look back on those photos and say to yourself, YUK.
It is fun to use HDR and make plastic looking photos. Pulling the greens, reds and yellows beyond normal out of the rocks, trees, grasses and flowers. Over saturating the sky with blue and cyan. In the end it is not what the eye sees.
To my understanding HDR stands for High Dynamic Range, which is different from HCS stands for High Color Saturation.
A HDR photo may also take away a lot of the contrast. Without contrast you have a very flat photo. Fine line in too little or too much contrast. As always, moderation is best.
For a true HDR picture take a telephoto lens and take pictures of the rocks, flowers, grasses, mountains, sky and clouds. Put these into a collage. Now take your HDR photo and make each of the areas look like the collage.
Thank you Guest for the time and effort. It is nice to see what other alternatives we have as photographers instead of just using one photo and saying that is good enough.
Very good comprehensive article.
I’ve been shooting HDR Panos for 3 years now with a Nikon D700 and a Fujifilm X-M1. The only thing I do differently than you suggest is that I shoot JPGs instead of RAW. My shots are used in newspapers and websites and RAW adds no or very little value while JPGs shorten processing time significantly. Basically, it’s more fun doing it this way…and I’ve never heard anyone say: “That’s great shot, but it would have been even better if you used RAW.”
I process in Photomatix, Microsoft ICE, and Photoshop with NIK.
I usually correct the lens distortion for each picture before add them to the panorama.
Thanks for your thoughts. Not a bad idea and can’t hurt. Since distortion is greatest in the outermost areas of the image, if there is more overlap between adjacent images, applying lens correction may not as be necessary. Combining portrait-oriented images should also help reduce distortion in the final panorama.
Also, most of the time the detail extractor filter from the Nike plugins extracts all the little details from the image. You just need to make sure that there are no clipped highlights/shadows.
Excellent article. A few observations from my personal experience:
1. Using the polarizer for panoramas leads to uneven sky colors and brightness, most of the time.
2. The number of the brackets depends on the camera sensor and scene – most of the time with modern aps-c or full frame sensors two exposures, with a 2stop difference are enough to cover the entire Histogram of the scenery.
3. Using a tripod with a leveled camera leads to the dreaded horizon-through-the-middle, where you get a lot of foreground – much more than intended. I found that you can get rid of that by using a tilt an shift lens. For those of us lacking the money and the dedication to use such a specialist lens, we can just tilt the camera. For lenses longer than 70mm the keystoning is negligible. For wider lenses , software like autopano pro can correct the keystoning.
All true about polarizers on any sort of wide angle photograph. What can “save the day” is having some clouds to break up the sky. As you know, if you tip the lens up, it makes getting the overlaps for a panorama slightly more complex. It is fairly easy to miss them as each component image is somewhat pie-slice shaped. My experience has been almost exclusively using a cylindrical stitching algorithm. Using a spherical stitching method might minimize the difficulties in stitching images made with the camera tipped. Of course if the resultant panorama has too much foreground, it is always an option to crop some of it off. Using a tilt/shift lens may help solve these problems and also helps keep more of the scene in focus.
Sometime you have to use cpl, but the key is to not “over do it”. As far as bracketing – I found out that more bracket(s) the more control I can get out of the shot without the overly dramatic HDR look common to HDR exposures – I use to do -2,0,+2 ev but now I almost always do 5 or 7 (5 for normal scenes and 7 for strange light conditions with big light/dark range) exposures at 1 ev apart
For sure more bracket(s) can help save situations that have more extreme contrast levels. Thanks for bringing this point out. In Photomatix there is an option called Fusion that works, as its name suggests, to blend the bracketed images with very little further modification possible. This is worth trying as it certainly avoids the “HDR look” while allowing a greater dynamic range to be captured. I suspect this is not unique to Photomatix, but it is the only HDR program I am familiar with.
Great article! Im glad you mentioned the potential pitfall(s) with using a CPL when taking Panoramic scene, HDR or not. Most articles that do write ups on Panoramic’s never mention this and post picture after picture with the sky being all out of whack. But like you said there may times where you as the photographer may feel that its other benefits outweigh that short coming.
For sure you can get into “trouble” with a CPL filter if there is lots of clear sky without clouds to break it up. Even if the area being covered is not too wide, the sky can come out much darker than it appears to the naked eye. I may tend to not notice the sky darkening as much as some as I always wear polarizing sun glasses when out. But for sure if within the picture there are dramatic changes from darker to lighter areas within the sky, it is clearly distracting and unnatural. I took the same picture as shown in Plate 1, Blue Lake, a week earlier when there happened to be no clouds. The sky was very distracting due to the dramatic changes depending on the camera orientation to the sun. There are work arounds, but it would have been easier to not have the problem in the first place. If you have the time, consider taking the panorama both ways and then you can decide which looks better in post.
These days I tend to only use polarizer if I want to remove reflections/glare – for everything else I did notice that polarizer filter in Nik Color Efex Pro 4 works great and gives me great amount of control. If I do use CPL (while not needing to reduce reflections) – I try to adjust it to just a minimal effect. But that’s just me. Additionally, the quality of CPL is critical – I use Hoya Pro1 Digital and they seam to work great (but can be pricey)
Thanks for the tip regarding Nik software approach. I agree that the quality of the CPL filter does make a difference. I “traded up” from a lesser quality one to a B+W Kaeseman and there was a marked improvement in results. They also suffer from the pricey problem you mention.