At a time when photography software can do almost anything, is there any reason to use physical glass filters in front of your lens? Absolutely! Some problems are still best solved with filters. Today, I’ll introduce one of my favorite types: the graduated neutral density (GND) filter.
Table of Contents
What Are Graduated Neutral Density Filters?
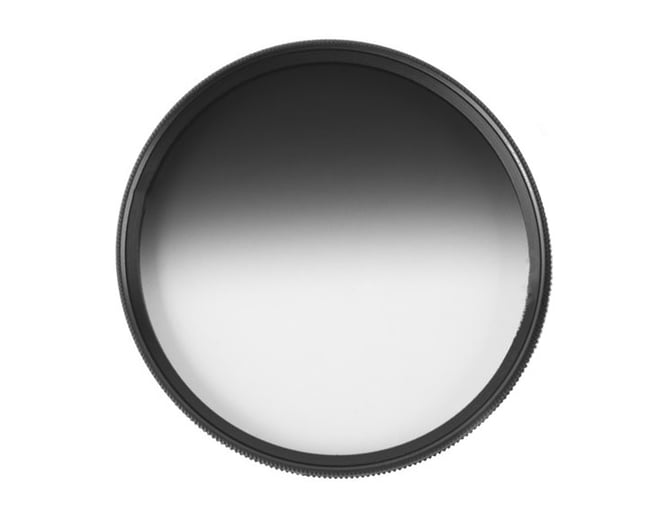
Graduated neutral density filters, or GND filters, are clear on one side and darker on the other, with a transition zone in the middle. They look like this:

The word “graduated” in the name refers to the soft transition zone in the middle of the filter. The words “neutral density” indicate that the darker portion of the filter is neutral in color. (You may find some color graduated filters available, too, but these are unusual and very specialized.)
If you put a GND filter on your lens and take a photo of a featureless subject, the photo will look like this:

In short, a graduated neutral density filter darkens part of the photo. With most filter holding systems, you’ll have full control over the height and rotation of the GND filter, allowing you more control over which portion of the image to darken.
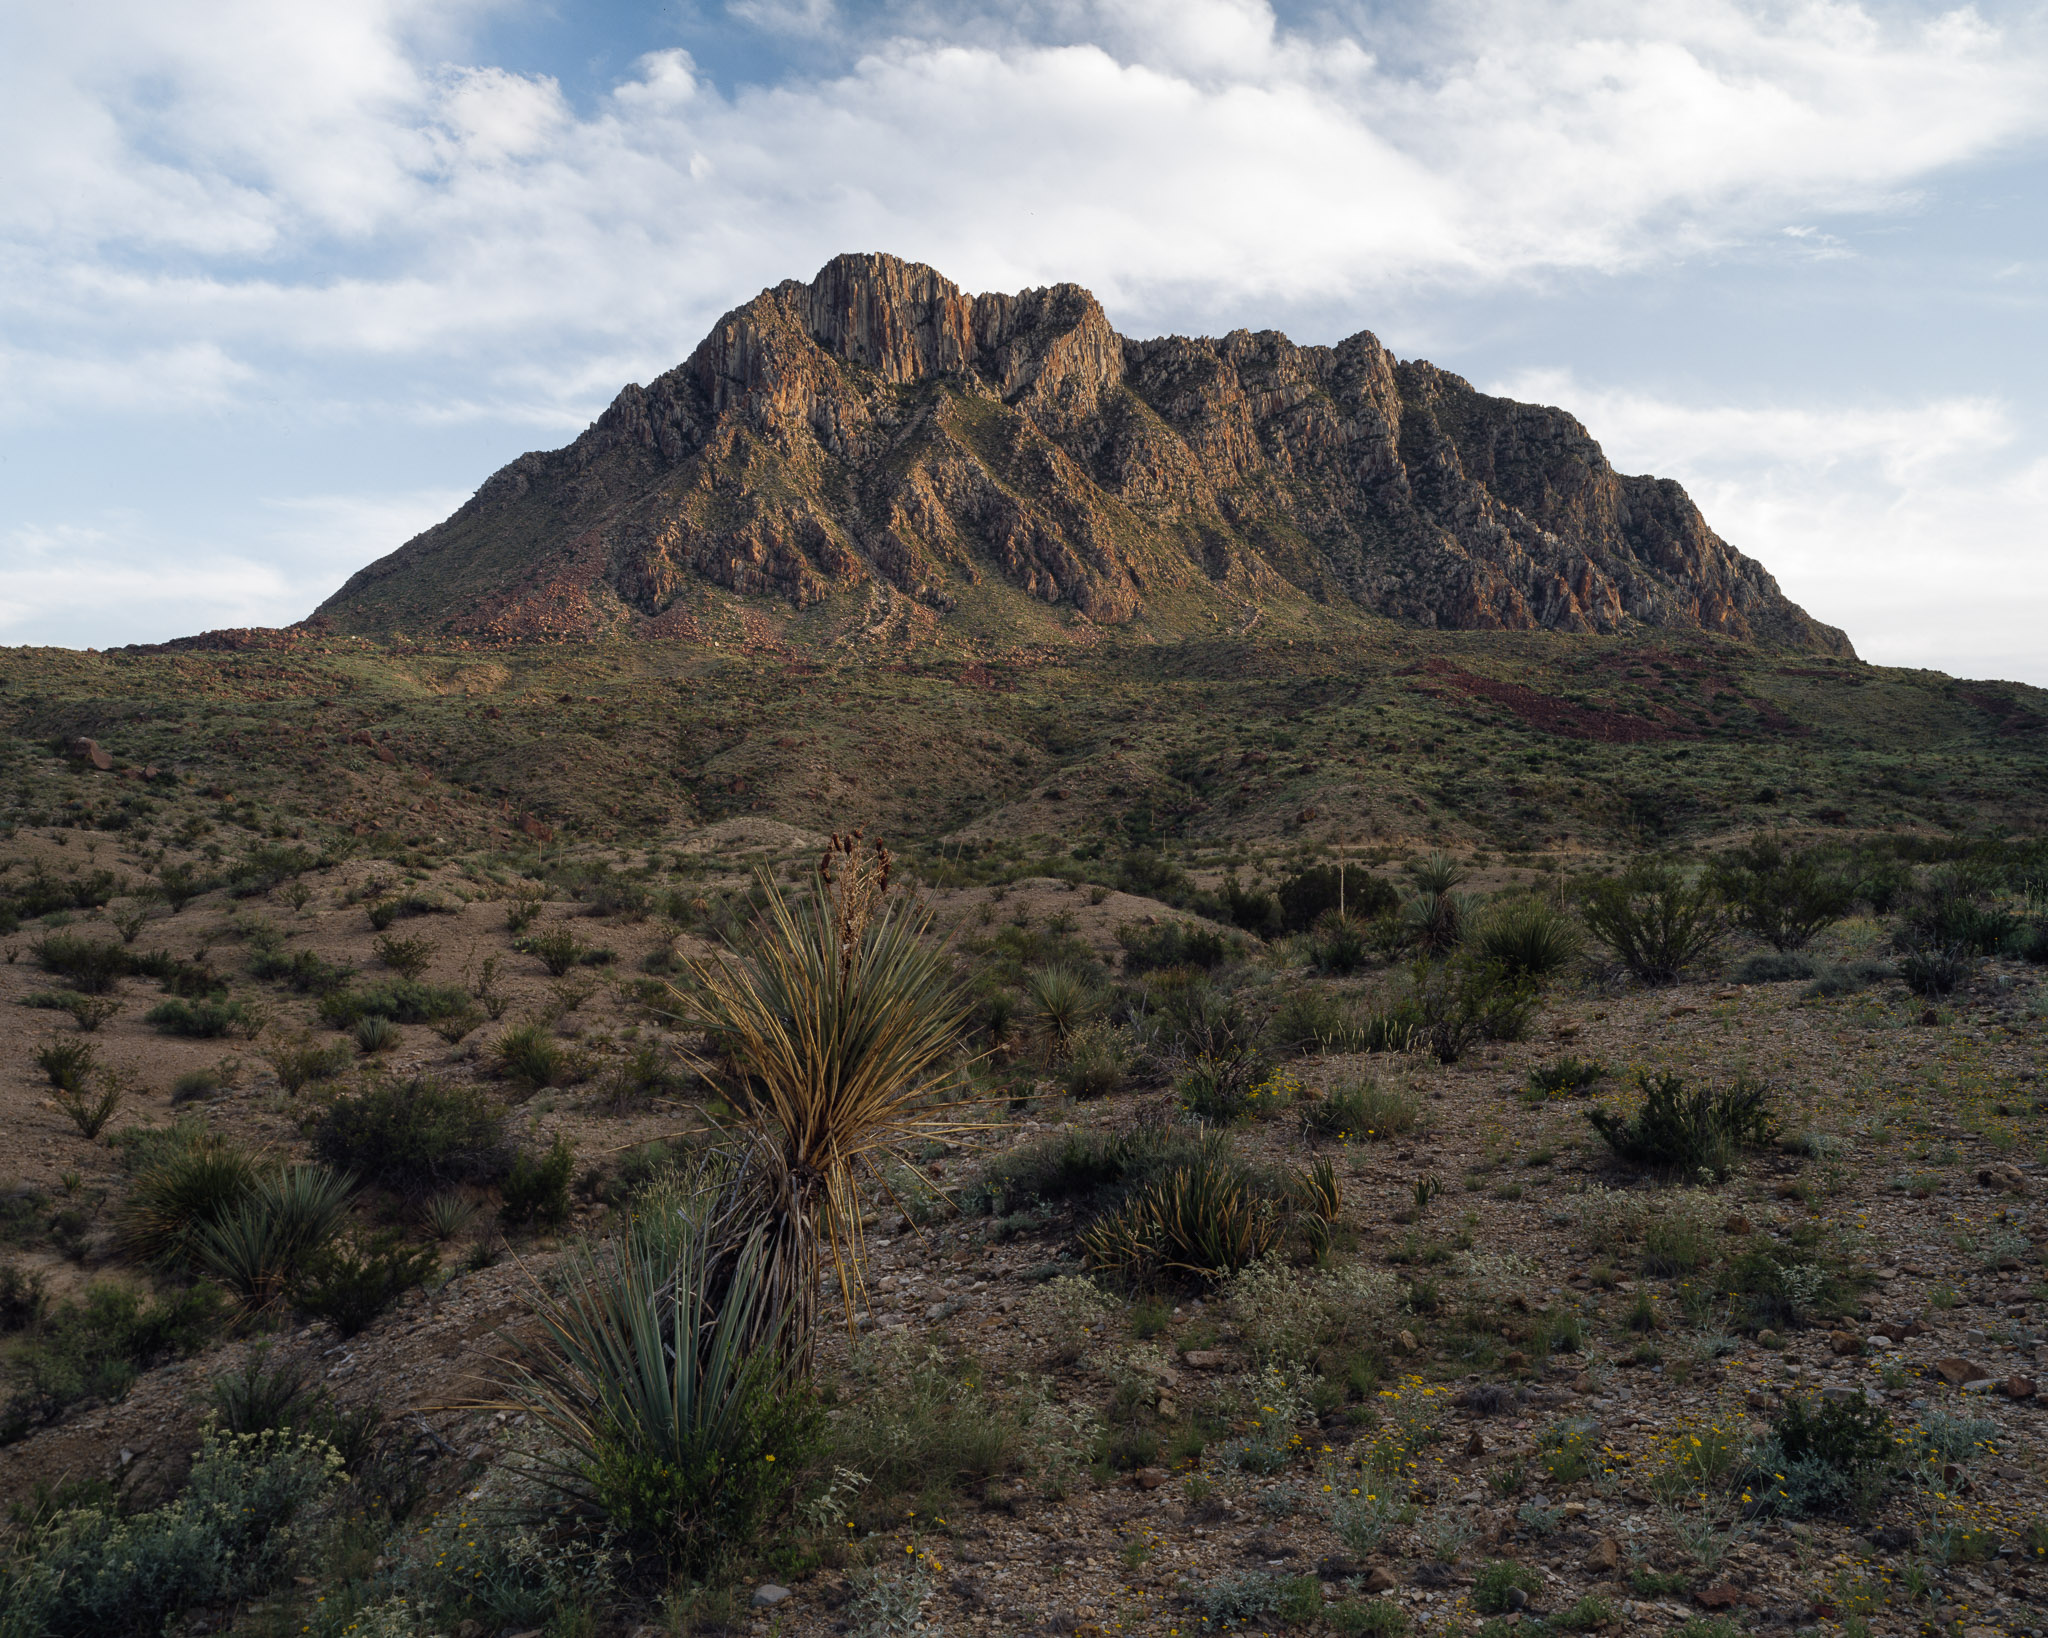
The most common purpose of GND filters is to darken the bright sky in a landscape photo while leaving the foreground untouched.
Types of GND Filters
Graduated neutral density filters come in many varieties. One question is how the graduated portion looks – including whether the transition zone is soft, hard, or a more unusual shape. Another question is how dark the darkest portion of the filter gets. I’ll dive into those two considerations here.
1. Shape of the Filter’s Transition Area
Graduated neutral density filters come in two main varieties: hard and soft. This refers to how sharp the gradient of the transition zone is. A hard neutral density filter transitions very quickly from dark to clear, while a soft neutral density filter is much more gradual. (Some companies also offer medium neutral density filters that are somewhere in between.)
You may also come across more unusual GND filters, such as a reverse GND, where the transition zone itself is sharp, but the filter gradually becomes brighter again toward the top of the filter. Meanwhile, some GND filters are totally atypical and may have a round or triangular shape. Below is an example of each.

In a minute, I’ll discuss which graduated neutral density filter might be right for you. For now, a rule of thumb is that hard GND filters are best when the horizon is flat and well-defined, while soft GNDs are good for irregular horizons. Those are the two main types of graduated filters and are the most useful 95% of the time.
Any other style of GND is more specialized, but can still be useful. For example, a reverse GND is ideal when the brightest portion of the sky is directly on the horizon, such as the sun dipping below the horizon at sunset.

2. Density of the Filter
Neutral density filters come in a variety of densities, usually ranging from 1 stop to 4 stops. If you need a quick refresher, reducing the light by one stop is the same as cutting it in half. So, the scale works like this:
- 1 stop GND: 1/2 as much light
- 2 stop GND: 1/4 as much light
- 3 stop GND: 1/8 as much light
- 4 stop GND: 1/16 as much light
Generally speaking, the most useful graduated neutral density filters are in the range from 2 to 3 stops. Anything less than that and the filter is hard to notice; anything more, and the filter is too strong.
Most companies that make graduated neutral density filters label them with a decimal system as follows:
- 0.3: 1 stop filter
- 0.6: 2 stop filter
- 0.9: 3 stop filter
- 1.2: 4 stop filter
You’ll also find some filters that are partway in between these whole values, such as a 2.5 stop filter (or 0.75 in the decimal system).

What GND Filter(s) Should You Get?
The right graduated neutral density filter depends upon the subject.
I already mentioned that a hard GND filter is good for sharp horizons, while a soft GND filter is good for irregular horizons where there may be hills or mountains in your photo. However, that’s a bit of a simplification, because it also depends upon the focal length of the lens you’re using!
With a wide-angle lens, any graduated filter will appear have a harder transition. Take a look at the comparison below between using the same filter on a 24mm lens and a 200mm lens:


This is a pretty dramatic difference, and it goes to show that the right filter really depends on your lens. For an ultra-wide lens, I will generally use a soft GND except when the horizon is totally flat. Meanwhile, with a telephoto lens, I use a hard GND filter 100% of the time, since the effect of soft GNDs is almost invisible.
Along similar lines, using a narrower aperture value will also make the transition line appear harder. This is not as major of an effect, but it’s still interesting that you can change the apparent softness of your filter (at least slightly) just by adjusting your aperture.
If you plan to get any graduated filters, my recommendation is to get at least two of them: a soft filter for your wide lenses, and a hard filter for telephotos and flat horizons. I think that specialized GND filters with different shapes are not necessary for most photographers, including reverse GND filters and especially any rounded or triangular GNDs.
I also strongly recommend avoiding GND filters that are circular and screw into your lens. These filters are pretty useless because you can’t raise or lower the position of the filter. Instead, go with a rectangular GND that works in conjunction with a proper filter holder system like those from Lee, NiSi, or Cokin.
That leaves me with my overall recommendation: Get two GND filters, one soft-edge and one hard-edge. Personally, I find that 2-stop GNDs are a bit too weak much of the time – I would recommend either a 2.5 stop or a 3 stop filter instead. In my opinion, an ideal kit would be a 2.5-stop hard GND and a 3-stop soft GND.
Also, I tend to recommend glass filters rather than resin as a general rule. This actually rules out some popular GND filters on the market, but I find that glass has less flare and better colors/contrast than resin, most of the time.
Is Any of This Even Necessary?
The main purpose of graduated neutral density filters is to capture high-contrast scenes more easily, especially when the sky is much brighter than the foreground. However, today’s cameras have very impressive dynamic range, and you can always take HDR or AHDR images to extend things even further.

For that reason, I would say that graduated neutral density filters are a bit of a luxury these days – not just in price, but also in the space they take up in a bag (especially in combination with a full filter holding system) and the time they take to set up. Many photographers will find it more practical to take a few photos to merge later as an HDR.
Even so, GNDs are still useful. Maybe your multi-image HDR doesn’t blend properly because of some unexpected movement in the frame. Plus, high-quality GND filters can even reduce flare if they help darken the bright sun in your photo. (Although low-quality GND filters will add flare if the sun is in your frame.)
Most of all, I’m a big proponent of “getting it right in-camera.” There’s something to be said for the thoughtful nature of using a GND filter and taking the time to ensure that your raw file is as good as possible – that it won’t require doing backflips in post-production in order to look right.
A well-filtered image is a joy to work with in Lightroom. You won’t run into any of the color shifts, weird contrast, or haloing artifacts that you might find in an HDR, not to mention that HDRs can be difficult to blend properly if there’s significant movement in your frame.

While there are other pieces of camera equipment that I would prioritize first, I do think that a graduated neutral density filter (or two) belongs in the bag of most landscape photographers. This article should have given you a good idea of how GND filters work and which ones are right for you! Let me know in the comments if you have any questions, and I’ll do my best to answer.
Spencer, the last sample image (taken w/2 stop hard edged filter) raises other questions. It is starting to look unnatural as the ground is nearly as bright as the sky. As with most effects, best applied in moderation.
I like the idea of square ND filters, but I barely ever even break out the tripod so it’s pretty academic. I even bought the Nisi base kit with the CPL and haven’t used it for real yet.
I need to go on more dedicated photography trips where taking an hour to nail the comp is totally fine and not holding up the crowd.
Spencer, the last sample image (taken w/2 stop hard edged filter) raises other questions. It is starting to look unnatural as the ground is nearly as bright as the sky. As with most effects, best applied in moderation.
Fair point! “Your scientists were so preoccupied with whether they could, they didn’t stop to think if they should.”
I did not know that focal length and aperture affected the gradient of a GND filter. Thanks!
Sure thing, I think a lot of photographers aren’t aware of that at first – until they try to use a soft GND with a telephoto and get hardly any effect.
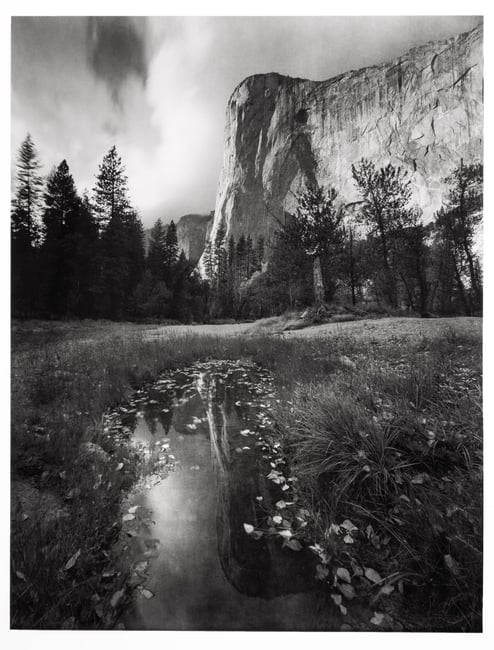
Well it looks like the sunset photo of half dome was one of your film photos! Can’t correct that in HDR in Adobe Lightroom haha. That’s just a really peaceful shot.
Thank you! Yes, a few of these are film photos, including that one. I use GNDs with both film and digital, but they’re even more useful for film, especially when shooting Velvia 50 like that photo (not much dynamic range in that film).
If ones is to use glass GND glass filters make sure the brand uses Tempered glass, they will not be as fragile, some cheaper GND glass filters I found out through experience will chip or break on the slightest impact.
It looks like NiSi, Breakthrough, and Cokin each have some tempered glass GND filters. I haven’t tried all of those brands, but I understand your recommendation – it’s not fun when a filter cracks.
A GND is something I haven’t tried yet but I’m planning to. There are definitely a dozen occasions I can recall where I would have really appreciated one, and I much prefer single Raw files to merging multiple ones. And it’s true that modern cameras have great dynamic range but I do think a GND filter would be quite useful for smaller sensors also. In practice (as expected), I notice a huge difference when trying to lift shadows from a m43 Raw file compared to a FF Raw file. And even with FF, there was one time in Arizona where I really would have appreciated a GND filter…
You should! I find that pushing the shadows slider too far causes some annoying interactions with the other sliders, even when the shadow noise itself is not objectionable (like with full-frame at base ISO). By comparison, images taken with proper GND filters are really enjoyable to work with.
You shouldn’t! (this is a rebuttal to Spencer’s reply) If the scene is static enough, take multiple exposures. If it’s not and you’re forced to use a GND, take one without a filter as a reference to help your memory of what it actually looked like (at least according to your camera’s sensor). :-)
Most people are too polite to say anything (a handicap I’m not encumbered by), but if your scene doesn’t look realistic (I know, I know… it does when YOU edit!) people will know and it will affect their opinion of your work.
A GND may give you the image you want, in camera, but that’s not to say you got it right, just your preference.
I’m not sure that I totally follow your point, but as I see it, the goal should be to get the most flexible raw image – one that helps you capture your vision of the scene, whether or not filters are involved.
A flexible raw image can be used to overcome the inherent shortcomings of your camera’s sensor, better representing the scene you recorded, or to create an image that looks nothing like the scene you were presented with and in many cases looking nothing like any scene that ever existed on the face of the planet. When you use a GND, you replace the image of your scene, albeit handicapped, again, by your camera’s sensor, with one that is absolutely NOT representative of the scene, having artificially darkened a portion of it.
So… not right, just your preference.
I’m afraid I’m going to have to disagree with you, Pat. Representative of the scene should taken into account how the eye perceives a scene. When a person looks at a scene, they don’t take it in all at once but in pieces. And when the eye looks at the ground in a landscape they evaluate it separately compared to the sky, and this gets integrated in the brain as an image. In this sense, the eye is quite different than a camera that takes a single reading very quickly.
Therefore, the process of using a GND is actually quite natural in the sense that it somewhat mimicks what the eye-brain combination does. The default look of an unprocessed image from a camera in an HDR scene on the contrary is a lot different than how my brain processes it: just go out and look at a very high-dynamic range landscape and see how much detail you can perceive in the darker areas. It will be quite a lot. Then, take a shot and don’t do much post-processing. It will look very different.
Therefore, the process of lightening the shadows a little and applying masks and GND filters actually is simply the process of getting a photo that is close to the brain’s perception of it…provided you don’t overdo it of course. But a 2-stop darkening of the sky is certainly NOT overdoing it.
Never hesitate to disagree with me or anyone else … it’s the only way we can learn from each other.
I would append that to “getting a photo that is close to your memory of the grain’s perception of it”.
I was about to respond with something similar when I read this post. Exactly. I will add also that the human eye has greater dynamic range than most cameras and so using a GND filter can be “right” assuming one’s idea of right is what is seen by the eye.
But, as Jason pointed out, the human eye doesn’t “see” any more than a piece of glass; seeing is a function of the brain/sensor.
I promise you, at my age, most readers of Photographylife don’t see what I do or vice versa.
Mark wrote: “I will add also that the human eye has greater dynamic range than most cameras…”
Not when looking at one scene.
QUOTE Dynamic range, Wikipedia
The human senses of sight and hearing have a relatively high dynamic range. However, a human cannot perform these feats of perception at both extremes of the scale at the same time. The human eye takes time to adjust to different light levels, and its dynamic range in a given scene is actually quite limited due to optical glare.
The instantaneous dynamic range of human audio perception is similarly subject to masking so that, for example, a whisper cannot be heard in loud surroundings.
en.m.wikipedia.org/wiki/…amic_range
END OF QUOTE
If you mean the light-adapted range of each, then a typical full-frame interchangeable lens camera can go from, say, f/32 at 1/8000s to f/1 at 30s, which is a range of 28 EV (stops), plus ~10 stops of photographic dynamic range, totalling 38 stops.
Interesting. But since it’s the brain, and not the eye, that actually sees, I wonder how relevant it is in practical application.
“since it’s the brain, and not the eye, that actually sees”
Tell that to people who’ve had one cataract removed and are waiting for the other to be removed. When they compare what is seen via each eye, they will notice a large difference in terms of both contrast and colour.
The question I’m often asked by such people is along the lines of: Which eye is showing me the correct colours?
If you are interested to learn about vision and seeing, there’s an excellent book on this subject entitled Vision and Art: The Biology of Seeing by Margaret Livingstone (the Takeda Professor of Neurobiology in the Department of Neurobiology at Harvard Medical School in the field of visual perception).
That’s interesting. I’ve always read that the eye sends information to the brain, which in turn interprets the information. It makes sense that the eyes are affecting it in various ways, but I’ve never spent a lot of time considering, or researching, the details. I’m getting old and my eyes definitely don’t work as well as they used to.
It’s an interesting subject, but not interesting enough (to me) to read about it. But thanks!
This is a bit of a non argument. The thing is, if you decide to expose appropriately for the light reflected from the land (or sea) the camera sensor will usually lose colour and detail in the sky. The best way to prevent that happening and provide a scene comparable to that seen by the eye is to use GND filters. Post-processing can sometimes get close but it’s not without the drawbacks mentioned in the article. The filters also usefully slow down the process of picture-taking, which can often be an advantage.
The entire process is subjective; my point is to eliminate as many variables as possible, GNDs being a variable.
We are told to ‘expose to the right’ to get the most useful RAW image to process. But an ettr image doesn’t ‘represent’ the scene.
See my response to Chris, above.
Getting it right is getting it according to your preference, so I don’t understand what point you’re trying to make.
See my response to Spencer, above.
Jumping in, here. Digital cameras are built with the expectation of post processing. In other words, post processing is part of a camera’s DNA. There is no such thing as ‘getting it right in camera’. All images need some amount of post processing. That is the whole idea of RAW files in the first place. Of course the degree of post processing is in the eye of the beholder. That is why we are artists and not mechanics.
Completely disagree about photographers being artists, not that we’re mechanics, but my point, cleverly disguised by my poor writing, is that any post processing will be based more heavily by what the camera captures, than what you saw in the field. By modifying various portions of the captured image differently, in camera, the degree to which your edits are skewed by that image will increase even more.
I always appreciate your comments, especially that we almost never agree! :-)
“any post processing will be based more heavily by what the camera captures, than what you saw in the field.”
I don’t quite understand you here. We are talking about cameras, are we not? Doesn’t it go without saying that we must deal with what the camera captures? It seems to me that the only way to satisfy your requirements as to meddling with raw files is to not take any pictures at all, but to just stand there and look at a scene. Not a bad idea, but not very helpful to photographers.
Being an artist myself, in both senses of the word, I deeply believe that photography is art. I don’t count snapshots in that, I am talking about that whole other realm that requires creativity and thought in the production of images. When an artist paints, he paints what he sees. All artists see everything differently. No two artists will create the same painting from the exact same scene. It is all totally subjective. When a photographer shoots, he captures raw data and then creates what he sees. Once again, it is totally subjective. If a person wishes to be totally objective in their photography, there are many genres that would suit that philosophy which don’t require creativity.
I meant that what we see in the field is not what the camera records, but our editing will be affected more by what the camera recorded than what we saw. My point being that I think it’s better to capture the scene as accurately as possible (keeping in mind the limitations of the camera’s dynamic range) for editing. The transitional areas of a GND will NOT do that. For film, that was necessary since editing was so limited for the average photographer; for digital, and especially with the most recent sensors, it’s not. Spencer’s comment about issues in dark areas is primarily a function of one’s editing process and not so much an inherent limitation in the format.
Being a Christian myself, in every sense of the word, I believe that only God can create anything. In my mind, what we call art would be better described as a commentary of God’s art (creation). One sees a scene and tries to call attention to certain areas by dodging, etc. and using other areas to frame the former areas better by burning, etc. Every editing decision is an attempt to comment on how one feels about a scene, regardless the subject. Bottom line: I’m not advocating objectivity, rather giving homage where it’s due. J.S. Bach, arguably one of the greatest composers of all time, thought that the purpose of all music should be to worship God. Having said that, I prefer Beethoven, an arrogant sob by all accounts! :-)
Pat, many zoom lenses and most ‘pre-digital’ prime lenses have a maximum contrast ratio circa 10‑stops, due to ghosting and veiling glare, both of which can be aided by a GND filter.
QUOTE Veiling glare, Wikipedia
Veiling glare is a limiting factor in high-dynamic-range imaging.
en.m.wikipedia.org/wiki/…ling_glare
I’ll keep that in mind when choosing my zoom lenses and ‘pre-digital’ prime lenses and, in particular, to avoid glare.
A full-frame digital camera has a photographic dynamic range in the region of 1000:1; 10 f‑stops.
A glossy photographic print has a contrast ratio in the region of 64:1; 6 f‑stops.
Therefore, we have two choices:
● “keep it natural” by using a linear brightness mapping between the scene and the print, which would not only discard 4 f‑stops of the camera’s range, the print would also look drab, flat, lifeless.
● use a nonlinear brightness mapping between the scene and the print via a carefully selected combination of:
• “S”-shaped tone curve (photographic film has this)
• artificial scene lighting, e.g.,
reflectors
strobes
• polarizing filter
• graduated filter
• …
Human visual response to brightness is approximately logarithmic, therefore, in order to obtain a natural-looking image of a scene, we need to process the linear data from the camera using nonlinear mathematical functions, which is completely different from simply adjusting the brightness and contrast controls in a picture editor.
Notwithstanding, after decades of my own photography I can usually spot the manipulations used to produce an image, because most photographers overdo them without realizing.
I think my original point wasn’t conveyed well by my words; in an effort to achieve wit, I’m far too brief. For a better representation (I hope), see my response to Elaine (above).
Does your reply to Elaine somehow affect the accuracy or otherwise of my comment? 😀
Happy New Year to you, Pat.
No, but I wanted to better explain myself. I’m not very good at talking/writing to others.
Happy New Year to you as well! We had a fairly major earthquake here (Japan), yesterday, but I’m not going to take it as a bad omen. :-)
I read about the earthquake via BBC News. For the readers who are interested to learn about it:
2024 Sea of Japan earthquake, Wikipedia
en.m.wikipedia.org/wiki/…earthquake
I heard about it via a phone alert telling me to remain calm and find shelter. I guess the Japanese government didn’t think it prudent to rely on BBC News to inform us. 😂
“I’m not very good at talking/writing to others.”
So it appears.