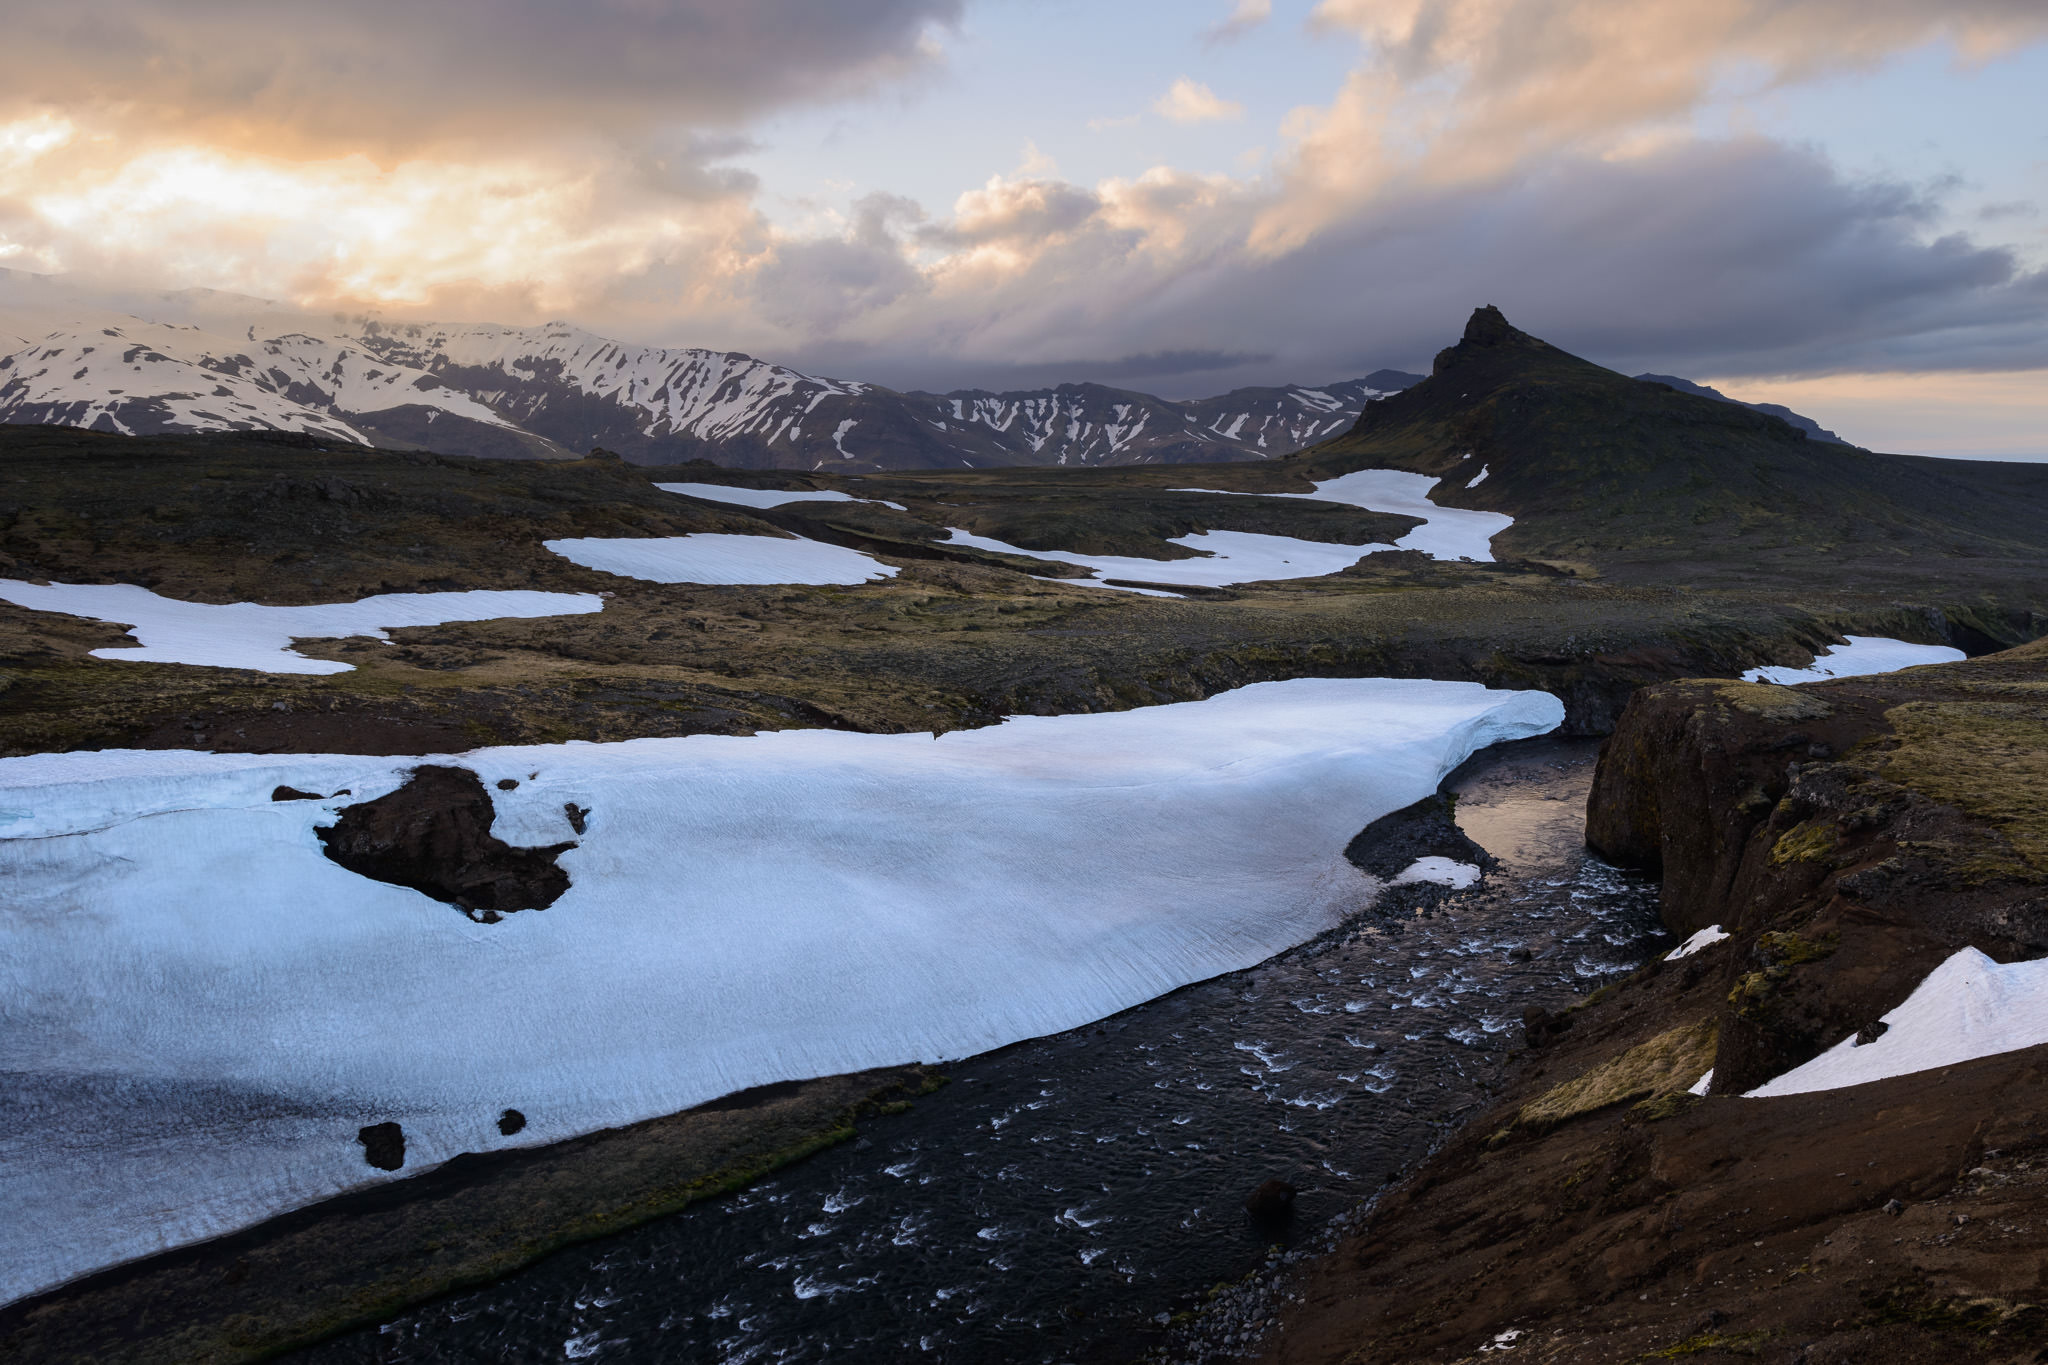
It’s the middle of the night and still bright outside. I’m in Iceland a few weeks after the summer solstice, and I just finished the longest hike of my life – a nine-day version of the Laugavegur. I’ll have several photos and articles to publish now that it’s done, including this first post about the process of going lightweight on such a long hike. How do you trim your camera setup for such an ordeal?
Table of Contents
How to Lighten Your Camera Kit
A heavy bag is never fun to carry along. For the trip I just finished, at its heaviest, my bag weighed just under 40 pounds (18 kilos). It got lighter as I ate food, but that’s still nowhere near what most people would consider lightweight. The big problem? Camera equipment. If I had taken my typical kit, the total weight would have been even higher, and likely completely unmanageable. It is only thanks to the tips in this article that I was able to carry it along in the first place without having to leave most of my camera kit behind. After all, I wanted this to be a photography centered expedition, and I didn’t want to skimp on the quality of camera equipment.
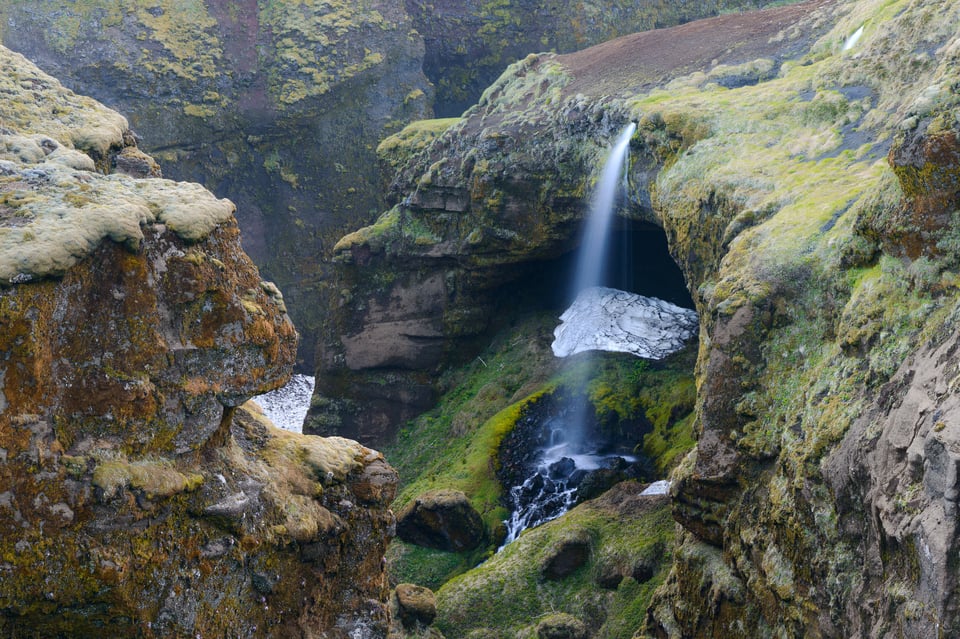
Taken a few years ago near the same area as the Laugavegur – I haven’t yet processed any photos from this trip so far.
To end up with a reasonable pack, you must be very deliberate about what you carry. The bottom line is simple: You have to become an ultralight hiker, packing as little as possible – and, once you’ve done that, pile your camera equipment on top.
When you add together a minimalist backpack and the weight of a good camera setup, you’ll end up carrying a bag with a relatively normal hiking weight. (My bag, as heavy as it was, still weighed less than that of a few hikers I met on the trail who didn’t have nearly as much camera gear.)
For typical hikes like this, a seasoned ultralight hiker might be able to get away with twenty or twenty-five pounds at the most, around ten kilos, not counting camera gear. That’s especially true if you are travelling with a companion, as I was, who can help spread out the weight of things like a camp stove and a tent. Always hike with someone else, if possible! It can save a good 20-40% of the weight of your backpack compared to carrying everything on your own.
The rest of the tips below cover choosing a camera kit for this type of photography. Note that this article is not about going on a hike and carrying a camera – it is about going on trips where your main goal is to take photos, which means your priorities will be different. When you aim for top image quality, you can only shed so much weight in camera equipment.
Still, it is possible to help yourself out by picking your camera gear carefully. Here’s a look into the type of kit I recommend, which won’t sacrifice image quality, yet is light enough to carry on a longer hike:
1) One Camera
I have a backup camera that I like to bring along while traveling. I actually have two backup cameras, just in case something goes especially wrong. But when your goal is to go light, this is overkill. I don’t recommend carrying more than a single camera on a long hike, without any backups.
If your camera malfunctions, that would be a frustrating situation. But the odds of that happening are low enough that it doesn’t matter for a single day, or even for multi-day hikes – low enough that you shouldn’t break your back over it.
Which specific camera should you bring? That’s up to you. Some people prefer the lightest possible mirrorless cameras, but it’s also true that today’s DSLRs are often quite lightweight. Unless your only camera is a massive Nikon D5 or Pentax 645z, you’re probably fine to bring along something that you already own.
On the Laugavegur, the most popular camera kit I saw was the Fuji X Series of mirrorless cameras, which does have a weight savings over other cameras on the market. I brought my Nikon D800e, which some would say is far too heavy for such a trip, but it’s what I owned and I didn’t want to skimp on quality. (Confession: Seemingly against the point of this entire section, I actually did bring two D800e cameras, but for an entirely different reason that I will cover in a future article; under most circumstances, I wouldn’t ever do that on a hike like this.)
The takeaway? Bring a backup camera on normal photography trips if you can. Sooner or later, one will break, and you’ll be stuck if you don’t have something in reserve. However, for long hikes and multi-day photo treks, this is overkill. Bring a single camera, and make it a good one.
2) Two Lightweight Lenses
You never need more than two lenses on a long hike.
Okay, never is a bit too strong – perhaps very rarely is better – but the advice stands. Do what you canto shrink your kit down to just two lenses.
Two lenses may seem restrictive, as if you are likely to miss a good photo in front of you if it is of the wrong focal length. That may be true for some photographers, but I find that it is rarely the case for most. To get in the right mindset, go out and shoot some sunsets with just a single lens, even a prime. After you do this a few times, I think you’ll be impressed by the results, and it will be easier to make the same psychological leap at a later date when weight is of top importance.
Photographers are incredibly adaptable people. If you only have a couple lenses in your kit, your eye will focus on scenes that work for those particular focal lengths. You’ll get creative when something amazing happens, and you’ll end up with fantastic results.
When I took this photo, the only telephoto lens I owned was a 105mm prime (and that had been the case for a couple years). But it didn’t harm my creativity – if anything, it simplified the process and helped improve my composition skills. This photo is actually a three-image panorama to simulate a wider focal length. Taken three years ago in a similar area to the Laugavegur.
What lenses do you need? That’s the fun part: It doesn’t matter. I prefer a wide-angle prime or zoom and a telephoto zoom, but other photographers will differ vastly. Do whatever fits your style.
I’ll stress again that this advice doesn’t apply to normal nature photography, where weight isn’t as much of a concern, and you should feel free to take along any lens that you might need. Even if you’re going on a day hike, it doesn’t necessarily apply, depending upon the length and difficulty. Instead, this is advice for photography expeditions where every ounce matters. In cases like that, you don’t need anything else.
I own seven lenses, but I never bring more than two on a long hike – one of which is usually a lightweight 20mm or 35mm prime. The lighter your lenses, the better. If you have something like an 18-35mm f/3.5-4.5 and a 70-300mm f/4.5-5.6, that’s great. If you have a 35mm f/1.8 and an 85mm f/1.8, that might be even better.
With two lightweight lenses that cover relatively different focal lengths, you can photograph nearly every scene successfully. Compose your images creatively, move around, create panoramas, crop if you must, and look for different subjects to photograph. A few missing focal lengths, or even many missing focal lengths, is not something to worry about.
In fact, if you’re really daring, you can pack just one lens. A lot of photographers might suggest a wide-to-medium or wide-to-telephoto zoom for this purpose, but, in some sense, it doesn’t matter what you choose; your eye will adapt to fit it, and you’ll rarely miss a shot along the way.
I’m not that daring, so I brought two lenses on my trip, but you still can get away with less weight than you would expect. Just carry prime lenses when possible, or pick zooms that have smaller maximum apertures. This is when it pays to use “consumer” lenses that weigh less and frequently have quite good image quality at landscape apertures like f/11.
3) A Tripod
Tripods remind me of those massive, puffy jackets that people wear in the winter. They’re large, expensive, and annoying to carry around. They also save your life.
I don’t want to bring a heavy chunk of carbon fiber everywhere I go – especially on multi-day expeditions where every ounce matters. Still, there’s a reason why I carry a tripod on even the craziest hikes I do, including nine days on and around the Laugavegur. (Granted, I wasn’t climbing Mount Everest, in which case I might have needed to be a bit pickier.)
The simple fact is that tripods offer unparalleled flexibility in your photography, improving the image quality of practically every photo you take. On top of that, they let you capture certain scenes that would be impossible handheld, and they give you a solid mental state upon which to start constructing an image. I know some photographers who can’t even begin to take pictures until their camera is on a firm tripod. It’s step one.
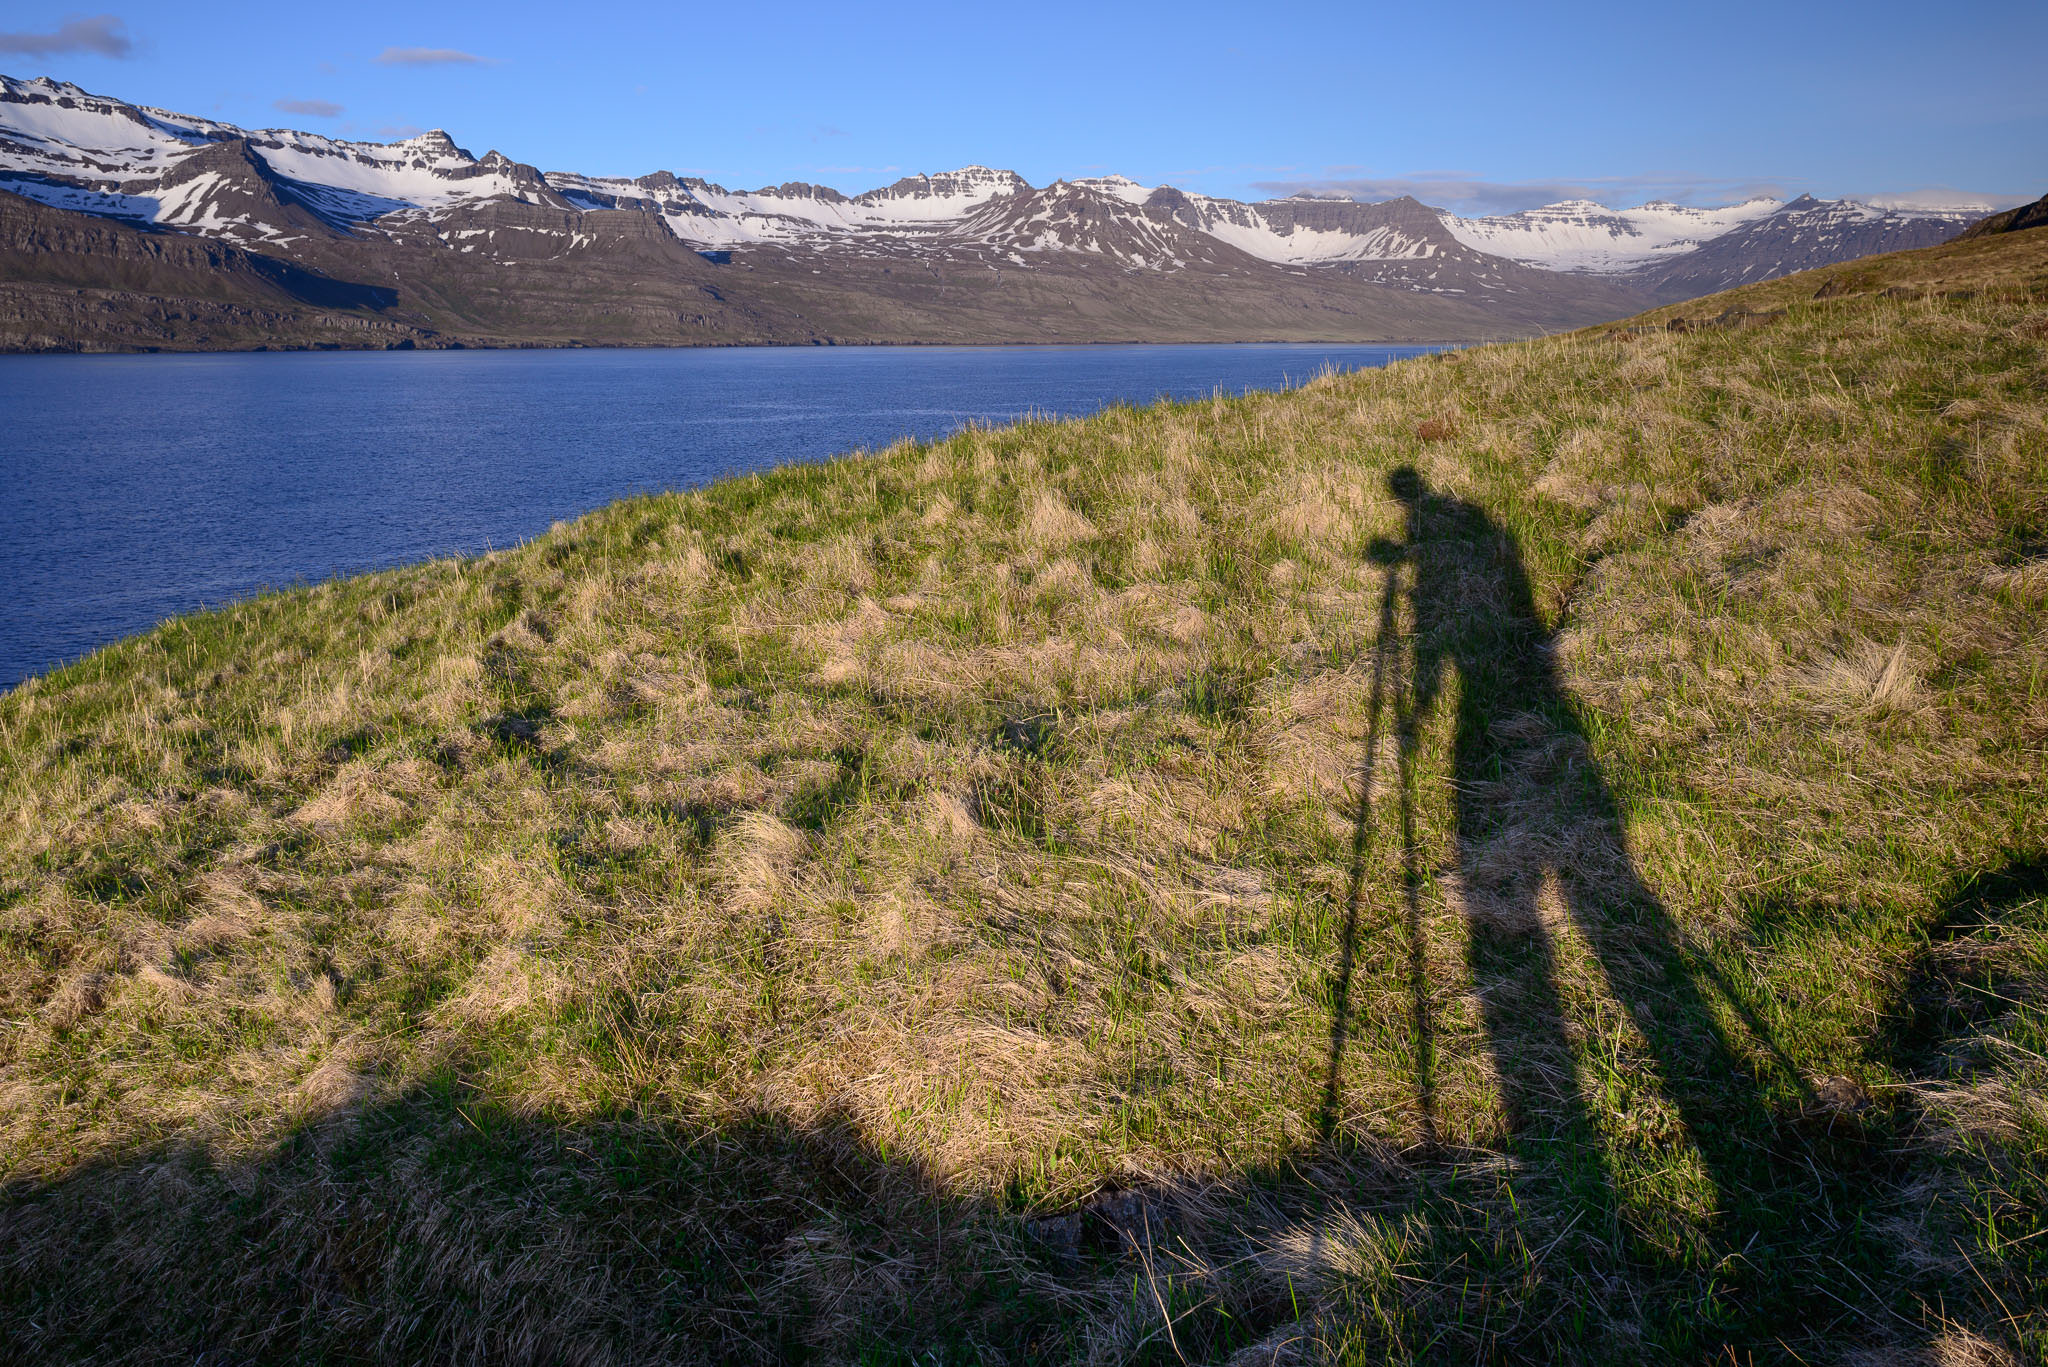
Step one, bring a tripod. Step two, shadow selfie.
So, should you bring a tripod on a photography expedition, where you’re trying to slim down all your equipment as much as possible? My answer is that it depends. It depends upon the length of the trip and the types of subjects you want to capture. It also depends upon how much you think the tripod will slow you down, and if you’re willing to accept that trade-off.
If you’re on the fence, I would say this: Don’t carry a tripod if you’re only taking pictures during the day, and you have no plans for sunset, sunrise, or nighttime photography. But if you do want to take high-quality pictures at the edge of the day, you’ll likely regret not bringing one along. Tripods are the easiest way to improve your image quality and expand the range of subjects you can capture. They increase your flexibility tenfold.
For what it’s worth, you might consider bringing along a lightweight, hiking tripod rather than your heaviest version. If you have one, that’s generally what I would recommend. My full tripod kit is two kilos (4.5 pounds), but there are travel options that weigh around half that. Lighter tripods definitely aren’t as stable as heavier ones, but even a featherweight tripod is far, far better than none at all, and you can improve their stability by using them intelligently. (See this article on improving tripod stability in windy conditions.)
We’ve written much more about tripods if you’d like to learn in-depth how to use them and buy the right one. But the most important thing to keep in mind is that tripods are critical to landscape photography. If there is any feasible way to bring one on your travels, I recommend it.
4) Other Camera Gear
When you pack light, keep all your other camera accessories to a minimum. Bring a good lens cloth, a few extra batteries (more than you think you’ll need), and a polarizing filter. Unless you have a very specific reason to carry anything else, that’s all that matters for most hikes. I’m a camera accessory junkie, and I didn’t bring any extras on the Laugavegur. I didn’t miss them, either.
Is This Still Too Much Weight?
Some long-distance hikers will find these suggestions surprising, to say the least. A camera, two lenses, and a tripod? If you’re not careful, that weight can get out of hand. Why not just bring along a good point-and-shoot, or even your phone, and shoot handheld? You’ll end up with equipment that weighs much less, and still gives you solid images.
From the perspective of holy-cow-my-shoulders-hurt, I agree. A bag of camera equipment isn’t awful on its own, but when you add in a tent, a sleeping pad and sleeping bag, water, extra food, safety equipment, and so on, it gets heavy very quickly.
But, from the perspective of a landscape photographer, I disagree. No doubt, many people hike just out of enjoyment, and bringing along a camera is secondary. I do that all the time myself. But when your goal is to capture the highest quality images, it’s worth the effort to bring something you won’t regret.
I’ll also point out that you can go relatively lightweight without compromising on quality. Once you slim down to just a couple light lenses and a travel tripod, most cameras on the market, including the vast majority of DSLRs, are surprisingly manageable. Sure, leave behind as much as possible – your backup camera, extra lenses, and most accessories – but keep what you need in order to photograph what you want, no compromises.
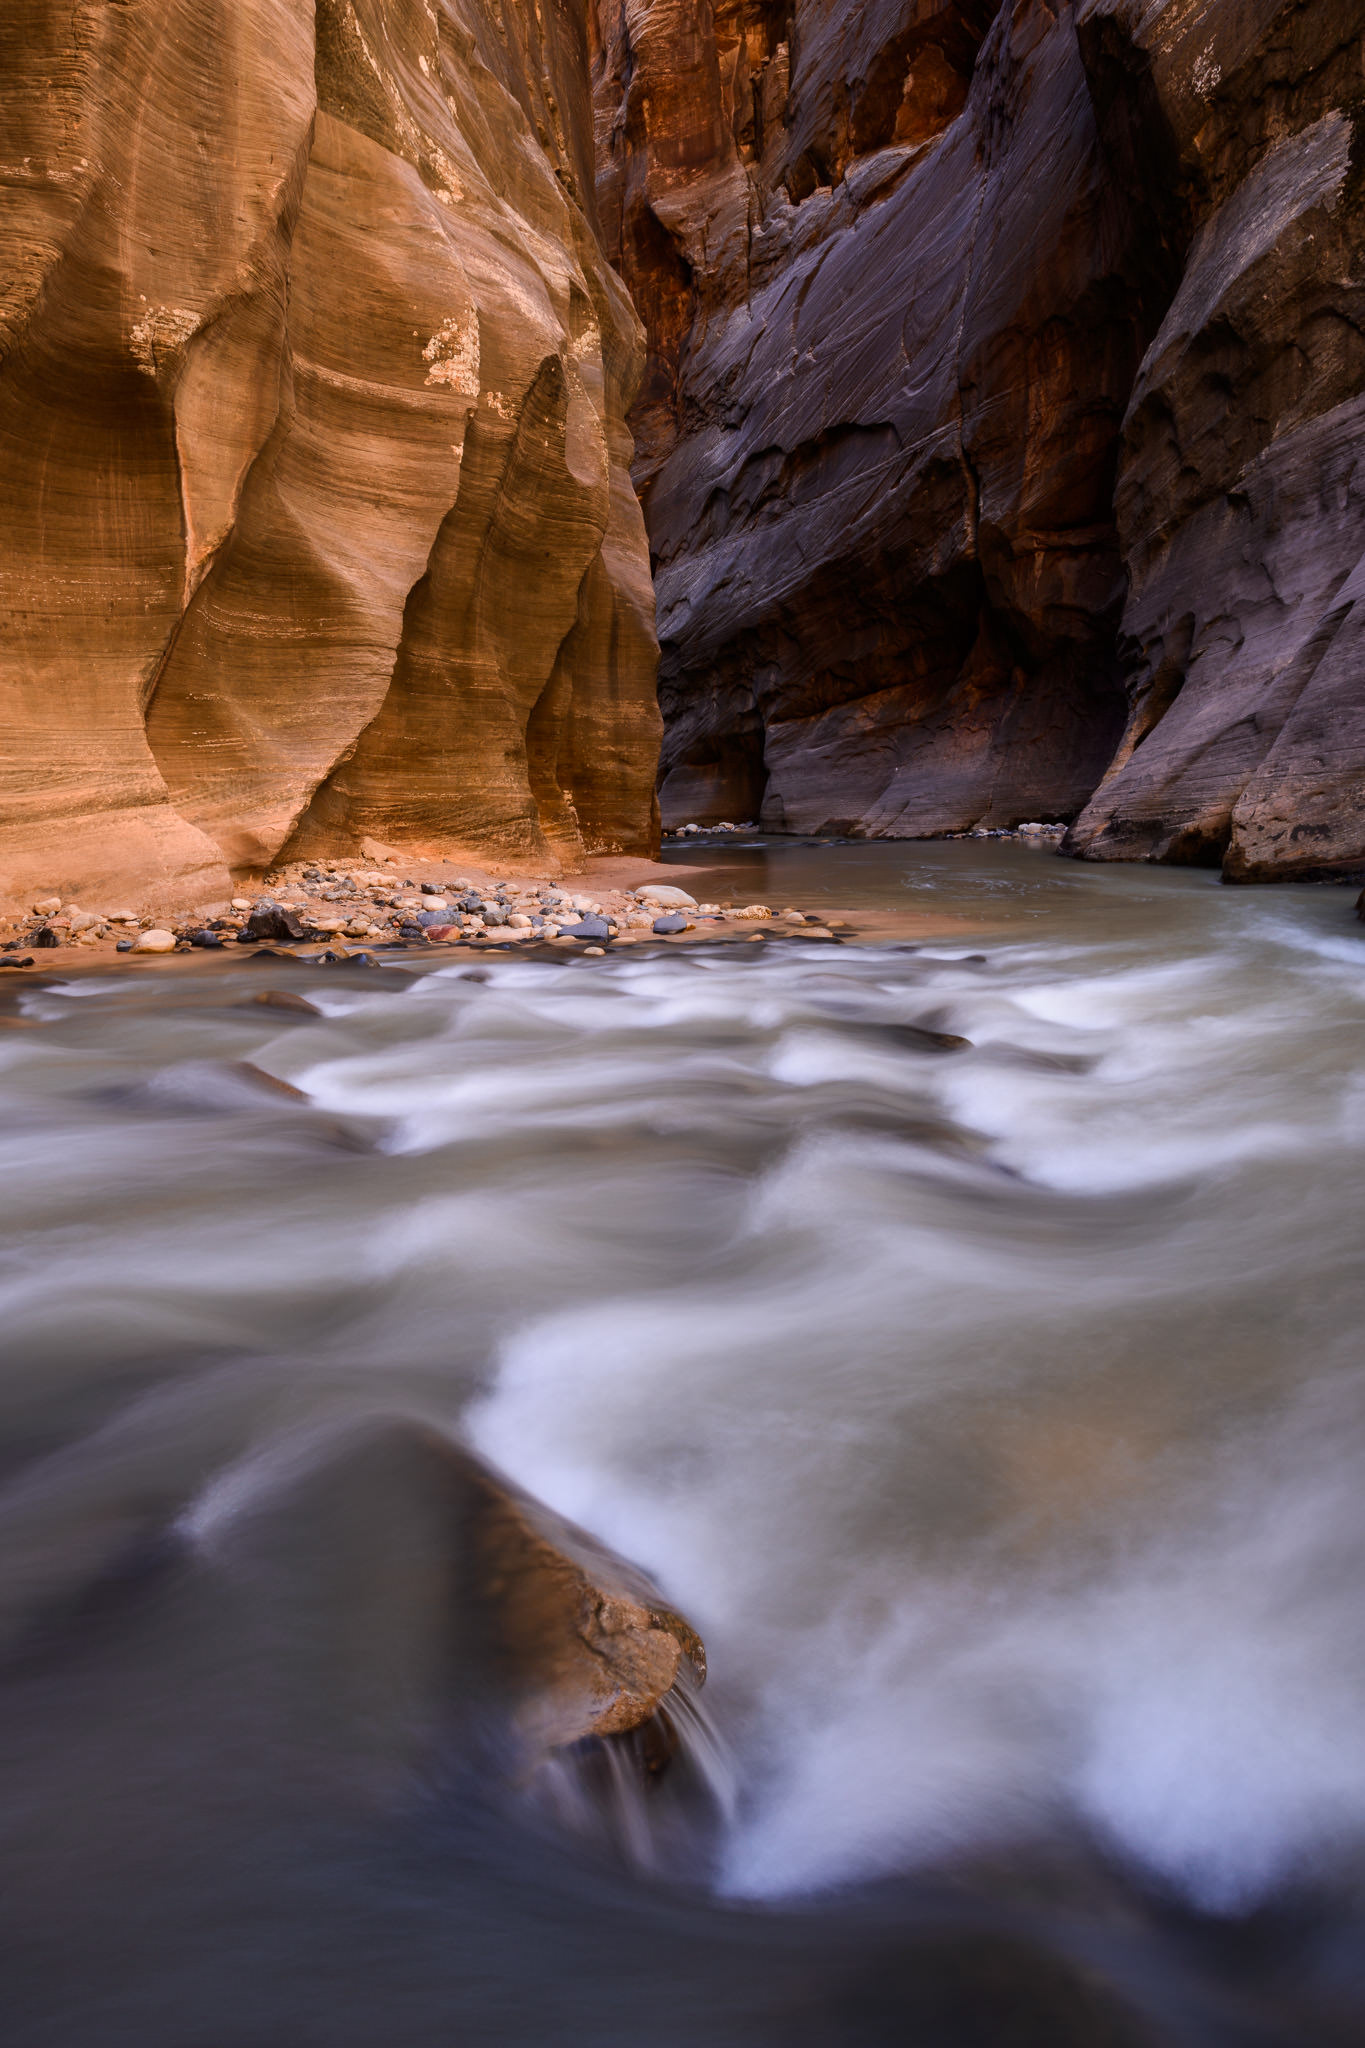
Did I like carrying my full tripod and full-frame camera kit through this river in Zion National Park? Nope. Will I leave them at home next time? No way!
Conclusion
A lot of photographers have I-left-it-at-home-phobia. It seems that the worst feeling in the world is to need a piece of equipment but not have it.
Turns out, it isn’t actually so bad. If you didn’t bring a telephoto lens, your brain just won’t look for telephoto landscapes. If you didn’t bring a wide-angle lens, your brain won’t look for wide-angle landscapes. Pretty simple.
But that doesn’t mean you need to pack the most minimal of bare-bones kits, especially if your goal for an expedition is specifically to take pictures. Give yourself the gear you need to capture the shots you’re after, and don’t compromise. If you’d like to photograph the Milky Way, bring along a lens that works. If you want high-quality sunset photos, carry a tripod. You’ll feel the pain of a missed photo long after your sore feet have healed. (And I don’t write that lightly; my feet need some serious R&R right now.)
For every choice you make, there’s a trade-off between weight and flexibility. If your bag weighs less, you’ll feel better, and your photos will improve as a result. At the same time, it’s better to carry ten pounds of useful equipment than five pounds of junk. This isn’t an easy balancing act to negotiate, but, when you get it right, the results are worth the effort. Once you choose the right lightweight camera kit, your portfolio and your shoulders will both be better off.
I plan to bring my Nikon 50mm Prime Lens and my 70-300mm on my hiking adventures. I feel that should be enough. Maybe squeeze in my 10-20mm wide angle but that would be my max lol!
So uh…I was with you and in agreement until you said “heavy chunk of carbon fiber.” It’s one of the lighter high-stregth materials on earth! If what you have is heavy, then it’s not carbon fiber. It’s probably PET or PVC dressed up to be carbon fiber. Even the most dense carbon fiber is lighter than most materials of similar size, and for certain it’s stronger than them at its weight.
Great article Spencer! I have been reading this a few times over along with the comments because I’m preparing for my own expedition in the north rim of the Grand Canton. That trip is exclusively backpacking but I’ve made a commitment to take my photo gear because it may be my only opportunity to do such a trip of a lifetime.
Because we are taking all provisions with us, obviously I will need to consider the fully loaded backpack carrying weight that includes photo gear. So I have some serious weight-benefit analysis to consider. I can’t skimp on necessities or emergency equipment, but I can make trade offs. For example I can choose to take a lighter weight tent to make room for a heavier lens.
Based on some training hikes, my target fully loaded kit with food and water is around 40-45 lbs. My plan is to take my A7RIII with Batis 18 and a 70-200 f4, polarizer, spare battery and a travel tripod. My target weight for photo gear is 7-9 lbs.
One major thing to consider in such a trip is fitness level and the demands of the trip. So I’ve been spending extra time in the gym to get my fitness level up so I can justify carrying more photo gear.
My last consideration is whether or not to take a gopro and do some video footage of my trip. I’m mostly a photo guy so adding video will be a little new to me.
Either way, your article has kept me from ditching all my photo gear and only taking my cell phone and a GoPro. Thanks again for the great article!
-Mark
Mark, what an awesome trip that will be! Your setup is about as good as it gets.
The only thing I wonder about is just brining a single spare battery. Do you have a way to charge it on the go? When I did the Iceland hike mentioned in this article, I carried along a USB battery charger and an external battery pack.
Planning to do a backpacking trip through peru, bolivia, argentina, chile and the antartica at the end of Sept through Dec. Wildlife and landscape are my two main goals as I will be visiting Machu Picchu, Amazon, Iguazu Falls and the Antarctica. I ordered the Nikon 500mm pf back on Marc 31 and I currently have a d7500 with an all-around 18-300mm and the lightweight ultra wide angle 10-20mm. I have always traveled with the 18-300mm but as I grow as a photographer, I begin to notice how soft my images are with that lens even though it’s great to cut down on weight to have one all-around lens.
For this trip, I definitely want to get a sharper telephoto and a sharper all-around zoom as it will be a one in a lifetime trip and if I am spending so much on the trip itself, I definitely want to have good photos as well. I have the 500mm pf ordered (still backordered and hasn’t shipped), should I
1. Instead order the 300mm pf to go with the d7500 (with extra reach) and a better zoom lens for landscape and general use?
2. or should I get a Sony mirrorless with the 100-400mm super zoom and a 24-70mm f/4?
3. or get the Z7 with the 500mm pf and the kit 24-70mm f/4?
Does it make sense to carry these setup (about 3kg total) of gear in my backpack and try to keep it to around 10kg total with all of my other stuff for 3 months of backpacking and hiking on Inca trail and in Patagonia for about 10miles a day?
First off, let me say what an exciting trip that sounds like!
From the looks of it, you have a lot of possibilities still to narrow down. The fact that you are considering the Z7 or Sony suggests that you are thinking of switching to full frame mirrorless at some point down the line. If that were not the case, I would say to keep the D7500 and 10-20mm, plus get the 24-120mm f/4 and perhaps switch your order to the 300 rather than 500 PF.
But if you’re eventually going to go with Nikon and Sony’s mirrorless lineups, the 24-120 won’t be a lens you keep for the long run, and you may want to jump to mirrorless now rather than later. In that case, I would skip the Z7 (and I say this even as a Z7 owner) because of price – get the 14-30 with that money instead, if you’re dead-set on spending it. The Z6 with the 14-30 and 24-70 f/4 is slightly lighter than the D7500 kit I’m recommending, but the two are pretty comparable. You could also get the excellent (but DX only) 16-80mm f/2.8-4 and shave off some weight. If you’re happy with the D7500 – a great camera, so hopefully you are :) – that may be your best overall option.
For most people, I would recommend sticking with the D7500 and either the 16-80 or 24-120. It’s only if you have your heart set on full frame mirrorless eventually that you might as well make the switch before your trip.
Hope this clarifies more than confuses!
Lightweight is exactly what I’m looking for. Thank you for the great advice. Being overloaded can prevent you from doing cool shots as you are thinking only about how to deal with all this stuff.
I’ve got the question concerning the post-processing of such photos. Can you recommend any good software to try? I’ve dealt with well known Lightroom lightroom.adobe.com and recently has got the trial of Luminar skylum.com/luminar. Is there anything good enough for editing?
I’ll appreciate your feedback.
Spencer, thank you very much for the great tips! I’ll follow them in my next trip tp Norway obligatory. Some additional gear like tripod sounds reasonable in the wild nature conditions. Landscape photographers should take these items into account, cause excessive tech isn’t the good thing to carry with you.
I think the people on the same trip as you carrying Fuji X system got it right.
Fuji X is probably the best compromise for IQ vs Portability it is possible to find. Sure, a Sony A7 family camera is similar in size but the lenses are not.
The advantage of the Fuji for travelling is the lenses are small. My 18/35/50 primes are tiny and fast at F2. They slip into a pocket easily.
Even the monster 100-400 is actually relatively easy to travel with because it is not as heavy as equivalent DSLR or Sony lenses.
After hauling a Nikon FF set up around the world I am very glad I made the change. And the A4 and A2 prints on my walls are great – you simply cannot tell which was taken with the Fuji and which with the D750.
I am going to Iceland in September I will take D800, 24-70 ed Gf2.8, Zeiss milvus 2/100M, and my lee filter kit.
Thank you very much for this timely essay. I agree for hiking I favour the 300 f4E PF with all 3 TCs (mostly TC14E III) on D500 or D850. And I also endorse the 18-35 G Nikkor: an excellent zoom and so light. I also have tracked down 2 copies of the 45 f2.8AIP – the tiny tessar prime for the “old” FM3a – one of these dinky pancakes works as body cap in the guise of a truly superb optic. If I go even lighter I use my Nikon Df with MF glass (see below)
Tripod ? Either a gorillapod but I prefer the Gitzo traveller with a Sirui leveling platform to which I’ve secured a Sirui arca-swiss compable clamp. And I use the Sunway L-Bracket for the D850 that also fits a D500
Much of my strategy for lighter hiking solution has been inspired by the late Galen Rowell. fyi check out the 2 articles – What Camera Would Galen Rowell Use if He Were Still Alive Today? and – Chasing Galen – the second a tribute by Thom Hogan to his late mentor.
I have used Nikon since 1984, and relied for years on the Nikon FM2 with 3-4 MF AIS Nikkors: 28mm f2.8, 55mm f2.8 Micro, 105mm f2.5 and 400mm f5.6. In fact for landscapes, I still use my MF lenses on the Nikon Df, and now treasure a 20mm f4AI …. in fact, this Nikkor was a Rowell Classic :-) One of his favourites. this tiny prime doesn’t flare when shooting into the sun. 2+ decades back I couldn’t afford a 80-200 f4AIS but now have one of these superb MF Nikkors – it works very well with the Df. Remember manual focus is all you need for landscapes, and many of us harking back to the film days can grab a fast shot with an “old” lens on a digital body :-)
here’s the links
danbaileyphoto.com/blog/…ive-today/
www.dslrbodies.com/techn…galen.html
Lightweight. taking my backup D5300, a 20mm 1.8 and the smaller tripod (a mefoto). that would be light weight. single lens and make do.
That is indeed lightweight, Velo! The 20mm f/1.8 is an excellent lens, one of the best wides on the market. It’s certainly good to stick with one lens – a prime, no less – to get a feel for how that focal length works and when it is optimal. I did the same with my 105mm f/2.8, which was the only lens I used for about a year, as I mentioned in a comment above. That experience definitely helped me grow as a photographer and visualize my subjects better.