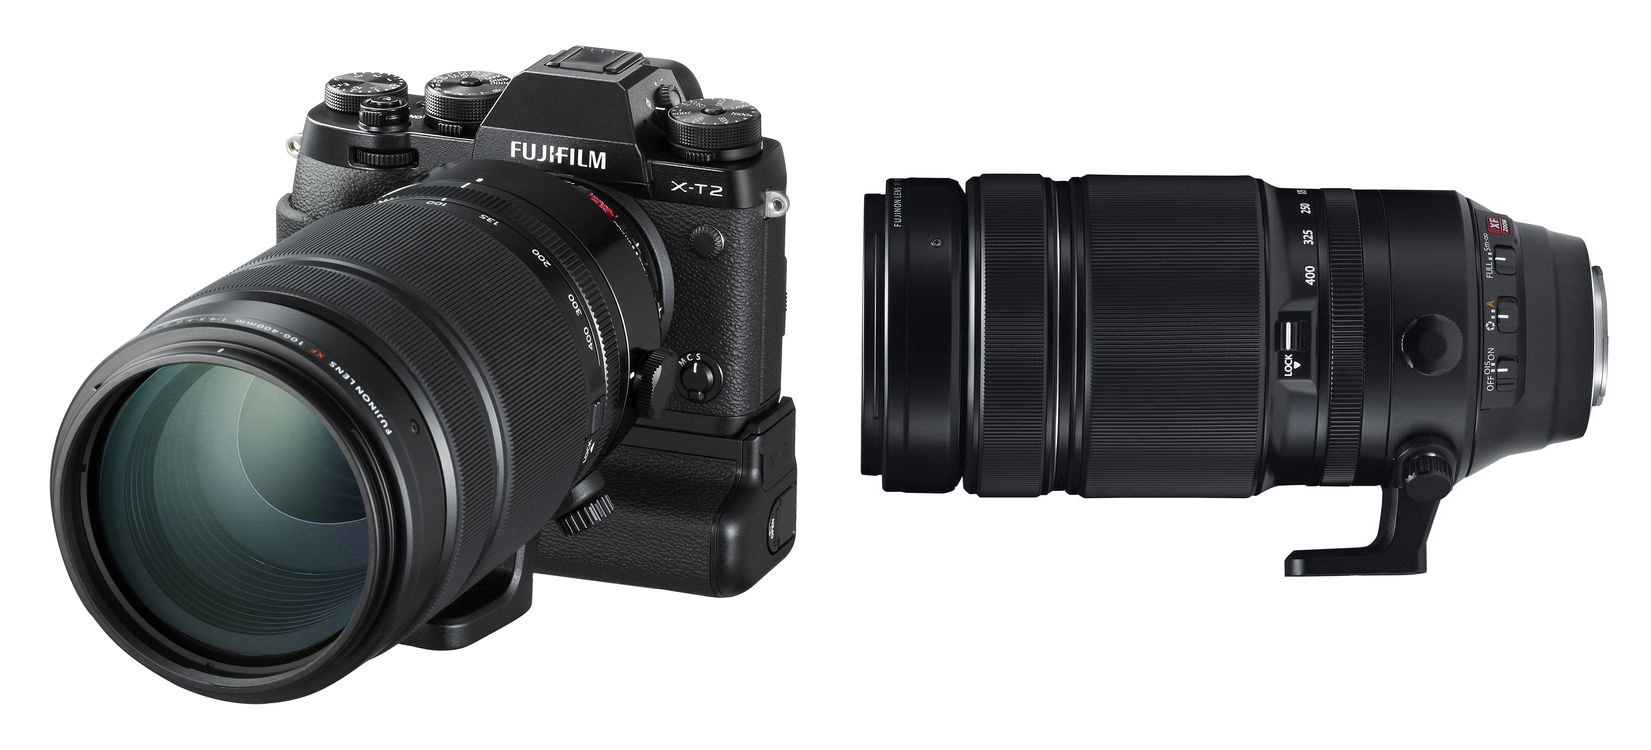
When I decided to sell my professional Nikon cameras and glass and make the switch to Fujifilm, the question I had was “will I still be able to photograph birds?” During spring migration last year, I was fortunate enough to be able to get a hold of the Fujifilm XF 100-400mm f/4.5-5.6 R LM OIS WR lens. In this article, I will let you know how the X-T2 and XF 100-400mm combo stacked up for bird photography.
Table of Contents
Gear
For my testing, I paired the XF 100-400mm with my X-T2 camera and my VPB-XT2 Vertical Power Booster Grip. In some cases, I also used my XF 1.4X TC WR Teleconverter for a little extra reach.
The one thing that I did not use very often was a tripod! Because of the excellent image stabilization built into the lens and the combination’s relatively light weight, I had no problems hand-holding the camera, lens, grip, and teleconverter.
Camera Set Up
Before I talk about how the camera performed, I want to touch on the settings I found returned the highest keeper rate for me. It took a bit of experimentation to find out what worked best. I want to stress that this is what worked for me. You may find that tweaking these settings works better for the way you shoot.
ISO – This varied according to the light and speed of birds in flight. When possible, I tried to stay at ISO 1600 or below. However, that was not always possible. There were several instances where I had to ride my ISO up to 6400.
Metering – If the light was balanced I used multi-metering and shutter priority for birds in flight (BIF) shots. For slower movement and when the light was low, I used aperture priority. If the light on my subject was constant, but the background light varied, I would spot meter to get a reading on the bird, and then switch to manual exposure. Using manual exposure in this instance allowed me to expose correctly for the bird while ignoring the fluctuations in background lighting that would erroneously alter the exposure if the bird moved. I also frequently adjusted my exposure compensation, especially shooting BIF.
Focus – I have been a back button focus type of person for many years now, so this is how I have my X-T2 set up. And, I always had the camera set to continuous focus. But more on customizing the AF-C settings in a bit. I also had the image stabilization turned on and set to continuous.
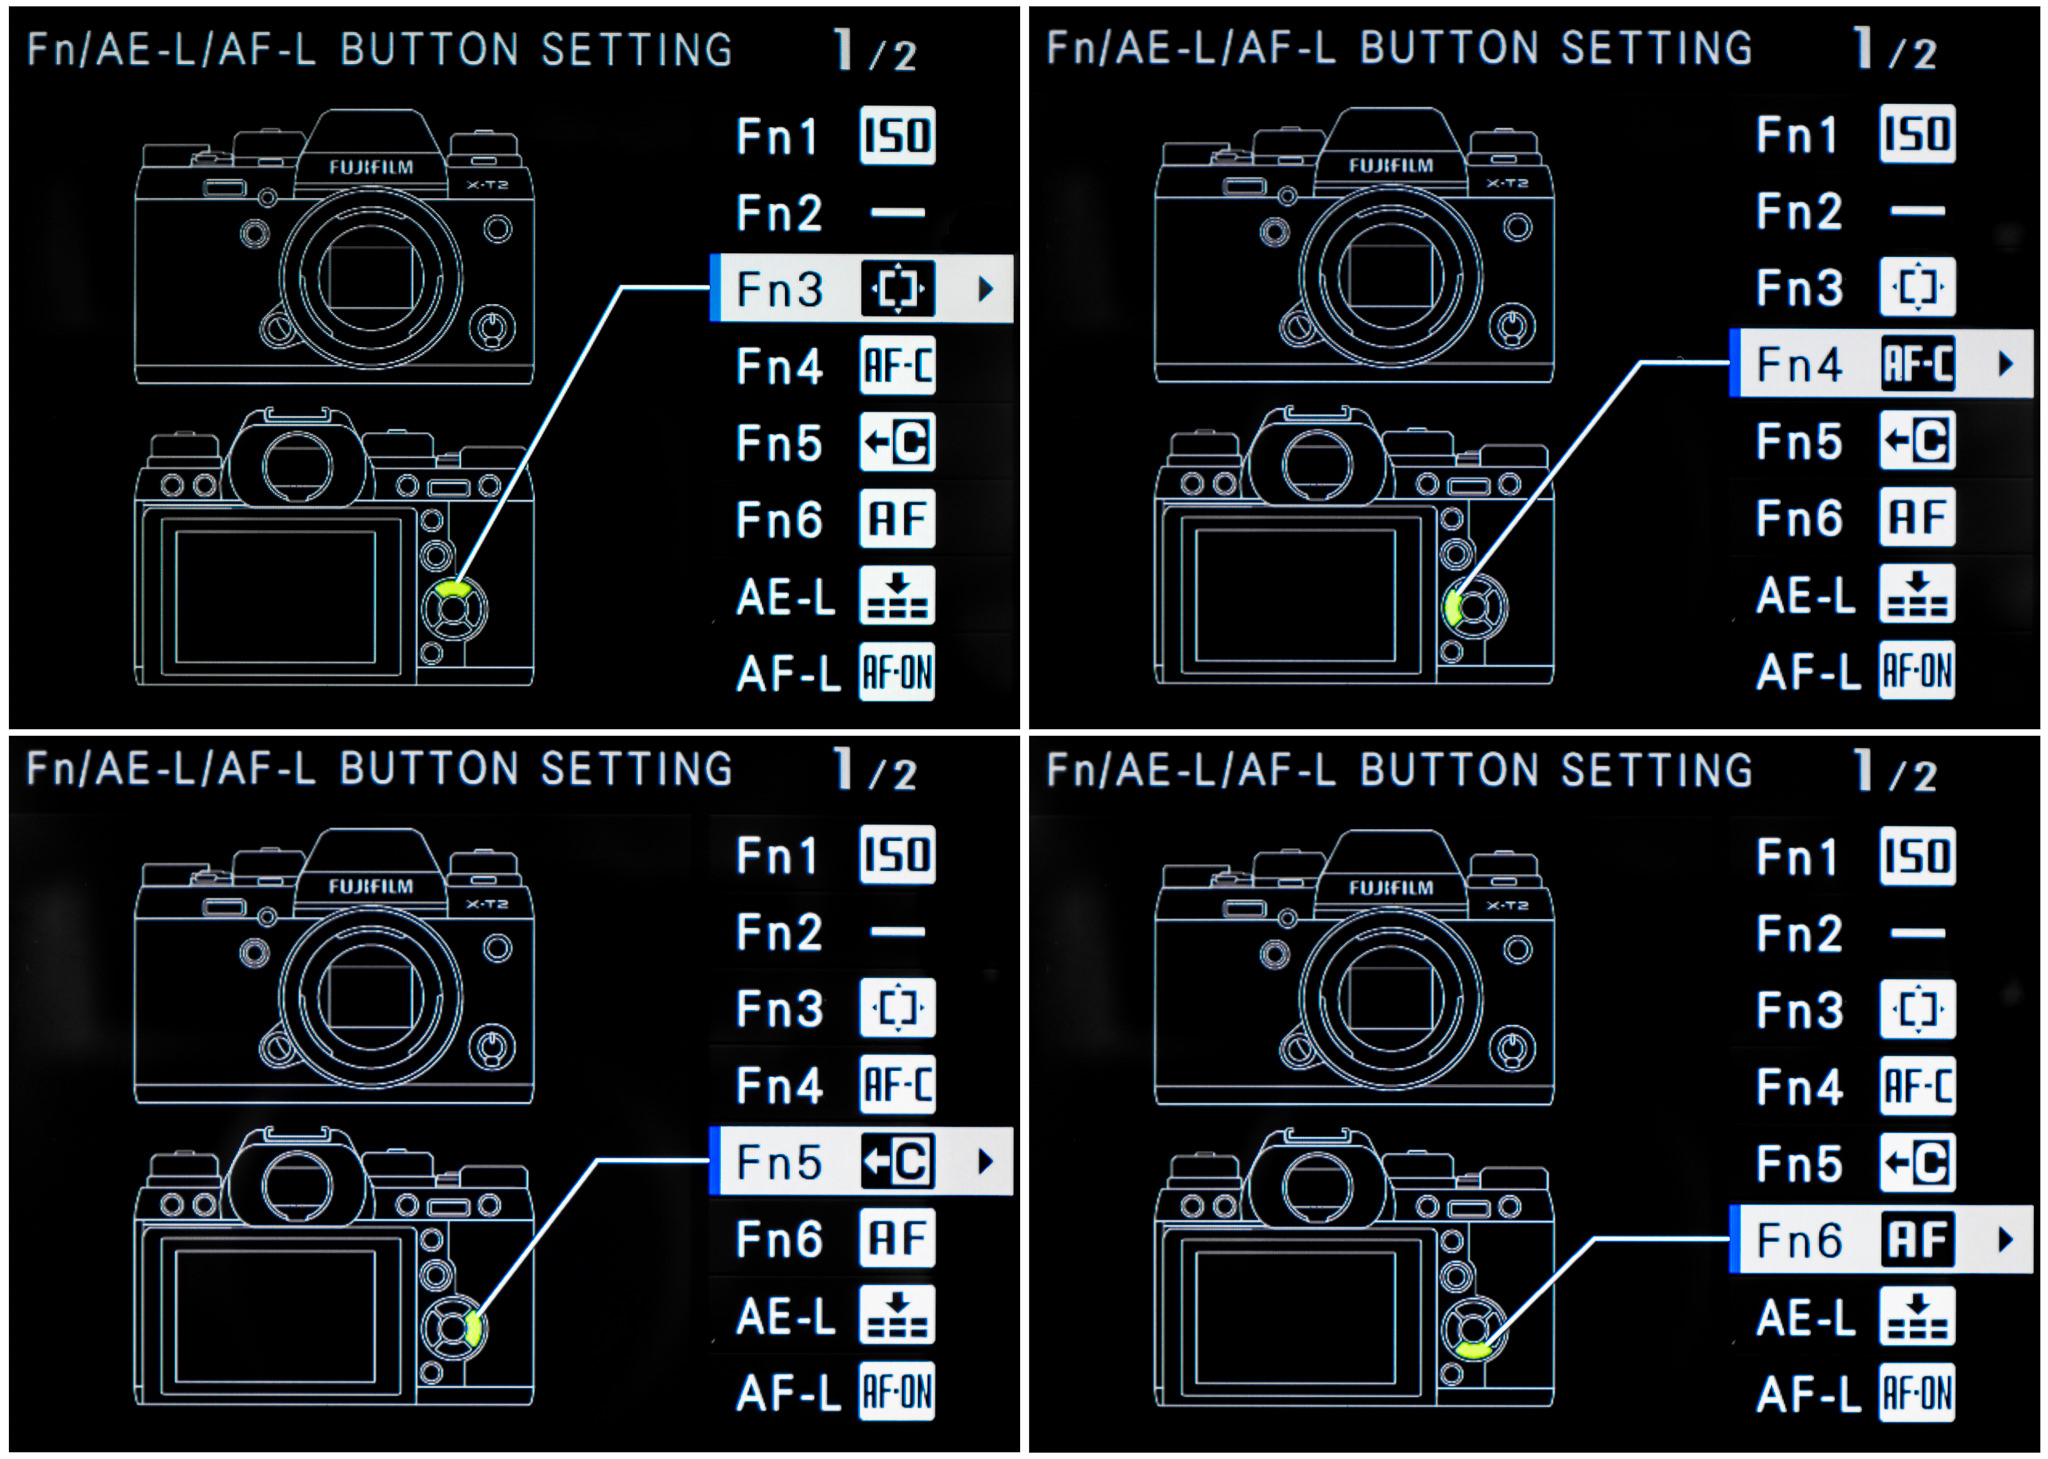
Function Buttons – When shooting subjects like birds, I find myself switching between single point and zone focusing (usually a 3×3 grid) often. And, I like to be able to adjust the size of the focus point/area quickly. Assigning these functions to the thumb pad saved me from hunting through menus when I needed to make focus adjustments. It also allowed me to make changes without lowering the camera from my eye. I assigned focus area to the top of the selector switch (FN3), AF-C custom settings to the left button (FN4), AF mode to the bottom button (FN6) and select custom settings to the right button (FN5).
In addition to assigning functions to the thumb pad, I also turned on the performance boost mode on the grip. This speeds up the frame rate from 8 fps to 11 fps and supposedly improves the camera’s tracking ability.
Continuous Autofocus
The downfall of most mirrorless cameras is their autofocus speed and tracking ability. The X-T2 has five pre-programmed AF-C presets. The camera also allows you to create your own custom setting. After some experimenting and many missed shots, I found that I got the best results using my own settings, as shown here.
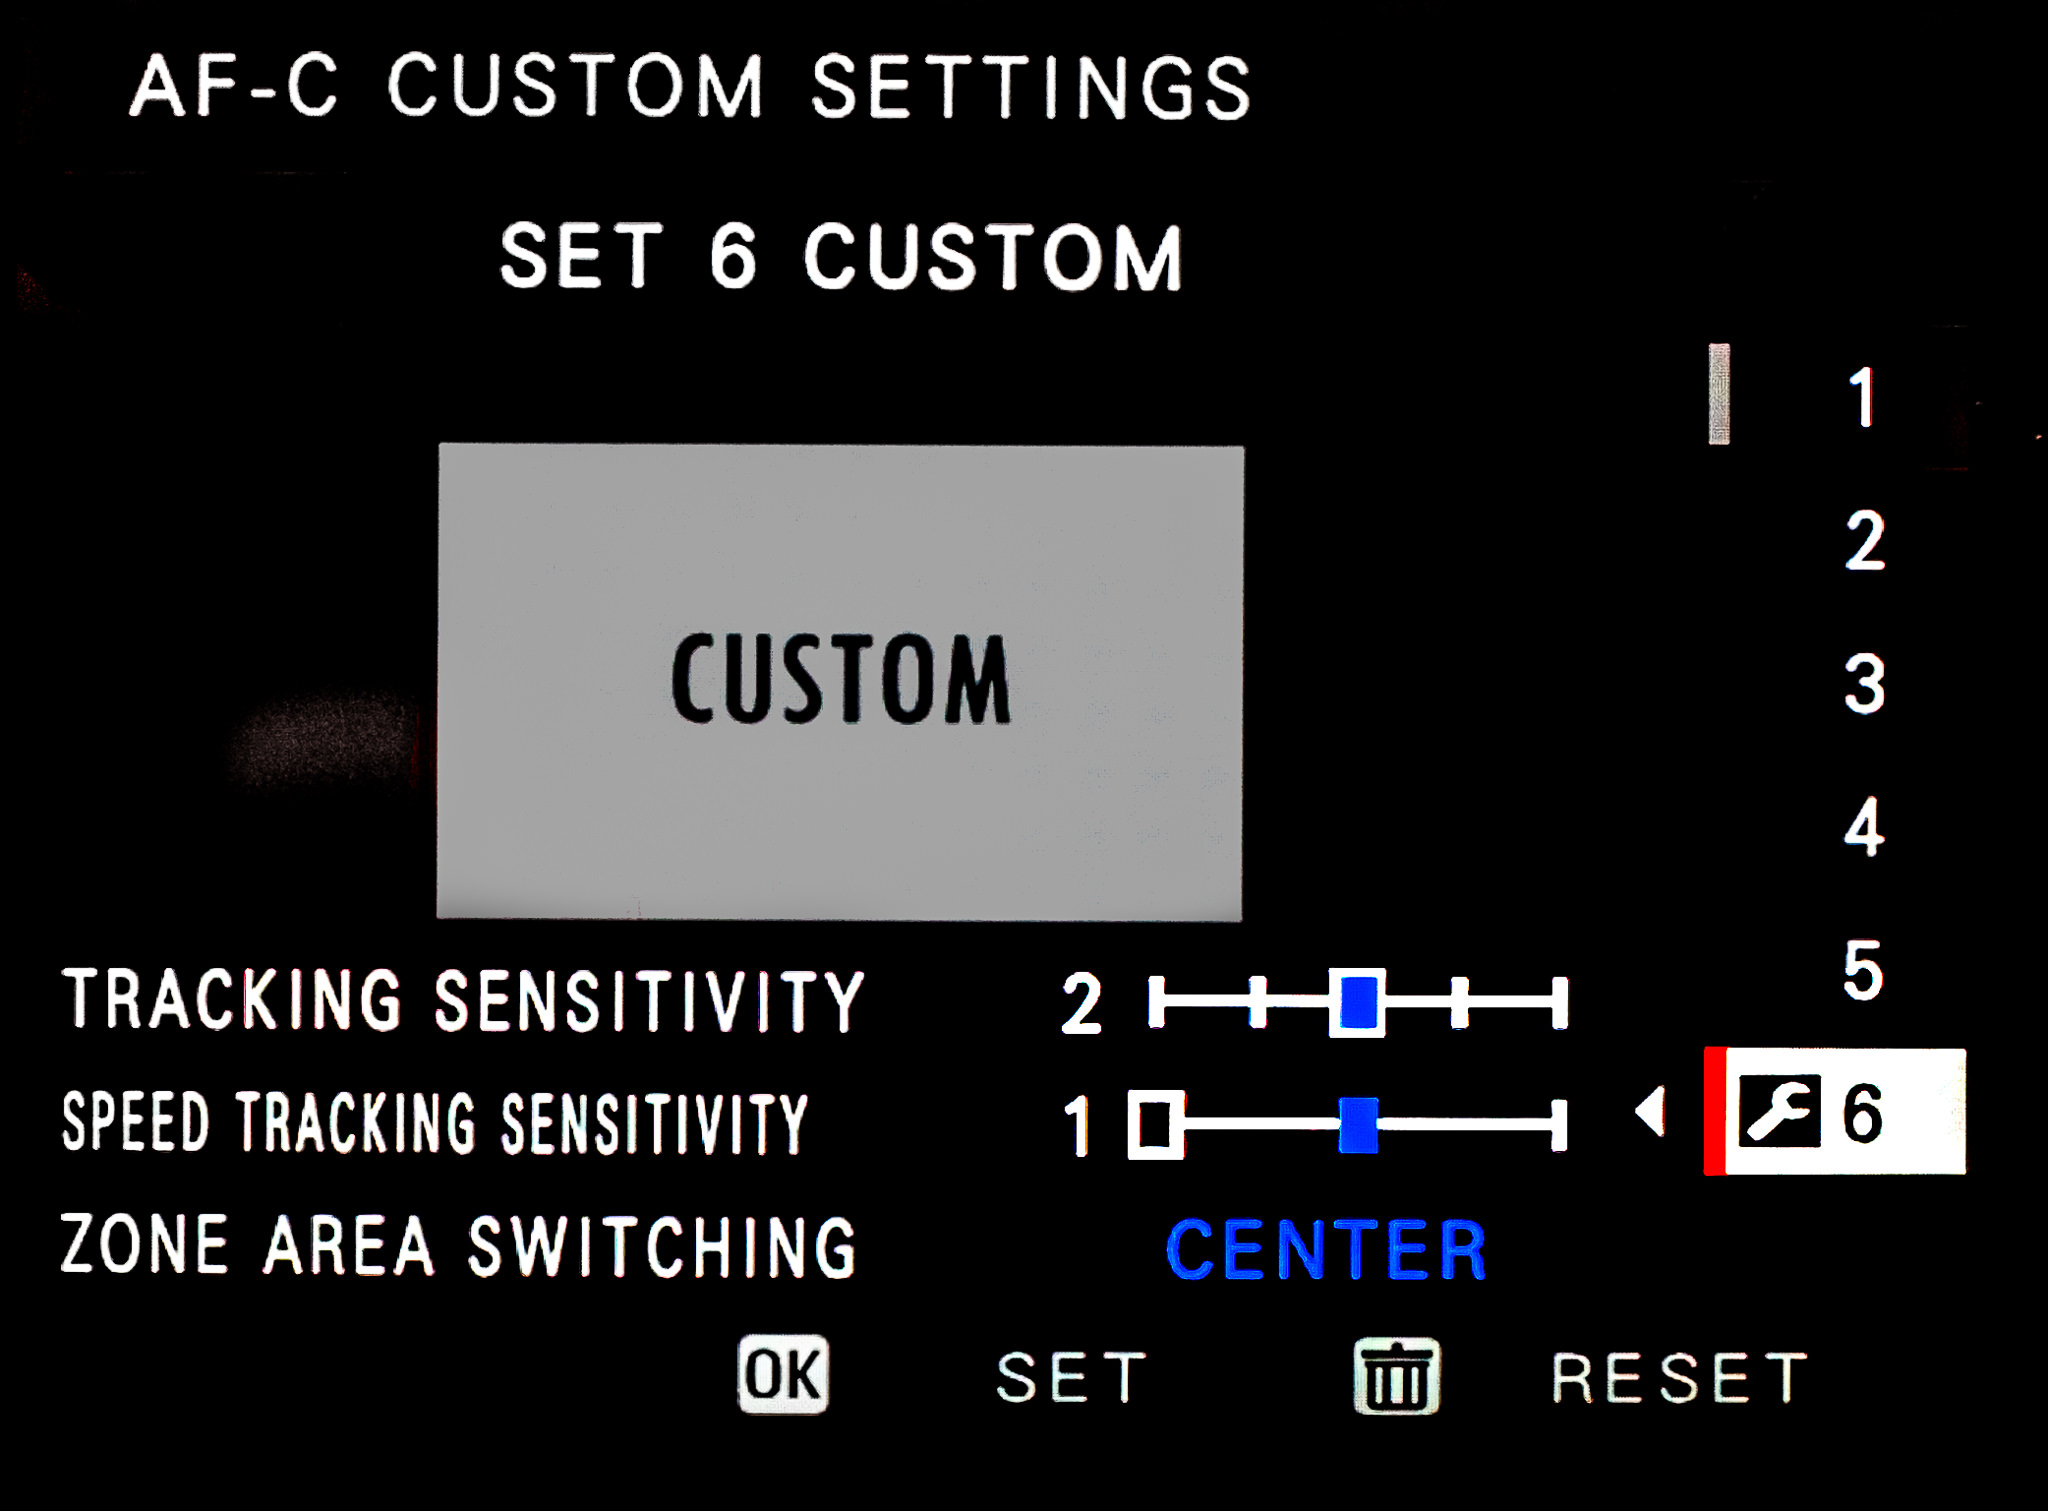
The tracking sensitivity determines how quickly the camera should try to reacquire focus when the subject disappears momentarily behind something, like another bird or a tree. I found that setting the tracking sensitivity to 2 worked well, especially in tricky situations, where the bird was not moving very quickly.
In each of these images, there was a substantial amount of reeds between myself and the birds. As the birds moved, they became temporarily obscured by the stalks. Please click on the photos to see the high-resolution images!
X-T2 + XF100-400mmF4.5-5.6 R LM OIS WR + 1.4x @ 328.7mm, ISO 2000, 1/2000, f/8.0

X-T2 + XF100-400mmF4.5-5.6 R LM OIS WR + 1.4x @ 560mm, ISO 400, 1/800, f/8.0
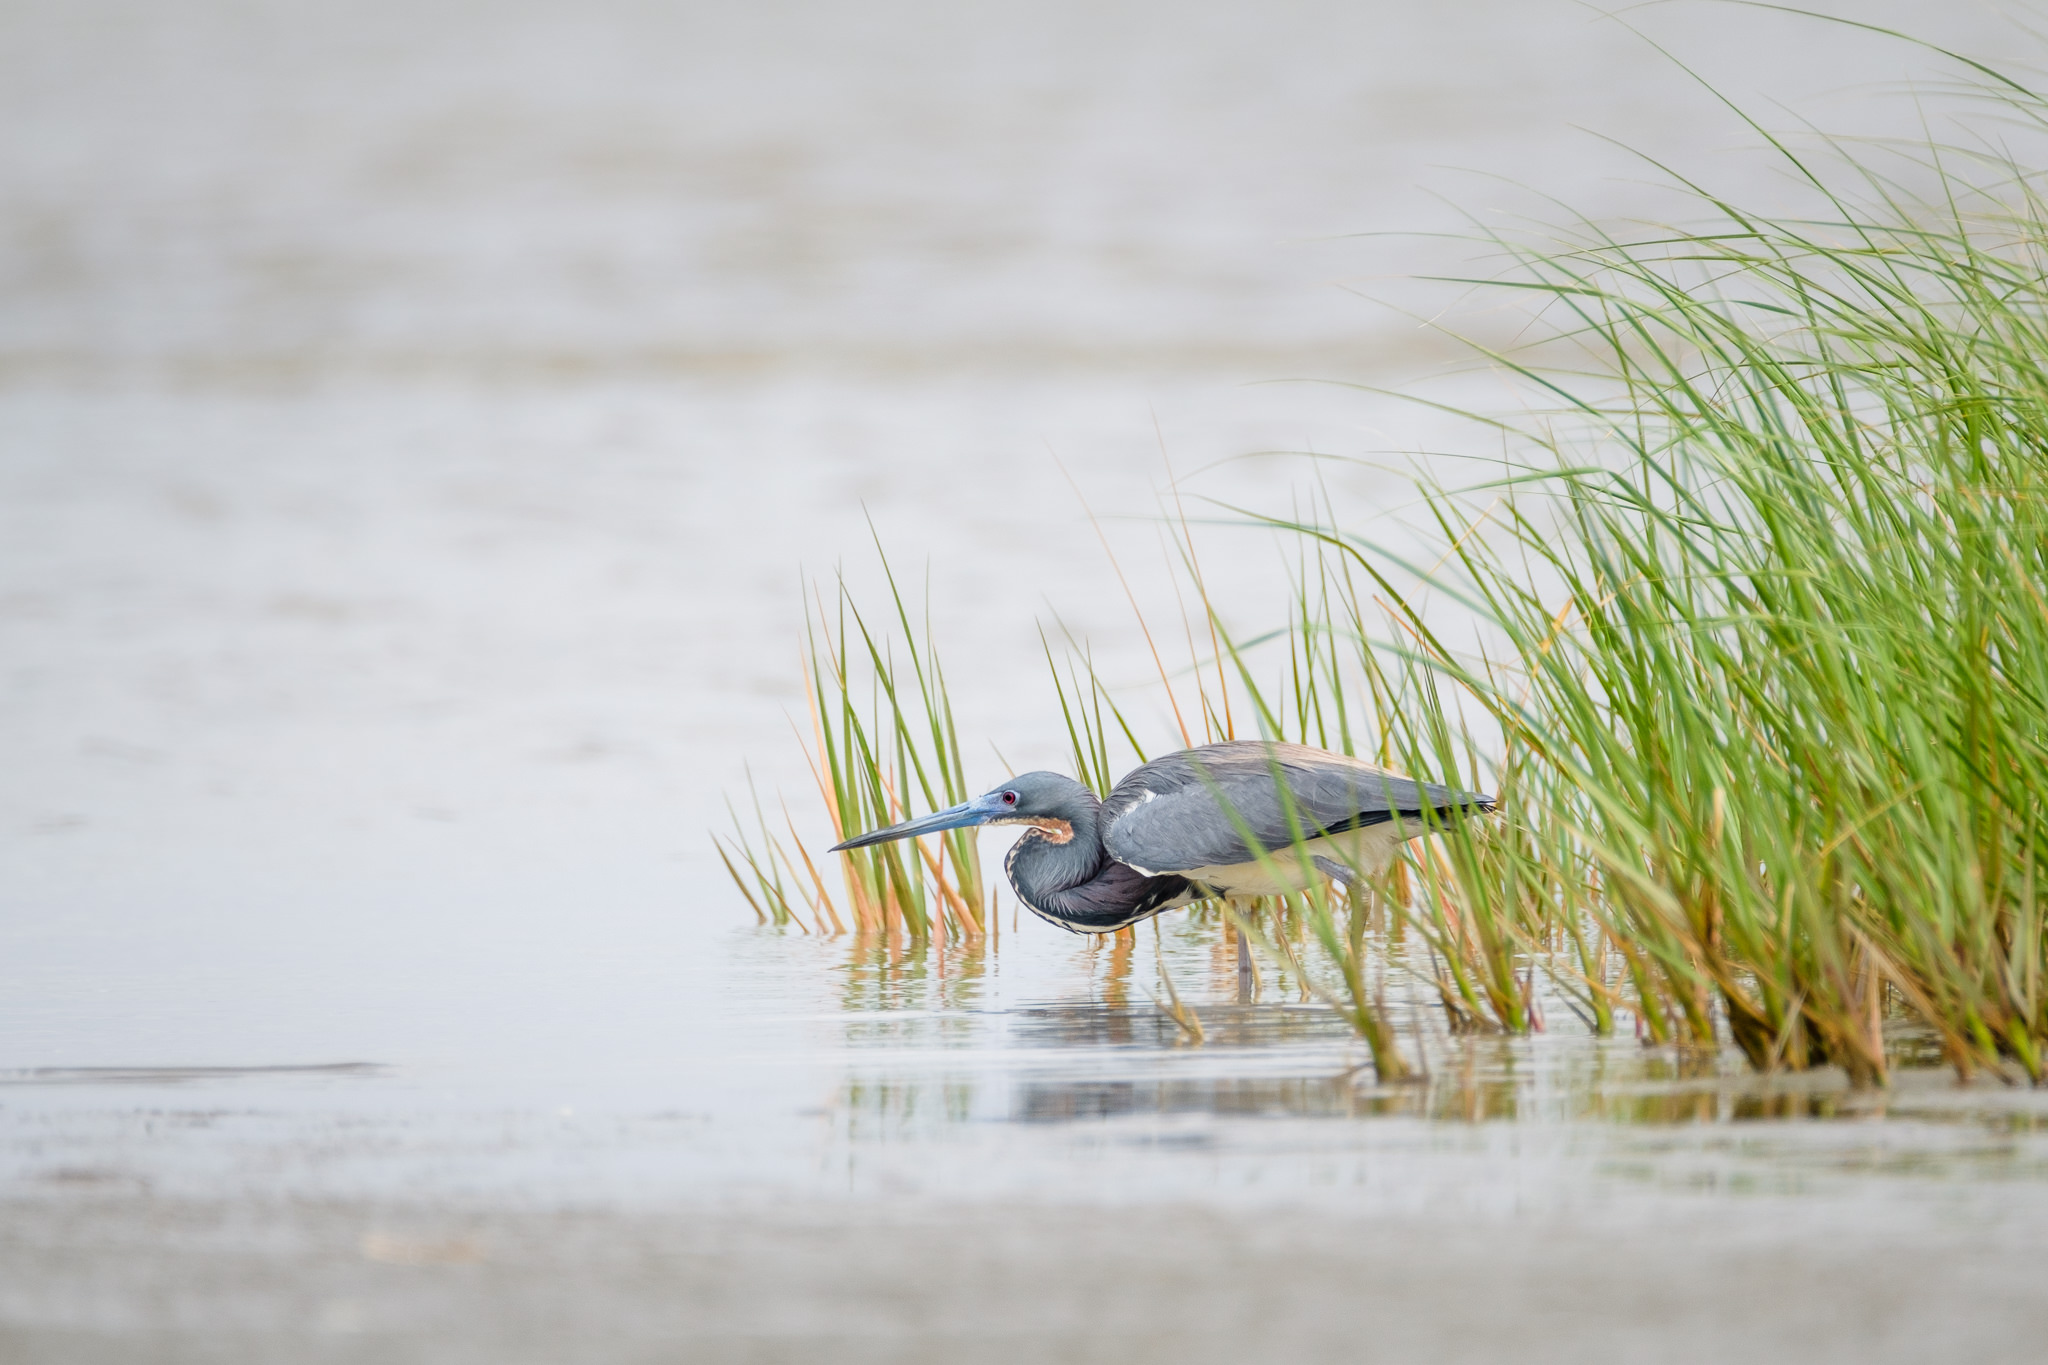
X-T2 + XF100-400mmF4.5-5.6 R LM OIS WR + 1.4x @ 560mm, ISO 200, 1/600, f/8.0
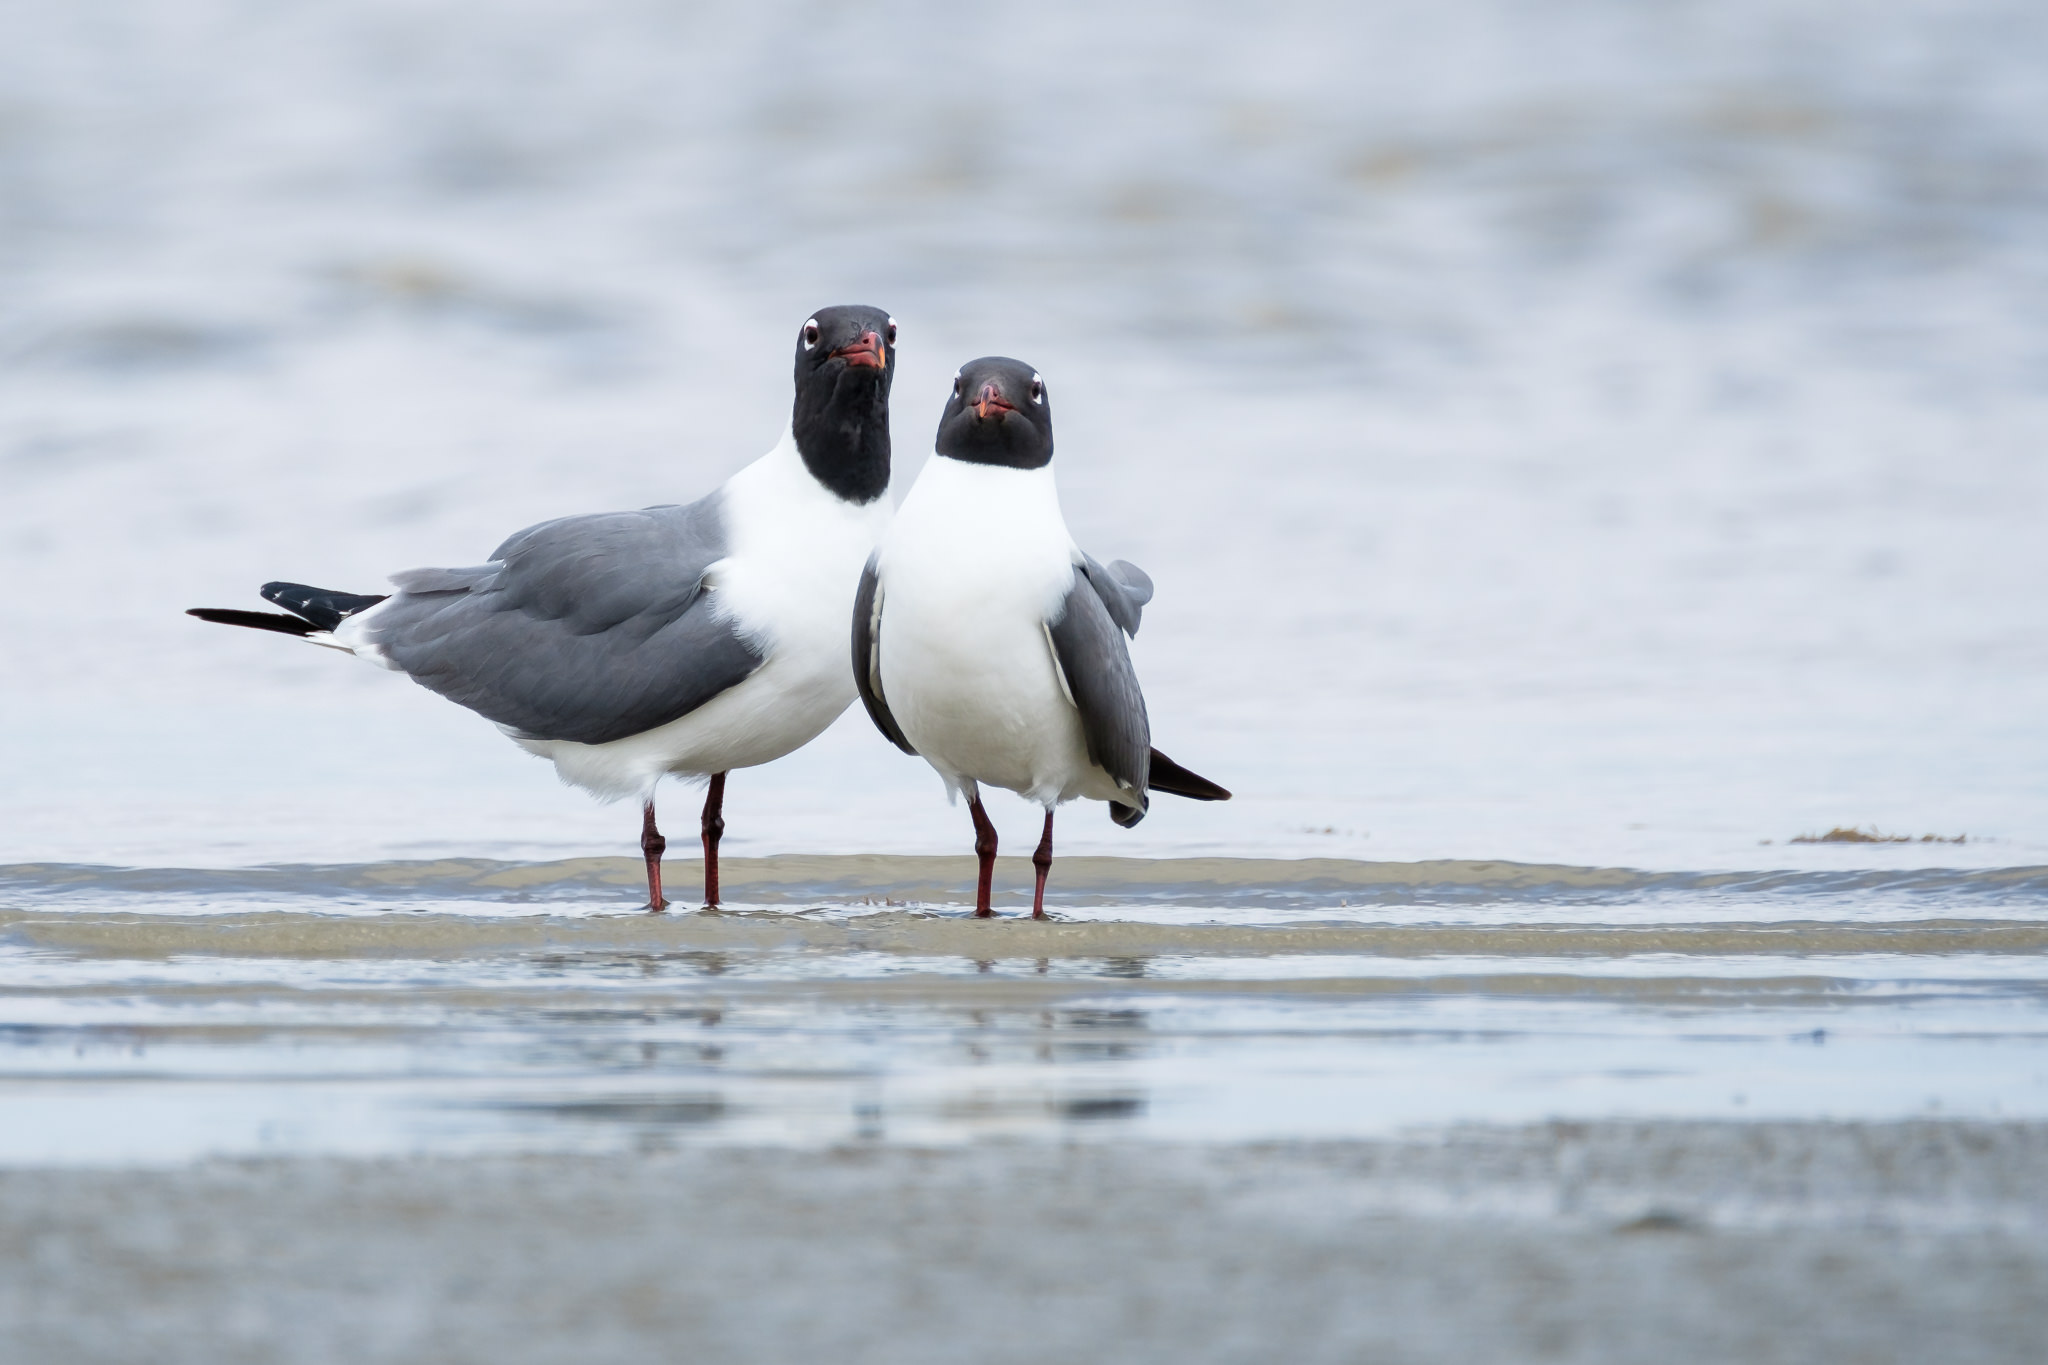
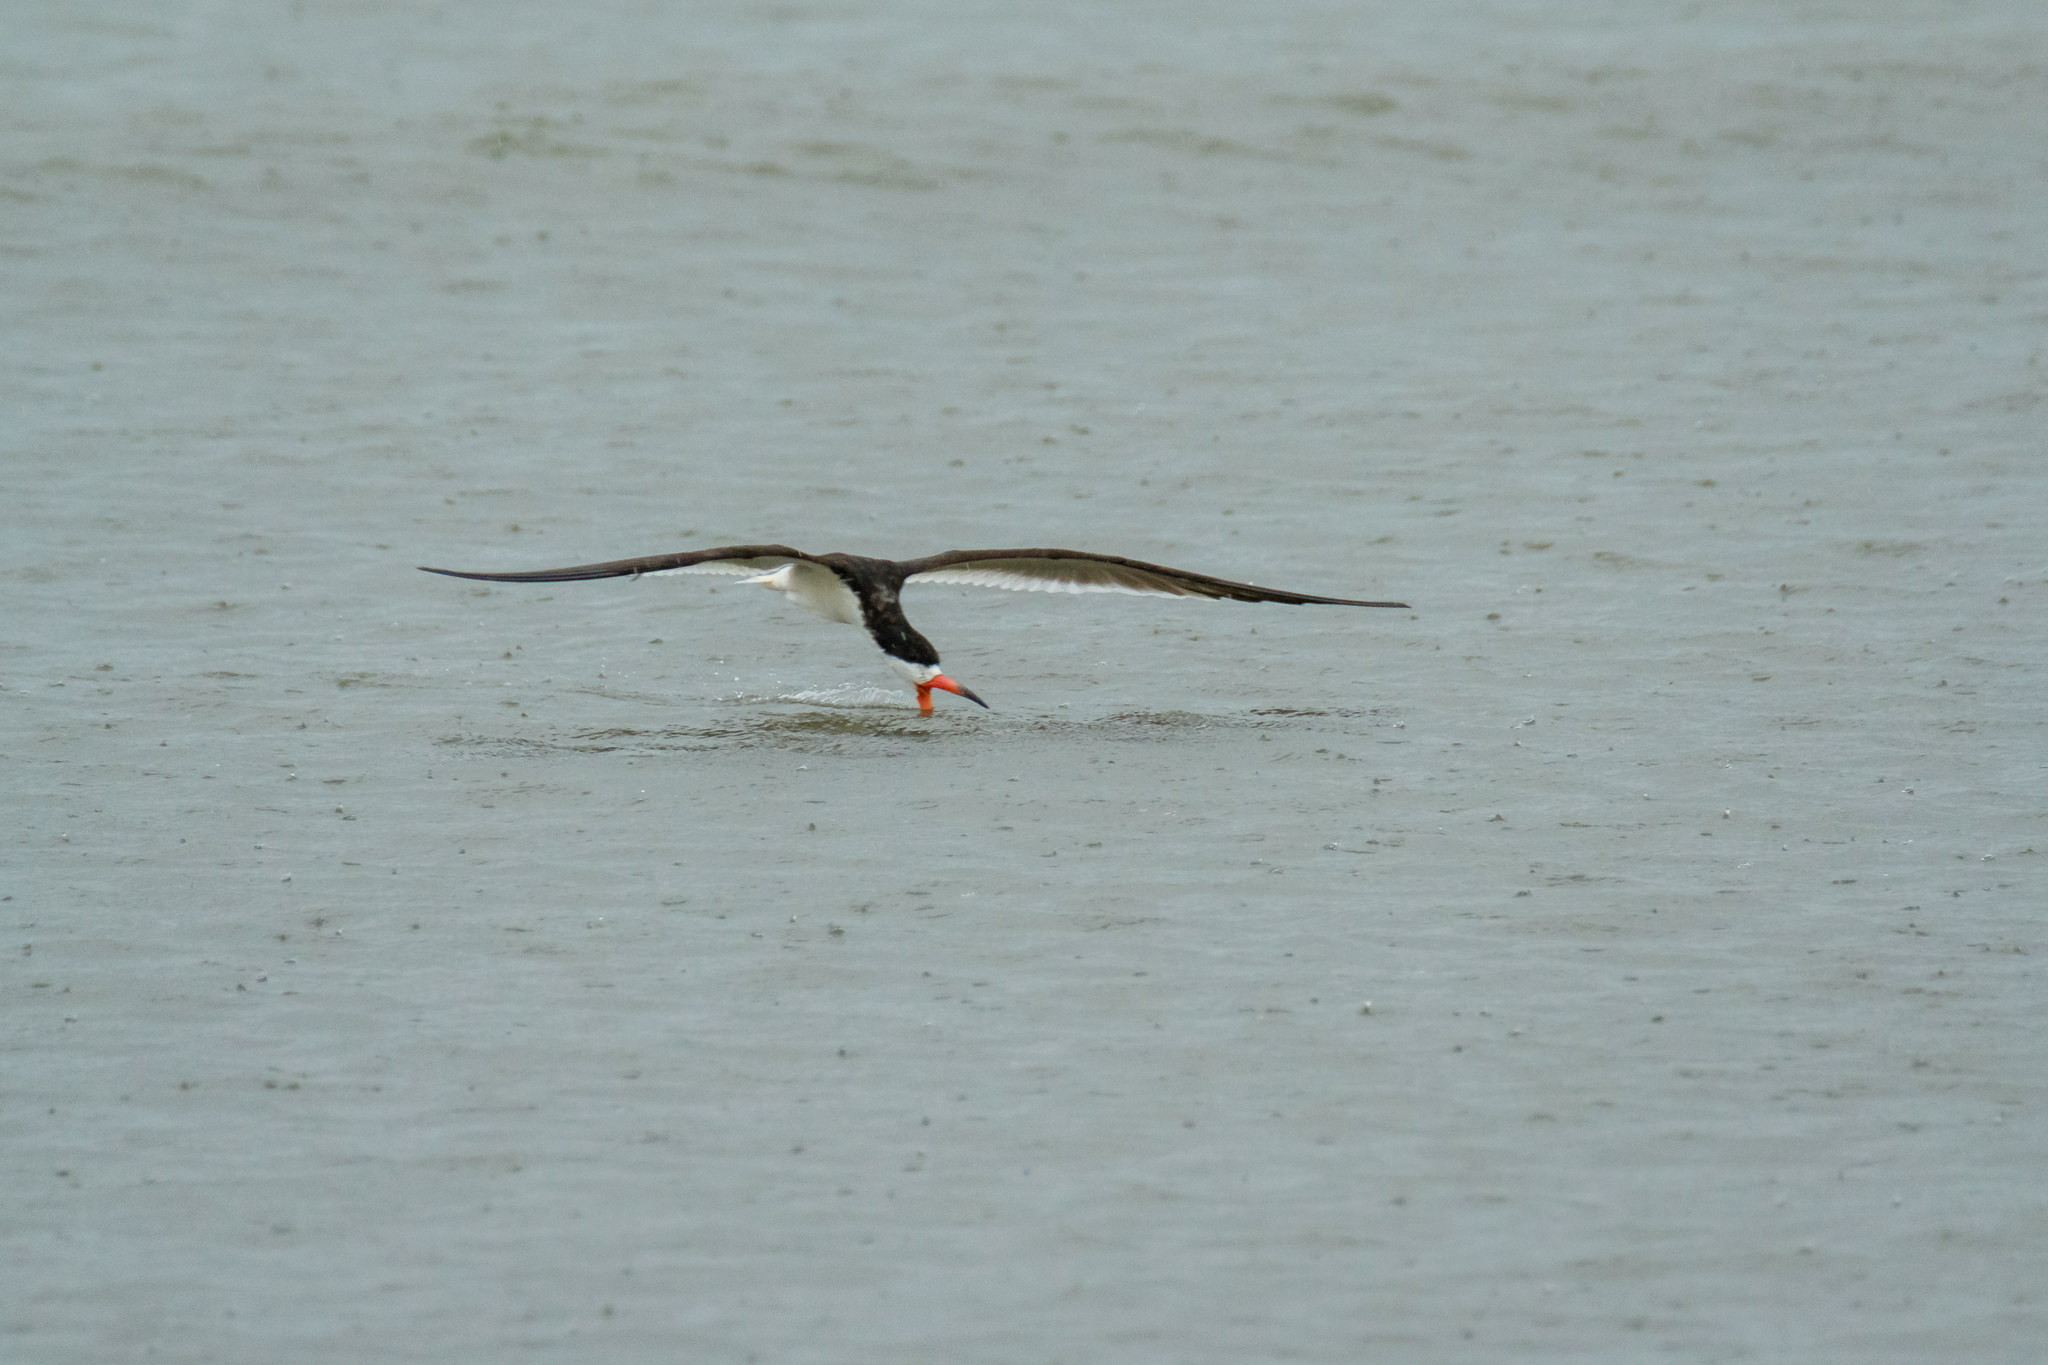
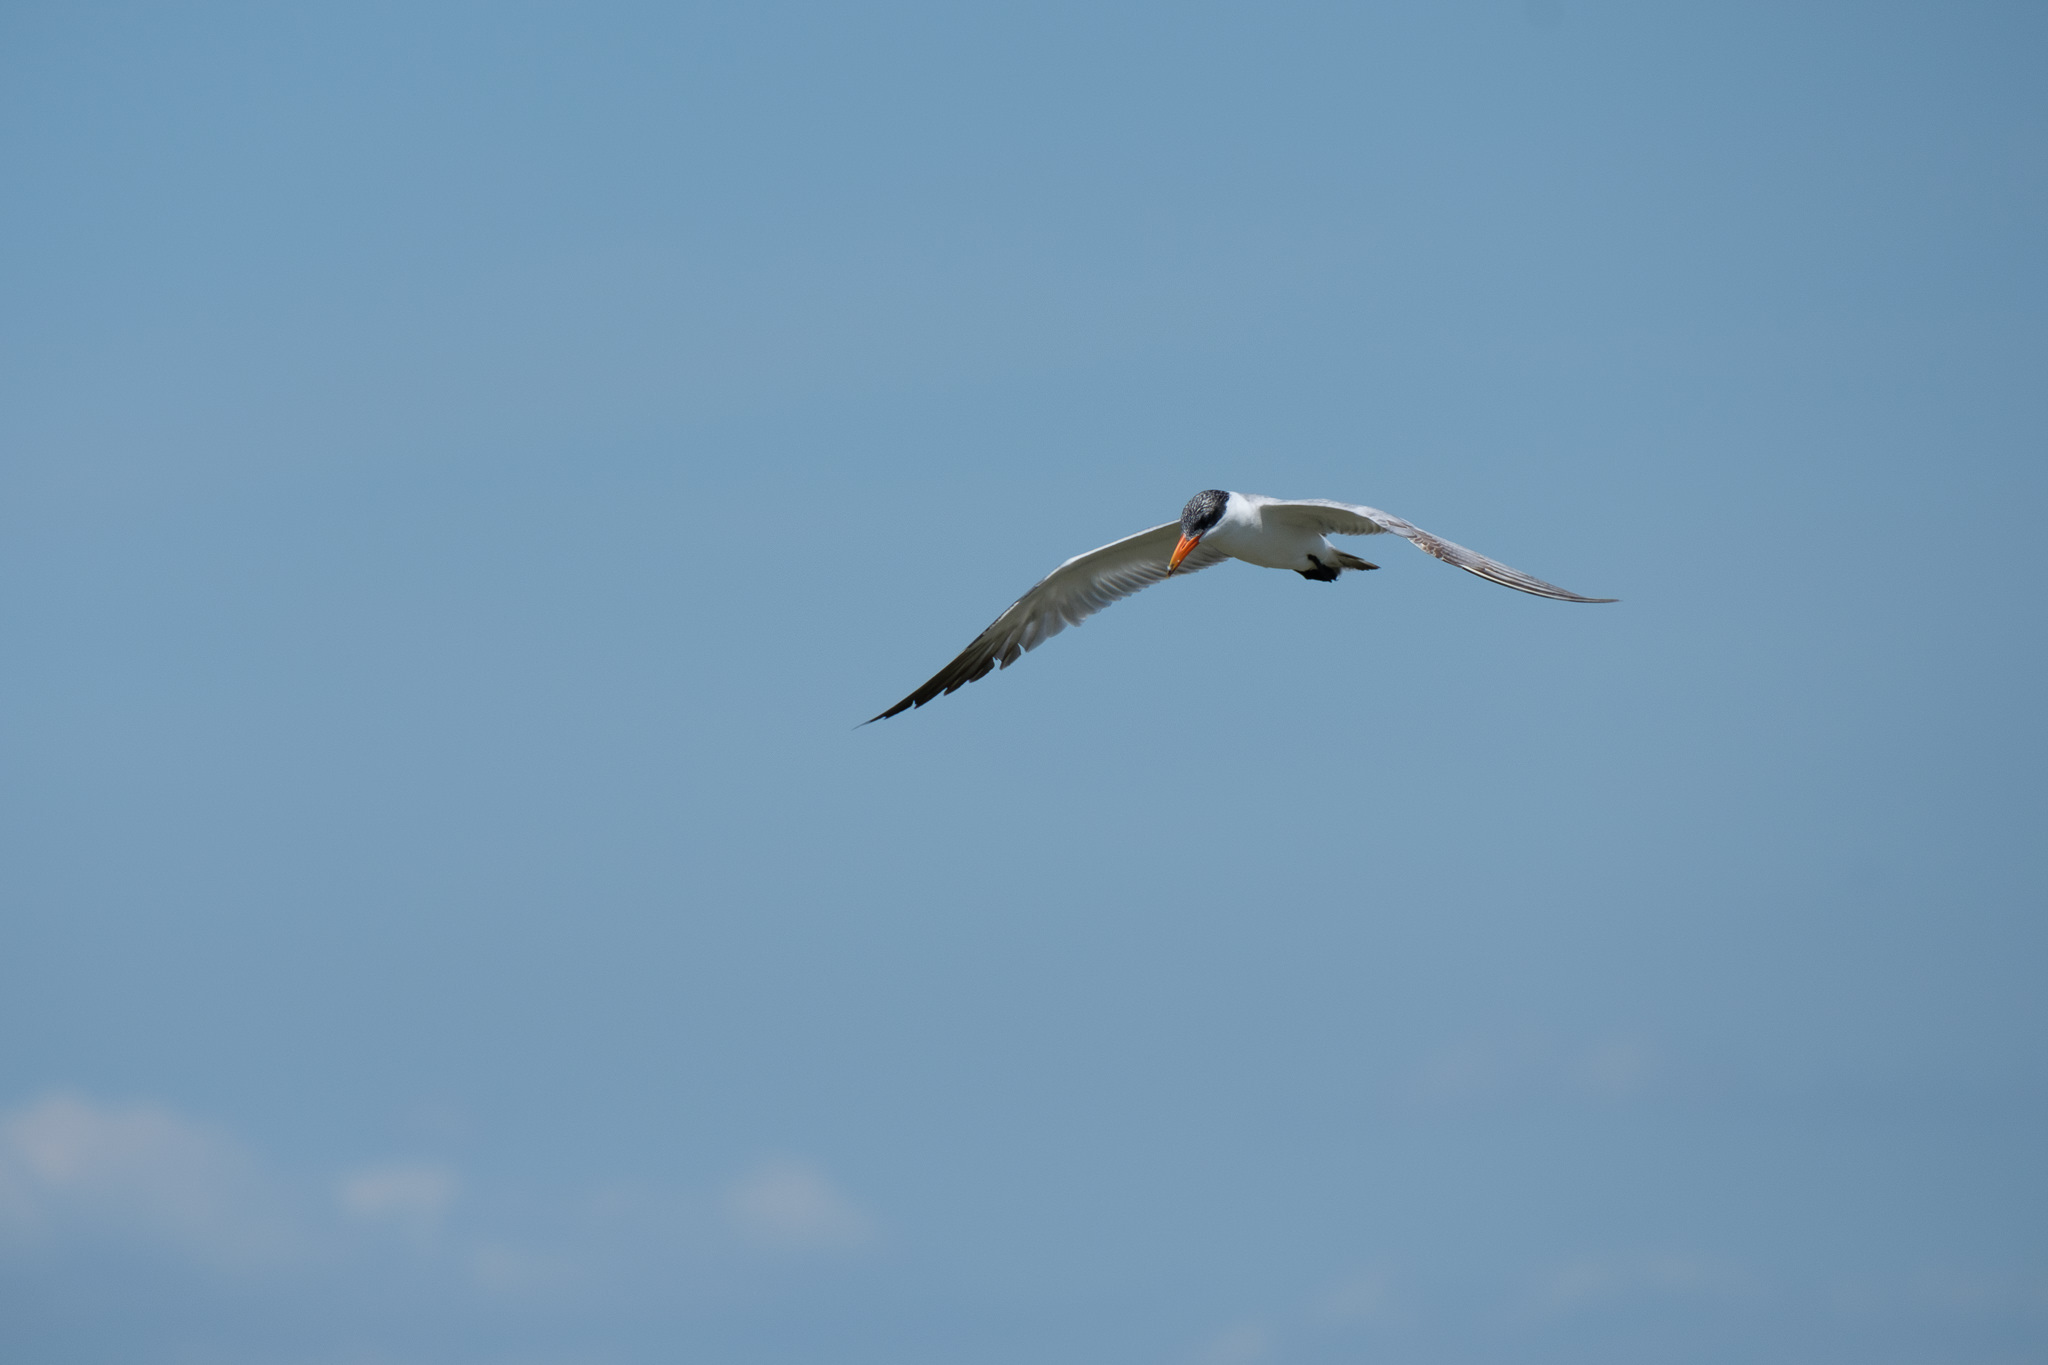
I set the speed tracking sensitivity to 1, the middle setting. This seemed to be the happy medium between steady and slightly more erratic subject movement. This white morph reddish egret changed course unpredictably as it danced in the shallows to catch fish.
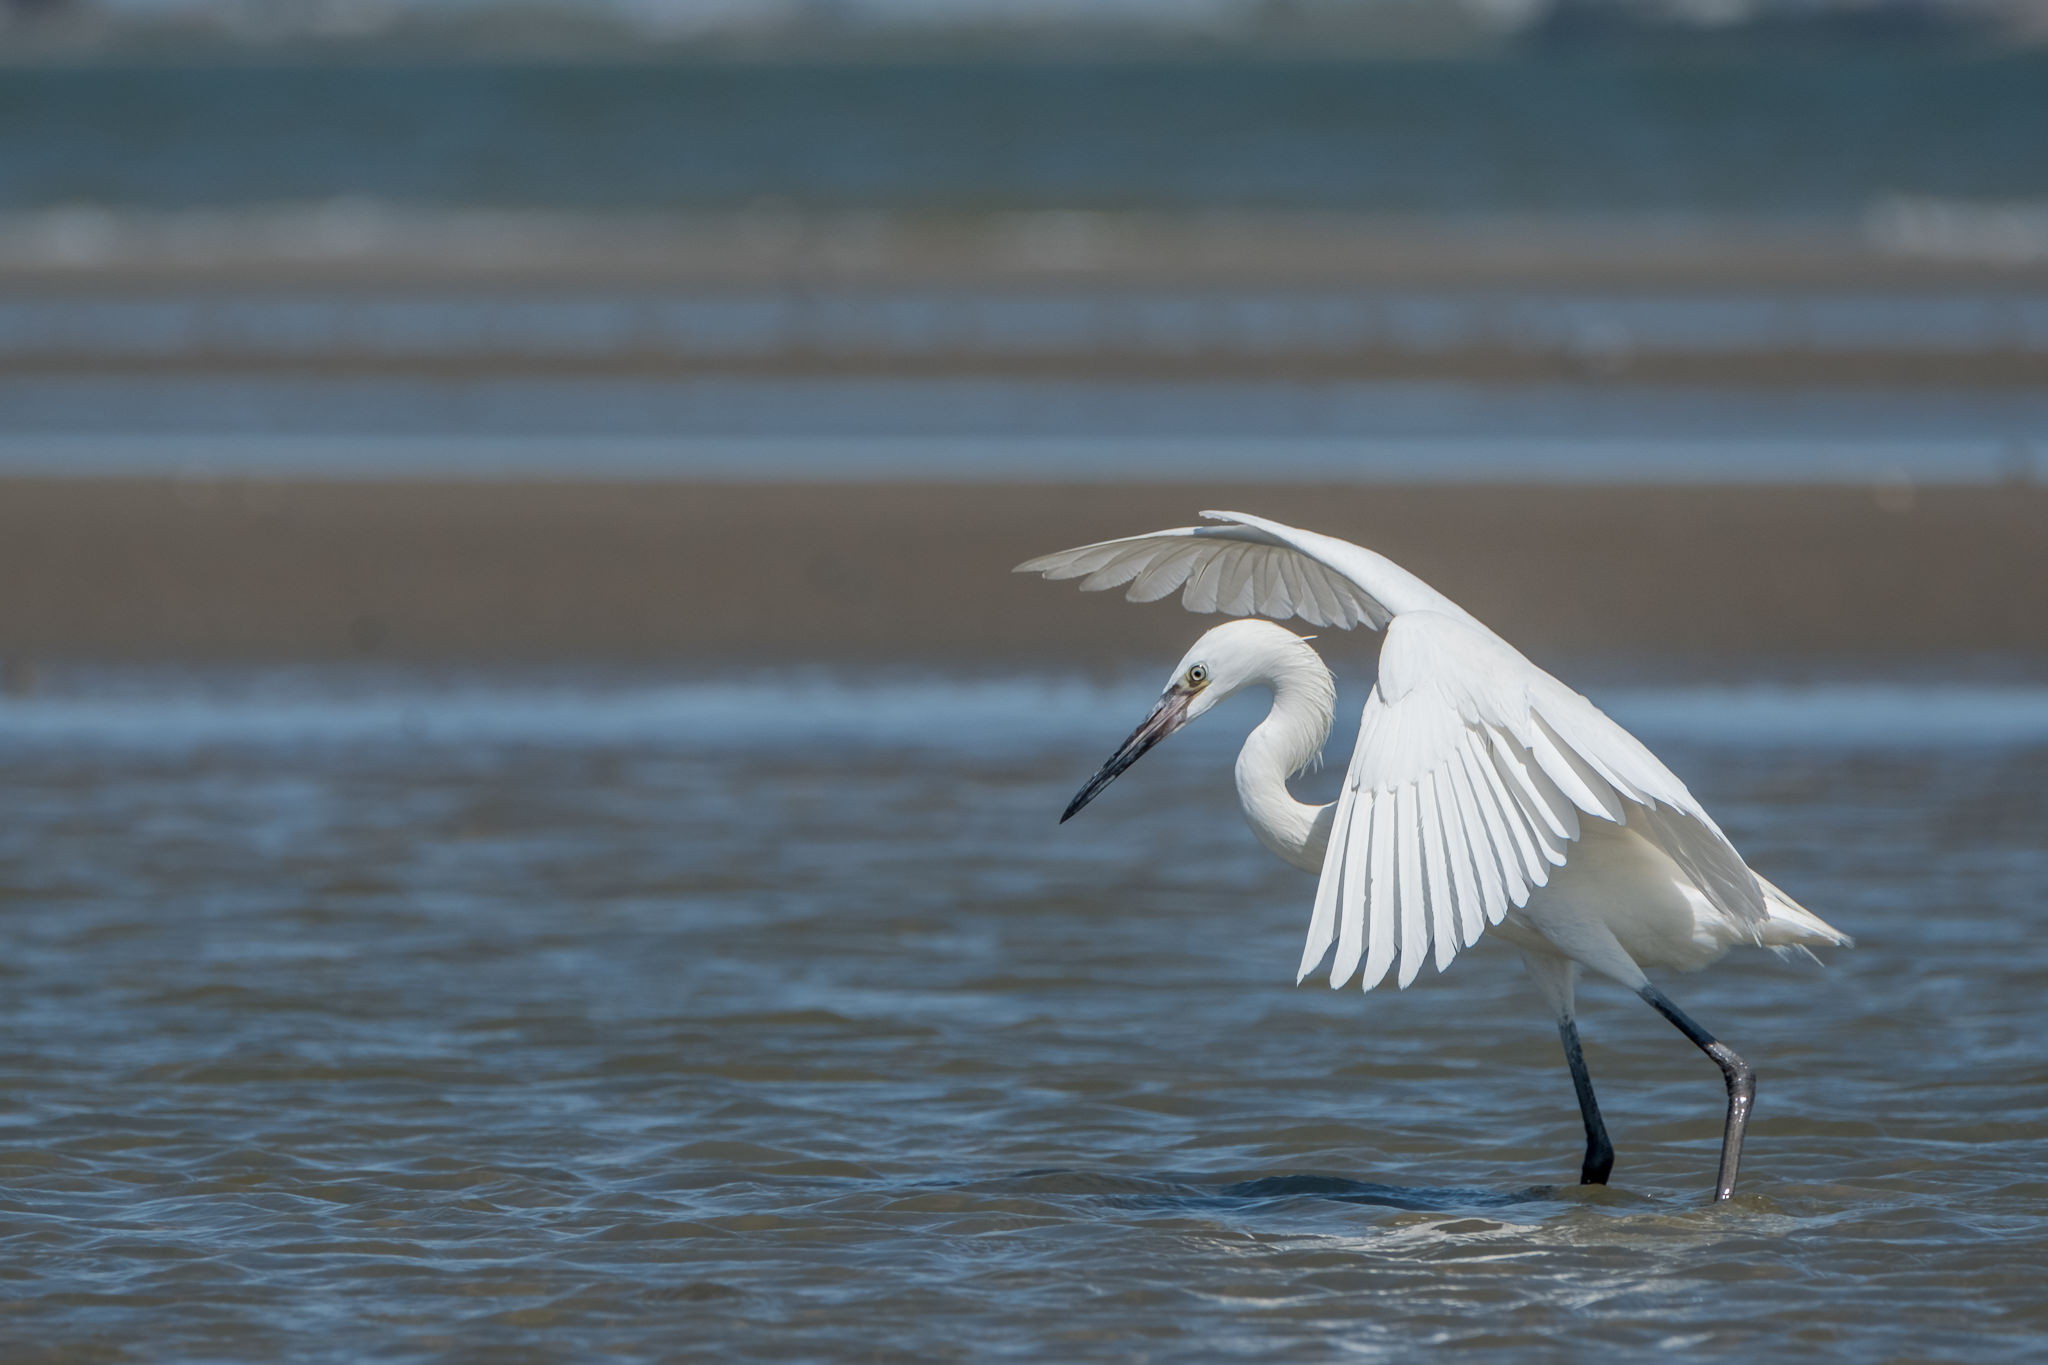
X-T2 + XF100-400mmF4.5-5.6 R LM OIS WR @ 400mm, ISO 500, 1/2000, f/7.1
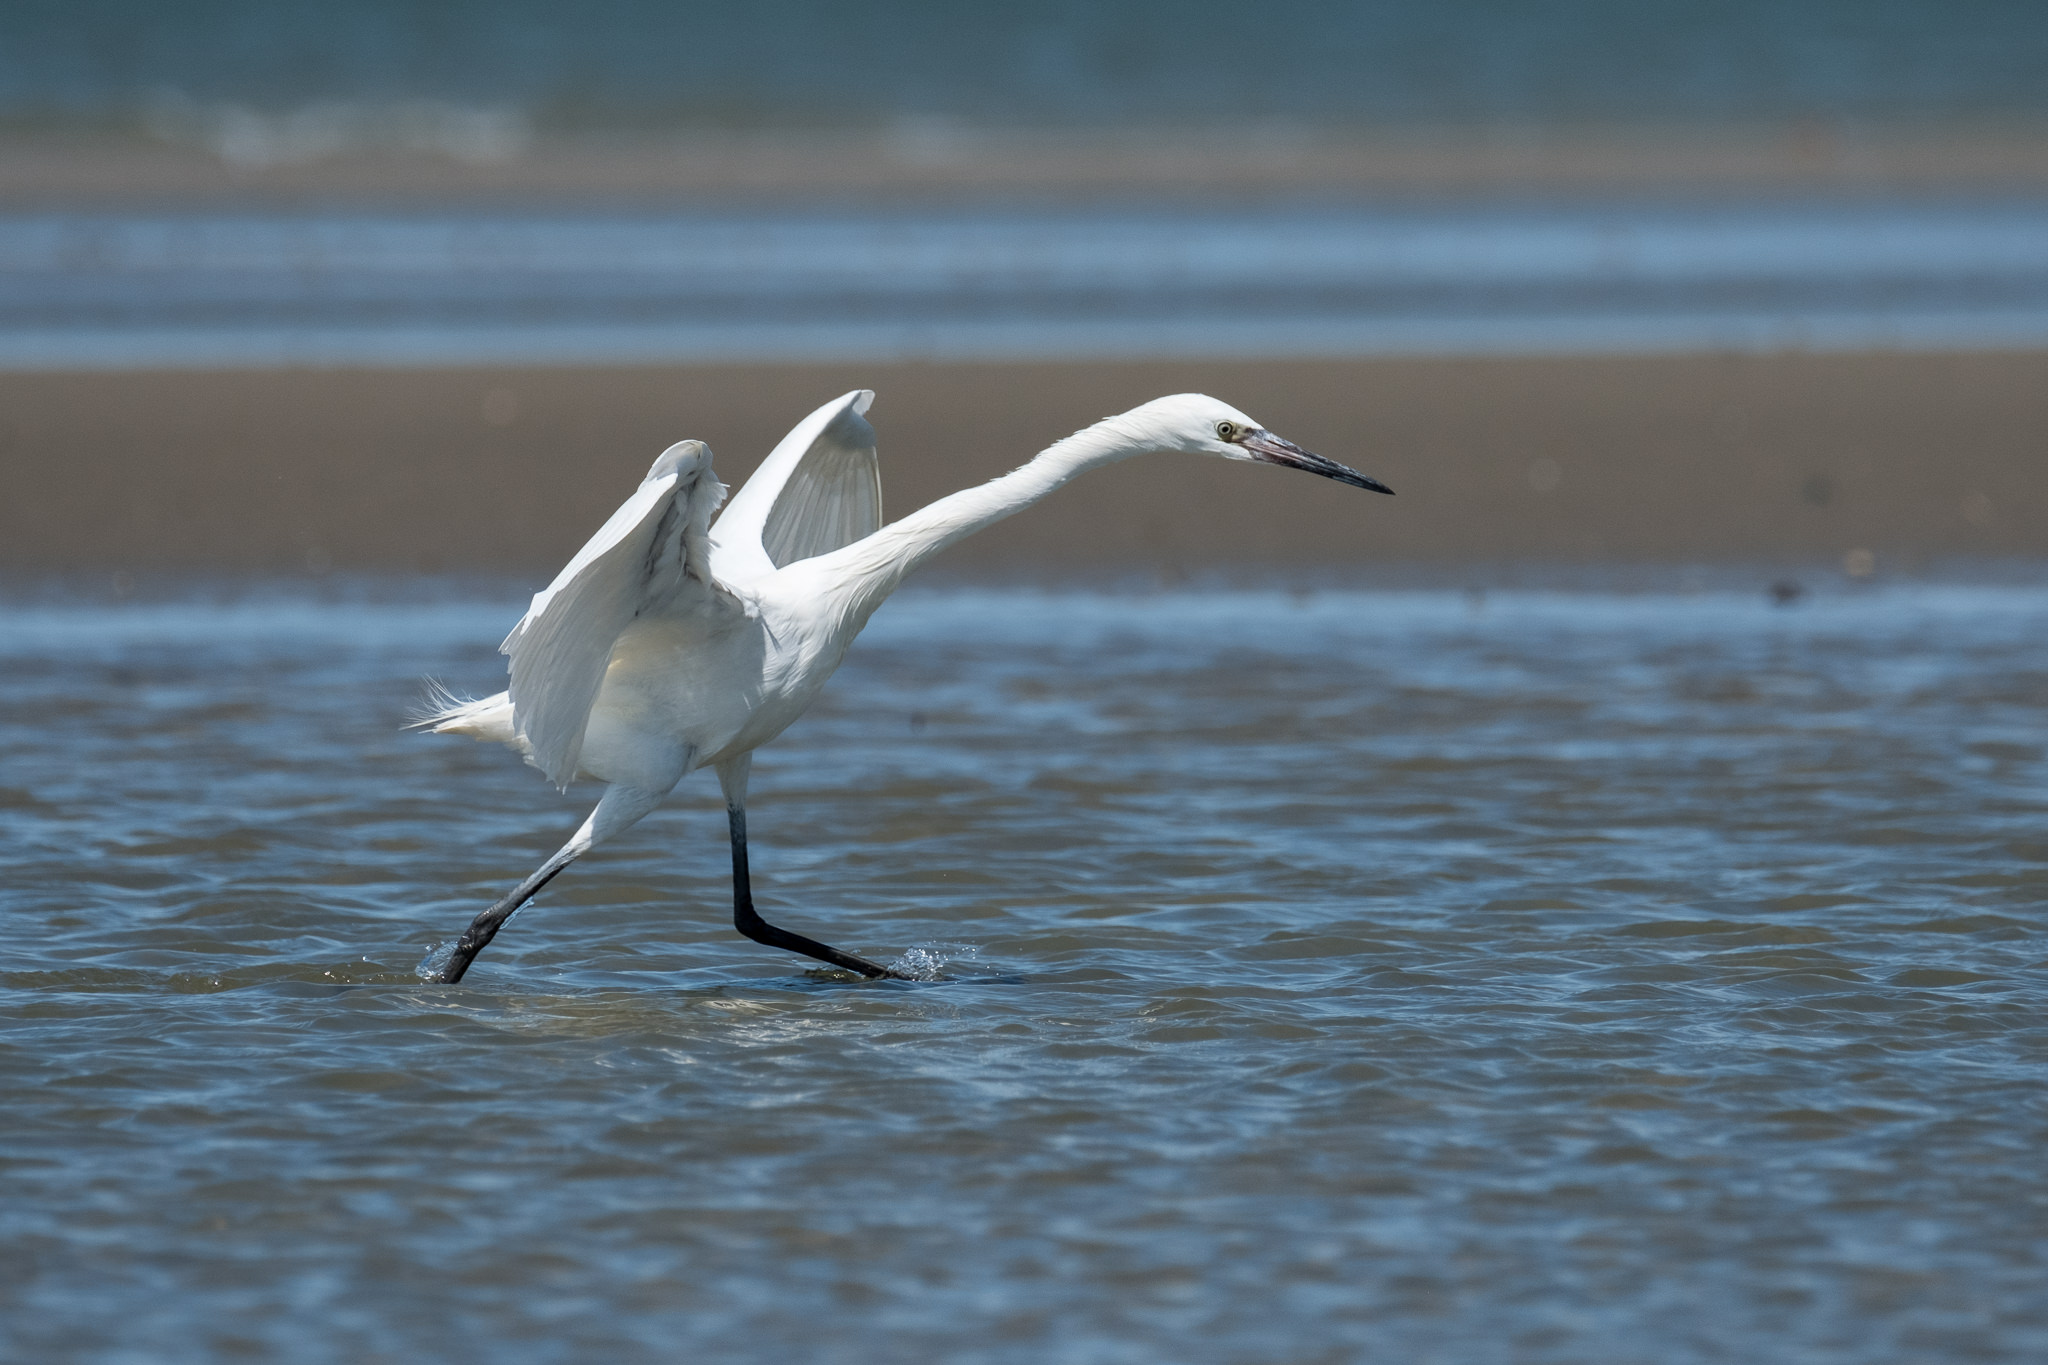
X-T2 + XF100-400mmF4.5-5.6 R LM OIS WR @ 400mm, ISO 500, 1/2000, f/7.1
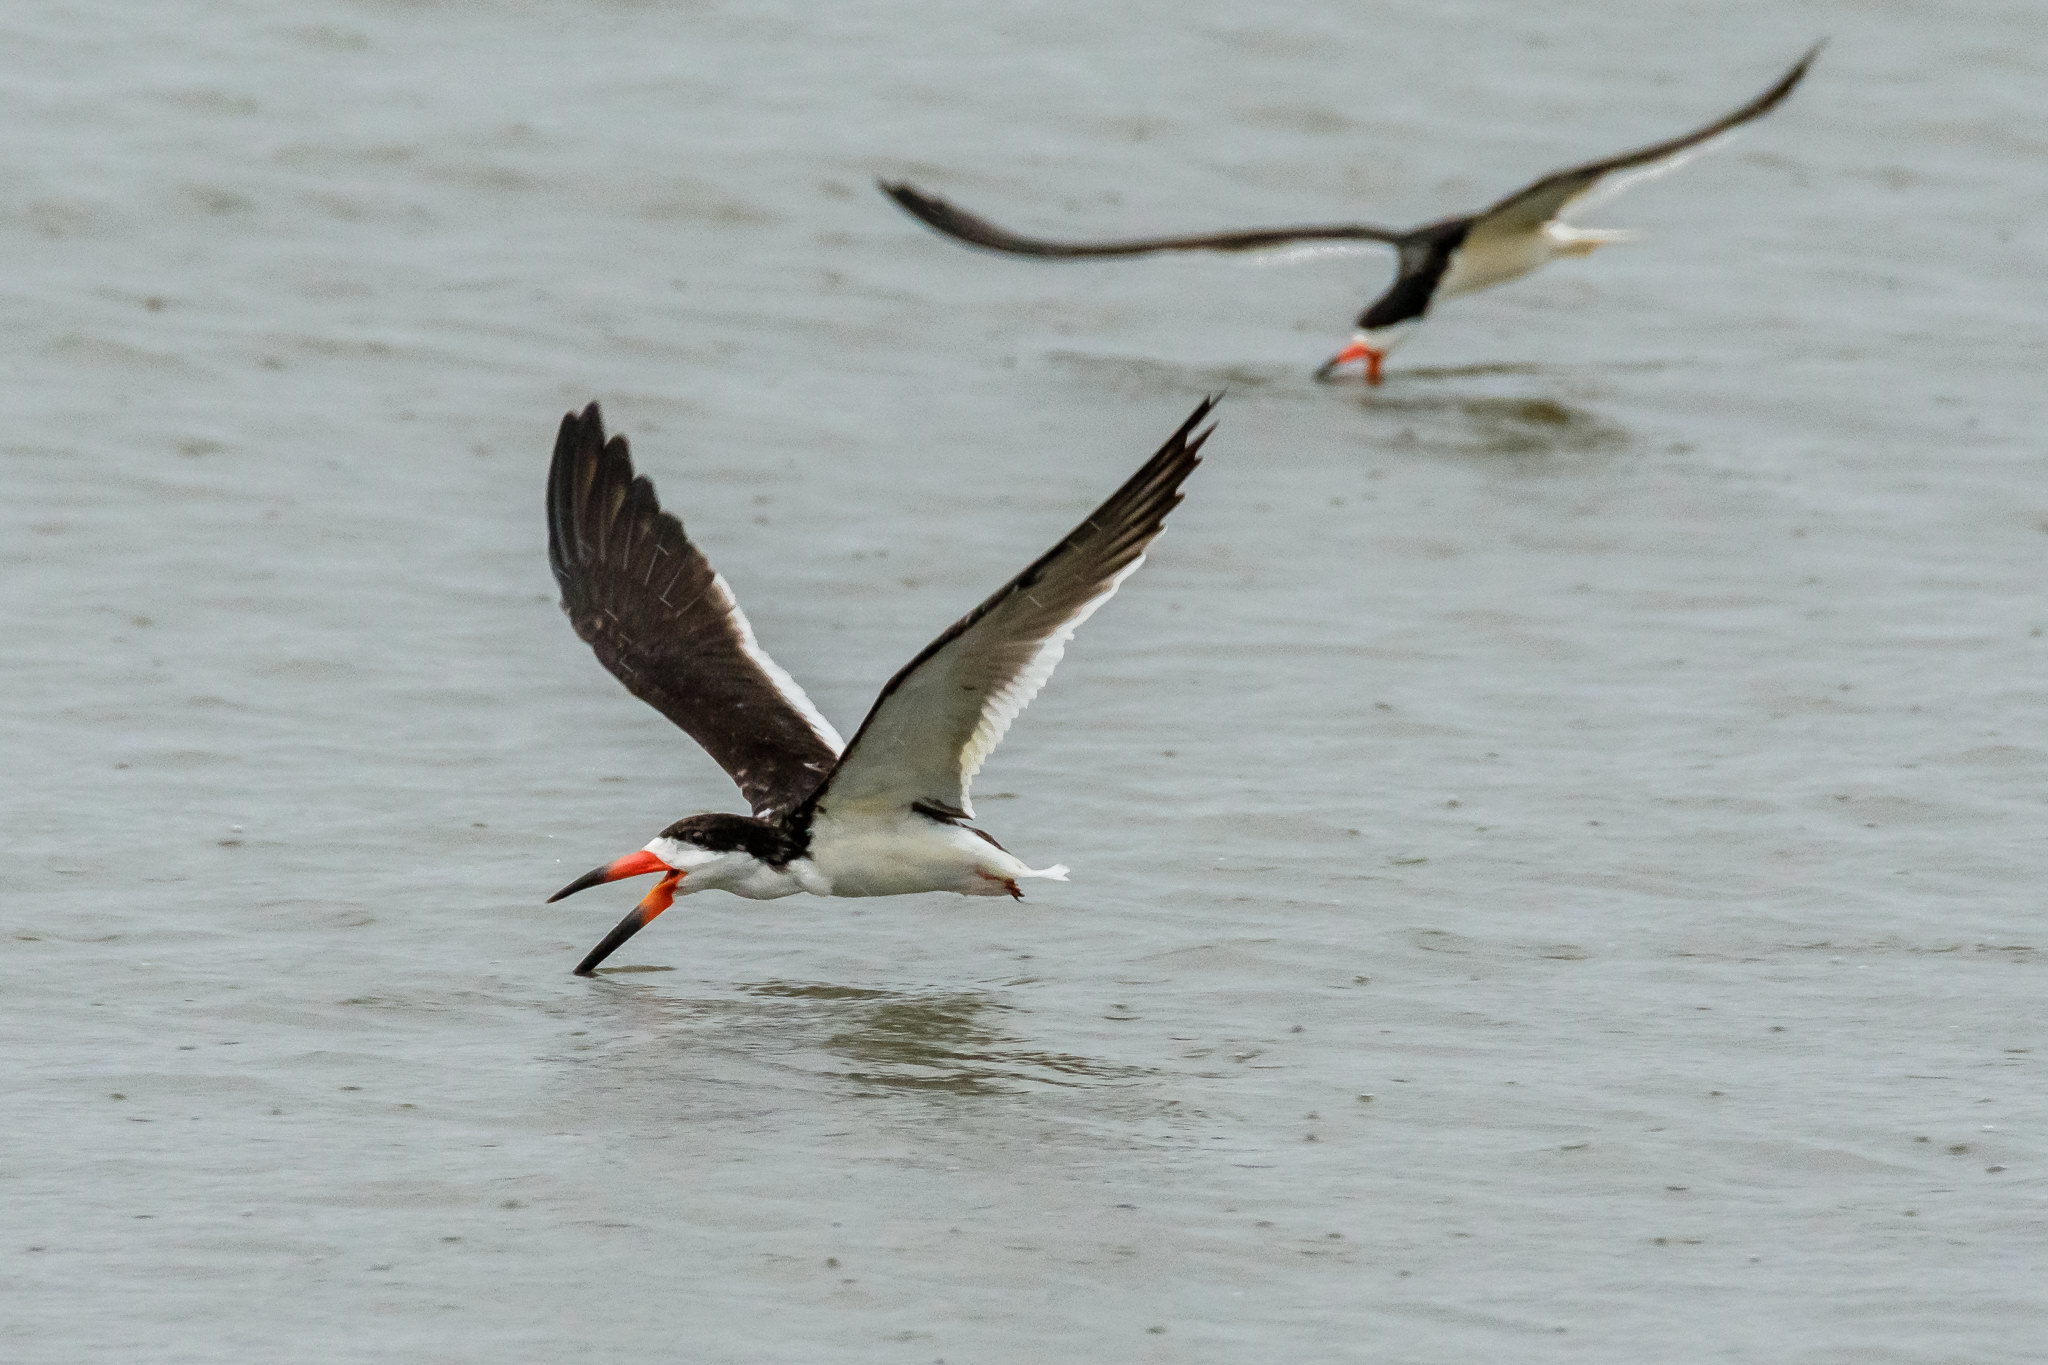
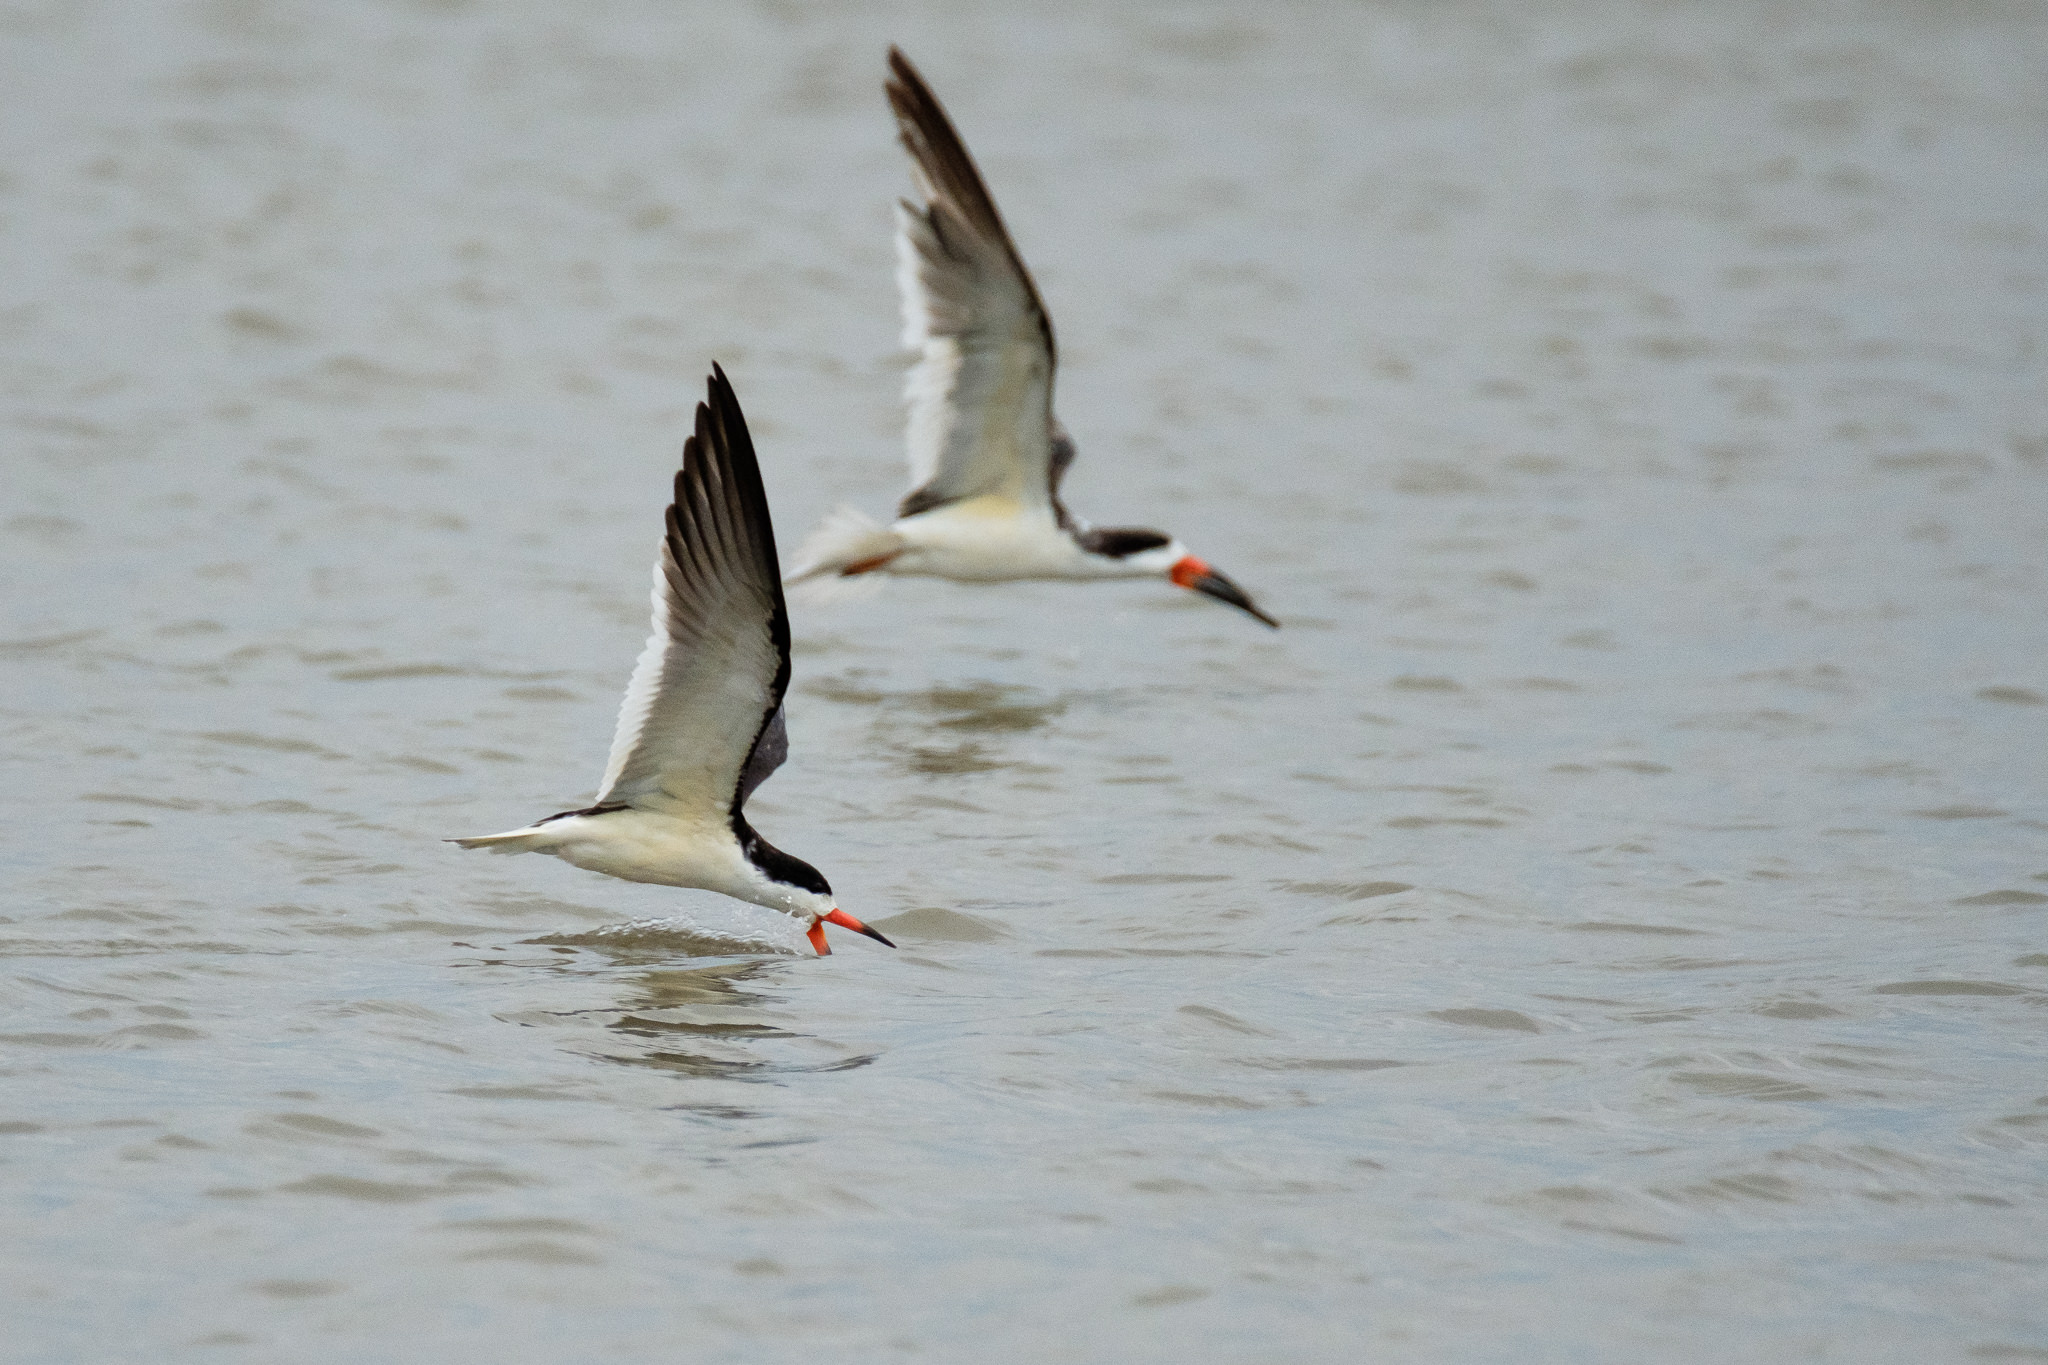
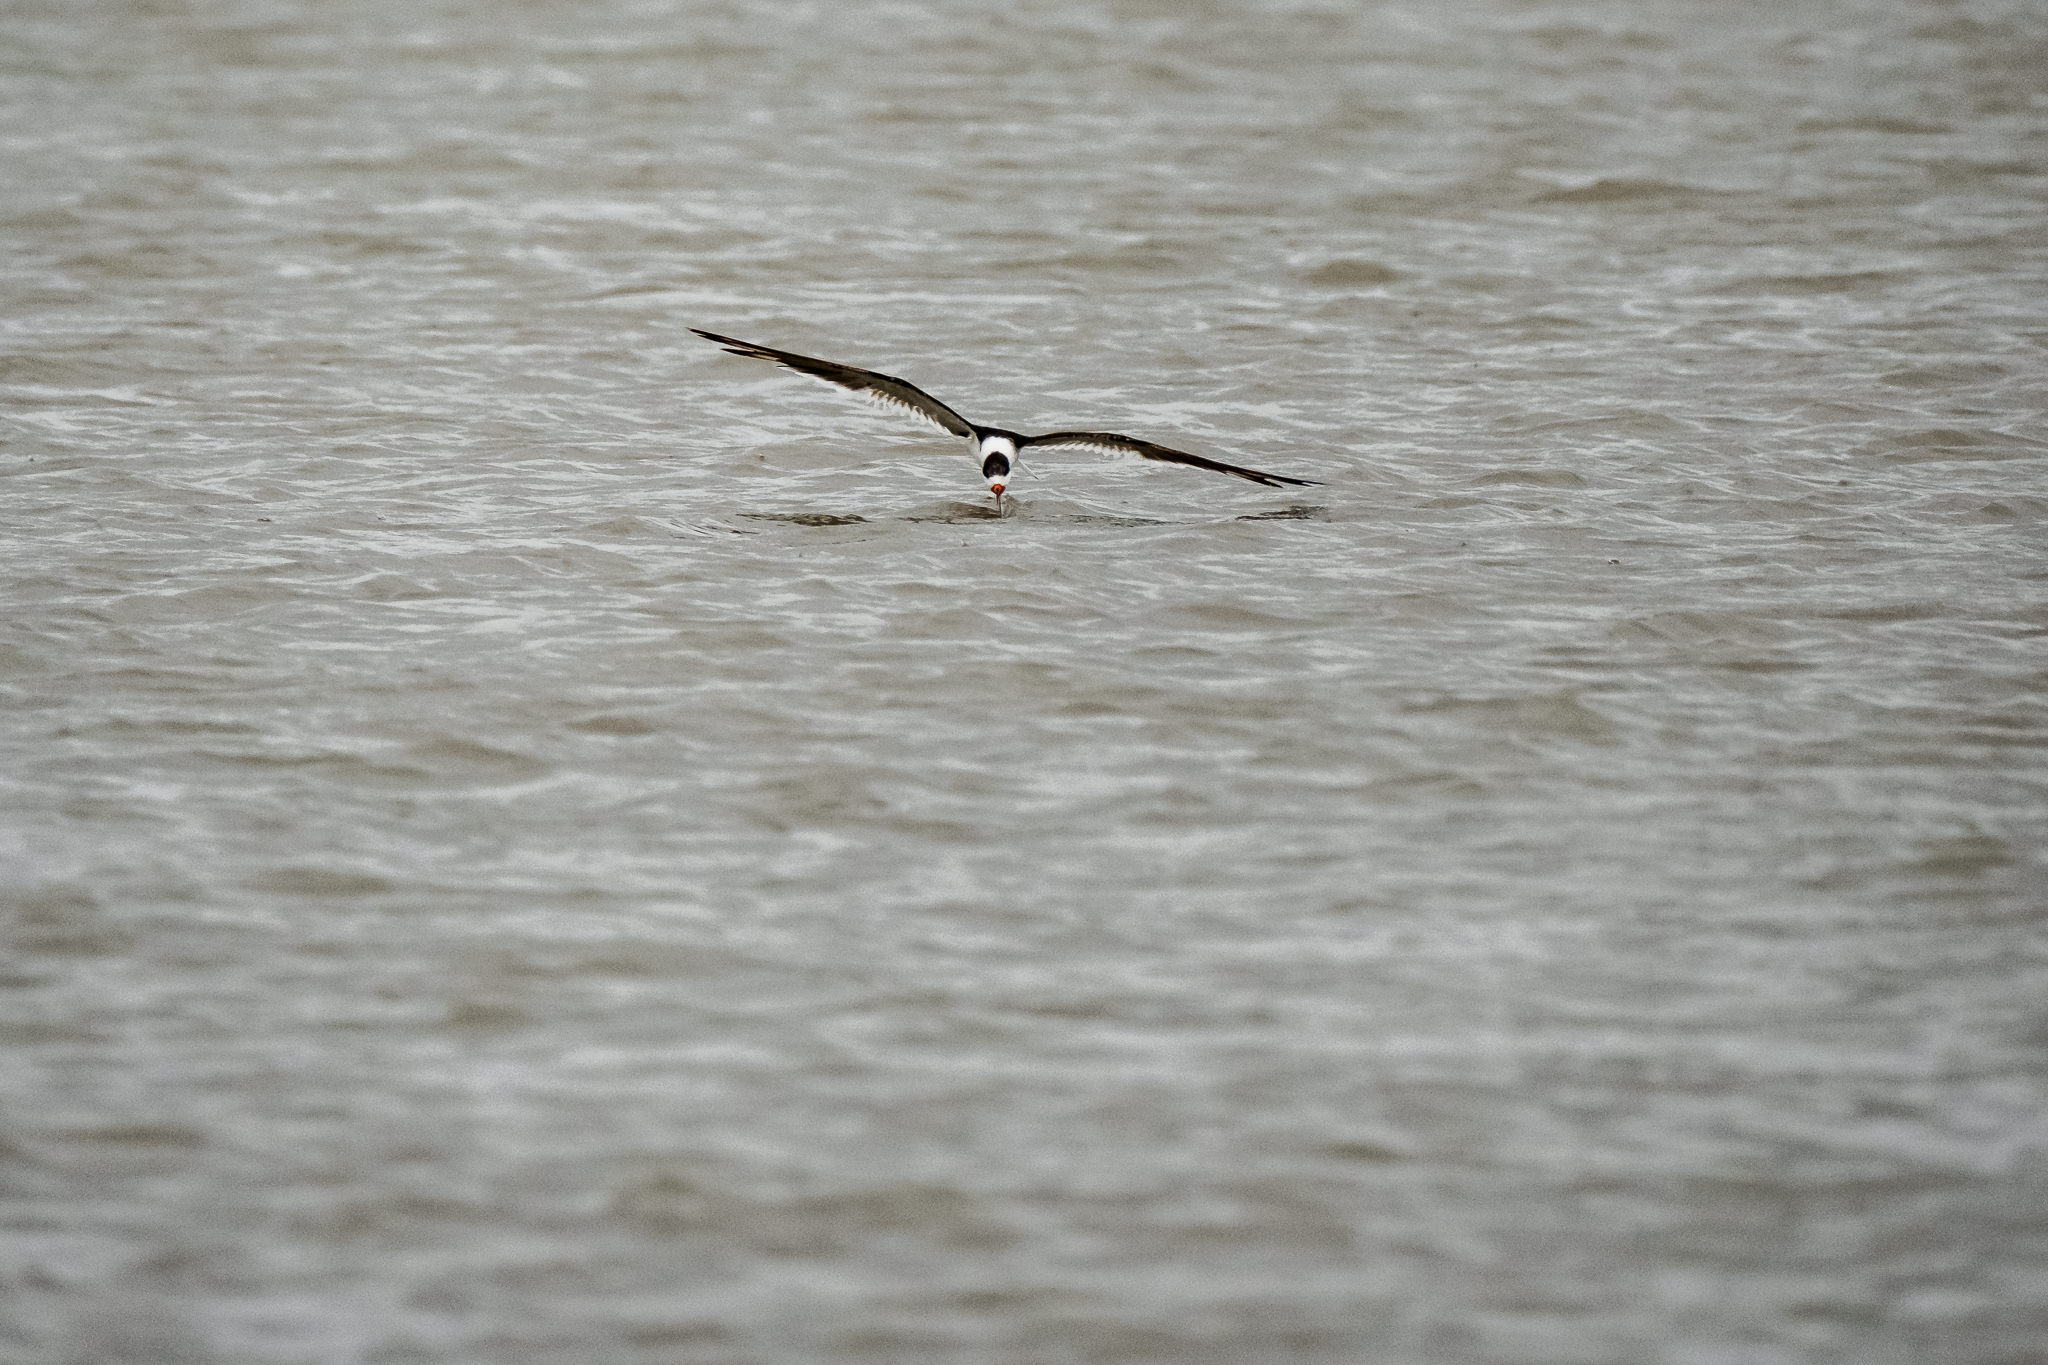
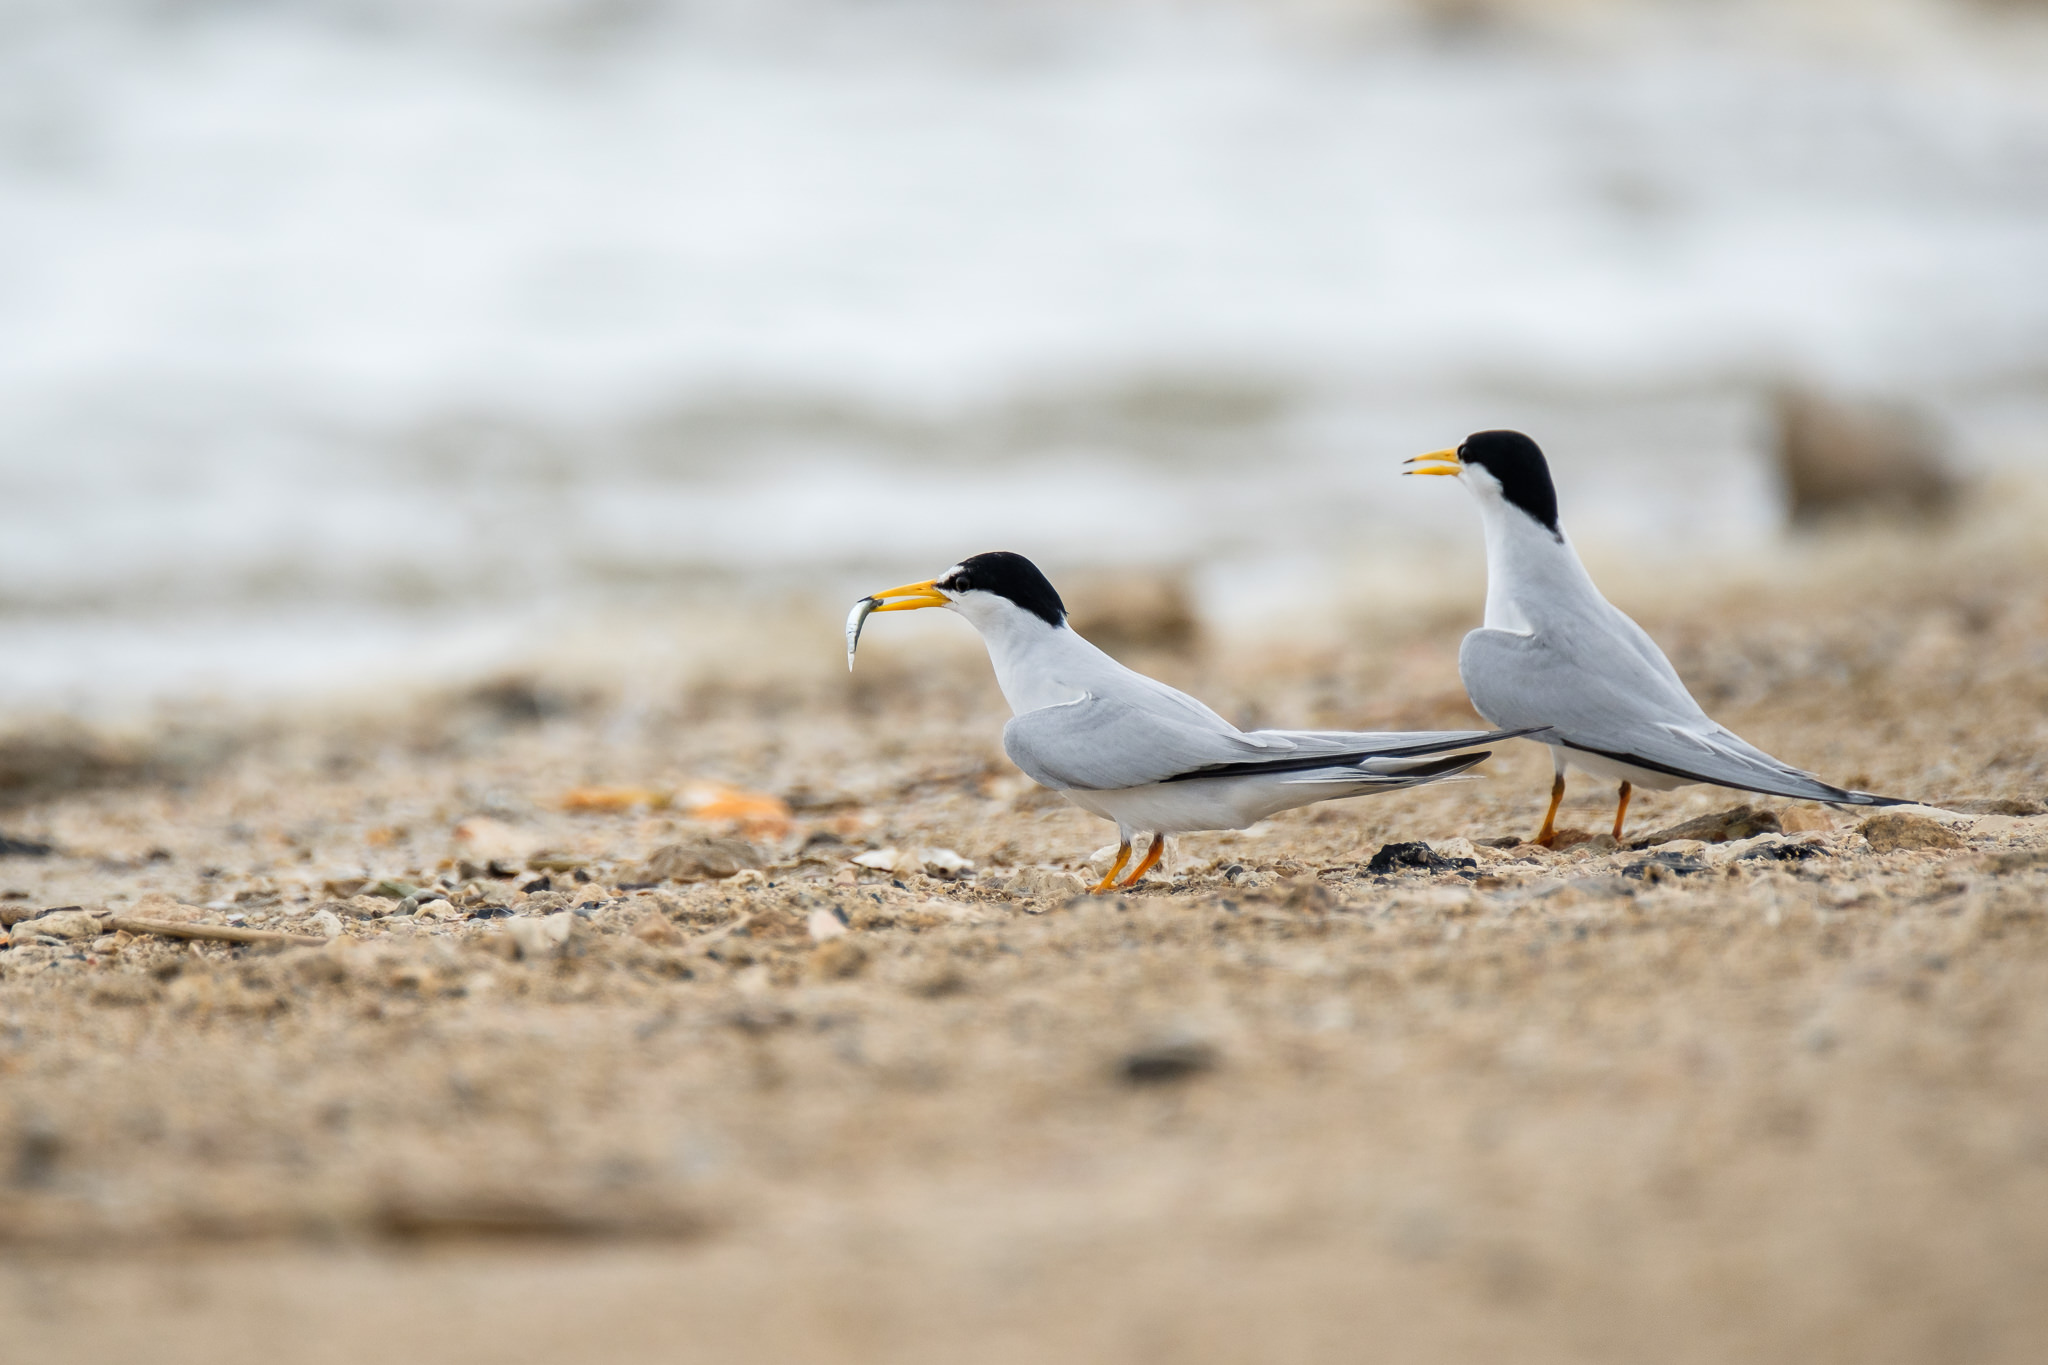
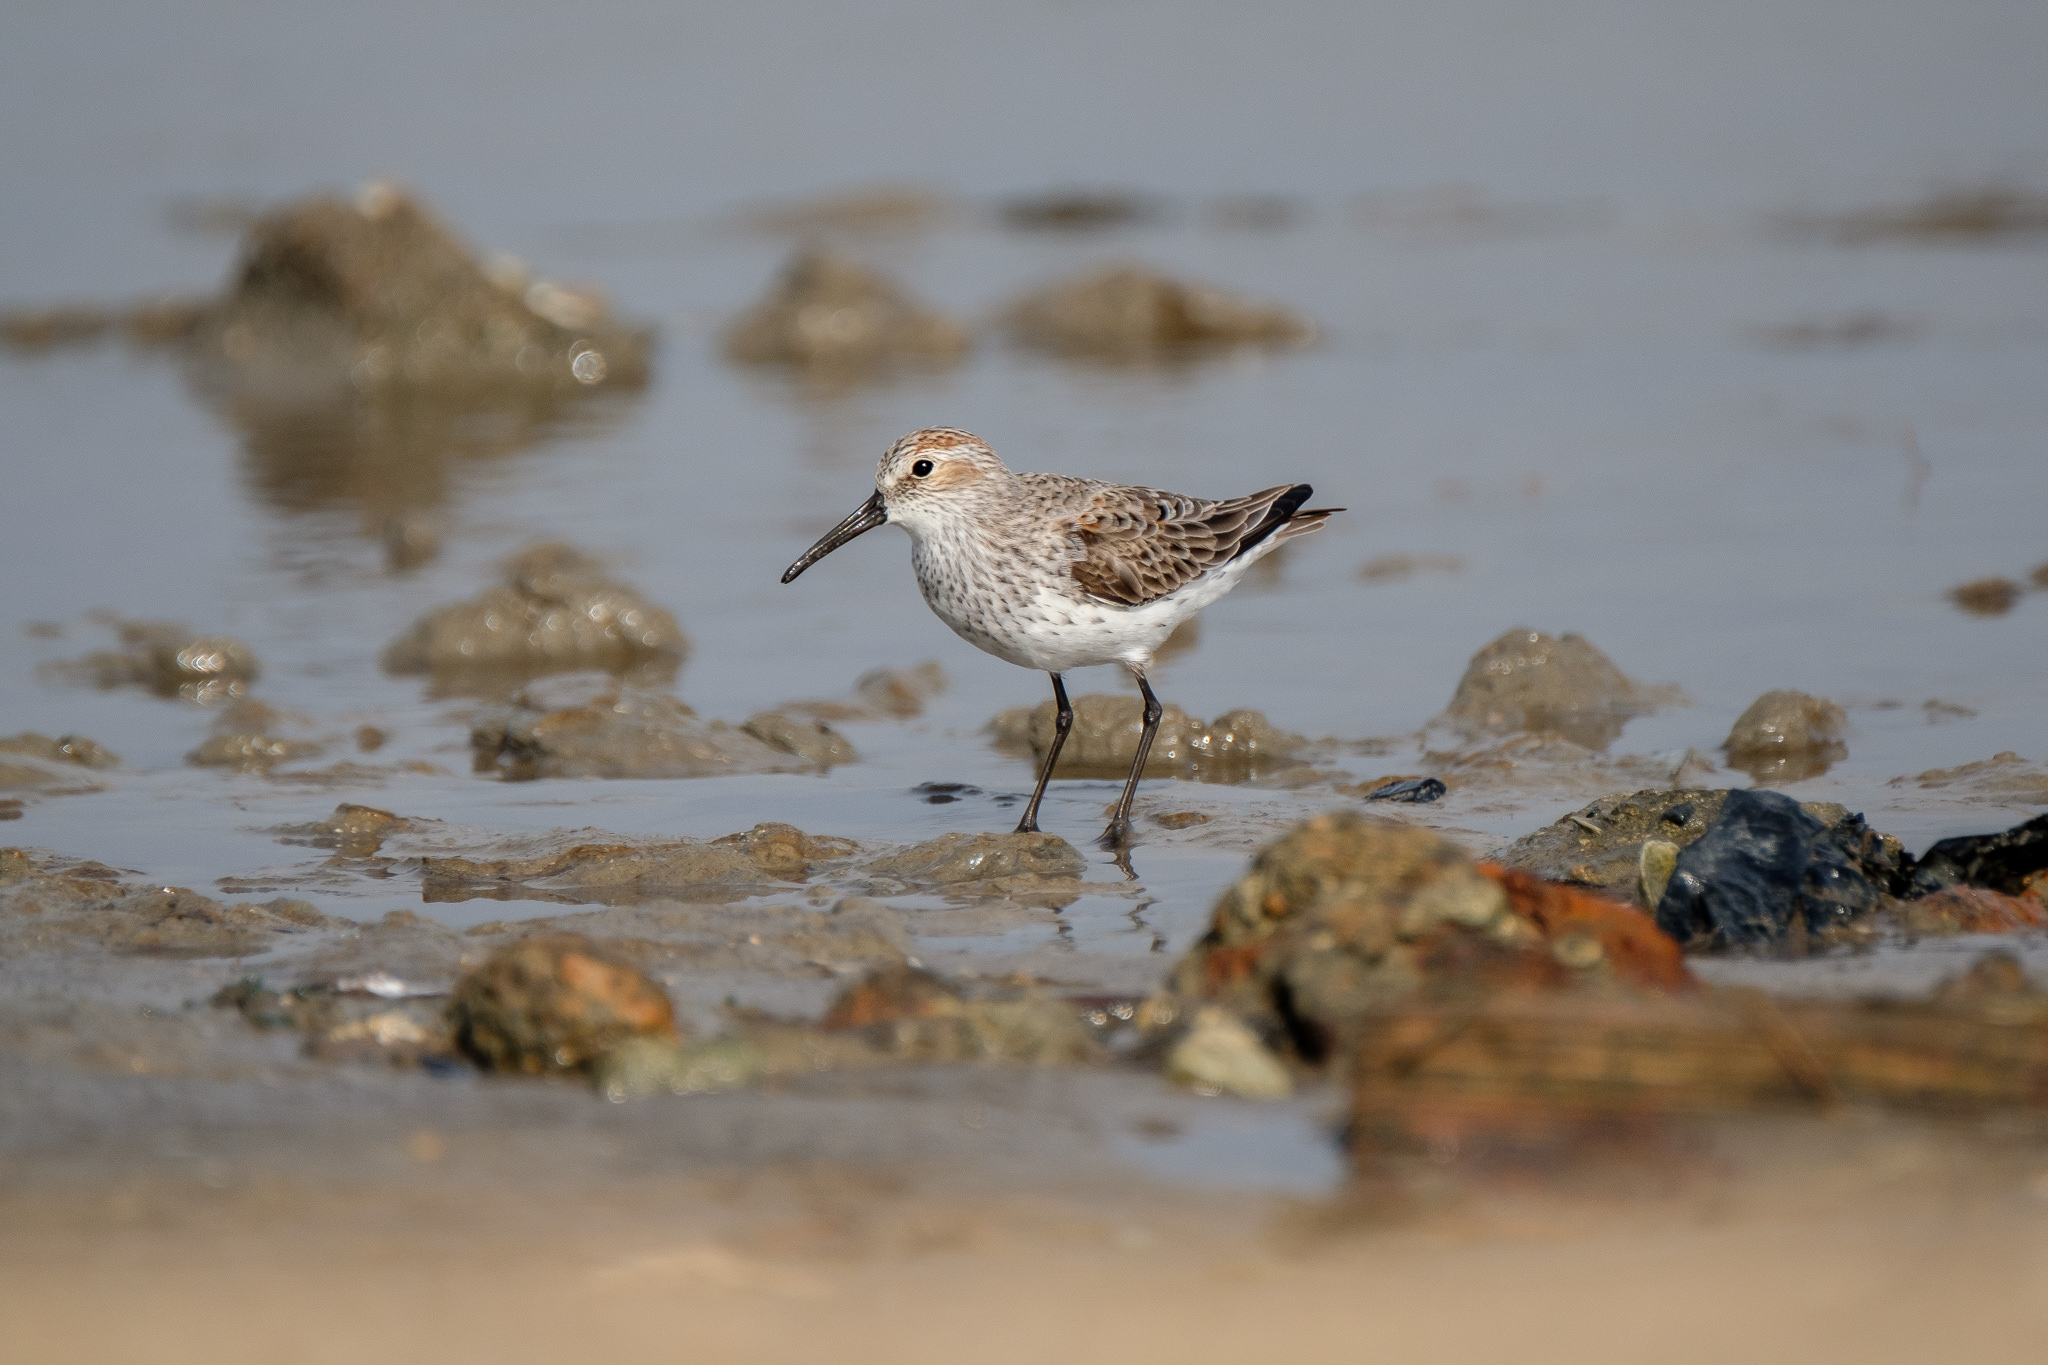
The setting that had the greatest effect on my keeper rate was the zone area switching. When the camera is set to zone focusing (as opposed to single point), zone area switching determines what part of the zone gets focus priority. For me, by far the best setup was to choose ‘center’. Center puts priority in the middle of the zone. So as long as your subject it near the center of the frame, it will be in focus. When the zone area switching was set to either ‘front’ or ‘auto,’ I found the camera tended to focus on the foreground, even if it was obvious that there was a subject several feet back. This was especially true when I was shooting prone (lying flat on the ground). The default for four of the five AF-C custom settings is either front or auto. Neither worked well for me! I became very frustrated before I figured this out and missed many shots because of it. Here I captured some beautifully textured sand and an out of focus mother least tern feeding her baby! I did manage one shot of the youngster … after the mother left and he had swallowed his meal!
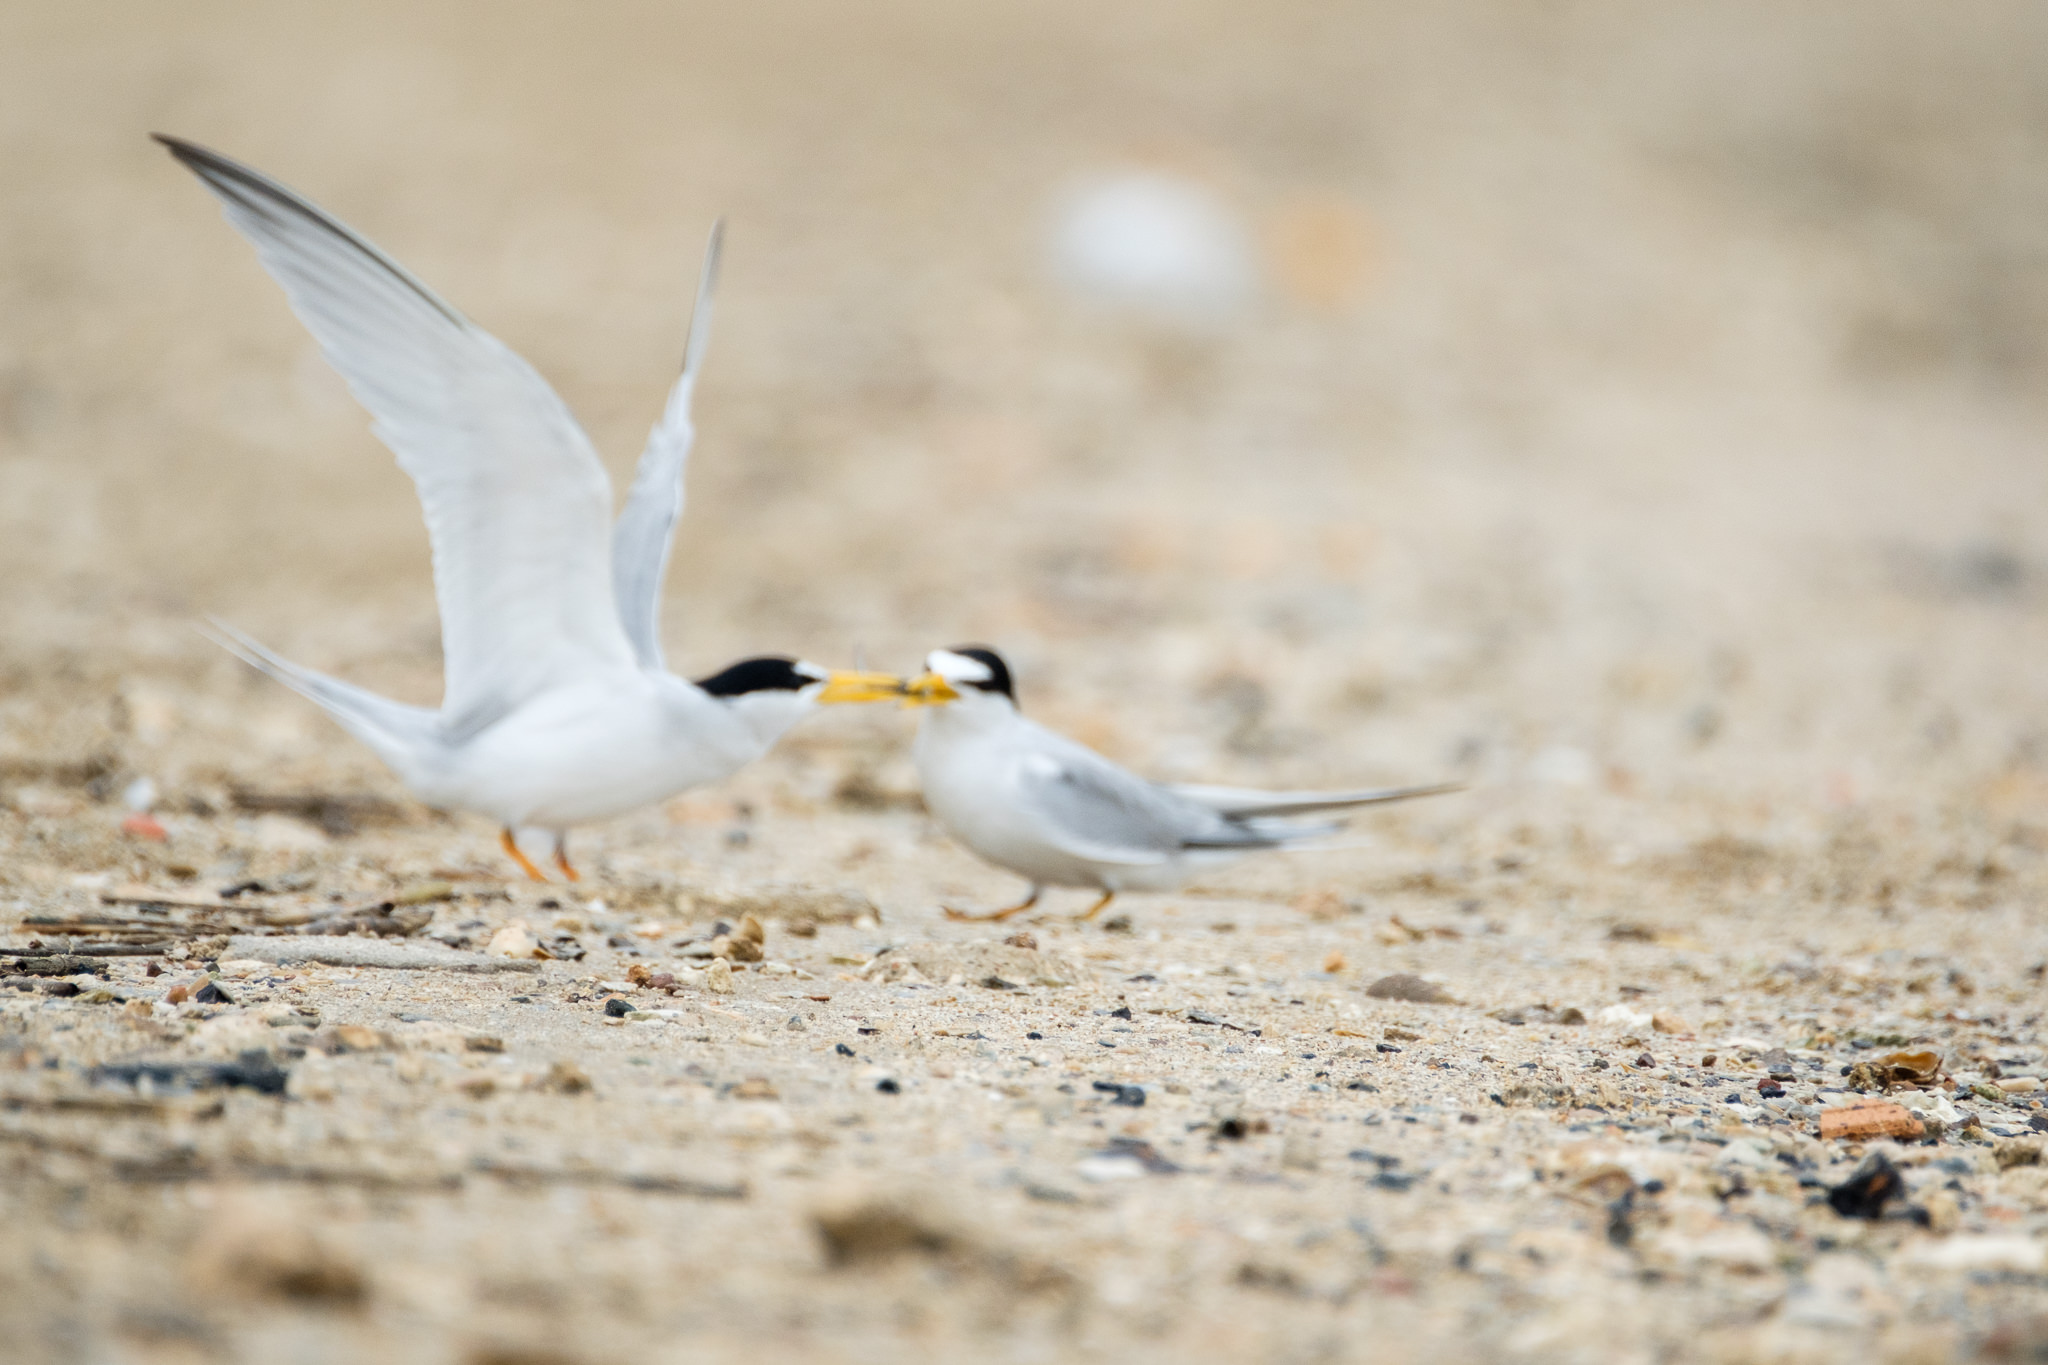
X-T2 + XF100-400mmF4.5-5.6 R LM OIS WR + 1.4x @ 560mm, ISO 1250, 1/1600, f/8.0
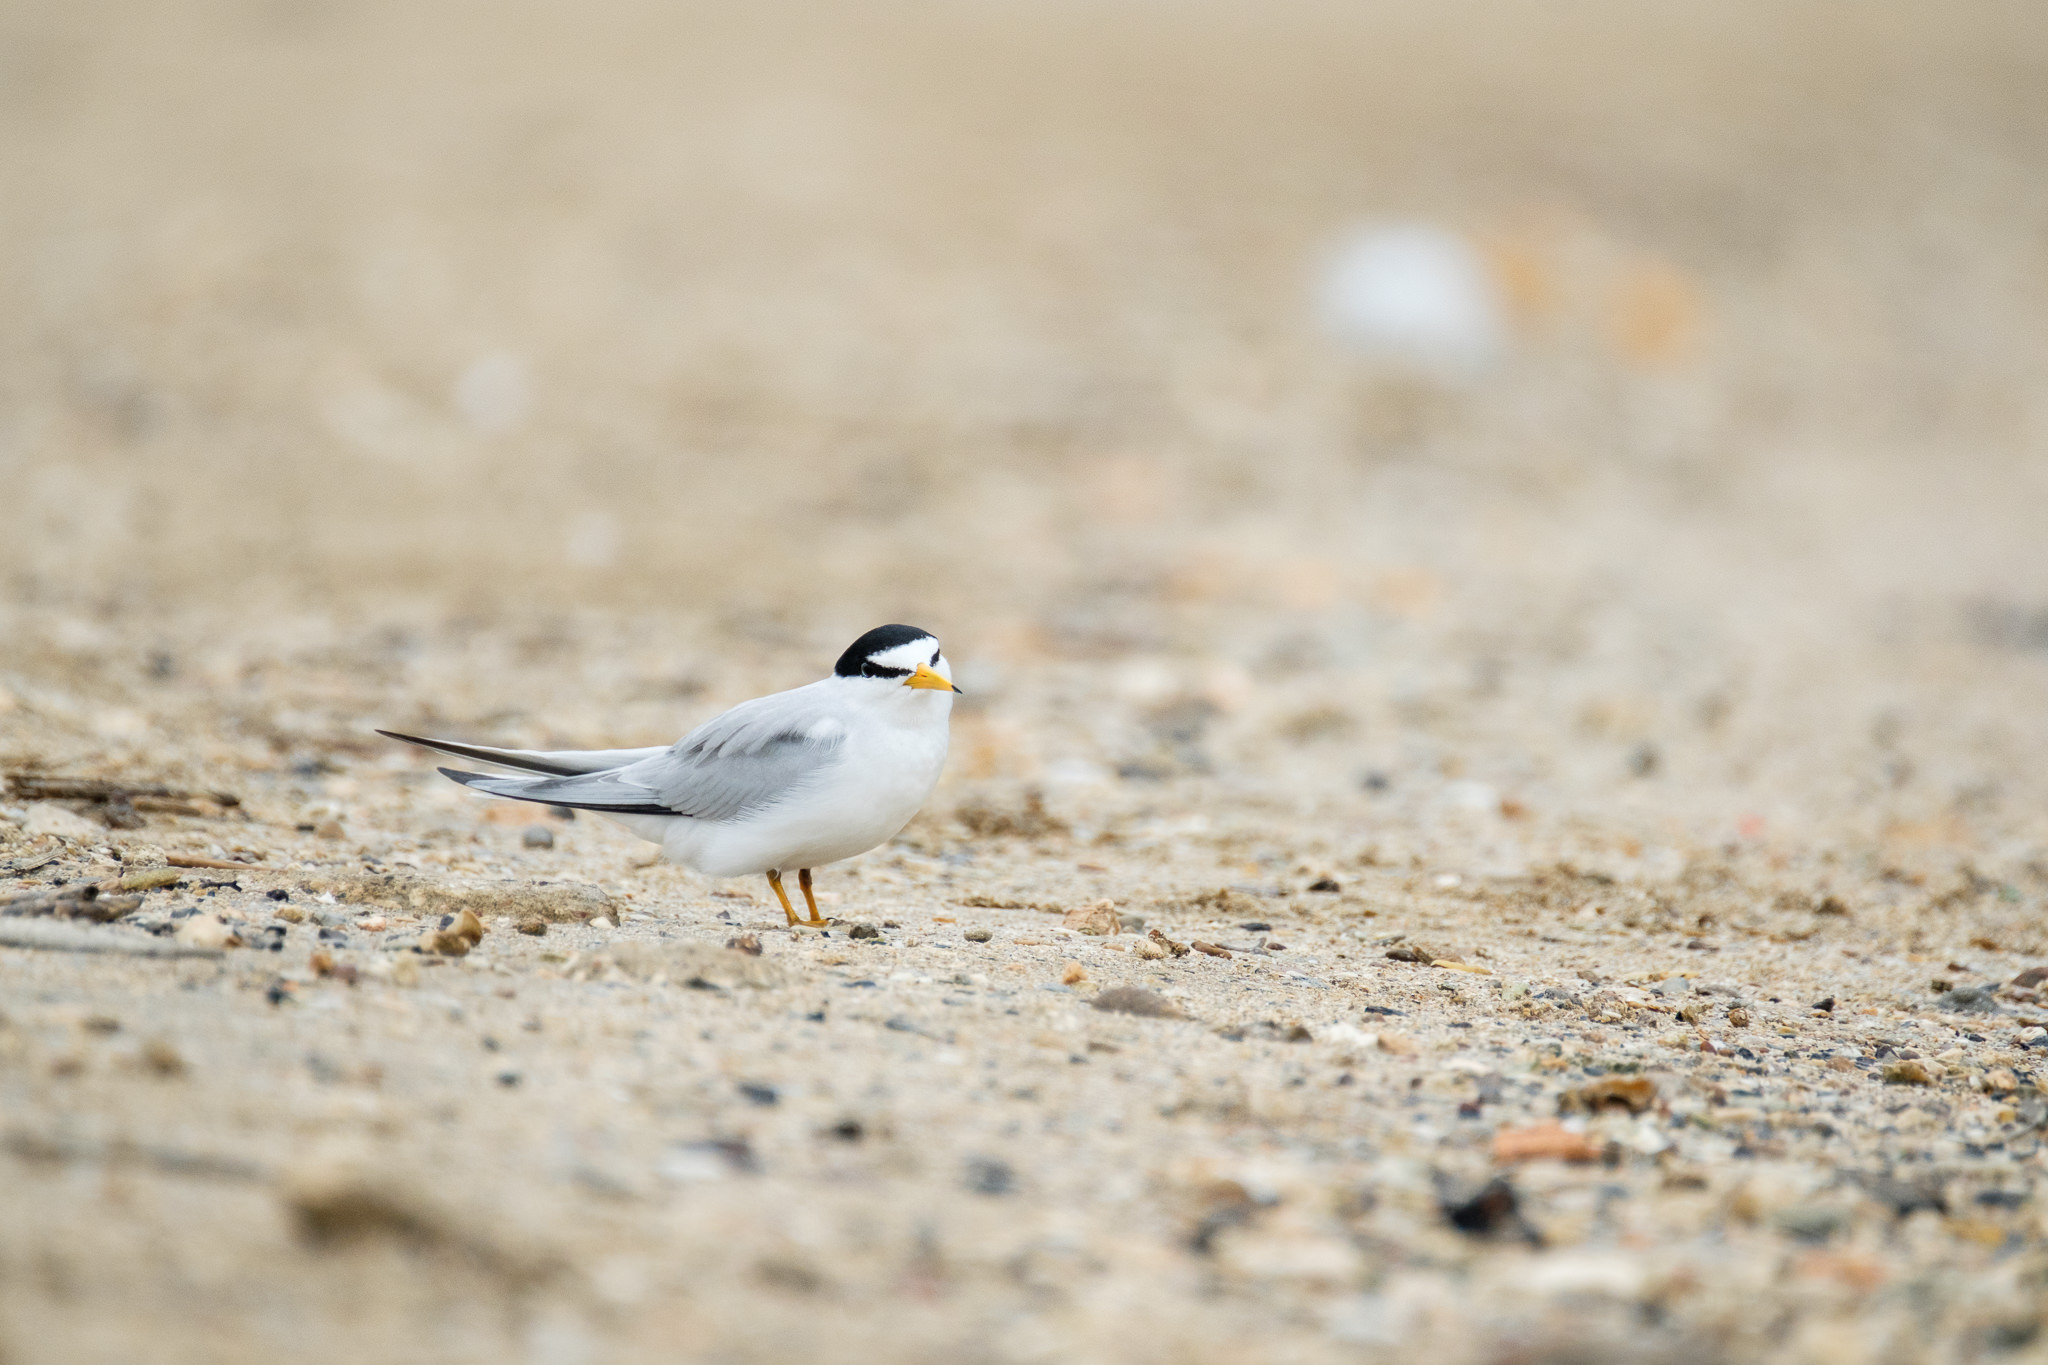
X-T2 + XF100-400mmF4.5-5.6 R LM OIS WR + 1.4x @ 560mm, ISO 1250, 1/1600, f/8.0
Performance
So, how did the X-T2 and XF 100-400mm lens perform when tasked with shooting birds? Well, I must say that once I worked out all the autofocusing kinks, I was pleasantly surprised!
Having used the camera for almost eight months already, I was certain that I would be able to capture good shots of large birds, and “bird on a stick” portraits. What I wanted to know though, was how would the combination do acquiring and maintaining focus while tracking small moving subjects. Especially for birds flying through cluttered backgrounds.
Here are a few traditional bird portraits.
X-T2 + XF100-400mmF4.5-5.6 R LM OIS WR + 1.4x @ 560mm, ISO 200, 1/450, f/8.0
X-T2 + XF100-400mmF4.5-5.6 R LM OIS WR + 1.4x @ 560mm, ISO 800, 1/3200, f/8.0
X-T2 + XF100-400mmF4.5-5.6 R LM OIS WR + 1.4x @ 521.6mm, ISO 250, 1/250, f/7.8
The lens arrived from B&H a couple of days before my trip to photograph warblers during spring migration in Galveston, TX. I try to do this trip every spring. Galveston is the first landfall that birds heading north from their wintering grounds in Mexico and South America find. Exhausted from their 2000-mile flight across the Gulf of Mexico, they land here briefly to find fresh water and food. This trip would be a perfect chance to test the Fujifilm gear.
The first day I went out the light was horrible, and it poured with rain for a good part of the day. And unfortunately, the storm that blew in came from the south. This meant that the small warblers and migratory songbirds used the storm’s tailwind to continue their journey north! The usual migrant traps I like to frequent were utterly void of birds! Regrettably, this weather persisted for all four days of my visit. As it turned out, the 2017 spring migration bird counts were some of the lowest counts ever recorded in the area. Luckily the gulf coast has lots of shorebirds, so I re-focused (pardon the pun) my attention on them.
My first subjects were several black skimmers fishing. The light was quite flat, the birds were far away, and the rain made it hard to focus. To get decent shutter speeds, I had to jack up my ISO to 3200. And although I have been thrilled with the low light capability of the X-T2 for street photography (where I’m often up at 6400 ISO), I was disappointed with these images. Unfortunately, I found the camera hunted for focus in these conditions. I have several series where the photos were either completely out of focus, or focus is slightly in front of the bird (these shots were taken before I adjusted the zone area switching to center). I was also disappointed in how soft and grainy the images were when I got home and looked at them on my computer. Would my D500 and 200-400 f/4 performed better in these conditions? Maybe, but a friend of mine was using a Canon 5D Mark III and 500 mm f/4 lens and was getting similar results.
X-T2 + XF100-400mmF4.5-5.6 R LM OIS WR + 1.4x @ 560mm, ISO 3200, 1/800, f/9.0
X-T2 + XF100-400mmF4.5-5.6 R LM OIS WR + 1.4x @ 468.9mm, ISO 3200, 1/800, f/9.0
X-T2 + XF100-400mmF4.5-5.6 R LM OIS WR + 1.4x @ 560mm, ISO 1600, 1/1250, f/8.0
As the afternoon progressed, I tweaked my AF-C custom preset, which made focus acquisition much more accurate. The light also got better, and the rain let up. We even saw a few moments of sun! With my new preset and brighter light, came much better results. The camera was not only quick to lock focus but was also extremely good at tracking birds in flight with clean, non-competing backgrounds, as shown in these next four images.
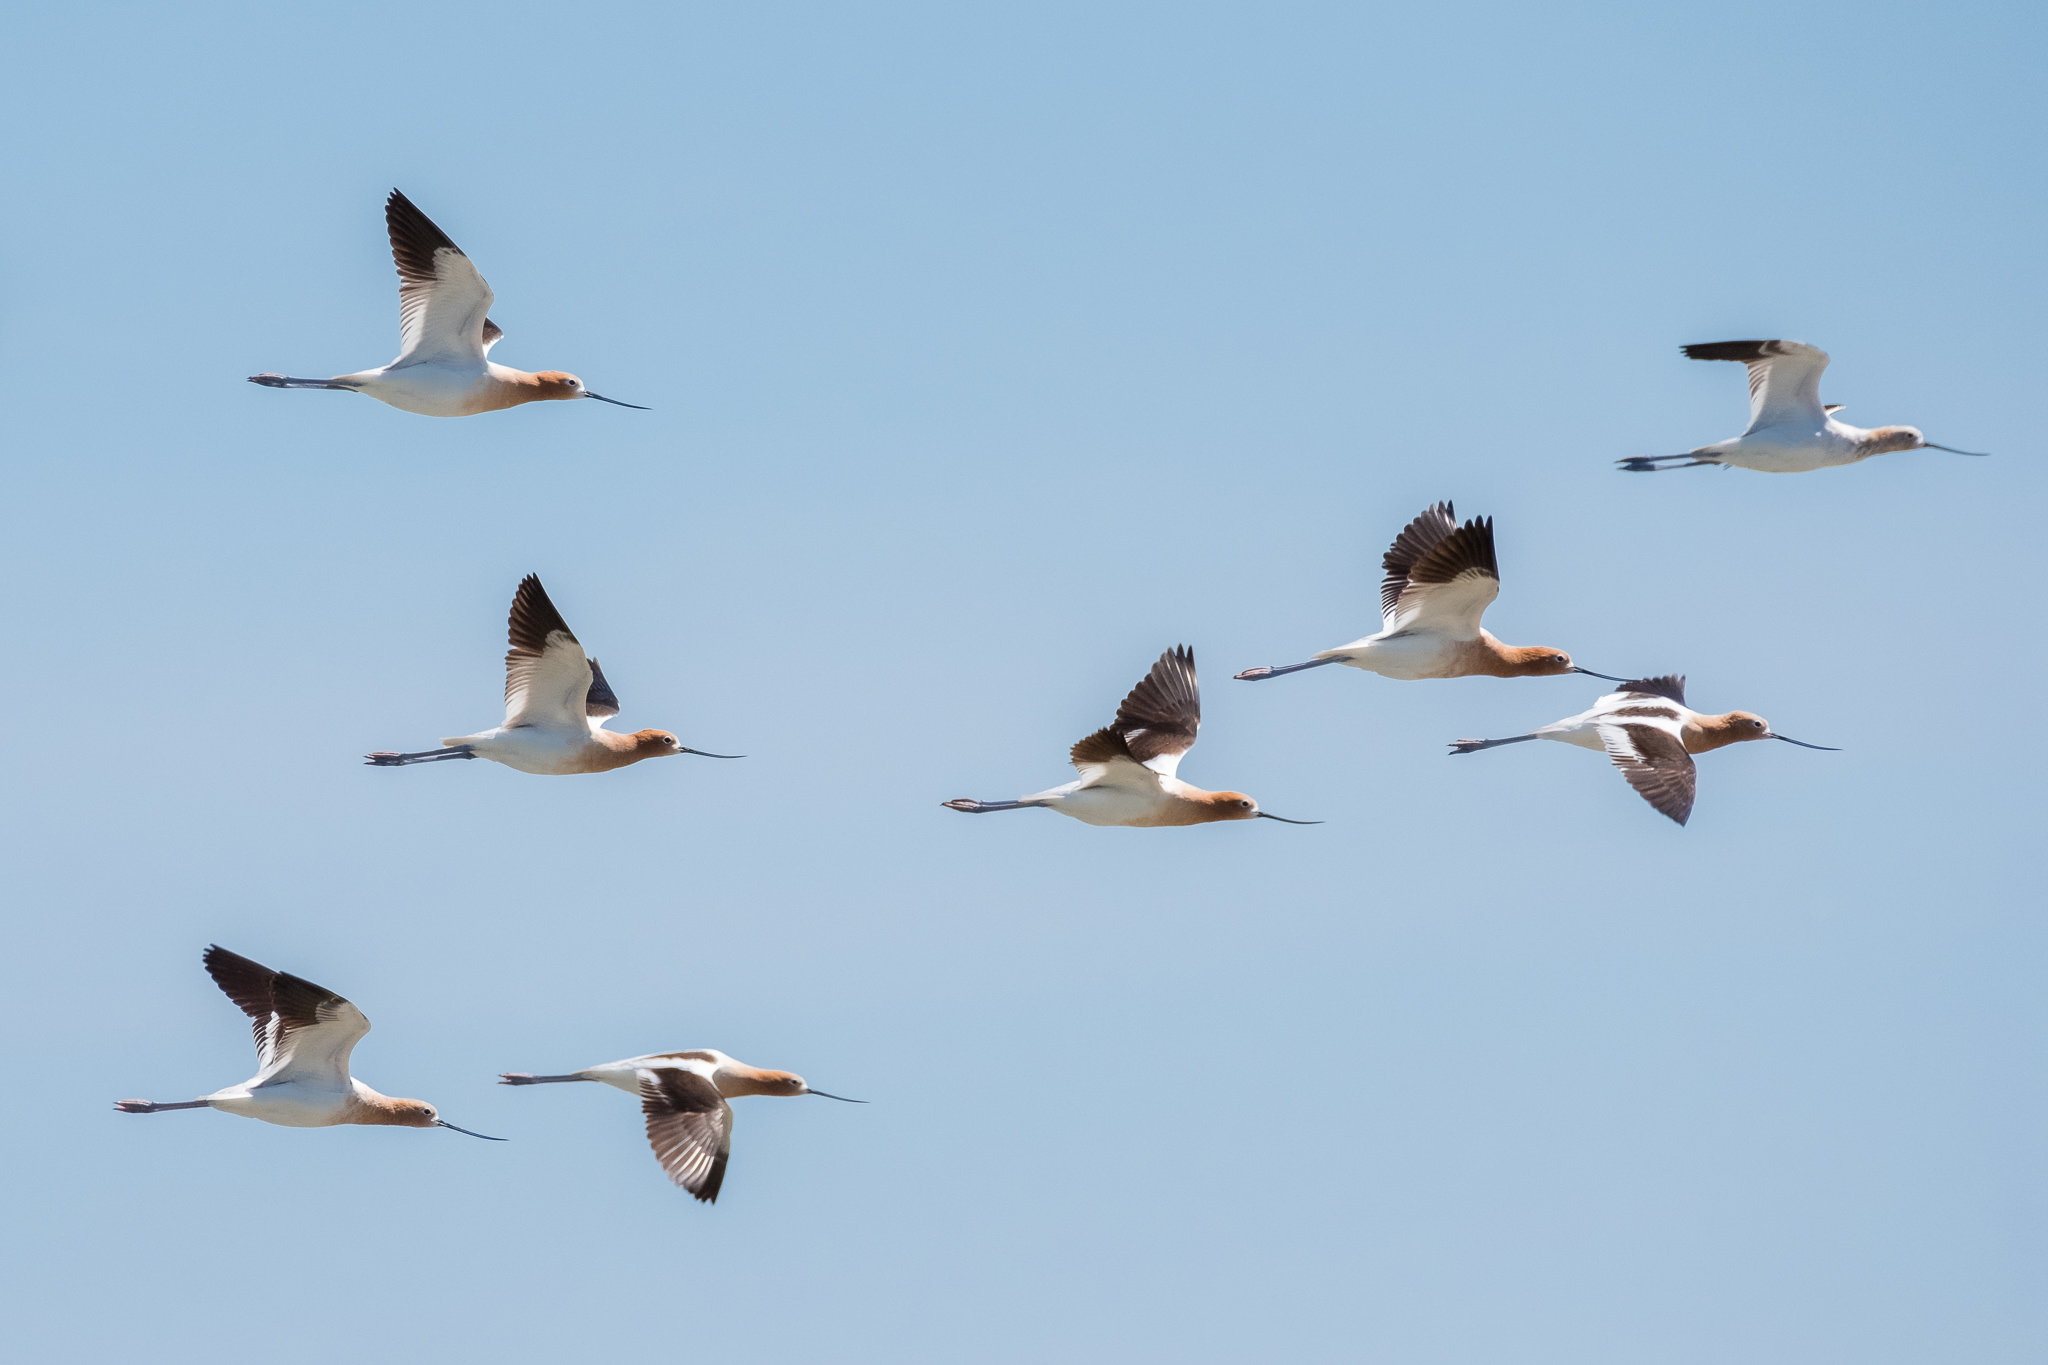
X-T2 + XF100-400mmF4.5-5.6 R LM OIS WR @ 400mm, ISO 800, 1/2000, f/8.0
X-T2 + XF100-400mmF4.5-5.6 R LM OIS WR @ 400mm, ISO 500, 1/2000, f/8.0
X-T2 + XF100-400mmF4.5-5.6 R LM OIS WR @ 400mm, ISO 500, 1/2000, f/8.0

X-T2 + XF100-400mmF4.5-5.6 R LM OIS WR @ 400mm, ISO 1000, 1/1600, f/7.1
The next place we headed was to High Island. High Island has a very large rookery where hundreds of roseate spoonbills, cormorants and several varieties of herons and egrets roost. There are several viewing platforms set up across the slew where the birds nest. The background is extremely cluttered, and birds take off and land from all different angles. These conditions would be a bit more of a challenge for the camera system.
In this shot, the camera had no trouble picking up the Great Egret and maintaining focus even though the background was busy and the bird flew behind some branches before landing.
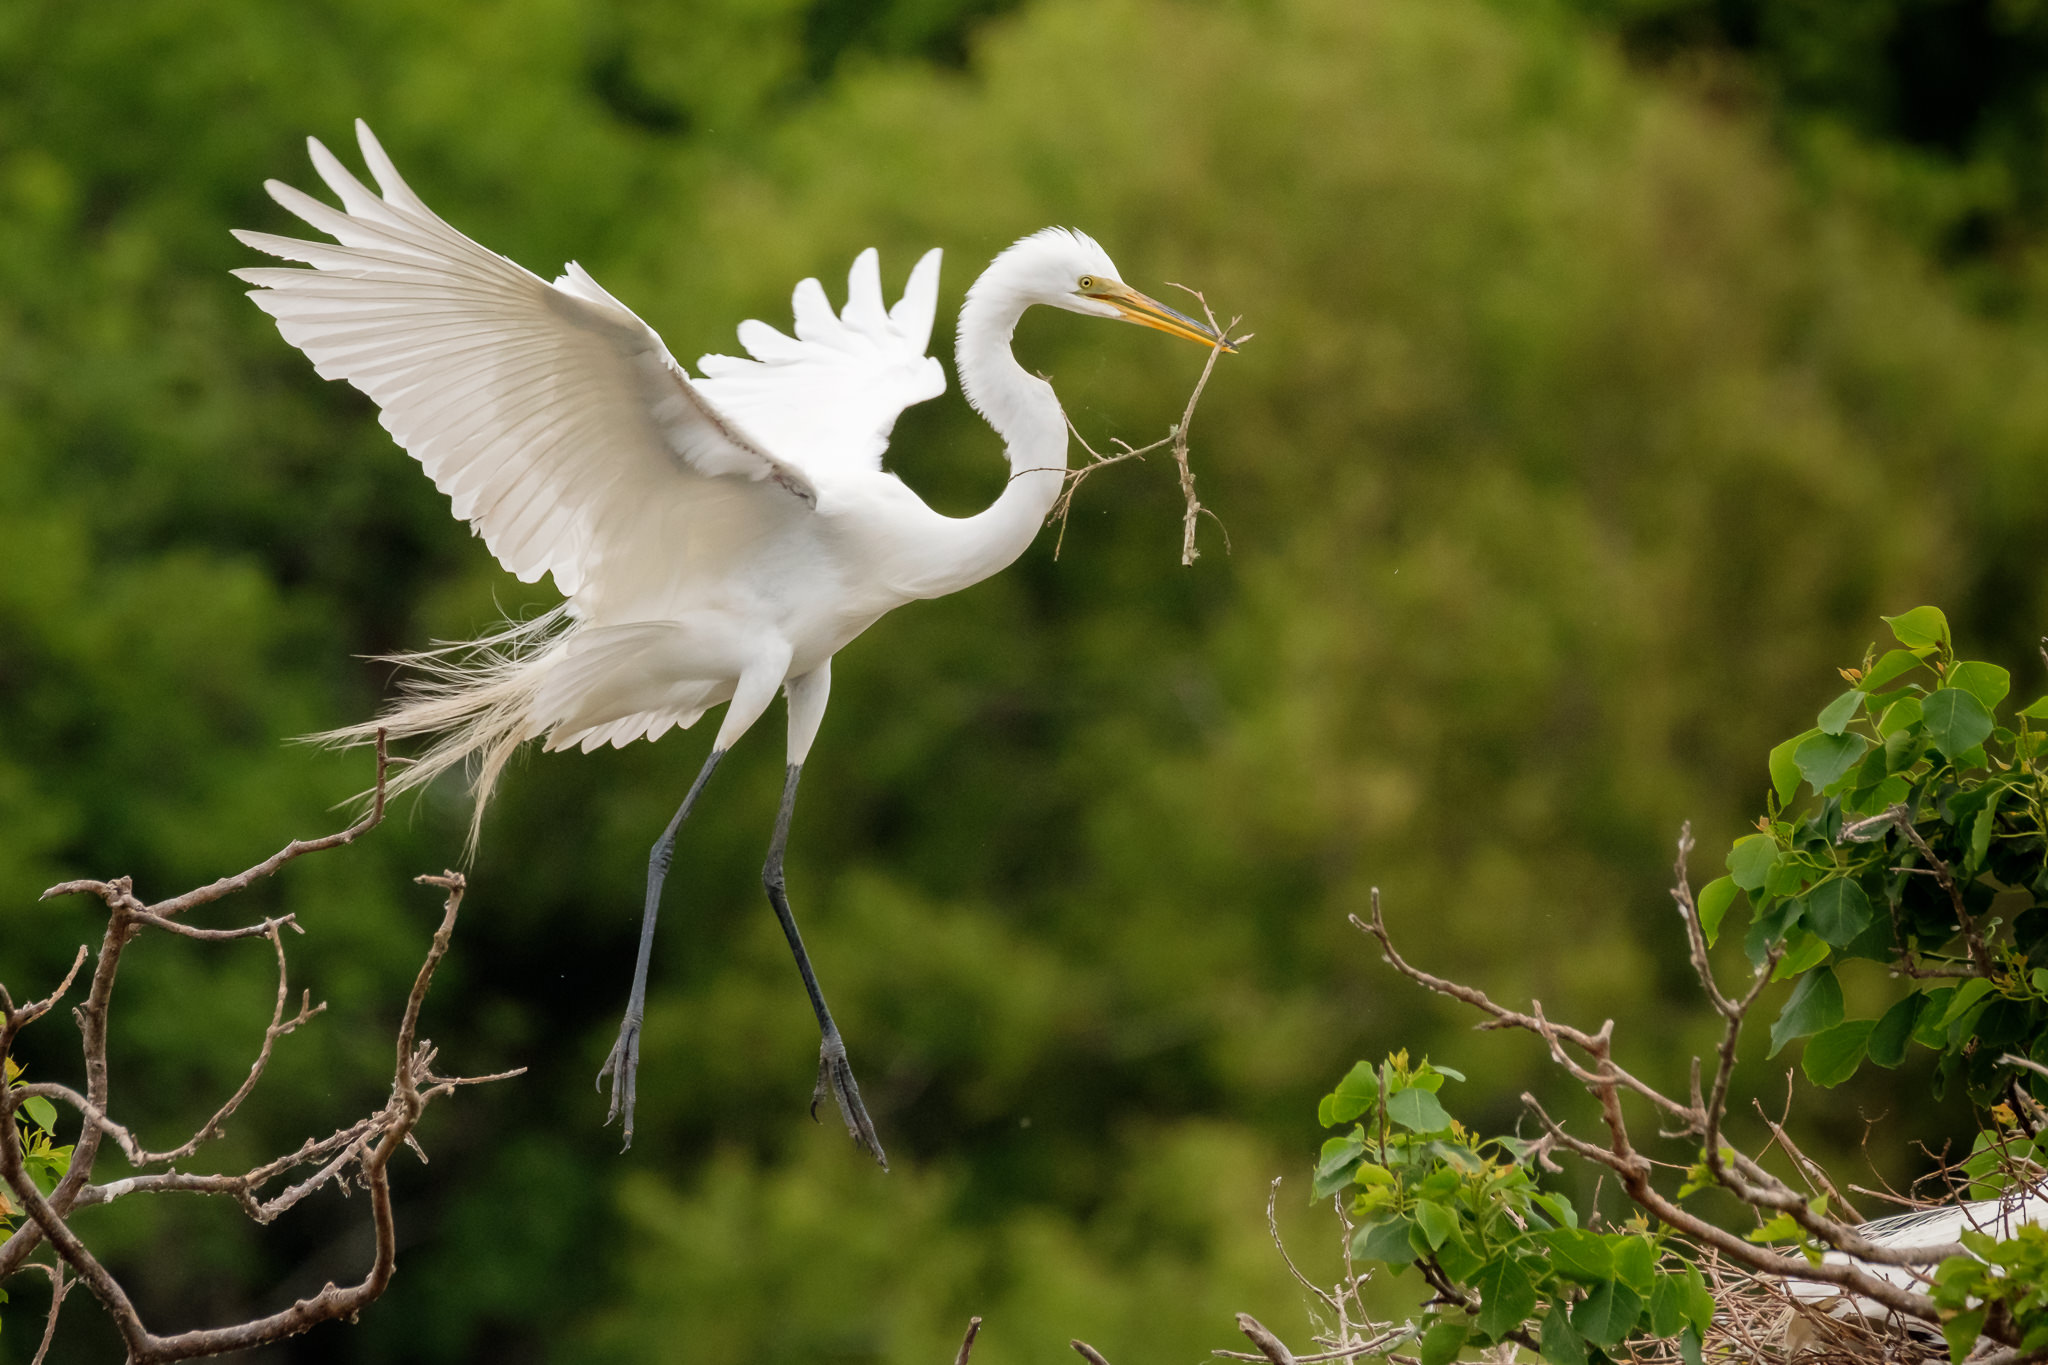
X-T2 + XF100-400mmF4.5-5.6 R LM OIS WR @ 400mm, ISO 2500, 1/2500, f/8.0
This spoonbill rounded the corner of the island fast and then flew past directly opposite me. Because of the orientation of the viewing platform, there was very little time to pick up the bird before it flew past me. Nevertheless, the camera was able to acquire focus quickly and accurately. I was pleased with how sharp the focus was on the eye of the bird.
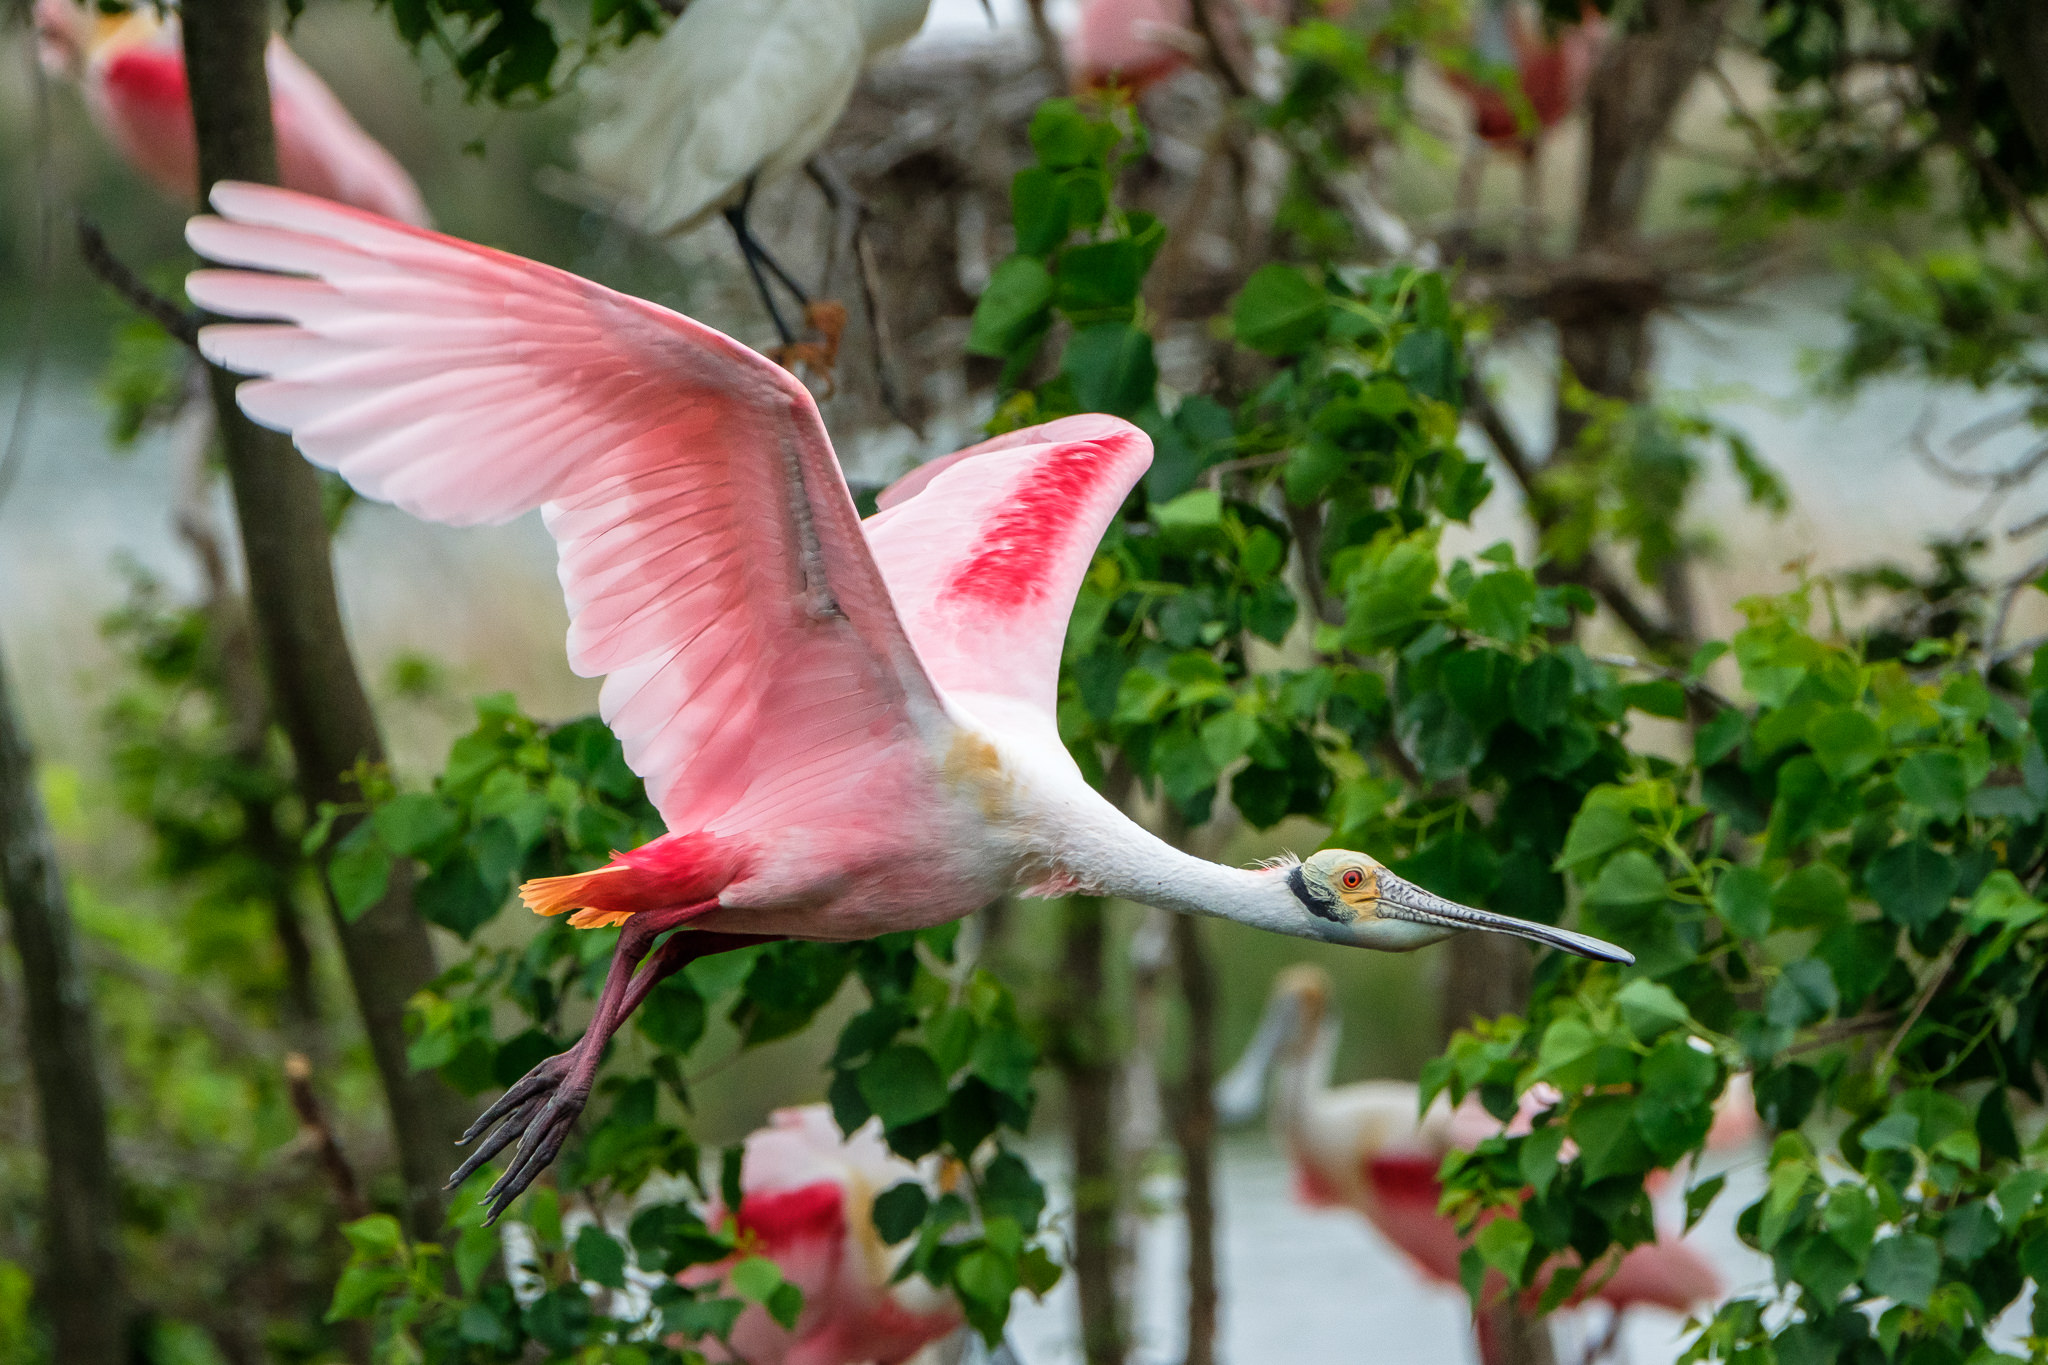
X-T2 + XF100-400mmF4.5-5.6 R LM OIS WR @ 400mm, ISO 2500, 1/2500, f/8.0
Here are a couple of shots of birds that were flying, more or less, directly at the camera. Again, the camera and lens combination was able to pick up the bird and adjust focus as the birds flew towards me.

X-T2 + XF100-400mmF4.5-5.6 R LM OIS WR @ 400mm, ISO 2500, 1/2000, f/13.0
X-T2 + XF100-400mmF4.5-5.6 R LM OIS WR @ 400mm, ISO 3200, 1/1250, f/5.6
Handling
Although the lens mounted on the camera alone felt a bit front-heavy, I did not notice this with the battery grip attached. I had no problems hand-holding the lens/camera/grip combination either, which was a welcome reprieve for my back and shoulders! I may have missed some shots because the focusing was, at times, slightly slower than my Nikon kit. However, being able to react much quicker without a tripod made up for those missed shots.
I was heading back to my car when I heard this white-tailed kite call. I turned and saw him approaching from behind me. I had maybe three seconds to get my camera up to my eye and capture several frames before he passed by me. I would not have been able to set up my D500 and 7.4 pounds 200-400 f/4 on a tripod, compose and focus in time to get off a shot. I found that the lighter gear gave me much more freedom than my Nikon equipment.

X-T2 + XF100-400mmF4.5-5.6 R LM OIS WR + 1.4x @ 560mm, ISO 2000, 1/2000, f/9.0
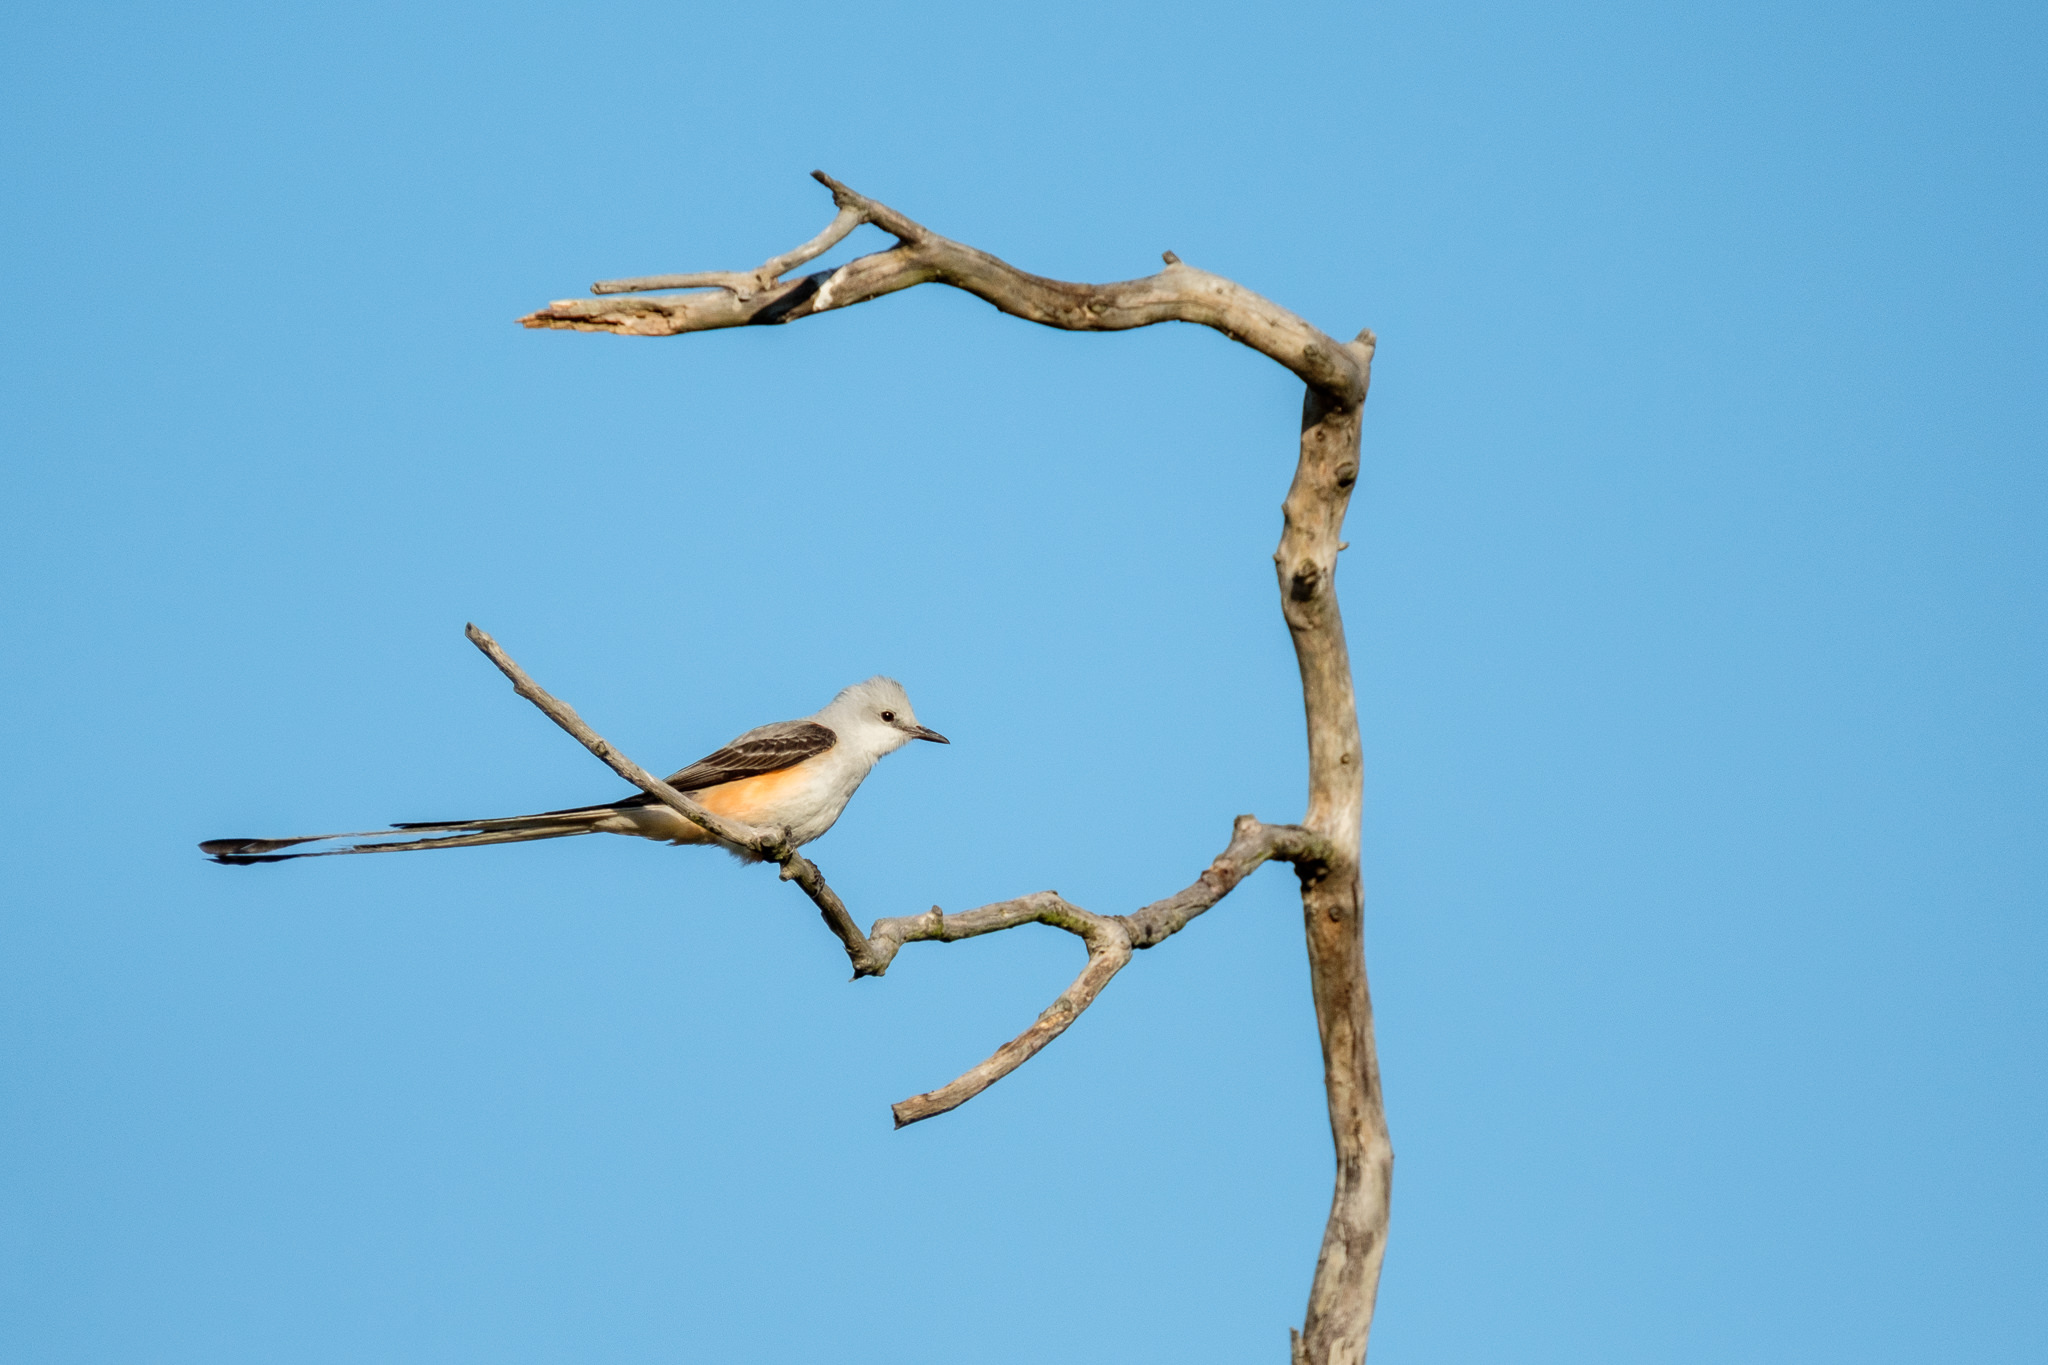
Another advantage of not having to lug a tripod around is the ability to get low to the ground quickly. I had been photographing a scissor-tailed flycatcher when I heard two meadowlarks singing. The birds landed in the grass on the shoulder of the road and began looking for food. I quickly dropped to my stomach to get eye-level with the birds and caught one with a small caterpillar. Getting low to the ground in time to capture this image would not have been easy to do with a camera/lens combination mounted on a tripod.
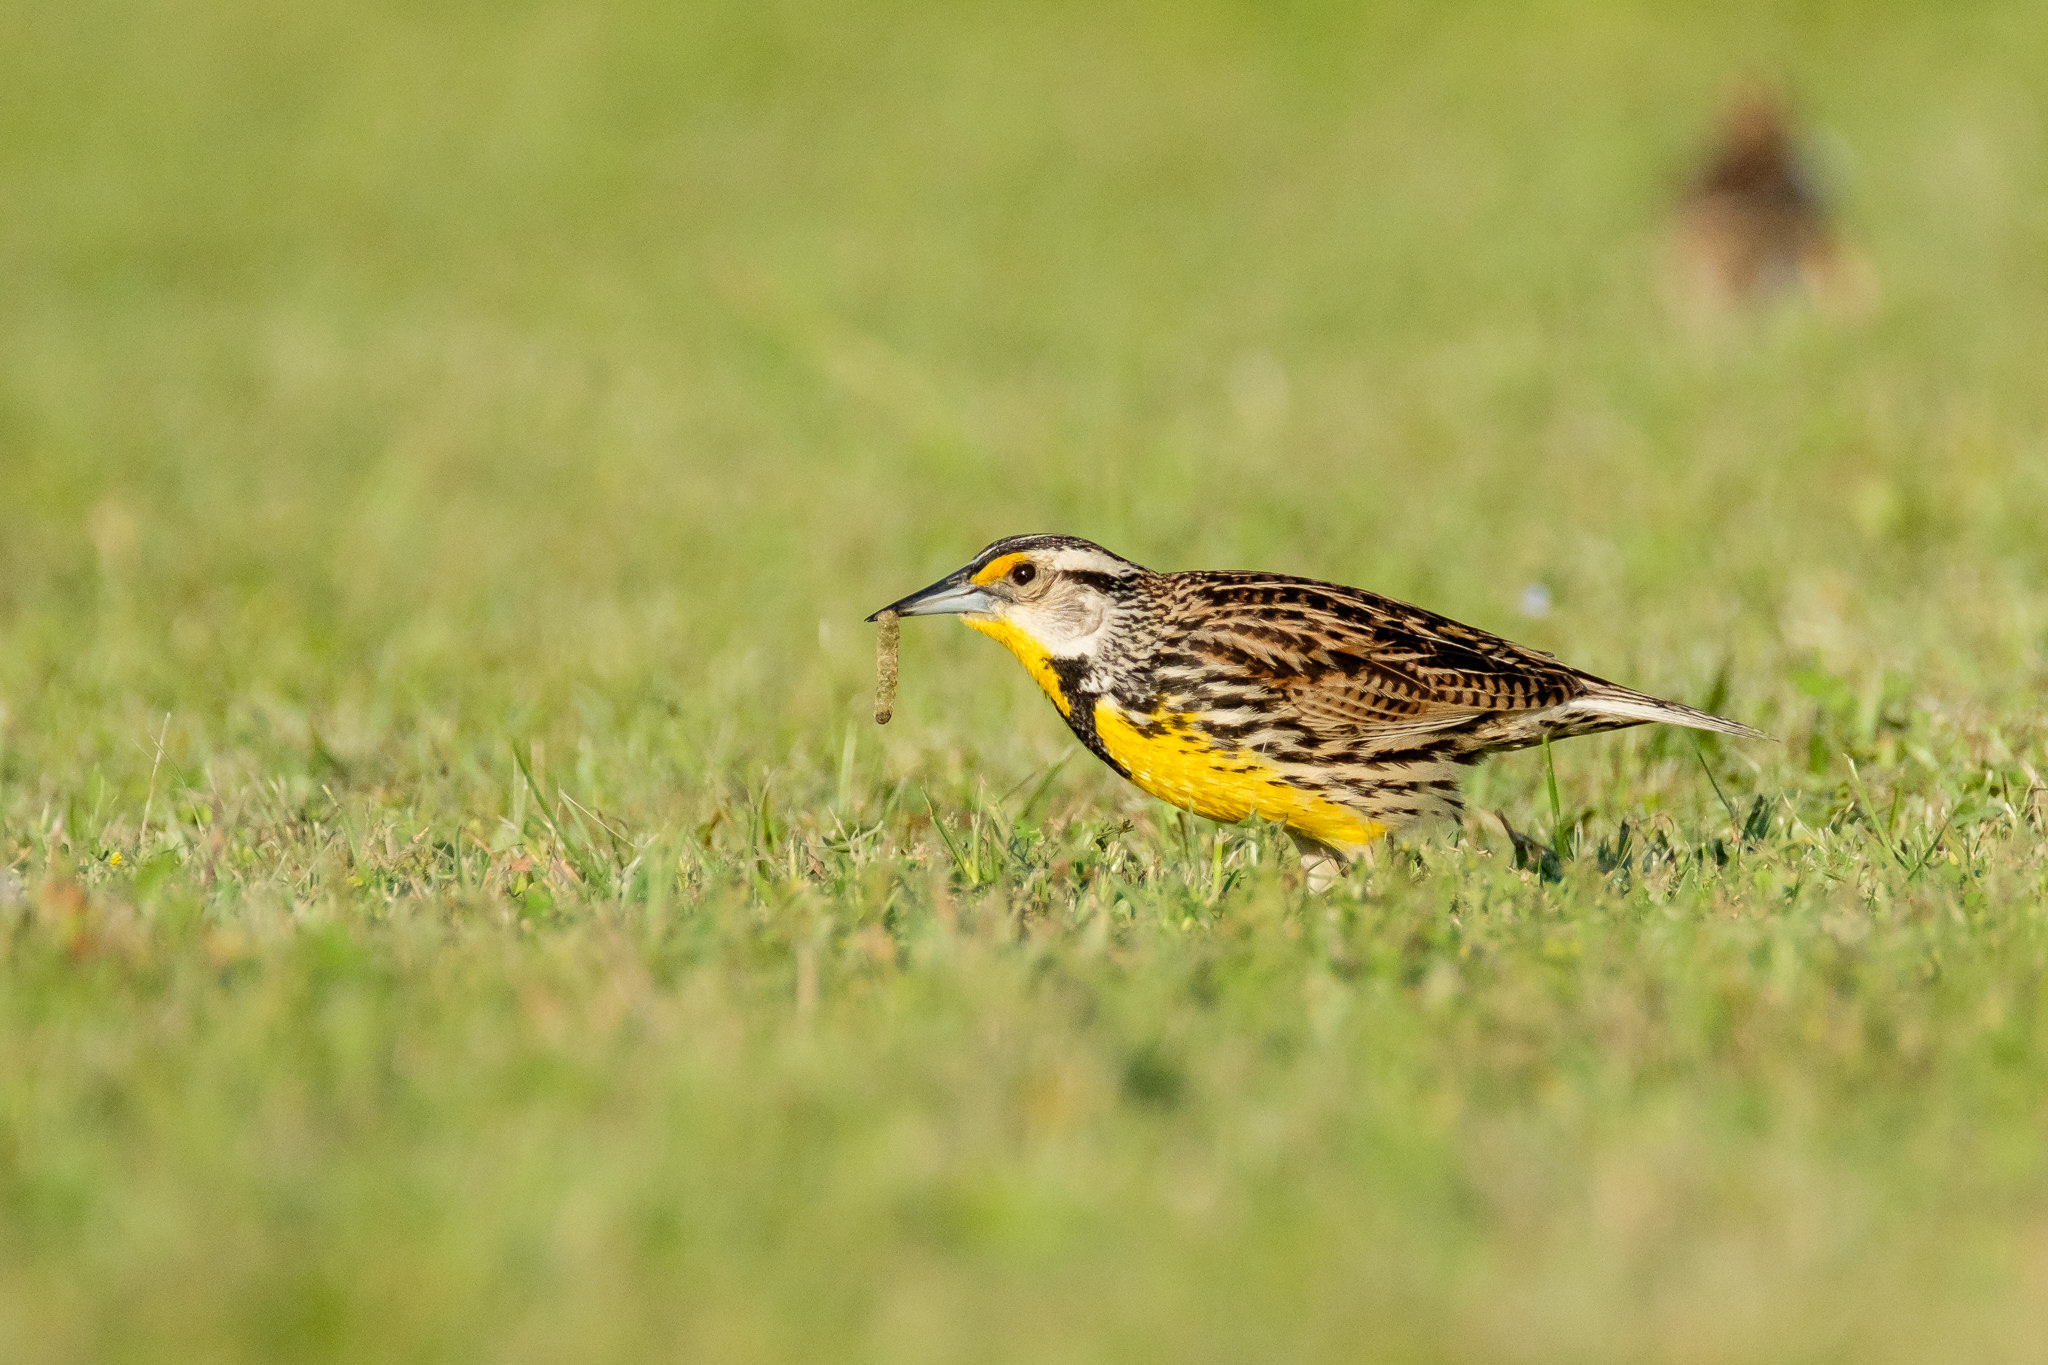
X-T2 + XF100-400mmF4.5-5.6 R LM OIS WR + 1.4x @ 560mm, ISO 2000, 1/3200, f/9.0
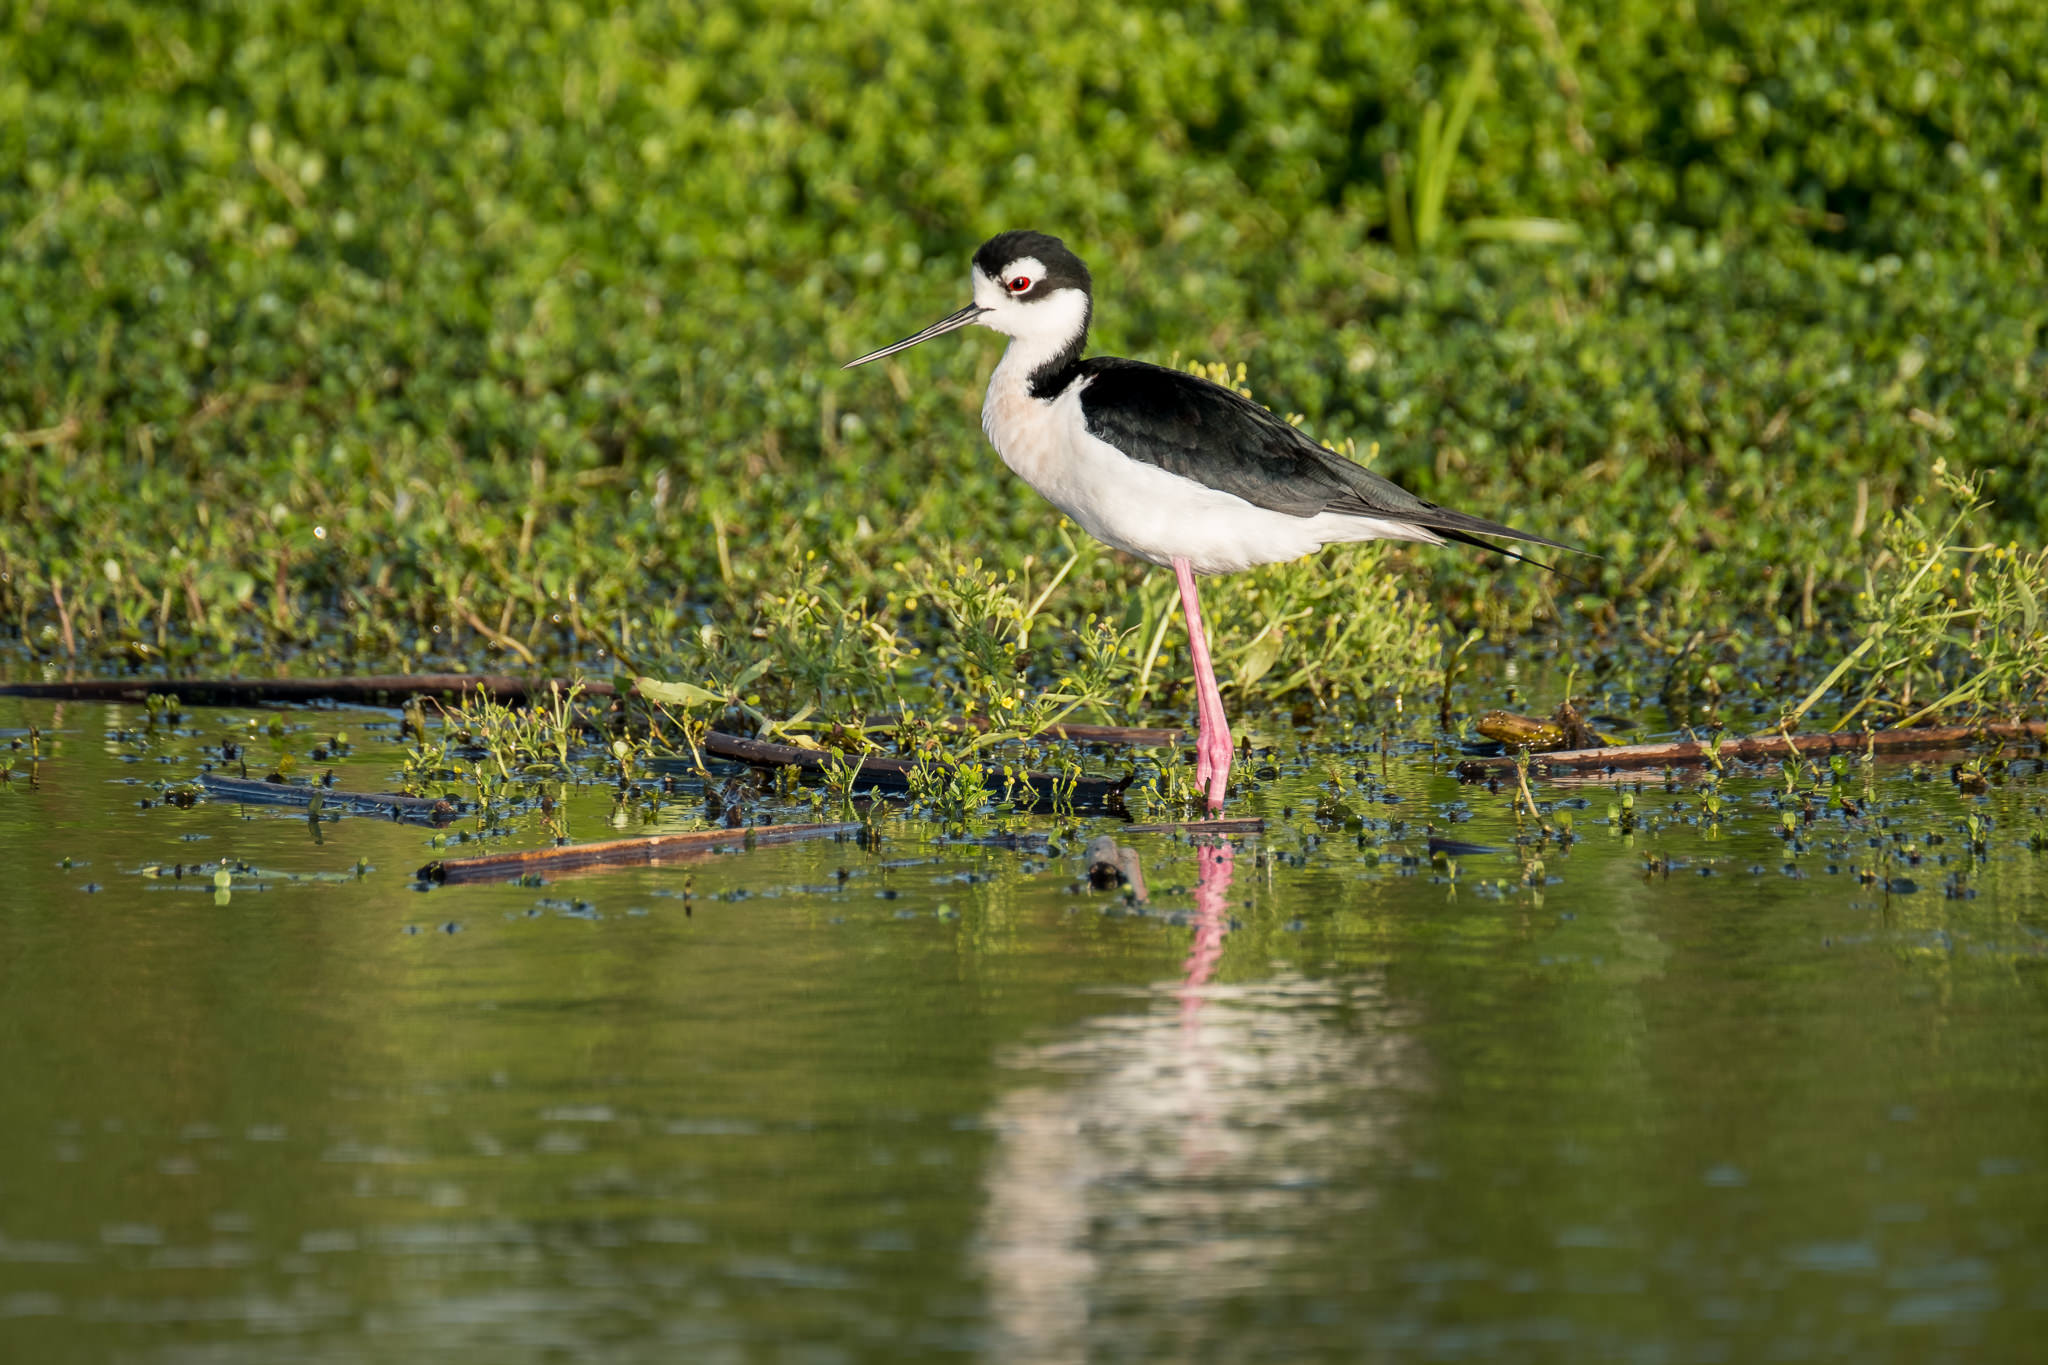
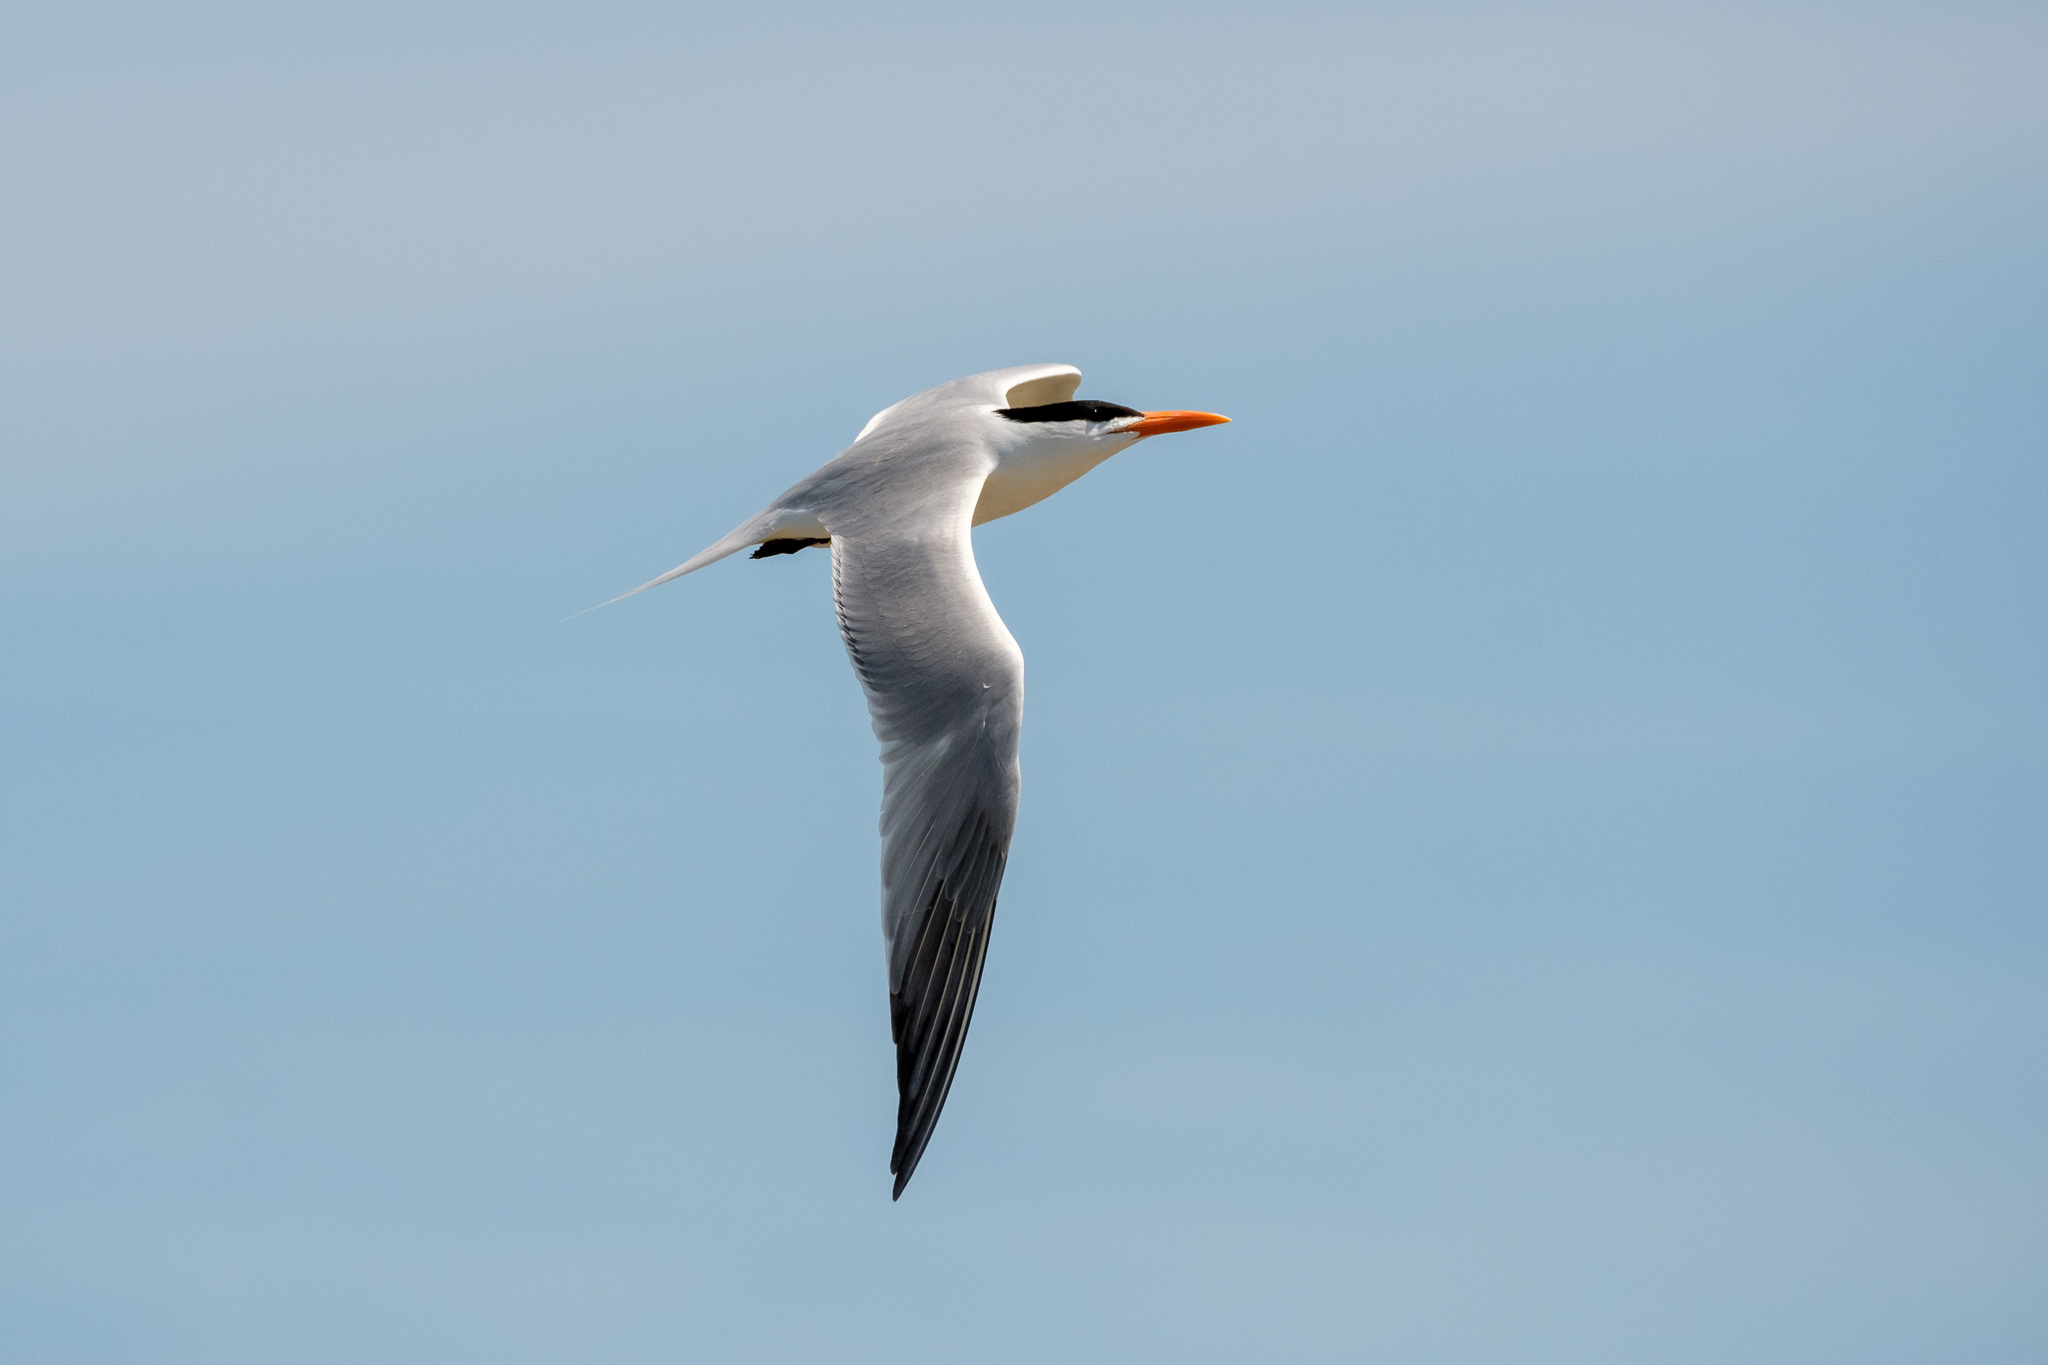
Image Quality
I was more than satisfied with the image quality of the photos created with the XF 100-400mm F4.5-5.6 and X-T2. The images are sharp and the out-of-focus areas are soft and pleasing. For me, the true test of how good an image is is how it looks once it is printed. I am not as concerned with how the image looks magnified to 100% on my screen because that is not how I view the final product.
I have had several of these images printed 8″x12″, and the quality is excellent. And before I get comments from the pixel peepers out there, I would challenge anyone to distinguish between a print made using the X-T2 and XF 100-400mm lens, and one taken with a Nikon 200-500mm or 80-400mm lenses or an image made with a Canon 100-400mm lens. I consider these lenses to be the closest comparisons to the Fujifilm zoom. I would even go as far as to say that you would be hard pressed to differentiate between prints made with the Fuji gear and Canon and Nikon’s professional 400mm prime lenses, especially in good light. Unless you are making huge prints, heavily cropping your image, or zooming to crazing magnifications on a screen, you will be hard-pressed to tell the difference.

X-T2 + XF100-400mmF4.5-5.6 R LM OIS WR @ 400mm, ISO 1250, 1/1000, f/8.0
X-T2 + XF100-400mmF4.5-5.6 R LM OIS WR @ 400mm, ISO 500, 1/1250, f/5.6

X-T2 + XF100-400mmF4.5-5.6 R LM OIS WR + 1.4x @ 378.8mm, ISO 200, 1/600, f/9.0

X-T2 + XF100-400mmF4.5-5.6 R LM OIS WR @ 400mm, ISO 2500, 1/2000, f/9.0
X-T2 + XF100-400mmF4.5-5.6 R LM OIS WR + 1.4x @ 560mm, ISO 500, 1/1000, f/8.0

X-T2 + XF100-400mmF4.5-5.6 R LM OIS WR + 1.4x @ 560mm, ISO 800, 1/1600, f/8.0

X-T2 + XF100-400mmF4.5-5.6 R LM OIS WR + 1.4x @ 560mm, ISO 400, 1/950, f/8.0
X-T2 + XF100-400mmF4.5-5.6 R LM OIS WR + 1.4x @ 560mm, ISO 800, 1/1600, f/8.0
A Bonus!
A benefit to using a mirrorless camera for bird photography, which I had not considered when I was taking pictures for this article, became apparent to me a month ago. We had gone on a trip up the Harrison River, not far from Vancouver, BC, to photograph the large concentrations of bald eagles that converge in the area when the salmon run. I was using my Nikon for the first time in almost a year because I had returned the Fujifilm lens and did not have a long enough piece of glass in my existing Fuji kit. Because I am so used to my mirrorless system, where I can see what the exposure looks like through the viewfinder, I did not realize how backlit the birds were. And although I know that a small bird against a bright sky needs several stops of exposure compensation, it didn’t dawn on me until I looked at the back of my D500 screen! As a result, I ended up with many underexposed images.
With mirrorless cameras, when you look through the viewfinder, what you see is what you get! This WYSIWYG feature makes capturing correct exposures easy. Any adjustments made using exposure compensation can be seen in real time. Also, you can display a live histogram of the exposed scene in your viewfinder, allowing you to fix clipped highlights and shadows before pressing the shutter button. None of this is possible looking through the viewfinder of a DSLR. You must guess at the compensation you need, add it, and can only see the results after the shot is taken. The WYSIWYG advantage is particularly beneficial when photographing BIF and in other backlit conditions.
When I took this image of two great egrets nesting, I was using manual exposure mode. I adjusted my exposure until I could see details in the nest while keeping an eye on my histogram to make sure I didn’t clip the highlights in the birds’ wings.

X-T2 + XF100-400mmF4.5-5.6 R LM OIS WR @ 400mm, ISO 2500, 1/3200, f/7.1
Summary
The XF 100-400mm F4.5-5.6 R LM OIS WR lens paired with the X-T2 is a great combination for bird photography. Once I optimized the AF-C settings, the camera obtained focus quickly and accurately. The kit was also excellent for tracking BIF. Even when the birds were flying in front of complicated backgrounds or were temporarily obstructed by foreground elements, the gear maintained precise focus.
My only disappointment was that the gear struggled a bit in low light. The focus was much slower and less accurate in these conditions, and the images lacked sharpness and were quite grainy. However, to be fair, I believe that any equipment would struggle with this type of lighting condition.
Lastly, several months after I captured the images for this article, Fujifilm updated the firmware on the X-T2 (as well as the X-Pro 2). The update enhances AF-C to track subjects moving twice as fast as the previous firmware. The update also improves tracking, so it can capture moving subjects which are up to 50% smaller than before. Although I have not had the opportunity to test the XF 100-400mm F4.5-5.6 lens on the X-T2 since the update, I have seen improvements in AF-C with my other lenses.
Conclusion
If you are a bird photographer and have held off switching to a mirrorless system because of perceived autofocus issues and image quality, I think you will be delighted with the results you get with the Fujifilm XF 100-400mm F4.5-5.6 R LM OIS WR lens and X-T2 camera.
So to answer the question, “Is the Fujifilm X-T2 and XF 100-400mm Lens Ready for Bird Photography?” I feel the answer is definitely yes! The size and weight of the Fujifilm gear make bird photography easier and far more enjoyable than my heavy DSLR kit. And having fun with my craft is so important. I don’t want photography to ever seem like a chore. I am so impressed with how the lens performed that I now have my Nikon 200-400 mm f/4 up for sale and am looking forward to picking up my own copy of Fuji’s 100-400mm lens.
The Fujifilm XF 100-400mm F4.5-5.6 R LM OIS WR lens is available from B&H for $1899.
Great article, thank you. I shot bif with the same setup a few years ago and loved it. After going back to Nikon I have now moved back to Fuji for the lighter setup. I forgot how lush the Fuji is.
As for the 100-400mm being not so good in low light/poor light is probably the fact that it’s an f5.6 lens and so can’t get enough light to the AF. Any f2.8/4 lens will always be better in these conditions.
So long as we know the limitations of the gear we use, we should never really have a problem getting out there and doing what we love.
I recently also sold all my Nikon Gear as I wanted to go lighter, my eyesight does not allow me to pixel peep anymore and a major factor was the benefits of the full sensor AF coverage as I like to compose in camera and not crop to final composition. I also got tired and irritated with sitting in hides or in a safary SUV having to listen to ongoing machine gun shutters spoiling the experience for the non photographers. The Fuji system is different, it engage elements of photography long forgotten. I now own 2 XT4 bodies and 10-24 f4, 16-80f4, 50-140 f2.8 and the 100-400 f4.5-5.6. I have been shooting nature and wildlife for 35 yrs, I have now started to carry the XT4 with 16-80f4 every day shooting everything and anything. It is fun and now discovered, how shooting other things improved my nature and wildlife eye. I don’t leave home without a fuji any more. It is fun and I just love the system.
Brilliant article on bird photography
I have 2 x Fuji XT2 and would like your general camera set up for this if at all possible
I have a XH1 with a new 100-400 fuji lens. Am a “old” photographer that has never used continuous auto focus. Trying to learn all the ins and out of Bird photography. Please explain the settings you use on your camera to obtain “continuous focus”. Thanks BTW – great article.
Great article, thanks for all the set-up and shooting details, very helpful.
Hi Elizabeth,
I’ve been trying to take pictures of my dog in motion, but I’ve been unsuccessful, even after trying the settings you mentioned in this article. I have an X-T30 and the XF 55-200mm. Is it my camera that’s the problem? Is it my lens? Or both? I know I need more practice, but I can’t seem to get any well-focused pictures of my doggie. I’d like to hear your thoughts.
And thank you for writing such a detailed, well-written guide.
Richard
to stop motion you want a minimum of 1/250th of a second, but closer to 1/1000 is best. In good light, this should not be a problem. Use C for continuous AF, pan and track your dog, and fire. You should be able to get a sharp image of your pup, with the background motion blurred for some nice dramatic effect. Practice! It ain’t film, you can take thousands of shots.
Hello Elizabeth,
I just found your great article on the X-T2 and 100-400mm lens. I currently own the XT-1. I’ll be going to the Galapagos and don’t want to take my heavy Nikon gear (D500 and 200-500mm lens). I have the Fuji 55-200 but I want a longer reach, I know the 100-400mm lens has been very good for bird photography.
Have you tried out the X-T3 with the 100-400mm lens? I plan to upgrade my X-T1, so I’m wondering how the X-T3 and 100-400 lens combo is for birdingj/wildlifr.
Thank you,
Monica
Dear Elizabeth,
any chance you had a go with x-t3 with 3.0 firmware update and 100-400 lens ?
I really appreciate your detailed review of x-t2. Wish there were more such superb guidlines online.
Regards,
Michal
Dear Elizabeth,
any chance you had a go with x-t3 with 3.0 firmware update and 100-400 lens ?
Regards,
Michal
Nice article, thank you.
I have the same setup and love it. I came from a D500 and 200-500 and I think this is much better although others will disagree of course.
The new V4.10 firmware makes the X-T2 even better with its new features and even quicker autofocus.
Fuji all the way.
Glad you liked the article, Jon. It is hard to convince the DSLR camp that this combination is very comparable to their kit. I am very anxious to test the upcoming 200 mm f/2 combined with a 2x teleconvertor when it is announced this fall. With two stops of light lost to the tele, it will still be faster than the 100-400. It will be interesting to see how this new combination fairs. Thanks for your comments. Cheers.