It’s a snowy day here in Colorado, which puts a damper on my plans to visit our studio and test more lenses in the lab. (I do, however, have the Nikon Z 100-400mm f/4.5-5.6 and both teleconverters in hand for testing once the roads clear.) Instead, I’ve spent the day developing film.
This isn’t a side of my photography that I usually write about on Photography Life. I know that most of you shoot digital and don’t want to hear me ramble about darkroom chemicals and scanning techniques. But I can’t hold myself back forever, and this next pair of articles – “From Idea to Print” – will be a small exception.
In these two articles, I want to walk you through my process of shooting an anachronistic 12×20 ultra-large-format camera in the field, developing each sheet of film by hand, and finally printing the results using contact printing in the darkroom. The process is very different from most film photography, even large format 4×5 and 8×10 film, and I hope that some of the lessons will apply to digital photographers, too.
Table of Contents
The Cost of a Photo
Something that I’ve been thinking about a lot recently is the cost of a photo. Even though this article involves film photography, I don’t mean the monetary cost. Compared to most art forms, you don’t need much money to take a photo – or thousands of photos – and I’m glad it’s that way.
Instead, I’m referring to the cost of time. If you consider painters, sculptors, composers, authors, and other artists, they will often spend months or years working on a single piece. By comparison, most photos are born in a few minutes (in the field) and hours (in post-processing) at most.
Granted, not everyone wants to take photos as a form of art. But if you do, I think it’s important to recognize this foreshortening of the creative process and how it can harm your photography. Even the most skilled artist would find it difficult to craft an effective message in a few minutes of work.
That’s why I’ve always been a proponent of slowing down as a photographer, especially in the field. I try to slow down no matter what camera equipment I’m using, but I’ve found the most success with large format film – maybe because there’s simply no way to shoot it quickly. My two preferred formats are 8×10 (for relative portability) and 12×20 (for maximalism and injuring myself).

What the 12×20 Camera Entails
No one gets into ultra-large format photography if they are entirely sane. Even without a lens, my 12×20 camera and one film holder already weigh more than seven Nikon Z9 cameras put together. The camera is about two feet / 0.6 meters long. I can only take two photos before I need to return to my car and replace the film holder. In short, it’s a monster.
At the same time, it works well for slow-paced landscape photography. I’ve found a huge, relatively comfortable 95 liter hiking backpack that manages to hold all of my 12×20 equipment when I stuff it to the brim. I can even hike with it without a problem, so long as you don’t count exhaustion and bruised feet as problems.
And boy do I love the prints I get out of this camera. If everything goes perfectly – which is… not always – the detail, dynamic range, and tones of the darkroom prints are indescribable. This format allows me to contact print images that are exactly 12 by 20 inches in size, skipping the need for an enlarger and allowing me to use various alternative printing processes at home.
Here’s the setup in the field. In terms of scale, it makes the massive Arca Swiss C1 Cube tripod head look like a miniature ballhead!
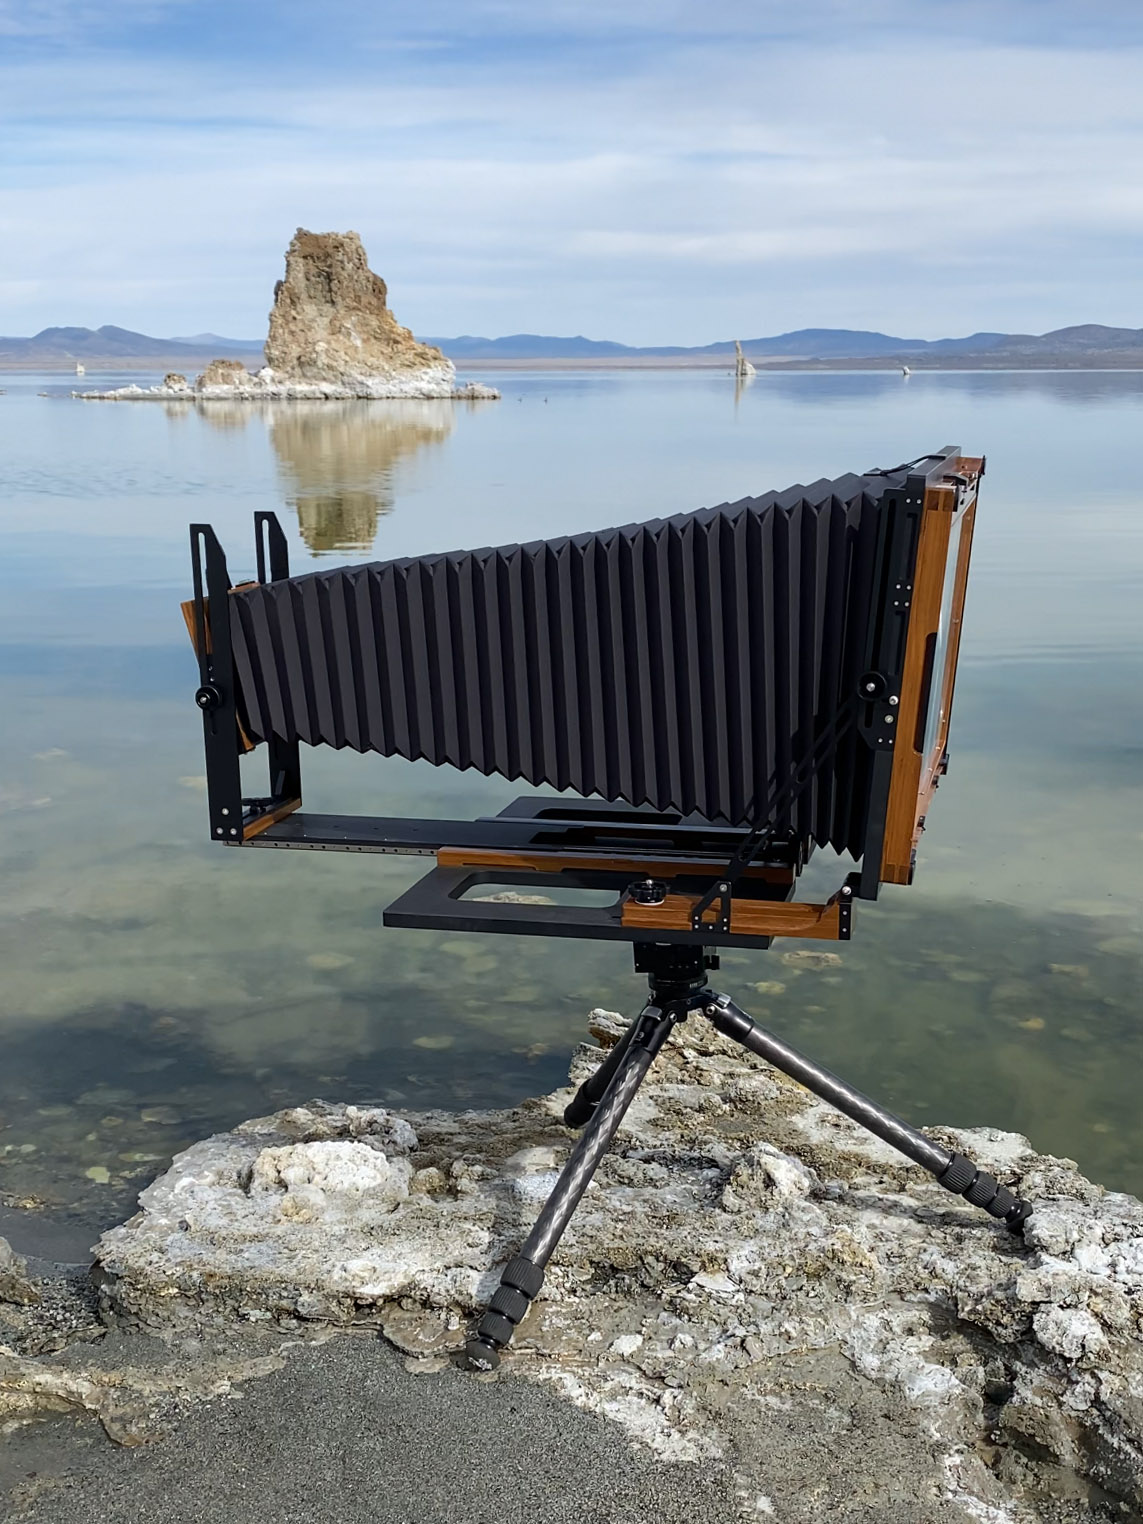
By the way, if you have any interest in large format film photography, don’t be scared off by this. 12×20 cameras are extreme by any definition. Smaller formats like 4×5 are much lighter and easier to use in the field, and they’re capable of stunning darkroom prints with the use of an enlarger. Almost anyone can shoot large format film, and it doesn’t need to break your back.
Composition in the Field
During my trip to Yosemite and Mono Lake last year, I took a total of 19 photos on my 12×20 camera. That averages to about one photo per day. I remember spending long hours standing next to my camera while the light was changing, having great conversations with people who passed by while I waited for the right moment.
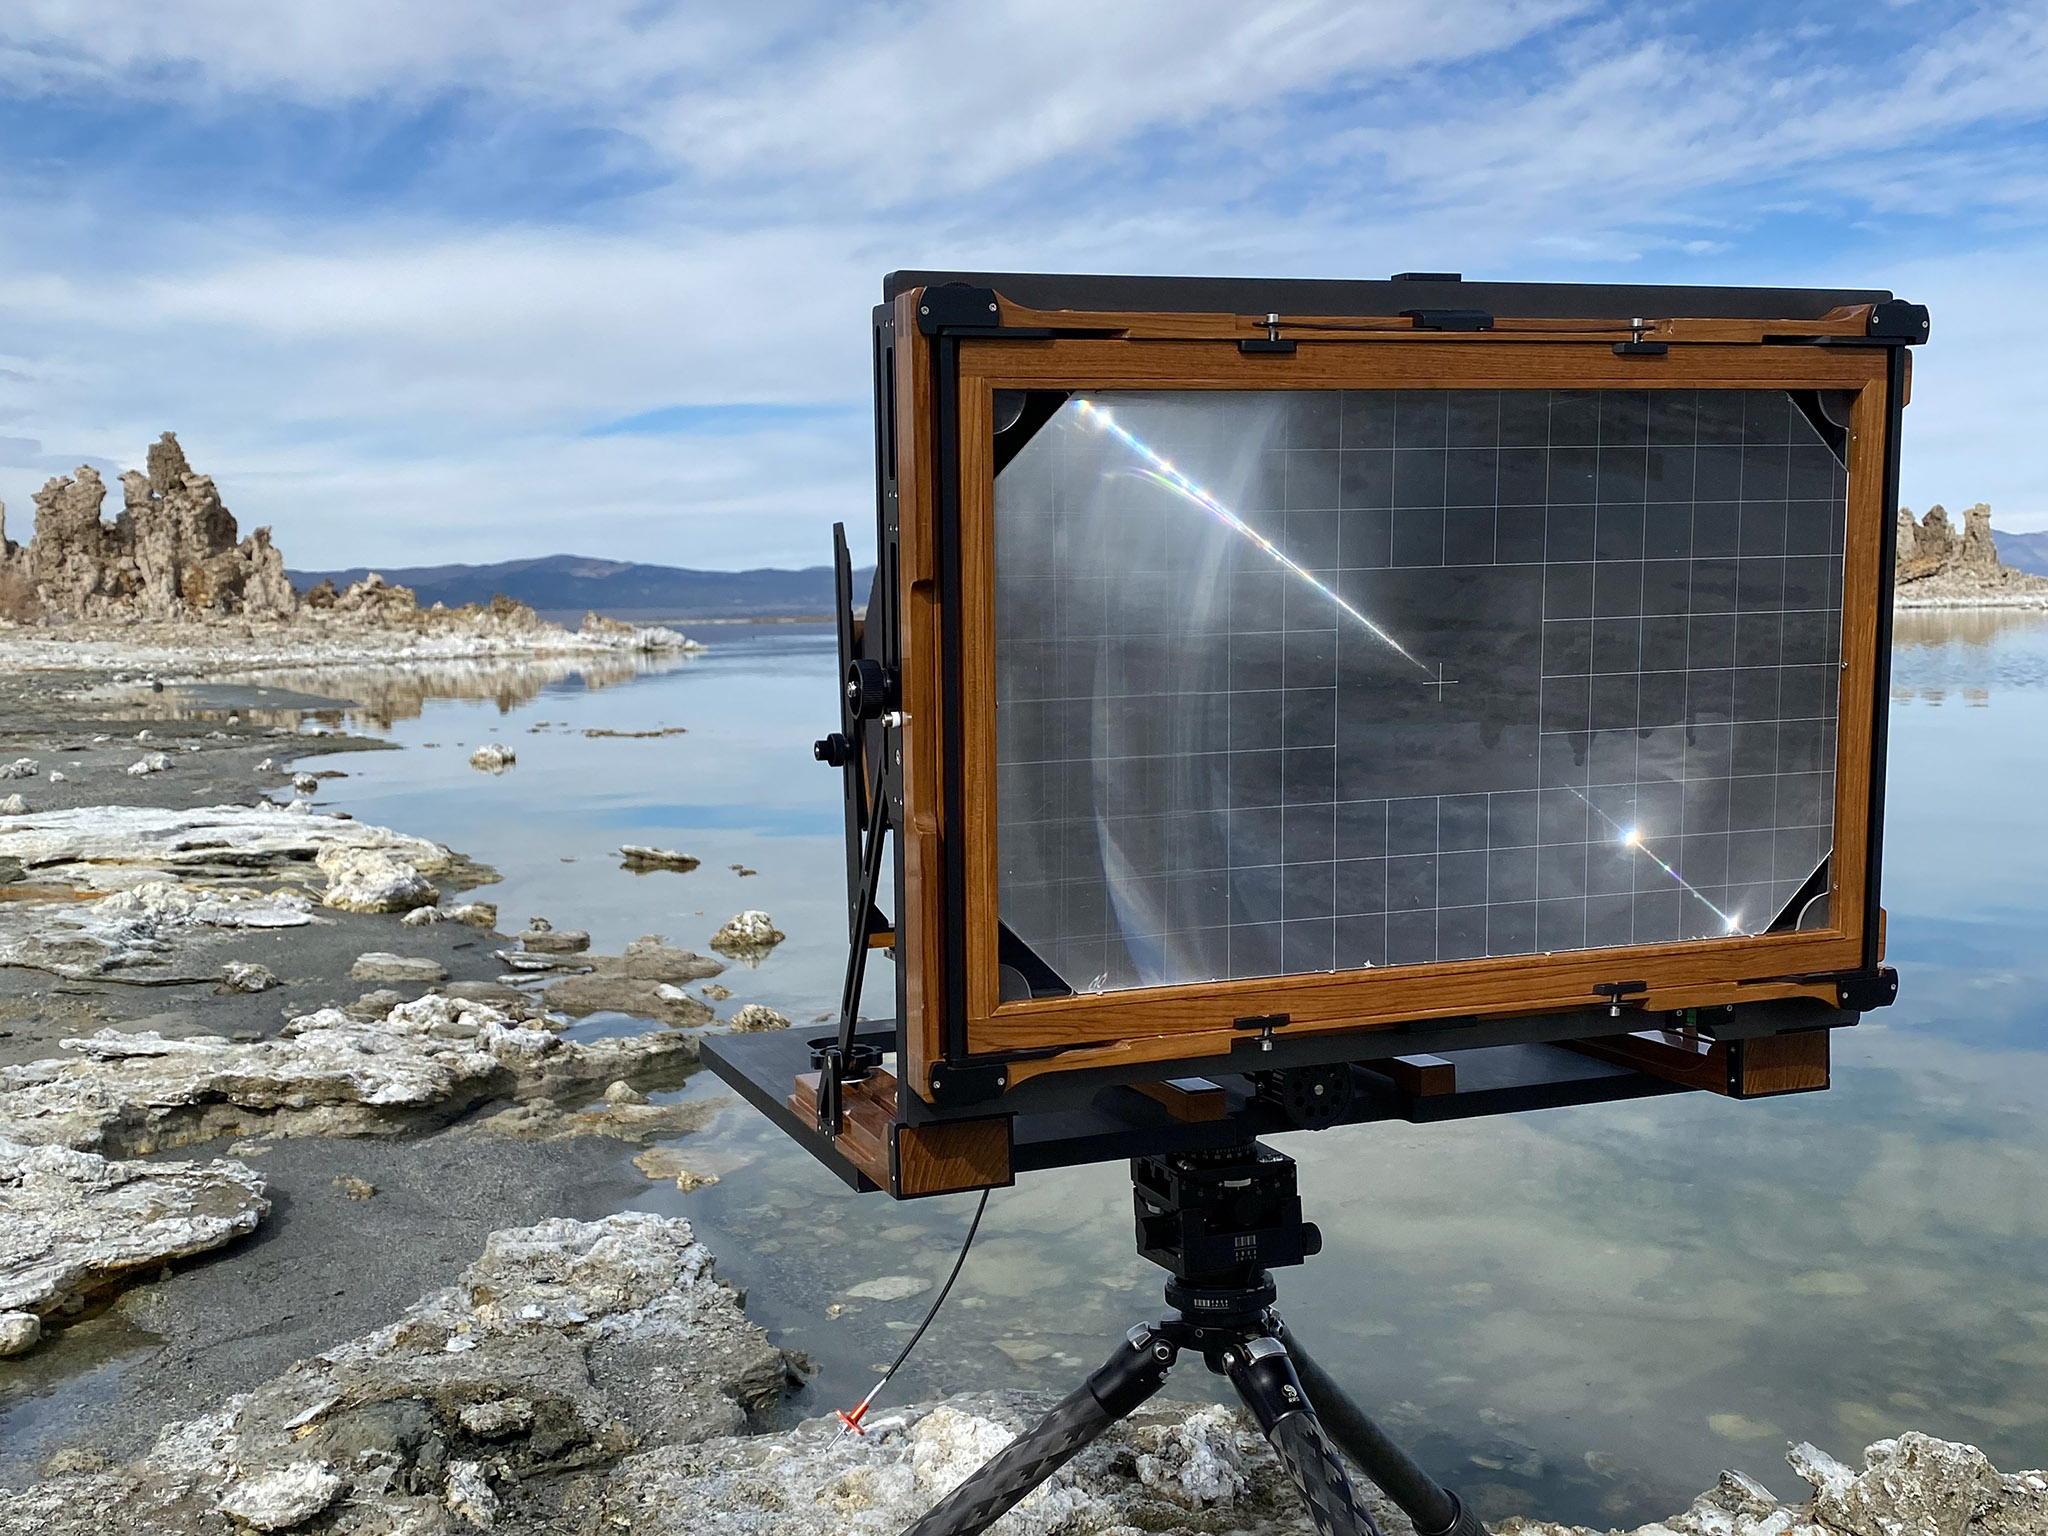
Composition with such a large format camera is interesting in part because the ground glass is, itself, 12 by 20 inches in size. I find myself noticing small details that would be invisible on a digital LCD, and adjusting my composition accordingly. Not to mention that the final print is also 12×20 inches, which makes it easier for me to visualize the entire “idea to print” process. (This despite the fact that the image on the ground glass is upside down and backwards.)
Because the camera takes so long to set up, change lenses, and compose, I use a viewfinder app to help me figure out what lens to use. Here’s an example from this same location at Mono Lake:

The 762mm focal length that you see in the screenshot above corresponds to my Goerz Red Dot Artar 30″ lens – a four-element, symmetrical lens design from the 1950s. A focal length of 762mm may seem extreme for landscape photography, but it’s actually equivalent to about a 60mm lens on full-frame.
The rest of my composition involved setting up the camera and carefully maneuvering the various dials and gears to find the best framing. I ended up with a very low tripod position, and I even added some “fall” to the front standard of the 12×20 in order to get more foreground. Thanks to some substantial front and rear tilt, I aligned the plane of focus more closely to the landscape itself, although I still had hardly any depth of field at my widest aperture of f/16.
Camera Settings
Photographers always look at me funny when I talk about using apertures like f/64 or f/90 with large format cameras. I can’t imagine why. In this case, I used a completely reasonable aperture of f/180 to take the Mono Lake photo in question.
Okay, I’ll stop joking around – f/180 sounds criminal. Wouldn’t diffraction ruin my photo at that point? Surprisingly enough, it doesn’t. With such a large film format as 12×20, an aperture of f/180 shows no more diffraction than f/13 does on a full-frame camera (at a given print size). It’s still a relatively narrow aperture, but it was necessary considering that the foreground was nearly touching my lens, and I was at 762mm.
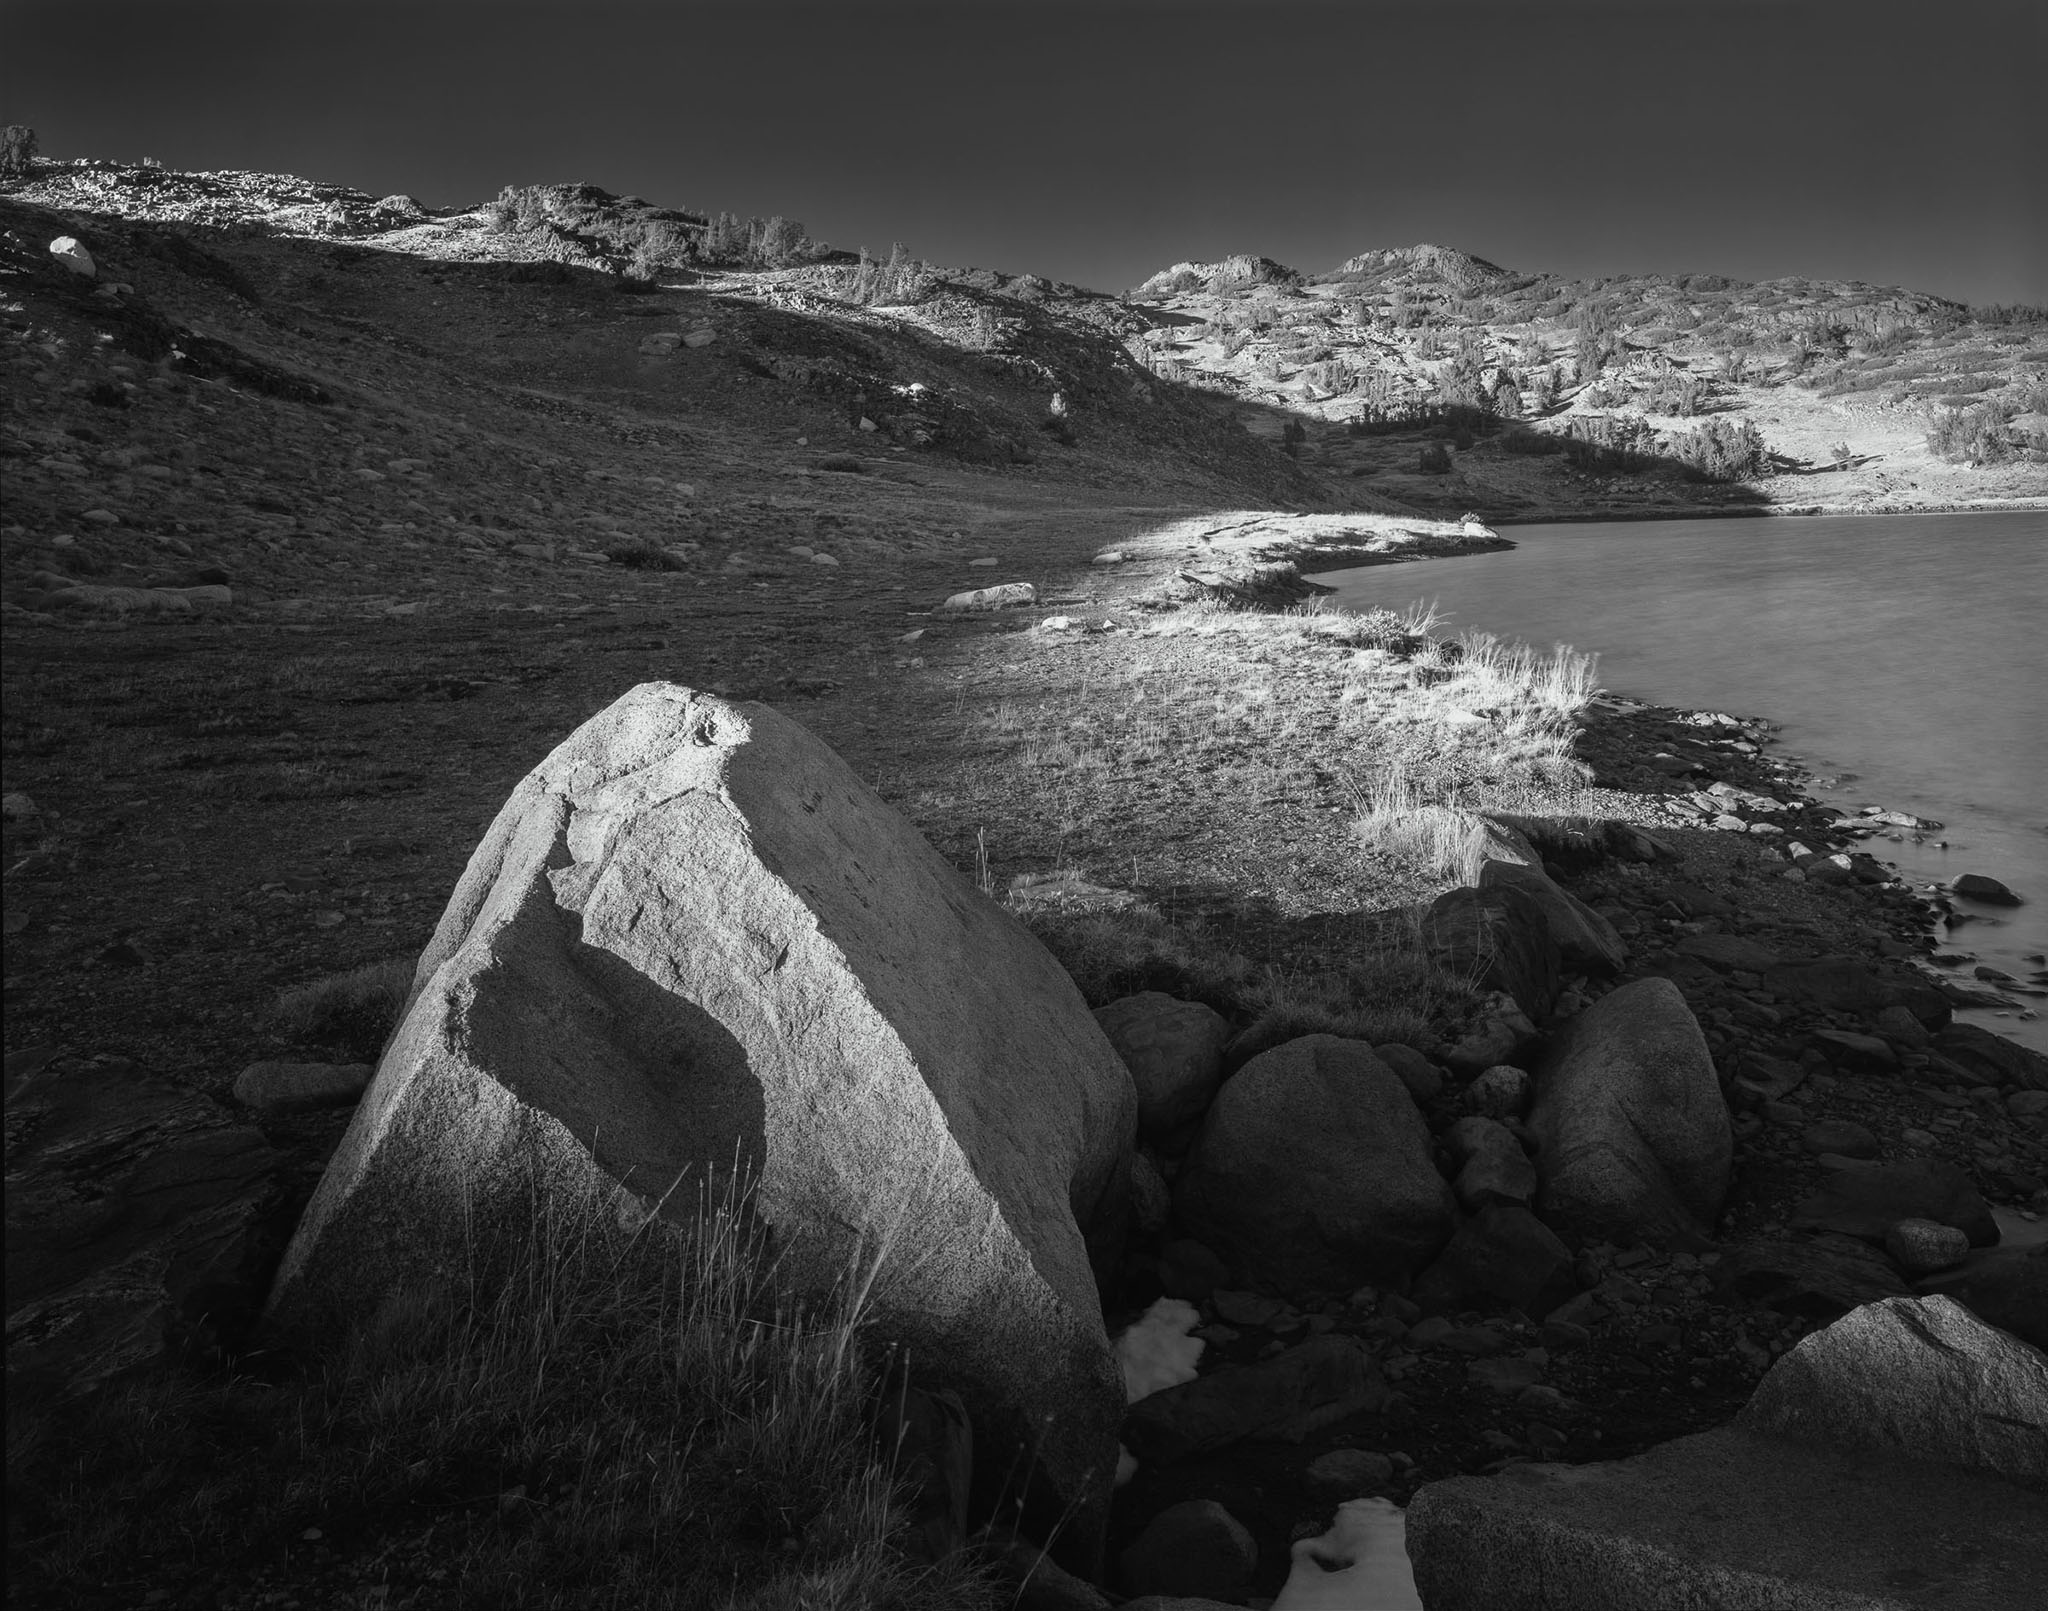
After that, I had to figure out my exposure time. For starters, to darken the water and sky, I used a strong red filter. I metered on the darkest portion of the frame, then exposed so that it would reach Zone IV in my negative. (Zone IV retains full detail, which makes the negative denser but gives me more leeway to dodge and burn the shadows in the darkroom.) Finally, my film was Kodak T-Max 400, which I generally rate for ASA 250. The end result is that I needed an exposure of 8 seconds despite shooting this photo on a sunny day.
The process is basically the same every time that I shoot with the 12×20 camera. I tilt and swing the lens to align my depth of field, figure out the optimal aperture, pick my filters, meter for the shadows, and expose the shot. By following the steps in the same order each time, I minimize any chances of making mistakes. Although I definitely don’t eliminate them :)
The Next Steps
I wish I could show you the finished result right now, but that’s the point of this series of articles – I didn’t know the result immediately! It could have been a complete failure, and I would have no way of realizing it. Some people have suggested I take backup photos, but I can only carry two sheets of film at a time, so I usually spend them on two different photos.
The good news is that I’ve now developed this photo (and almost all of the others from the trip), and it turned out how I had hoped. In my next two articles, I’ll show you the development and printing processes that come next. The photos from this trip are very special to me because of how closely they match my artistic intent, and I’m looking forward to sharing them with you in the coming days.
Update: Part two can be read here.
Thanks for sharing this! I work with 8×10 and 11×14 (the latter is also a Canham, like yours). I look forward to getting a sense of the final print (on screen… you know what I mean, :)). What is the viewfinder app you mentioned (sorry if I missed the name if you have already talked about this).
Sure thing Pradip, it’s just called Viewfinder Mark II. Sorry for my slow response, I hope this is still useful!
Thank you, Spencer for an inspiring article. And on analog darkroom work to boot! I love it. Please keep up your Large Format series writing and please continue to embellish your darkroom techniques. Need to learn more. Thanks again, Spencer, for some great shadow detail, too! Great job.
Years ago, I took a course in large format photography at a local college. As a result, I purchased a used large format 4X5. I loved the camera and took it on trips to Chaco Canyon and southern Utah.
Later, with a more time intensive and stressful job, I stopped using it and switched to digital. I still have that camera in my attic, and maybe I’ll take it for a spin one of these days.
Hi Spencer,
I enjoy reading your occasional “large format” articles, I certainly would not have the patience for the medium, but I admire your enthusiasm and appreciate the results you achieve.
I really love the Yosemite image, the quality looks great in the article and I’m sure the print is stunning. It has a lovely “soft warmth” about it and looks “big”.
I remember many years ago, visiting the Grand Canyon and noted how they were still using large format, to capture the “size” of the landscape, for their publicity shots.
Regards John Taylor.
I’m really happy you like that photo, thank you, John. I had that shot in mind for about a week before the conditions aligned and the sunset was exactly right! The Velvia colors look beautiful in a print, and especially viewing the original slide on a light table.
Large format is seriously niche these days, but it still has a foothold in some corners of the landscape photography world, like the Grand Canyon photographer you mention. When everything works out, the results are something else. Although, I mostly shoot with it because I just like the process.
Thanks for this nice little article spencer. I didn’t even know 20×12 exists. Always thought 10×12 was already a big pain in the butt :D
Thinking about the cost of the photograph, I would argue that there isn’t much of a difference between the creativ crafts. The time you spend thinking about your next painting could easily be spend by finding your work in the field.
I too resonate a lot with the idea of slowing down and taking your time while taking the photo. And although there might be a lot of struggle involved, it’s a big part of the joy I find in photography.
PS: Really looking foward to that 100-400Z review ;D
Thank you, Arne! 12×20 isn’t so bad, just glue two of those 10x12s together and you get the idea! (Well, at least I’m not shooting with 20×24…)
You bring up a good point – it’s possible to spend a long time thinking about a photo, scouting locations, getting to know your subject, etc., beforehand, which certainly adds to the time spent in the creative process. In terms of time investment, that might make photography comparable to something like painting, if you take the time to go through these steps beforehand. I think that most photographers, including me, don’t do that often enough, though!