At times we have photographs that are not properly exposed throughout the image. Regardless how smart and sophisticated camera systems have become lately, there seem to always be a way for them to get tricked into metering incorrectly. Or it could just be a simple mistake by a photographer. Either way, there will be photographs that you do not want to discard because of this, especially if there are very simple ways to fix the problem. Today I am going to show you how to fix a partly underexposed image in Photoshop using the Gradient Tool.
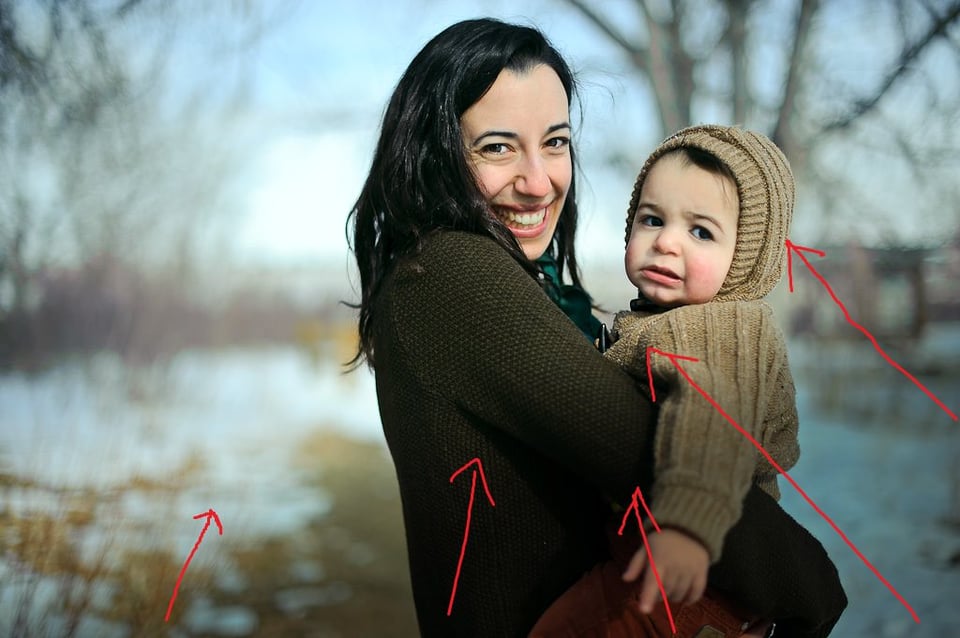
Take a look at the above image. The subject stood in a partly lit area and tree shadows caused half of the image to get underexposed. Normally, if you work in Lightroom or Camera RAW, fixing this kind of problem is rather simple – you just use the Neutral Density tool to fix the affected area, or you use the Adjustment Brush as I have shown in my Lightroom Dodging and Burning Tutorial to adjust the exposure of a specific part of the photo. But if you do not use Lightroom / Camera RAW and you have already taken the image into Photoshop for detailed processing, the below steps will give you quite a bit of control on bringing out those affected areas of the image. Obviously, there are many ways to skin the cat in Photoshop, so the below method is what I personally prefer to use when repairing exposure problems in images.
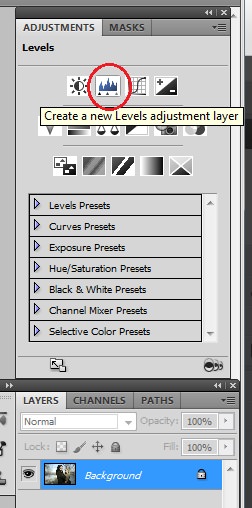
- Open the image in Photoshop and identify the problem area. As you can see from the above image, I identified the affected area for you to see. Start out by adding a Levels adjustment layer as shown below:
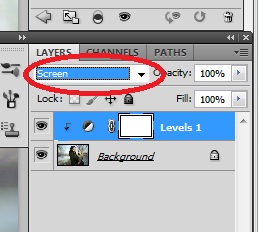
- Change the blending mode of the layer to “Screen”:
Choosing this blending mode will overexpose parts of your image as shown below:
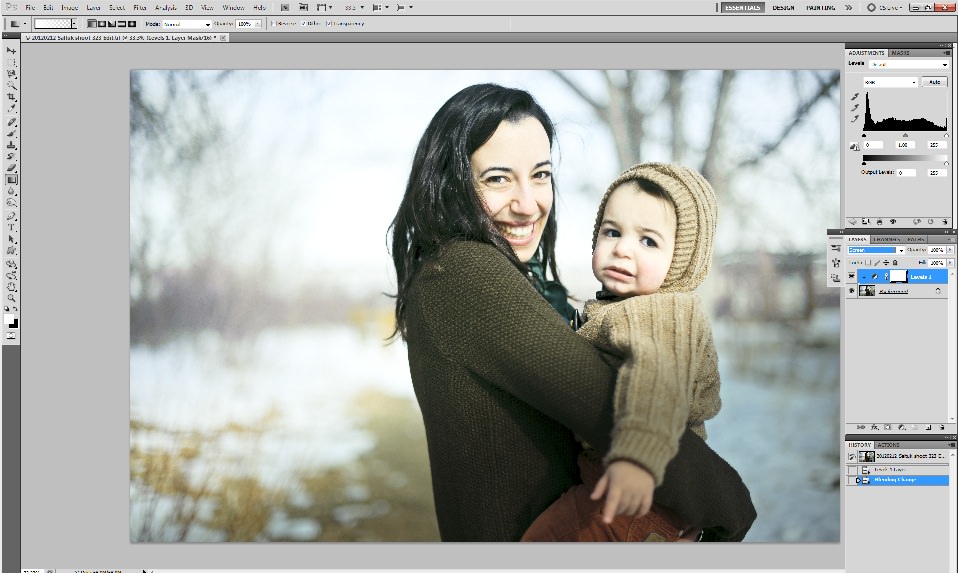
Don’t worry, this is normal and nothing is getting affected at the moment.
- The next step is to conceal the above step by Inverting the layer mask. Go to Image->Adjustments->Invert and the image will appear as if the blending mode is still normal (but you will notice the blending square turn black from white. A good sign that you are doing everything correctly):
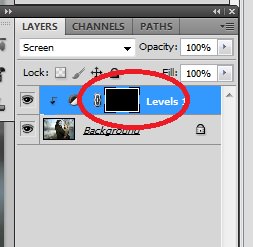
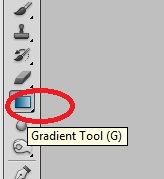
- The next step is to select the Gradient Tool (G). Once you’ve done that, choose foreground as transparent gradient, as shown below. The last step will allow you to use multiple gradient actions on one layer mask:
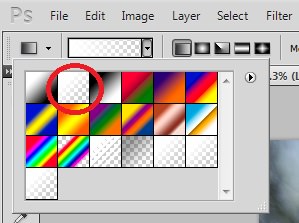
- Start drawing the problem areas of the photograph with the gradient tool from the outer edge of the image to the middle where the problem area starts to fade. If you Alt+Click on the mask, you can see the areas the gradient is being applied. Alt+Click to return to the image you are working on:
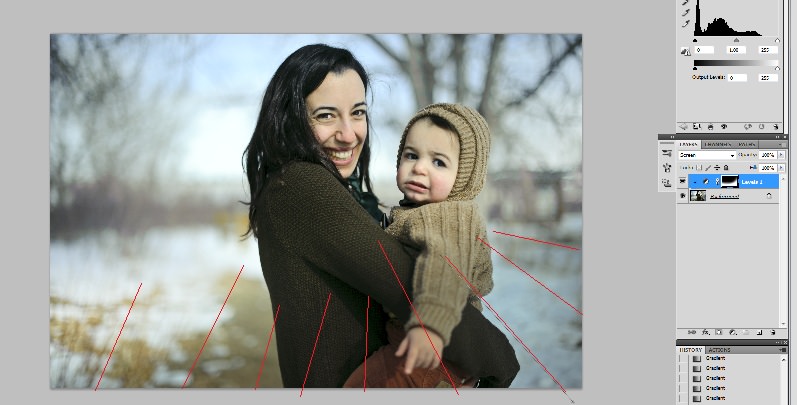
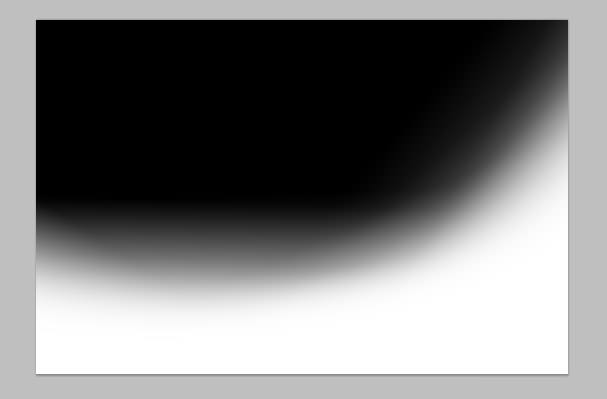
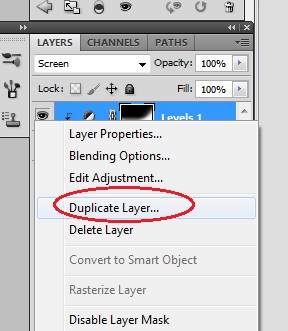
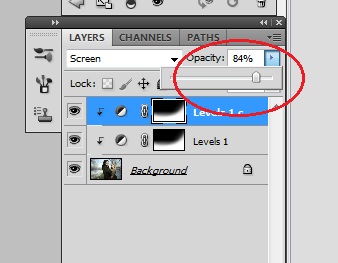
- If it seems that you could use more opening up of the darker areas, you can simply duplicate the adjustment layer as many times as you want. For this particular image I duplicated the layer once. The gradient will be applied to the same area once more and will give you more desirable results. If it seems too much, just lower the opacity of the layer to that of your liking. I tuned it down to 85% and it worked wonders for me:
- Below is the final image after the above adjustments:
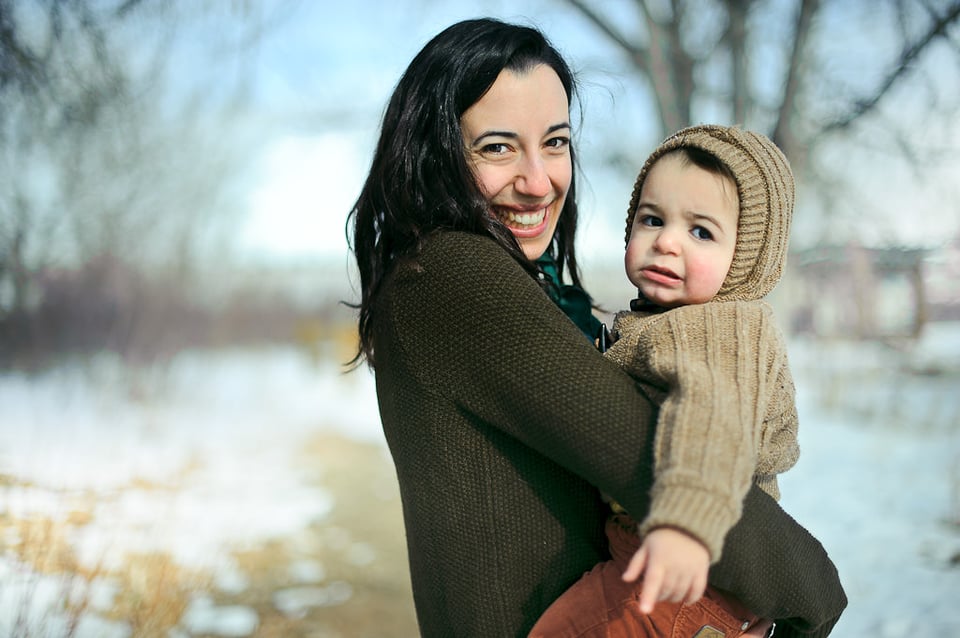
NIKON D700 + 50mm f/1.4 @ 50mm, ISO 200, 1/6400, f/2.0
This method could be used for ample amount of other stuff. Play around with it and see how you like it.
I get an even better image from the sample by simply applying 62% “lighten shadows” in PSE8, no need for so many actions.
how do I fix a nasty looking light flare in photoshop? It’s a night scene, and a light glowing behind my friend has nearly erased his hair and part of his face.
Thanks.
Wonderful technique….
Thank you so much for this quality post.
Your post make me better with photoshop.
Wish you always be on top of every photography lovers website.
Nice review!
I have a question:
What is the difference between using the ‘dodge’ tool carefully compare to above explained Mansour?
Joe, thnx, i’ll try this!
Hi Tomas, You can do the same thing in Lightroom – in fact it’s a lot easier. You just click on the gradient tool in “develop” mode (it looks like a graduated ND filter) and then drag a line in the direction of the gradient, then adjust the exposure (plus/minus) and viola – you’re done! You can have multiple gradients on a single image to cover different parts as well.
Hi again- I’ve figured it out-using elements 10-on fixing partly underexposed images.
I just commented on another post and found this one and oh boy, awesome blog. Treasure trove of info. Yes!
Hi Lola,
Thanks for this so useful tip! Can you make some Capture NX 2 tutorials? Thanks in advance.