As with many photographers, being able to manipulate natural light is essential for the images I produce. Whether I’m close to home, walking through the Parisian boulevards, or exploring entirely new places, my favorite activity is chasing and framing the ‘perfect’ light. My obsession with light goes back to my very first interaction with photography as a student of Art History in Granada. I spent hours looking at images – not only photographs but also building plans, façades, engravings and, especially, paintings. I became fascinated by the power of a static image – not just in its ability to tell a story, but in how light can be used within it to convey a message or feeling.
For me, photography is an opportunity to explore this. Like literature, photography is a means of telling a story – not through words, but with lights, shadows and shapes. To take a photo is to write using light, and I believe natural light is the most organic way to communicate to others.
And so, below, you can find my top five tips for photographing natural light.
Table of Contents
1) Plan Carefully to Predict Lighting Conditions
The understanding and continual observation of light is essential to making good use of it. Natural light changes throughout the day and, depending on the type of light you are working with, will deliver radically different results.
Today there are many mobile apps that provide us with detailed information about the path of the sun, its orientation, height etc. I usually use Photopills to plan my movements, but there are many others. These will help you anticipate the position of the sun, to give you the best chance of being in the right place at the right time to capture the type of light you want – whether it’s the ‘golden’ or ‘blue’ hours, or something else entirely.

NIKON D750 + 24-70mm f/2.8 @ 70mm, ISO 250, 1/80, f/5.6
2) Understand How the Sun Can Affect Your Image
I often take ‘backlit’ photographs, where the camera is pointed directly at the sun. It is often, however, better to partially hide the sun behind an element such as the ledge of a building. This allows you to capture direct ‘frontal’ light without burning parts of the image or creating unwanted reflections.
It is essential to discover the right balance between blocking the sun to reduce flare and leaving enough of it exposed to create a strong burst. Therefore, don’t hesitate to move constantly, looking for appropriate angles and positions. Find a camera that allows you to move easily, ideally one with a tiltable monitor to test different positions.
Also, when shooting into the sun you can create a fascinating and striking ‘starburst’ effect where you manipulate a light source to create a star effect, with beams radiating around one specific point. The quality and characteristics of the starburst depend on the type of lens you use, specifically the number and shape of the aperture blades. I like the 18-spike stars produced by 9-blade lenses, like the AF-S NIKKOR 14-24mm f/2.8G ED.

NIKON D750 + 35mm f/1.4 @ 35mm, ISO 100, 1/200, f/5.6

NIKON D750 + 35mm f/1.4 @ 35mm, ISO 100, 1/200, f/4.5
3) Use Light to ‘Write’ Your Image
Using natural light effectively can make any subject interesting; transforming an uninspiring space into something beautiful. For example, in my collaboration with Nikon on the on the “Elevate the Everyday” project, I accepted the challenge to take inspirational photos of an apparently uninspiring setting by using light in a clever way. The setting was a car park and I spent entire days in the parking lot, studying how light modified the spaces inside.
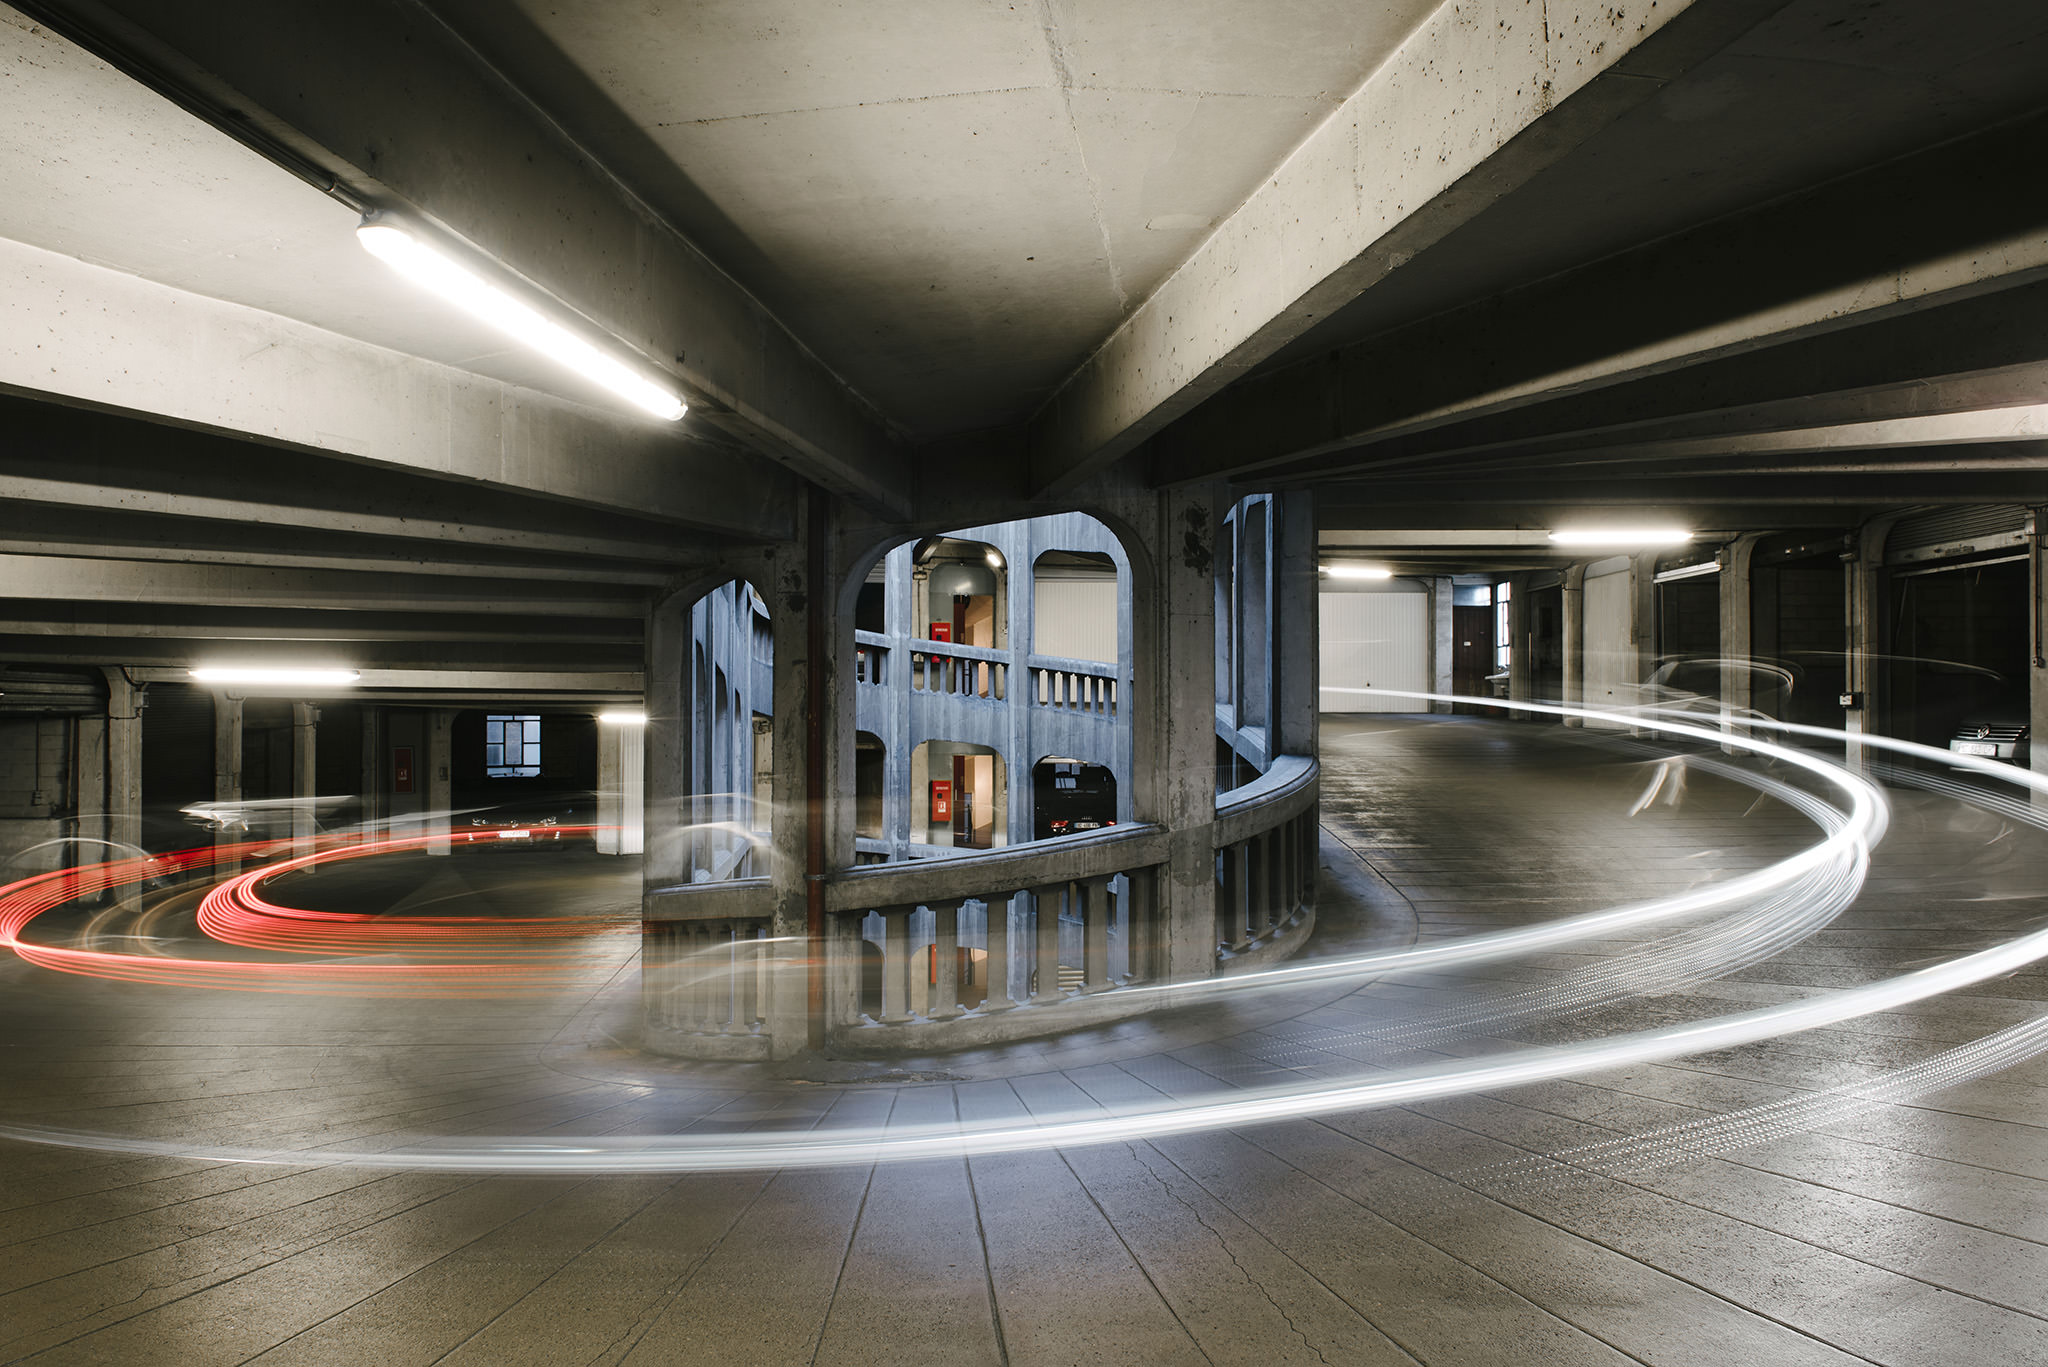
NIKON D750 + 24-70mm f/2.8 @ 24mm, ISO 100, 13/1, f/14.0
Don’t be afraid to experiment with exposure settings when finding your personal ‘style’ of lighting. Photography is a creative process. I personally under-expose certain pictures to emphasise the subtlety of the light. I use the manual mode and put the exposure compensation button three steps down. The camera might not know what you want or need, but you do. You know which part of the photograph you want to expose correctly.
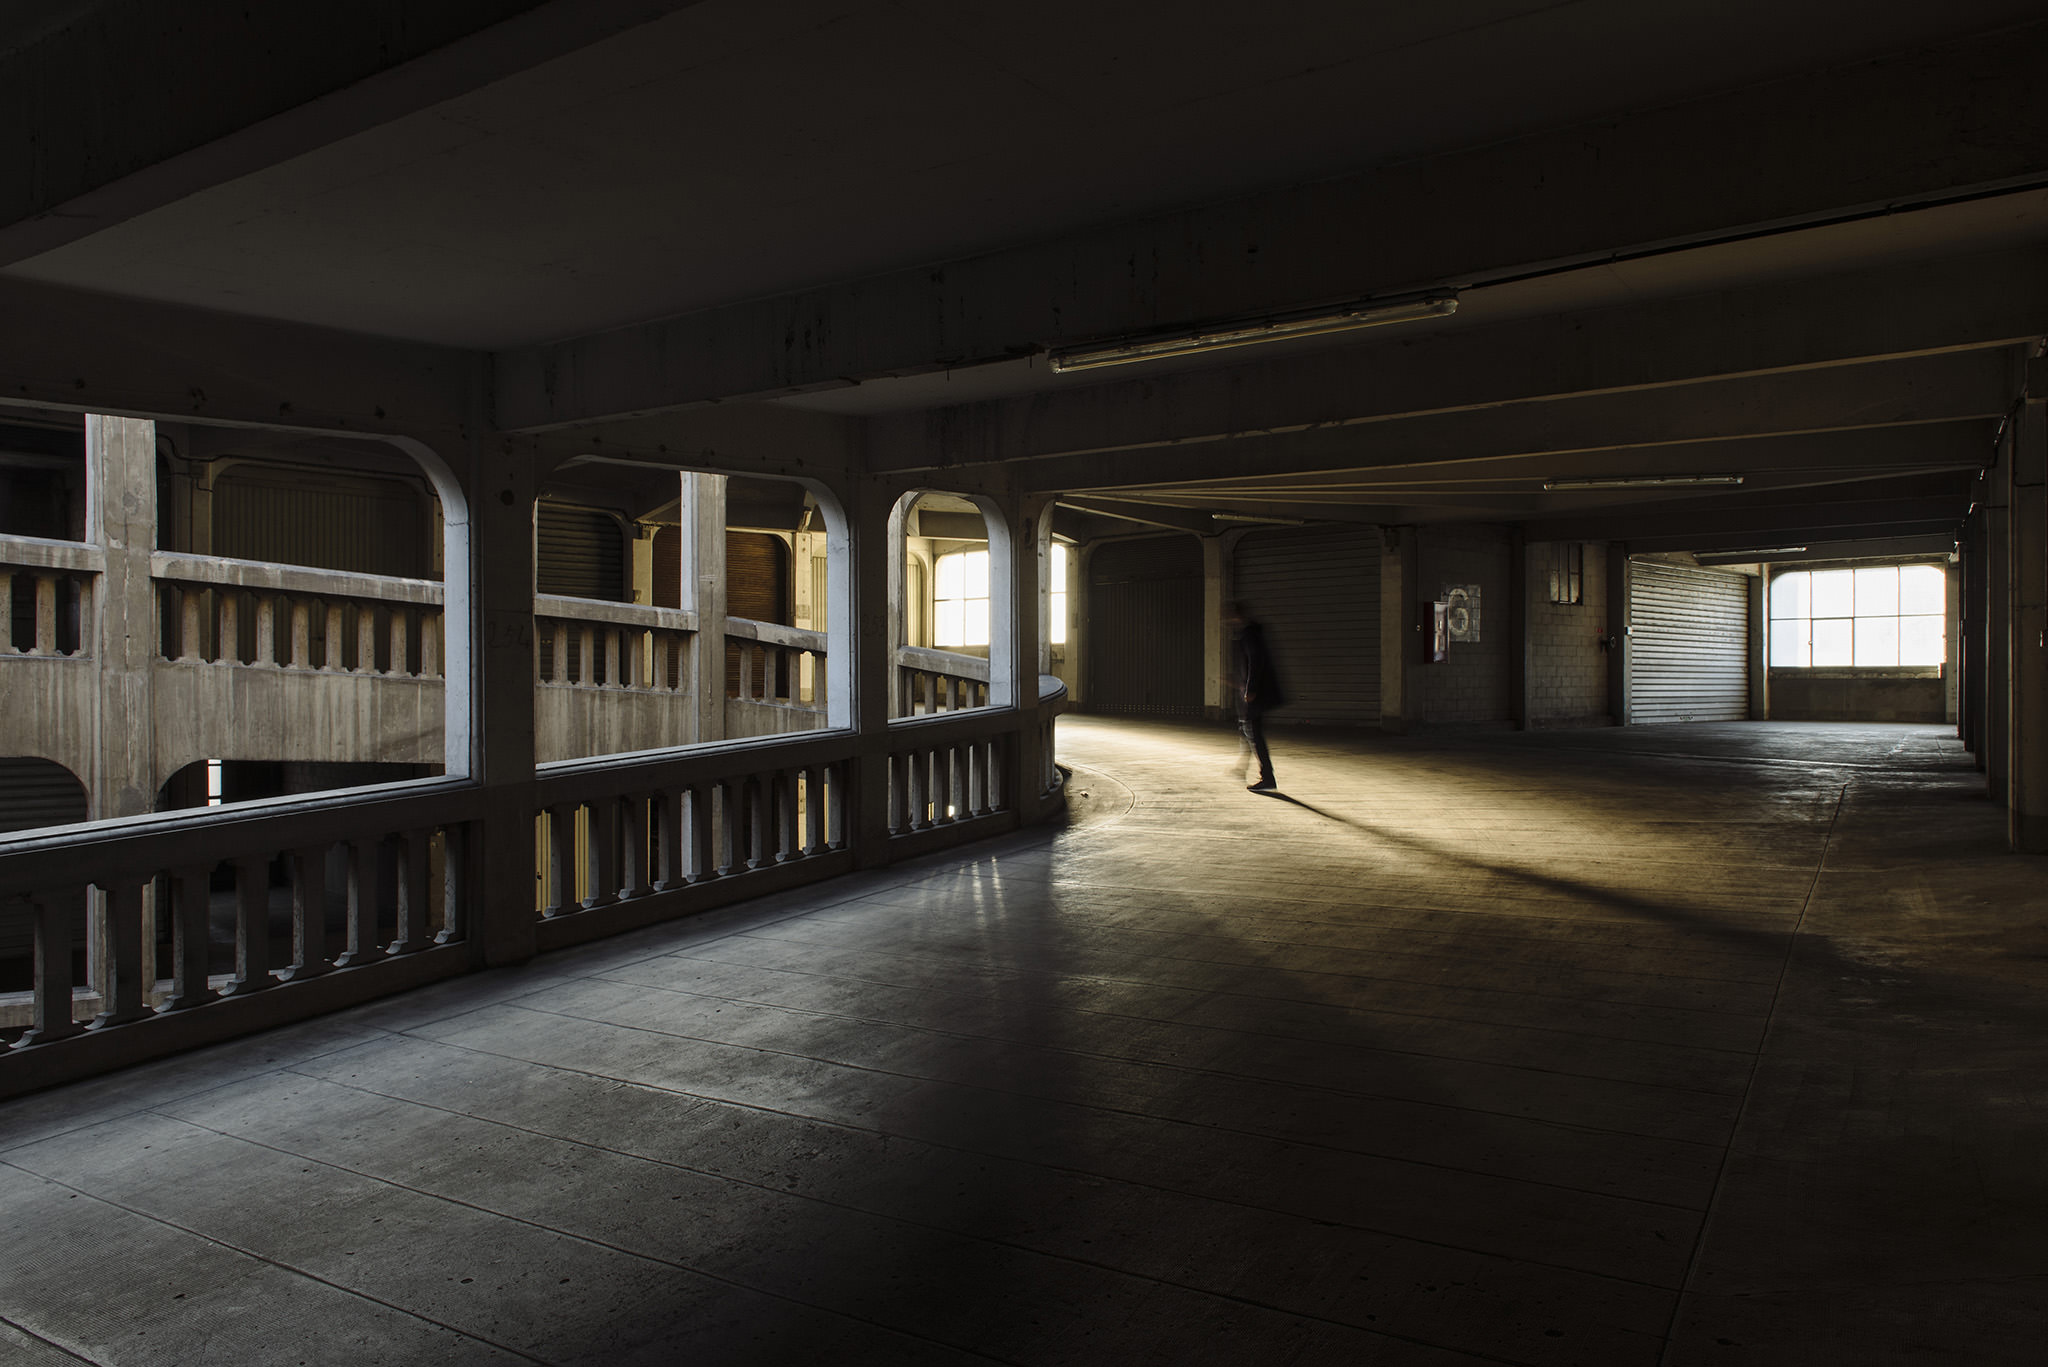
NIKON D750 + 24-70mm f/2.8 @ 24mm, ISO 100, 6/10, f/14.0
4) Don’t Underestimate the Importance of Shadows
A hard, strong, natural light also produces powerful shadows. As Tanizaki rightly states in “The Praise of Shadows”, his classic essay on aesthetics; shadows contain an extraordinarily rich universe with a great suggestive power, full of shades, mystery and contrasts.
The use of shadows allows you to play with ‘negative space’ – the space around and between the subject of your image that defines it – something that requires a great capacity for observation, and a great deal of patience. You must choose the right place and wait for something to happen.
If you lose some detail of the shadowed area, the modern DSLR camera should allow you to recover this – providing you’ve shot in RAW (something that I always recommend).
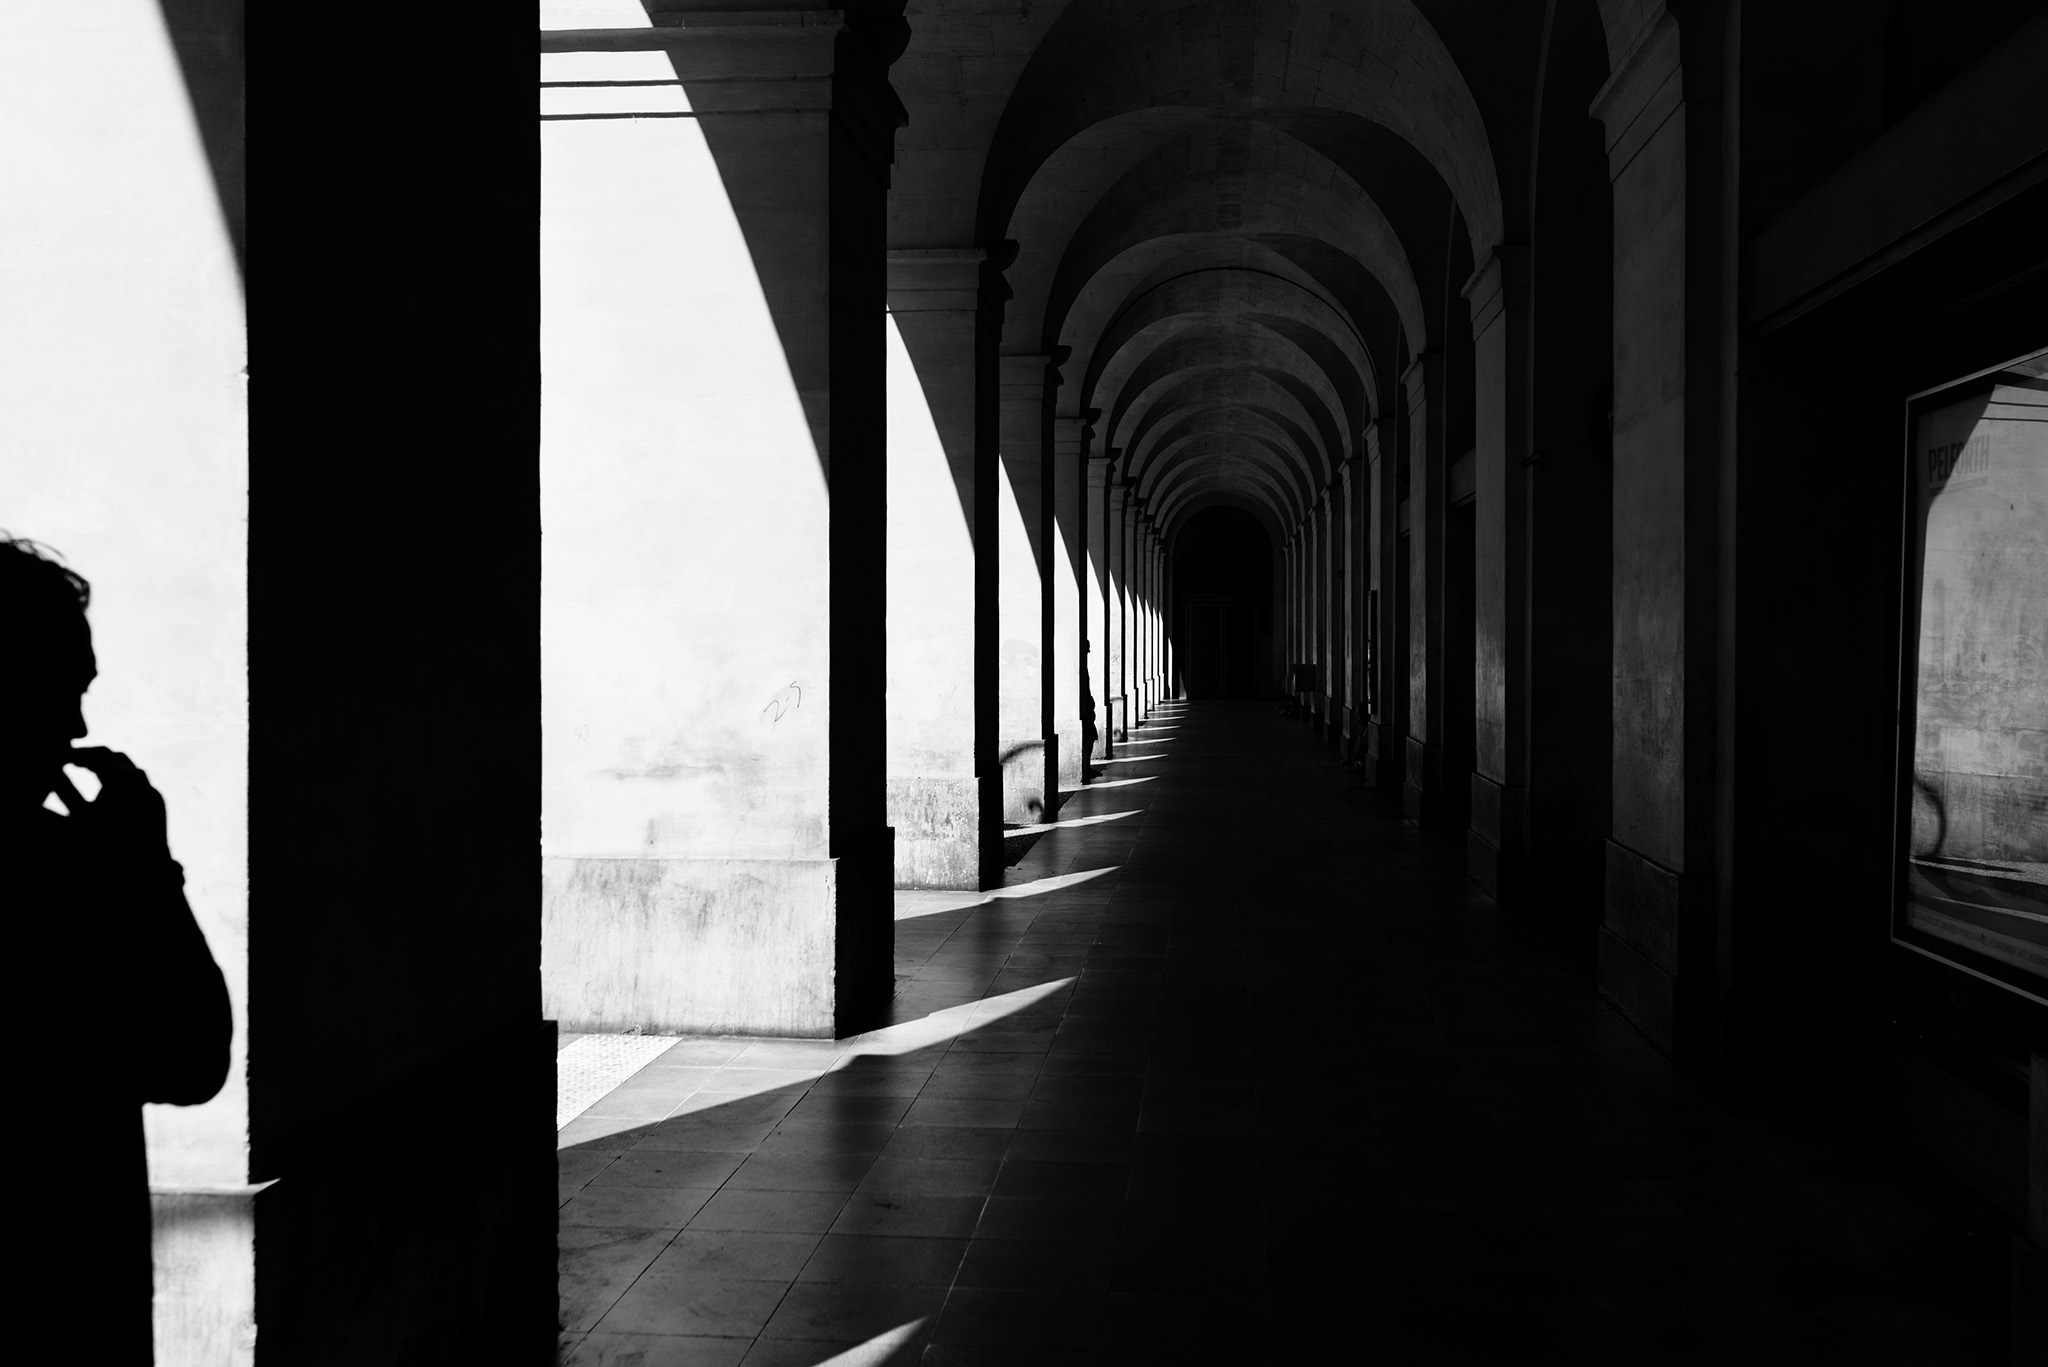
NIKON D750 + 35mm f/1.4 @ 35mm, ISO 100, 1/640, f/5.0
5) Be Patient and Seize the Right Moment
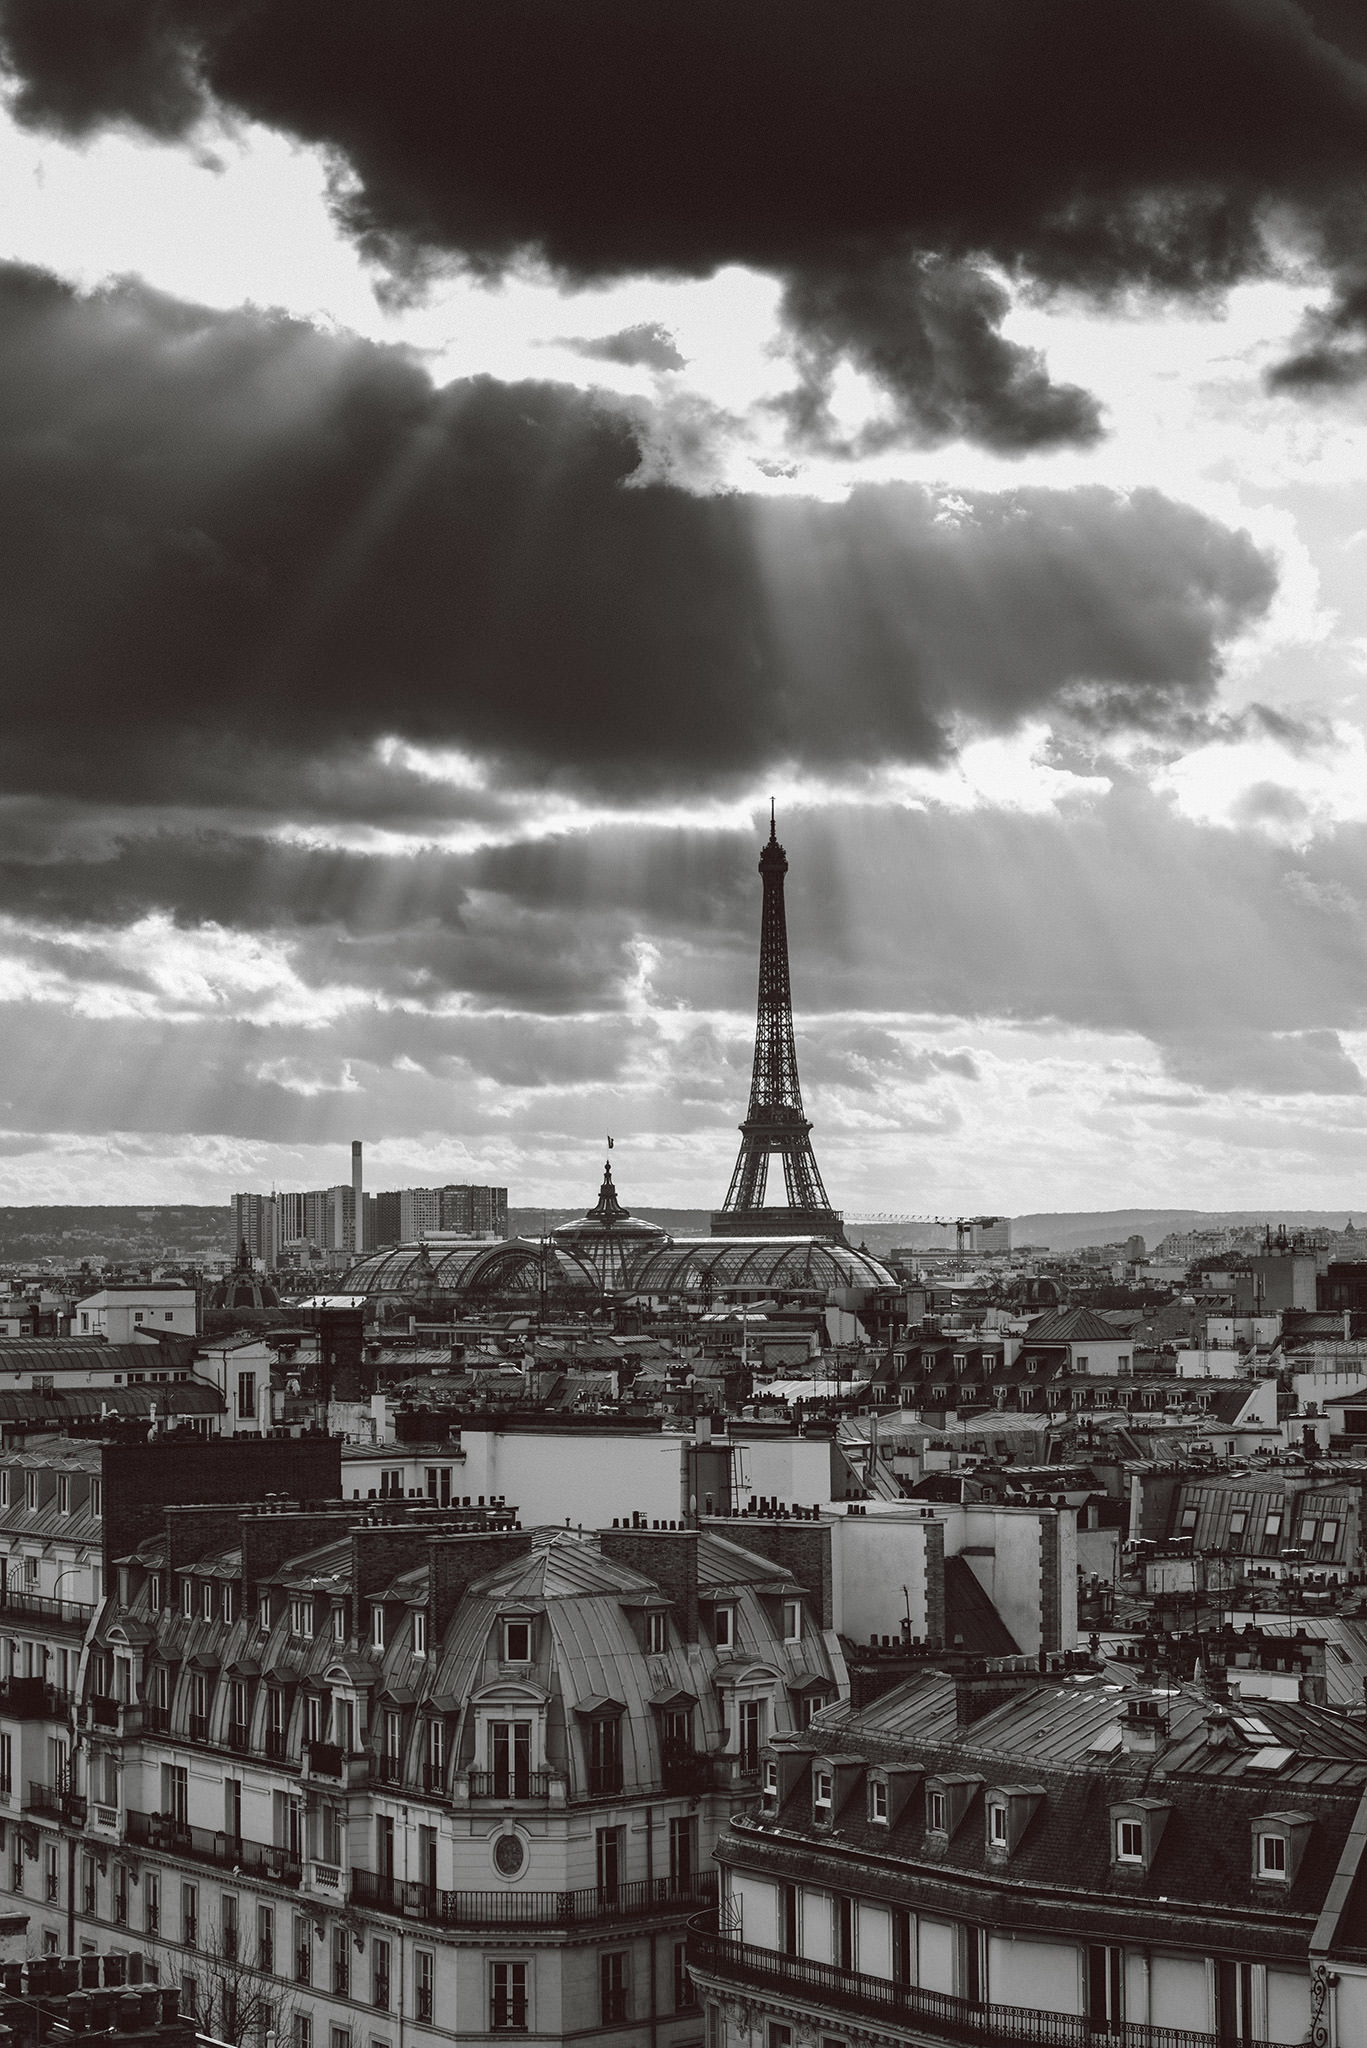
Natural light changes constantly and you will often come across unexpected situations. For example, rays of sunlight may find an ‘exit’ through a small hole in cloud cover during an overcast day, which will suddenly look dramatic. To capture these moments, it is necessary to not only observe the sky with attention, but also have patience and wait for the right moment. Equally you need to be prepared for the magic moment, which doesn’t usually last longer than a couple of minutes.
As a street photographer, I also need to be fast – really fast. I need to balance moving subjects against the constantly changing light. I prefer to work with a fixed lens, because this allows me to be familiar with the focal distance and anticipate the framing in my mind before seeing it in the camera. Specifically, I use the AF-S NIKKOR 35mm f1.4G. Setting the aperture at f/1.4 or f/1.8 allows you to isolate your subject and get a fantastic “bokeh” effect that compliments the surrounding light of the moment.
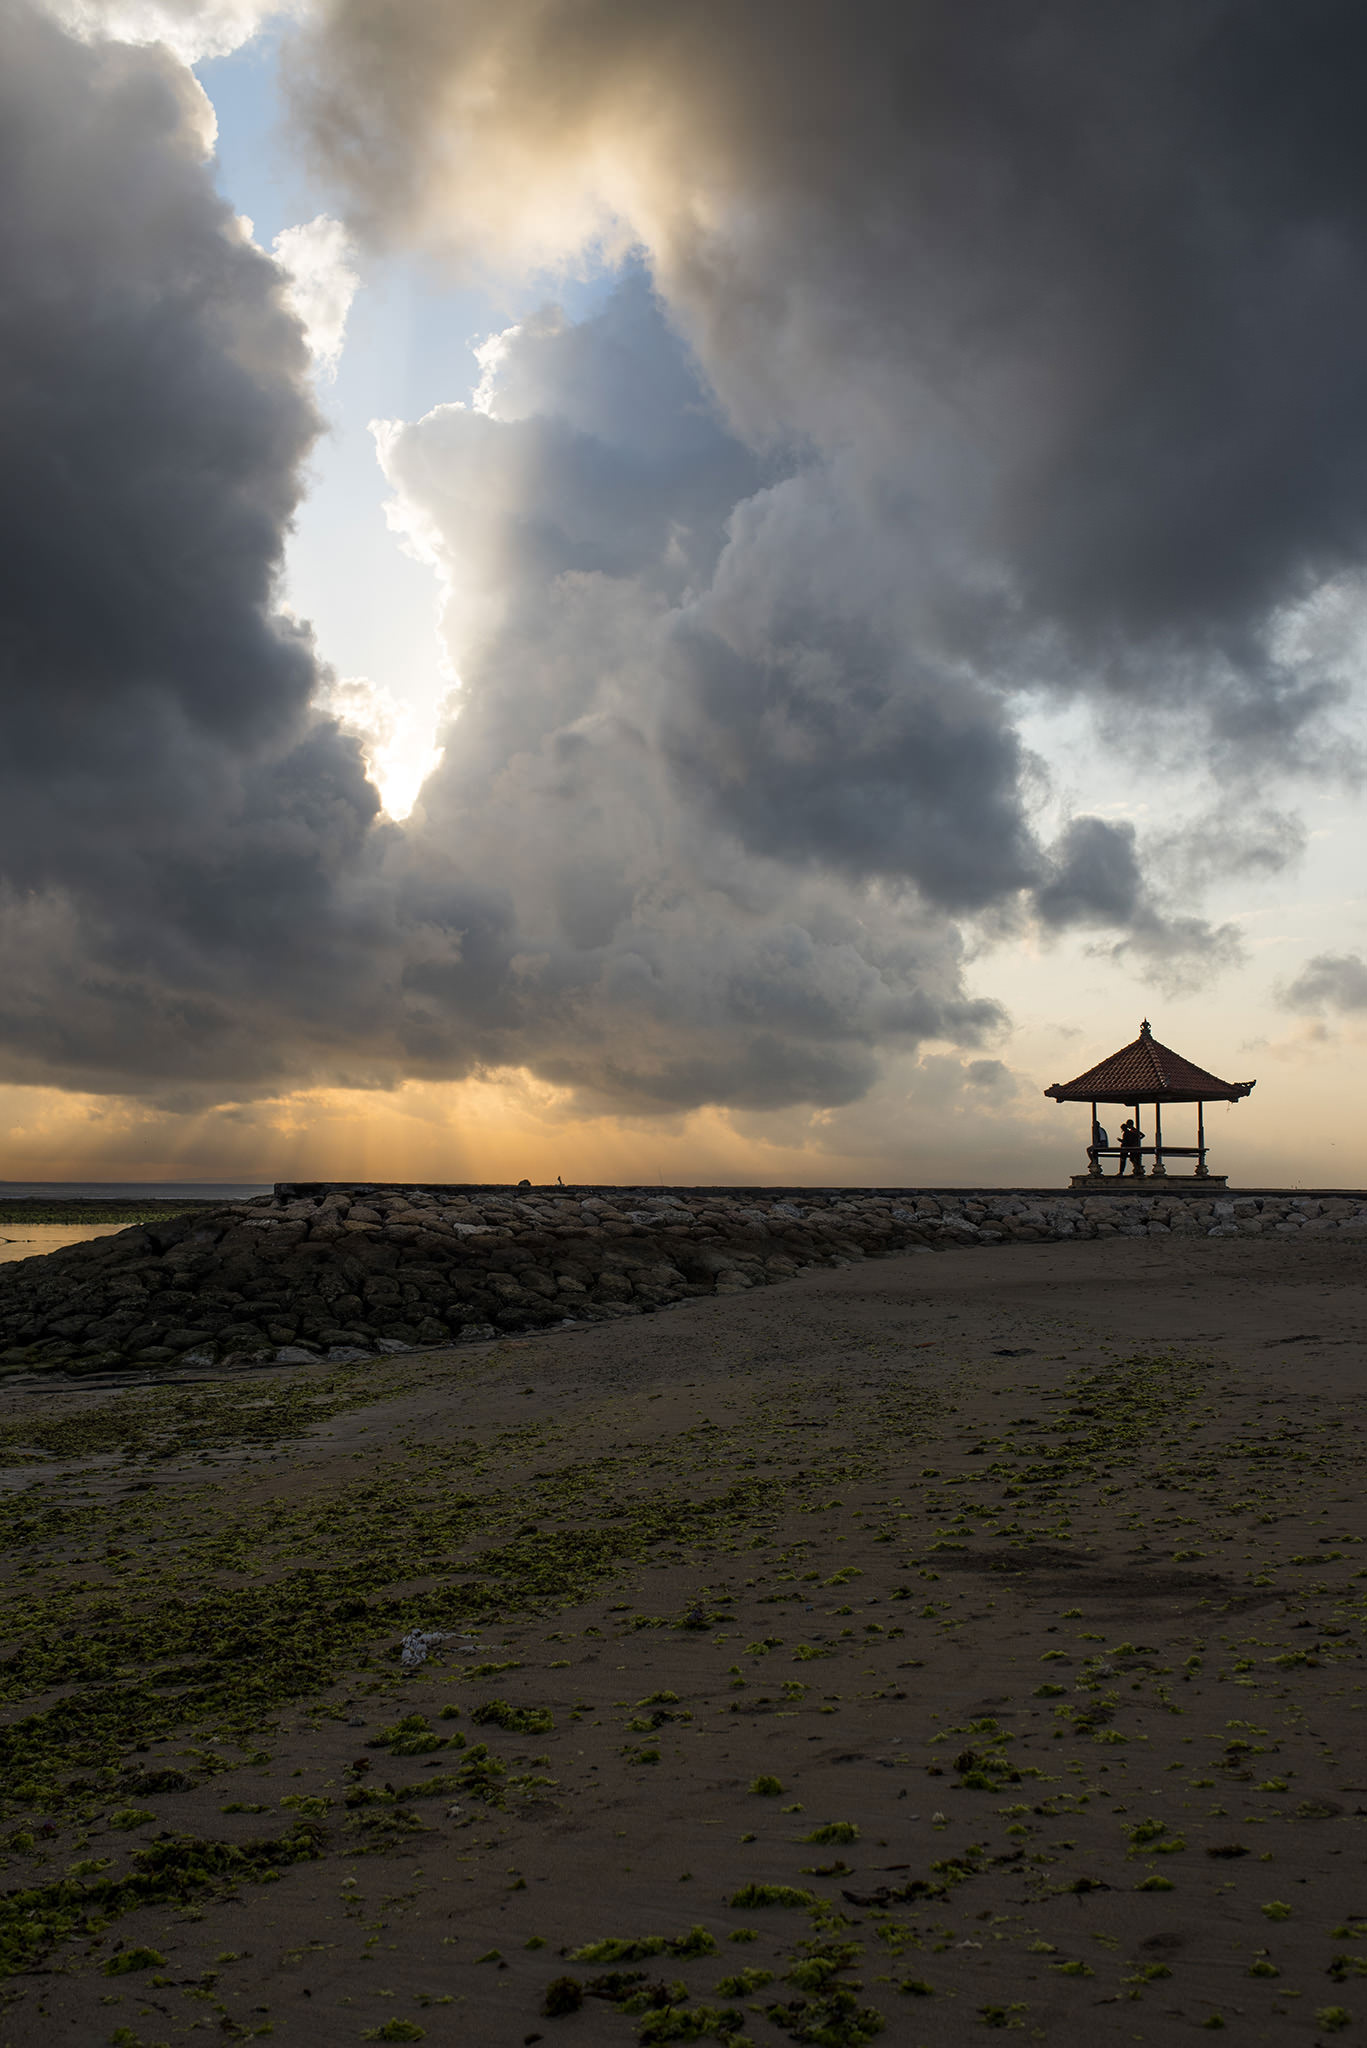
NIKON D750 + 35mm f/1.4 @ 35mm, ISO 200, 1/1600, f/5.0
NIKON D750 + 85mm f/1.4 @ 85mm, ISO 100, 1/320, f/6.3
Great article Juan. I have a question about the Nikon D750. Would you recommend it for a beginner? I currently shoot with a D5500 (mostly event photography) and in the market for a full frame camera and D750 seem to be within my price range.
Thanks for the great article.
Imagesbyolu
Hello,
Thanks for your comment. The Nikon D750 is a great camera. I have used it for five years in different challenges and the results were always fantastic. I really recommend it!
Very best,
Juan
An excellent article and some wonderful images.
One question…you say you often deliberately underexpose to create a certain darker mood.
Would it not be advantageous to expose fully (to the right) without blowing out important highlights and then darken the image in your editing software to create the moody look you are looking for?
That way the darker tones will retain more data (tonal detail), can be opened up without introducing noise and be richer as a result?
Thanks for your comment Betty. Yes, I use to use the right exposition mode for scenes with a low/medium contrast. As you say this allow to you to have more data and less noise in the final picture. Nevertheless sometimes I don’t mind if the image is a little dark or t have noise. It depends any case. Thank again for your words. Very best.
It’s so nice to see photos identified by location first. These images are really dramatic. Since I am not much of a world traveler, often (not always) photo locations on PL are a mystery to me. Location is context. Nice work, Juan. Thanks to you and PL for publishing this article.
Hello Bob. Many thanks for your comment. Yes, location is very important to me. I always give the name of the place where I took the picture. Very best.
Beautiful work!
And a great article – it gives me inspiration to try to achieve more.
Many thanks for writing this and I hope you continue with these excellent articles.
Thanks a lot Henri! Yes, I’ll try to write more articles. Very best.
Wow, the photos are absolutely wonderful, engaging, and meaningful. Congratulations, and thank you for sharing.
Your commentary is equally valuable, and appreciated.
Please consider sharing more here.
Beautiful photos!
Many thanks ! Much appreciated.
Mr.Perez,
So much of ‘photography’ these days is sliders-gone-wild.
Your work is real art.
Flawless compositions, interesting light, perfect execution.
I hope you will sharing more of your work here.
Hello Joachim. Thanks for your words. I can understand you. The f/1.4 is not easy to use but when you get the perfect shot it is just wonderful.
Mr. Shiraz,
Thank you so much for your words. I really appreciate it!
These pictures radiate so much very warm energy, it’s a pleasure and delight to look at them.
Juan, you’ve said “Specifically, I use the AF-S NIKKOR 35mm f1.4G. Setting the aperture at f/1.4 or f/1.8 allows you to isolate your subject and get a fantastic “bokeh” effect that compliments the surrounding light of the moment.” I’d love to see such a shot or two. In terms of sharpness and clarity your pictures are also outstanding. Usually I struggle when I try to get so many things sharp at the same time – well, sharp, clear and well composed, that is.
Hello Joachim. Thanks for your words. I can understand you. The f/1.4 is not easy to use but when you get the perfect shot it is just wonderful.
That’s why I asked for a nice sample picture with the 35 wide open. I’ve nearly all Sigma Art lenses with f/1.4 or f/1.8 and I really like their possibilities, I just want to see you mastering them :)) What’s more: truly it’s sort of easy to compose with shallow DoF and leave the rest in bokeh, but in your pictures I didn’t see the typical “f/16 and everything sharp” what I see from a lot of photogs. To me, you know how to set the proper aperture and the focus pane.
Juan,
I learned much from this article and thank you. I have most of the same lenses, the 85mm f/1.4 being one of my favorites. That is a magic lens in the “right light”. Your parking garage time lapse has inspired me to try to accomplish similar results.
Your words and photos bespeak understated excellent. I hope you might consider writing another article for us in the future.
Regards,
peter
Hello Peter. Many thanks for your comments.
The 85mm f/1.4 is magic. It’s one of my favorites lens too. I use to use two cameras and I always have the 85mm in one of them.
I’m so happy to know you like the pictures. I hope to write more articles in the future!
A very encouraging article for aspiring photographers. I liked the shots very much.
Many thanks Rabin!