Earlier this year, I had the incredible experience of going on my first safari (and first visit to Africa). Although I am primarily a portrait and event photographer, I do enjoy wildlife and landscape photography as a hobby. I thought it would be interesting and hopefully helpful to take you along with my full approach – where I went, what I brought, how I backed up my photos, and the experience of being there. Finally, if I were to do it over again, what would I have done differently?
This is part one of a two-part series documenting the trip. Below, I’ll cover my choice of locations, camera equipment, and backing up my images. Part two will be coming within the next few days.
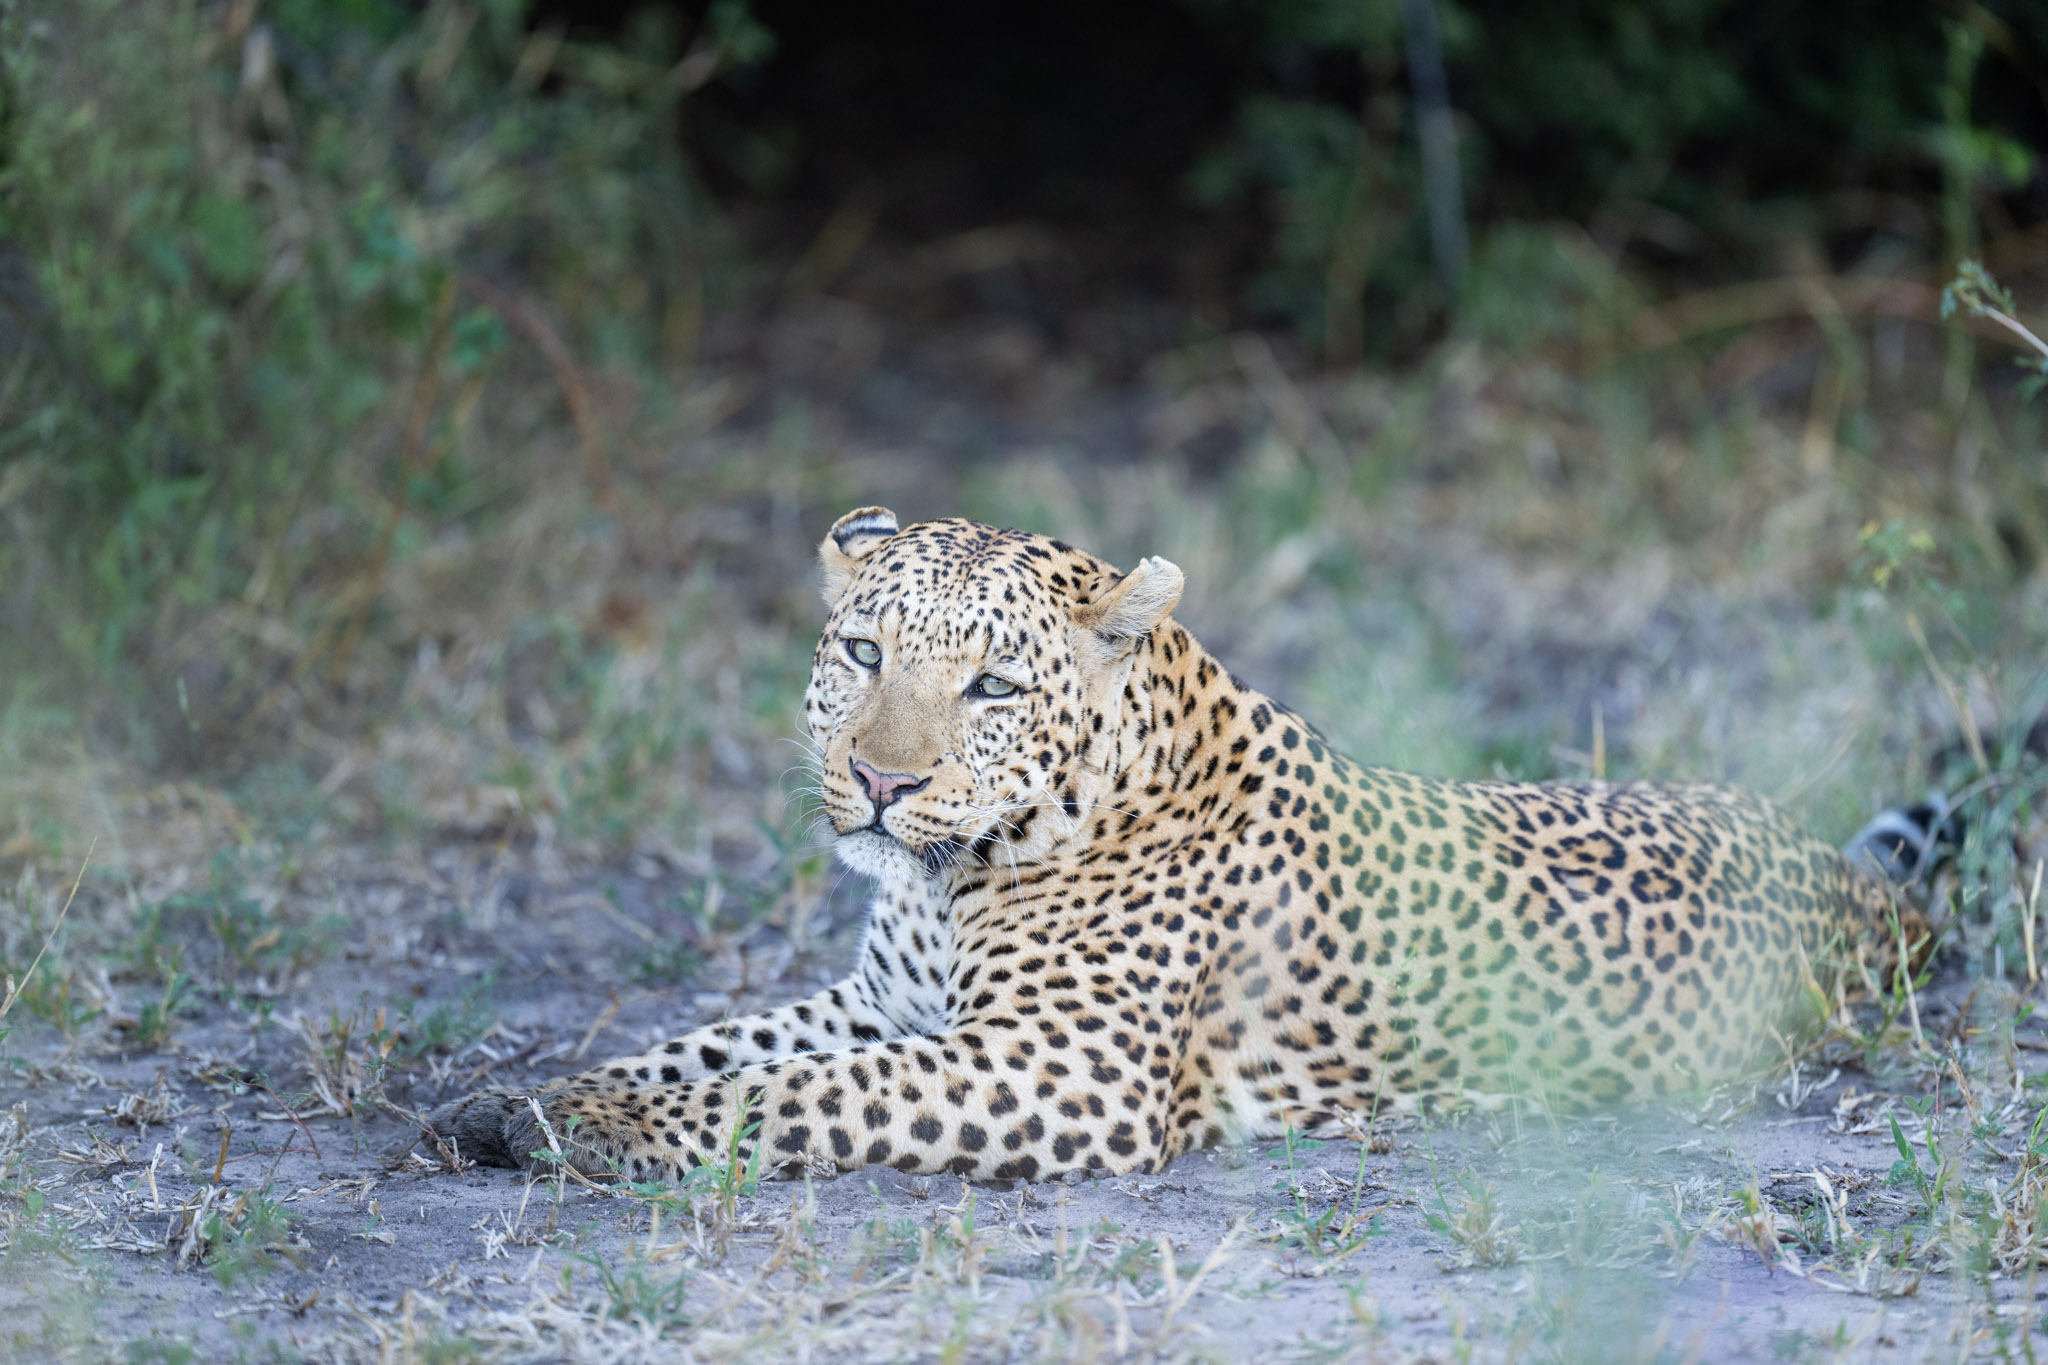
Table of Contents
Deciding Where to Go
When you start researching where to go on safari, you will quickly realize two things:
- There are tons of options and safari tour operators
- The prices of these options vary dramatically
It becomes clear that where you go will have a significant impact on your experience, along with what you see. Some animals are more common in certain places than others (and some are only seen in small areas). Also, the type of vehicles, and where those vehicles can go, will depend on where you are. My wife and I knew we had no interest in self driving for this trip.
We went in April/May because this was the only time of year that worked for our schedules. This is (slightly) off season, so we looked for places to go that would still have abundant wildlife. Just like in much of the world, seasonal differences can have a huge impact on different locations. Places that may be too dry to support much wildlife part of the year may be the ideal place during the rainy season. But places with tons of water can be tricky to find wildlife because they can spread out more.
We ultimately settled on Zimbabwe and Botswana for a combination of three reasons:
- We wanted to see lots of elephants. Elephants are my wife’s favorite animal, and we wanted to make sure we didn’t struggle to find them. Botswana has the largest elephant population in the world.
- We wanted to go somewhere that had open-air vehicles, not the bus style. This was largely for photography reasons, but also a motion sickness/fresh air consideration
- We wanted to experience a variety of animals and types of places (in particular, both a national park and a private reserve where you can off-road).
Picking a tour operator was a more difficult decision. Typically, my wife and I book our own things, but in this case we wanted to have someone else do it. Between all the vehicles, bush planes, border crossings, park entrances, etc., we felt it was worth enlisting the help of a pro. We requested quotes from several operators, and ultimately booked the one who we felt gave us what we wanted for the right price, and was also very responsive, as we had MANY questions.
The result:
Both Zimbabwe and Botswana were incredible countries, with amazing wildlife and warm people. We first went to Victoria Falls in Zimbabwe, visited an elephant sanctuary, and then went into Botswana to go into the bush. We stayed at two camps in Botswana, one outside of Chobe National Park, and one on a private reserve in the Okavango Delta. Both were fantastic. They took great care of us, put us in position to see amazing wildlife, and fed us very well.
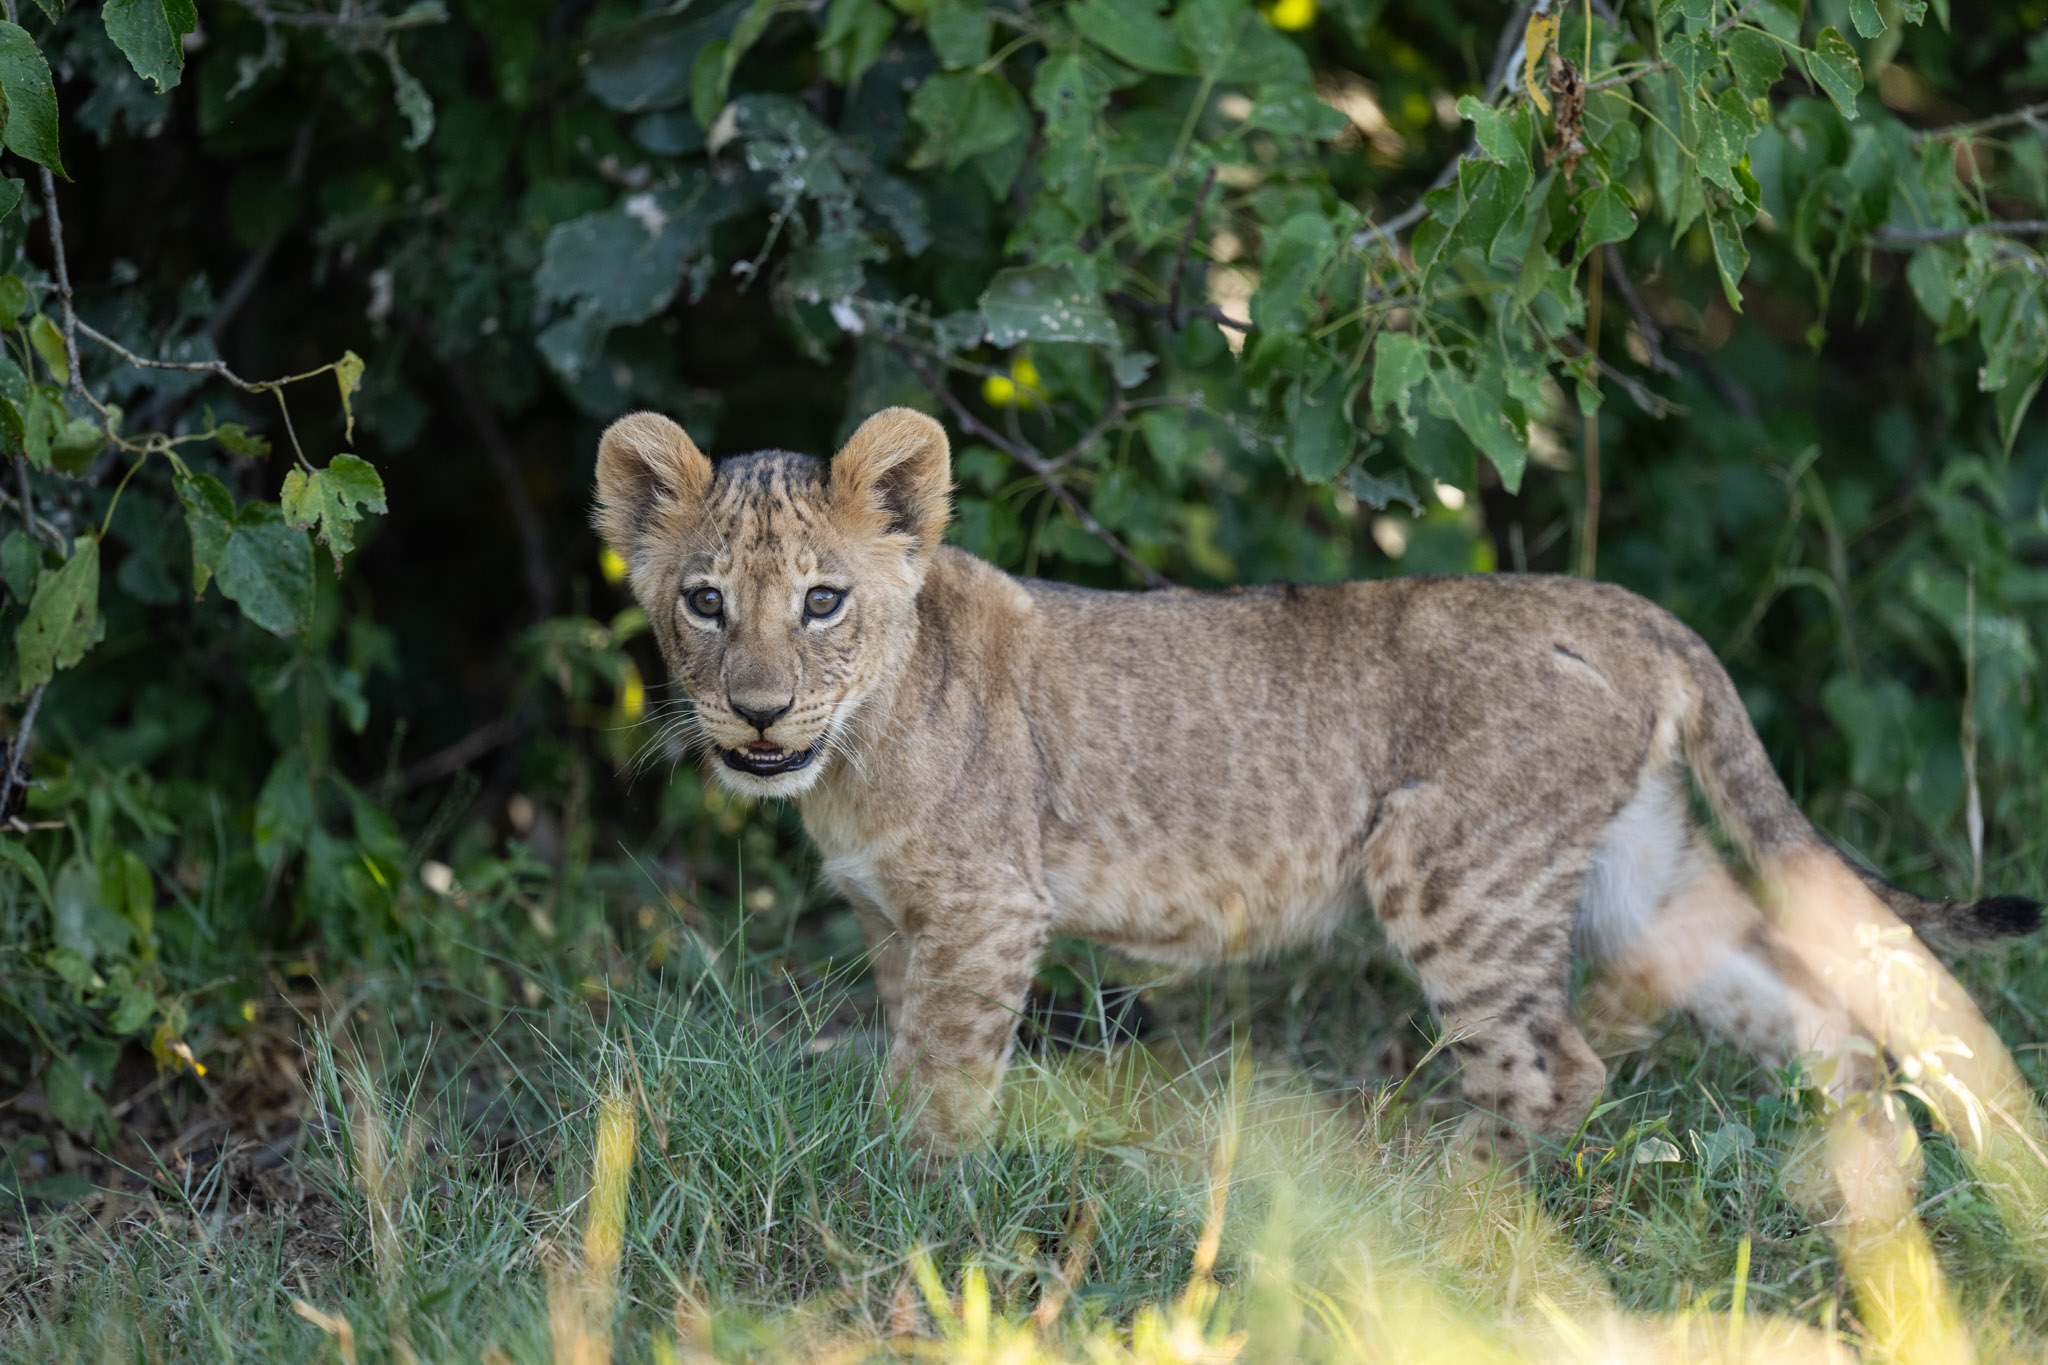
The first day, we arrived in the afternoon, so they took us out for our first drive that evening. We went down to the water in Chobe, and it was truly a full-on Lion King experience. We saw elephants, zebra, lions, monkeys, giraffes, kudu, and more all down at the water. It was like “wow,” ok, we are really here!
We were also really happy with the variety of experiences from visiting both the National Park and also a private reserve. They were very different from one another, and I’m glad we did them both. Our personal experience was that Chobe had more abundant wildlife, but that we got to see more unique moments at the reserve.
What to Bring
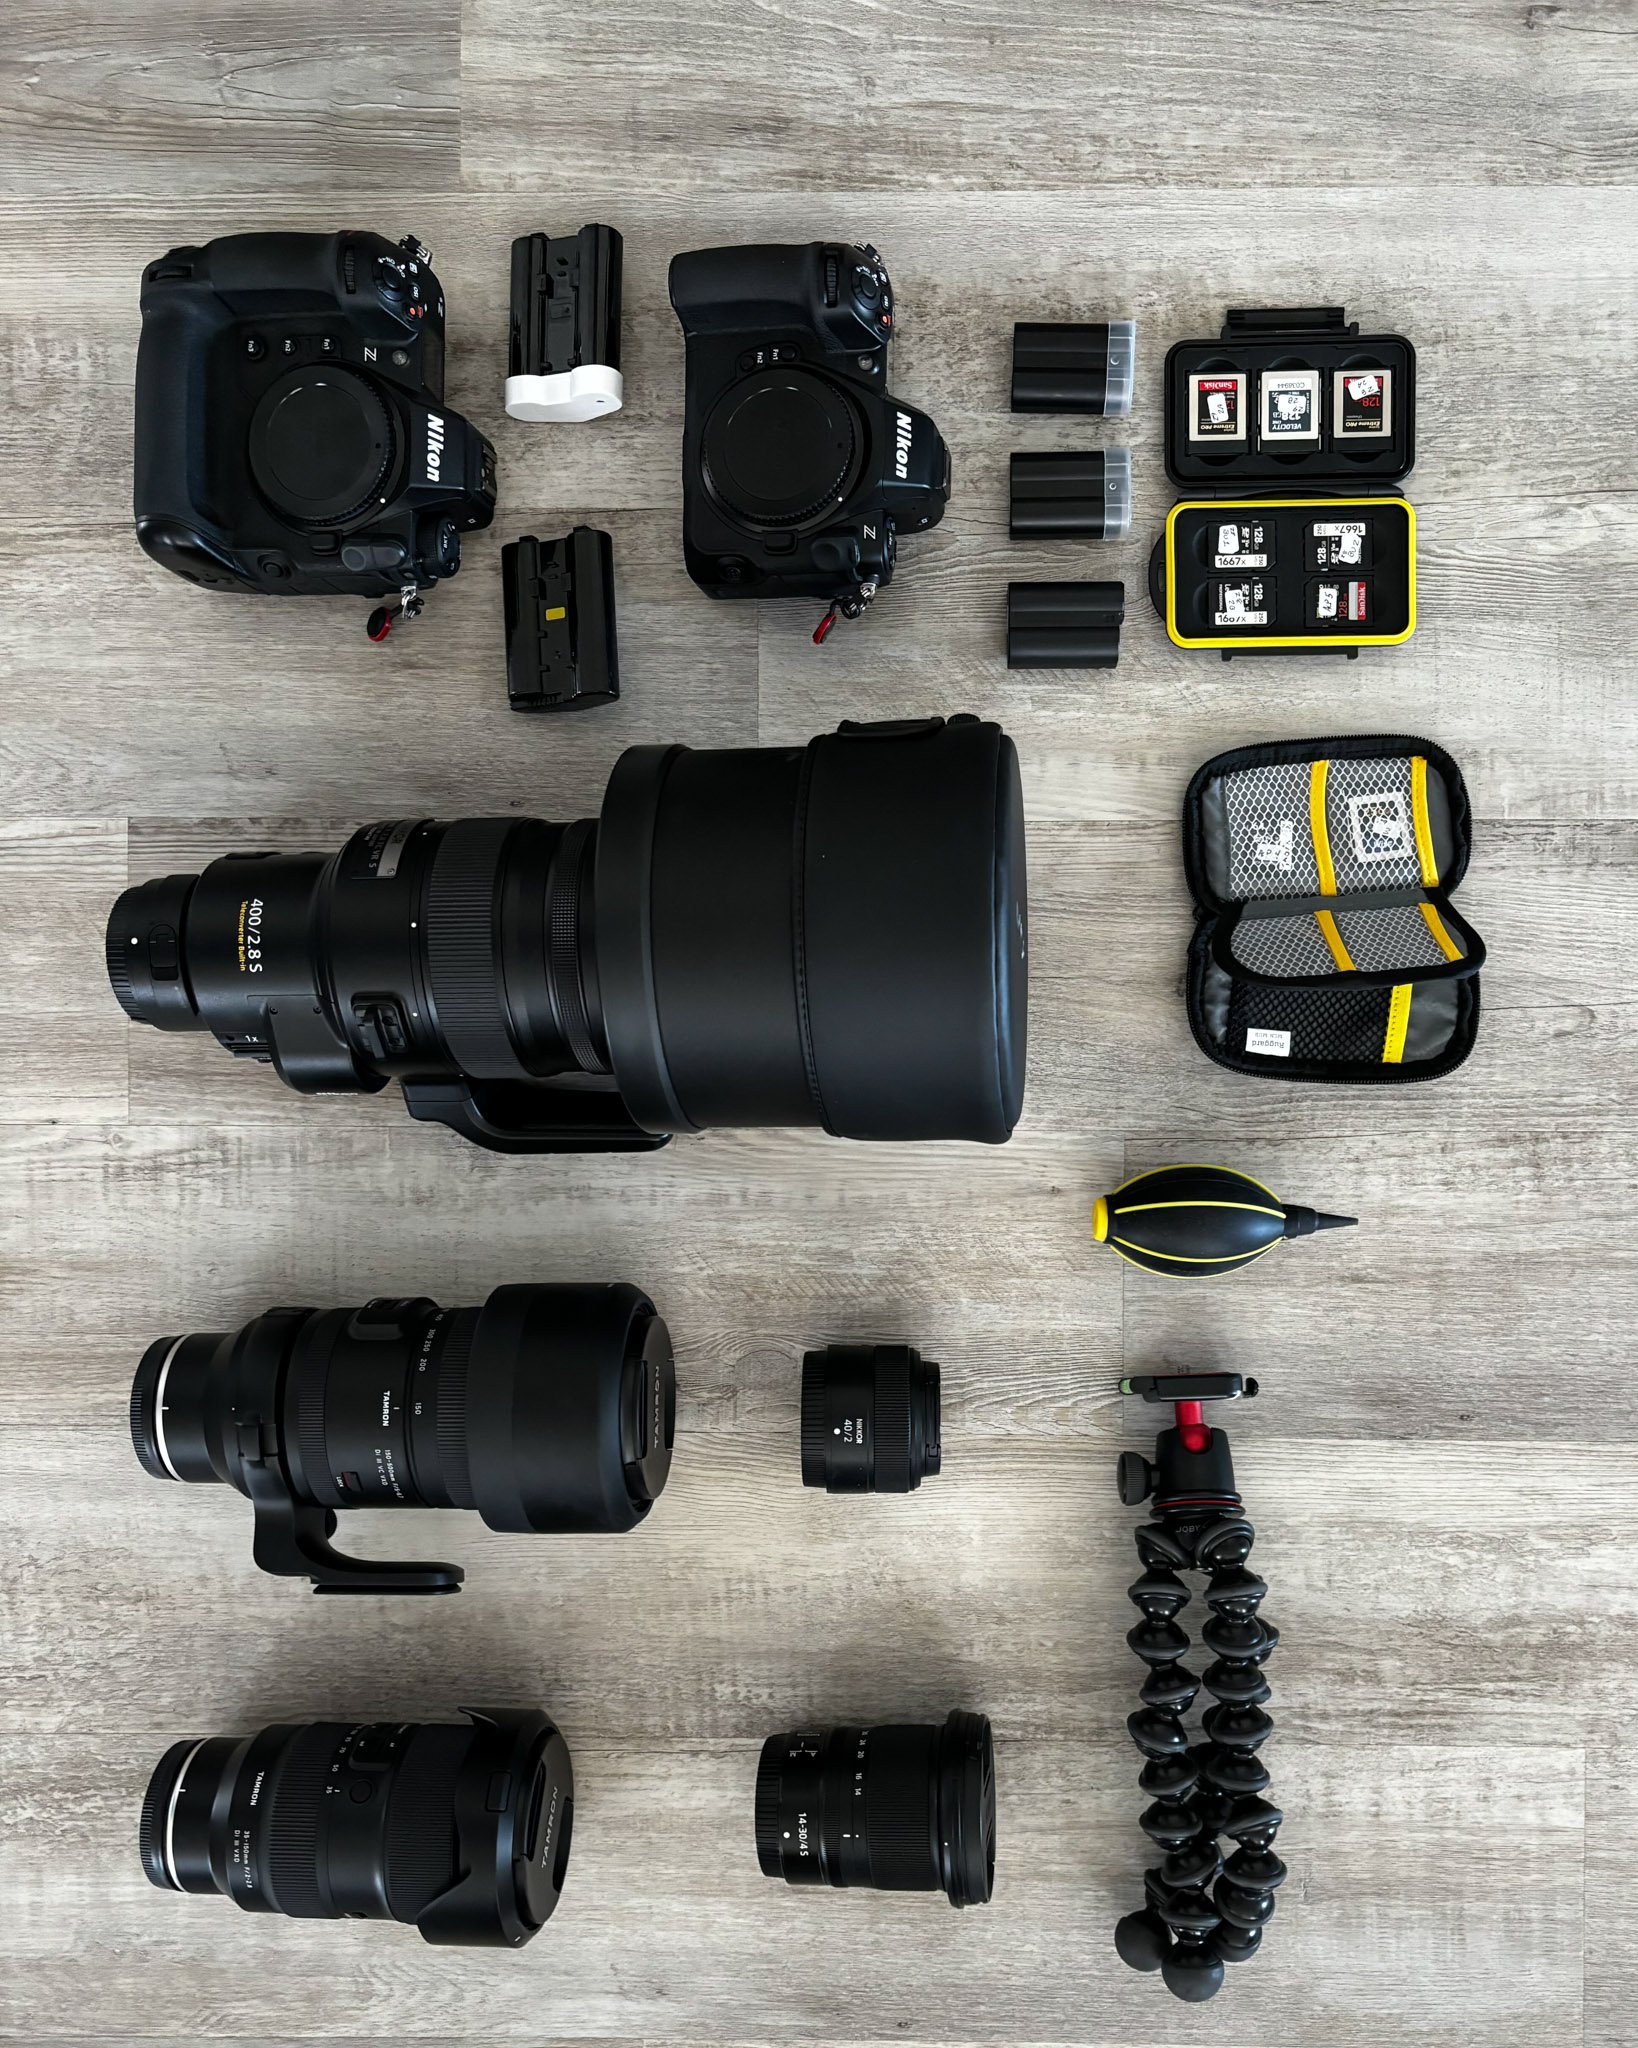
1. Cameras and Lenses
- Nikon Z9
- Nikon Z8
- Nikon Z 14-30mm f/4
- Nikon Z 40mm f/2
- Tamron 35-150mm f/2-2.8
- Tamron 150-500mm f/5-6.7
- Nikon Z 400 f/2.8 TC
Of all the decisions I needed to make before the trip, the lens combination was by far the one I spent the most time on (and agonizing over). I own the Nikon Z 180-600 and the Nikon Z 70-200, and they are both fantastic lenses. In fact, when this trip first came up, I thought I would bring those two plus my 24-70mm and call it a day. However, I was fortunate and had the opportunity to bring a 400mm f/2.8 for testing via Photography Life, and that was an opportunity I couldn’t say no to!
Unfortunately, I couldn’t fit the 400mm f/2.8 plus the 180-600mm and 70-200mm f/2.8 in my bag. So I decided to go with some smaller lenses to pair with the 400mm. The Tamron 35-150mm and 150-500mm seemed to fit the bill! The 150-500mm is somewhat lighter than the Nikon 180-600, but significantly smaller. In an ideal world, I would have brought the Nikon 180-600 instead of the Tamron 150-500 because I like it better (for the reasons I described in this article), but only the Tamron fit in my bag.
The Nikon Z 14-30mm f/4 was my “just in case” lens, and I figured there was a good chance I wouldn’t use it. But in case the situation warranted an ultra-wide, I didn’t want to go on a trip like this and not have anything wider than 35mm.
The Nikon Z 40mm f/2 is such a small lens that I travel with it on the body as a lens cap. In addition to the Africa portion of our trip, we spent a few days in London on the way, and the 40mm is my favorite street photography lens.
The camera decision was an easy one. No way I would have brought only one body, and I had the Z9 and Z8. The only dilemma was if I should bring a third body (which would have been a Nikon Z6 II). In the end, the decision was made for me, as I didn’t have the room or weight allowance anyway! If you are doing a private safari with more relaxed space considerations, you could consider bringing three cameras and three lenses, each paired together. But after being there, I think this would have been more of a hassle than it would be worth. Having the two bodies with two mounted lenses (usually the 150-500mm and the 400mm f/2.8) was perfect.
2. Other Photo Gear
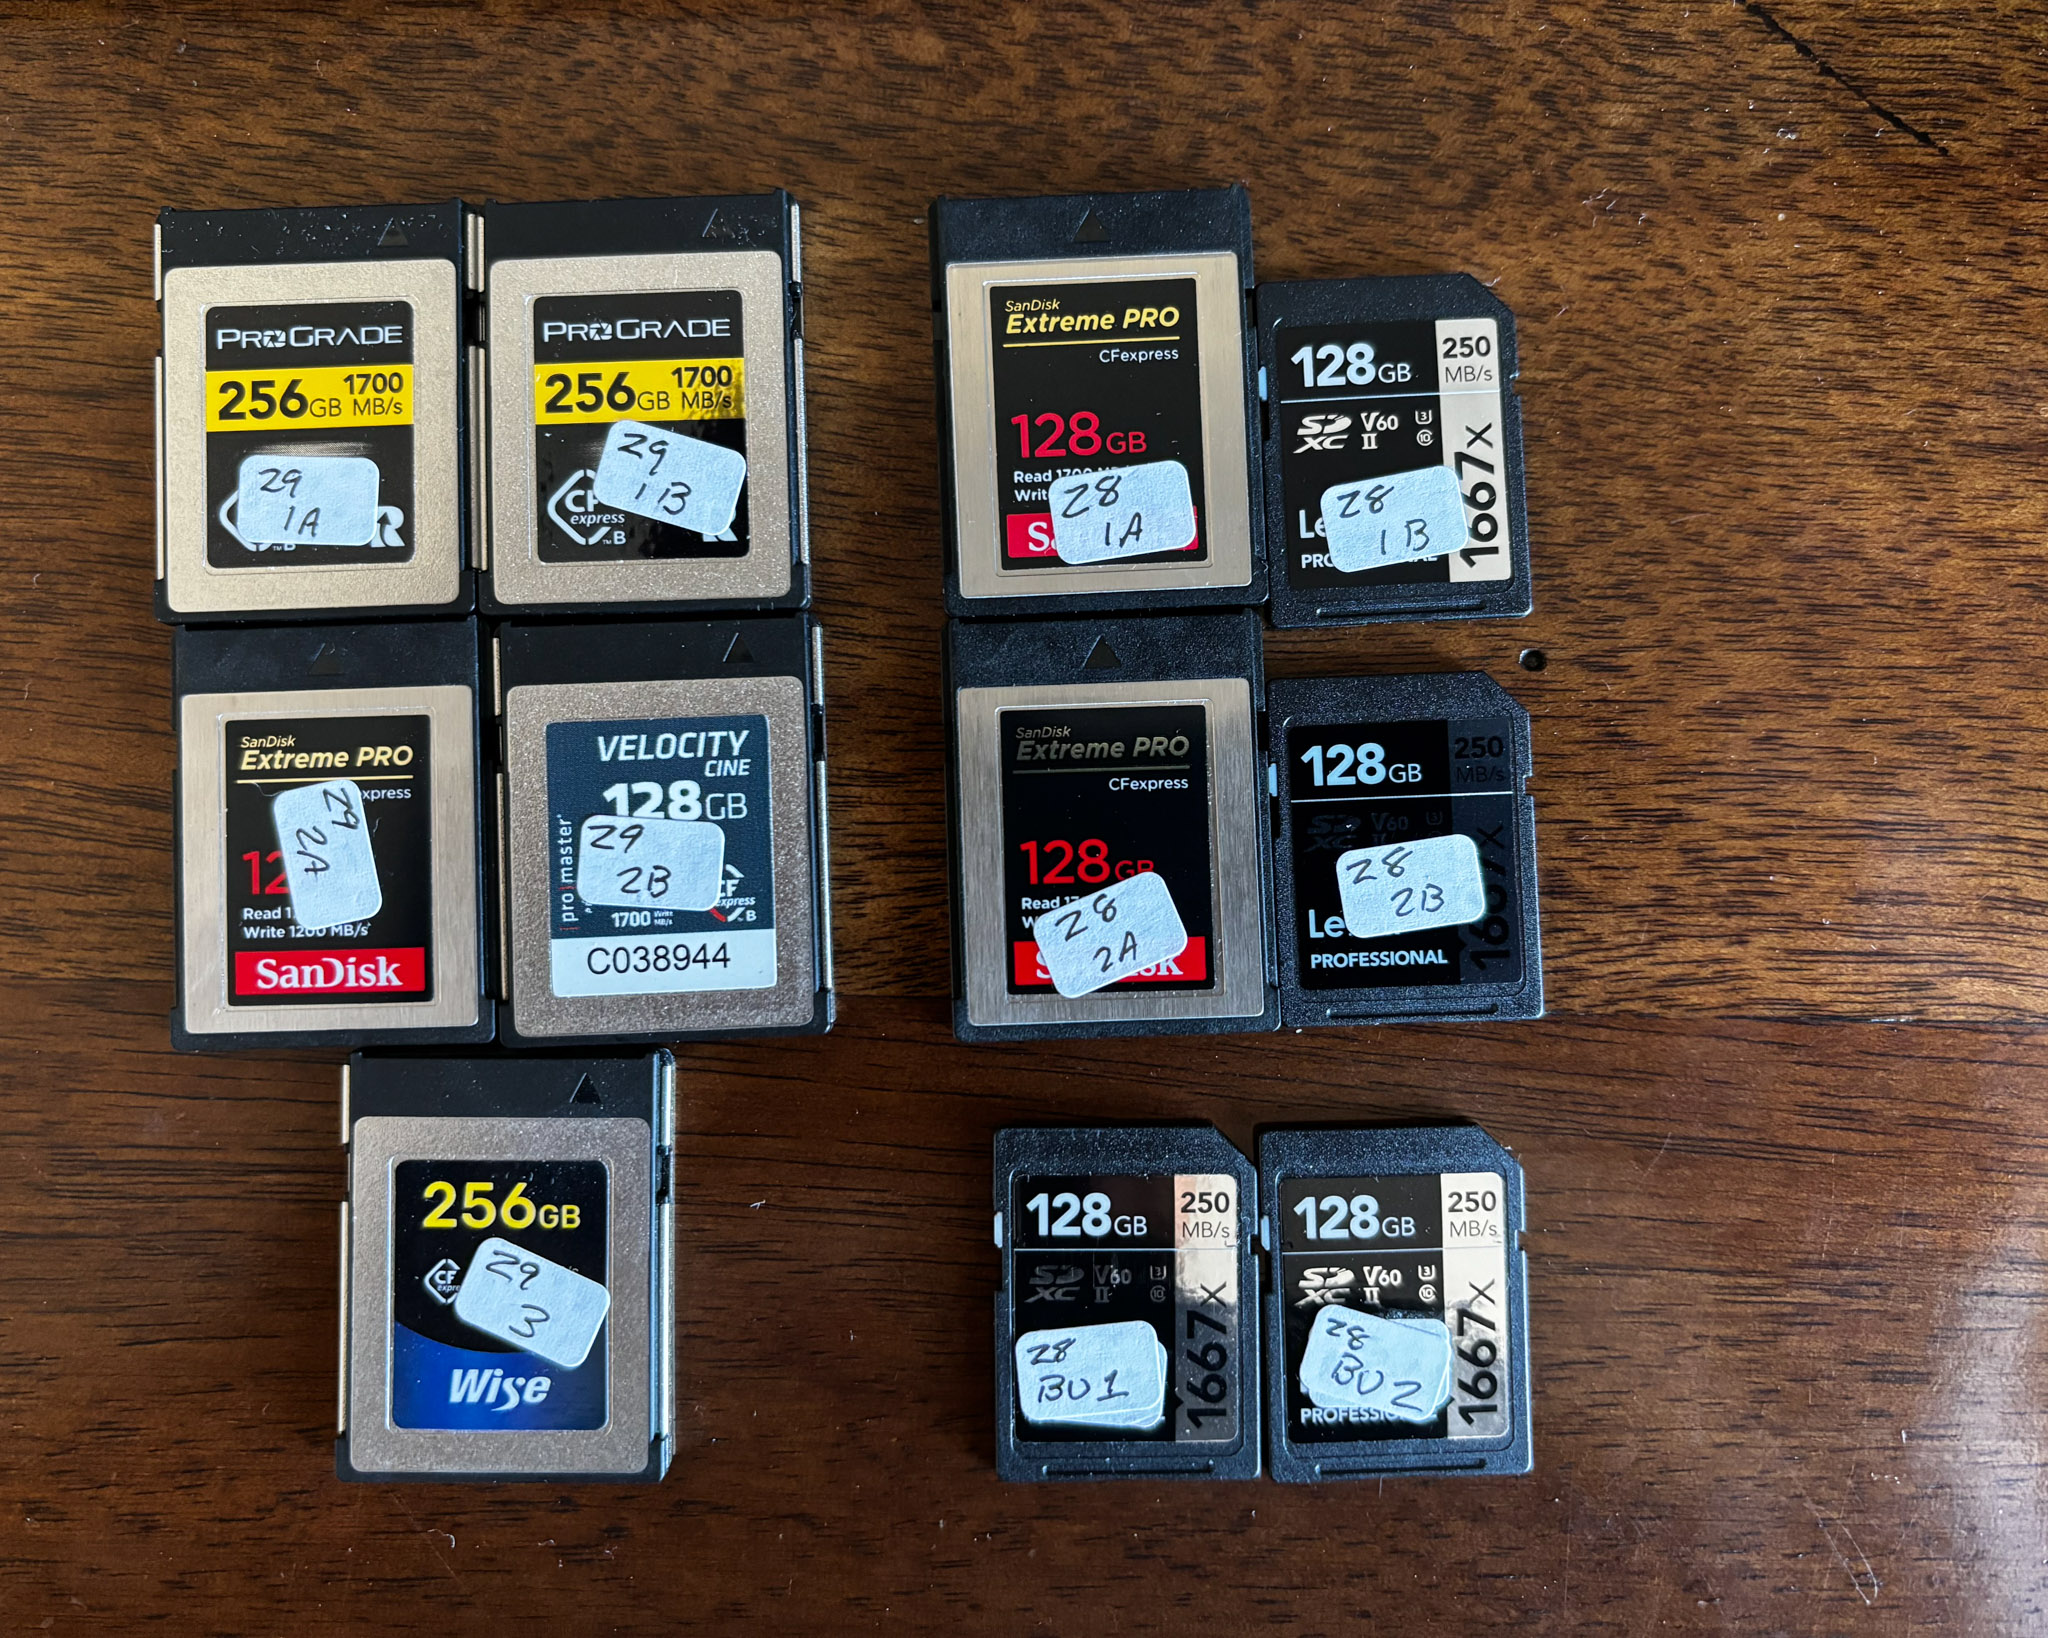
- Lots of memory cards
- 2x batteries for the Z9
- 2x batteries for the Z8
- CFExpress Type B Card Reader
- 3x Samsung SSD 2TB Hard Drives
- iPad Air
- Apple Pencil
- Mini USB C Hub
- Cleaning swabs, rocket blowers, etc.
- GorillaPod mini-tripod
From a photography standpoint, the Z9 and Z8 were a good compliment, and great redundancy since they can do essentially all the same things (for my type of work anyway). Unfortunately, they don’t use the same battery or same memory card configuration. Because of this, I needed to bring a variety of memory cards that added some complexity to my workflow. The difference in battery, while annoying, ultimately didn’t have an impact on what I brought, since I would have packed two batteries for each camera regardless. I actually saved some weight with the two Z8 batteries and never ran out of power, although I was careful to recharge each night.
3. Non-Photo Gear
Besides the photography gear, I packed very light for this trip. A few extra t-shirts, an extra pair of pants, some socks and underwear, toiletries, and my kindle is about all I brought. I knew that at least one of the camps we were at had laundry service, and I figured that years from now, I would look back on and appreciate the photos with the photo gear I brought, and not care that I wore the same shirt 3 times!
This turned out to be a great approach. Although outside the focus of this article, the only problem I had with my clothes was that I packed knowing it would be hot in Africa. While this was true, we were in London for a few days beforehand and it was freezing cold! But still, I’m happy I packed minimally.
4. Luggage
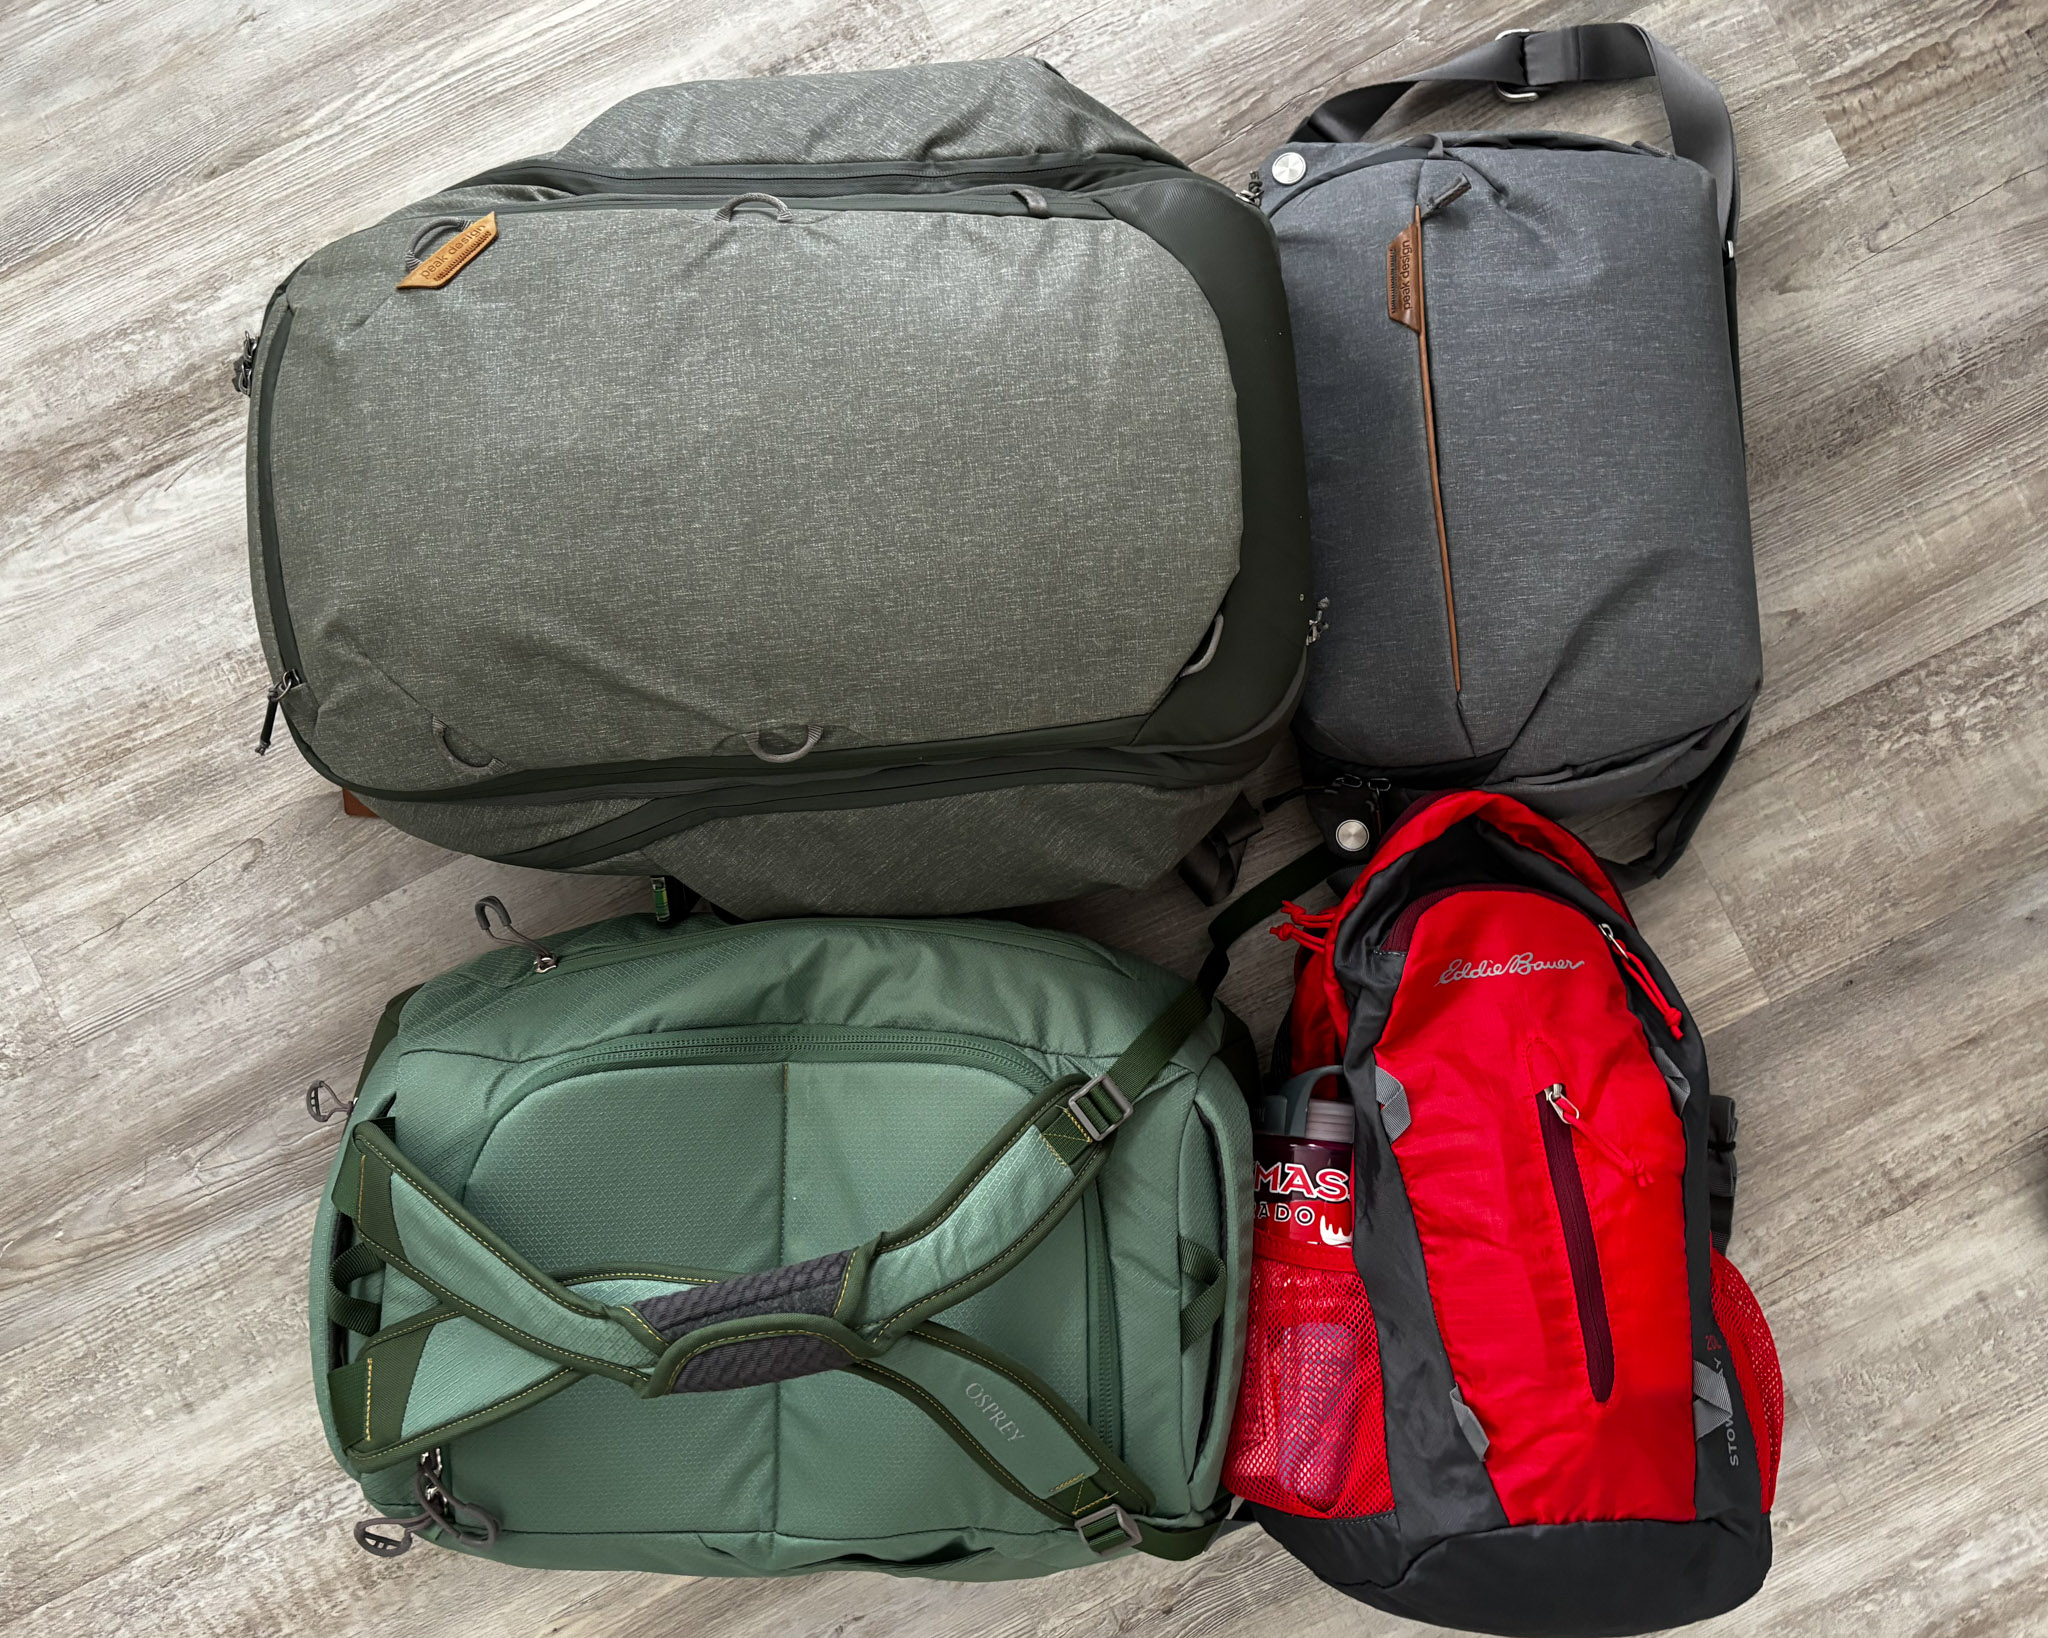
- Peak Design 45L Travel Bag with the “Large” photo cube
- Peak Design 10L Sling
Many of the flights we were on had very strict size and weight limits. And with all the different places and terrain we were going through, I didn’t want to bring a roller bag. All the flights we had allowed one “carry-on” and one “personal item.” My 45L backpack was my carry-on, and the sling was my personal item. I kept my clothes and toiletries in the sling bag so that I could gate-check it if asked, but fortunately, this was never an issue. I didn’t check a bag at all.
My thought process was this: the 45L bag with the large insert could hold all of my cameras and lenses during travel. Then, once I got to camp, I would transfer the camera gear to the sling bag and bring that on the safari drive/boat. The one exception was the 400mm f/2.8, which is much bigger than the sling. That lens I simply carried, mounted to the Z9 at all times.
I was pushing the weight limit on some of the flights for the 45L backpack, so in a few instances, I added a camera and lens to the sling and put some clothes in the 45L. This helped distribute the weight more evenly (I’ve never seen a personal item be weighed). In this end, none of my bags were weighed, but I’m still glad I had a plan.
Backing up in the Field
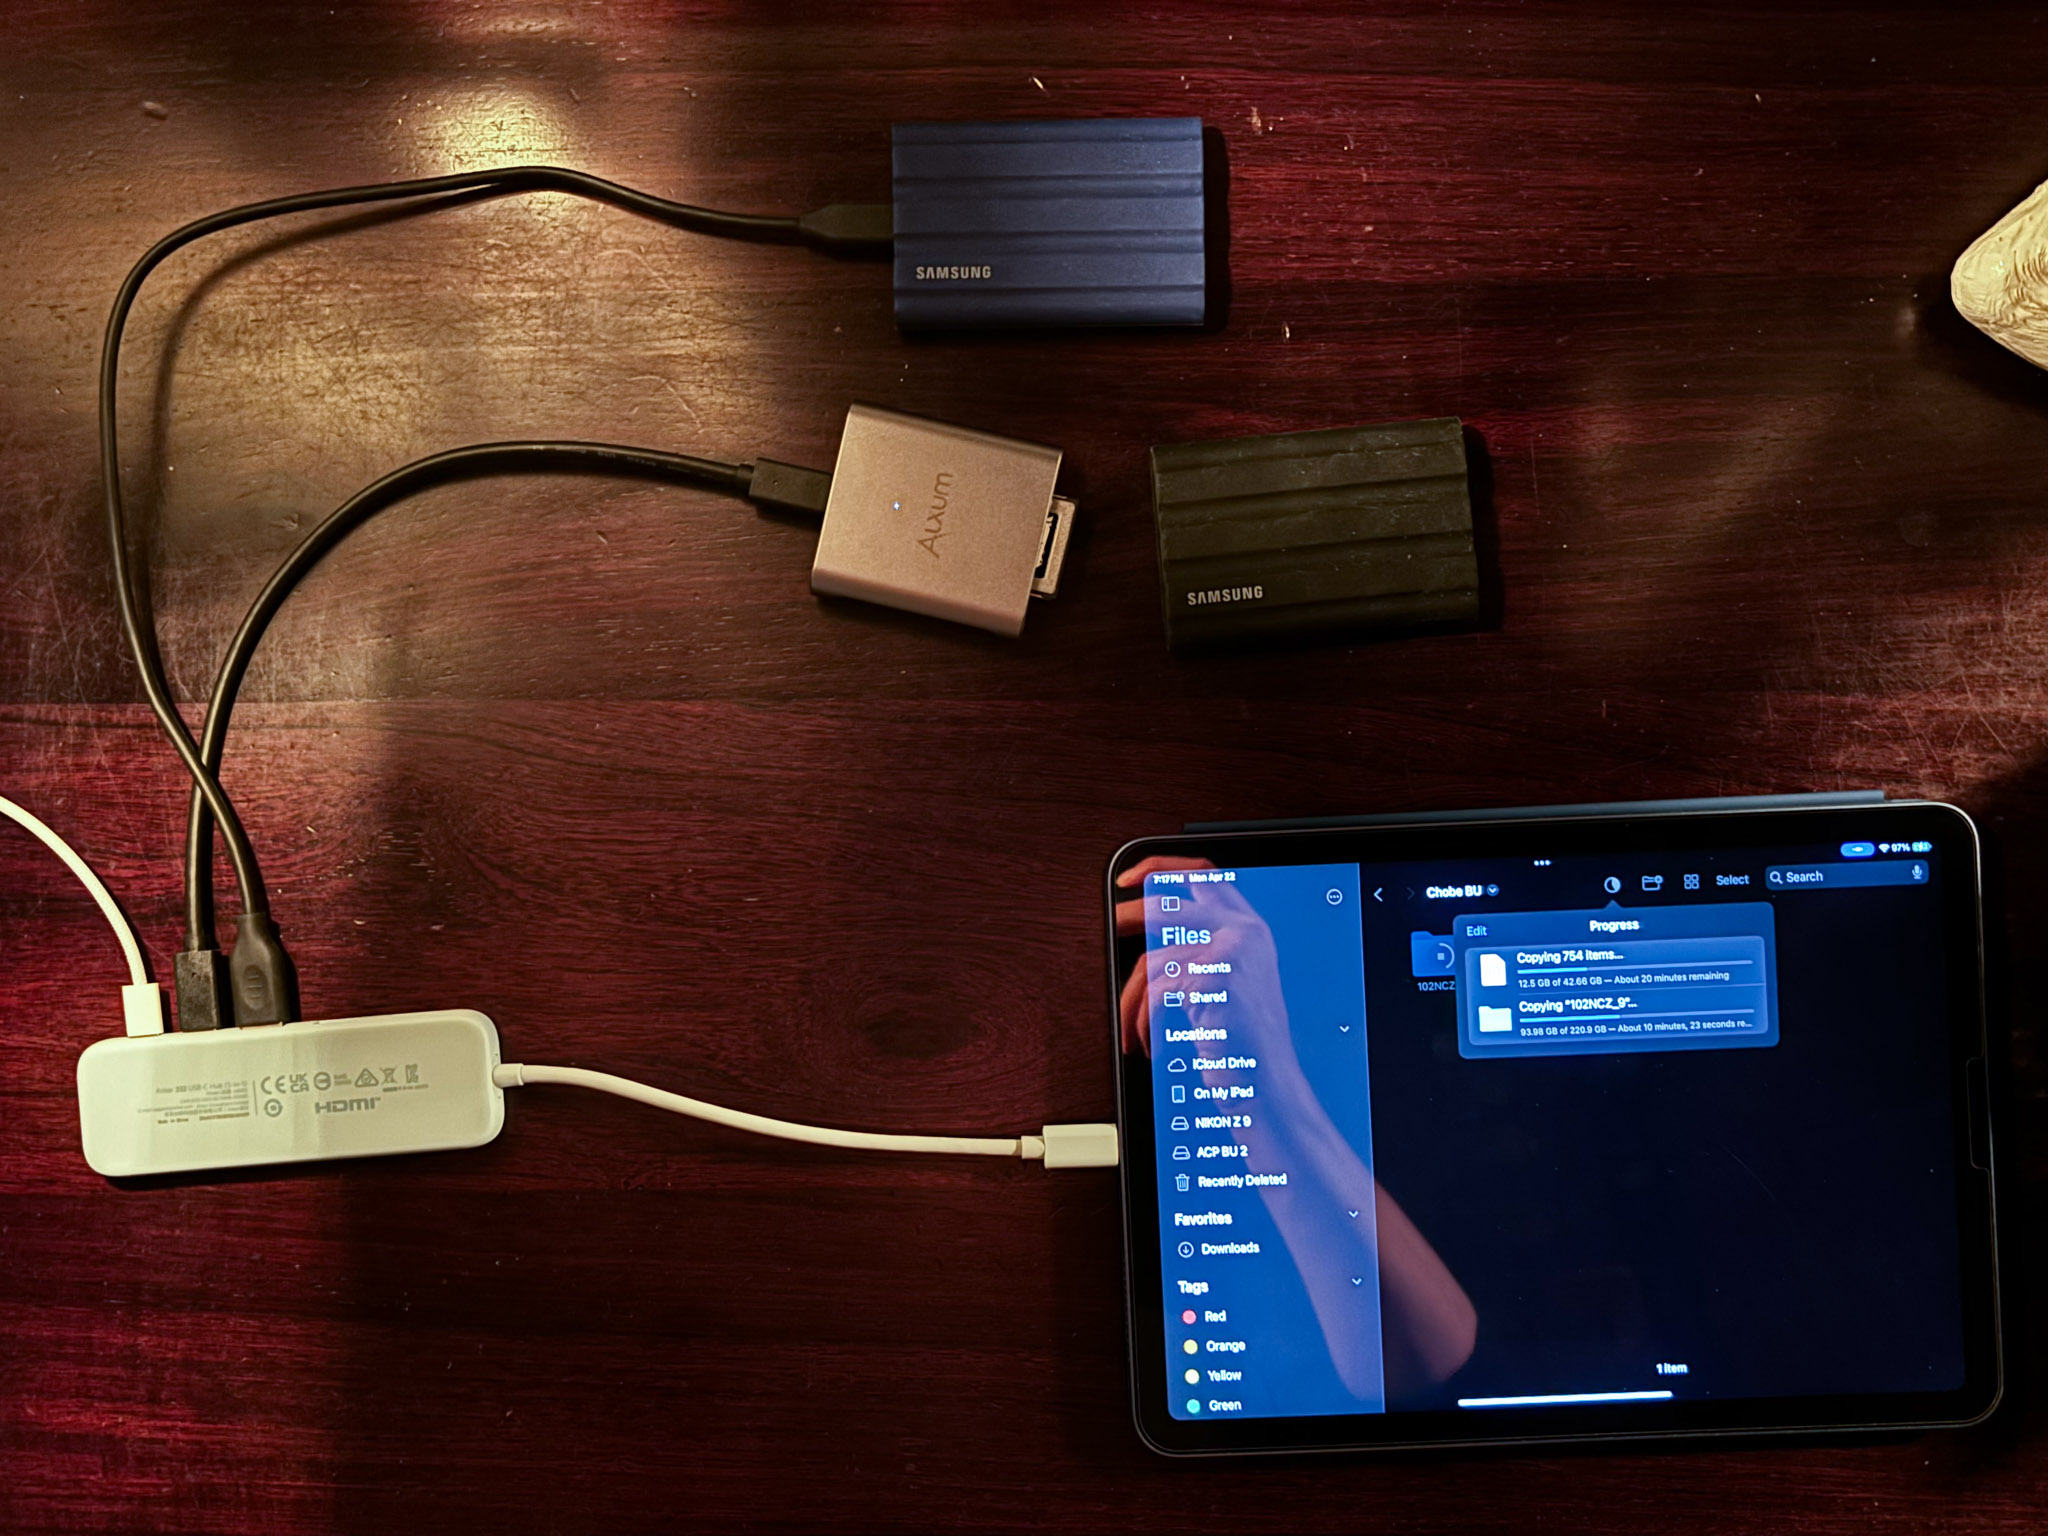
Assuming that we would have little or no internet connectivity during the trip, I needed to find a way to back up all the photos without resorting to cloud storage. My solution was the same thing that I often use when traveling for weddings or other events where I try to pack as light as possible.
It goes like this: A mini USB-C hub plugs into my iPad. Both a CFExpress reader and an external SSD plug into the hub. Then I copy all the files from the CFExpress card into a new folder on the hard drive. Disconnect the hard drive, plug in a second hard drive, and repeat.
I always write my photos to both memory card slots as backup, so after transferring the images, I would only format one of the two memory cards. The other went into my bag for safe keeping (and the hard drive in my wife’s bag in case one of ours got lost or stolen).
Some may say this is overly cautious, but I would rather be too cautious than lose the photos, especially if it’s client work.
And that’s a wrap for part one! Part two will cover the experience of actually being there, along with my lessons learned in the field. Here’s a sneak peek:
Hi Adam, I enjoyed this article! Regarding your backup process, what USB-C hub do you use? I experimented at home with this method, but the backing up was so slow as to be completely impractical. But the hub I tried does not use an independent power source, so I’m wondering if that was the problem. Thanks!
Hi John,
I used the Anker 332 USB-C hub. It is not one that has an external power source, so it was certainly slower than downloading/backing up at home, but I didn’t find it to be an issue in practice. I would backup after each morning and evening outing, and if I had to guess (I didn’t time it), it probably took about 15 minutes each time, which was not an issue with our schedule.
Hope that helps!
Adam, thanks for the article! I really enjoyed learning about your process for choosing what to take and reading some of your comments around airline weight and size limits.
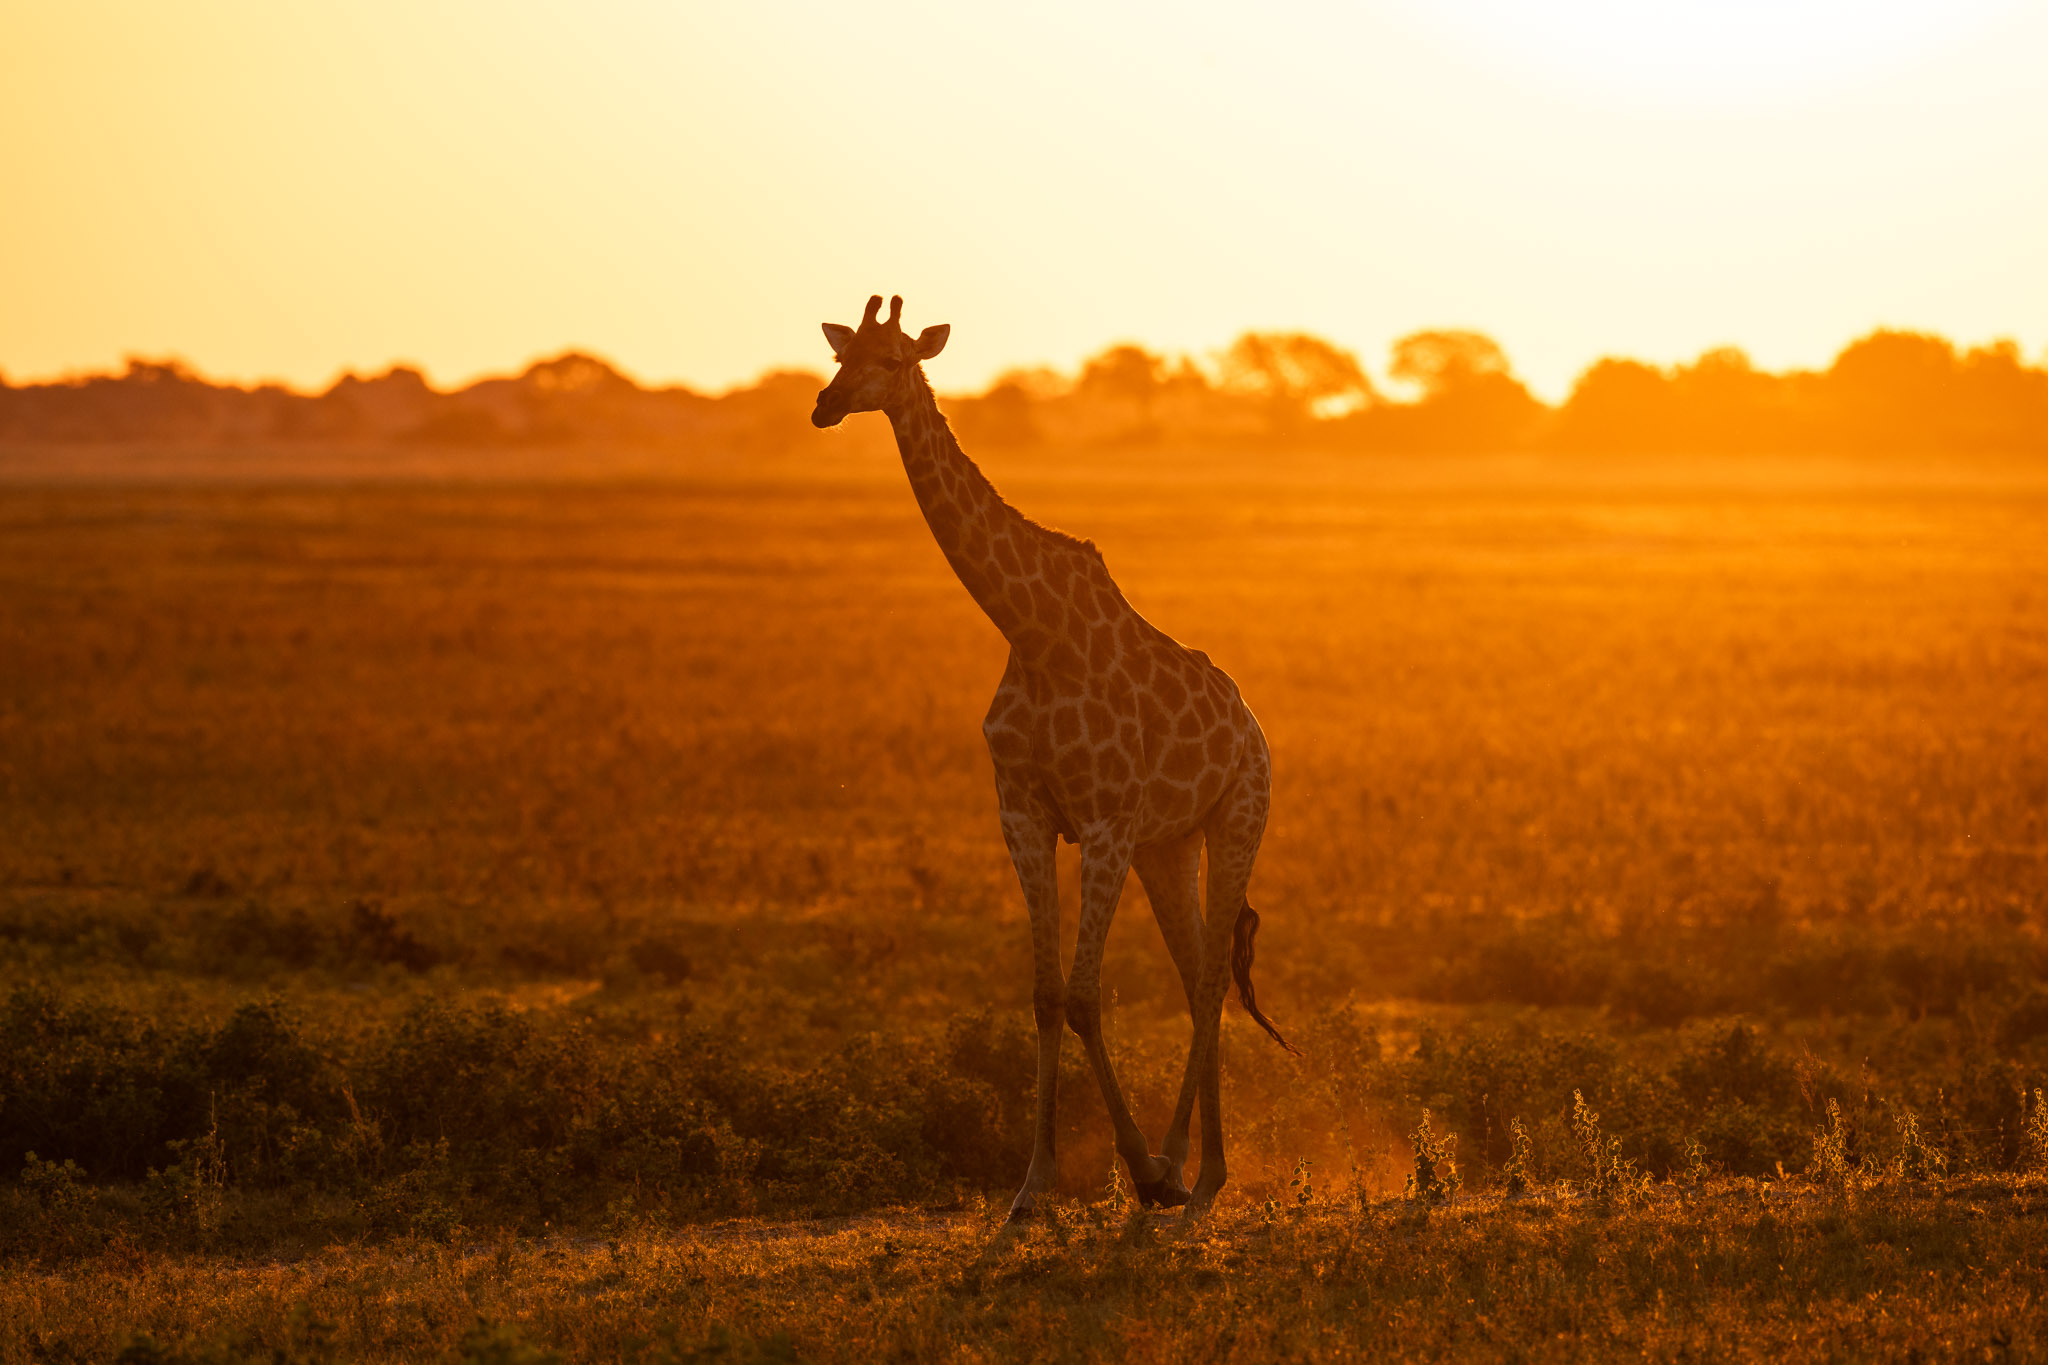
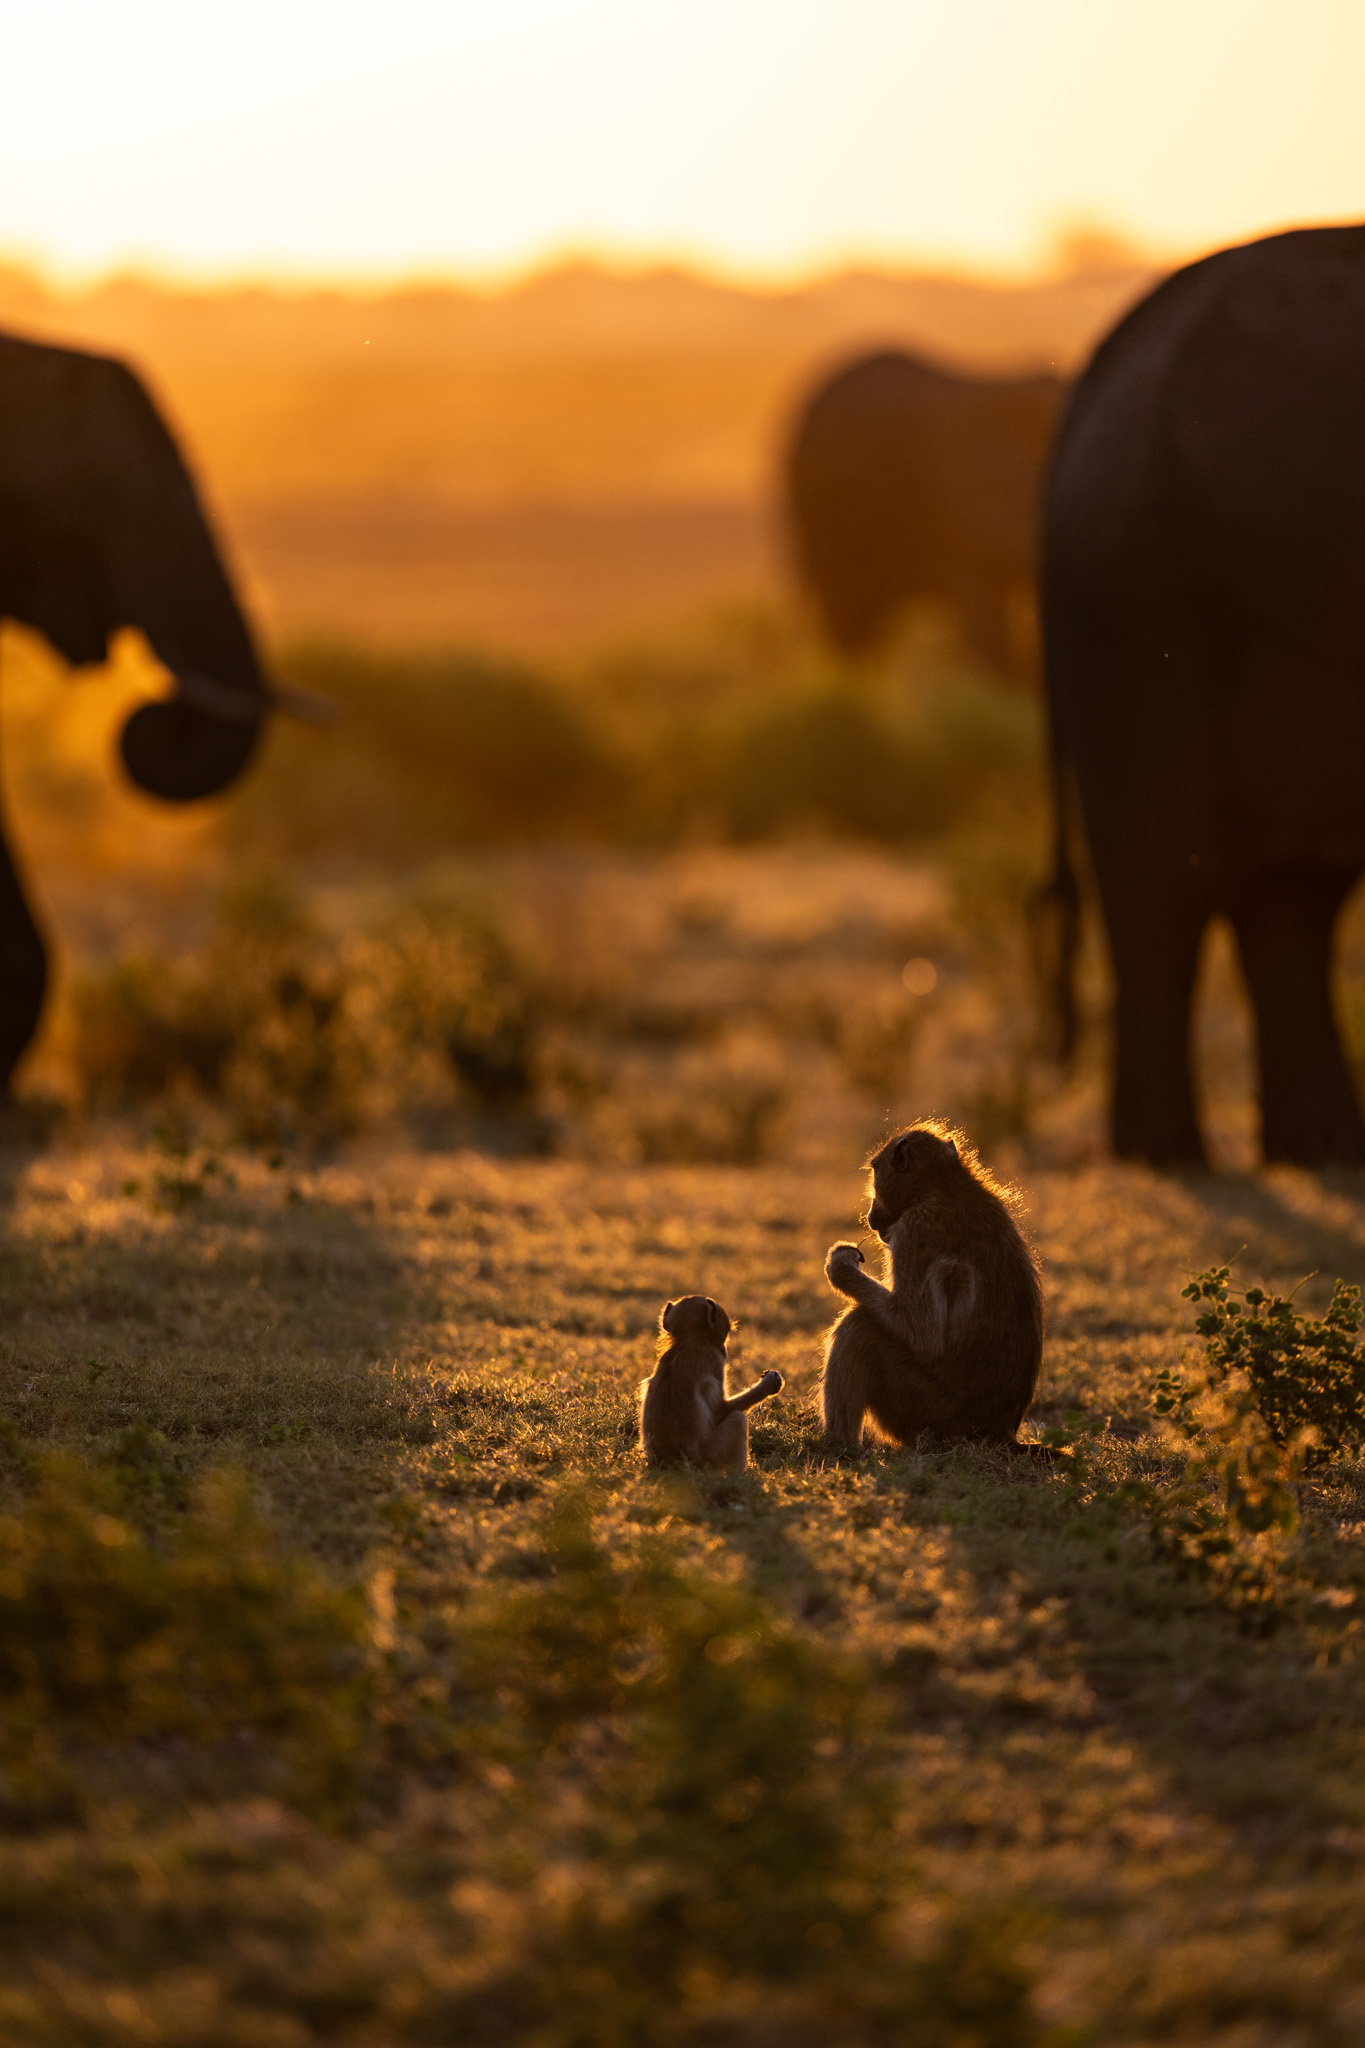
I really like the two somewhat backlit shots of the giraffe and monkeys. They have a really fun vibe to them and make me remember exactly what it felt like to be there.
The Tamron 150-500 seems like a great choice for your needs. It’s optically very good but definitely it’s size was what drew me to it. The fact that it collapses so small is really useful for travel.
I imagine taking the 400mm f/2.8 is one of those things where it’s a dream lens for so many of us, it would be hard to leave it behind for a dream trip!
Thanks James!
And yeah you are exactly right – I was all set to take the gear I already owned, but the opportunity to take a lens like the 400 on a trip like this was just too compelling to pass up!
I went last time with the 180-600, 70-200 and 24-120… 90% were taken with the 180-600, 9% with my iphone… 1% with the other. Next time I’ll bring only the 180-600 and maybe an uwa (14-24 or 30) just in case.
I believe it – the vast majority of my shots were in the 180-600 range as well. I would be happy with the 180-600 and a 70-200 (mostly for the 2.8 aperture).
Thanks Adam, a great article. Your rationale is very similar to my safari experience and it worked. I may have missed it: what were your charging arrangements? Looking forward to part 2.
Thanks Robin, glad you liked it!
Good question – I didn’t want the bulk of the chargers for both the Z8 and Z9 batteries, so I brought a wall splitter with 2 USB-C outlets so I could charge the batteries of both in-camera at the same time. And then the outlet adapter. It worked well, especially since I never used more than one battery per camera without then going back to camp.
Hi Adam, enjoyed your article. Was wondering how much you used your 14-30mm f4 lens . Was it worth taking?
Thanks
Allan
Thanks Allan,
I do talk a little about the answer to your question in part two of the article coming soon, but spoiler alert – I didn’t use it. I didn’t want my widest focal length to be 35, which is why I brought it, but I’d probably leave it home next time unless I wanted to do some night sky or big landscape stuff.
Great information, especially about trip planning, thank you!
As good as the Nikon 400mm F2.8 TC is, I would never take it with me on a safari unless I am planning to sell my photos afterward, that would cause a lot of unnecessary stress during traveling and back pain for me!
If I had the choice, I would probably take 24-120, 100-400, and 40mm with me, and throw in the 28-400mm as a backup.
Yeah, the 400 was amazing, but massive. Took up a third of my total packing space, but I’m still glad I brought it, especially for the very early morning/late evening shots where I was really maxing out what I could do.
The kit you describe would be an awesome, and MUCH lighter setup! I likely would have gone 24-70, 70-200 and 180-600 if I didn’t have the option to use the 400.
Wow, a dreamtrip, I am jealous😊! You carry a lot, must be quit heavy. As long as you are in a car no problem but if you also want to walk or just want to be more mobile m4/3 would always be my preferred system.
It was definitely a heavy setup! I knew in advance that this would be almost an exclusively vehicle based trip – if I had been on foot for most of it, I would have gone with a much lighter setup.
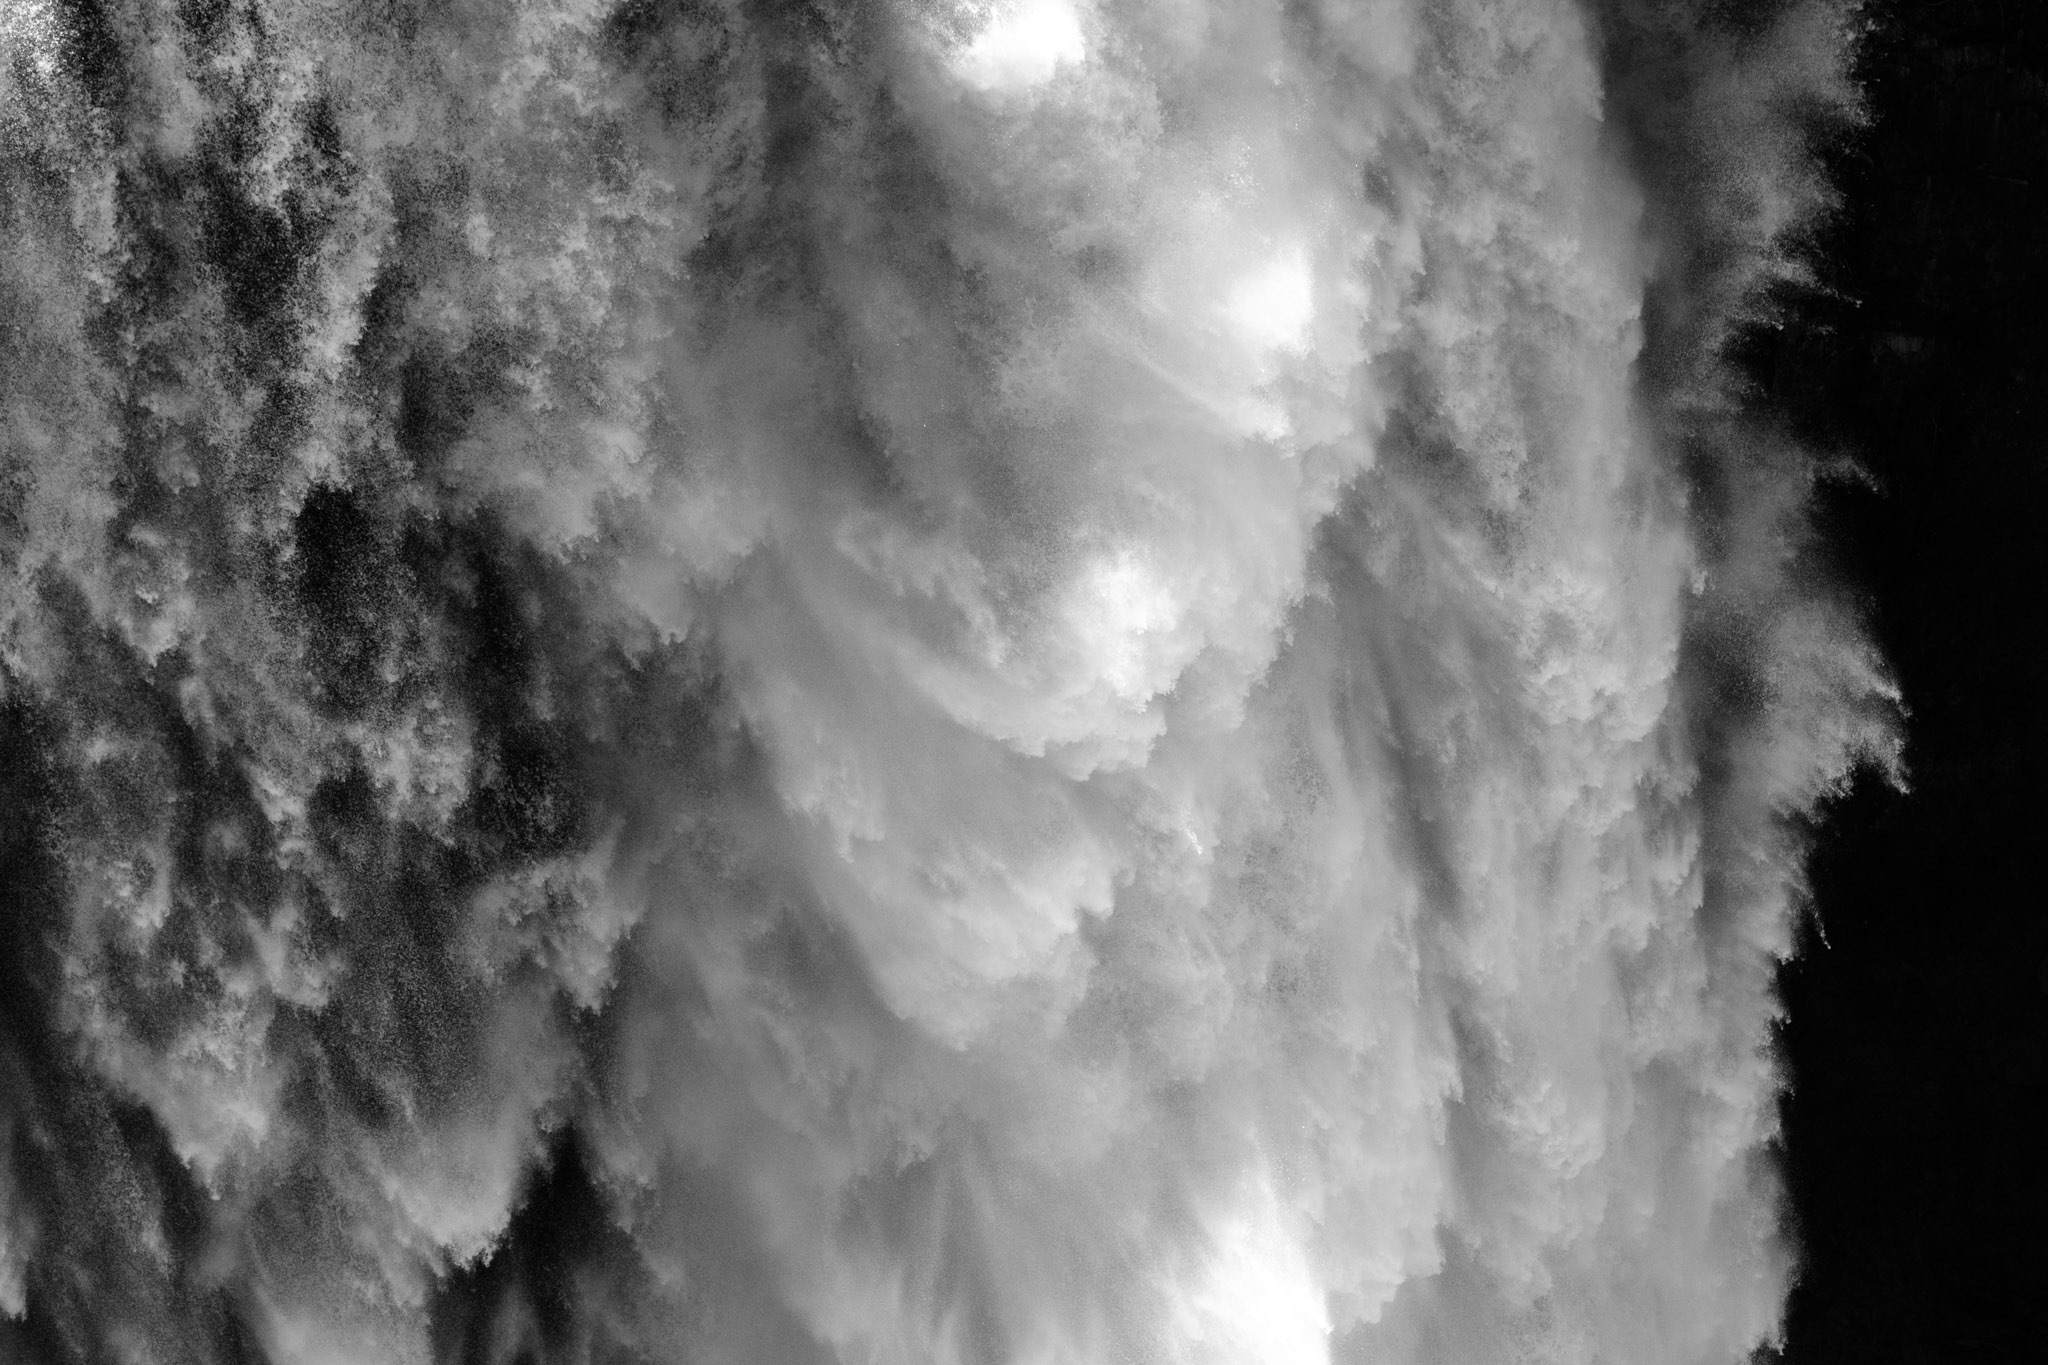
On the rare times that I was was walking on this trip (like when we went to Victoria Falls), I brought just the Z8 and the 35-150 lens
Good article, enlightening.
What was the weight of both of your bags ? All the airlines I travel with in SEAsia, Argentina, Australia, and India, usually have 7 kg carry-on (economy class). Your 45L pack would have exceeded 7 kg by a lot. I have seen some airlines enforce the carry-on 7 kg and size limits. And carry-on bag and personal item combined is limited to 7 kg. Which is a problem with camera gear having to be being checked . Or are you flying business class which normally has greater carry-on ability / weights ?
Hi Keith,
Good question, and yes we did take several flights with 7kg limits, although all of them specified that this was for the carry on item, and did not mention a weight for the personal item (only a size requirement). My approach was this:
1) Load my personal item with as much weight as possible (Z9, Z8, and 35-150 all fit in it)
2) Put one lens in my wife’s carry one, and take some of her clothes in exchange (the 150-500)
3) At this point, it’s just the 400, 14-30, and a few other accessories left in the 45L, which got me close to the 7kg (I believe at one point I weighed it and it was about 7.5).
At some points, my personal item bag was heavier than the 45L, but I’ve never had a personal item weighed (I’m not saying airlines never do this, but I personally haven’t experienced it). If they were weighing and I was still a little over, my last resort was to wear the Z9 with a lens on it.
In all, this method worked primarily because there were two of us and only one was bringing gear. Being able to add some of my wife’s clothes in exchange for a heavy lens or two made all the difference. The other thing that allowed it to work was that I packed extremely minimally for everything except gear. Very little clothes, personal items, etc. I figured I would much rather have the gear I wanted for the photos I wanted to take vs. an extra pair of clean clothes.
Thank you Adam, this article is very helpful. I’m planning a trip to Africa too and it’s driving me crazy about the photography gears selection. I own a nikon 17-28 and a tamron 35-150, maybe I should rent a tamron 150-500 to go. Now lets wait for the Part II!
Seraph,
I’m glad you liked the article. Yeah, the gear dilemma drove me crazy for a long time! The 17-28 and the 35-150 is a great start to a kit, giving you the wide and medium coverage. I would say pick a long lens of your choice (Tamron 150-500, Nikon 180-600, etc) and you’ll be good to go! Part II does talk about those choices as well :)
Hi.
I really liked your article. A lot of people do not dimension or plan ahead in terms of traveling gear. Another issue I would throw in would also be insurance, you can never be too careful and traveling does bring risks such as gear loss, damage due to the elements, also safety issues present anywhere in the world, etc.
I read photographylife magazine about five times a month. I recently moved from Colombia into Montreal in order to become a student and pursue a MA. Leaving everything behind and adapting to this new place has been a times very challenging. Even though I am with my wife and kids, I still miss all those loved ones that are back home. Photography has been extremely therapeutical and I believe this is something that is not talked about enough. THe mere fact that we carry a camera around puts our mind in something outside ourselves.
Immigrants and anyone that deals with difficult feelings can find in the camera a way to relief the pain. It may be that the person finds themes out there that resonate with his or her own feelings, or it may be that the camera just distracts, or maybe the person encounters something new and different, a new pattern, a topic to work around, anything.
I believe photography can save the world, not because others will see our pictures, but because we create pictures. The fact that we can CREATE something is worth doing it. We will later come back to our photos and remember how low we were feeling back then, or the ups and downs, or our life stages, or the desease of a loved one and how that desease took that loved one away.
Photography can change the world and I would like to write a piece about it which could possibly be published here, maybe? What would you say?
Thank you for reading this comment.
My instagram account is @carlosgerardocelis
Thank you and have a greay day.
Carlos.
Hi Carlos,
Thanks for the comment! Glad you enjoyed part one.
You bring up an excellent point about insurance – I do have insurance on all my gear, but you are right that many don’t, and is especially a consideration for a trip like this. I’ll make a short addition to the article in the next day or two to include that consideration.
Thank you for sharing your story – and I’m glad that photography has been so therapeutical for you! I will let Spencer know about your interest in potentially writing an article! Also, I just checked out your instagram – nice work!
Having moved countries and continents a few times, I agree with you – taking pictures helps. For me, it has also been a way to find places I like, or rather, to help me start liking places, which, I guess, is the first step towards feeling at home somewhere.