It is no secret that the fall / autumn season attracts many photographers to the most scenic locations of the world. Photographing fall foliage is a rewarding experience, as it presents very unique opportunities when capturing the transformation of otherwise boring locations into stunning displays of color. I have been photographing fall colors for many years now and I have been fortunate to acquire some knowledge on what specific tools and photography techniques work best in the field. In this article, I want to share a few tips with our readers on how to best capture fall foliage.

Table of Contents
Research Locations
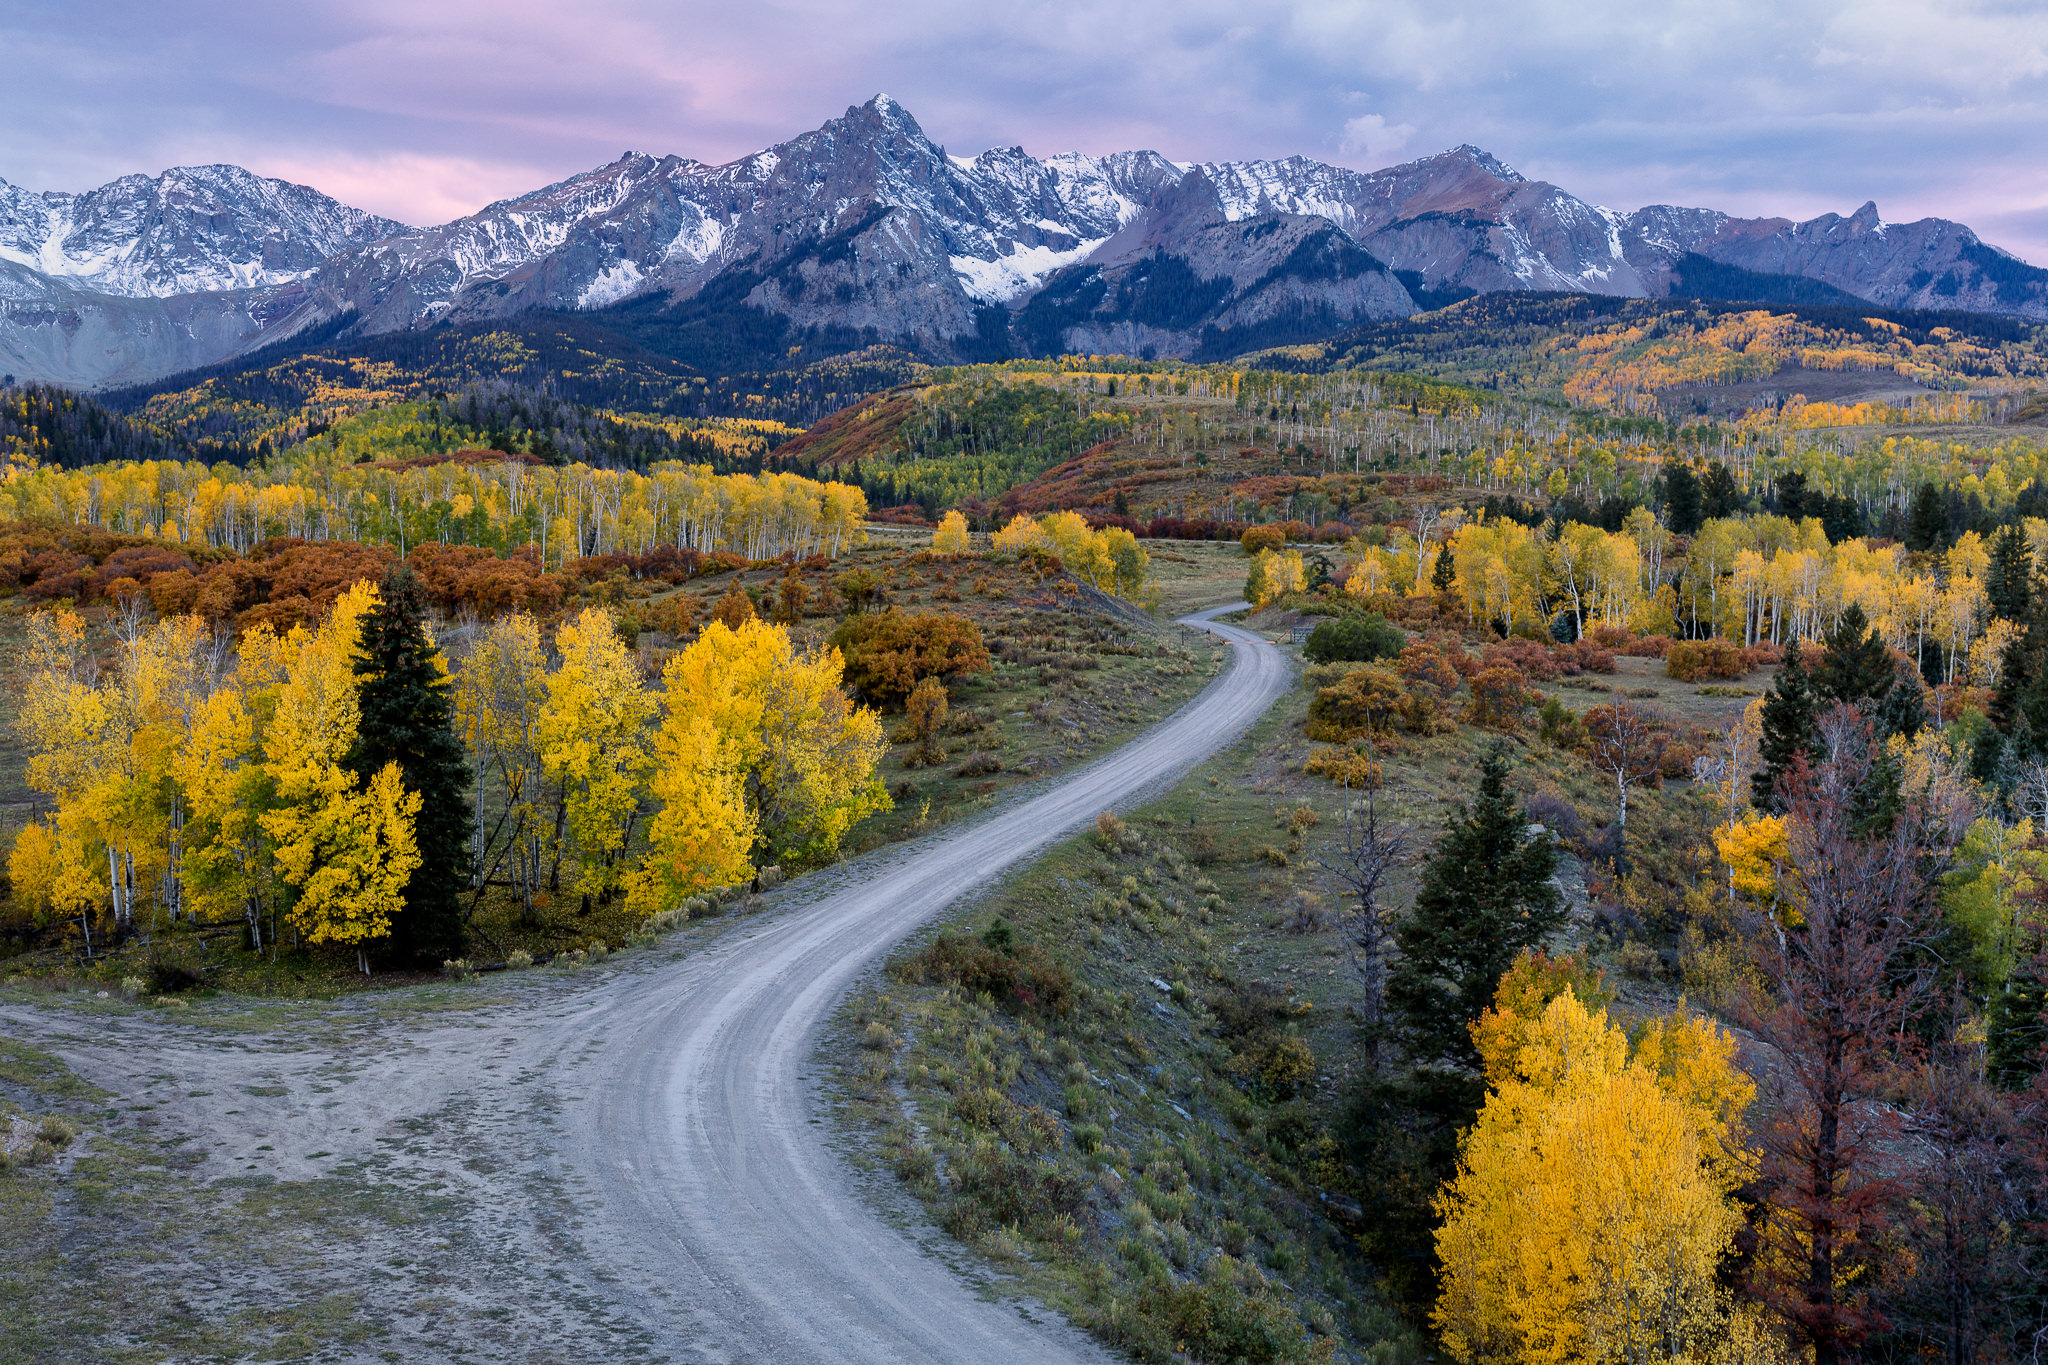
While it might be tempting to just head out to photograph fall colors when you see leaves change outside your house, you might want to spend some time researching the locations you are about to visit beforehand. The main reason for this is differences in foliage timing – even slight differences in elevation can drastically influence how early or late fall colors will show up. For example, we normally don’t see fall colors until late October in Denver, and yet if you plan on visiting some of the scenic mountains of Colorado, you will find that most colors will be gone by then, since everything starts about a month early at higher elevations. In addition, there might be seasonal drifts and other weather patterns that might change exactly when fall colors will change. Droughts, rainfall, winds, freezing temperatures and early snow can all impact how soon trees will change their colors and how long their leaves will remain on them. It is therefore important to plan well in advance, hopefully at least a few weeks before colors start to change at higher elevations. Ideally, it is best to scout the area beforehand or rely on reports from local residents, so that you know exactly when to plan out your trip.
There are a number of different resources that you can take advantage of to see fall foliage reports. Below is a list of websites I can recommend to look into:
- The Weather Channel Fall Foliage Maps
- Smoky Mountains Fall Foliage Prediction Map
- The Foliage Network (limited to Midwest, Northeast and Southeast US)
In addition to these, I would recommend looking at various local message boards, forums and Facebook groups where locals often share their fall foliage trip reports.
Shoot at Sunrise for Best Colors
As I have already explained in my “Why Sunrises are Better than Sunsets” article, sunrises could be better than sunsets photographically, so if you can manage to get up early, you have a chance to capture something truly unique and interesting. During the fall season, nights typically get very cold, with winds dying down and atmospheric haze significantly reduced. Such drastic temperature changes can bring in some fog, or if you shoot near a lake, you might see steam coming off of it, which will make the scene even more attractive to photograph. And with clear air around, you will have no problem incorporating distant mountains into the scene.
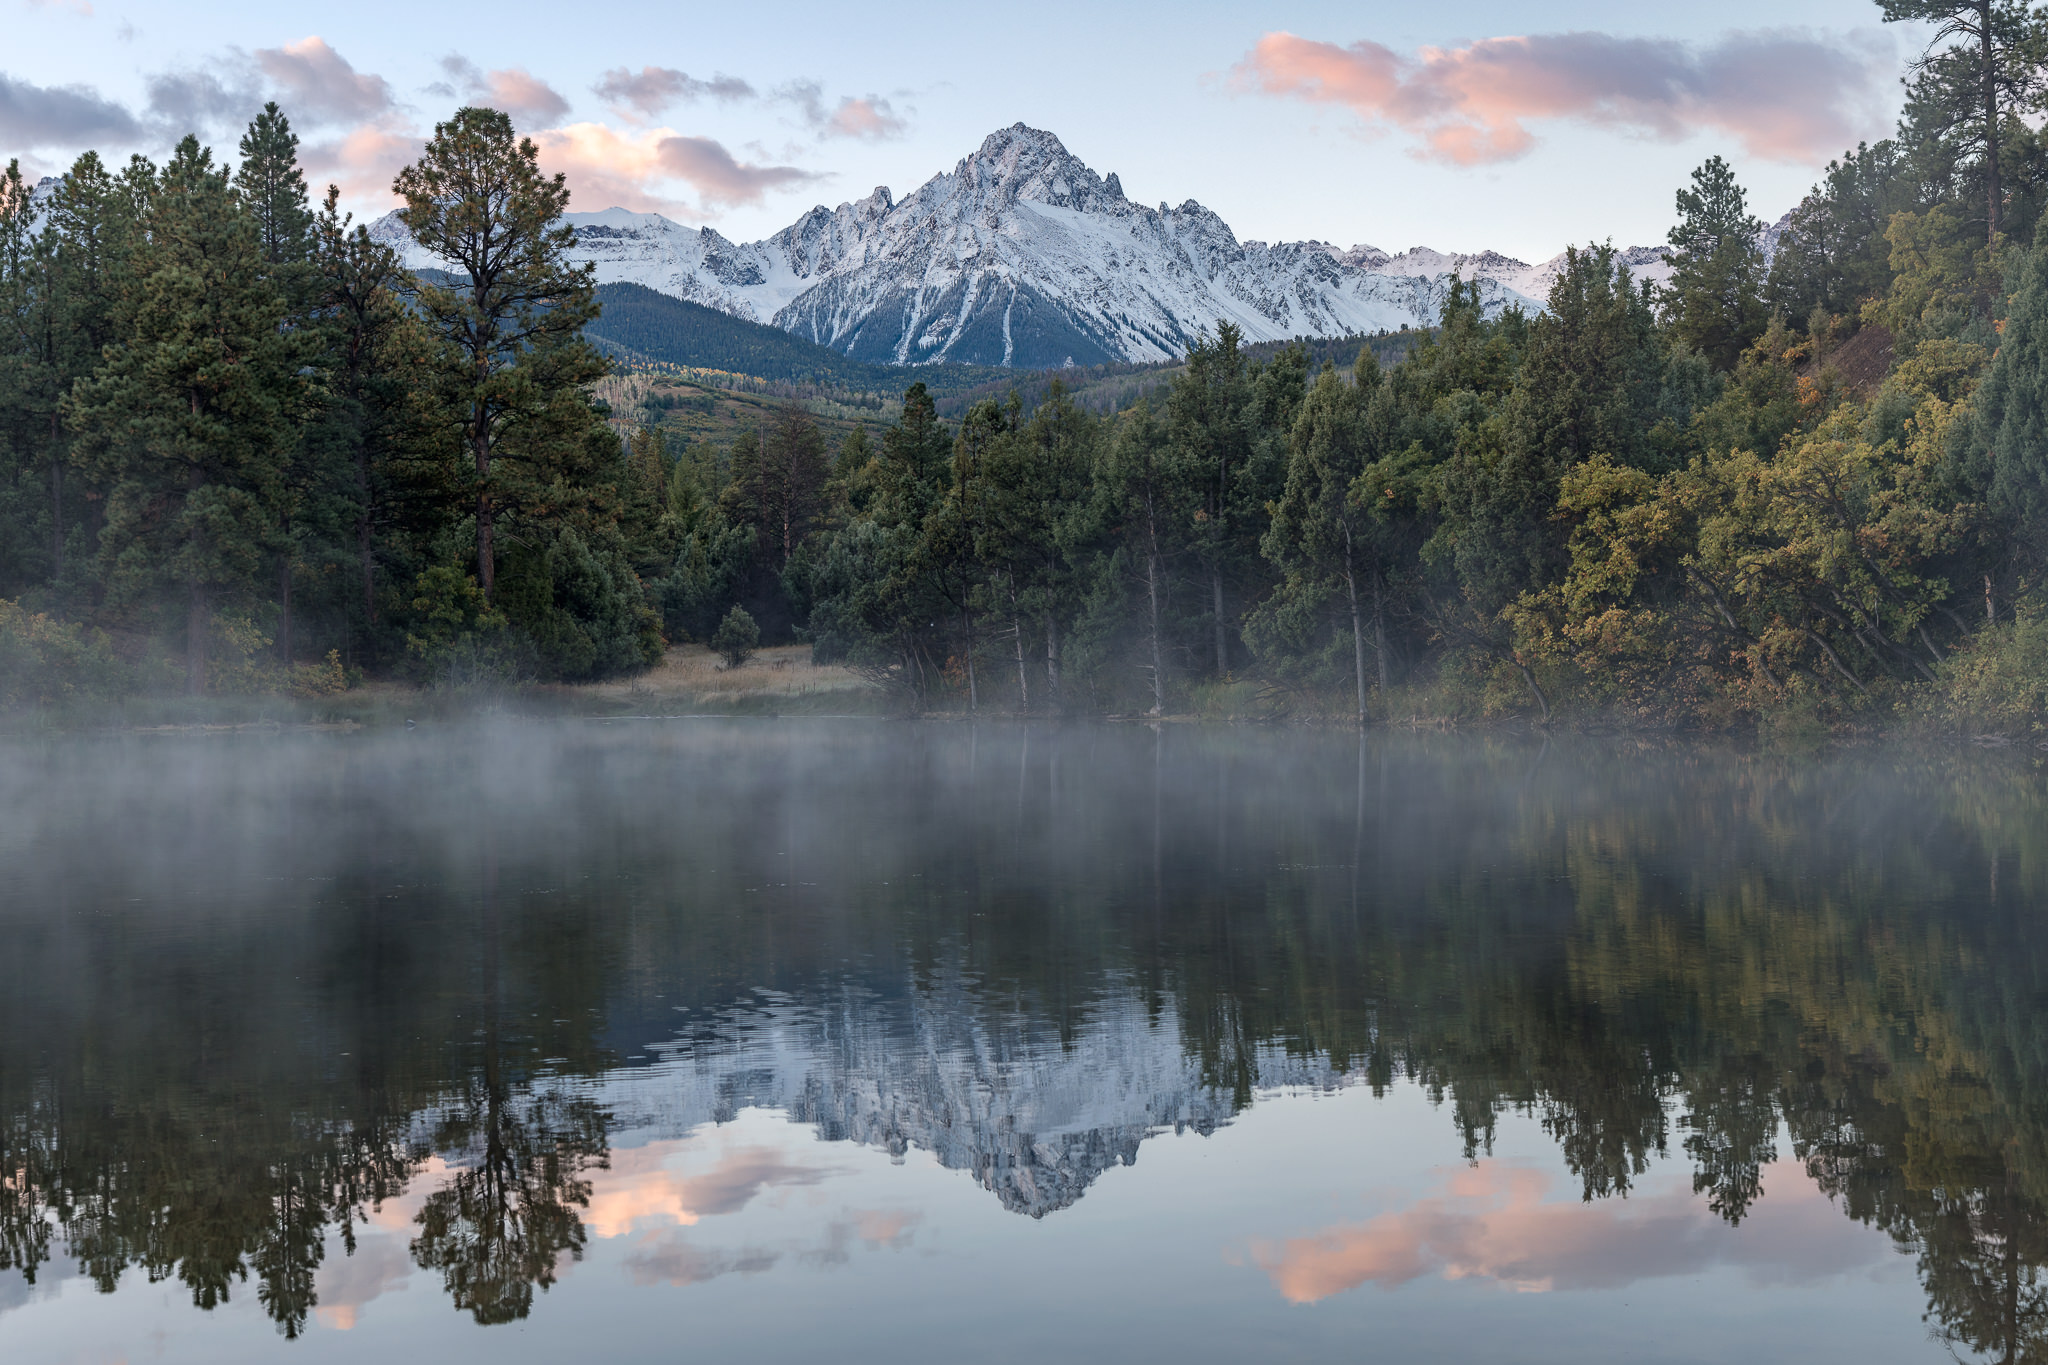
Sunrise photography can be very rewarding in the fall. In fact, when I travel in the fall or conduct workshops, I rarely miss sunrise opportunities. It can be tough to get up very early and be on location, but I always find it to be well worth it.
Stay After Sunset
I have already written about why it is a good idea to stay after sunset due to the potential of a secondary sunset, which can take place way after the sun dips below the horizon. I have personally observed situations where the actual sunset turned out to be rather boring with very few colors and yet the second sunset, roughly 15-20 minutes afterwards yielded a stunning display of colors. Couple that with fall colors and you could end up with very unique-looking images that are impossible to capture at sunset. Since light levels drop significantly, the subtle colors emitting from the horizon could paint the landscape in a very different way. For example, take a look at the below image that I captured together with my workshop group last week:
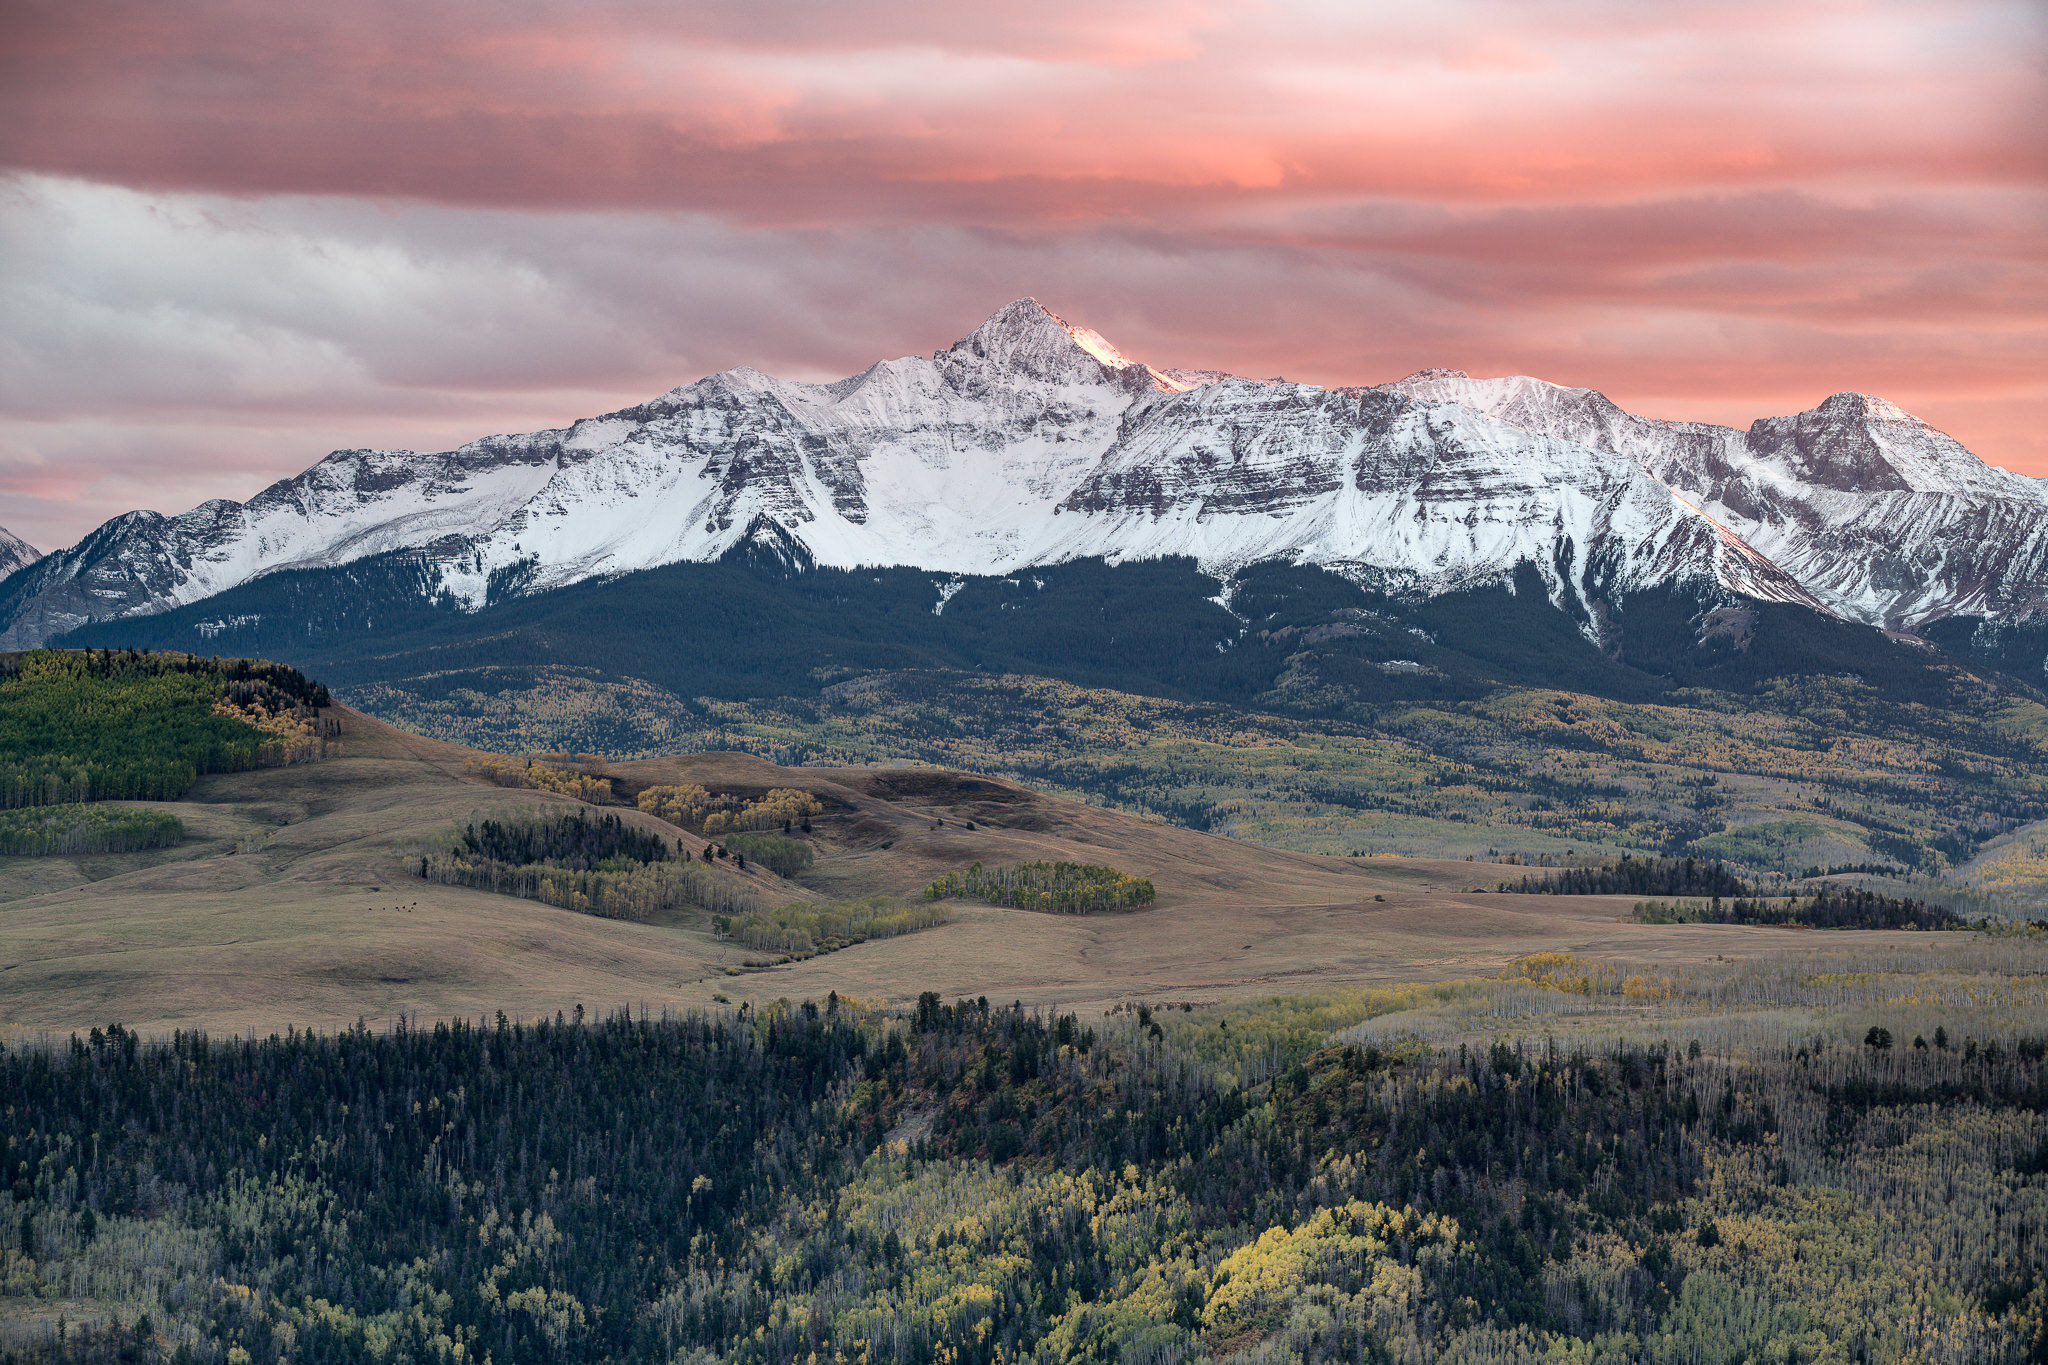
We were shooting at an overlook with a few dozen other photographers. Right after the sun set, we watched everyone leave in a hurry, but I asked my workshop participants to stick around for another 15-20 minutes. It was very cold and the group was not very enthusiastic about it. However, I observed the horizon and saw that there was a high chance for a second sunset taking place, so I suggested everyone to stay. It started to get dark pretty quickly, but right after 15 minutes or so, we again started to see color in the sky. It was very faint and hard to see, but the cameras were surely catching all that beautiful color. What’s unique about the second sunset, is that you deal with much longer shutter speeds, sometimes as long as 30+ seconds, which means that it is possible to capture moving clouds with beautiful sunset colors on them. This yields a very different look, as can be seen below:

The only things to watch out for are noise and motion blur – if images come out underexposed, or you have close bushes / trees in proximity that end up looking blurry, you might need to bump up your camera’s ISO. Thankfully, we did not deal with any foreground objects, so both images came out pretty sharp!
It seems like most photographers are not aware of the second sunset. While many photographers were able to capture the first image above, I know for sure that only my group was there to see and capture the second one in the same location. Interestingly, I often end up staying alone after sunsets, since other photographers seem to take off right after the sun sets…
Use a Polarizing Filter
A polarizing filter is a must-have tool for photographing fall colors. If you previously thought that polarizing filters are only good for adding color to the sky, you should really spend some time understanding how polarizing filters actually work. First of all, the primary purpose of a polarizing filter is to reduce reflections. When photographing colorful foliage, you will notice that light can bounce all over the place, making trees and bushes look flat and dull (this is especially noticeable after rainfall). With a polarizing filter, it is possible to significantly reduce such reflections and bring out the real color in the scene. That’s why polarizing filters are immensely helpful when photographing foliage and waterfalls, since those light reflections are cut off by the filter. At the same time, the ability to filter out reflections is also another reason why polarizing filters are so helpful when dealing with atmospheric haze. When shooting sunrises and especially sunsets, one might think that a polarizing filter would be useless to keep on a lens, but that’s far from the truth! If used right, it can significantly cut down haze in the scene. Most images shown in this article with distant mountains in the scene (including the two above) were photographed with a polarizing filter attached to a lens, which helped significantly reduce atmospheric haze.
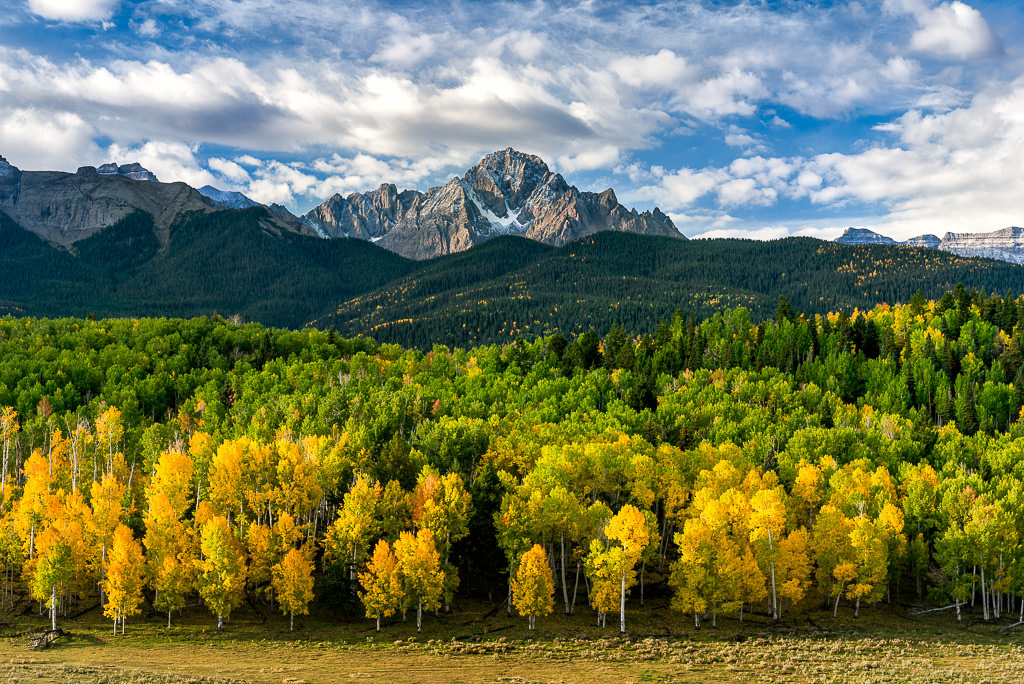
Second, the effect of a polarizing filter cannot be replicated in post-processing. While one could get away without using a GND (Graduated Neutral Density) filter by shooting in brackets, then using specific HDR or blending techniques to create a single image, it is impossible to deal with reflections later on in post-processing. Reducing haze can also be quite painful in post-processing, which is why it is best to do it right in camera with a polarizing filter. Remember, there is a reason why a polarizing filter is a must-have tool for landscape photography.
Identify Your Subject(s)
When photographing the fall, many photographers fall into the trap of chasing colors, rather than thinking about things that are far more important. For example, some think that colors by themselves can create a beautiful photograph, but that’s often far from the truth, especially when an image lacks a subject. Photographing colors by themselves is really no different than photographing a colorful sky – unless there is a distinct feature or an interesting pattern, such images often look boring and compositionally weak.
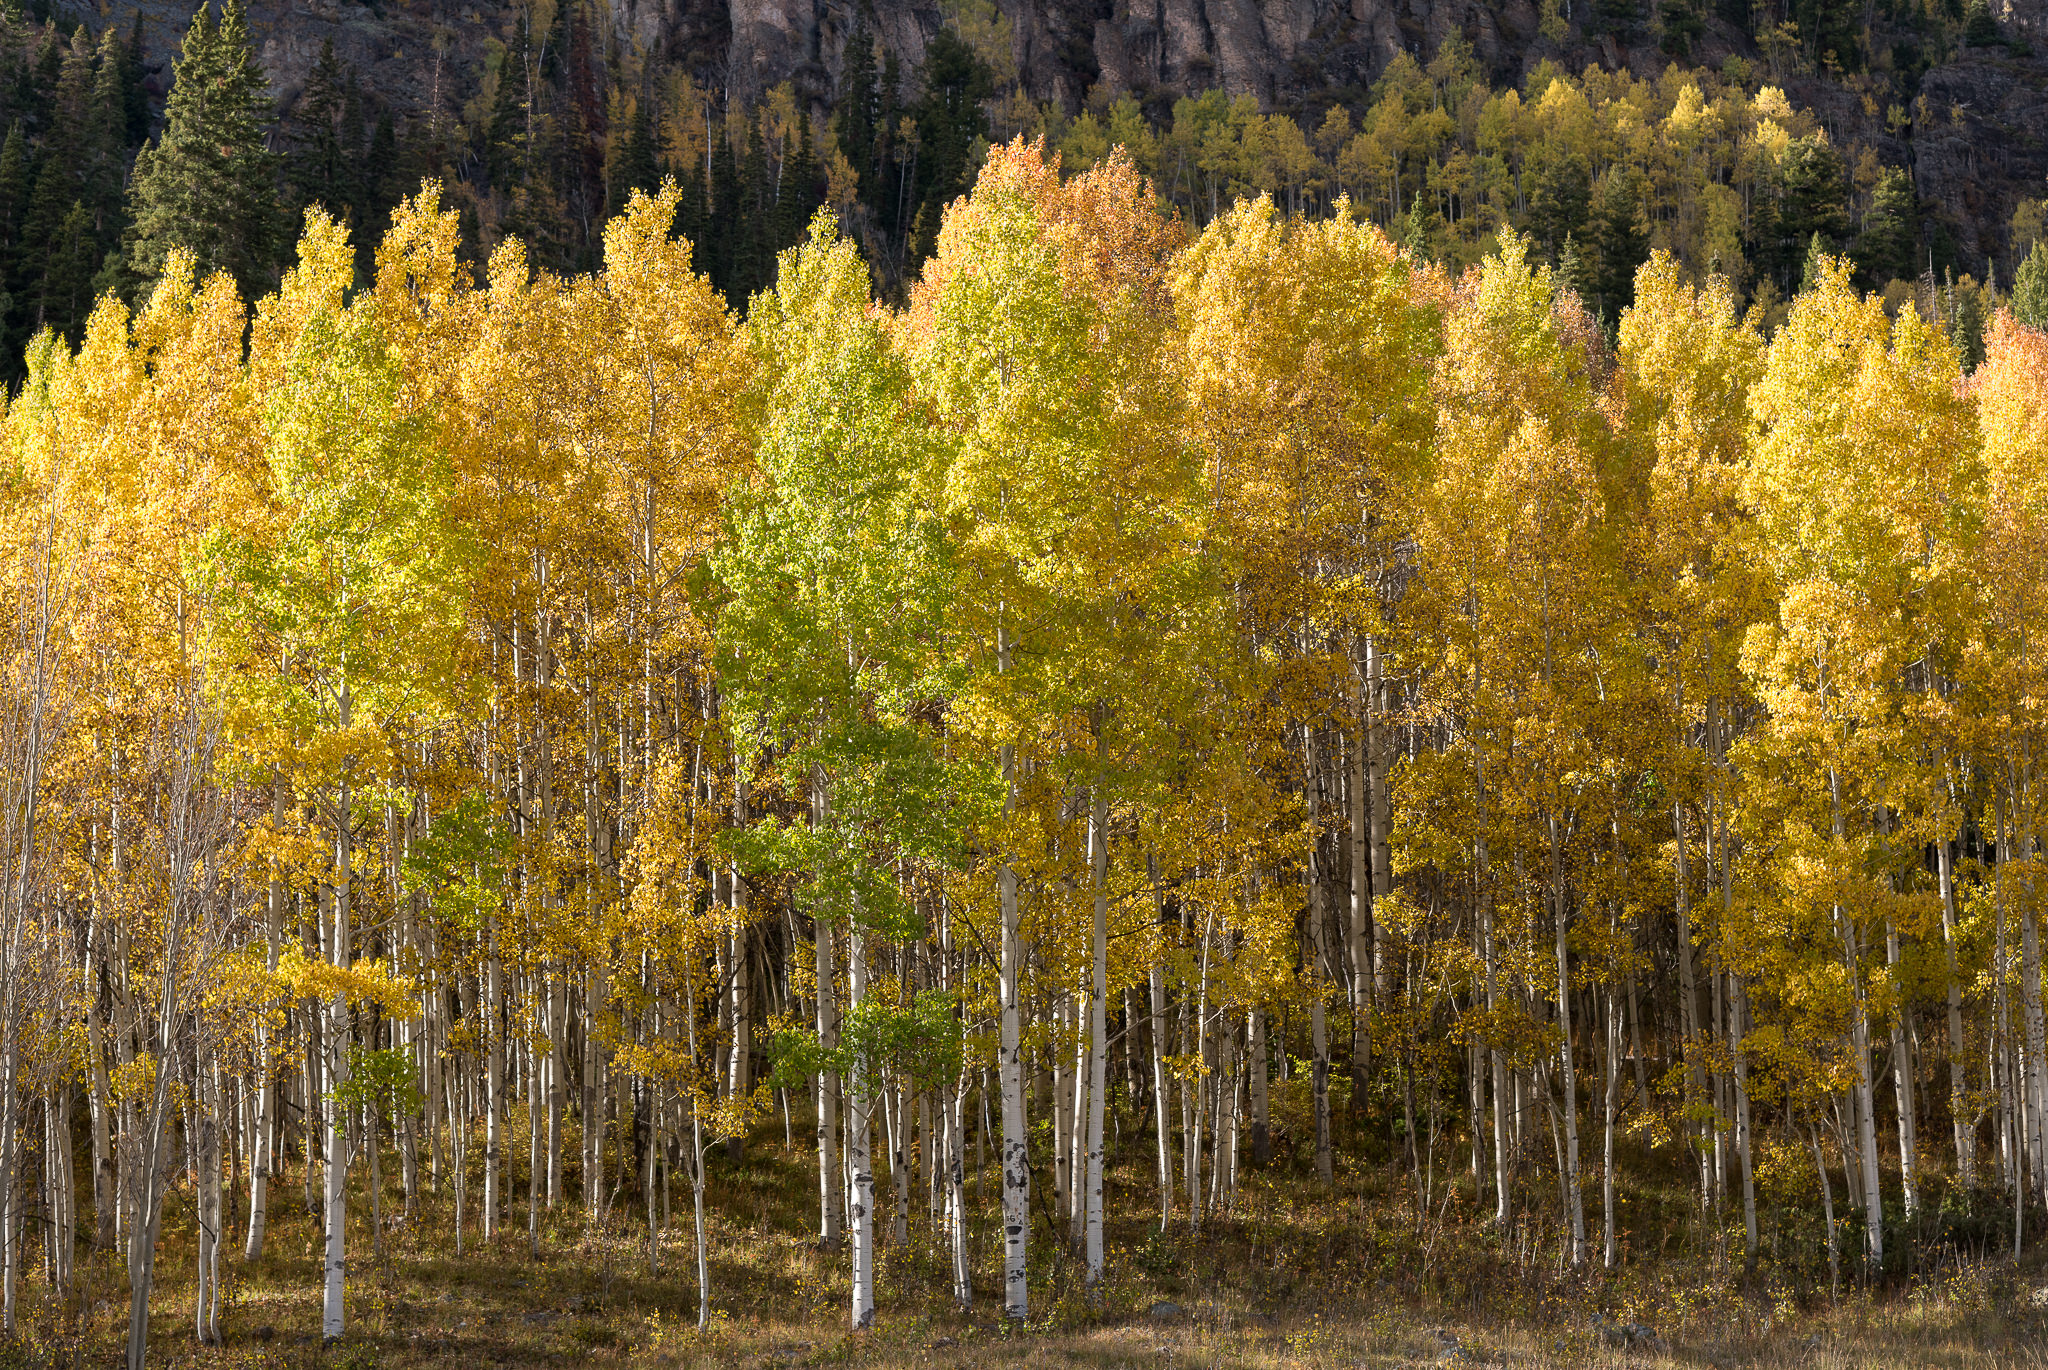
Instead, try to find something unique and interesting in those colors and do your best to focus on that area of the photograph to bring the subject or the pattern out. This way, your photograph will no longer look like a snapshot, but more like a well-planned and thought-out image. So instead of just looking at a bunch of pretty trees, see if you can find something that stands out – perhaps a single evergreen among a myriad of colorful aspens; or a single colorful aspen among many dead ones. If you cannot find such interesting subjects, expand your search to unique repeating patterns and textures.
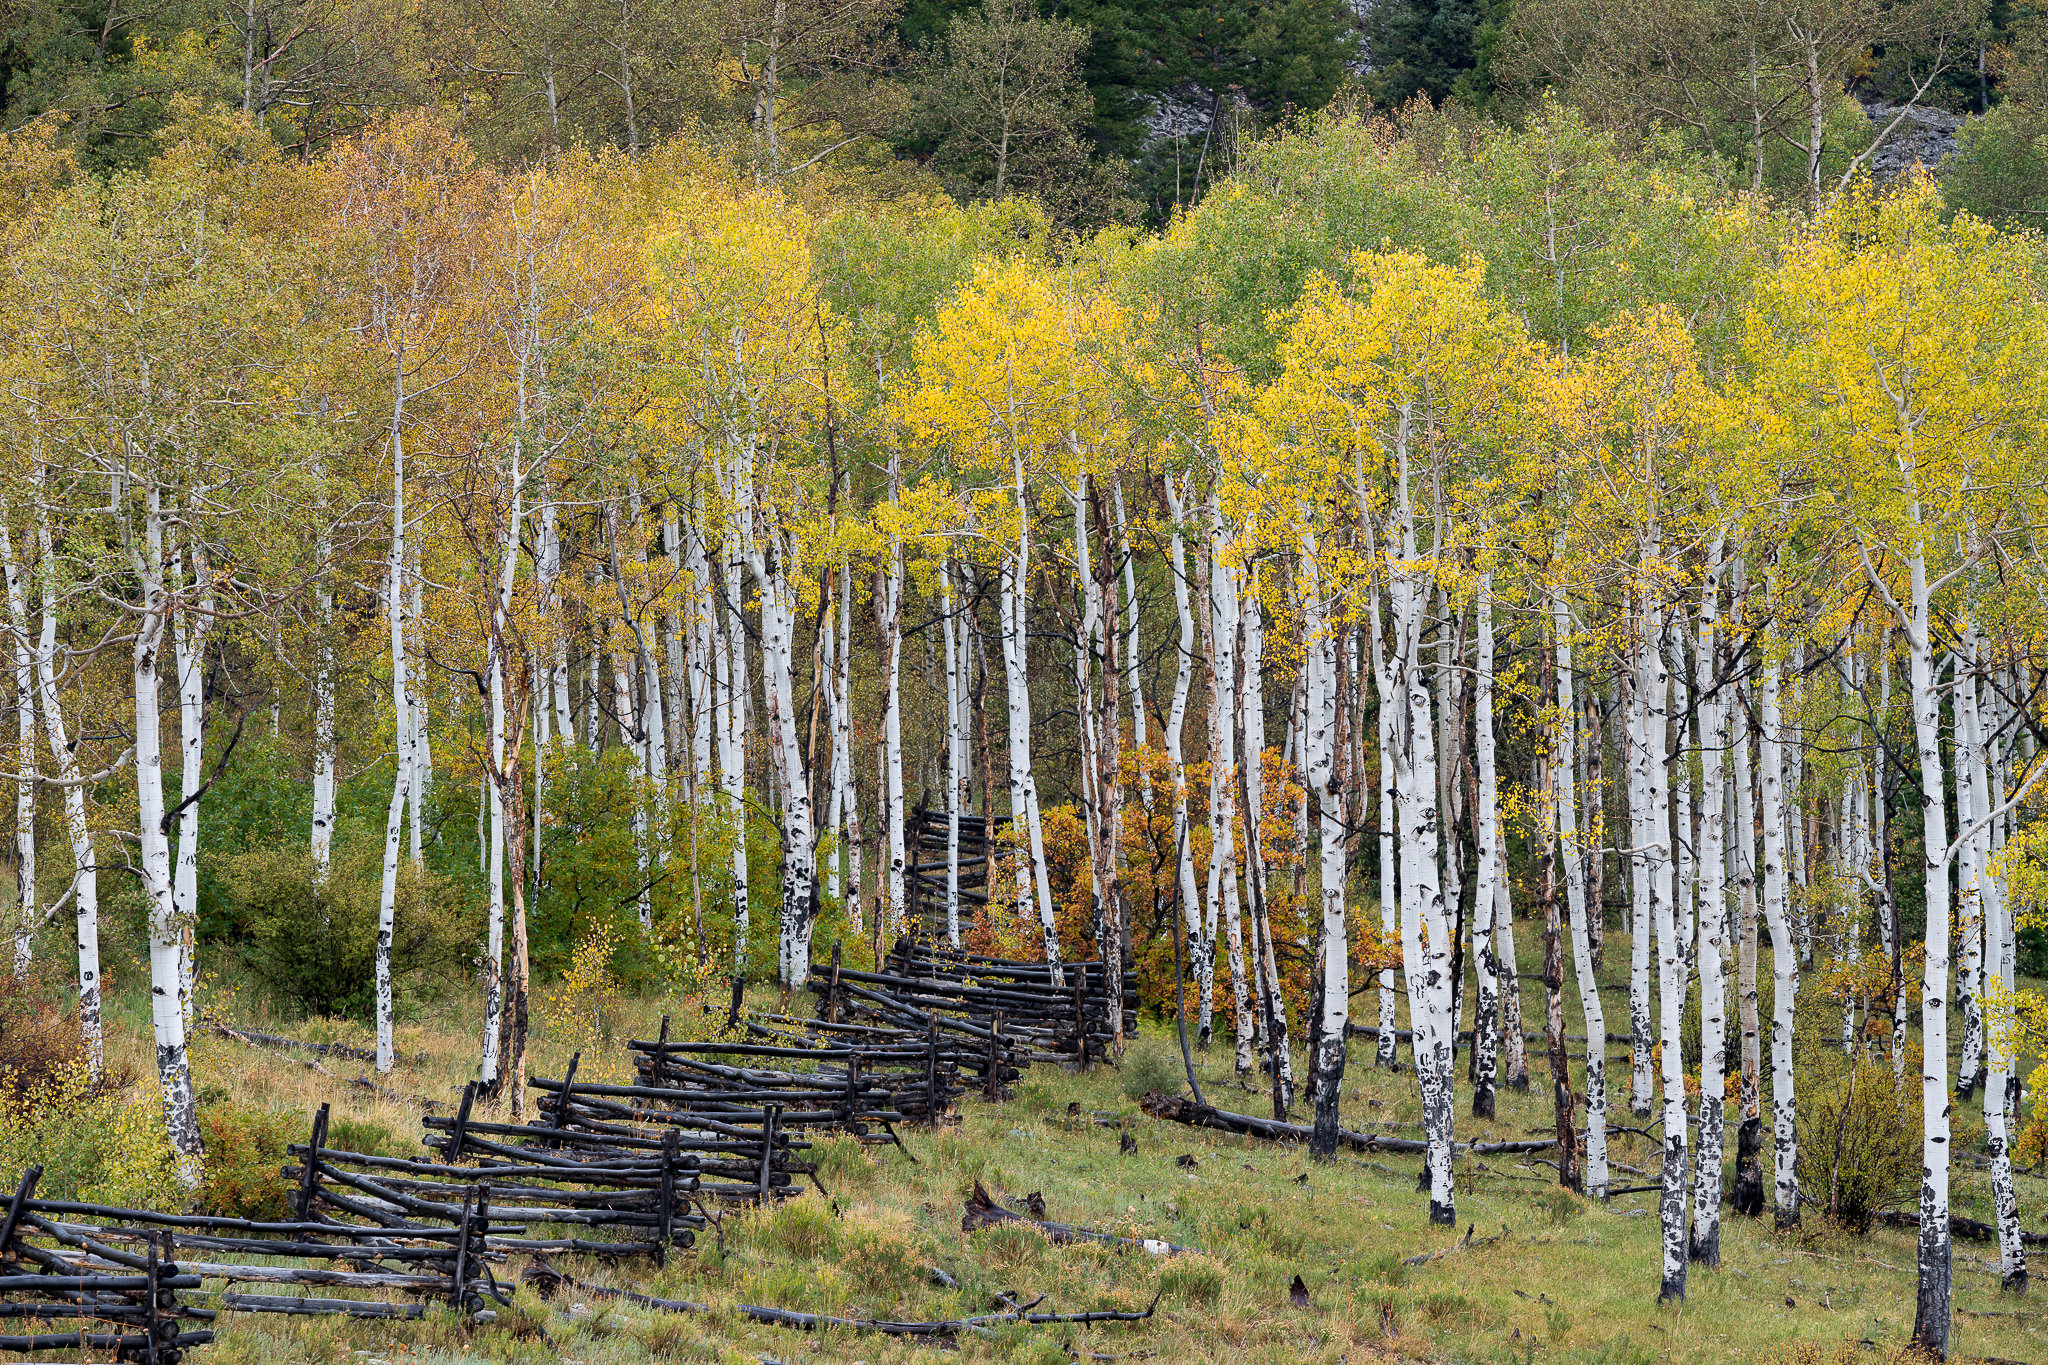
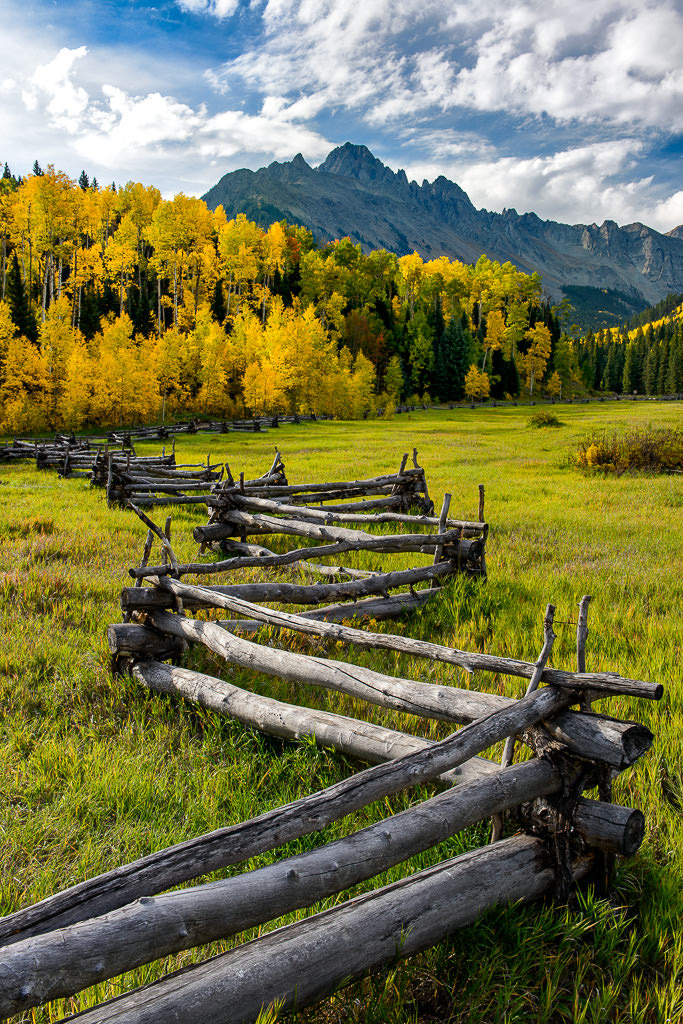
Don’t Compromise Your Framing and Composition
As always, keep in mind that fall photography is really no different than any other types of photography when it comes to things like location, timing, light, form, subject, mood, framing and composition. Fall colors are surely beautiful to see and photograph, but they should not be the primary attraction of a photograph. They are more like filler, supporting elements in your images and their function is similar to colorful clouds in a scene, as I have already pointed out above. When combined with a strong subject, beautiful light, perfect location + timing, solid framing and strong composition, fall colors add more drama and mood to the scene, making the image even more powerful.
I have seen many instances at sunrises and sunsets, where photographers turn away from their subject(s) towards pretty light in the sky and I am not ashamed to admit that I used to do that myself in the past. A colorful sky or a bunch of colorful trees surely look tempting, but if you are not thinking your image through, there is a low chance that you will walk away with a solid photograph. In fact, I often observe the same pattern at sunrises and sunsets among many photographers – the moment some color appears in the sky, I see them adjusting their cameras towards the light. What’s there to photograph? Nothing really, other than some pretty light in the clouds! I have seen the same behavior with my workshop participants as well, especially on the first day. We will go out to a beautiful location at sunrise, carefully set up cameras with a solid subject and composition, then wait for the light. As soon as the light starts happening elsewhere, I see cameras getting turned towards that direction. I then approach the participants and ask them what they are photographing and the response is very typical: “it is prettier over there”. When questioned about lack of subject, poor framing and composition, they cannot come up with reasoning behind what they are doing. The bad thing is, while being distracted by some pretty colors in the scene, once the light moves towards the initial framing and composition, they cannot readjust their cameras quick enough, so they end up with nothing. Such behavior is very typical among many beginner photographers, since they just don’t know any better.
If you catch yourself doing the same, stop! Slow down and really put some thought into what you are doing. It will be worth it, I promise.
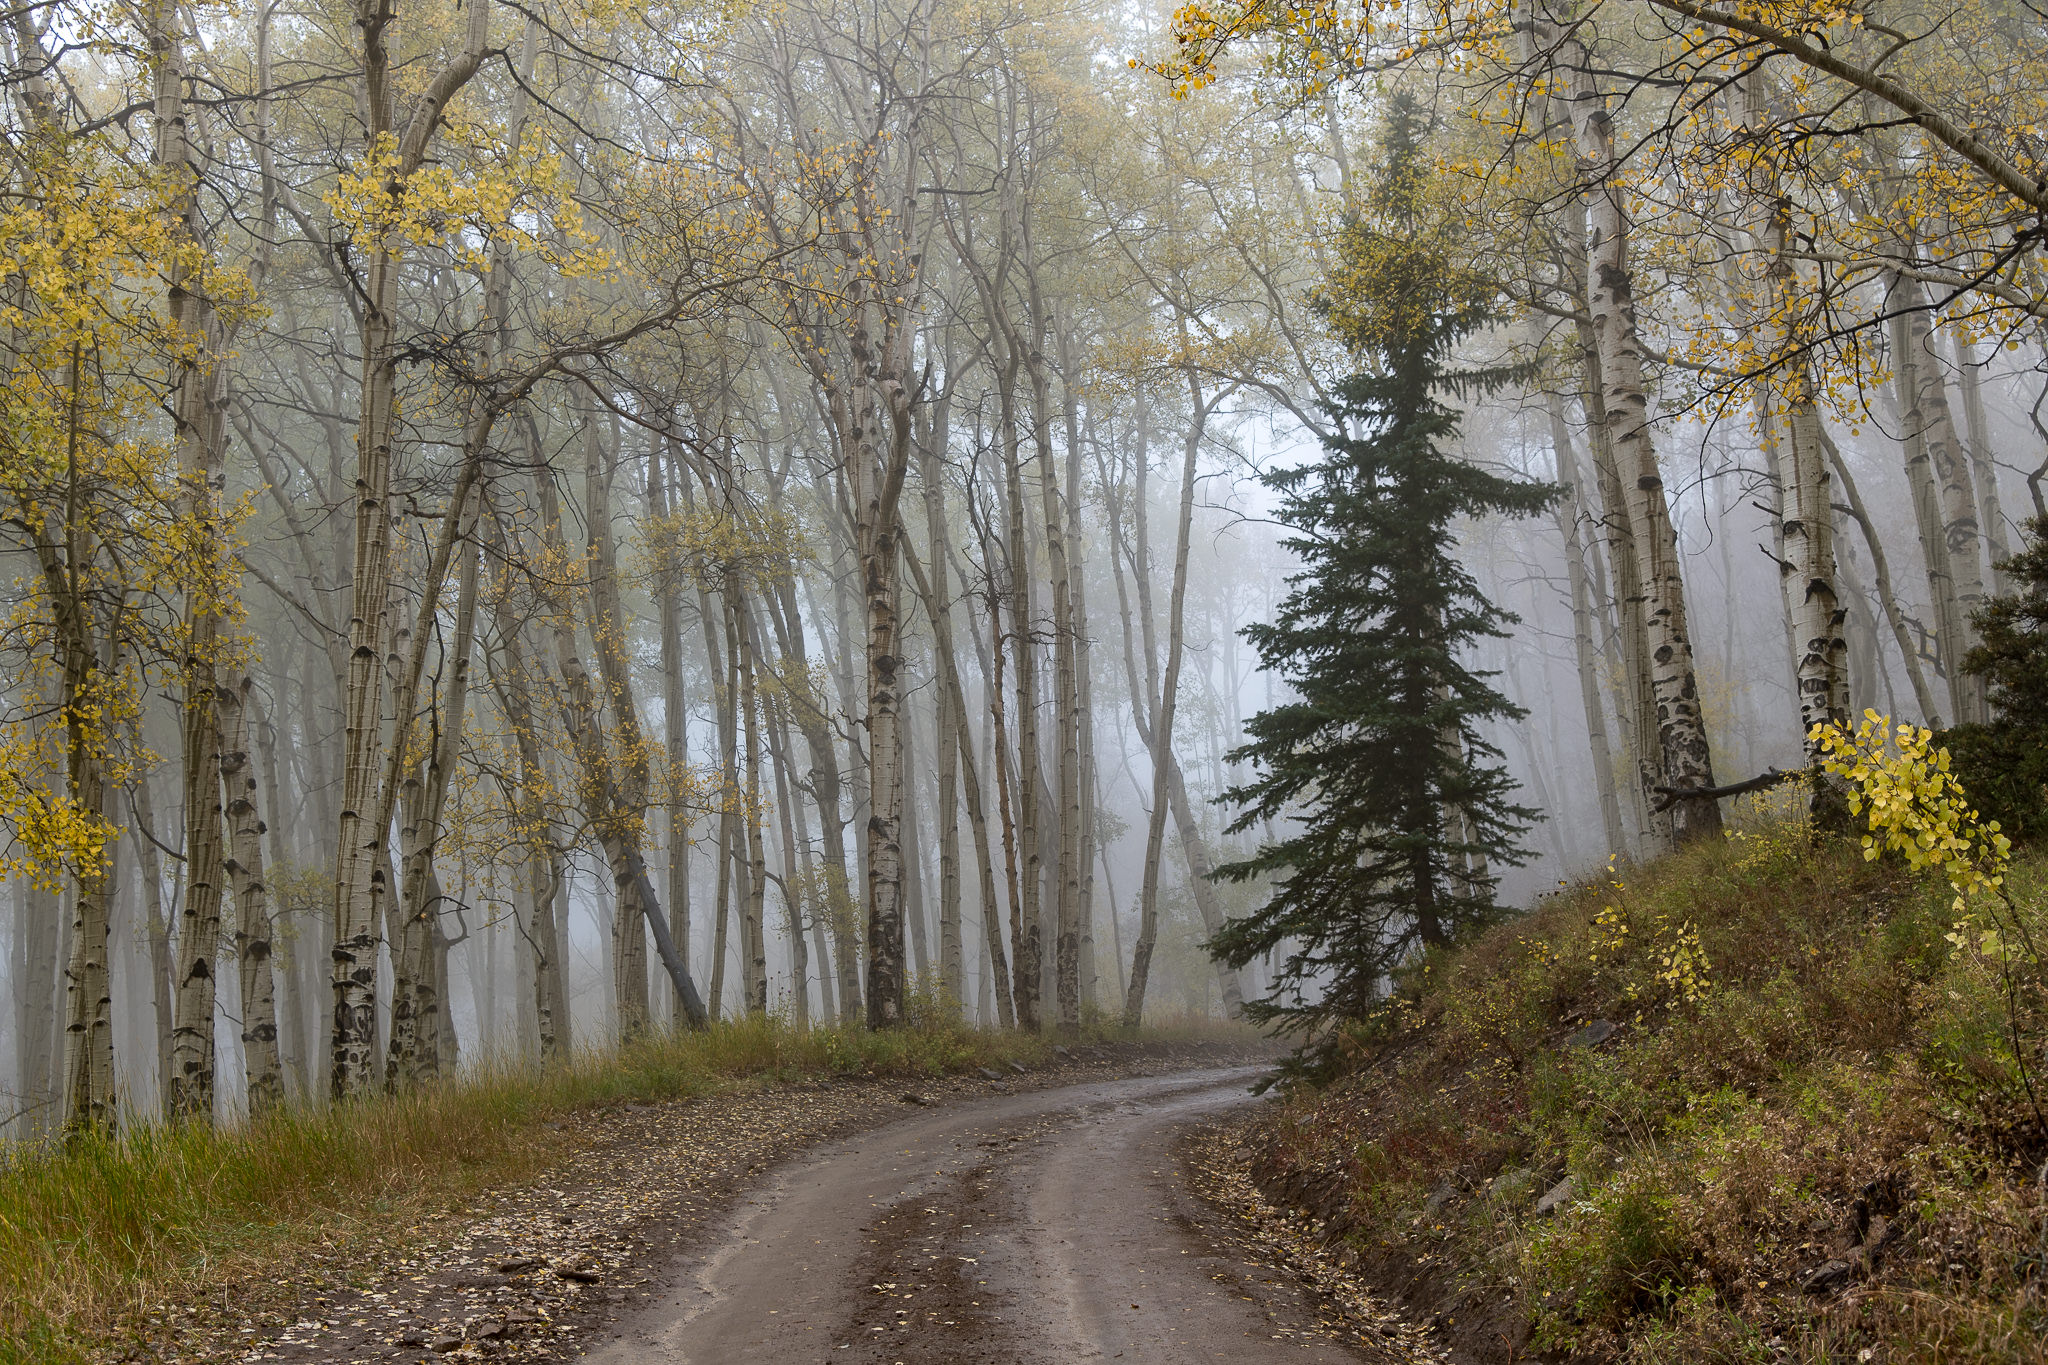
Bad Weather is Good Weather
Photographing fall can be a challenging task, since it often comes with some harsh weather. You might experience plenty of rain, fog, snow, hail and wind, which can be rather frustrating to deal with. Don’t let harsh weather stop you from photographing in the fall! In fact, I personally prefer rainy days to cloudless skies, because I know that there is always a chance for an opening in the sky. Clouds add character and drama to images and when they get some beautiful golden light on them, the stunning color can spill everywhere in the scene, painting the whole landscape with intense color. And if you are lucky, you might even see a rainbow. Right before the start of the workshop, a number of participants decided to accompany me to an overlook. We stood there in the rain for a while and it did not look promising at all. Right before sunset, clouds suddenly opened up for a few minutes and we were able to witness a stunning rainbow:

The rainbow was so saturated in red, that it looked unreal – I have never previously seen one like this. Interestingly, the rainbow cast a red shadow on the hill right behind it and the light spilled all over the place. This lasted only for 30-45 seconds at most. Most photographers ended up leaving earlier, so there were only a few of us who were able to experience this incredible rainbow.
We experienced another day with pretty harsh weather a couple of days later, when we set up to shoot the Chimney Rock. After waiting through plenty of rain and hail, we witnessed one of the most colorful sunsets I have ever seen. In fact, the colors were so intense at sunset, that I had to tone saturation down quite a bit to prevent the red channel from blowing out:

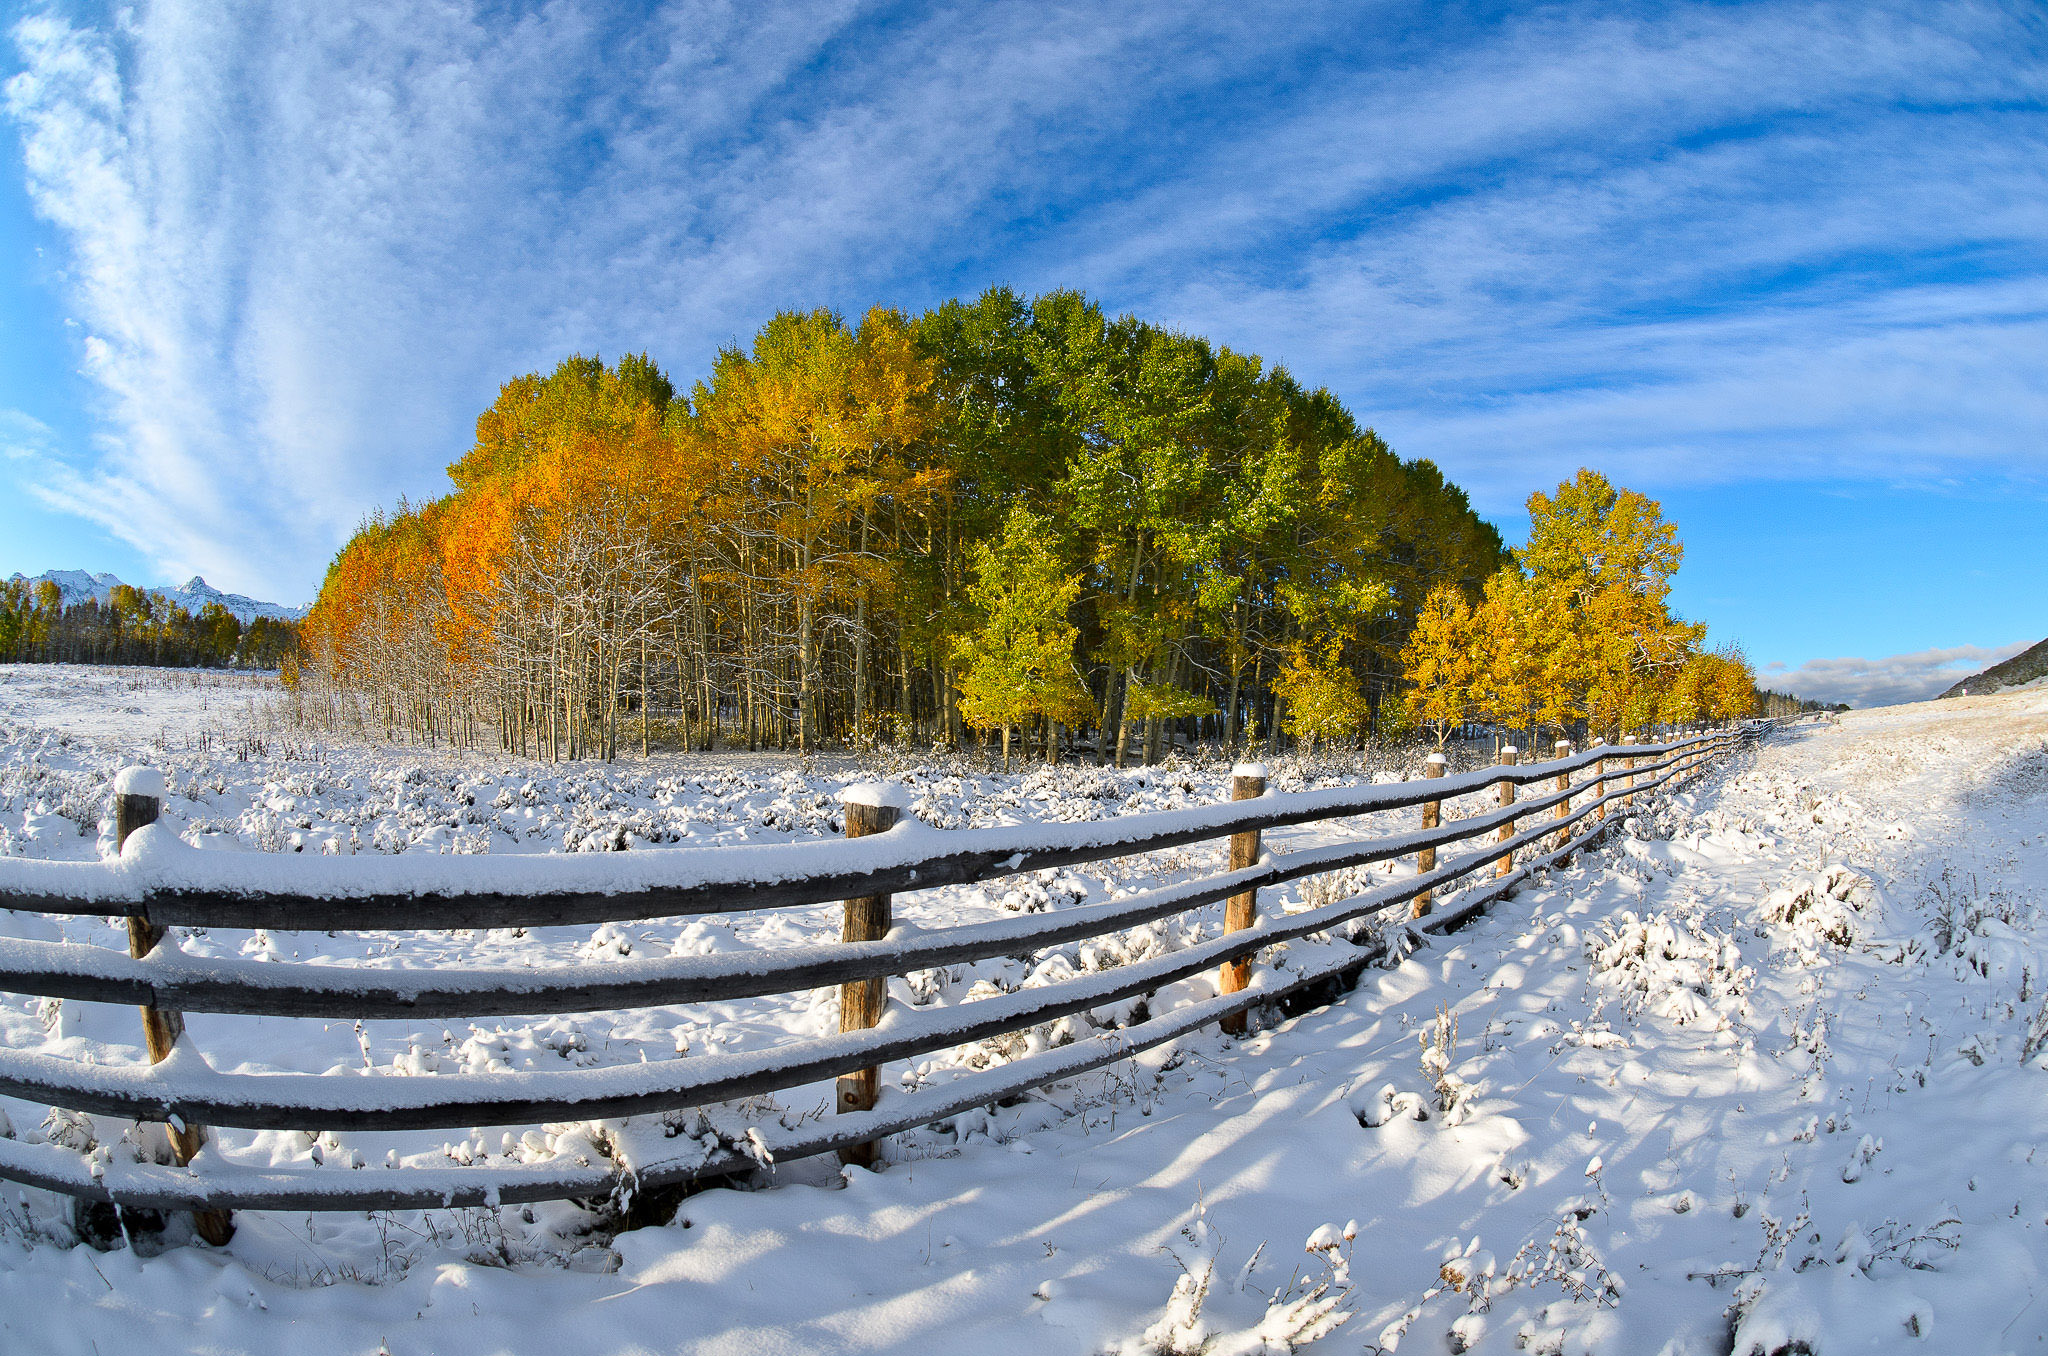
Thanks to such rare opportunities, I always prefer bad weather to good weather in the fall. And if you ever get treated with some early season snow, the combination of snow with colors can make a huge impact on your images.
Don’t Forget to Look Up
When going through colorful forests with tall trees, don’t forget to occasionally look up – there might be wonderful opportunities waiting for you. If you have a wide-angle lens handy, you can capture unique images with trees converging towards the center, as shown below:
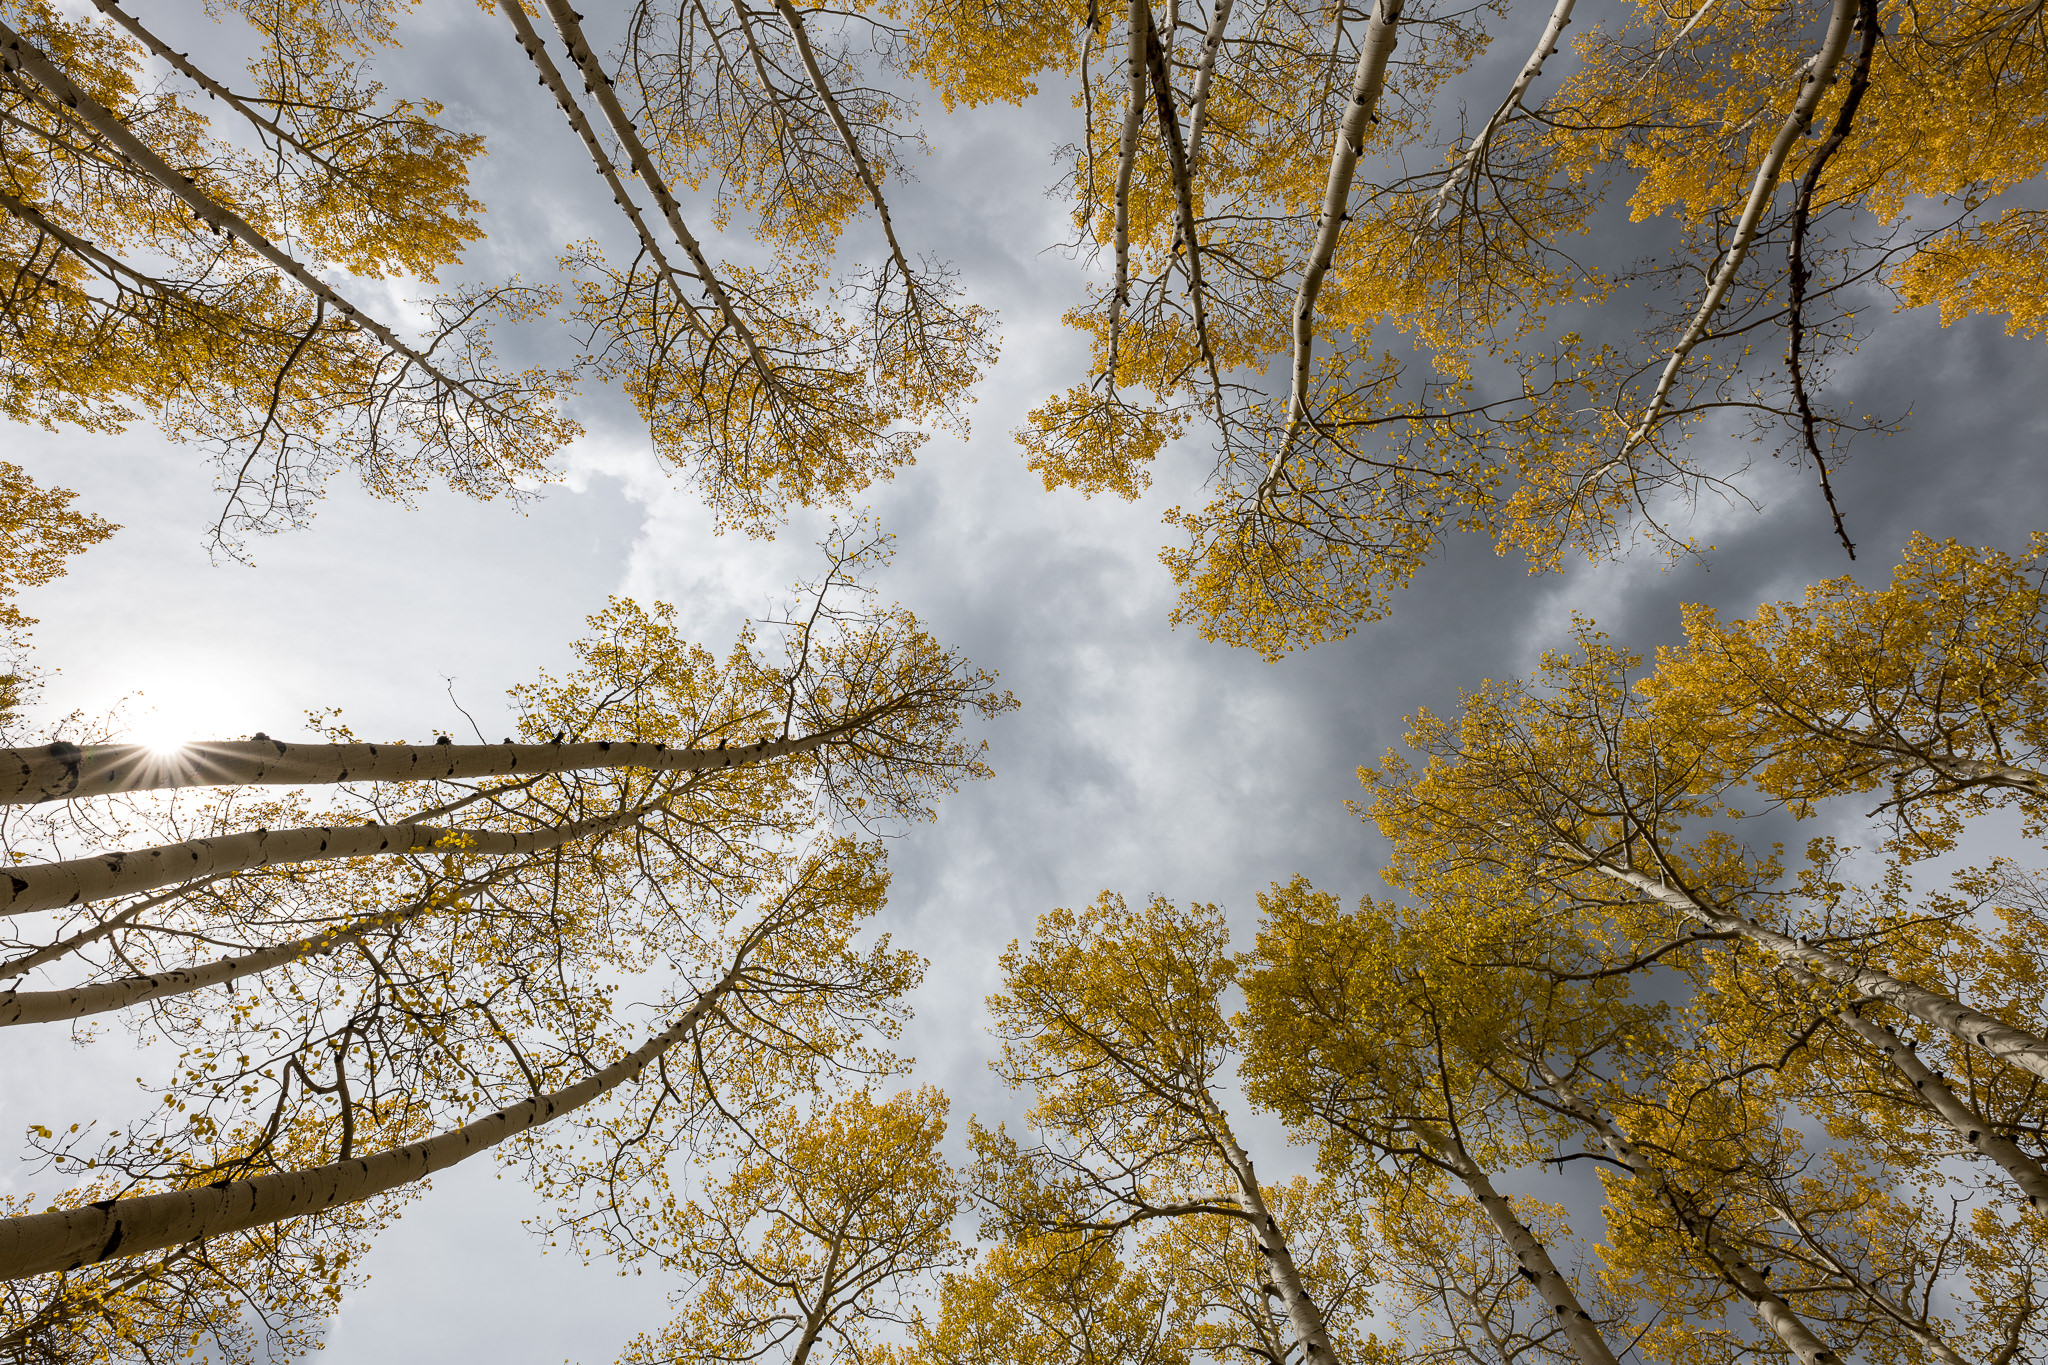
If the sun is in the frame, you can make your photograph even more interesting by blocking part of the sun and stopping down your lens to a small aperture in order to make beautiful sun stars.
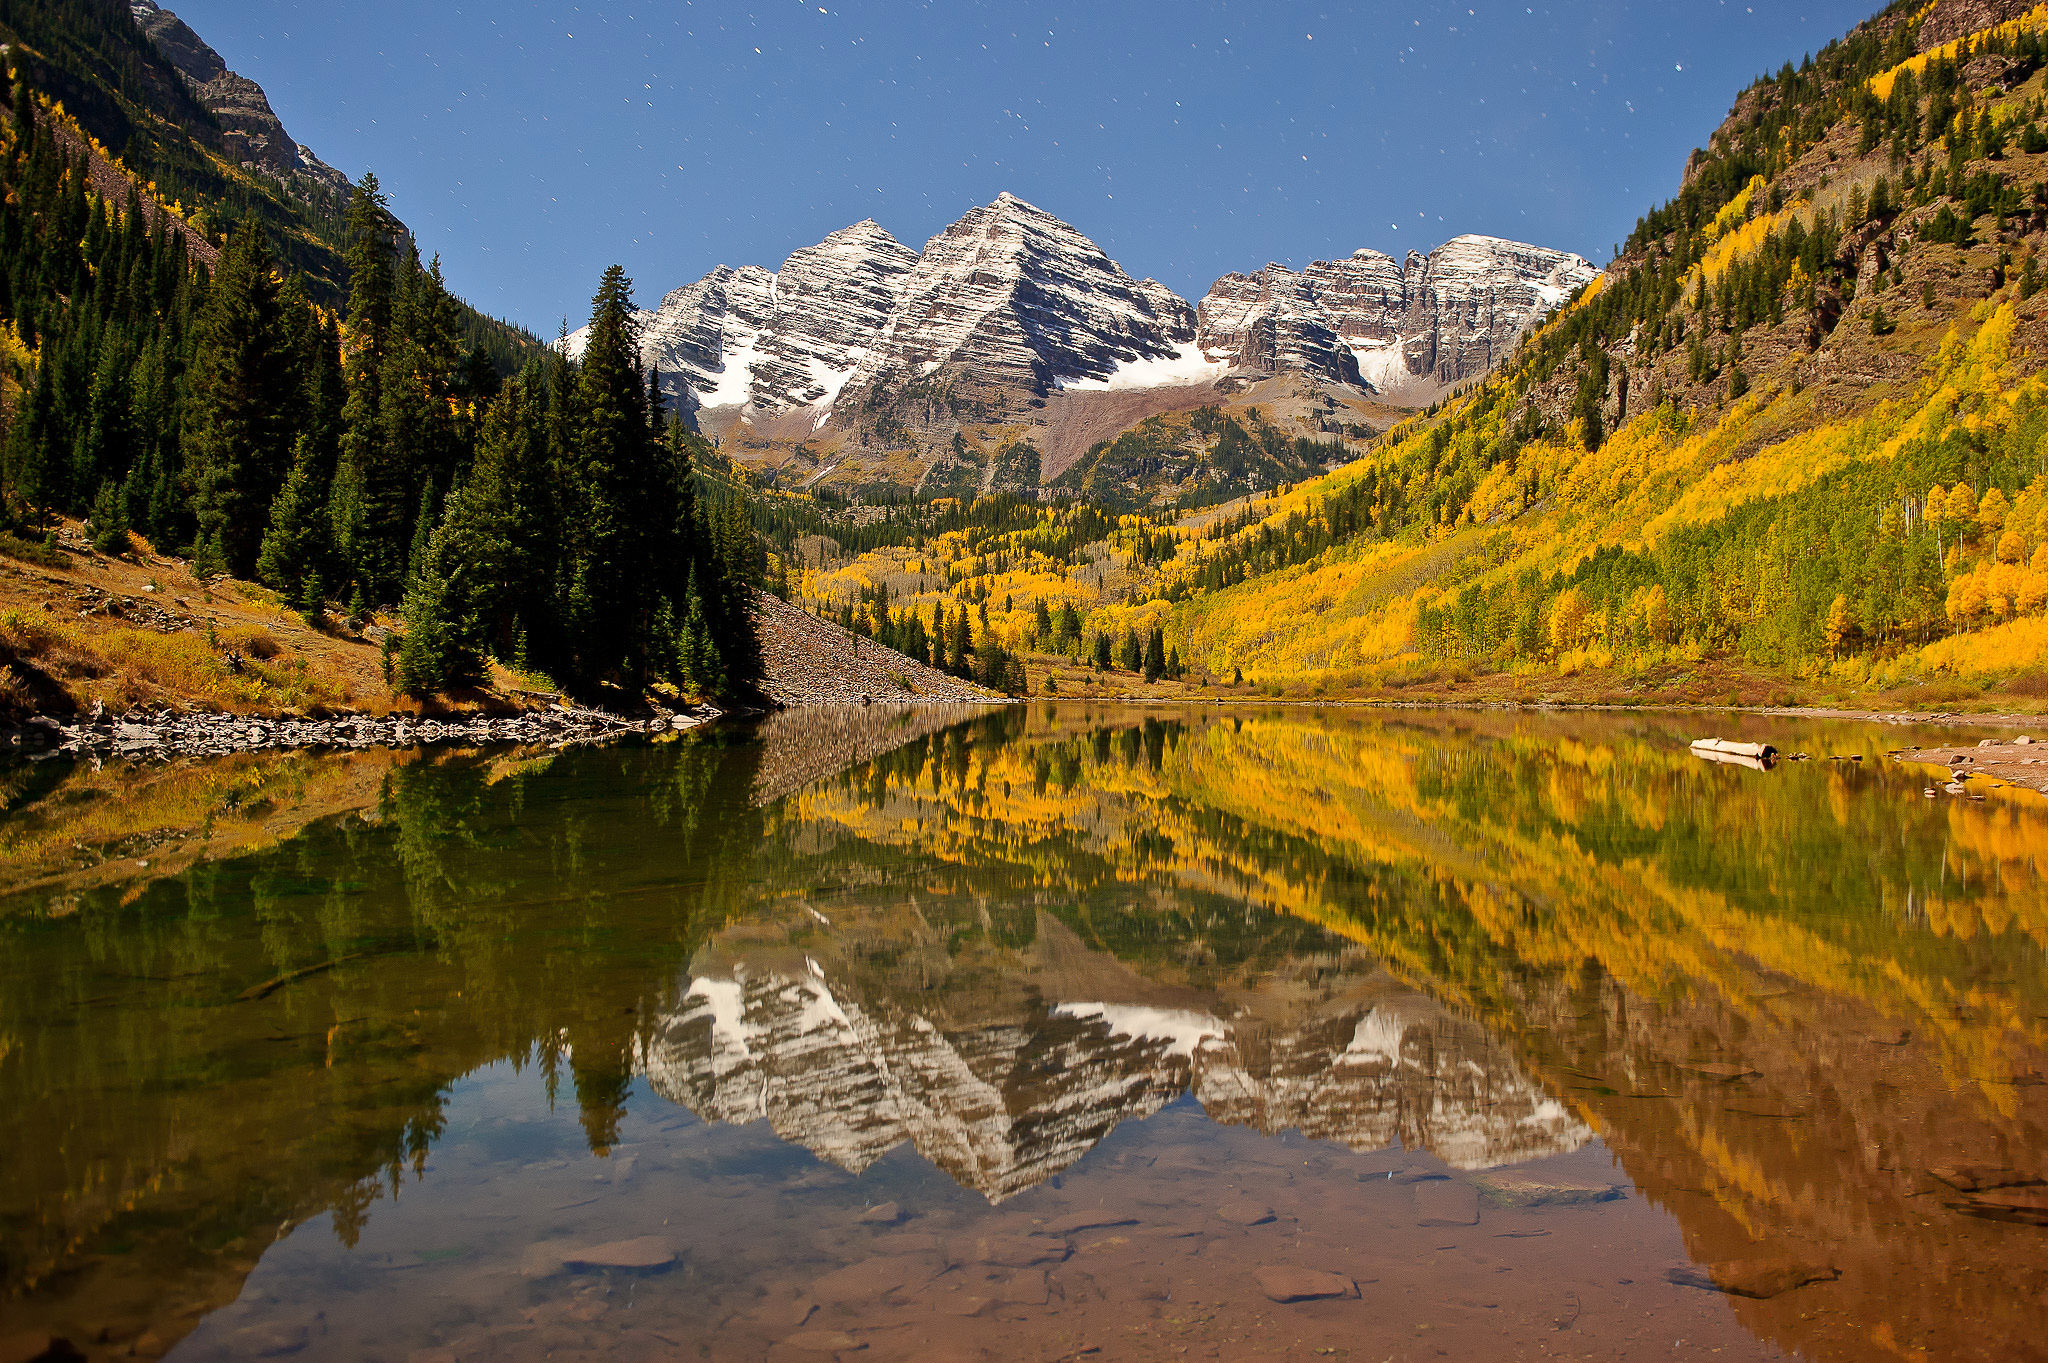
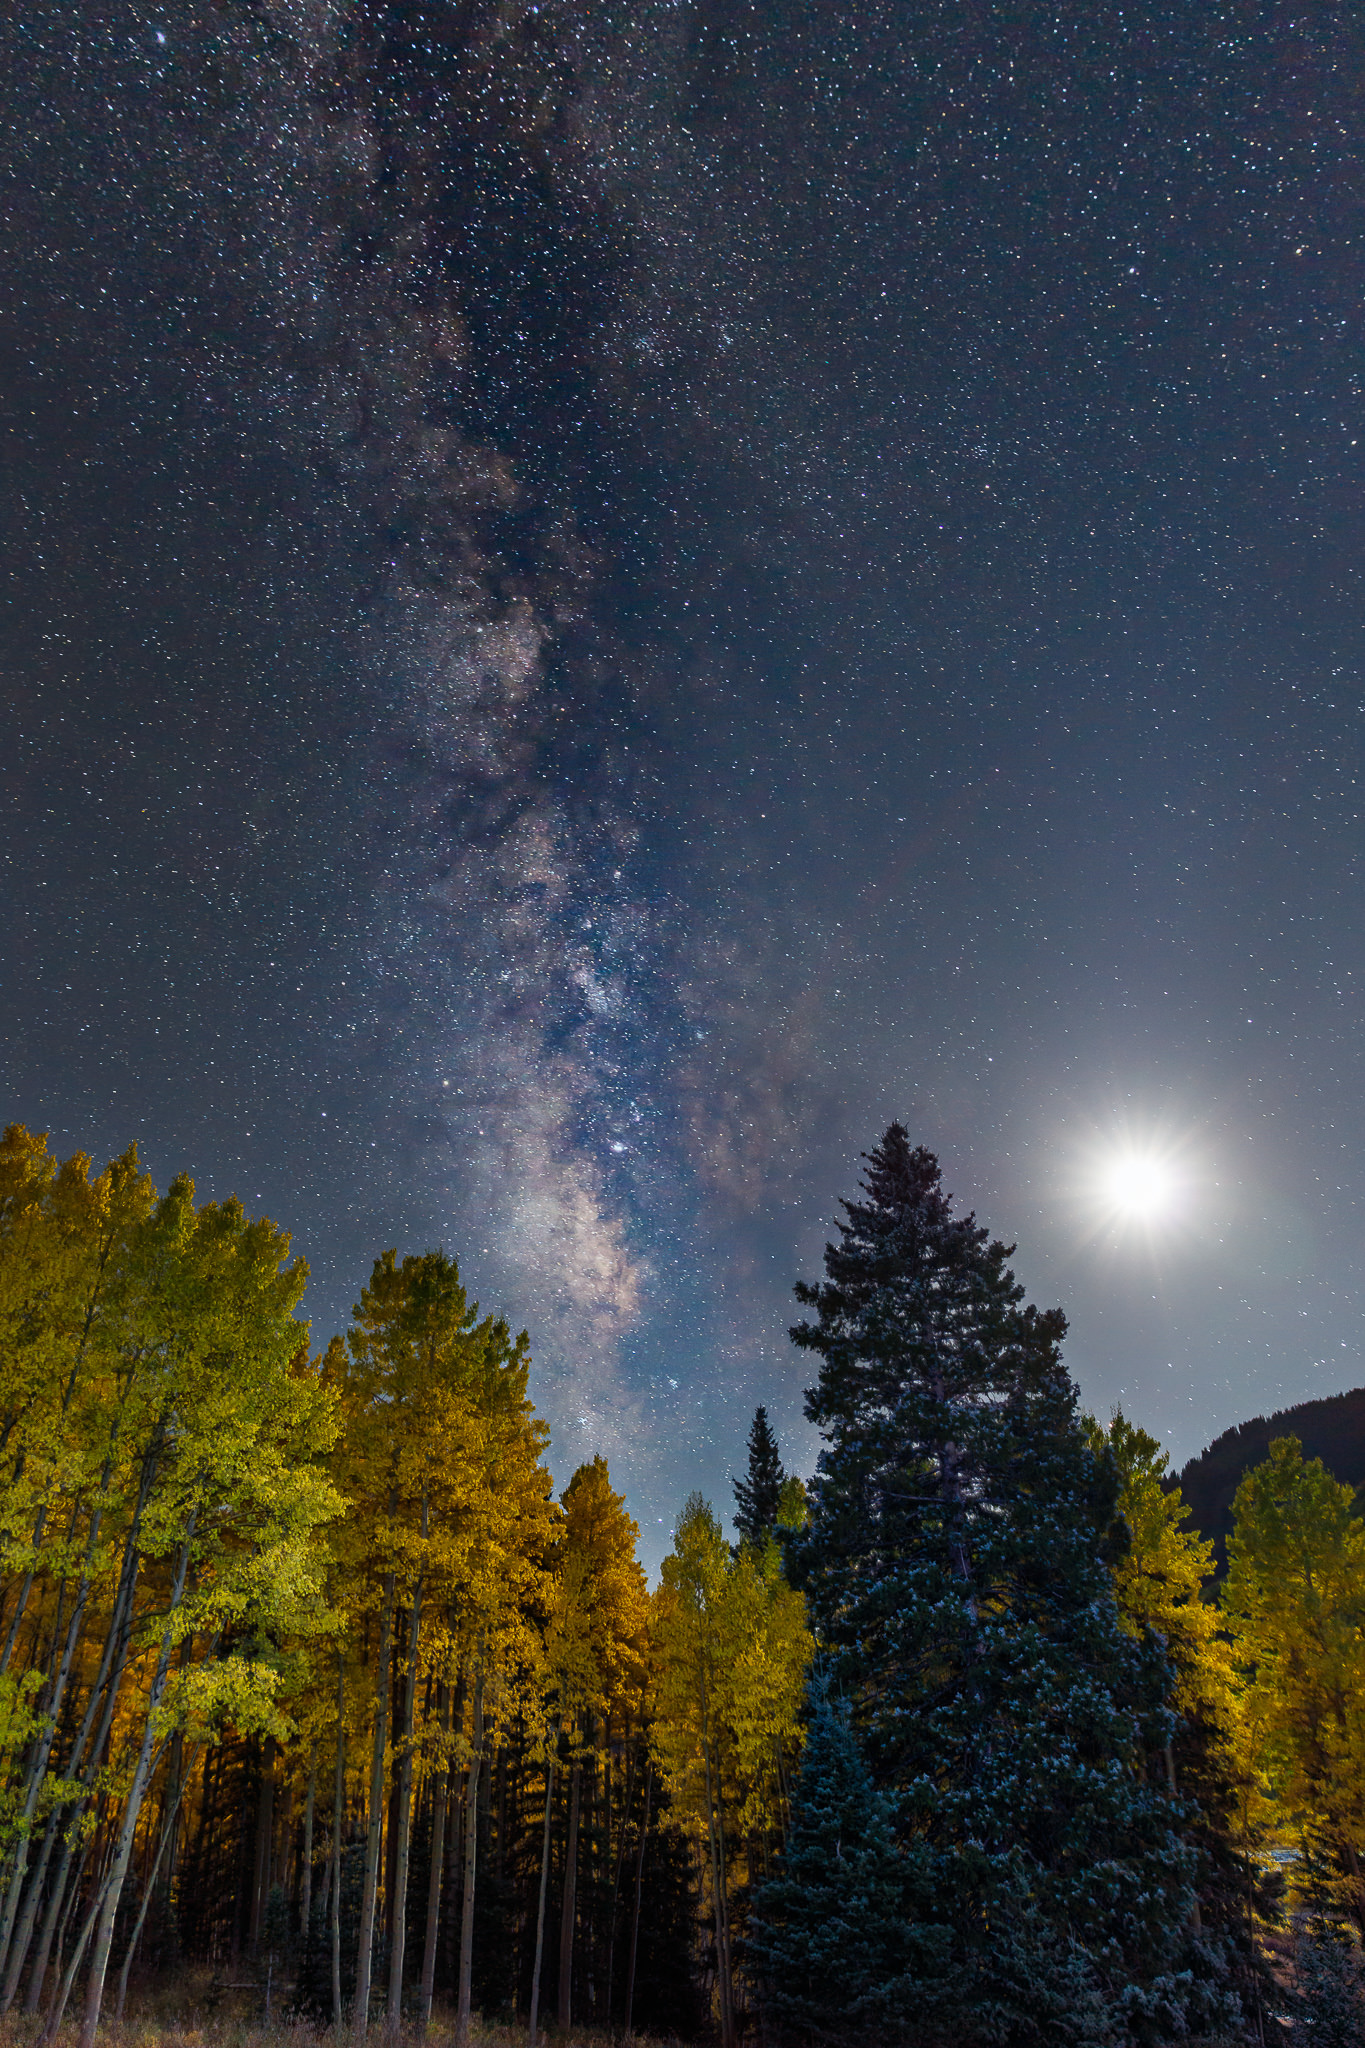
Try Shooting at Night
If the weather treats you too well and you end up with very bland, empty skies, don’t forget that you can also shoot at night! Night photography in the fall can be a lot of fun and if you plan ahead of time, you can capture very unique images. For example, the Maroon Bells in Aspen, Colorado, are very famous among photographers in the fall. Having been there a few times, I realized that I wanted to capture something unique, so I decided to photograph at night. It was a very still and quiet night, but thanks to the full moon in the sky, I was able to successfully capture Maroon Bells at night with a full mirror reflection, as seen below:
On another occasion, our team went out to shoot at night in the fall and I was able to capture the following image with the Milky Way and the moon in the same frame:
I hope you find the above tips useful. If you have other tips to share, or if you have any questions / feedback, please let me know in the comments section below!
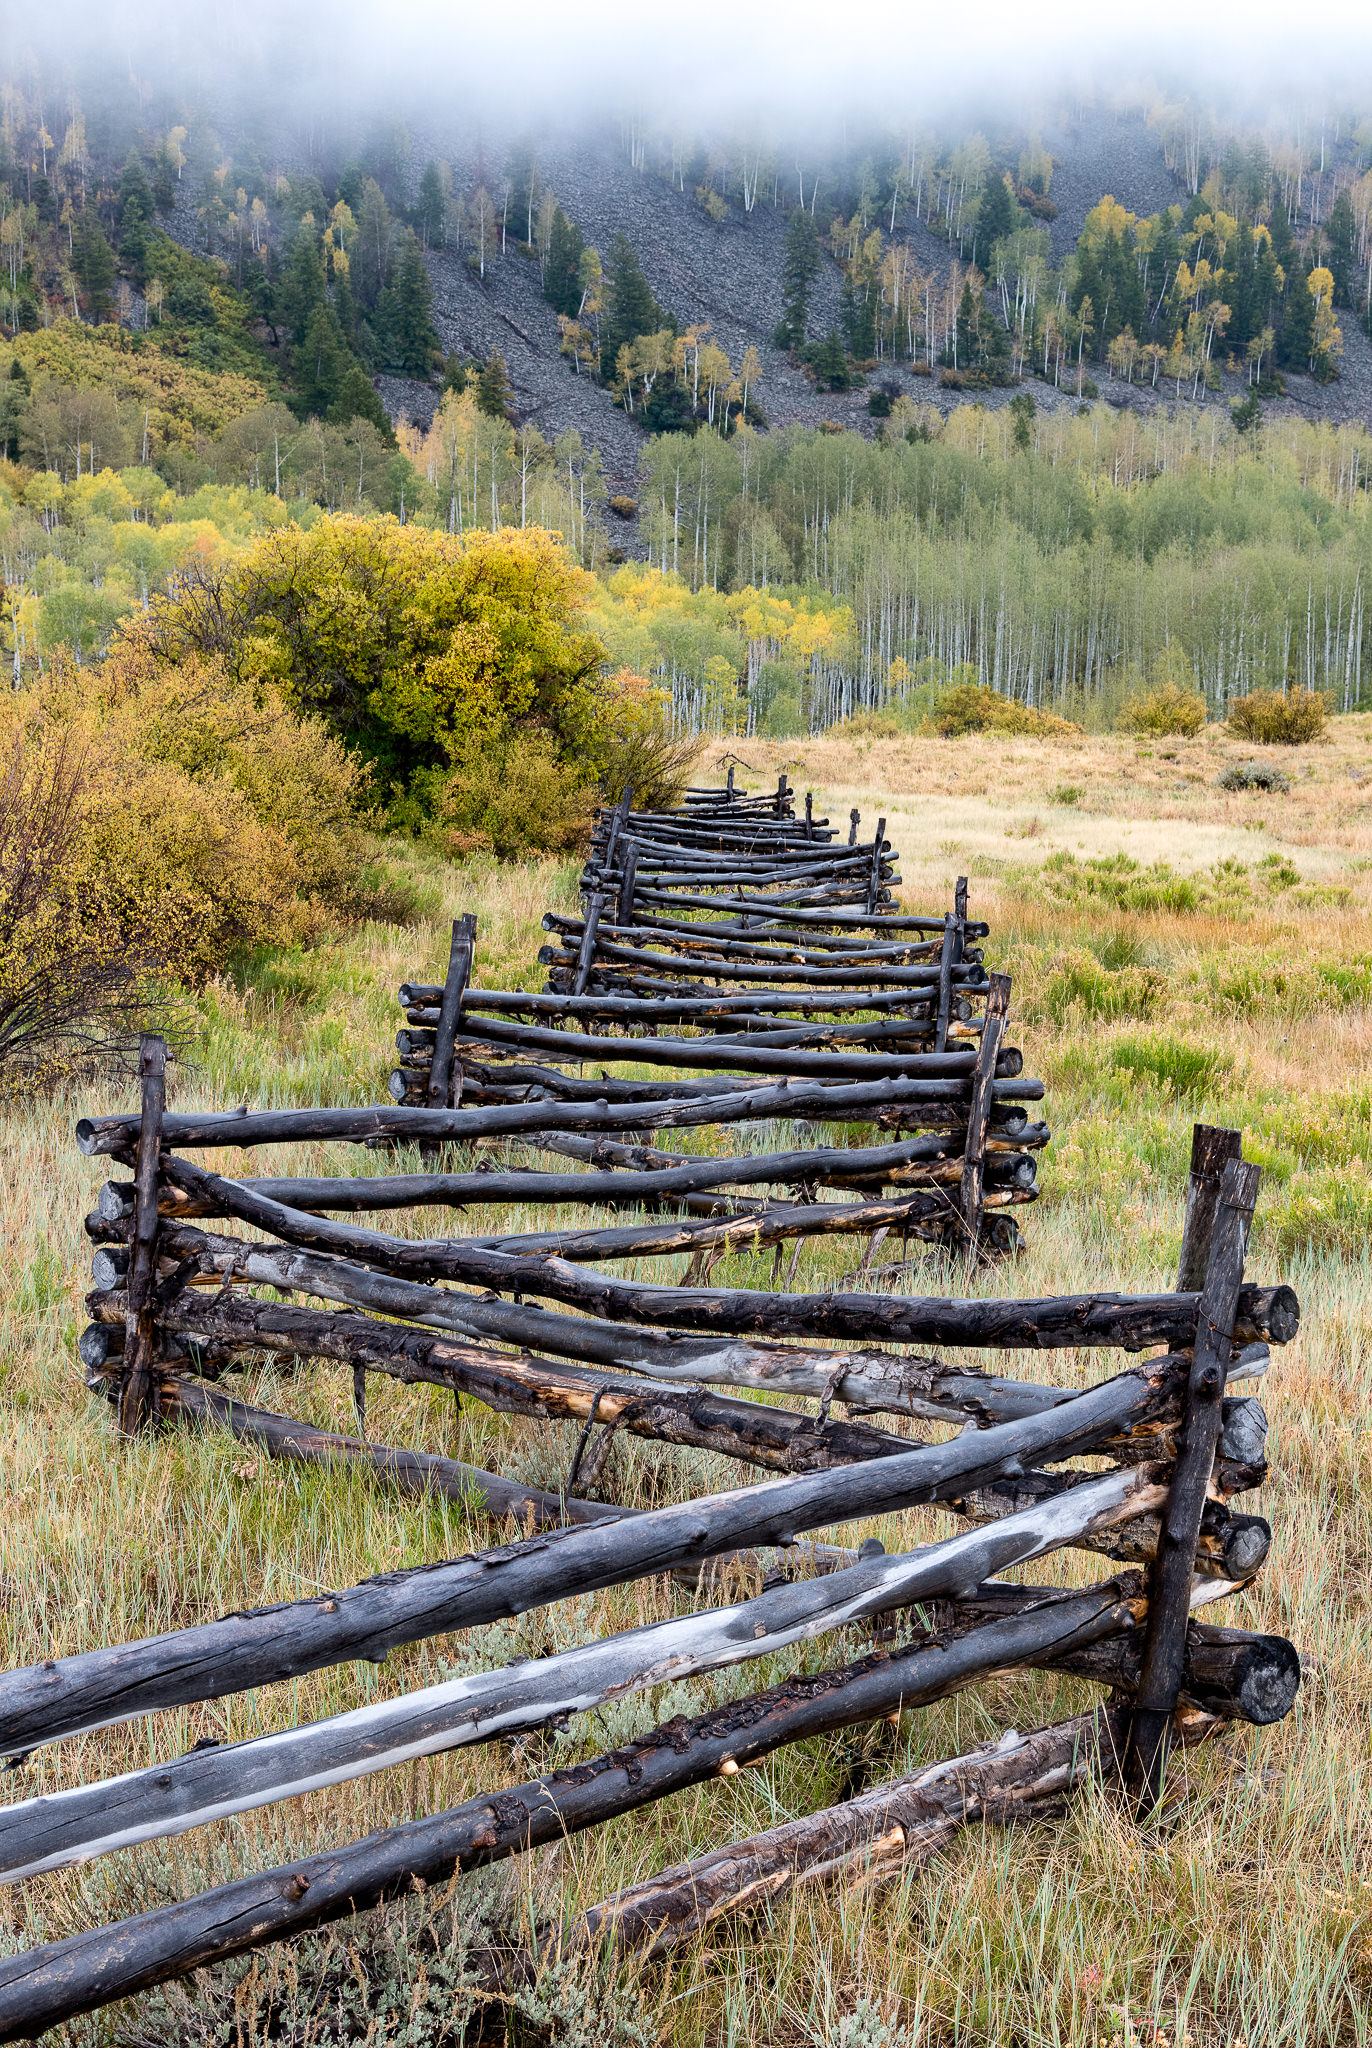
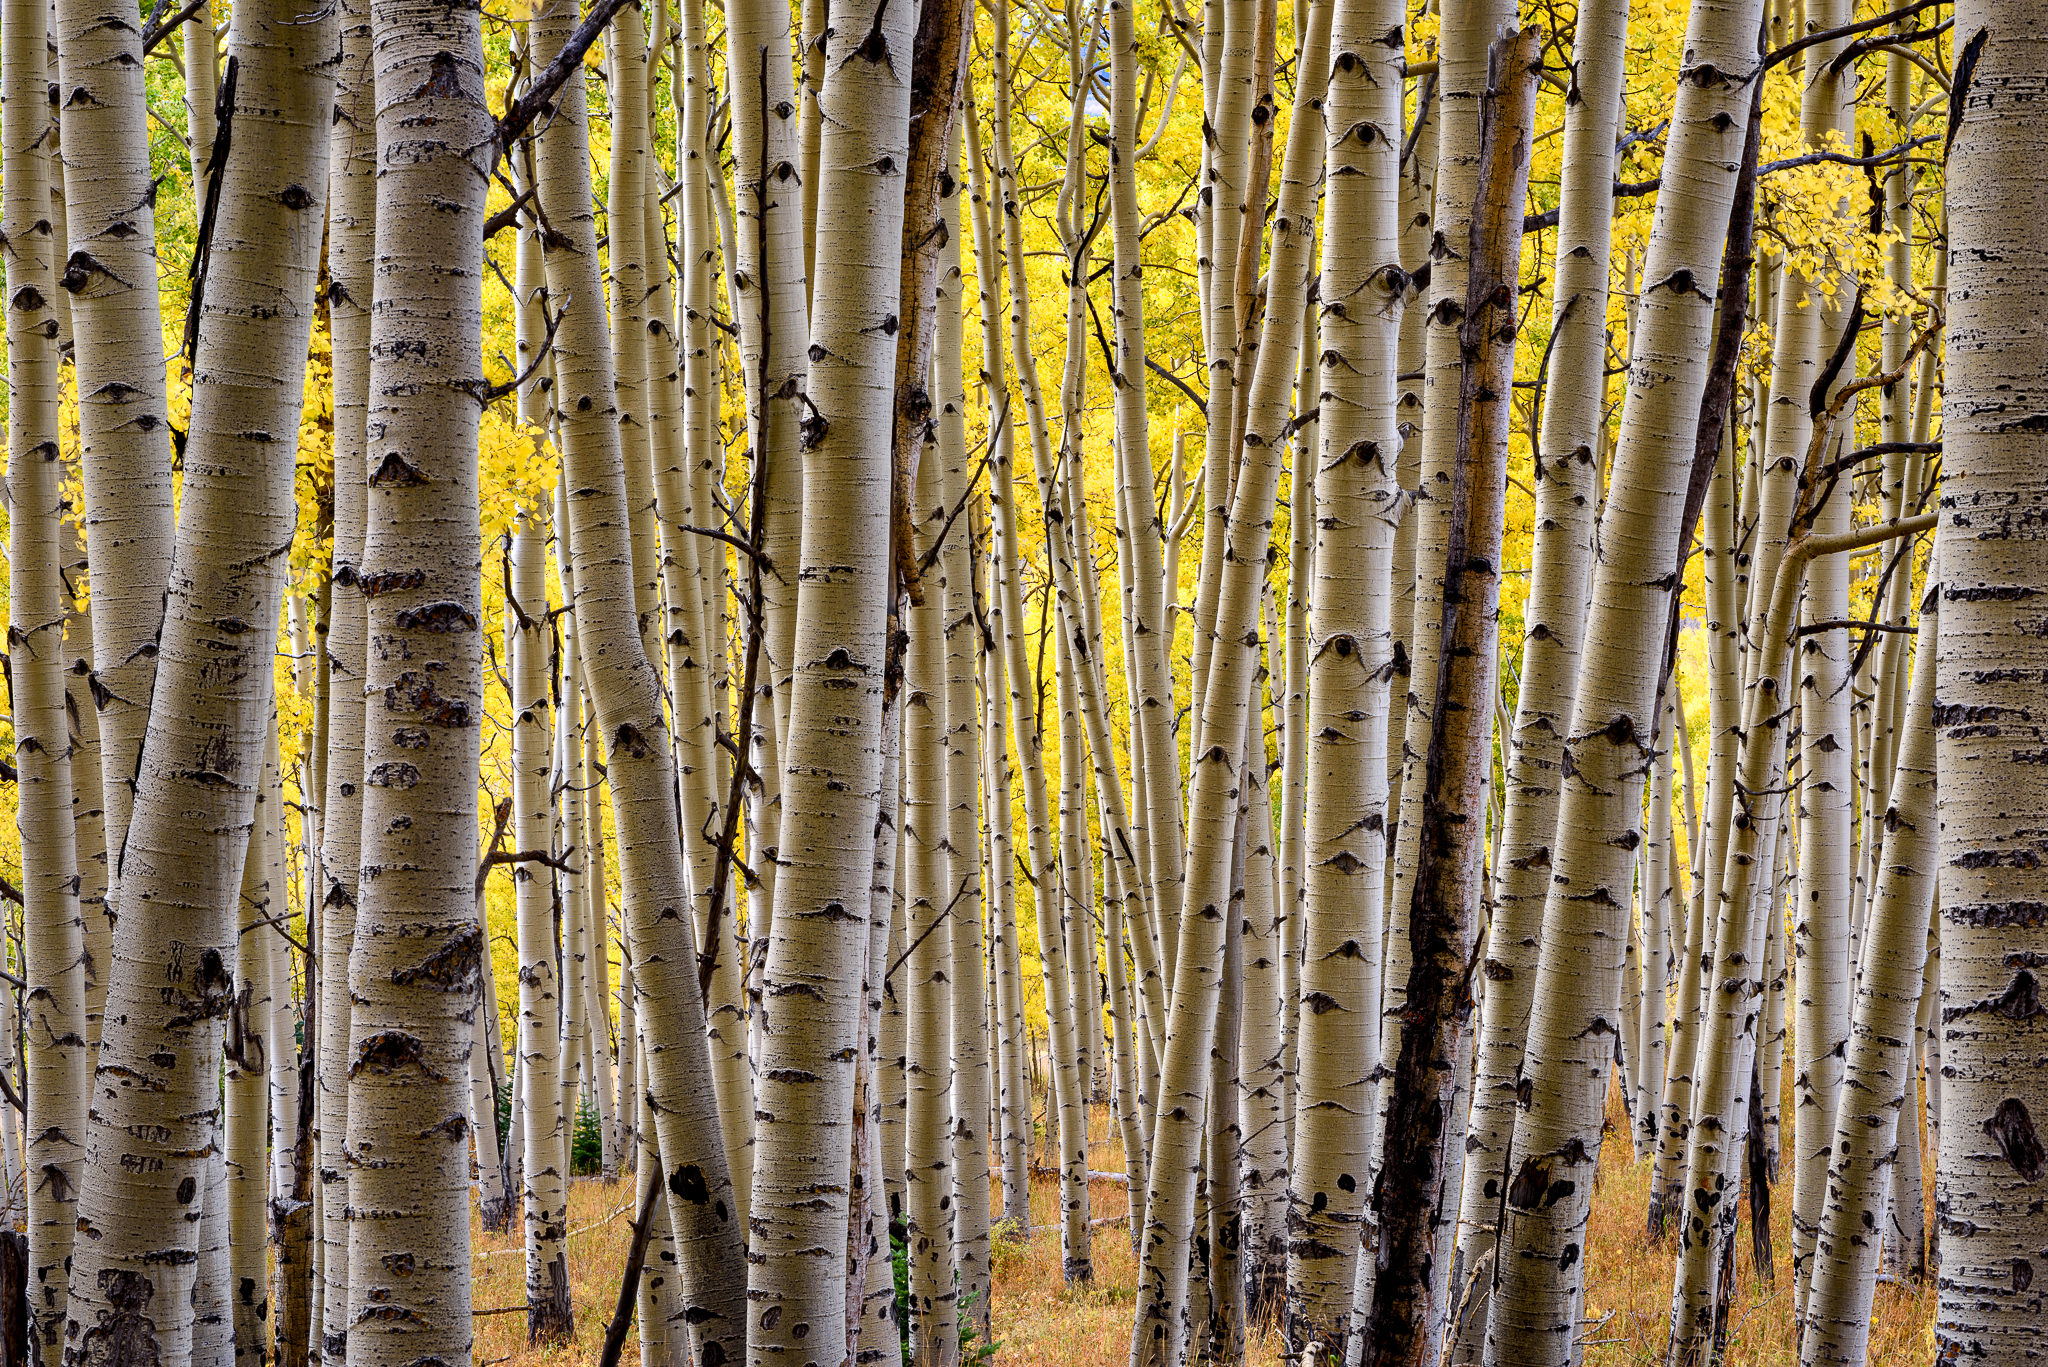
Go for the Details
Don’t forget to focus on the details that might be surrounding you. If most of the leaves are on the ground and the trees themselves look bland and boring, why not photograph the colorful leaves by themselves? You might find some interesting compositions, patterns and textures by looking down and exploring your surroundings. If colors are not quite peak yet, perhaps you can photograph bare tree trunks and detailed textures on them. If you are surrounded by a forest, scout the area and look around – you might find some interesting vantage points.
If you come across a scene like the one above and you find yourself maxing out on aperture, try using the focus stacking technique.
NIKON D850 + 24-120mm f/4 @ 46mm, ISO 64, 1/13, f/8.0
NIKON D850 + 70-200mm f/2.8 @ 95mm, ISO 64, 6/10, f/5.6
NIKON D850 + 70-200mm f/2.8 @ 95mm, ISO 200, 15/1, f/5.6
NIKON D850 + 24-120mm f/4 @ 28mm, ISO 64, 16/10, f/8.0
Canon EOS 5DS R + EF24-70mm f/2.8L II USM @ 24mm, ISO 3200, 20/1, f/2.8
seems to me the values 1/13, 6/10, 15/1, 16/10 and 20/1 represents Shutter speed. Looks like all these photos were taken at a very low light. I am assuming that you were using the BULB mode on the camera.
I will highly appreciate if you please explain those figures to clarify my confusion.
Thank you
CP
I was further down the road, towards Telluride the night you were shooting on Last Dollar and the sky lit up. I think I got my best pano in SW Colorado that night. That sky retained some light for a really long time that night
Nasim, how did you get so much detail in the Milky Way with a full moon? I’ve tried photographing a similar situation but couldn’t resolve as much detail. Photo is great.
Hi Nasim,
Medical doctor by profession, I started taking my hobby seriously six years back at 56 yrs age with Nikon D 90 and later on D 610 . I desperately searched some expert to convince me technically. When I started going through your articles, my search almost ended. Your threadbare analysis & observations are so simple as well as impressive which convinced me to purchase Nikon 300 mm f 4 E PF ED lens with TC 14 E III recently, since earlier I was scared of carrying heavy weight lenses even Nikon 200-500. I have also added Nikon D 850 , seeing its results through your articles, Fall Foliage…..in particular. In a couple of days myself and my friends will be visiting Uttarakhand in India to photoshoot Himalaya. I would like to send you some photographs for review, if permitted.
with kind regards,
Dr Arun Sinha
This article, and others, is not helping me resist the D850…… Just saying
Hi Nasim,
As of today – Oct. 9 – have any glitches been found with the D850 that must be corrected by Nikon?
Nasim,
Great workshop, I really learnt a lot !
Also, I am downloading the FastRawViewer app, for a round of numerous photos I shot yesterday viewing the Blue Angels over San Francisco Bay.
Best, Shubha
Hi everbody,
here in my home in france close to “mont-blanc” mountain, the colors of landscapes just start to change. I love this time of year in the mountain for the very specials colors as you wrote in your article.
for the moment I use D7200 + 16-80 vr, do you have plan to test with imatest the 16-80?
I would like to know if it is better for landscape photography to buy a D750 and a 24-120?
I have a doubt because in your review of 16-80 you seems to say that the DX combinaison is better.
thanks a lot
Hi Nasem
Just a general comment. I have come across a few web sites of claimed professional photographer but soon quitting them Only photography life connects with me! Your vast knowledge is amazing and I am thankful of you for sharing. I copied and saved electronically some articles for reference. These days, lots of amateur photographers, it is a crowded field, so I am only trying to improve myself, difficult to compare to others. I am from Canada by the way. Thanks
Nasim,
Your statement “Interestingly, the rainbow cast a red shadow on the hill right behind it” seems to defy physics. The rainbow you see is the reflected and refracted light coming in your direction, which would be away from the mountains behind the rainbow. However, there probably was a lot of light, bouncing around that day, that cast the red shadow you captured in your picture.
Either way, a great article and great pictures. Thanks,