Exposing to the right, or ETTR, is an approach to photography that is as helpful as it is controversial. On one hand, exposing to the right is yet another technique to remember while shooting, and it can potentially ruin your exposure if utilized incorrectly. On the other hand, at least in theory, ETTR is the epitome of digital exposure. With proper ETTR, your images have as much detail in the shadows as they possibly can, without any of the highlights losing information along the way.
It is important to know that this article is not for beginners. If you do not fully understand the fundamentals of exposure, then this article will be more confusing than helpful. But if you already know the basics and you are looking to get the highest-quality images possible, ETTR is something that could benefit your photography.

Table of Contents
1. Overview
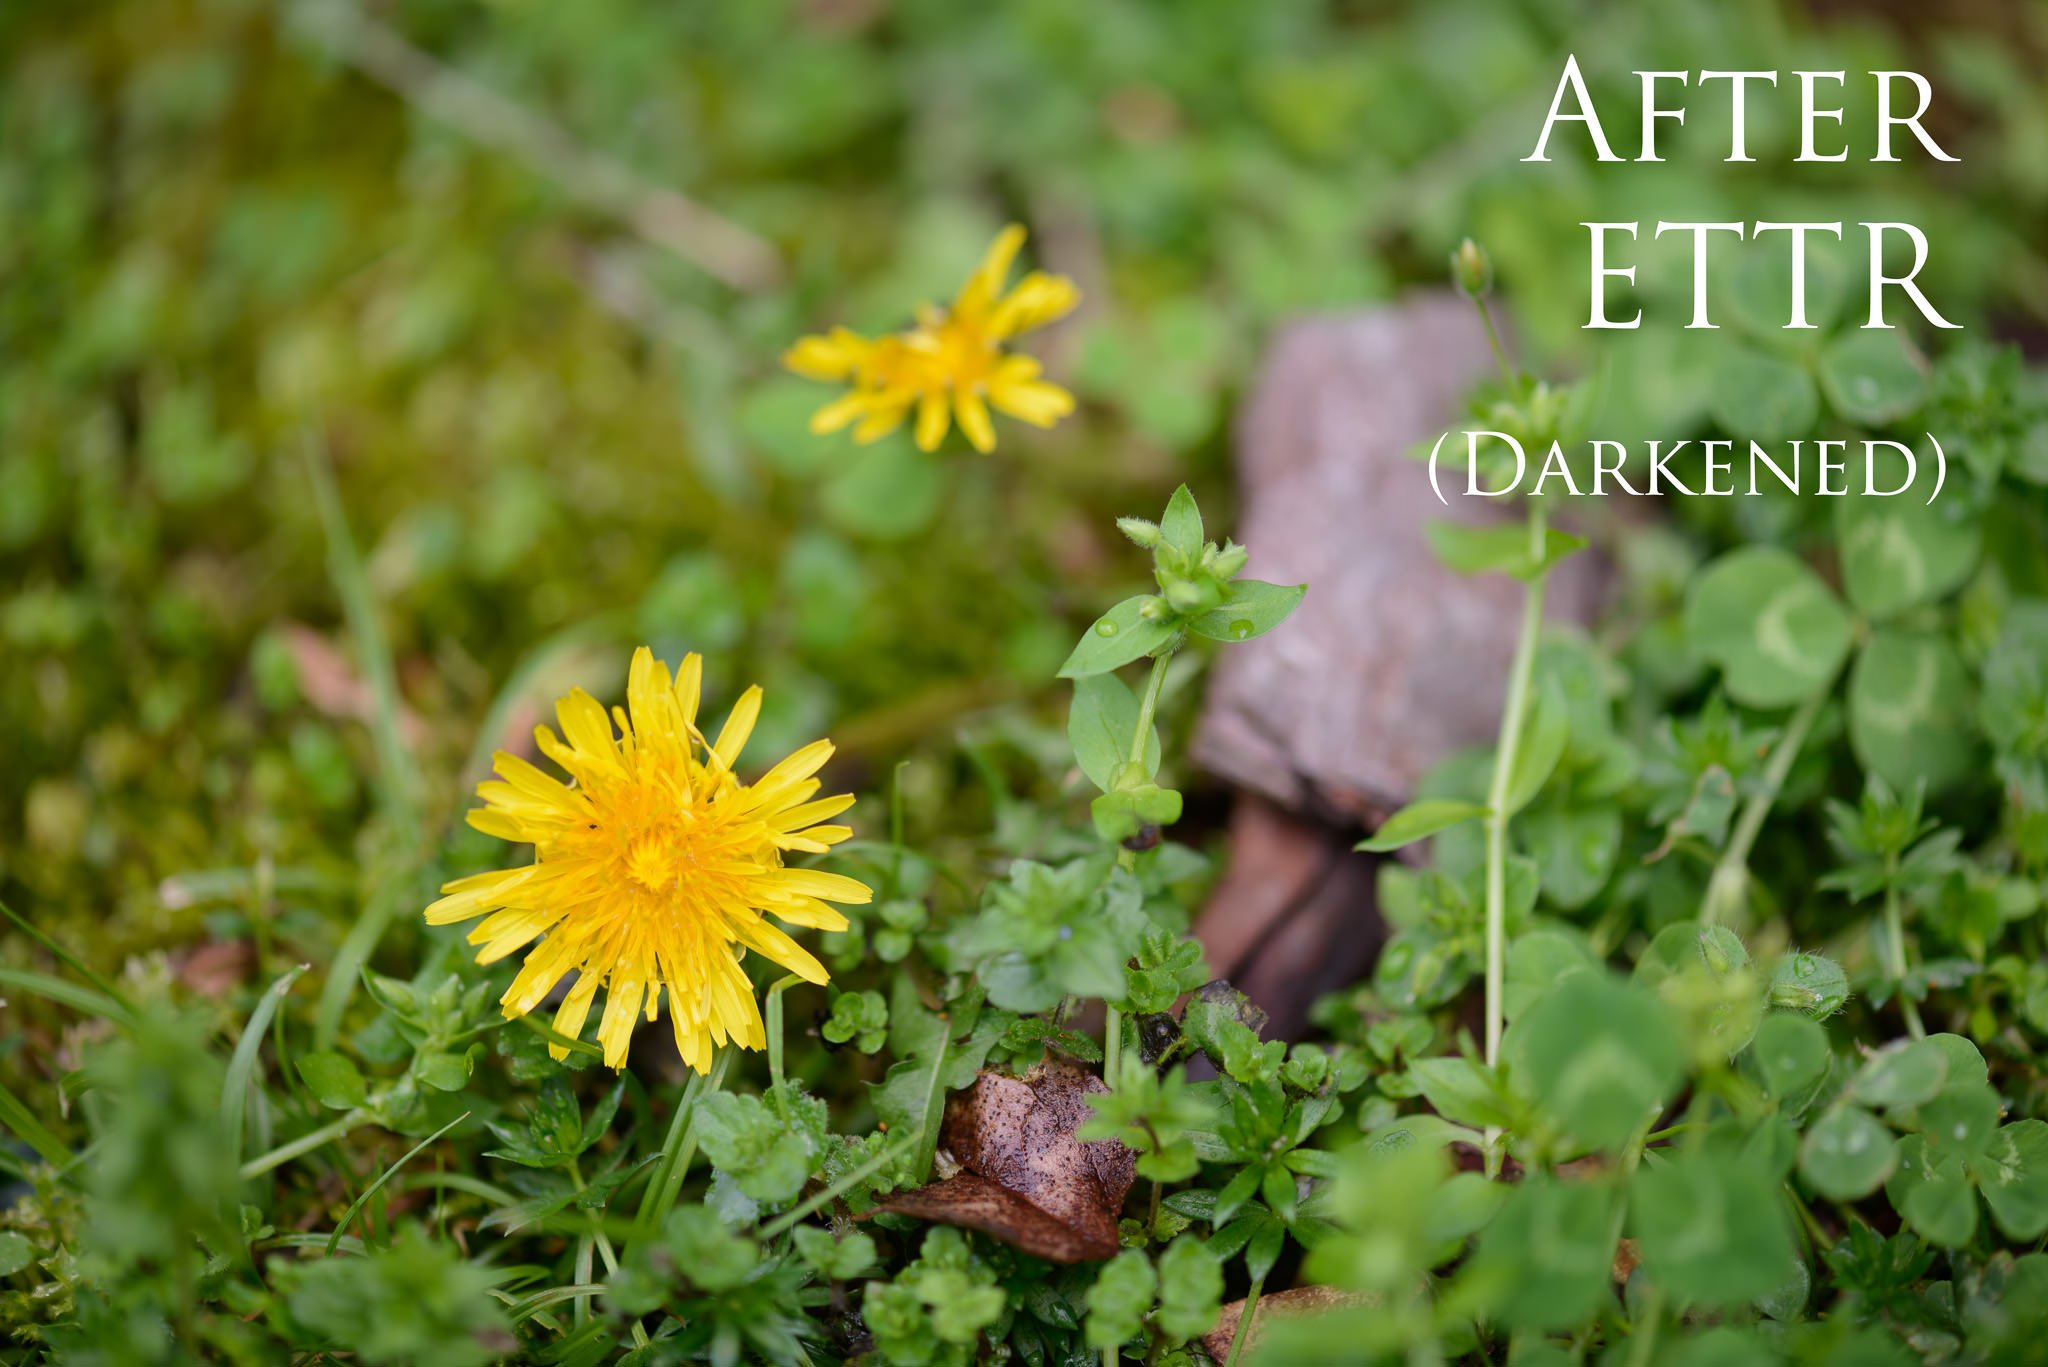
The basis of ETTR is simple: optimize your exposure, and get the highest-quality image possible. Most people expose a scene so that the image looks how they want — and, at face value, this makes sense. Optimum exposure is different, though. Instead of exposing the scene “correctly”, it is better to expose a scene to be as bright as possible, without blowing out the scene’s highlights and losing all of that data. Then, in post-processing, you darken the image so that it looks how you want.
By darkening an exposure in post-processing, you are effectively using a lower-than-base ISO. It brings similar benefits, too — a decrease in image noise, richer colors, and a greater dynamic range. Images exposed using ETTR are more malleable in post-processing, making it easier to produce the photo you have in your mind’s eye.
Look at the histograms below (from the photo of the columns at the top of the page):


The first histogram is the “correct” exposure for the columns photo — everything is at the brightness level that I want. The second histogram, though, is from the ideal exposure. It can be darkened to match the histogram on the top, and none of the highlights in the image are completely white. As such, the second histogram contains more details than the first.
2. Image Quality Comparisons
Of course, ETTR is only useful if it has noticeable effects on an image. The comparison below shows an example of the difference between a matrix-metered exposure and an image with +1.3 exposure compensation, shooting a relatively low-contrast scene at ISO 100 on a D800E.

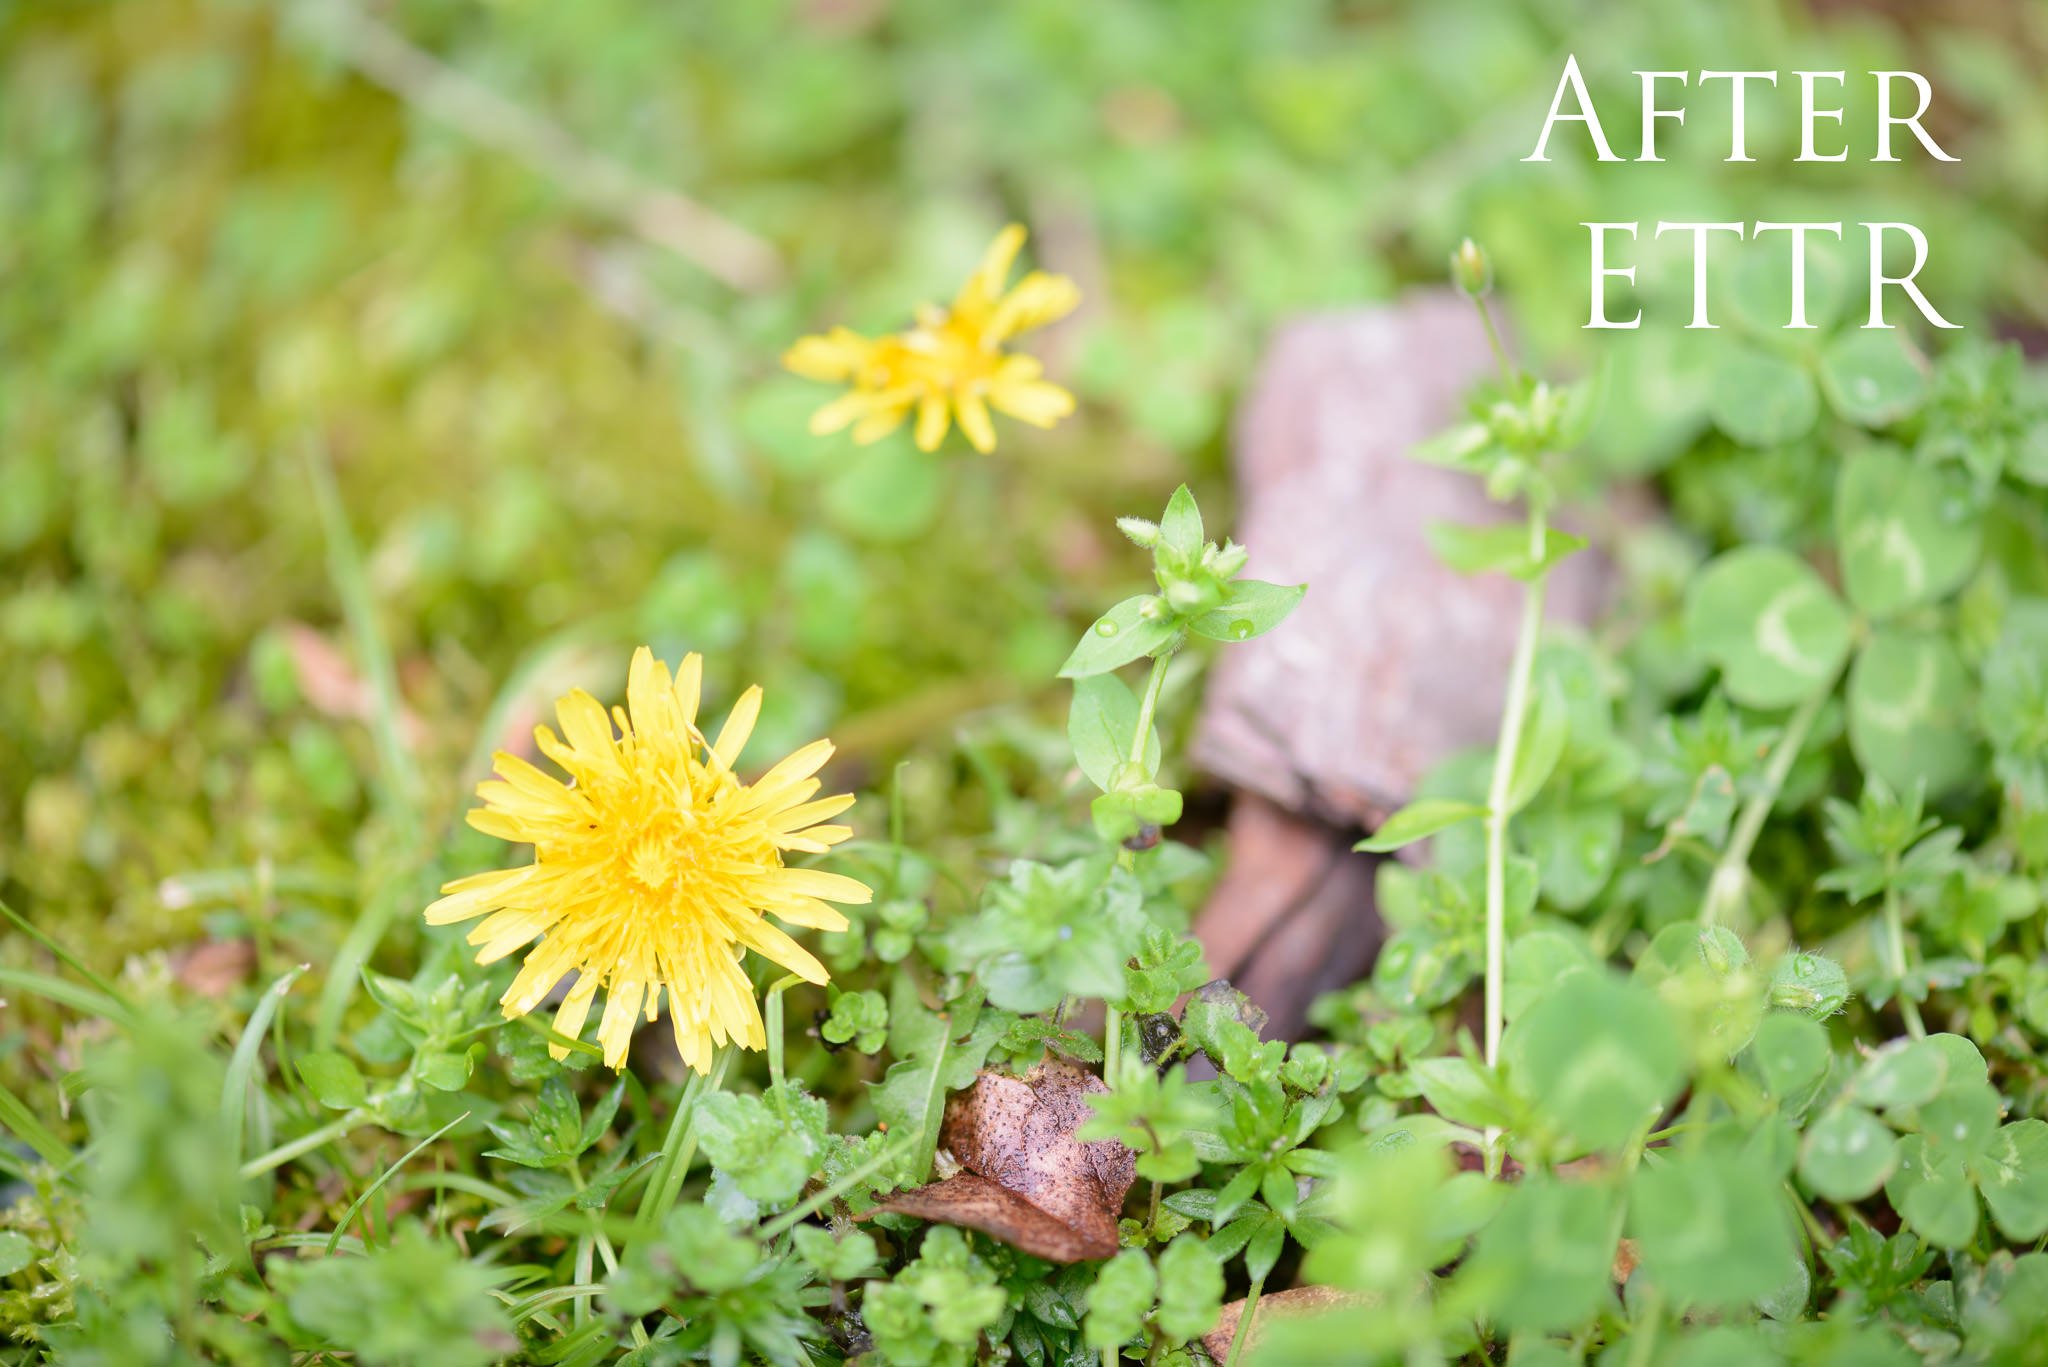
Now, when I reduce the second image’s exposure in Lightroom, the photos look essentially the same:
However, the second image has some more detail than the one on the left, at least in theory. With contrast, sharpening, and vibrance changes in Lightroom, the differences are visible in the crop below:
The above photos show why there is so much controversy behind ETTR. Yes, there are differences in the images above — the crop on the left is certainly noisier than the one on the right — but this is a 100% crop. If the images above are four inches (10 cm) wide on your screen, they would be crops from a six-foot wide print (about two meters).
In fact, the differences between the images are all but invisible on a print that is less than two feet wide. For many photographers, the image quality gains simply are not worth the hassle of exposing to the right.
Still, there are clear differences between the two exposures above. Photographers worry so much about capturing optimum data in the first place, and exposing to the right undeniably does improve the resulting image. In this scene, there was only a difference of 1.3 EV between the metered exposure and the ETTR exposure — in scenes where this difference is greater, the improvement from the ETTR shot will also be more obvious. And, if you ever print large or use an older-generation camera, these differences start to become more relevant.
3. Putting it into Practice
The hardest part about ETTR is that you must be careful to avoid exposing too far to the right. The danger is that you accidentally render an image’s highlights completely white (which means there is zero / no data there), even if you intend to shoot a darker exposure. And, although it is fairly easy to recover dark shadows in post-processing, it is nearly impossible to recover completely blown-out highlights. This is what turns many people away from using ETTR, which is unfortunate. There are a few ways to determine the proper ETTR exposure and still avoid blowing out the highlights.
One way to do so is to look at the photo’s histogram when reviewing the image in-camera. Your goal is to take the brightest photo possible that does not push too far to the right of the histogram, as shown below.

Unfortunately, the histogram on your camera is not as accurate as it looks. Current cameras are incapable of showing the RAW histogram of an image, even if you shoot in RAW (which you should, if you use ETTR). Instead, the histogram is based on the processed JPEG image that is embedded into RAW files. This means that although the camera might indicate that you have pushed your exposure too far, there is potentially more headroom for recovery in post-processing.
There is truly no reason for camera companies to avoid implementing a RAW histogram option, which has been one of the most-requested features amongst landscape and studio professionals for more than a decade. At this point, it is truly absurd that photographers cannot judge their RAW histograms until loading their photos onto a computer (see Iliah Borg’s excellent article on culling RAW images vs JPEG). The first mainstream camera manufacturer to get this right will earn a lot of respect in my book.
Still, although the camera-generated histogram is not completely accurate, it does serve as a useful guide for what the proper ETTR exposure could be. And, as I describe later, there is one (albeit cumbersome) way to fix the inaccurate histogram issue.
4. ETTR Method One
One method of aiming for a proper ETTR image is to take a photo, then analyze its histogram in-camera. If none of the histogram is bunching up against the right, you can increase the exposure. Stop increasing the exposure once the histogram says that your highlights are blown-out to white, and you’re good.
Instead of a histogram, it is also possible to use so-called “blinkies” to judge your image’s exposure. With this option enabled, the pure-white areas of your photo will blink between white and another color — typically black or red, but it depends upon your camera.
Blinkies are easier to notice than a histogram, but they are a more limited method of judging your exposure because they only tell you one value: white. Blinkies are valuable, just not to the same extent as a histogram. Plus, just like histograms, blinkies are based on the JPEG that is embedded in the RAW file, not the RAW data itself.
Using the JPEG embedded in a RAW file certainly isn’t the perfect method of judging exposure, whether you use a histogram or blinkies. Still, it is perhaps the easiest ETTR method to implement, since it requires almost no extra work. Plus, it still leads to better exposure than blindly using the matrix meter without any compensation.
5. ETTR Method Two
The other method is a bit more complicated, and it requires that you do some testing. First, change your metering mode to spot metering, then find the brightest part of the scene that has to retain detail. If you test your camera beforehand, you will know the amount that you can increase exposure compensation by and still be able to recover information from this area in post-processing. For example, with my Nikon D800E, I can increase exposure at least by +2.3 EV above the spot meter’s recommendation for the brightest part of the image.
If you use this method, you don’t need to rely on the less-than-accurate histogram in your camera, although it puts more weight on your personal ability to judge the brightest part of a scene.
The first step is to find how much brighter you can expose your image compared to the spot meter’s recommendation. Set the camera to manual mode and spot metering. Point the metering point on the brightest part of the scene, and record the exposure that the camera tells you to set. Then, take several photos, ranging from +1/3 EV to +4 EV. Open the images in your image editor, then darken them all to match the spot-metered exposure. Check the exposure compensation of the brightest photo that still retains highlight detail — with my D800E, it was +3 exposure compensation.
However, to give yourself some breathing room, you don’t want to choose the value that is right on the limit. It is best to decide on an exposure compensation that is -1/3 or -2/3 from the value you just found. In my case, I decided that a +2.3 exposure compensation is ideal.
To use ETTR from now on, shoot in manual mode with spot metering, permanently using the compensation that you just found. Scan your photo with the spot meter, and manually set the exposure to render the brightest area at what the camera says is 0 EV (since it is automatically factoring in your positive exposure compensation). Congratulations — your images are now exposed to the right.
6. Bracketing
Regardless of the method you choose, it is always a good idea to bracket your scene if you are exposing to the right. I recommend that you shoot one image that is 2/3 EV more than your standard ETTR exposure, and one that is 2/3 EV less. If you are implementing the second method of ETTR (assuming that your “standard” compensation is, like mine, +2.3 EV), your bracketed images would be +1.7, +2.3, and +3 EV.
It is important to have a lower exposure than your normal value, in case you accidentally exposed too far to the right. On the other hand, you may find that your +2/3 EV exposure did not blow out any highlights, and you can use it instead of your standard ETTR exposure.
7. ETTR with High-Contrast Scenes
A common misconception is that ETTR says a photographer should always use positive exposure compensation, meaning that the resulting photo is brighter than what the camera’s matrix meter says. Often, this is not the case. For example, see the image below:

The extreme contrast in this scene fooled my camera’s matrix meter into suggesting a much brighter exposure than ideal. I took this image with a -2/3 exposure compensation, and some of the highlights are still blown out (especially along the left-hand side of the tree in the middle). Using ETTR with this image, I actually should have shot at one stop less than what the matrix meter recommended.
The lower a scene’s contrast, the more likely it becomes that your camera will recommend an exposure that is too dark — one that does not contain all the possible detail of an ETTR exposure. However, with a contrasty scene like the one above, your camera could do the opposite, recommending an exposure that is brighter than ideal.
8. What is UniWB?
As discussed above, the histogram that you see on the back of the camera is not technically accurate — oftentimes, a highlight that your histogram shows as pure white can actually be recovered in post-processing. If you can’t trust the histogram, it becomes much more difficult to know if your ETTR exposure is ideal until you open the photo on your computer.
Compounding the issue, modern cameras have several “picture control” options for JPEG shooters (or “Picture Styles” for Canon cameras). Since the camera’s histogram is based off of the JPEG preview, each of the different picture controls will show a different histogram, even when you are shooting RAW. Plus, your white balance setting will also affect the histogram you see, even though the white balance setting does not affect a RAW file in a destructive way. The complicated part is that none of these histograms is actually the same as the RAW histogram — the one that you actually want to see.
In an effort to fix this dilemma, Iliah Borg created UniWB, or unity white balance. This white balance makes it easier to see an accurate histogram in-camera, but it creates its own set of problems along the way. To get an accurate RAW histogram, your only option is to load a UniWB on your camera and to implement a completely flat tone curve — in other words, settings with no contrast whatsoever.
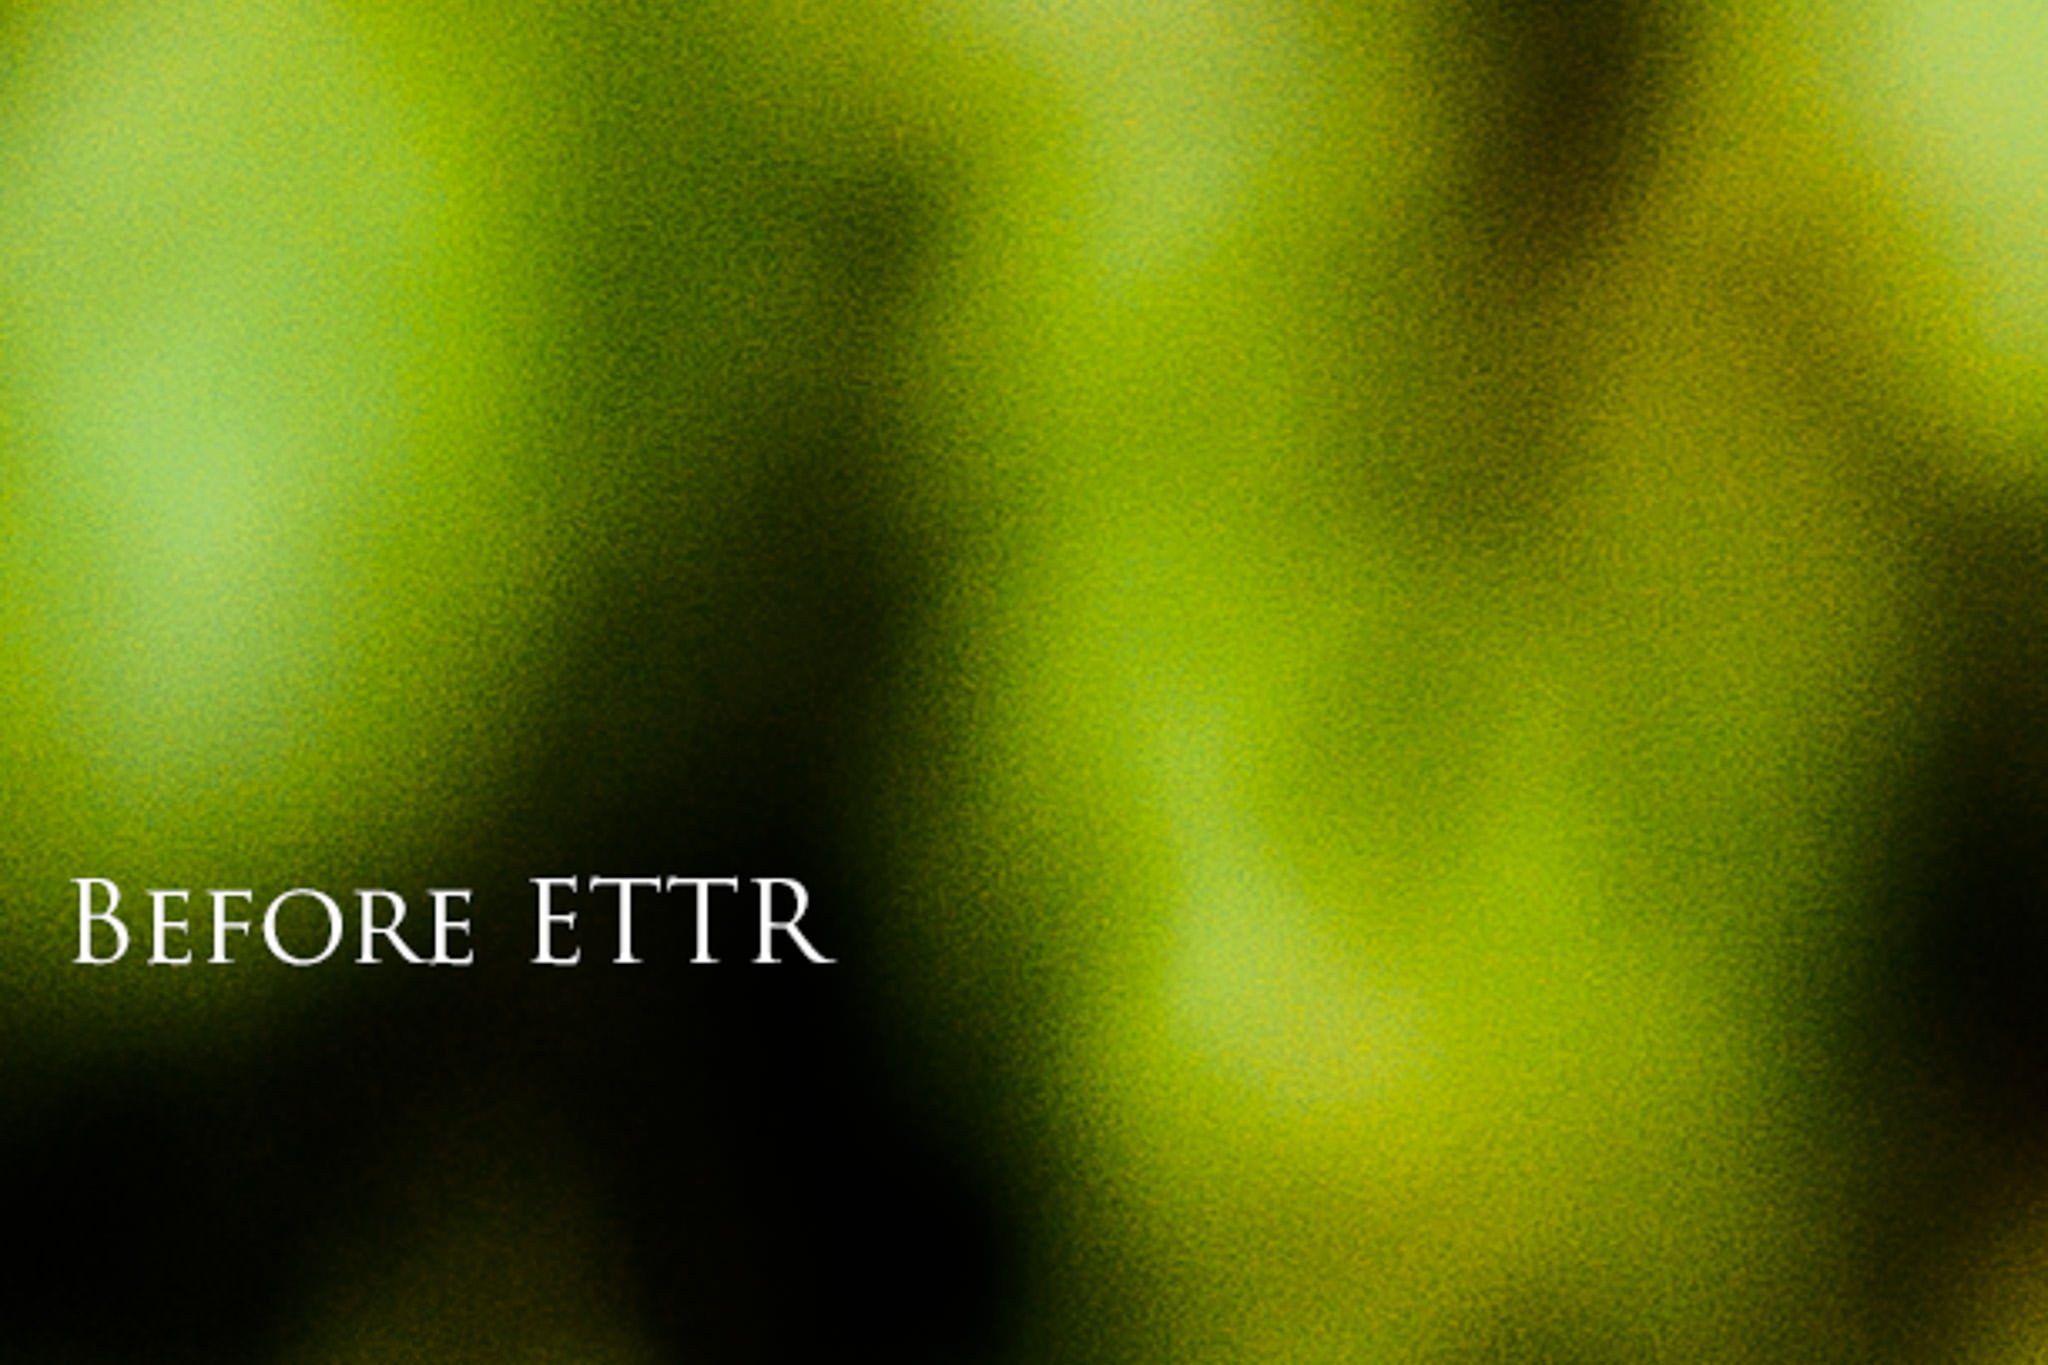
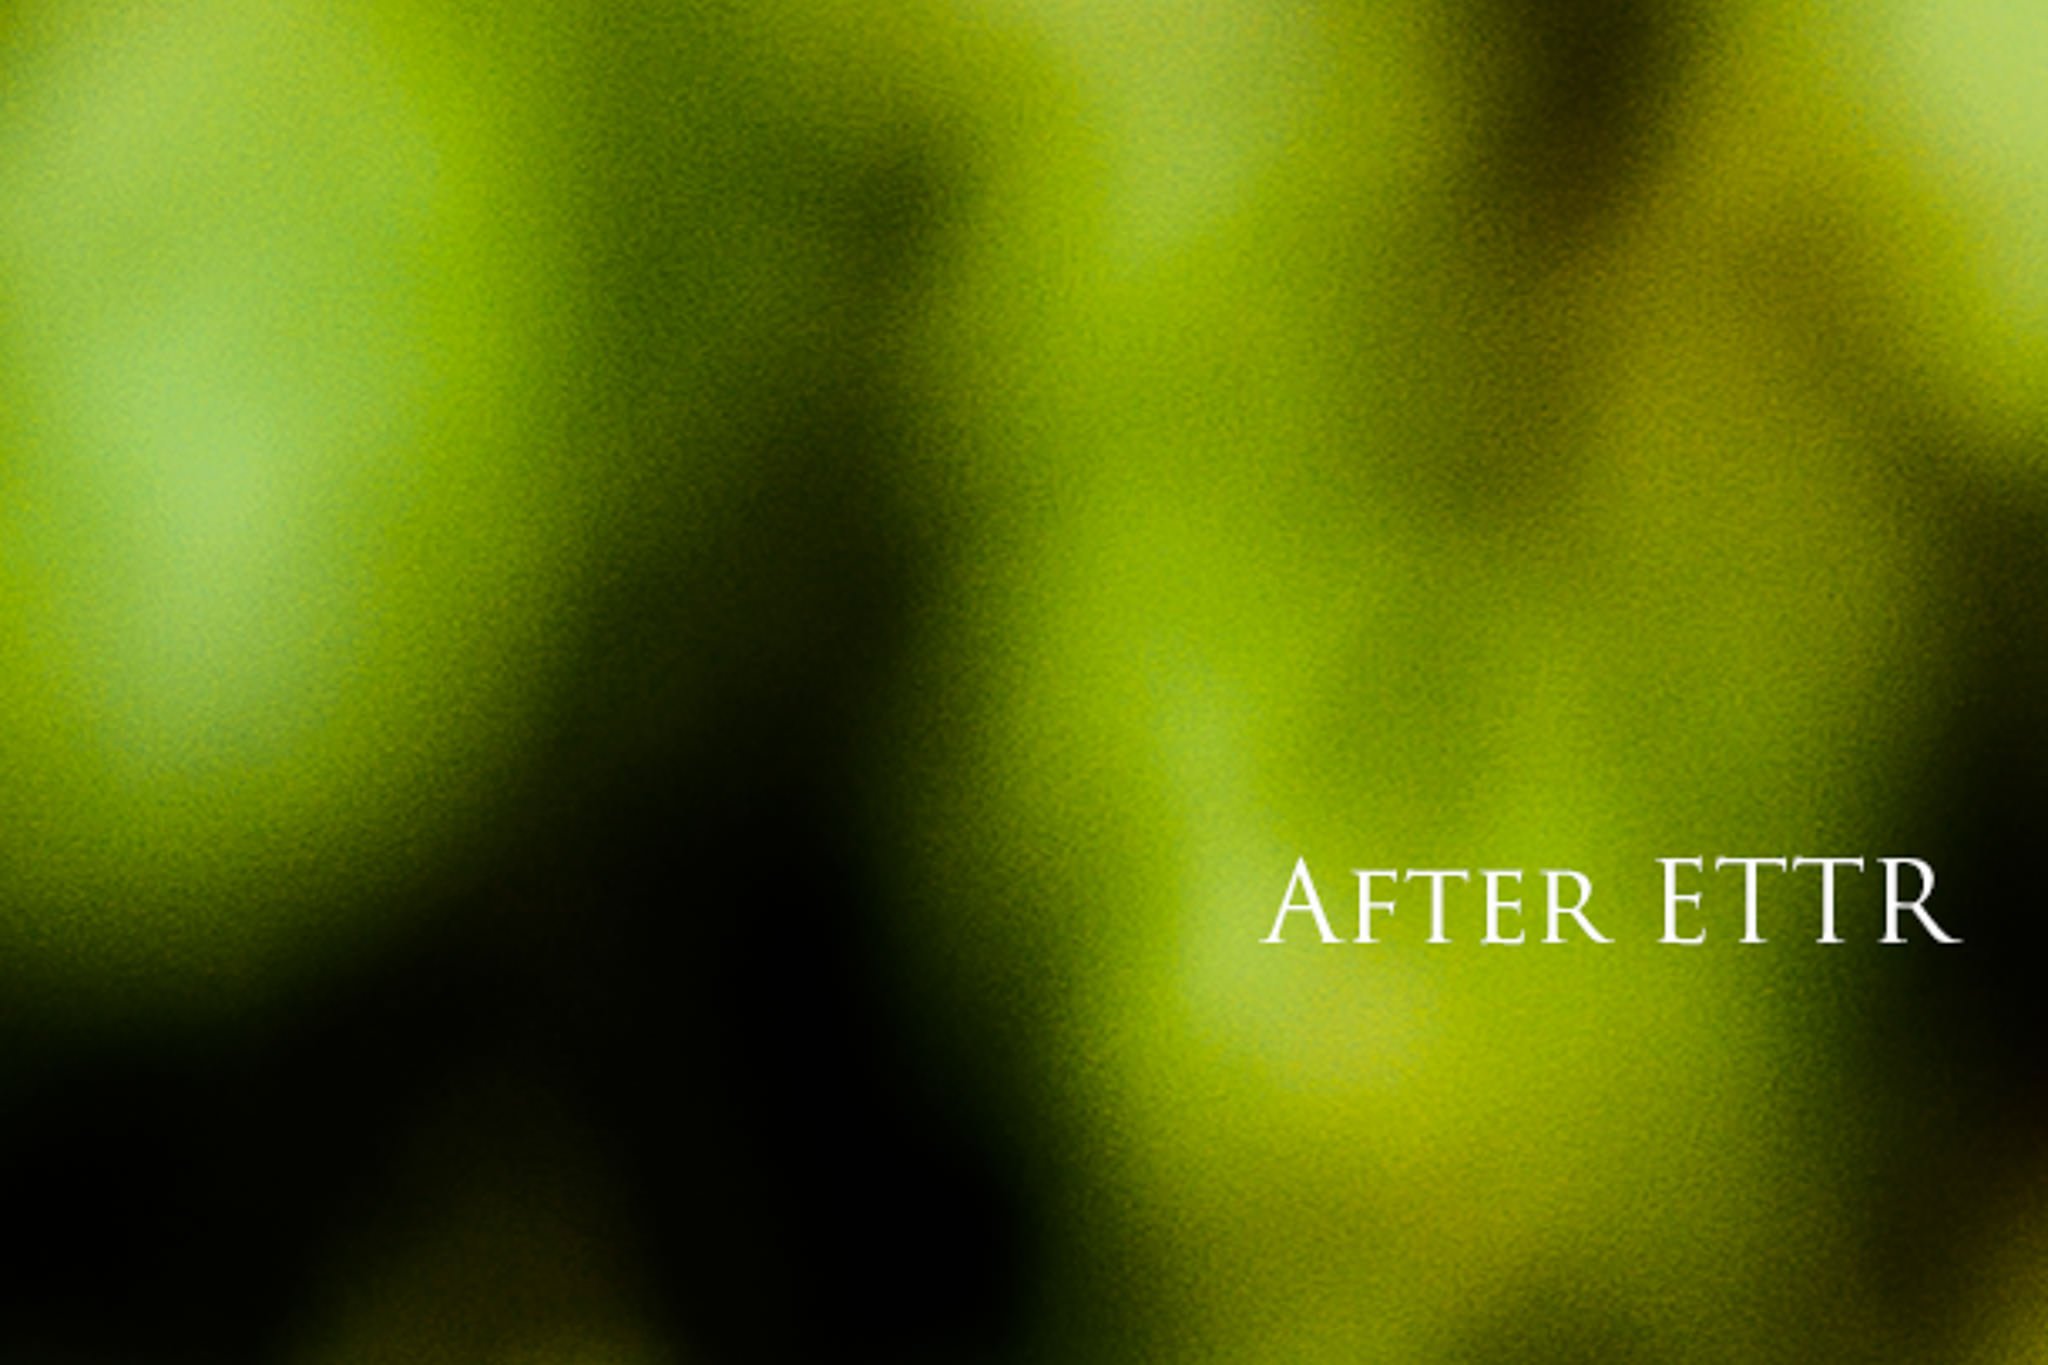
The only issue with UniWB and a flat tone curve are that they make the image on the back of your screen look horribly green and completely free from contrast.
This problem is important for me, and many other photographers, because the image on the back of the screen is a crucial aspect of my shooting style. Especially while I am photographing landscapes, I pay special attention to the image on the camera’s screen, and I adjust my composition according to how the objects in the photo look. If everything on the screen is green and has no contrast, I cannot judge an image’s success until I see it on the computer. If your method is like mine, using UniWB and a flat tone curve are probably not good options for you.
However, if you do want to implement a UniWB and a flat tone curve, be warned that your camera is fighting against you. All of the “background” JPEG settings that normally make no difference suddenly become important, since they affect how your histogram appears.
For starters, you must choose the lowest-contrast profile within the camera. This means using the Picture Control / Picture Style “Neutral” (or “Flat” on some of the newest Nikon cameras). Then, you need to lower the contrast and saturation as much as possible. Set sharpening to zero, turn off any automatic corrections (especially vignetting control), and set your color space to AdobeRGB. Although RAW files do not inherently have a color space, AdobeRGB is better than sRGB at showing a more accurate histogram. Also, turn off that silly Active D-Lighting, if you still have it on — not only does it mess with the histogram, but it also affects the exposure your meter recommends (yes, even in RAW mode). All of the other special effect modes that your camera has should also be turned off as well, as always. None of these settings will matter once you import the file into a RAW editing program, but they still affect how the histogram appears on the camera screen.
That is actually the point of UniWB in the first place — setting a white balance that does not falsely affect the appearance of the histogram. If the white balance were too warm, for example, a resulting histogram could show the red channel as blown out when it actually still contained usable information. The “exposure-neutral” white balance, UniWB, just so happens to look extremely green.
Again, if camera manufacturers implemented a simple RAW histogram feature (or, if it’s not too crazy to ask, a different metering mode for RAW exposures), none of this would be necessary, to begin with. Until that day, though, we have to work with the tools we have. In this case, that means that we are stuck with clumsy workarounds until the camera manufacturers decide to fix this unnecessary issue.
On that same note, if you want the UniWB file specific to your camera, you need to find it online from a kind individual who has taken the time to create one. It would be nice if a camera manufacturer provided these files on their websites, but I guess that would be admitting that some people need to use RAW histograms in the first place.
For the record, I do not use UniWB or a flat tone curve — instead, I use one of the two other ETTR methods that I outlined above (generally method two). They aren’t the most scientifically accurate ways to expose to the right, but at least they don’t turn my camera screen green.
9. When to Avoid ETTR
In theory, ETTR works with every possible scene. There will always be a “best” exposure for an image — one which is as bright as possible without blowing out any of the highlights. However, in practice, this is not always true.
If you aren’t shooting at your camera’s base ISO, ETTR is all but useless. For example, you wouldn’t want to shoot a scene at ISO 1600 and then decrease the exposure by one stop in Lightroom — it’s just as good to shoot the scene at ISO 800 in the first place, and that is less likely to blow out the highlights in your image anyway. The added noise from ISO 1600 would cancel out any benefits that come from darkening the photo in post-processing.
Similarly, ETTR is useless if it requires that you leave base ISO. For example, consider a windy landscape scene. Your metered exposure settings could be f/11, 1/2 second, and ISO 100 (base ISO), with no highlights in danger of blowing out to pure white. This scene may seem like the perfect candidate for increasing your exposure beyond the matrix meter’s recommendation, but that doesn’t work in this case. A longer shutter speed would blur moving objects, and a wider aperture would result in too shallow depth of field. So, to reach the suggested ETTR exposure, you would need to raise your ISO. Again, though, the increased noise from a higher ISO would cancel out the effects of darkening the exposure in Lightroom. In this case, it is better just to go with the metered exposure.
ETTR is also difficult to implement if you do not have much time to take the photo you want. For example, wildlife or wedding photographers may prefer a “safer” exposure — one that is darker than what ETTR recommends, but one that is less likely to blow out important highlights in the image. Sometimes this particular technique is referred to as “Exposing to the Left”, or “ETTL”. Although it is nice to have as much detail as possible in a photo, the small differences are not worth the possibility of missing a fleeting image in the first place.
Also, If you shoot JPEG, there is little benefit to using ETTR. Although you could see a decrease in the image’s noise, reducing a bright exposure in Lightroom has the potential to change colors around. Plus, JPEG files contain very little data compared to RAW by their nature (they are only 8-bit), so it is contradictory to use a technique like ETTR on an already-compromised image format.
It is also worth noting that you can sometimes go overboard on ETTR even if you do not blow any of the highlights. If you are shooting a very dark subject, for example, extreme brightness changes in Lightroom can shift the colors of the image somewhat. Still, these color changes are generally negligible and they should not deter you from using ETTR (from what I understand, this has more to do with the RAW converter than with the image data itself).
10. Is It Worth It?
With the extreme dynamic range capabilities of modern sensors, as well as a much lower amount of noise at base ISO, the value of ETTR is coming under scrutiny in the photographic community. Since it is so easy to recover shadows with modern cameras, isn’t it better to go with a “safer” exposure that is less likely to blow out the highlights? In many cases, yes. It is no longer an issue to increase an image’s brightness in post-processing by one or two stops, and few people print large enough to notice a substantial difference anyways.
Yet, as photographers, we strive to take the highest-quality images possible. We want our RAW files to contain as much data as they can, giving us more legroom to recover data in post-processing. If you are a landscape or studio photographer, especially, you should have enough time to bracket your photos in an attempt to get the ideal ETTR exposure. And if you have the time to implement ETTR, why not do so?
As a final note, it is worth mentioning that some photographers take the idea of ETTR too far, subconsciously putting its importance above the composition of the image itself. Exposing to the right can be a valuable tool for many photographers, but its benefits are only meaningful if the photo is already successful in every other way — composition, lighting, optimal focus, and so on. I am sure you have seen your share of photographers always taking 3 or more exposures (even when light is too flat or there is nothing interesting to photograph), ending up with a lot of wasted memory and too many images to even bother working with later.
As such, it is important to know when and how to use ETTR. If you get your shot set up and you have optimized everything else in your image, ETTR is valuable because it lets you squeeze the last little bit of image quality from a scene. For many photographers, that benefit alone outweighs the drawbacks of exposing to the right.
I just learned about ETTR yesterday. Terrific article – thank you. I’m going to be exploring it a lot more. So far I love the results.
Since my film developing times, the ETTR recommendation has been the most worthy of all among all the other digital advices (and it came from this site). All of my shots are taken with ETTR in mind and I am not unhappy about it. Histogram has been always a part of my viewing screen, with the conciousness that it is not perfectly correct.
Thanks a lot, Spencer, for sharing your knowledge and experiences.
Spencer, extremely well written article. You have helped me to overcome my fear of shooting in manual mode. Followed your advice in the article, found the ‘sweet spot’ for my Nikon D7000 is+2.3. Now have the confidence, and understanding to be able to achieve the best exposure in the camera. Was shooting to the left before reading you article. And yes, I am still shooting with the Nikon D700.
Thanks for an excellent article, and thanks to all the contributors for maintaining a truly unique photography site.
My use of ETTR generally involves changing shutter speed or aperture to move the histogram to the right, not changing the ISO, which is generally the last thing I tweak, being a recovering film shooter, where you were stuck with the ISO of the film/develeoping combo you used.
Why would exposing to the right without changing the ISO be a bad idea?
The issue with ETTR at higher ISOs is that it’s unnecessary. For example, you could shoot a particular scene at (say) ISO 800 that is exposed as bright as possible, only to reduce the brightness by one stop in Lightroom. Or for the same scene you could just shoot at ISO 400 and not use ETTR. It’s a simplification to say this, but ISO 400 has better image quality and less noise than ISO 800 to begin with. So any benefits you get from ETTR at ISO 800 would be achieved just as well by lowering the ISO. I hope that makes sense!
Of course this is complicated by the fact that often analog gain before digitization produces less noise than gain applied after digitization, especially prominant at low ISO. To see this in effect, look at measurements for dynamic range as a function of ISO on DXOmark. This is more prominant on old cameras like the Canon 5D mkII (oldest Canon full frame I saw had there that had this data) and notice how with each stop increase in ISO, the the decrease in dynamic range, or noise increase, is less than one stop. If you compare a shot at ISO 100 to that at ISO 3200, with the same lighting, aperture and shutter, the ISO 3200 will look cleaner than the ISO 100 in a dramatic manner, assuming no highlights are blown at ISO 3200.
That is 100% incorrect and I’m sure you’re one of the people posting outdoor portraits of people where the sky is just an expanse of white nothingness.
There is absolutely nothing “dramatic” about a canon 5dii running 3200 iso at +3EV. Digital cameras, by their fundamental design, lose data (permanently) from the highlights with each increase in gain/amplification, and lose fidelity/detail in the shadows with each increase. Although it’s not actually what happens, with novice photographers I’ll explain that the closer to maximum well depth each pixel gets, the more data pours out of the pixel, and runs downhill towards the darkest parts of the image as noise.
ETTR is like a hotshoe flash. An artifact of film photography, that can be very rarely used to improve an image when using a digital camera, but is overwhelmingly more useful in identifying photographers who just don’t know what they’re doing, or just don’t care.
A good place to start, if you really just dont know, is photonstophotos.com, they have several very important tests you need to understand. The most critical is the dynamic range of the 5dii adjusted for 18% SnR. At 3200, you are barely over 6 dynamic range. Canons are pretty terrible outdoors to begin with, most outdoor, daylight photos are gonna have a range in the double digits, and even at base iso, the 5dii is under 10 usable stops of DR. So yeah, good luck in future, and remember, if you’re above base iso, ETTR is the worst thing you can do for composition.
When I am shooting astrophotography using wide angle lens (and no tracker and no stacking), I set the f stop to wide open, shutter to longest exposure acceptable (to avoid star-trailing). The f-stop and shutter values are set for duration of my shoot. The variable is then ISO (of course, up to my camera’s max ISO for acceptable noise). I use ISO adjustment to ETTR. This maximizes exposure of foreground .
Just started using ETTR on my new Canon R7, since the EVF can keep a histogram in the viewfinder. I’ve always shot RAW, but just got religion on the value of the histogram.
To try to have the histogram match the dynamic range of RAW, I’ve set the Picture Style to “Neutral” but with Contrast dialed down to the minimum (-4).
I shoot using manual exposure, setting aperture with the Control Ring on the lens and shutter speed with the main dial on the top deck of the camera. It feels like my long-time Canon FT film SLR! And the histogram is a more informative version of the match-needle system on the FT.
Why can’t camera manufacturers give us an autoexposure mode that does ETTR for us? All they would have to do is set it to meter the full frame and set the exposure so that the brightest areas are almost but not quite overexposed. That doesn’t sound very difficult to me.
PS I don’t see why using ETTR above base ISO isn’t useful – you’re still getting the benefit, at any ISO, of being able to reduce noise in dark areas.
What brought me to this post was another on the LinkedIn Fine Art group.
The photographer posted recommending ETTL and I have always tried to work by exposing to the right and using the “blinkies”
So to review my knowledge of ETTR I googled not expecting such a well written article.
Whilst I can’t point to anything concrete to back it up. I was told many years ago that the other reason to use ETTR is that the sensor is more accurate at the brighter end of the scale so capturing these tones creates on the whole a better image. I have used this when I have more time because it does need some thought and I also agree taking a bracket darker shot is essential.
Dear Spencer, thanks for another remarkable article. Yet, it is still unclear to me if you would use ETTR in low-light conditions, say street photography in late afternoons or evenings. Would you expose a scene to be as bright as possible (without clipping, of course), thus moving the histogram a great deal to the right (especially in such low-light conditions) and then post-process to darken the image so that it looks how you want? I suppose, under such conditions, there is no point in implementing ETTR if you need to shoot at ISO 200 or 400 (in the article you argue ETTR is useless if you are not shooting at 1SO 100). But what if you are using a tripod and ISO 100?
The problem with the ETTR rule is that it relies on the imperfect representation of the image luminosity information by the histogram.
A typical histogram occupies 3-5% of the area of the viewfinder display which itself has a resolution that is about 10% of the resolution of the camera sensor. This means that one pixel in the histogram represents about 200-300 pixels in the actual image. If these are the pixels we care about (e.g. a detail of the wedding ring) the histogram will not tell us that they have been saturated and consequently all detail has been lost.
So, while the ETTR rule is sound in its own right, the ability to judge whether one applies the rule correctly is limited by what one can see in the histogram.
What is therefore needed is the visual representation of the 200-300 saturated pixels in the image not as a single pixel on the histogram but as a highlighted area in the viewfinder (therefore improving the visibility of the affected area by a factor of 20-30). Fortunately, this has been done for a long time in videography and is known as “zebra highlights”.
Most modern mirrorles cameras as well as DSLR cameras when switched to video mode, offer this functionality thus providing a significant improvement over the information contained in the histogram.
i started shooting with a mirrorless, most of the time i rely on highlight weighted metering while looking at the histogram in evf, i think this does achieve the same objective right given that as long the right histogram is not clipping?
Very nice and informative article!
However, the last para, on ETTR, method two, is a bit confusing.
If I spot meter on the brightest scene, I get lesser light even with the extra (lets say 2.3) EV . Making my histogram shift to the left. Is it that I need to simply expose using spot meter on my main subject ( not brightest scene), and add the EV? But then there could still be some room left for shifting to the right without loosing details. What am I missing here?
Tried searching other sources on internet and all use the Histogram. Now after reading Iliah’s blog, I am just not going to use that approach. Any clarity on how to finally shoot ETTR after I know my camera’s recoverable overexposed EV would be great.
Many Thanks