You are probably familiar with the Exposing to the Right (ETTR) technique, where an image is intentionally captured as bright as possible in order to maximize the potential of a digital camera sensor. I recently came across some forum posts and articles on other resources that talk about Exposing to The Left (ETTL) and its benefits. In this article, I want to point out why ETTR is the only proper way to get good exposure from a digital camera and why terms like ETTL do not make any sense.
My purpose is not to create a provocative article, but rather to educate our readers on this important topic. Please keep in mind that this article is fairly technical and it is not for everyone.
Table of Contents
What is Proper Exposure?
A properly exposed digital image contains plenty of information to be able to recover both highlight and shadow detail. This means that the image should be neither grossly overexposed to the point of losing highlight detail, nor underexposed to the point of losing shadow detail. The “feel and look” of an image in terms of its brightness is a whole different matter – a properly exposed image can be developed to intentionally look brighter or darker, depending on what the photographer is trying to achieve.
Ideally, an image should have the least amount of noise in both highlights and shadows once post-processed, with enough dynamic range to cover the whole range of darks and whites.
In order to maximize signal-to-noise ratio and get the least amount of noise in images, you should overexpose your image as much as possible, without blowing out any highlights. Simply put, the more of the image is distributed to the right of the histogram, the better. This is especially important for the shadows, because that’s where you are likely to see the most amount of noise in your images when you recover them through post-processing software.
All this means that on a modern digital camera sensor, the ideal exposure should be shot at the base ISO of the camera, and the scene should be exposed as brightly as possible, which is what the ETTR technique is all about.
However, some scenes, particularly high contrast ones, might have such a wide range of highlights and shadows, that they might not fit the dynamic range capabilities of an image sensor. In such cases, as we will see below, there is simply no such thing as “proper exposure” using a single image. The only proper way to correctly capture both highlights and shadows, will be to split it into two or more images.
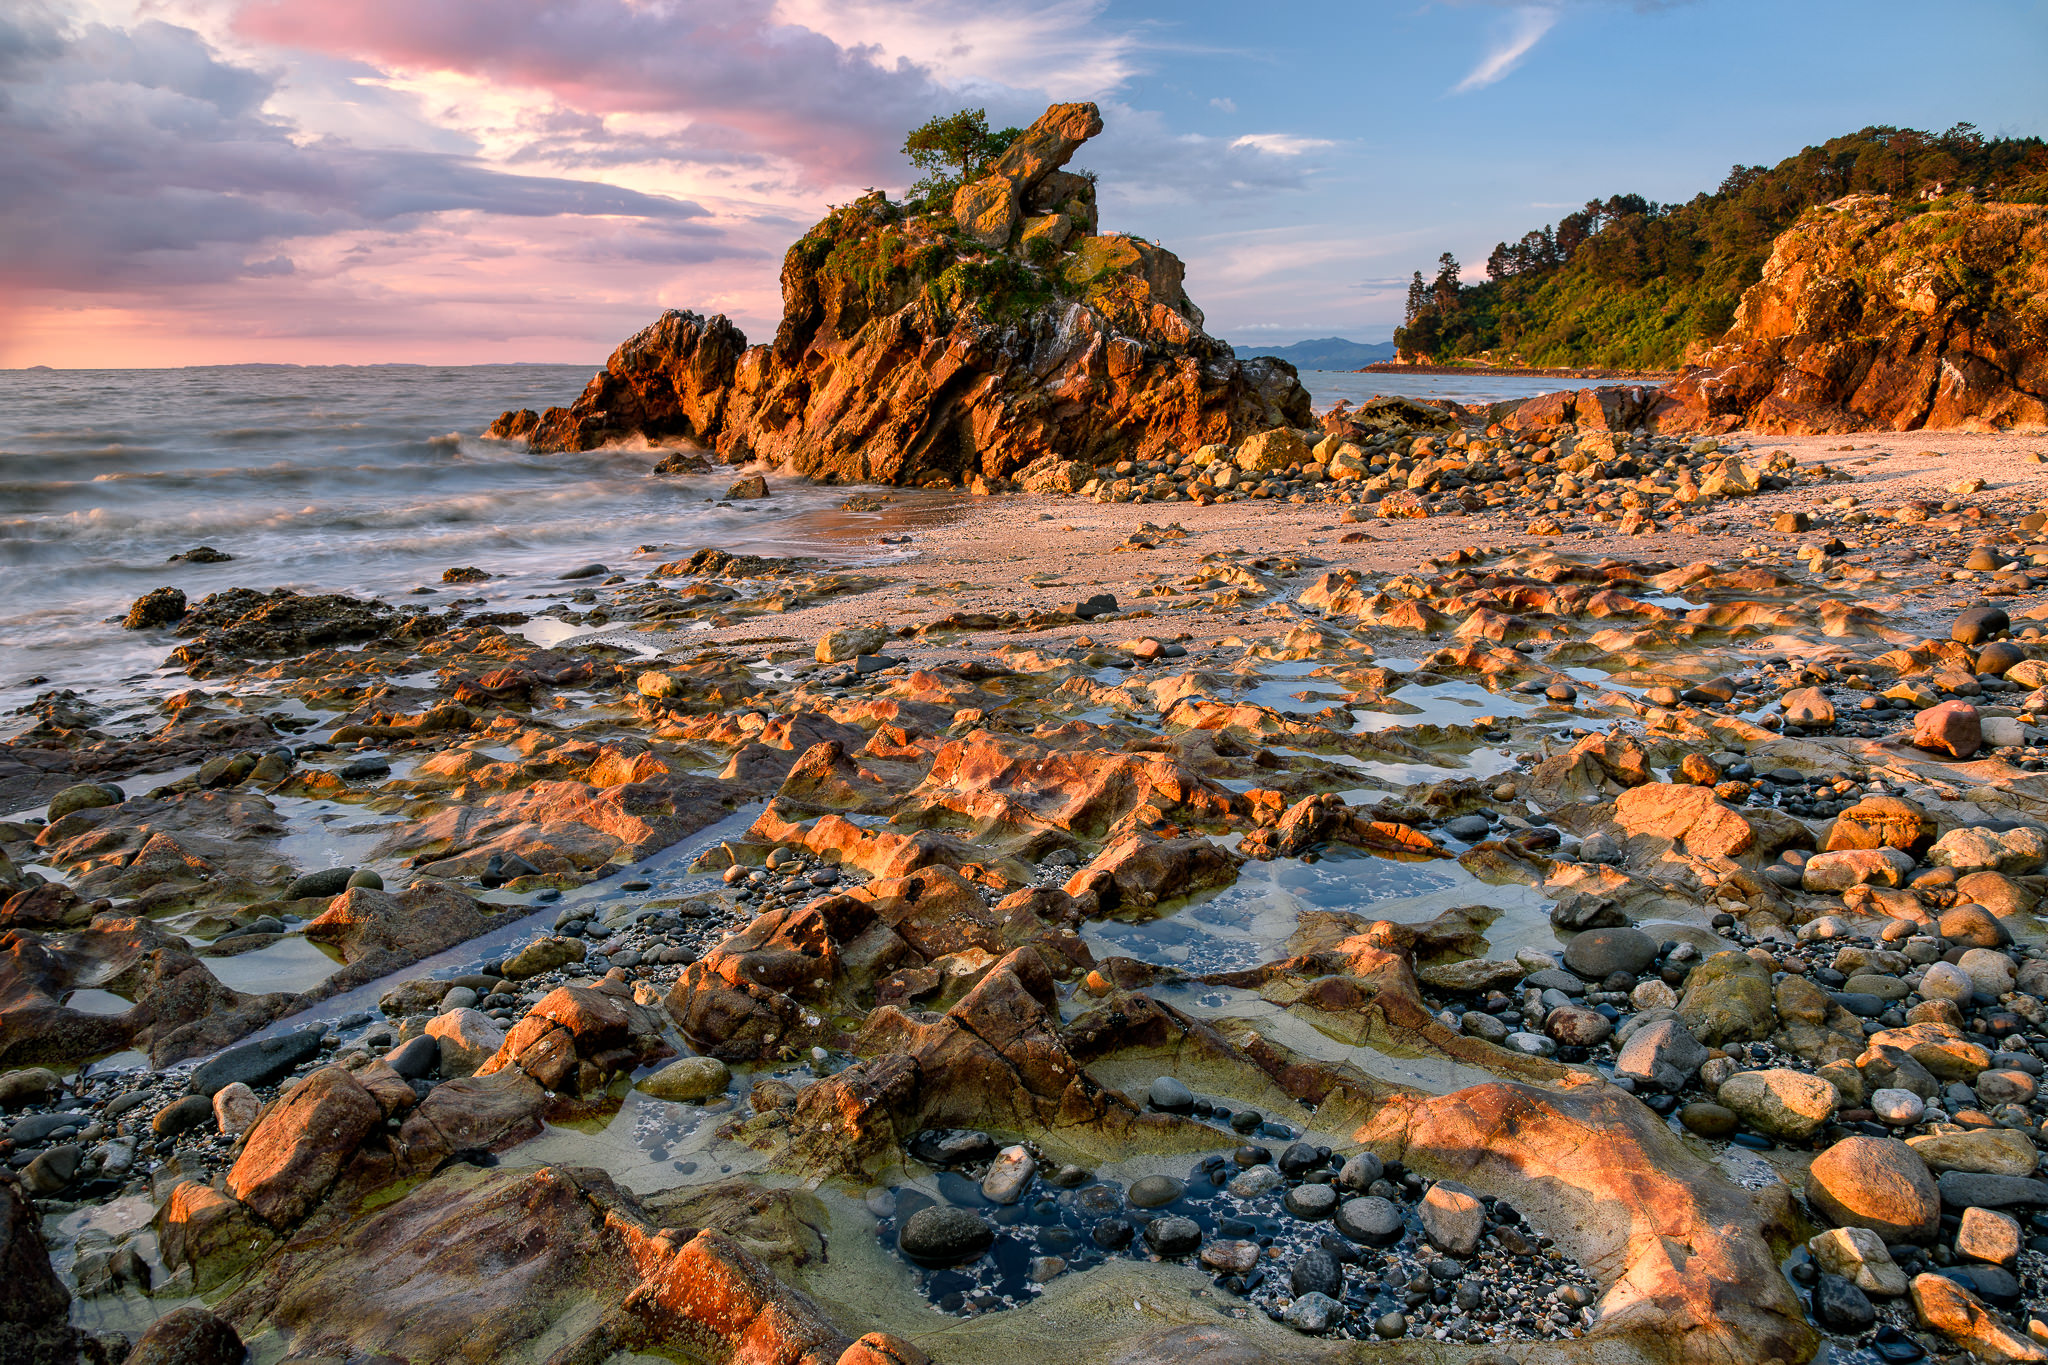
Fuji GFX 50S + GF 110mm f/2 R LM WR @ 110mm, ISO 100, 1/450, f/2.5
There are also cases where “proper exposure” is all about capturing the details of a particular subject, while ignoring the rest of the scene (as is often the case with portraiture).
ETTR Histogram Examples
Unfortunately, ETTR is misunderstood by many photographers, because they think that ETTR images always show a curve to the right of the histogram. That’s certainly not the case! ETTR is all about getting proper exposure for a digital sensor, which means retaining data, not losing any of it. Hence, if most of the image is to the right of the histogram, but some parts of the image are getting blown out, that’s not ETTR – that’s overexposure.
Let’s take a look at a few images and their corresponding histograms to understand how wide the range of ETTR histograms can be:

Those who do not understand how ETTR works would only qualify the rightmost image to be ETTR, purely because of the way the histogram appears. However, both left and middle images are also shot using the ETTR technique.
Although the leftmost image appears very dark in the shadows and there seems to be some clipping of the darks, it was exposed to be as bright as possible while keeping highlights from blowing out. The middle image contains a range of tones, and although it shows a pretty big spread in the middle of the histogram, the rightmost side of it shows that the highlights were fully preserved.
All three images have something in common – they are exposed to take advantage of a modern digital sensor. However, there is certainly a problem with the left image – its darks are very underexposed and there might be some clipping taking place there, which is not ideal. In such cases, the dynamic range is too wide for the camera to be able to effectively capture both sides of the histogram. The solution is to capture multiple images and blend them together via HDR / Exposure Blending techniques, which I will discuss below.
Exposing to the Left: Film vs Digital
Film photographers sometimes “Expose to The Left”, because there is more leverage in the highlights than in the shadows when using negative film (such as silver-based black-and-white). With such film, you can recover a few stops in the shadows, but the real recovery potential is in the highlights, where even 8+ stops of overexposure is workable. Because of this, it makes sense to ensure that shadows are not very underexposed, since that’s one area that is tough to pull during development.
Digital, on the other hand, has great tolerance to underexposure, with its ability to recover 6+ stops in the shadows, while the highlights are typically clipped at just a couple of stops of overexposure.
To summarize, with film, you expose for the shadows and develop for the highlights. Whereas with digital, you expose for the highlights and recover the shadows.

The above chart is a very rough approximation of film vs digital response to under- and over-exposure. As you can see, film has more legroom in the highlights, while digital has more legroom in the shadows.
Let’s take a look at a couple of images below:
The “before” image above was the result of intentional underexposure to show off the dynamic range capabilities of a digital camera. The “after” image is what it looked like after 5+ stops of exposure recovery. The histogram, at the time of capture, looked very far to the left, appearing quite clipped, and yet it retained so much information.
All this essentially means that we should be worrying more about the highlights vs the shadows when shooting with digital cameras. By pushing our exposure as much to the right of the histogram as possible without blowing anything out (ETTR), we make sure that maximum information is retained at each pixel. This might result in a histogram that appears quite left-heavy, but that’s OK, because we have plenty of leverage in the shadows.
Speaking of which, the histogram is not particularly useful for assessing the recovery potential of the shadows in digital cameras. Even though the histogram for the “before” image above appears completely to the left, indicating severe underexposure, there is quite a bit of data residing in those shadows, as evidenced from the “after” image and its histogram:
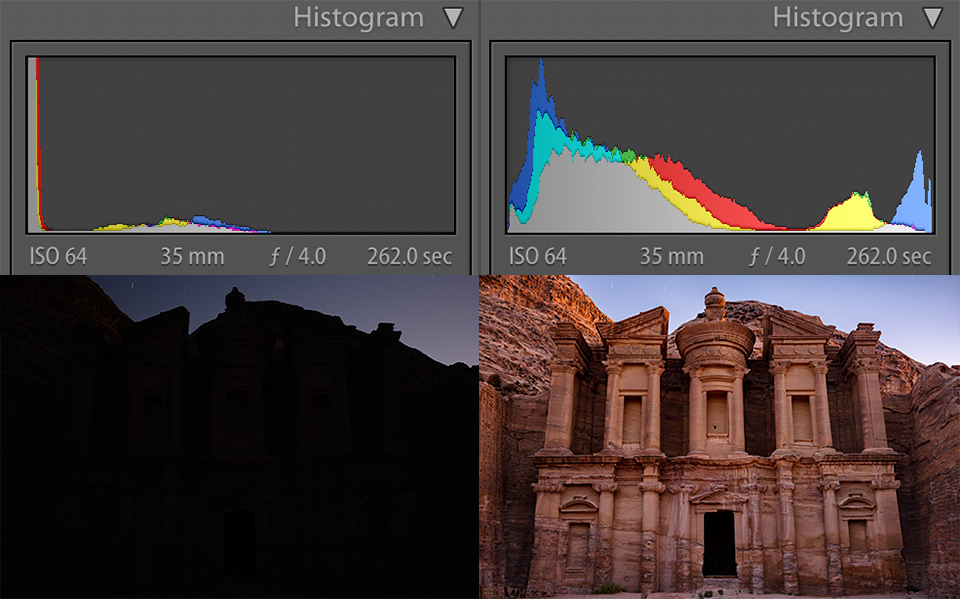
Very little data is actually clipped here, which is remarkable. The good news is, most modern digital sensors have superb dynamic range and are capable of such recovery.
The Problem with “ETTL”
So where does this leave Exposing to the Left? Not in a good place for sure! Trying to expose for the shadows has no benefits on digital camera sensors. By pushing the histogram to the left, you are simply underexposing the image, which is going to end up hurting the overall image quality of the photograph once it is post-processed.
Take a look at the below images:

Here, the “before” image was captured with the ETTL technique, which was roughly two stops underexposed compared to ETTR. Once both images were post-processed and matched in brightness, it is clear that the “before” image contains a lot more noise compared to the properly exposed “after” image.
This proves that underexposing images is not a good idea in digital cameras. In almost every case, your goal should be to make the image as bright as possible, not the other way around!
The interesting thing is that many photographers are so confused about ETTL, that they often refer to ETTR as ETTL, just because of what they see in their histograms.
There is No Such Thing as “ETTL”
Some photographers argue that ETTL can be useful for portraiture, because ETTR often results in subject underexposure, which leads to too much noise on the subject’s face after the shadows are recovered.
Photographing people is obviously different from photographing landscapes. While landscape photographers do their best to make sure that all highlight and shadow details are preserved, that’s not a typical priority for portrait photographers. When doing portraiture, photographers focus on the subjects, making sure that they are properly exposed, as they are the “highlight” of the photograph. As a result, these photographers are probably going to expose for the subject and ignore potential overexposure issues, which could be seen in the foreground or the background, or both.
So, would such cases be referred to as “Exposing to The Left”? After all, the shadows are much brighter and the histogram appears heavy to the left? No, this is still ETTR!
If you are purposefully making your image brighter to expose for what’s important (your subject), while completely ignoring some parts of the image that might be blowing out, you are still using the ETTR technique. Because your end goal is to reduce image noise, which is the essence of ETTR.
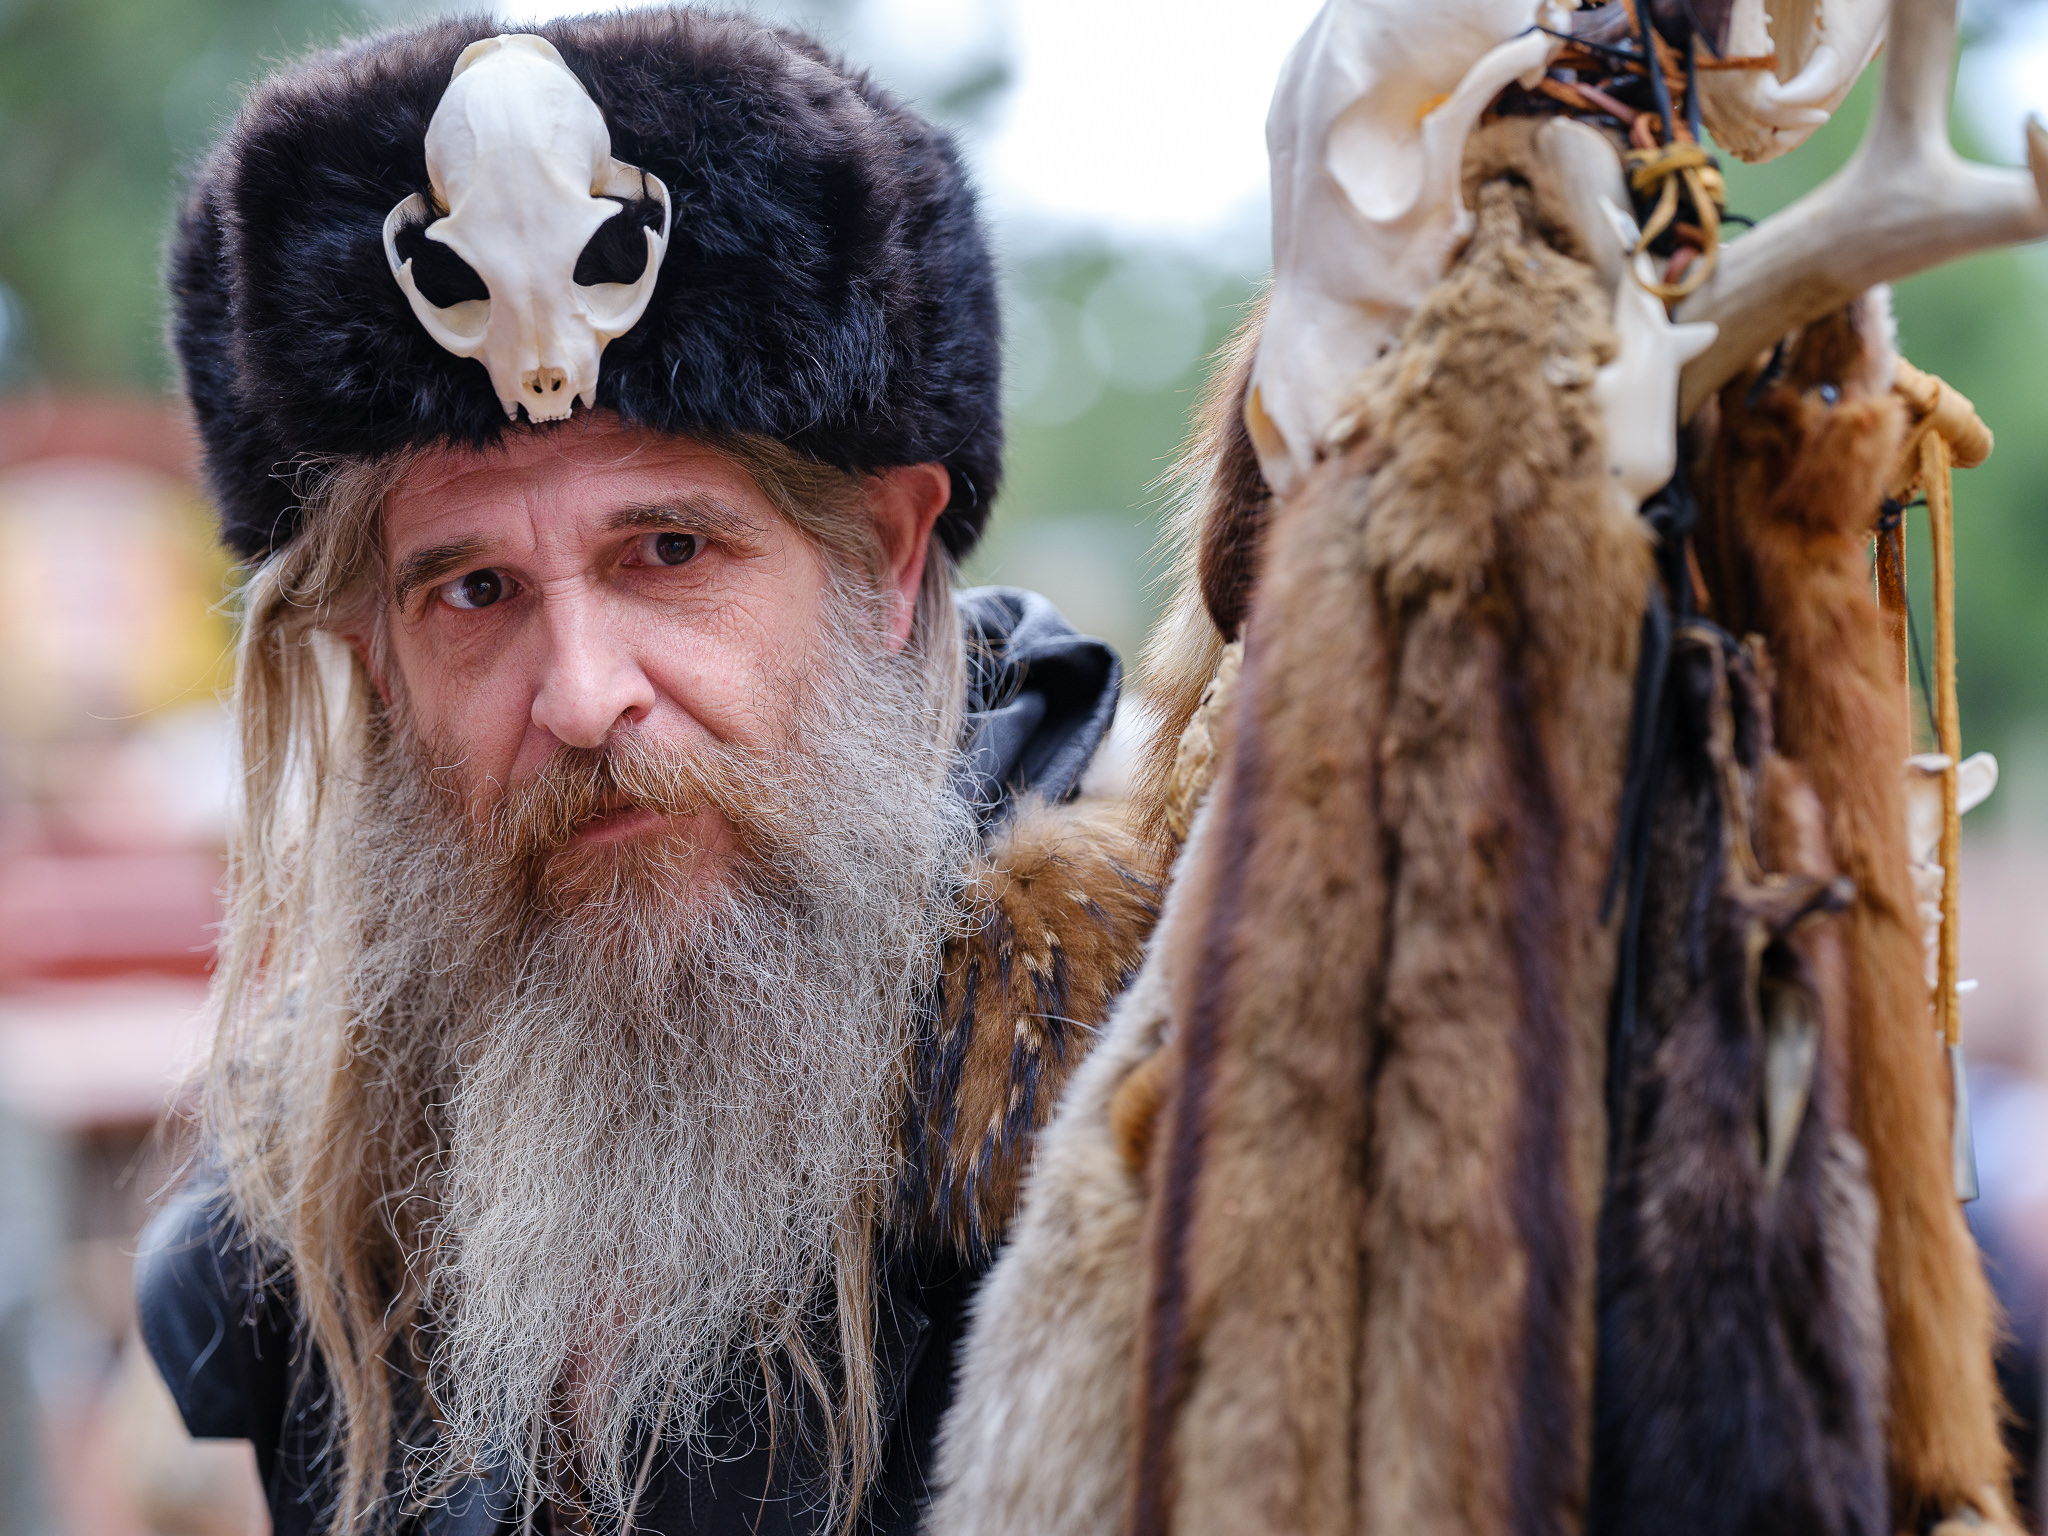
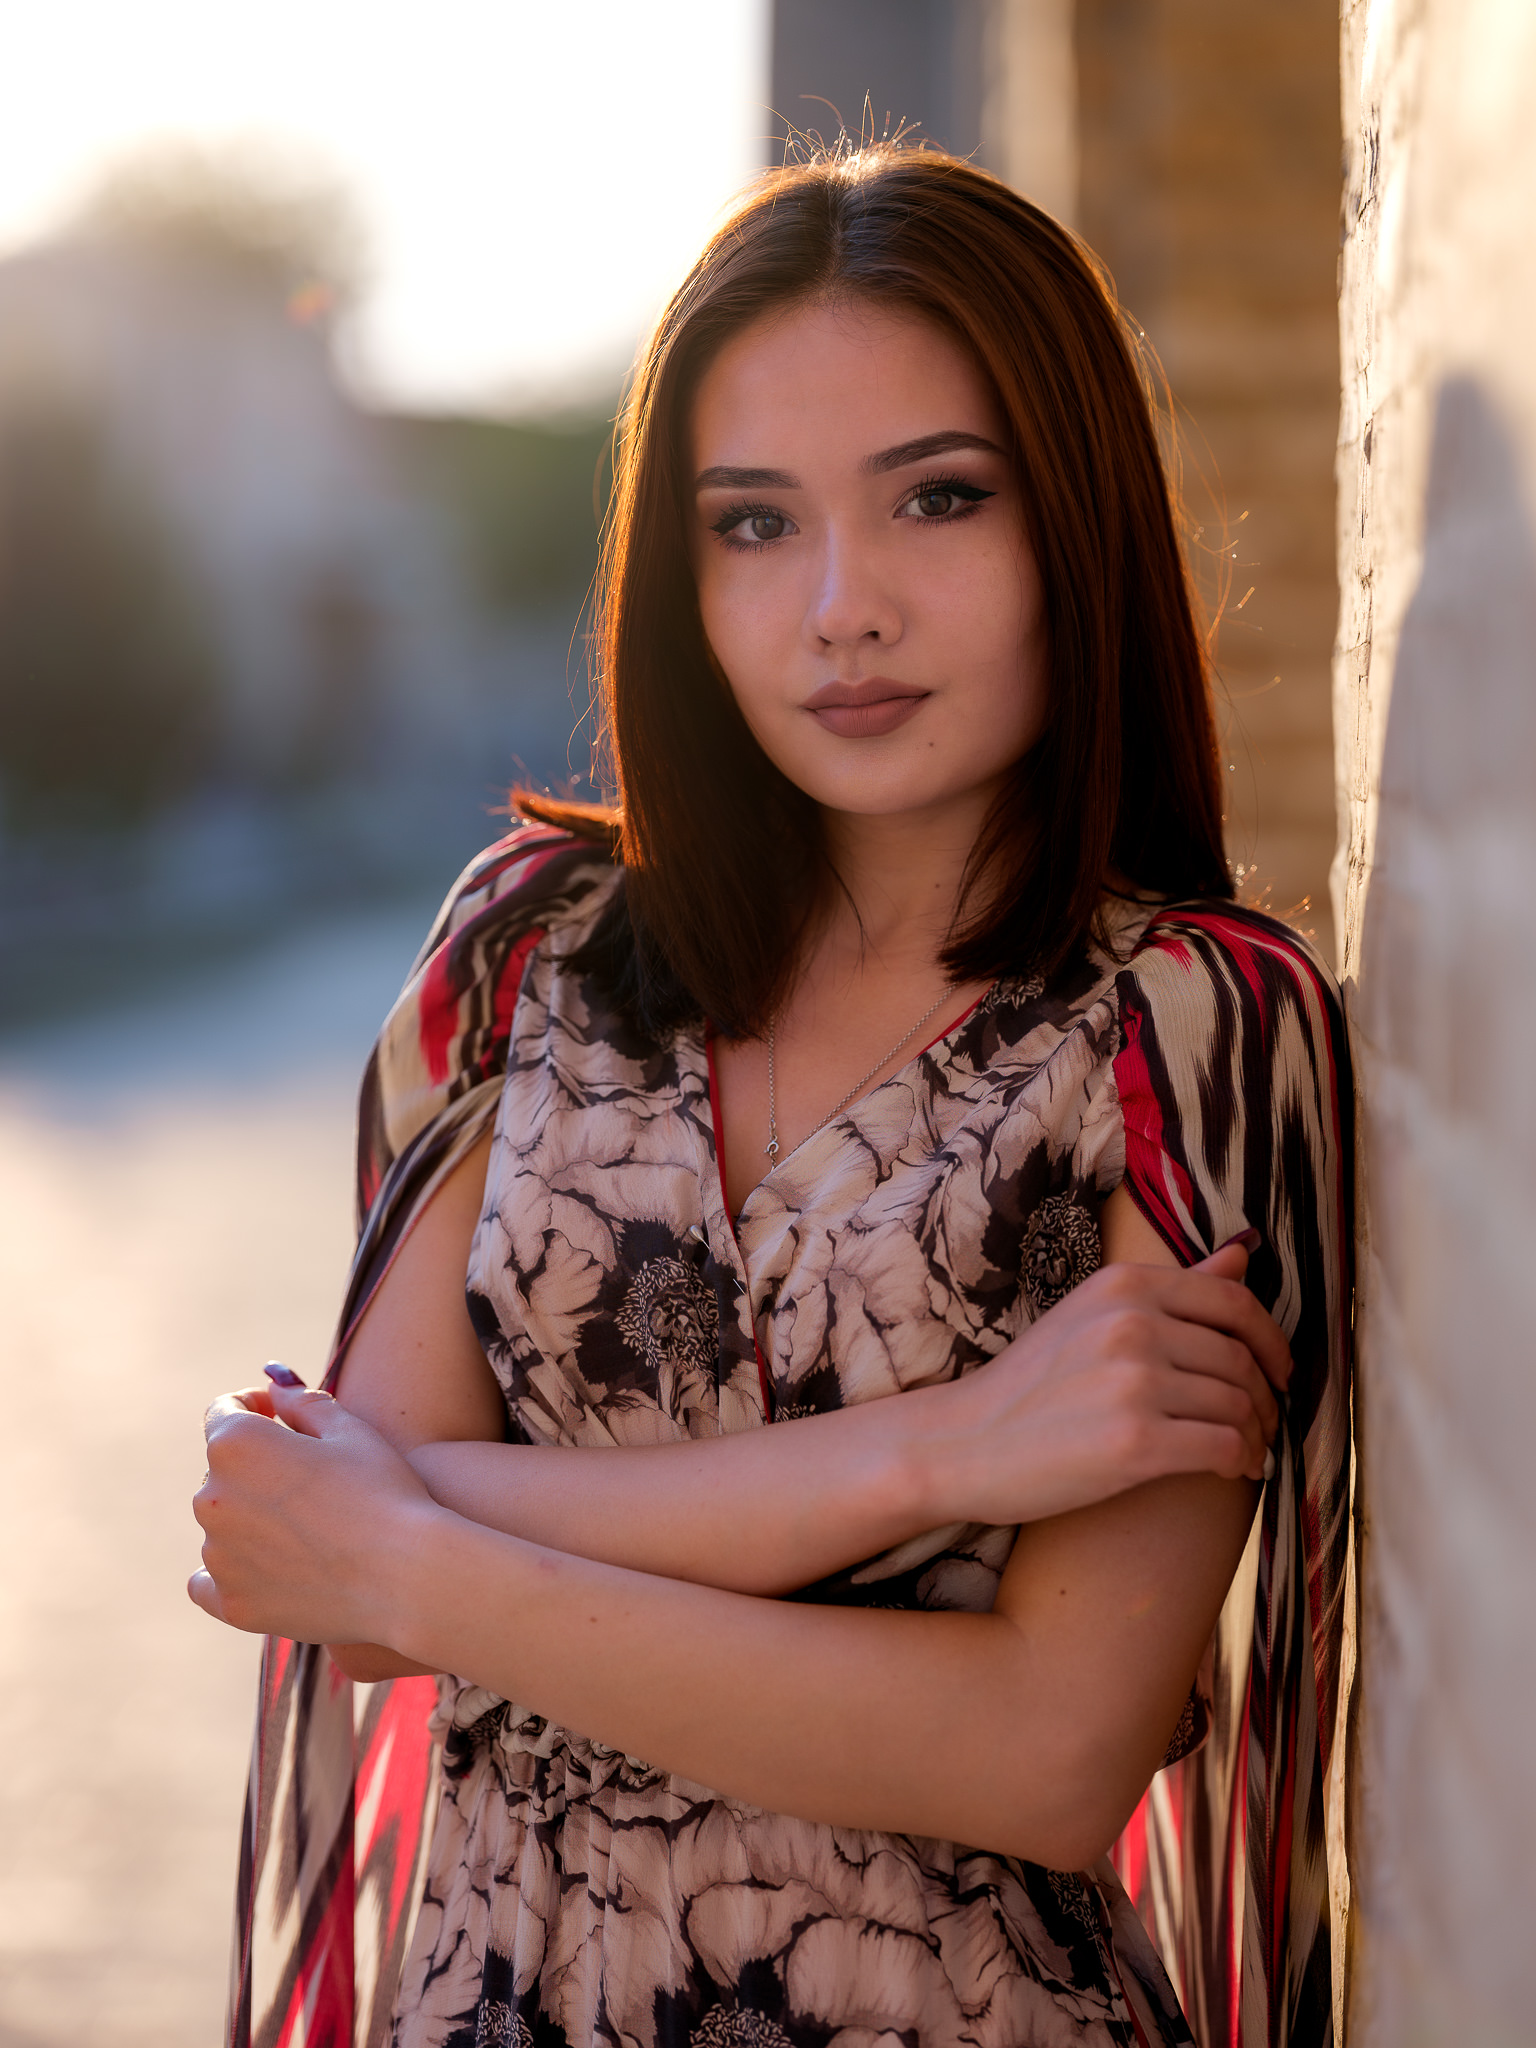
Fuji GFX 100 + GF 110mm f/2 R LM WR @ 110mm, ISO 1000, 1/500, f/2.8
For the above headshot, I exposed for the subject. If my goal was to preserve all the highlights in that small part of the sky on the top of the image, my subject would have turned out very dark and I would have ended up with an unnecessary amount of noise in the shadows. This would have been especially bad at ISO 1000, which is noisy “as-is”.
By letting the small part of the sky blow out (which is out of focus anyway), I might not be following ETTR strictly, but that’s because I made that choice. Losing a little bit of highlight detail is not a problem, since it does not change the essence of my photograph and that part of the sky is not particularly distracting to me. What’s important, is that I am making my subject look their best with the help of ETTR.
So, for those photographers who intentionally overexpose their images to get better shadow detail – you are using ETTR, not ETTL.
In fact, I would argue that there is no such thing as “ETTL”. ETTR is a technique to get the best out of your image sensor. ETTL is simply “underexposure”, with zero benefits. That’s all there is to it. And no, there is no such thing as ETTM (Exposing to the Middle) either. Stop looking at the histogram and making up terms please :)
High Dynamic Range Scenes
If the dynamic range of the scene is so wide that ETTR results in a severely dark image, some of the shadow detail might be getting lost / clipped. In other cases, recovering that shadow detail is going to add too much noise to the image. In such circumstances, a single ETTR exposure is simply insufficient and two or more exposures must be taken in order to recover shadow detail. That’s what specific camera and post-processing techniques are for.
Landscape and architecture photographers will often bracket their cameras in order to get three or more images that cover both highlight and shadow areas of the scene. These images are then brought into post-processing software in order to be merged together into a single HDR image. Other times, two or more images can be blended together using Luminosity Masks. In cases of extreme exposure recovery, or when high ISO is used (with noise and other artifacts showing up in the shadows), other techniques such as “image averaging” can be used to reduce noise and improve the overall quality of the image.
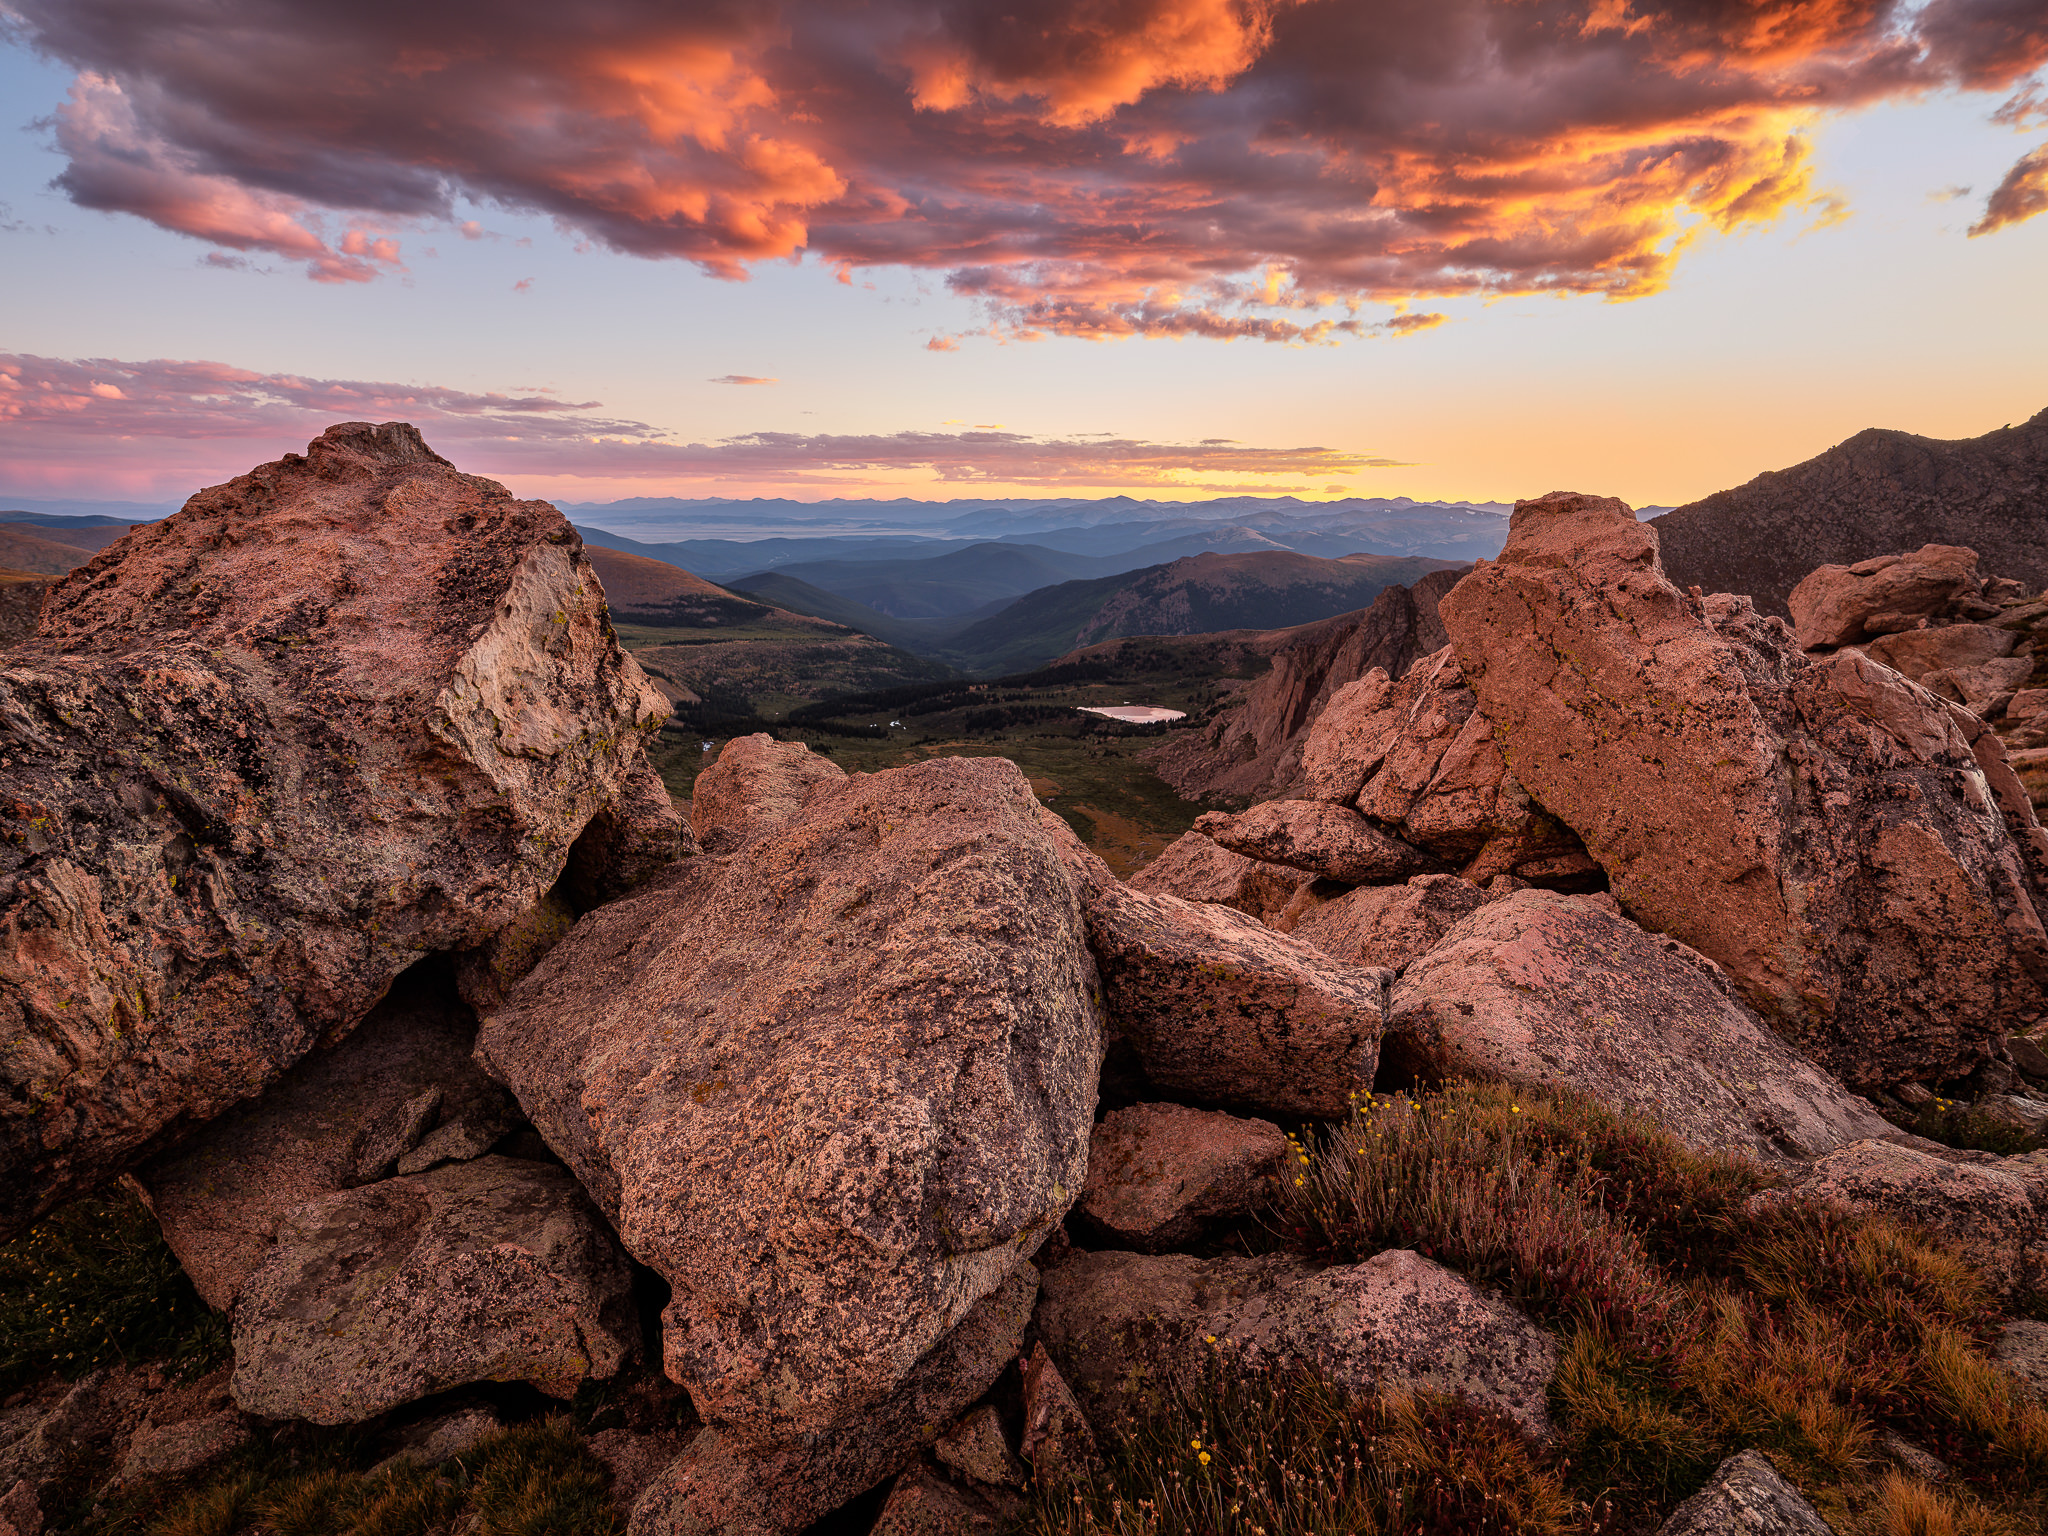
Fuji GFX 100 + GF 23mm f/4 R LM WR @ 23mm, ISO 200, 1/10, f/8.0
In short, not everything can be captured via a single shot ETTR technique, which is something you always have to keep in mind.
Hope you found this article useful. If you have any questions or concerns, please let me know in the comments section below!
I know this is an old article, but the topic will always be important with digital. If people are interested in getting the exposure as far to the right as possible, read up on “uni-wb” or uniform white balance. The idea is that using uni-wb will give you a more accurate histogram than what a normal white balance setting might give, since the histogram is usually based on the data from the jpeg which has shifted the colors to make it look correct. The images will look awful straight out of camera, but histogram will give you a better idea of where the highlights are really blown out. A good explanation is here : www.dslrbodies.com/camer…uniwb.html
In the first sentence of the article, the anchor text “Exposing to the Right (ETTR)” is a hyperlink to the article Exposing to the Right Explained by Spencer Cox, which contains the section:
8) What is UniWB?
photographylife.com/expos…t-is-uniwb
Think of all the photos we wouldn’t have today if photographers in the past had stood there worrying about this kind of stuff instead of just taking the picture with best guess exposure using simple sunny 16 or just quickly metering on a reasonably average portion of the scene. I question whether the subject is even relevant with the cameras of the past five years or so.
If you’re new to photography, don’t let yourself be paralyzed by technicalities. Learn to recognize and use light instead, and then, if you’re doing landscapes, you can spend your time on ETTL’ing to your heart’s content… hoping the light doesn’t change while you’re doing it.
Sorry!, the article is confusing for me. I am quoting the article here “By pushing our exposure as much to the right of the histogram as possible without blowing anything out (ETTR), we make sure that maximum information is retained at each pixel. This might result in a histogram that appears quite left-heavy, but that’s OK, because we have plenty of leverage in the shadows”
These lines contradicts themselves. How does pushing a histogram to right make it left heavy and have recoverable shadows. :-(
Also, Please read these articles. It says the that we lose details if the histogram is left heavy or shadow clipped.
luminous-landscape.com/expose-right/
digital-photography-school.com/expos…the-right/
I use a Canon and I can tell you that you need to use the ETTL method to preserve detail in your shadows otherwise it will end up extremely destructive just lifting the shadows to 50% of the slider in post processing. If I use the ETTL method I can take my shadow slider to 100%, plus lift my over all exposure and it still won’t be destructive to the shadows. It retains all detail in thshadows shadows and properly exposes for the highlights which I can still find detail in so long as I don’t completely clip the highlights in my historagram. Any blowouts in the highlights there after are natural and meant to be there
Thanks ! I was speaking to a photographer other day about this and he said he exposes for the shadows ..so I got nicely confused but this helped clear it up. I try to expose to the bright (as I call it) but the blinkies always throw me off and I worry I overexposed (practice practice) but it definitely makes sense to make image bright and not have noise in the shadows.
There is something to consider: Some days I shot some performers of a classical concert with the D4 in low light (not while playing, of course) in the range of about 5000 to 12800 ISO. If you take quickly some pictures in a row, there can be some inconsistency with the exposures e.g. in low light. Some of the images were a little overexposed, some a little underexposed. The extra space to the left which could be used for ETTR was used of the overexposed shots and could be fixed in post processing. So this is also a safety margin left by Nikon (or Canon, but I do not know about that for sure).
very well explained . I often use bracketing to get as far to the right as possible to avoid the noise in shadows . Generally only one file is used although there are times some lost highlights and shadows may used from the other two files. Using raw capture also increases the possibility of recovering slightly blown highlights . Mirrorless cameras with live histograms in the EVF are a god-send for getting exposure correct with one click
Little bit of history — in the early days of digital, it was often suggested to expose more to the left so there is less chance of blown out the highlights that cannot be recovered; as mentioned above . There are still a number of older “do not dos” and “must dos” that are no longer applicable to today’s amazing equipment . My first pro quality camera (nikon D1) that “featured a 2.7-megapixel image sensor, 4.5-frames-per-second continuous shooting” — but that was only with jpg LOL. That camera was over Au$2000!!
Another great article from you — many thanks for your time
simply a huge thanks nasim!!! simple, to the point, and explaining why!!! such a confusing topic that one could endlessly misunderstand because of not being told the whole theory!!! you, and photography life, is my most trusted go-to, to be able to fully understand what the topic happens to be!!! thank you ever so much!!!
It is a shame that Nikon and Canon, after all the years of experience in the field, cannot provide an auto exposure metering mode to recognise difficult scenes and adjust accordingly. I guess the best policy is to crank the exposure compensation setting to +0.5 or +1ev to nudge the camera’s exposure to the right. I see very little if any noise in my images since plumping for the D810, very different in that respect to the APS-C’s I had been using. Of course, the software for post processing has also improved so much that a lot of these images are not degraded as they may have been a few years ago. I recall using slide film years ago, where highlights simply left clear areas of celluloid garnering no image information at all, exposure being highly critical to avoid wiping out detail, while underexposing left muddy (we call it noise now) areas which detracted from the result – but there was not much lattitude for fixing an incorrect exposure. My SLR at the time had two buttons over on the left side near the lens mount, You could meter a scene, press one to lock exposure, then recompose and shoot. The other button the same, except that you had to keep it depressed until you took the shot. That camera also had exposure compensation available so I learned a lot from using it. A 25 year break from photography, and I came back to it via DSLR’s. I was fully expecting, after a quarter of a century, that the camera manufacturers would have sorted this problem out – only to find the ability of in-camera metering, though vastly better in many ways, still stumbles on tricky images. Goes to show you, 40 years after they put a man on the moon, we’re still not quite there yet! Great analysis as usual Nasim, At least these days we don’t have to wait for our film to be developed, we can be more dynamic in our quest to discover how to fix such problems. I am also glad the cost of doing this kind of experimenting is much lower now – no film, no processing. Today’s photographers have it so much better, I do miss film though, I learned so much when using it. It made you think a lot more – digital can make you a little slapdash, with the ‘fix it in post’ approach being a little too prevelant – I am guilty of that too, but this article makes me remember so much about those tricky shots when using film, it is well worth the effort. Your readers should now go off and deliberately choose shots which have these issues, to perfect their technique in dealing with them. That is the fun part of all this, after all!
I did not think that was very helpful at all. You often confused exposure concepts. Your film comments did not take into consideration transparency (positive) output or print film (negative). Overexpose transparencies, even slightly, at your peril. The aim with digital photography is to expose CORRECTLY. What is needed for one image can be vastly different from another. Most photographers understand this and the concept of exposure compensation. They do not need concepts like ETTL. If such a concept exists as distinct from over exposure, then ETTL or ETTC are just as legitimate depending on the subject. Be careful recommending in this day and age to use what you term base ISO. Photographers need to seek an appropriate balance between aperture, shutter speed and ISO for the subject. As a Nikon devotee, I am sure you are aware of how easily this can be set up.
In conclusion I felt you made some simple concepts confusing and pedantic.
David, my comments on film are very generic and relate to some particular film types that have much more exposure latitude in the highlights than in the shadows. They wouldn’t apply to things like slide film, where dynamic range is limited and overexposure is not tolerated. I did not want to add too much detail to all this and mention specific film types, as the idea was simply to mention differences in how one could expose for some types of film vs digital. These comments weren’t meant to generalize all film.
In regards to digital exposure, ETTR makes a lot of sense if you understand how a digital sensor works. I’m not going to reiterate what has already been said, but an ideal exposure for digital is not just about using the exposure compensation button, or understanding the relationship between exposure variables – it is about saturating pixels to the point where data can be processed and recovered without much penalty. A sensor is not sensitive to light like film is, so even the concept of ISO is very different compared to film. Base ISO is typically where image sensors perform the best with the widest possible DR, so of course I’m going to recommend to stick to it whenever possible. Are there exceptions to these recommendations? Of course – I devoted a whole section to this in the article to show that.
ETTR is very simple to understand. All you have to remember is that if you can make your image as bright as possible without blowing out the highlights, you will get better results in post. This is a proven methodology and it works.