It seems that the continuous increase of megapixels in our digital cameras is inevitable. Year after year, camera sensors are getting better, image resolution is increasing and file sizes are getting bigger. This increase of resolution and file sizes clearly puts a load on our quickly aging computers. Larger files require more storage and post-processing images in Lightroom and Photoshop is taking longer due to insufficient computing power and resources, dramatically slowing down our photography workflow process.
While upgrading computers can speed things up quite a bit, it is often a costly proposition. Instead of spending money on more gear, revisiting the workflow process and perhaps even revising it might significantly reduce the amount of time one spends editing images. In this article, I will show you a very efficient Lightroom workflow for high-resolution images, which my wife and I adopted for our commercial photography.
Table of Contents
1. Why I Changed my Lightroom Workflow
On average, my wife and I shoot about 20-30 thousand images a year. It sure sounds like a lot, but if you factor in all the wedding and portrait work we do, where a single wedding day could yield over a thousand images, it is actually not that big of a number. Since it was extremely slow and inefficient to keep all images in a single Lightroom catalog, I started organizing catalogs by year. Since then, I was quite happy with my Lightroom workflow. At the beginning of each year, I would move my primary catalog for the previous year to slower storage and create a new one for the current year. Everything was working well, although towards the end of the year Lightroom would get a little sluggish. But it was tolerable…until we bought a high-resolution camera.
While we were both extremely happy with the quality of images we were getting from the new camera, our post-processing workflow turned out to be simply inefficient. Lola got quite frustrated when working on high-resolution images, since they opened so much slower than images from older, lower-resolution cameras.
So I had to find a quick solution. I knew that the main post-processing PC was powerful enough to handle these images. The issue was with our Lightroom Workflow – storing tens of thousands of RAW photos in one Lightroom catalog was a bad idea. After experimenting a little, I came up with a much faster process, which worked out much better for image culling and editing.
2. Export Images to a Separate Catalog
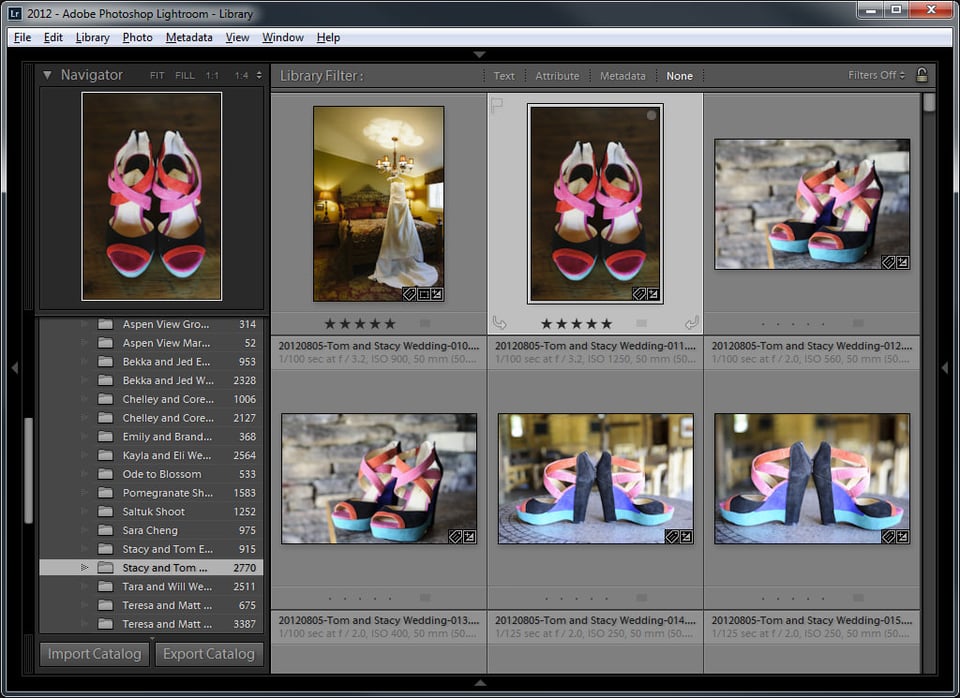
The reason why Lightroom gets slow overtime, is because of the large number of objects and associated metadata stored in a single catalog. The first thing I recommend to do, is take the content you will be editing out of your current catalog to a separate one. By doing that, you will be editing a single event with no other photographs in it. Here is an example of how Lola’s Lightroom folder structure looks like:
As an example, I chose a single wedding (Stacy and Tom) by clicking on the folder in the Library module, which contains 2770 images. Go ahead and pick a folder or a group of photos.
Now export the entire folder into a different catalog. In this case, I will be exporting 2770 images to a separate catalog. You can do this by either pressing the “ALT” button on your keyboard and clicking the “Export Catalog” button on the bottom or by going to “File”->”Export as Catalog”. When you do that, you will be presented with the “Export As Catalog” window:
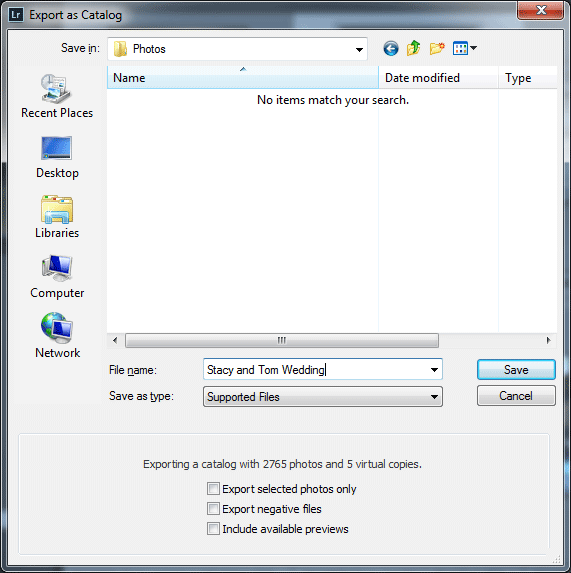
Now you need to select the folder where you will store the new catalog. I highly recommend using a folder in your fastest hard drive. For example, if you have an SSD drive as your primary hard drive (C: Drive), then create a folder in the main folder like “Photos” or “Lightroom”.
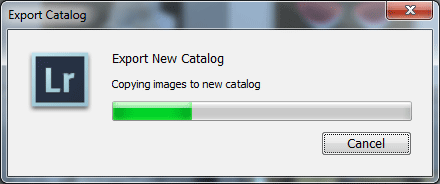
Once you create a folder, type the file name of your catalog. As you can see from the above image, I typed “Stacy and Tom Wedding” and I am storing it in a folder called “Photos”. Now here is the important part – make sure that the bottom of the window states the correct number of images you will be exporting and all three boxes are unchecked. If you hand-picked the photos you want to export, then only the first box “Export selected photos only” should be checked. You definitely do not want to check “Export negative files”, because it will duplicate your RAW files in the location you picked. Including available previews is not needed, since we will be re-rendering them (see below). Click “Save” to begin the export process:
2. Open the New Catalog
Once the export is complete, you will receive a message that the export was successful. Next, navigate to “File”->”Open Recent” and pick the catalog that Lightroom just created for you. In my case, it is “Stacy and Tom.lrcat”. When you click the file name, the following message will come up:
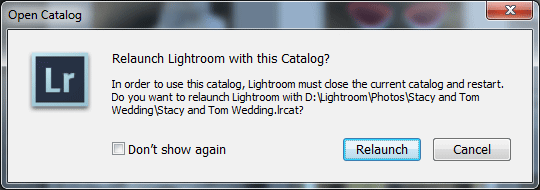
This means that Lightroom is about to close your current catalog and open the new one. Just click “Relaunch” and the new catalog will come up:
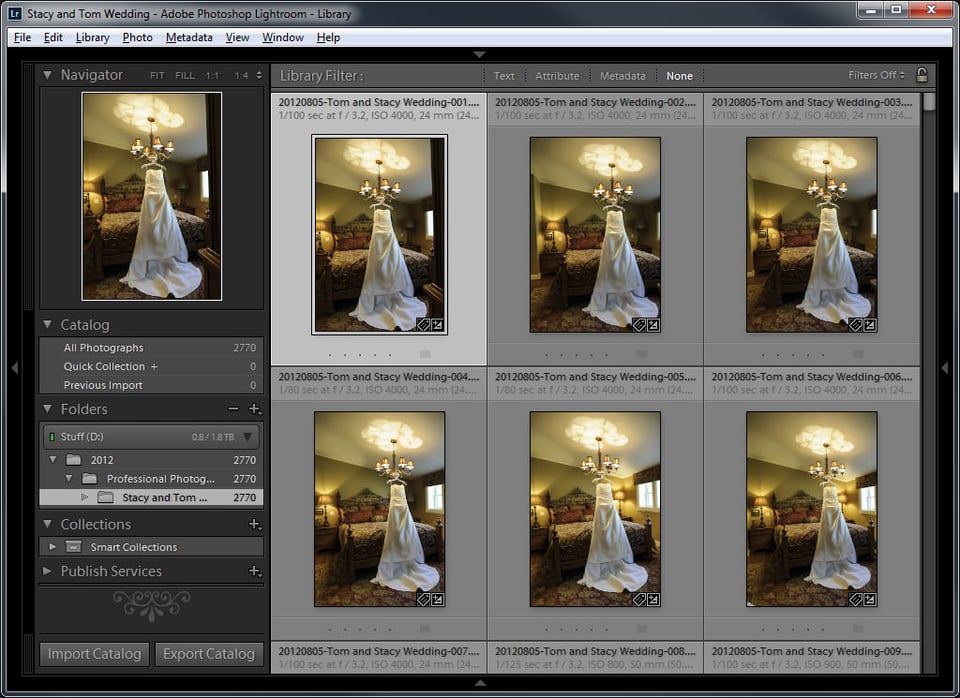
As you can see, only the current folder is visible in the new catalog – no other photos have been exported. Lightroom should already be much faster, but there is one issue – none of the images you see have been rendered by Lightroom yet. This means that if you start scrolling down or trying to open each image, it will take a while for Lightroom to generate all the thumbnails and display the full size image. In the next step below, we will make Lightroom render each image separately, which will speed it up even more.
3. Render 1:1 Previews
The reason why high-resolution files take so long to open up when you zoom into them, is because Lightroom has to read the RAW file, then render a full size JPEG image out of it. This takes a while, which adds to the frustration when you have to go through hundreds of images and check for sharpness and other issues. To avoid this time-consuming process, you can render each image before you start editing, which will speed things up significantly when going from one image to the next. However, keep in mind that this process takes a long time – it might take hours to finish, depending on how many images you want Lightroom to render.
To do this, navigate to “Library”->”Previews”->”Render 1:1 Previews” as shown below:
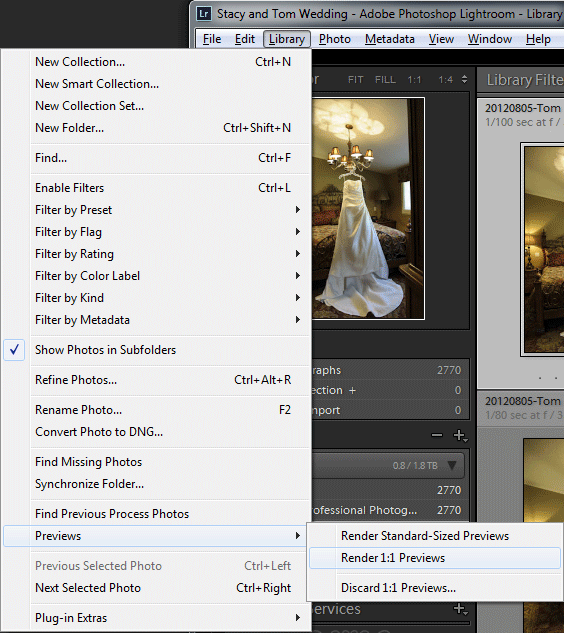
The following message will pop-up, asking you to confirm if you want to build previews for a single image or all images:
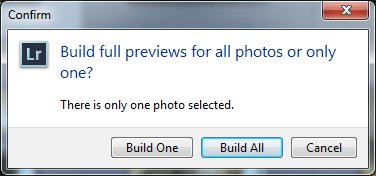
Click “Build All” and the rendering process will start. You can monitor the progress of image rendering on the top side of Lightroom, similar to how you monitor the export process.
Once all the images are rendered, try to edit a couple of images and zoom in/out – everything should be much faster now!
4. How to Get Back to Your Old Catalog
So you worked through your images, made modifications, exported them and now you are done. How do you get back to your old Lightroom catalog? It is simple, just like you switched to this one, just navigate once more to “File”->”Open Recent” and click the name of your old catalog. Lightroom will again ask you if you want to Relaunch the catalog, so just click “Relaunch” and you will be taken to your old catalog.
Now here is something important to keep in mind. All image edits that you have performed in the newly created catalog will NOT be replicated back to your old catalog. When I had to do this for a number of different weddings, I kept them all separate and deleted them from my main catalog. If you choose to clean up your old catalog by deleting the exported photos, absolutely make sure NOT to delete the actual photos from your file system, since the exported catalog above references the images in the same location. When deleting files, Lightroom will ask you this:
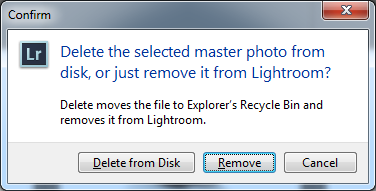
Only click “Remove” and NOT “Delete from Disk”. By removing the image, you are removing it from your Lightroom catalog, but the actual photo in your file system is preserved. If you click “Delete from Disk”, then the RAW file will be deleted as well, which will break your other Lightroom catalog that you exported.
If you want to synchronize the photos back to your main Lightroom catalog after editing, you can easily do it by going to “File”->”Import from Another Catalog…”. In the import screen, choose “Metadata and develop settings only” under “Changed Existing Photos” and resolve other potential issues with missing files and click Import. Now all the changes should be synchronized back to your main catalog.
5. Modify Your Current Import Workflow
If the above process works out for you and you find it to be efficient for editing photographs, I would recommend to change your import workflow process. Instead of putting all photographs into the same catalog, why don’t you start creating catalogs for each major import? That way, you do not have to export photographs and import them again to sync the catalogs every time. Now if you still want to have one main catalog that contains all of your photographs, then you would be better off creating a separate catalog, importing images into it, editing images and then importing the small catalog into your main one.
6. Better Image Culling with Third-Party Tools
When it comes to image culling, Lightroom might not be the best choice. There are other third-party options such as FastRawViewer and Photo Mechanic that provide much better image culling experience.
FastRawViewer, as the name applies, is an incredibly fast tool to view RAW images. It is ideal for reviewing high-resolution images quickly, so I use it exclusively for the image culling process. I wrote a detailed guide on how to cull images faster with FastRawViewer, so check out the article, along with the accompanying video for details.
Hope this helps, let me know if you have any questions!
I’ve just exported my images to a new catalog but it states the photos are now missing? Any help
Have 1.1 million images in Lightroom in one catalog and it runs acceptably fast. For the last couple years images are from D800e and D810. I like having everything available when I’m searching for images.
I have been a photographer for 40 yrs and anyone who takes over a 1000 images at a wedding is insane and foolish and probably not very good at “first capture” photography. That means they shoot “hoping” to get a good shot in the 1000 they take. Thats a Problem!!
Real photographers work efficiently. If you shoot 500 images you have halved you work load, and doubled you pay. Try doing a wedding taking 250 or 100…. Doing this a photographer will put more work in doing their job… as a professional photographer.
It has become a problem that in todays age people buy a camera and ‘Think they are a photographer’
I ask a few questions to all photographers:
How many of you take a shot of the bride and make sure behind her …its out of focus
not many of you could it and I don’t think you would know why its done this way
How many of you what the main objective is at the wedding?
You talk like a film user and I assume you are since you’ve been a photographer for 40 years. Let me get you up to date. You don’t actually have to develop digital files to see them so you don’t double your workload by taking more. It hurts nothing as long as you weed the good from the bad.
What total and utter nonsense. My camera shoots 10pfs, I often burst 4-5 shots at crucial moments to ensure I get eyes open and not blinking, smiles, freeze movement and in gerneral this gives me a choice of shots to choose from.
RAW files can quickly be sifted through, best files picked out, the rest ignore… and then the processing begins.
1000 files from a wedding is perfectly OK. You can easily eliminate 70-80% of them in an hour and be ready to work on the best of them.
Real photographers use the tools available to them, they don’t go on blog posts complaining about other peoples work flow and post processing methods.
If it’s not your cup of tea, fine, but you are not the majority, and anyone can stand around procrastonating about taking the perfect shot for an eternity, the rest of us press the shutter and do the job at hand.
I would like to know how many weddings ceremonies you have been a photographer on and told everyone to stop what they are doing because you want to capture the perfect moment…..I bet you miss most of the fun.
There are too many “pro photographers” out there who think they know best because they own a (pro) camera. I have met plenty of “pro photographers” with “pro” gear that are not capable photographers, just gear-whores or worse, trolls with no real skill themselves, who speak “pro” (all mouth no action).
If you are such a hardcore pro, post your website and let us see your incredible professional work…. something tells me that wont happen.
Hi Nasim,
I’ve been following your method on my workflow. I bought a new fast PC (Xeon processor 32GB RAM and 2x 2TB SSD internal drives who are in RAID) for working with the D800 files in future. I do use the D700 right now. I keep my main LR catalog and all my photos on a external NAS. I do work from there too. Concerning your article now I export a folder with photos to a separate catalog on my SSD drive on my PC and edit the images there. Then I re-import them into the main catalog on the NAS. But doing all this including rendering 1:1 seems like it costs me more time as I work straight from the NAS. I think the connenction between my PC and my NAS slows it down?
Maybe I can copy the images I want to edit to my SSD drive first, edit them, then re-import to the main catalog on the NAS? I will have two folders with photos so I don’t know if LR gives a conflict?
It is about wedding photos so I just want to be sure. And work faster ;-)
Best regards, Jan
The Netherlands
Thanks for a super helpful post. Very clear description of what to do and why. Much appreciated!
Thanks for the tip especially the 1:1 preview, I missed this.
I import the sets to a temporary catalog and work from there. When I’m done It will be imported to the main catalog which is by year.
This has helped me immensely! Thank you. I came upon this by doing a general search.
I like the idea of separate catalogs, but is there a better way when publishing to online services/own website?
How do I change my catalogs from almost 3 years worth of images? Thanks!
The Aperture workflow in the “sister article” seems so much more eloquent. The workarounds described here make Lightroom seem not ready for prime time. This is too bad as I really do like the results I get in Lightroom as well as the better noise reduction and downsampling/export features there. Also, the Aperture workflow truly saves time and disk space by not even importing the RAW information of unwanted images. I guess you just really need to make sure you don’t want those images before reformatting your memory card. I think until Lightroom improves a bit I will continue to import and manage my images via Aperture using Lightroom (along with other tools like Nik) as a step in the workflow process. Expensive…