DxO PureRAW is a handy software that first appeared in 2021, promising photographers a solution to improve the quality of Raw files by automatically correcting lens defects and getting rid of image noise. In this article, I’ll focus on the features that DxO added to PureRAW version 4 and how they can help your photos.
First, an overview of the included features that DxO claims can “supercharge all your cameras and lenses.” They are, as stated on the DxO web page:
- Lens softness compensation
- Demosaicing built on neural networks
- Industry-leading noise reduction powered by deep learning
- Superior distortion adjustments giving maximum field of view
- Chromatic aberration corrections tailored to your lens
- Vignetting rectification based on precise measurements
The features are based on a large database containing lens and camera information, as well as laboratory measurements. This allows for the creation of accurate profiles of defects and potential corrections. These features are all excellent, but honestly, I can’t say they do a distinctly better job than Capture One or Adobe when used on my typical Nikon Z files. If I shot with older or more unconventional equipment, that may be different.
Where DxO PureRAW 4 shines is in noise reduction, both in terms of the quality of the results and the easy way to reach it. My opinion is that, with version 4, DxO not only improves the effectiveness of their algorithm in preserving details while reducing noise but also makes a step forward in avoiding artifacts and the “synthetic” feeling that digital images can get if over-processed. All of this is thanks to introducing DeepPRIME XD2 and, most of all, giving more user control over the intensity of noise reduction and detail improvement.
Let’s look at some examples using photos I took with a Z9 set at ISO 6400. Even though ISO 6400 isn’t extremely high, I think it’s high enough to clearly show the differences in results. In fact, my experience is that DxO PureRAW 4 is the most effective at improving these “middle-high” ISO values, anything from about ISO 1600 to 6400.
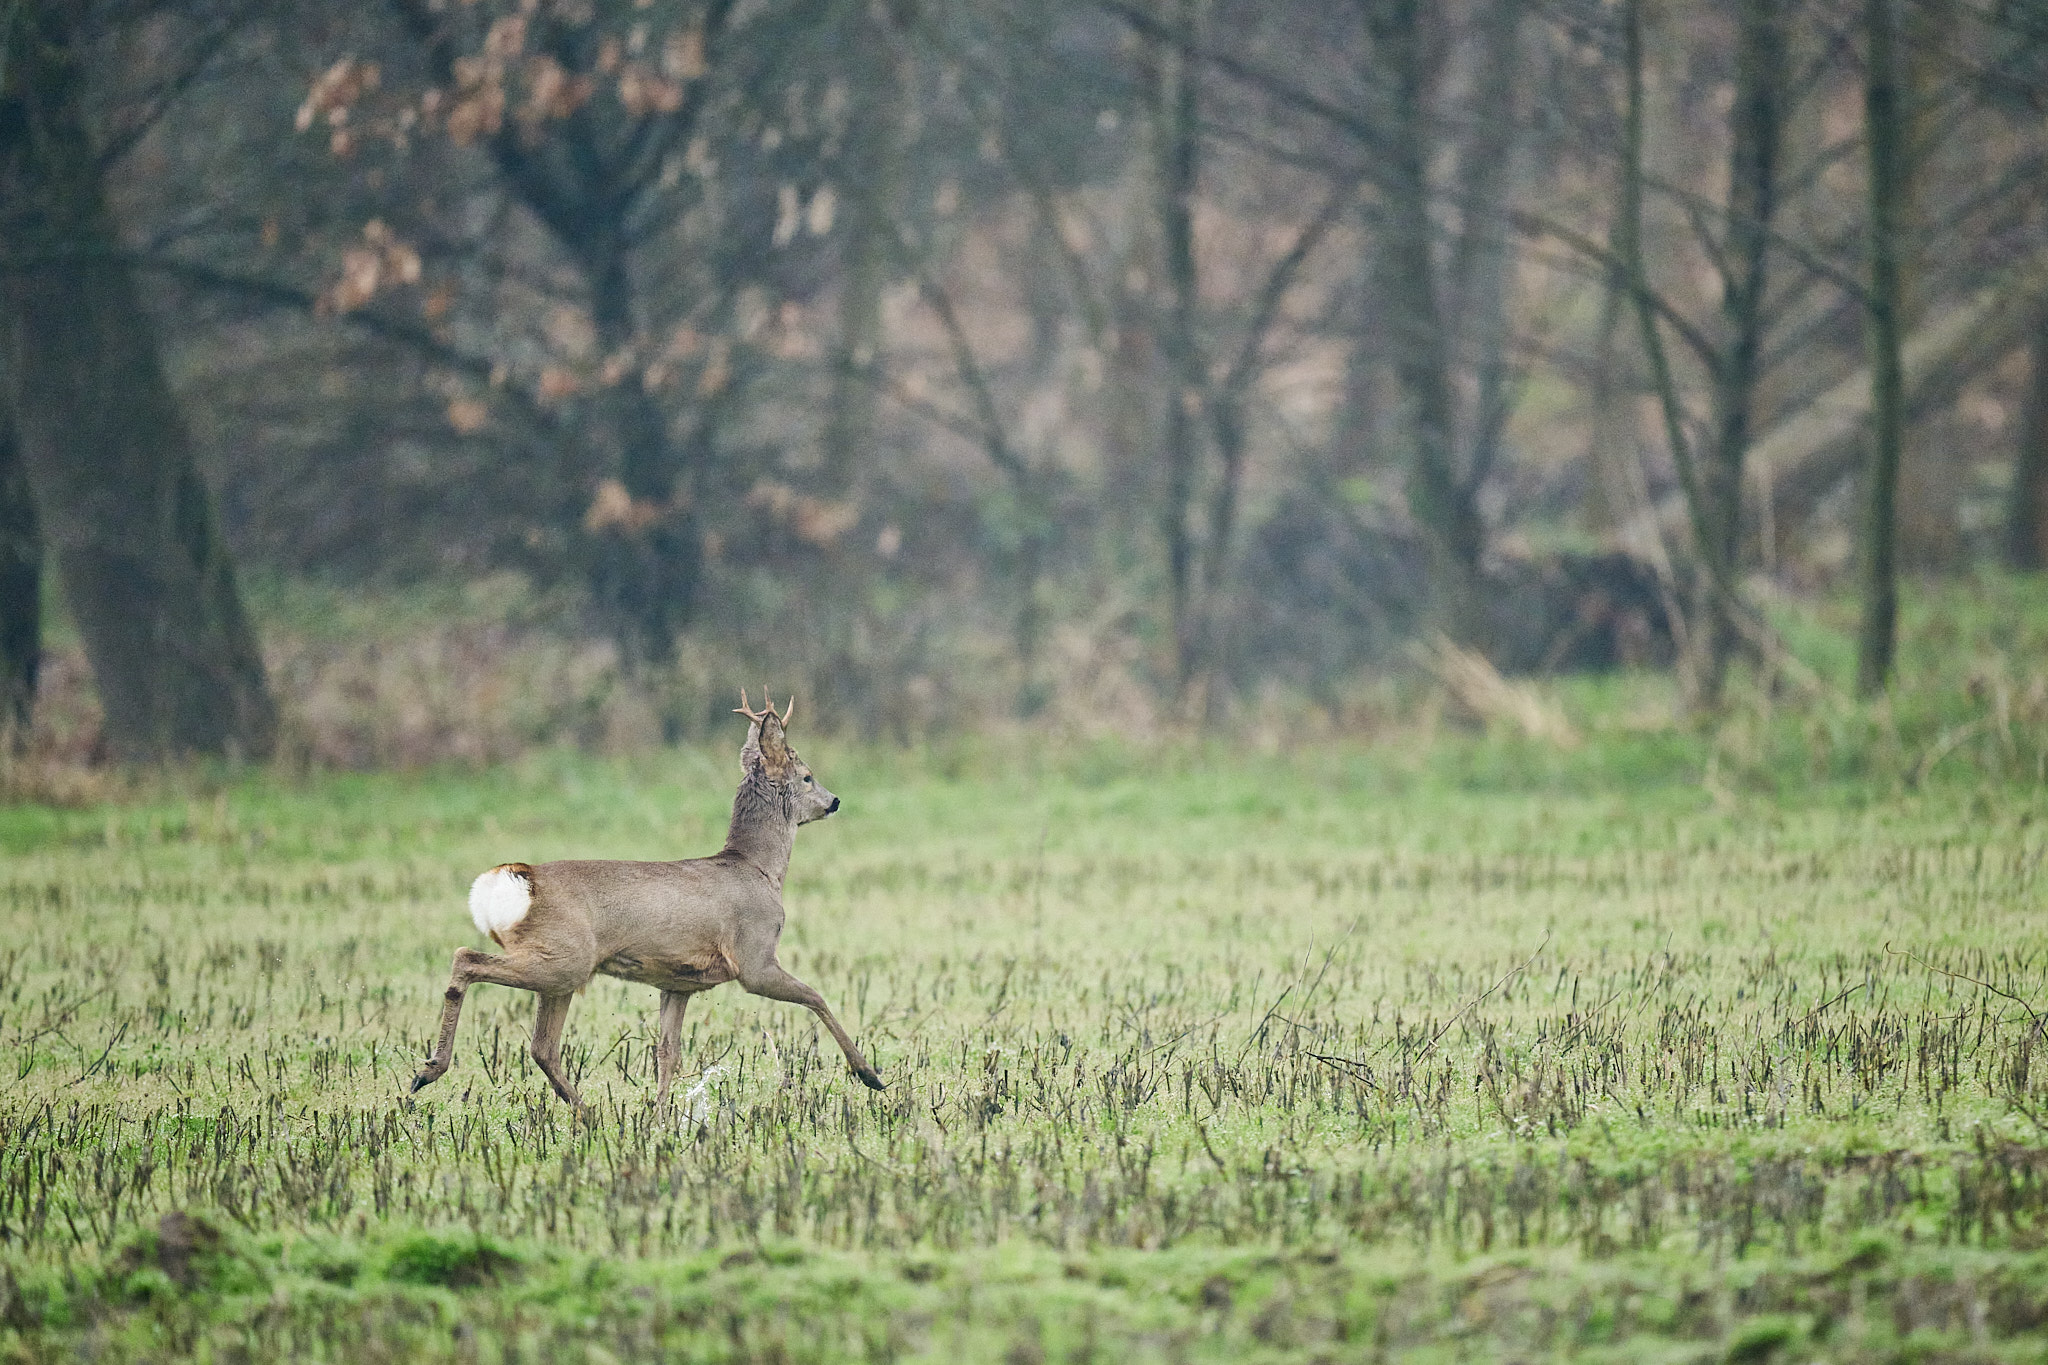
The first image is of a roe deer running through a field I photographed early in the morning. There wasn’t beautiful light that day because of low clouds and light fog. The picture above was developed with default settings for noise reduction and sharpening with the latest version of Capture One (16.4.2.1), while the version below was treated by DxO PureRAW 4.
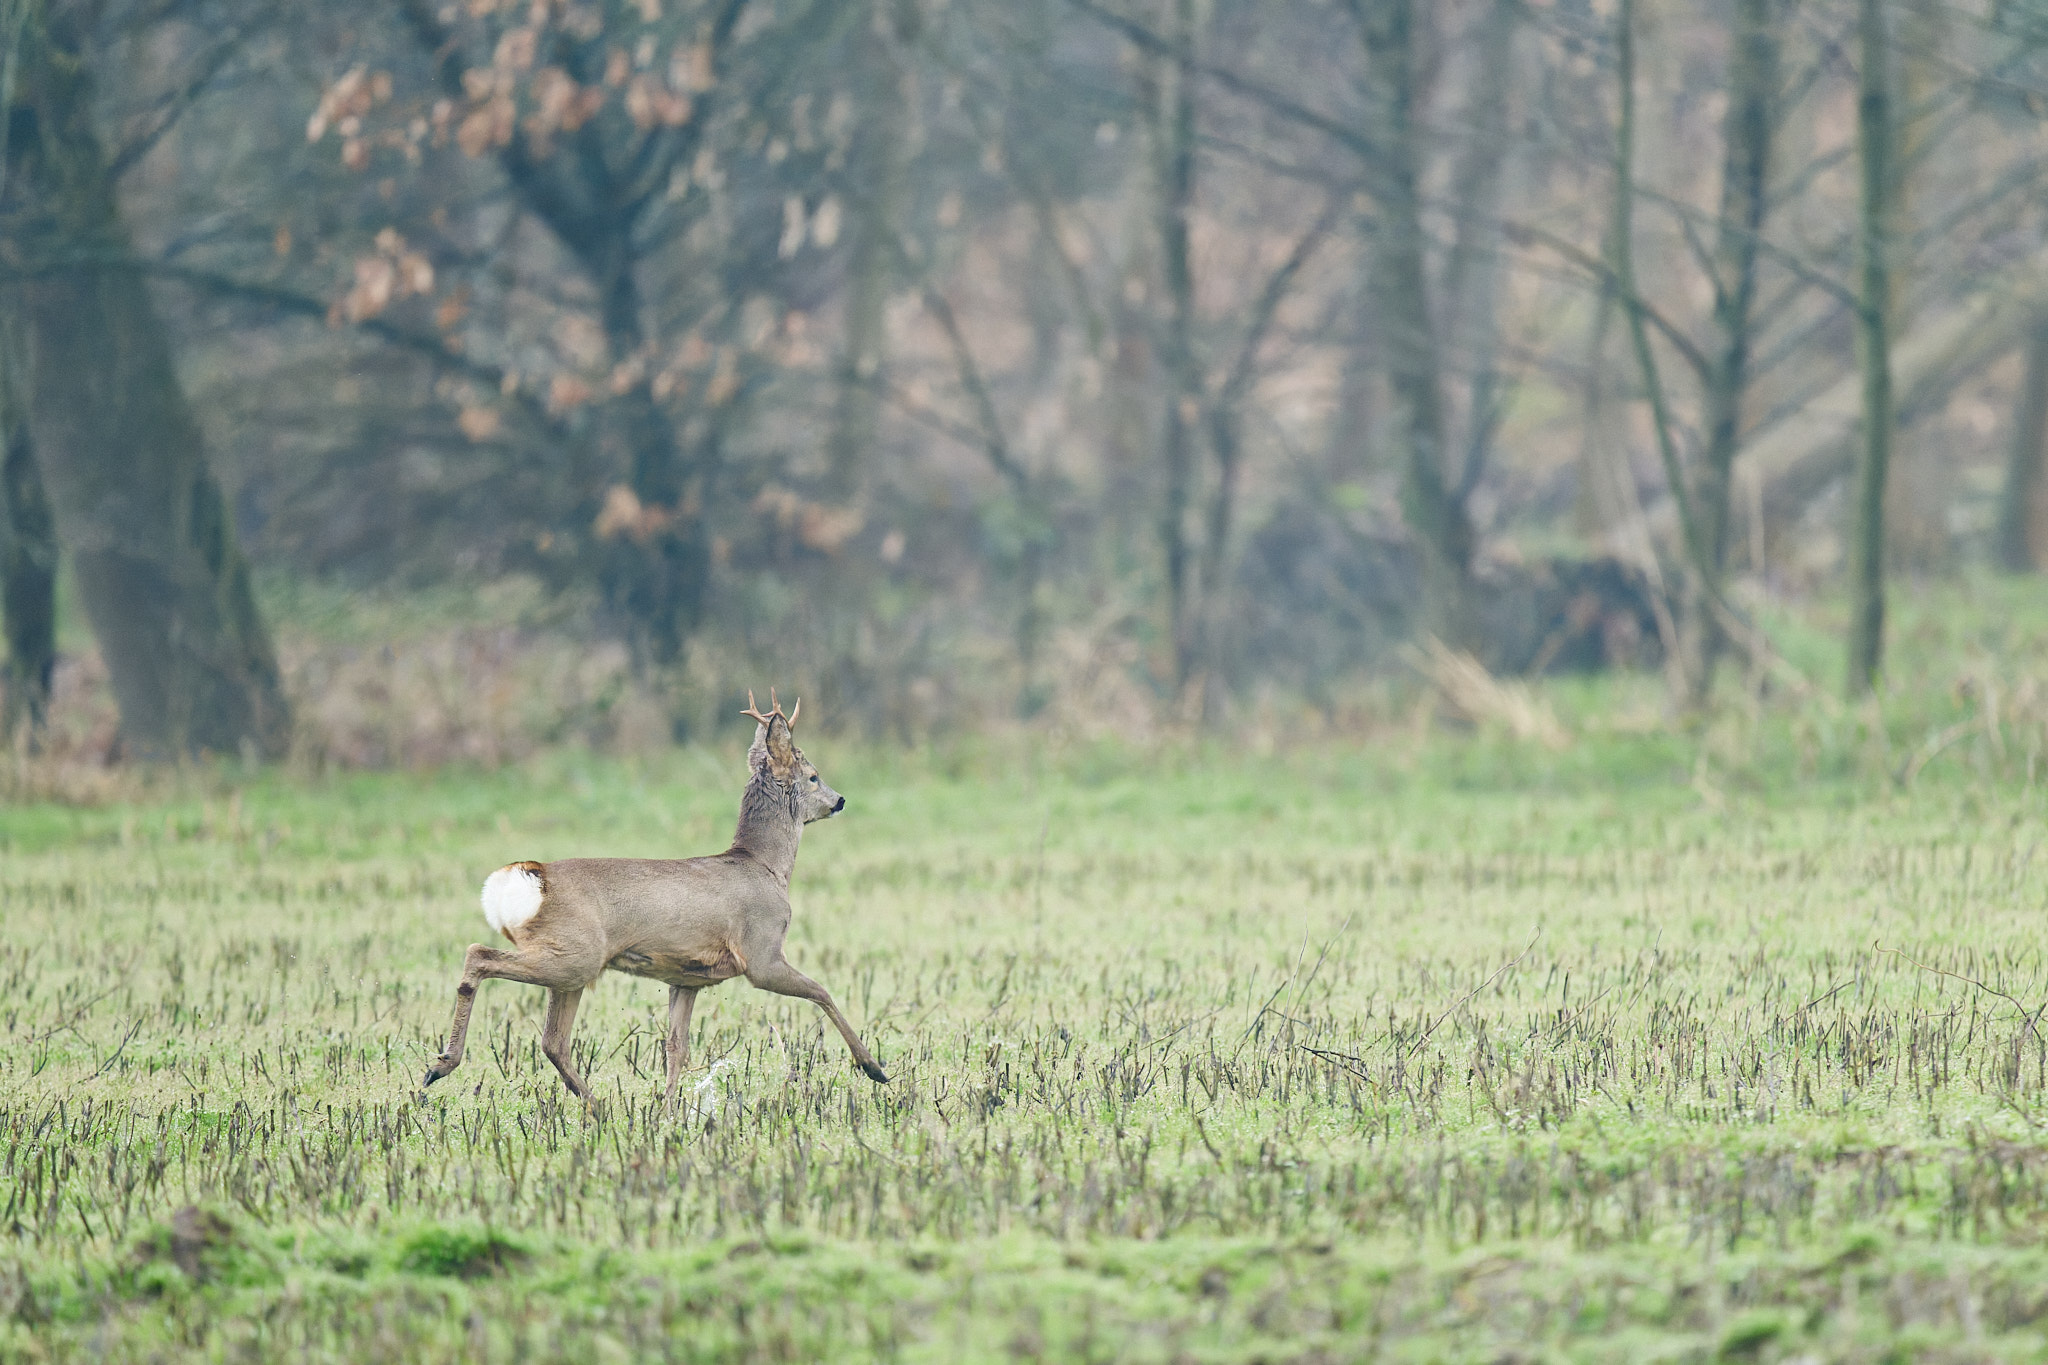
Even uncropped, this is a pretty impressive difference – just click on the images and switch between them to see. I’ll show DxO’s process, as well as crops, below.
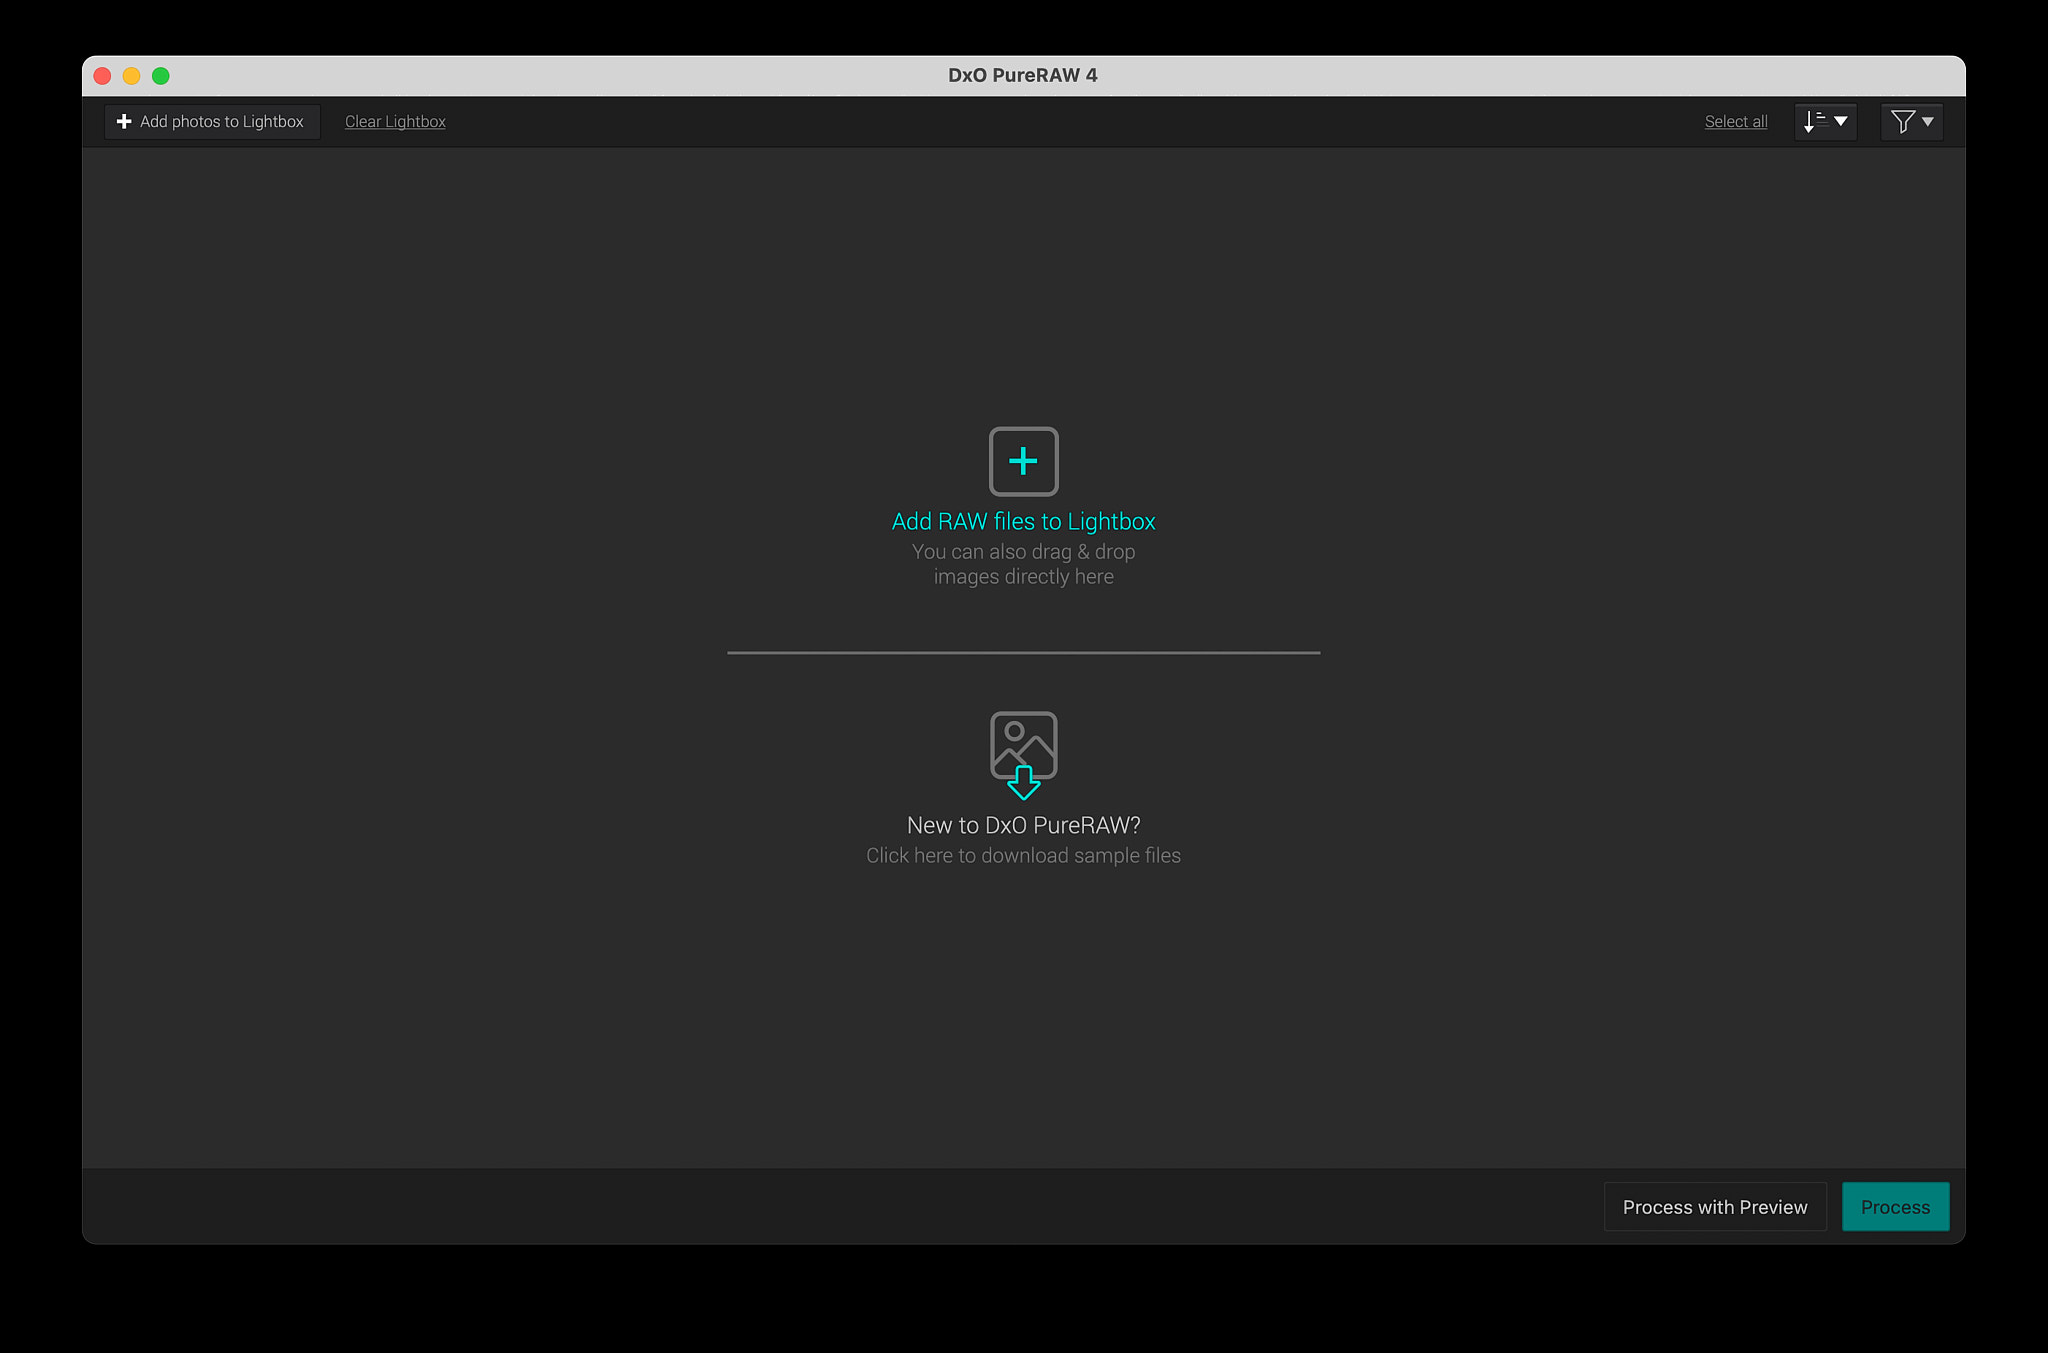
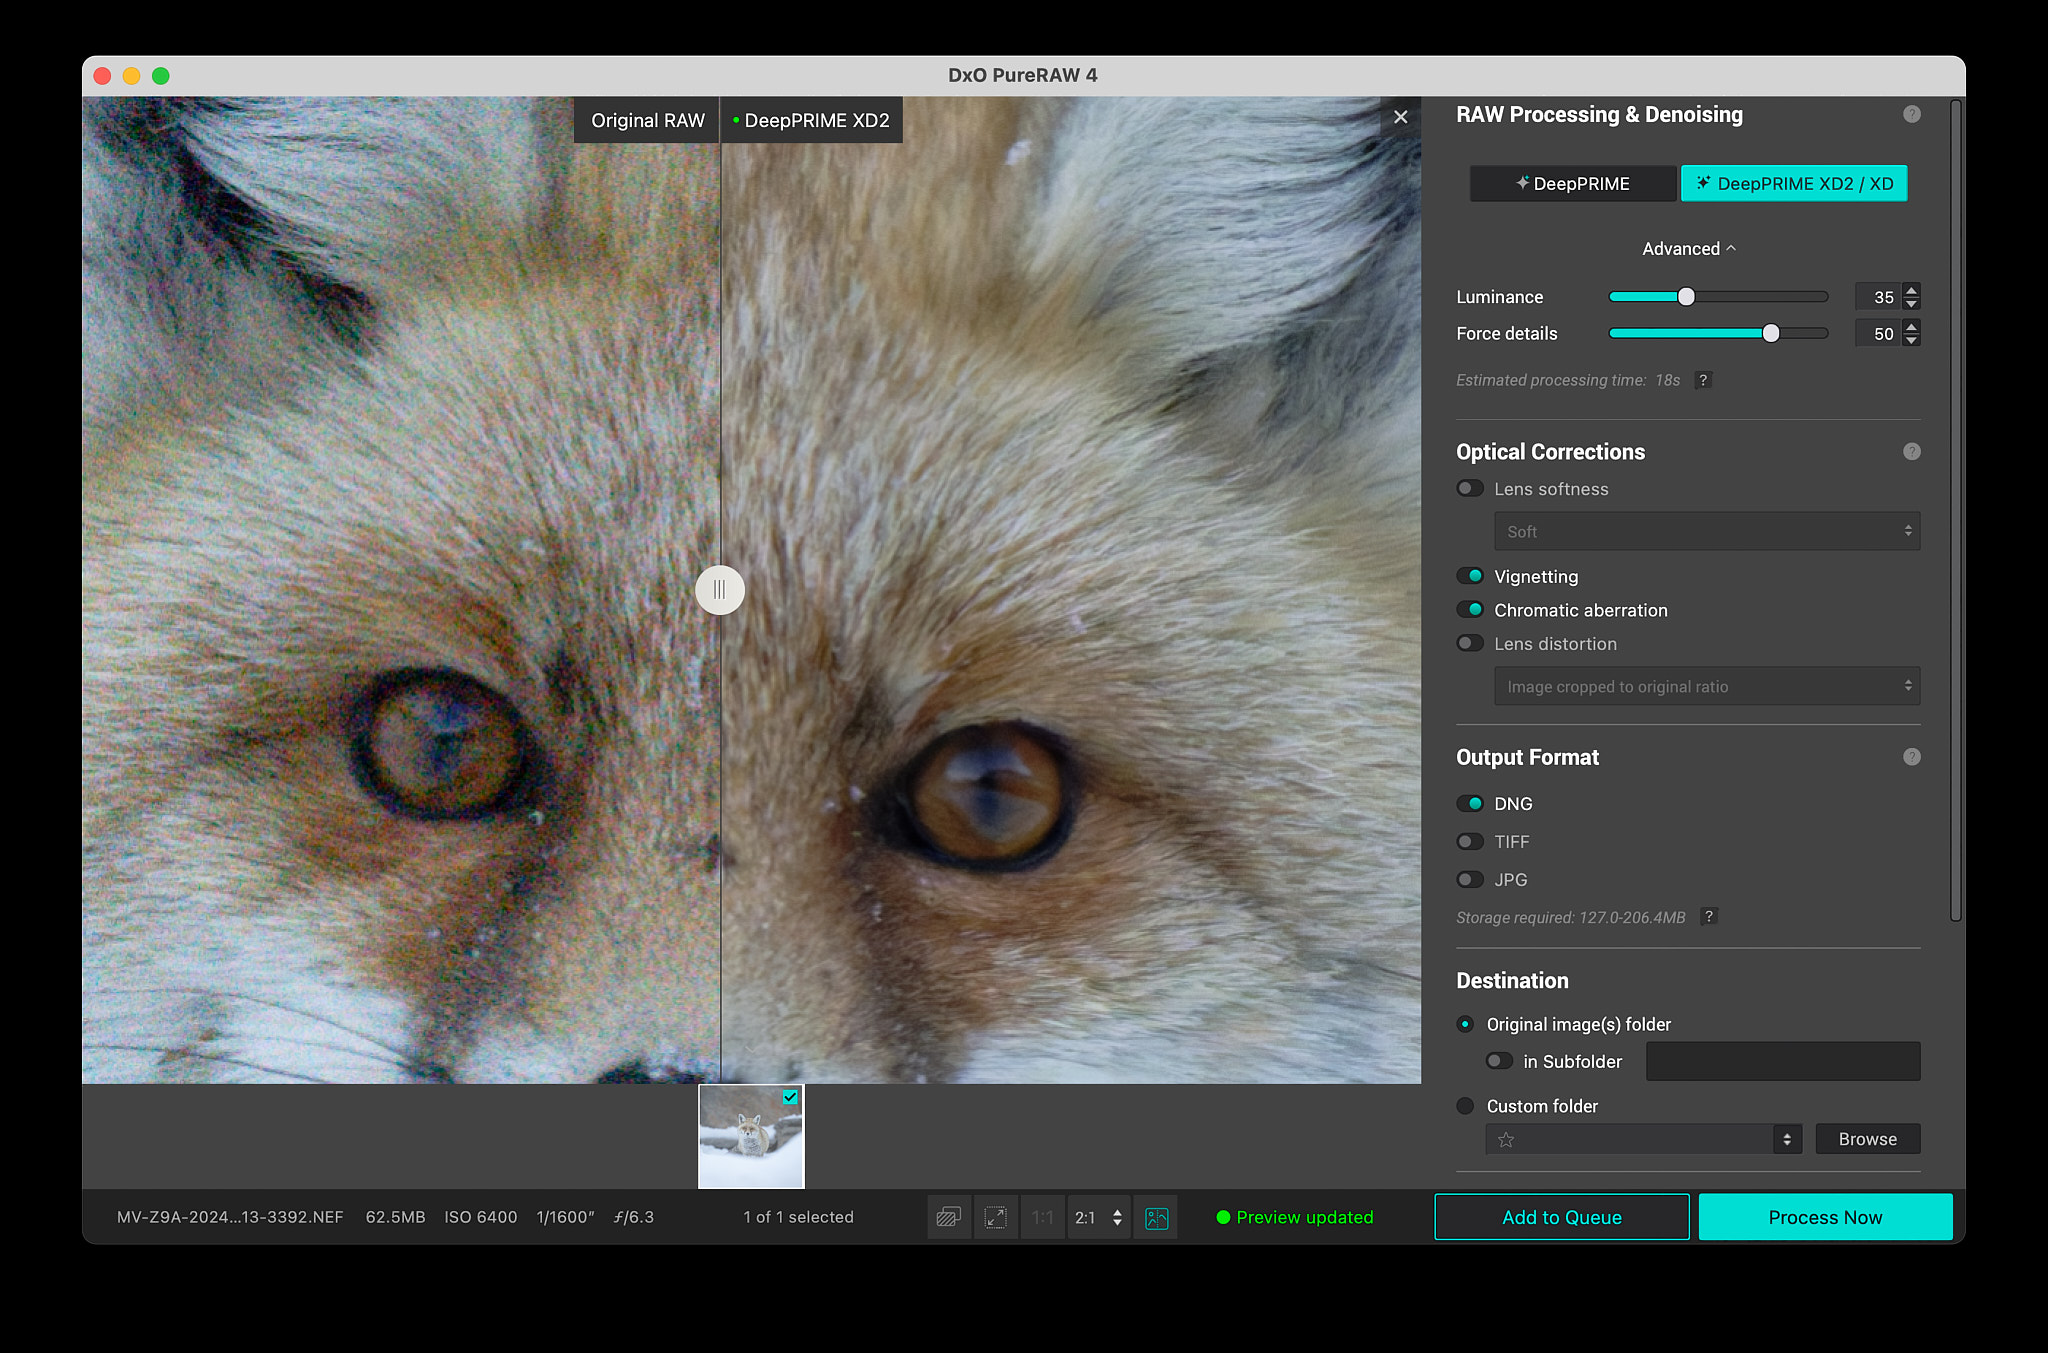
Note that you can use DxO PureRAW 4 as a Lightroom plugin, but I’m not a Lightroom user, so I keep it as a standalone application. The process is very simple and begins by dragging and dropping the image into PureRAW:
From here, I prefer to click “Process with Preview” at the bottom (instead of simple “Process”). Unless you want to process a batch of photos with the same settings, seeing the preview is the way to go. That lets you fine-tune your settings, which I consider to be one of the strengths of DxO PureRAW 4.
In the next screen, you can turn off and on the correction you want to apply (lens softness, vignetting, chromatic aberration, lens distortion). In this case, I was using the Nikon Z 600mm f/4 TC VR S – quite a good lens, so I turned off all of the corrections except noise reduction. You can also choose name, destination folder, and output format (I prefer DNG).
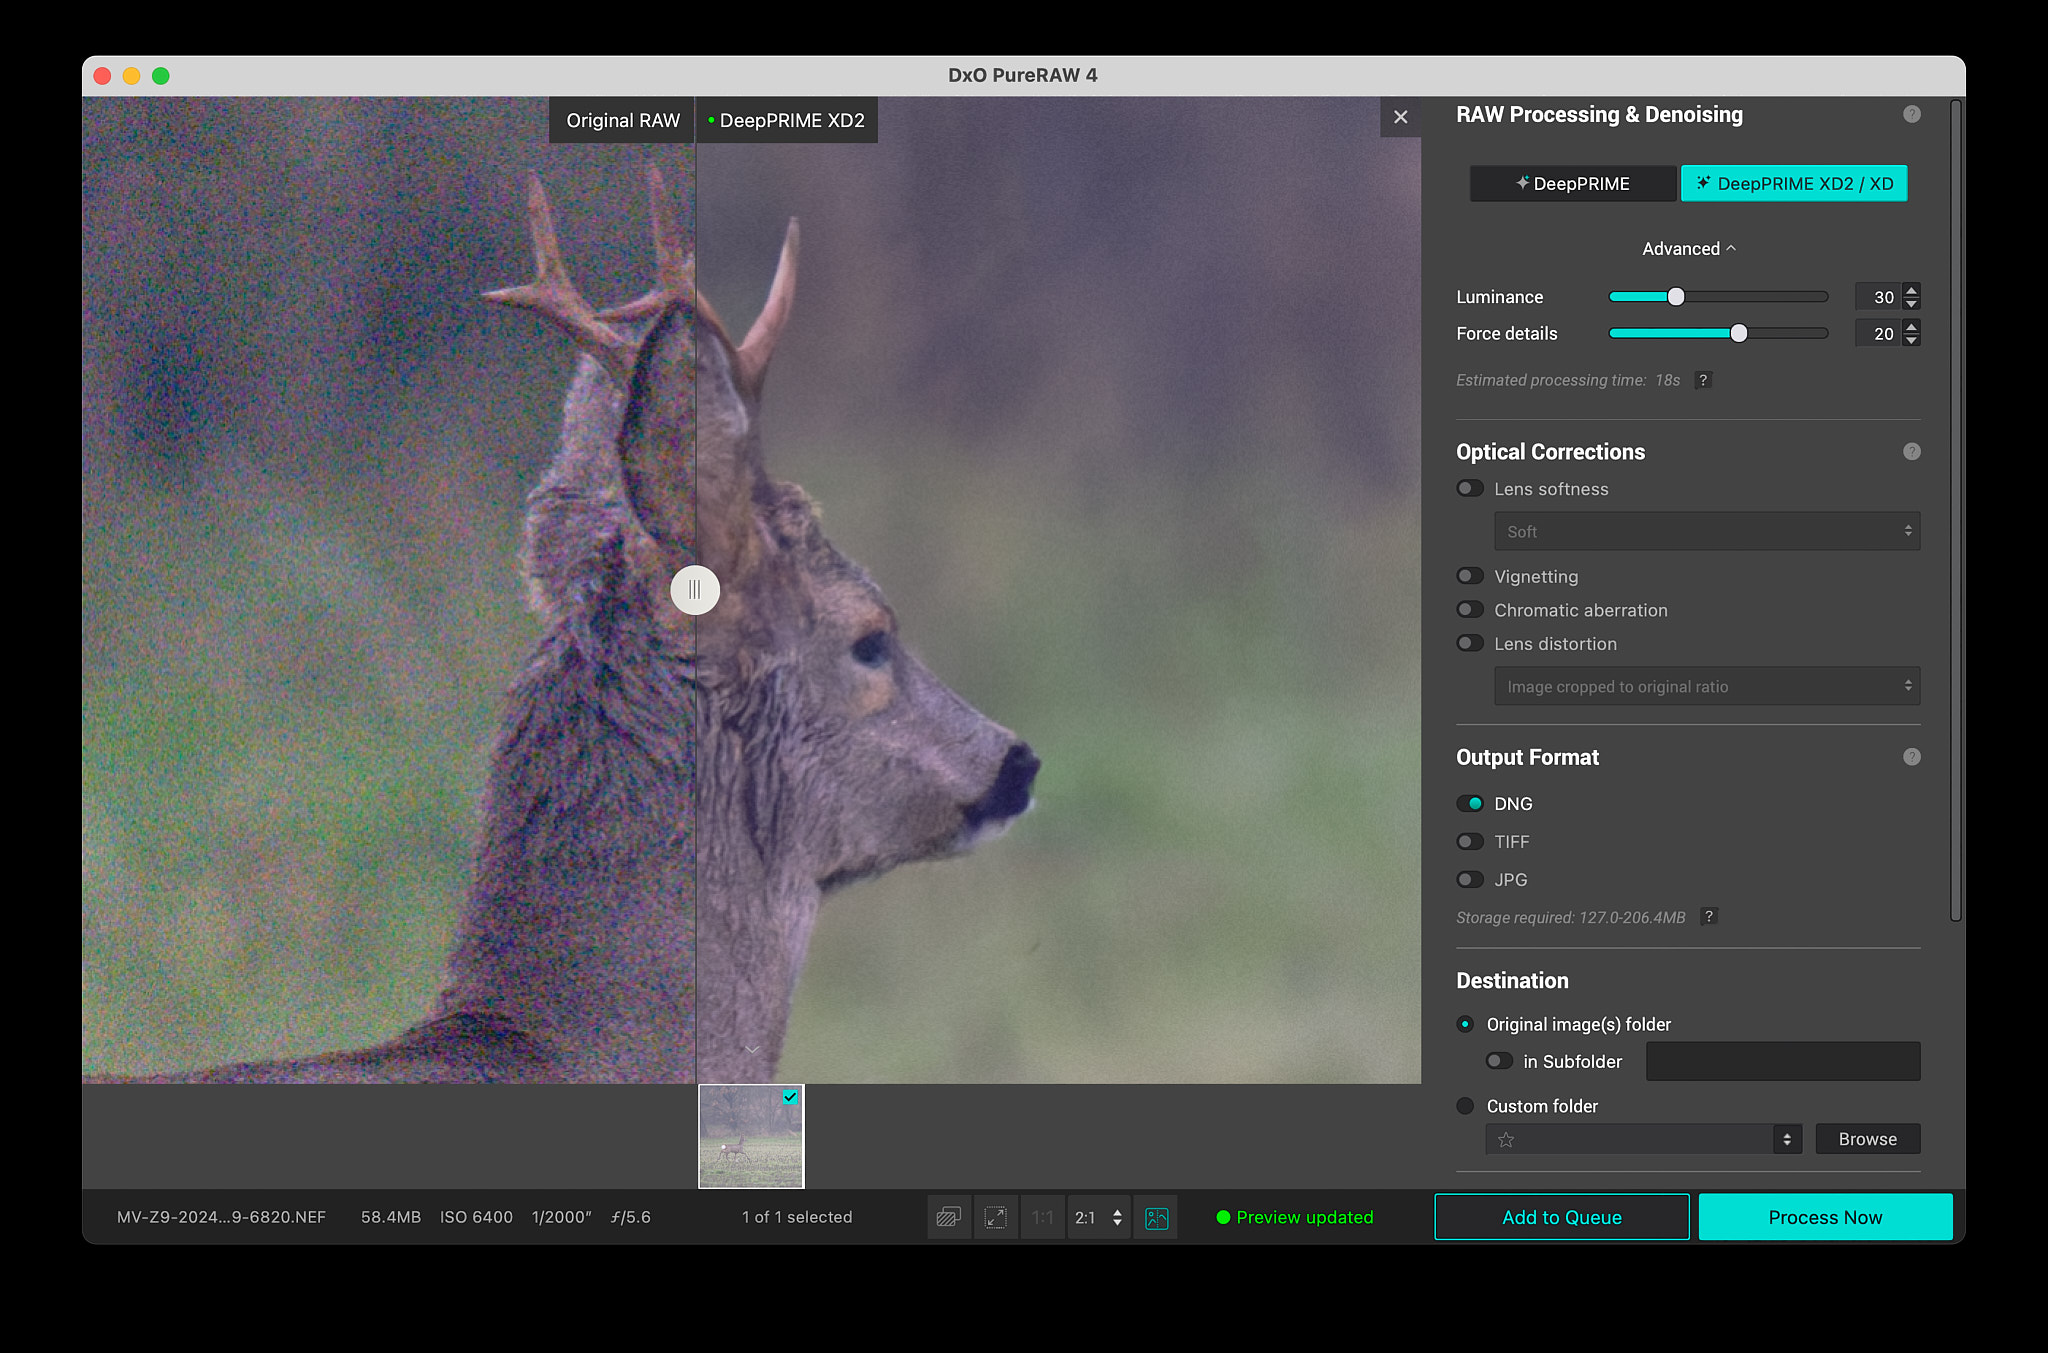
As mentioned before, I suggest working with DeepPRIME XD2 instead of the older algorithm. Then, you can adjust “luminance” and “force details” to your taste. I find that I like the results the most after reducing the luminance slightly and increasing “force details.” The defaults are 40 and 0 respectively; I prefer 30 and 20 instead.
The process can be long. Using my Mac Studio in the base configuration, it takes 18 seconds to process a Nikon Z9 file. Because of this long processing time, I suggest using the preview feature to see the effect of the settings before processing the file. In the end, DxO PureRAW 4 can save a DNG file that allows you to go forward with the rest of your workflow as normal. Simply ingest this DNG in the software you prefer to use and develop it instead of the original Raw.
Below, you can see the comparison of three different developments of the previous file. Clockwise, they are:
- Manually applying noise reduction in Capture One by using masks (I used a gentle hand; others might push it further)
- Using auto processing with Capture One defaults
- DxO PureRAW 4 result with the settings I just showed
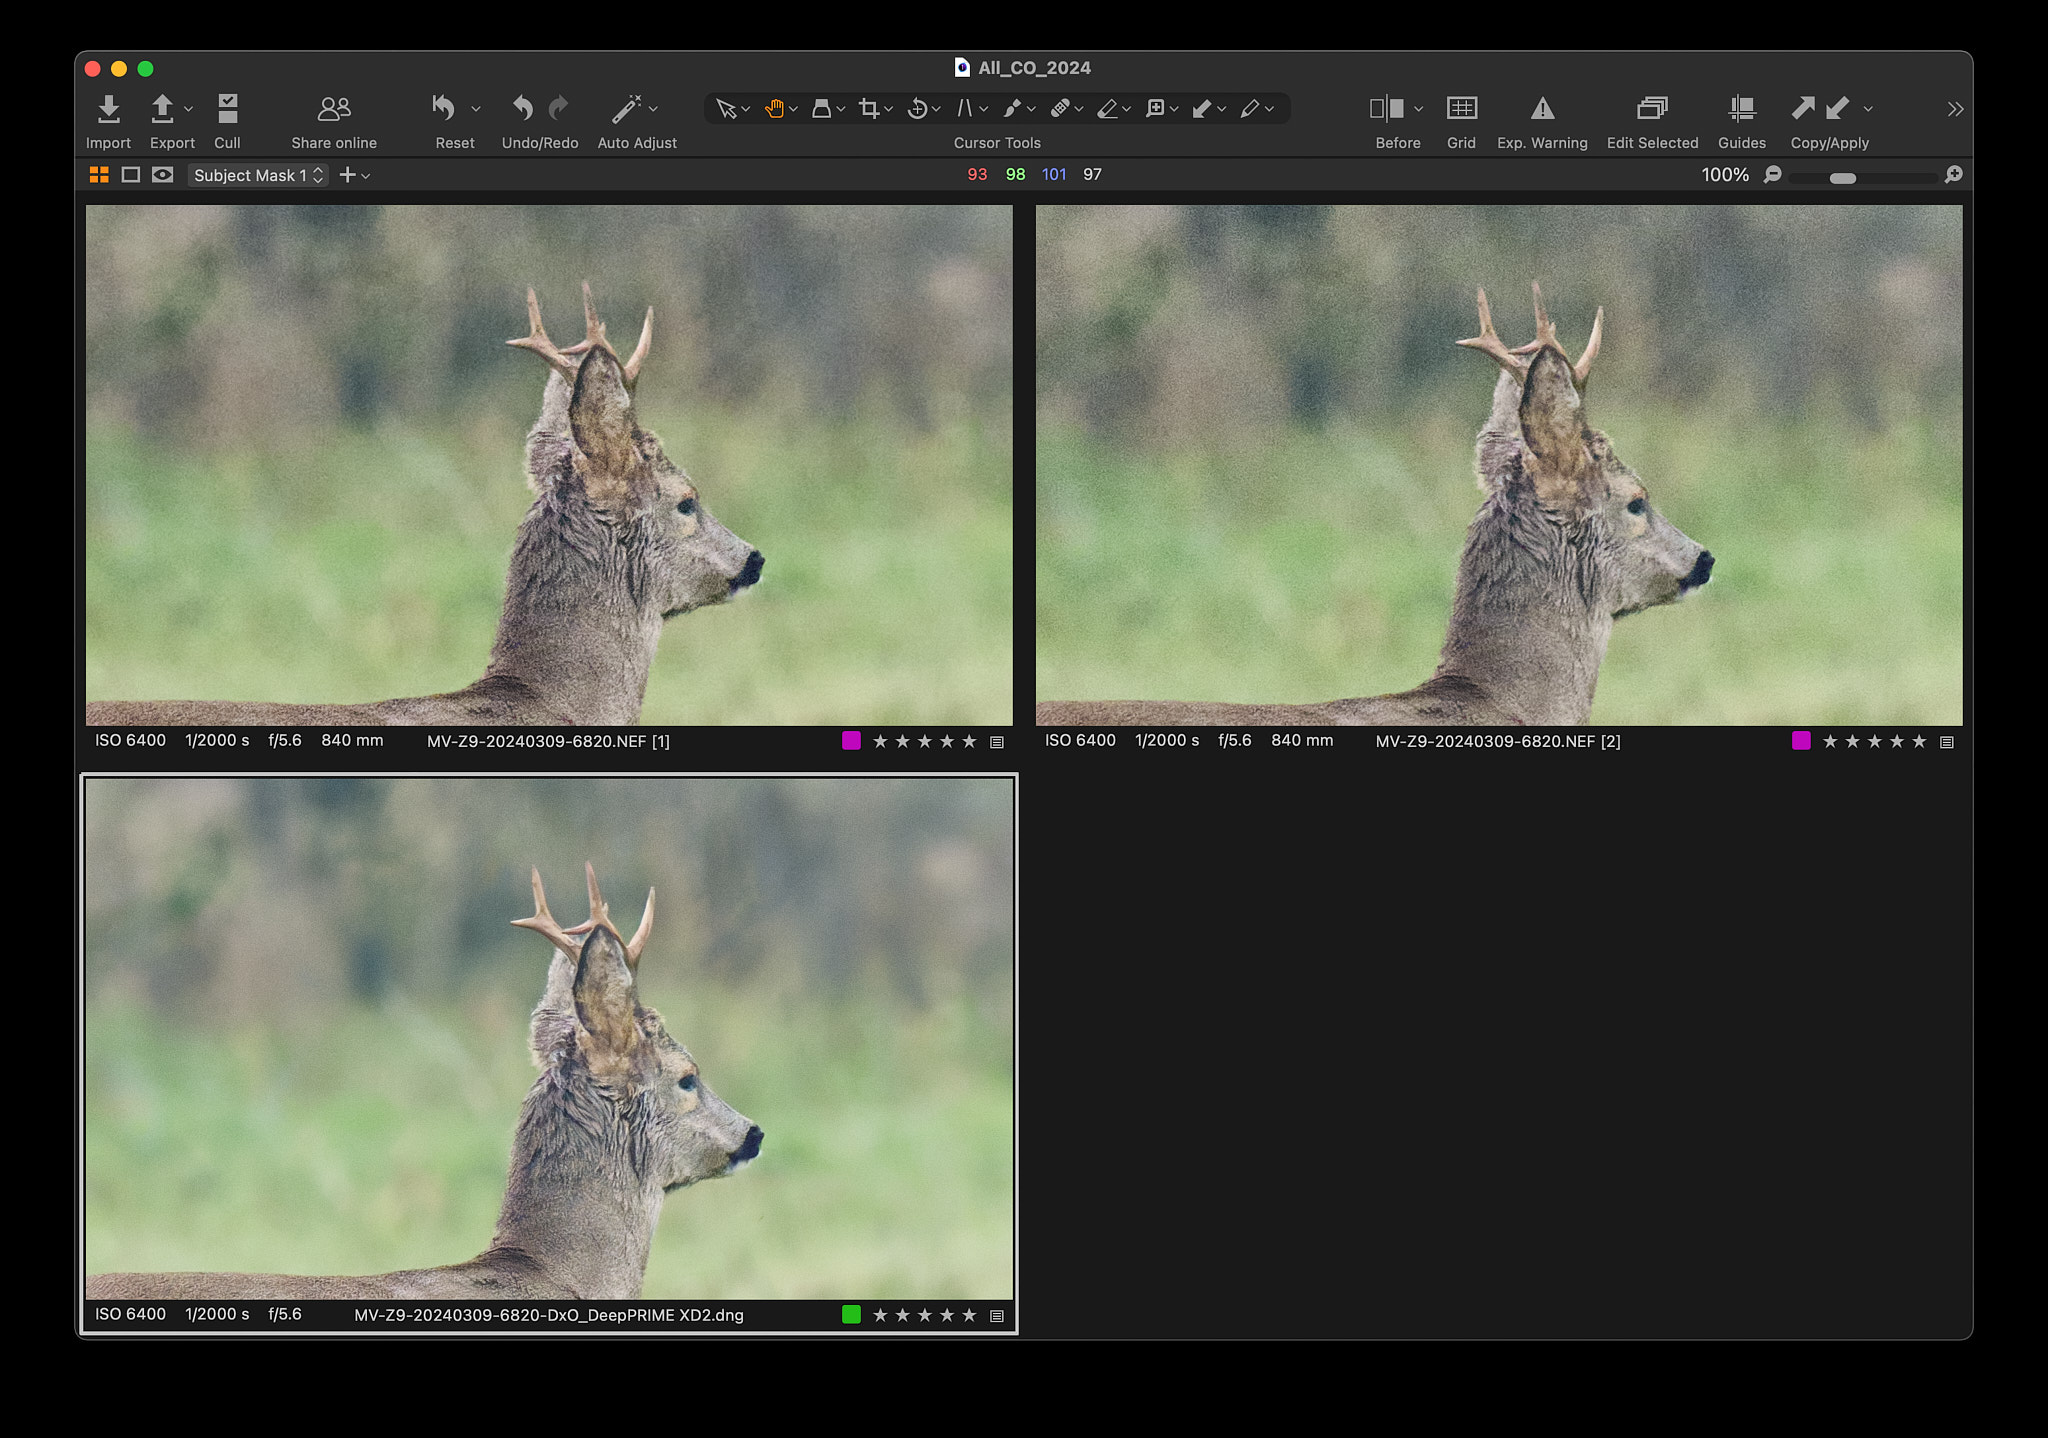
To my eye, DxO even beats manual noise reduction with masks, which used to be the top approach in scenes like this.
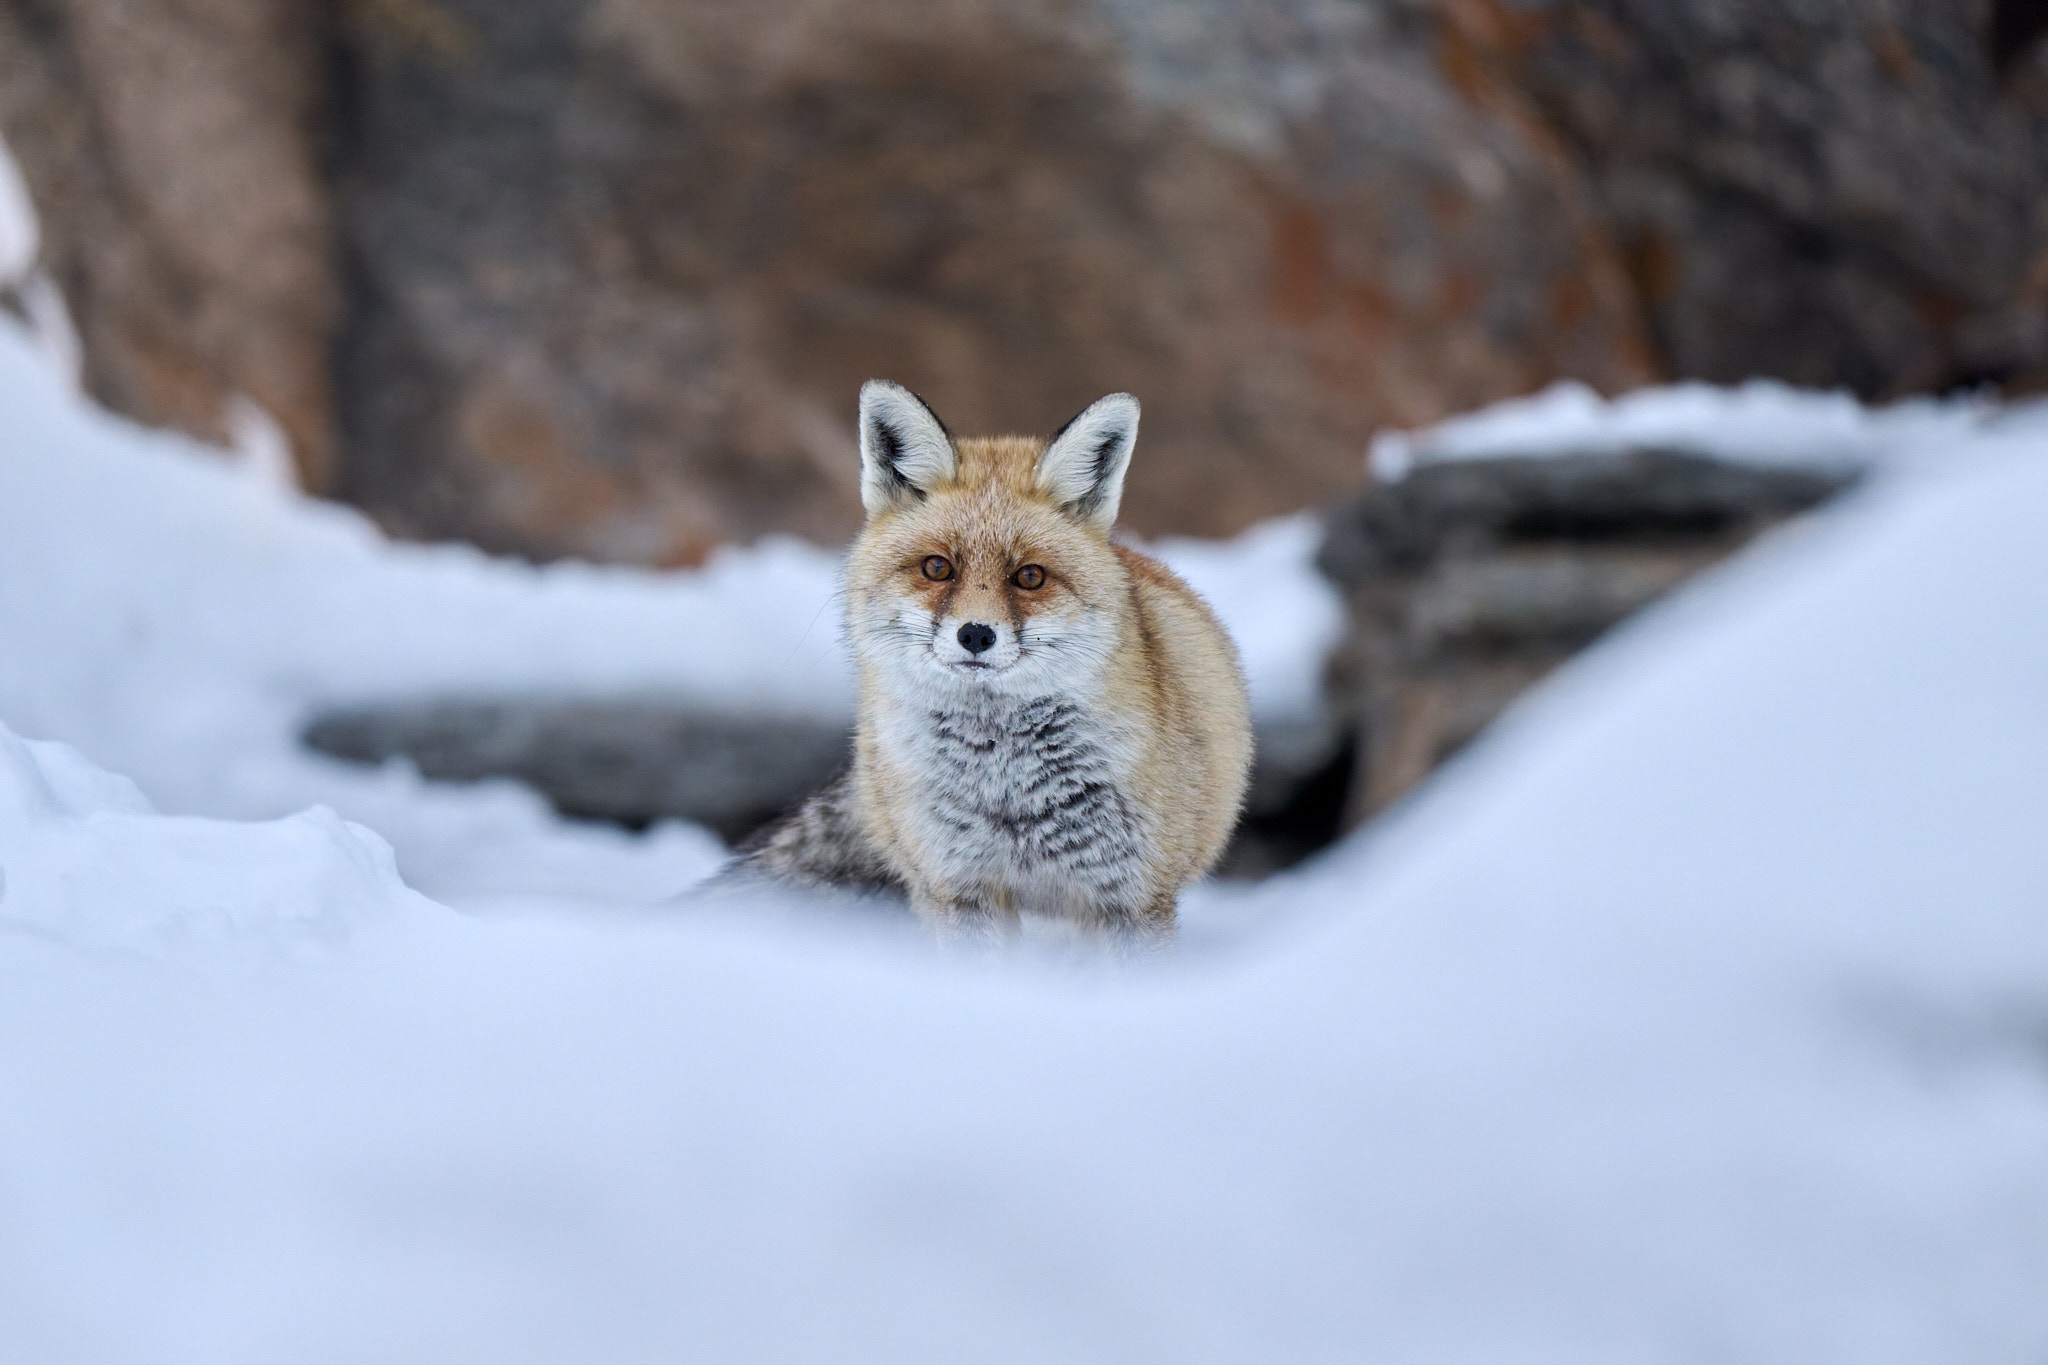
Now I’ll show you a different picture, portraying a red fox in winter. The file was slightly underexposed and a bit soft, so I added a bit more noise reduction and details this time.
This is the uncropped result:
And this a crop showing real pixels (image shown at 100%; click to see full size).
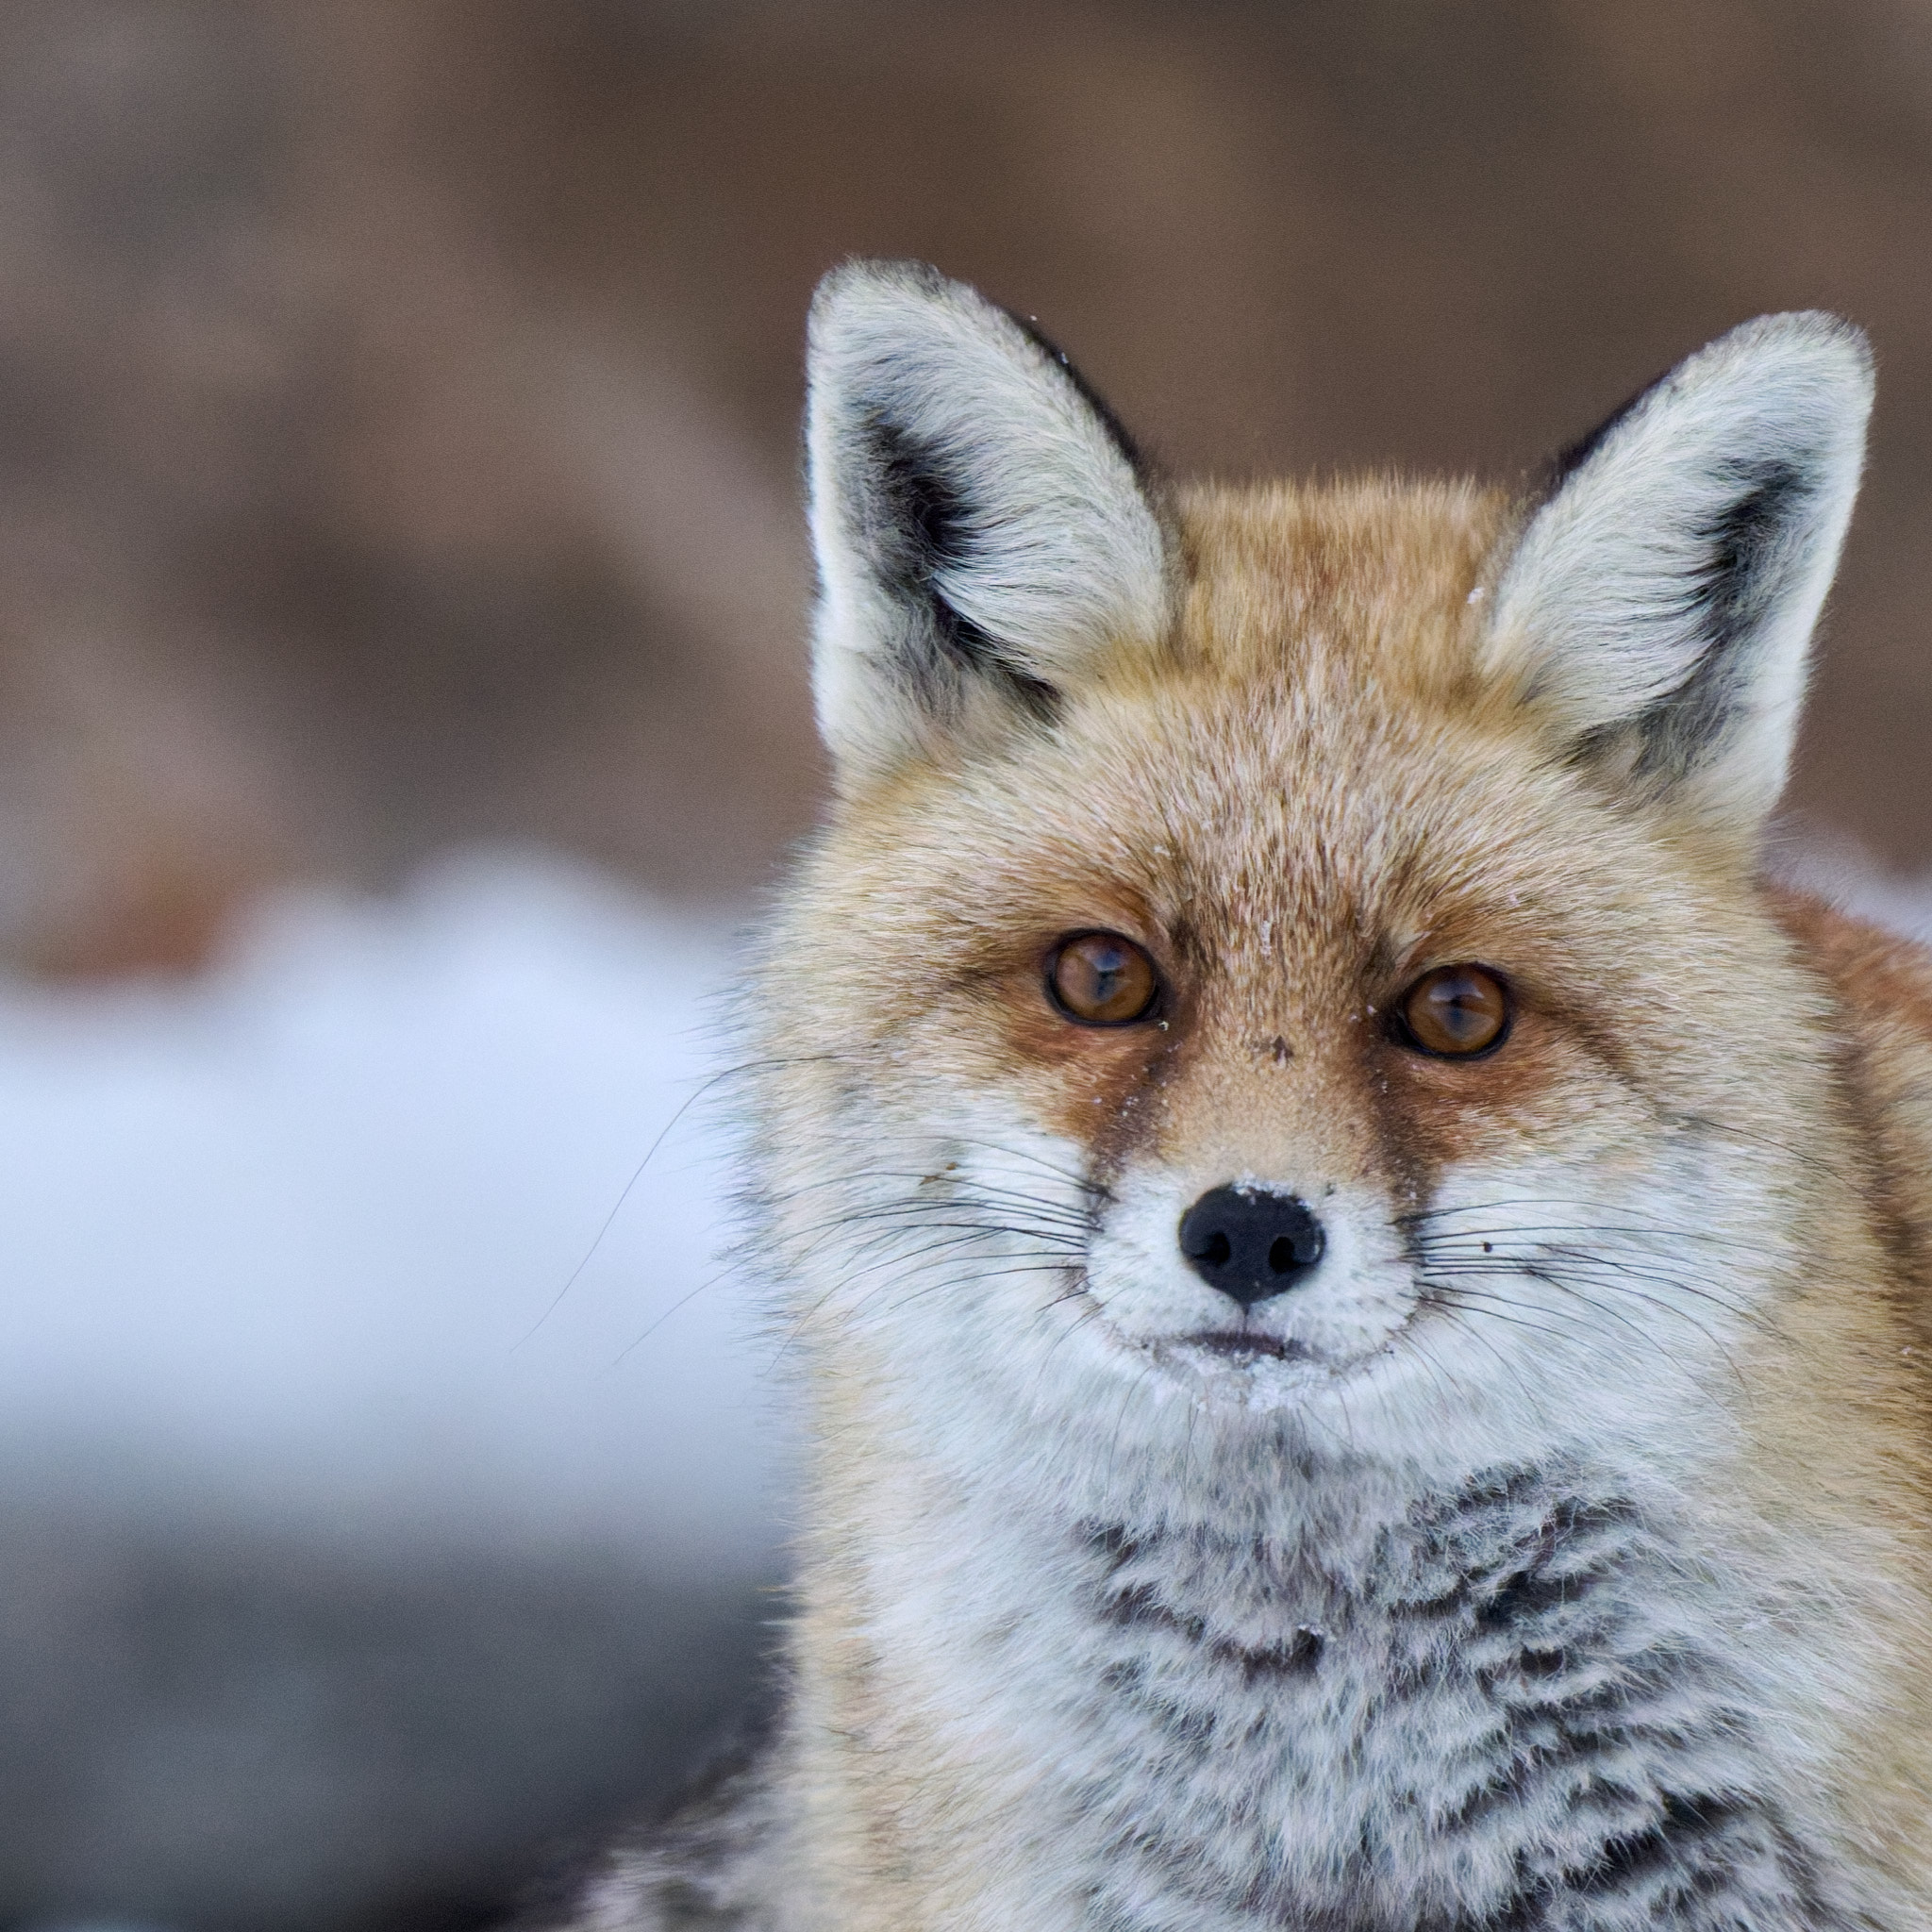
I think that PureRAW 4 did a great job here of making the noise reduction look natural, without substantially harming the sharpness of the image up close.
Lastly, here’s a picture where good noise reduction was particularly useful. It was the first lioness with a very young cub that I saw in my life. She emerged from a dense thicket and walked alongside our car. I was so thrilled that I didn’t consider a better composition. I just snapped some shots and watched the marvel of a mother taking care of her baby.

And this a crop showing real pixels after noise reduction (image shown at 100%; click to see full size).
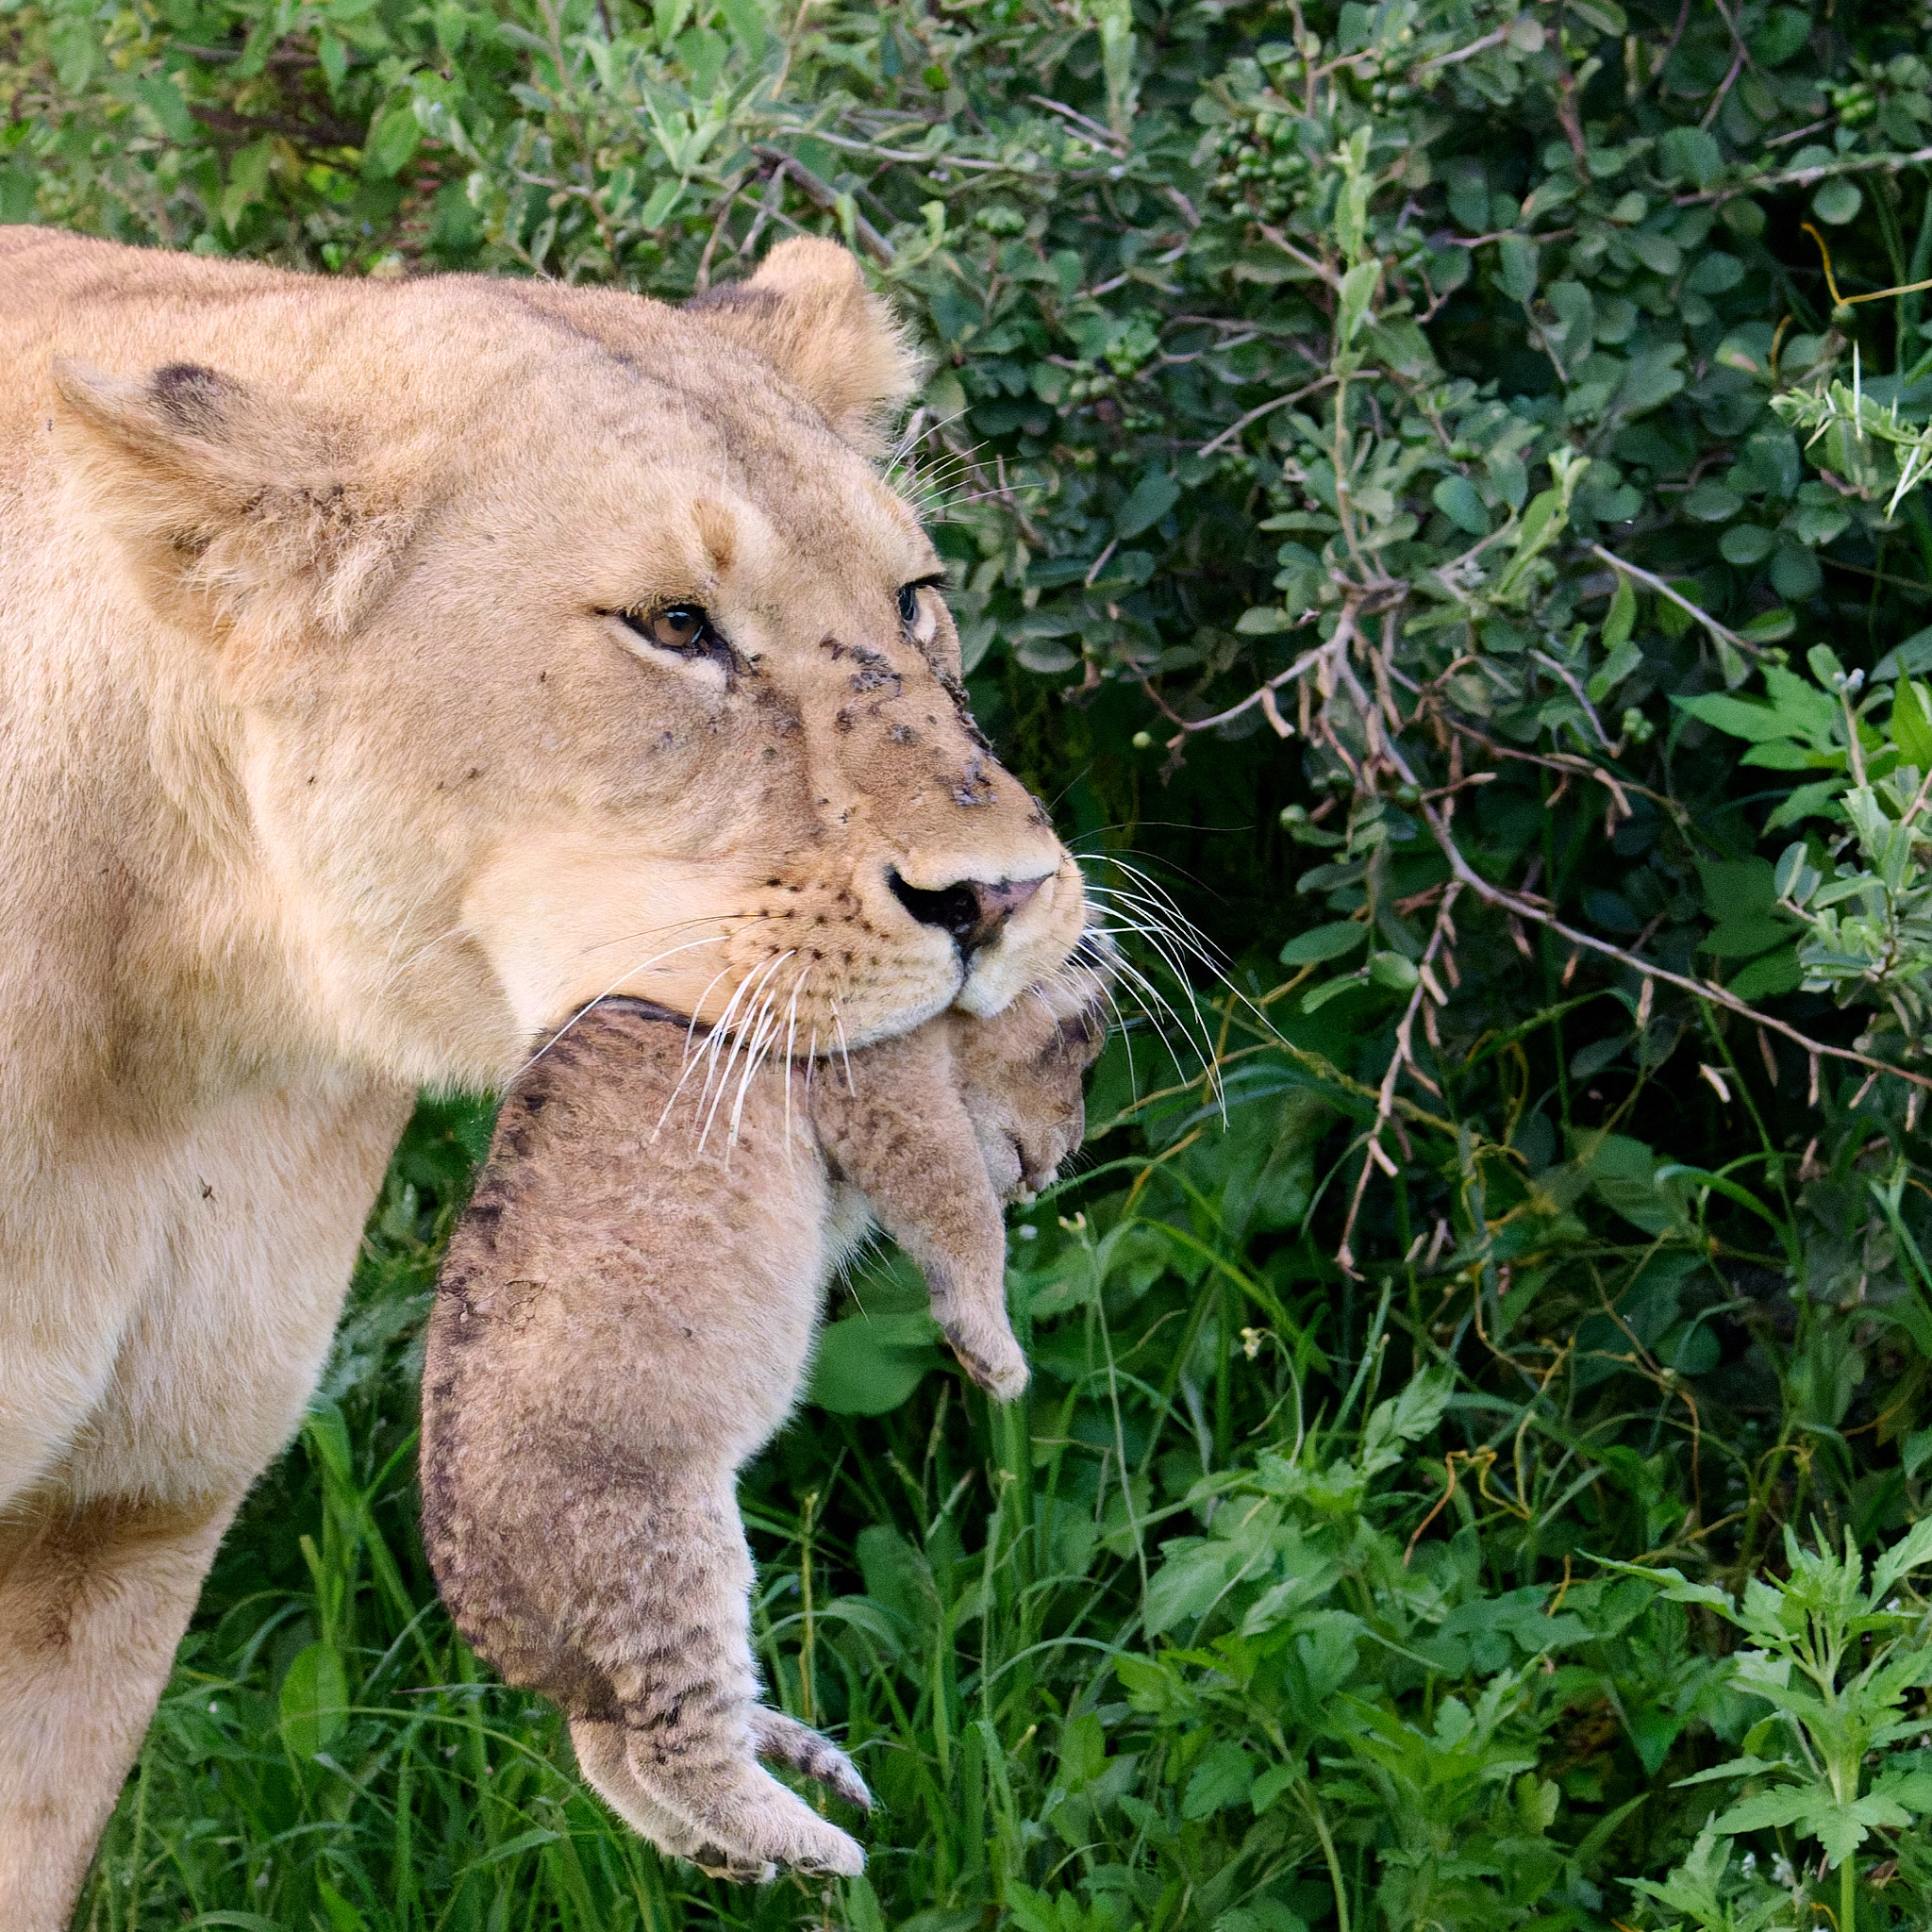
I think it is outstanding! I think that the software did a very good job here of reducing noise despite the busy background. It has also kept a high level of detail on the lioness and her cub.
My advice, either if you are a new user or if you weren’t completely satisfied with the previous versions of DxO software, is to give PureRAW 4 a try with an open mind. It’s easy to do because DxO has a 14-day trial period with fully-functional software, and you don’t need to provide any payment data or credit card information. You can access it here.
Let me clarify that I have no relationship with DxO. I purchased this software for my individual use last March, before I worked for Photography Life. However, Photography Life itself is part of DxO’s affiliate program and can earn a commission if you buy anything through the link above.
I hope you enjoyed this article on using DxO PureRAW 4. If you have any questions or feedback, please feel free to let me know in the comments section below!
You mention a processing time of 18 seconds on a mac studio. Did you change change the default Preferences for DeepPRIME Acceleration to use the GPU instead of the CPU? On my 2020 mbpro quadcore i5 it made a huge difference in processing time. I thought it was strange that Cpu was the default setting.
Cheers, Frank
Thank you for the question, Frank.
On my Mac Studio (the original M1 Max lower configuration) it selected automatically Apple Neural Engine. To answer you properly, I set it “CPU Only” and it took 3′ 35″. During the processing, I checked the system with the monitor and it was using just one core.
I think it is their ARM implementation combined with a huge amount of processing needed to make this magic happen.
I think they are aware of the requirements and implemented a batch mode to avoid the photographer to wait while processing a big number of files.
Thanks for the review Massimo.
Thanks Rogério, glad you liked it.
I find the DXO noise reduction especially usefull for my OM-1 M4/3 camera. It makes the gap between FX and M4/3 really small. I hardly use my Nikon Z fx camera any more and am thinking about selling it, thanks to DXO pure raw.
I believe PureRAW is especially useful for noisier sensors.
In my experience with Nikon Z9 files, it is really helpful at ISO 1600 and above. I think it would be useful for your sensor at least 1 stop earlier, if not more. And some people use it at any ISO because they like the result!
Massimo, what is your workflow for DXO when importing into CP1?
Thank you.
I export DNG from DxO PureRaw 4 and develop it exactly as a raw file except for turning off global sharpening (CaptureOne automatically turns off noise reduction with DNG) because sharpening and denoising are already executed.
Then, I go forward with my usual workflow, which is tuning:
– White balance (often confirming the automatic setting of my camera)
– Exposure
– Highlight and shadow
– Levels (often tuning black, white AND midpoint)
Sometimes I also use a bit of:
– Curves
– Clarity
– Localized adjustments with masks
More often than not they are just a few clicks, I like gently developing my picture.
Good review. I’ve denoised thousands of images with manual denoising (luminosity and drawn masks, drawn mask on eye, other complex masks), and while the results can be very good, masked denoising can’t really do an ideal job on the detailed areas. Masked denoising relies on the fact that noise is harder to see in the detailed areas.
So yes, indeed, there is no way that traditional denoising with masks comes close to the DxO PureRaw 4 algorithm, especially the latest one. That’s especially true if you start cropping a little.
Thanks Jason.
Yes, this is the point. You can do a good job working with masks, but it is harder and less effective than what you get with this new DxO PureRaw 4 and a few clicks.