Drones – often called unmanned aerial vehicles – have become vastly more common over the past few years. In the United States alone, the Federal Aviation Administration (FAA) predicts that more than one million drones will be sold over this holiday season; many more will be sold in other countries across the world. Whether you love or hate the growing prevalence of drones, their popularity has never been greater. In this tutorial, I will share some tips that I have learned over the past few months of using a drone for taking pictures. My focus is on still images, but many of these tips apply to drone video and cinematography as well – particularly for people in the midst of buying their first drone.
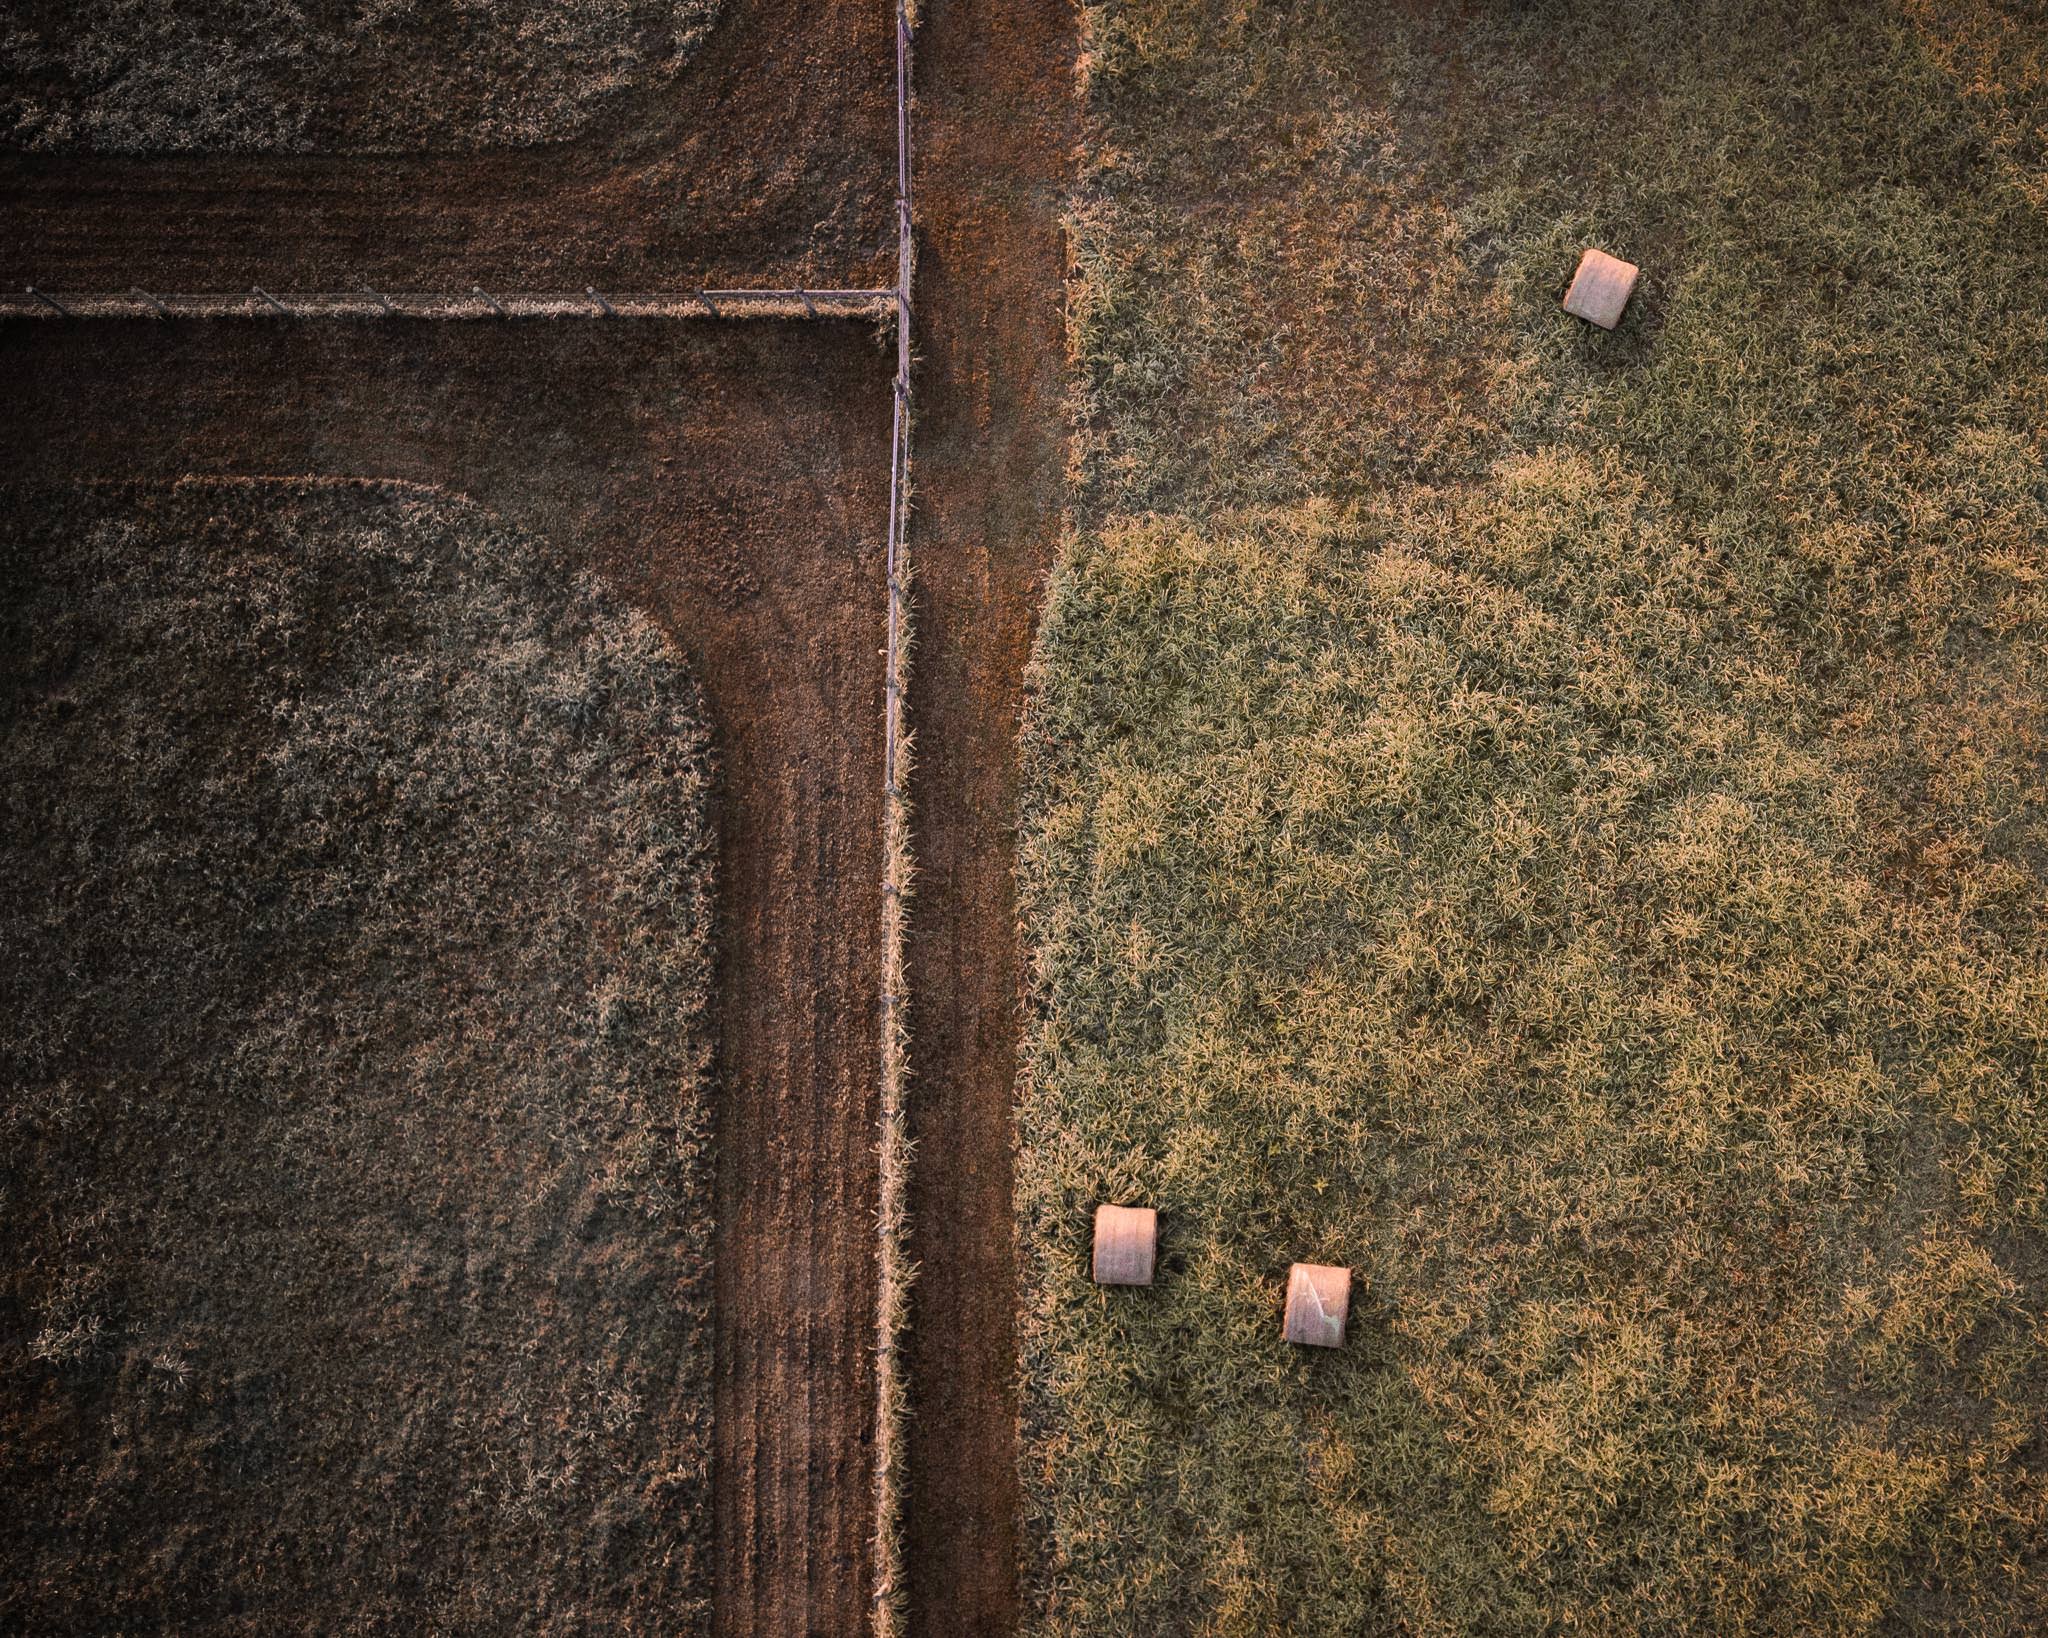
Table of Contents
1) Practice
For a beginner, flying a drone can be difficult. If you add another layer of complexity – taking pictures or filming video footage – it can become unmanageable. The last thing you want to do is crash your drone on its inaugural flight! Before you ever start taking pictures or videos, my first recommendation is to understand how your drone works. If you are still learning about the buttons on your transmitter, it is way too early to start taking pictures.
There is no denying the excitement of taking your first drone photos, but you also have no reason to rush. It took me dozens of flights before I felt comfortable with my drone, knowing exactly how to control it in difficult flying conditions. Even now I am far from an expert pilot, but I have much more confidence that I can handle my drone if anything malfunctions. If I had started taking pictures from day one, I can say confidently that I would have crashed my drone at some point – there is just too much to worry about as a beginner.
It goes without saying that you should be in an empty field for your first flights, too; Murphy’s law hits drone pilots particularly hard. My drone has flipped over in midair, flown out of view, and refused to launch in the first place (not that I blame it). And yet – in part because of luck, and in part because of preparation – it has never crashed or fallen out of the sky. Even if it had, I am careful never to fly my drone over anything valuable, particularly people. If it crashes, I want the worst-case scenario to be a broken drone.
This is especially true on windy days. As frustrating as it is to call off a flight, I can’t imagine sending such an expensive piece of equipment into a heavy breeze. Even on calmer days, my drone has been hit by more than a few gusts of wind. If you don’t spend time practicing how to fly – particularly before you start taking pictures – a windy day could be the end of your fancy drone.
2) The Best Subjects
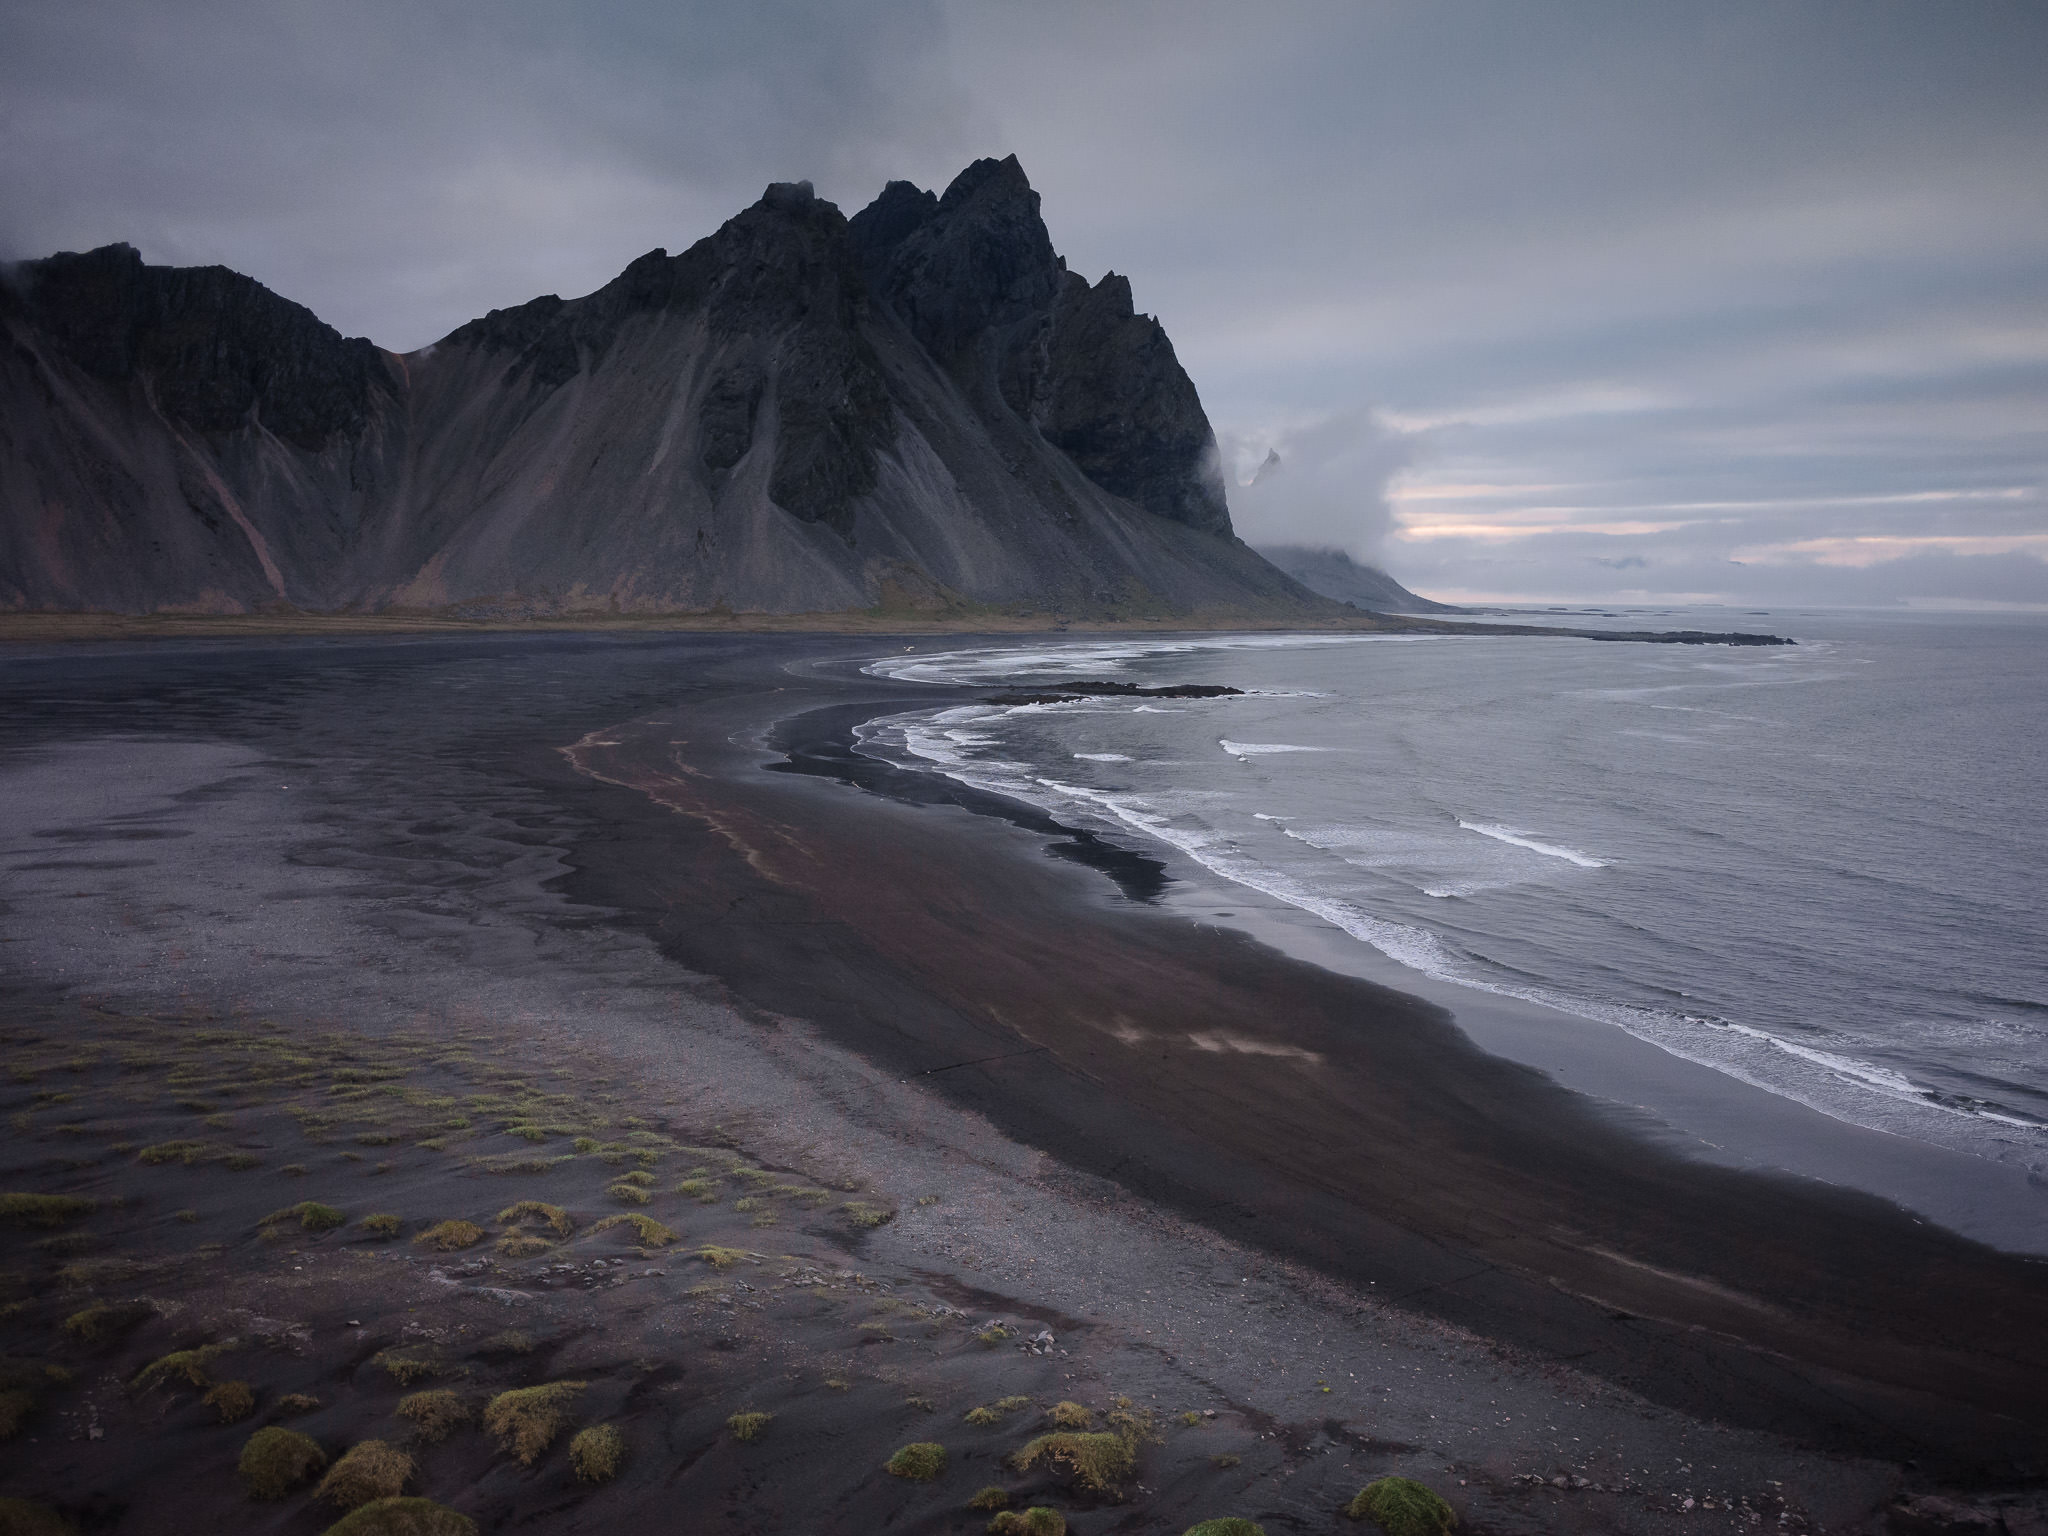
My first goal with a drone, particularly after seeing beautiful aerial videos online, was to take landscape pictures on my trip to Iceland. However, although I didn’t realize it until after the trip, a beautiful landscape does not necessarily translate well to drone photography. (Videography is a different story, as I will explain in a moment.)
Why is this? I’m sure that many factors are at play, but one of the most important may be an image’s uniqueness. Some drone images look like they were taken from ground level, making them seem significantly less interesting. Even if you can tell that an image was taken from a high angle, certain photographs don’t inherently scream “drone.” Take a look at the image below for an example:
This photograph was taken from a drone more than one hundred feet (thirty meters) in the air, and yet it looks like it could be from ground level. Sometimes, this may be your goal; there is nothing inherently wrong with a shot like this. Still, at least for me, I like my drone photos to be obvious – images that couldn’t have been taken from any other perspective.
Videography is slightly different. If you move your drone while filming, it should be pretty clear that you are capturing video from an unusual angle. Before traveling to Iceland, I saw a few videos that people had taken from a drone; needless to say, most of my photos didn’t have the same awe power.
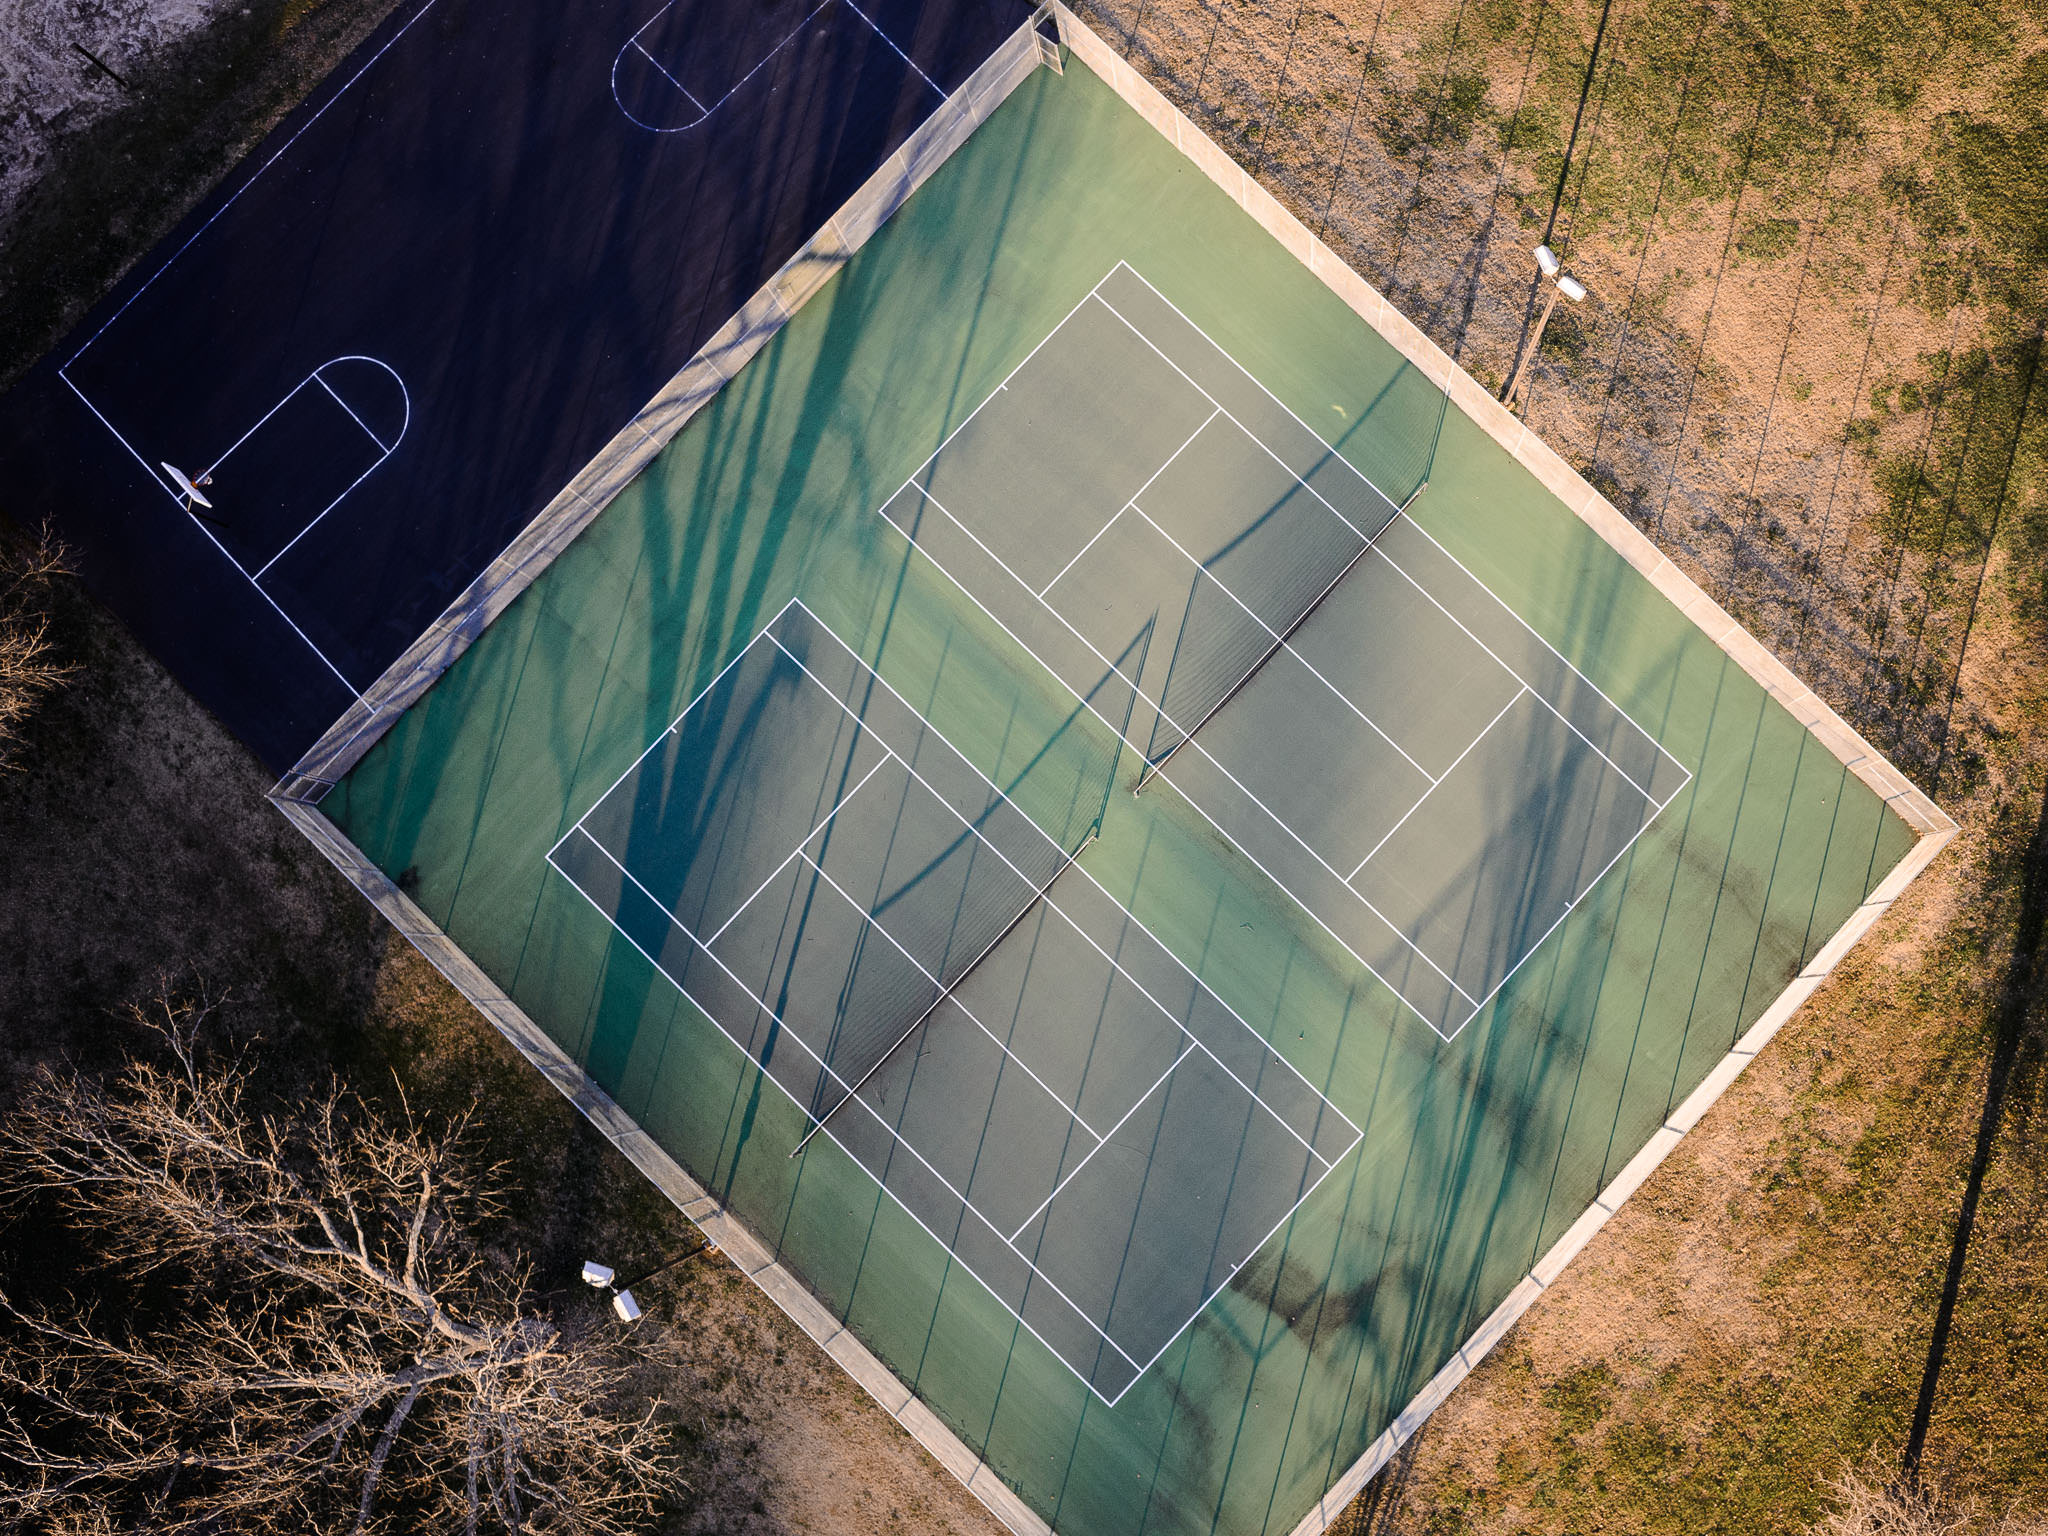
This doesn’t mean that drone photography is inherently bad, but it does mean that you need to be creative with your subjects. Sometimes, I point my camera directly at the ground for an interesting perspective; this works well for landscape photography. I also think that man-made objects look particularly cool from the skies, both for stills and video. Even landscapes with a human element (a road, fence, bridge, etc.) can be unexpectedly beautiful from a drone. Since realizing this, I have focused most of my efforts on taking pictures of less “natural” scenes, and I have been much happier with my images.
3) Necessary Equipment
If you plan to take pictures or videos from your drone, your equipment is likely to be somewhat expensive. Many drones have a built-in camera – one of the most popular is the DJI Phantom 3 Professional – but this is not enough for some photographers and videographers. The camera built into this drone, for example, has a smartphone-sized sensor; this works for some photographers, but it certainly isn’t ideal. This is why I use the Nikon Coolpix A rather than a built-in camera or a GoPro – the Coolpix has a much larger sensor, producing significantly better images.
One of the standard products included with a consumer drone is a transmitter, essentially the control system for your drone. My transmitter has two joysticks; one controls the altitude and rotation of the drone, while the other moves it horizontally. Some of these transmitters have built-in video monitors (or attachments for a smartphone), allowing you to see the live video from the drone’s camera as you fly. Unfortunately, this only works well if your drone has a built-in camera; with an external camera (like my Coolpix), you need more equipment to view your camera’s live feed.
I personally use the TX-5D for this purpose, which works quite well. It isn’t the sturdiest product in the world, but I haven’t found anything similar. The TX-5D sends a live feed to my monitor, the Elvid Skyvision. There are several such monitors to be found, including many that are less expensive, but I have been happy with the Elvid Skyvision. (I tried a cheaper monitor at first, but it didn’t have a good range.) These two products let me see exactly what my camera sees, allowing me to compose my images with much more precision.
Another accessory for your drone is a gimbal. Gimbals are essentially a camera stabilization mechanism that attaches to the bottom of your drone, holding your camera steady as the drone accelerates. This is particularly important for smooth video footage; otherwise, your shots could be jerky and chaotic. Luckily, most drones (even inexpensive options) have a built-in gimbal for their onboard camera, which improves the video quality significantly. Gimbals also let you move your camera while it is on the drone, giving you much more flexibility with your composition. If you want to tilt your camera towards the ground while in midair, a gimbal is your best bet. Some transmitters even include a dial that lets you adjust the position of your gimbal; this particular feature depends upon the drone that you use.
Unfortunately, with an external camera like mine, gimbals aren’t built into the drone. In fact, a gimbal for an external camera is likely to be heavy and expensive; good ones can cost as much as the drone itself. I actually tried to use a cheap gimbal when I first got my drone, but it was far too difficult to use. I ultimately decided that a gimbal was more trouble than it was worth, particularly since I don’t shoot video. In its place, I have a small ballhead on my drone – my camera attaches to the ballhead, which I position before every flight. This setup isn’t as flexible, but it has saved me a lot of money and weight.
4) Image Quality
Unless you spend tens of thousands of dollars, your photographs and videos from a drone won’t compare to those taken from a sturdy tripod. At the same time, the unique angles afforded by a drone make up for the quality, which may not be a huge concern for you in the first place (particularly for video, which doesn’t demand the same sharpness as a high-resolution photograph).
If you are taking still images, you have to fly your drone more slowly. The key is that you want your drone to remain motionless; even with a gimbal, your shots will become very blurry as you accelerate. I get the sharpest photos when my drone hovers in midair as I take a picture. I let the drone stay in place for a few shots, just in case any of them have some blur. Using this method, some of my drone photos can be printed a few feet wide without a significant loss in image quality.
At the same time, since you can’t use a sturdy tripod, your photos from a drone will start to suffer in low light. This problem has been particularly prevalent for me at dawn and dusk. To take consistently sharp images (no matter the time of day), I tend to shoot around 1/500 of a second or faster; before sunrise, this means that my ISO will be unreasonably high. I get the best drone photos when there are no clouds in the sky, making for the brightest subjects possible.
If you use an expensive drone with a DSLR or mirrorless camera, your settings may be very different than those for ground-level photography. For one, since you can’t zoom your lens, you need to choose a focal length before your flight. At the same time, your subject will be extremely far away from your lens – even at an aperture of f/2.8 or wider, you entire scene will be in focus. This helps quite a bit in low light! I recommend using an automatic mode, perhaps aperture priority with a maximum shutter speed of 1/500 second, to take your drone photographs. Be careful not to blow out your highlights; I always shoot with -1/3 exposure compensation.
As I discussed earlier, many drones have built-in cameras or options for GoPros. I recommend using the camera in its automatic mode in this case, since your camera should be configured to work well with your drone. Feel free to take manual control if you are a practiced photographer, but this definitely isn’t necessary – you already have so much on your mind while flying a drone, and there is no reason to stress over camera settings.
5) Saving Battery
One thing that struck me, reading the manual for my drone, is that the drone’s default behavior in case of emergency is to return to the spot where it launched. If your drone malfunctions over a body of water, this can be a lifesaver; I have needed to use this feature more than a few times. Unfortunately, there is one case when the drone doesn’t bother to return to its launch position: a dead battery. If your drone runs out of power in midair, it immediately lands – even if it’s flying over water.
The takeaway is that you need to keep a vigilant watch on your battery life. It is easy to get caught up in taking pictures, and you almost need to train yourself to pay attention to how much time you still have in the air. I actually failed to notice a dead battery on one of my first flights, and I wasn’t able to control my drone as it landed. I was in the middle of an empty field, luckily, although the experience was still a harrowing reminder. It is wonderful to take photos from a drone, but that shouldn’t come at the expense of paying attention to your flight.
The best way to avoid running out of battery power, particularly for still photography, is to launch the drone from the exact area that you want to take pictures. By making your flight a quick up-down journey, you don’t have to waste battery flying around in search of the perfect composition. If you do most of your work from the ground, you can make the most of your time in the air.
Beware of heavy cameras, as well. If you use a massive gimbal and a DSLR camera, your drone certainly won’t be able to fly for very long. Even my Coolpix camera drains my drone’s battery noticeably, and it only weighs eleven ounces (300 grams). This is part of why I avoid gimbals! They can be helpful for composition, and they are essential for video, but they can weigh several pounds. If you already have a photo in mind from the ground, a ballhead is just as good – and far lighter.
Lastly, it is worth noting that your battery will drain more quickly depending upon the conditions outside. Batteries die rapidly in the cold, reducing your flight time to a fraction of what you might expect. Similarly, in heavy winds, the drone must work hard to stay in place; its battery drains much more quickly than normal. In ideal conditions, I can fly for about ten minutes before I have to land – in bad conditions, this becomes closer to five (although I rarely fly in the wind). This isn’t much time, but it is more than enough if I plan my shots beforehand. I also carry three batteries whenever I fly my drone, giving me the chance to take whatever photos I have in mind.
6) Legality and Privacy
The legality of drones is somewhat in flux, and I certainly am not an expert. That said, I have some broad advice that should be useful: avoid doing anything stupid. In particular, don’t fly the drone somewhere that can cause damage if it crashes. Beyond that, the laws vary depending upon the country or state that you live.
In the United States, at least, the FAA does have some rules to regulate drone use. You can’t fly over 400 feet in the air, for one, although many drones can’t go this high anyway. You also can’t sell your drone shots for commercial purposes (unless you have authorization from the FAA) or fly within five miles of an airport. There are many more rules, and the best website that I have found is called Know Before You Fly. It focuses primarily on the United States, but it is a good place to start no matter where you live. If you live in Europe, you can find similar information on a website called Heli Guy.
Personally, I also try to avoid taking pictures that could violate someone’s privacy – I definitely don’t fly my drone over anyone’s house or backyard. Doing so does appear to be legal (although it is hotly contested), but I definitely don’t recommend trying it; there is no reason to anger your neighbors, and a typical backyard photograph probably would not be worth the effort. At the same time, with the fast-growing popularity of drones, there may not be a way to avoid such a future. We all got over our Google Maps concerns, right?
It is worth noting that, if you are in the US, you are required to register your drone with the FAA. This includes a $5 fine, although the fee is refunded if you register before January 20th of 2016. Here is the link to register your drone.
Beware that the information you provide on this site becomes public, at least under the current structure (see this article, with my apologies for the advertisements). As a drone owner, your privacy may be at risk – I find this a bit ironic! At the same time, it is probably worth complying if you have a drone; you don’t want to be caught without a registration code, particularly if your drone crashes somewhere out of reach.

Drones certainly aren’t for everyone, and their growing presence has me just as cautious as anyone else. I know that the vast majority of drone owners operate safely – frankly, the vast majority of drone owners probably only fly a few times each year – but drones are becoming so widespread that a major accident is almost inevitable. If you are careful and respectful, though, I see no reason that drones are inherently evil.
A drone can be a powerful tool for your photography or videography, letting you reach angles that would otherwise be impossible. I am excited to be part of this budding movement, and I keep finding new subjects to photograph from the skies. At the same time, a drone isn’t a magical way to improve your shots. As always, the key to making high-quality content is to find interesting subjects and stories – in this case, ones which will be particularly compelling from above.
I hope this article helps! If you have any questions or comments about drone photography, please let me know in the comments section.
Thank you for your tutorial, as new drone user it has enlightened me of my approach for a future business.
Thank you.
Nice this article taught me a lot.
Great Information it did help me a lot thanks a lot man!!!
Keep it up!
Envy does who live in the big countries which with so much to offer in nature.
Great article Spencer.
I myself have just begun flying and this article has already given me quite a few things to keep in mind.
Cheers!
Thank you, glad you found it useful!
Very nice article. I never fly further than 150 meters away from me, nor higher than 120 meter. Regulations in Holland state that you are not allowed to loose eye sight of your drone. Flying higher than 120 meters is prohibited. Even with these restrictions I can make magnificent photo’s.
In wintertime I put the batteries of my DJI Phantom 3 in the pockets of my trousers, where I can keep them warm. It helps to maintain the capacity of the batteries in cold conditions. Once you are in the air, the batteries remain reasonably warm because of the taking out of power by the drone. Don’t fly with cold batteries. Your drone might not even want tot start. Mine refused to fly in frosty conditions. I keep the batteries warm now, with good results. I think there even batterie warmers for sale. Nevertheless the capacity of batteries will be lower in wintyer time, even when ‘warmed up’. As far as my Phantom concerns it makes a difference of about 5 or 6 minutes (25 minutes max in normal conditions).
please is any way one can get trained on how to use fly drones since there not much people using drones in nigeria
here in Nigeria we dont yet have so many people using drones , which other way can one be trained to use one.
Hi Spencer,
fabulous idea with the Coolpix on this drone, glad to hear it worked out well for you, and your resulting images really shine.
I’ve had the idea for a while now, similar to what you outlined, to hard mount a lightweight camera to the drone for stills, and bypass the gimbal’s weight.
I don’t have a drone yet, still not sure what to get, so I don’t have any hands-on ideas about how to attach a camera to any particular drone. But I’m curious how you actually accomplished it on the 3dr X8. You mentioned in the above comments that you attached the camera to a small ballhead then to a piece of aluminium, then onto the drone.
If you’ve got the time, I’d really appreciate if you fleshed out the camera attachment to the drone a bit more. Were there screw holes on the rig you could place the aluminium to?
3dr have discontinued the X8 it now seems. Their main drone, the Solo, is focusing on dedicated go-pro systems like the DJI Phantoms. Do you think your aluminium method would work on drones like these which have been designed to have a lot of smooth surfaces and a gimbal mount for a gopro?
Hi James, thanks for the kind words! I don’t think that it is possible to use a gimbal with the aluminum mount method, although I could be wrong. Those drones are weighted for GoPros, and I would be surprised if the gimbal worked smoothly with a different camera.
All I did to attach the ballhead to the aluminum plate was to drill a hole in the aluminum, then attach a bolt that fit the ballhead. I then drilled two more holes on the aluminum plate and attached them to two screws on the body of the X8+. I don’t have the drone with me at the moment or I would attach photos. However, all of this is pretty easy to do in practice.
That said, this may not be the best possible route. It was clumsy and more expensive than I had expected; in hindsight, a DJI Pantom 3 or Phantom 4 would have done the job almost as well, and with a lot less stress. It doesn’t have the same sensor size as the Coolpix, but you’d be surprised by the image quality. If you need something more, the Inspire 1 X5 costs a lot more but has a m43 sensor. You may be able to find a used Inspire for a decent price — probably less than it would cost to recreate my drone.
Thanks for that, it’s always good to hear how others go about solving problems that one has coincidentally also been ruminating upon.
Yeah I can understand what you mean about the stress involved in building your rig, it’s been a tad somewhat harrowing just trying to hone down specs versus design versus budget to try to make some kind of decision.
I actually hadn’t considered fully the Inspire, I hadn’t looked properly at the X5 specs, so yep, wow it has 16MP with a gimbal and weighs 3.4kg total in the air. Pretty nice. Thanks for the comradely wisdom,
I may indeed travel that road.
I’ll drop you a line back here in the future and show how my project shapes up, hoping to capture the ancient Australian forests from different perspectives.
Cheers
Thanks for writing! I’m very curious about your setup. I own a Phantom 3 and use it exclusively for stills, and I’m already looking at other options. The image quality just isn’t sufficient for my commercial work, so I need an alternative that can provide a clean, sharp image at as high as ISO 400.
With your setup, the 3DR X8+, how much do you think you have invested to be able to fly the Coolpix A? Was it a challenge to build yourself, or was it pretty sufficient out-of-the-box?
At it’s most basic, I only bought the X8+, the Coolpix A, two extra batteries (and conversions at a local shop so that they fit my drone), a better charger, and the two items I mentioned in the article (the live view transmitter and monitor). In total, this was in the $2500 range. Unfortunately, my attempts to buy a gimbal ended up costing me more. I also bought additional transmission equipment that I never used, since the setup in the article was significantly better.
All of this equipment is very easy to assemble, with the one difficulty being the attachment of the camera to the drone. I used a small and cheap ballhead, then bought some pieces of aluminum at Lowes. I attached the ballhead to the aluminum, then the aluminum to the drone. You have some flexibility with your attachment decisions, so you don’t necessarily need to follow this exact setup.
Great article thank you. I’m considering aerial video as a business so some useful insights and viewpoints for me to digest.
Thank you, Richard! I’m glad you found the article helpful.