Drone photography can be a fantastic way to expand your photographic horizons. However, it can be tricky to equip your drone with the proper accessories for a photoshoot. There are simply so many accessories available for drone photography that it can be difficult to sort through the noise. In this article, I’ll try to simplify the process by explaining the core set of gear I bring with me for every flight.
For this guide, I’ll be following our existing ranking system for accessories, as detailed in our previous pieces on astrophotography and landscape gear. As a refresher, the scores go:
- 1/4: Rarely worth getting
- 2/4: Can be useful
- 3/4: Very useful
- 4/4: Must buy!
With those scores in mind, let’s take a look at the essential gear for drone photography!
Table of Contents
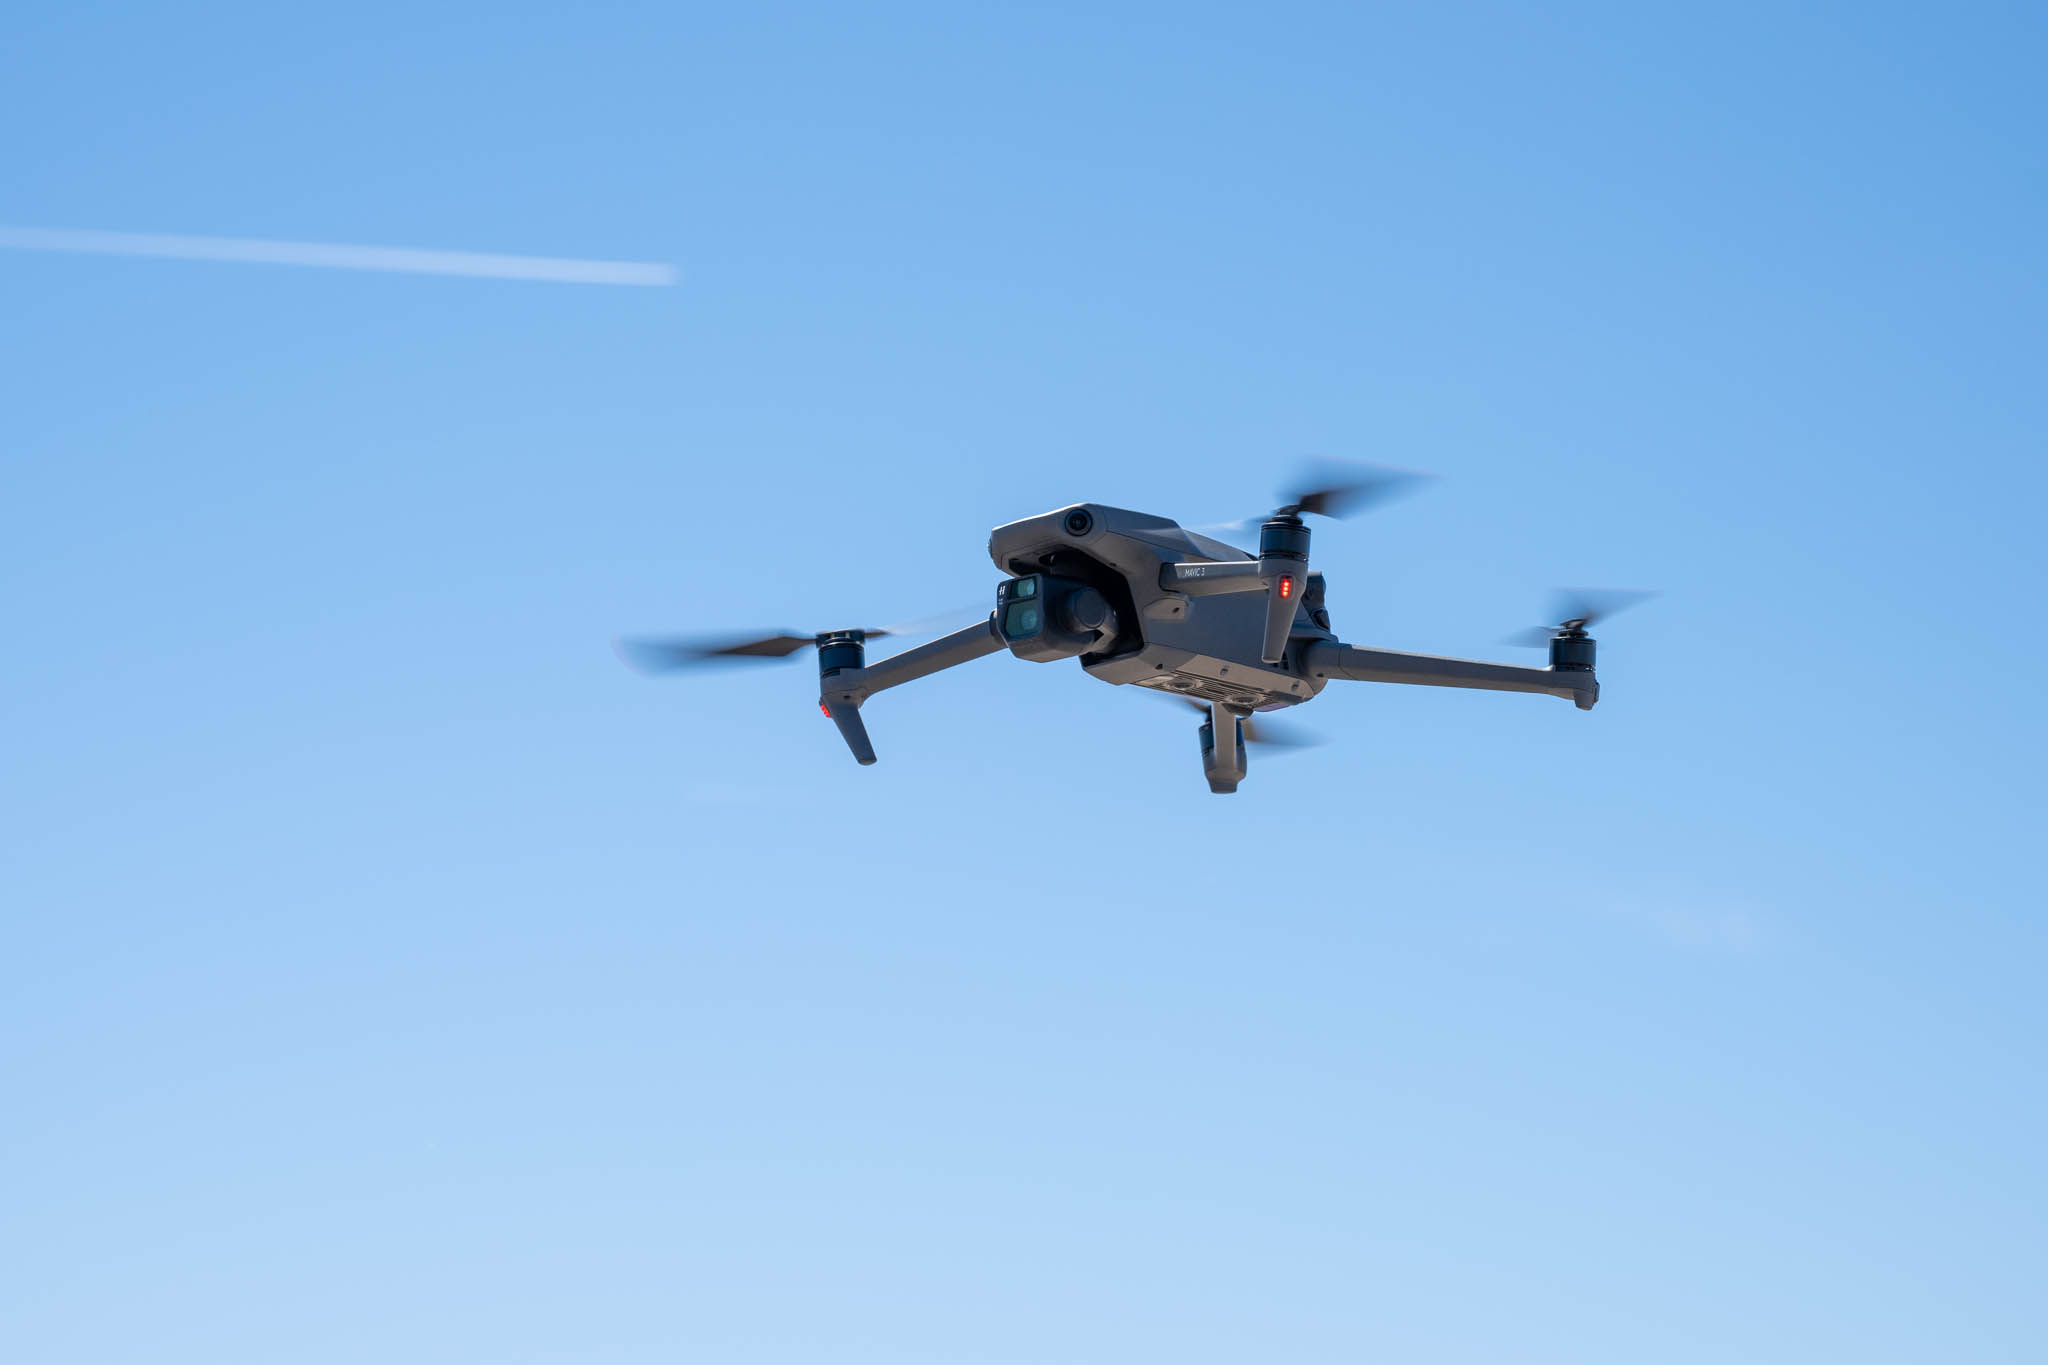
Drone (4/4)
While this one is self explanatory, I thought it was a great opportunity to link back to our guide to the best drones available. If you’re looking for an upgrade or alternate option to your existing drone, check out our roundup there of the best drones for photography.
As a recap, my two favorite drones are currently the Mini 3 Pro and Mavic 3. For those just getting into drones, the Mini 3 Pro offers surprisingly good image quality and features, while weighing under 250g with a specific battery. (As a reminder, 250g is the weight level where a number of regulations change, making this drone very easy to fly.)
The Mavic 3, on the other hand, is significantly larger, but also offers the best image and video quality available in a consumer/prosumer drone today. It’s capable of flying for 40+ minutes on a single battery and can intelligently avoid obstacles with ease. All this comes at a significant financial and size penalty over the Mini 3 Pro, however, so carefully consider if the extra image quality is worth it for your use cases.
Extra Batteries (3/4)
While some drones can have surprisingly good endurance figures, including the Mavic 3 and Mini 3 Pro at over 40 minutes, more time is always better. With drones, don’t forget that you don’t want to run the battery pack to 0, as this both degrades the battery, and leaves you in a potentially dangerous forced-landing situations.
As a result, if you leave 20% margin in the batteries, the official flight times start to look pretty optimistic. That’s even more true if you fly at high speeds or fly on a windy day, where the drone will need to work harder and drain its battery quickly. In the end, even with a state-of-the-art drone, you may only get about 20 minutes of flight time per battery.
That’s why I recommend bringing at least one extra battery, and ideally more than one. With multiple packs, you have time to scout compositions, wait for the light, shoot panoramas or hyperlapses, and still have a margin of safety.
Some drones come in kits with multiple batteries at the time of purchase, but the batteries are also available by themselves. If you are buying standalone batteries, make sure you’re buying from a reputable vendor like B&H or the drone manufacturers themselves. Avoiding counterfeit or poor quality batteries is a huge consideration with drones, as a voltage drop or fire could have disastrous results.
While extra batteries can be one of the most expensive accessories, they’re well worth it.
Charger (4/4)
Even with some extra batteries, you need a way to charge them, ideally on the go. Fortunately, there are plenty of great options for charging drone batteries in the field. Some drones can recharge via USB-C, while there are also power packs that supply AC and 12V adapters available.
Whatever your choice, remember that batteries should have time to cool between use and recharging. That’s particularly notable in my area, where a summer flight can leave batteries quite toasty.

TRUST License (4/4)
In the United States, the FAA now requires passing The Recreational UAS Safety Test (TRUST) before flying, even if you plan on just flying under the exception for recreational flyers.
Fortunately, the test is both quite easy and short, as well as being no-fail. The test presents some slides of drone safety basics, then quizzes you on them afterwards. Answer correctly and you receive the completion certificate, which doesn’t expire.
While a number of organizations are approved to offer the test, I found the Academy of Model Aeronautics version to be clear, concise, and easy. It didn’t require a login and worked well.
107 License or local equivalent (3/4)
In the United States, the Part 107 license opens up some really significant opportunities as a drone pilot. Flying for commercial purposes (which, don’t forget, has a very expansive definition) is only allowed under these terms. Meanwhile, you can fly in a greater variety of conditions, like at night, which allows for many more photo opportunities.
As always, it’s worth mentioning these regulations are based on location and subject to change. So, take some to understand your local authority’s regulations and make sure to comply with them. Similar licenses exist for other airspace authorities, so the broad category of “commercial license” is highly recommended.
If you’re in the US, studying for the Part 107 can be tricky. You’ll probably want to go with a test prep school in order to pass your Part 107 exam with the FAA, as I explained in this article. The FAA charges $175 to take the test, and due to the test’s difficulty, you may also want to budget for a test prep company (anywhere from about $100-250 extra). Here’s one such prep company that I recommend, but it’s not the only one, so do your research beforehand.
In total, that’s not a small investment, but I consider it very useful for drone photographers and videographers who want to do more than just the bare minimum with their drone.
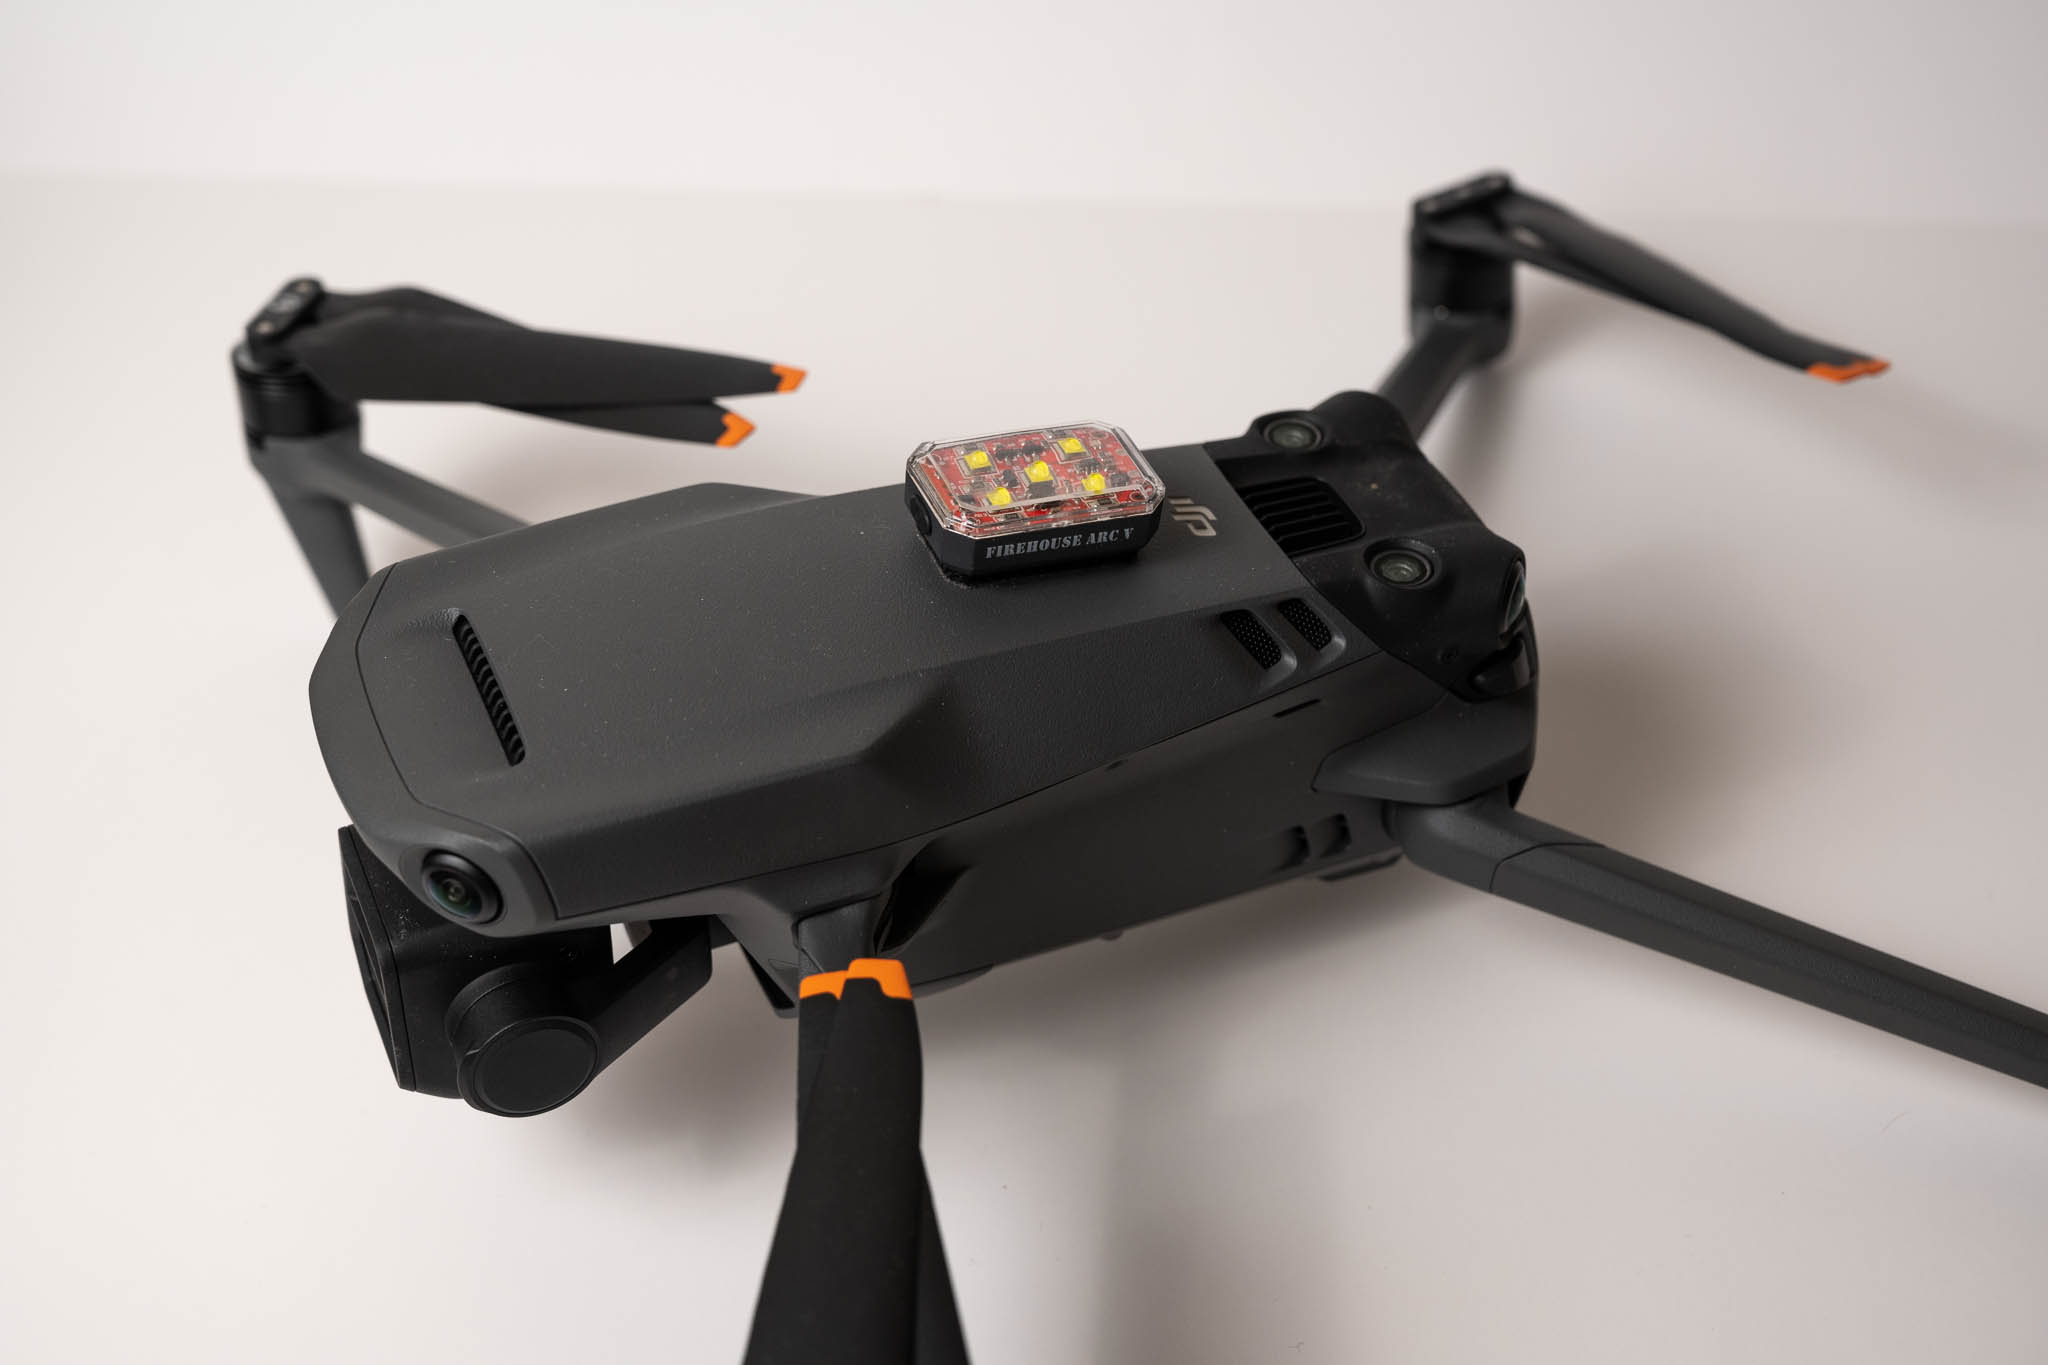
Light (2/4)
If your local authority allows flights at night, having a light is essential. These add-on lights attach to your drone with industrial Velcro, and are visible for miles. For Part 107 flights, these lights need to be visible for 3 miles, and the Firehouse Arc V certainly fits the bill.
The best option is to purchase multiple lights, including white and red/green navigational lights. Together, these can help you orient your drone and maintain visibility in a wide range of conditions. As these are important, safety-critical pieces of gear, don’t try to cheap out on these. Battery life, weather resistance, brightness, and a secure mounting mechanism are all critical to these lights being able to perform their function.
I’ve been using Firehouse Technology’s ARC V lights on my Mavic 3, and have found them to perform very well. There are also smaller alternatives for more compact drones, and plenty of mounting mechanisms depending on your drone model.
I ranked this as “worth considering” instead of “recommended” because not all drone photographers need or want to shoot at night. But if you do, it’s pretty essential.
Smartphone (4/4)
A phone not only serves as the control screen for most drones, but it’s critical for a number of other flight-related functions. As a result, even if you’re using a separate controller, like DJI’s remotes with integrated screens, you’ll still want to have a smartphone with you.
The number one use is to request airspace clearance. The FAA’s existing system, called LAANC, works surprisingly well. You can get clearance to fly near airports with ease, while still remaining safe. I also have found a number of other apps to be very useful when planning flights, and I’ll explain them individually in the following section.
Apps
DJI Fly or Equivalent (4/4)
Having the manufacturer’s control app is, of course, essential. For DJI, their app allows you to calibrate the gimbal, compass, update firmware, and perform other crucial functions that I wouldn’t trust to a third-party control app. Even if you intend to fly with an alternate control app, keeping the manufacturer’s version installed is a necessary part of owning a drone.
Litchi or alternate control app (2/4)
Some drones support API access for alternate control apps. Apps like Litchi can therefore offer a different way to fly your drone. This typically involves support for additional autonomous flight modes. To pilots who are flying mapping missions, this functionality is critical, as it lets them fly predetermined paths methodically and easily. However, these apps can also offer more control over things like camera movements, VR support, and other useful features for photo/video needs.
That said, not all drones are supported by these apps. Typically, newer and higher-end drones are slower to support these alternate apps, reducing their usefulness. Plus, as DJI’s app has grown (including support for things like flying waypoints and hyperlapses), it’s usually easier to just stick with the native app.
Aloft (3/4)
Aloft, formerly Kittyhawk, is my favorite app for requesting airspace clearance via LAANC. The same company was also tapped by the FAA to create the official B4UFLY app, and I’ve found their dataset to be well-maintained.
Aloft’s mechanism for actually designating airspace is good, but not perfect. The app requires you to drag a small box around the area you intend to fly, but the touch targets are a bit glitchy. Improving the area designation process is a small thing that would take this app from great to perfect.
Unless you’re flying in the middle of nowhere, being able to request LAANC permissions is extremely important. As an alternate option, some other apps are also available like Airmap and Open Sky, but I’ve not found them to offer a compelling reason to switch.
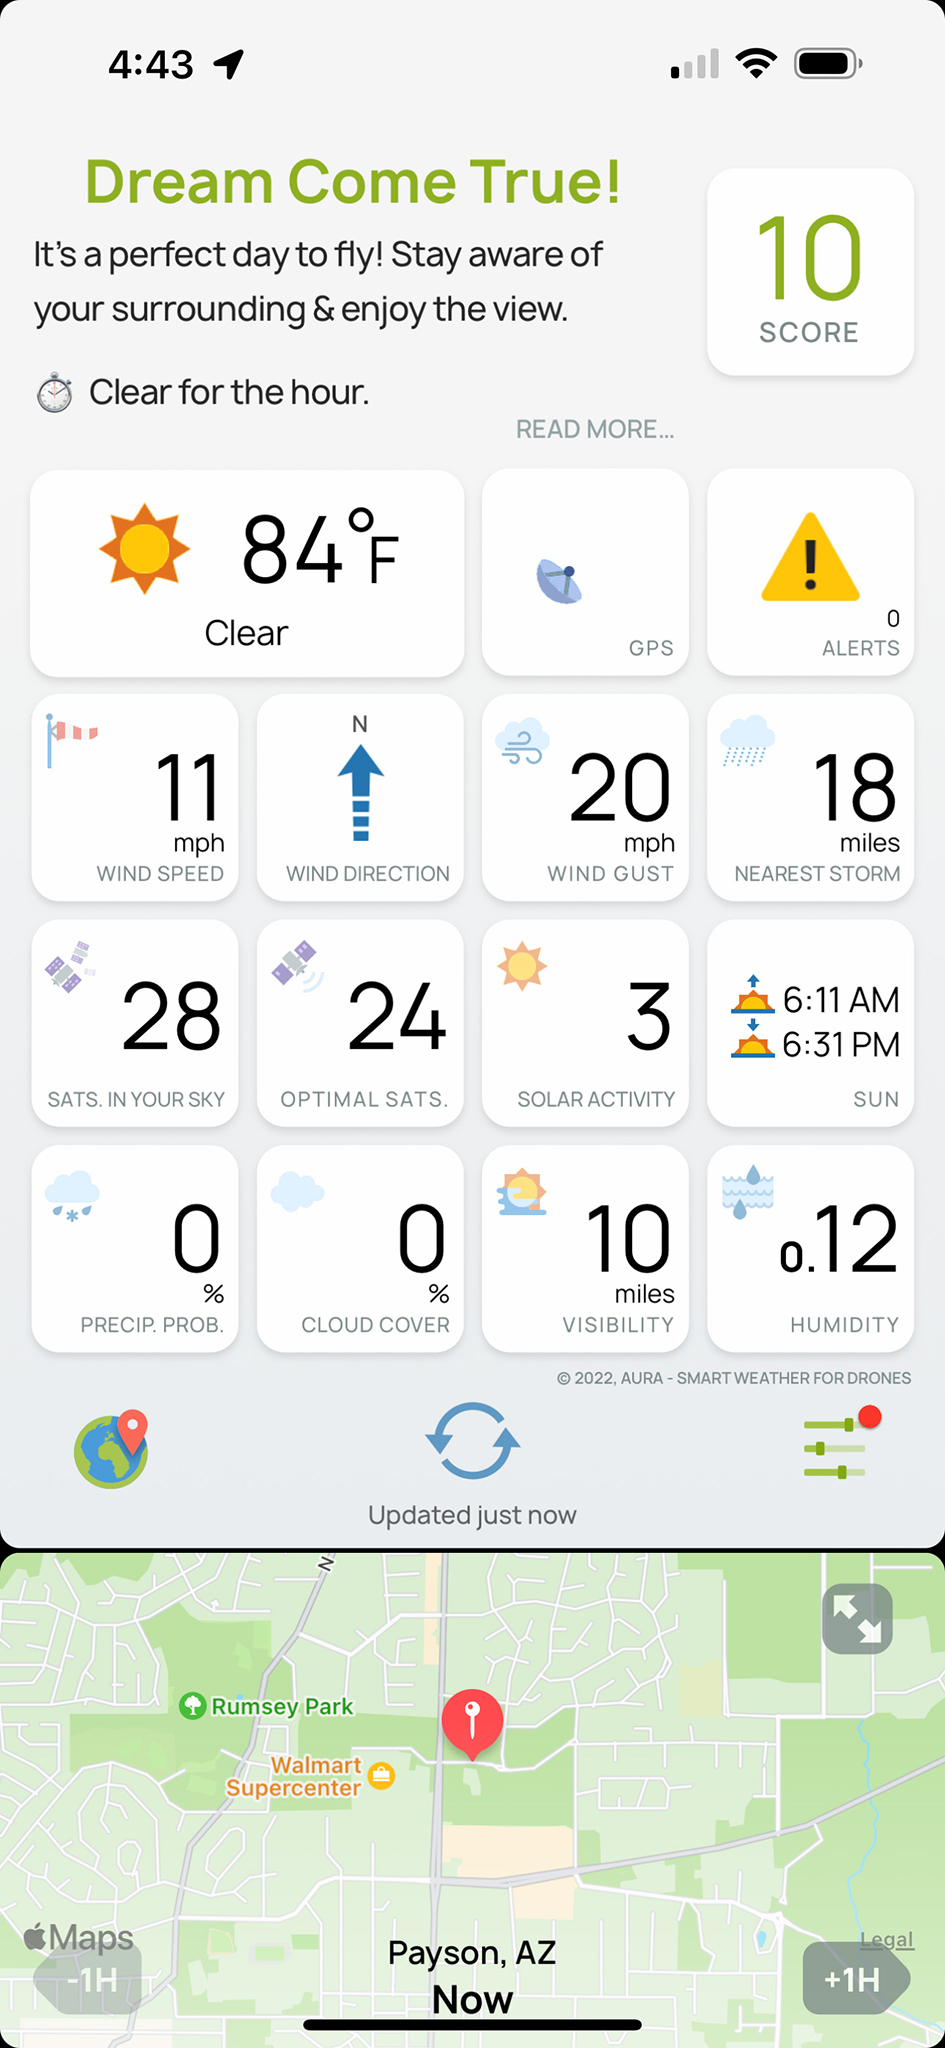
Aura (2/4)
Aura is essentially a weather app on steroids, tailored for drone use. Rather than just showing weather conditions, Aura also shows forecasts for other factors that can affect your flight, like the visible GNSS constellations, solar activity, and more.
The design of Aura puts it ahead of other drone weather apps, with the interface being very clear and easy to understand. It can flag metrics that are of concern, making it easy to quickly read.
While no app is a substitute for exercising good judgment in evaluating conditions for flying, Aura does a great job of helping you understand the factors that may be less visible. I don’t always feel the need to check it before I take off, but I’m glad to have it when needed.
OnX Hunt (2/4)
While an app like Aloft does a great job of showing you what the airspace looks like, it can be equally important to understand the ground you’re launching from. A surprising amount of regulation, typically local and state, affects where you can launch, land, and operate from. This makes understanding just what ground you’re standing on very important.
One of the best ways to identify the ground ownership situation is actually an app that has nothing to do with drones: OnX Hunt. This app has highly detailed satellite maps, as well as a crucial overlay showing park, parcel, and lot boundaries. With that info, it’s a lot easier to plan a flight that launches from cleared ground. I’m a big fan of the highly detailed maps, customizable interface, and rich feature set. If you’re looking for info on a map, this is one of the best ways to get it.
While the app’s subscription for these additional features is a bit expensive, I think it’s worth the cost for drone pilots and landscape photographers who are looking for the most accurate information.

Tablet (2/4)
While some pilots prefer a far larger screen for flying, I’m not one of them. To me, the largest phones, like the iPhone “Max” series, are plenty large, and come with their own benefits (like being a single-device solution that is also internet connected, allowing you to get updates and LAANC clearance).
However, if you are in need of a larger screen, a tablet is one of the only ways to get that bigger view on most consumer drones. While some higher-end drones have controllers that support HDMI out to alternate screens, most consumer products are limited to the phone or tablet you have hooked up to the controller. As a result, getting a big tablet enables more precise compositions.
I don’t find these combos particularly usable, as the controllers really weren’t built with supporting a big screen device in mind, but again, I know this is an important option to many pilots.

Add-on Phone Holder (2/4)
The remote control for most drones already has a built-in phone holder, but it usually isn’t very flexible, and typically only holds your phone at one angle. Although it’s a personal preference that I don’t share, some drone photographers/videographers prefer a separate phone holder instead.
These add-on phone holders still typically attach to the drone’s remote control, but they allow the phone to be tilted at different angles. Unfortunately, none of the products I’ve tried have very good build quality, nor do they pack down very well. I’d love to see a well-made version that’s Magsafe compatible, but unfortunately I’ve been unimpressed with most of the options I’ve tested.
The good news is that they’re pretty cheap, like this one from Amazon, so it’s not much of a commitment.
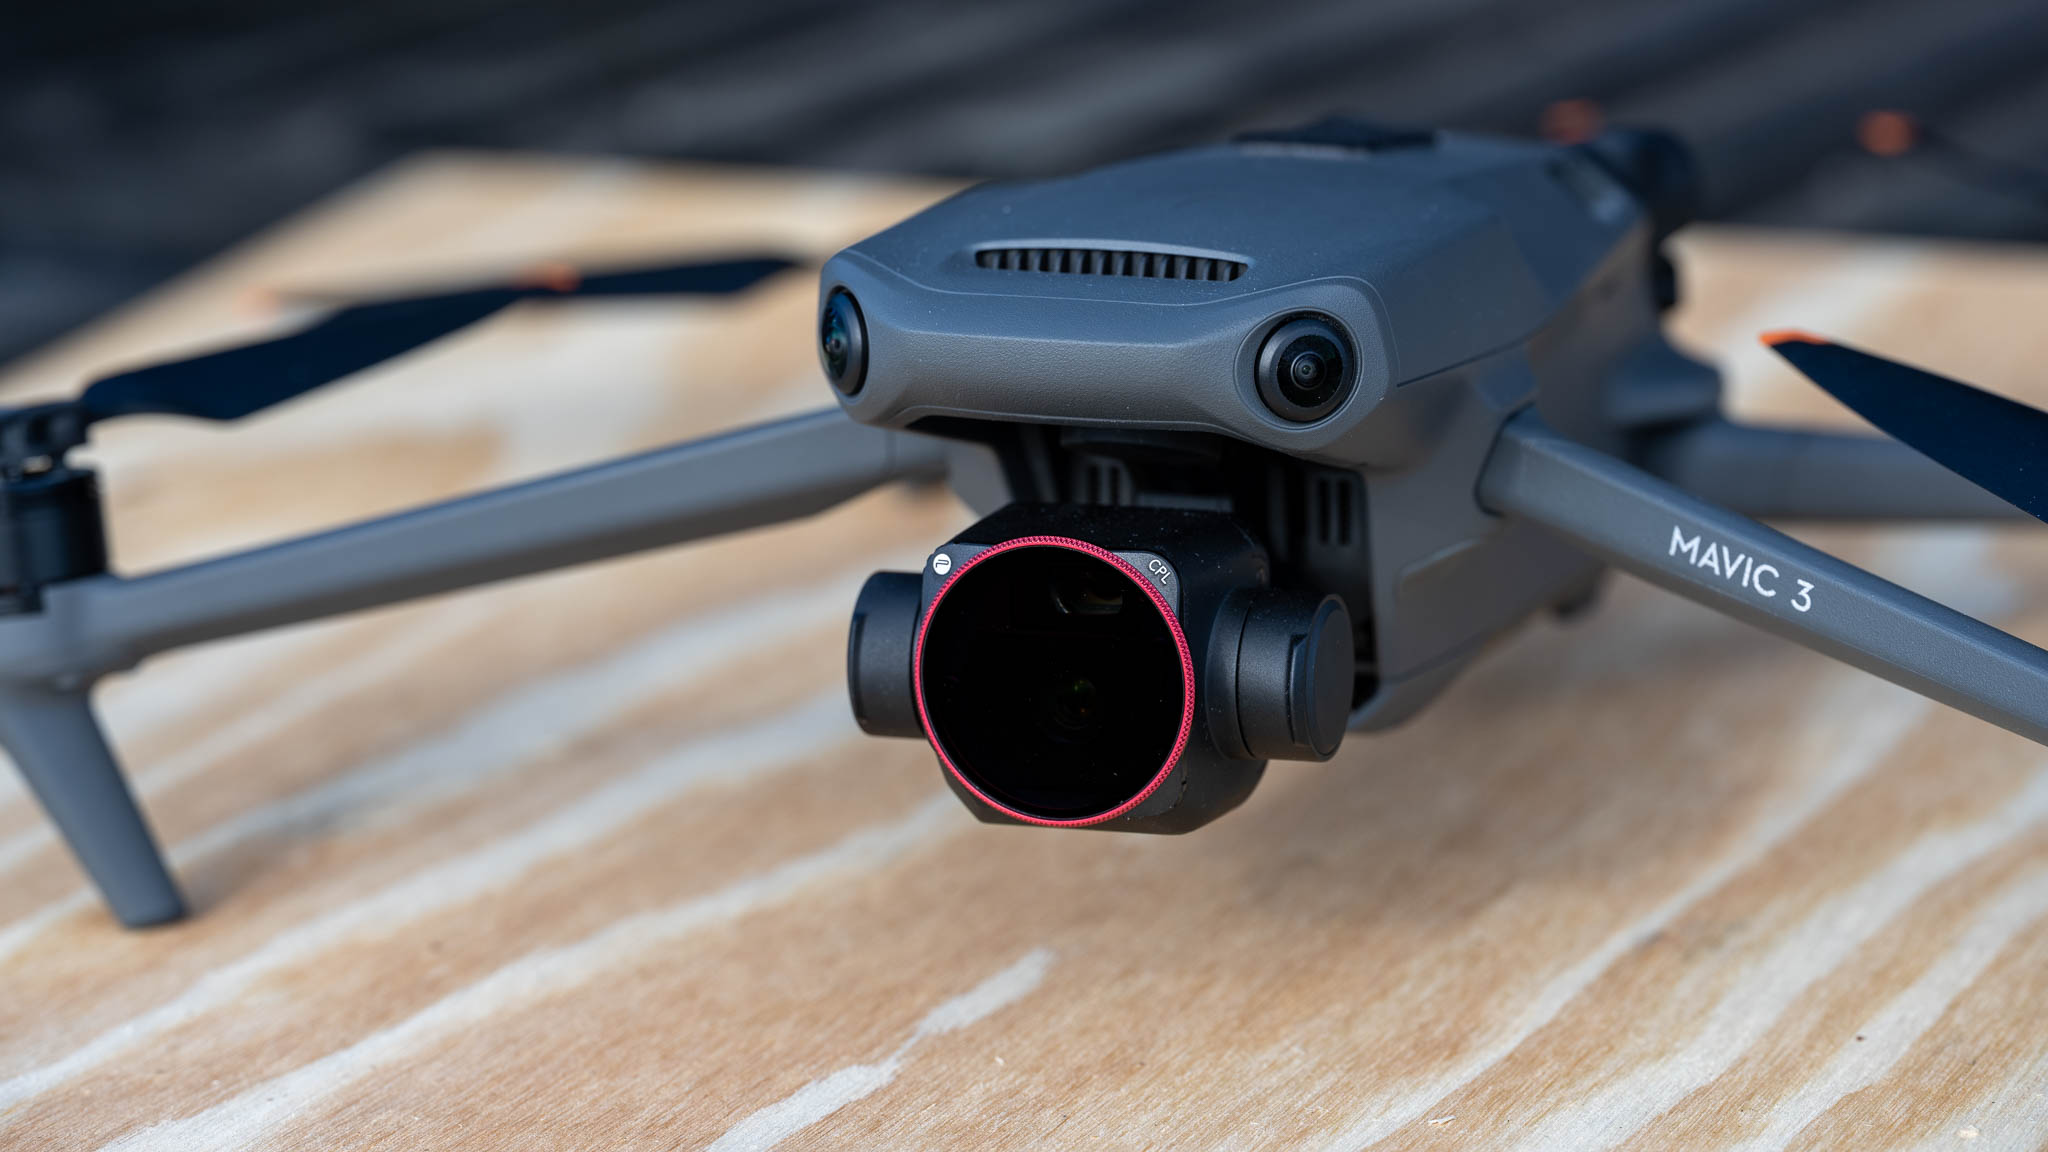
Filters (2/4)
Just like with regular cameras, I don’t find filters to be particularly useful for drones, outside of a few instances. For drone photography, I do like to have access to a circular polarizer, in case I need to cut reflections from water or glass.
Beyond that, neutral density filters can be a necessary evil for video usage. It’s annoying to land each time to swap them out, but having the proper ND makes a big difference in video quality in bright conditions.
If you’re just shooting photos with your drone, consider just picking up a good quality polarizer, while pilots who expect to shoot video should also add a set of ND filters. I’ve tested PGYTECH’s filter sets for the Mavic 3 and I found that they offered good performance at a great value. Many manufacturers make filters for the popular drones, however, so you should have a lot of options to choose from.
Carrying case (1/4)
With today’s compact and foldable drones, I’ve not really bothered with a separate carrying case in recent years. Instead, I just add my drone to my existing camera bag. Most drones are pretty sturdy, and if your backpack is padded enough for a camera lens, it will certainly be padded enough for a drone.
That said, if you have a much larger drone, you may want to consider a dedicated bag with foam-core cutouts in the shape of your drone equipment. The odd and bulky shape of big airframes makes using anything but a dedicated bag difficult.
Launching/Landing Pad (2/4)
A launching/landing pad of some kind is useful when operating your drone from certain types of terrain. If your props hit grass, sticks, or debris while taking off, it can chip or damage them. Likewise, in dusty conditions, you can end up throwing a ton of particulate matter at your lens and motors.
Landing pads aren’t a perfect solution, but they’re a lot better than just launching from a dirty surface. In really bad conditions, some photographers will hold their drone for launching and catch it for landing, but this is not recommended either and a good way to cut open your hand.
I hope this article gave you a good sense of the accessories and apps you’ll need for drone photography! Let me know in the comments if you have any other suggestions, or questions about the accessories I recommended.
Hello, I’m Leah. I am currently still in grade 11. My dream one day is to do 3 years in the military and then go do drone photography just for experience, after I wanna go do crime scene photography and write books about it as i am a writer and a photographer. But will I make it?
I have the Mini 2 drone from DJI and it has a 2.8 lens- Although the Mini 3 has a faster lens of 1.8 I consider the 2.8 lens sharper in the corners…
Since you cannot change aperture with these drones ( hence the ND-filter) there is no way to make this f1.8 lens getting sharper.