Wildlife photography is inextricably linked with long telephoto lenses. Most wildlife photographers dream of having a fast, professional lens in their arsenal. Is it just a desire to own something beautiful and expensive? Not at all. There’s a rational reason to own an exotic lens: the fast maximum aperture.
It’s usually possible to find long telephoto lenses for good prices these days. Consider lenses like the Nikon Z 180-600mm f/5.6-6.3, the Tamron 150-500mm f/5-6.7, or even the Canon 600mm and 800mm f/11 lenses. These lenses give you lots of reach as a wildlife photographer without breaking the bank. And concerns about sharpness are largely a thing of the past.
The remaining concern is one of aperture. A faster maximum aperture lets you focus more easily in low light, shoot at a lower ISO, and employ a shallower depth of field. But the difference between, say, f/4 and f/6.3 does not seem that big. Certainly not as big as the difference in price.
That gave me the idea for this article. How much of an effect does your aperture have on depth of field in wildlife photography? Is the difference between f/4 and f/6.3 enough to justify a much heavier and expensive lens? And what about lenses with a maximum aperture of f/11 – are they even worth considering? On my recent trip to Ecuador, I met several patient birds who were kind enough to cooperate with me in answering these questions.
Different Aperture Values and Depth of Field
Many things can be simulated in the lab under controlled conditions. However, my favorite laboratory is nature with its wild inhabitants. There are more dynamic environments and conditions that are impossible to replicate. Nevertheless, it shows how something like depth of field really looks in a photo and how it impacts the artistry of photography.
When I took the photos below, I tried to keep the number of variables to a minimum so that you could focus on how each different aperture looks. I photographed each bird from a tripod and therefore from the same distance, with the same 500mm f/4 lens, and against an identical background. The only major change was the aperture used. All photos are without cropping and, unless otherwise noted, without denoising and local adjustments.
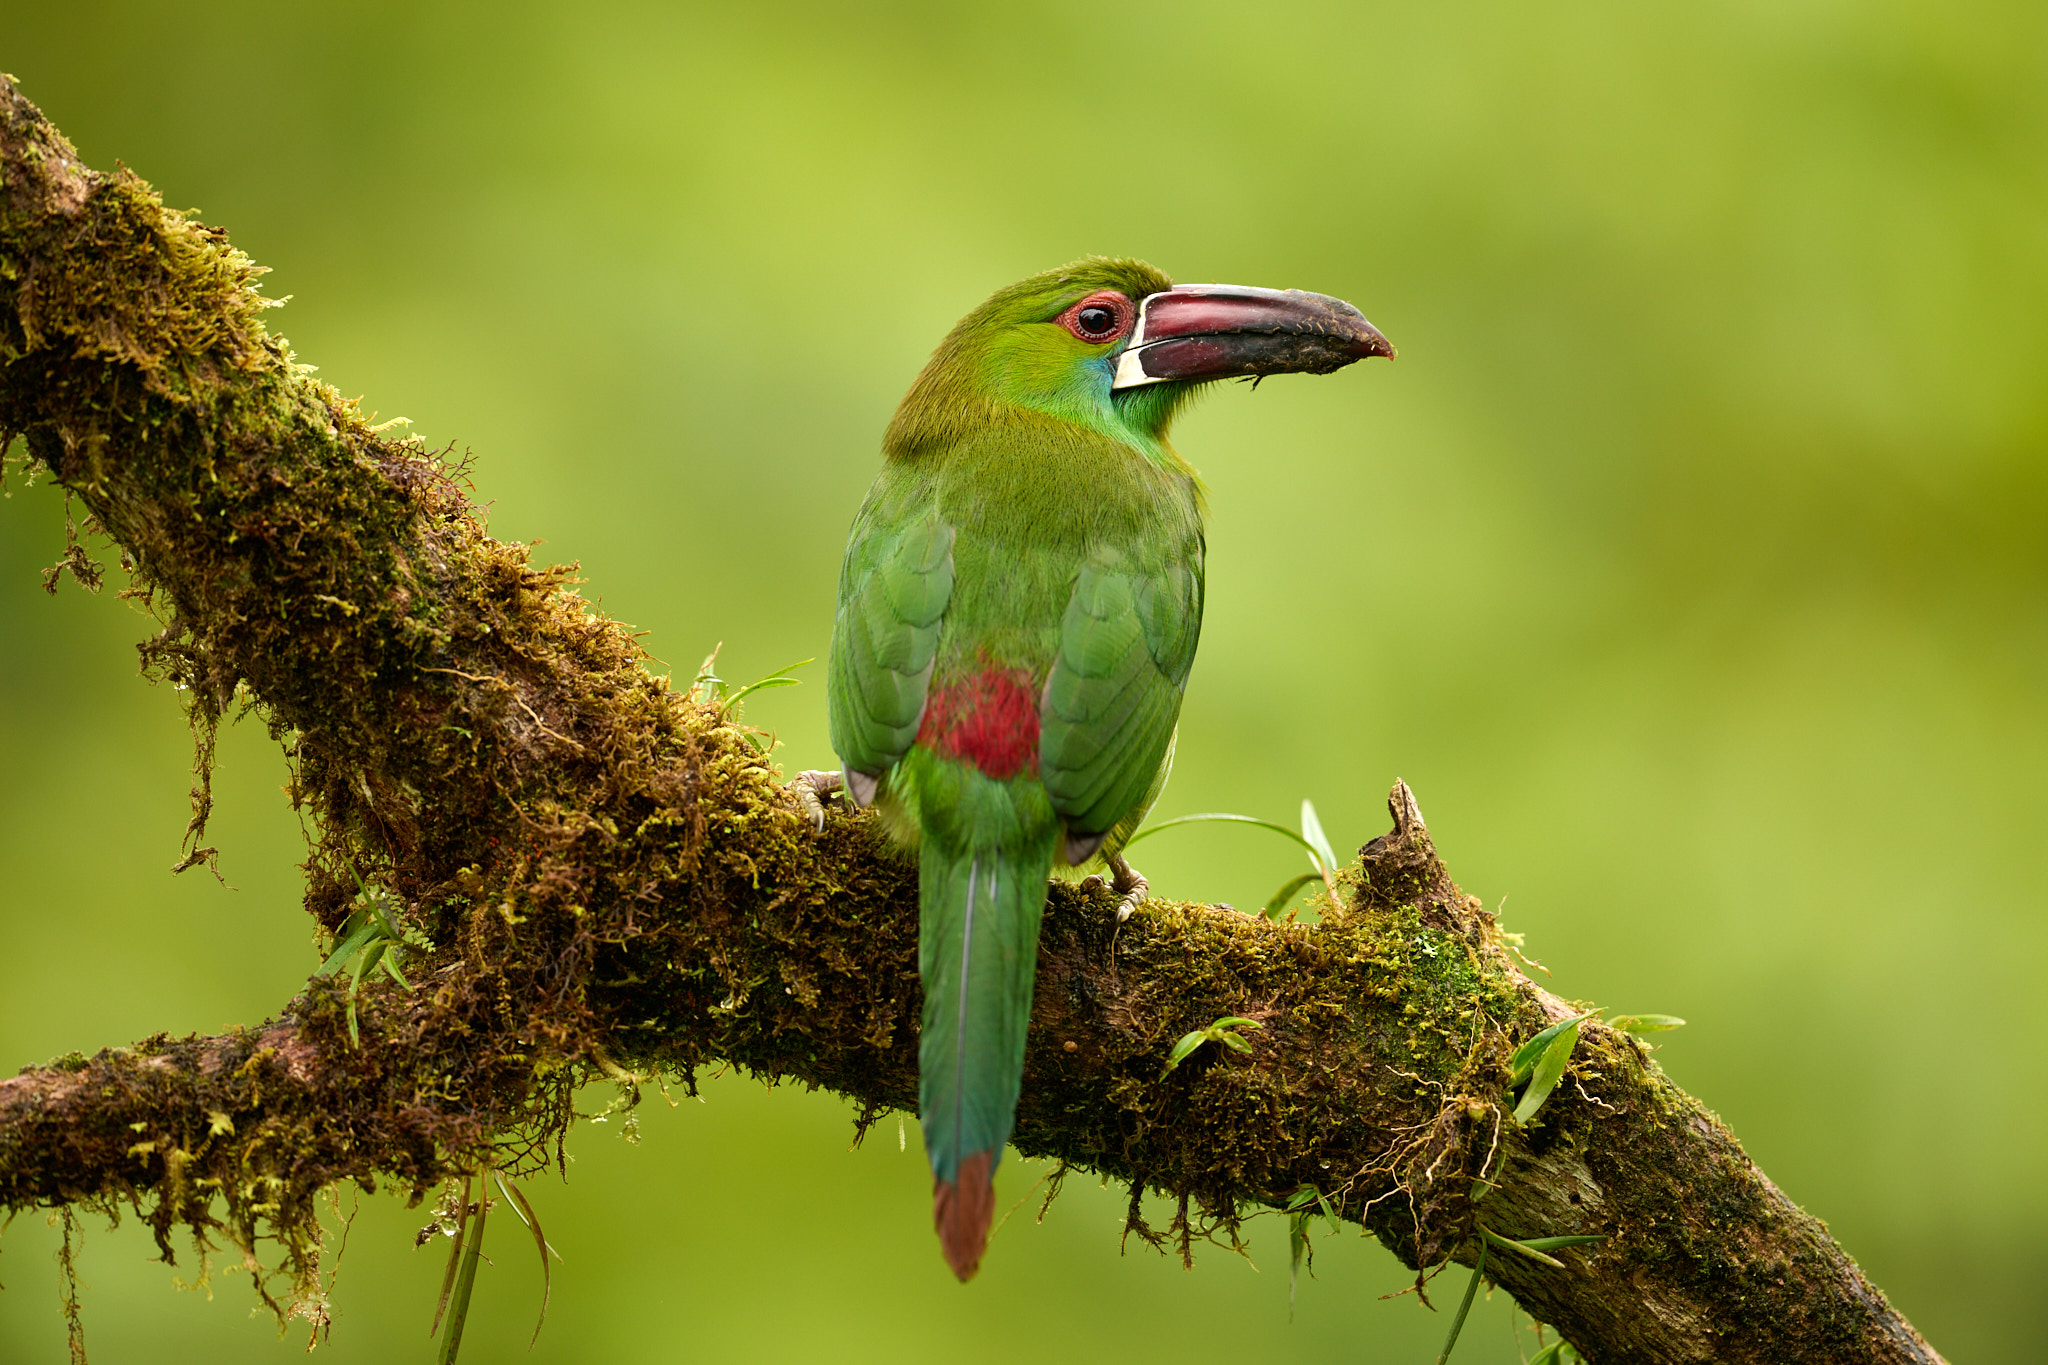
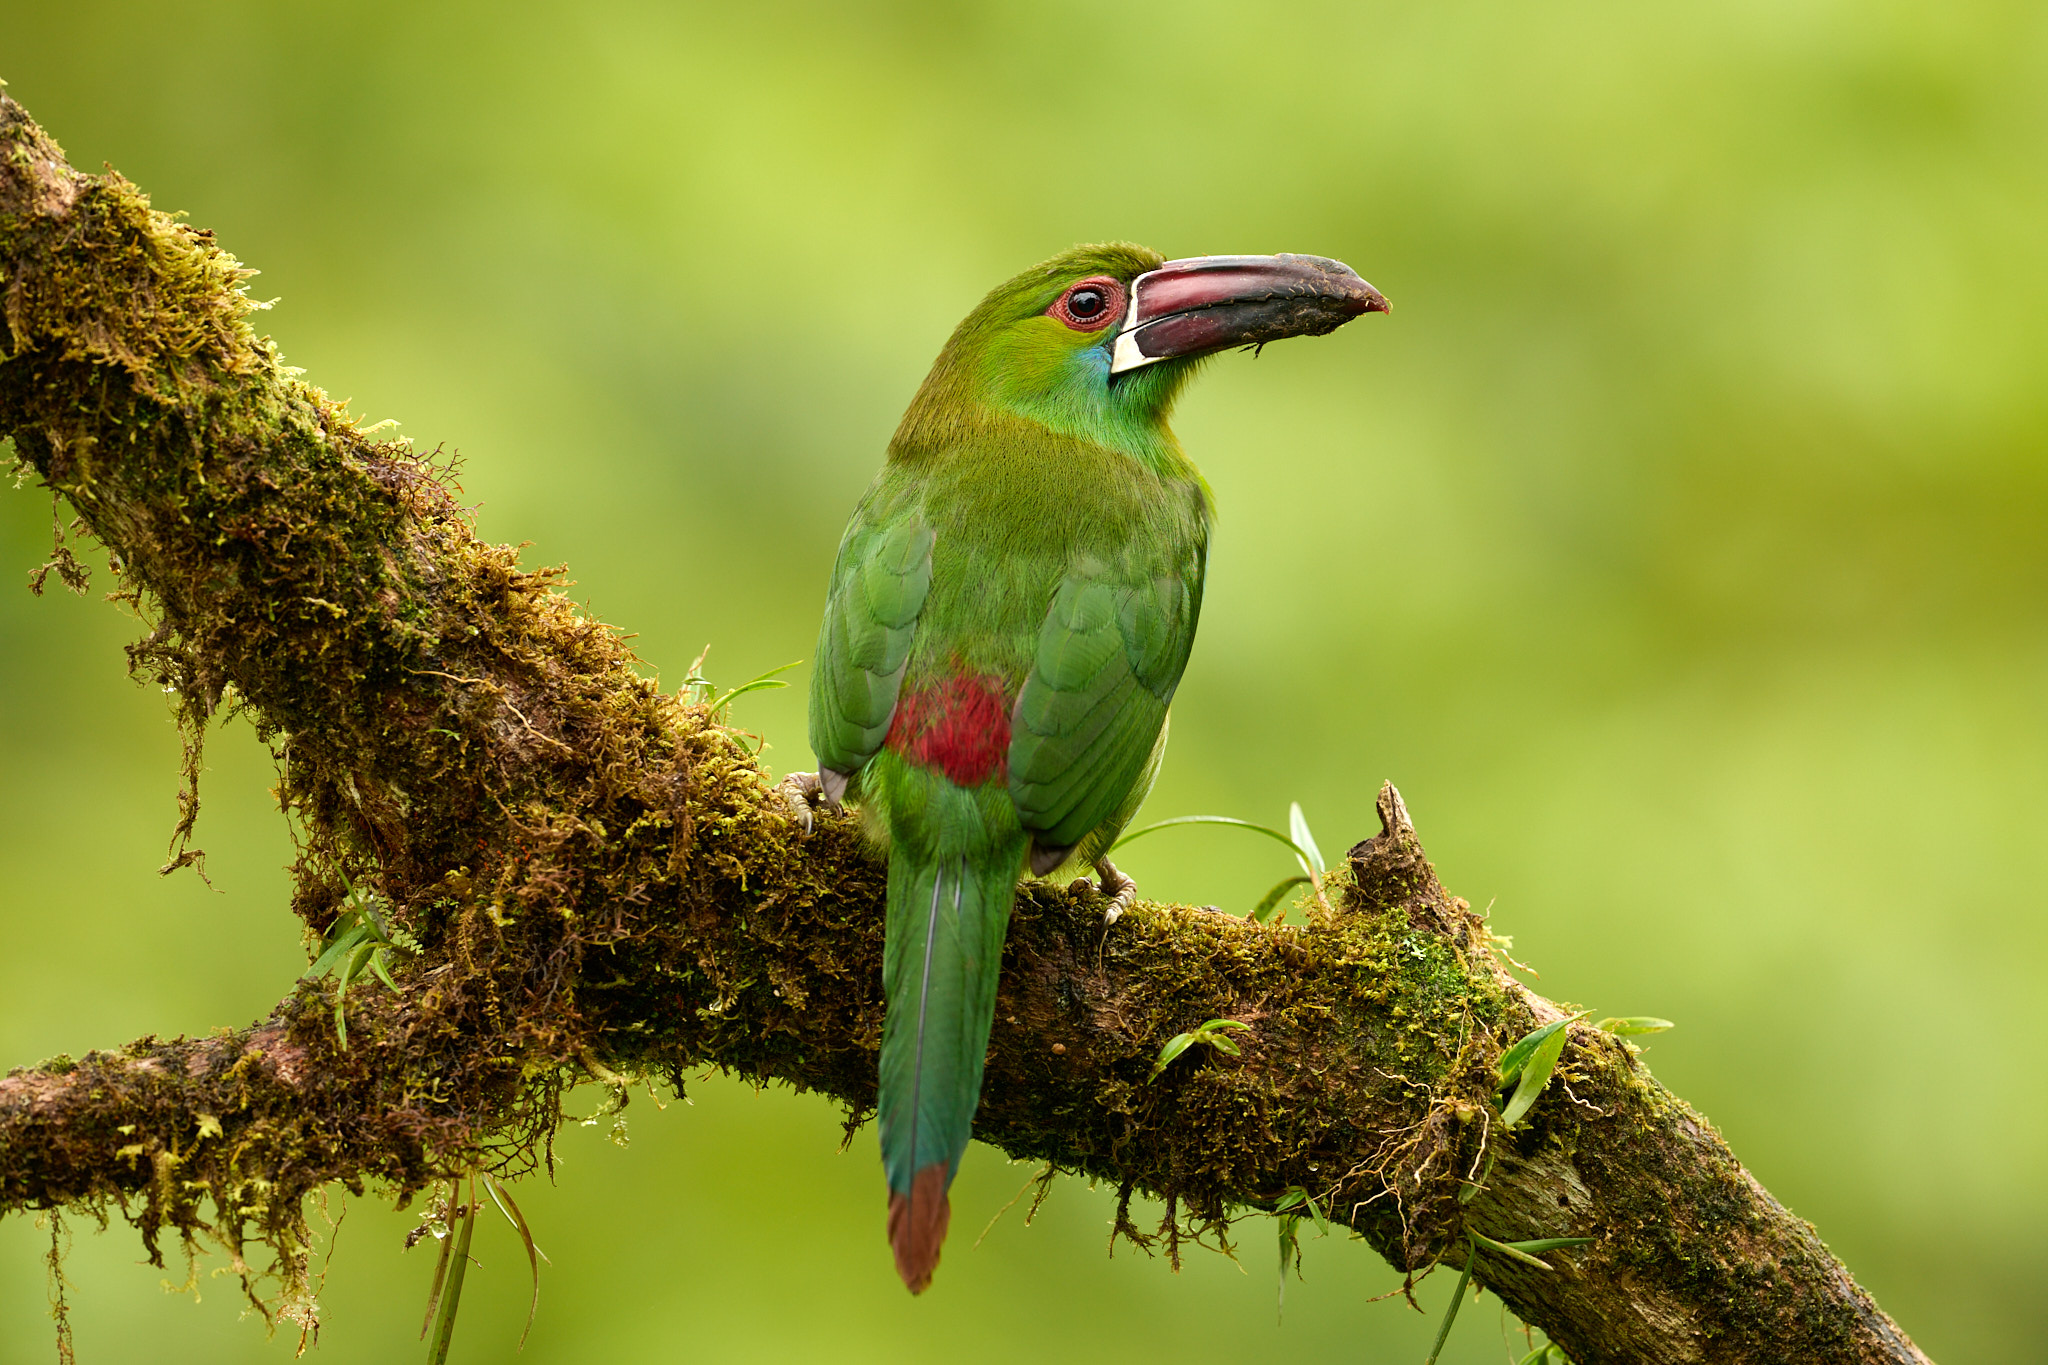
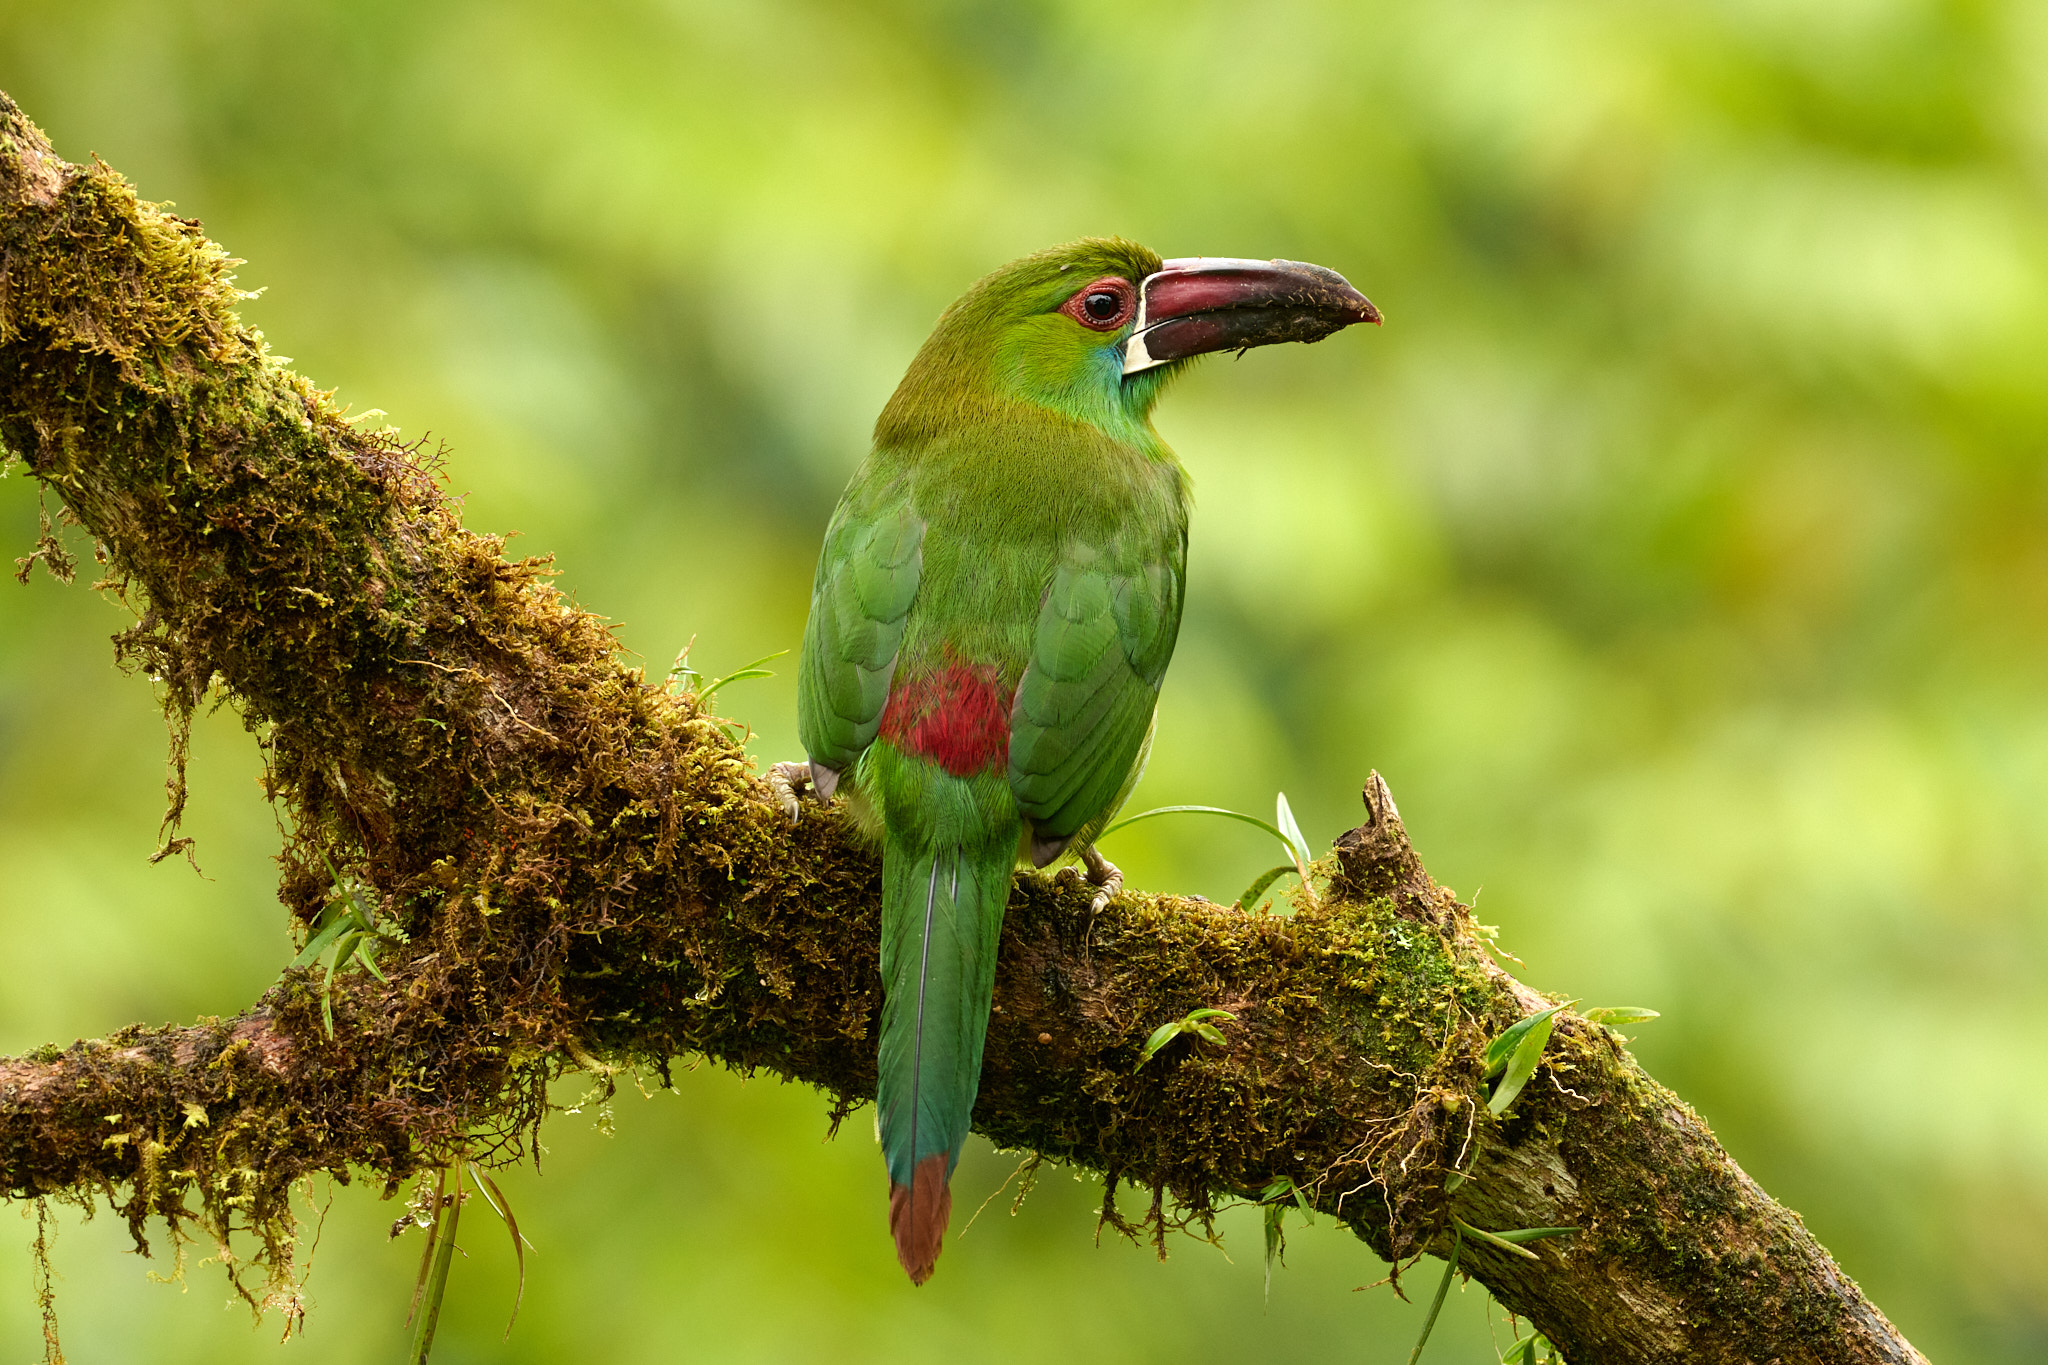
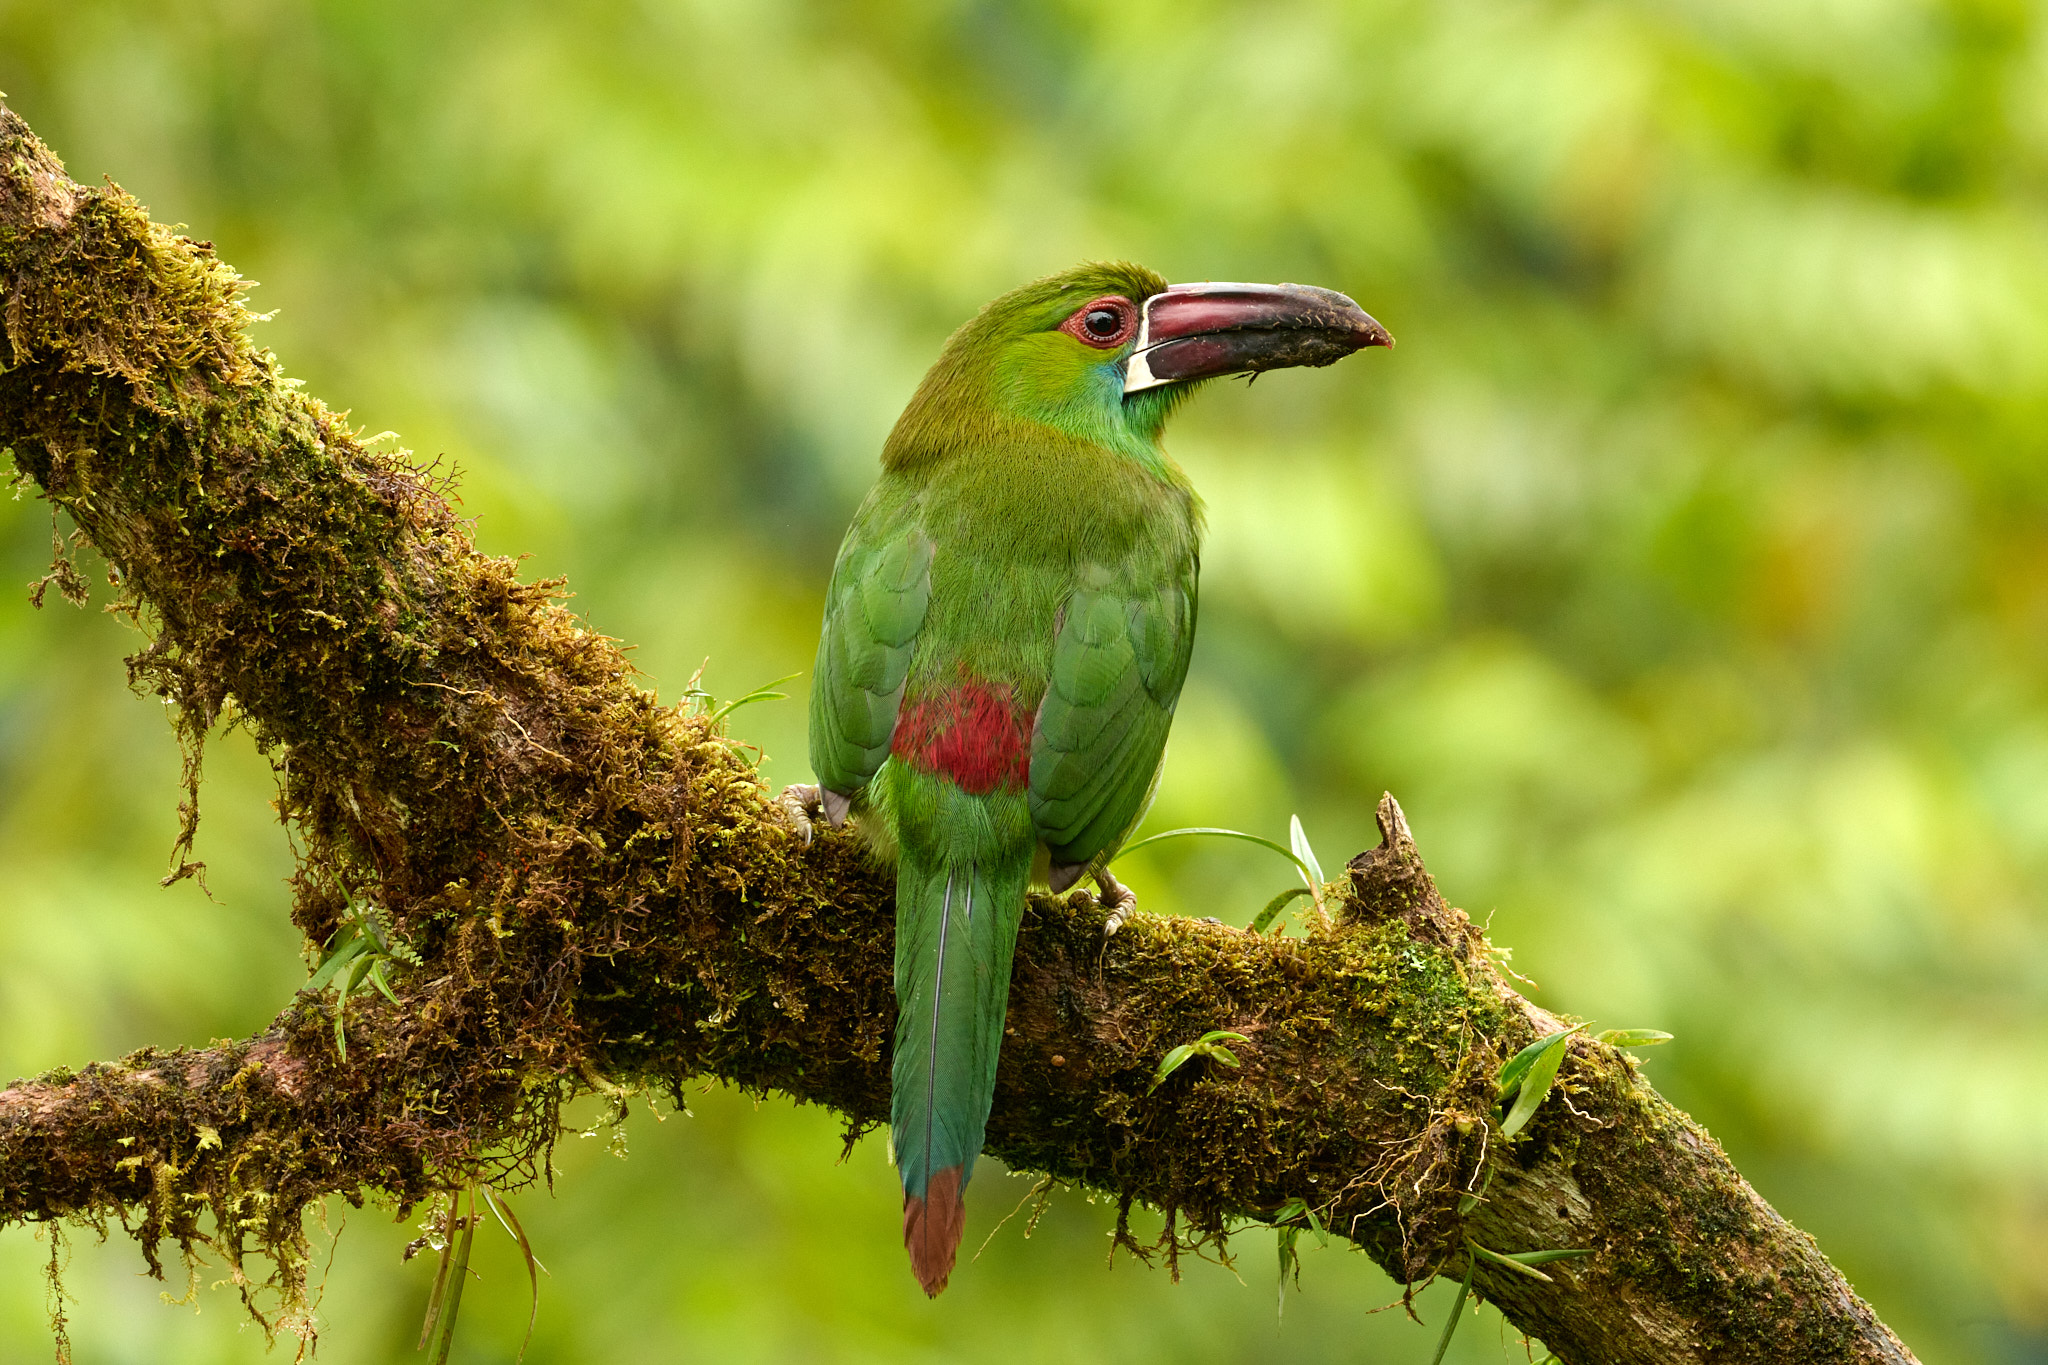
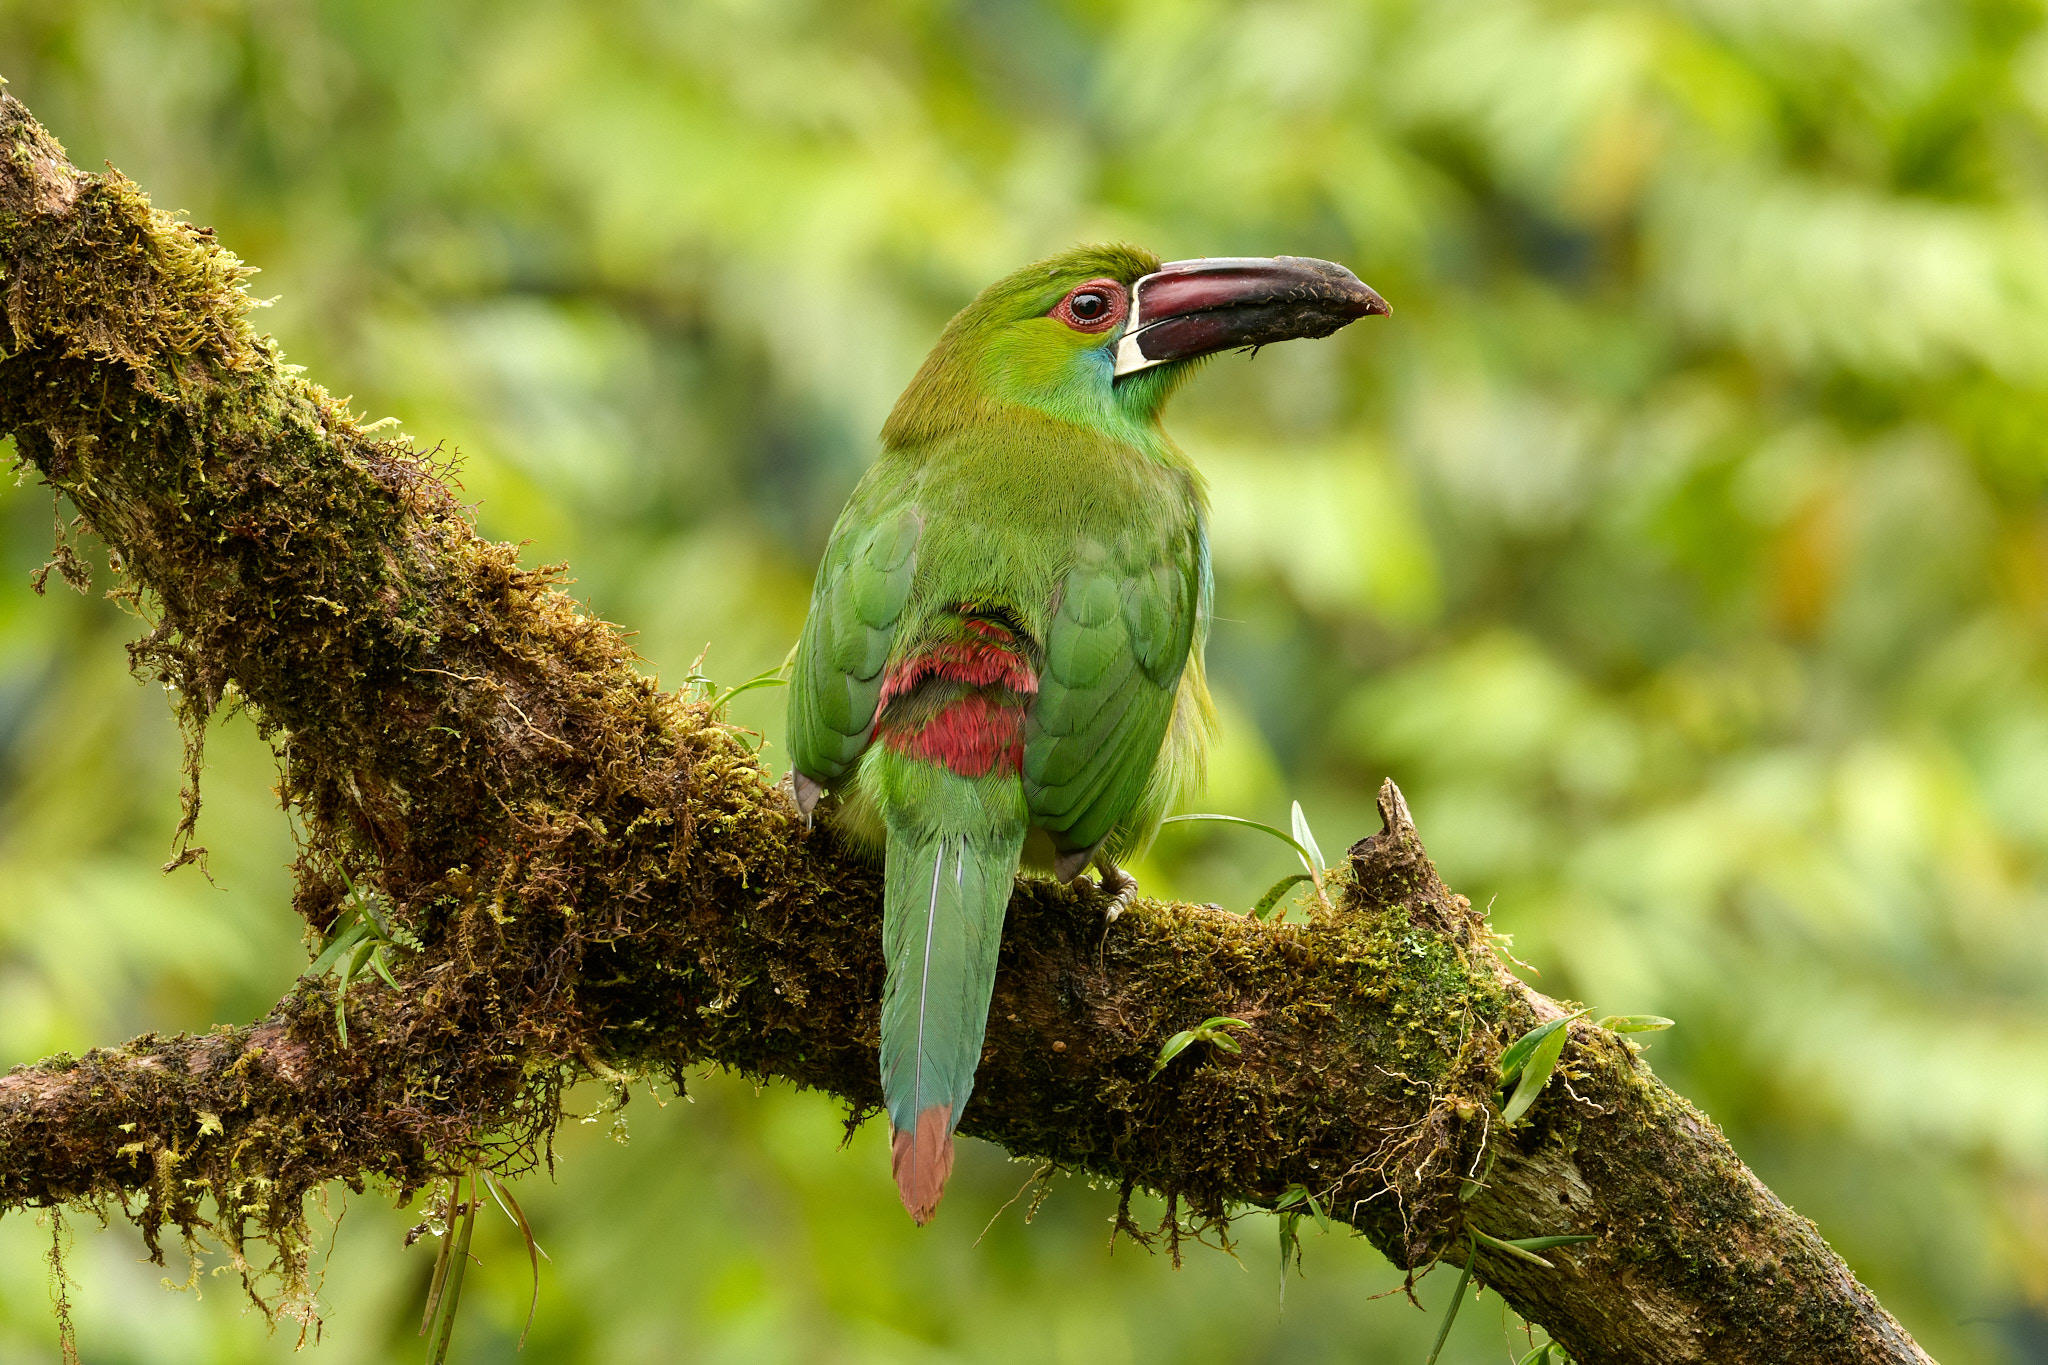
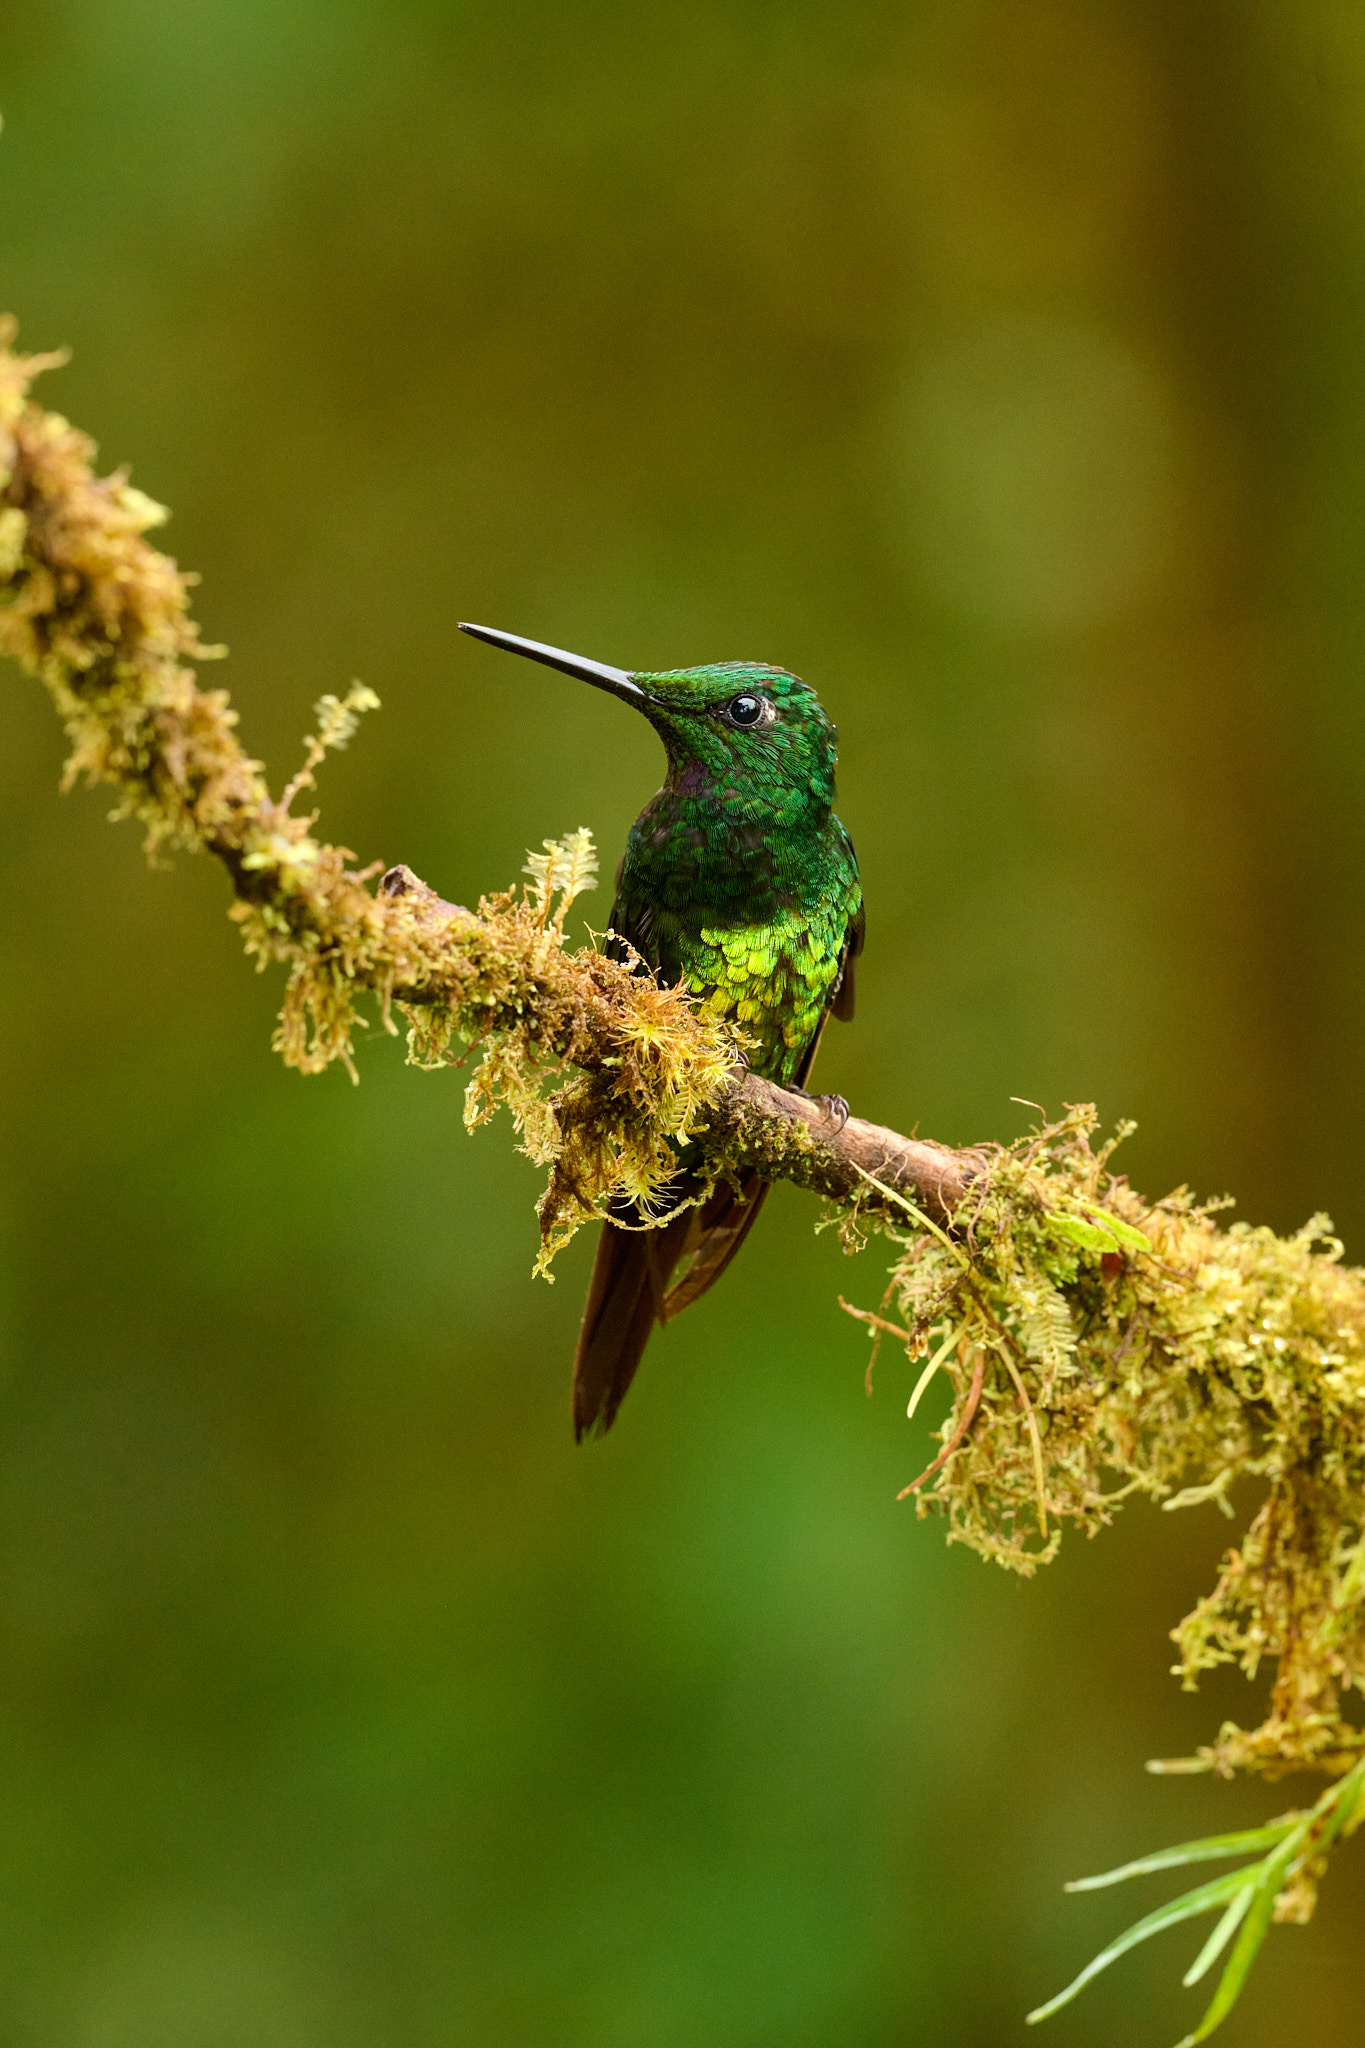
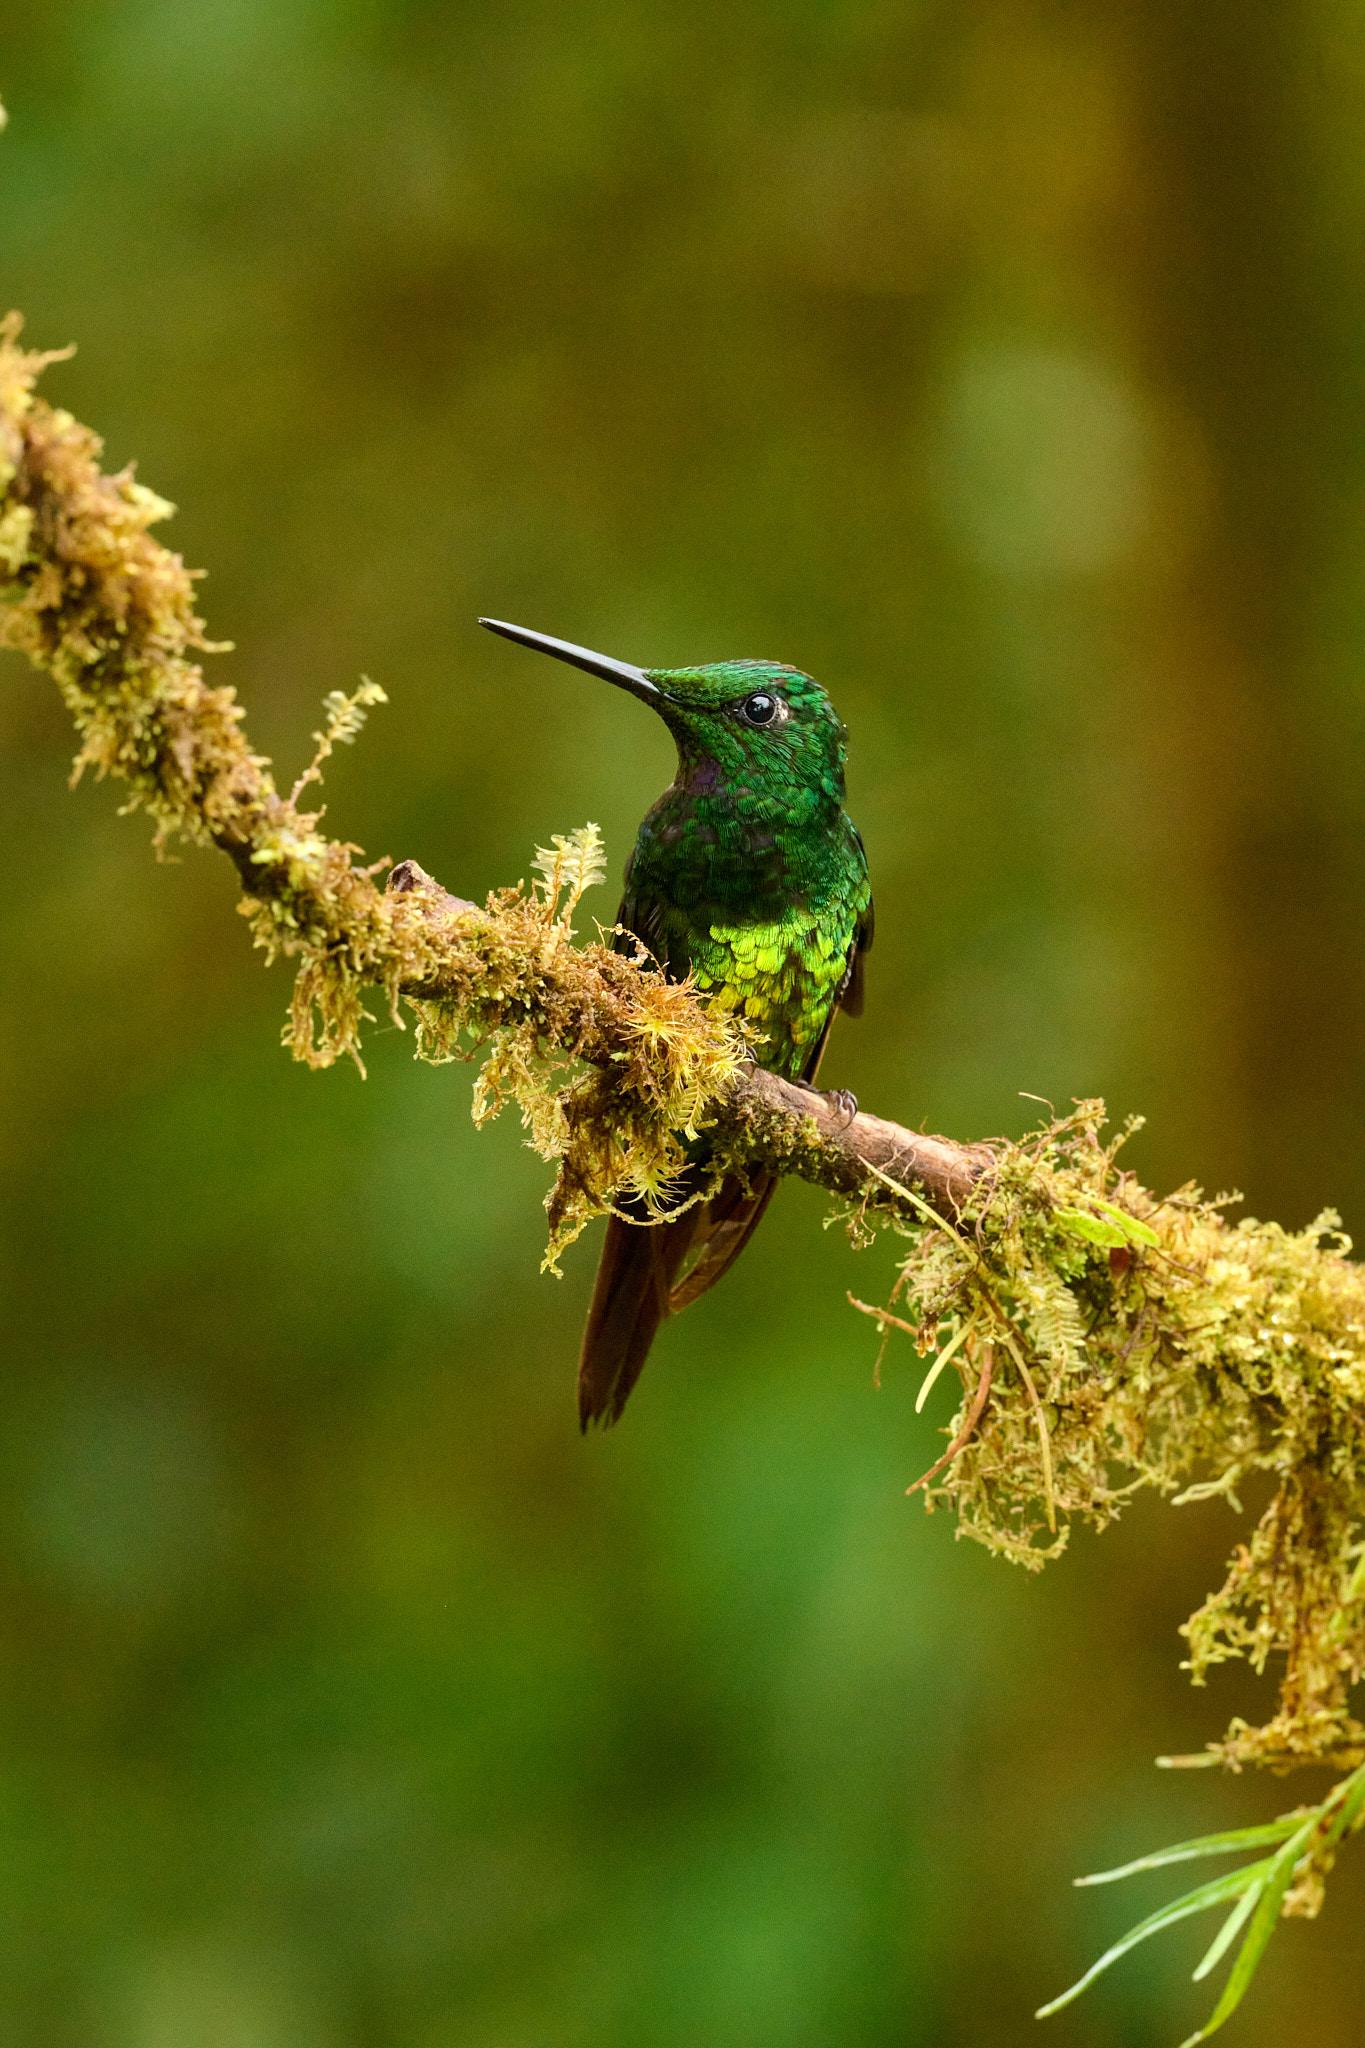
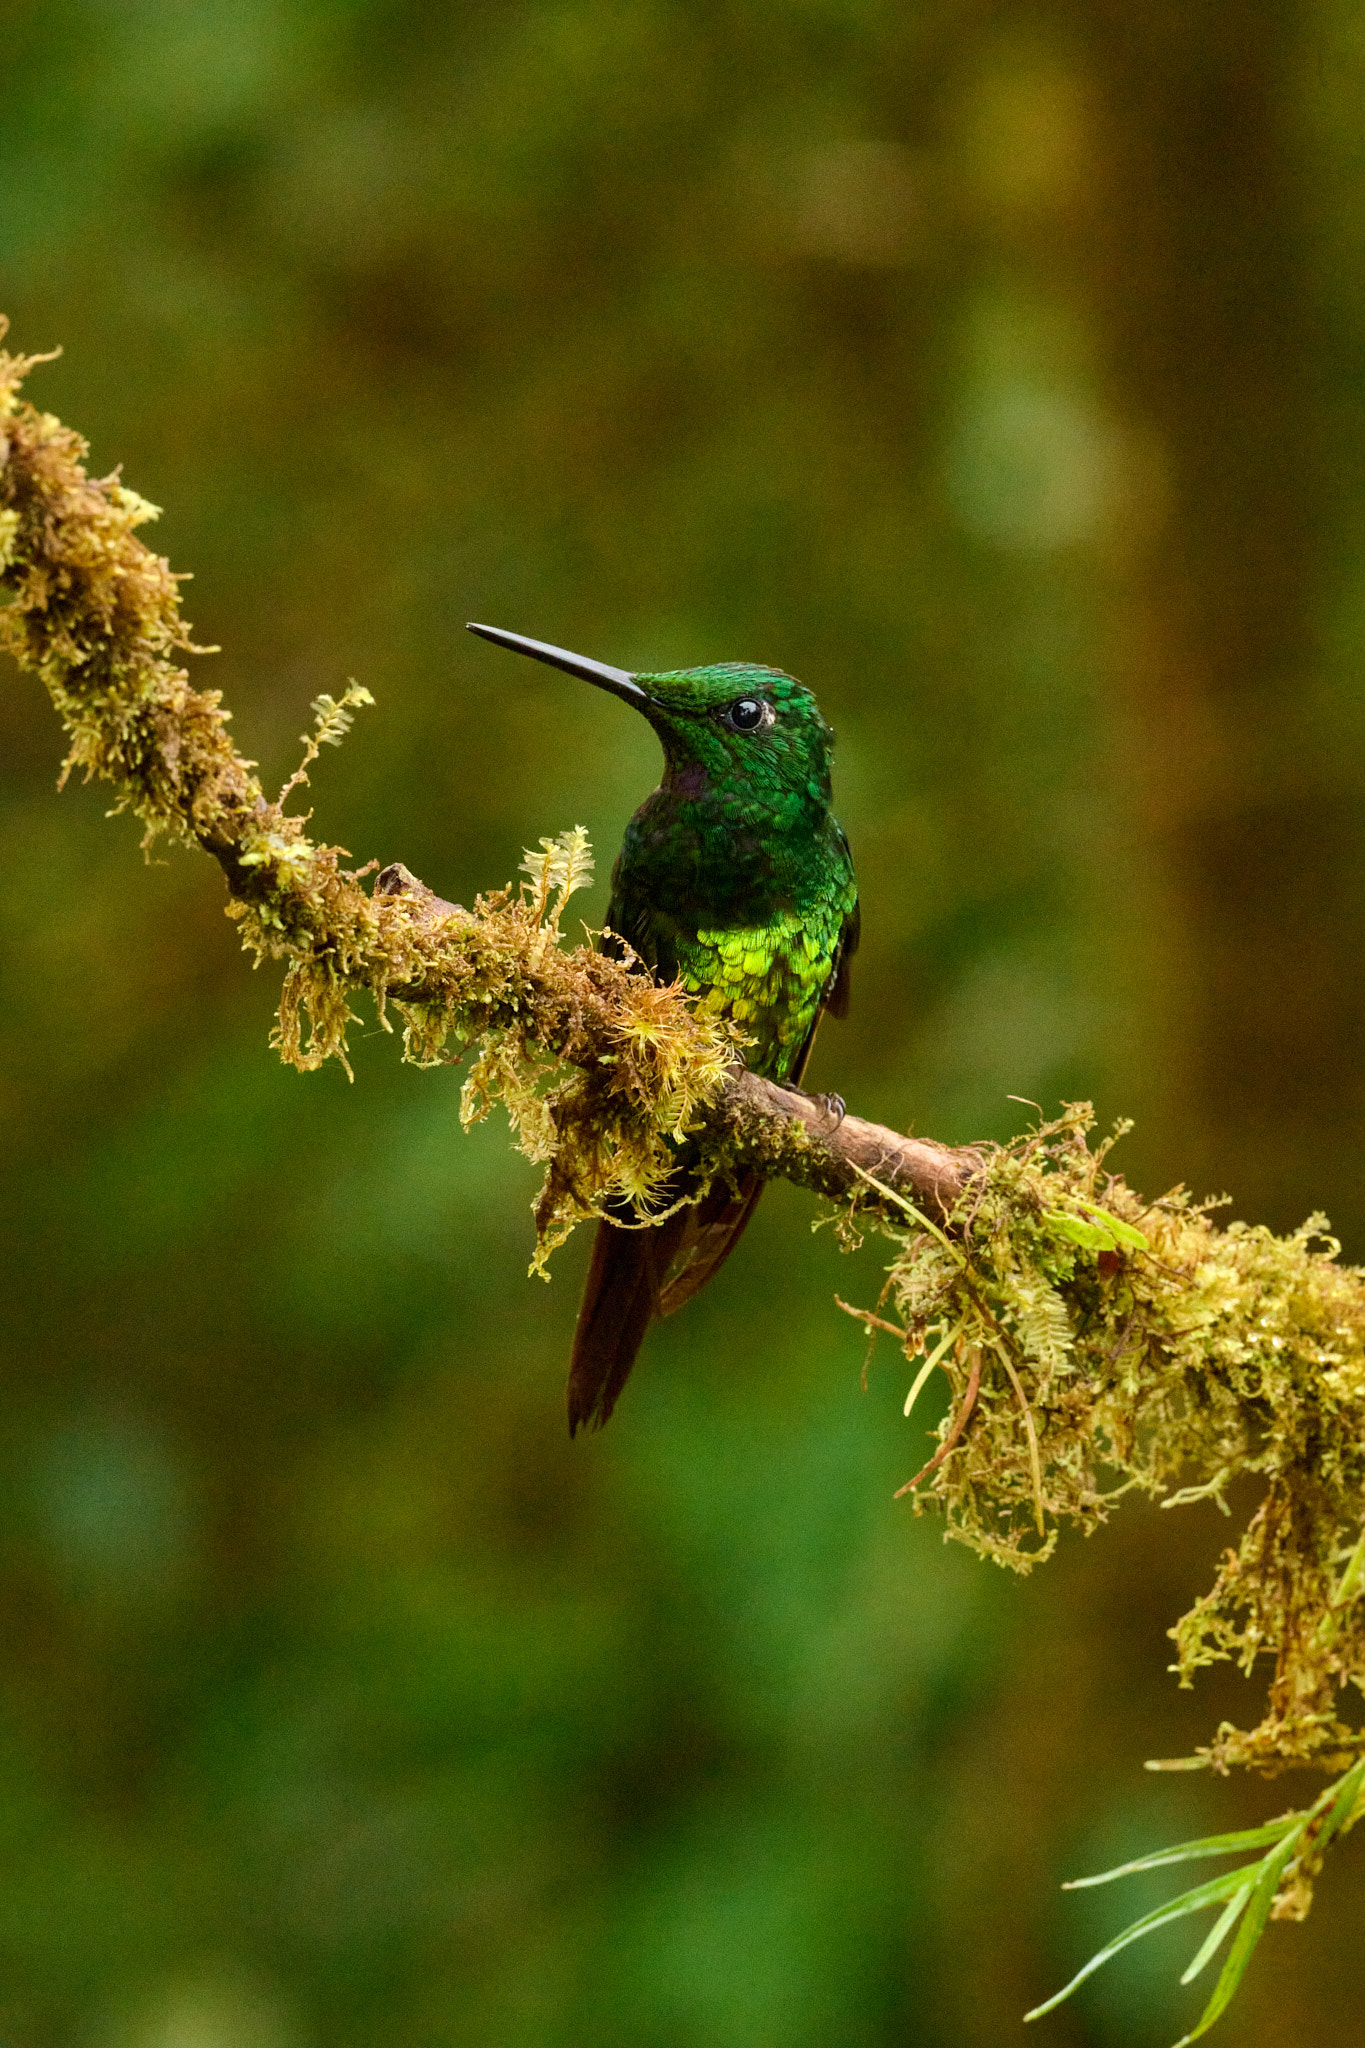
Let’s start this series with this Crimson-rumped Toucanet, which inspired me to write this article in the field. With the lens wide open, the background is beautifully separated, but only the head of the Toucanet is in focus. The tail is within the depth of field by f/11. With each step toward f/22, the background becomes more distinct and distracting. (I had to raise ISO to compensate for the narrower apertures, so the noise also increases.)
Here’s how the progression of photos looks. Note that I included f/6.3 even though it’s only 1/3 stop slower than f/5.6, since many of today’s telephoto lenses have a maximum aperture of f/6.3:
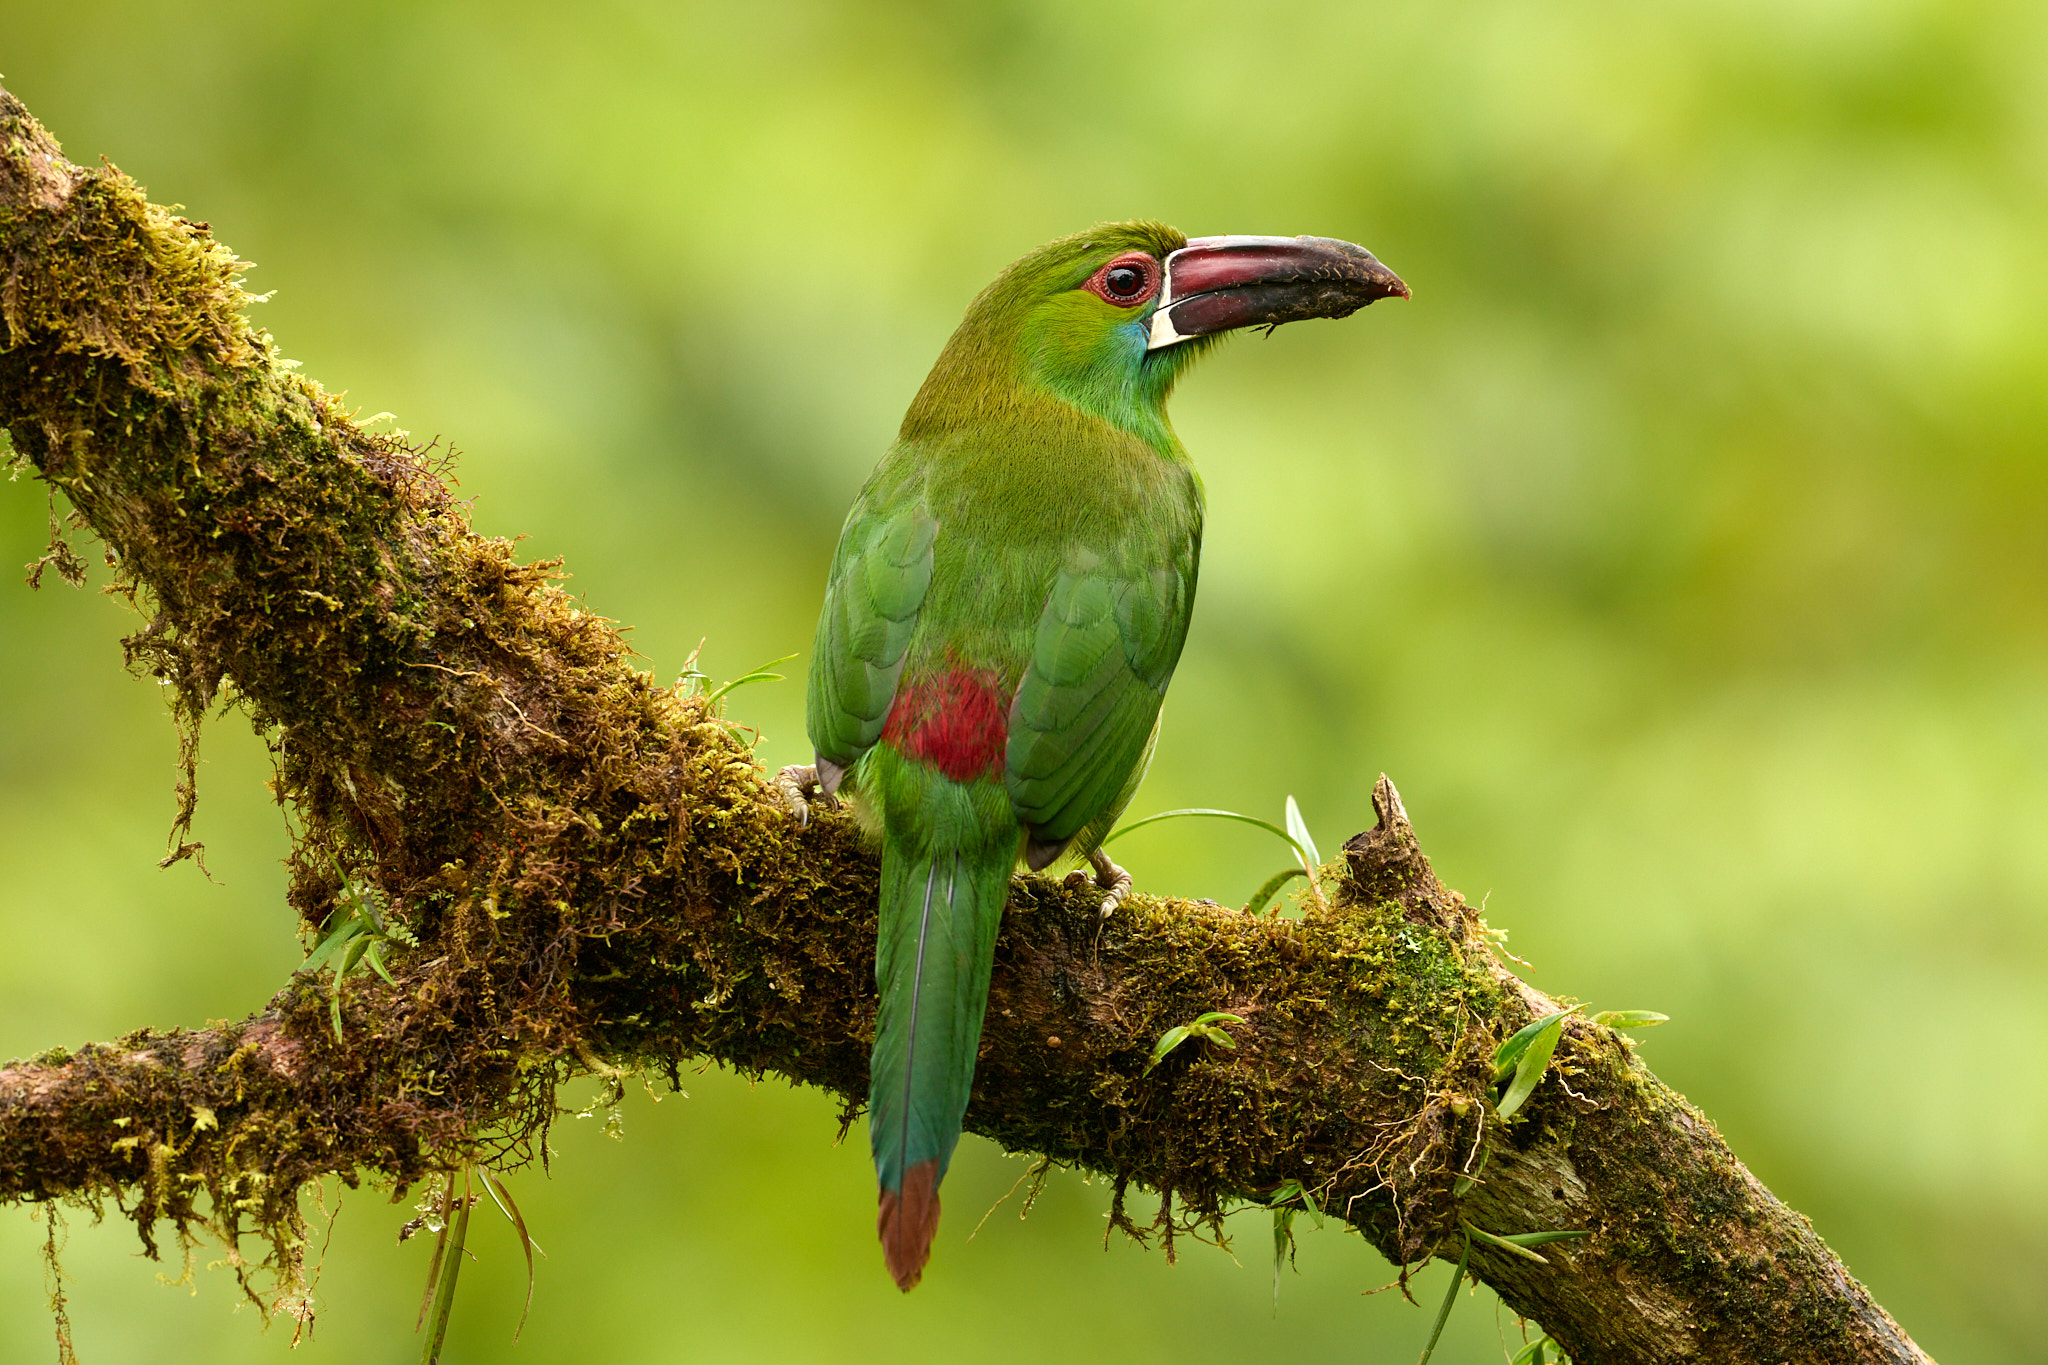
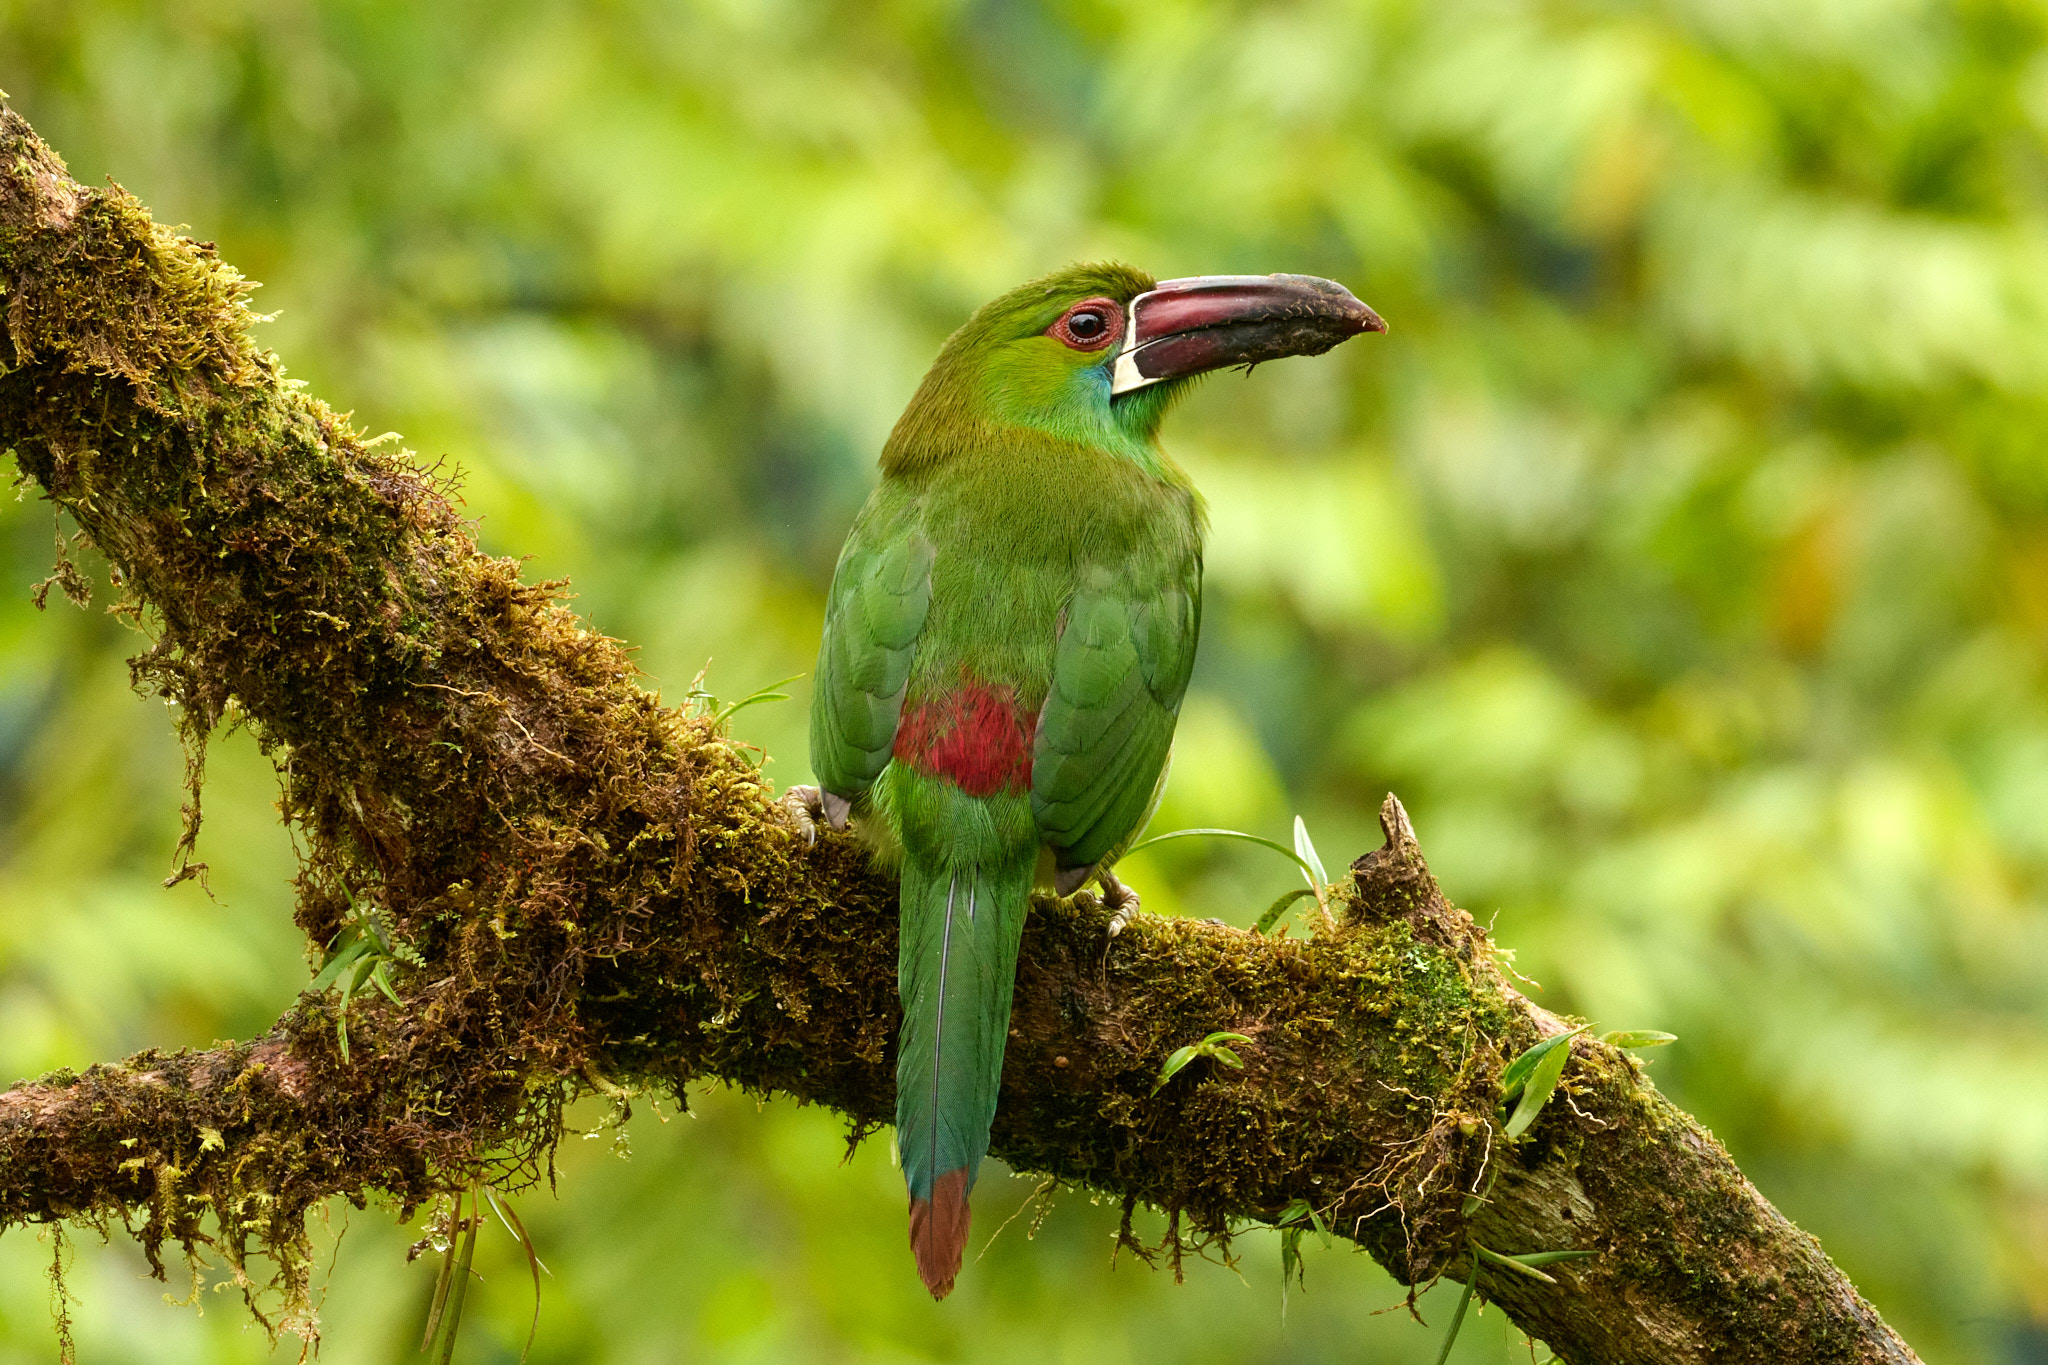
For reference, here’s how the first photo compares to the last:
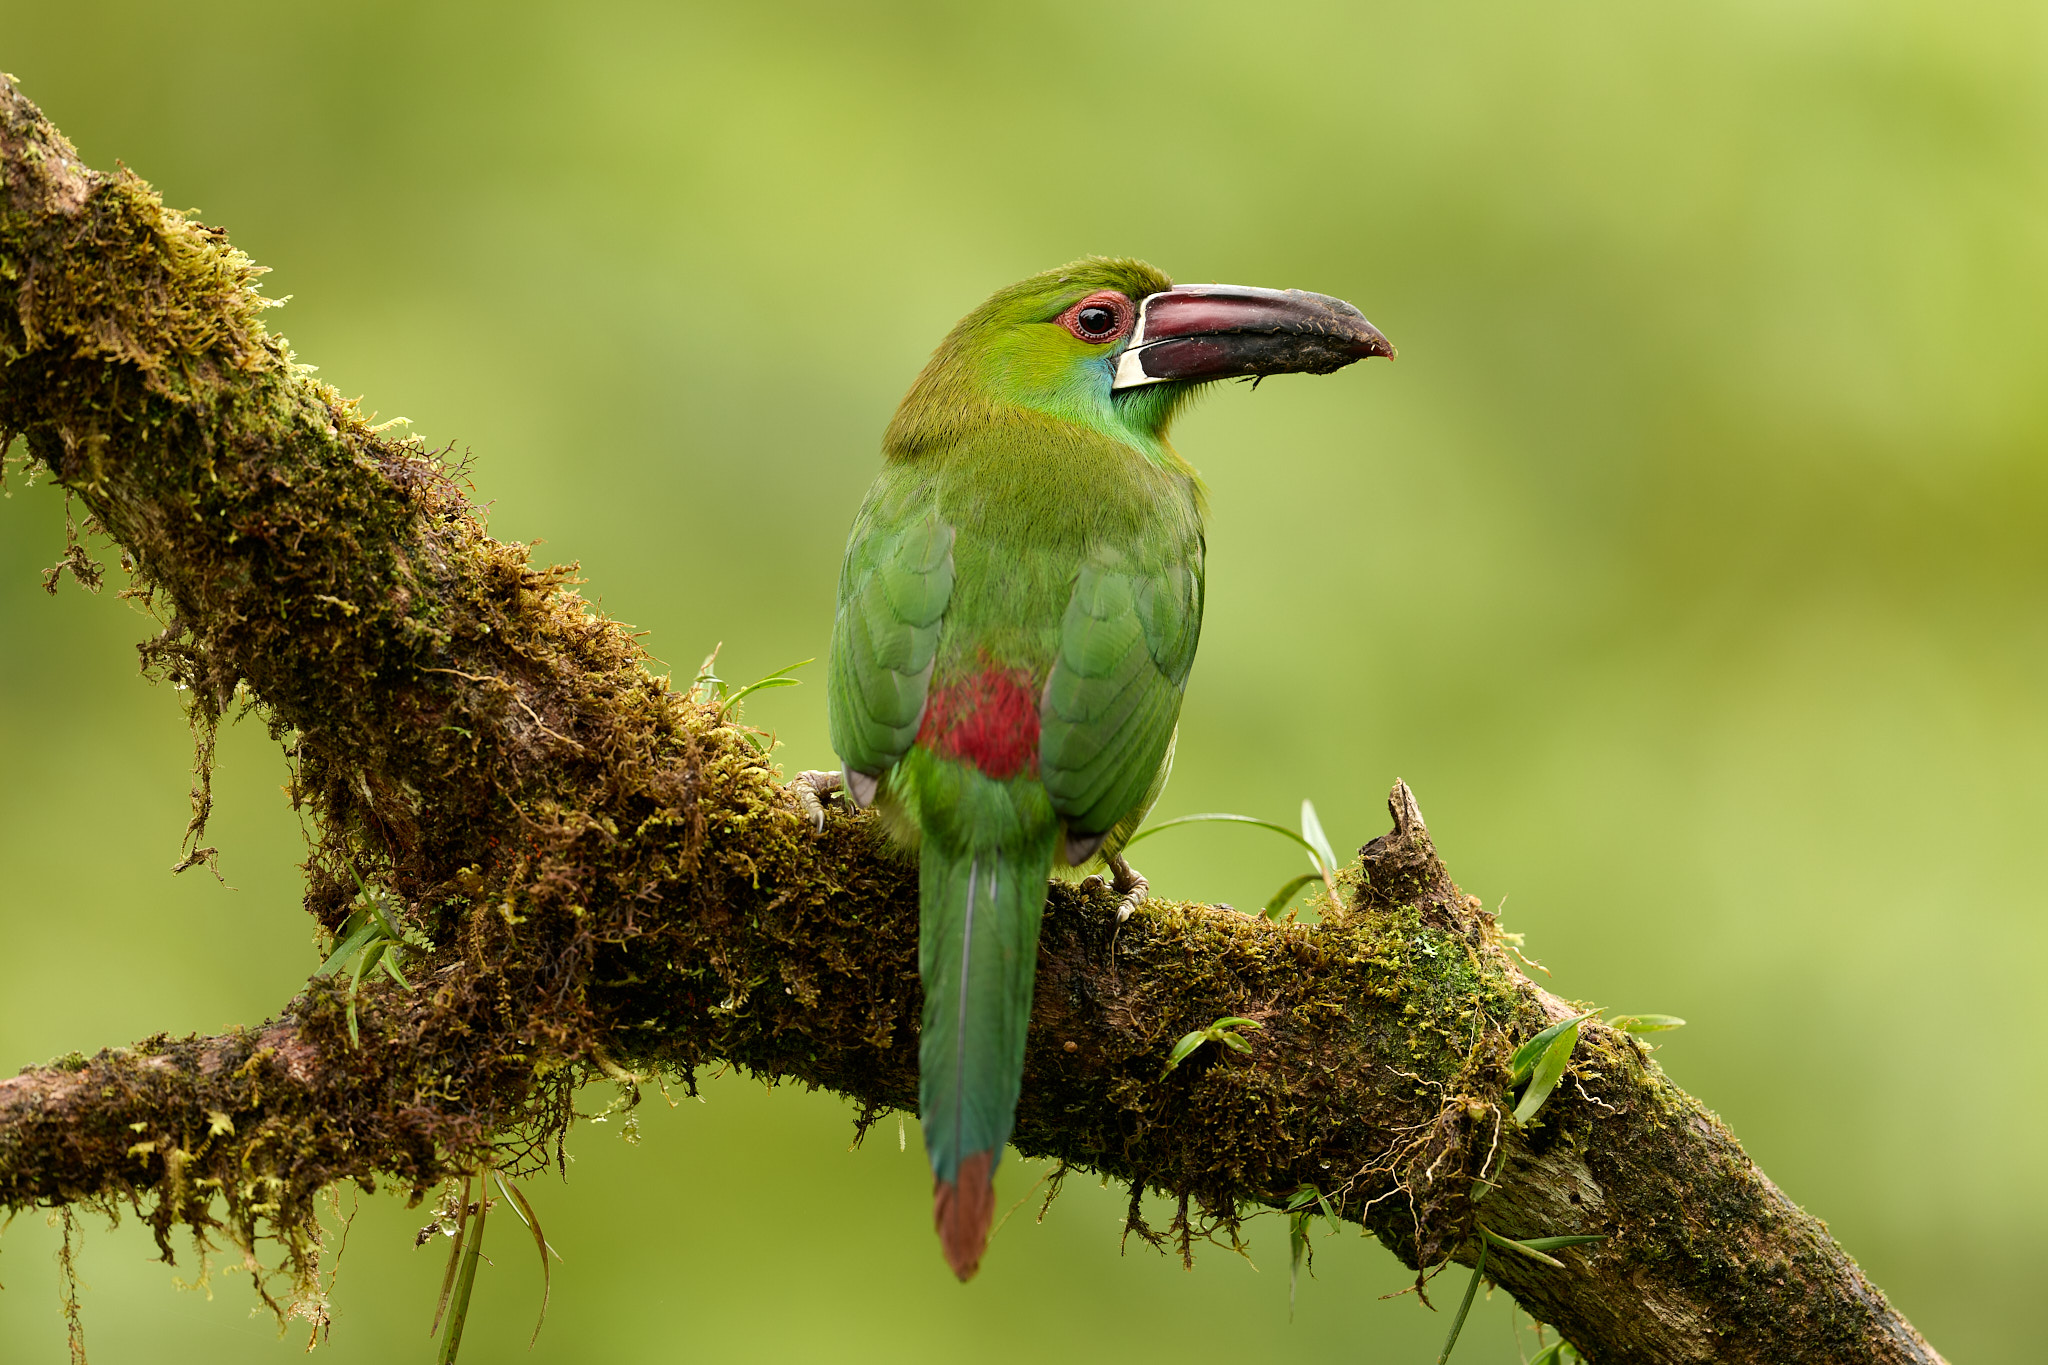
NIKON Z 9 + VR 500mm f/4E @ 500mm, ISO 180, 1/125, f/4.0
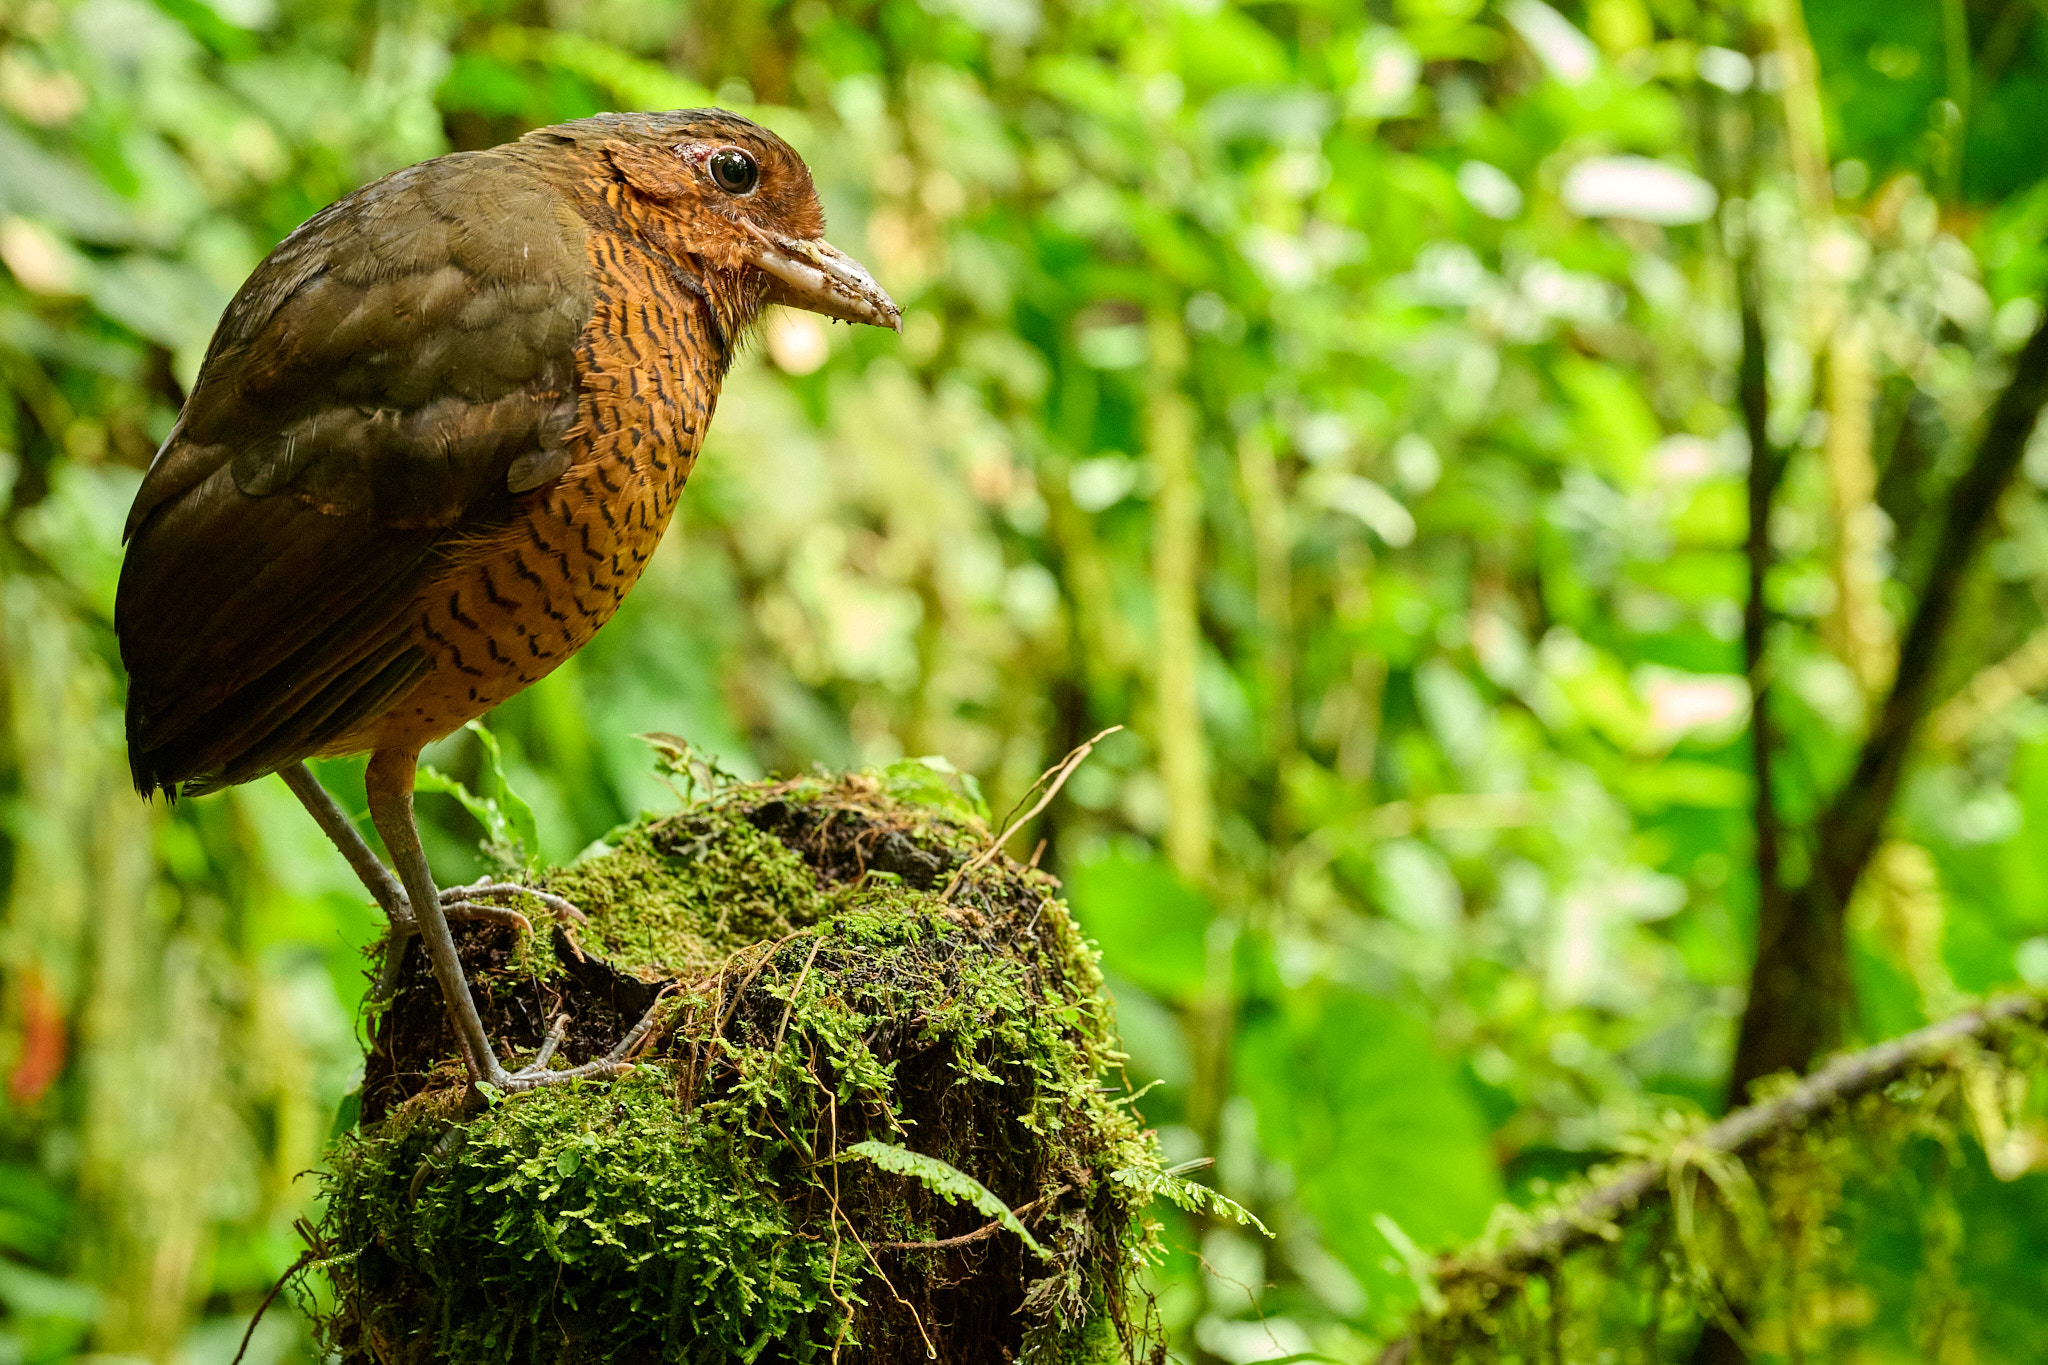
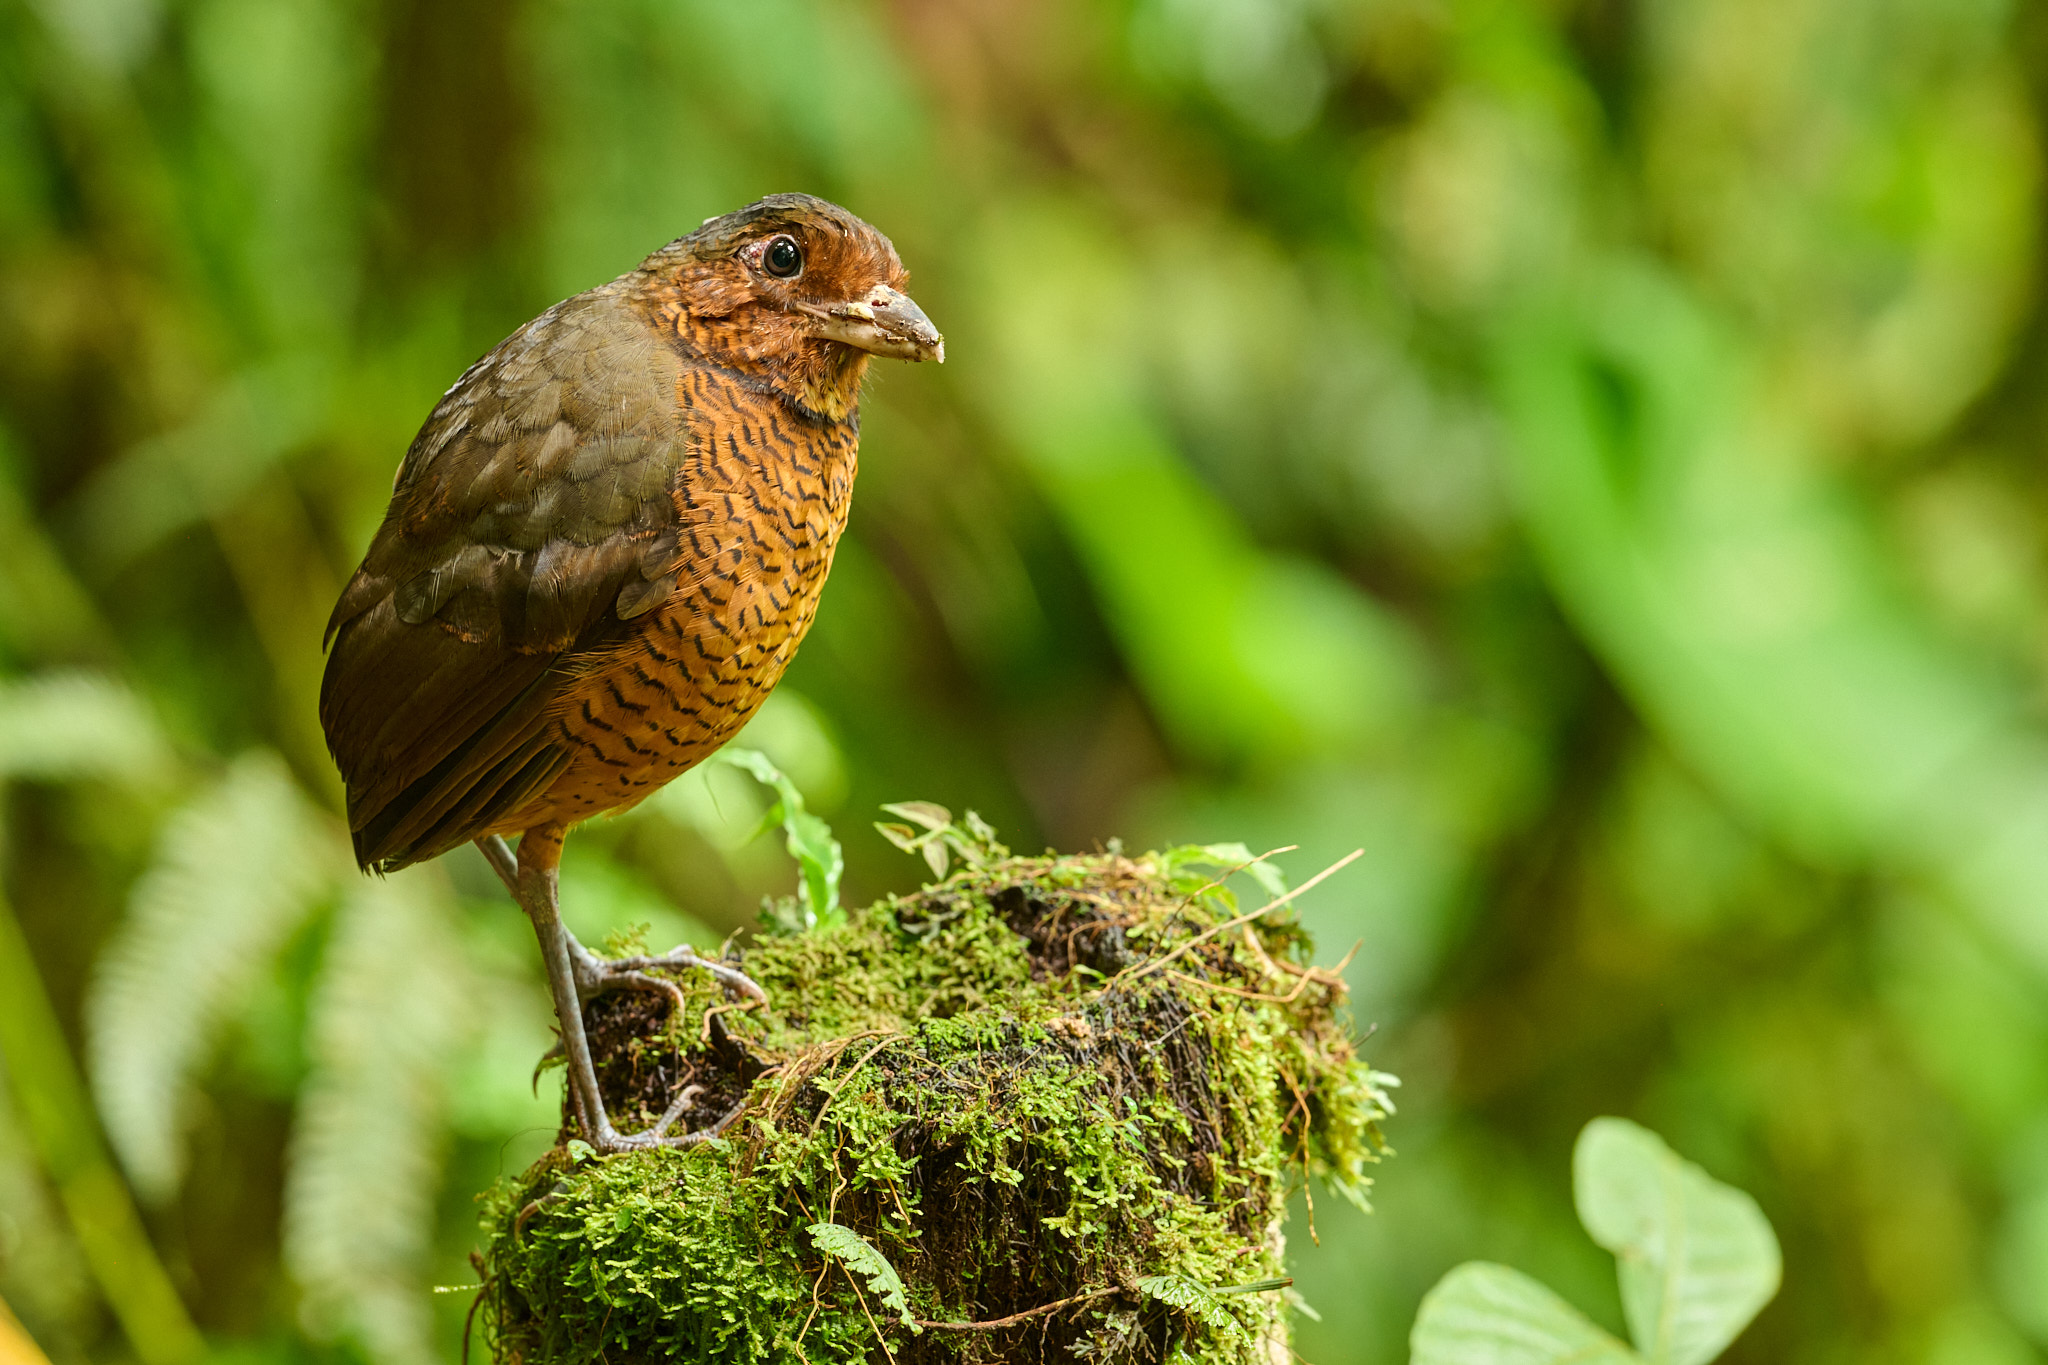
Unfortunately, the Giant Antpitta didn’t allow me to go narrower than f/8 before flying away. Still, it’s interesting to study how the lens handles a much busier background:
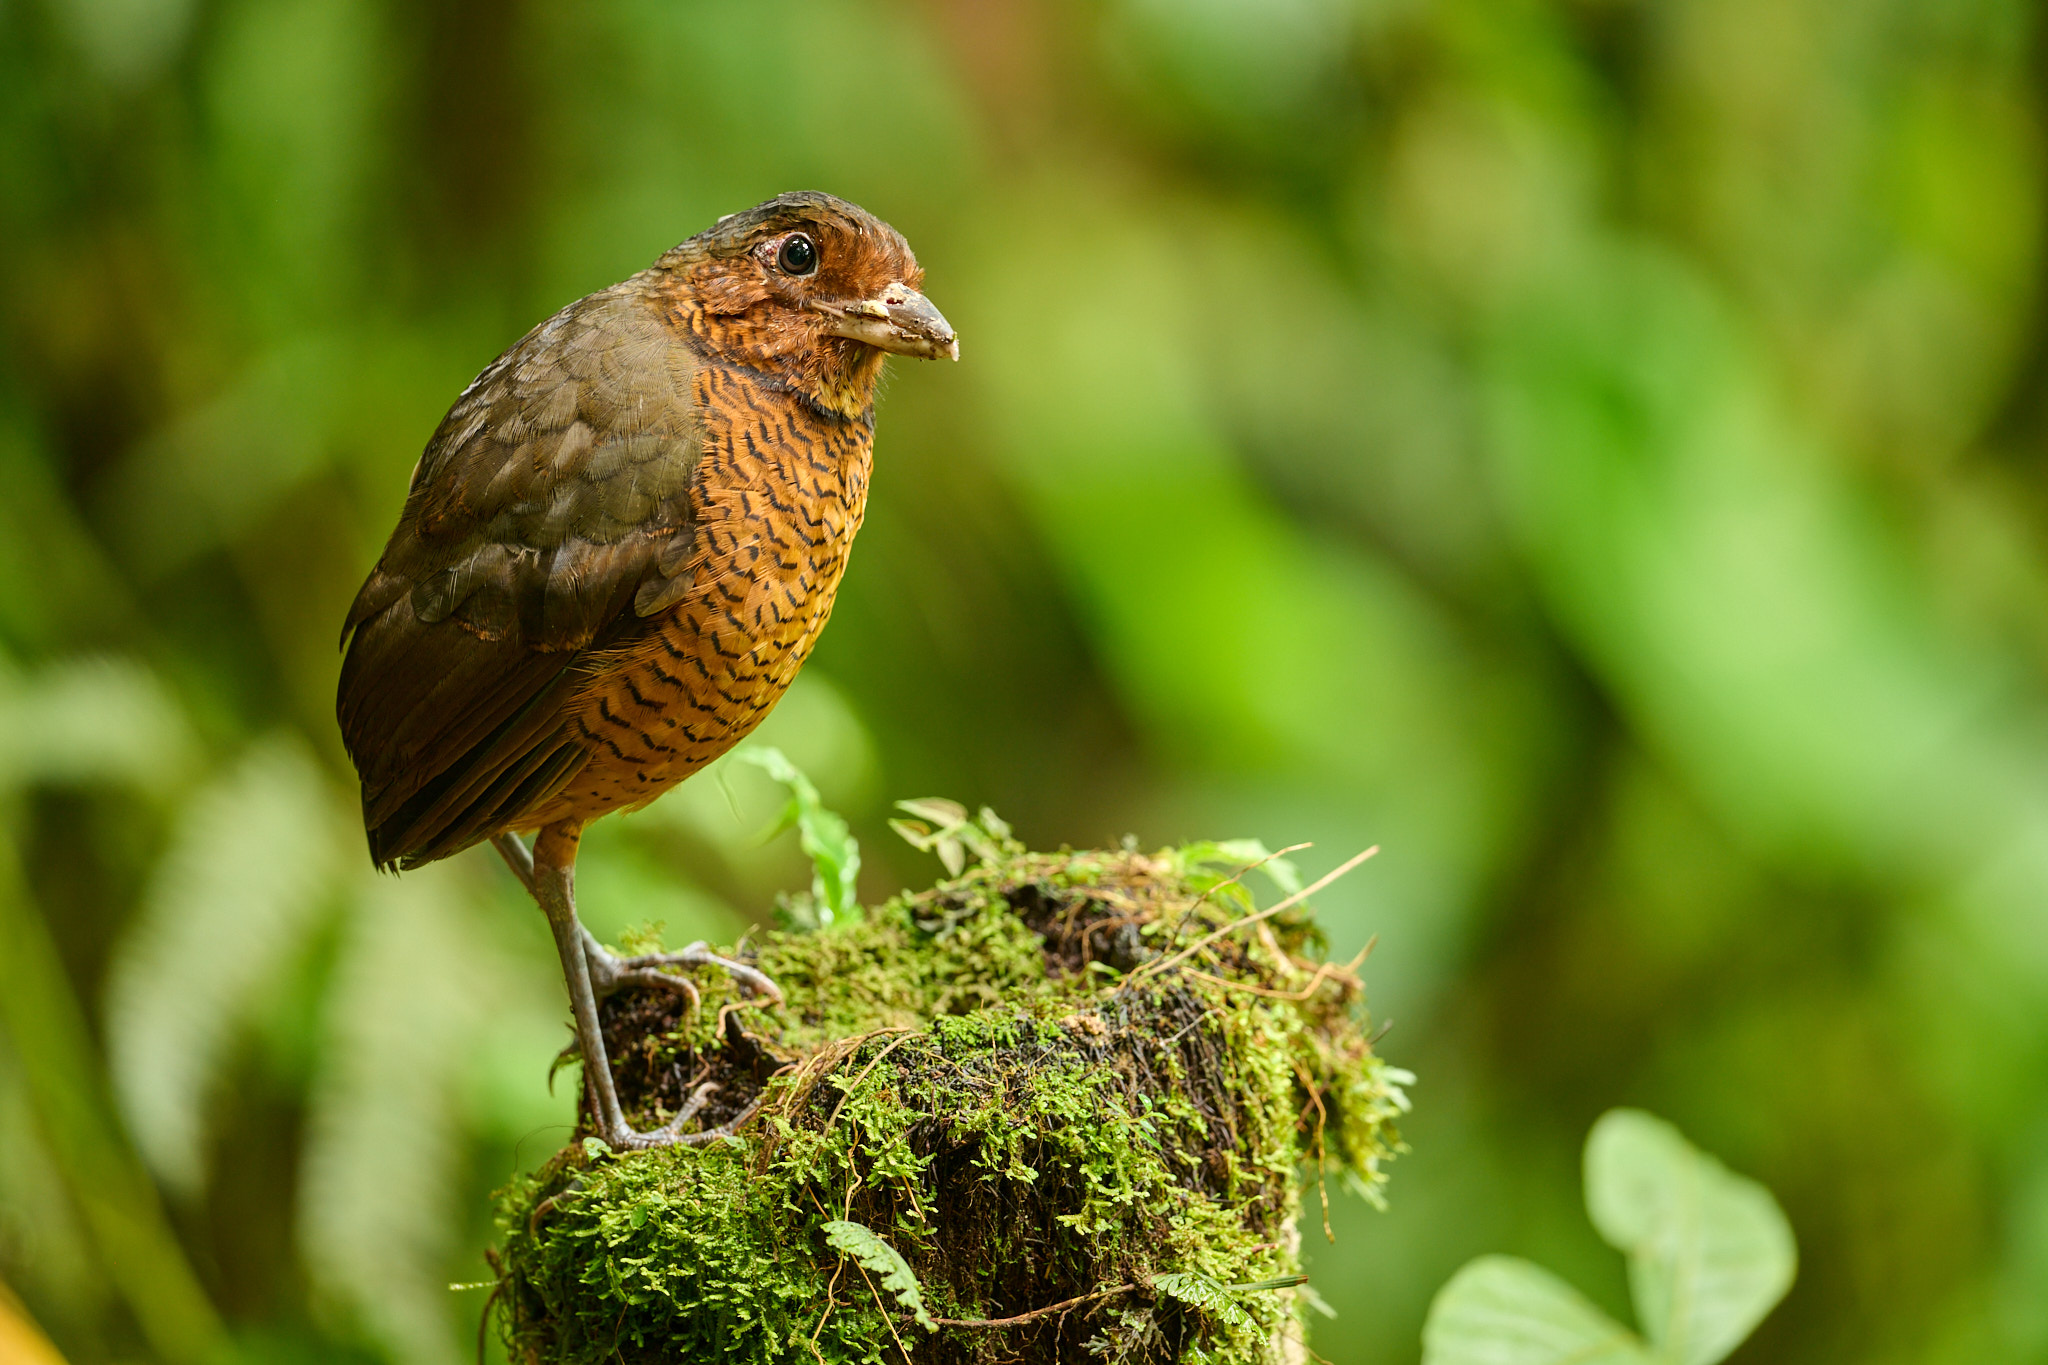
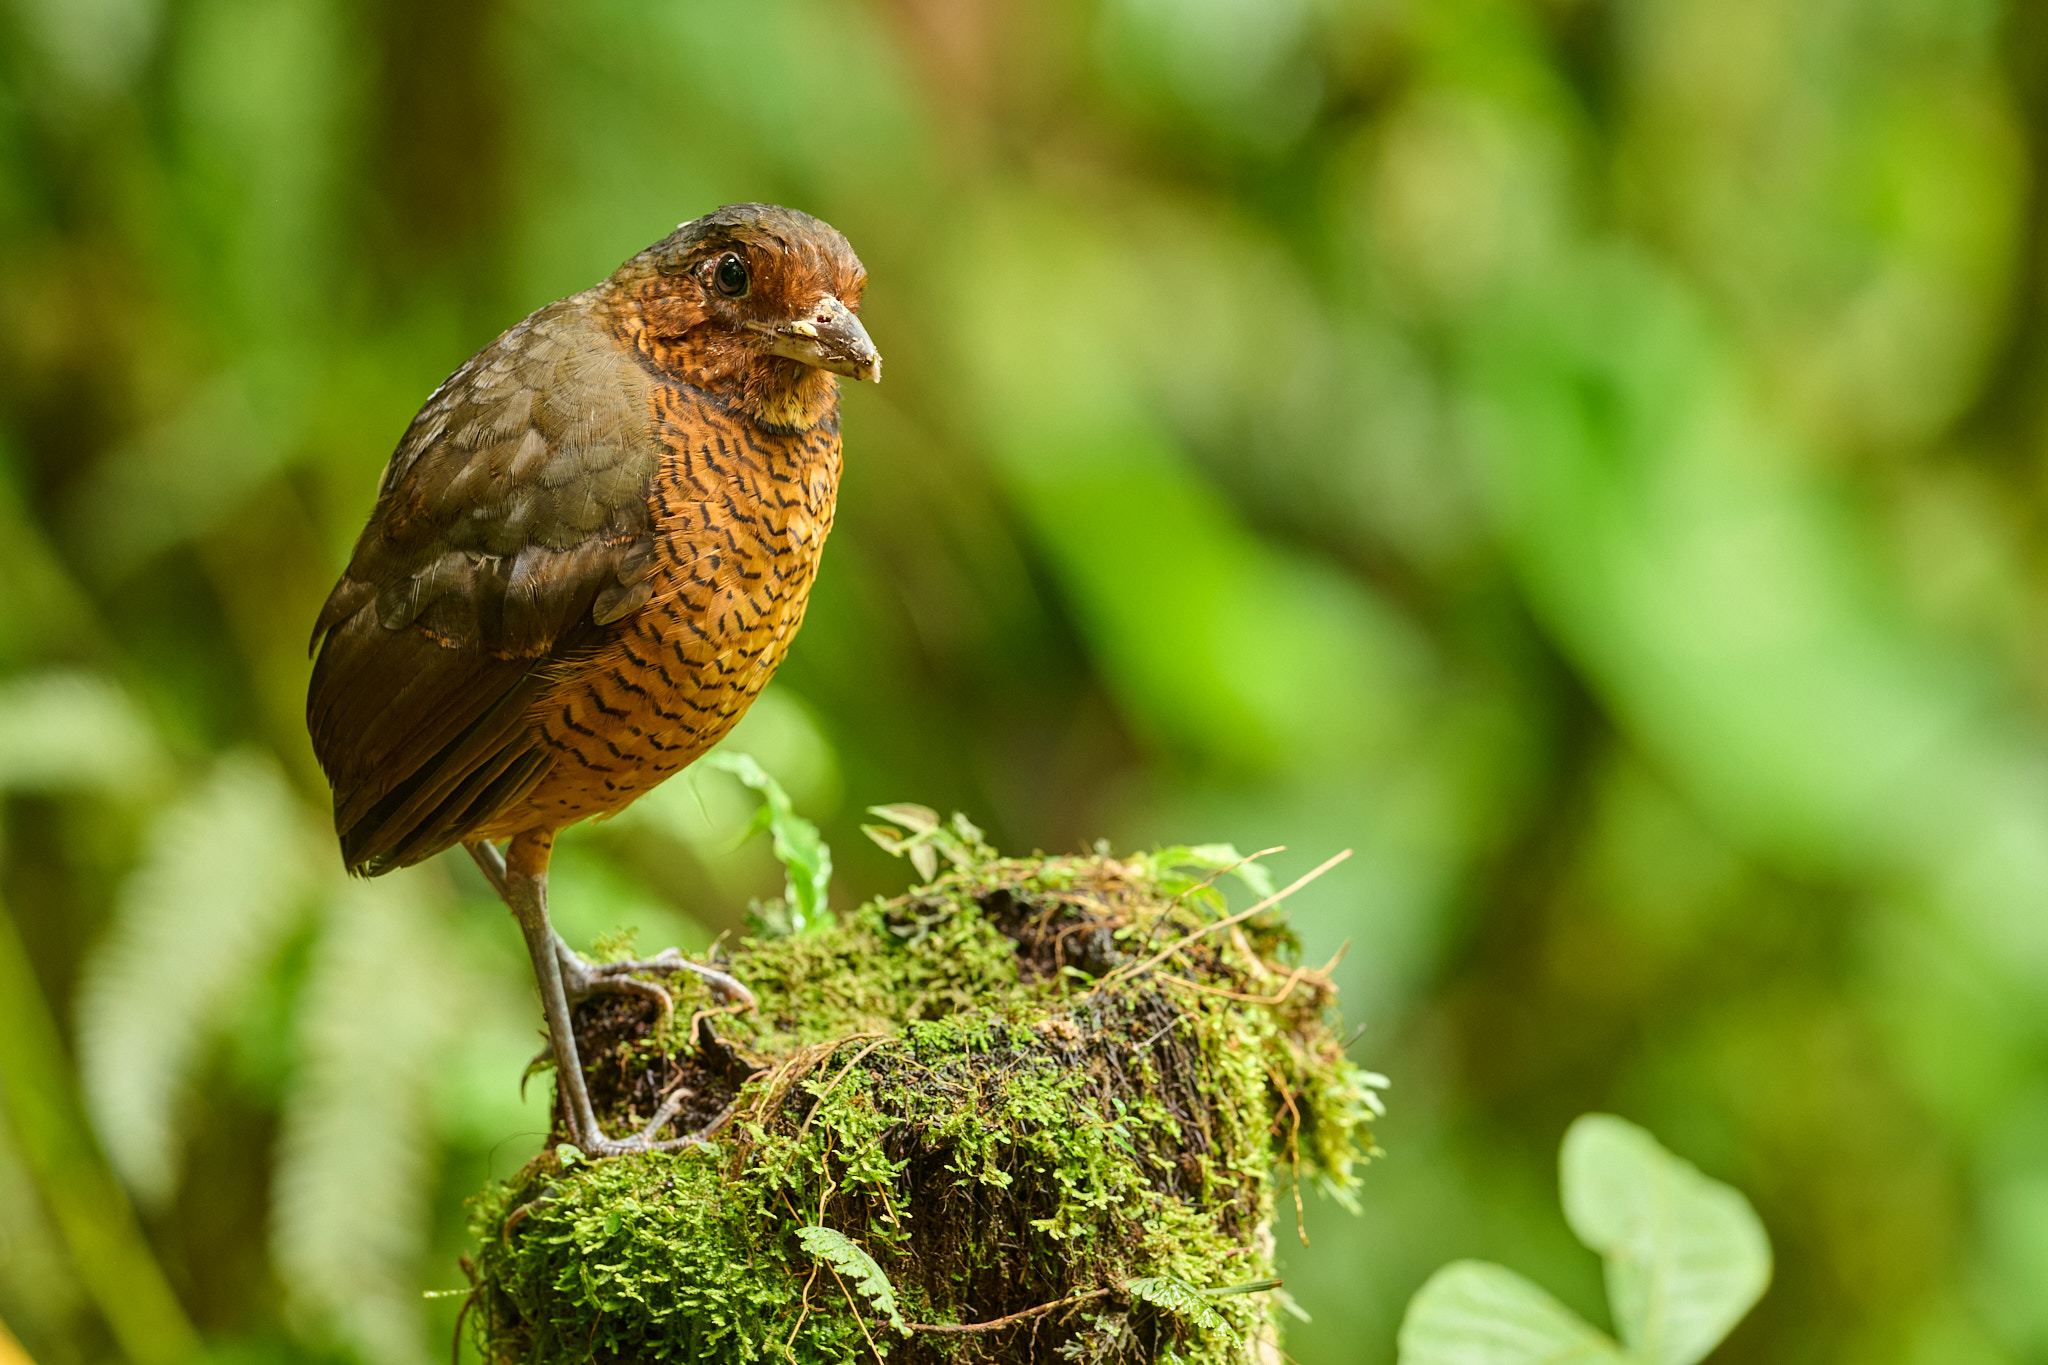
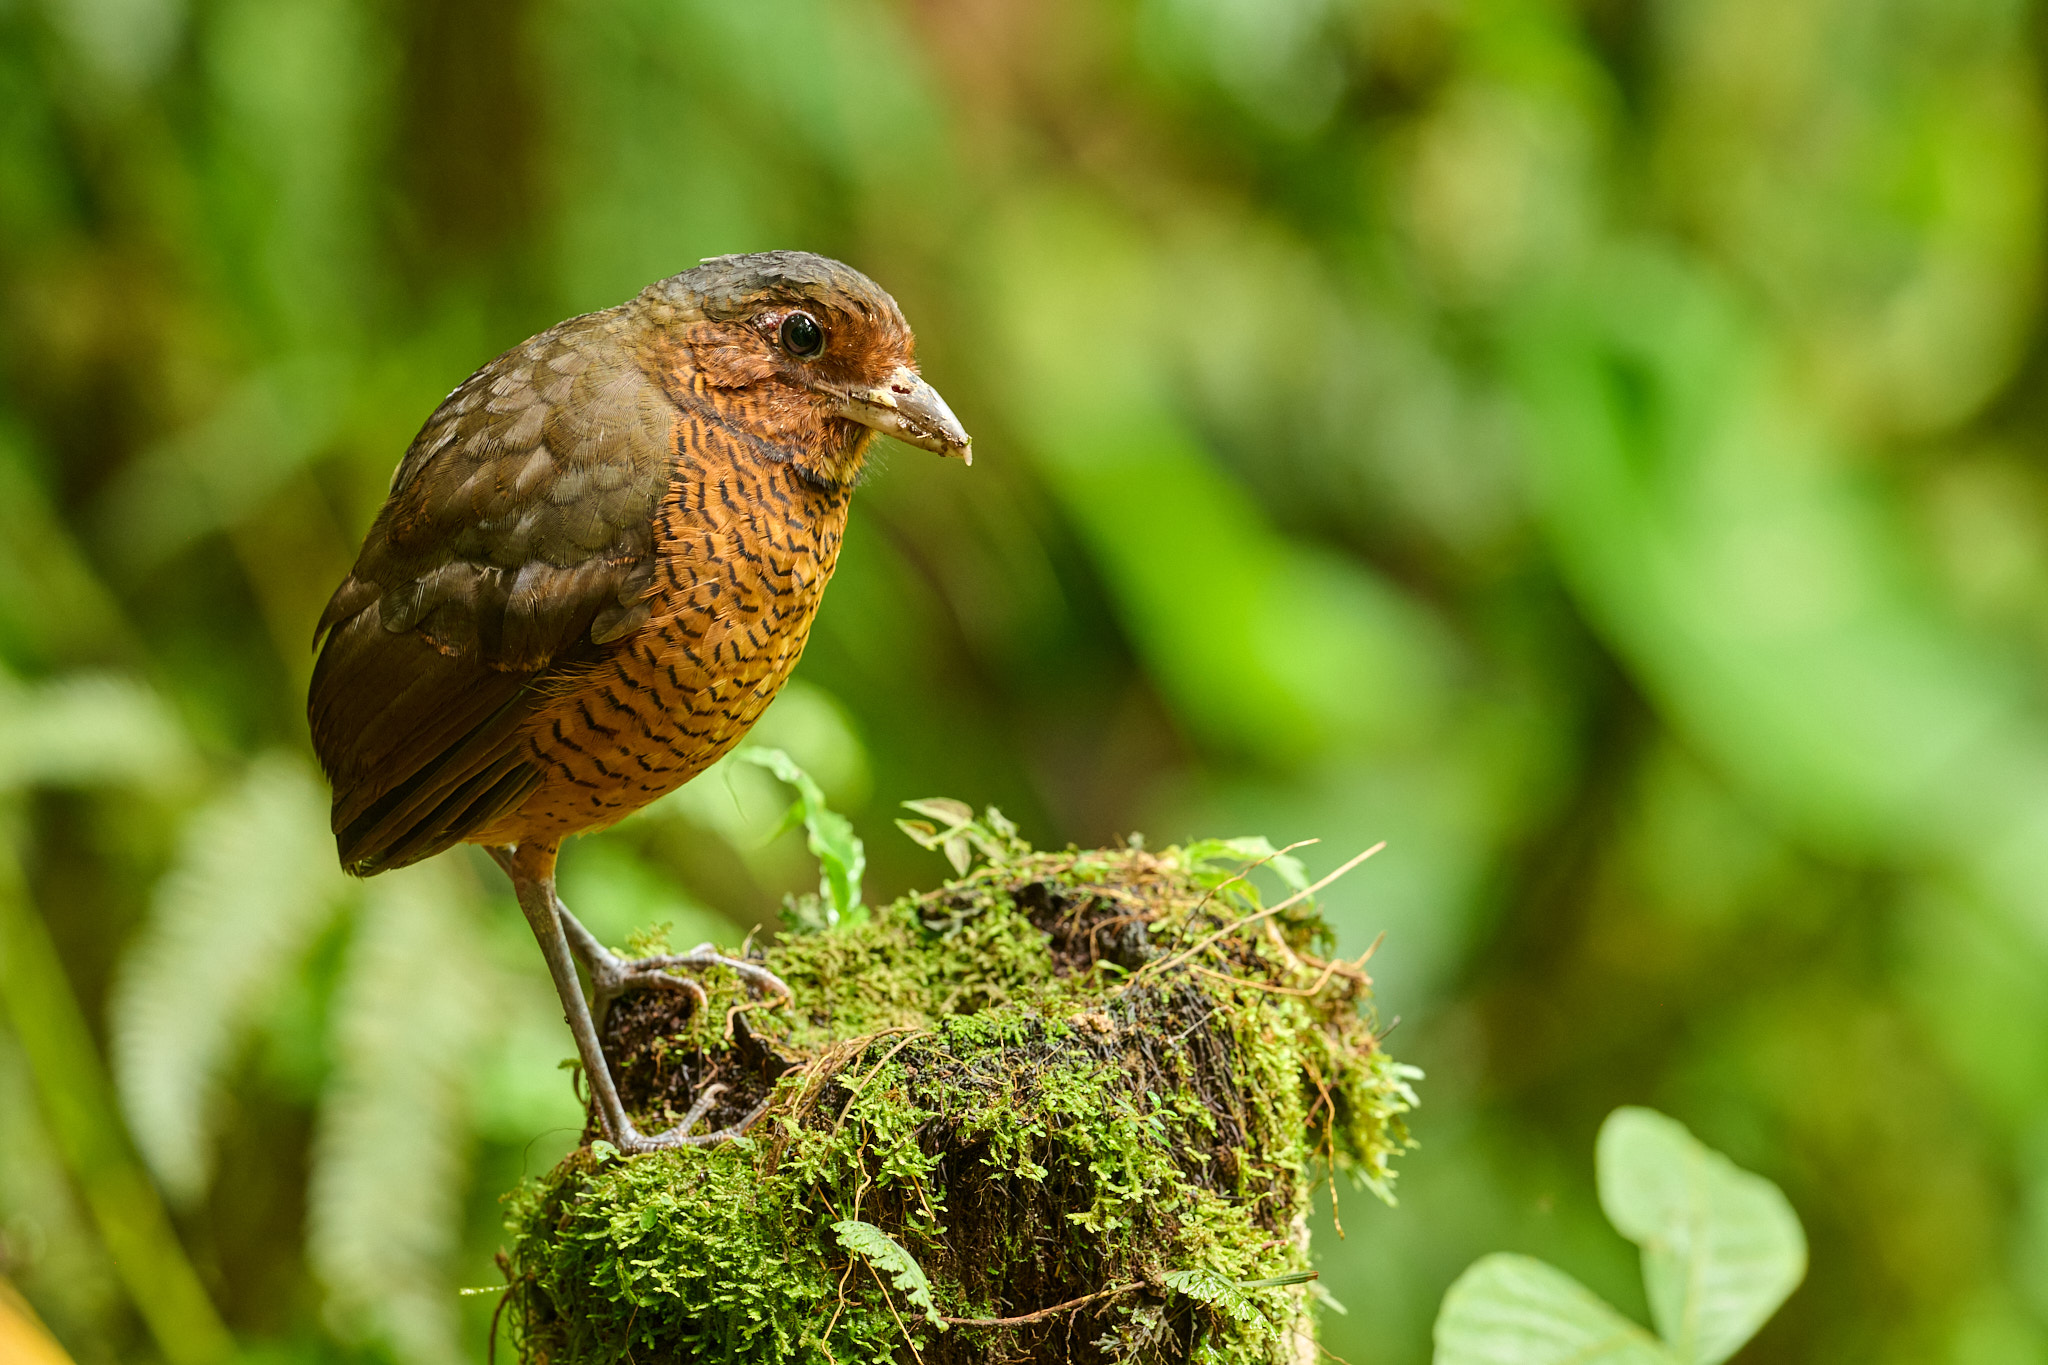
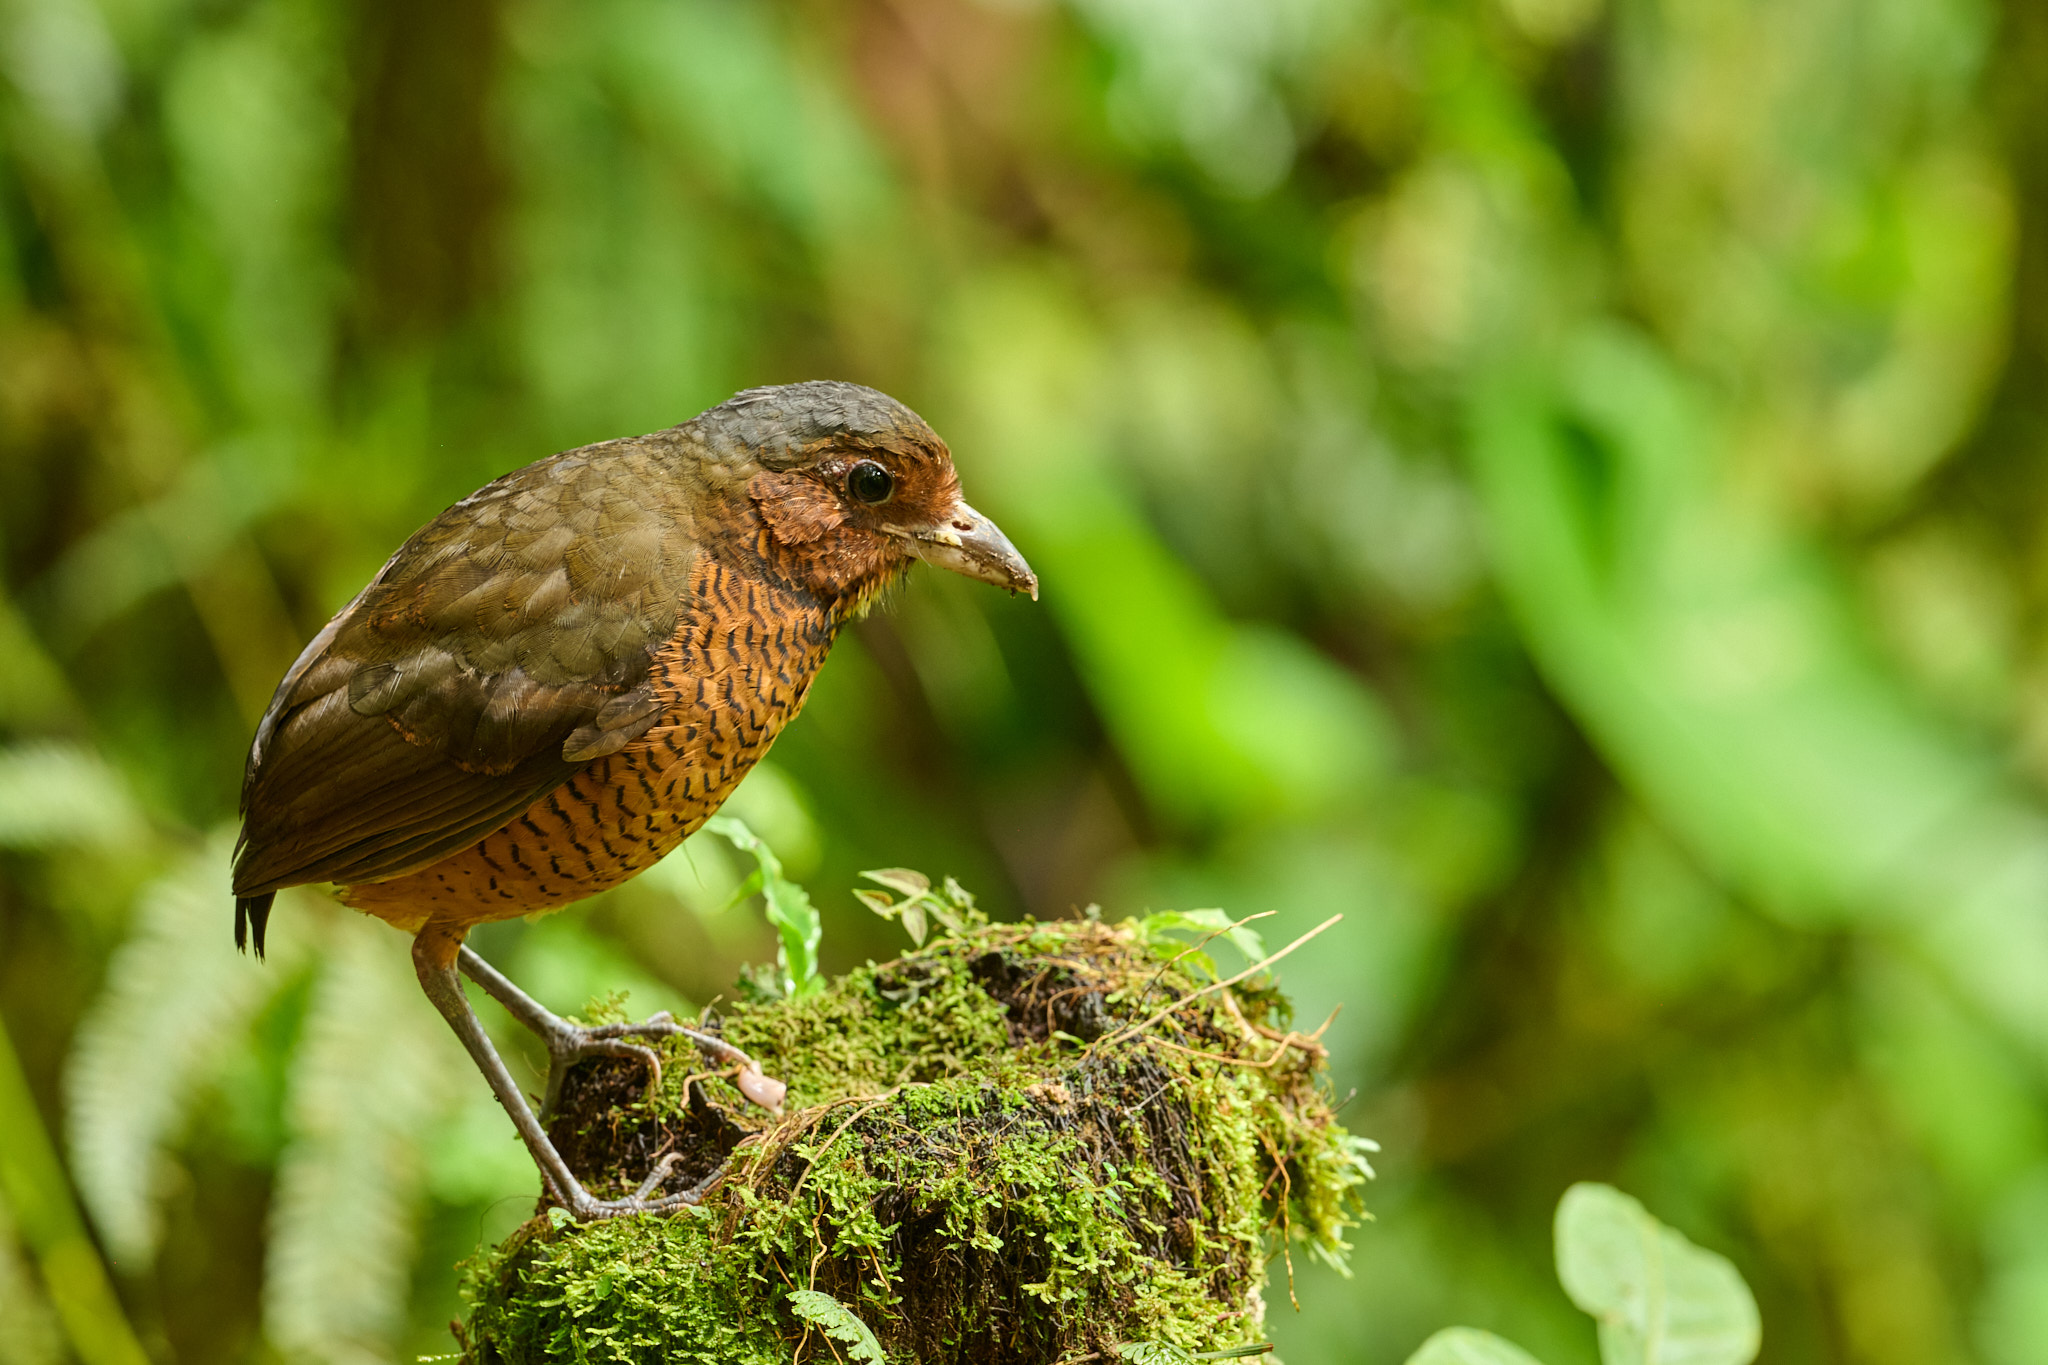
In this case, the final photo imitates the kind of subject separation you could expect from a slower zoom, such as the Canon RF 100-500mm f/4.5-7.1 L. As you can see from the example, even f/4 can’t work wonders if the background is too close to the subject. But there is still a clear progression from more to less separation.
Now for something a little different. Aperture is not the only thing that affects your depth of field. So does your focal length. And thanks to the Auto Capture feature on my Nikon Z9, I was able to set up a photo with this Antpitta at a 65mm focal length! Thanks to this, you can compare the following pair of photos taken with the same camera, same f/7.1 aperture, and approximately the same size of the bird in the photo.
The photo taken at 500mm substantially magnifies the size of the out-of-focus background. This clearly helps with subject separation. However, I should mention that you aren’t technically gaining any more depth of field on your subject with the wider lens. If you look at the stump the Antpitta is standing on, suddenly you see that the same region is out of focus both times:
What’s the practical lesson here? Simply put, the background will appear different with a wide-angle lens and a telephoto, even when the depth of field is technically the same. This is an advantage to telephoto lenses if you want to get more subject separation at a given aperture.
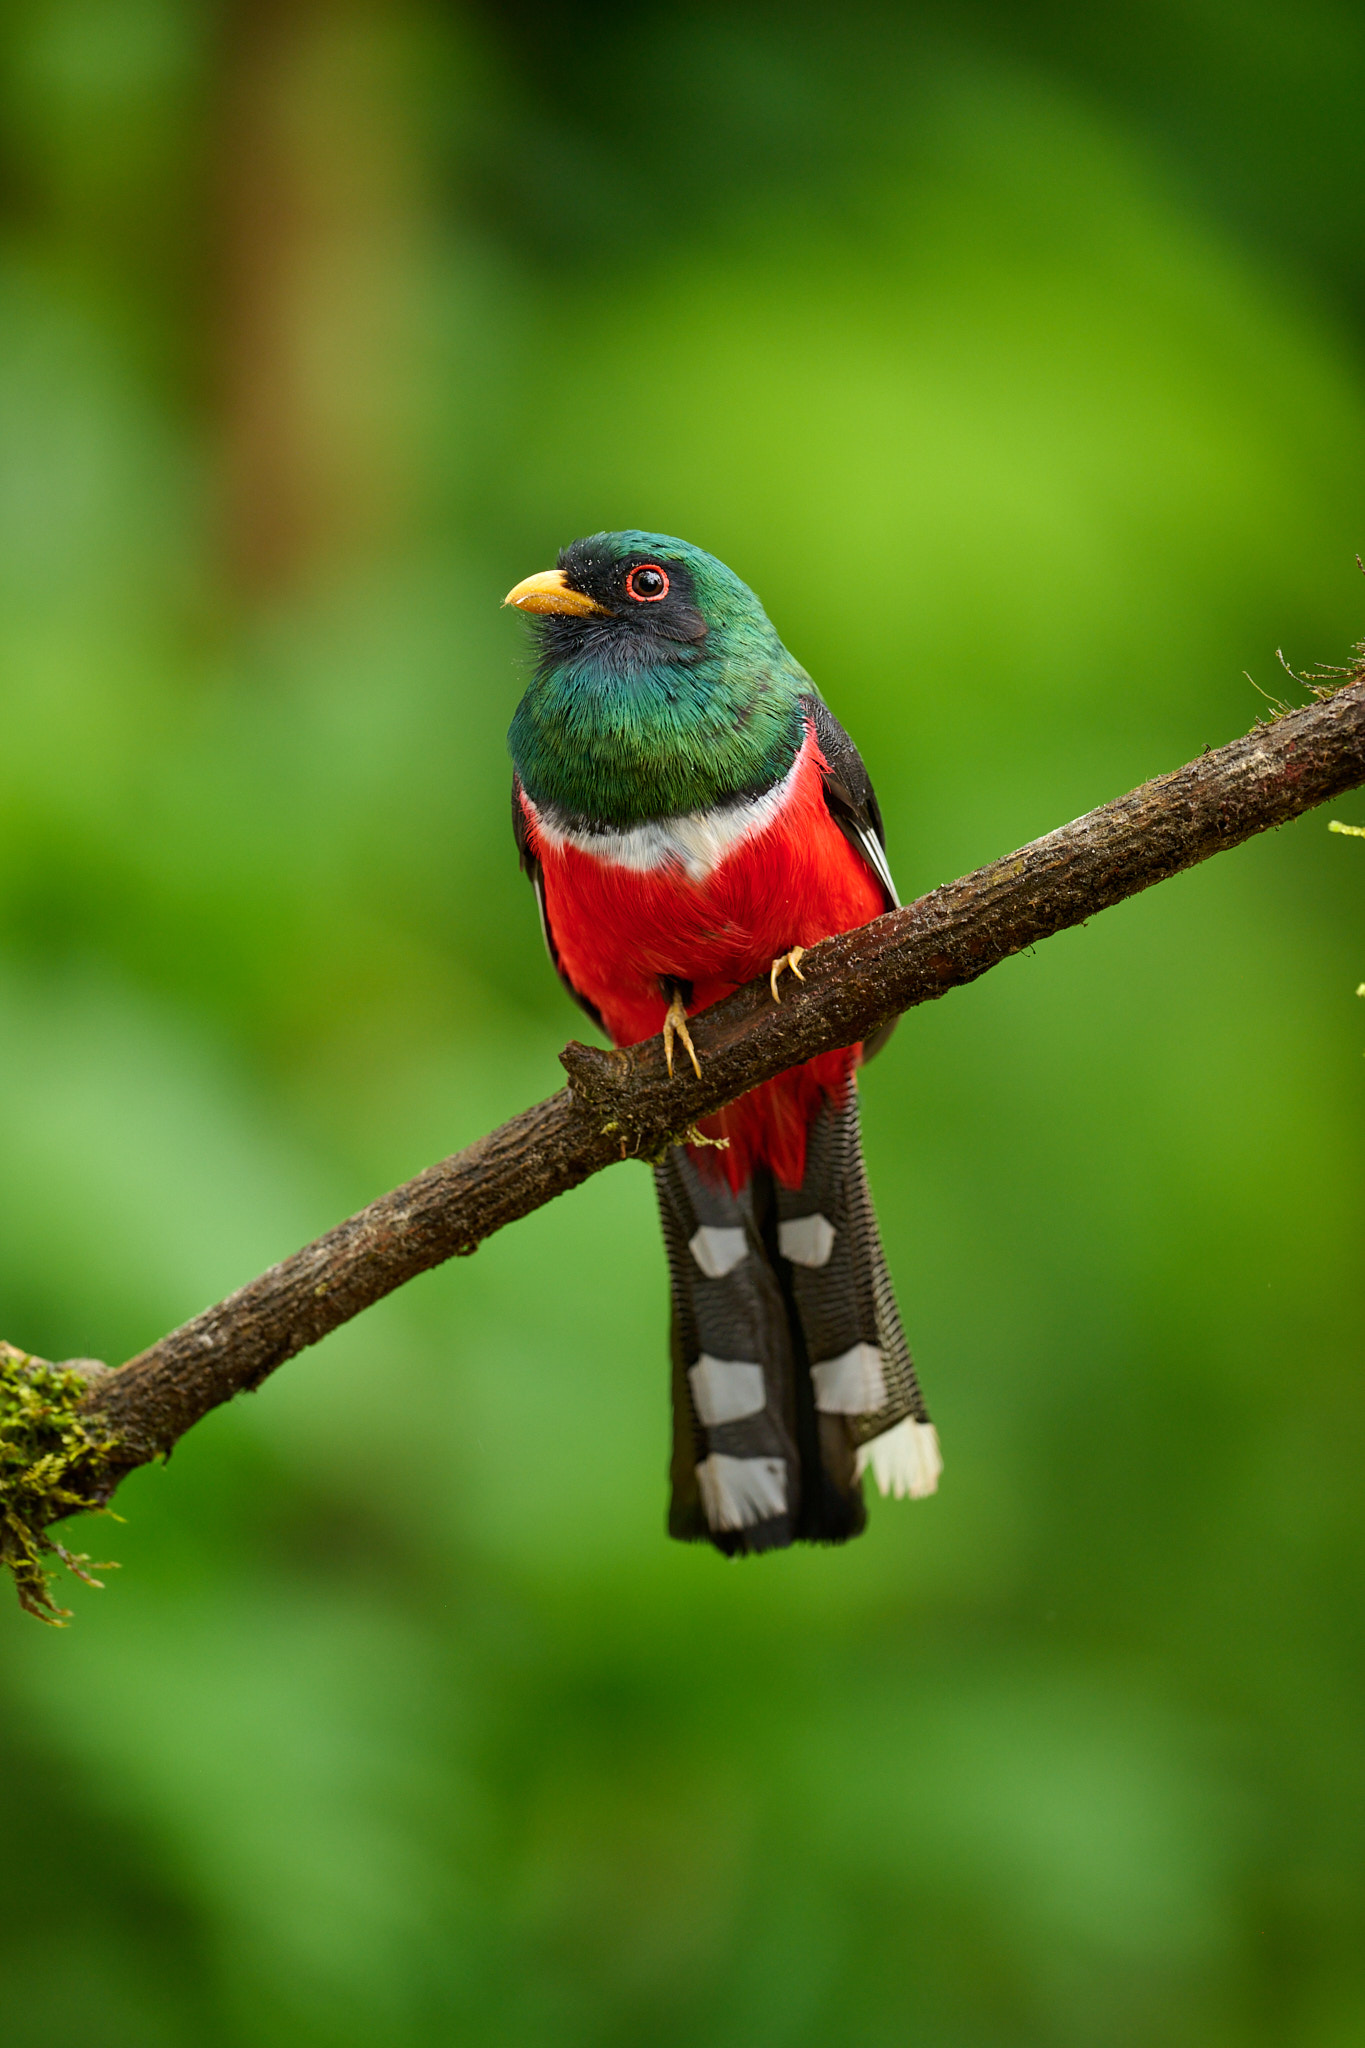
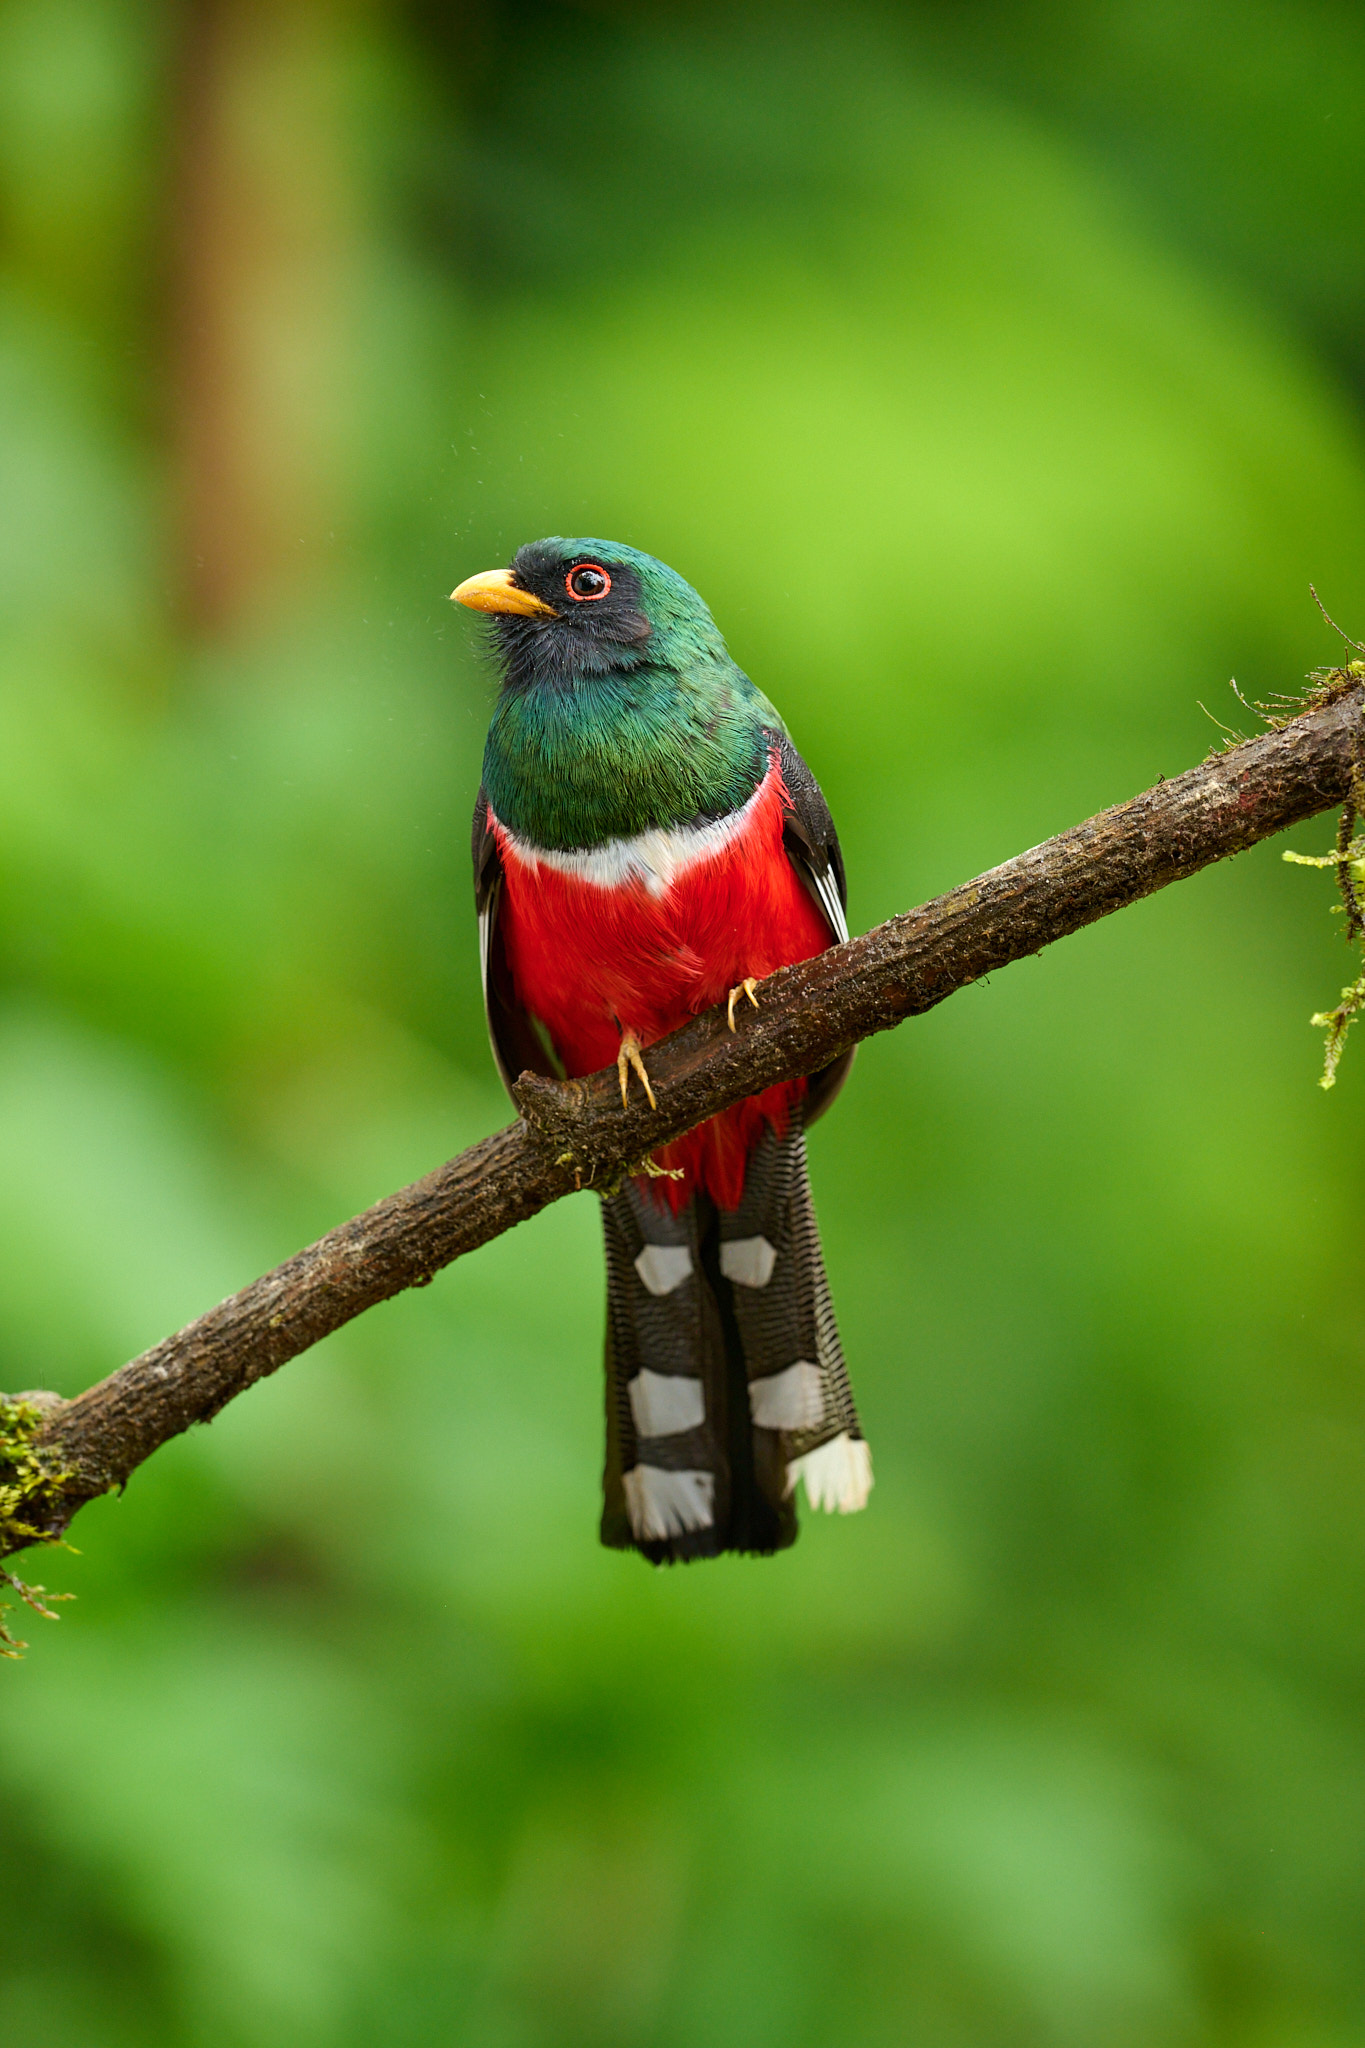
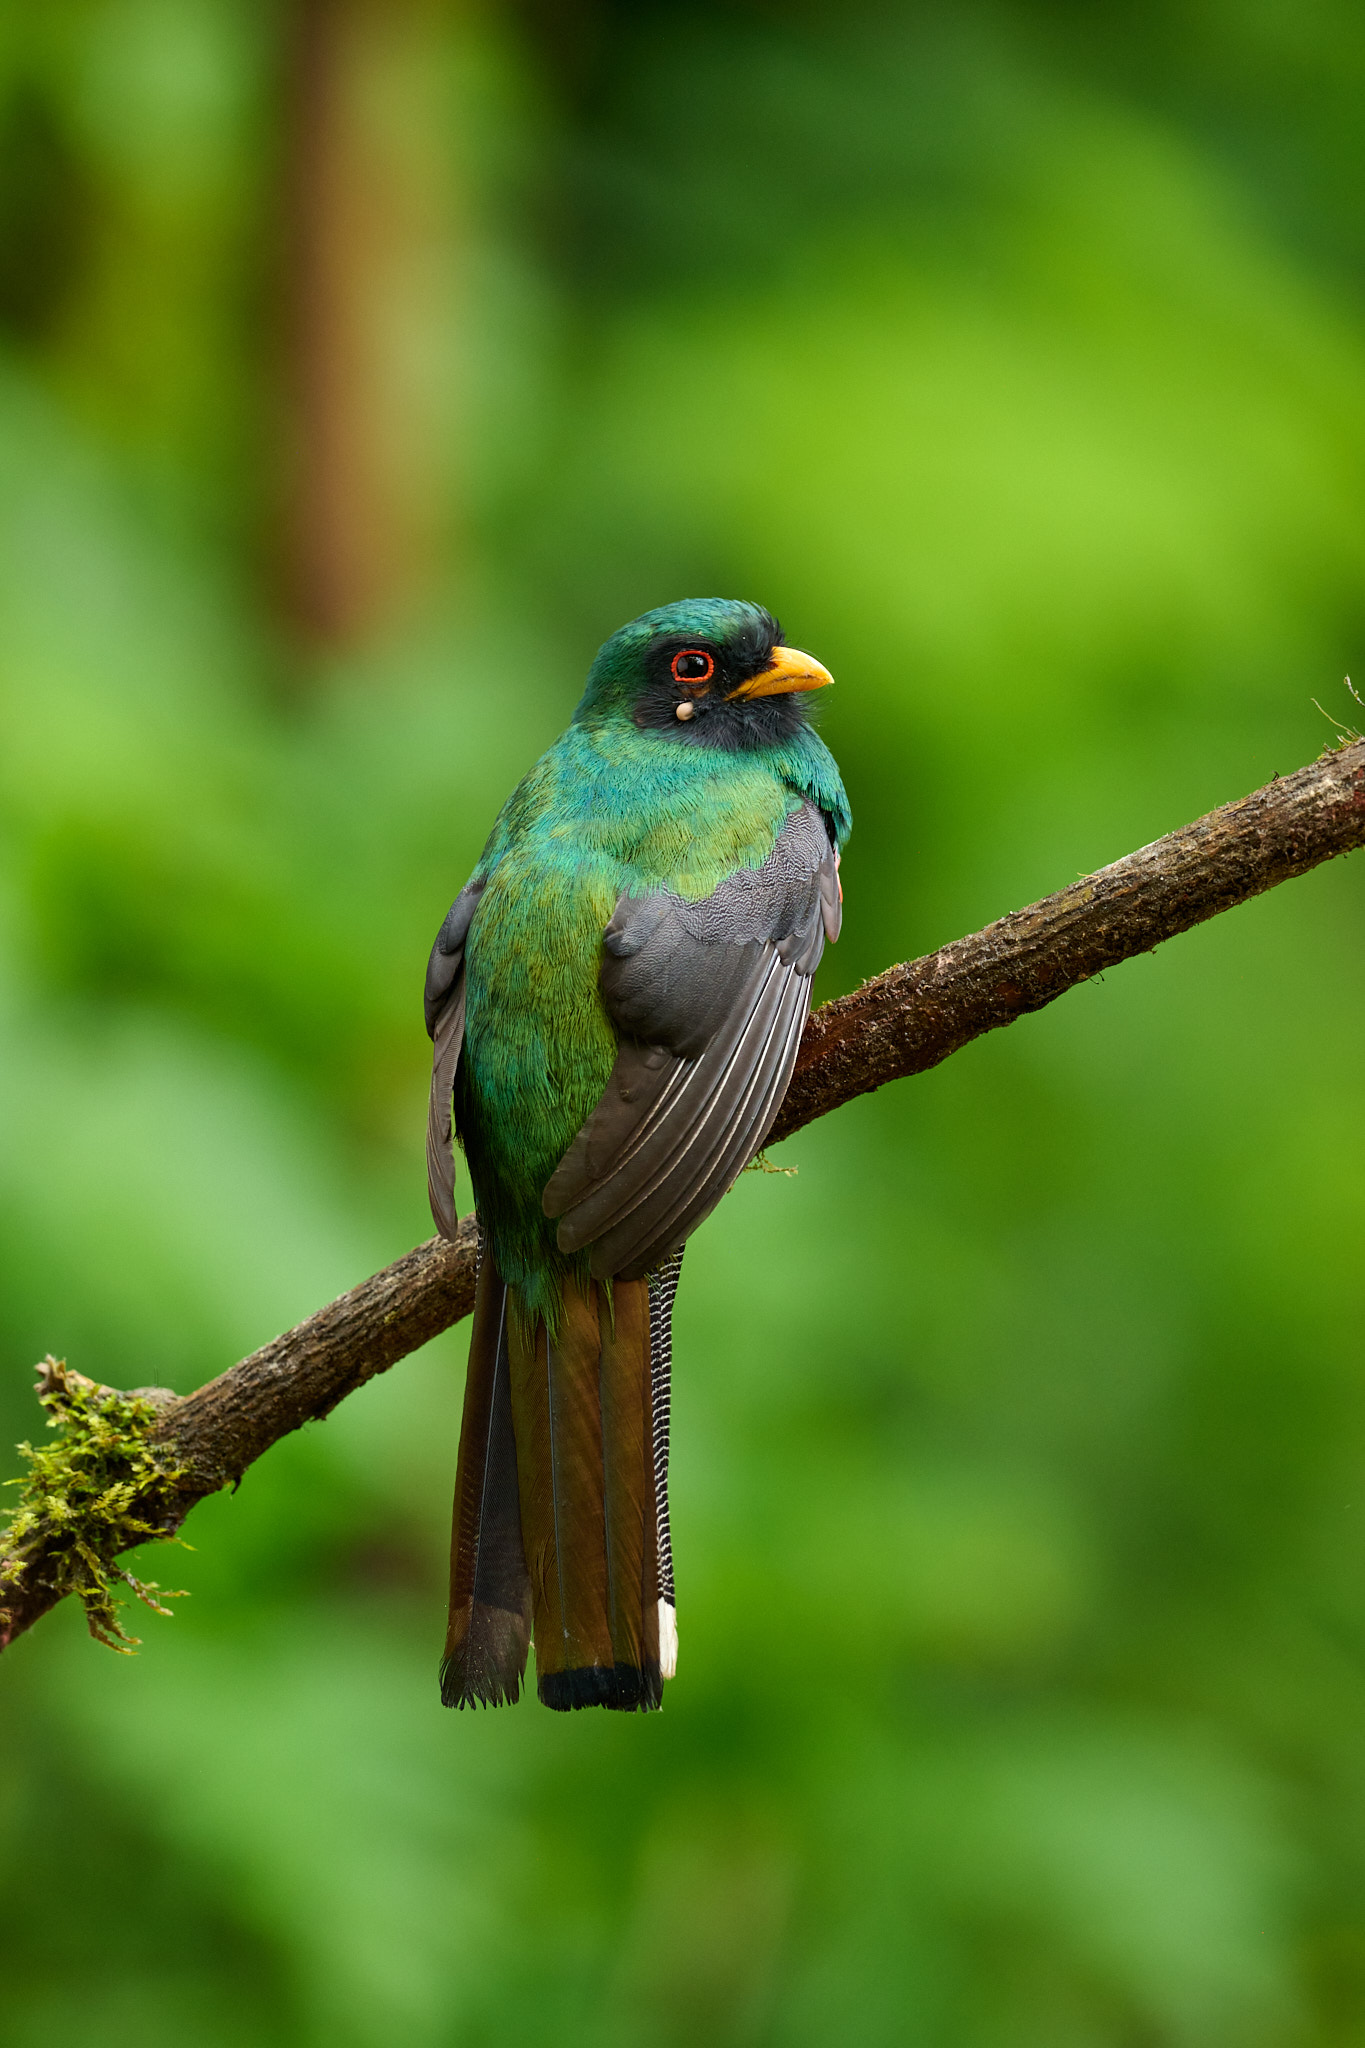
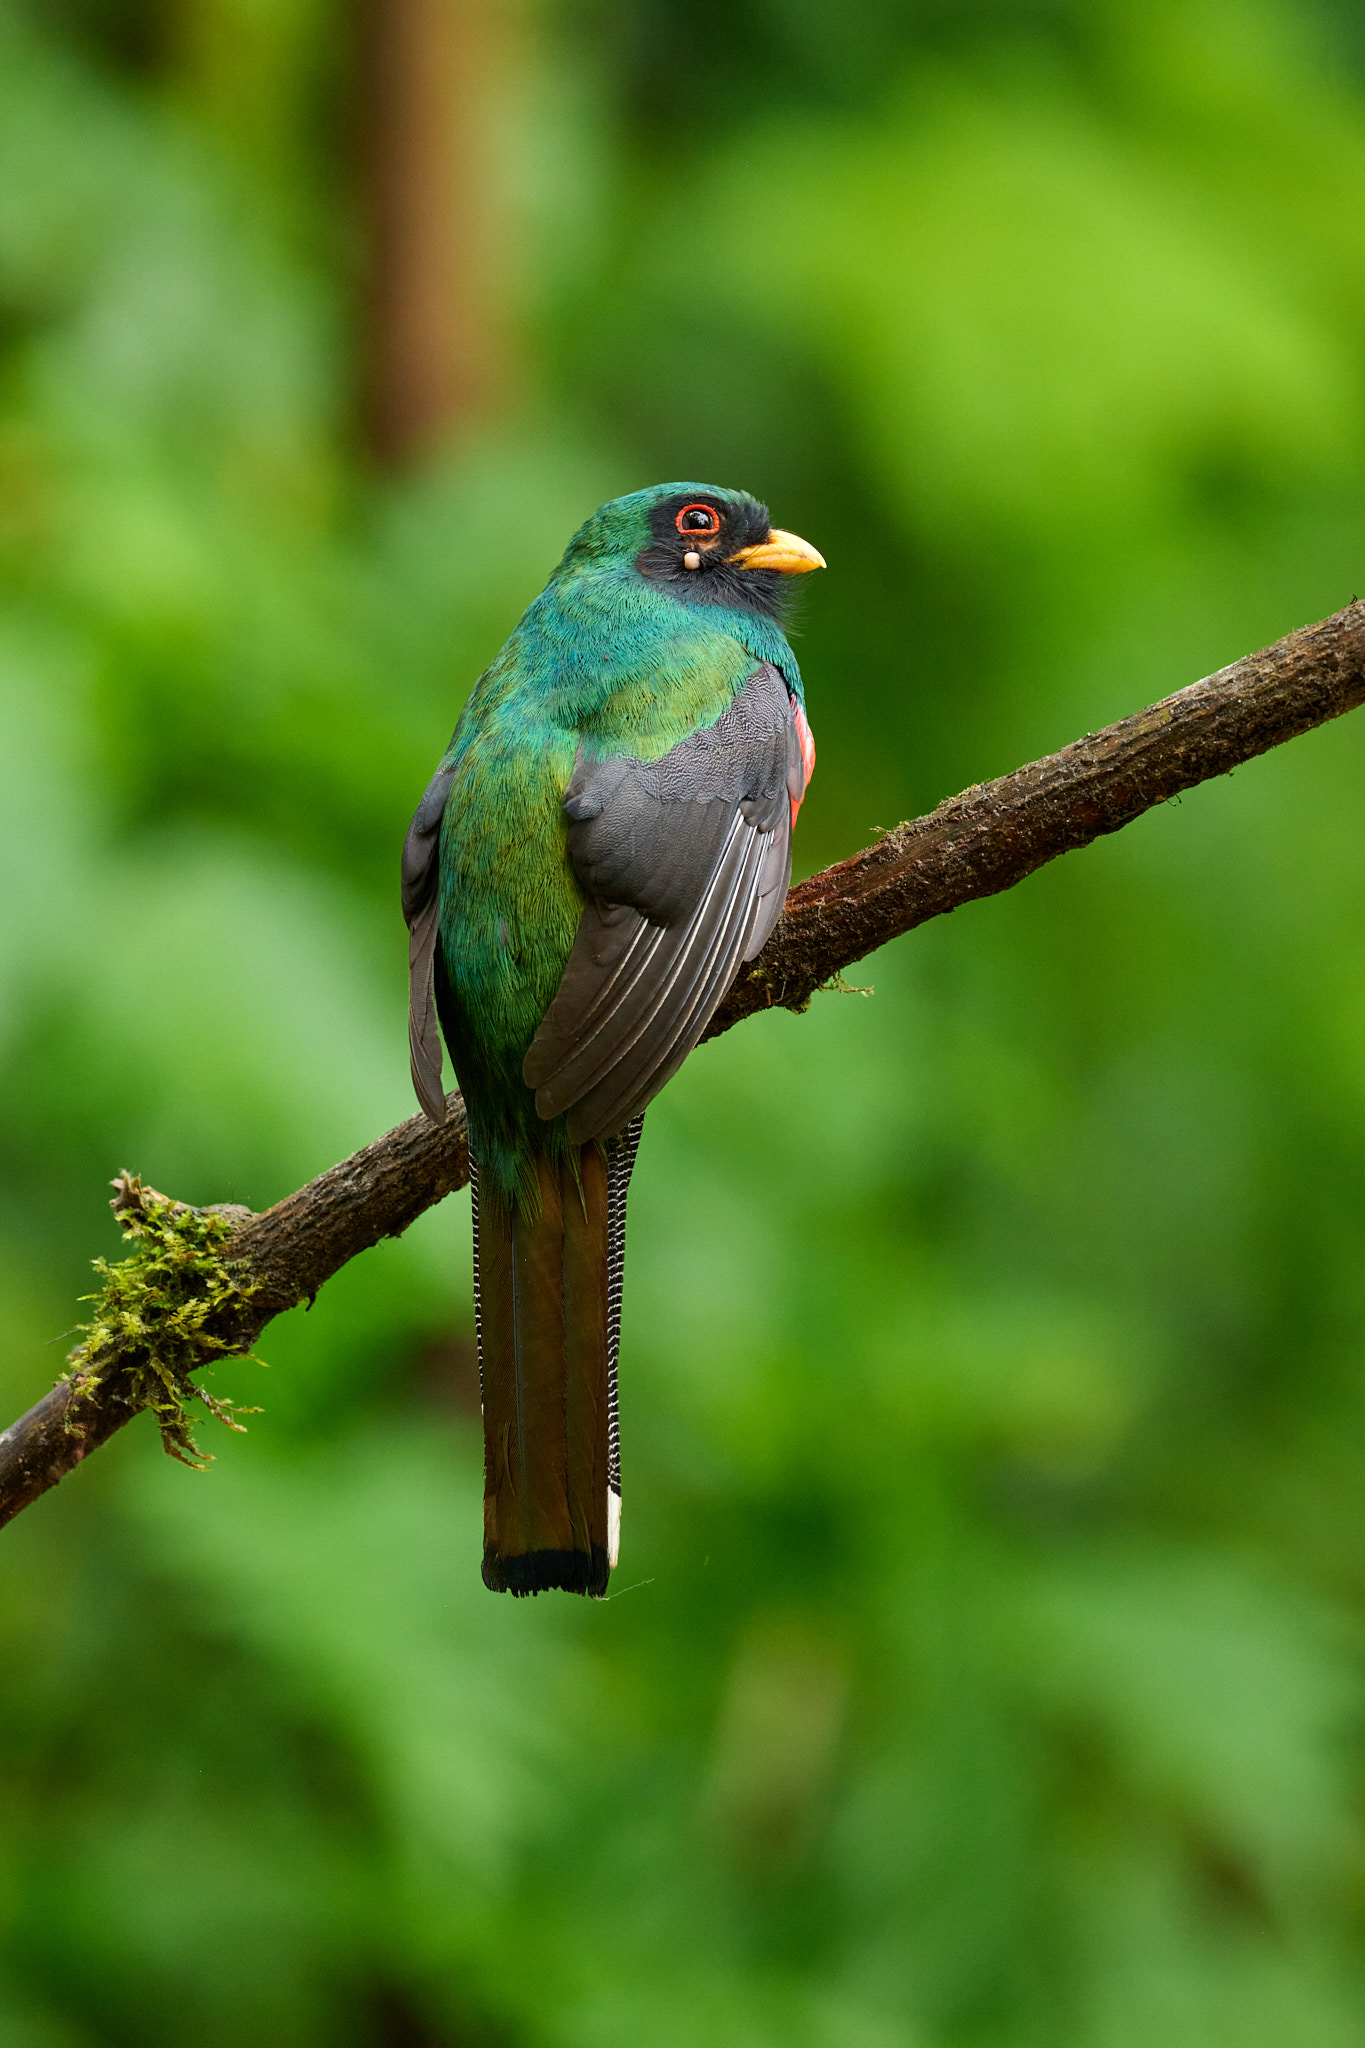
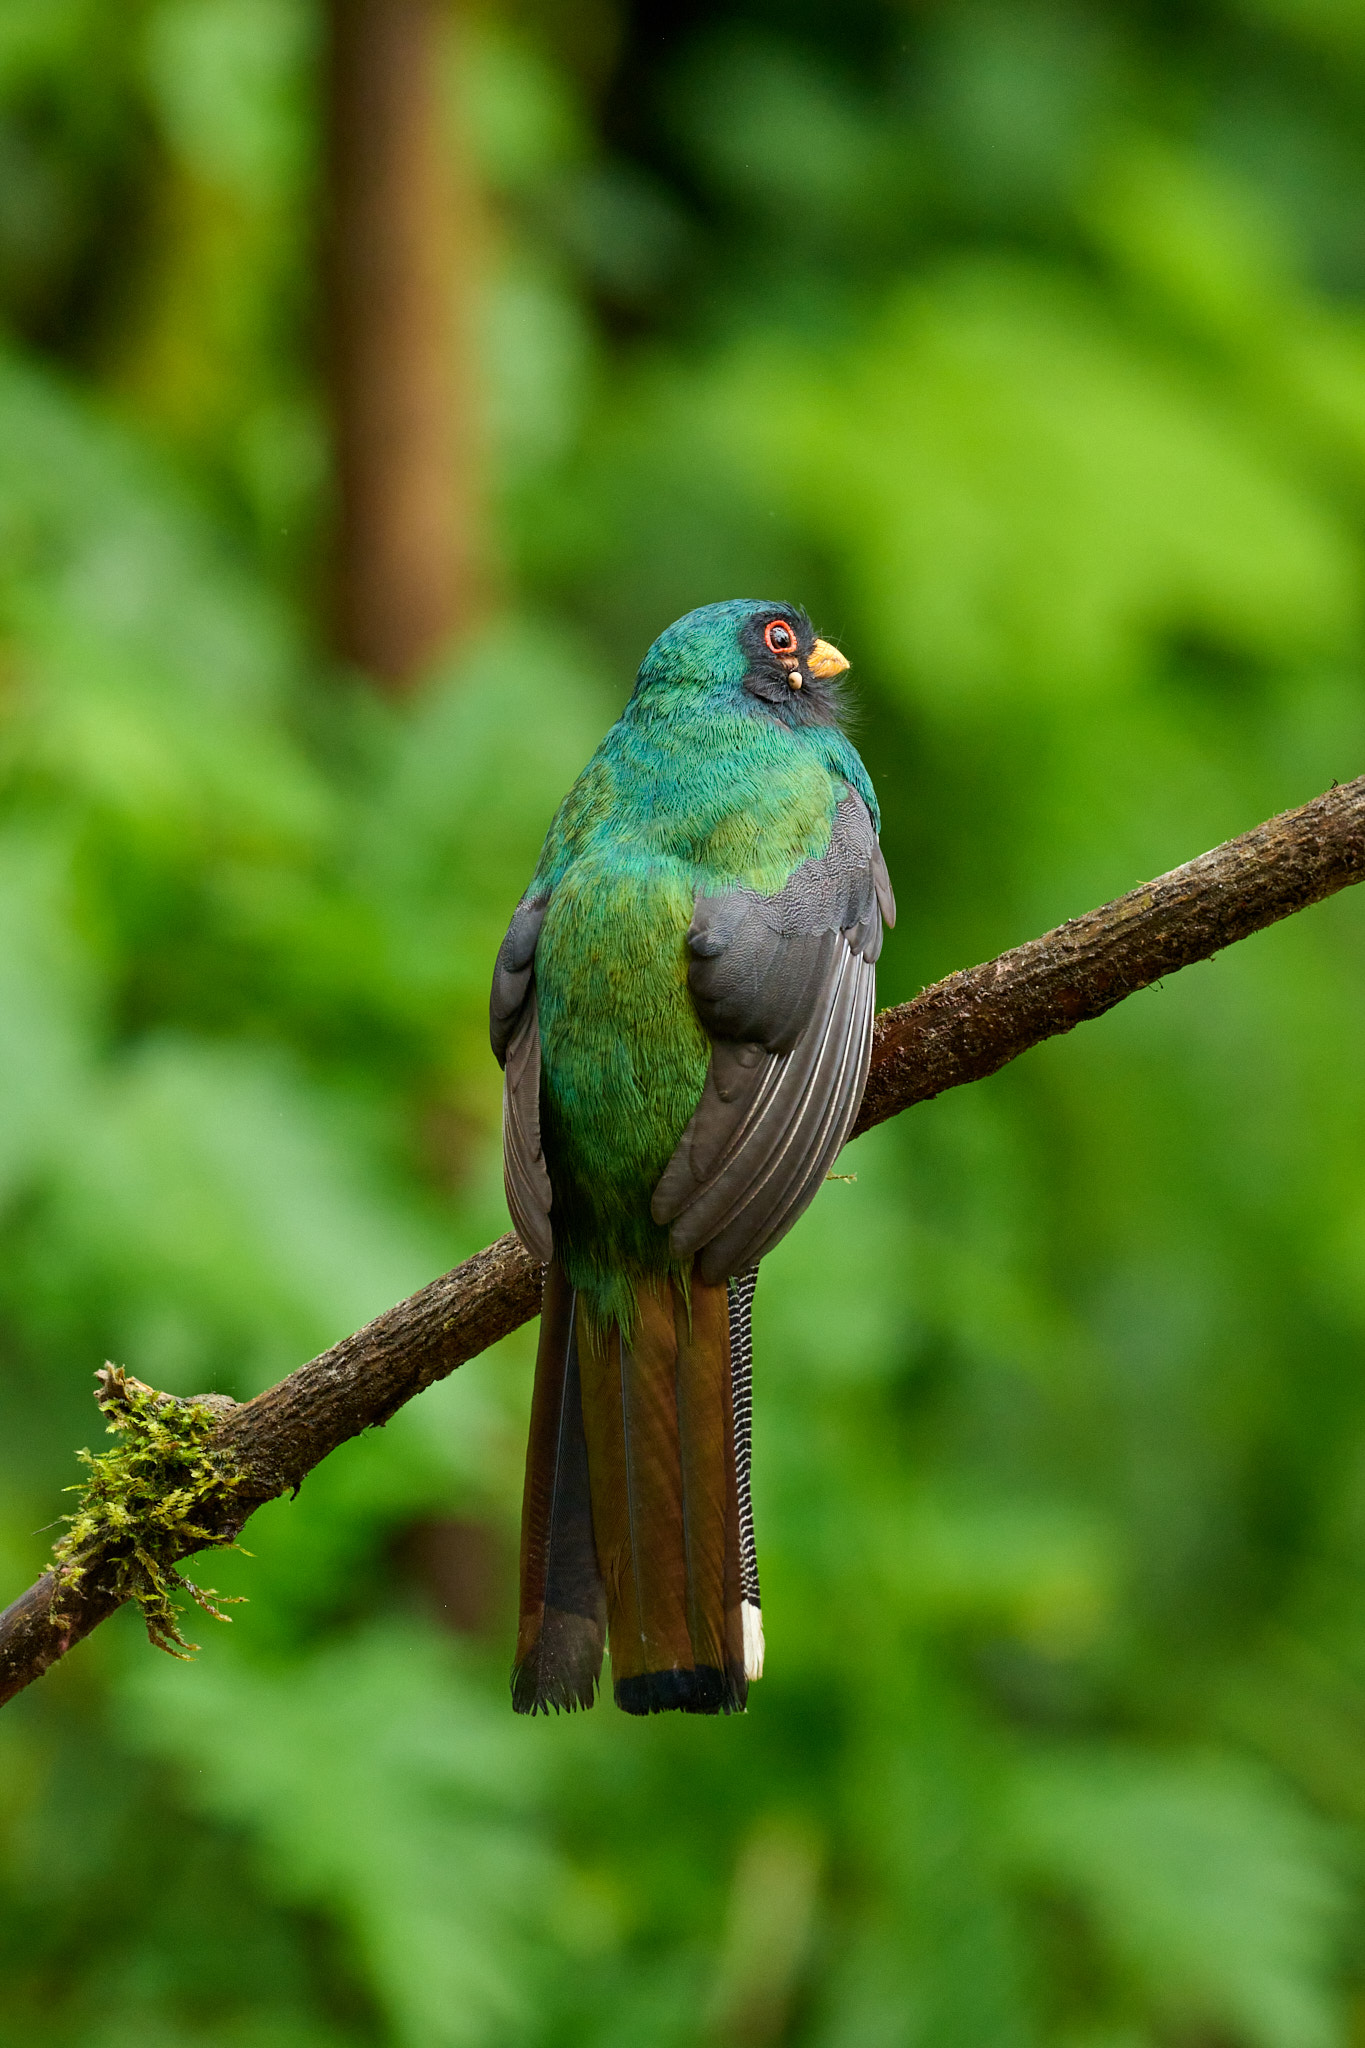
Let’s move onto another examples. The male Masked Trogon seems to know which aperture suits him best. When photographed at f/4 and f/5.6 he showed the camera his beautiful red belly. At f/6.3 through f/11, he turned around on the branch to show me a disinterested look, plus a blood-soaked tick on the side of his face. He didn’t let me shoot at the narrower apertures and flew away. I can only agree with Trogon. I also think that f/5.6 offers a balanced mix of depth of field and subject separation. What about you?
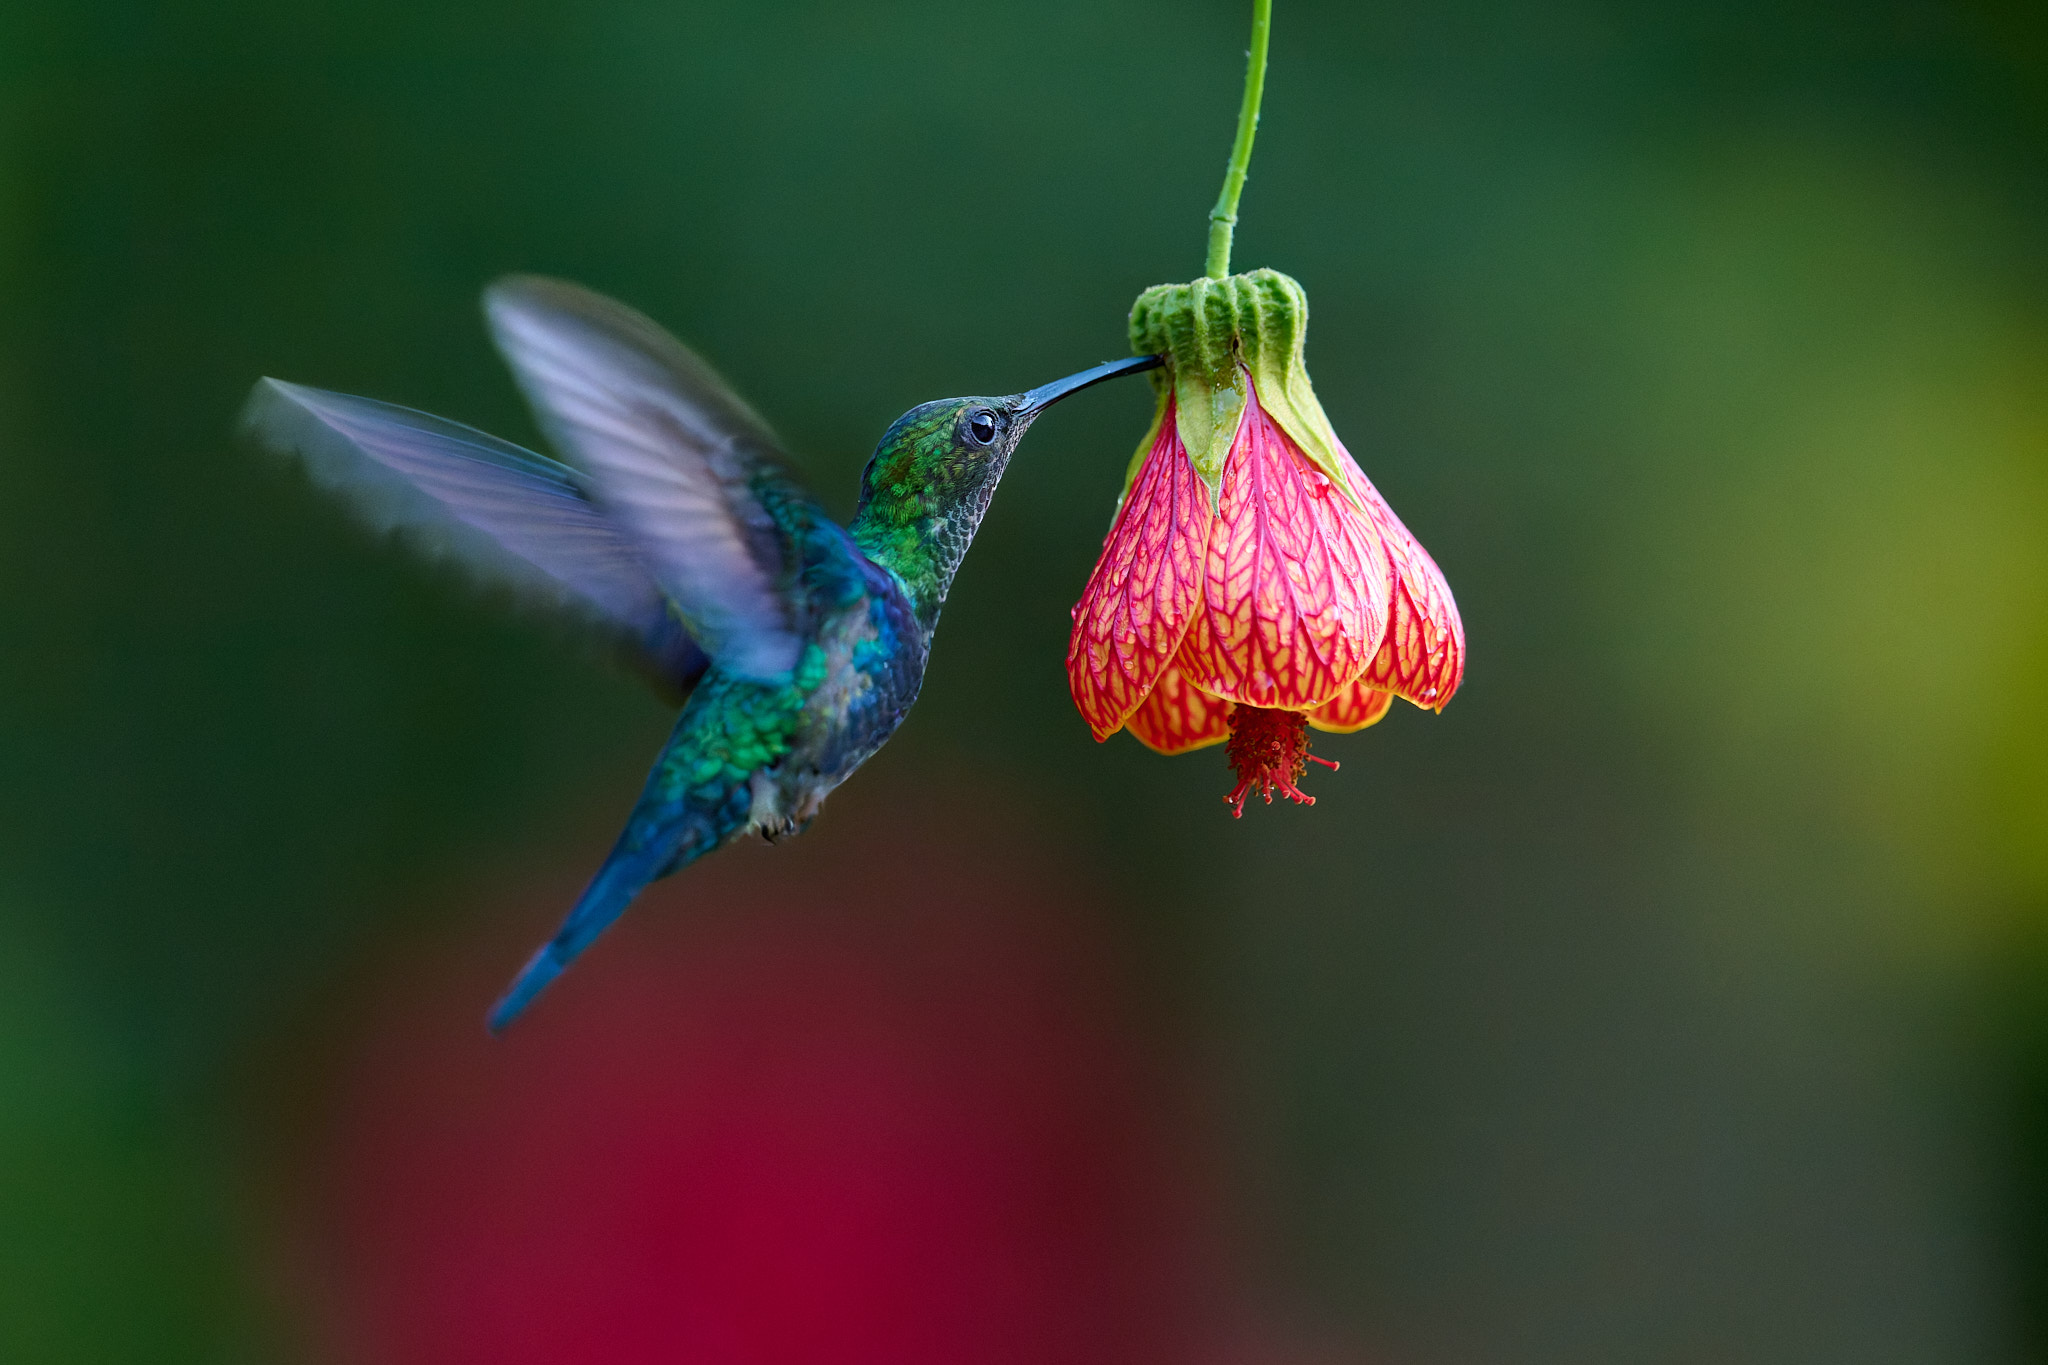
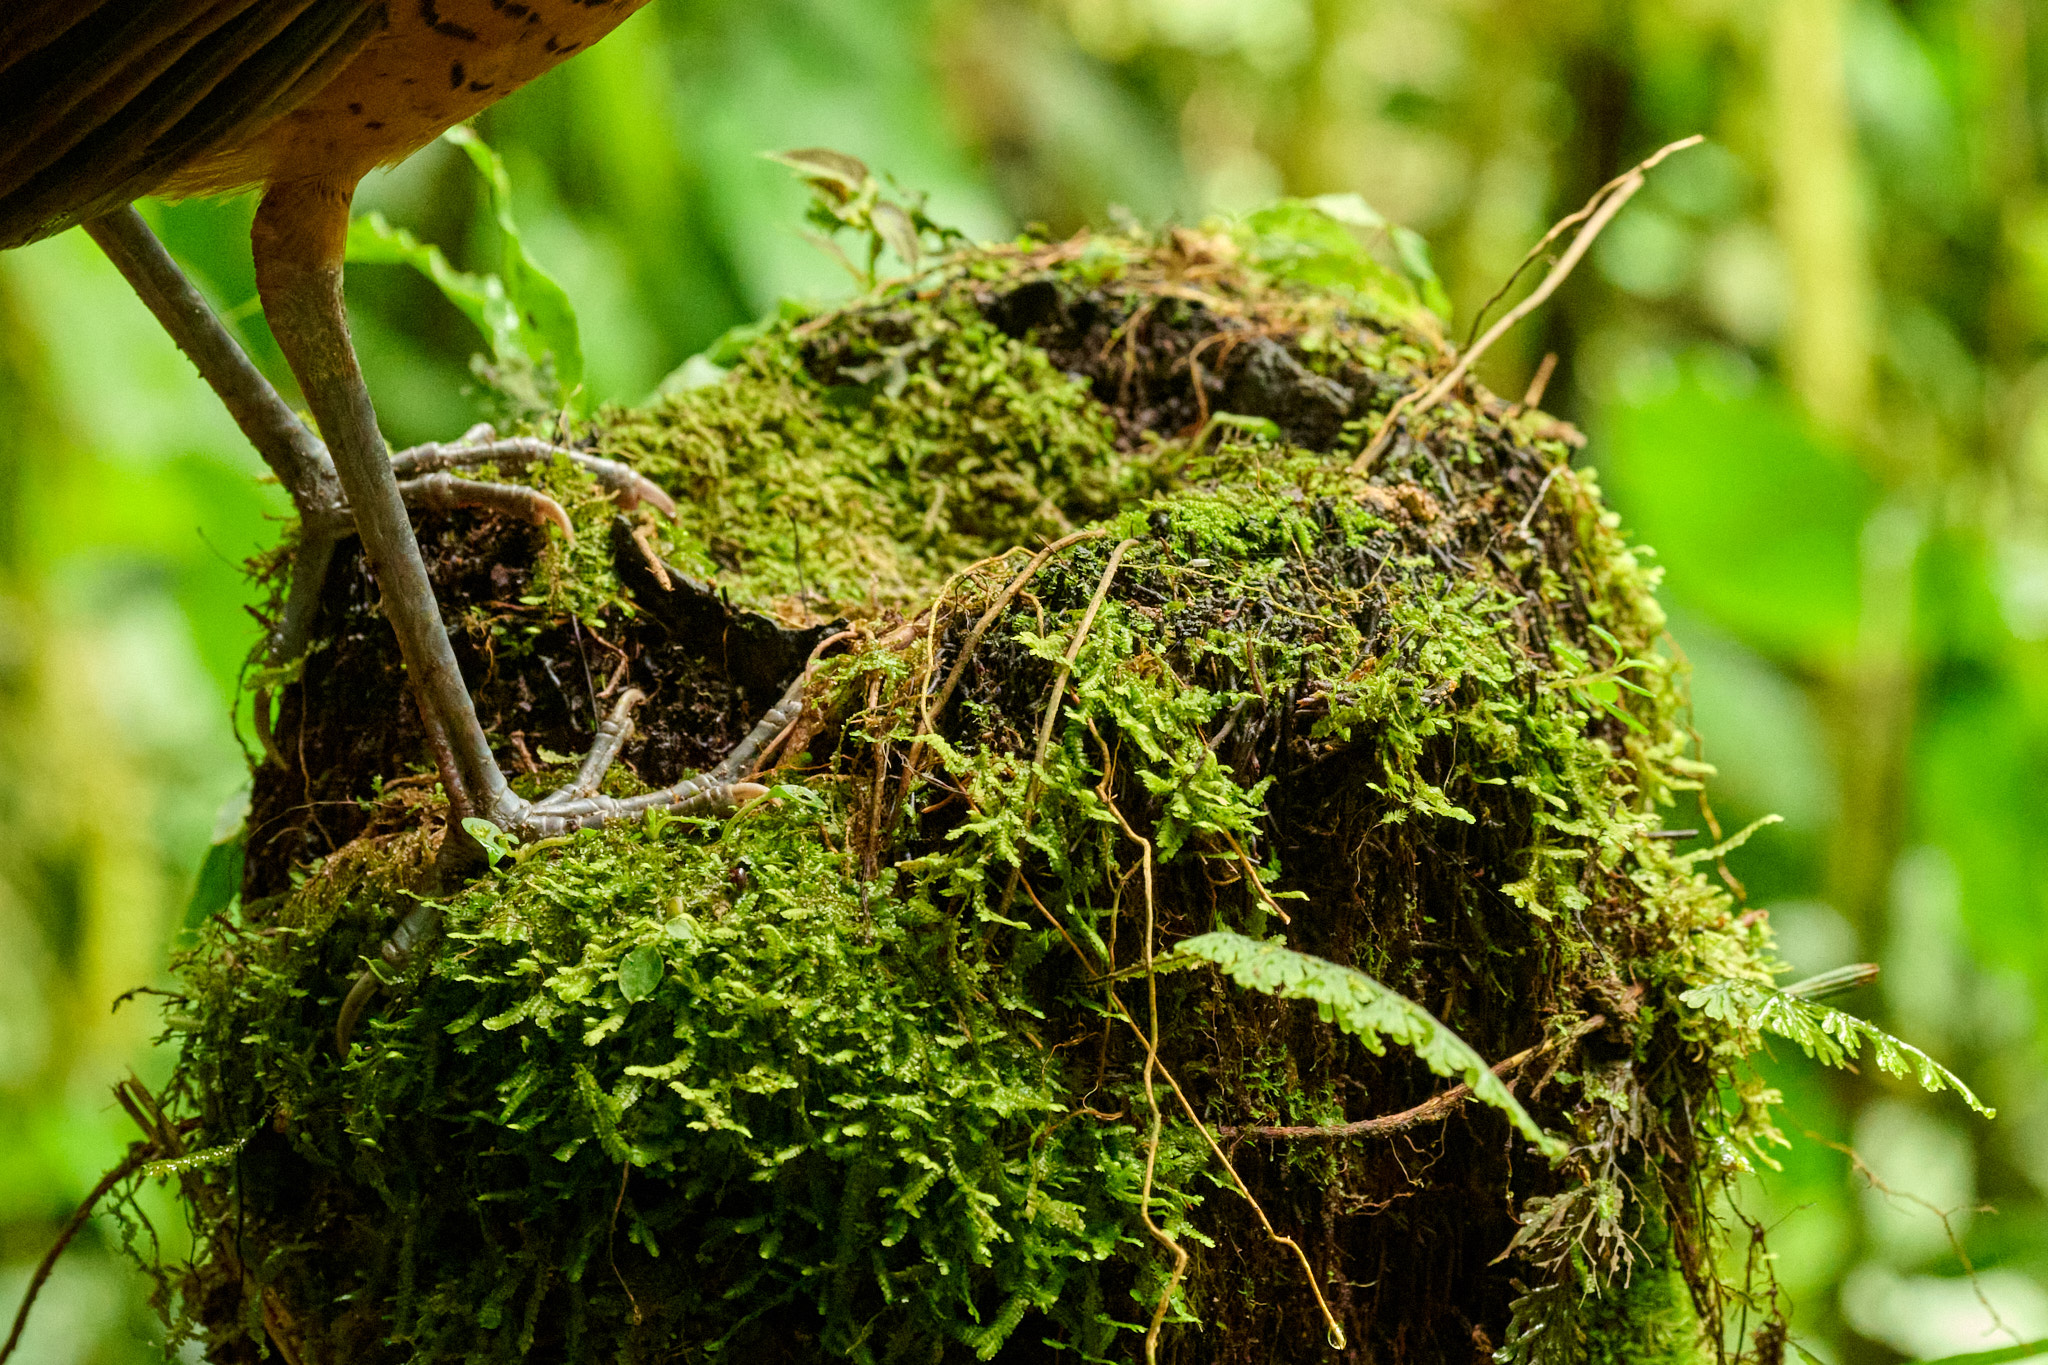
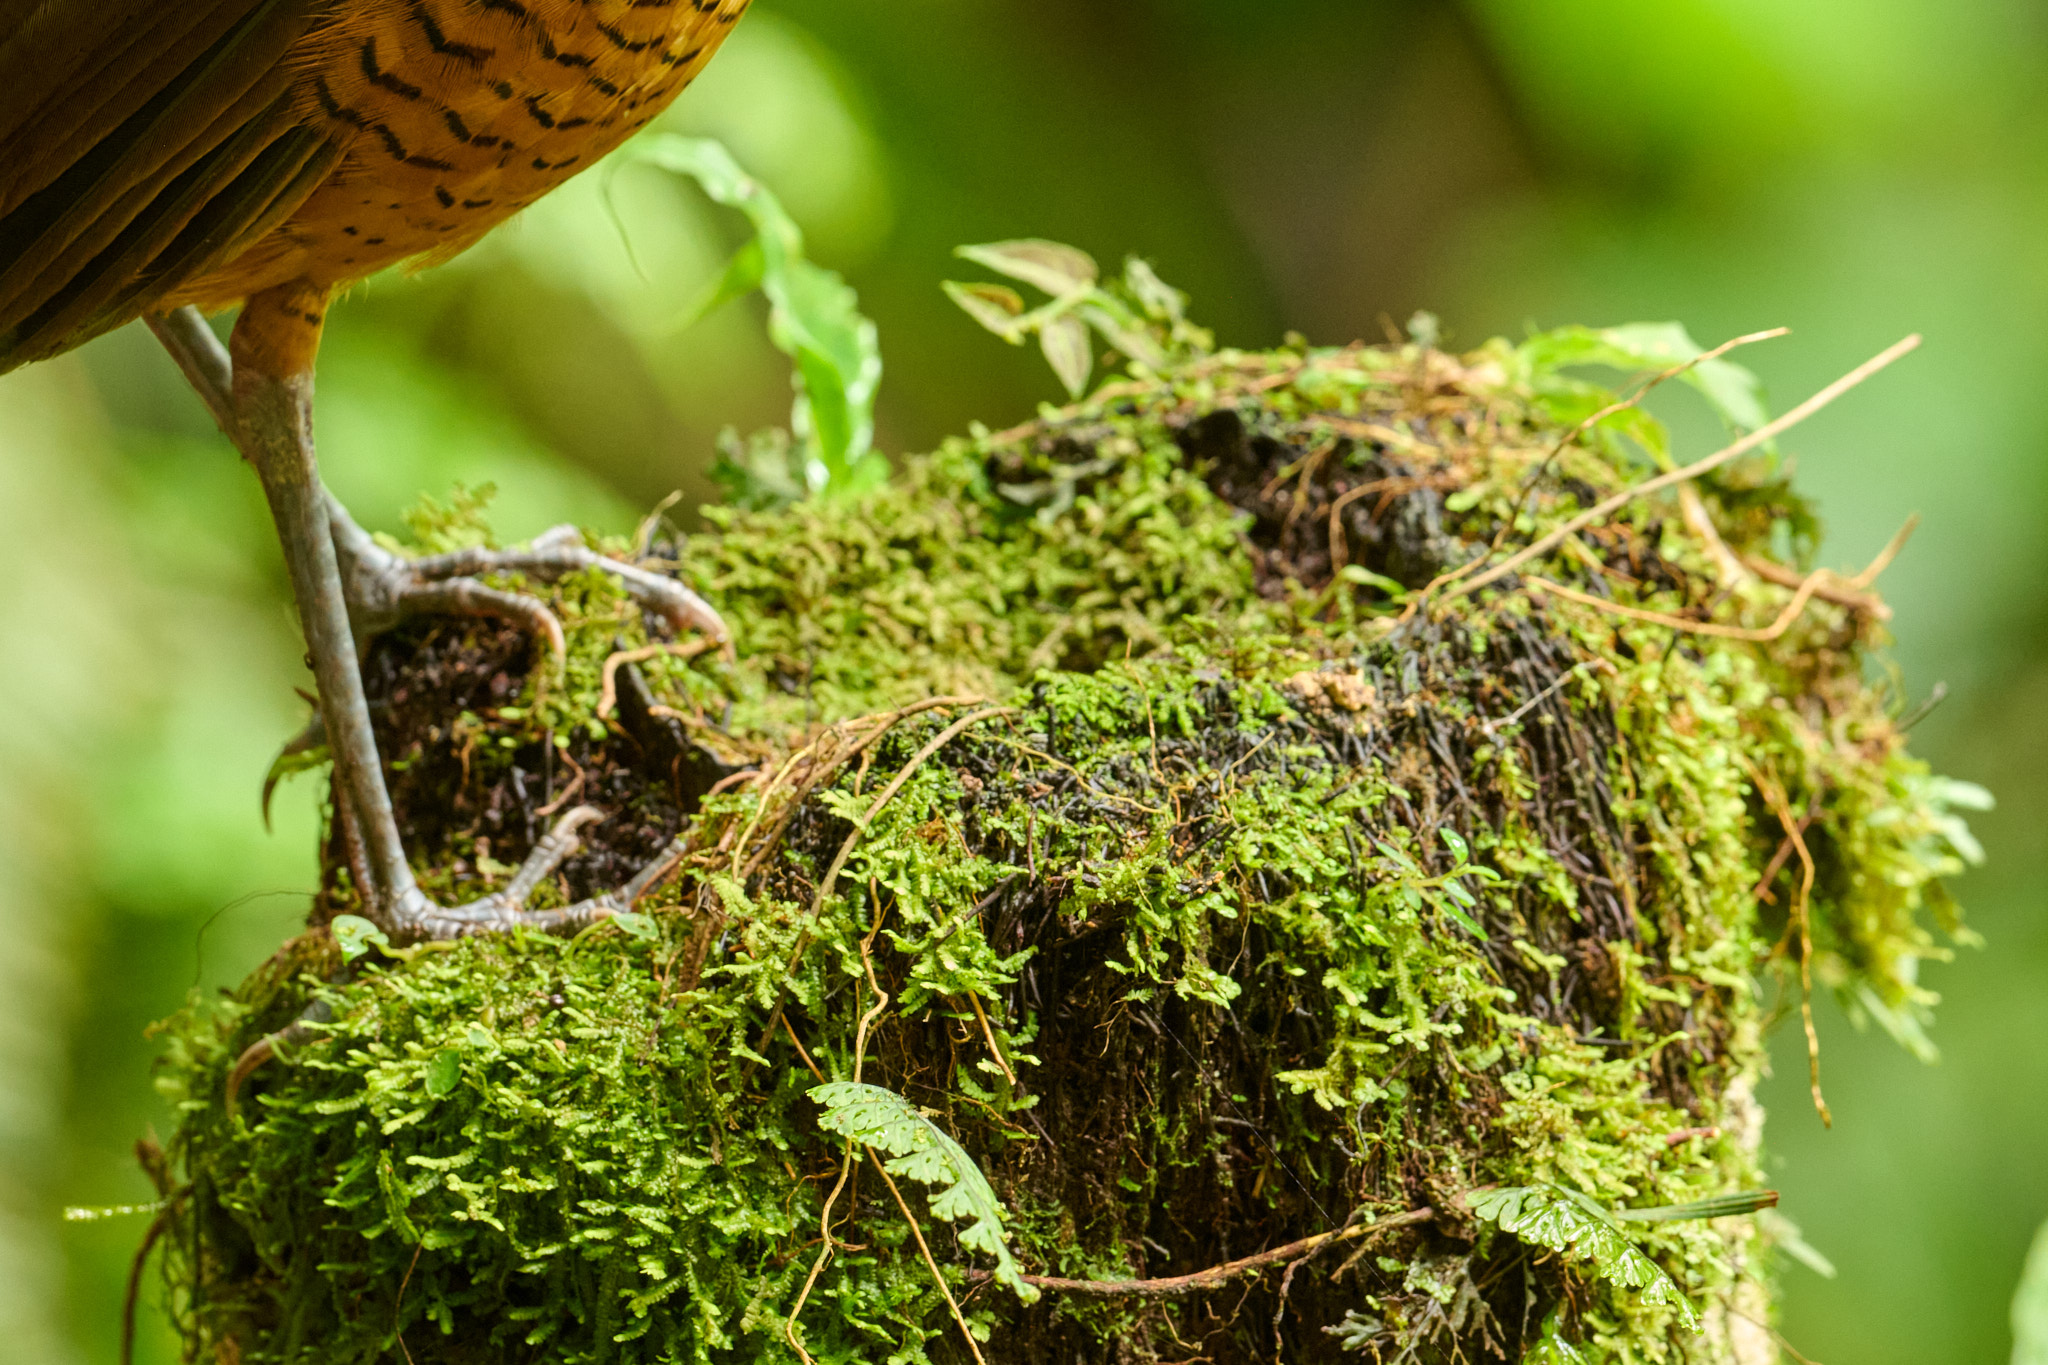
So far I’ve shown you fairly large birds, from blackbirds to pigeons. But smaller birds require you to get much closer. In the case of hummingbirds, I reached the limit of my lens’s close-focus capabilities.
In this case, I was dealing with two conflicting goals. I wanted a sharp image of the hummingbird, including details of its nest, while suppressing the complexity of the surrounding environment. The optimal aperture is therefore a work of compromise. Note that even at the extreme aperture of f/22, the depth of field is still quite shallow.
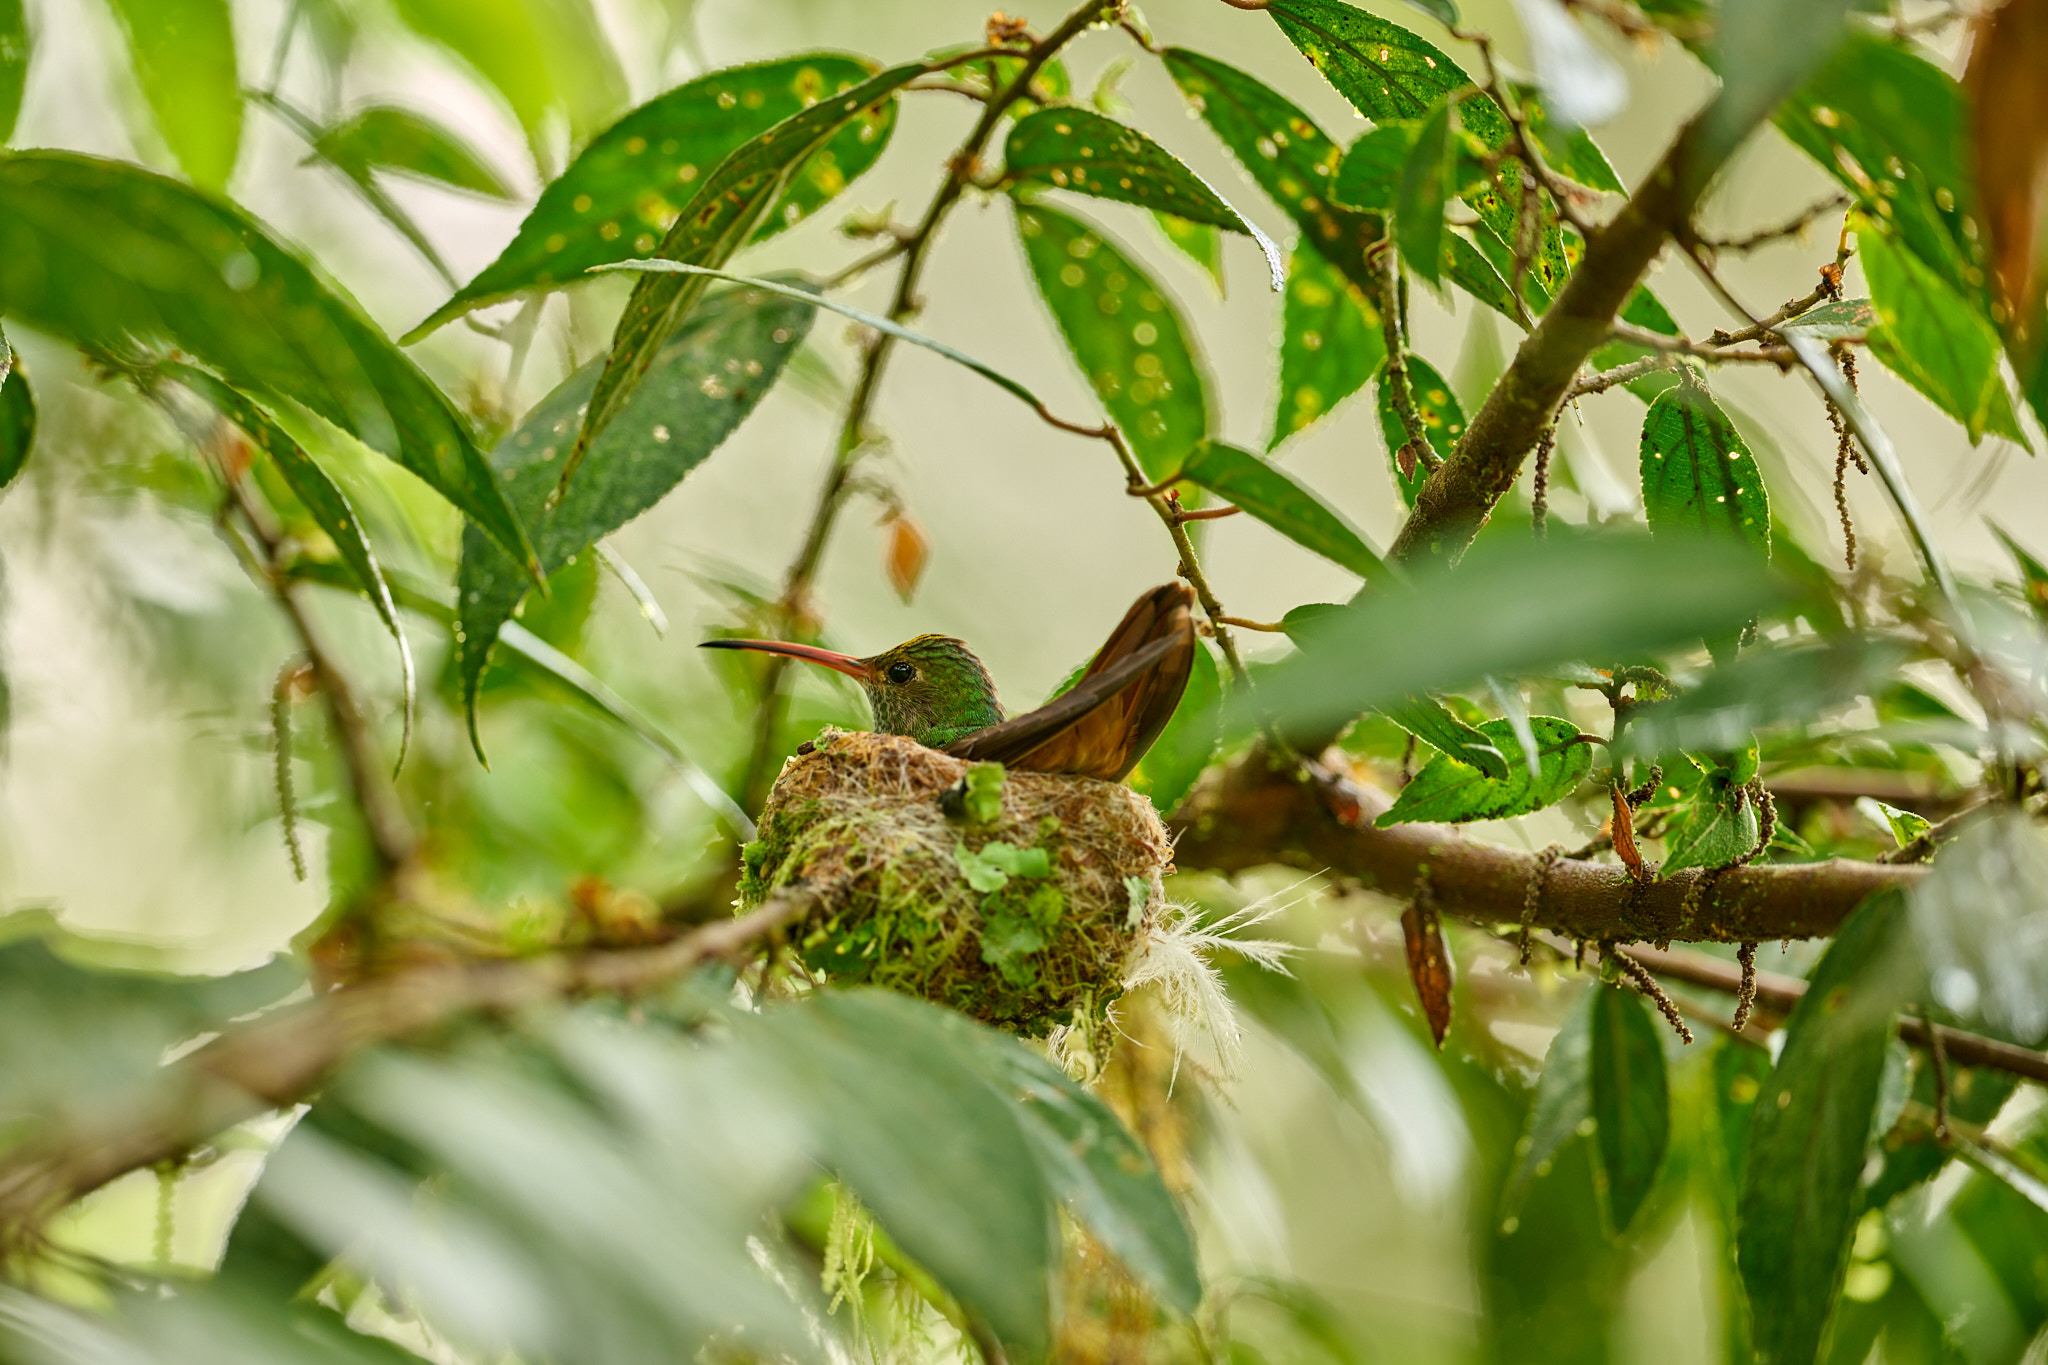
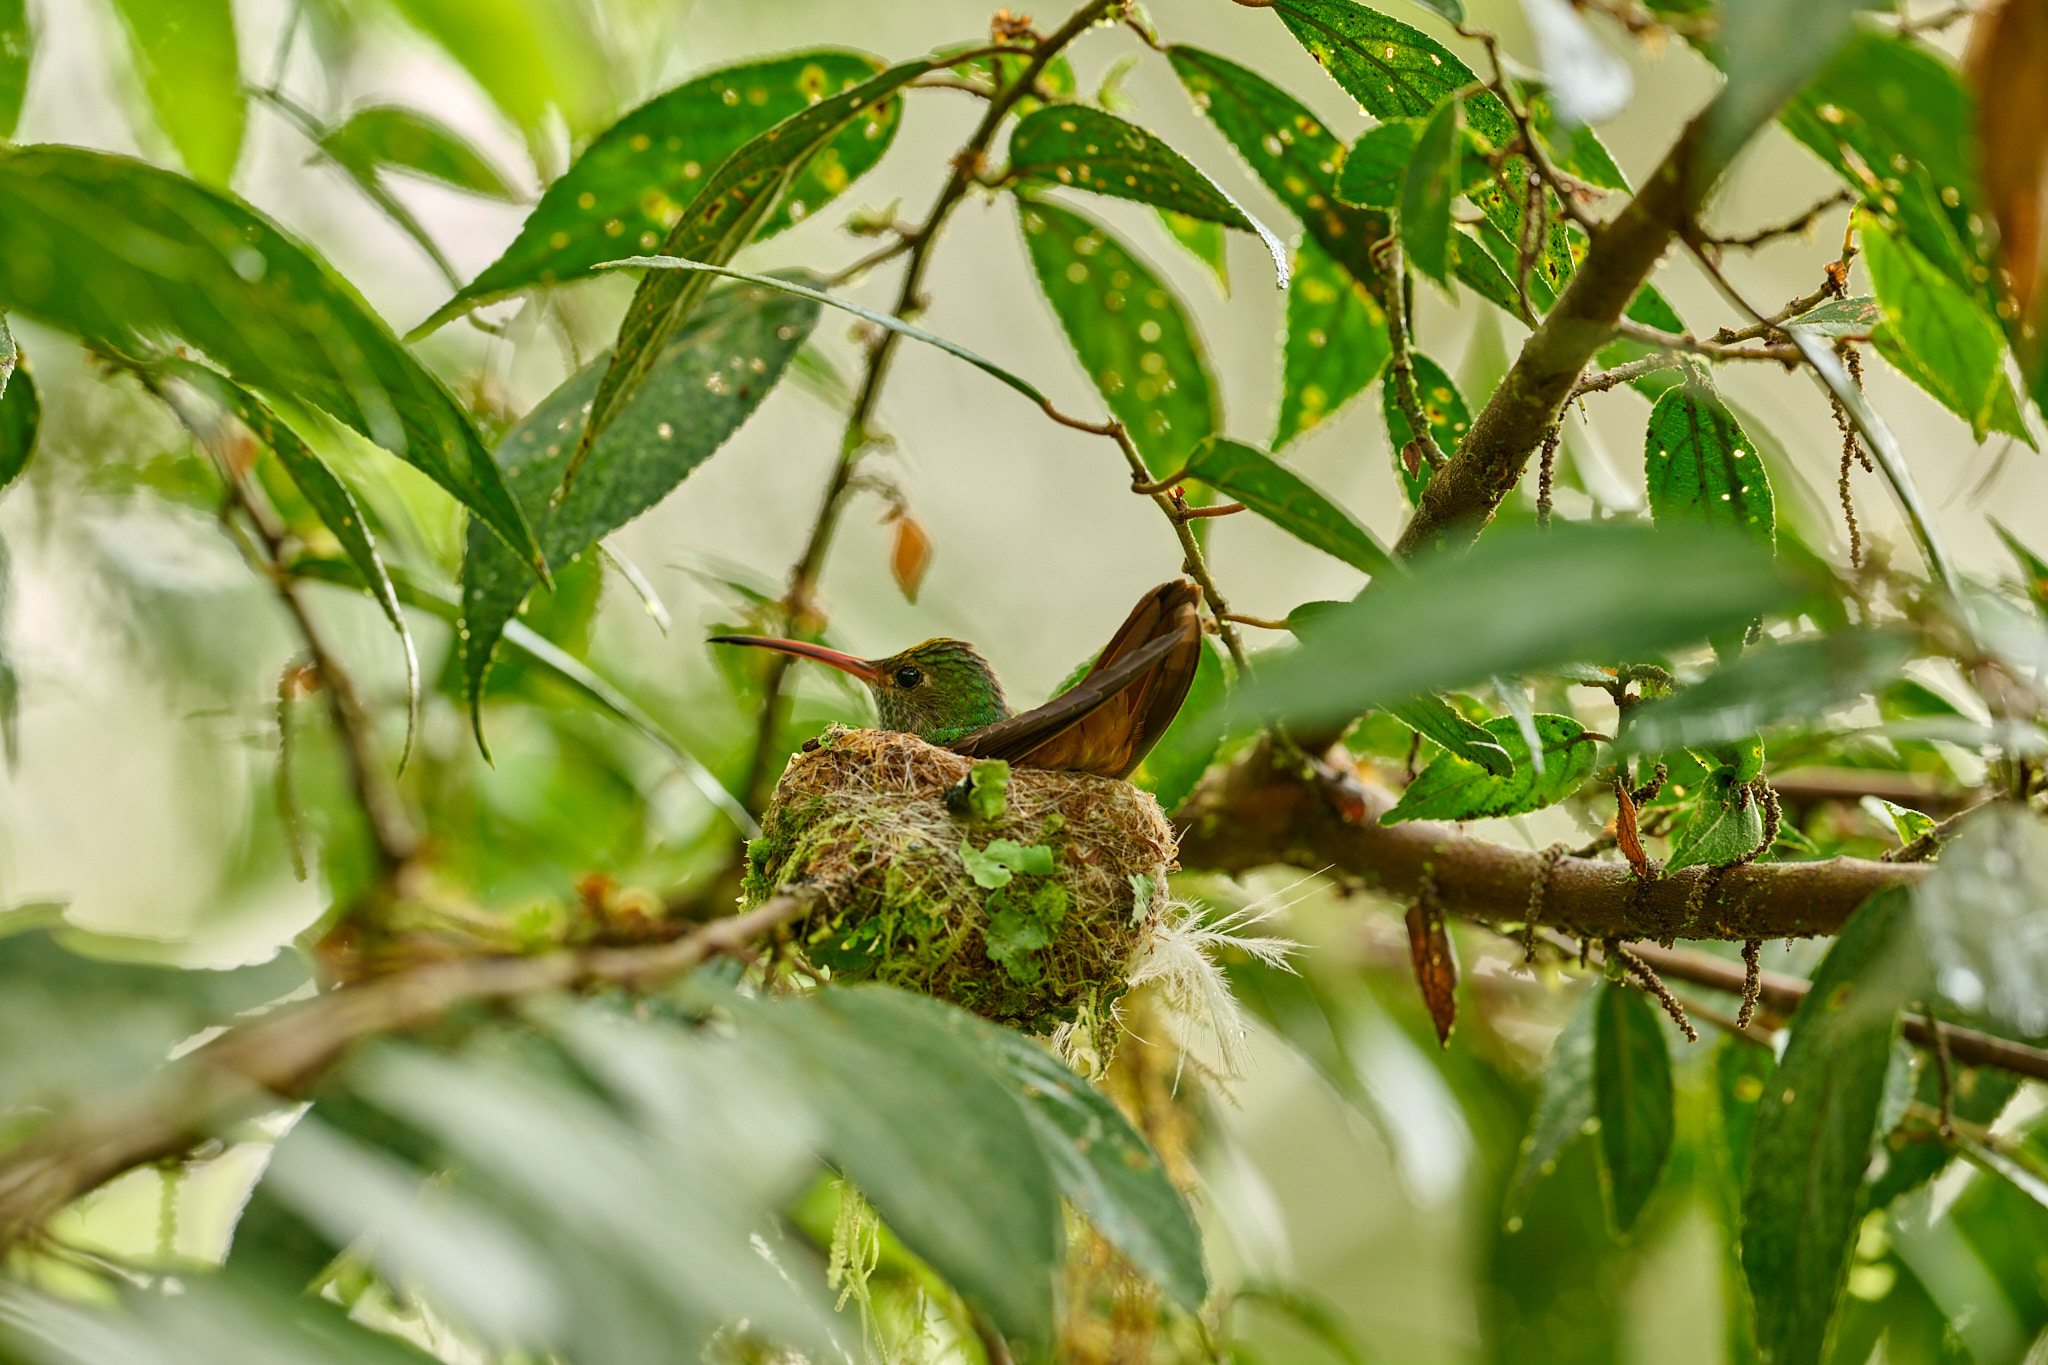
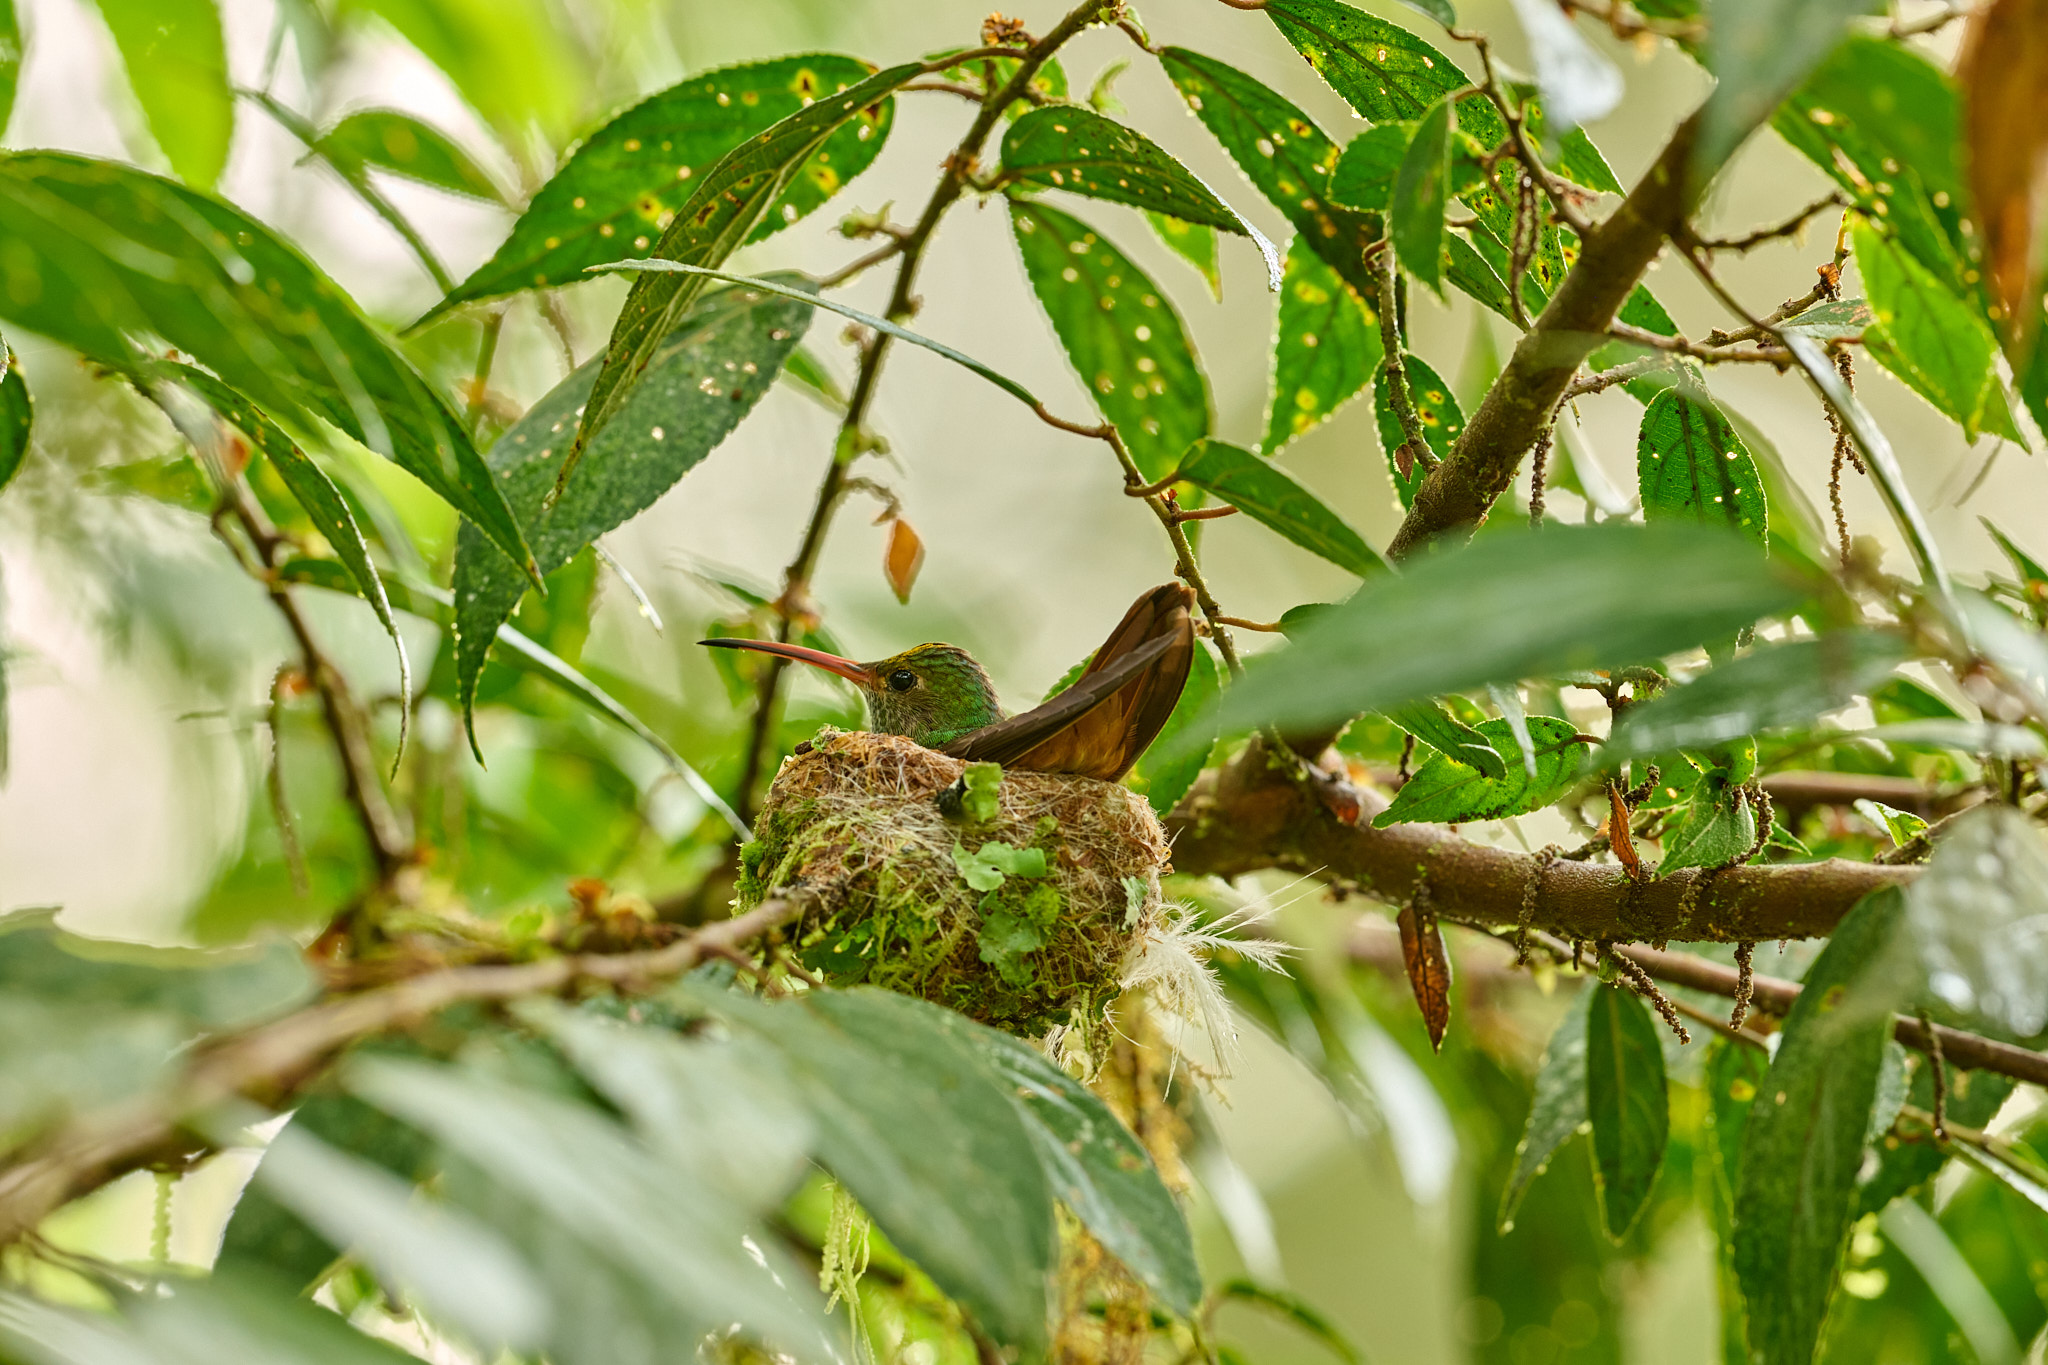
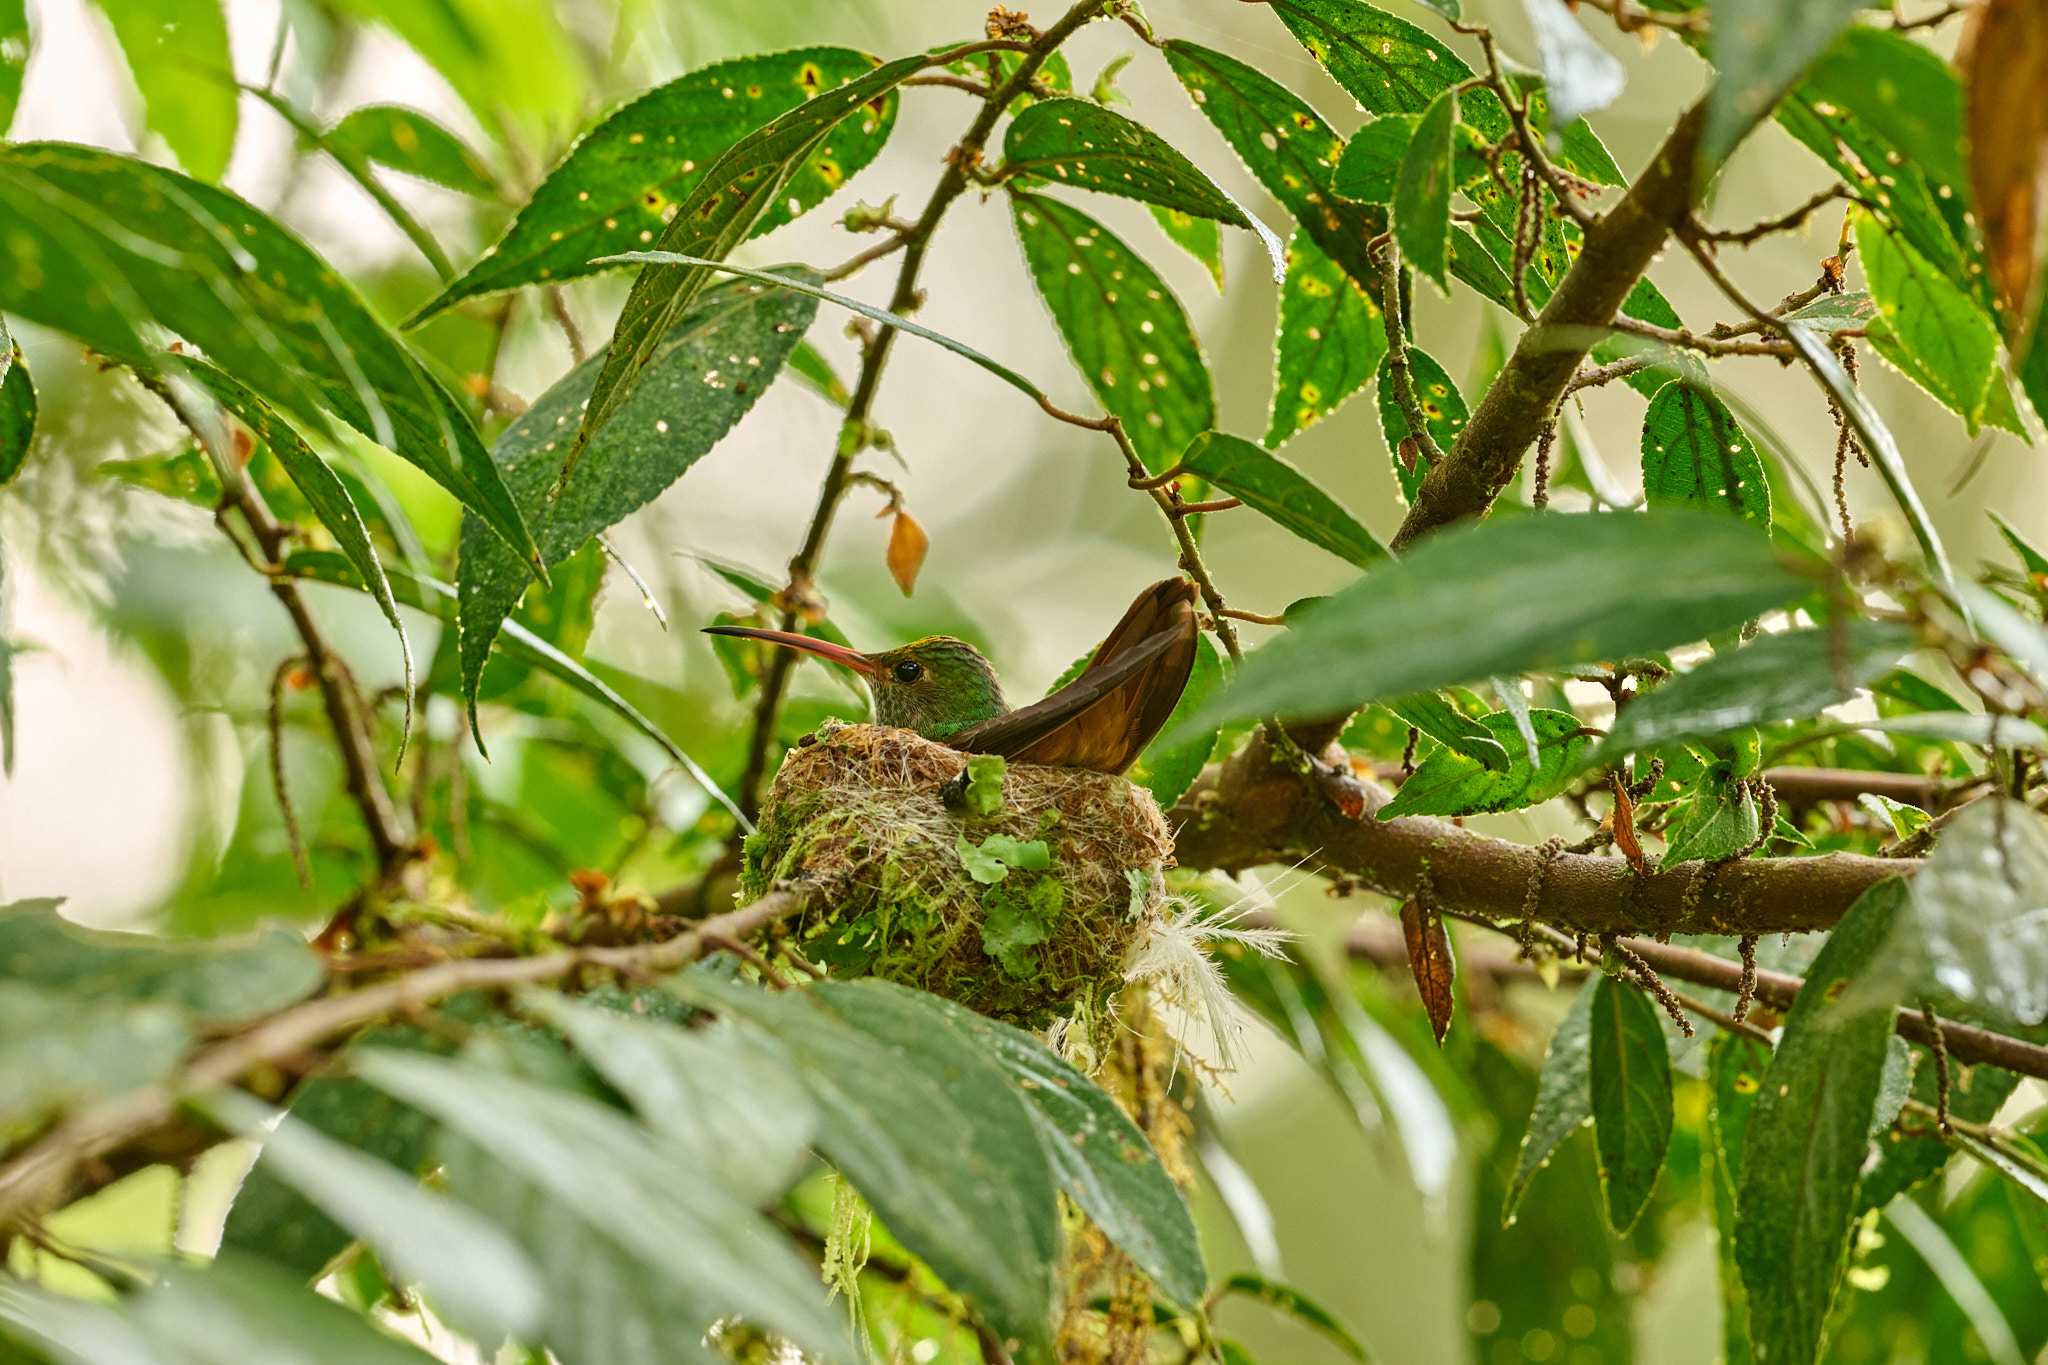
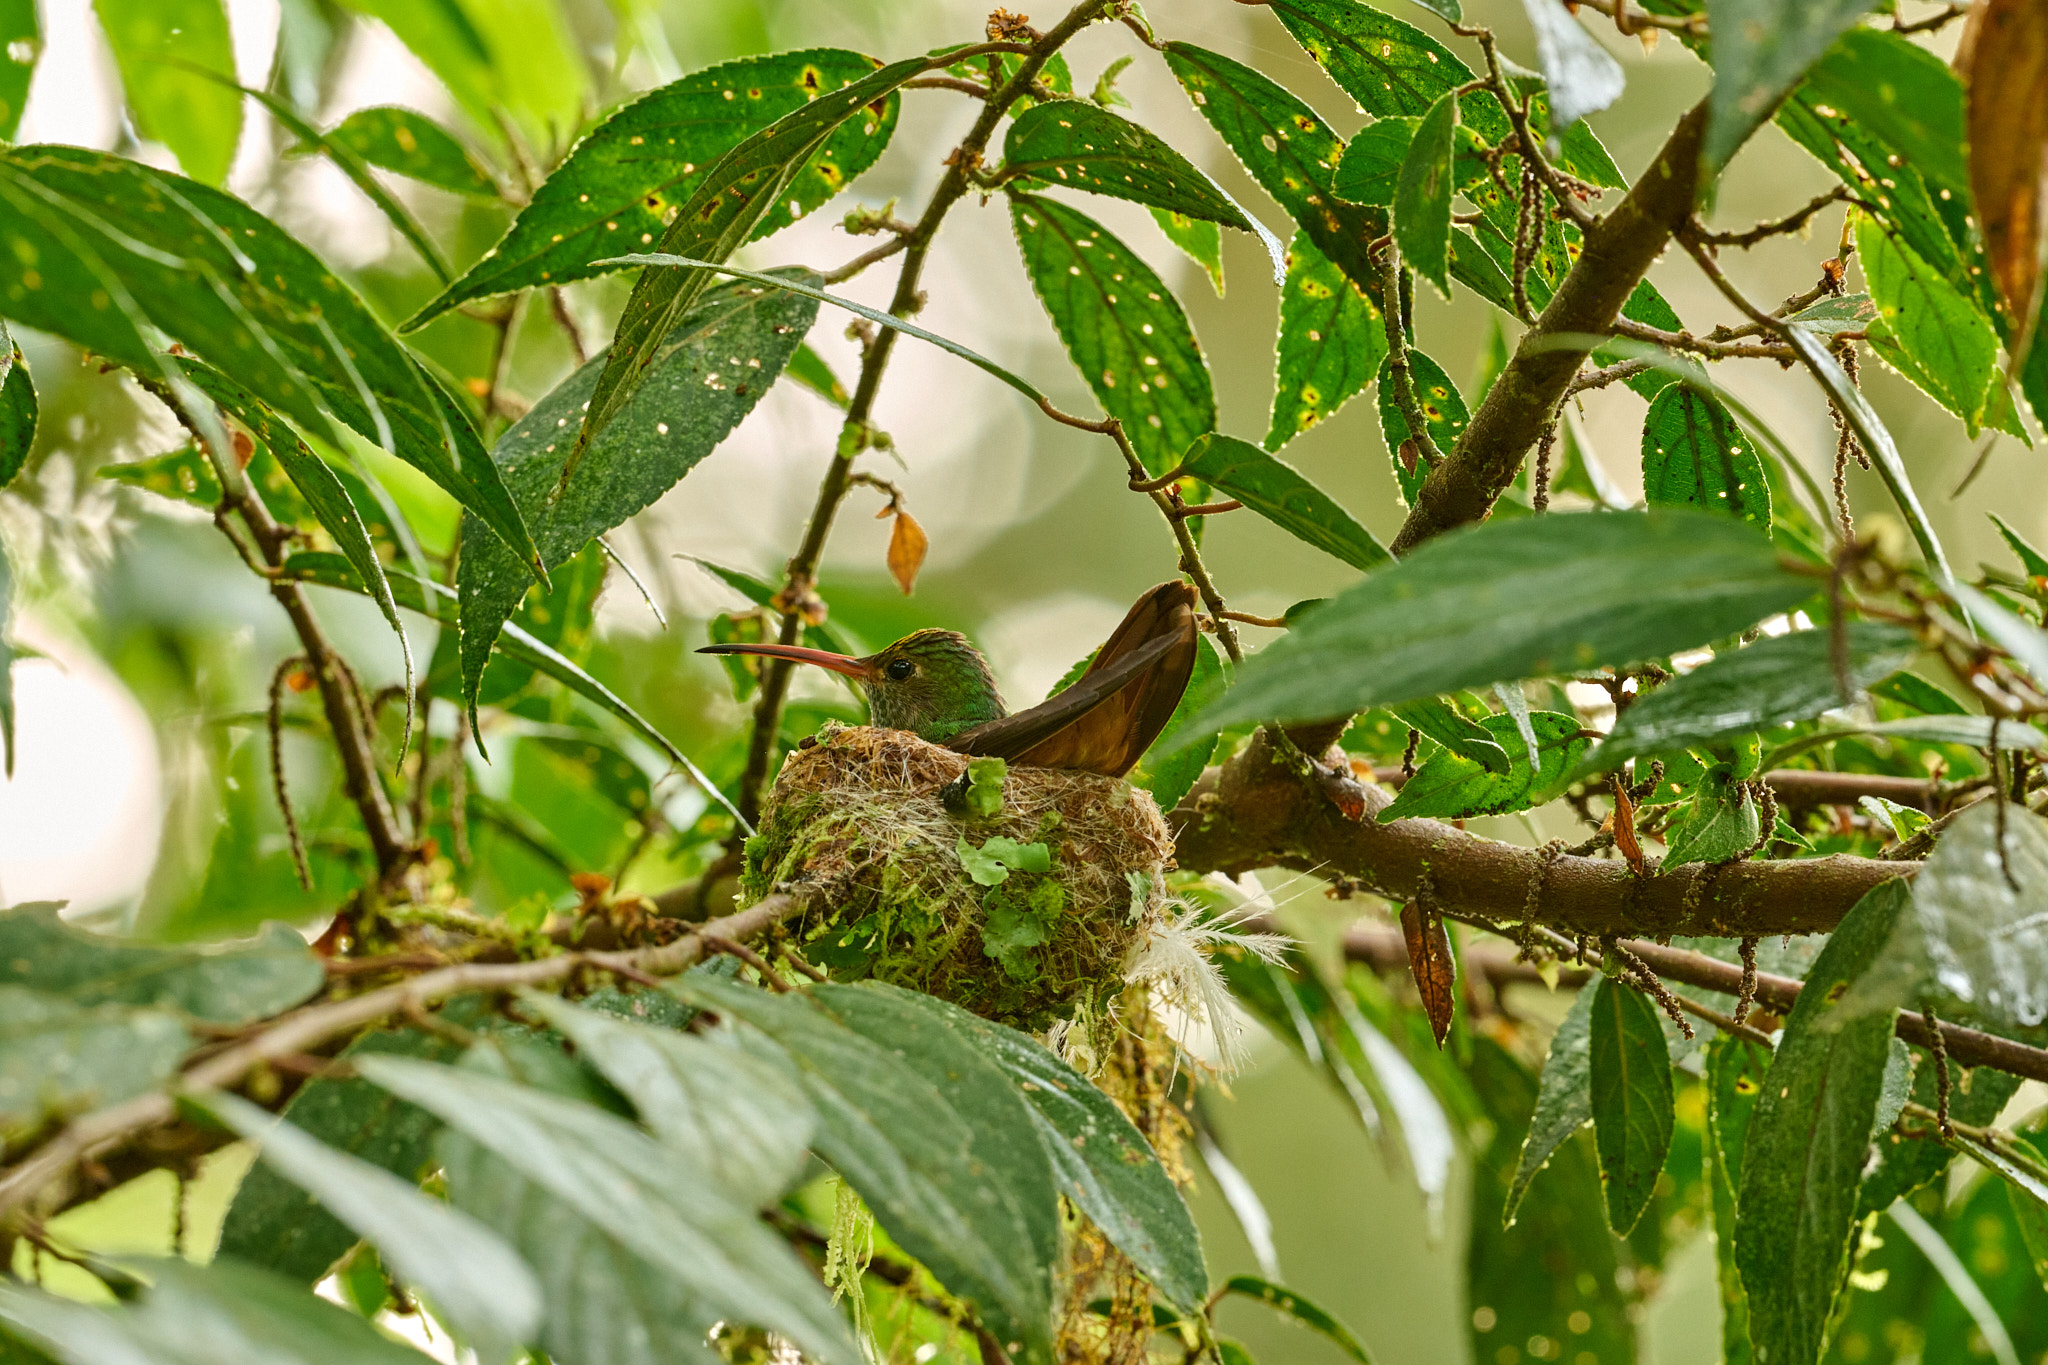
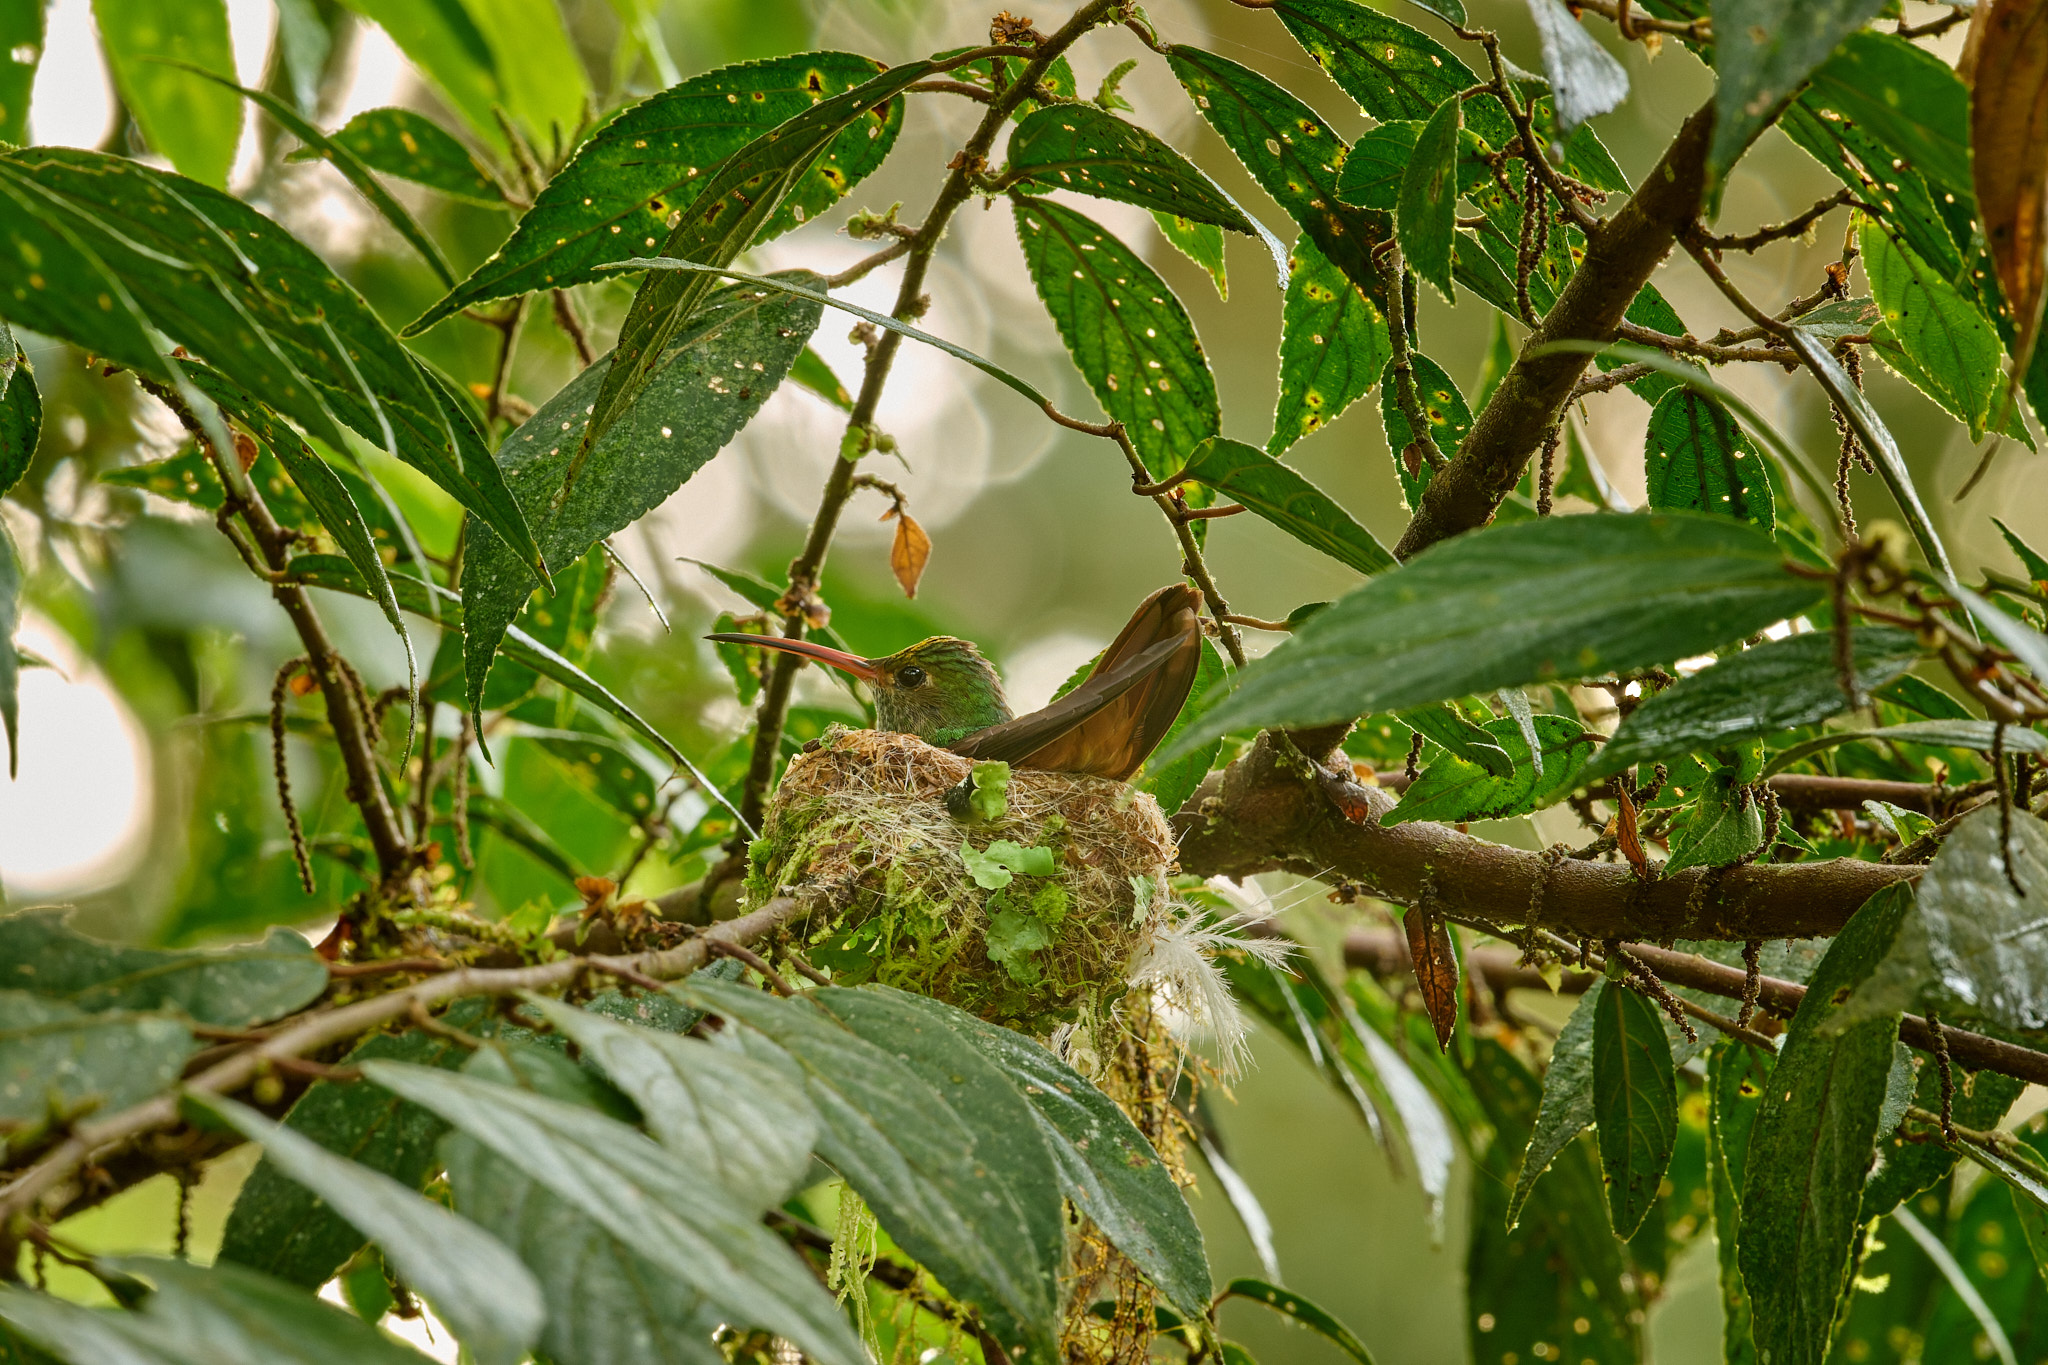
In this case, for telling a story, I prefer the range from f/5.6 to f/8. The maximum aperture of f/4 just leaves the subject a little too blurry.
In the last example, we approach another small subject at the close focus limit of my camera. Although the Empress Brilliant is one of the larger hummingbird species, it will hardly fill the frame.
Photographing hummingbirds is a kind of action macro photography. You’ll be focused so closely that even a moderate aperture will give you a very shallow depth of field. For this particular image, I would consider an aperture of f/8 to be optimal. (Although hummingbirds sometimes force you to shoot at maximum aperture so that you can use a better shutter speed.)
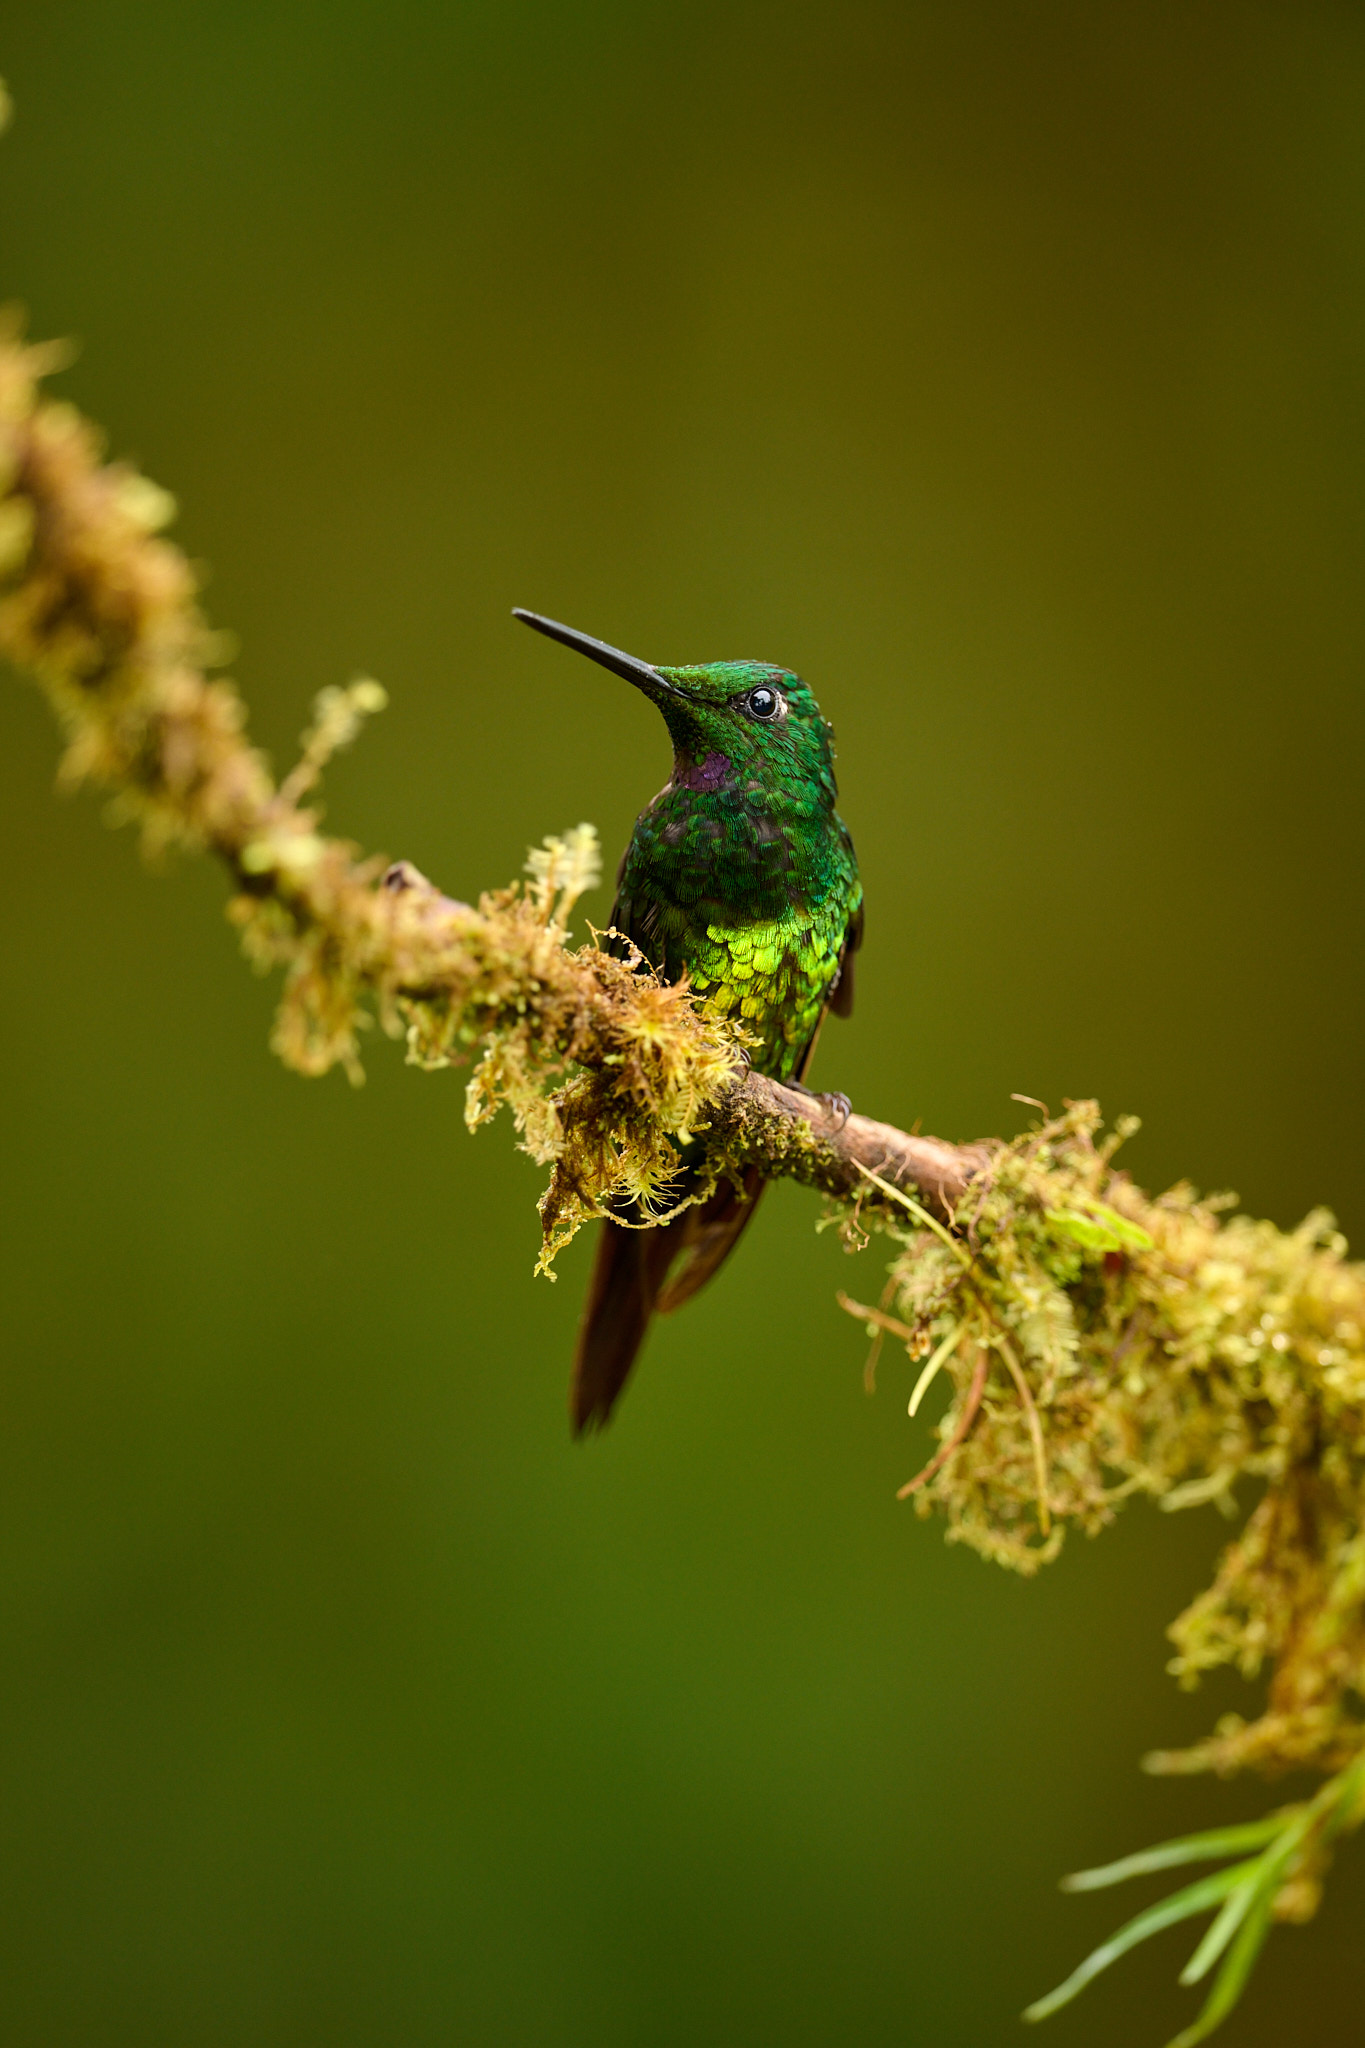
Even an aperture of f/11 isn’t quite unusable. So in theory, you could take the Canon RF 600mm f/11 IS STM lens. But its minimum focusing distance is 4.5m, which can be limiting for this type of photography. However, I’m more concerned about the reliability of its autofocus, which would have to deal with a really small amount of light.
Conclusion
In the examples above, I’ve demonstrated a range of situations where your choice of aperture has an important effect on the photo. And it wasn’t always the photo taken wide open at f/4 that I preferred. Of course, there are situations where an aperture of f/4 or even f/2.8 is literally priceless with exotic prime telephoto lenses. However, even slower lenses with apertures of f/5.6 or a bit slower are not out of the question. Especially for smaller subjects, you may need to stop down if you want your subject to have enough depth of field.
Of course, you’ll still run into other compromises like autofocus performance and the ability to shoot in very low light. But with the better autofocus systems and high ISO performance of today’s cameras, plus better noise reduction tools, those considerations are less significant than ever.
Finally, I want to highlight that you don’t get any extra depth of field by using a shorter lens and then getting correspondingly closer to your subject. In both cases, the magnification of your subject is the same size, so anything that’s out of focus in one photo will also be out of focus in the other (even though the background will look substantially different). If you need more depth of field on your subject itself, using a narrower aperture is the best approach. You could also back up or zoom out so that the subject takes up a smaller amount of space in the photo.
If you’d like to learn more about depth of field, there are several resources on Photography Life where you can expand your knowledge. For example, you can read Understanding Depth of Field – A Beginner’s Guide by Elizabeth. Then you can move on to Spencer’s Depth of Field Myths: The Biggest Misconceptions or Hyperfocal Distance Explained.
I have a feeling, that now a days there is much more attention to just blurred background and extreme sharpness, rather than to the “context” of the scene.
When the background is very much out of focus, the picture does not look natural to me. We do not see the world like this. Also we do not see the world with such an extreme sharpness (single feather level). Again, not natural to me.
I disagree with this statement, in a sense: the extreme background blur to me psychologically simulates the effect when seeing a cool bird in the wild. Yes, our eyes have a greater depth of field, but when we are actually looking with our eyes at the subject, the background is ignored or “blurred out” psychologically. It is this that the wide aperture imitates, in my opinion. Yes, using f/16 might look closer technically to how we “blur out” the background with our eyes, but it’s clear in a photo that the resulting background is far more “in your face” or evident compared to in real life, when our brains are much more selective to focus.
And I disagree with single feather level sharpness also. When a bird is fairly close, you actually DO see single feather level. I see it all the time in real life, at least. And with binoculars, you see all that detail in real time.
I like how you demonstrate the point that longer lenses give you better backgrounds at the same DoF. This is one of the reasons why I liked long lenses (up to 400 mm) for macro photography (back in the day when I had time for macro photography). That said, the text associated with this example says 24 mm and the photo says 65 mm (with the latter being more plausible, probably). Is that an error or did I misunderstand something?
Thanks for the heads up, BG. I used the 24mm and even the 20mm a few minutes later on the same species of bird. Somehow the experience made it into my text. Corrected.
I have felt that the light gathering vs depth of field aspects of micro 4/3 systems are often skipped over. Sometimes it’s nice to have a bit more depth of field, say with bigger animals especially, but you still want the light gathering of a bigger aperture. Other times you want that separation for sure, but it can still be convenient.
The MFT system is great especially for smaller birds. The relatively greater depth of field resulting from the smaller sensor and thus different shooting distance at the same focal length as with the FF allows you to shoot with a wide open aperture. And then there are a few other advantages (and disadvantages). I’ll write more about this in the next article so stay tuned, Chad.
Thank you for this article Libor. It illustrates very well what combination of distance, focal length, minimum focusing distance and aperture will have on the final photo.
Thank you, too. For reading and for your comment.
I would say that in the toucanet photo, and almost all the others, for me your sweet spot was f/5.6.
I used to shoot almost everything at f/5.6 and f/6.3, but after reading so many articles in PL about sharpness, I became a little obsessed and started shooting almost exclusively at f/8, which for my 28-300 lens is its sweet spot for sharpness. Now looking at this article, I begin to remember what I loved about the two wider apertures. I look back at my older photos for sharpness, and they weren’t so bad at f/5.6 and 6.3. I think I will go back from time to time and use them. You remind me that sharpness isn’t everything. A good lesson to learn. Thank you, Libor.
Thank you so much for your comment, Elaine. I totally agree that sharpness isn’t everything. Sometimes I’d love to shoot at two apertures at the same time to get a nice bokeh while still having the whole animal within the depth of field. I would also say that f/5.6 to f/8 is usually the sweet spot. It really depends on the size of the animal and therefore the shooting distance. However, when I have 400/2.8 available, I don’t hesitate to use that aperture as well. I find that I usually don’t need to have the whole bird (animal) sharp. I’m usually happy when the eye is in focus. What I didn’t mention in the article are the specular highlights, which look very nice at wide apertures. But that’s a bit of a different story. So to sum up, photography is like life itself – the eternal search for a compromise, or rather an optimal solution. Have a nice day, Elaine.
I agree. I thought f5.6 was pretty good throughout and certainly represents a sweet spot (for the amateur!) when it comes to cost and weight.
Thanks for this!
Now if you want to shoot a bird in dark conditions at f/5.6 and you have a fast lens say f/2.8.
Mirrorless cameras want to focus on f/5.6 and the good old DSLR focusses on f/2.8.
So 4x more light to use the autofocus and get exactly the birdseye sharp.
So with mirrorless are you going to f/2.8 to do the focus ?
A DSLR autofocus sensor receives only some of the light from the lens: most of the light is reflected by the partially silvered mirror to the viewfinder; the remainder passes through the mirror to the autofocus sensor.
To Pete A: I don’t think so – most DSLRs throw all the light via the mirror to the AF sensor in the pentaprism. To Pieter: Most mirrorless focus at the aperture used (up to 5.6 for Nikon), so at f/2.8 they are generally equivalent in light-to-focus-with, and at 5.6 the DSLR has the advantage (focusing at 2.8).
In addition: I am not a bird photographer, but in a studio with modelling light for focusing and flash for exposure (say at 5.6) the advantage is for the DSLR.
another good example -wish Nikon would leave me the choice how to focus.
One benefit of focussing at the chosen aperture will be speed and perfect equal exposure since the aperture stays put ( up to F/5.6)
Pete A is correct. DSLRs (and AF-capable film [SLR] cameras) need to divert light to a dedicated focusing sensor to be able to focus, while the user looks through the viewfinder. At least the Nikon D’s that sensor is below the mirror box, there is a second smaller mirror behind the main mirror diverting the light down to the AF sensor. This more complex geometry limits the ability of the (DSLR) camera to focus with a small apperture, Nikon DSLRs can only focus up to f/5.6 in most of the points, and sometimes f/8 in the central point. Mirrorless cameras have much less of a limitation here, this is why we now see lenses like the Z600 f/6.3…
In mirrorless cameras, on the other hand, the lens is illuminating the only (main) sensor all the time: that one is used both to create the “video stream” for the viewfinder and to focus at the same time, therefore getting MORE light to focus. And as said above, they are also able to focus with smaller apertures, getting a double advantage over DSLRs…
DSLRs are not all equal, and some go beyond what stated in their manuals. Sure, the external points array is changing with maximal aperture of the lens+TCs, and sometimes the focus precision is not sure as it may seem.
But a D5 with the central point (rated at -4EV) can drive, slowly but quite reliably, f/9.5 combos (not with the outer points, although selectable and with positive confirmation of the focus acquisition, but not reliable), while a D6 (central point rated at -4.5EV) can also drive a f/11 combo (but with sure hunting on the outer points, still selectable, but useless).
This means, with AF limited to the central point only, that the 500mm (or 800mm) f/5.6 can be extended to the limits by the TC17eII on the D5, but with the better TC20eIII on the D6. Sure, it is not as fast as using the naked lens, but in extreme conditions of needing extra reach it might be of help.
“To Pete A: I don’t think so – most DSLRs throw all the light via the mirror to the AF sensor in the pentaprism.”
The AF sensor is not in the pentaprism!
See: How Phase Detection Autofocus Works by Nasim Mansurov
photographylife.com/how-p…ocus-works
Ok Pete, I stand corrected! Thanks for relaying Nasim’s article.
You’re most welcome, Rob.
Photography Life is an exquisite treasure trove of information.
forgot about that !
but i have noticed that focussing with mirrorless becomes less precise due to DOF and less light when focussing on f/5.6 .
And sometimes i want to make photographs with a f/1.4 lens set at f5.6 in dark conditions to find out i first have to go to f/1.4 to do the focus.
( 4 stops more light and less DOF)
PS
I always wanted nikon to make a true manual focus DSLRcamera with a non-translucent mirror – in order to get the beautiful viewfinder back from the old F3HP nikon series.
It would be interesting to be able to change this in the user settings. Option A – focus at selected aperture up to f/5.6; Option B – always focus at maximum aperture. According to a Nikon specialist from Nikon CZ, there are two practical reasons for closing the aperture. The first is that the user can see the change in depth of field. The second reason is that a larger depth of field supposedly helps the camera with subject recognition. On the other hand, I don’t feel that a 400mm lens focuses differently (worse) at f/2.8 than at f/5.6.
A third practical reason is to allow the use of lenses that have deliberately under-corrected spherical aberration — which render the most pleasing background blur — without suffering the effect of their inherent focus shift as they are stopped down.
I don’t know if this is what you mean, but I had (actually still have) an F3, and I always loved using that camera. The thing I miss is the old split screen focus circle of the old lenses. I forget what you actually call those. They sure did help with manual focus. I wish Nikon never took them away. It is very hard to manually focus a modern lens, especially at very wide apertures like f/1.2 which I always find nearly impossible. Those split circles would really help.
What i meant was that the mirror in an autofucus DSLR is half translucent. One part of the light goes trough the mirror were the AF-focus detector is. In other words : Not al the light that goes through the lens is used for viewing-. The F3 has a non translucent mirror and the viewfinder is therefore clearer.
And the High Eyepoint F3 has one of the best viewfinders.
The spit screen is something very helpful to precisely put the focus, but for me i liked best a clear screen without any stuff but the subject.
What do you mean by “Mirrorless cameras want to focus on f/5.6”?? All cameras (both DSLRs and mirrorless ones) focus using the lens wide open. DSLRs need to divide the light in two, part goes to the focusing sensor and part goes to the pentaprism/viewfinder. Mirrorless cameras let the whole beam of light reach the sensor, having in fact more light to focus.
No. The Nikon Z cameras focus with the lens at shooting aperture as long as that aperture is f/5.6 or wider. This is to account for focus shift.
Indeed. Here’s a reference…
QUOTE
You should also know that the Z6 respects shooting aperture up to f/5.6. In other words, focus is performed at f/2.8 if you’re set at f/2.8, at f/5.6 if you’re set at f/5.6. When you set apertures of f/6.3 and smaller, the camera focuses with the lens set to f/5.6.
— Thom Hogan, Nikon Z6 Camera Review
www.zsystemuser.com/z-mou…eview.html
I agree. If you have some fast lens available, you can do a little experiment. Put it on your Nikon mirrorless camera and set it to maximum aperture. When stopping down, the aperture will gradually close until it reaches f/5.6. This will be noticeable both when looking at the lens from the front and when looking into the viewfinder, as the depth of field increases with each step. From f/6.3 up, the blades will close to their working diameter only during the exposure.
How come this important feature isn’t mentioned in the Z9 review, or anywhere else I could find on this website?
As I have written previously, and your illustrations confirm…
For a given subject-to-image magnification 𝑚:
• the depth of field depends only on the f‑number 𝑁
• the image blur disc diameter 𝑏 for background objects at ∞ is given by
𝑏 = 𝐷 × 𝑚
where 𝐷 is the entrance pupil diameter (aperture diameter)
𝐷 = 𝑓 / 𝑁
Bibliography
H. H. Nasse (2010), Depth of Field and Bokeh, Zeiss
Thanks for this;
For a given subject-to-image magnification 𝑚:
• the depth of field depends only on the f‑number 𝑁
does this mean that if you photograph a bird that fills the whole sensor of microfourthirds at a certain aperture N ,
The DOF is the same as you have that same size of bird projected on FF with aperture N (but fills ony part of the sensor)
Yes, if I have understood your question correctly. Let’s see if this example clarifies it…
Using the same f‑number 𝑁; at the same bird-height-to-image-height magnification ratio 𝑚 at each camera sensor, the following options will yield the same DOF and size of bird when the prints are viewed from the same viewing distance.
⒈ uncropped MFT image printed, say, 8×10
⒉ uncropped FF image printed 16×20, which will have the same size bird plus its surroundings occupying the extra print area.
⒊ 50% linear (25% areal) crop of FF image printed 8×10, which will be the same as option⒈
⒋ any of the images above printed at twice their linear size, then viewed from twice the original distance.
⒌ et cetera.
The specified viewing conditions are necessary simply because an image, in and of itself, does not possess a depth of field property.