You may find this article to be useful in a practical way, not just as an isolated case of RAW data damage. Often, just a casual look into raw data provides arguments allowing one to persuade technical support that there is a problem with your camera body that needs to be addressed. The case started with this post at DPReview:
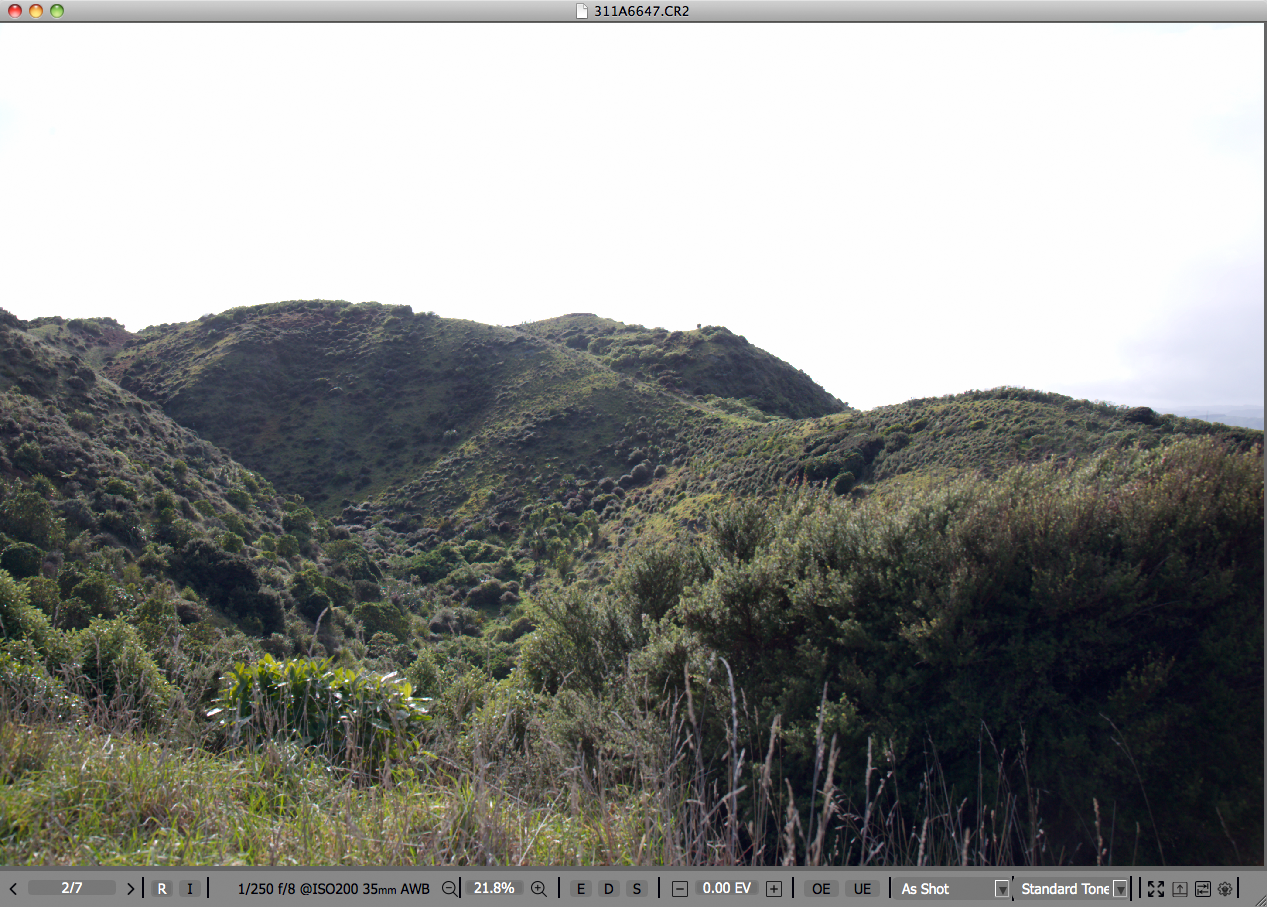
“Hi all, Last weekend I took a 360 deg panorama and on processing the files discovered two frames had the partial magenta coloring. Both affected frames appeared identical and were taken 3 seconds apart. I have included the preceding frame as a reference. The sun would have been at the top of the left hand edge on the affected frame. The 5D3 has done 35k frames and I was using a 24-105L lens – 2 yrs old and manual exposure. I have not had this problem before and fired off another 73 frames without incident. Exif intact. Any comments. Thanks Allan” 1>
And here are the JPEGs (no processing of any kind):
“I should have checked all the frames before I left the site! There does seem to be a problem with the green channel but with the tools I have I can’t get my head around it. Looks like I will have to contact Canon.” 2
“I contacted Canon (New Zealand) and the tech said ‘Clear all camera settings’ and see if the problem still occurs. He wasn’t interested in looking at the RAW file. We shall see.” 3
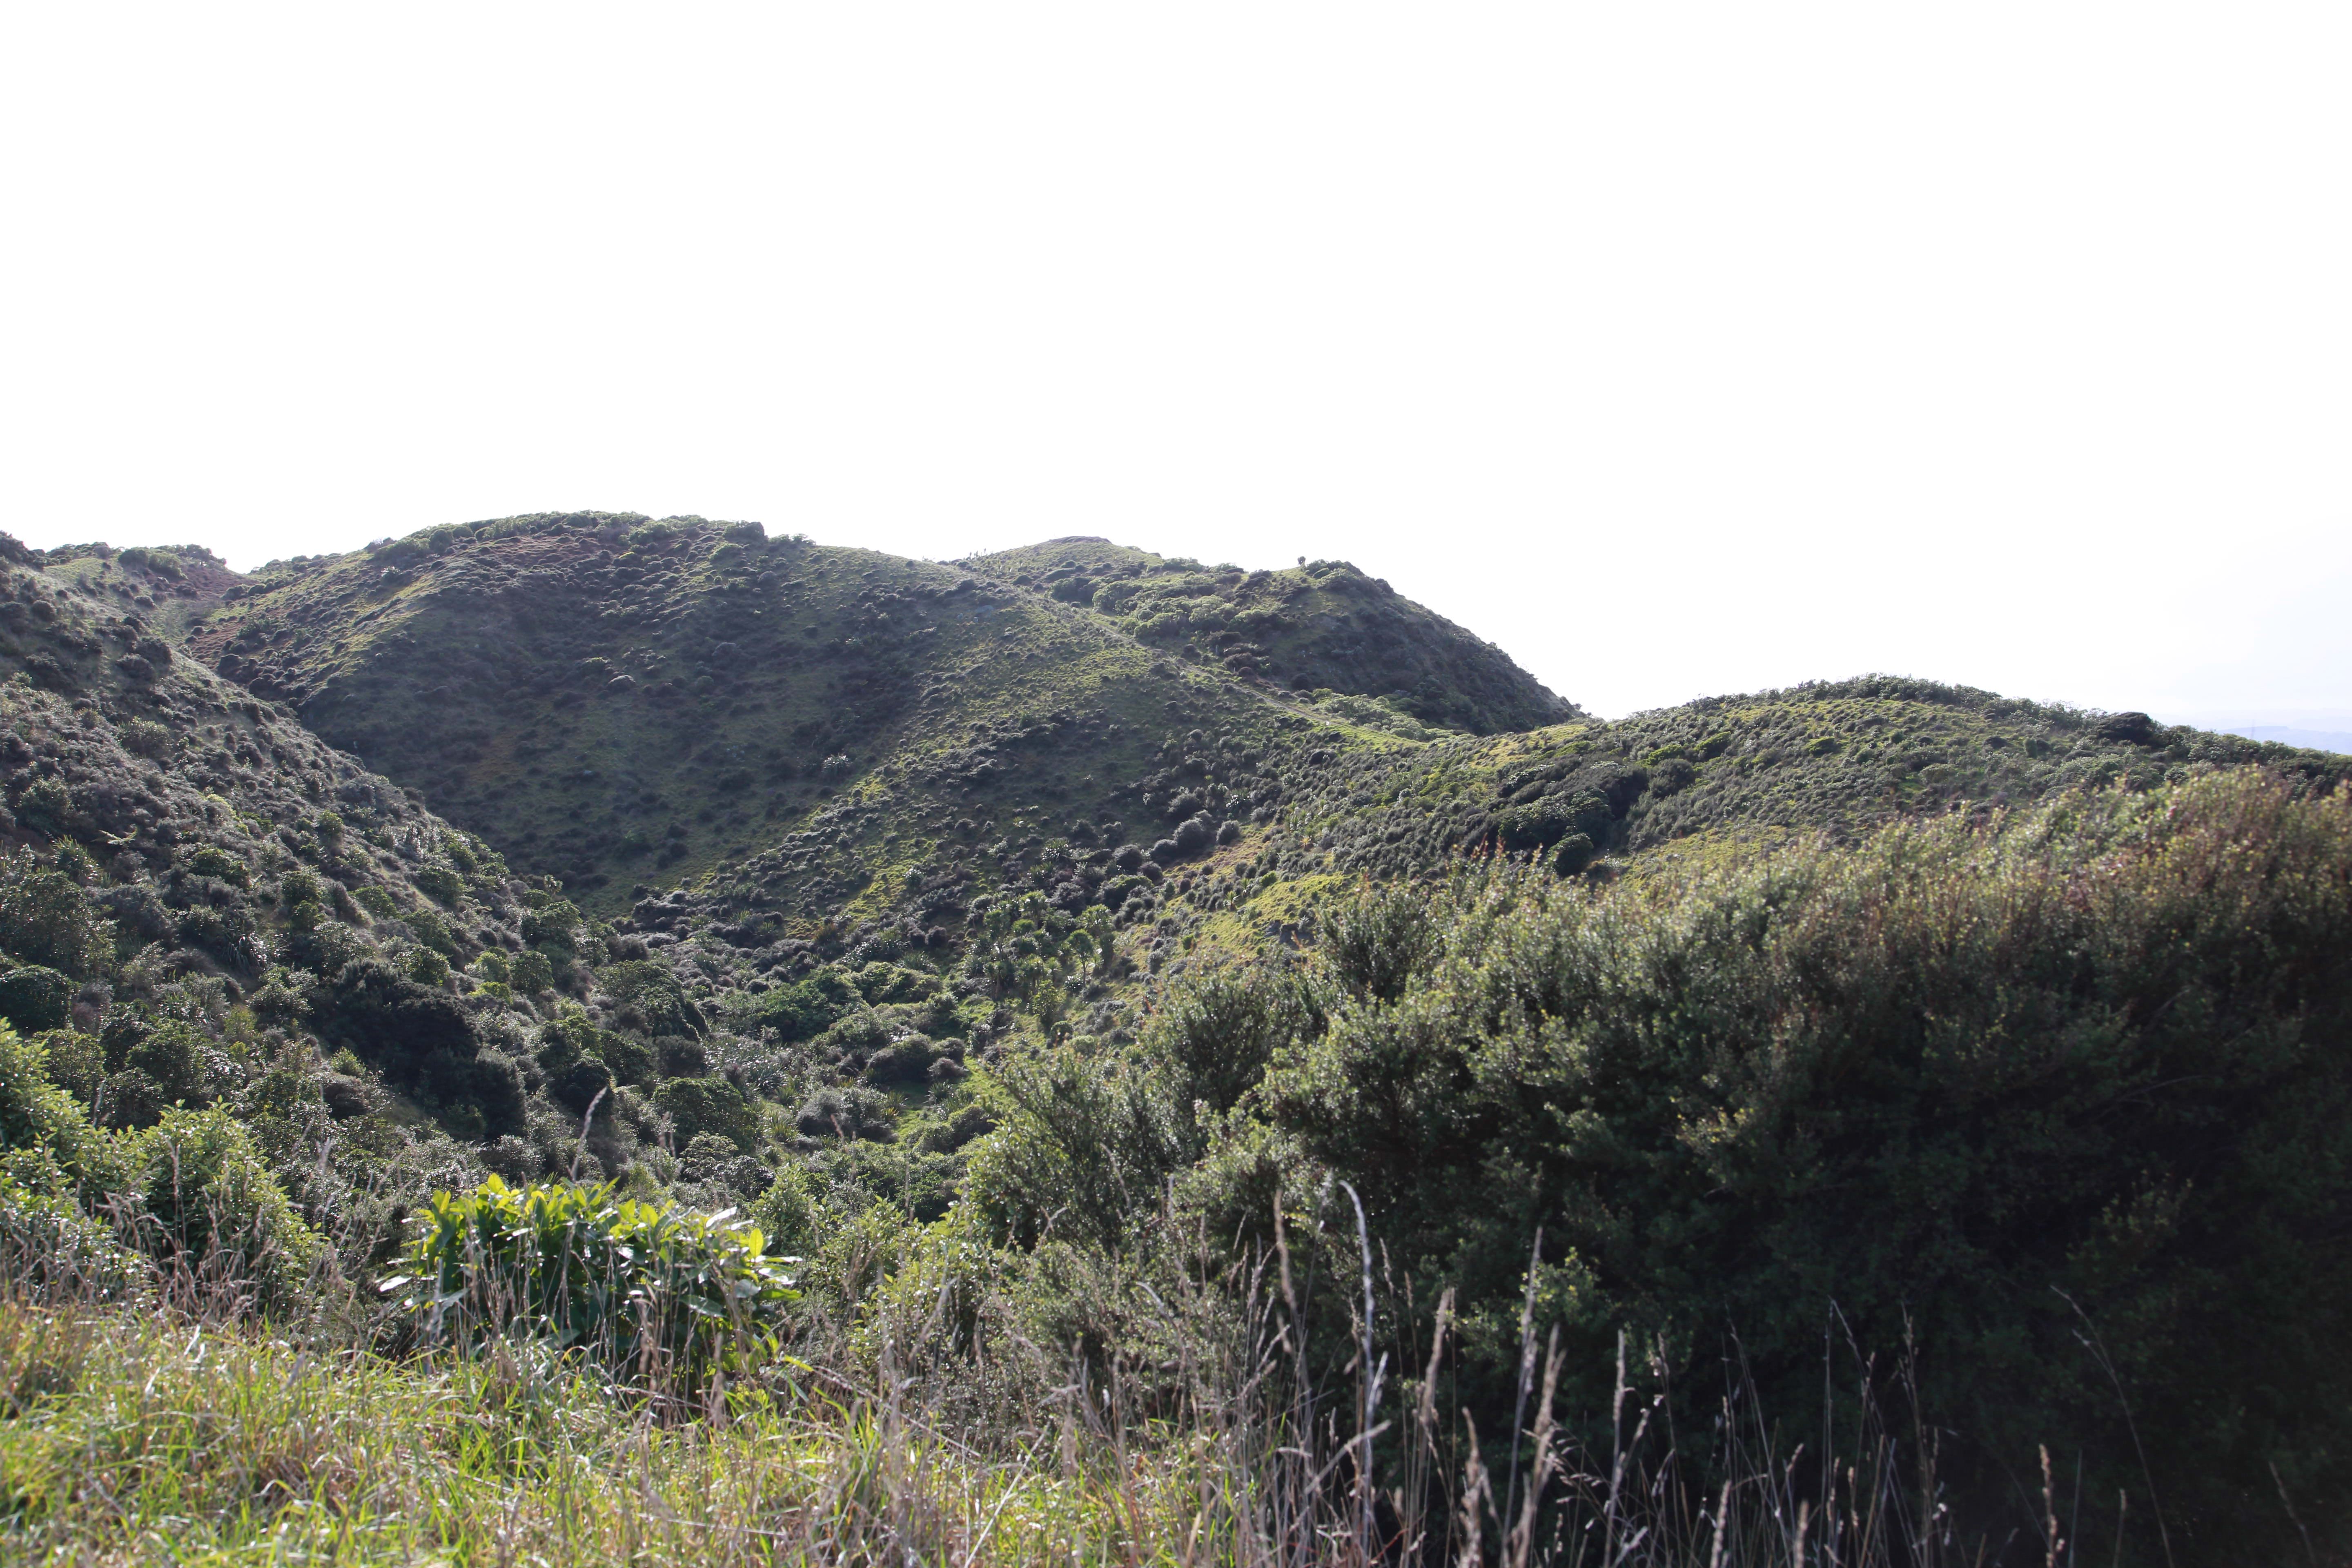
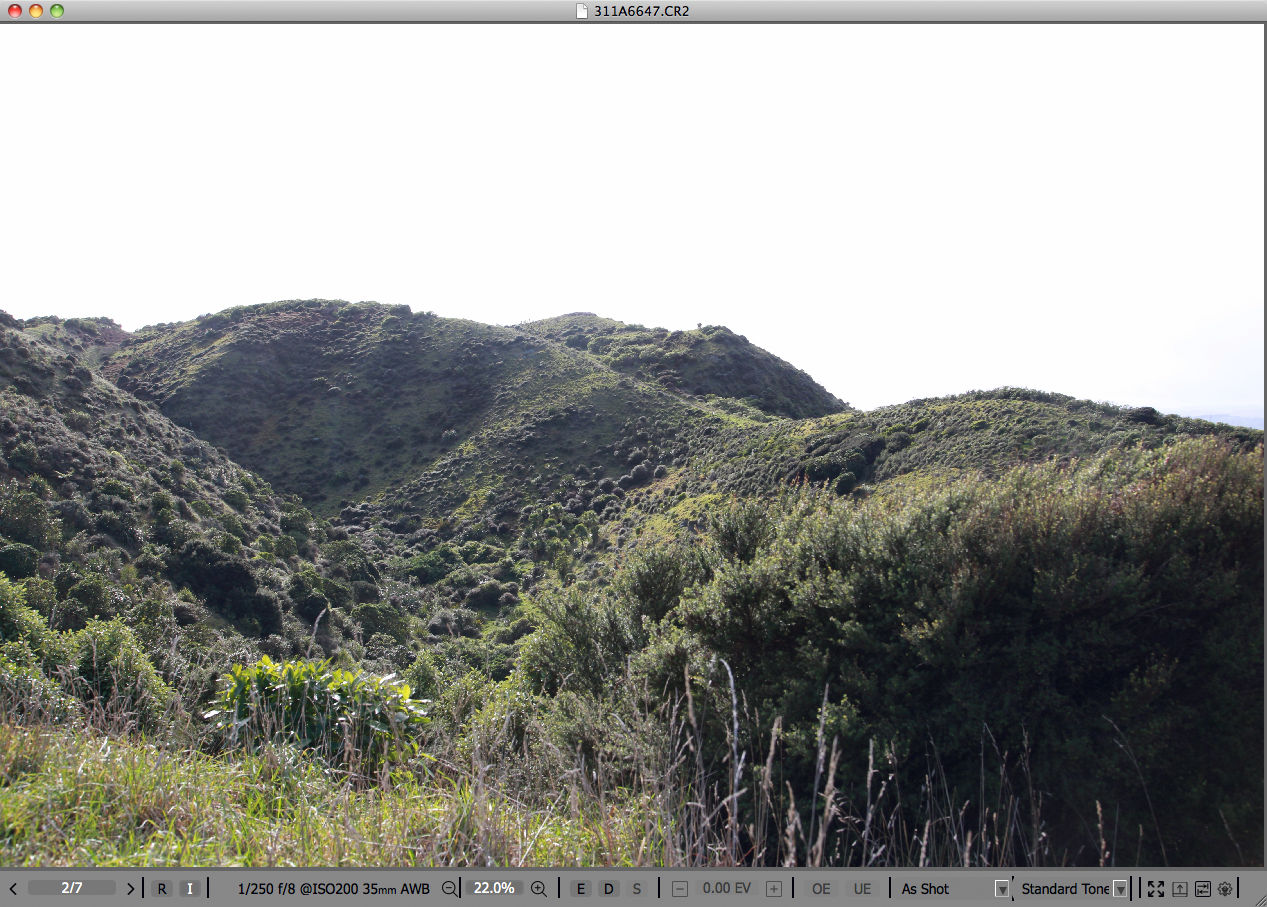
Later Allan kindly provided three consequent shots, two of which are damaged and one isn’t; and gave us permission to share them:
Link to Normal shot RAW (CR2)
Link to Damaged shot RAW (CR2)
Link to another damaged shot RAW (CR2)
To start solving this mystery, we need to first establish that a faulty memory card did not cause this problem. We opened the damaged RAW shot in FastRawViewer (see Photography Life’s detailed review), and switching between RAW and embedded JPEG (by pressing “J” on the keyboard), we saw that they both look similar, which proves that we can exonerate the memory card and recording interface from all charges – otherwise the embedded JPEG and RAW would look different.

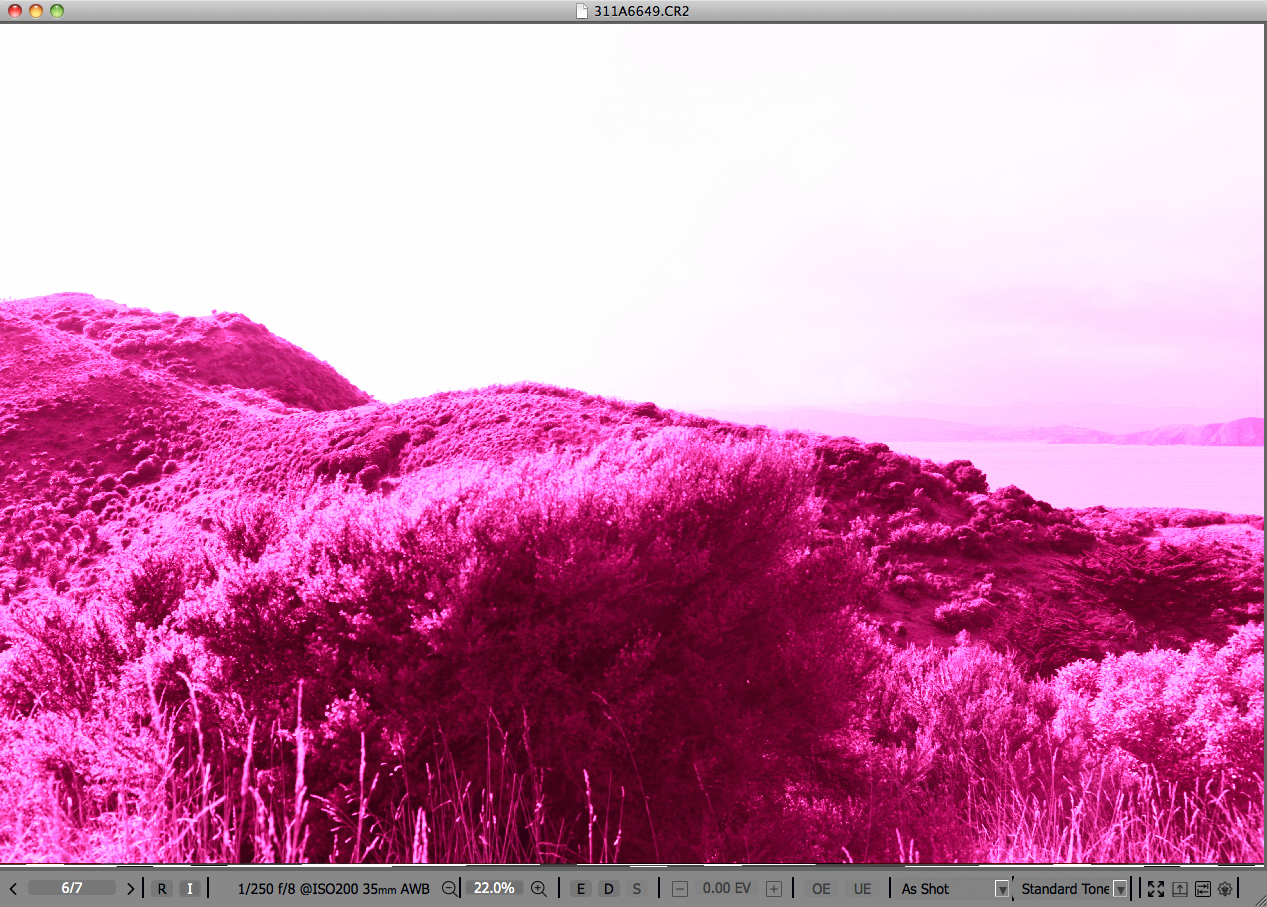
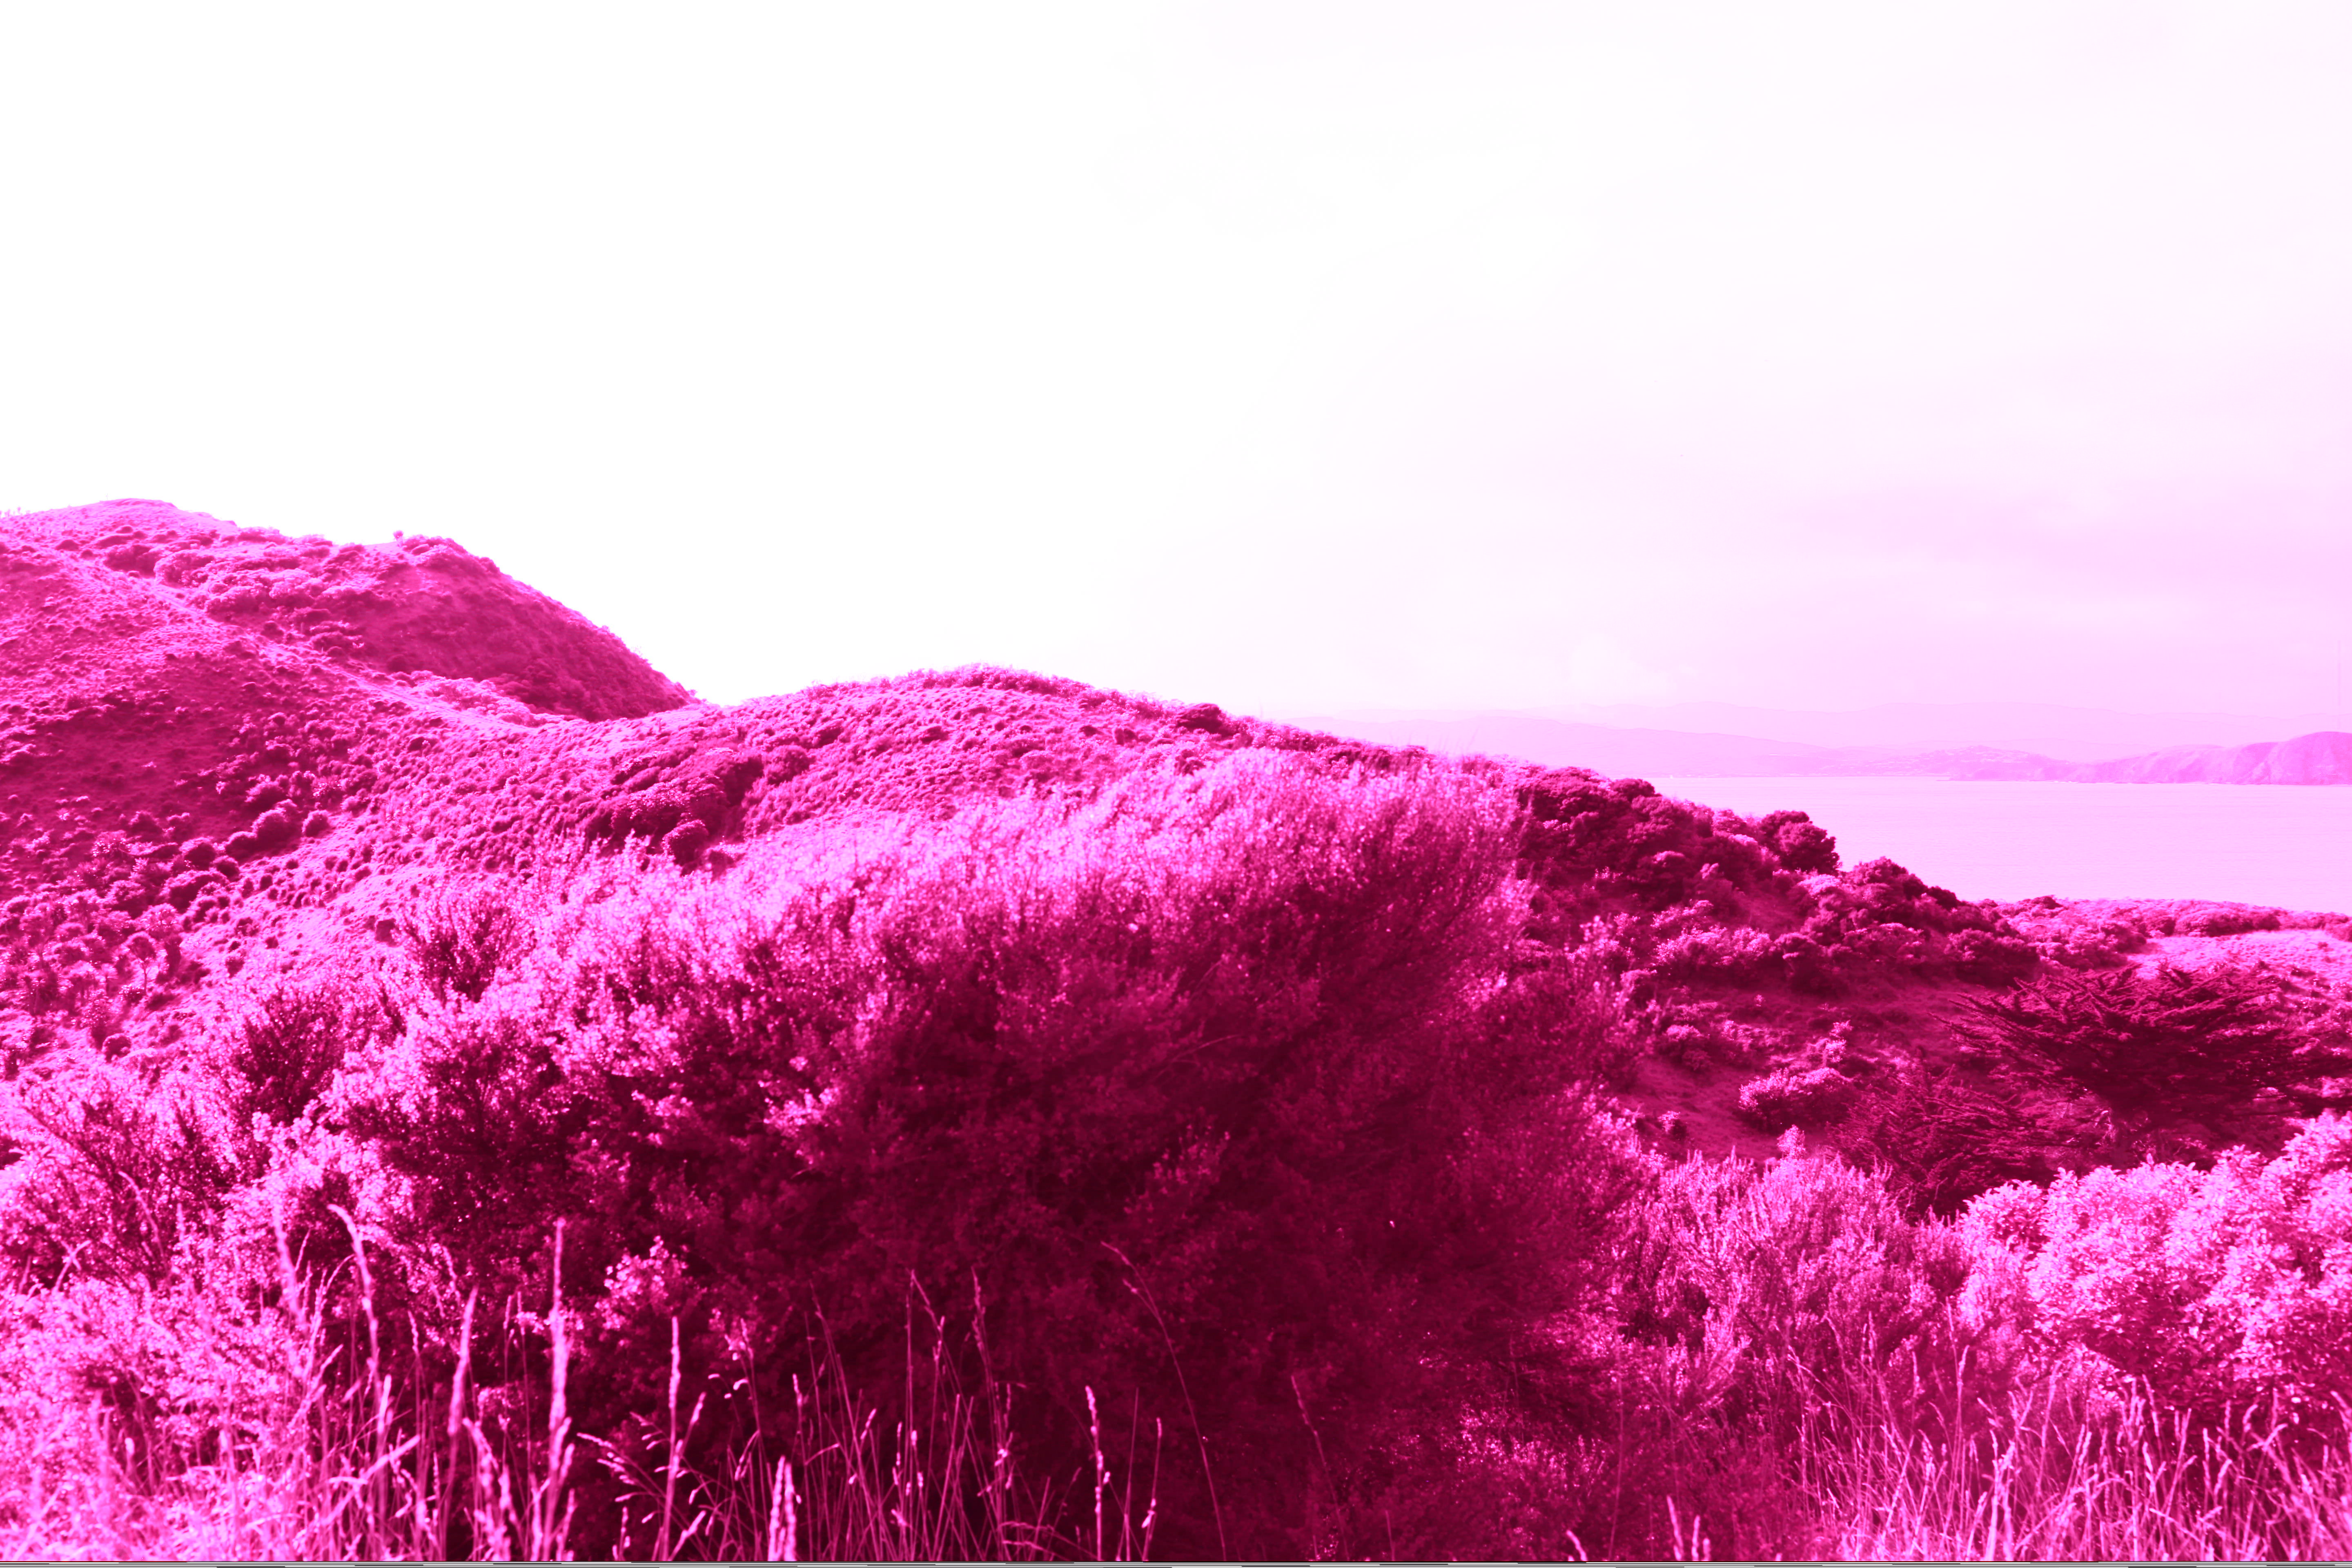
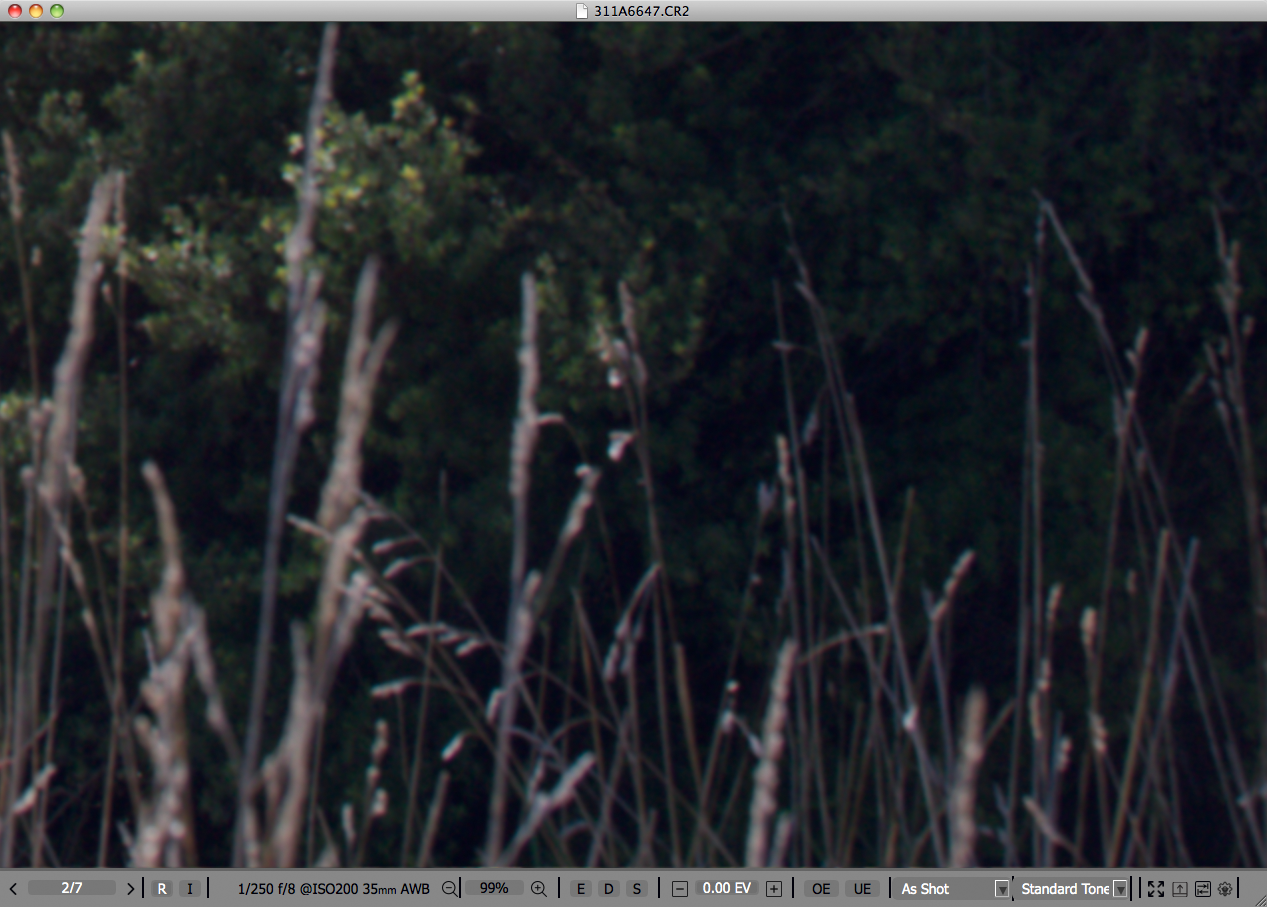
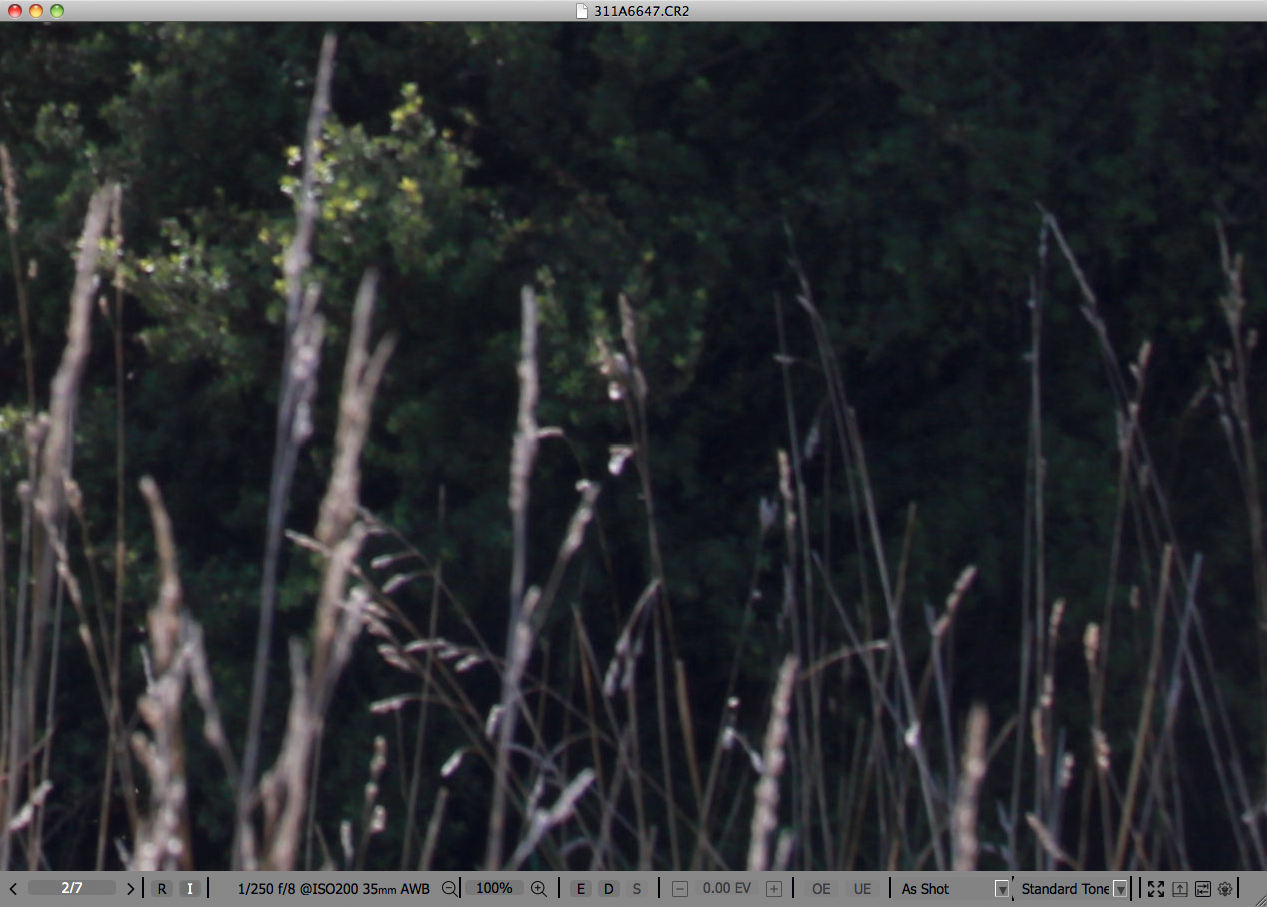
Now, if we take a close look at the bottom of the shot we see a narrow strip of, for lack of a better term, garbage at the very bottom, both in the raw and in the embedded JPEG.
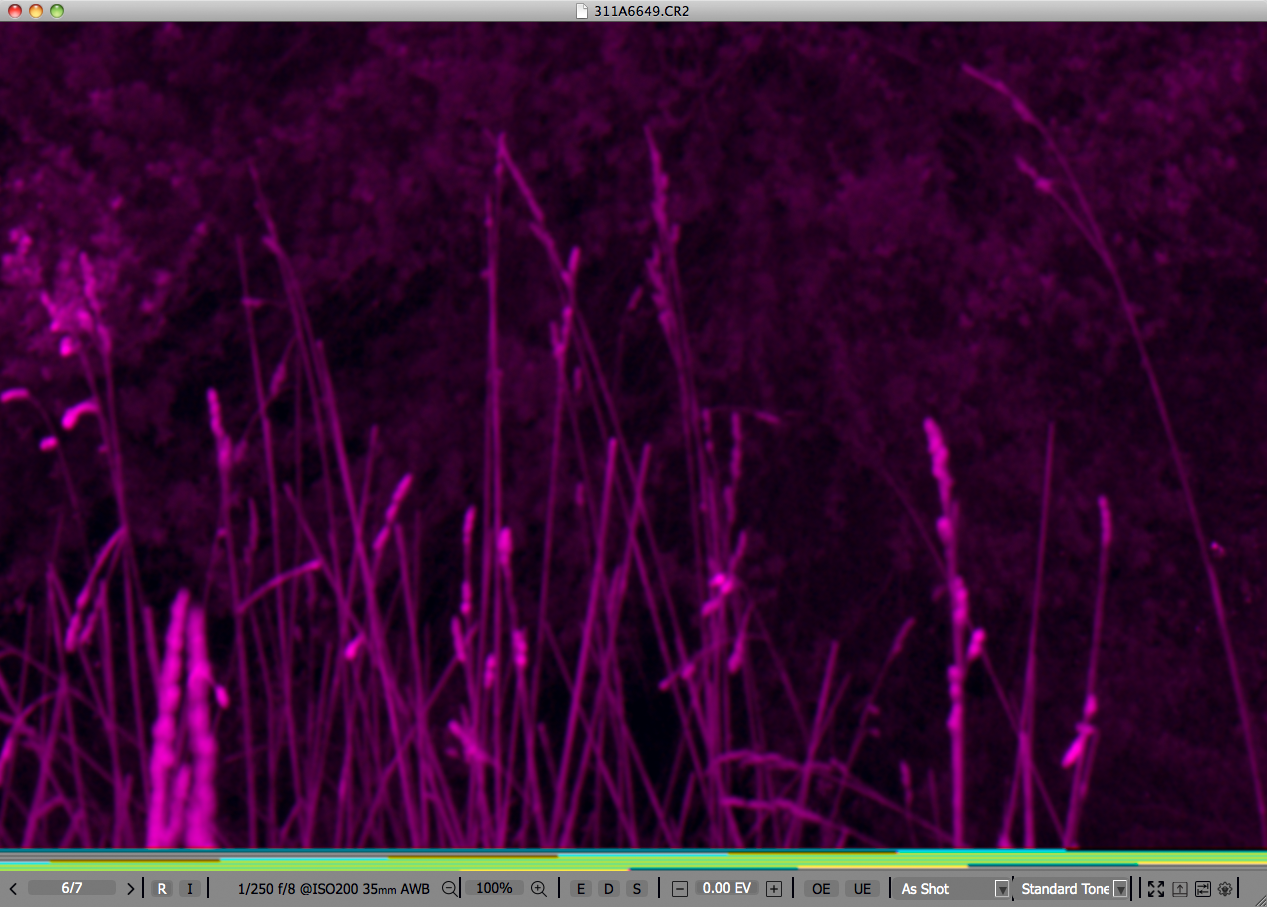
Let’s zoom to 100% and see that odd band:

The garbage at the bottom is another clue to the problem – as a result of this problem, the start of the image buffer seems shifted “to the right” by a number that should closely correspond to the number of garbage pixels at the bottom, and the read operation goes past the image, into the memory block which contains some other information or even arbitrary bytes; hence the garbage. The shift also affected the Bayer pattern, so the supposedly red, green, and blue pixels are now not in the expected order, and consequently they were recorded in the wrong channels in the raw data.
The undamaged shot, however, looks quite normal – both the RAW and the embedded JPEG; no odd bands at the bottom, too.
So we can deduce that there was some sort of in-camera synchronization glitch. But what sort of the glitch was there? And could we somehow repair it, if the file must be salvaged?
To answer it, let’s open a damaged RAW in RawDigger (we have RawDigger on a Shift-R shortcut in FastRawViewer), and look at the histogram of the portion of the frame that should not contain clipping. We placed the selection on a cloud (shown as a grey rectangle positioned close to the right edge of the shot and overlaying the magenta-looking sky):
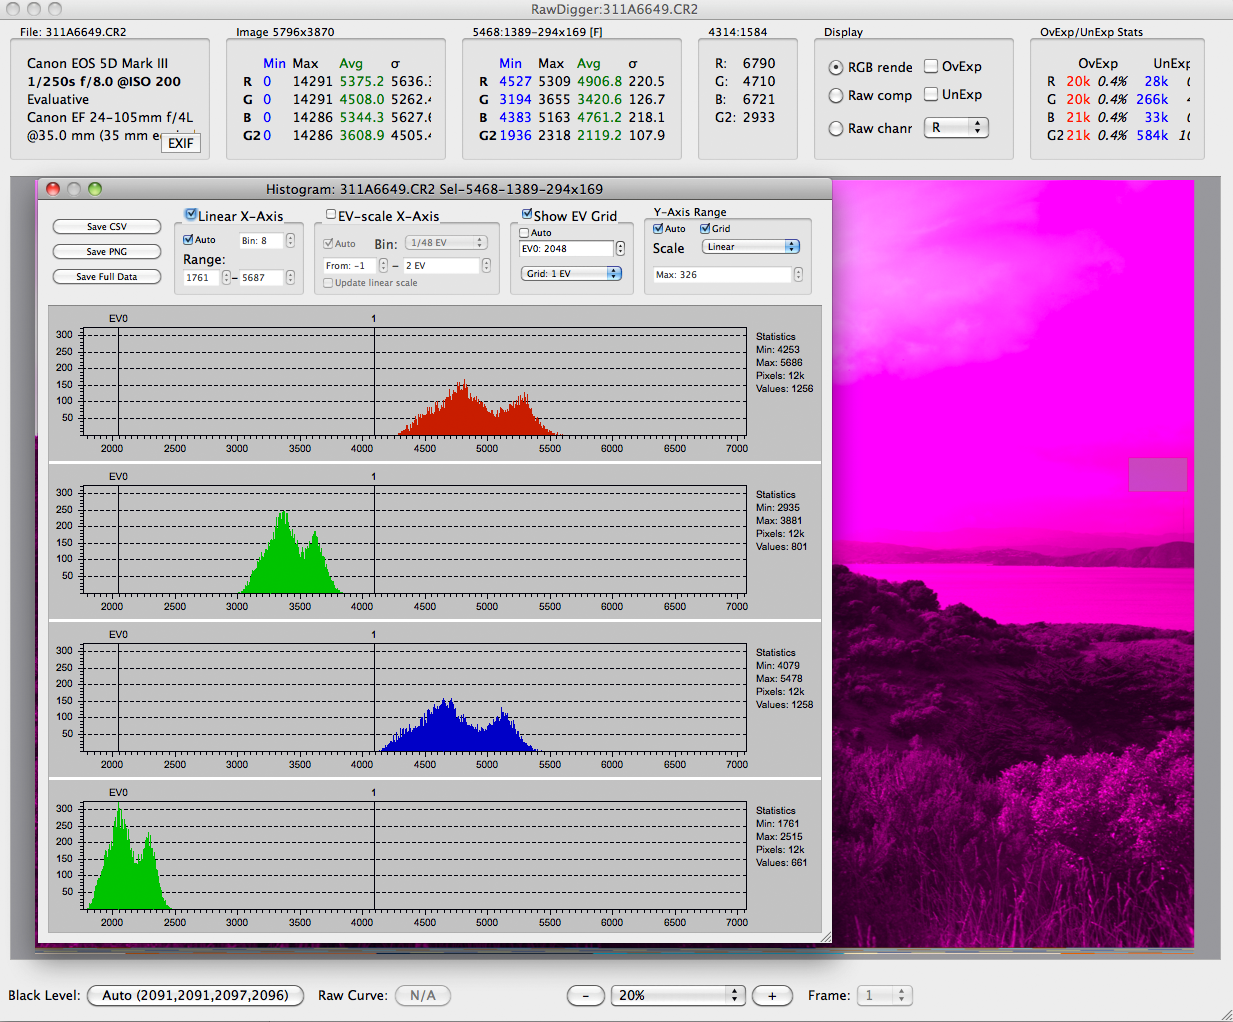
So we see that according to the histogram, the Red and Blue channels are nearly equal, while the Green channels (both G and G2) are significantly different. This is not right. We know that the G and G2 channels are always very similar, while on the skies (except for sunrise / sunset) or the water reflecting the bluish sky, the Red channel is nearly always the weakest and the Blue channel has a peak in-between the Green and Red channel peaks, which is obviously not the case here. Based on that, it is apparent that the green pixels were recorded in the Red and Blue channels in the RAW file, while the red and blue pixels were recorded in the Green channels. It is the channel sequence that is mixed up here; the “colors” of pixels and the “colors” of channels do not match.
Suppose you do not have a good image to compare to, but (out of curiosity, or for the purpose of repairing the raw file) you still need to attribute channels as they are recorded in raw to the real red and blue (as you’ve seen, detecting green channels is rather trivial, based on their similarity).
To find out which of the Green channels in RAW contains red pixels and which contains blue ones, let’s have a look at the per-channel view, keeping in mind that the “true” Red channel typically has lower values for this type of light and subject than “true” Blue, and more contrast and details in the sky are also in the “true” Red channel (Dan Margulis in his books offers a lot of information on recognizing which channel is which).

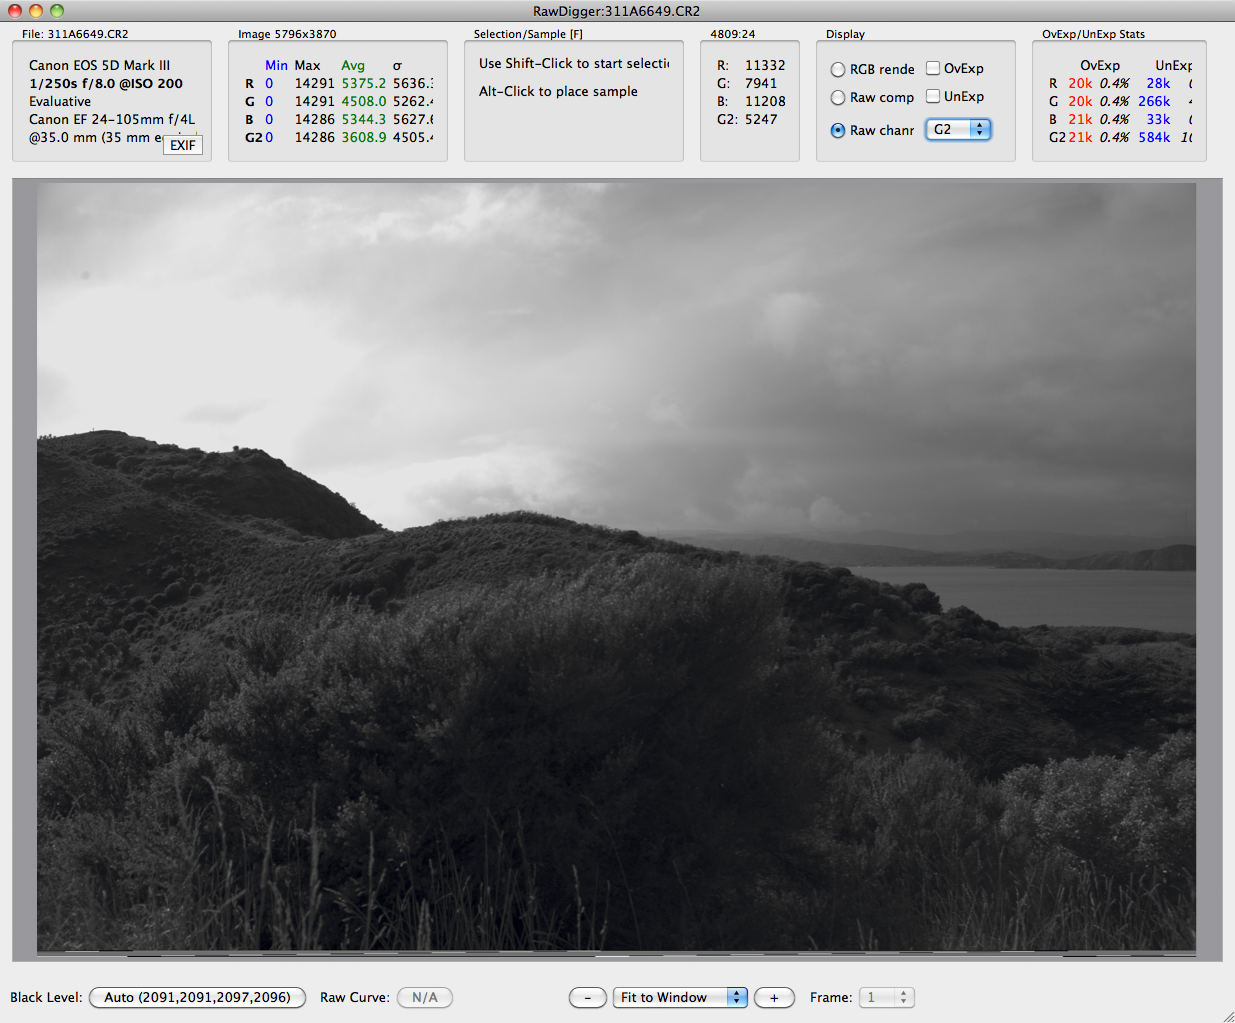
From these images, and taking the above-mentioned into account (more details and contrast on the sky is in red), it is obvious that the G channel contains blue pixels, while the G2 contains red pixels.
We can also see it from the comparison with the correctly recorded shot.

As you can see, on the normal shot (the left one) both Green channels are vertically aligned, the Red channel is the weakest, the Blue channel is in-between Green and Red channels. That is how it should be. As to the damaged shot (to the right), see above.
If this shot is very important to you, you can try to salvage it. One can export the channels and put them in the correct order in Photoshop, but a better way would be to recompile a decoder in a raw converter with a different Bayer pattern just for this case to rescue the shot (if you can’t do it yourself, your friendly neighborhood open source RAW converter developer should be able to help).
However, in the long run, this camera will be unpredictable and should be replaced or fixed. In either case, you now have irrefutable proof to show tech support, and they will have to deal with your issue instead of making you try and hang up the phone in frustration.
1 https://www.dpreview.com/forums/post/56331303
2 https://www.dpreview.com/forums/post/56337033
3 https://www.dpreview.com/forums/post/56339983
Dazy,
You can try a third party jpeg repair tool. Download this tool: www.stellarinfo.com/jpeg-repair.php
I have corrupted JPEG files (RAW files are not present). How to repair them?
Hi! I happened across this post in a frantic search for corrupted RAW fixes.
My story is that I shot an event (just a few hours ago at the time of this posting) and came home to offload the RAWs (sRAW) into Lightroom for editing. In the process, my card reader disconnected from my Macbook Pro (not physically, just was prematurely ejected, interrupting the transfer 95% of the way through) and when I went to look at the folder, all of the files had been transferred. However, when I imported into Lightroom, the final 140 files were unable to be read by LR. I stupidly made the mistake of doing a move instead of a copy, so there was nothing left on the card. No RAW-reading software I have has been able to open the files.
Are there any suggestions from you folks much smarter than I, as to how to possibly retrieve these files? I have my apology email for the client locked and loaded in case the worst is true, but I’m praying for some light at the end of this tunnel.
Hi David,
It’s been a while since you wrote your comment. I still post a possible answer:
In case you have not touched the memory card since, you could try to get your files on it using PhotoRec:
www.cgsecurity.org/
I have had some problems with a card reader corrupting my SD card and was able to retrieve Canon RAWs (cr2) with almost no problem. (Among hundreds of RAW photos only three remain illegible by LightRoom. Of these I was still able to extract the JPEG with exiftool).
Cheers,
Fabian
Thanks for the interesting article. After having similar problems quite a few times recently, on different memory cards, I have now started shooting RAW + JPG so that at least I still have a JPG. My Nikon D3200 only has one slot. Since shooting RAW + JPG I don’t seem to have encountered any problems again. Not sure if this is coincidence but fingers crossed.
I’d welcome the opportunity for someone to check my RAW files to tell me whether it’s my cards or camera at fault.
I must be the luckiest person in the world. I have never had a memory card fail or a damaged RAW. I take all kinds of precautions (2 card cameras when possible, shooting tethered, careful handling, insurance against loss, etc.) but have never had a problem. I do appreciate this article for pointing out tools that might help if you do and how to deal with tech support (Nikon would just replace the camera….at least I think so) I also shoot Olympus and not as sure about what they would do. Regardless, it’s good to have your ducks in a line.
The title of your article caught my attention since I recently experienced my first damaged RAW files. Although, my issue is a different one, it seems with your knowledge perhaps you and/or others in the Photography Life community may be able to help me discern if it is a card, camera, Lightroom or some other issue. Unfortunately (perhaps fortunately, if it had to happen) it affected two images during a professional photo shoot of 49 portraits.
The issue: In Lightroom 5.7 “unexpected end of file occurred” message is superimposed over two of the raw files. Initially they both showed a black thick line running up the left side of each file. Then when I clicked on one of them the black line disappeared and was replaced with many blurry lines as if some one ran water over film and smeared it. Also, the image seems to be separated and now not aligned. When clicking on the second image the error message has changed. It now reads: “There was an error working with the photo”. The histogram isn’t visible in either file.
Fortunately I had second image for one of the damaged RAW files. At this point I’ve offered to re-shoot the corrupted portrait again. Though the county administrator was gracious, it’s rather embarrassing and inconvenient for all. Lesson learned, that even when you get it right on the first shot take another for the unexpected.
I would appreciate any solutions to recover damages RAW files or insights on source of issue: card, card reader, Lightroom, camera, computer?
Photos were taken with new Nikon D750 (July 2015) using Lexar Professional SDHC Class 10 (600X speed) 32 GB card. Thanks goodness this didn’t happen on wedding I shot in July. This is only the second time I’ve used Lexar cards/this card. Previously only have used SanDisk Extreme Pro.
Dear Phoenix:
I think I know what happened, but I need raw files to be sure. Can you upload a couple?
Hi Iliah, would you mind sharing your findings with us all as I have had end of file messages too using a Nikon D750 and a Scandisk32gb card without any apparent reason.
The photo loads into Lightroom and looks the same as any other. I then have gone onto edit it without problems. But the problem has appeared when I export it. For example, I export one copy in jpg at max resolution, which is ok, but when I export the same photo again but with a lower resolution, 70%, 72ppp and with my watermark, the end of file message appears. From this point on the photo is damaged and I can’t edit it or export it again. I have tried to remove the original RAW file and import it again separately but the same problem persists.
I now thinking I should amend my import workflow and make a copy of all my RAW files to a separate HD before I import them into Lightroom, (storing them on a separate HD) which will take up a lot of memory space but keep the original files separate from Lightroom. I don’t really know.
I should add that I checked my Scandisk with the disk utility on my Mac and this showed everything was ok.
Any help you can shed on this topic would be most welcome. Thanks.
Dear Bernard,
I can’t share images sent to me without explicit permission of the owner. As to your damaged files, please let me look at the raw – only that allows to make any conclusions.
Hi Iliah! Thank You. Yes, I’d be pleased to send you the files. Ready to upload. How do I that through this page?
To upload, you can use a service like www.transferbigfiles.com/
Do you have an email address to send files to. You can send PM to my email. Thanks!
e-mail sent.
The lady portrait has a minor damage, very close to the left side of the frame, thin line. Simplest way to salvage it is to download recent Adobe DNG converter (it is free), convert to DNG, and Lightroom should be able to process the image just fine. You may need a minor touch-up or a crop after that.
Links to DNG converter, scroll to the bottom of the pages please:
Windows: www.adobe.com/suppo…ftpID=5919
OS X: www.adobe.com/suppo…ftpID=5918
The portrait of the gentleman is, unfortunately, heavily damaged. The only simple way here is to extract the embedded JPEG, I will e-mail it to you.
Both shots are damaged due to the transfer problem (memory card , most probably), that is why we not only shoot several “takes”, but also use 2-slot cameras in the field. In studio I prefer to shoot tethered, so that I can immediately check the results on a notebook. Shooting tethered has other advantages as well.
Thanks IIiah! Yes, you’re right about taking several shots. I will use both slots in future sessions like this. Also, thanks for confirming that problem is most likely from the memory card. This was my first and last time using this brand card. Would love to salvage the gentleman photo. Look forward to receiving the embedded JPEG. You’ll help me look good, or at least better to the administrator who hired me.Thankfully have another file of the woman. Greatly appreciate your offer to help and very quick response.
e-mail with JPEGs sent.
Thank You. Thank You. Thank You.
I can now finalize these images. They will be enlarged to 3’X5′ and featured along with all the other portraits on the local government building soon.
In Gratitude, From My Heart!
I’m very glad I was able to help.
Interesting and informative post and of great value to the owner of the camera. I hope he posts a follow up.
Of course. We sent Allan our conclusions 10 days ago. Unfortunately, this type of damage is not an isolated case.
Nice detective work there. Very hard to fix without being able to exactly determine the incorrect offsets (at least modulo 4)
It was indeed superb detective work. Without Iliah Borg and his co-authors of RawDigger this would’ve been almost impossible, if not impossible to achieve. Clearly, camera vendors and their service departments have no wish to undertake this type of in-depth fault diagnosis on behalf of their customers.