One of the features of Lightroom that I use the most often and has probably saved me more time than any other step in my editing process is creating and using develop presets. A develop preset is simply a group of adjustments that all get applied to an image at the same time. By default, Lightroom includes a variety of presets, but you can also create your own if you want something more personalized. In this post, I’ll show you the process of creating a Lightroom develop preset, as well as how to modify an existing develop preset.
Table of Contents
An Introduction To Develop Presets
Lightroom develop presets are simply a way to make many adjustments to an image at the same time. Let’s say you find yourself making the same basic adjustments to most of your images. Maybe you add a bit of contrast, recover some highlights, and increase saturation. Instead of applying these three steps individually every time you edit an image, you can create a develop preset that does them all at once. Not only that, but you can automatically apply develop presets when you import images! Before we discuss that, let’s talk about how to create a develop preset.
Creating A Lightroom Develop Preset
The first step in creating a develop preset is to make edits to an image. When you create a preset, you are basically copying changes that you’ve made to an image and saving them for future use. I’m going to go ahead and show you my “Quick Fix” preset that I apply to every single image I import into Lightroom. Go ahead and open up an image in Lightroom. If you’ve already made edits to the image, make sure to hit “Reset” in the lower-right corner to clear any existing edits. Now apply these settings:
Basic
– Contrast +5
– Highlights -5
– Shadows +5
– Whites +15
– Blacks -10
– Clarity +3
– Vibrance +5
– Saturation -5
Tone Curve
– Highlights +7
– Lights +10
– Darks -5
– Shadows -7
Camera Calibration
– Red Primary Saturation +5
– Green Primary Saturation +10
– Blue Primary Saturation +20
Note: The camera calibration is not critical to the preset and might work great for some camera models and poorly for others. Feel free to exclude these settings if you want to.
Here you can see the before/after of how these edits affect an image. For me, this is a great starting point for my editing process.
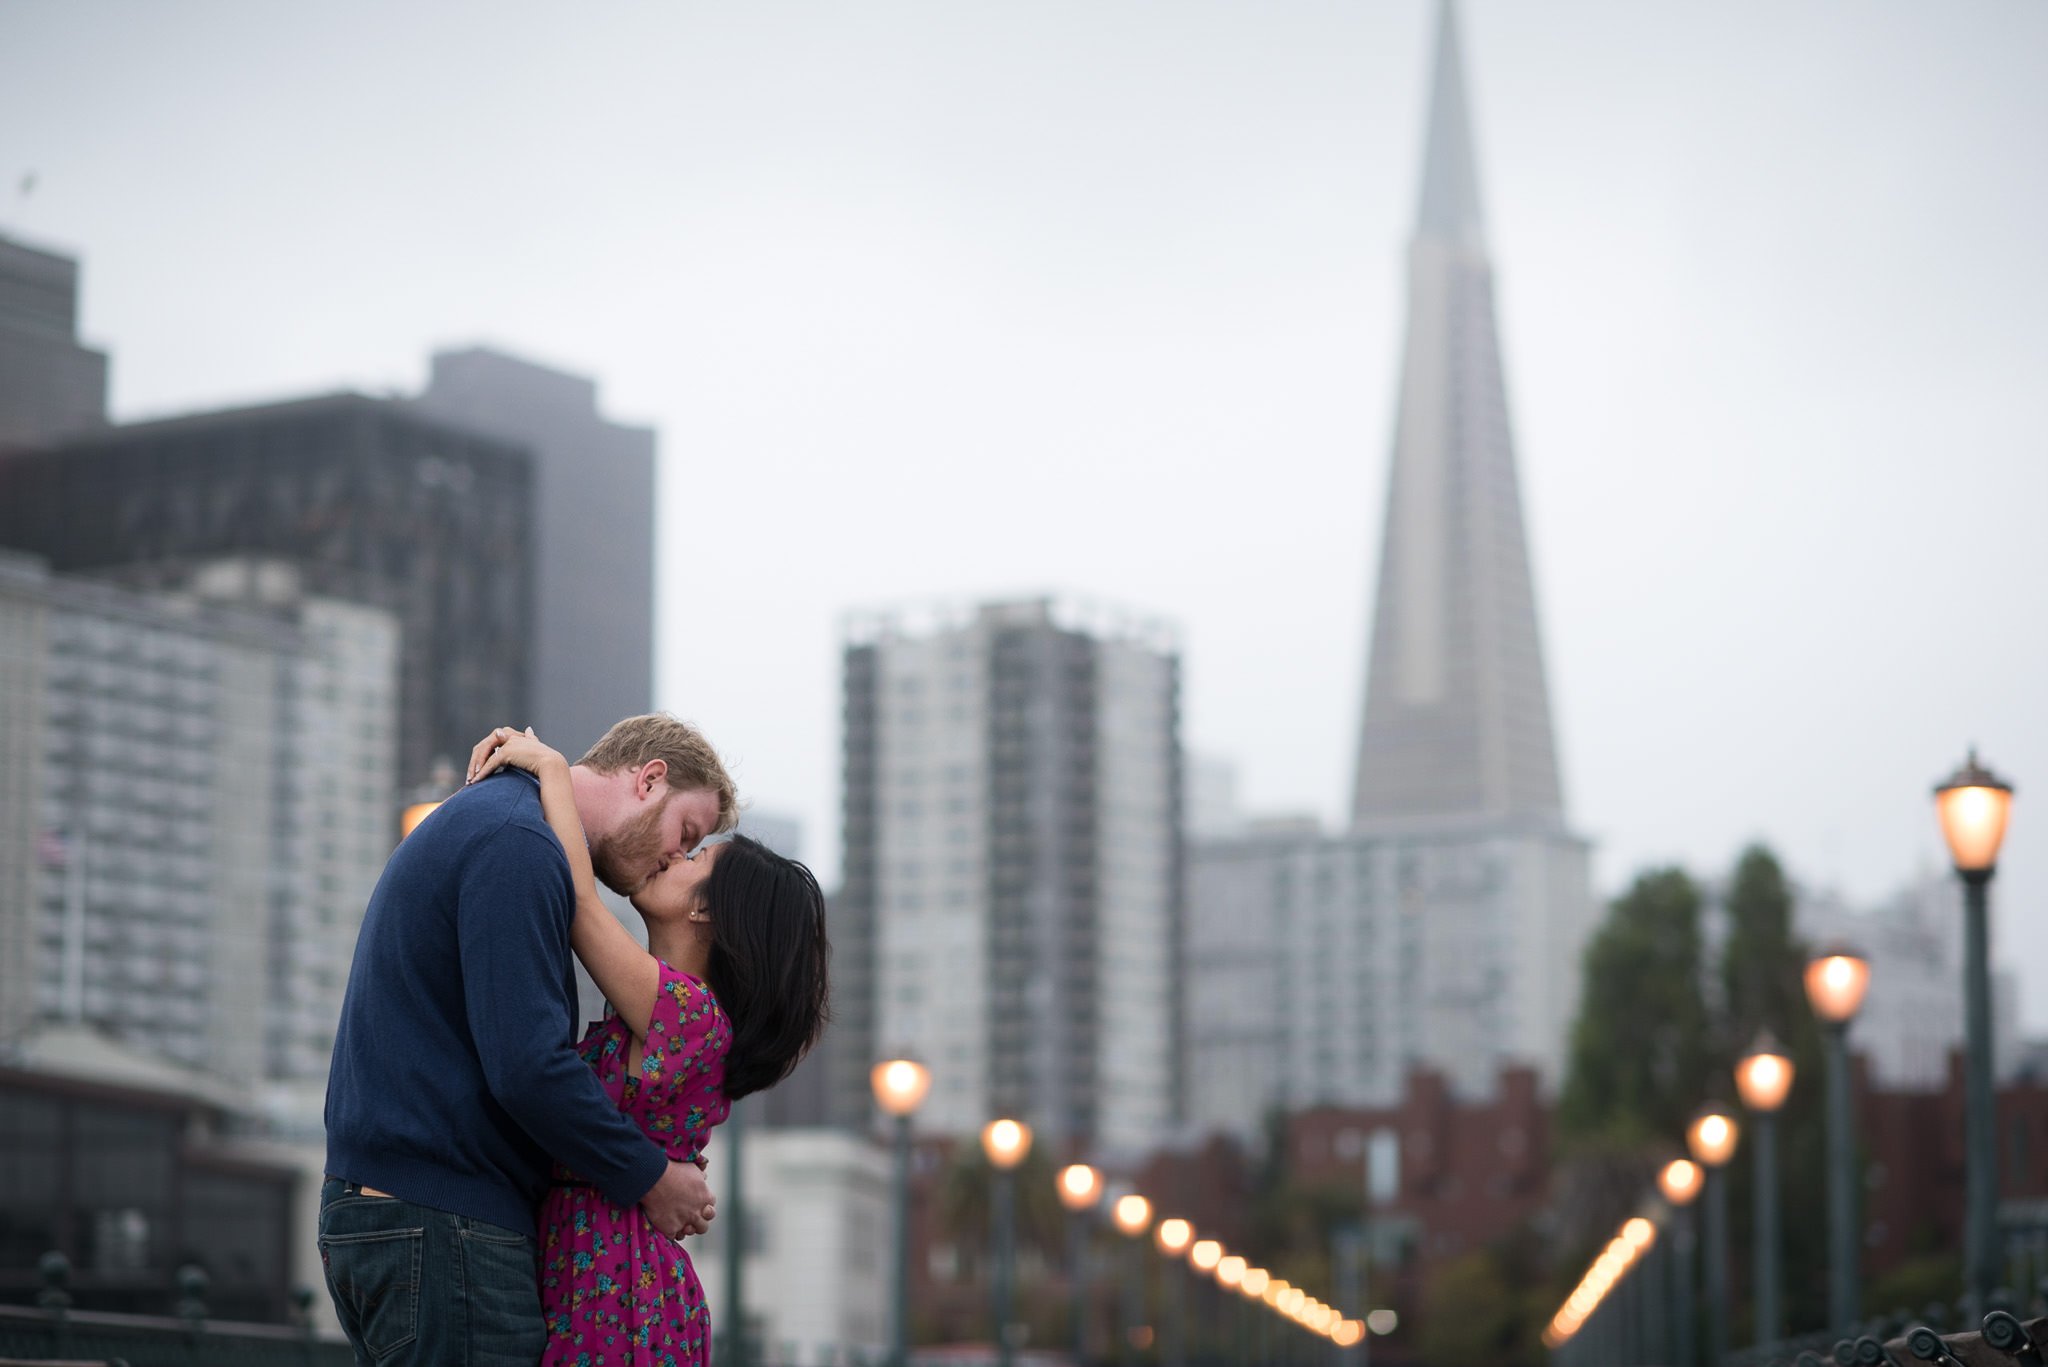
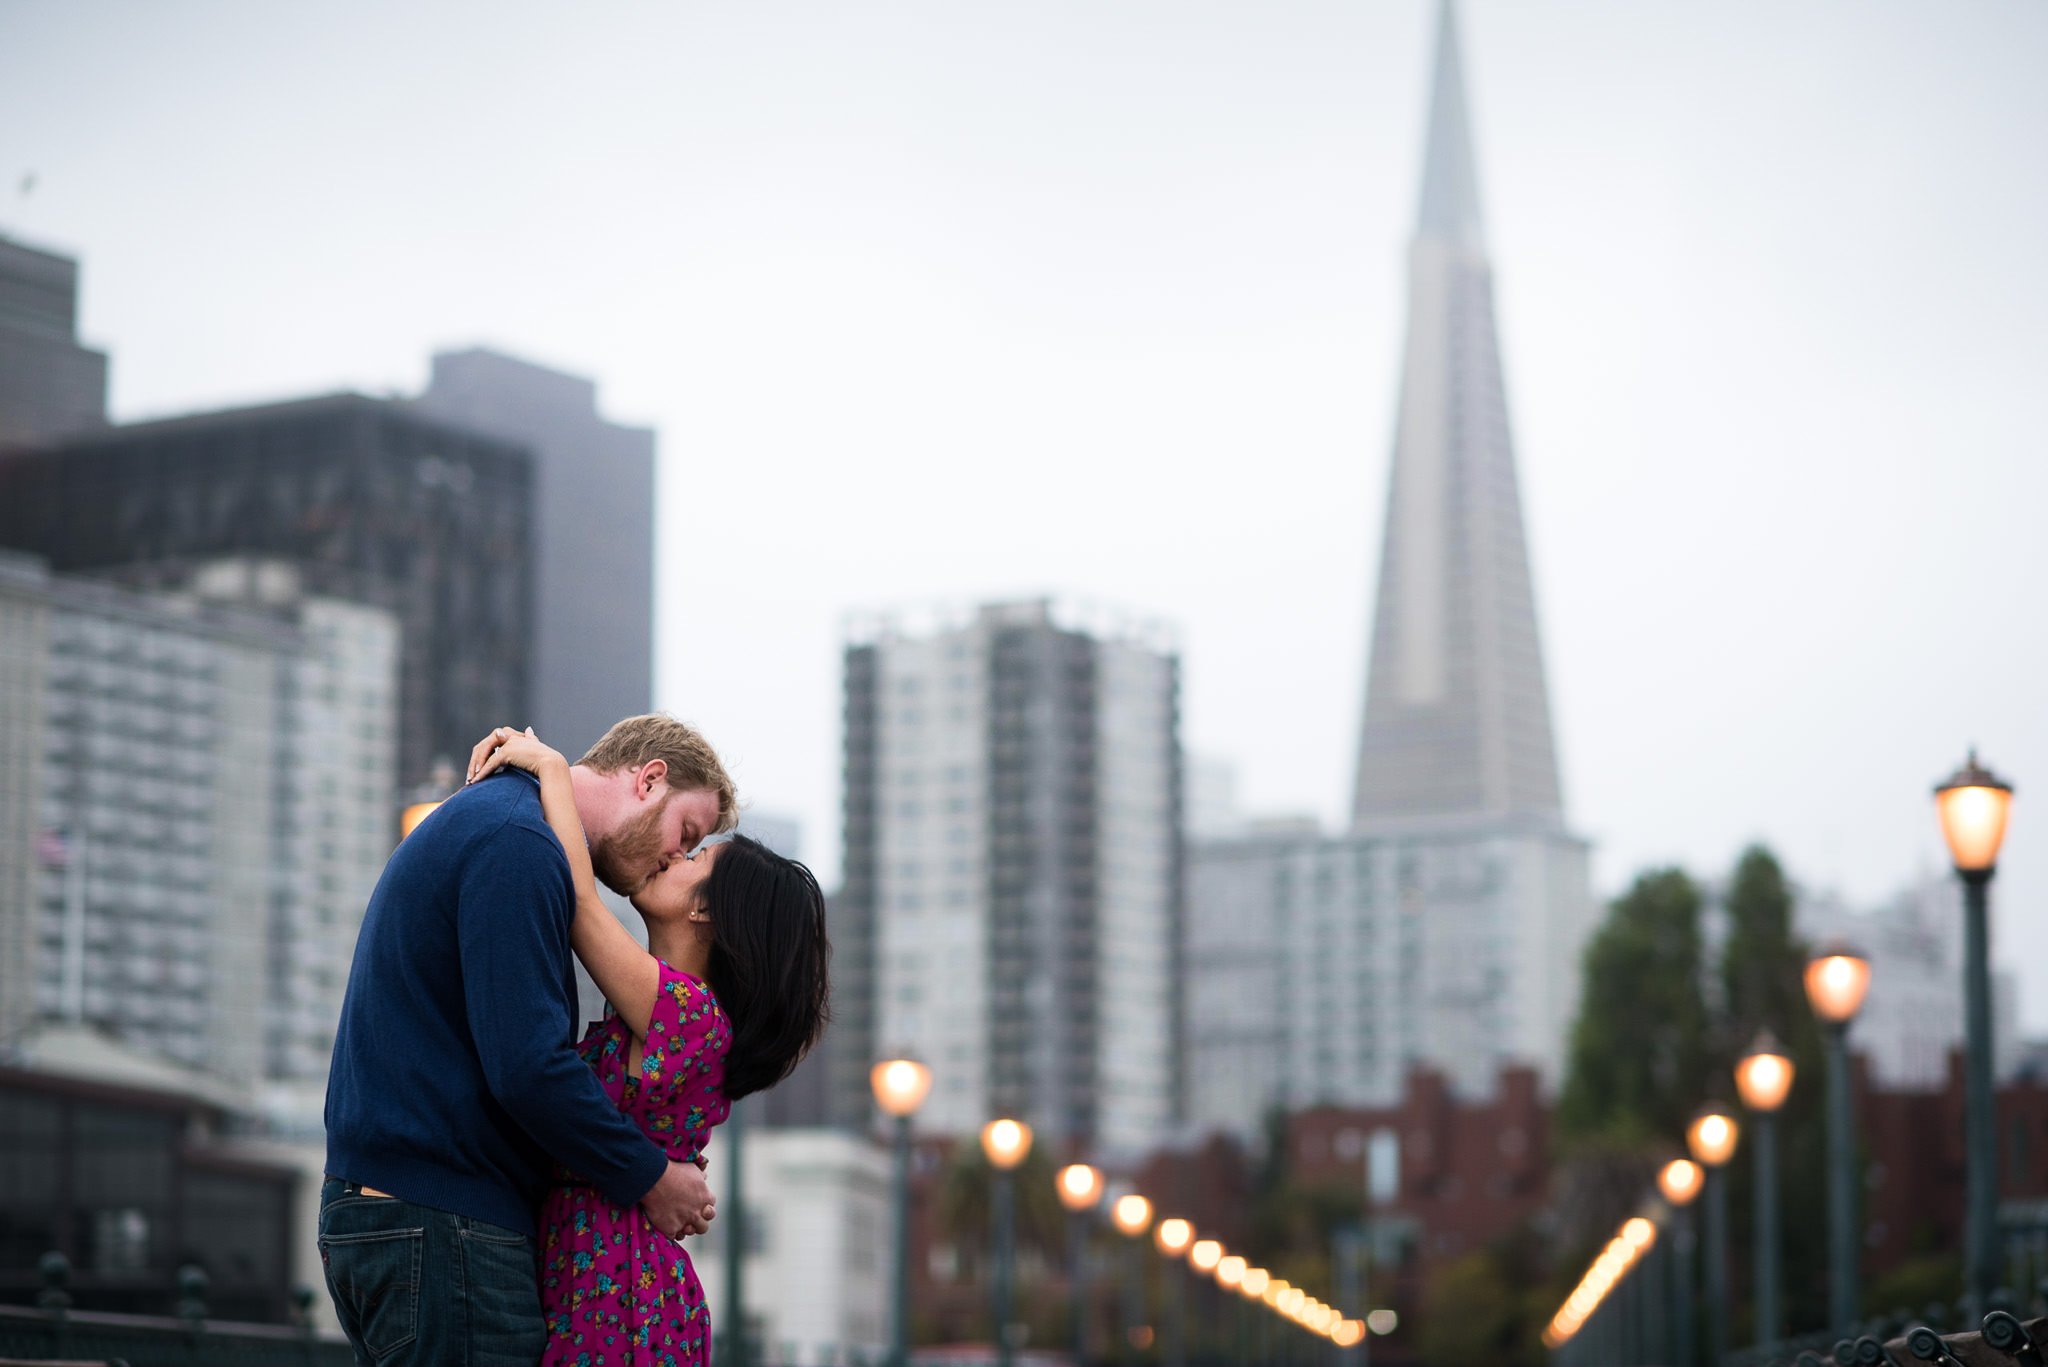
Now that you’ve made all of those edits to your image, you can see the benefit of saving them as a develop preset so you don’t have to go through that process every single time you edit an image. Let’s go ahead and create a develop preset that will apply these particular changes.
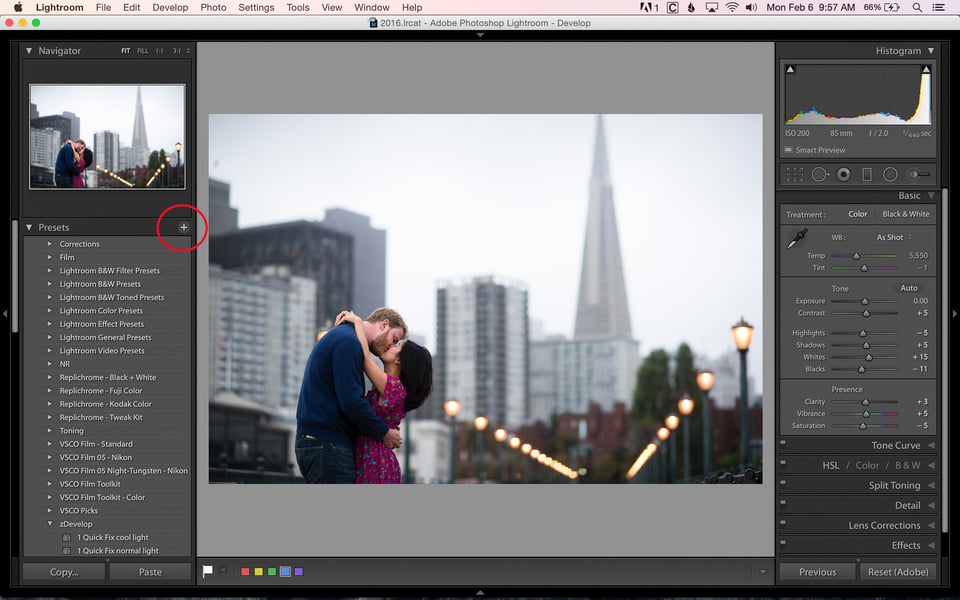
On the left pane of the develop module, you should see the Presets sub-module. Click on the “+” sign, which will bring up the New Develop Preset screen.
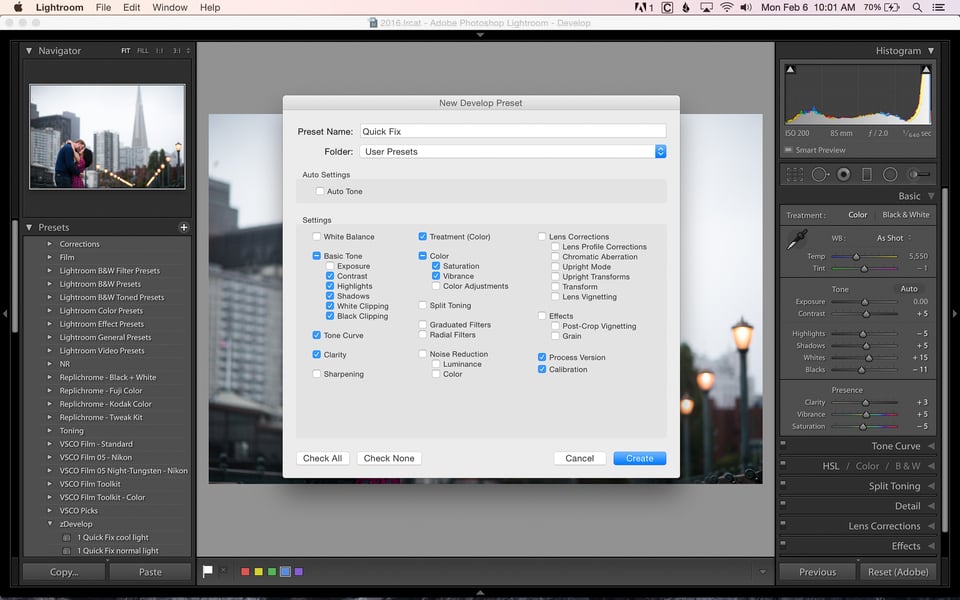
Go ahead and give your new preset a name. I named mine “Quick Fix”, but you can call yours whatever you want. You’ll also want to choose a preset folder where your preset is stored. By default it will be stored in a User Presets folder, but you can also create your own. You can always move the presets to a different folder if you change your mind.
The next and most important step is to choose what settings from your current image adjustments you want to include in your new develop preset. Let’s go ahead and include all of the changes we just made. I find it easiest to click “Check None” and then add the individual settings I want to include in my new preset. Here are the settings that we adjusted, so go ahead and check these boxes (Note: Process Version will remain checked even after you choose “Check None”. Unless you work with images that were edited in a much older version of Lightroom, you can leave this checked):
– Contrast
– Highlights
– Shadows
– White Clipping
– Black Clipping
– Tone Curve
– Clarity
– Saturation
– Vibrance
– Calibration
Once they’re all checked, click “Create”. Now if you look under the User Presets section of the Presets sub-module, you should see the develop preset that you just made. To use this preset, in the Develop module choose a new image that hasn’t been edited and simply click your new preset. You should see all of those adjustments instantly get applied to your image. Wasn’t that easy? Now you can quickly apply those changes to any image in the future.
Applying Develop Presets On Import
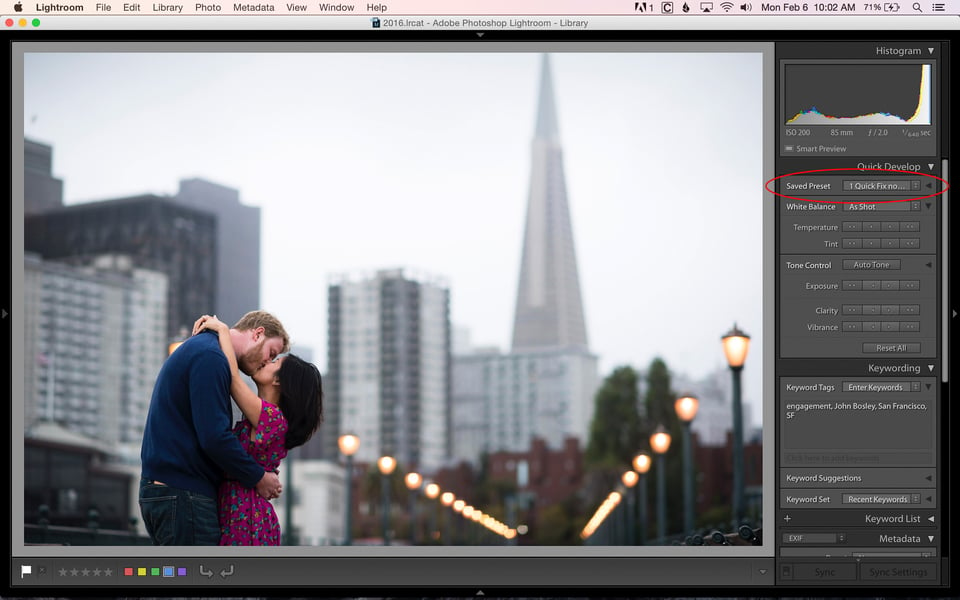
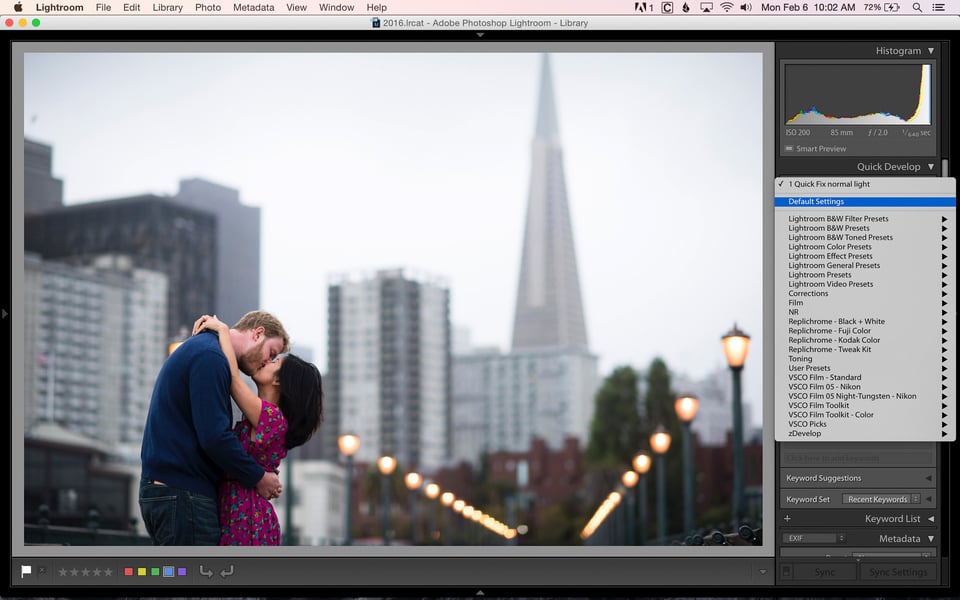
You’re not limited to using develop presets on individual images in the develop module. You can also apply them to images on import. In the Loupe or Grid view, in the right pane you should see the Quick Develop sub-module. The first section of that says “Saved Preset”. Choose the develop preset that you want to apply to images on import. Once you choose one, it will get applied to every image you import in the future (even if you close Lightroom) until you change it to something else. If you want to remove the develop preset so it doesn’t get applied on import, just change it back to “Default Settings”.
Modifying A Develop Preset
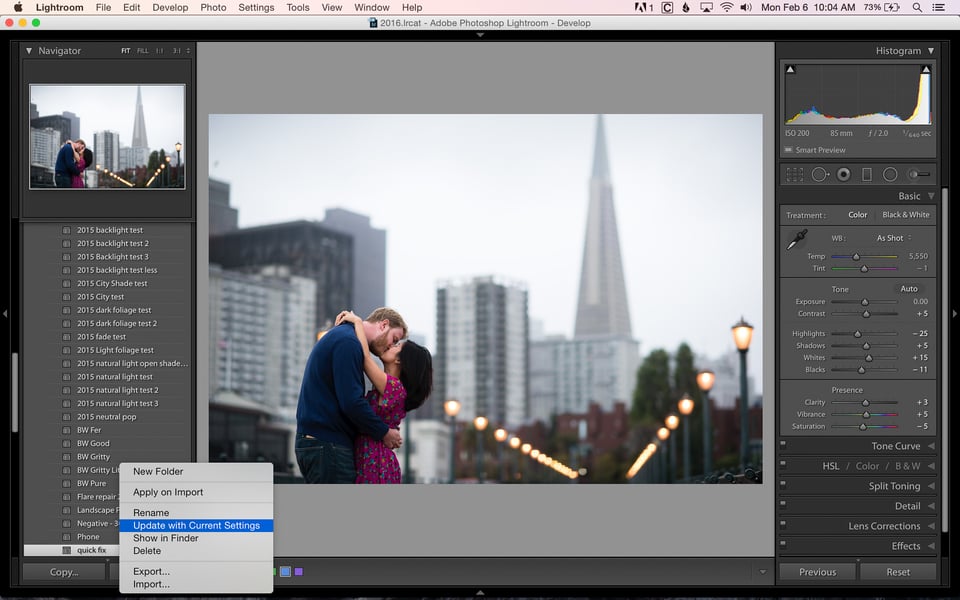
If you decide you want to change or update a develop preset, it’s really easy. The process is almost exactly the same as creating a develop preset. First, go ahead and make the changes to the image that you want to make to the preset. Maybe in my “Quick Fix” example you prefer more highlight recovery and want to change it from -5 to -25. Next, in the Develop module, go to the develop preset you want to modify, right-click on it and click “Update With Current Settings”. The “Update Develop Preset” screen will appear. Similar to when you create a preset, you’ll need to choose which settings to include in the update. Keep in mind, you need to check all of the settings you want to include in your updated develop preset, not only the ones that have changed.
Other Considerations
You might be asking, “Why can’t I just check all of the boxes when I create a develop preset?” That’s a good question. I did that exact thing when I started creating develop presets, but quickly figured out why it’s not a good idea. Let’s say you’ve just made a bunch of edits to an image and decide to add a develop preset that adds a warm tone to your image. If, when you created your “warm tone” preset, you selected exposure in addition to whatever adjustments you wanted to make, it would adjust the exposure of your image that you’ve already edited.
This is why earlier I suggested that you choose “Check None” when creating your develop presets. If you only choose the settings you want to adjust with a given preset, you won’t accidentally affect other settings that you may have already adjusted.
If you already have develop presets that you like to use, but they affect too many settings, adjusting them is very easy. Just modify the preset with the process I mentioned above, but uncheck any adjustments you don’t want to make. For example, if you have a preset that adjusts exposure, contrast and saturation, but you don’t want it to adjust exposure, simply update the preset and only check contrast and saturation. That preset will no longer affect exposure.
Creating A Library Of Develop Presets
Once you’ve created a few develop presets and get a feel for how they fit into your workflow, you can start to create your own library of presets. After years of figuring out what works best for me, I’ve settled on a system that fits nicely into my editing process. Basically, I name my presets in the order that I work. Here’s a few of my basic editing presets:
– 1 Quick Fix Cool Light
– 1 Quick Fix Normal Light
– 2 Curve Light
– 2 Curve Medium
– 3 Split Toning Warm
– 3 Split Toning Cool
– 4 HSL Skin 1
– 4 HSL Skin 2
I use them in different steps of my editing process. By default, “Quick Fix Normal Light” gets applied on import, but while I’m editing if I come across an image with cool light I’ll try “Quick Fix Cool Light” and see if it works better. After making some basic adjustments, I’ll move on to the “2”s and decide if I want to adjust the curve. Once I have the basic editing done to the image, I’ll move on to “3” and see if it can benefit from some split toning. Finally, I’ll move to “4” if I feel like there are some issues with skin tone.
The reason this system works so well for me is that each develop preset does one specific thing to an image. If I follow this order, I don’t have to worry about changing an adjustment that I’ve already made to an image. I also found that numbering them helps, otherwise my presets get sorted alphabetically, which doesn’t necessarily follow my workflow.
I want to point out that you don’t have to create presets that can be used on all of your images. Sometimes I will make very complex edits to an image and will save those edits as a develop preset to save myself from having to repeat the effort again in the future. For example, I once photographed a wedding in a barn. The interior of the barn was dark with incandescent lighting, but there was still window light coming in from outside. Because of the different color temperature of these two light sources, I ended up with very blue highlights wherever the window light entered the image. I was able to correct it through split toning and saved my edits as a preset in case I ever run into the same situation again.
The possibilities for develop presets are virtually endless. You can create presets that affect only one small part of your editing process or presets that apply an entire range of edits with one click. If you find yourself constantly applying graduated filters to the sky, you can create a graduated filter preset. If you have a favorite group of settings for black and white images, save them as a preset. If you don’t like Lightroom’s lens corrections, you can update them with your own lens correction preset. I could go on and on with suggestions, but I think you get the idea.
Using Multiple Presets
One of the great things about using develop presets is that you can use more than one on an image. In the example I gave above regarding my workflow, I might use four different presets on an image (one from each section of my workflow preset library). Since I only create presets that affect one particular setting, I don’t have to worry about conflicts between them.
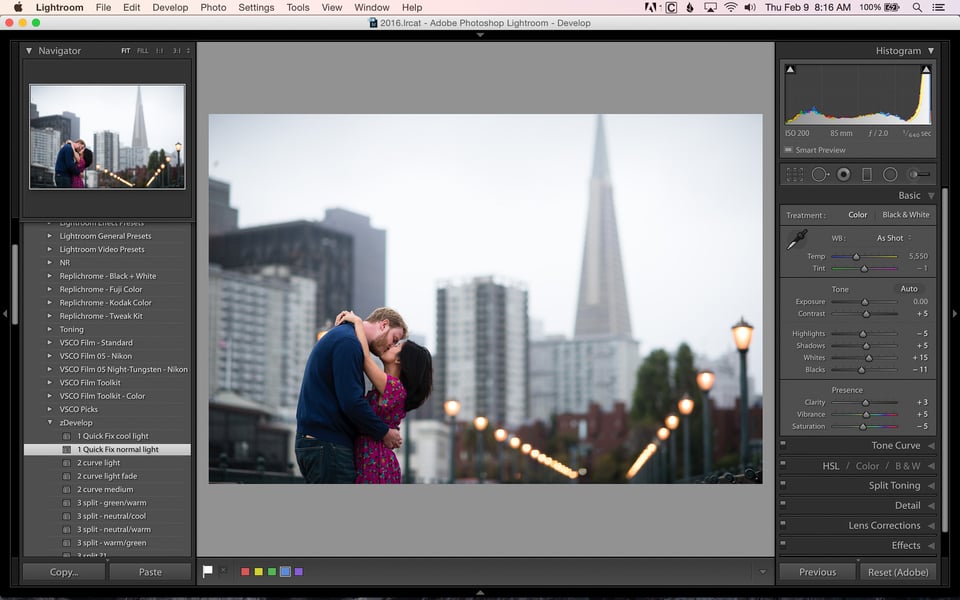
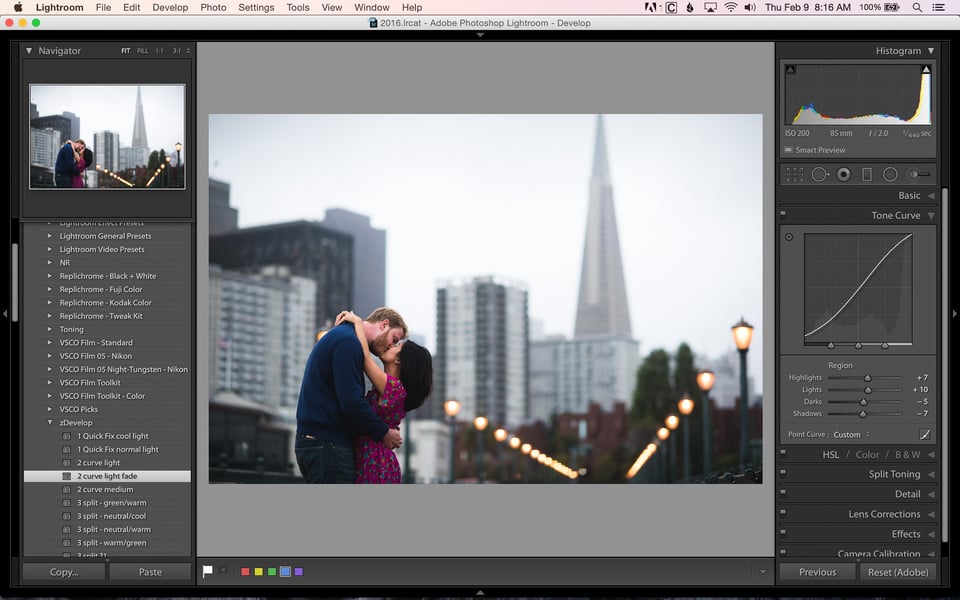
Let’s take a look at how that looks in practice. In this first image, I applied my “1 Quick Fix Normal Light” preset, which affects settings in the Basic and Tone Curve sub-modules.
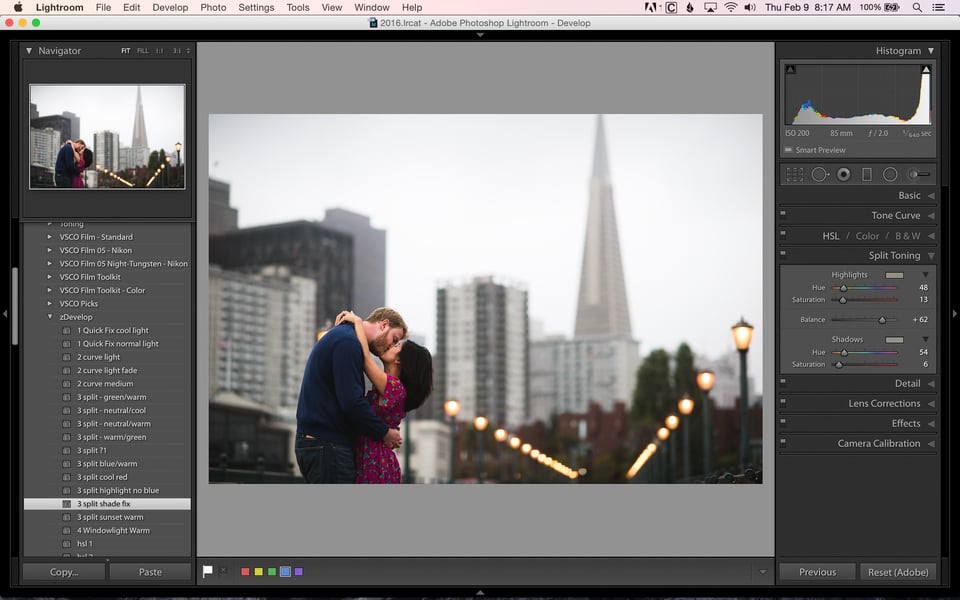
Next, I add my preset “2 Curve Light Fade” preset, which affects the tone curve. Note that this will override the tone curve setting that was applied by my previous preset, but everything else remains unchanged!
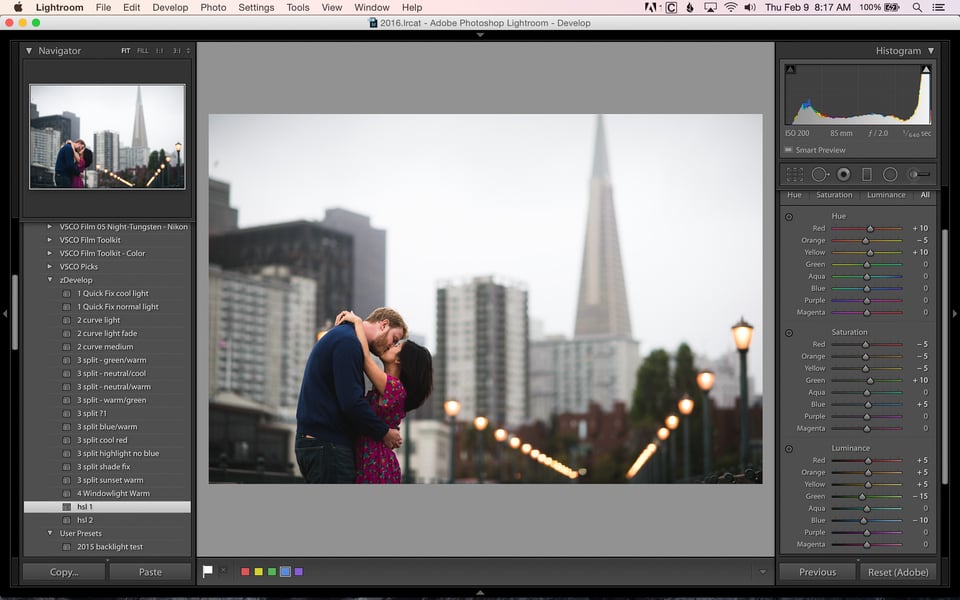
Next, I add my “3 Split Shade Fix” preset to warm up the image a bit. This only affects the split toning in my image. Nothing else gets affected.
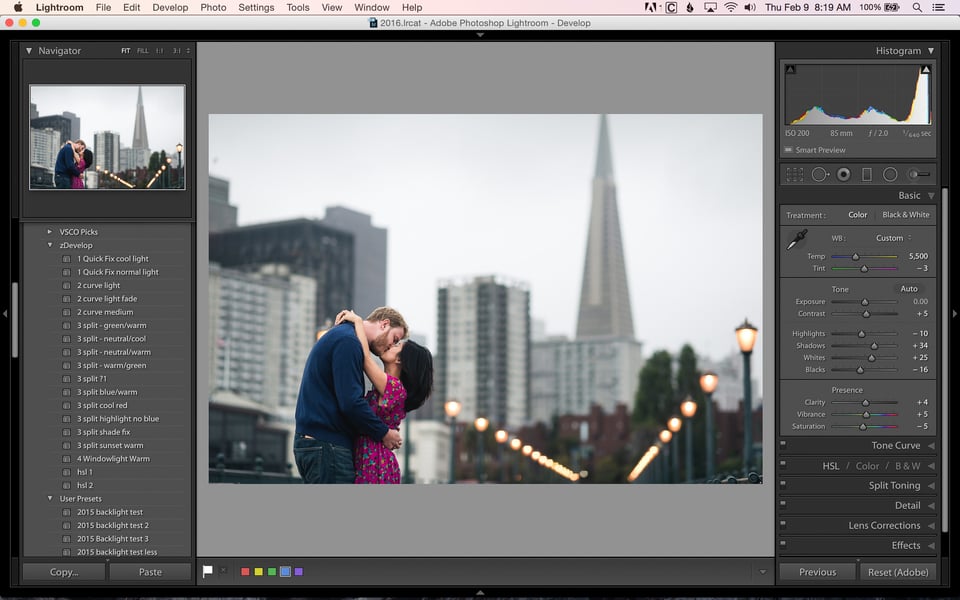
Finally, I add my “4 HSL 1” preset, which affects the hue/saturation/luminance in the image and is intended to fix red skin tones. Again, no previous adjustments (basic settings, tone curve or split toning) were affected by this preset.
So now I effectively have 4 presets “stacked” on top of each other in the same image.
Conclusion
Develop presets are powerful, time-saving tools that are built into Lightroom. They are not meant to be one-click solutions, although at times they might work like that. Instead, they are meant to save you time and give you a starting point for image corrections. You can create develop presets that can be used on every single image, but you can also create very specialized presets that you will only use occasionally.
Based on my experience and the mistakes I’ve made, here are my top tips for creating develop presets:
– Don’t include all of the settings when you create a preset. Only include the settings that you’ve adjusted and want to apply to images in the future. This means image-specific adjustments like white balance and exposure will probably not be included in most develop presets.
– Create a naming system for your presets that makes sense to you and your workflow. If you don’t know what a preset does or where it fits into your workflow, chances are you won’t use it. You don’t have to number your presets like I do, but even something as simple as creating different folders can greatly help organize your presets.
– Don’t limit yourself to the type of presets that you make. Get creative. Ask yourself, “Are the changes that I just made to this image something that I might want to do again in the future?”. If so, create a develop preset. It might just come in useful someday.
Also, for reference, my final edit of this image looks completely different than what you’ve seen up to this point. I did use my Quick Fix preset as a starting point, but all of my other corrections were done manually. Remember, develop presets are not intended to be one-click solutions! Here’s how this image looked as delivered to my clients:
If you have any favorite preset “recipes” you want to share, please do so in the comment section. In a future article, I’ll cover how to install presets that you’ve downloaded.
Thanks very much John, this is very usefull. However I have one question; I Always apply a lens-profile to my photo’s, which (next to straitening the horizon) has the effect of making the photo a little brighter, but then if I apply your recommended develop preset, it makes changes again (and vice versa if I do it the other way around). How can I make this work in conjunction?
Thanks in advance ,
Hans Schalk.
Thank you for reading, Hans! I also apply lens correction profiles to all of my images. They work together with presets without any problem. The reason is that lens corrections only affect the “Lens Corrections” settings, while any other presets that you apply should affect other settings besides lens corrections. So, you can apply a lens correction and then apply my Quick Fix preset (which does not affect the lens corrections since you didn’t check them when you created the preset) without any conflict between the two. Hope that makes sense!
Why can’t you include the lens correction in the preset? I created a preset just for lens correction but it didn’t work, using current LR and nikon raw.
I appreciate the article and all that the PL Life team does.
Steve, you can include the lens correction in a preset. You’ll need to apply both the lens correction and any other changes you want to include in the preset to an image, then save those settings as a preset (making sure to check all of the appropriate boxes when you create the preset). I wouldn’t suggest doing this, though, as that particular preset will only work with images shot with that particular lens. I find it’s better to have more “generic” presets that will work with any image and don’t affect many settings at once.
For example, if you were to fully edit an image but then realized you forgot to apply your lens correction preset, applying it on top of your other edits could potentially change your edits that you’d just made if it adjusts more than just the lens correction settings.
To create a lens correction preset or a preset which includes lens correction beside other corrections, you need to select a raw file, apply the relevant profile, and make sure that the Configuration menu (in the Lens corrections panel) is set to “By default”. In that case, lens correction will apply to right lens profile to the right lens model.
Thank you for a very useful and thorough article. There is just one addition that would be very useful. How can you stack presets in LR?
You’re very welcome Waldemar! As long as one preset doesn’t affect a setting that another preset has changed, they will stack. So, if one preset changes image contrast and another adds a graduated filter, they will “stack” with no problem. On the other hand, if both presets affect contrast, whichever you apply second will override the first for any settings that are the same. I’ll add a short section to the article to clarify this point.
Hi,
Thanks for a great tip. I see that you also modify the camera calibration. I guess that would be very camera specific. For example, I suspect Canon and Nikon would have quite different values. Also, Lightroom allows you to choose different profiles for some camera models, but not all are supported. Do you have any thoughts on that?
Cheers,
Tom
Tom, this is exactly for the solution I explain in my previous post.
Hi Tom,
The camera calibration could potentially lead to issues with certain cameras. So far I haven’t run into any problems, but you never know! I’ll go in and update the article with a disclaimer. Look above at 9.1 for the answer that I gave to Gilles regarding camera profiles.
Thanks for the comments and the update. I am testing it out now.
Nice article John but I wouldn’t use presets for the “quickfix” method. Instead, I would change the default behaviour of the Develop module based on the camera serial number.
This has the advantage of freeing the preset option in the import menu, and it makes the workflow easier, more flexible and faster.
Best regards,
Gilles
Thanks for the suggestion, Gilles. This is a good idea if you always work with the same cameras. If you end up working with different cameras (for example, I hire second-shooters for the weddings I photograph and they use their own cameras), it’s still nice to have a preset that you can apply regardless of which camera body was used.
Hi John,
I forgot to mention that, of course, you can change the default of the Develop module the same way for each different cameras you have. In that case, don’t check the camera serial number option in the Preferences !
Best,
Gilles.
The presets in LR are great and do make the editing process a lot faster. What I love and what you might try or add to the article: You can apply different presets not only manually or when importing the images but also automatically based on camera models, iso settings etc. Especially for noise reduction, sharpening etc. this is a very nice option
Thanks for the suggestion Thorben! I’ll give it some thought as to whether this is something I’ll add to this article or maybe write a new article about.
Thanks John, I often find myself just using LR at it’s most basic capability with cropping and exposure adjustments. There is so many more ways to use it to save time and get the most out of your images.
Your article gives me some needed inspiration to actually start using LR more efficiently and god forbid ‘creatively’.
You’re very welcome Monte! Lightroom is super-powerful, so I hope you dive in, explore it and stretch those creative muscles! :)
Hi there,
the most basic questions:
Is there any shortcut to navigate (either mac or win) across the presets list?
Thanks in advance for answering me.
Hi Homer,
I’m not exactly sure what you mean by navigating across the preset list. Can you be a bit more specific?
Hi John,
Well what I mean is the following:
If I have 10 presets ready to apply to my photo, I have to do it with my mouse and click on each of them (to see which one is the most suitable for my image). Is any way to do this job via keyboard (shortcut)? Dont ask me to google it, please; I did already.
Hi Homer, now I see what you mean. As far as I know, there’s no way to quickly cycle through presets. If you hover your mouse over each one, it will be applied to the preview in the Navigator sub-module. I sometimes use this to see which preset looks best without actually applying them all to my image. It’s not a perfect solution, but it’s better than nothing!
John,
I thank you for your article. I am 8 days into Lightroom and 60 years into photography. Your preset manufacturing process makes sense to me. However, I am fearful that I will wind up producing 50 so more presets and spend more time looking up my presets than doing the actual production work.
For me, your photo is an “outdoor portrait” in low light. Your preset will probably not work for an “indoor portrait” in controlled light. So, would you not need a separate preset for both situations. Or another for a portrait in good afternoon light. Etc. if I continue, I will wind up describing possibly 10 or more presets just for portraits.
Is your method one that you use one preset for all portraits and then adjust the individual settings. And, if that is the case, how do you save much time. I can understand if you come back from a photo shoot and all of the images have blueing from low light. Then, you can use the settings on the first image as a preset to automatically adjust the remaining images. That will save much time.
Nasim – I have learned much from this website. Thank you.
peter
Hi Peter,
I’m glad this article is timely and helpful for you! I understand your concerns about spending too much time trying to figure out which preset to use. This can definitely happen if you go overboard and make a preset for every single scenario, which I wouldn’t recommend.
Honestly, I use this “quick fix” preset on every single image I import. It doesn’t matter if it’s an overcast day, sunny day, indoor portrait, landscape or flower macro… this exact preset gets applied. Now, that doesn’t mean I don’t make adjustments after applying it. I do. This just gives me a starting point from which to work.
You can definitely make edits to one image and then copy/paste those edits to the rest of the images from a session with similar light. Again, the preset only gives me a good starting point for even that first image I edit. Instead of touching 15 different sliders, I only have to click one button to apply the preset and then maybe adjust 3 or 4 sliders.
I hope this helps! Of course, develop presets should be helpful and save you time. If they prove to be the opposite, you don’t have to use them. Since you are so new to Lightroom, I’d suggest getting used to how the program works before getting too carried away with creating many different types of presets. Maybe just make one or two to see if you like using them and how they fit into your workflow. If you like them, you can always make more!
“Honestly, I use this “quick fix” preset on every single image I import. It doesn’t matter if it’s an overcast day, sunny day, indoor portrait, landscape or flower macro… this exact preset gets applied.”
The logic behind this is utterly baffling.
Applying the same preset to completely different images will result in totally unpredictable and random changes. You might as well not bother and just start from the original exposure using some common sense.
Can you tell me what’s so baffling? There’s no unpredictability or randomness here. All I’m basically doing is adding a bit of “pop” to the image that I can always adjust if necessary. Sorry if you don’t see the point of doing it, but I’ve been doing it for years with great results. Maybe you have a preconceived notion of what a develop preset does that isn’t necessarily accurate?
Another important part of using custom presets that I’ve made is knowing what they do. They’re not magic. If they change something in an image that I don’t like, I know exactly what to change to get the results I want. I’ve used some VSCO presets before and those change so many aspects of an image I never know what to adjust to get the results I want. Maybe this is what you have experience with? If so, I’d suggest you try making your own and see if you might be a little more open to trying something new.
I thought that the rest of my comment made it clear what I find so baffling.
It’s not presets I have a problem with, they are very useful in a number of ways, but applying them in the universal, not to say unthinking, way you describe, makes no sense whatsoever to me.
If you have to make a number of changes after applying each preset in a sequence of presets, one has to question the point of the exercise. It certainly doesn’t save time and if it’s so unpredictable as to need extensive changes, there’s no point in doing it in the first place.
Simultaneously adding say, some warmth, a touch of saturation and a bit of contrast as a preset, to an image, may well be fine.
Adding say, +10 to the whites and -15 to the highlights as a preset when you have no idea how near to clipping the white point is, is not fine.
Similarly, adding a bit of ‘pop’ to an image which is already maybe over contrasty or overexposed is, as likely as not, going to pop it straight into clipping, desaturation and loss of detail, while adding a bit of ‘pop’ to a subtle, low-key or pastel image is probably going to ruin it.
As for VSCO presets, these are quite complex and designed to emulate a particular film stock or development process. If you don’t like the look of one of these presets there is no point in trying to make changes – better to just try another preset.
I use custom presets as appropriate, most often as import presets, but also on occasion as a stimulus to a fresh approach to an image. I am however not in favour of cooky cutter photography and try always to be open to trying something new, thank you.
I’m not going to try to change your mind, as I know it’s futile. I’ve shared how I do things and hopefully some other readers can benefit from it as well. If you don’t like it, that’s fine. Let’s just leave it at that.
I will say that the preset that I shared does not create “cooky cutter” images. It is more like a base coat of primer that gets applied to images on import that serves as a starting point for the rest of my edits. Maybe you should give it a try, use it in the way I’ve suggested and see what you think?
>>It is more like a base coat of primer that gets applied to images on import that serves as a starting point for the rest of my edits. Maybe you should give it a try, use it in the way I’ve suggested and see what you think?<>The reason this system works so well for me is that each develop preset does one specific thing to an image. If I follow this order, I don’t have to worry about changing an adjustment that I’ve already made to an image.<<
This is very erroneous.
Applying develop presets is not only cumulative where settings in presets coincide, but changes to say, something like saturation, can easily push one or more channels into clipping or into an alteration in hue or contrast due to quantisation errors. This is why Lightroom and editing in general is such an iterative process often requiring one to go back and forth between adjustments before arriving at a final optimal balance.
So, even though I recommend starting with setting white point and black point, at the end of editing I will go back and, if necessary, give one or other a tweak if my other edits have caused them to shift noticeably from where I want them to be.
Very useful, detailed and easy to understand article. Thank you John
Thanks Rashad! Glad you found it useful!
What comes out of your ‘LightRoom’ is NOT the same what you made/took/shot with your camera! and you call that that PHOTOGRAPHY? Google, go to WiKi, or even the Encyclopaedia Britannica, and look up what the word PHOTOGRAPHY means.
Spoiler alert: it has something to do with ‘writing with light’…
Nowadays, people have more money than brains and buy the most expensive camera they can afford. The camera is thinking for them, they go into their darkroom, now called ‘PhotoShop’ or ‘LightRoom’, or the like, and come out of their digital world and showing off the photos they took. THEY DID NOT! Show me your RAW-file and then show me your ‘result’ coming out of your imaginary world.
I would like to see those same people making those SAME results [coming out of their Adobe-shop] working with a FILM camera!
Of course, one can argue, take advantage of the latest technology, but please, DO NOT call yourself a ‘PHOTOGRAPHER’!
Oh boy, here we go…
I’m pretty sure most readers of this site, as well as the majority of people living in the year 2017 would disagree with your absurdly strict definition of what a photographer is. I’d be happy to show you my RAW files. They’re pretty solid, usually only off by .3 stops or so. I also shoot film with good results. If you think the great pre-digital photographers didn’t do any work to their images in the darkroom, well, you might want to do a bit of research yourself.
Oh yeah… thanks for reading!
Purists don’t realize that the great film photographers in the past manipulated the heck out of their photos. Don’t believe me? Read the books by Ansel Adams and check out some of the most successful film photographers in the past and what they used to do in post with dodging and burning and other techniques. How is that not post-processing? Ansel would have loved Photoshop!
And by the way, even your camera bakes its own interpretation of the scene into your files – that’s what JPEG straight out of the camera is. If you shoot RAW and you don’t develop your files, you have absolutely no idea what you are doing. Might as well get yourself a point and shoot camera and shoot JPEG, as you won’t see a bit of useful data out of your RAW files anyway.
You are far disconnected from the real world my friend. You should do some learning about what photography is about. And no, it does not stop with your camera.
Surely the fact that the dynamic range of the human eye is so much greater than digital OR film photography allows the photographer the ‘right’ to try and reproduce what they saw on the day? Also if you get a good scan of a negative of course you could make the same edits!
How about thanking someone for taking the time to provide you with free material/ideas for developing your own skills? Or better still provide an article to PL so we can all learn from your amazing film skills…
SC:
I suggest you actually study photographer, you might learn something. Just to reiterate the ignorance of the your comment, the first photographers in the 1800’s burned, dodged, painted on their negatives to remove objects, and took multiple images, e.g., sky and ground and blended them. Ansel Adams’ Moon over Hernandez was a flat image with a gray sky out of the camera. He spent many, many hours in the darkroom getting it where he wanted it before showing it. And then he spent the rest of his life modifying the image as his tastes changed.
The point is making an image better than what the camera “sees” is one of the factors that separates us from the rest of the animal kingdom.
Stunning levels of ignorance.
First, a RAW file is not even an image until it has been processed. It is just data – ones and zeros.
If you enjoy looking at binary code instead of pictures you are even sadder than you sound.
Second, even a RAW file straight out of a converter/processor rarely looks other than drab, dull and somewhat unsharp.
We have to presume that all your images are of this type.
Third, as Nasim points out, JPEGs straight out of the camera have been subjected to extensive processing before you ever get to see them.
Fourth, film is not some ‘pure’ exception to the rule – film has always been exposed, developed, manipulated and printed in a hundred different ways to fulfil the photographer’s vision.