Many times in my travels I’ve happened upon a beautiful scene spread wide before me with a huge dynamic range that just begged to be photographed. It would require HDR to capture the range but also need to be stitched together as a panorama. I’d set up my tripod, snap the sequences, then get home and say “Verm, it’s time you give HDR another try.” Which would last about two minutes until the first bracketed set of shots made it into Photoshop HDR Pro and gave me a result that looked like someone painted a coat of gray primer over it.
I’d look at the slider panel and have no idea where to start.
I’d randomly play the sliders until I felt the stomach contents crawling up my throat then give up in disgust.
Those files languished about until now. Enter Lightroom 6.
For me the biggest new addition with Lightroom 6 is its HDR and Panorama features. Both are very basic and easy to use. But do they yield good results? Let’s drag some of those old files out.
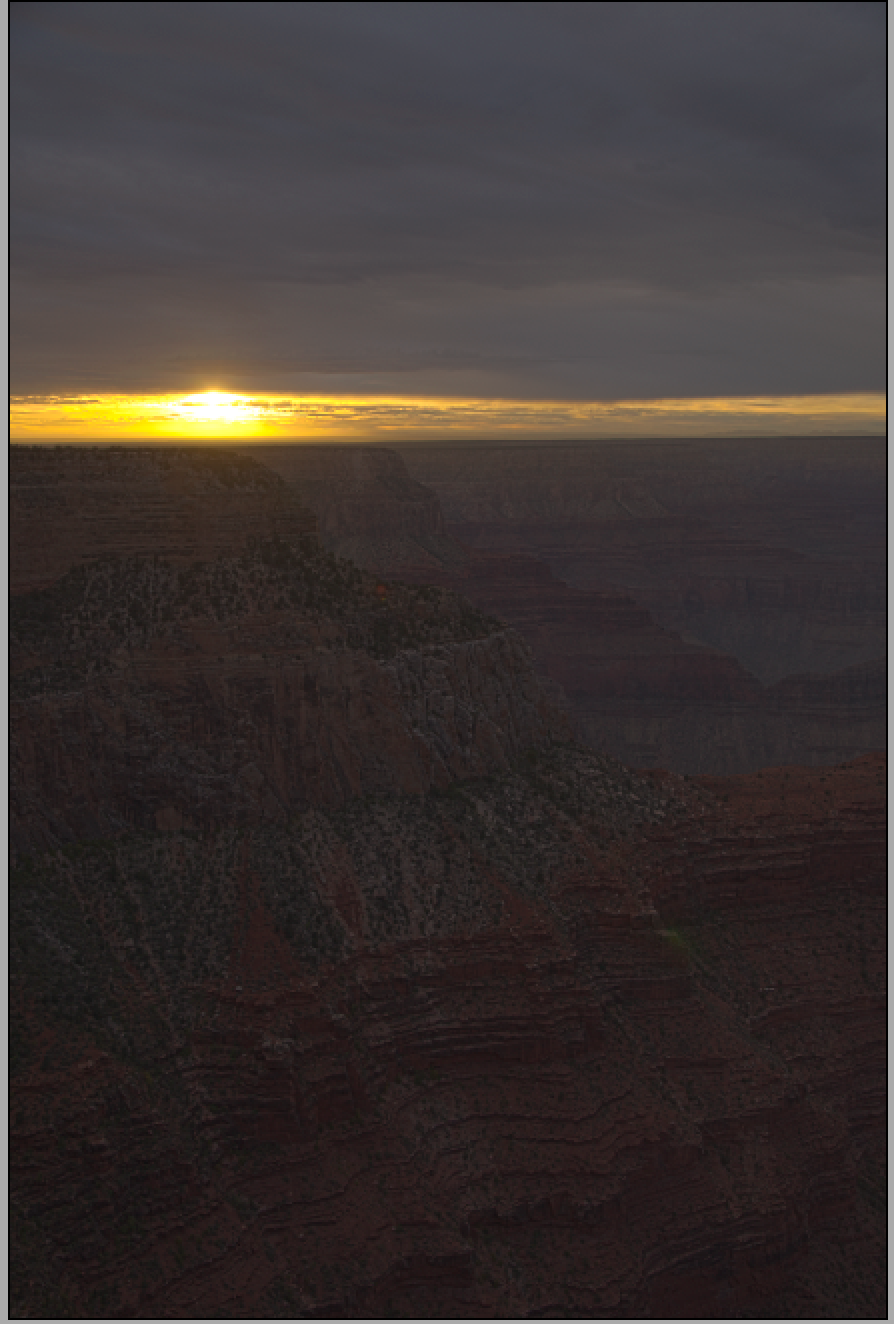
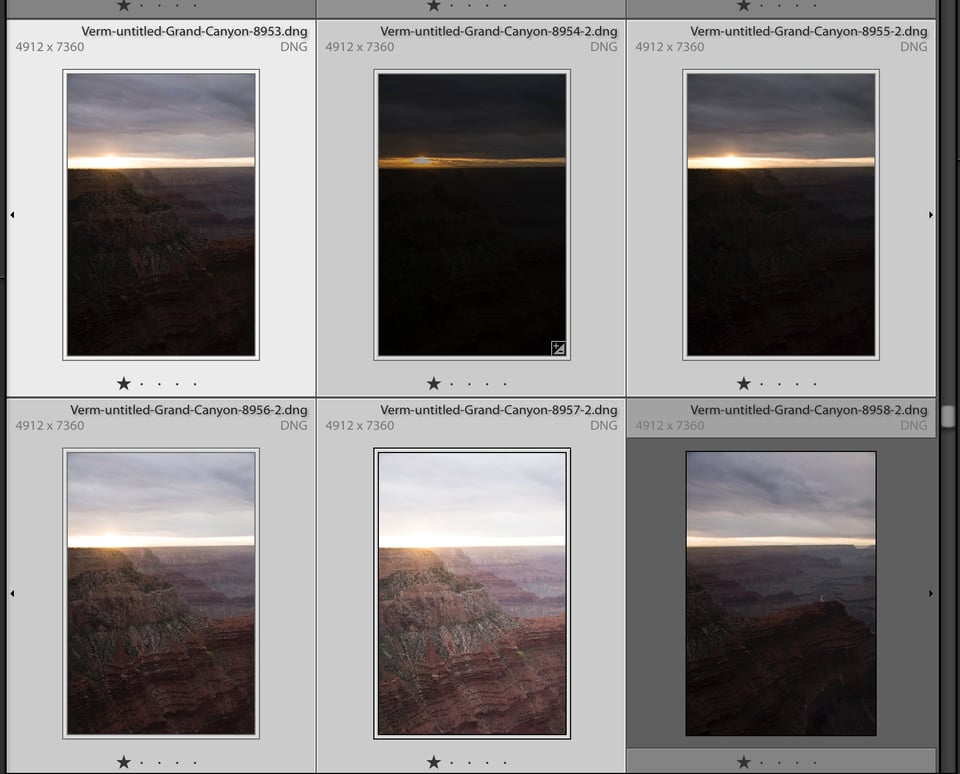
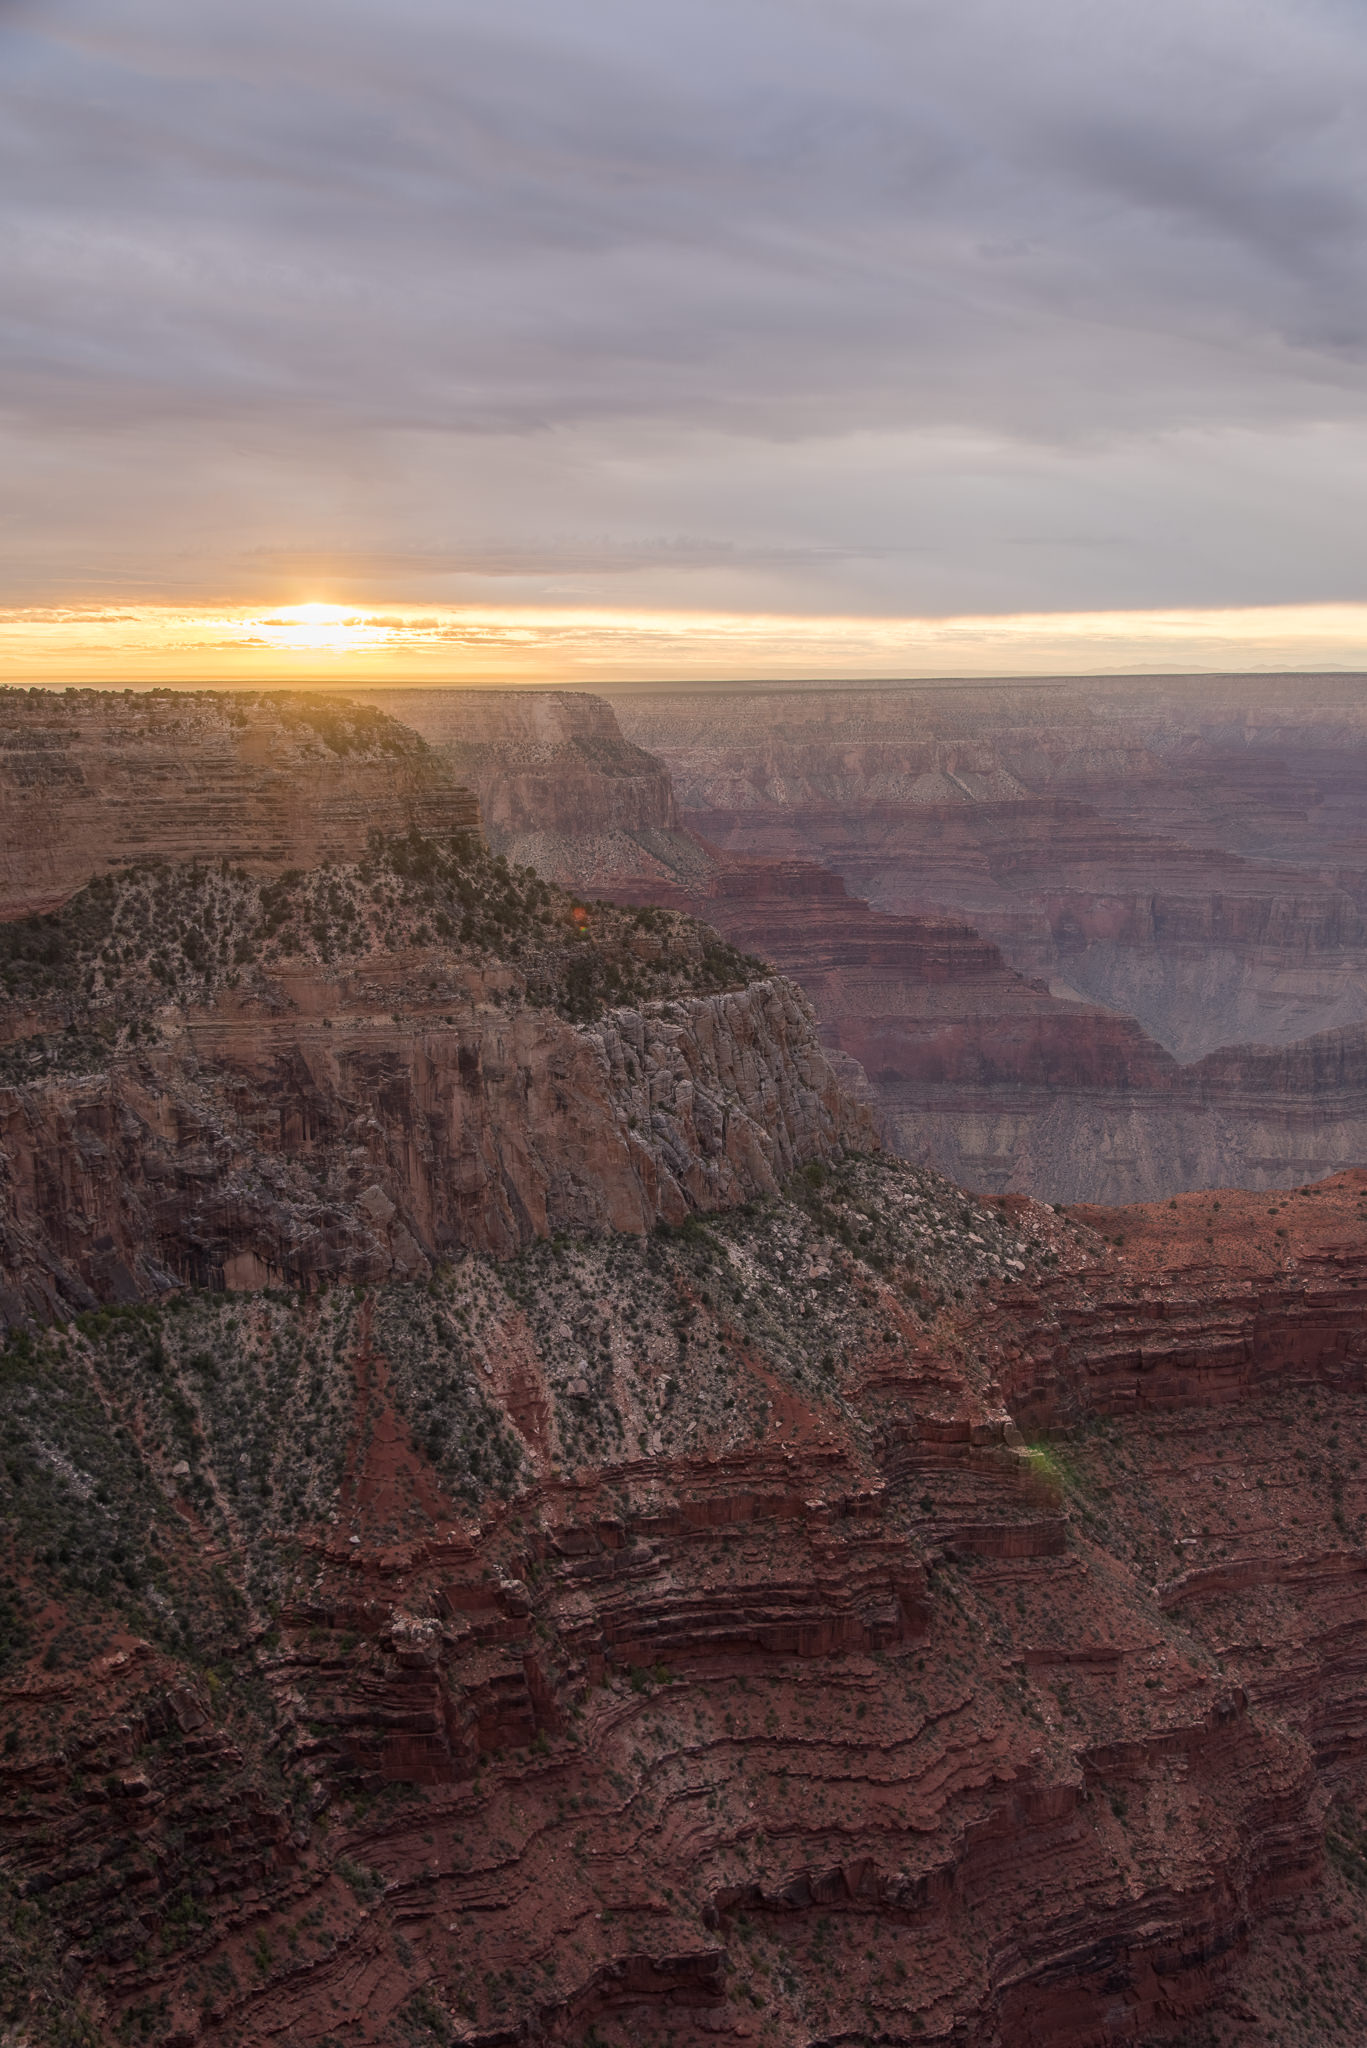
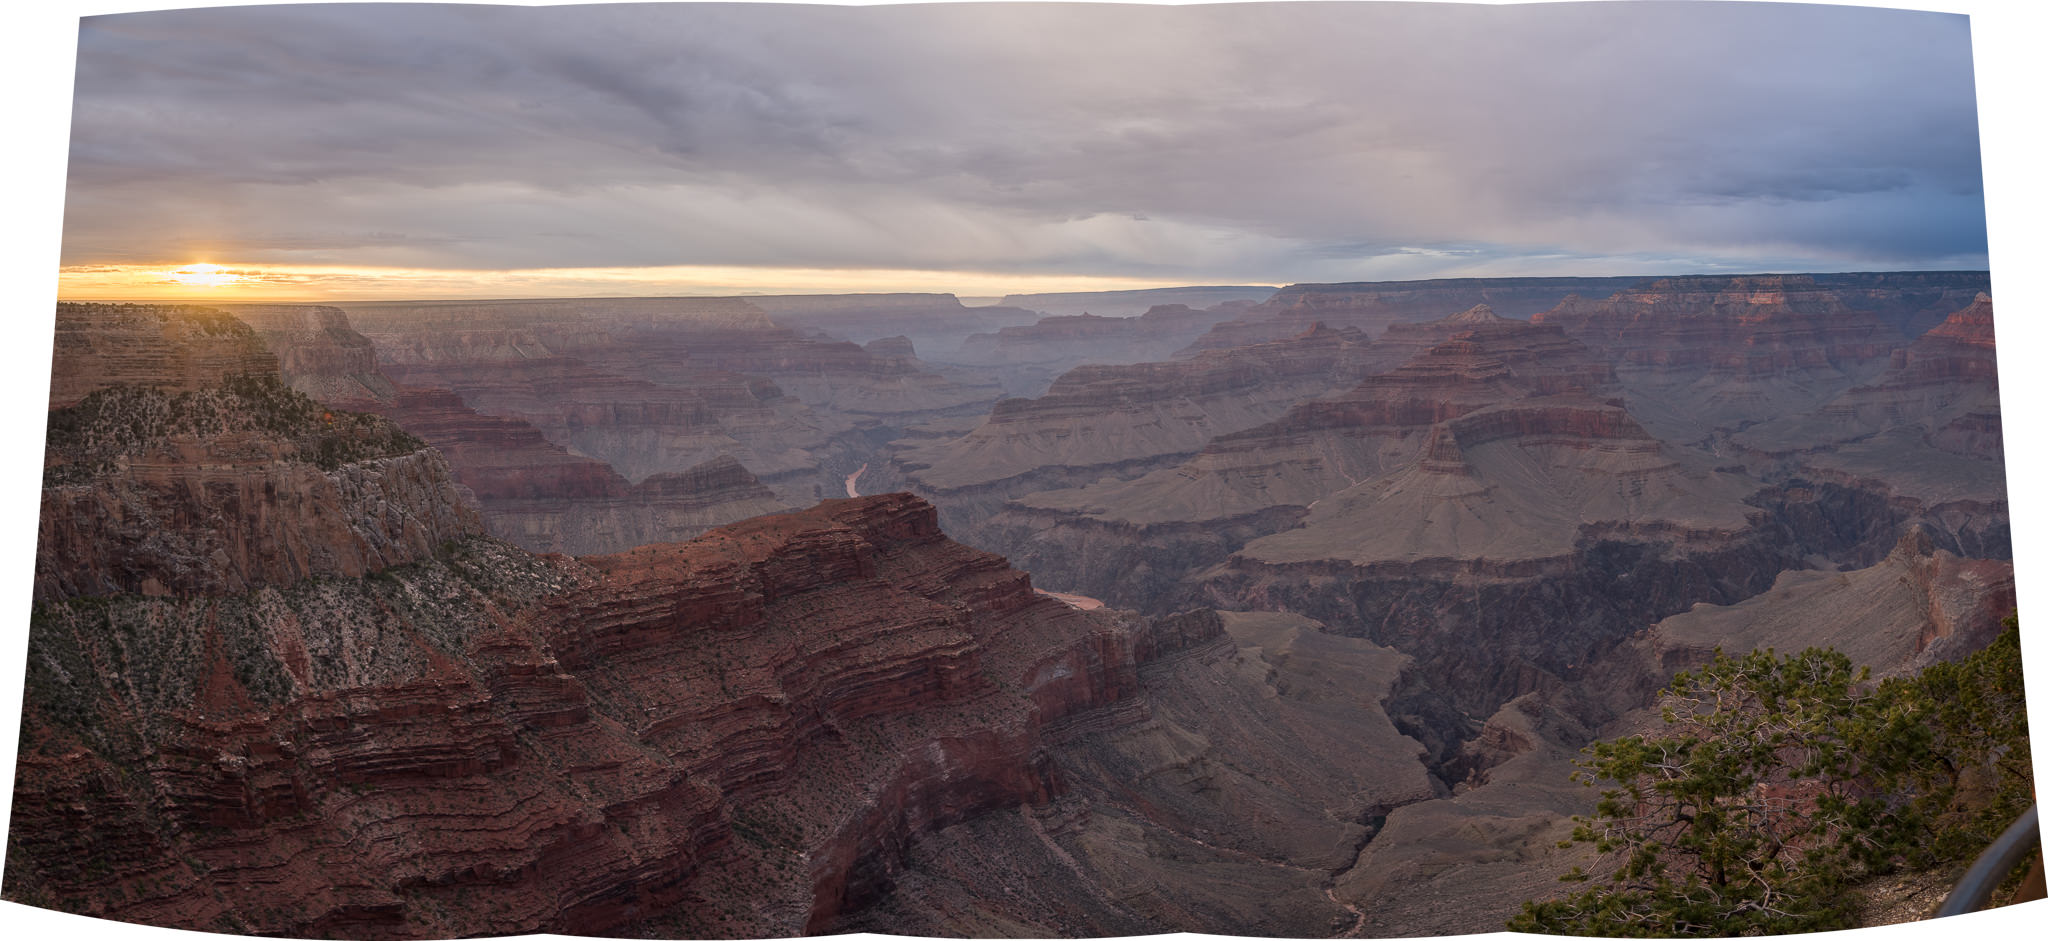
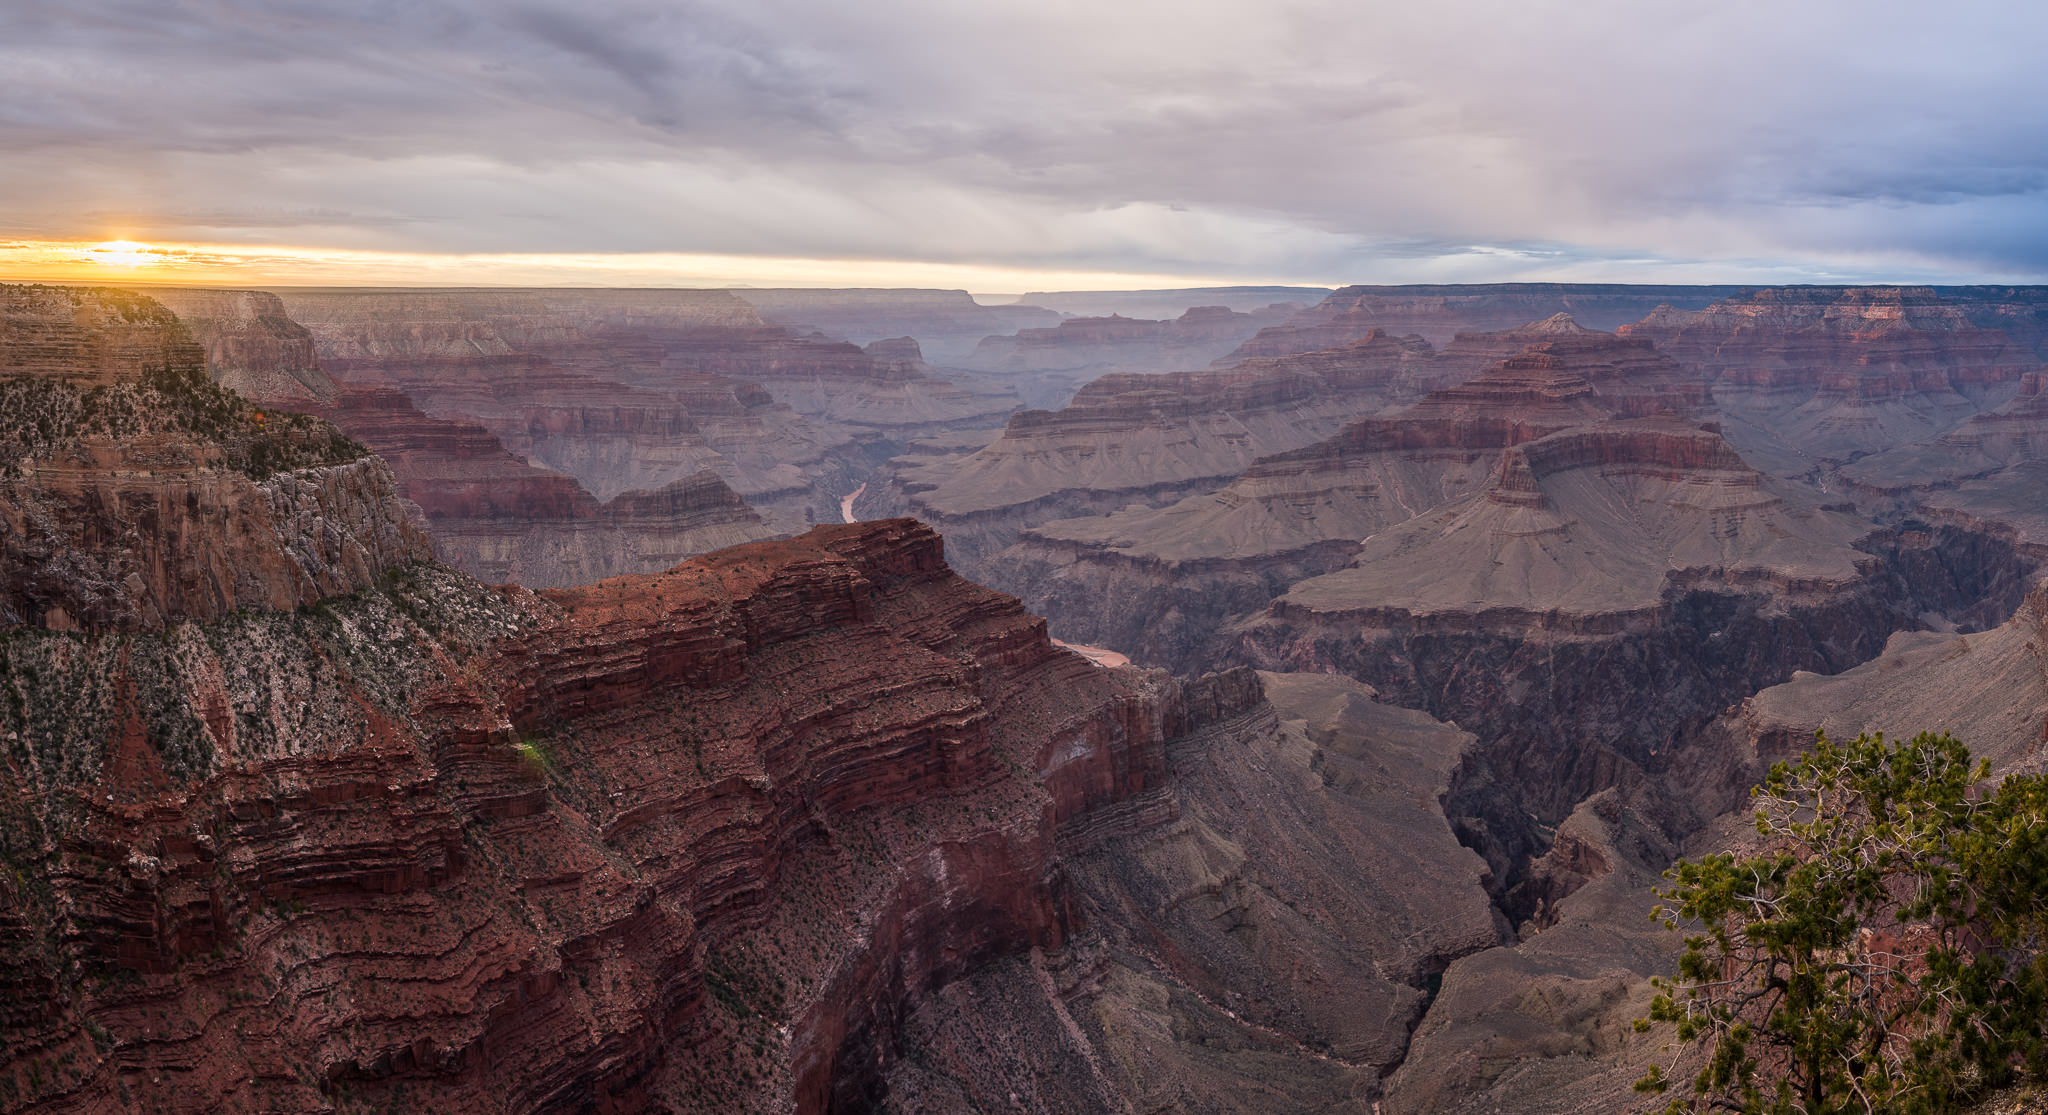
Ah, sunset over the Grand Canyon. Bright sun, deep dark canyon, huge dynamic range. As you can see, capturing the glory in one shot is a losing proposition. The above was shot at 31mm with a 24-120mm. The sky’s blown out in parts and what you can see of the canyon doesn’t look all that grand. So I set up a tripod, leveled the head (bubble level in head), then took five sets of bracketed shots, each set having five exposures a stop apart for a total of 25 shots. I panned between each set of brackets yielding about 50% overlap, which in this case was overkill (30% would have been fine).
Back on the computer I opened the 25 shot group in Lightroom 6 and went through the following steps:
- Select all 25 files, go to develop module and check “Enable Profile Corrections”:
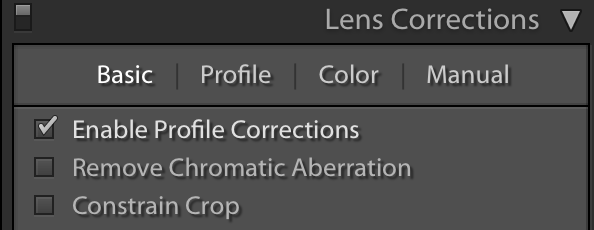
This straightens out any distortion. Click “sync” at the bottom of the window:

- Select first set of five bracketed images:
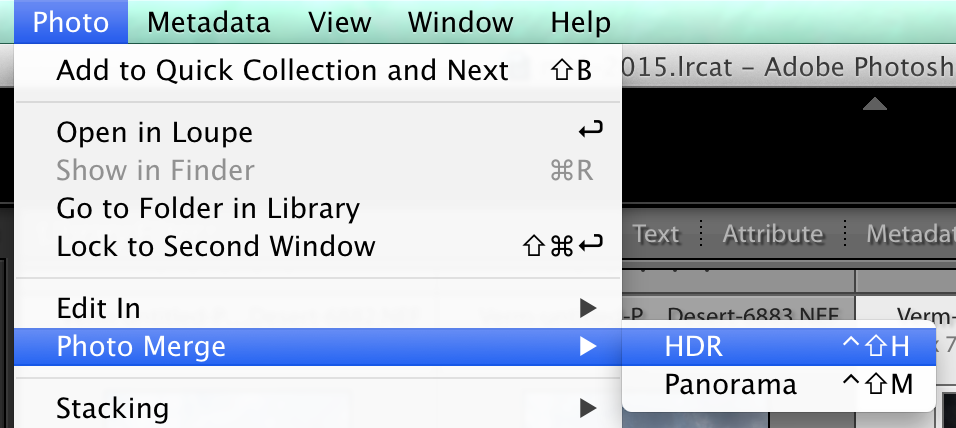
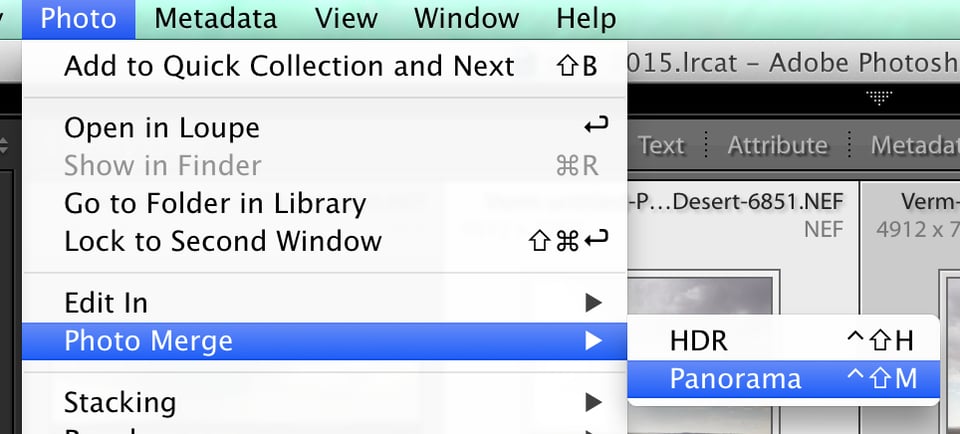
Go to Photo>Photo Merge>HDR and click HDR:

You can do this straight out of the library module if you wish.
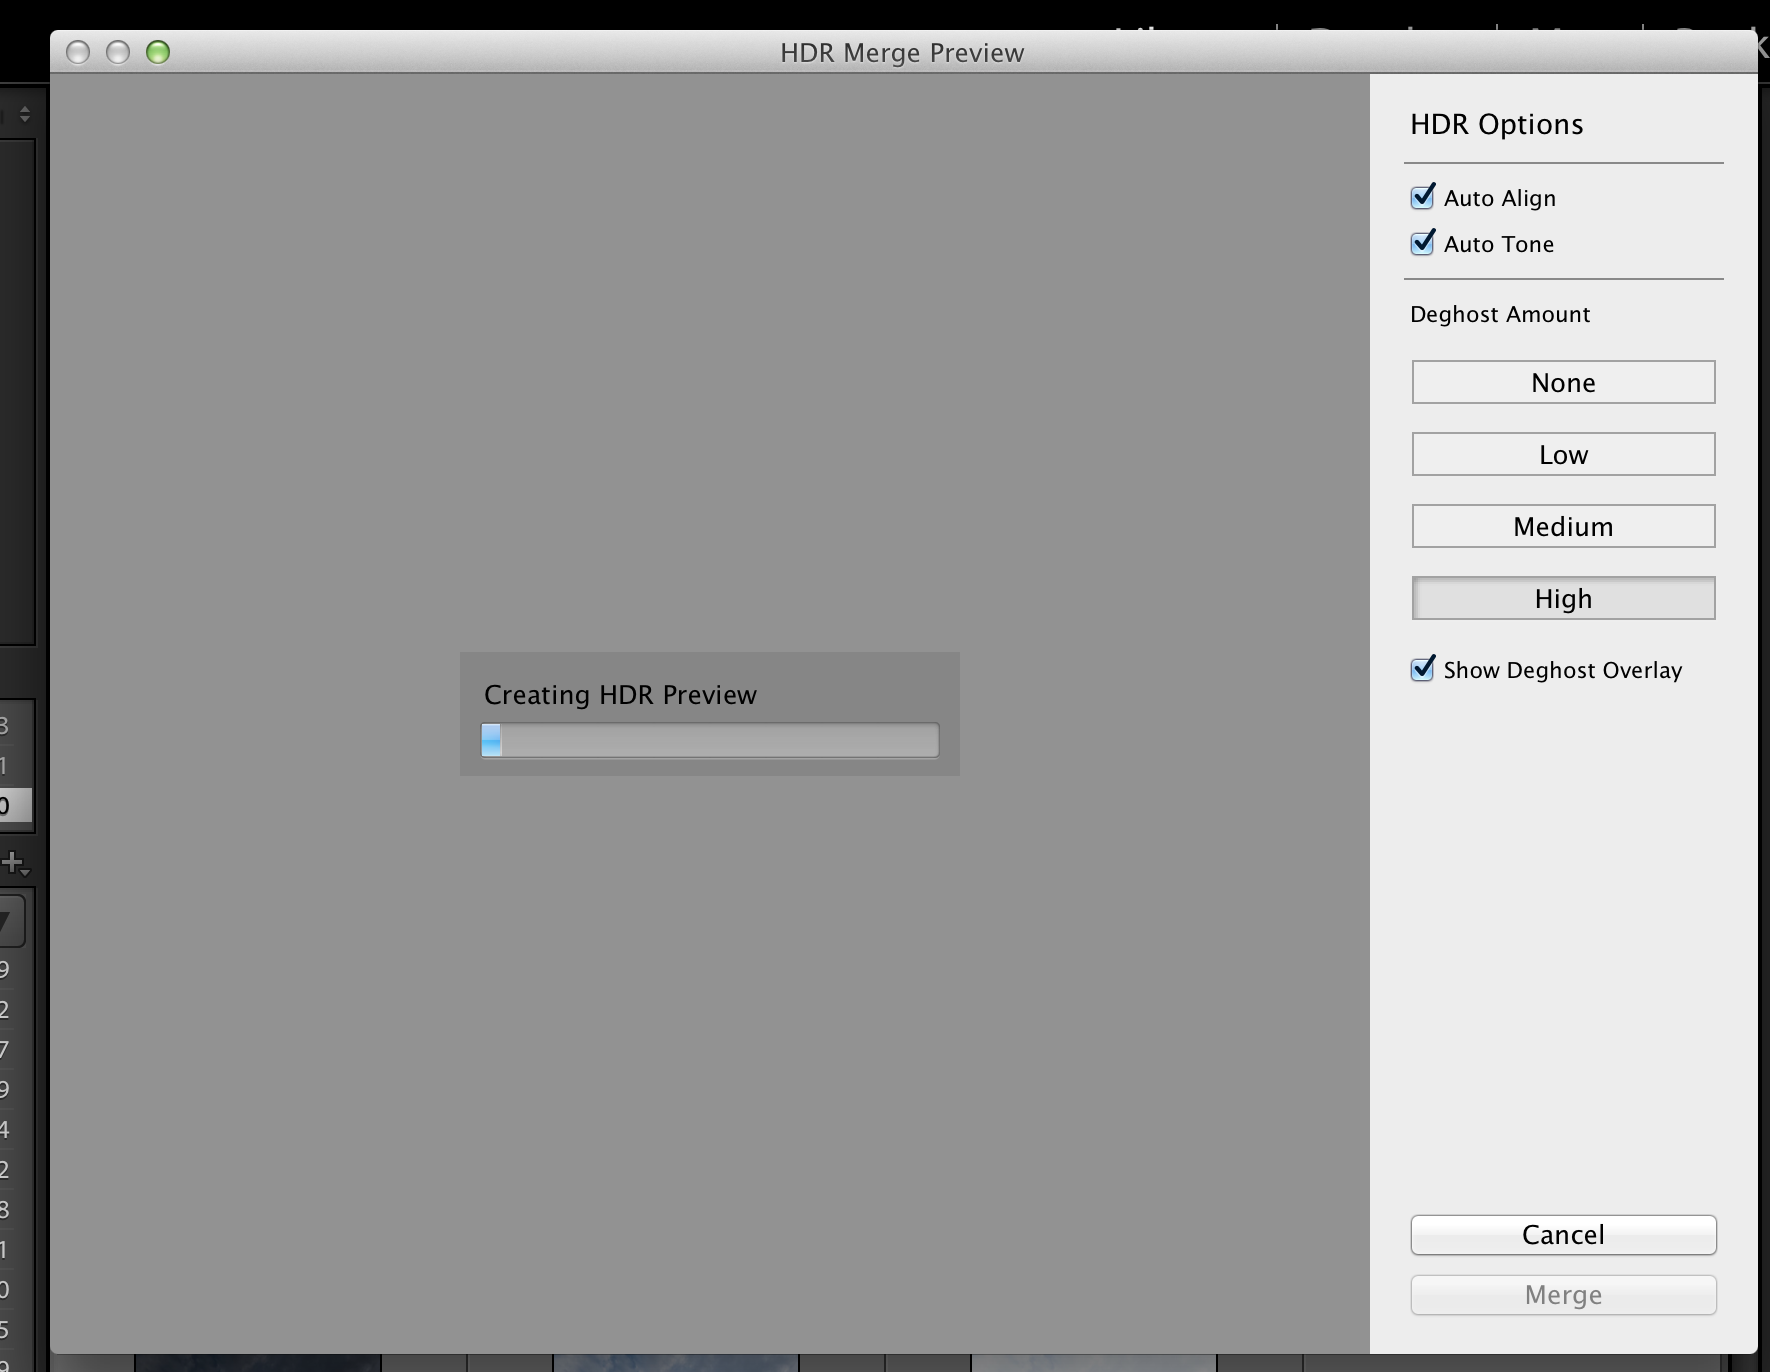
- In HDR mode you will get this screen:
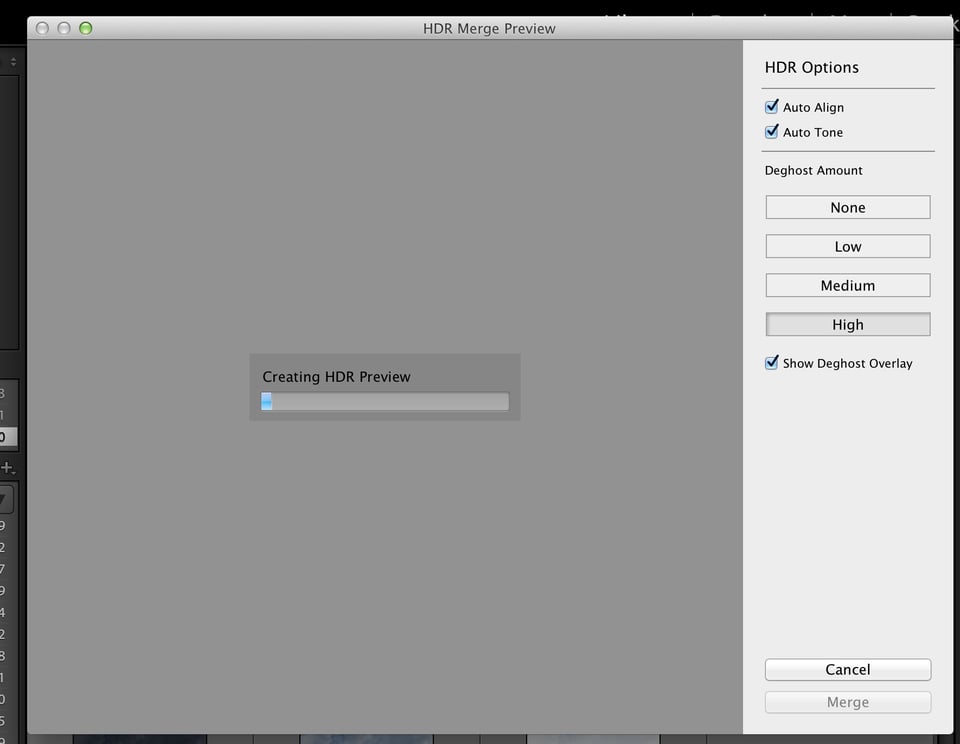
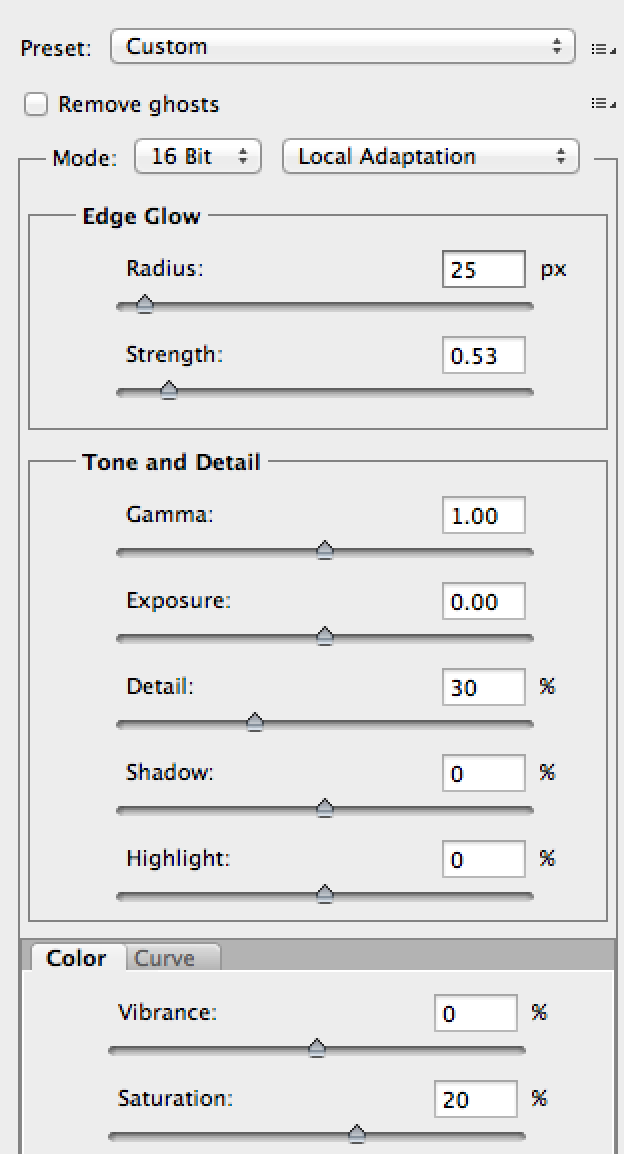
Even though I was shooting from a tripod I leave auto align checked in case there was some subtle shift between exposures. Note: I have tried auto align with some handheld HDR attempts and it did a good job lining up the shots – handy to know if you leave the tripod at home or don’t have time to set it up. When it comes to auto tone, sometimes I like the result, sometimes I don’t. It doesn’t hurt to leave it checked because if you don’t the result, just take the HDR file into develop module and hit reset. This will remove the auto tone, but leave all the data to work with giving you the same file you would have had if you didn’t check the box.
- Choose how much deghosting if any. Deghosting tries to correct for the presence of moving objects. For example, if there is a person in the sequence who doesn’t stay perfectly still or if there is wind blowing leaves about. If no moving objects, click none. Click low for slight movement, medium for medium movement and high for lots of movement. Checking the deghost overlay box shows a light red overlay on the image where deghosting has done its magic. This red overlay does not show in the final HDR file so it doesn’t hurt to check it and it’s kinda cool to see how the program picks out data to merge into the final file.
- Click merge, wait about a minute, and out pops your first HDR file.
- Repeat steps 1 to 5 for the other bracketed sequences.


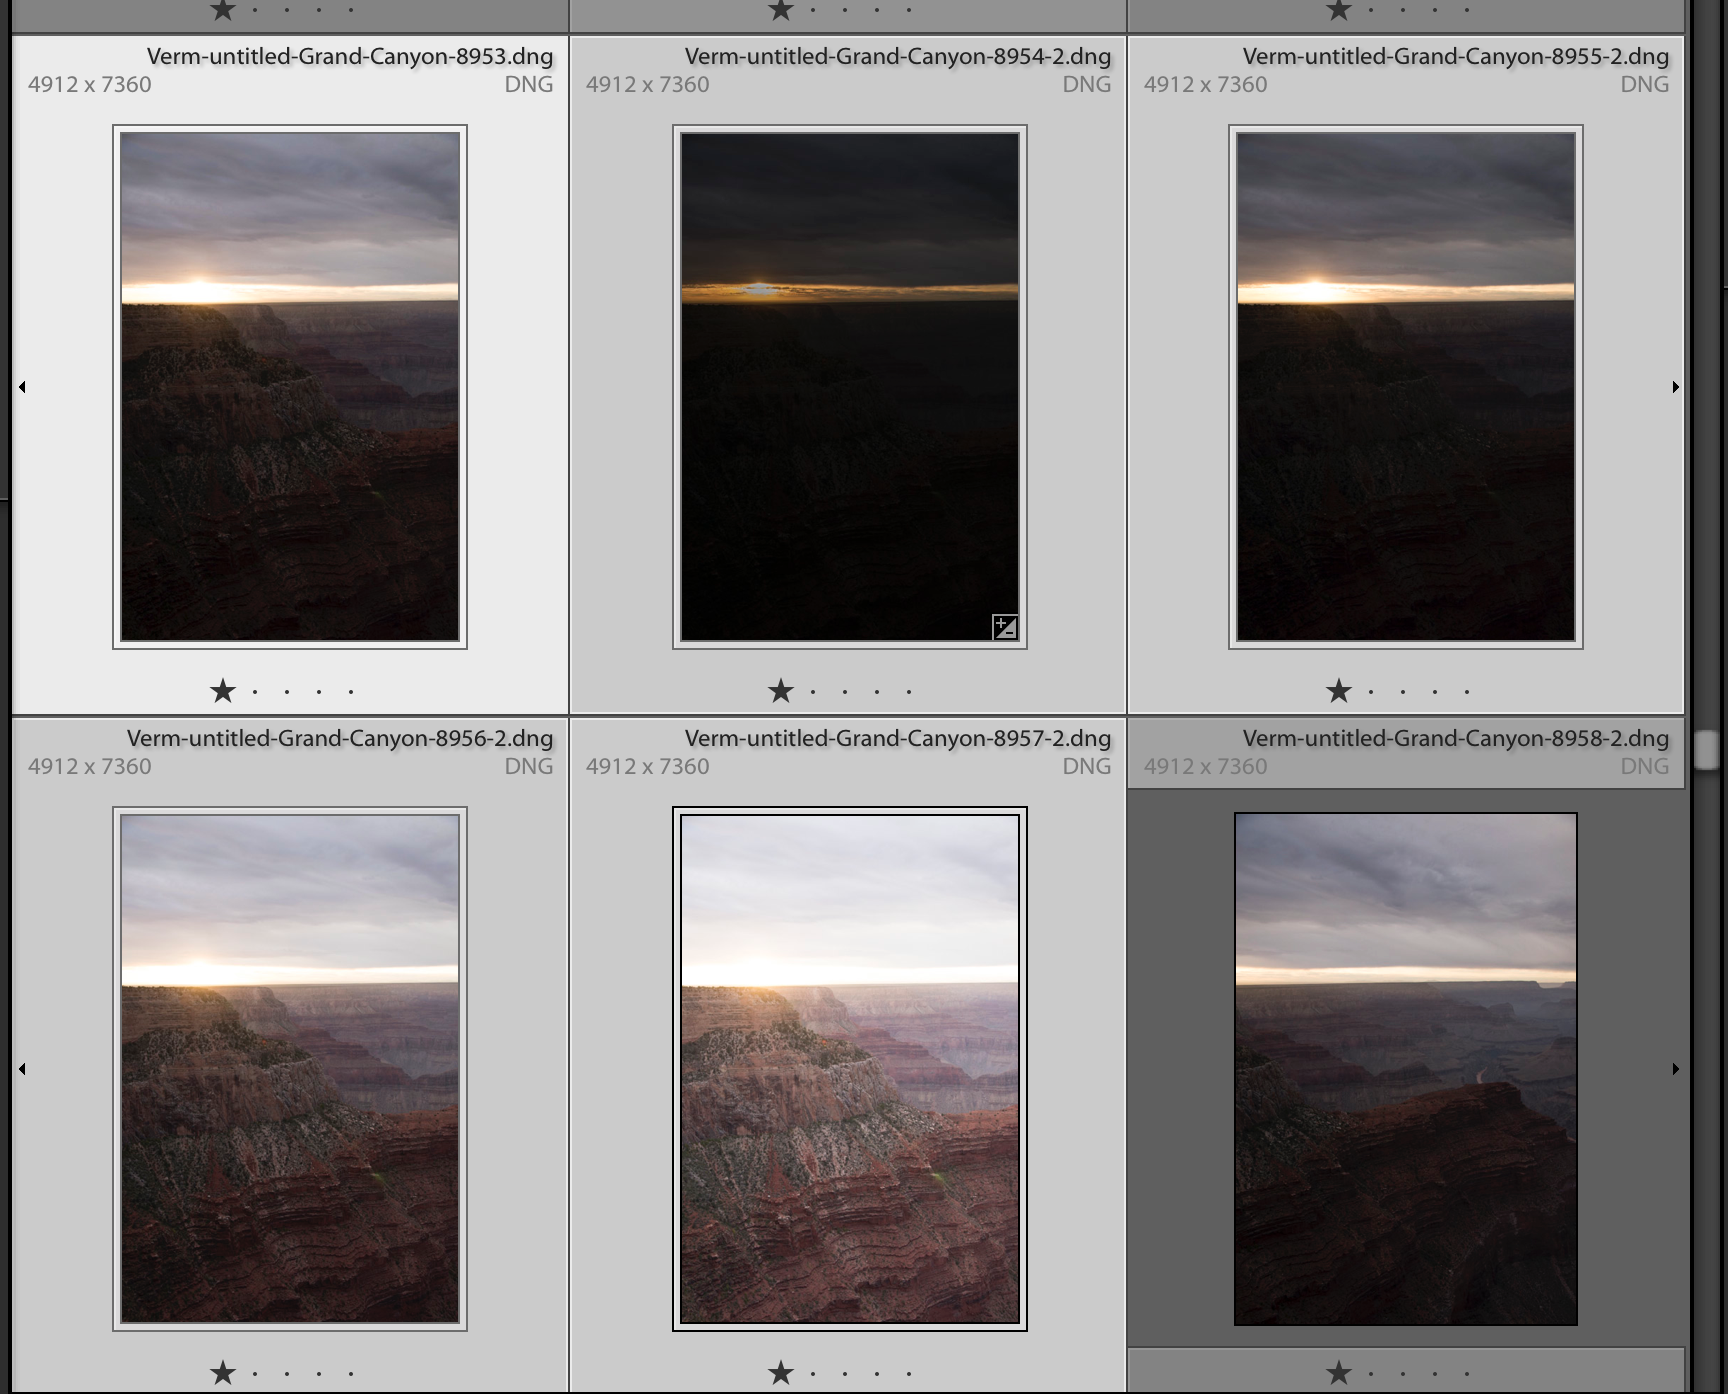
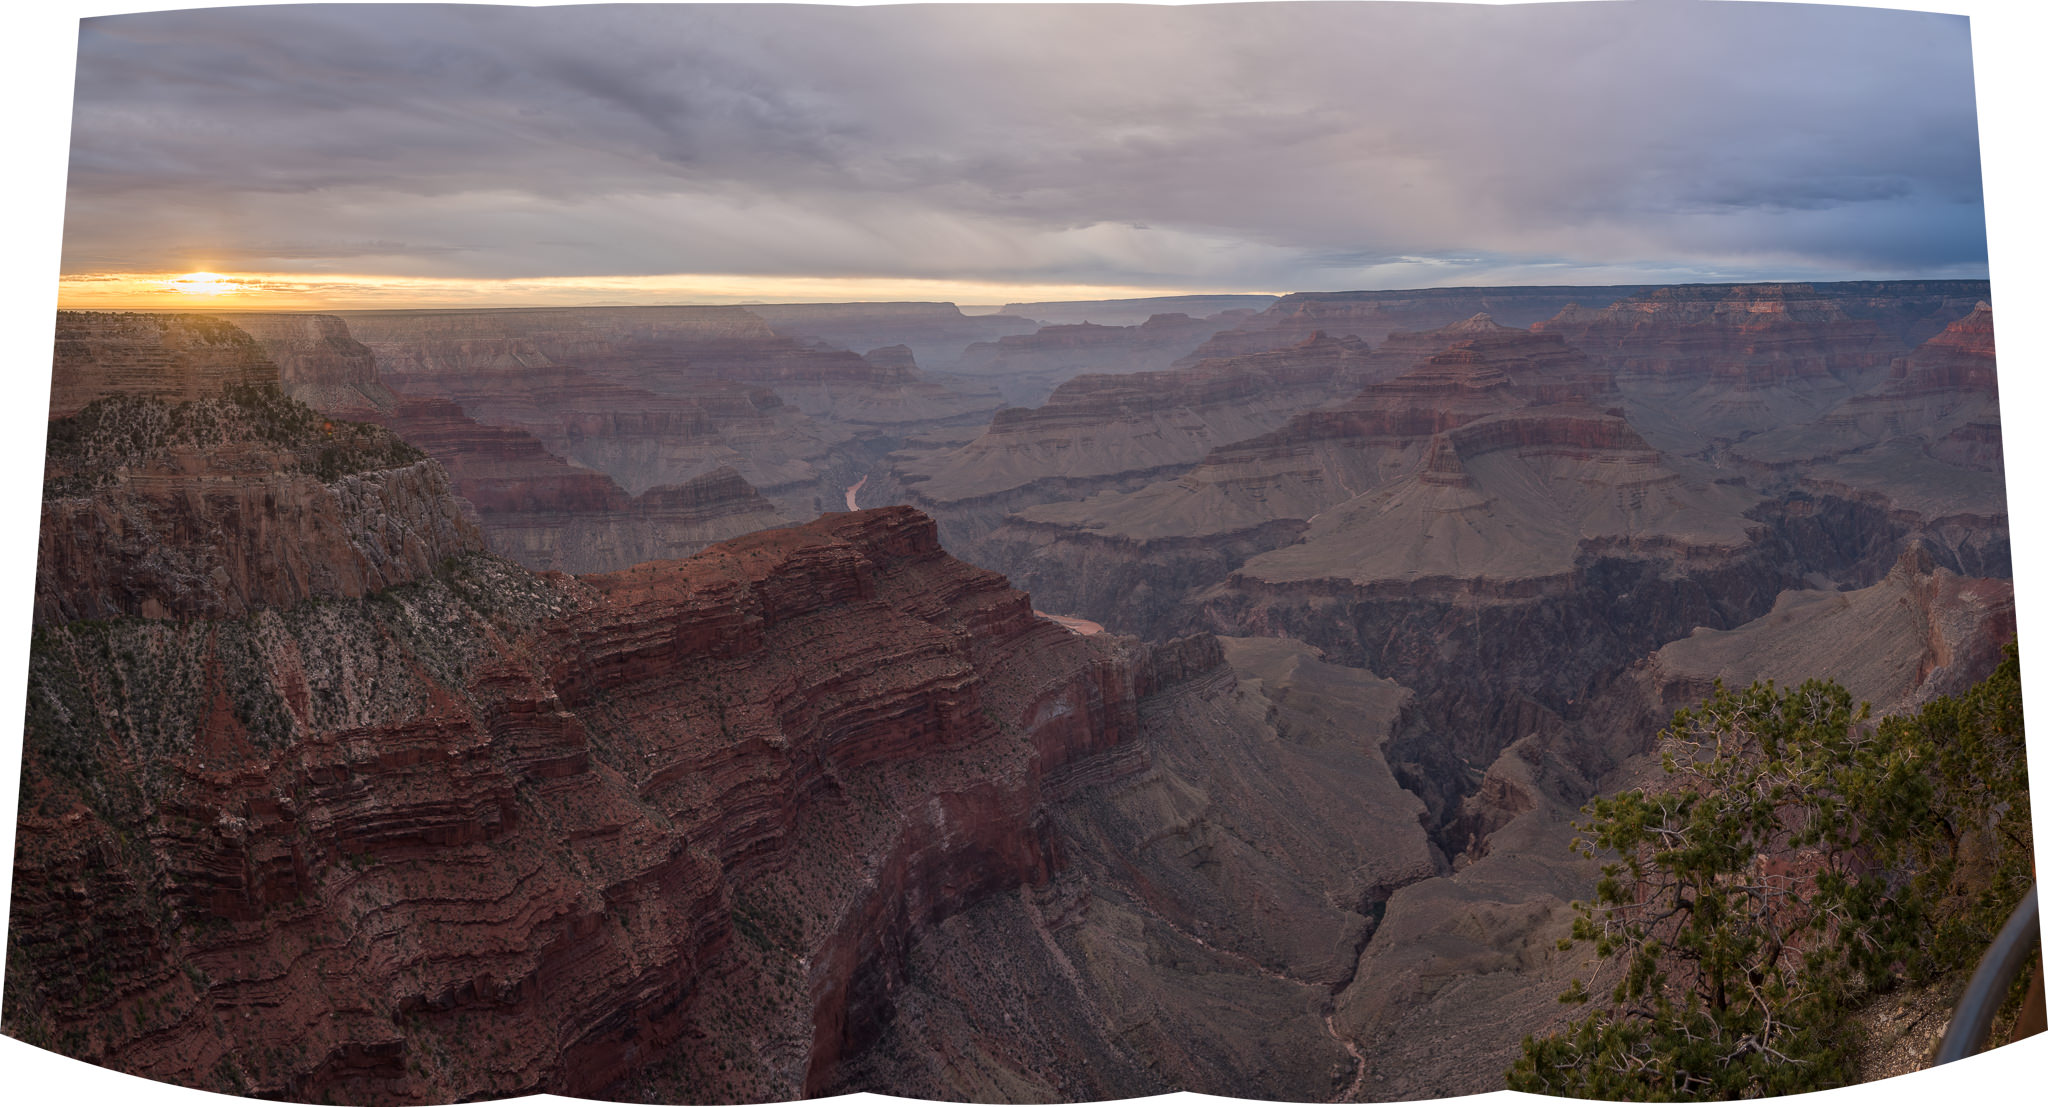
After following the steps above, I’ve got five HDR files to stich into my pano. Here’s one.
What’s great is these HDR files are DNGs, meaning they are still RAW files I can nondestructively edit to my taste later. Had I created my HDR’s in Photoshop, I would have ended up with TIFFs which would be huge and cumbersome to deal with or JPEGs I couldn’t tweak nondestructively.
Note: at this point, if I forgot to apply lens corrections I still can to the HDR DNGs.
- Select the five HDRs.
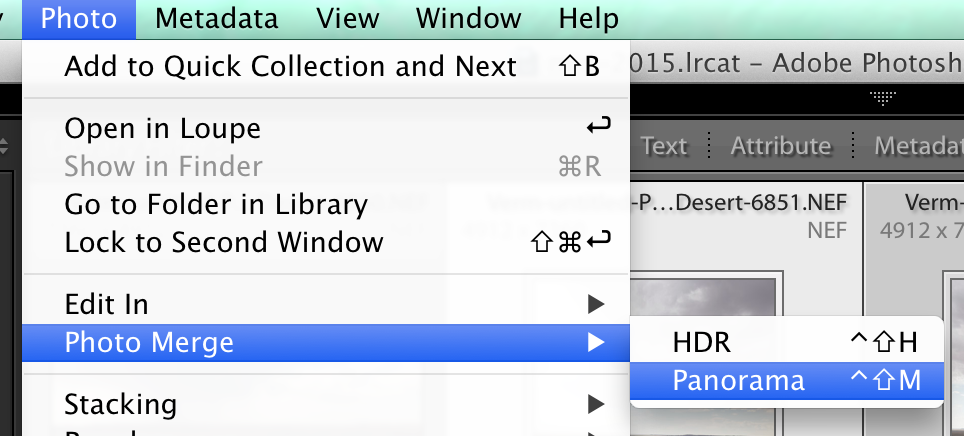
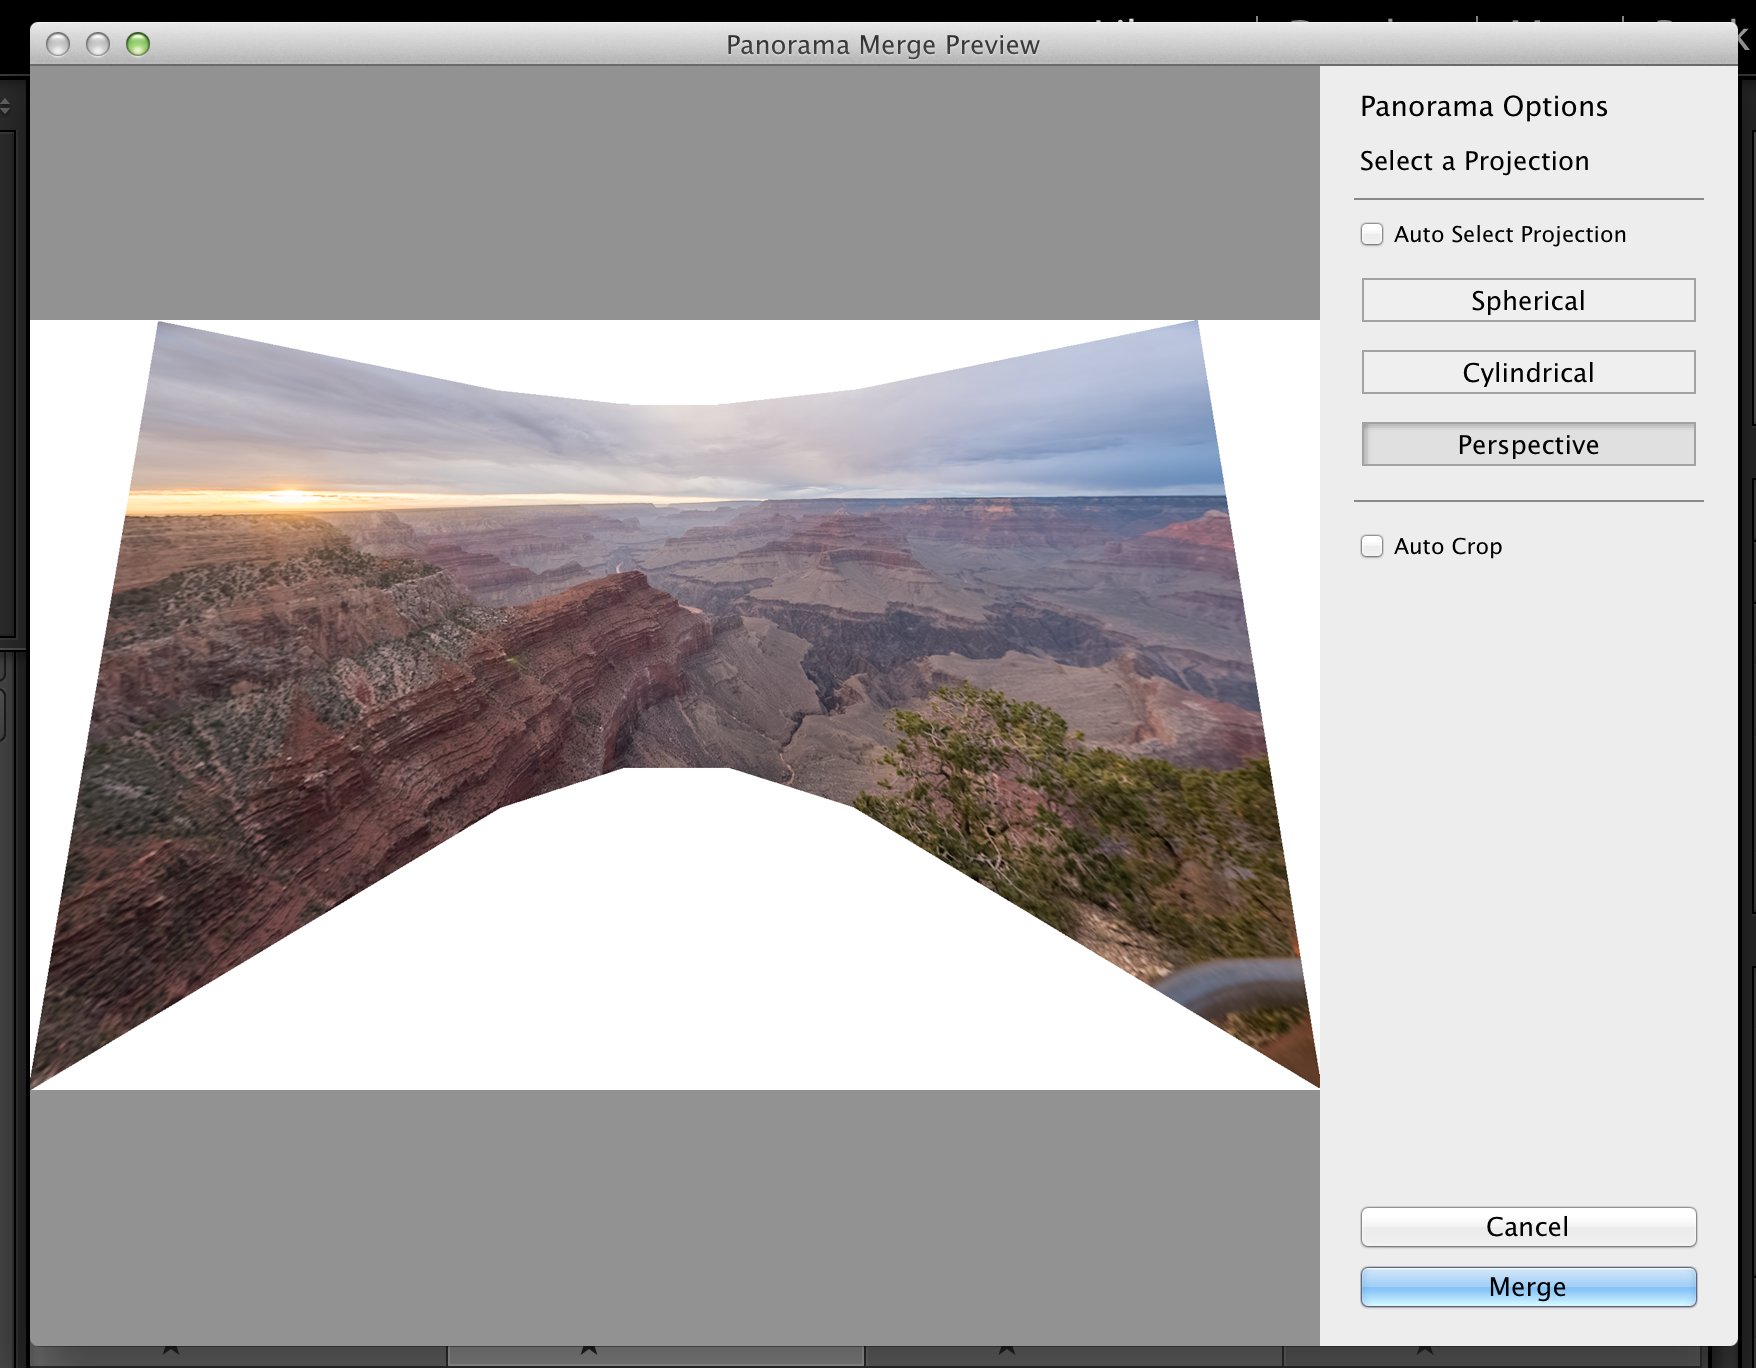
- Go to Photo>Photo Merge>Panorama and click “Panorama”
Again this can be done from library module.
- You only have a couple choices to make. Insert screen shot. Going with auto-select projection usually yields good results but let’s learn what the other choices mean. Adobe’s website explains them thusly: “Spherical: Aligns and transforms the images as if they were mapped to the inside of a sphere. This projection mode is great for really wide or multirow panoramas. Cylindrical: Projects the panorama as if it were mapped to the inside of a cylinder. This projection mode works really well for wide panoramas, but it also keeps vertical lines straight. Perspective: Projects the panorama as if it were mapped to a flat surface. Since this mode keeps straight lines straight, it is great for architectural photography. Really wide panoramas may not work well with this mode due to excessive distortion near the edges of the resulting panorama.” Shortly I’ll show examples of how all three look with our Grand Canyon pano. Before that we need to decide on auto-crop. Again you can check this and change your mind later (to do this don’t hit reset as this will reset any other changes like auto-tone – just go to the crop tool and you’ll see the entire uncropped file). I leave it unchecked in this case because it looks like my tripod is a degree askew and I’ll need to go into the crop tool anyway to straighten it later.
- Click merge.
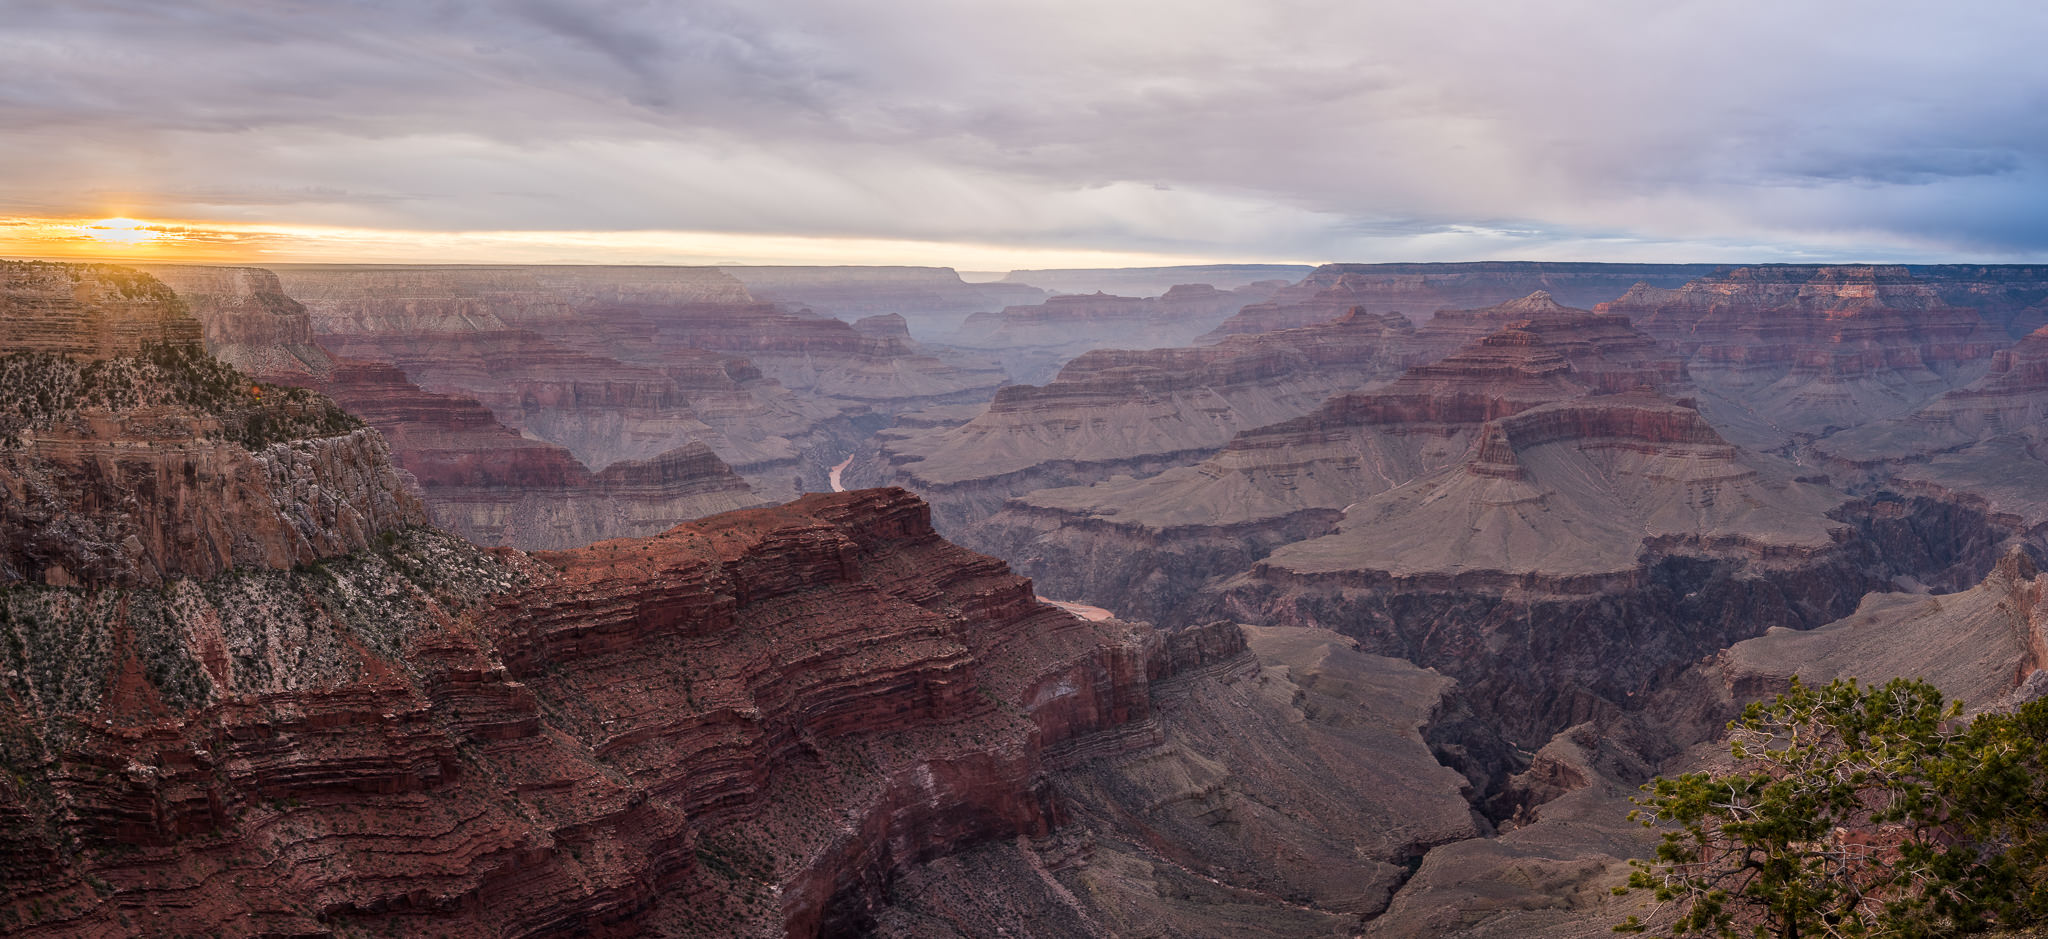
A couple minutes of computer crunching and out pops this.
Looks pretty good and it appears auto-select chose spherical projection this time. From step one through step ten only took 10 minutes.
Here’s what cylindrical projection looks like:
And here’s as close as I got with perspective:
Super stretched and distorted at the corners and when I tried to save an uncropped version it crashed Lightroom each time.
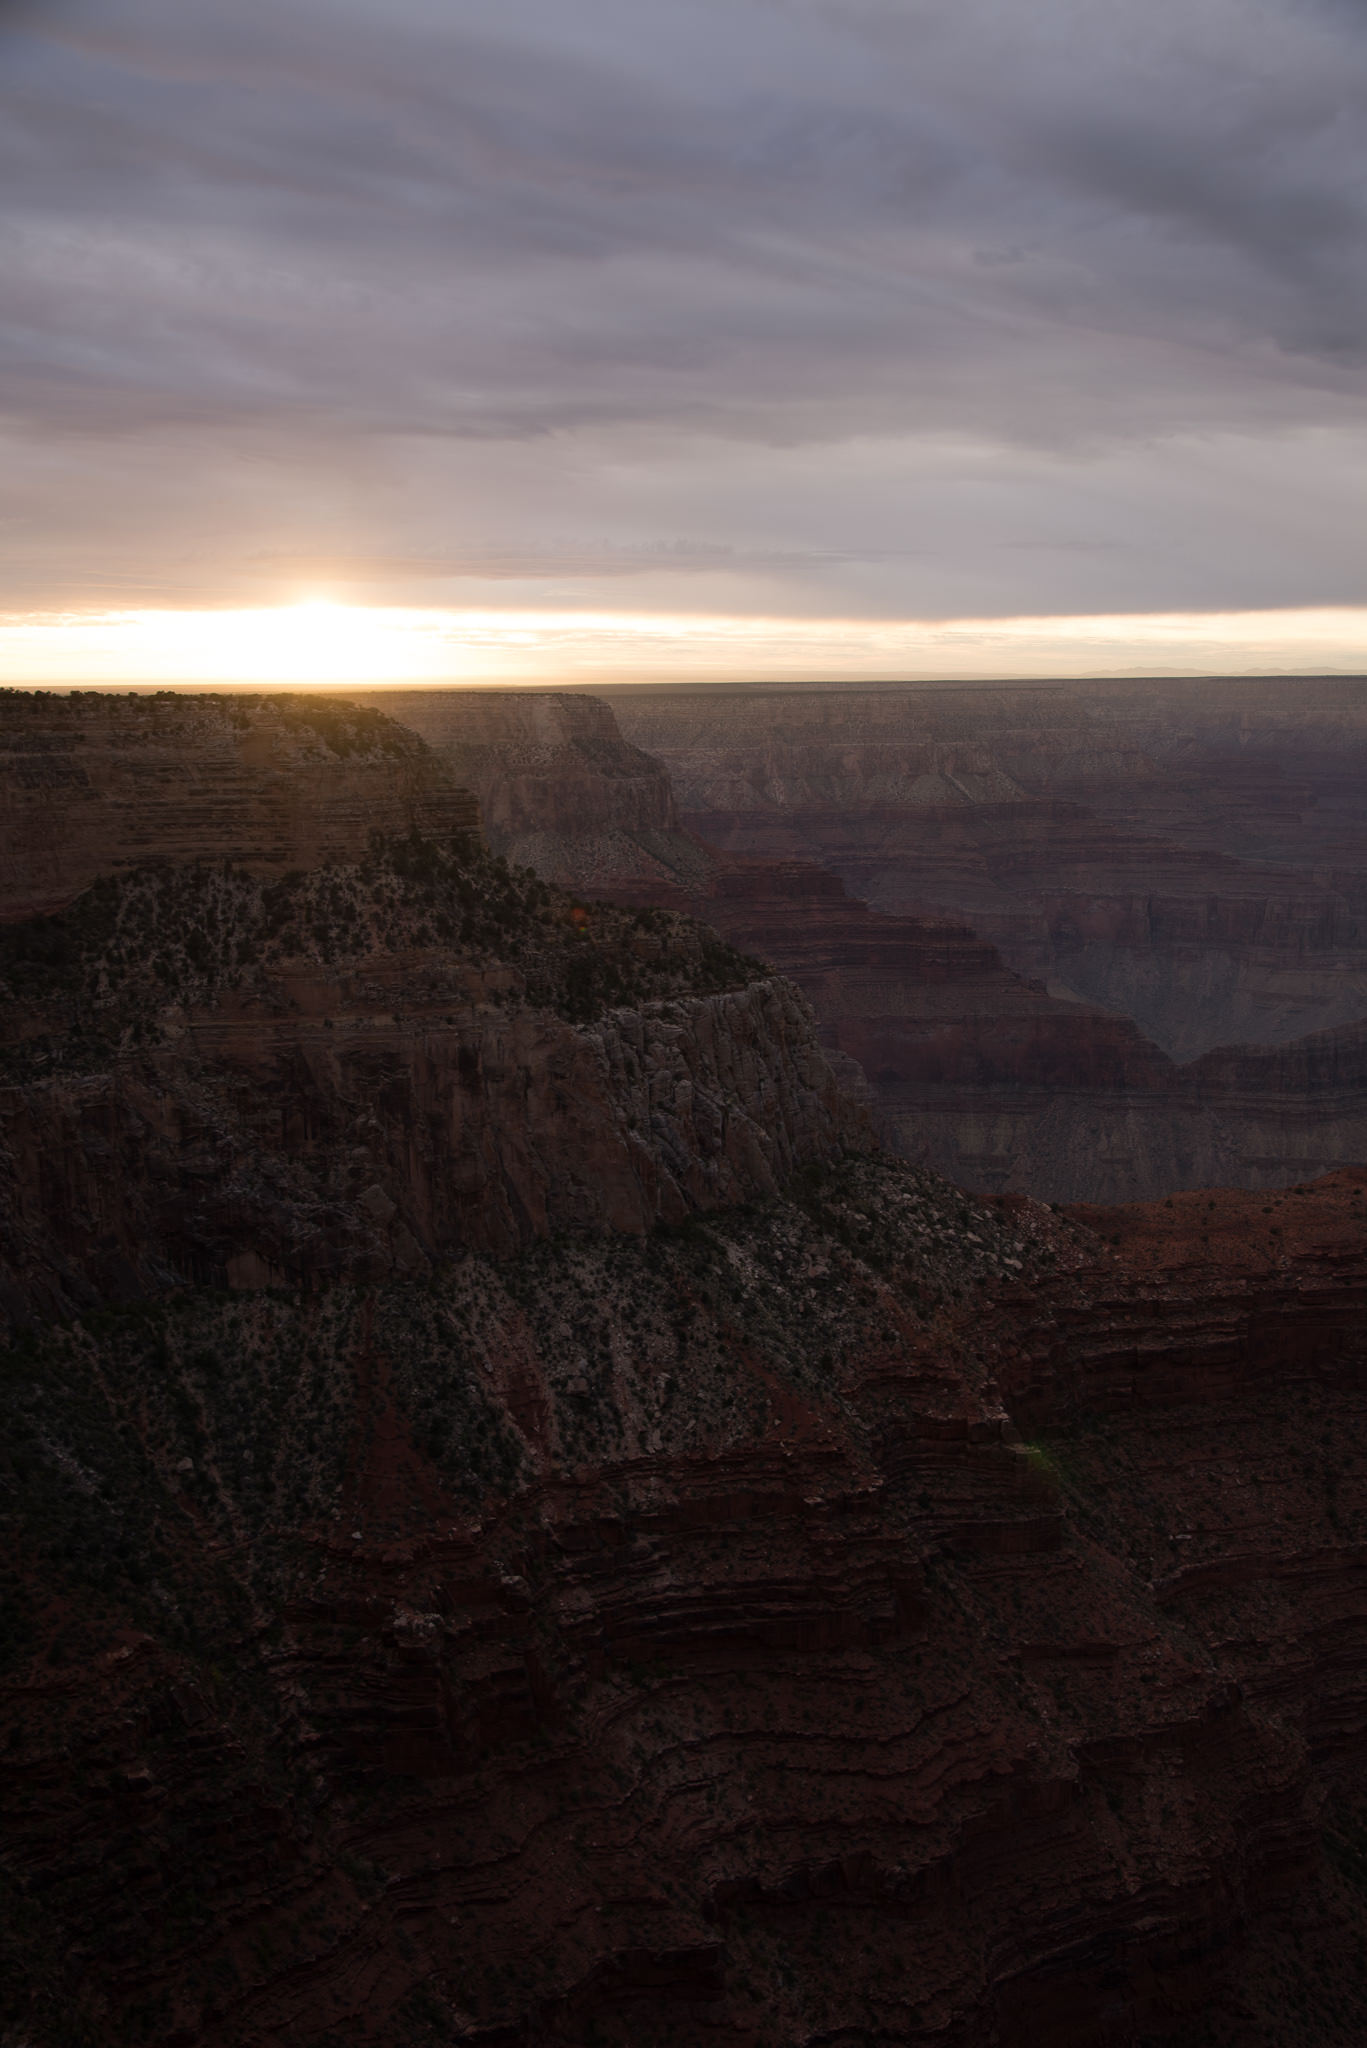
So both spherical and cylindrical gave great results but a different feel. For the feel of the wide-open expanse of the canyon, I like the spherical projection. However, the cylindrical projection gives the canyon depth and that vertiginous feeling you get leaning over the lookout railing. Either way it comes down to a matter of taste.
Now we get to the part I really like about how Lightroom 6 handles HDR and DNG. The HDR-pano it just cranked out is also a DNG file, so I can mosey over to the develop module and fondle my beloved sliders as much as I want.
Add a little contrast, a nip of vibrance and a dash of saturation to get rid of the RAW blah and voila:
Photos all © John Sherman. Text © John Sherman except as attributed elsewhere.
Hi all, just stumbled across this thread now so hoping 2 years after the last post you might still notice my comment!
I’m moving over to spherical panography from 360 mono videography and had a couple of questions.
1. Is PTgui still a much faster/better option than lightroom CC?
2. Instead of bracketing different ev shots to produce HDR images which are then stitched together, has anyone ever tried producing 3 different ev stitched panos. Say 1 produced from -1, another at 0 and a third at +1, and then, this is where it gets crazy, merging the 3 different EV panoramas to create an HDR panorama? I imagine it would be seriously intensive for the computer, but if it didn’t take too long to process might wind up being much faster? Also, please don’t mock me for being stupid if that’s an idiotic suggestion.
I tried option 2 in Lightroom without success.
Hi James!
I specialize in 360 spherical panoramas. PTGui Pro is indeed one of the best programs in the market for 360 stitching. Highly recommend it!
I also shoot a lot of HDR panos. Generally speaking, blending three (or more) separate panoramas is a bad workflow. You can try it, but results are usually poor as most HDR/tonemapping apps can’t handle panoramas that large, or it can’t handle the 360 seam properly and you get a very visible seam to fix. Usually it’s a much faster workflow with better results to either blend your exposures before stitching, or do it all in one pass in PTGui (the Pro version has both tonemapping and exposure fusion engines, as well as outputting a 32-bit HDR file if you really want to get advanced). I also add focus stacking into the mix, so my workflow generally involves focus stacking each of the focus planes for each exposure (from RAW to DNG via Helicon Focus usually, in batch mode), then blending my exposure brackets (via luminosity masks or exposure fusion apps usually) into 16-bit TIFFs, and then stitching those into my final .PSB file with PTGui, sometimes with manual blending via masks in Photoshop to clean it up (as they are often gigapans and don’t fit in the 4GB TIFF limit). Hope that helps!
Here are a couple examples of the finished work: www.aaronpriestphoto.com/panor…nday_Pond/
This is a quick one I did tonight in PTGui if anyone is interested. Didn’t expose for the shadows as I wanted closer to how I saw it (and I was too cold to brave longer exposures).
This was a 5-frame 50mm (DX, D7100) pano with 2 exposures (0, -2) in the high contrast sections of the image. Processed for colour and contrast in Capture One, exported as TIFFs, then loaded all the bracketed TIFFs into PTGui, clicked about 3 buttons, then some final touches in PS. Same thing in LR CC would have taken about 3x longer and probably not had the same result.
Great article and photo! I do wish they would optimise this feature though, even on a 3570k, 16gb RAM, SSD and an R9 290 it just takes too long to be practical, and often crashes or produces errors. The final results are nice though.
I shoot a lot of landscapes, and my camera almost permanently lives on my pano head, and I end up bracketing most shots as well. I have tried many different ways, my best recommendation yet is ptGUI, if you shoot like this (almost) nothing can beat it. Import bracketed panoramas (I use temporary TIFs), and it will spit out a full file in a fraction of the time LR CC does even one frame, and with very natural results. Fully sold. What used to take a few different steps that I couldn’t automate, now 2 steps and its mostly automated!
Here’s hoping this feature gets the improvements it deserves! I know what’s possible and I really hope Adobe gets it done
PTGui Pro is also my most used panorama app, particularly for spherical panoramas, which Adobe hasn’t been able to achieve yet.
You can choose “spherical” within the Photomerge dialog box as a projection option, unless you’re referring to the “planet” panoramas? I just use PS if it’s a more simple panorama, and I also find PS’s Photomerge to sometimes blend things that PTGui and AutoPano cannot, such as waves when shooting a beach scene, which I think is due to content-aware capabilities, and it also seems to handle ocean horizons better, which can freak out the other two due to changing pixels
I left a comment days ago, but it never got approved, and now probably never will be with the comment system changing. :-D I’ll type it again…
I shoot mostly spherical panoramas and gigapixel panos. Photoshop and Lightroom can’t handle a full sphere yet–it doesn’t stitch the nadir, zenith, or 360° seam without a lot of manual effort. Also, Camera RAW and Lightroom are still limited to 65,535 pixels along the greatest side or 512 megapixels, whichever comes first. For spherical panorama photographers, that limits us to 32,000 x 16,000 for a 2:1 equirectangular projection. PTGui Pro and AutoPano Giga are much better for these types of things. However, Photoshop does have a very good blender. I often save out both a blended and unblended/layered pano from PTGui or APG, use Photoshop’s autoblend on the aligned layers, and then mask the best parts of each blender.
I really wish Adobe would listen to HDR panorama and timelapse shooters. We need batch capability for HDR!!! :-D
Nice article! Lightroom HDR turned out to be my favourite HDR program, much more natural results on natural landscapes.
Another way is to take one “properly exposed” image in Raw then to use this as your template. Make as many jpeg copies as you wish by changing the exposure in Raw each time e.g. EV-1, EV-2, EV-3, EV+1, EV+2, EV+3, EV0 then merge these into HDR. You get no ghosting at all as they are from the same RAW file. The original RAW file remains for future but you have much more precise images to work with as they are all from the same RAW file. You might need to experiment with the number of jpegs for best effect but I find this much easier, quicker and more reliable, thus giving better results. This way it saves the minute changes in lighting, foliage movement etc that you get in bracketed images. Less space too on a memory card so you can shoot more. Works well for wildlife in tricky lighting conditions too, where any movement between bracketed shots can ruin any image.
As you correctly point out, any motion in the scene can be a problem for HDR. However, the main reason for trying HDR for landscapes to to increase the dynamic range available. By only using one RAW image, you lose this advantage. Things that are over exposed are still over exposed, and the same for the under exposed areas. In John’s image there is simply too much dynamic range for the camera to capture with one exposure, hence the obvious advantage of HDR in this situation.
I think that’s a fair point and it depends on your hardware too I suppose. I’m lucky in that I can use a Nikon D810 which has a great dynamic range. Really enjoyed the article though :-)
Hi Tom, You’re right that the “one-shot HDR” method can be effective when there are moving subjects. The downside is in increased noise in the shadows as you boost the original exposure several stops. As well, if the original file had clipped highlights you will never get those back.
Excellent photo and article, thank you. I have been eager to get out and shoot some panos and HDRs using the new LRCC. Just a few Q’s, how did you determine the number of bracketed shots per set? Would three bracketed shots set at 2 stops apart be much worse? Would 7 1-stop increments improve the look? Personally I love the look of this HDR but am unsure how different bracketing settings would change the look.
Also, any ideas on how how well a 2.7 GHZ with 8GB RAM MBP would handle panos and HDRs with a D750? Thinking of upgrading to this model after my 2009 2.2 GHZ 2GB RAM MBP took well over an hour to stitch a 13-shot pano of D700 files in LRCC.
Thanks.
I upgraded from a D700 to a D750 earlier this year and found my PC took ages to process files in Photoshop CS6.
I then upgraded my tower unit to i5-4460 3.2 Ghz – 8MB Ram – 64bit Windows 7 prof.
I can open far more files and they are processed much quicker – well recommended
John, Jim and Rod, thank you all very much for the comments and further explanation, everything makes sense and I’m appreciative of your advice. This discussion excites me, can’t wait to get out and try this method.
Having shot literally hundreds of HDR images, and many as panoramas, it seems that shooting a properly exposed image, and one 2 ev over and one with 2ev under exposed works almost all the time. You can get an idea if you need, say, a more under exposed image by looking for “blinkies” in histogram view on your camera. If the under/over exposed images still have part of the histogram touching the border, this is another criteria that the exposure range needs to be expanded. If so, rather than adding further exposures within the first group, try expanding the exposure range further.
Ha Jim,
I wish I’d gotten to your comment before leaving my reply – the same advice. Thanks for chiming in.
John
Hi Michael,
To quickly determine the number of shots to bracket you can adjust exposure (while checking test shots on your camera’s LCD) until all blinkies are gone. This will be your least exposed frame. Then adjust until you get fully exposed detail in the most shadowed part of the image you want to see detail in. This will be to most exposed frame. Then depending on your time and patience you can choose how many shots you want to bracket within that range. 2-stop brackets will probably yield good results for starters and will be a timesaver on the postprocessing end.
John
Extremely helpful instruction. Thank you.
How much time it took to create the panorama? For me just four raw files took almost an hour. Though it also depends on your RAM size, over all i feel it is taking too much of time. Are there any free tools for making panorama?
Wow, time for a CPU upgrade I would think. My iMac 3.3gHz and 8G of RAM will process six D810 RAW files in about 4 minutes, I actually never timed it but it was not very long.
Its not all about CPU. I have by defnition a wooden PC. Good CPU, 3GHz 4 core, decent GFX for everything i need so far but the RAM is very wooden by novadays standard. I have 4GB total of DDR2 memory, its so old that i cant even find DDR2 4GB sticks anymore and if i do, they are just as expensive as 16GB DDR3 sticks! Outrageous! AS far as i understand Lightroom, the major work is done dfinetly not in GFX nor in CPU, my CPU is using 20% capacity during rendering and other “heavy” things but the RAM is skyrocketing during those momens. Now, since i have 4GB of RAM and its working at 667MHz, its is slow, its is very slow for Lightroom 6. In fact, 40% of my RAM is eaten away by windows itself. During high moments, from 30-40% RAM usage to 100% RAM usage and at that time, hard faults are happening on HDD which make PC even slower. Its definetly time for me to upgrade at least my motherboard and RAM, but even better would be just get new PC. Modern computer lasts about 5-10 years before it is not worth anymore upgrading parts.
As the article states, from choosing the 25 RAW files to the stitched panorama took 10 minutes. I did it on a Macbook Pro with 16 GB of RAM. The actual panorama stitching part was probably about 4-5 minutes of that.
nicely done. looks natural and not HDR, which is the most important thing.
I like LR6’s HDR results because they look pretty natural, but most importantly give me a DNG that I can later tweak to remove the pasty shadow HDR look my older efforts with other programs gave.