You must forgive that this is merely the thought process of a hobbyist, rather than a tutorial from an expert. In a world awash with blinding, over-saturated colour photos, plenty has been written on this subject in response, but I felt it might help some readers (especially those just starting out in photography) to elaborate on my decision-making process and reasons for rendering or shooting an image in black and white (B+W). Your rationales may be different, of course, but by articulating mine it might help an understanding of what makes black and white images so appealing.
Rest assured I absolutely love colour, and when I first started shooting eons ago I was somewhat indifferent, perhaps even a little averse, to B+W. Colour was everything, and even the simple juxtaposition of primary colours in an image was satisfying enough.
For some images, colour is either part or all of the subject. A beautiful sunset, for example, doesn’t look very spectacular de-saturated of its colour. Nor do richly colourful plants or flowers. But, as I have mentioned in previous articles, stripping colour away from the right image can deconstruct its components to emphasise their shapes, textures and light, and each of these alone can form the subject of the image regardless of what they describe within it. Perhaps even the mood of the scene can change in the absence of colour.
Revealing the inter-tonal relationships or light and shadow within an image can evoke a different response or appreciation from the viewer than if the image is in colour. Colour can thus be a distraction from or a mask for such relationships. B+W is also versatile enough to apply to almost any subject, be it landscape, street, wildlife or portraits, as we explain in our beginner’s guide on the subject.
Whenever I take an image now, I almost always ask if the colour adds anything to it. Is the colour necessary or expendable to the image, and would the image therefore be just as, if not more, effective without the colour in it? I’ll usually shoot in colour with a view to rendering in B+W afterwards, but on occasion I’ll use one of the Art Filters on my camera and shoot directly to B+W in-camera. This allows me to see what the result could look like, and if it’s not to my liking, my camera (Olympus EM-5) generously creates an original colour RAW file alongside it so that I may adjust that on my own in post.
(SOOC JPEG from the camera’s B+W Art Filter)
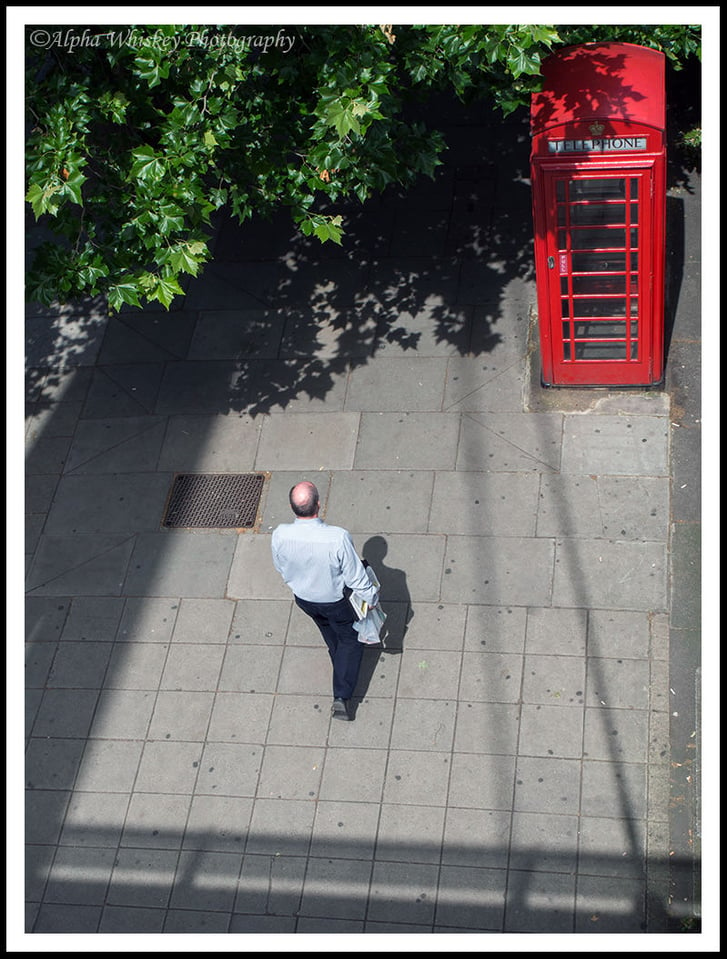
With time one learns to ‘see’ beyond the colours of a scene, switching them off in the minds eye. One can then determine if an image would work in B+W before making the shot, and this opens up many more possibilities to our shooting experience. Below is such an example. A simple shot taken from a bridge of a guy walking down the street, and one I took knowing I wanted to render it in B+W later. He is framed by some shadow and with some deep colours from the foliage and phone box. Not a particularly interesting shot.
But with the colour removed and rendered B+W, it becomes more about the shadow frame and the contrast between the light and dark, emphasising the man’s place in the centre. He is also partially framed by his own dark trousers and shadow. Arguably still not a very interesting subject, but perhaps rendered in a more interesting way without the distraction of colour. Seeing the shadows and the frame it created are what inspired me to think of a B+W rendition; then all I had to do was wait for someone to walk into the frame.
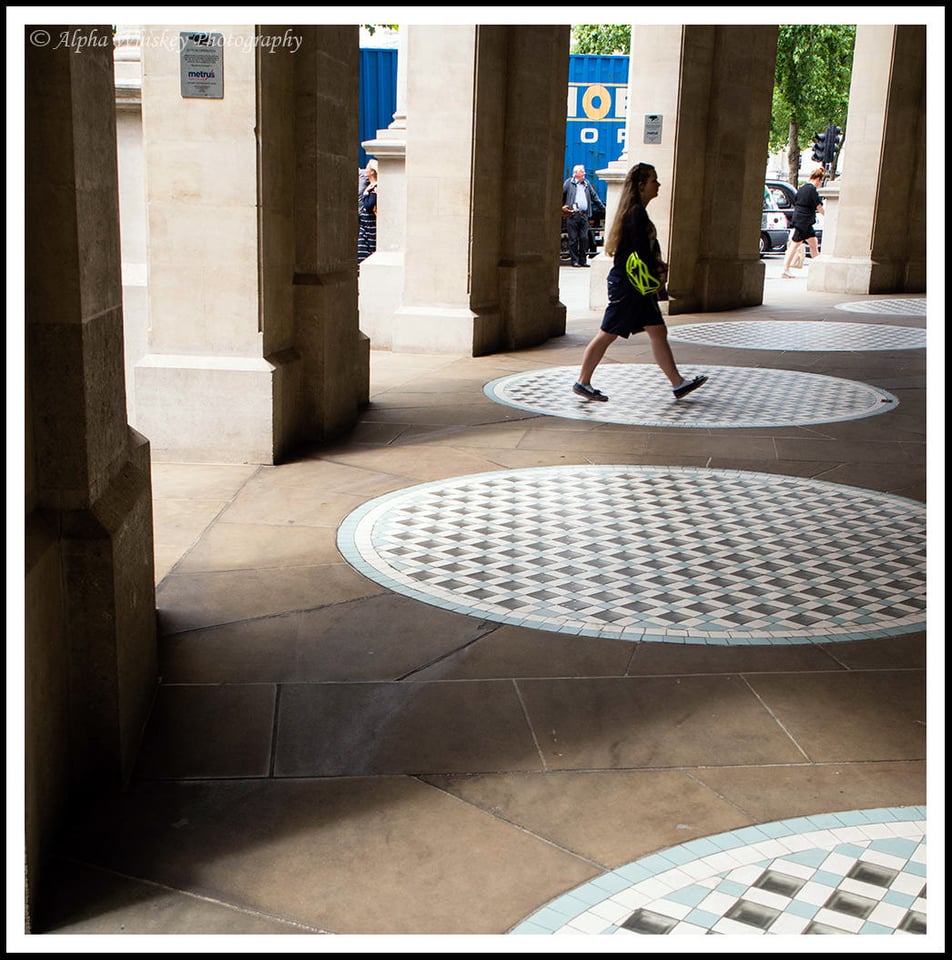
Another example below, taken on the same day, with a view to rendering in B+W later in post. Again, just a random, uninteresting shot of a woman walking through a passageway on London’s Strand. But the contrasting areas of light and shadow gave me the idea for B+W here.
And with the colour removed, this contrast between light and shade is emphasised. The random pedestrian now becomes something of a focal point as the intersecting light and shadow seems to lead the eye towards her.
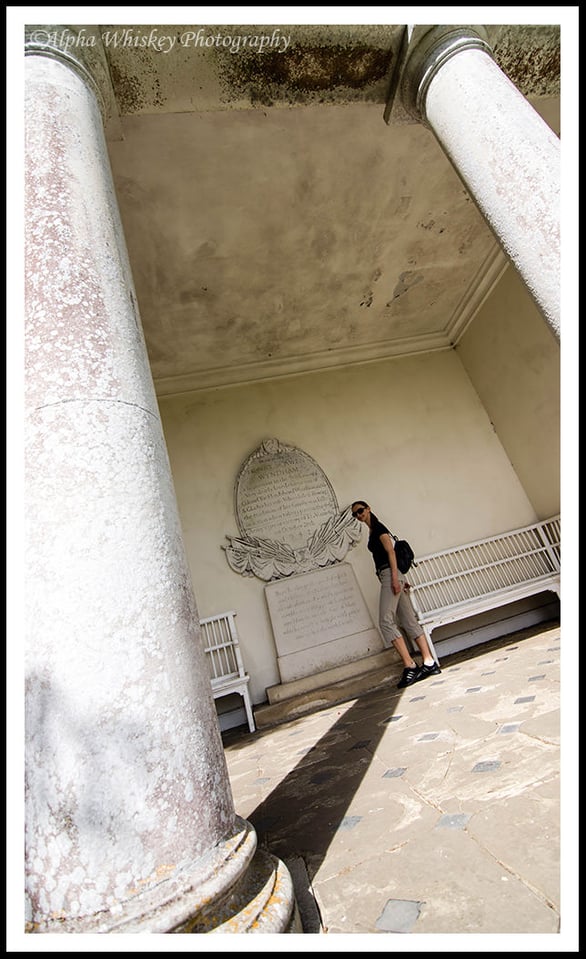
Here’s an example with a more specific intent. My friend wanted a photo of herself inside this temple.
In colour it’s not a very interesting shot to me, but in B+W I can use the shadow from the pillar to lead the eye to her. With some selective curves adjustment and dodging and burning, the contrast in black and white render her more starkly to the viewer’s eye as the focal point in the image.
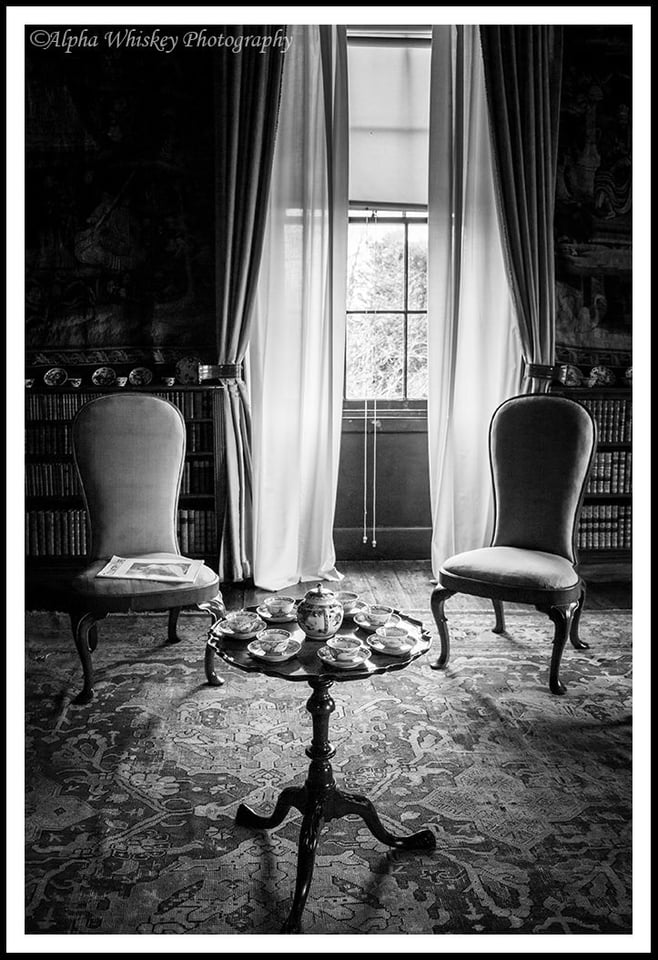
B+W often has connotations of something old or historical, and to that end it can be used to evoke a bygone era. Many of the shots I take in historical buildings will be rendered in B+W for this very reason. Both externally…
…and internally.
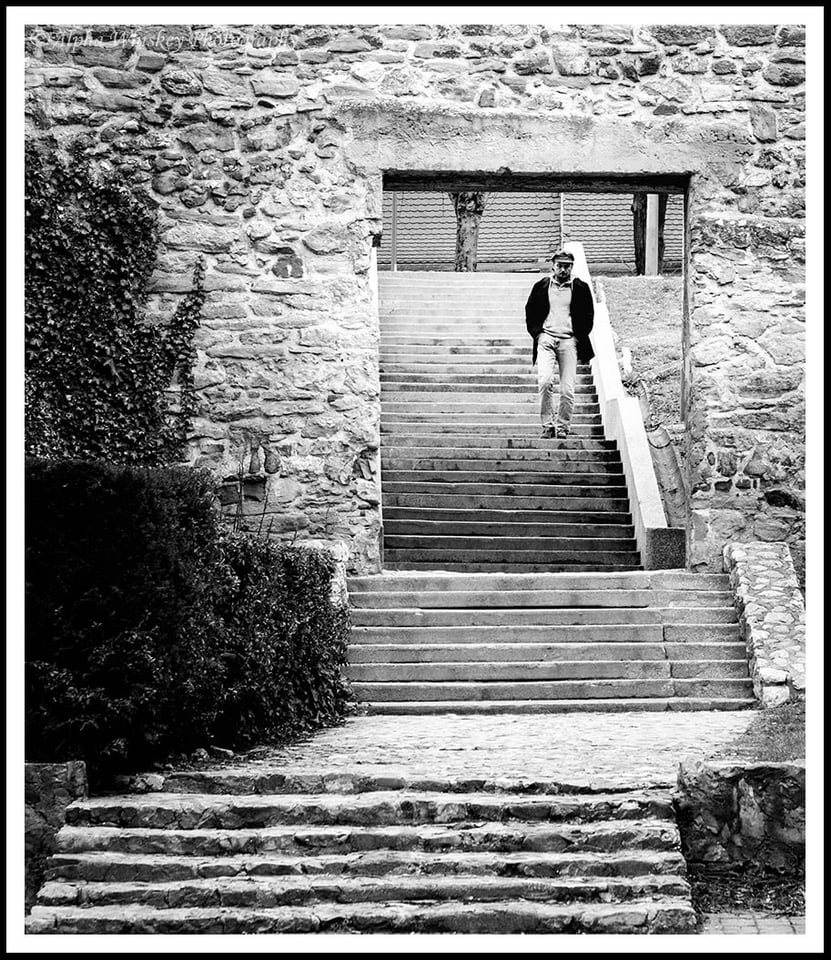
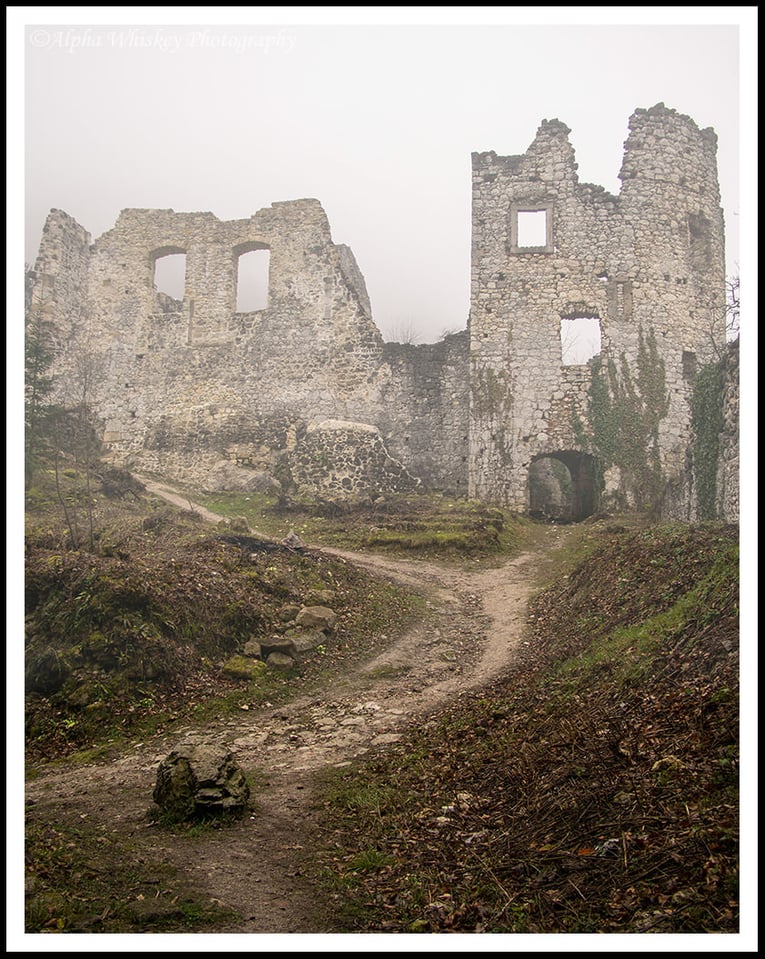
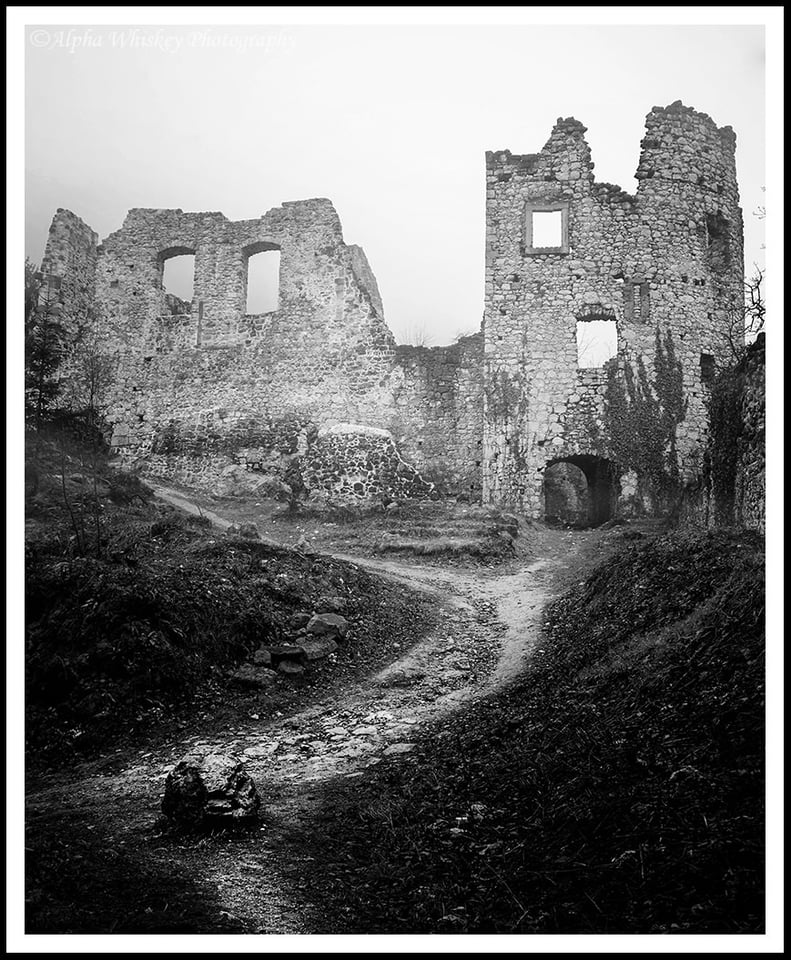
Additionally, mood and atmosphere can also be affected by B+W. When I found the ruins of this fortress atop a hill in Croatia an eerie mist was descending upon it.
Atmospheric enough, but then removing the colour made it seem even more desolate and mysterious to me.
This shot below of Westminster Palace from the South Bank was taken in the rain. I rather like the colour version; it has areas of primary colours and light playing of each other and balancing the image (in my view). The diffuse lighting and shiny wet surfaces allude to the mist from the rain.
Now without the colour, I think it has a little more atmosphere, with the light areas breaking up a somewhat eerie scene.
One of the commonest reasons for rendering or shooting an image in B+W is to hide a dreary or featureless sky, and I’m not immune to that reason. I like to shoot on nice days with clear skies, but bad weather lends itself to B+W photography. I took a couple of friends on a photowalk around St Paul’s Cathedral a while ago and the sky was a dull grey. So I used the B+W Art filter on my camera to shoot this silhouette of the cathedral, exposing for the light areas to deepen the blacks (SOOC JPEG).
Below is how it would have looked like otherwise (processed from the RAW file). Dull sky and dull image. The B+W above is far more dramatic and atmospheric.
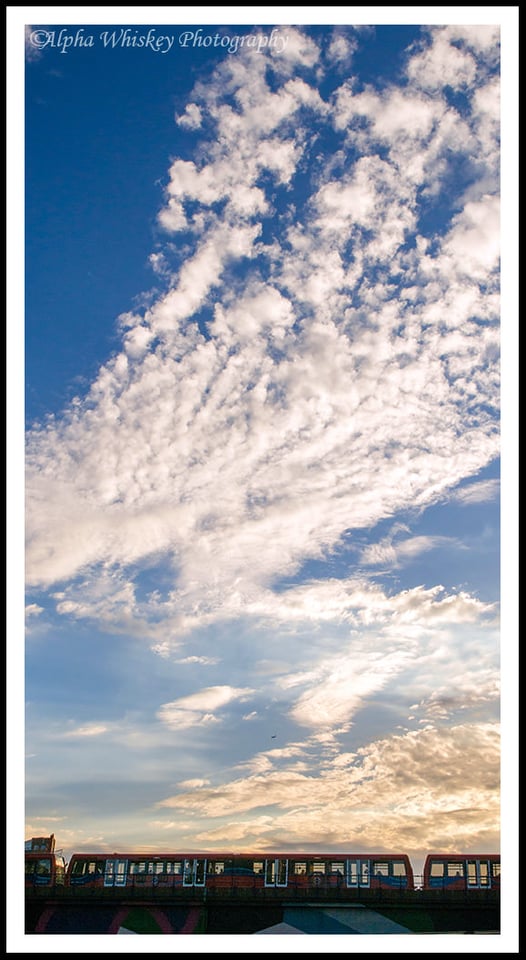
In contrast, you might use B+W to make a sky more dramatic, especially where there is an interesting cloud pattern. In the shot below, the sky is already the subject of the image, with the train giving a horizon to anchor the shot.
Without the colour, the sky looks more dramatic to me and trails my eye down to the silhouette of the train.
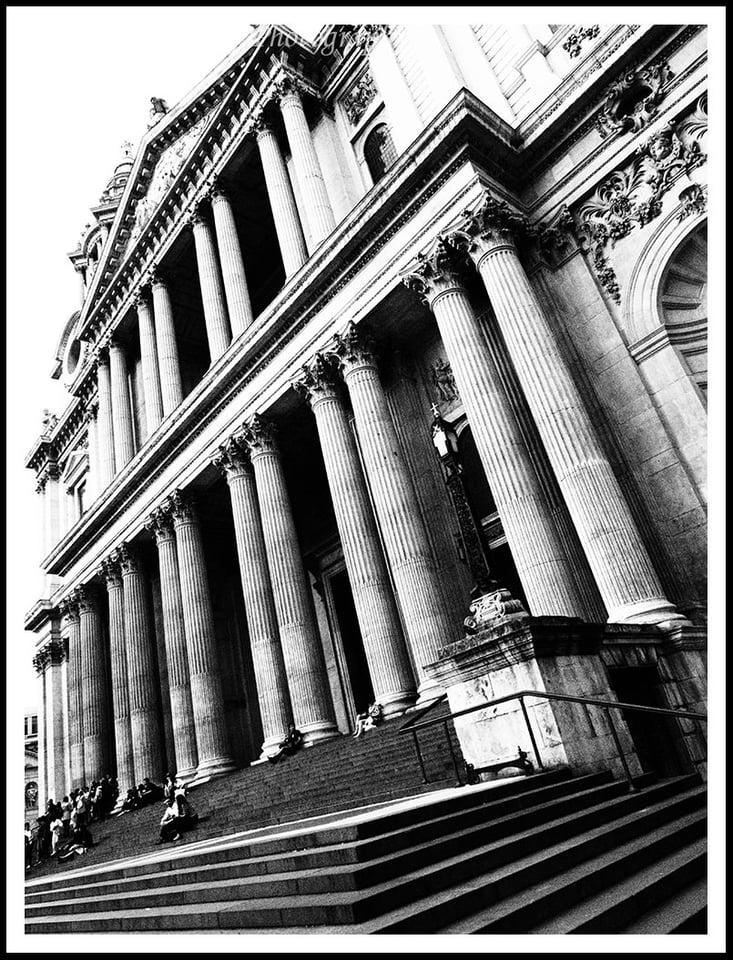
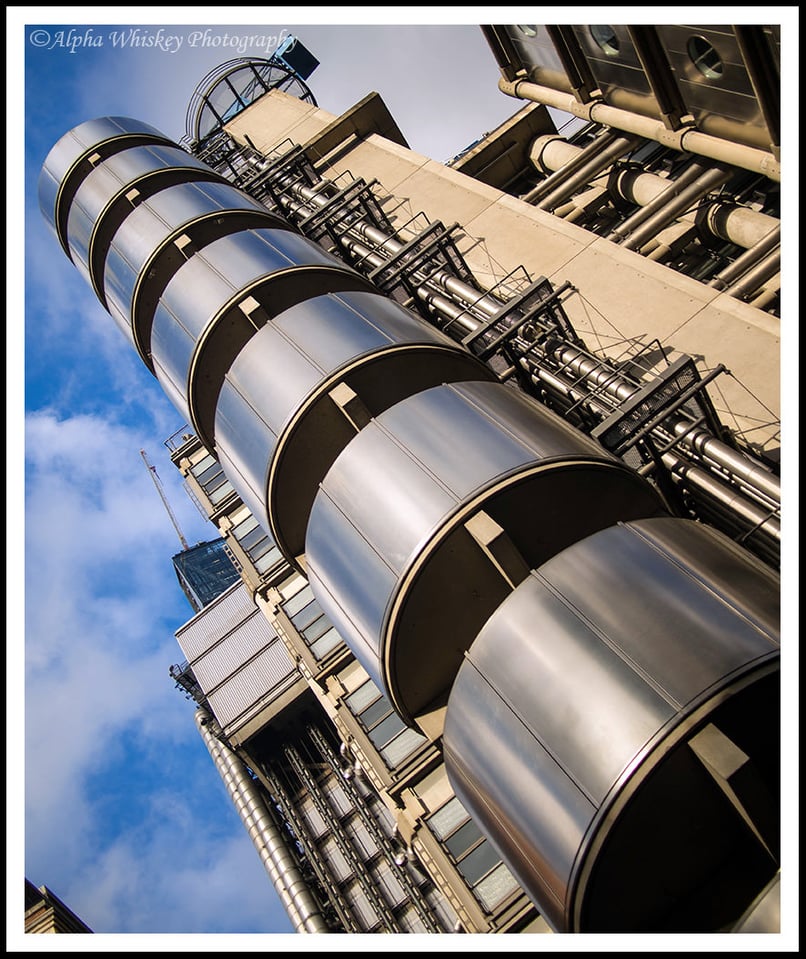
With architecture, B+W is often more effective at emphasising the geometry and shapes of a building. I have also tilted this image to take the perception bias away from the building and onto the lines and shapes leading the eye into the shot. A slight curves adjustment to deepen the blacks and some dodging on the cylinders help too. (I also removed the distraction from the bottom left corner.)
Even with simple details, B+W can draw out details and textures, as in this headlight of my…. ahem…. someone’s Jaguar F-Type.
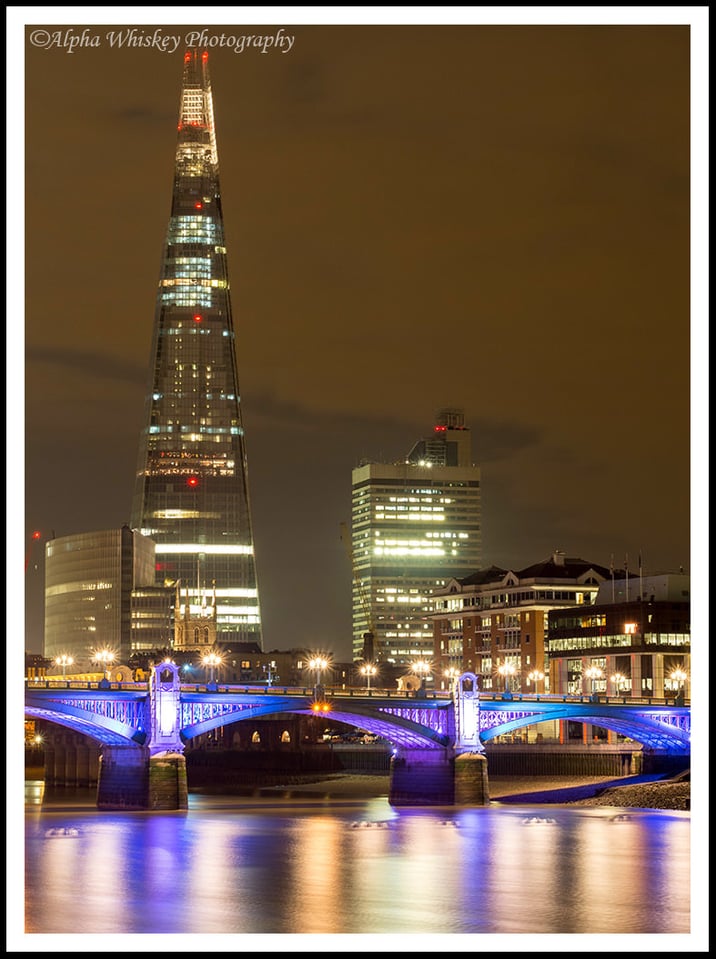
I had discussed my attempts at fine art B+W landscapes in a previous article, but cityscapes lend themselves to this treatment as well. This long exposure of the Shard in London appeals to me in colour, but in B+W it seems to have more of a fine art gravitas, if I can put it that way.
In terms of processing, I use the B+W tab in Lightroom and then selectively move the colour sliders around in the HSL/Color/B&W tab below (as described in a previous article). I’ll also dodge and burn to emphasise the subject, or apply a curves adjustment to increase contrast. If I shoot in colour first then I always shoot RAW, as this gives me far greater latitude in exploiting as much tonal range in the scene as I can. Processing JPEGs, you may find there are more artefacts and obvious demarcations between the tones. The EM-5, however, makes pretty good B+W JPEGs in camera using its Art Filter.
Of course, much of this is my subjective perception, and you may have your own take on rendering or shooting in B+W. But perhaps this may articulate a few of my thoughts on the subject for some people who are still as tentative as I used to be in making B+W images. Thank you for reading.













I would simply like to say thank you for such a thoughtful and well put together piece of writing. I have begun to experiment with candid impromptu portraits in black and white and both the subjects and I enjoy the results a lot. Black and white is the linguistic dream of a common language but is an artistic reality in its commonality amongst all walks of man today.
Thank you kindly, Mike :)
Hi all
For all interested in B&W I remember having seen a training tutorial with Katrin Eismann at kelbytraining.com, on how to convert color to B&W using channels and channel mixer in photoshop cs3. It was a very technical training and Katrin had all the files available for download to follow exactly its techniques. It was the first time I heard about “LAB”. I remember It was quite interesting. Katrin showed how to used masks using different channels on the same pic. This training is probably available at a cheap price for thoses who do not want to enroll for a year training. In my younger years I was shooting 95% B&W and now its 99% colors.
Have a nice day
Luc
Hello Sharif,
Thank you again for another interesting article. I also LOVE B&W photography. I appreciate your desire and efforts to present this marvelous (and vast) topic within photography and share with us your insights and experiences. Your photographs are excellent! Also, I can see that there are a couple of the commentators who shoot B&W film, too. Bravo!
If I may, I’d like to offer two suggestions for potentially improving one’s B&W photography.
As we all know and appreciate (at I least hope so), Ansel Adams was a genius in his craft because of the one aspect that he deemed to be crucial for translating the image in the mind’s eye into the final print. And that is visualization. Indeed, Adams dedicated entire chapters in his books to this tenet. In the modern era, with color photography having carved such a dominant stronghold within photography, visualization arguably holds more meaning for B&W photography than it ever did.
What Adams and other great photographers of his generation used to help visualize their final images in B&W was to use a “viewing filter”. In his book, “The Negative”, Adams endorses the use of hand-held viewing filters to minimize colors in a scene in order to study, appreciate, and visualize the tonal relationships before making the exposure. Specifically, Adams recommended a “Kodak Wratten #90” filter. To this day, many photographers (myself included) continue to use this filter for the visualization process. Although the Wratten #90 does not render the scene in actual B&W, it nevertheless effectively does what it designed to do. If I may quote from Adams’ book:
“I strongly recommend the use of a viewing filter. The Wratten#90 provides a visual indication of the monochromatic relationships of color subjects . . . The filter does not completely neutralize the colors, but minimizes their visual significance . . . I recommend for black and white a plain 2- or 3-inch gel #90 filter mounted for protection in a simple open frame. The filter should be held in front of the eye for short time intervals only, since the eye will adapt to the filter in time and the filter’s effectiveness in suggesting black-and-white rendition of colors is thereby reduced. ”
– “The Negative.” The Ansel Adams Photography Series 2. Page 6.
In addition to the Kodak Wratten #90 (which I luckily obtained in used but excellent condition at a bargain price), a newer eye-piece type of hand-held filter is available on the market; this particular item is compact, light, durable, and fits within the palm of your hand or your shirt pocket. I use both the gel filter and eye-pice extensively for my B&W work, which is exclusively on medium format film; but these tools should prove very helpful for the digital photographer as well.
Now, I am not suggesting that anyone immediately go out and spend $45 dollars on such an item in the hope that it will improve your photography instantaneously. By no means do I believe that gear in and of itself will improve the quality of your photography. However, for those advanced amateurs and professionals who are likewise fascinated by and appreciate the multi-faceted nature of light and its tonal relationships among sky, land, and sea and know exactly what they want to achieve in B&W, then these tools may be a good investment for you. :-)
These viewing filters are widely available on the market, both used and new. You can still find the Kodak Wratten #90 new from B&H. Here is the link: bhphotovideo.com/c/product/817795-REG/Kodak_1558170_3_x_3_90.html
In this link, the one reviewer of this product was kind enough to post a sample photo of a scene taken with and w/o the filter to show what to expect of the Wratten #90.
An eye piece viewing filter (manufactured by Tiffen) for B&W can be found here: bhphotovideo.com/bnh/controller/home?O=&sku=330726&gclid=CIe-x76hmL8CFQ-CfgodSWMAhA&is=REG&Q=&A=details
Finally, for my fellow film photographers out there, a second suggestion for improving your visualization process for B&W would be to use a digital camera to make a test image in monochrome to simulate what you want to create on your negative and ultimately on your print. Initially, I found this very helpful in the visualization process; however, I quickly appreciated that hauling an additional piece of equipment like a digital camera on long hikes and nature photo shoots was counterproductive, so I now only use the above compact and light-weight hand-held viewing filters.
Interestingly, for those of you who are also history buffs of the art of photography, Ansel Adams and other professionals in his generation actually carried Polaroid cameras to take test shots of their scene as another aid in the visualization process. Adams masterfully used the (near) instantaneous Polaroid print to adjust his camera exposures to create the image he conceived in his mind at an early stage of the visualization process – well before the development and printing process. Adams also writes of this in his book, “The Negative”, which by the way I highly recommend for photographers at any level.
I hope these suggestions help. Cheers!
Rick
Thank you Rick for such a comprehensive response and some interesting suggestions :)
Rick, I, too, want to thank you for such a great comment! Also, if you ever happen to write a comment that does not get published immediately, don’t worry too much, it just means it’s waiting for approval which rarely takes long. ;)
Cheers.
Hey Sharif,
Great post! I began in my younger days as a sketcher / oil painter. To me both mediums give dramatically different results and so they should. It’s the same with colour / B&W photography. One common mistake when drawing with pencil was to shade things in depending on their colour, where instead you should be shading in where there is less light. Oil paints on the other hand, are great where you want to highlight the vivid colours in front of you.
I tend to use the same kind of decision making when deciding if a shot should be colour or B&W. Are the colours here what I’m after? Or is there a play with light/shadows that would be better highlighted with B&W? Patterns of texture fall into that category, because what the eye picks up is actually light/shadow. Since I used to spend my youth sketching buildings / people, it falls naturally to do this with photography, and so even with my earliest point and shoot camera I’d stick it on B&W if I could.
With documentary photography, especially if the name of the game is capturing expressions, I find colour photography crowds the picture, particularly if the background is cluttered, and you lose the subject. B&W here removes the mess and focuses the eye.
Another great exercise I do, especially with a mirrorless camera is always have it on B&W, even if you are shooting in RAW. I find it helps me see texture and light/shadow much more.
As with most photography, there are no rights and wrongs here, just all parts of the toolkit :)
Anyway, keep those great posts coming!
Daniel
Thanks Daniel! I started out sketching and drawing in my youth too. Still do the odd caricature these days! It’s great that our cameras allow us to shoot directly in B+W and visualise the image therein.
Cheers,
Sharif.
“Still do the odd caricature these days!”
Can I laugh at that a little?
ok…..?
Like your caricature of Tony….
Ah! Gotcha!! Yeah….we don’t talk about that….! ;) LOL!
Excellent article and examples. Some cameras with an EVF allow for real time B&W visualization, stripping away color cues which can be distracting.. This is one of my favorite features of the Fuji X100s.
Thank you HomoSapiensWannabe :) I didn’t realise the Fuji X100s had that feature; sounds very useful!
I have begun shooting B&W on medium format film. Up until recently I was a firm believer in colour, and I believed colour added compositional values to my photographs. But a fellow University photography student began using B&W 35mm and from studying his prints, I noticed that what B&W did, was reduce photographic elements into a sort of pure design situation, and so I began experimenting with different films and printing methods and have continued to do so.
For whatever reason I can’t bring myself to shoot B&W digital. Perhaps it’s too easy, I don’t know, but I keep my digital photography, colour, and film photography B&W. For the moment anyway.
I agree that B&W can be a better way to present many images. However, some of the improvements noted in your post come largely from completing the post processing on the image and I think some of these would be excellent (perhaps even better than the B&W) if the color PP had been completed. There are stark changes to contrast and plunging of the dark/shadow levels in some of these B&W images that isn’t present in the color counterparts.
When I shoot film (either 35mm or 120), I tend to shoot in B&W and I think it’s very useful to think of images as either color or B&W at the time of capture. One reason it has been such a focus of the photography learning process for decades is that it forces you to think purely about light intensity – bright and shadow. Evolving to using filters for B&W film photography then moves one into manipulating light intensity within the color spectrum (some post-processing tools like Nik Silver Efex allow you to replicate the process of using color filters when converting images to B&W).
B&W post processing can be fun, educational and many times net a better picture, but it can’t replace the process of envisioning an image in B&W while you are taking it. Those new to B&W might need time to develop the skill of viewing a scene as simply light intensity and not color.
Your very good point is one I alluded to explicitly in the text (6th paragraph) and have provided examples to illustrate it.
Alpha Whiskey, A comment and a question.
I have not used film for many years except the occasional large format film I have to produce for some of my work. As a rule I do everything in digital and do convert many of my exposures to B&W as I still love the look of that medium. In days past an unwritten rule for B&W or Color film was to expose for the shadows in B&W and the high lights in Color.
My question to you Sharif is do you alter your exposure in camera for these two situations or do you just expose for the image present and adjust in post processing.
I have been adjusting in camera for the final outcome and find it works for me.
Hi Mike.
Generally speaking I try to aim for a middle ground in both situations. It really depends on what I’m shooting. If I’m shooting in B+W then I lean towards exposing for the shadows in camera, unless I want a silhouette or deep contrast and then I expose for the lighter areas. In colour I lean more towards exposing for the highlights.
I really don’t like blown highlights in either situation as that’s just missing information and can’t be recovered in post anyway. The dynamic range of my EM5 and especially my Nikon D600 are good enough that I have some latitude in the highlight detail which I can recover in post should I need to. One has to know their own camera to know how much freedom they have. It really all depends on the situation and how I pre-visualise it.
I don’t like to think that I would need to adjust the exposure too much in post as I want to believe I have the ability to get it right in-camera on-scene. But the reality is that sometimes I have to :)
I’m not sure if I’ve answered your question well, but I hope this helps! :)
Regards,
Sharif.
Sharif,
Actually, you answered my question exactly as I expected. Personally, I am not strong in the arena of post production. I’m learning but have a long way to go. I’ve learned to use Light Room, Matrix, and Photo Efix Pro; the last two to a minor degree but I’m working one it.
I tend to use the digital camera in exactly the say way I used film cameras. Mostly in manual and then in A or S priority when necessary. I carry a hand held light meter everywhere and use it often. One great feature of the digital camera age is the in camera histogram which I will look at frequently when the exposure is critical. I don’t keep blinkies turned on because I find them distracting but after so many years I already know when I’ve overexposed and blown highlights. Ticks me off when it is street scenes involving people, not so much for static shots. I can recreate those but I can’t go back and ask the folks I photographed to walk back a scene. LOL
I truly expect anyone with film experience to create exposures in a similar manor once the final image is set in the photographers mind.
I would like to hear comments from some of the other folks here regarding their exposure technique in digital as opposed to film or do we all work the same way.
I agree that the exposure needs to be created in camera. Post production is for tweaking what we intended to create in the first place. Although I marvel at the expertise of some photographers who can manipulate post production software to the nth degree, I sometimes look at a work of art and think….over photoshopped. But then I never did really get Dali either.
Many years ago, Siskel and Ebert featured all BW movies in one of their episodes of their movie review TV program, Sneak Previews. Ebert made an observation that rang true at the time and has guided my choice about converting an image to BW ever since. He pointed out that color photos are specific–Jim, age 9, at the beach–whereas BW images have a universal appeal–all boys at the beach. Even when photographing iconic images, say the Eiffel Tower, a color photo will be about MY trip to Paris whereas BW can simply be Paris. It is this sense of universality that invites the viewer to bring their own experience and participate with the photo that I find most appealing about BW. My thanks to Roger Ebert.
Wow! I never thought about it that way but it’s obvious now that you wrote it. I wonder why that is? Maybe that’s why I don’t really care for B&W; I attempt to invite my audience into the photo and B&W would be counterproductive.
Years ago someone wrote that to his way of thinking color in photography was nothing more than “visual chaos”. Though I feel this statement is overkill I have kept it in mind because often it is just that. Obviously when photographing a bouquet of roses you are after the color, on the other hand industrial subjects beg to be done in B&W. Often when processing in ACR when the image just don’t push my buttons converting to B&W brings it to life. It is simple to do or undo with ACR so many of my images get checked to see the difference.
I’ll gonna test b&w film (35mm). My concern is wich ISO (100 or 400) will give more dramatism to the image that I capture?
Frank, the choice of ISO for film will depend upon the decision for the final image. In years past, I would use Tri-x pushed to 1600 and developed in Rodinal 1-9 instead of the 1-16 recommended for Tri-X at 400 ASA or now ISO. What I wanted to achieve with that process was the grain in the photograph. Just remember once you hot soup film, you can’t go back.
Certainly, the lower the ISO for film with represent the same as a lower ISO in digital. My suggestion to you is experiment with digital by pushing the ISO and shooting b&W to see what effects you get then transfer that experience to film.
Thanks Mike for the comment. I allready start as you indicated. Hope to get hice results.
You’ll have fun with it. It is also good to give yourself assignments to experiment with different effects and color filters for B&W in different film speeds. I once did an experiment with 8×10 sheet film in Germany and developed the film in X-Ray developer. This process actually turned the negative to a positive when placed against a light box.