If you’re like me, you’ve planned a trip, had visions of coming home with an SD card full of National Geographic images, but ended up with a hard drive full of vacation snapshots. What can you do to better prepare for a trip when you really want to spend some quality time behind your camera? Consider taking a photography tour. You will find yourself among a group of like-minded people, all of whom are excited about spending several days dedicating time to photography. A tour can be a wonderful learning environment. And if you take the time to do some research and planning, you will end up at the right spot, at the right time, and you will come home with some exceptional photographs.
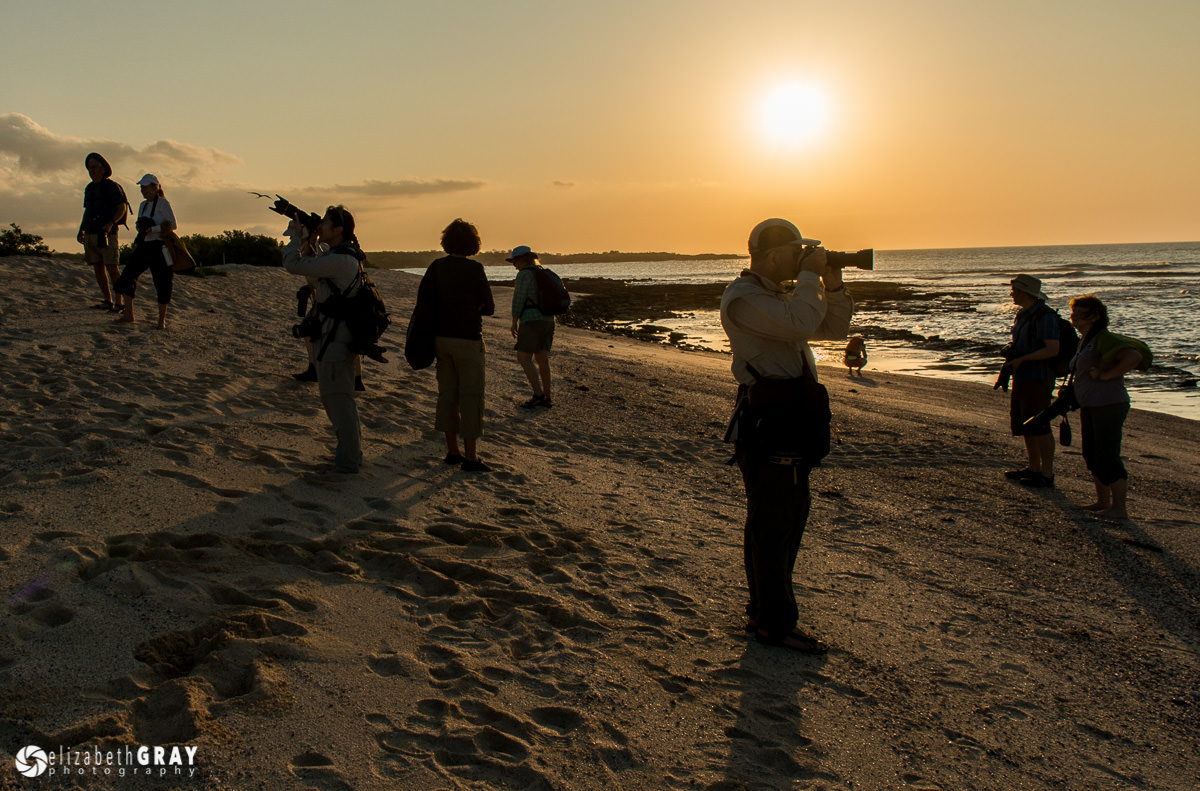
Table of Contents
Choosing a Photography Tour
Of all the things to consider when choosing a photography tour, the first is location. Not all tours have to be to exotic, distant locations. A tour near your hometown can give you well deserved time to immerse yourself in photography. All too often the best-laid plans to spend a day shooting get interrupted by work, errands or other disruptions. On a photo tour, your time is focused (mind the pun), on photography.
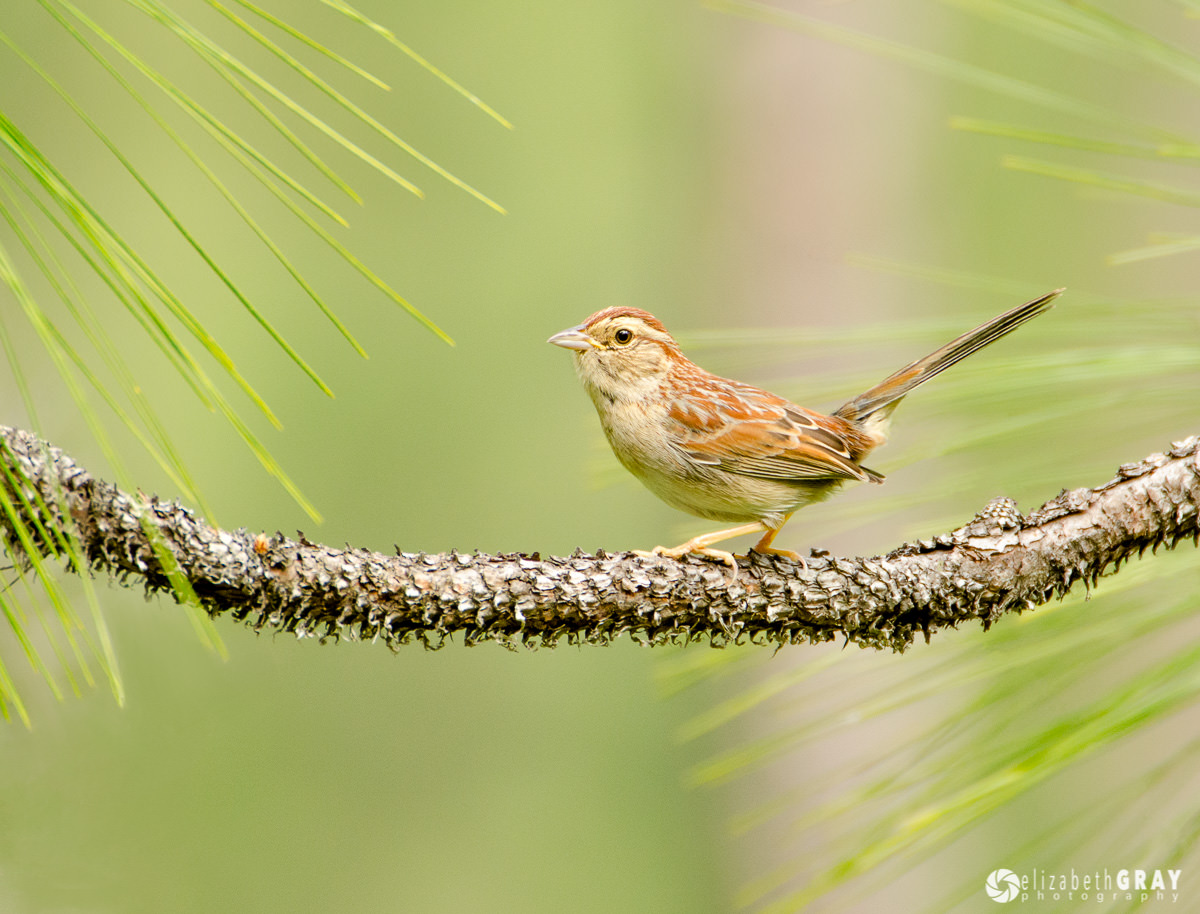
This shot was taken only a few miles from where I was living in Houston while on a birding photography tour. Bachman’s Sparrows are very elusive. Without an experienced photography guide, I never would have found this extremely secretive sparrow which likes to hide in the underbrush.
Cost is a big factor in tour choice. Tours to the same location can vary greatly in price, which makes comparison hard. When you start searching, look closely at the tour descriptions. For most tours you will be responsible for getting yourself from your home to the tour location. However, the costs of accommodation, meals, entrance fees and transportation during the tour may or may not be included.
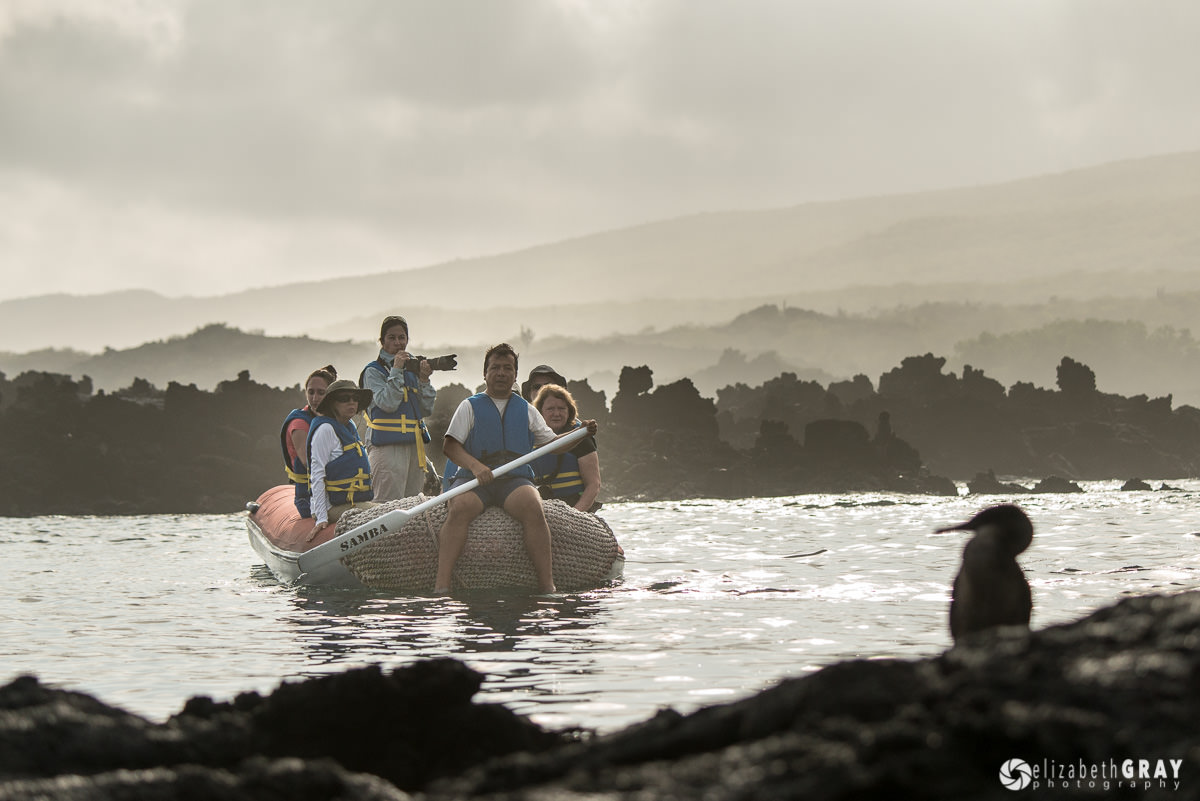
Another consideration is group size or student/leader ratio. One of the big advantages of a tour, compared to a self-organized trip, is that you get photography instruction. Make sure that the group size is not so big that it becomes hard to ask questions and get help from the guide(s).

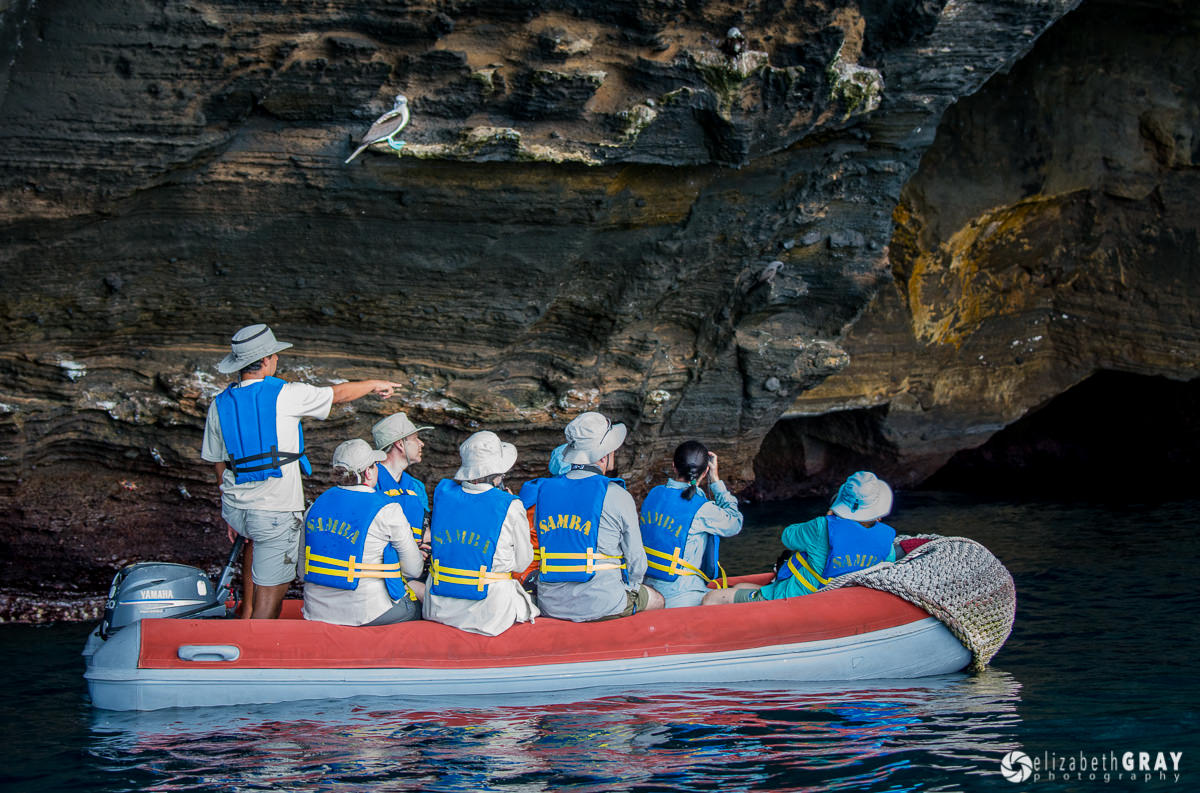
Too many photographers on a very small boat!
I classify photo tours into three categories:
- Workshops
- Educational photo ops
- Photo only tours
Workshops combine shooting time with dedicated classroom teaching time. You can expect some combination of lectures, instruction on post-processing techniques and supportive critiques of your images. Of course, workshops also give you plenty of opportunities to ask questions when you are out in the field.
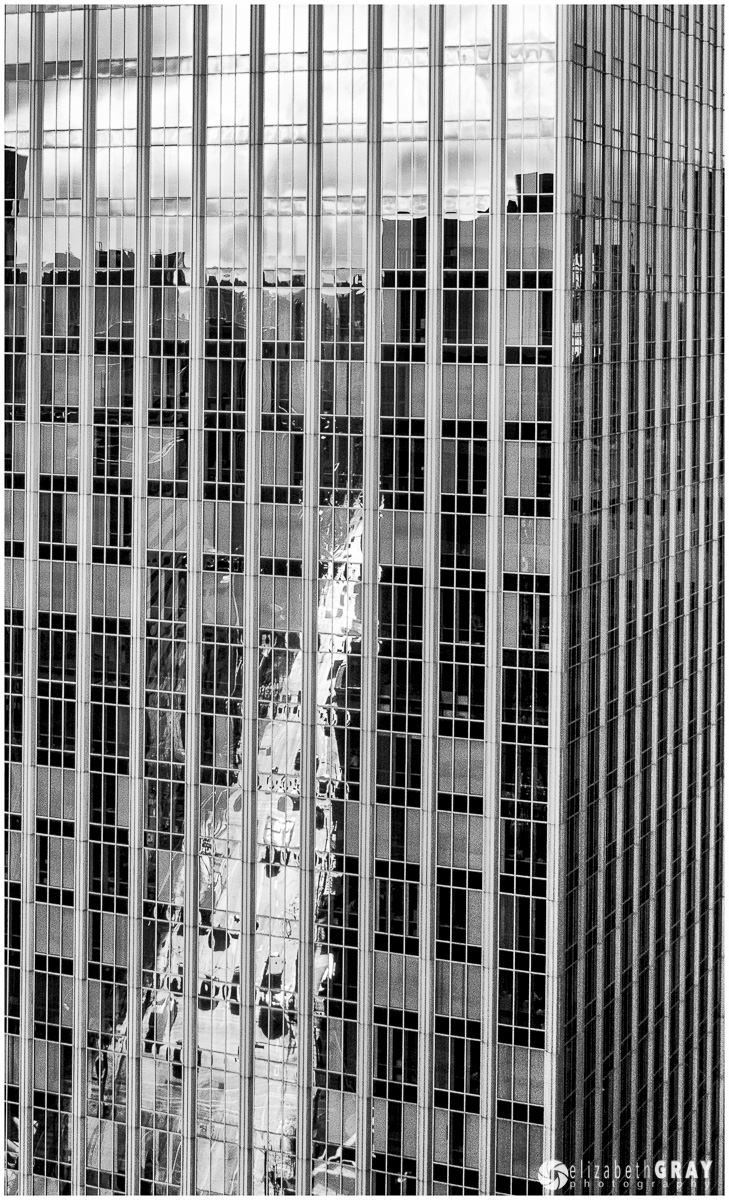
This shot was taken during an architectural photography workshop I participated in. We alternated shooting time with classroom lectures.
Educational photo ops do not offer separate instruction time. However, the leader is readily available in the field to answer questions about composition and camera techniques. Some may offer critiques as well.
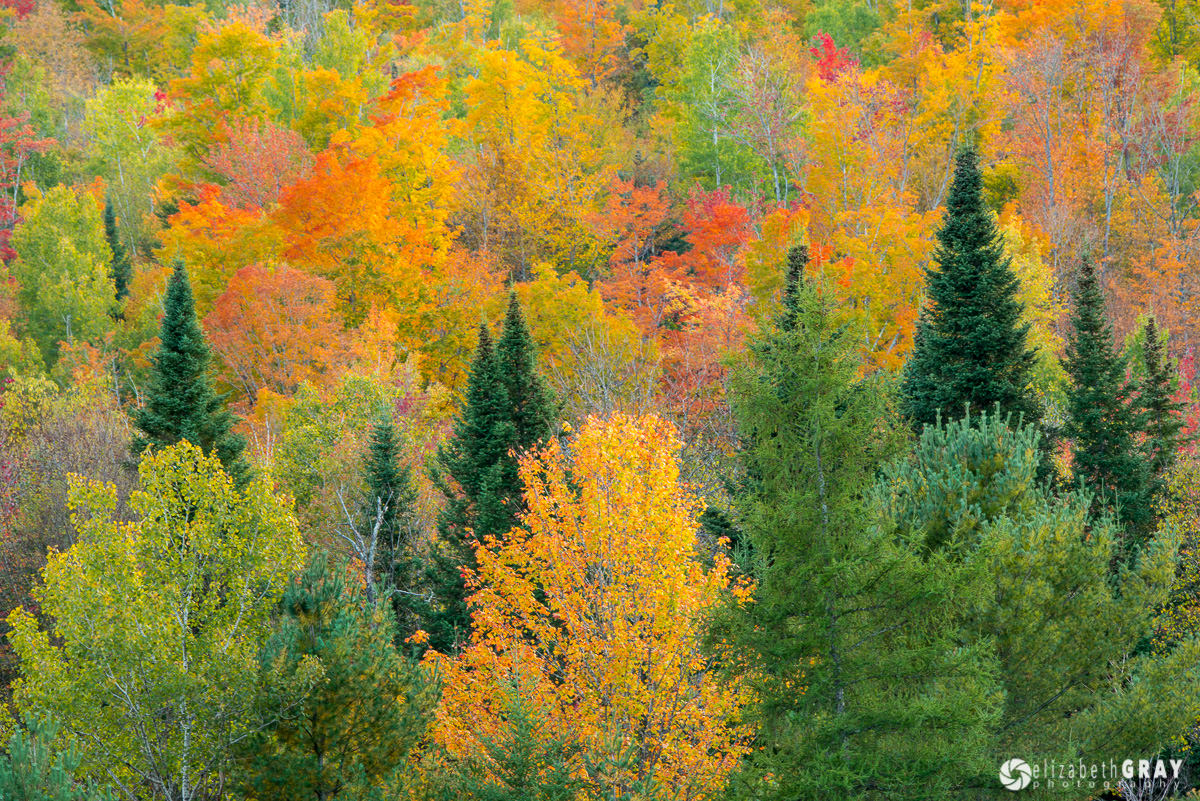
With seven of us on this fall foliage tour in New Hampshire, there was plenty of opportunity to ask questions while we were shooting.
The last type, photo only tours, simply get you to the right place at the right time. This type of tour is to be avoided! If you are paying top dollar for a photo tour, you should not be bankrolling the leader’s trip so he/she can pad their portfolio. Make sure you ask if the guide will be taking pictures too. It is one thing for them to bring a camera to show you how to compose, or how to set up. It is another for the leader to be so busy taking his/her own images that they don’t have time to answer your questions. Two years ago I was fortunate enough to take a photo tour to the Galapagos Islands. It was a once in a lifetime opportunity. However, one of the instructors seemed more interested in taking her own images than helping the paying clients. There were several instances where she asked me (or others) to move because we were in her frame! Luckily the other guide was extremely knowledgeable, and freely shared his knowledge with anyone who had questions.
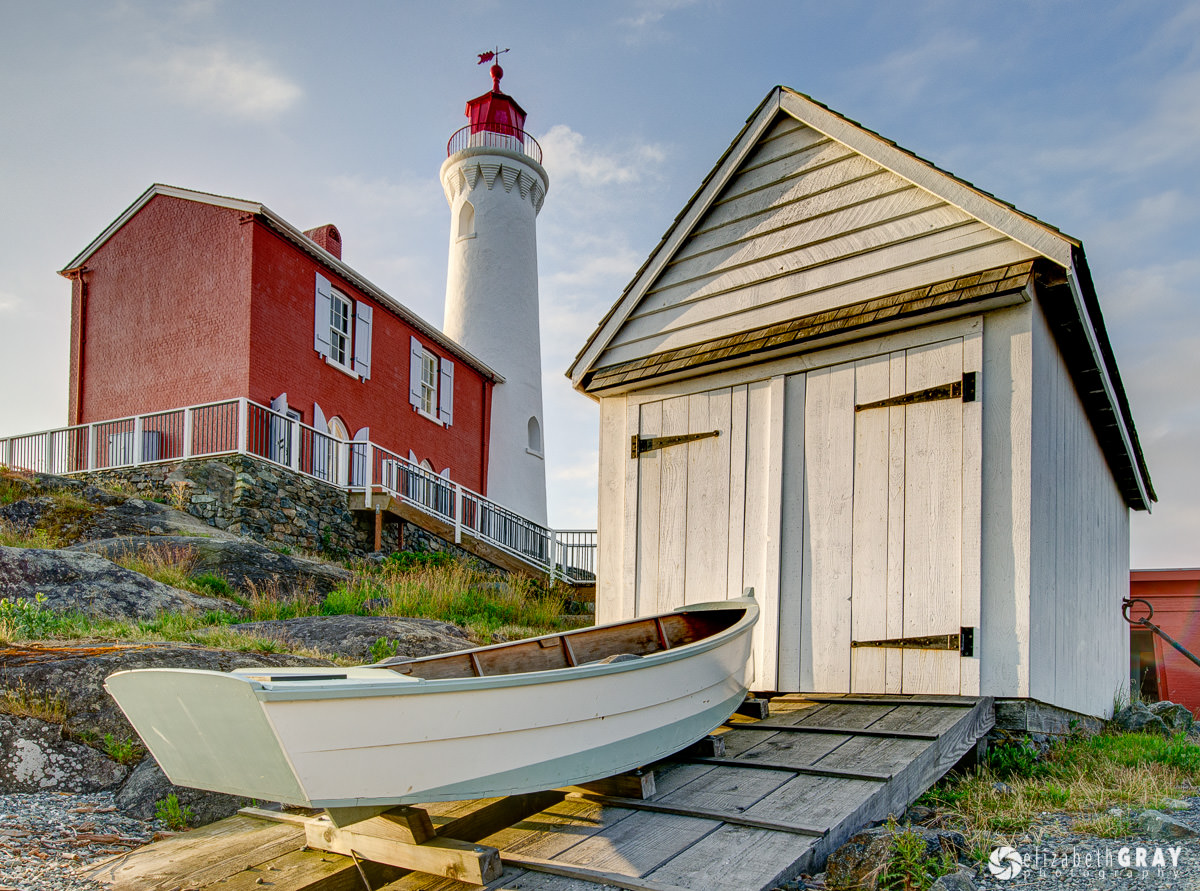
Our photography guide got us to the Fisgard Lighthouse in Victoria just as the sun was rising.
If you are a beginner or intermediate photographer, a workshop tour is a wonderful learning experience. If you are more advanced, you may find that it is not worth paying extra for classroom instruction. An educational photo op tour may be best for you. Regardless of your ability, a tour that includes group critiques is invaluable. Having an opportunity to see other photographers’ images can inspire all kinds of creative ideas. Getting your images critiqued by a professional helps you understand your photos’ strengths and weaknesses. This can elevate your photography to the next level.

When researching tours, look for detailed itineraries, with some built in flexibility. Be wary of tours that shoot from dawn to dusk. They can be exhausting after a couple of days. Make sure that you pick one that has some down time, usually during mid-day when the light is not at its best. Use some of that down time to process some of your images. This will give you the opportunity to ask questions about composition and technique before it is too late and the tour is over.
Lastly, conduct some research on the professional leading the tour. How long have they been doing this tour or been in business? Do they have their own website? If so, check out their portfolio. Have they posted photographs from past tours? Are these the types of images that inspire you? If they are, then that leader may be a good fit for you. If not, check out some other tours. And of course, read reviews from past clients.
Gear
So you’ve selected your tour and paid your down payment. Now it’s time to figure out what gear you are going to take. Choosing the right gear is a balancing act. You want to make sure that you have enough equipment to get the shots you envision, but not too much that carrying it breaks your back. You may also be limited by airline baggage restrictions. Most airlines allow you to carry on one bag and one small personal item. Personally, I never check my camera gear, the only exception being my tripod and head. So that means my camera, lenses, hard drives, and all the bits and pieces that accompany them, must go in a camera bag small enough to fit in the overhead bin.
Choose lenses based on the type of shots you plan to take. Don’t try and take it all! When I pack for a wildlife trip I bring very different lenses than if I am packing for a landscape or street photography tour. If you will be doing a lot of hiking, you will want to travel lighter. For trips where I know the tour involves short walks, and we won’t be far from a vehicle, I may carry a larger selection of lenses. Will you have the opportunity for close-up shots? Instead of a dedicated macro lens, consider extension tubes or a close-up filter. If weight and space are at a premium, use a versatile all-purpose zoom, such as a 24-120mm or 18-300mm, instead of several lenses that cover the same range. Regardless of which lenses you take, challenge yourself with the gear you have and do not lament the gear you left at home!
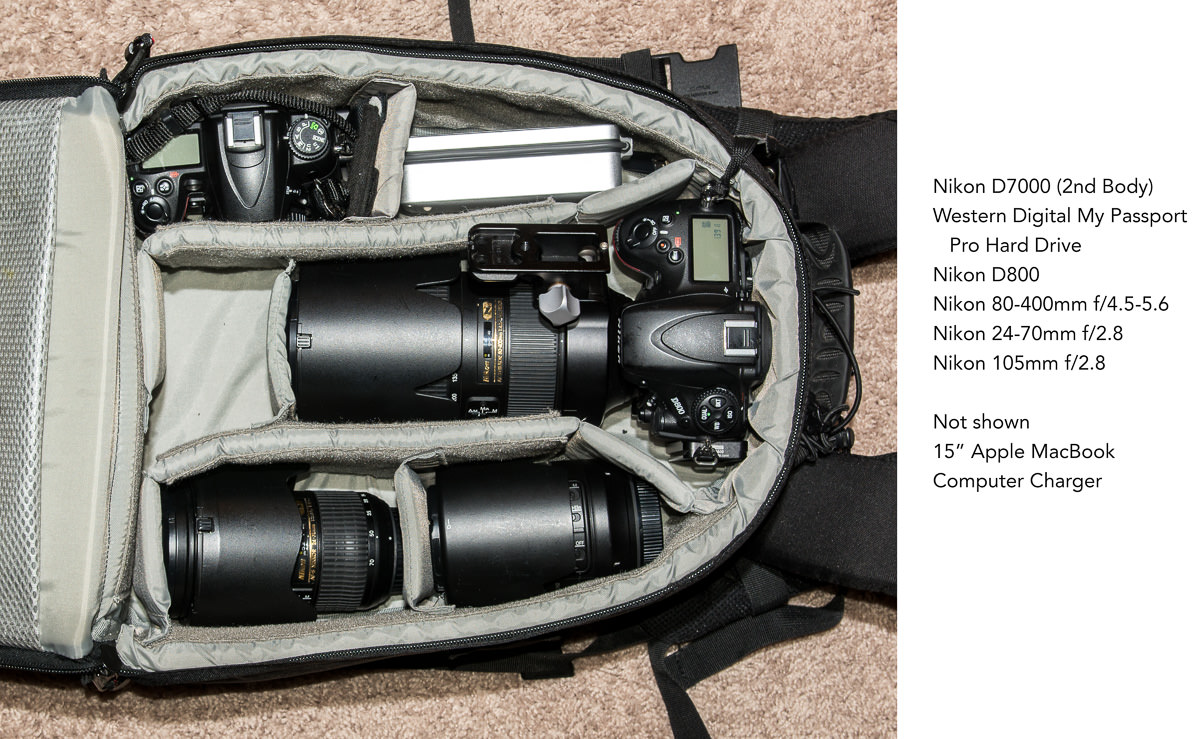
As for cameras, I recommend taking two bodies. There is nothing worse than investing in a photo tour, only to find that your camera has malfunctioned. Even a point-and-shoot can act as second body. And, they have the added advantage of being small enough to keep in your pocket for casual shots, like in a restaurant or on the plane when you don’t want to pull out your full-size DSLR. Another option is to rent a second body to take with you. A rental body is a wise investment for those once in a lifetime bucket list trips.
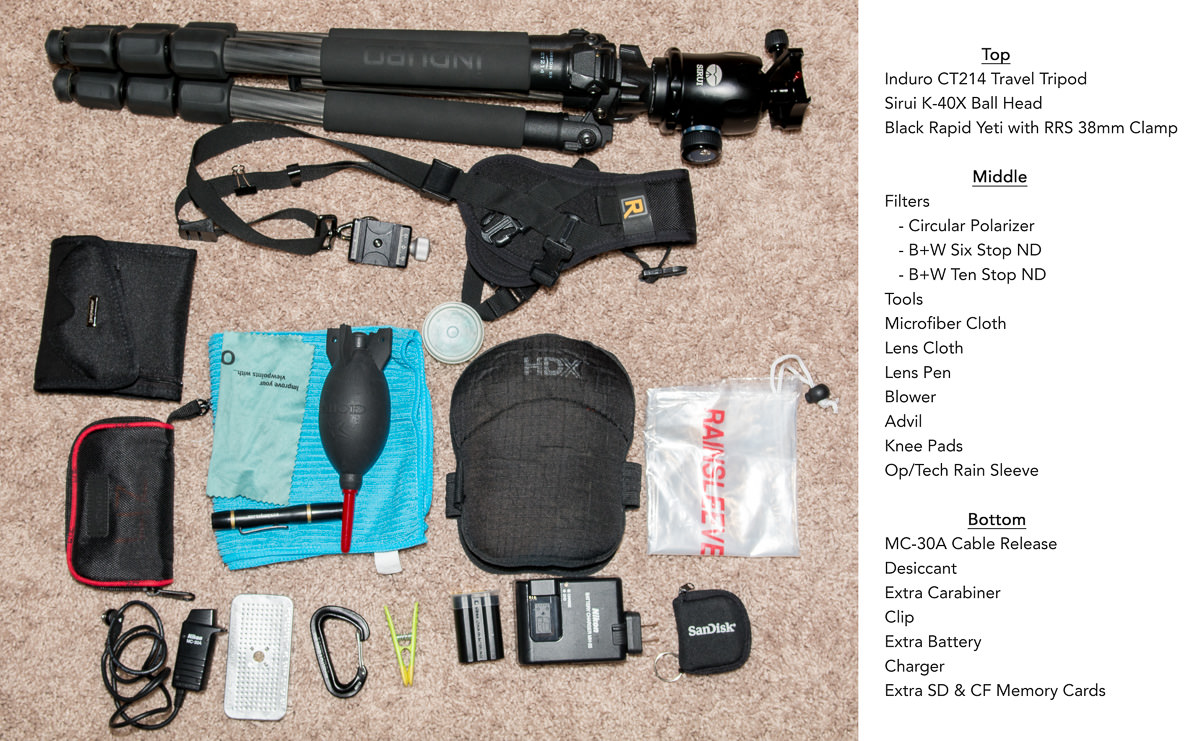
Besides a camera and lenses, don’t forget memory cards, your computer and an external drive(s) for backups. And if your computer does not have SD or CF drives, you will need a card reader as well. Other necessities include:
- Batteries and charger.
- Protective filters, circular polarizers.
- Rain sleeves – the inexpensive plastic ones from Op/Tech work great.
- Camera strap – I prefer a sling type strap to a neck strap.
- Lightweight travel tripod, monopod or beanbag if you will be doing any low light shooting or long exposures.
- Cell phone with PDF copies of all your instruction manuals.
- Flashlight or headlamp for night shots.
- Lens blower, lens cloth, lens pens and a microfiber cloth for cleaning your gear.
The best investment I ever made was in a $10 pair of kneepads from the hardware store. They are invaluable if you like to get down low to shoot from interesting perspectives. They are always in my camera bag!
A flash is another piece of gear that you may want to consider packing. However, today’s cameras have very good high ISO capabilities. I prefer to use natural light and bump up my ISO instead of packing a flash. This leaves me more room for another lens!
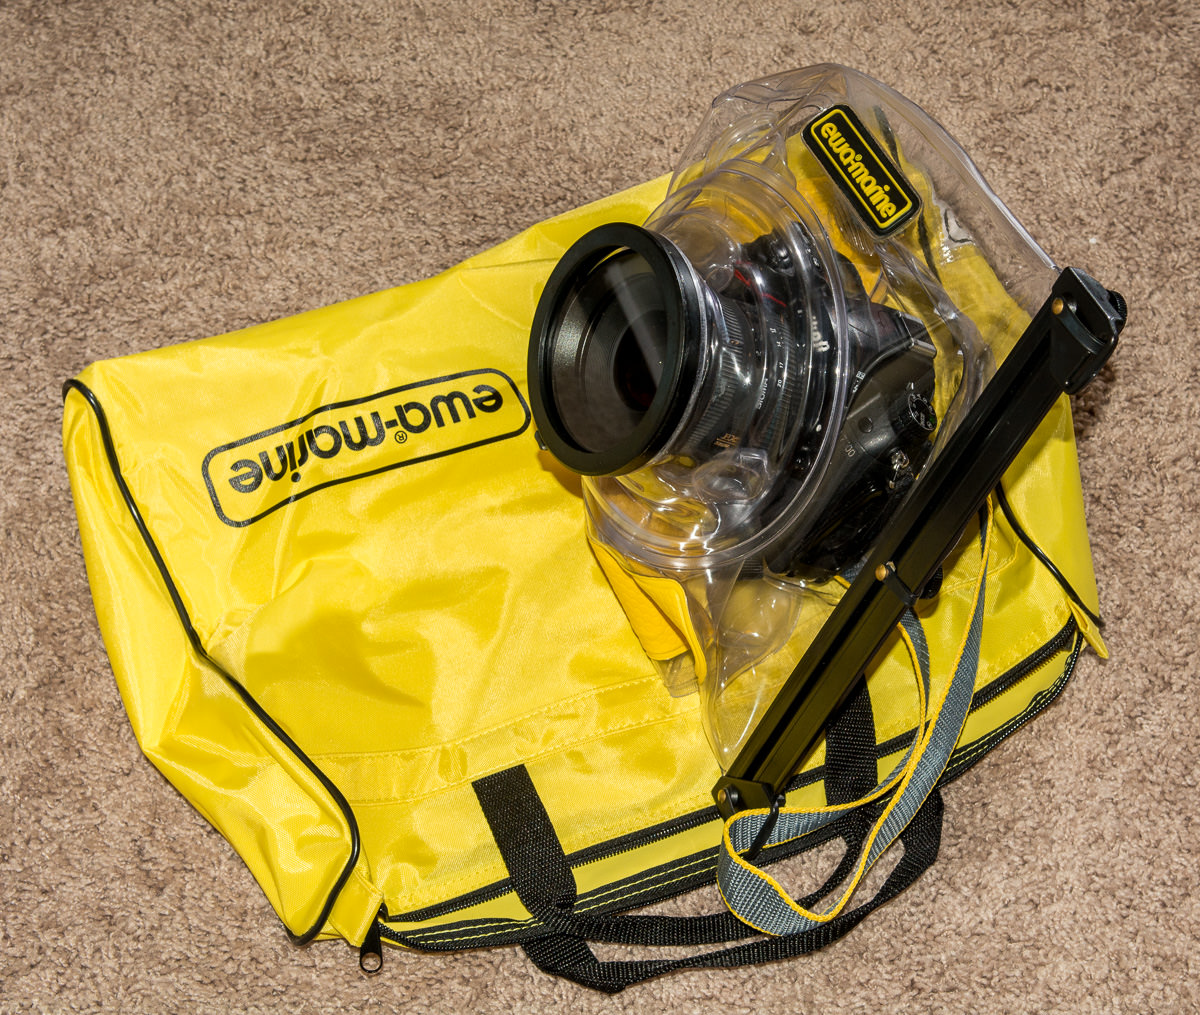
Will you have the opportunity to do any underwater shooting? Instead of investing thousands of dollars on a professional housing, use an underwater rated point-and-shoot camera or a GoPro. On our trip to the Galapagos, my husband borrowed a GoPro and I used an EWA marine bag for my DSLR. The EWA bag cost around the same as an underwater point-and-shoot, but much less than a professional housing. It worked very well and let me capture RAW files using my Nikon D7000 and Sigma 10-20mm f/4-5.6 lens.

In addition, check with your tour leader. They have had the advantage of visiting your tour location several times (at least you hope they have). Your guide will have a very good feel for what equipment you will need, and what you need to leave behind. They will gladly provide you with a suggested gear list before you go.
Taking time to research your tour options, and discerningly choosing the gear you want to take with you are the first steps to a successful photo tour.
You are excited about your upcoming photo tour and have narrowed down the equipment you want to take with you. But what should you do next? How can you load the odds in your favor so that you come home with winning images? On the previous page, I talked about how to choose and pack for your photography tour. In this section, I would like to suggest some ideas for pre-tour preparation and on-tour tips. These suggestions will help you come home with photos worthy of a place on your wall.

Things to do Before You Leave
Practice!
Firstly, know your equipment! Do not bring a new camera on an African Safari if you are not intimately familiar with all its features! Make sure you can quickly change ISO, focusing modes, metering settings and compensation without having to look through your instruction book, or fumble through menus on the back of your camera.
I consider myself fluent using my Nikon D800; however, on our trip to the Galapagos two years ago I decided to shoot some video. Although I am very competent on the still photography side. I can change settings on the fly without lowering my camera from my eye. I dropped the ball on the video side. I wasn’t even sure how to start recording a video! I wasted precious time fumbling through various settings, missing opportunities. In addition, I did not realize that autofocus is next to useless for video on my camera, and that manual focus would produce much better clips. I did get some video clips on that trip, but most are out of focus and very jumpy.
Here is a clip of some very bad video! I am posting it here so that others can learn from my mistakes! The only positive thing I can say about this clip is that it evokes different memories than my still shots do. And, it reinforces that I need to practice!
Knowing your equipment also means holding a dress rehearsal, especially if you will be using something new, or a piece of equipment you haven’t used in a while. If you have never used a quick release plate on your tripod, practice taking your camera on and off. If you have never changed a lens outside with no place to put your gear down, practice in your living room. Any scenario you are not fluent with, practice before you leave.
If you read Part I of this article, you will know that I used an EWA Marine Bag to shoot underwater images with my DSLR on our Galapagos trip. This was a new piece of equipment for me. Before we left I practiced taking my camera in and out of the bag. I tested the enclosure in the sink! I did not want to find that it leaked during my first time snorkeling in salt water! I took my camera to the local pool and tested it there. I learned before I left what lens settings worked best and how to change them underwater. More importantly, I learned that I needed to change some settings on my camera before sealing it in the bag. I had to remove back-button focusing and return focus to the shutter release, and I preset my ISO to 400. I learned a valuable lesson about floatation. Unlike professional housing, the EWA Marine Bag is very buoyant! Without my dress rehearsal at the pool, I would not have figured out how to get around this. Practice, practice, practice! I can’t stress this enough!
Camera Manuals
Another thing you should do pre-tour is download PDF versions of all your instruction manuals onto your cell phone. You never know when you will need them. These will be much easier to carry around than the paper copies. And PDF files are searchable, so you will be able to find answers to your queries faster than thumbing through a traditional book.
Clean Your Gear
Thirdly, make sure you have thoroughly cleaned and checked over all your equipment. When you are cleaning your lenses, don’t forget to dust off lens caps too. They have a habit of collecting lots of dust and grit from your pockets, which can be transferred back to a clean lens. Clean your sensor as well. If you are not comfortable doing this yourself, take your camera into a reputable dealer and get them to do it for you.
Shot List
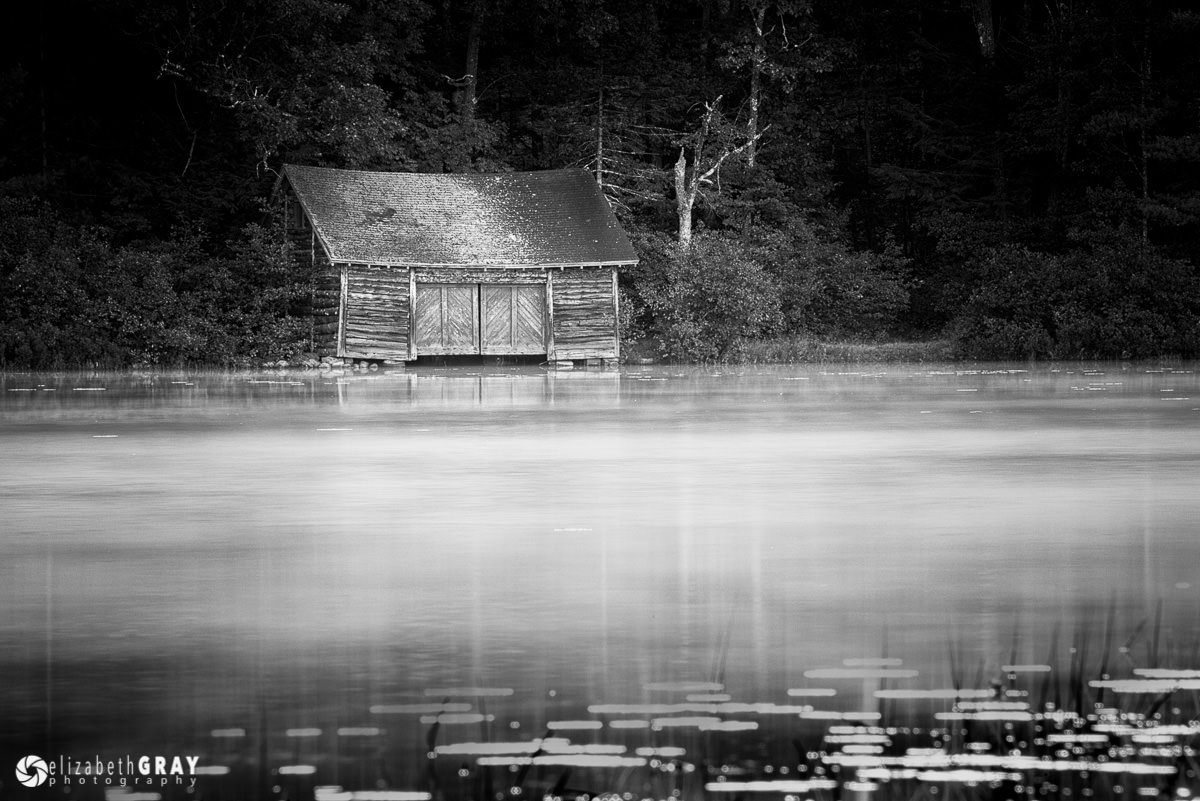
Another bit of homework to do before you leave is to search the Internet for photographs from the area you are visiting. Make notes on photos that inspire you. What vantage point was the photo taken from, what type of lighting do the photos use, what are the subjects, and compositions? Create a target list of photos that you would like to capture during your trip. The purpose of this is not to duplicate images you’ve seen, but rather give you inspiration for your own photos. Check this list regularly during your tour.

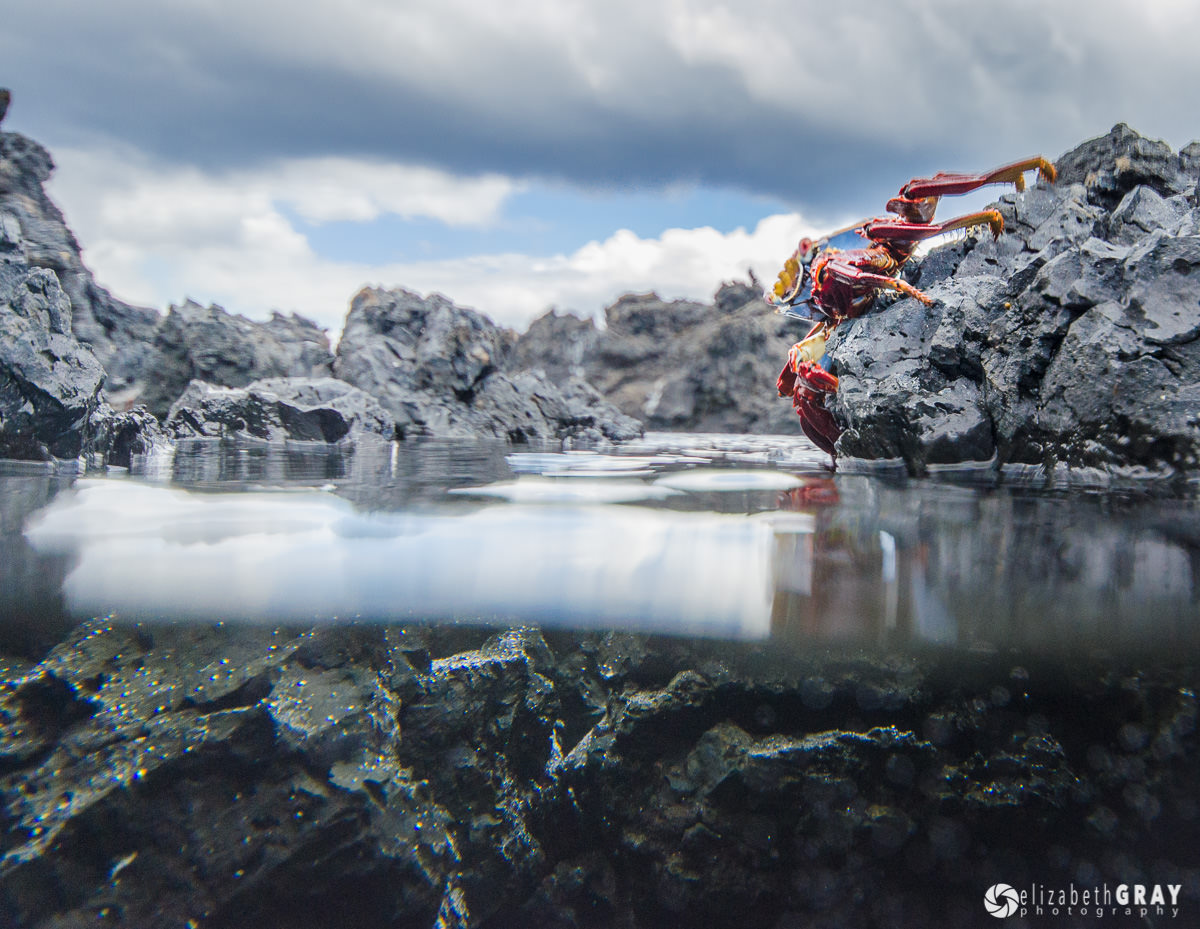
On this trip I had water reflections on my shot list.
With the above being said, don’t hold yourself to just your shot list. Be prepared to improvise. I was very excited about a tour we took this past October to New Hampshire. I had always wanted to visit the Northeastern U.S. during the fall. I had a shot list of images I wanted to capture. However, this past year the weather was unusually warm. Consequently, the leaves were not at their prime during our tour. Instead of feeling disappointed, I turned my attention to smaller intimate details instead of sweeping vistas of red and yellow. As a result, I came home with images I was more than happy with.
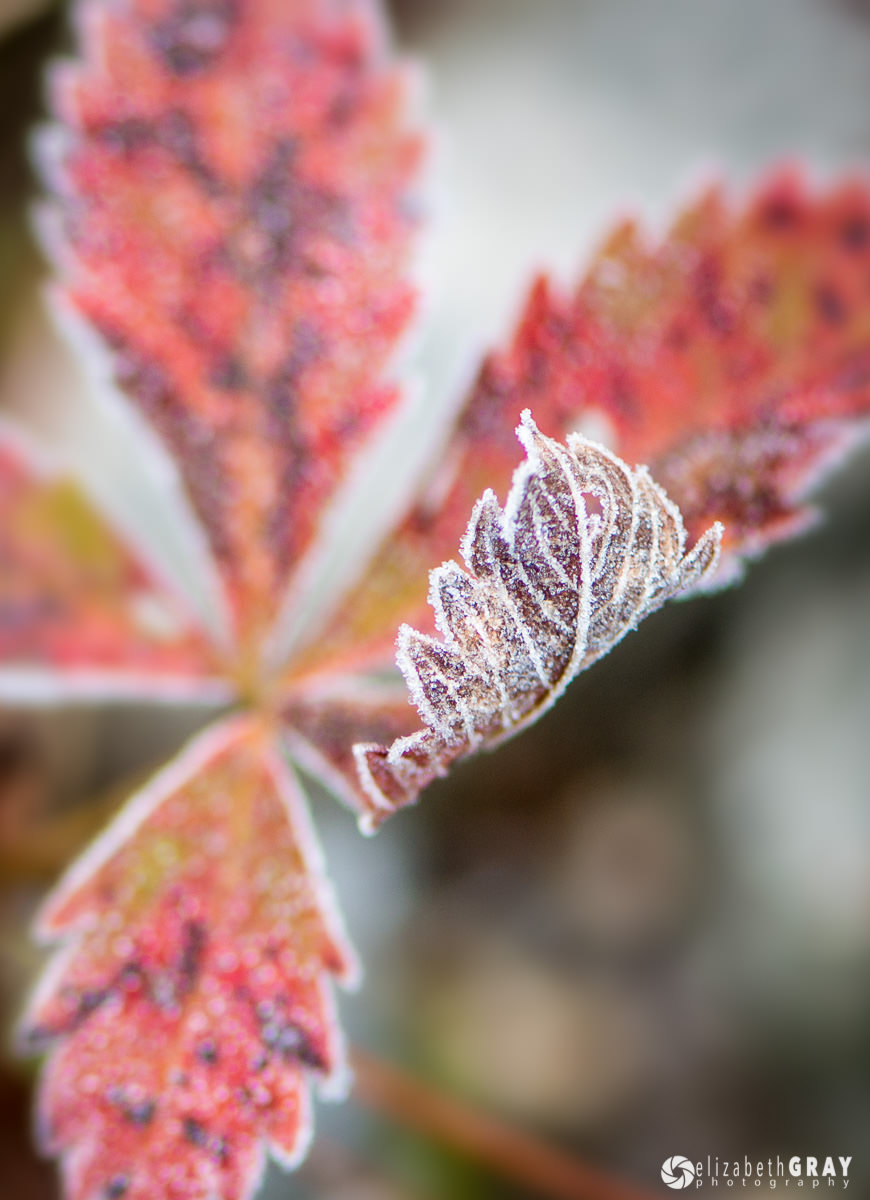
Small details instead of grand vistas.

A single red maple with gold foreground amongst the green.
On Your Tour
Preset Your Camera
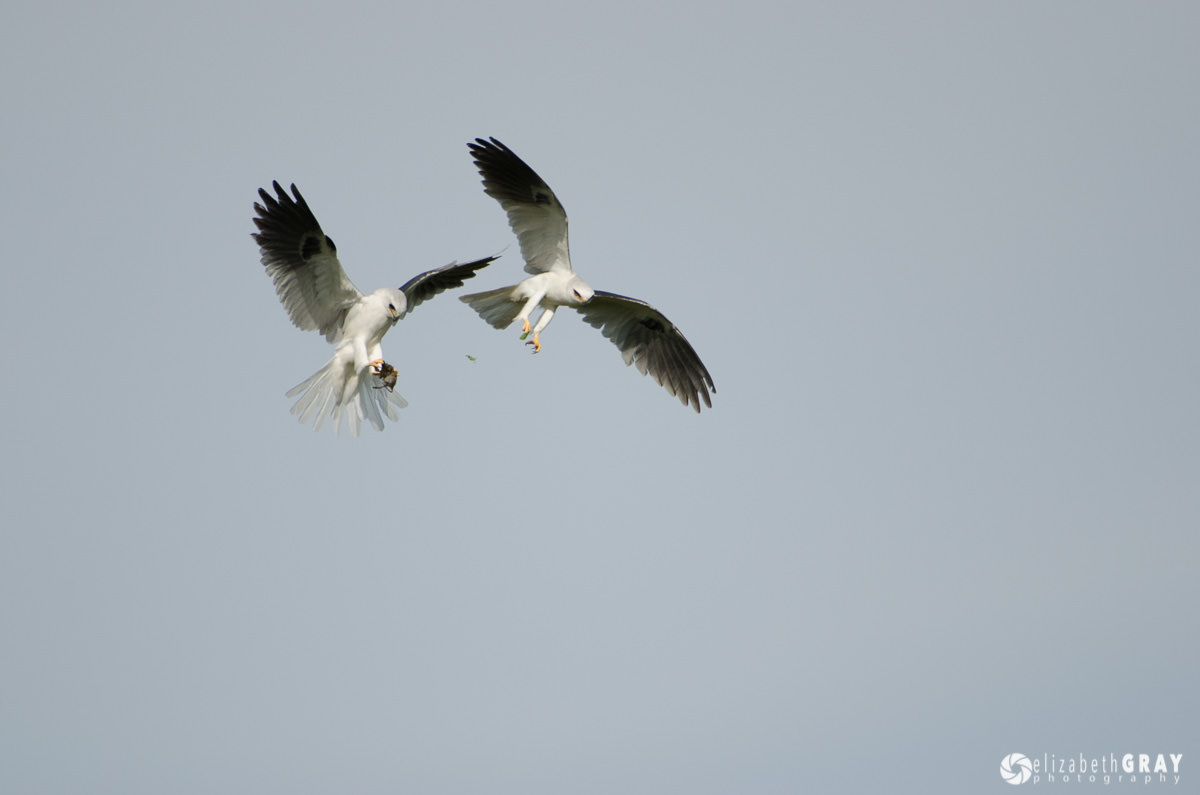
Before you head out each day, try to anticipate what types of subjects you will encounter. Preset your camera settings so you are ready for your subject. Is your ISO high enough for the available light? Do you need a fast shutter speed or a large depth of field? What type of focus mode would be best, spot or evaluative? Continuous focus or single shot, which would be the most appropriate? How is your white balance set? This is especially important if you are shooting jpegs. Again, be flexible, and be prepared to change settings as conditions or subjects change. This type of preparation can be the difference between capturing that bald eagle as it dives for a fish, or catching the light of a storm just as a rainbow appears.
On a birding trip I took while living in Texas, we noticed a pair of white-tailed kites out the window as we were driving between shoot locations. We pulled over and jumped out of the van to take some shots. As we did, the male kite dove down and caught a mouse. Then, while in flight, he passed it off to the female as a courting gift. The only thing I had time to do when I stepped out of the van was lift the camera up to my eye and start shooting. Luckily I had continuous focus, nine-point tracking, and a high enough ISO to get a fast shutter speed preset on my camera! You just can’t count on luck to be in the right place at the right time. It also takes some planning!
Using High ISO
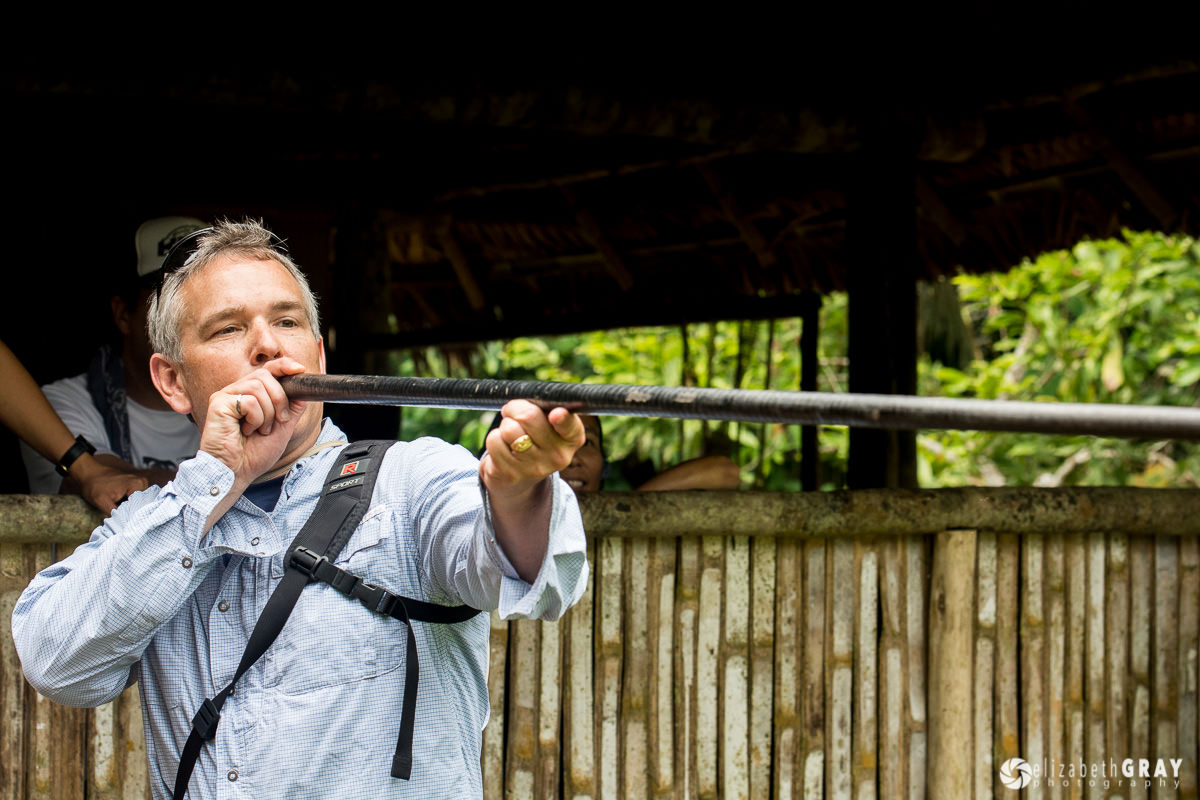
Don’t be afraid to jack up your ISO to get a shot. At some locations, you will not be allowed to use a flash or a tripod. Remember that today’s DSLR’s have very good high ISO capability when shooting in low light. Know the limits of your camera’s ISO though, and what level of noise you are willing to tolerate ahead of time. For me, I would rather capture a noisy shot taken at a high ISO than a blurry shot taken at too low a shutter speed. Or worse, miss the shot completely. As well, noise can often be mitigated using post-processing software (see John Sherman’s excellent article “How to Avoid and Mitigate Noise”). In this shot we were deep in the jungle with very little light. I’m glad I was able to capture this little marmoset monkey, even if the shot is exceedingly grainy!

Be Flexible
Be prepared to make the best of bad situations, think outside the box. Shoot close-ups, textures and patterns when your main subjects are not cooperating. Remember that powerful black and white images can be made when the light is harsh. The contrasty shadows during midday lend themselves well to black and white images.
Since the fall color was not cooperating, I chose to shoot in black and white.
On our Galapagos tour, we were returning to our boat from a land excursion one evening. We were traveling on zodiacs just as the sun was setting. Our cruise boat made a wonderful subject bathed in the warm light. Everyone was trying to get a shot of the boat. However, with our long wildlife lenses, and close proximity to the ship, it was not possible to get the entire ship in the frame. Many of the photographers gave up! This is when you need to think outside the box. Go for details! I zoomed my Nikon 80-400 mm lens to 150mm, and was able to isolate the bow and anchor of our boat. The moral of the story is: be flexible! Take advantage of opportunities as they arise.

Workflow
Don’t forget about good workflow habits while you are on your tour. At the end of each day download your images to your computer. Once this is done, make a second copy to an external backup drive. Once you are convinced that both sets of copies have been successfully saved, return your memory cards to your camera and format them. Formatting your memory cards in your camera will reset them to their factory settings. This adds the directory structure needed by your camera and image processor, and completely removes all the previous data. Simply erasing files or formatting the card from your computer does not reset this structure and can leave residue from old data. Although the odds are low, not formatting your memory cards in your camera may result in a corrupt card or the loss of photographs. You only have to have this happen to you once to recognize that it is worth taking 15 seconds to format your card in your camera. And yes, I am speaking from experience! I lost all the images from an SD card on a trip to England a dozen years ago! Since that incident, I always format my memory cards in my camera every time I replace them. I have not run into any issues of corrupt files or lost photos since.
Make sure that you take care of your equipment on the tour. Wipe down your gear each night and clean your lenses. This is especially important if you have been near salt water. It is also a good idea to empty your camera bag and brush out any sand and grit that may have made its way inside while you were out shooting.
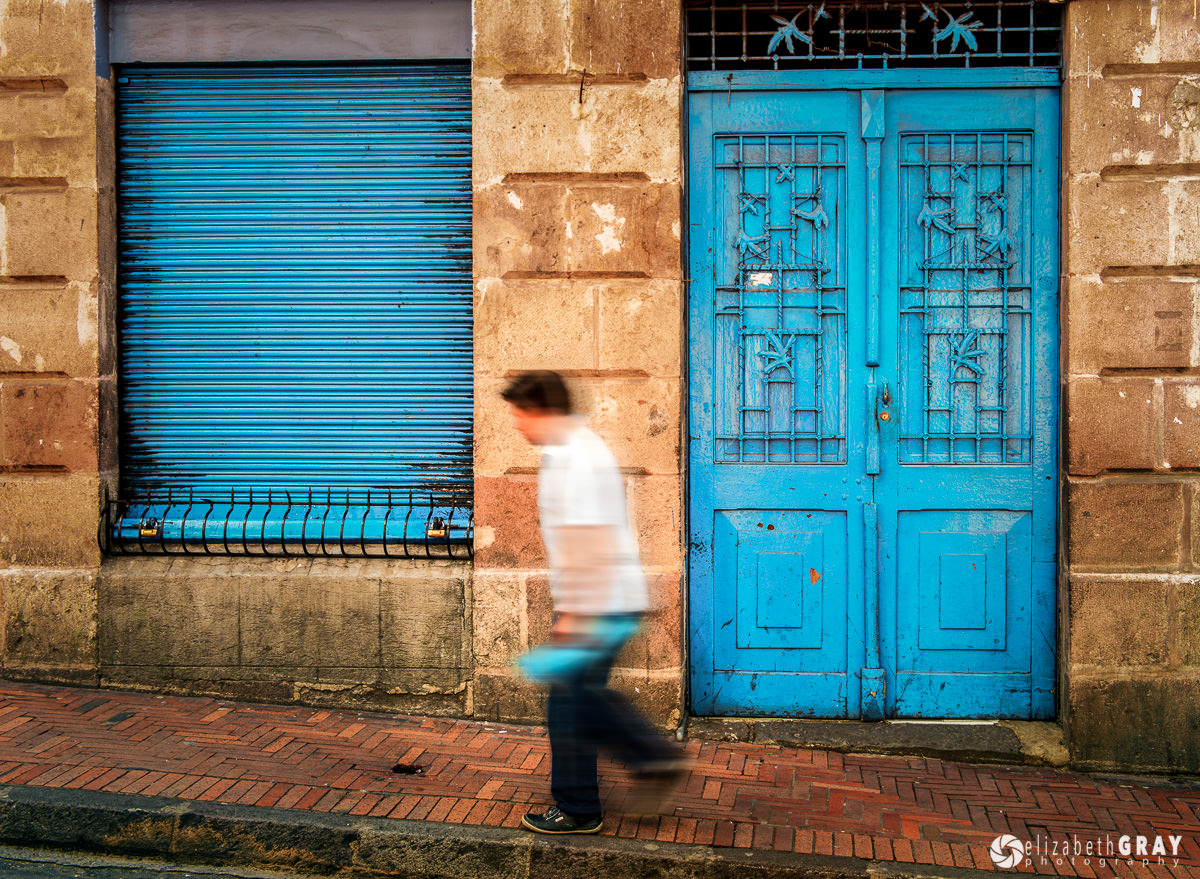
Include People
Make sure that you include people in some of your shots. I am not a portrait photographer. I gravitate towards images of architecture, wildlife and landscapes. While I’m on a tour I have to make a conscious effort to include people in my shots. Incorporating people adds a sense of scale and proximity that would otherwise be missing.
Shoot Video
Remember to take some short videos along with your stills. But note what I said above about practicing before hand! Short five to 15 second clips can be interspersed with still shots to add variation to a slide show. I have also found that video elicits different memories than stills do when I look back on my images post trip.
Here is a very short clip shot with a GoPro by my husband. The video does not have to be an academy award winner. You just want to capture moments that have special meaning to you, that stills alone can’t record.
Shoot Moments
Not all your shots have to be “National Geographic” type captures. Document the trip as well with pictures of meals, getting ready to go on excursions, photos of your hotels. These are the shots that bring back the most intense emotions and feelings of the tour once you are home and reflecting on your trip.
5.8) Enjoy the Experience
I can’t stress this last point enough, get out from behind your camera every once in a while! On a tour, especially to a distant location, there is so much to see. Slow down and enjoy it. This may be a once in a lifetime experience. Participate in rituals, touch and feel things, talk to locals, take in customs. Sometimes it is best just to breathe it all in! Make a conscious effort to do this every day. When you look at your photos years after your trip, they will trigger incredible memories.
Conclusion
Photo tours are not only educational; they are designed around getting you to the best locations in the best light. A good leader knows the tour area. He/she can guide you to all the best spots, taking the guessing game out of finding photographic locations on your own.
Do your research, pack appropriately, do a little pre-tour planning and you will have an incredible opportunity to bring home images that far exceed vacation snapshots!

In conclusion, when you get home, get your photos off your computer! Print some to hang on your wall. Or make a book. There are loads of easy programs and websites that will allow you to print a beautiful coffee table book of your adventure. Creating a slideshow is also a wonderful idea. What ever you do, look at them and enjoy the memories you made.
Great post. I would also add plastic filter removers. I use knock-out filters and I have found that I occasionally have to use them. Another item I use is a light and strong mini-tripod which supports 55 lbs.
Thanks for your suggestions Steve. What type of mini-tripod are you using?
Great article Elizabeth. I need to invest in the rain sleeves and knee pads. Just went to Dr. yesterday to find out what is causing my severe knee pain, and how to treat it. Luckily it’s just osteoarthritis and can be treated with cortisone injections. These will not make me gain weight like the steroids have, so once I start, and they feel better, I can get into some exercise routines to lose the extra weight from the steroids. But now that I know, I think it will be wise to preserve what cartlidge and bone I have remaining. So glad it wasn’t RA! Can’t wait to read more articles, and very excited that you are able to share your wealth of knowledge to others! I’m always eager to soak up anything I can, and I’m glad to have a new resource in Photography Life.
Thanks Becky! It’s hard to believe you can buy a piece of photo gear for under $10, but knee pads are well worth the investment!
Hi Elizabeth
Great article and thanks to all the readers who’ve added great ideas.
May I add a few from experience of several 7day+ photo trips:
* make a list of all your equipment and then check off what you need for each trip (so you don’t end up somewhere without a hex key, or a charger, or spare battery);
* some gaffer tape is always useful – wrap it round a pencil rather than taking the roll
* a spare lens cap (77mm fits most)
* a couple of large snap lock plastic bags, big enough for a camera body and possibly lens, if you strike really wet weather or if you are sandy terrain and the wind is howling; and
* I now take a lightweight power board because if you have the computer, the camera/s, the phone etc to charge, it’s easier, and saves carrying several adaptor plugs.
Thanks again for a great article – looking forward to the next.
Cheers
Janine
PS – and I love Cal’s “geek trousers” – amazing!
Great tips Janine! Thanks for sharing. Keep an eye out for Part II to this article.
Very useful information, particularly for someone like me who hasn’t yet taken a tour. Excellent advise about matching the equipment with the tour. Like many, I would initially consider taking everything. I am looking forward to Part II.
Elizabeth,
Great article and filled with useful advice. My wife and I added knee pads to our travel kit last year when going to the Tetons and Yellowstone and since have added one more item you may consider–a plastic trash bag. It weighs nothing and is great if you have to sit or lie on wet ground or snow in order to get that low shot or just take a break. Also, it can double as a poncho or backpack rain cover in a pinch. Looking forward to the second article.
Great idea Mike, and thanks for mentioning it!
Yes, I too, can definitely recommend knee pads for safari trips.
Kneeling on the ridged metal floor of a converted landrover or on rocks, to get low angle shots, can get very painful in a short space of time.
Also, a large bin liner is easily folded flat and tucked into a jacket pocket or camera bag. It can be a life saver when caught in a thunderstorm carrying a long, camera mounted telephoto. The whole combination can be quickly stuffed into the bin liner and the open end tied shut.
On one memorable occasion my vehicle got hopelessly stuck in mud in the the bush forcing me to sit out the night in an open vehicle in a tropical thunderstom. The camera mounted 500mm stayed on the gimbal, enclosed in a bin liner, in torrential rain, all night – and survived just fine.
Thanks Betty, the bin liner is a great idea! Thanks for sharing.
There can be a funny side (with apologies in advance to the overly politically correct).
On one occasion when wearing the big black kneepads we met another vehicle full of foreign tourists.
They looked at me in a bemused way and muttered amongst themselves.
Finally, their guide leaned across and asked my guide a question in the local language, Setswana.
My guide gave a very serious, poker faced answer.
Their guide relayed the answer to the tourists.
The tourists all looked terribly sad and and drove away sighing and shaking their heads.
What did they want to know?, I asked my guide.
They wanted to know why you had those black things on your knees, he answered.
What did you tell them?, I asked.
I told them you had no legs and that we had to us a winch to get you into the vehicle, he answered.
He is a wicked man.
We fell about laughing till we cried.
Lots of good practical suggestion in your article. I would have liked to see some information on the fees charged for most of these tours as they are not within most people’s budget. This is an extremely expensive luxury to be able to afford, often $1000 a day.
This might be a great place to critique/recommend/review workshops.
I have attended many over the years, and can highly recommend 3. (I would bet that Nasim’s are great, but have not yet had the pleasure)
1. Bill Fortney – Bill practically invented photo workshops with “Great American Photography Weekend”s ?20 years ago. I attended his workshops in Acadia, Banff, Yosemite, Olympic, Utah and Arizona, and Palouse. They are all excellent in every way. Bill works very hard scouting locations before you get there, getting good places to stay, making sure everything in the workshop works right, providing personal attention, and not going off to work on his portfolio. He is a true southern gentleman, an excellent photographer, and an exemplary workshop leader. He now runs “His Light Workshops”. He charges about $1000 for FOUR days. (You pay room and food in addition) Very highly recommended.
1, also. Jack Graham – Jack worked for and learned from Bill Fortney, and runs workshops every bit as well organized and executed as Bill’s. I attended the Eastern Sierra Workshop, his most famous, and look forward to attending more. LOTS of personal attention and very hard work from Jack. I cannot say that either Jack’s or Bill’s are better than the other. They are running workshops together, also. The best of the best. Same price, basically.
3. Joseph Van Os Photosafaris – More high end than the above, staying at first class hotels, etc., often with famous photographers teaching. Often all-inclusive (room and food), often in far-flung/exotic locations therefore more expensive ($1000+ a day), but they are, in effect, a travel agency for photographers which get you to wonderful locations, at just the right time, often with lodging and transportation you could not get on your own, with expert instruction (e.g. John Shaw, Jack Dykinga). I attended Denali (staying at North Face Lodge where you cannot drive your car, with our own buses to take us out before sunrise, etc), and Masai Mara in Kenya (the trip of a lifetime – expensive, and worth every penny).
On the other hand, would not recommend Moose Peterson, a legend in his own mind.
Monte, Anthony has suggested some great tours. There are lots of tours way under $1000/day. In fact, I would say that $1000/day is approaching the high end. Trips to Iceland, Antarctica, Africa and the Galapagos may be near that, but usually that price includes food and accommodation. Check for some local tours near where you live. I went on several birding tours when I lived in Houston that were just one day long. We met at the park at sunrise, toured and took pictures until sunset, and they were under $150 and limited to only four people. I learned a lot, met some locals that shared the same interests and got some great shots. Check with some of your local photography clubs too. They may be able to point you in the right direction. Also, check out some photo walks. I did not discuss them in this article. But they are great way to learn and meet others interested in photography, and they are usually free!
Old knees, knee pads & my geek pants.
My wife will not be seen with me when I have my “geek pants” on but for a trip to Iceland she bought a pair for herself.
www.cryeprecision.com/Produ…field-pant
They are made in NY and were designed for the army. They have 10 pockets, 4 leg lengths per waist size, cut the wind, water resistant, have pockets to insert the optional knee pads, and are very comfortable. When working to get the right focal length for a shot or trying out various feelings with different lenses, I’ve rotated 28-120, 70-200 f4, and 300 f4 lenses using the larger thigh pockets. Not comfortable to walk any distance with but very ok when standing at a tripod or moving around a small area. They are not cheep but I doubt that you will ever ware them out.
Cal
Love the pants Cal! I will have to get myself some! I’ll get a pair for my husband too. We can look like twin geeks!
Nice, practical article. I have not been on a guided tour but this gives me some good pointers,
Thanks for the informative article Elizabeth. Your advise is spot-on. I have gone on two photography tours — both relatively close to home. Although close to home one tour provided access to places I would not have been able to go on my own. The other — to a local wild animal preserve — provided a tour that stopped along the route so the group could take the time to take photos. This stop and go, slow speed, tour is not generally available on regular visits to the preserve. I think the most important thing to find out in advance is how much emphasis is given to teaching how to use your camera for the type of photography you will be using on the tour (landscape, macro, moving subjects, etc.) At least that is true for me, always a “beginner” and always eager to learn something new.
Good article,
Yes, we go on a lot of trips with JUST photographers, your correct it’s great when we all will have the same agenda on our plate. I have also been on lots of “non-photographer” trips and usually get someone in the group “wining “when I ask to stop for a special shot I see, or I’m holding the group up with setting up a tripod. So we either go by ourselves or with a group as your article suggests.
I love the knee pads ideal, I will definitely add them to my list. You want to get down to the subject level and that requires to be on your knees which I have 2 bad ones. I would mention (we all discussed in a backup topic earlier) to have at least 2 copies (I make 3) of all my pictures on the road, so I did not see an external HD in your bag, they are small and cheap. One more thing that happened twice in the last 20 years of travel. The Laptop died twice, Once I dropped it and it would not boot, a second time I got the Blue screen of death. Well now I only use a laptop with SSD in it AND I make a system start up disk and take that with me (it’s a cheap/slow 8GB SD card $5.00) It will not cure all problems BUT it will let your start your PC and download your pictures. Very cheap/small/light (SD card) and extremely useful if its required.
One more issue
If you flying, look at what types of planes you will be going on. I’m assuming you Do Not check your camera gear? When traveling to remote places you will usually end up on a small plane that does not have large overhead areas. For large planes I have an APE camera bag that will easily hold what your packing and will easily fit in any normal aircraft over head, I always pack my tripod in my checked suitcase. But for small planes these bags will not fit and they will take them and CHECK them for you. So in those cases we then carry 2 small backpacks that will fit above OR under the seat. Once in New Zealand on a small plane they took my camera bag, but before I gave it to them, me and my wife Both had a camera with lens attached hanging around our neck and coat pockets filled with Hard drives and 2 other lenses. Carried the 400mm fixed 2.8f on my lap. I learned the hard way :(
Again good article and plan more photographer’s trips, I love them- Great shoots and great people.
My thoughts
Off to buy some knee pads
I can still hear my kids saying “come on Mum, not another photo!”, so I can sympathize with you Mark! The external drive is there in the bag. I love my Western Digital My Passport Pro. It connects with a Thunderbolt cable, so is faster than USB3. What I like best is that it actually has two independent 2TB drives in it. You can use it as a 4TB drive, but I have configured it in Raid 1 mirror mode. That way I have a copy of my photos on my computer’s hard drive and two more copies on each of the 2TB drives inside the My Passport.
Thanks for you comments and stay tuned for Part II!