As many of you probably know, having a camera with you at all times isn’t always possible. As much as you might try, there will be times when you want to take a photo and don’t have a camera at hand. Or do you? Pretty much everyone these days has a phone in their purse or pocket that’s capable of taking photos. While you may dismiss your phone’s capabilities as a camera, don’t be so quick to judge. In this article, I will not only cover the basics of cell phone photography, including the camera basics and some of the differences between a few available camera apps, but also go over the process of using apps to post-process the images that you capture.
Table of Contents
Capturing Images
A Camera Is A Camera… Or Is It?
In many ways, it doesn’t matter whether you use a professional DSLR or a cell phone to capture an image… the basics of photography remain the same. You still want to consider important factors that go into creating an image like your subject and composition, as well as the quality of light you have to work with.
In many ways though, cell phone photography requires you to be a little more aware of the equipment that you’re using. For example, on a cell phone you’re pretty much stuck with the default lens. It might have distortion and/or flare issues, as well as smudges on the lens from using your phone as, well, a phone. You’ll also have a variety of apps that you can use to take pictures, all of which perform differently.
A Few Notes Before We Get Started
First, a few assumptions. I’m going to assume everyone reading this has used the camera on their cell phone before, so I’m going to skip over steps like downloading and installing apps, opening the camera app and reviewing images. I’m also going to assume that most people are using a phone or operating system that’s fairly modern. I’m sure that there are some of you reading this who will not have the features or capabilities that I mention, and I’m sorry that you’ll be somewhat excluded from the technical aspects of this conversation.
One last note… most of my screenshots and app suggestions will be from my personal experience with an iPhone and my wife’s Samsung Galaxy Note5. I am not purposely excluding other Android or Blackberry users. Pretty much everything that I discuss will apply to photography using any cell phone. Unfortunately, most Android devices will have subtle differences in controls within the default camera app, so I find it easiest to just refer to what I know (which is currently an iPhone 7+ running iOS 10.2) and let you translate for yourself depending on which phone and OS you’re using.
The Basics Of Cell Phone Photography
As I already mentioned, the basics of cell phone photography are simply those of photography, so I won’t be going into detail on those here. Let’s discuss what makes using a cell phone for photography unique and what you need to know to get started. For this discussion, we’re going to assume you are using a phone with a touchscreen, rear camera and the ability to download and install apps. We’ll also assume you’re using the rear camera, not the front-facing camera.
There are some important things to know before you get started taking photos with a cell phone. Everything is controlled through the touchscreen, so it’s best to familiarize yourself with the interface of your particular camera first. Most cell phones will only shoot in JPEG, although some manufacturers are starting to add RAW capabilities. Also, most cell phones only have one non-interchangeable fixed focal length lens, although some manufacturers are starting to add dual lenses. In these dual-lens setups, one lens is a wide-angle while the other is a normal or telephoto (on the iPhone 7+, they have 28/56mm equivalent focal lengths).
Another thing that’s unique to cell phone photography is the use of apps. All phones will come with a basic camera app, but you also have the ability to download and install more advanced camera apps. Additionally, different social media apps also come with their own built-in camera within the app. Which one should you use? I’ll get to that in a bit. First, let’s discuss how you actually create images with a cell phone.
Creating Images With A Cell Phone
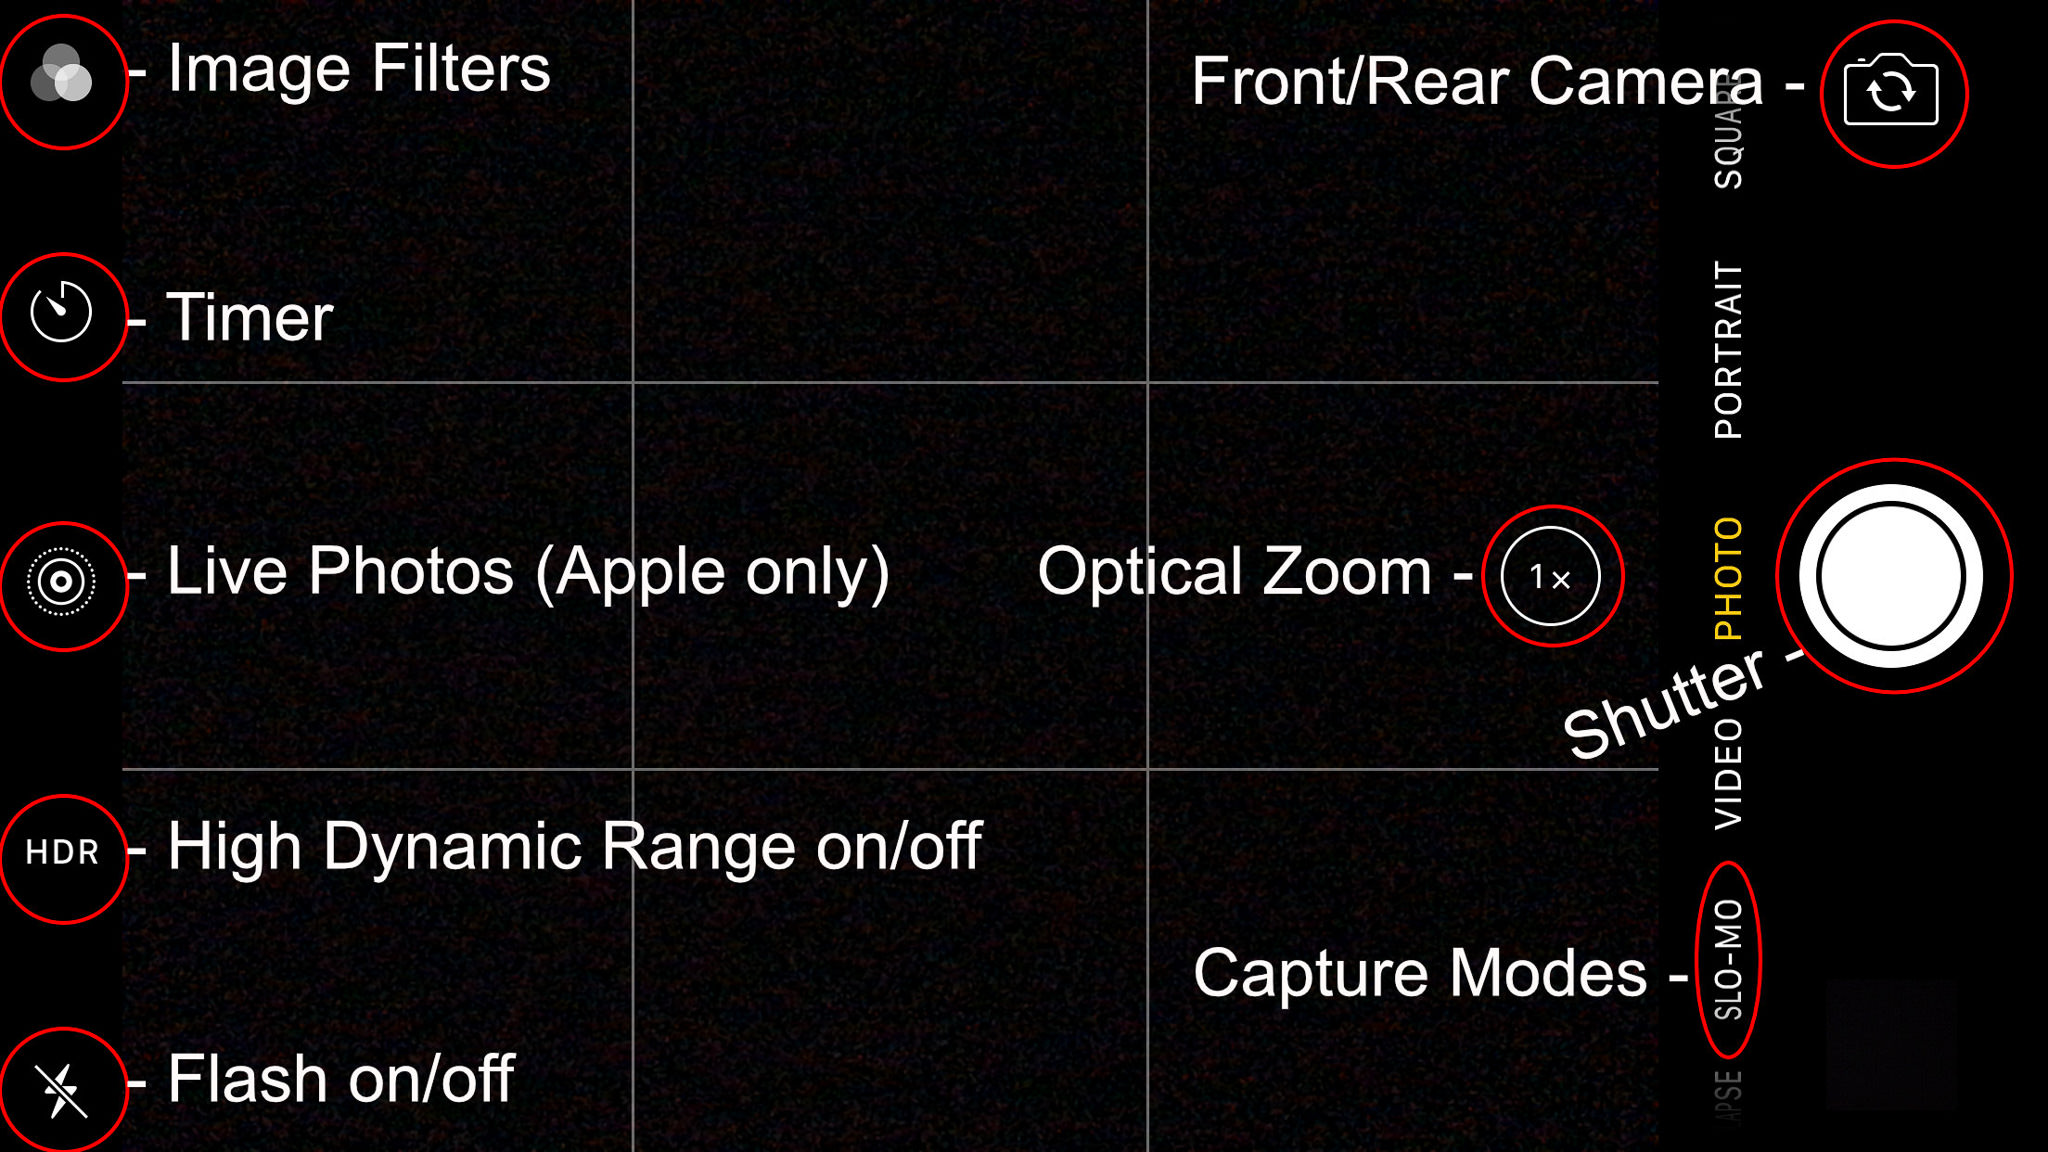
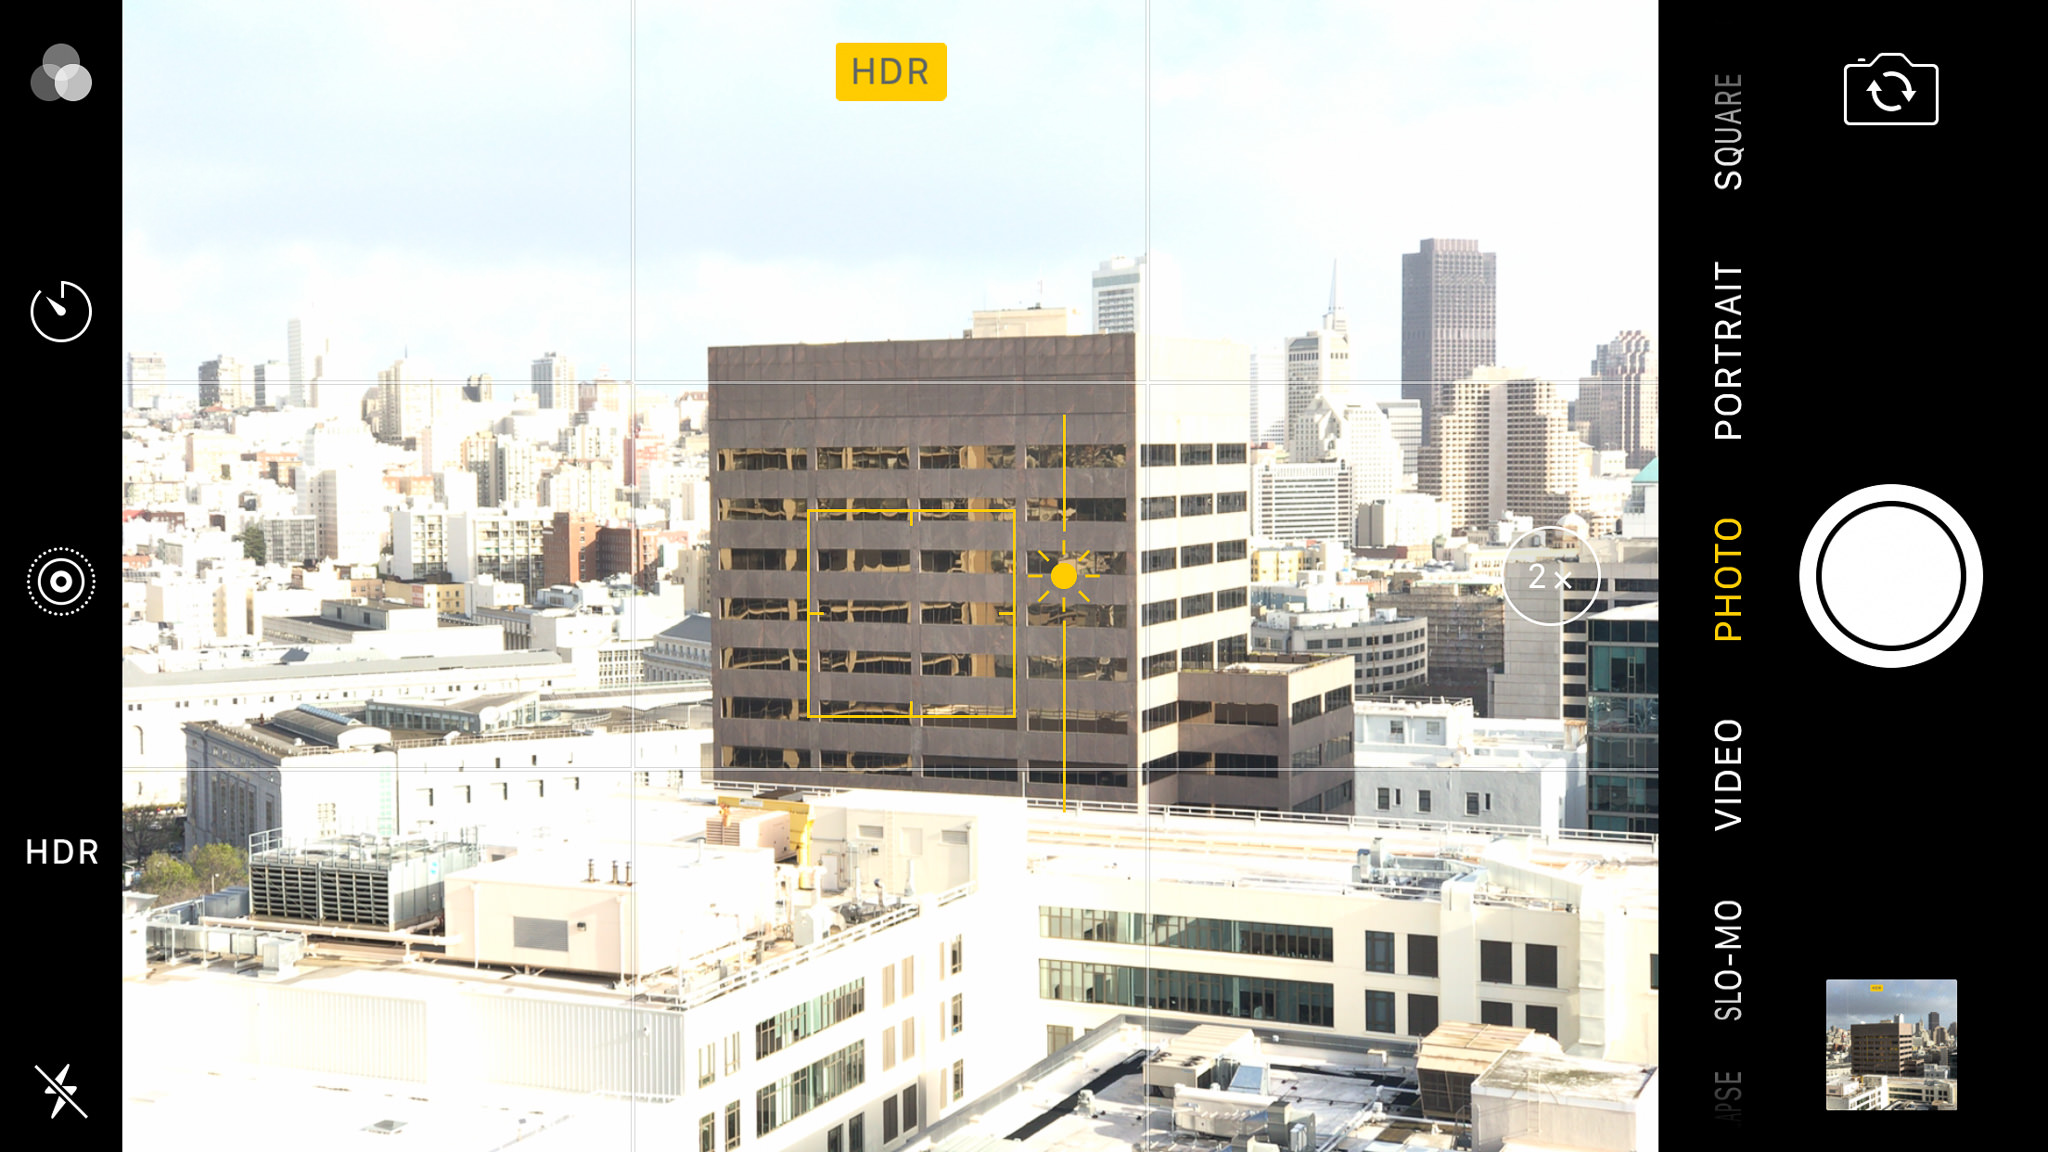
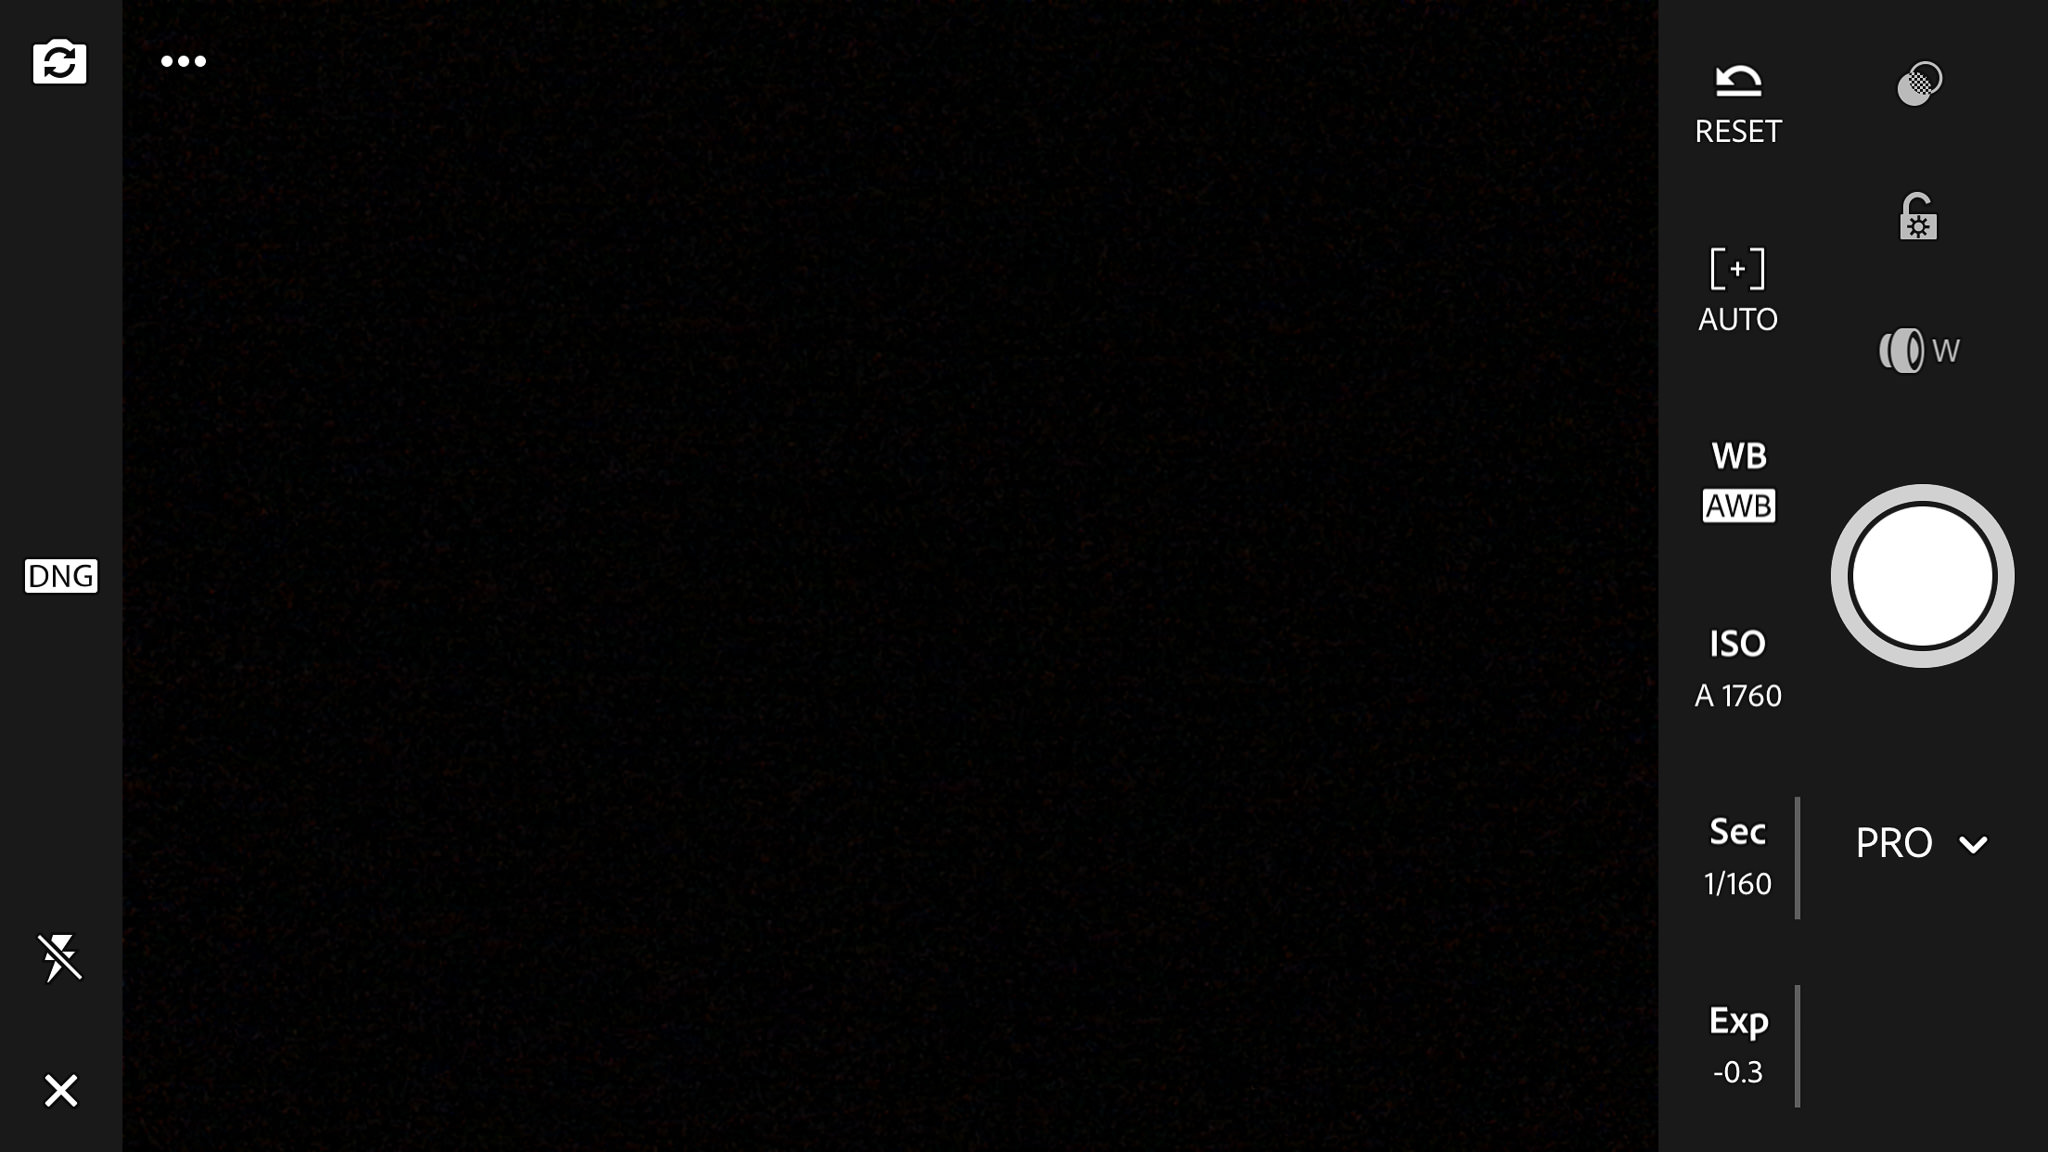
Now it’s time to grab your cell phone and open the camera app. On many phones, there is a shortcut you can use to access the camera app without even unlocking your phone. I would highly suggest learning this for your particular phone so that you are able to quickly take photos without first having to unlock your phone. Once you’re in the camera app, you’ll see a variety of controls. Take a look at the iPhone screenshot below. You’ll see a lot of different icons and the label I’ve added for each one.
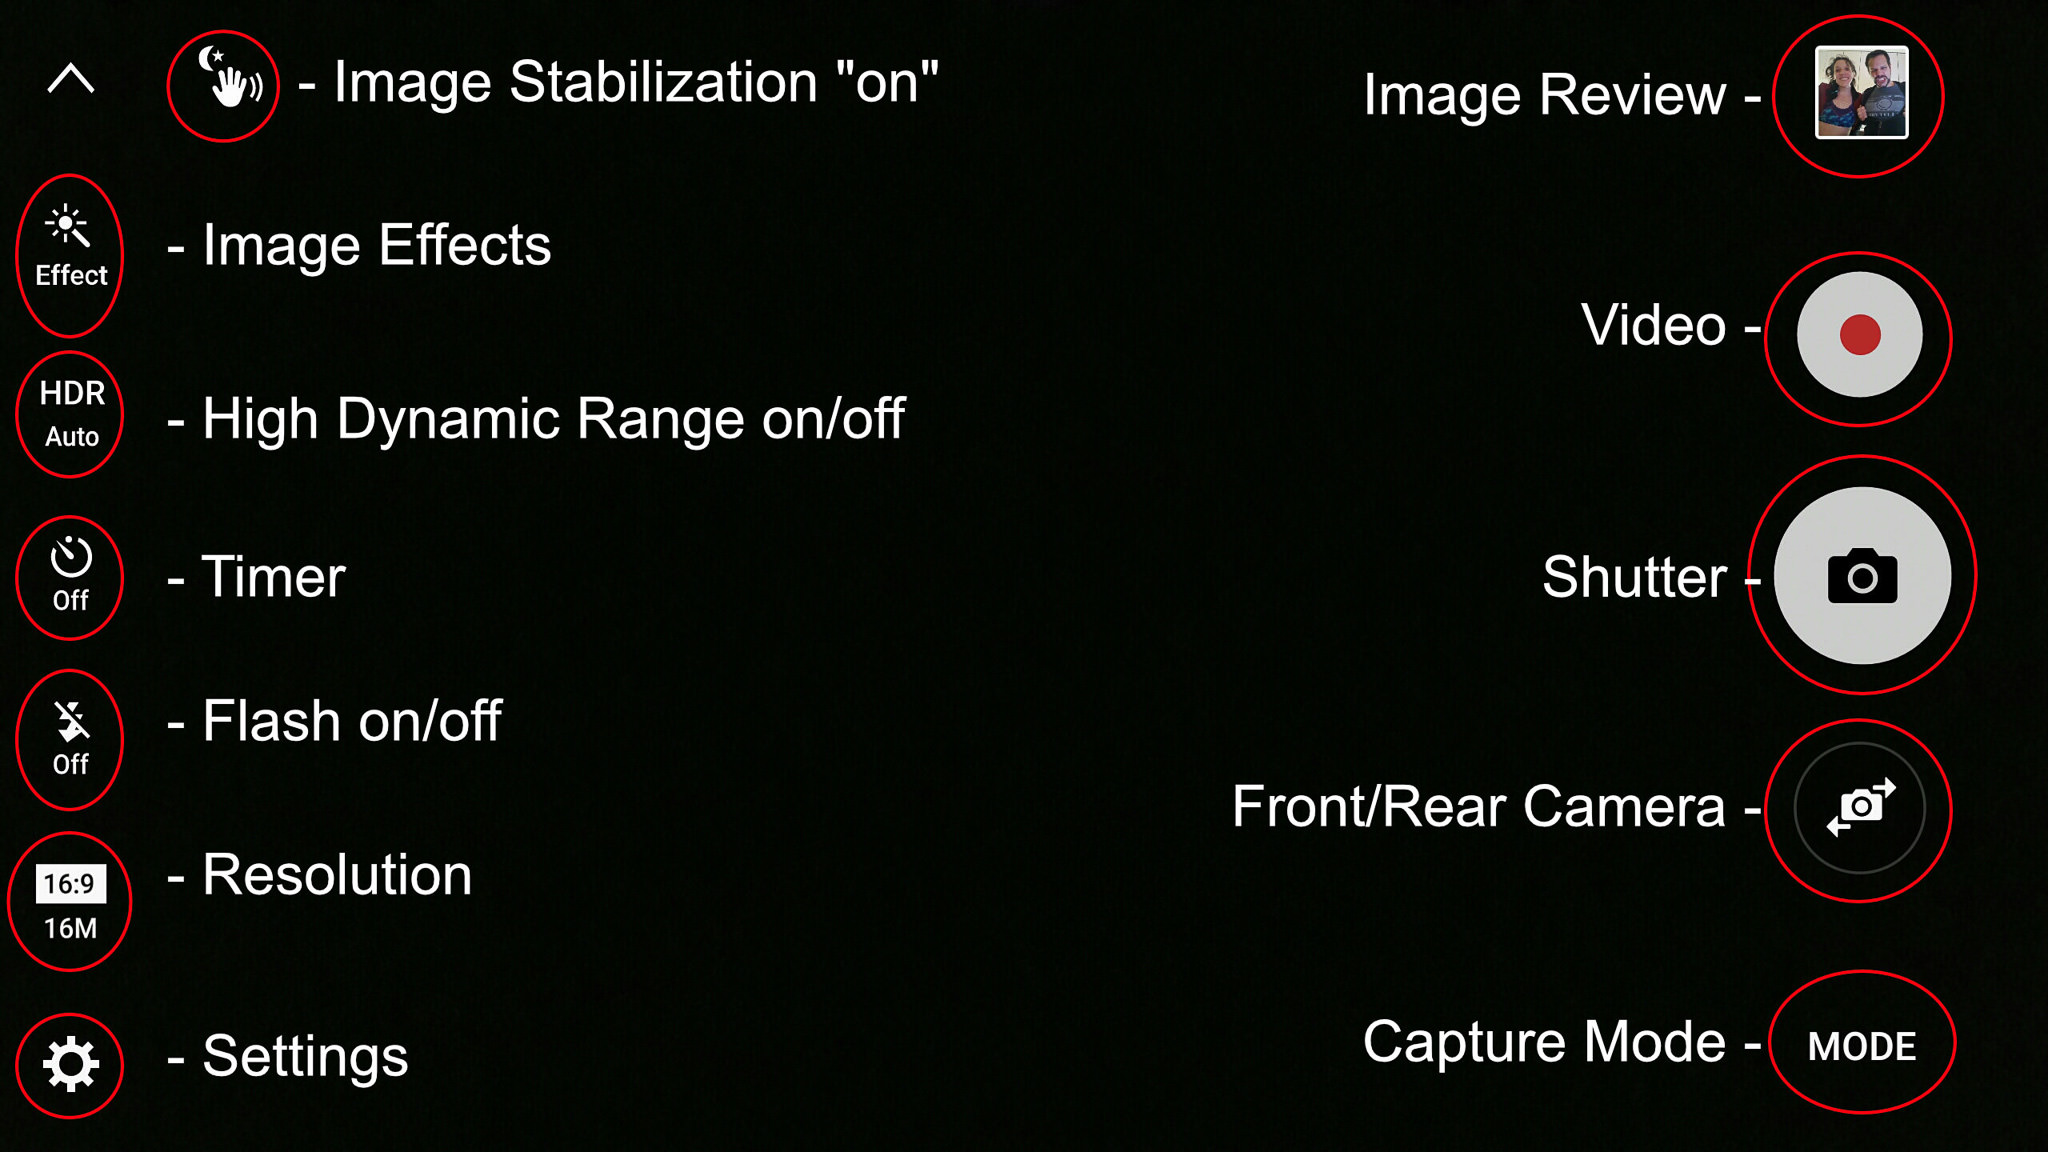
If you’re using an Android device, you might see something like this instead.
Fortunately, you don’t really need to concern yourself with these controls. I’ve found that for the majority of the photography I do, I really don’t need to change anything shown here. Occasionally I’ll turn on the flash if I’m photographing a person in a dark place. I also sometimes use the timer or switch to the front camera, but otherwise, I let the camera decide when to use HDR in an image and never use Live Photos or in-camera filters.
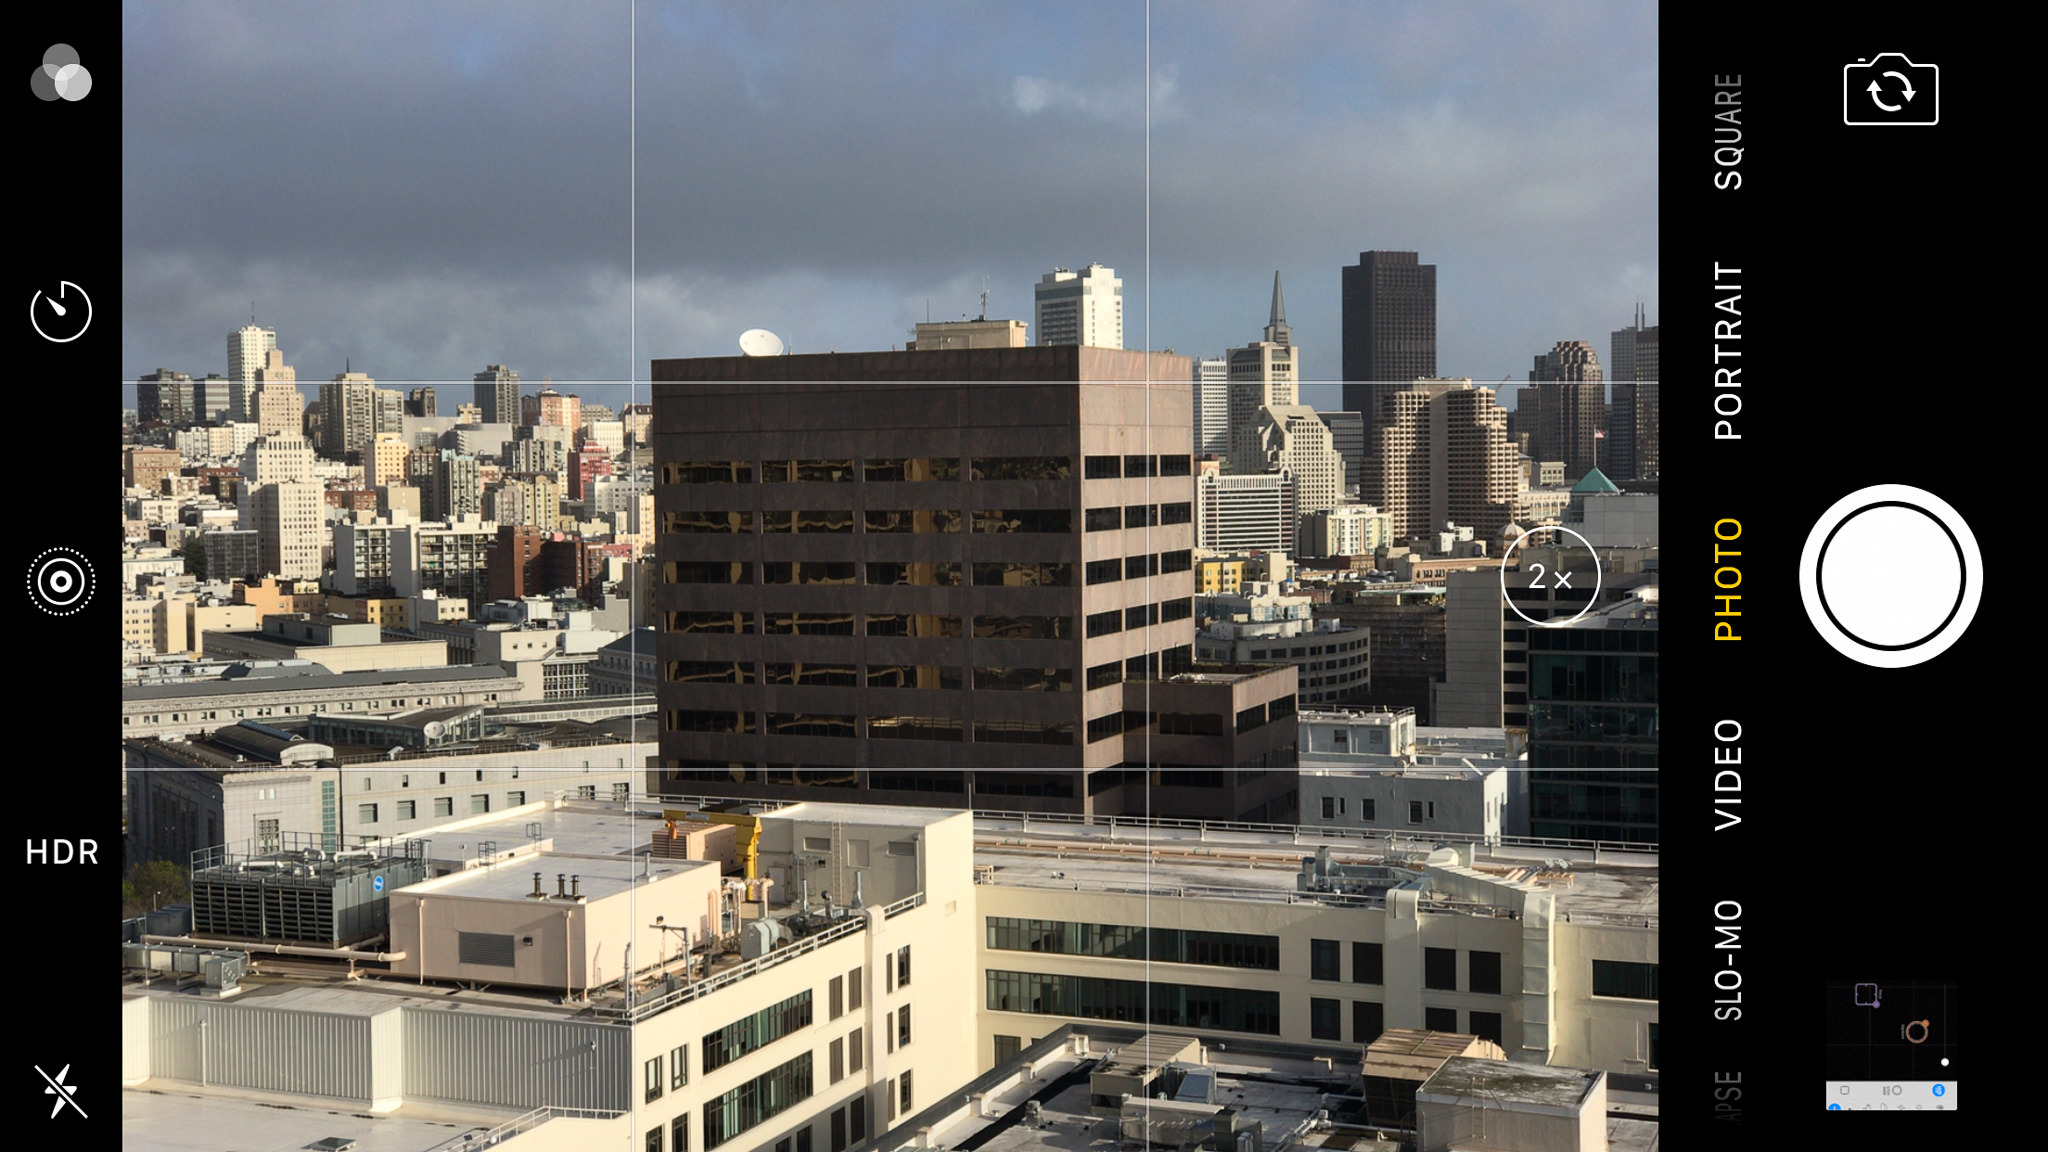
Of course, there is more to cell phone photography than just pressing the big round button and letting the camera make all of the decisions for you. One of the biggest things you can do to immediately improve most photos taken with your phone is to tell it where to meter. Here you can see the default exposure for this scene:
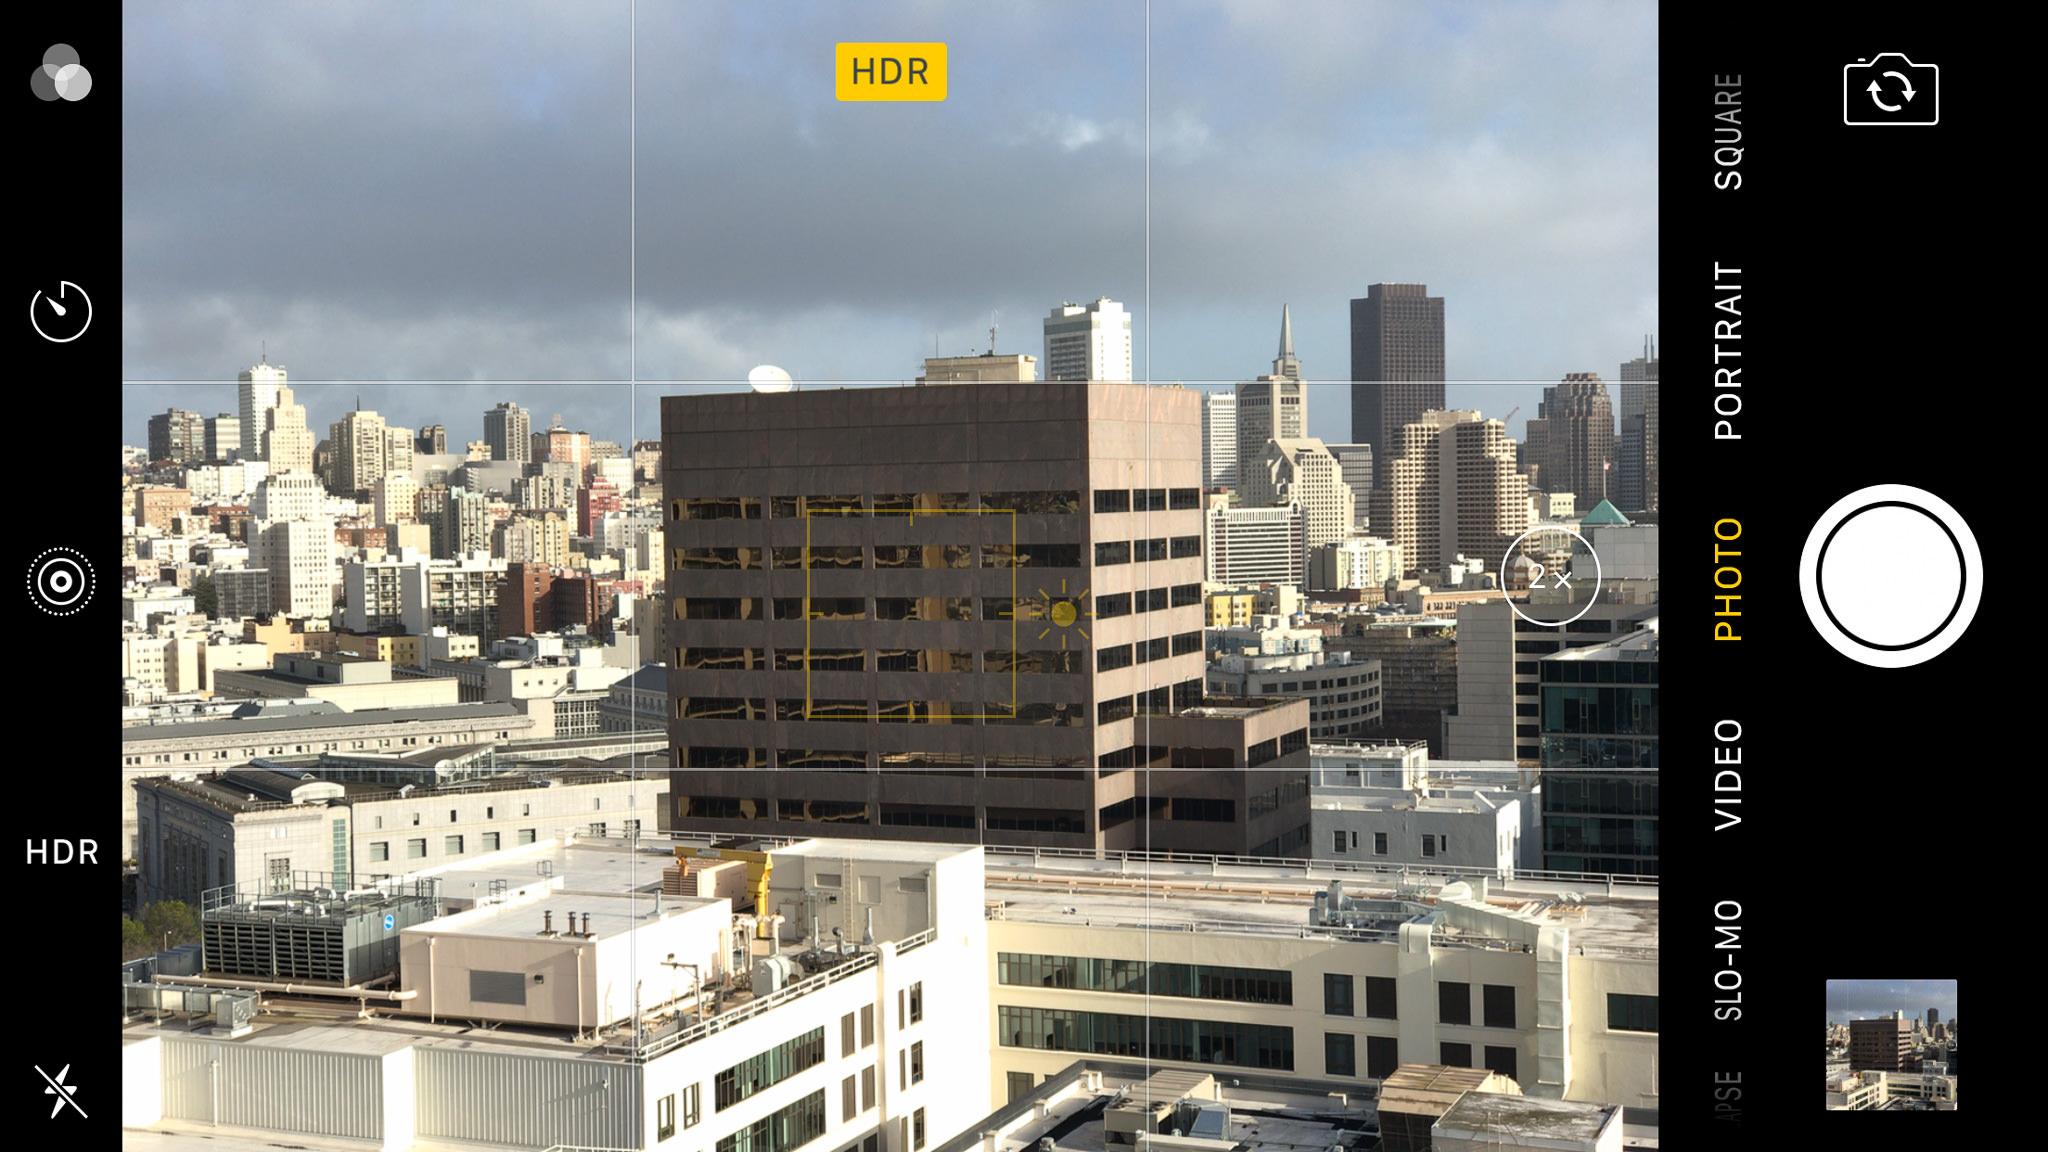
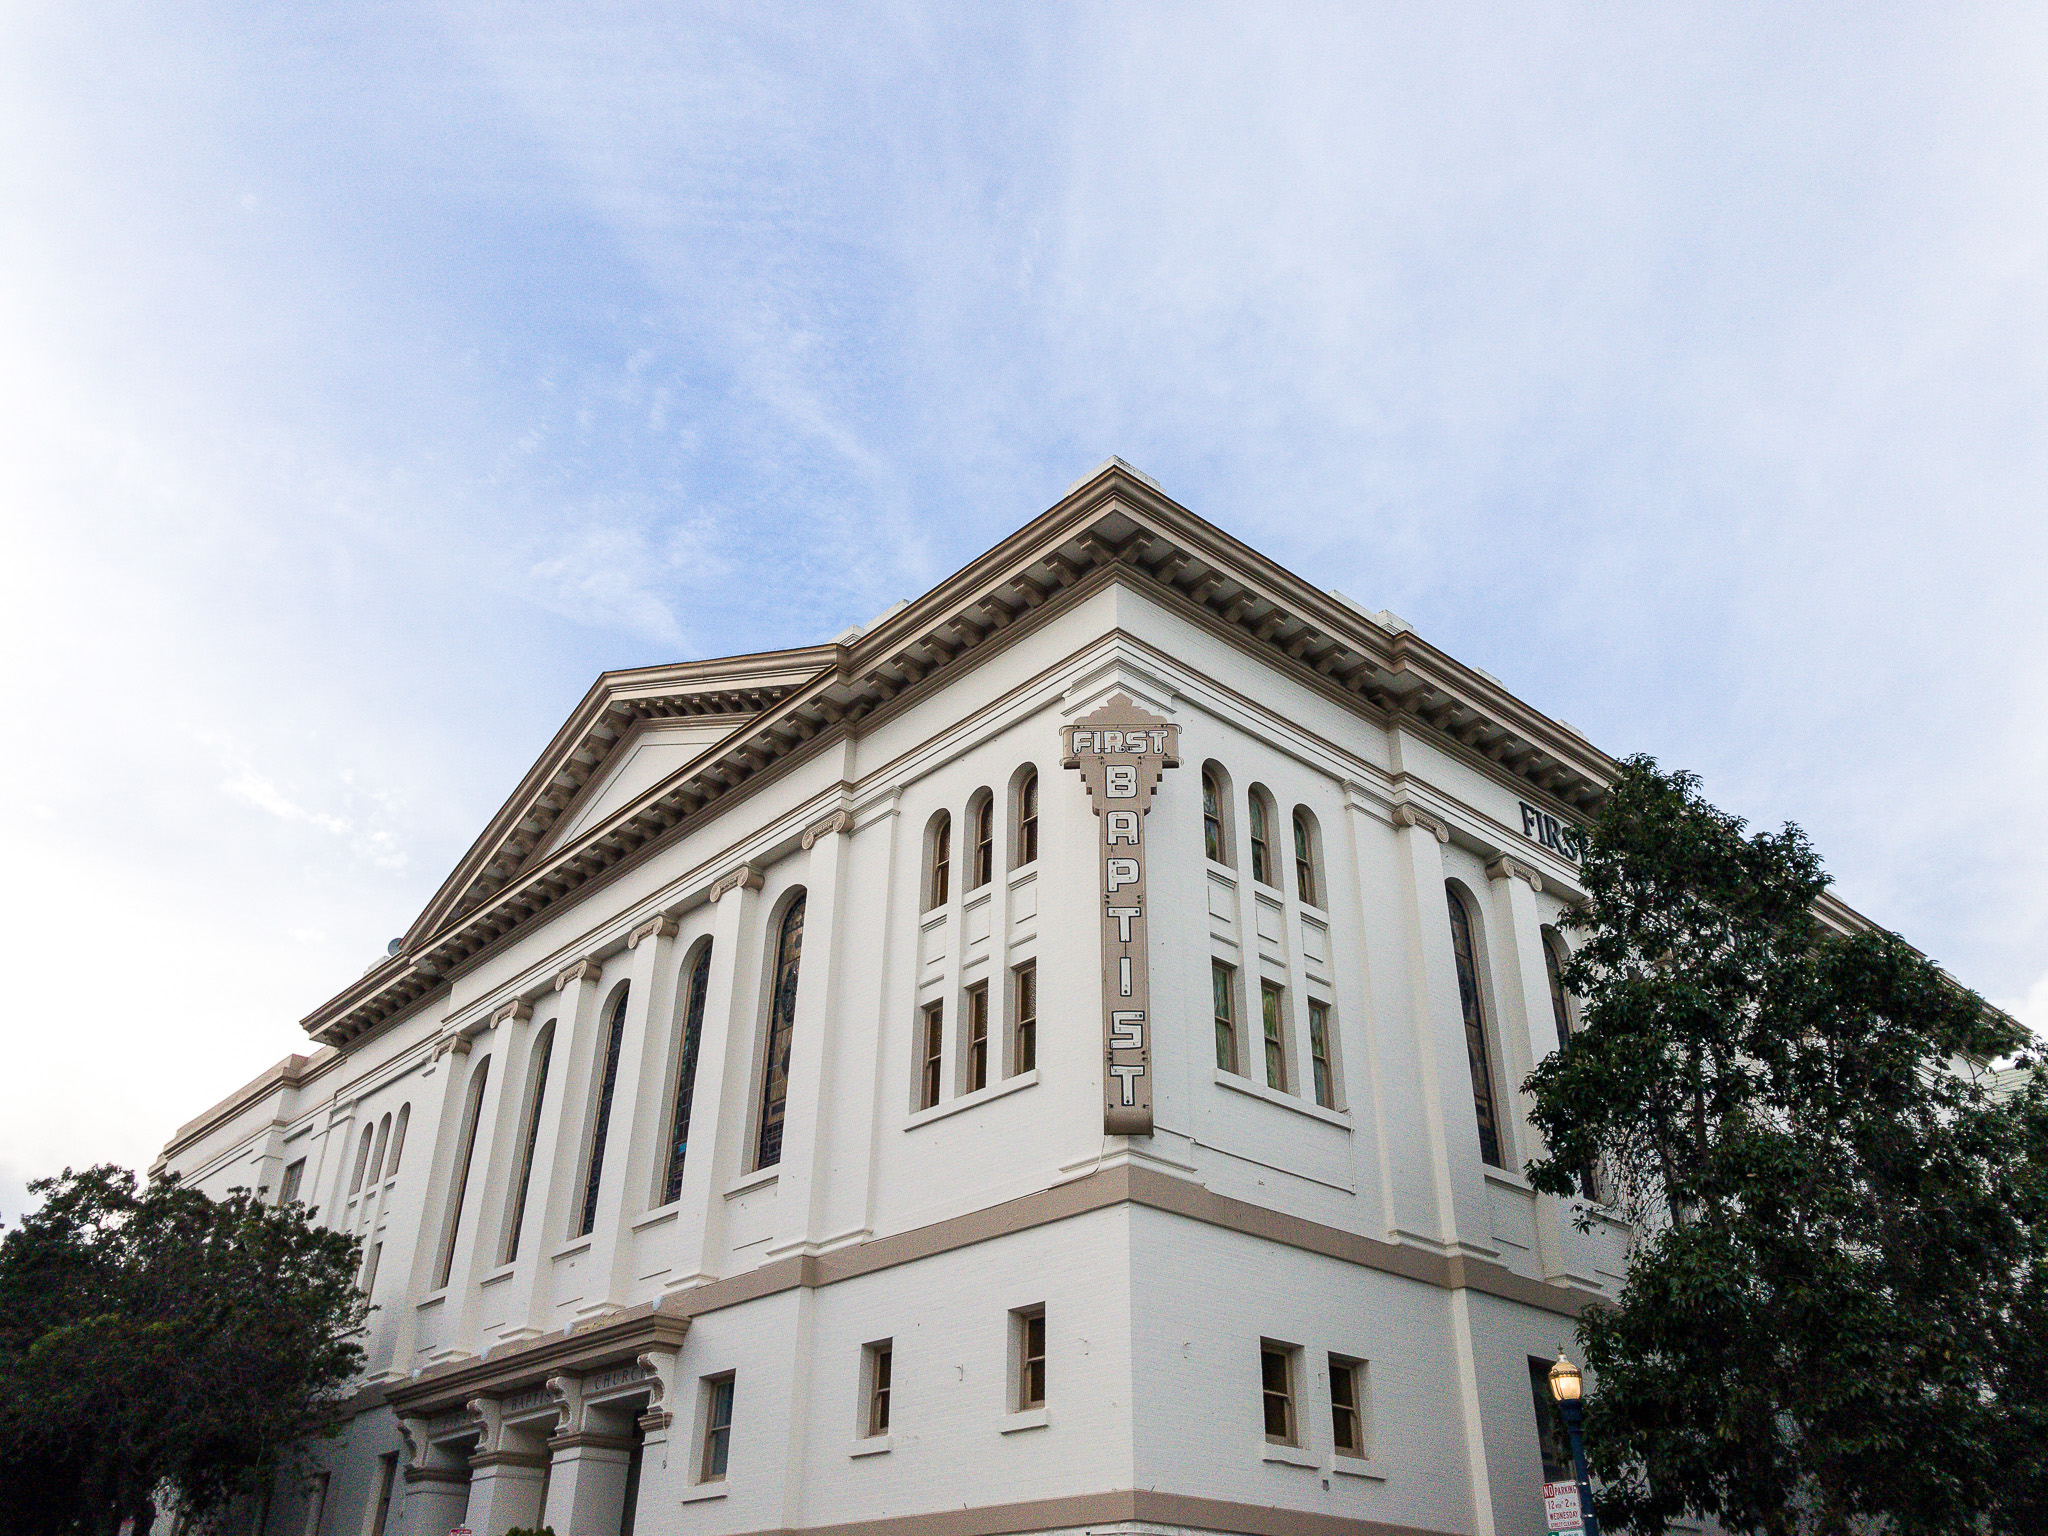
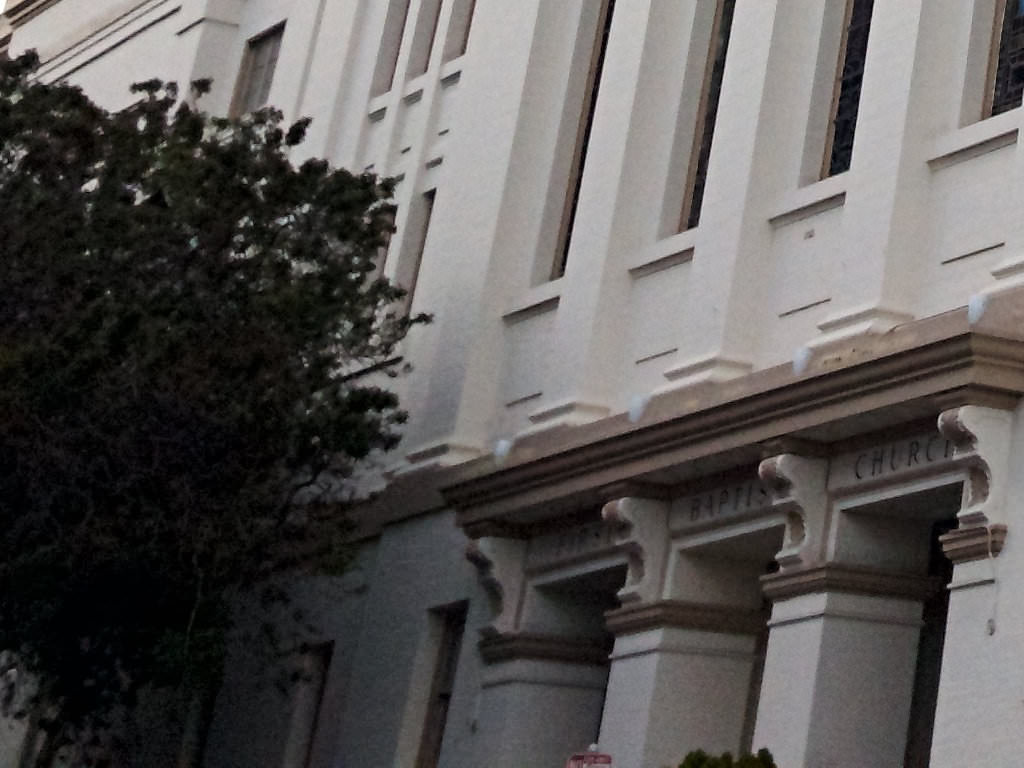
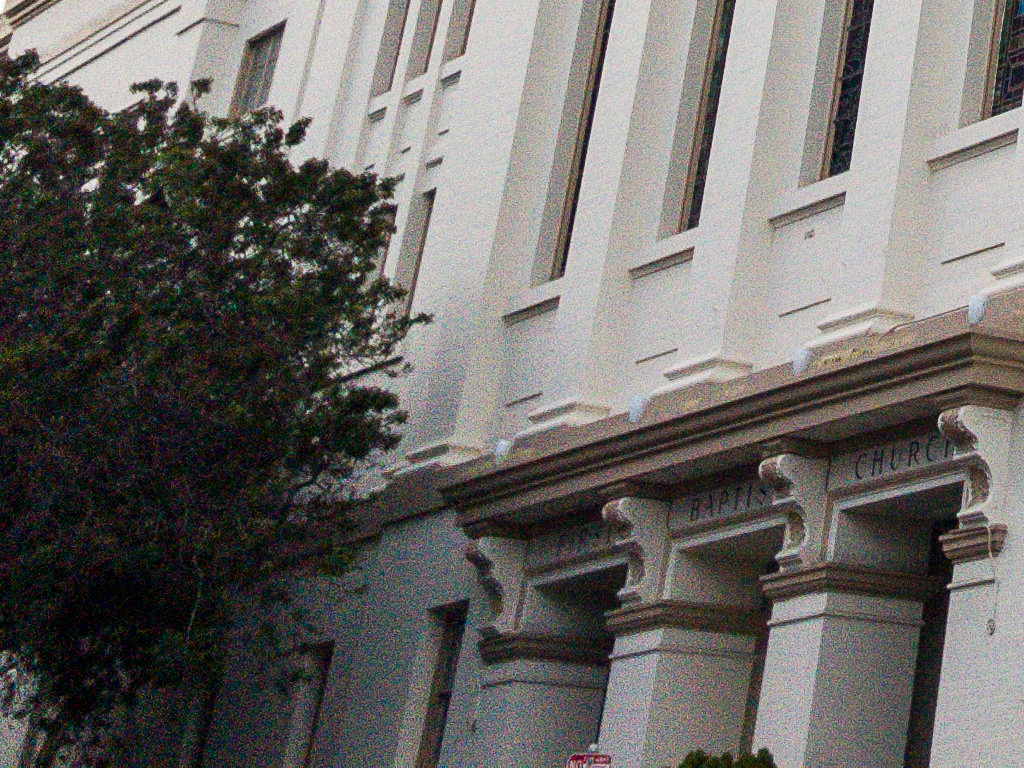
You can adjust that exposure by touching the screen on the part of your image that you want to be properly exposed (note: your phone will also focus in that same spot). Let’s say I want the shadowy side of the building to be properly exposed. If I touch the dark building, the overall exposure of the image increases. Notice that a square appeared on the building where I touched my screen:
Unfortunately, I don’t think any default camera apps give you control over settings like shutter speed and ISO, but most do allow you to adjust the exposure by dragging your finger up or down on the screen. Once you’ve touched an area of the screen and the exposure has adjusted, touch and hold your finger outside of the square and drag it up to increase exposure or down to decrease exposure. This should give you more precise control over the exposure of your final image. One word of warning: this adjustment typically resets each time you take a picture, so be prepared to adjust your exposure multiple times if you plan to take more than one photo.

If you do want to have the same exposure (and focus) for every photo you take, press and hold the screen until you see something like this:
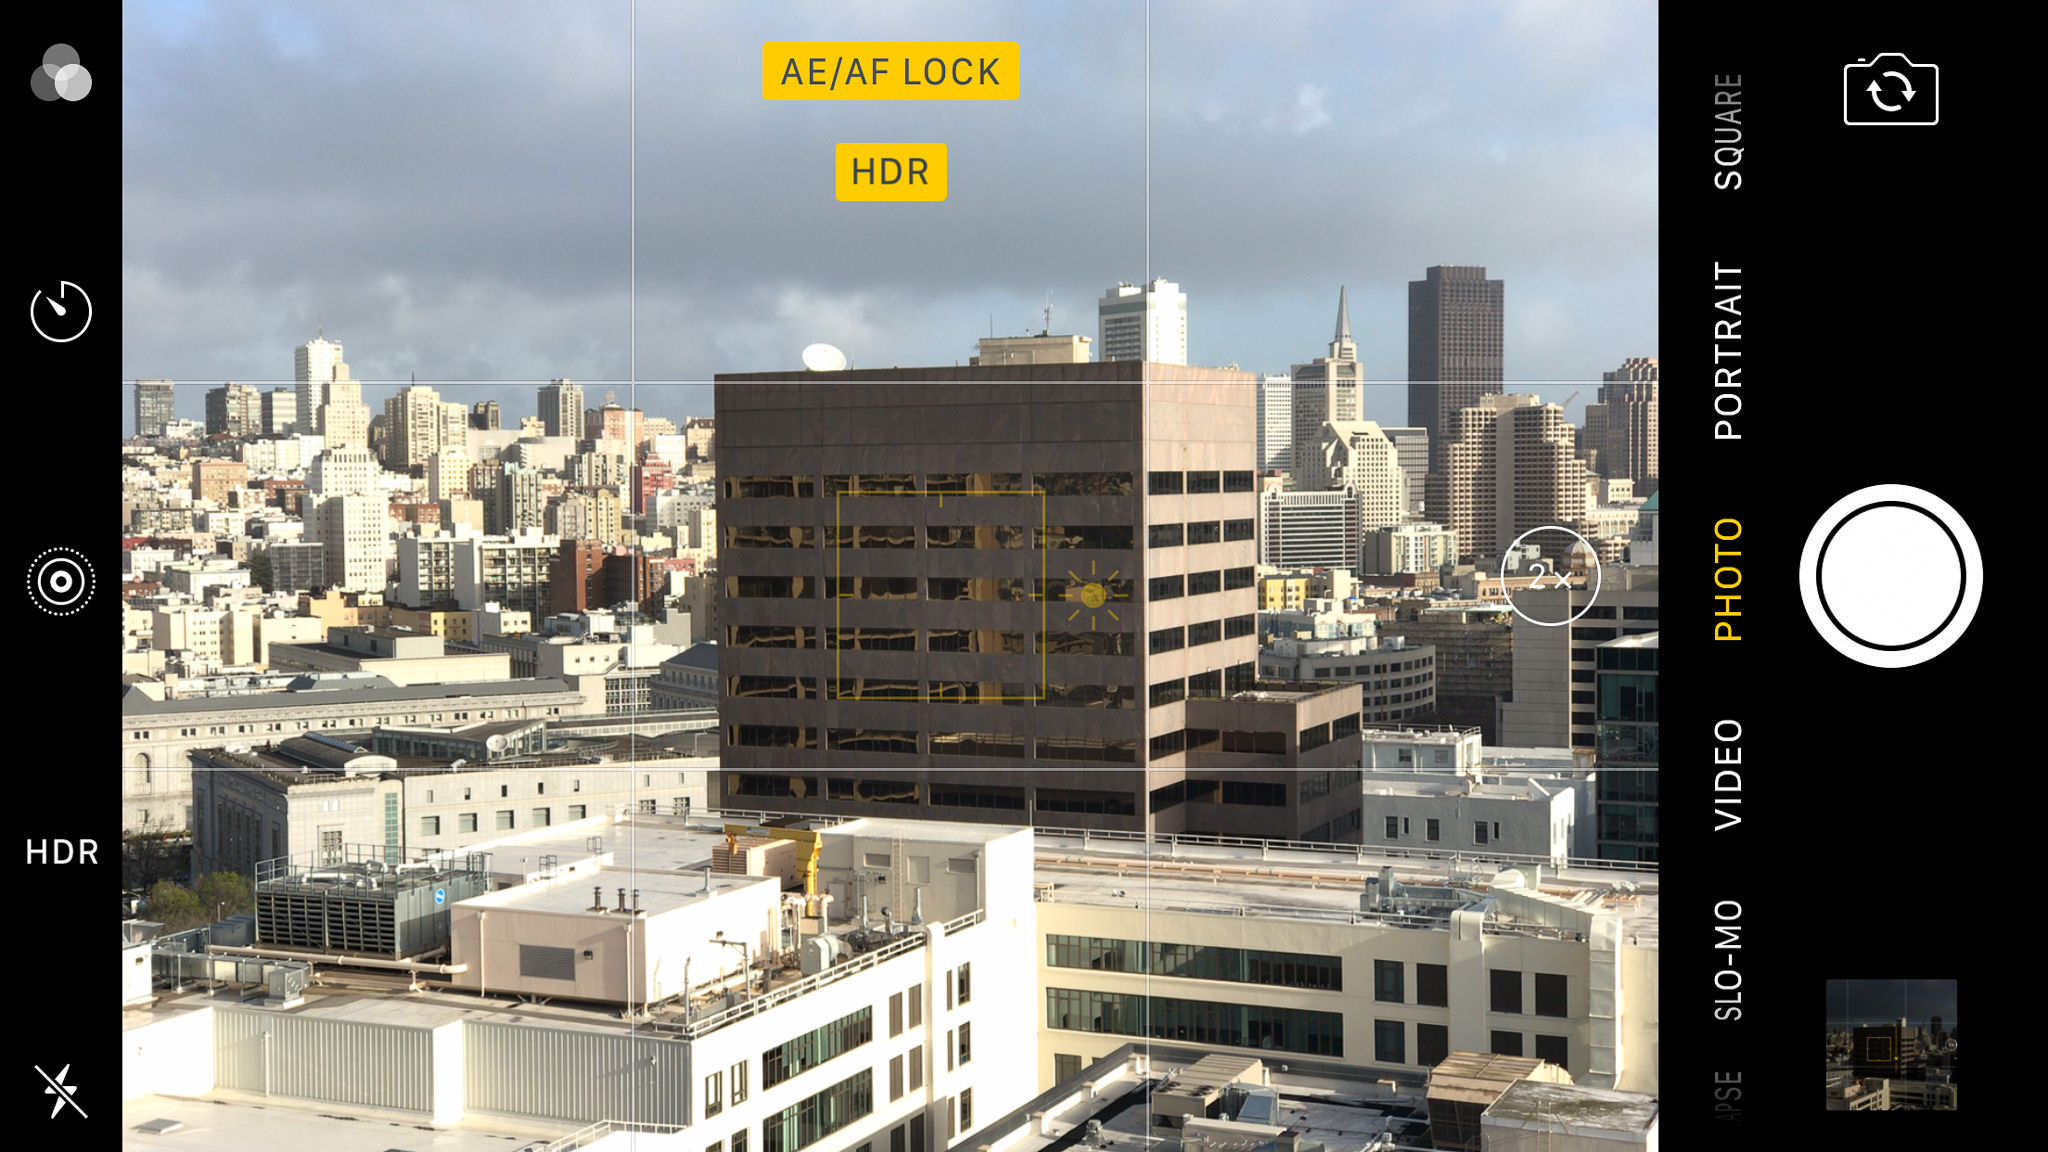
When you see AE/AF Lock, your phone has locked the focus and exposure and you can take multiple images without the settings changing. To return the focus and metering back to normal, simply touch anywhere on the screen again.
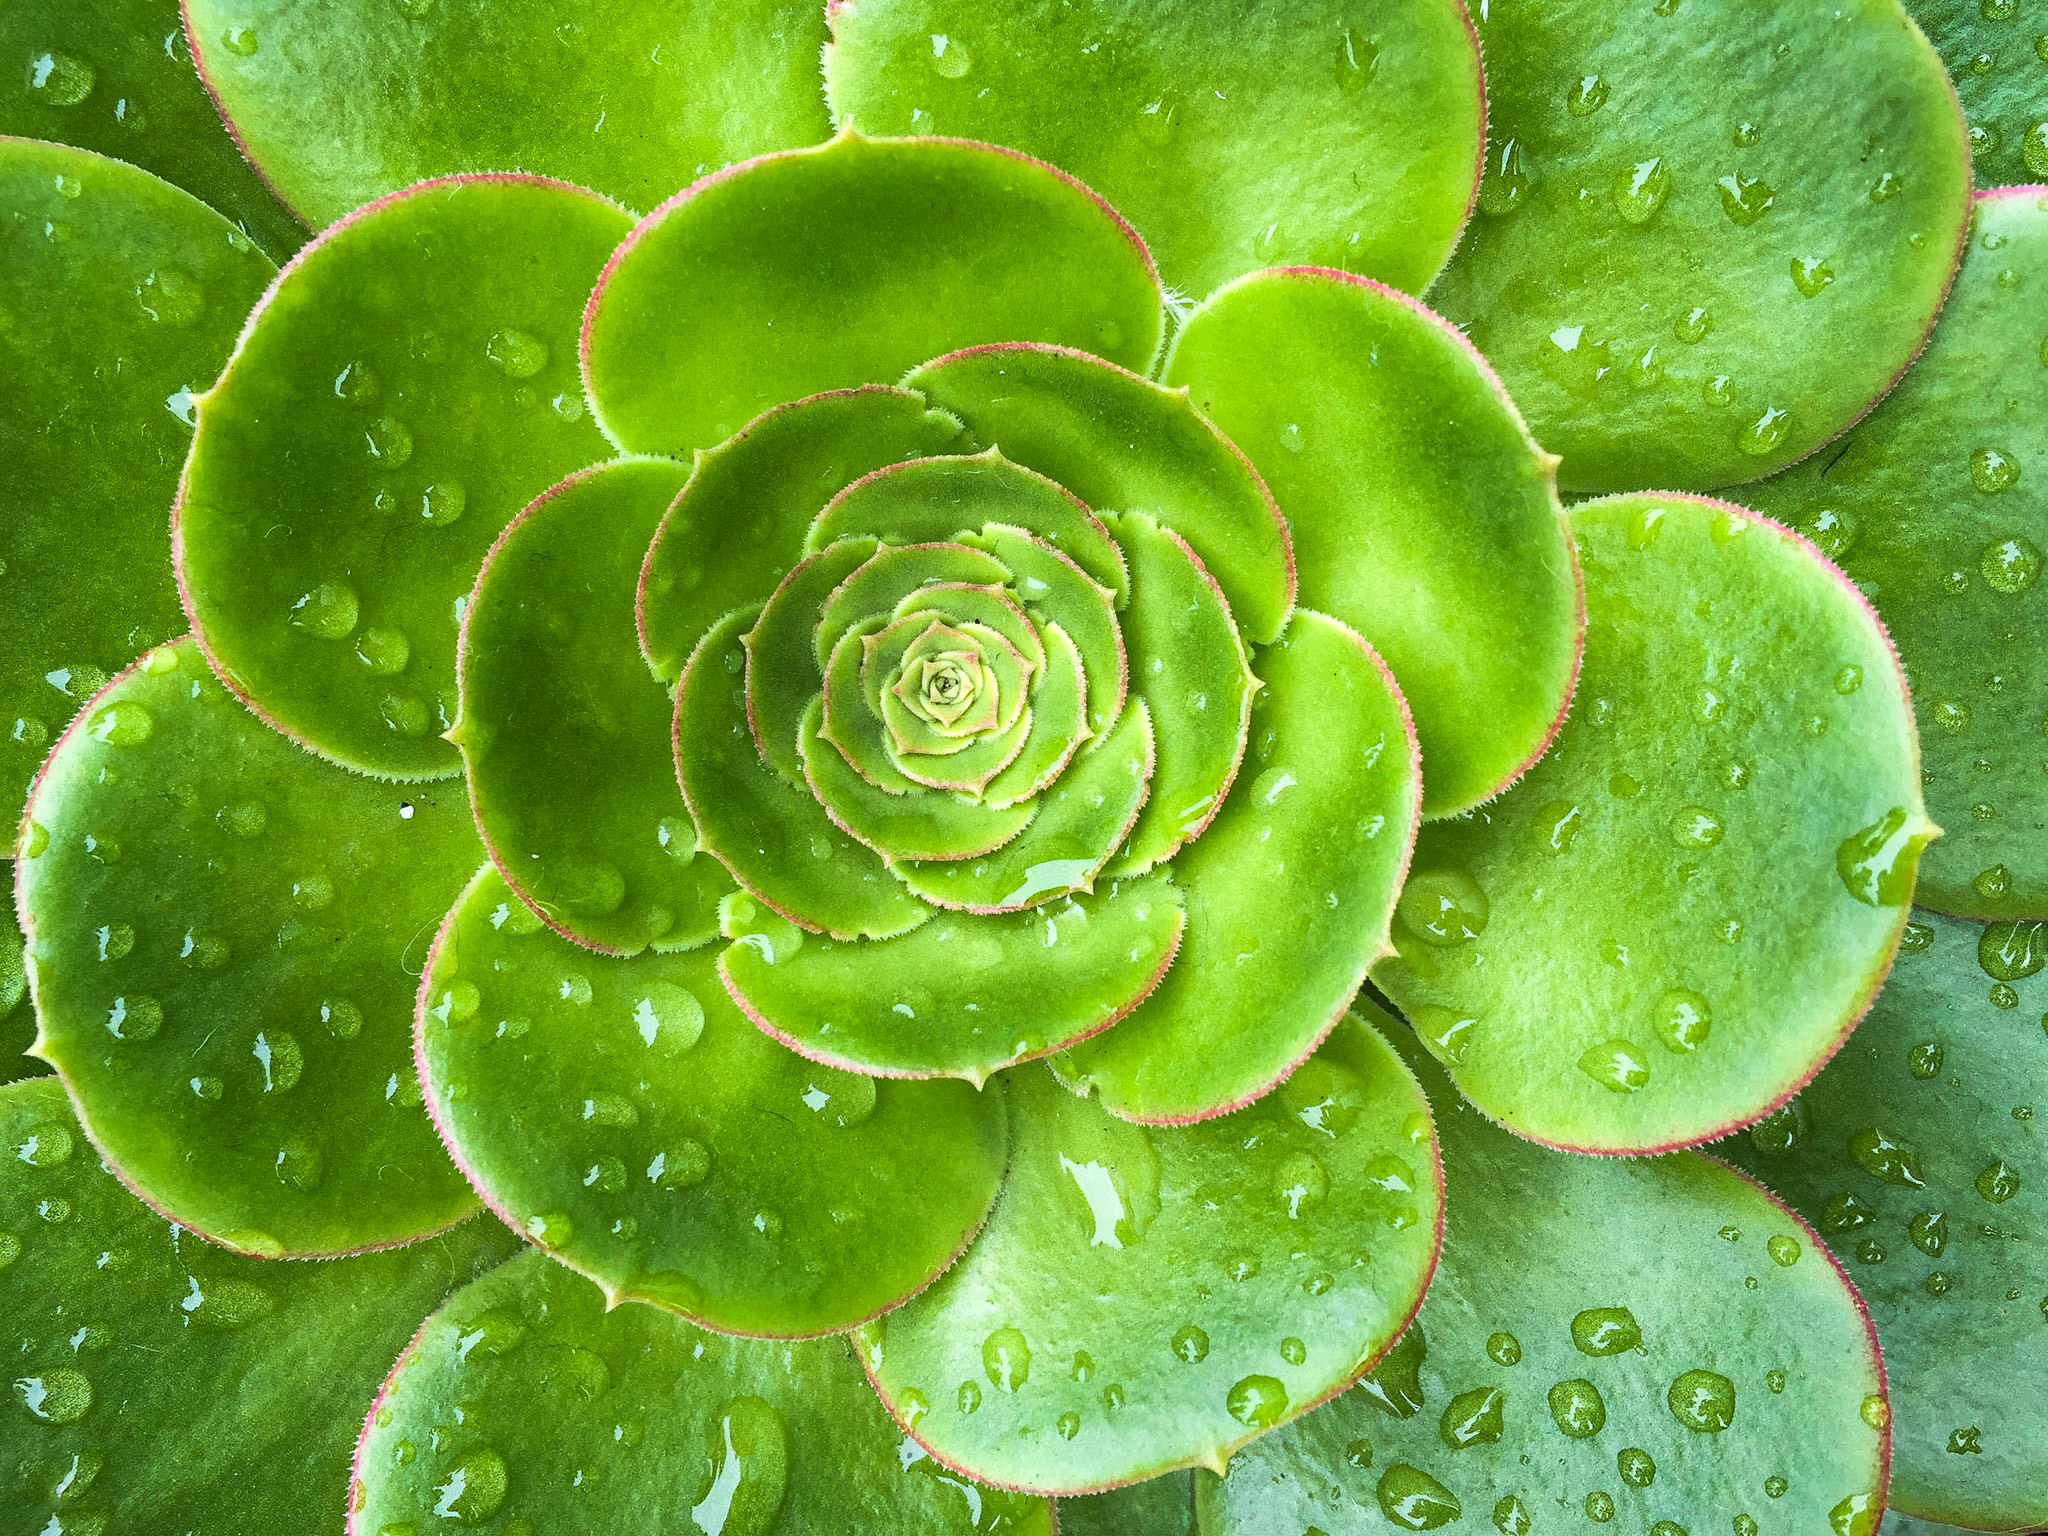
Cell phones are also able to focus surprisingly close to subjects. This can make them great for photographing flowers and other small objects with a lot of detail. Again, you’ll want to frame your subject, tap the screen where you want the point of focus to be, adjust exposure and take the image. You’ll find, as with macro photography, any movement of the camera will be amplified relative to your subject, so if you’re photographing something very close up, be prepared to take a few images before you get one that is properly focused.
Using Advanced Camera Apps
For most people, the default camera app will be enough for them to create images that they’re happy with. For those who want more control over their camera settings or maybe just a different interface, there are many different third-party camera apps out there.
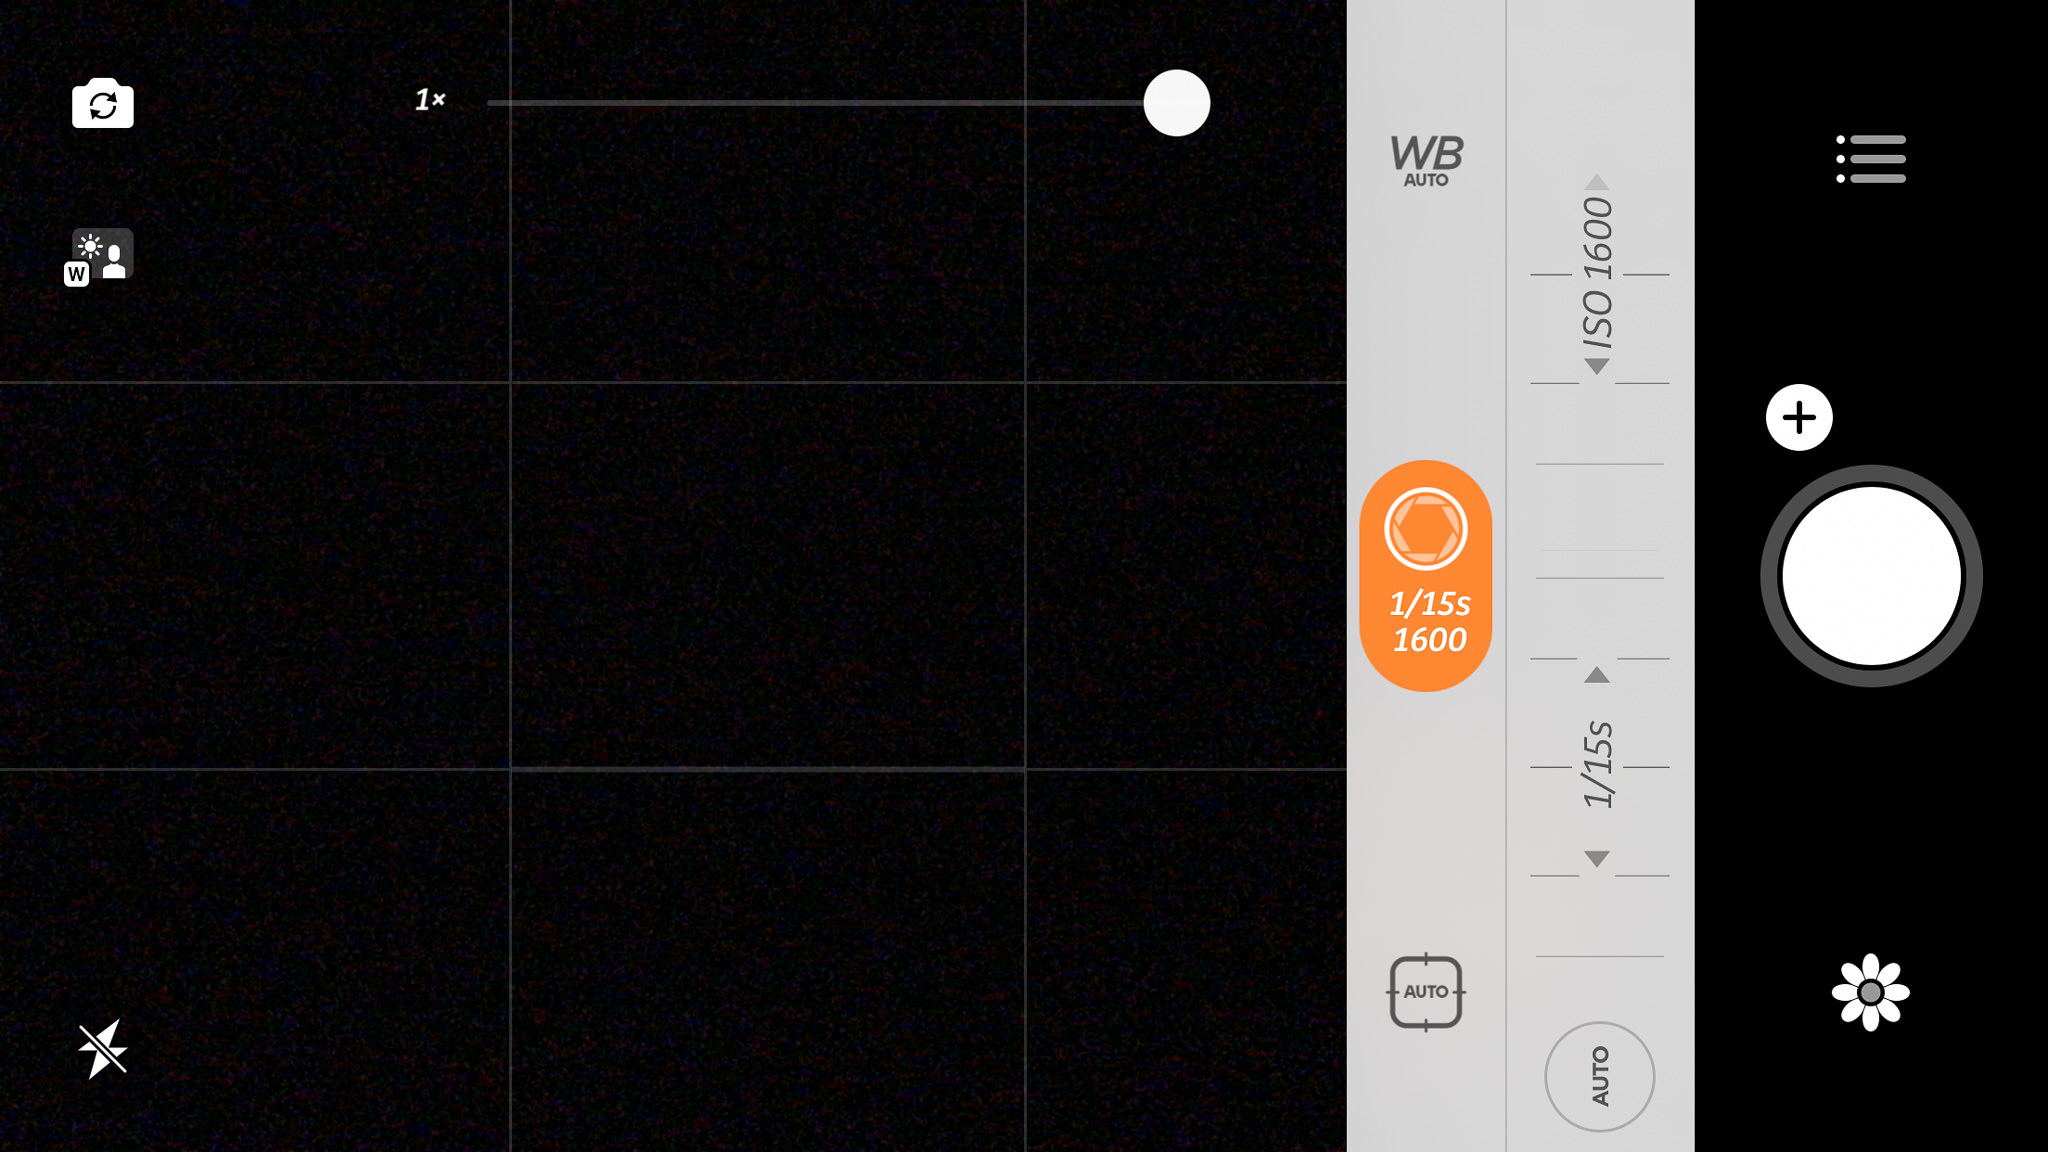
One of the first that I tried out when I started to get more serious about phone-ography is an iOS-only app, Camera+. One of the most attractive features of Camera+ is that it has a manual mode, giving you full control over shutter speed and ISO. If you decide to shoot in Auto mode, you can independently set the focus and exposure points. It also has adjustable white balance, which is a feature that I feel is sorely lacking in most default camera apps.

One of the least obvious apps that’s available for both iOS and Android that offers full manual controls as well as DNG capture is Adobe Photoshop Lightroom for Mobile. It may not be a dedicated camera app, but the camera is full-featured and a great example of a cell phone camera done right.
Of course, there are countless different camera apps out there, but ultimately they all more or less do the same thing. When choosing the best one for photography, I’d suggest you focus on a clean, easy to use interface that lets you quickly create images that you’re happy with. For most users, including myself, this is going to be the default camera app.
Using Cameras Within Other Apps
Not all cameras are created equal. Just as some apps offer more controls than the default camera app, some also offer fewer. Not only that, but some also create photos of inferior quality. For example, photos taken with dedicated camera apps should use your camera’s full resolution and lower ISOs and JPEG compression. Apps with built-in cameras (such as Facebook) will typically use the resolution that works best for the app and higher ISOs to prevent motion blur.
Compare these two images. One was taken with the default iPhone camera app while the other was taken and saved within Instagram Stories. Unfortunately, Stories does not record the camera settings, so I don’t know what ISO was used, but you should be able to tell that it’s definitely of lower image quality. It’s also much lower resolution (4032×3024 vs 1280×720). While they didn’t look any different on the screen of my phone, they do look a lot different when seen on a computer screen. Be sure to compare the detail in the wood grain and the cat itself.

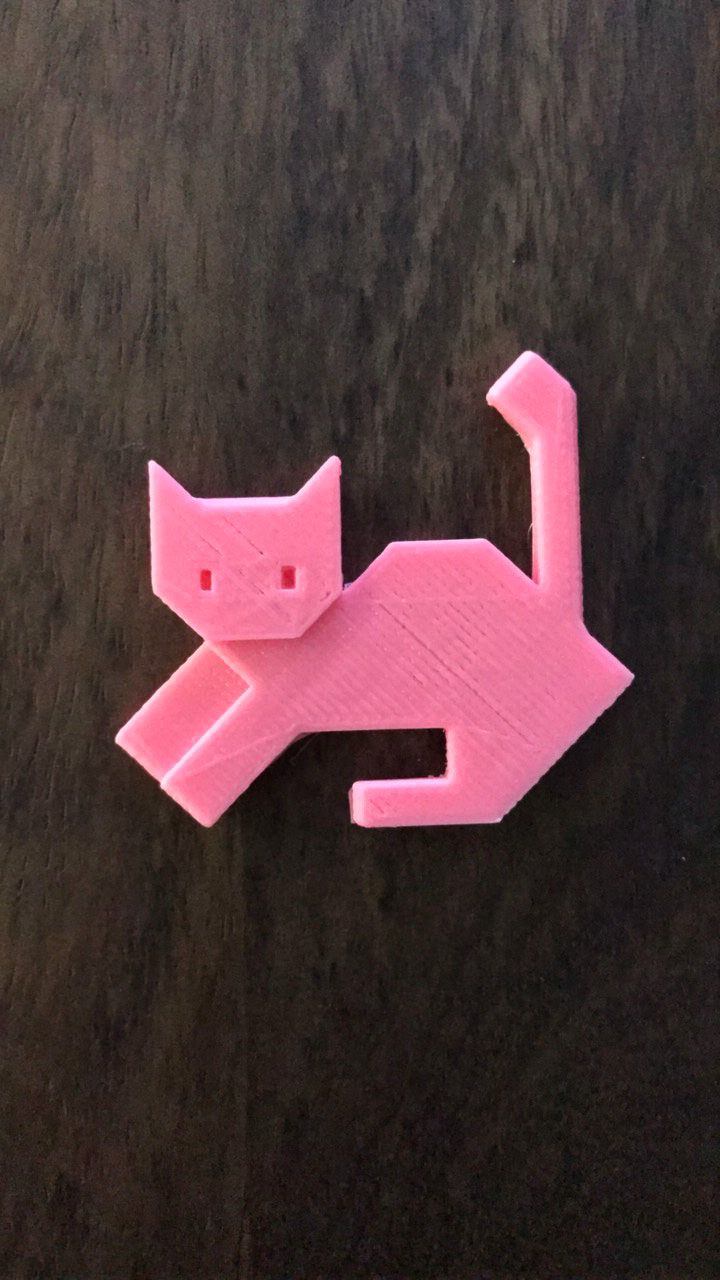
Many apps like Facebook and Instagram also have limited camera controls and often by default don’t save photos taken through them. Almost all social media apps will allow you to post images that were taken outside of the app, so unless you only want to take a photo for quick sharing, I’d highly recommend using a dedicated camera app.
Other Considerations
Image Organization: In addition to deciding which app you plan to use for photography, you’ll also need to keep track of the images you’ve taken. Some apps create unique folders where they store images, meaning you might not be able to view all of your images in the same place. Other apps won’t actually show images that were taken with them until they are exported, meaning you might have taken a photo but won’t be able to view it with the rest of your images until you export it out of the app.
Sensor Limitations: The actual capabilities of a phone’s sensor is another major consideration. You’ll never achieve the same results with a phone that you will with a DSLR or mirrorless camera, so don’t go in with the same expectations. The high ISO performance and dynamic range capabilities are not in the same league, but of course, this should be pretty obvious. I mean, it is a phone after all.
Add-On Lenses: If you want to use something besides the standard lens, you might look into purchasing an add-on lens for your cell phone. They come in many different types, from macro to telephoto, so there’s surely something out there to fit your needs. Just be sure to do your research and read some reviews before your purchase anything, as the quality can vary greatly from manufacturer to manufacturer.
Smudges: Speaking of lenses, be sure to keep your phone’s lens free of smudges. These can often degrade image quality, as well as add streaky lens flare if there are any bright light sources in the image. I’ll often find my lens covered in fingerprints, so I’ve made it a habit to wipe it off before taking any images.
Lens Flare: Lens flare can also be an issue for cell phones. With no lens hood and the lens being flush with the exterior of the phone’s body, flare can occur quite often. Most of the time you should be able to hold up one hand to prevent the sun from hitting the lens, but sometimes it’s unavoidable. Also, due to the coatings and special materials that some lens covers are made from, flare will occasionally take on a color cast. Here’s an extreme example from my iPhone 5 review.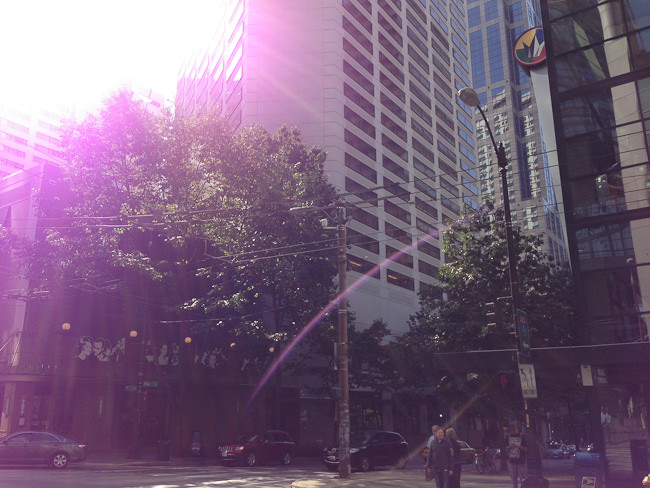
Lens Distortion: Most cell phones lenses tend to distort near the edges of the frame. This is especially visible when you’re photographing a person from a few feet away with the phone in portrait mode. Be careful not to allow lens distortion to ruin an image.
Alternate Shutter Buttons: Most cell phones should also have a physical button that triggers the camera shutter when the camera app is open. For example, on an iPhone, the volume buttons trigger the camera shutter. I find myself using this feature when I only have one hand available for taking photos or am holding the phone in an unusual way.
Press Lightly: Regardless of whether you use the simulated shutter button within the app or a physical button on your phone, be careful of how hard you press. Many people will “peck” at the screen with their finger, causing the phone to move when an image is captured, thus creating a blurry image.
Capturing HDR Images: I have my phone set to auto-HDR mode, which means that it will capture a scene in HDR if it needs to. I also have the setting turned on that saves a normal version of each image that is captured in HDR. I do this because sometimes I prefer the non-HDR image over the HDR image. I end up with two images, but have made it a habit to review images at the end of the day and delete extras so I don’t fill my phone’s storage with duplicate photos.
Photographing Action: Using the phone on your camera to photograph action can be quite tricky, but not impossible. If you’re in a low light situation, you can forget about it (unless you want blurry photos). If you have plenty of light to work with, your best option would be to shoot a burst of images. Due to the significant “shutter lag” phones have, you probably won’t capture the peak of the action with a single shot. By shooting a burst (just hold down the shutter button), you greatly increase the chances of getting the shot you want.
Optical vs. Digital Zoom: Unless you have an optical zoom on your phone (typically only available if your phone has more than one lens), you should probably ignore the zoom option. Once you start using digital zoom, image quality quickly deteriorates. For serious photography, you should refrain from using the digital zoom.
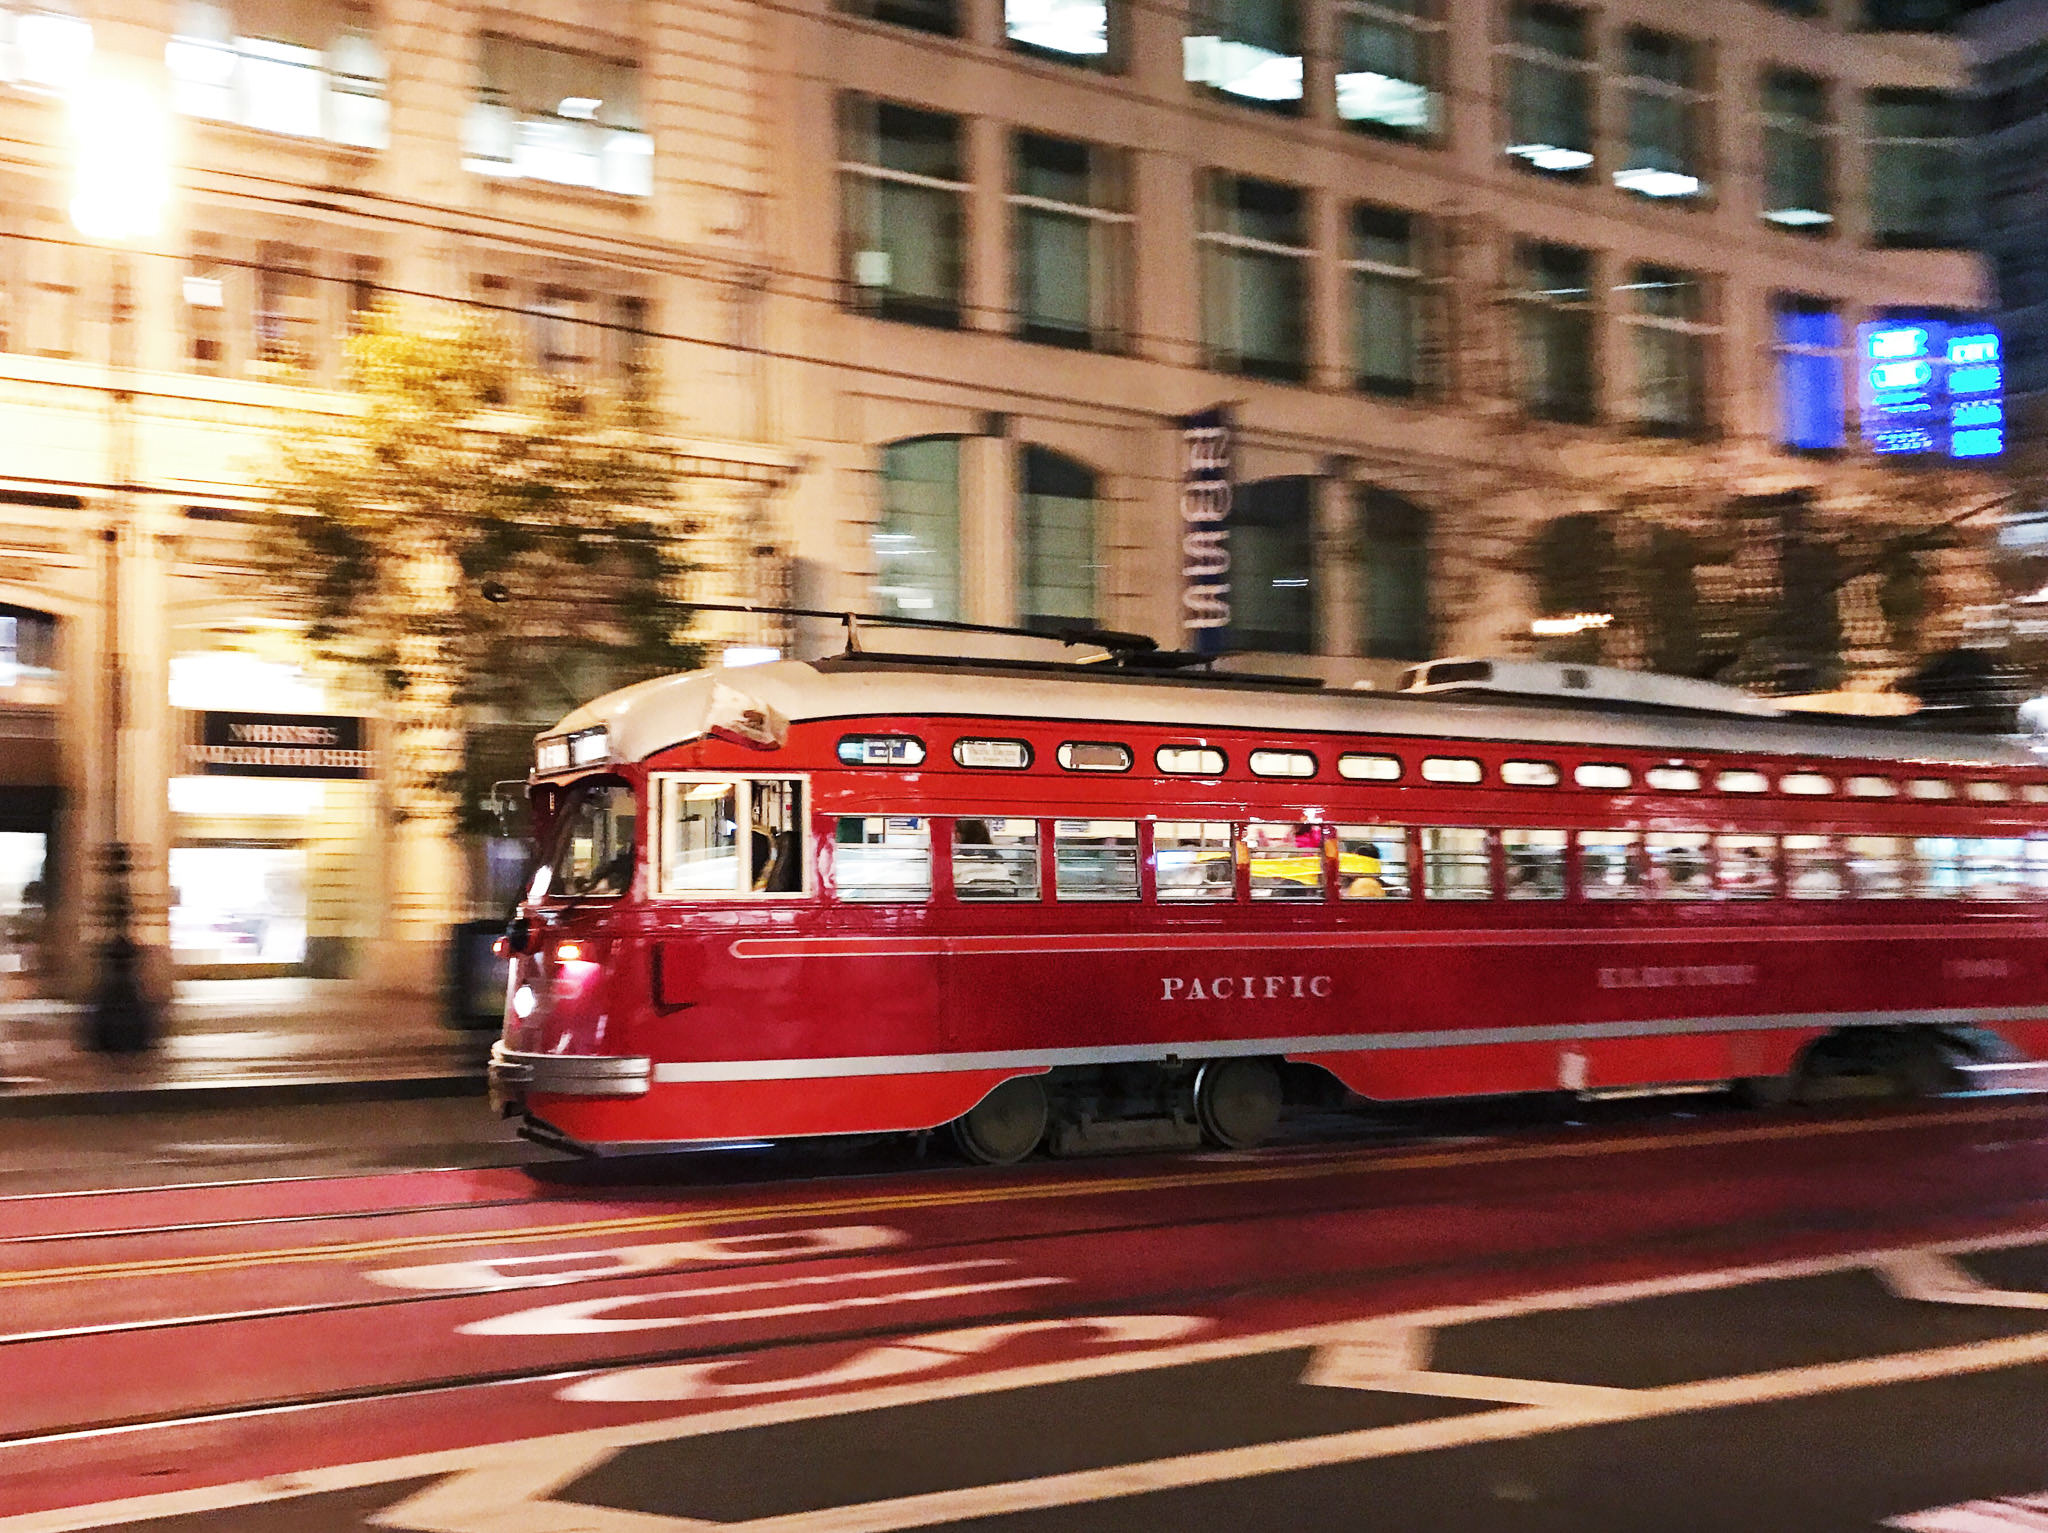
Low Light Photography: Low light photography with your phone is difficult, but not impossible. Your phone will usually set the shutter speed quite low, which means there’s a greater chance of motion blur. Of course, if you’re aware of this, you can compensate. Here’s an image I created by panning with the streetcar as it rolled along the tracks of Market Street in San Francisco.
Capturing Images on a Smartphone: Summary
If you’ve been ignoring the camera feature on your cell phone because you think it’s not capable of producing good results, you should definitely give it another try. Most modern cell phones have great cameras that can produce surprising results. Of course, you have to realize that it does have limitations and not expect it to perform miracles. With a little practice, though, you might just start leaving your “real” camera at home once in a while.
If you find that the default camera app doesn’t offer you enough control over the camera settings, you might try downloading an advanced camera app. These can offer a variety of different options that are missing from the default camera app, including full manual controls overexposure and RAW capture mode.
Regardless of if you choose to use the default app or download something more advanced, make sure you take the time to familiarize yourself with it. Just like with an expensive DSLR, you won’t be able to create the best photos possible if you aren’t familiar with all of the options available and how to use it.
If you prefer to use a “real” camera, by all means, feel free. There’s no question that DSLRs and mirrorless cameras are superior to the cameras found on any cell phone today. But, if you don’t want to be weighed down by carrying around a bunch of heavy and expensive gear, you might try heading out one day armed with only your cell phone. Personally, I find a certain type of freedom when I’m out walking around with only a phone in my pocket. There are times I wish I had my DSLR with me, but usually, I’m completely content seeing what I can create with just a cell phone.
More Image Samples
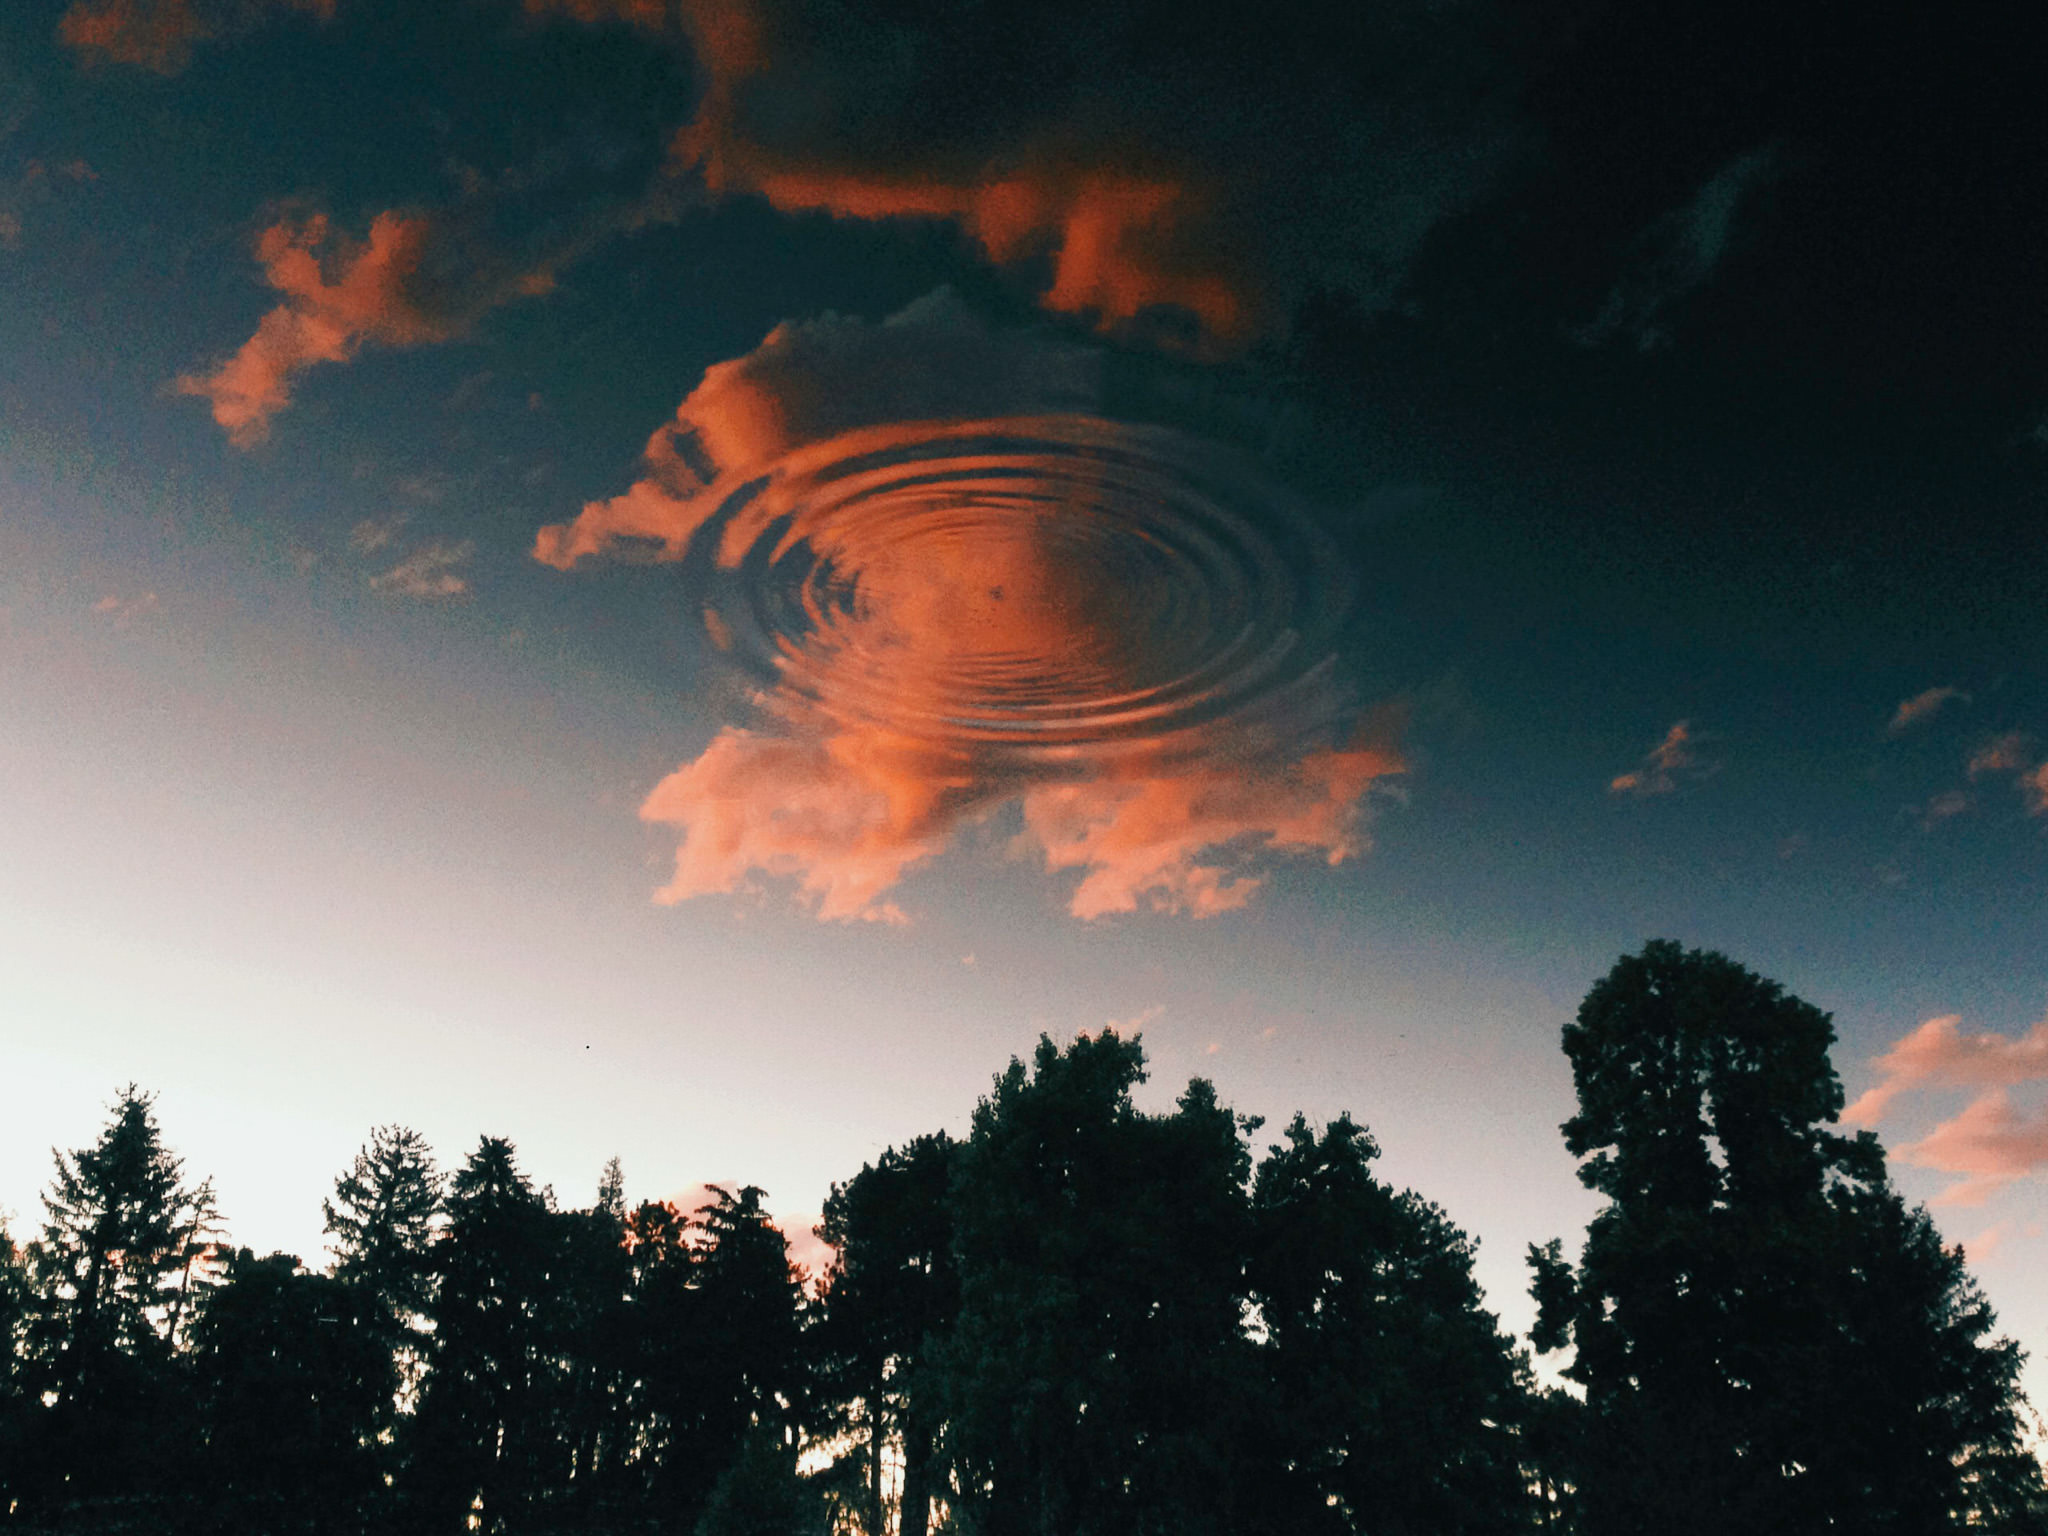
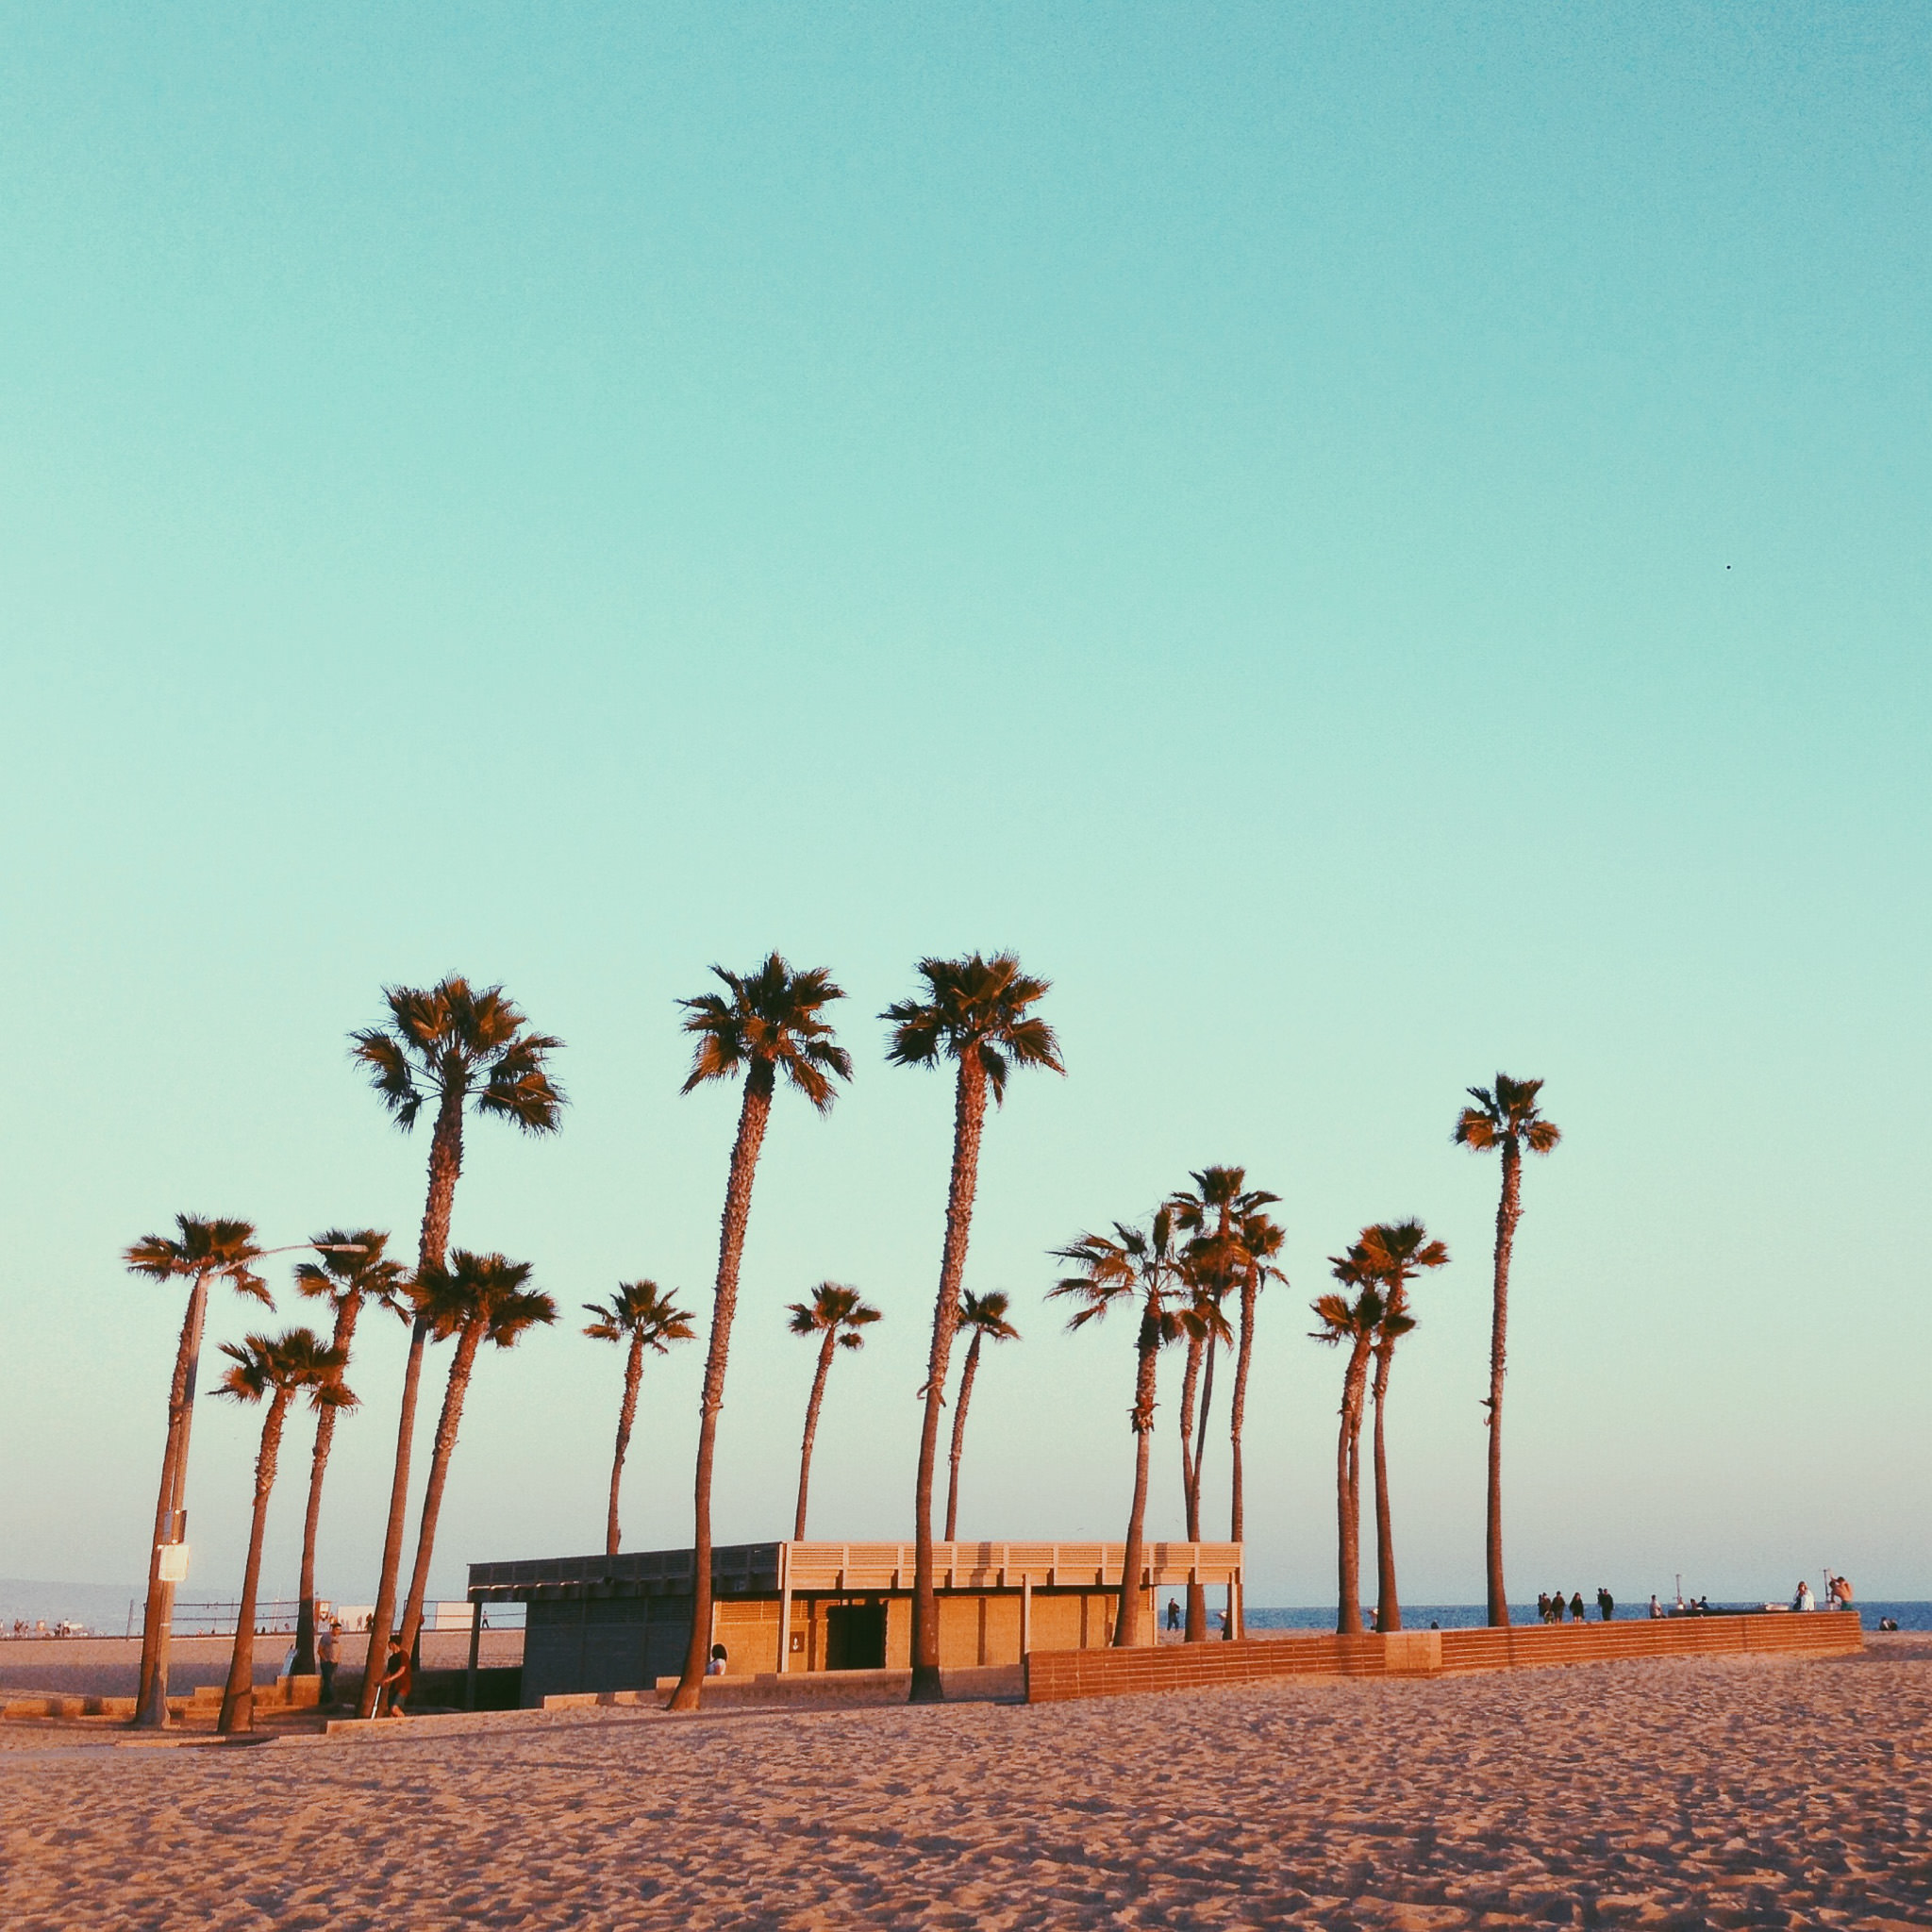
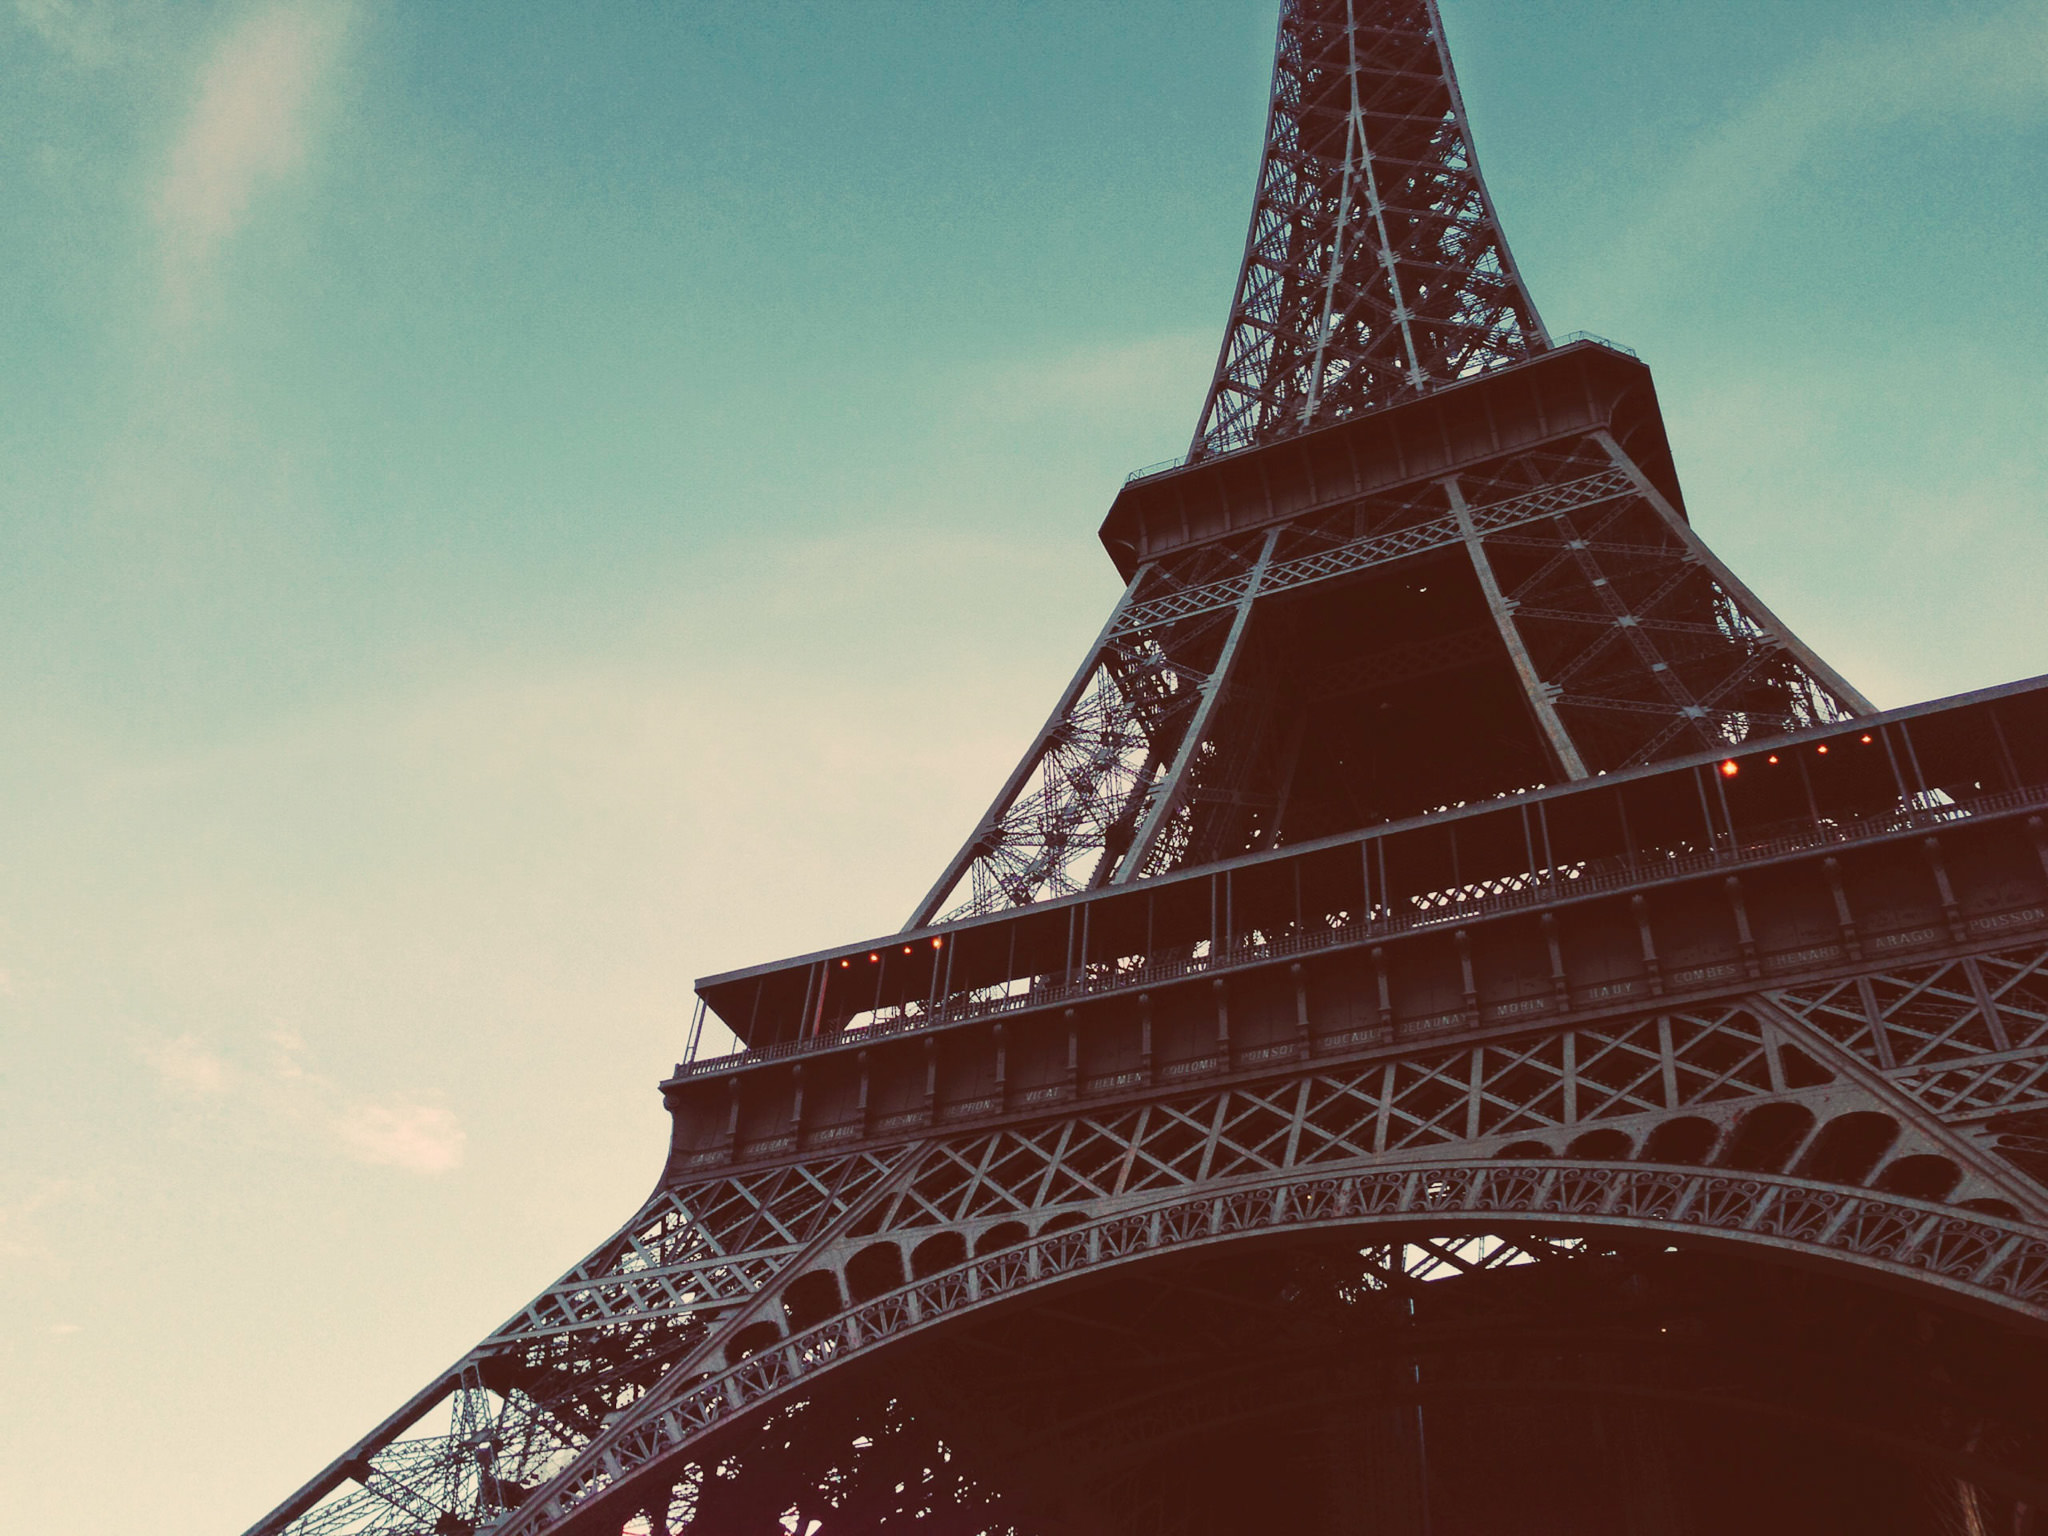
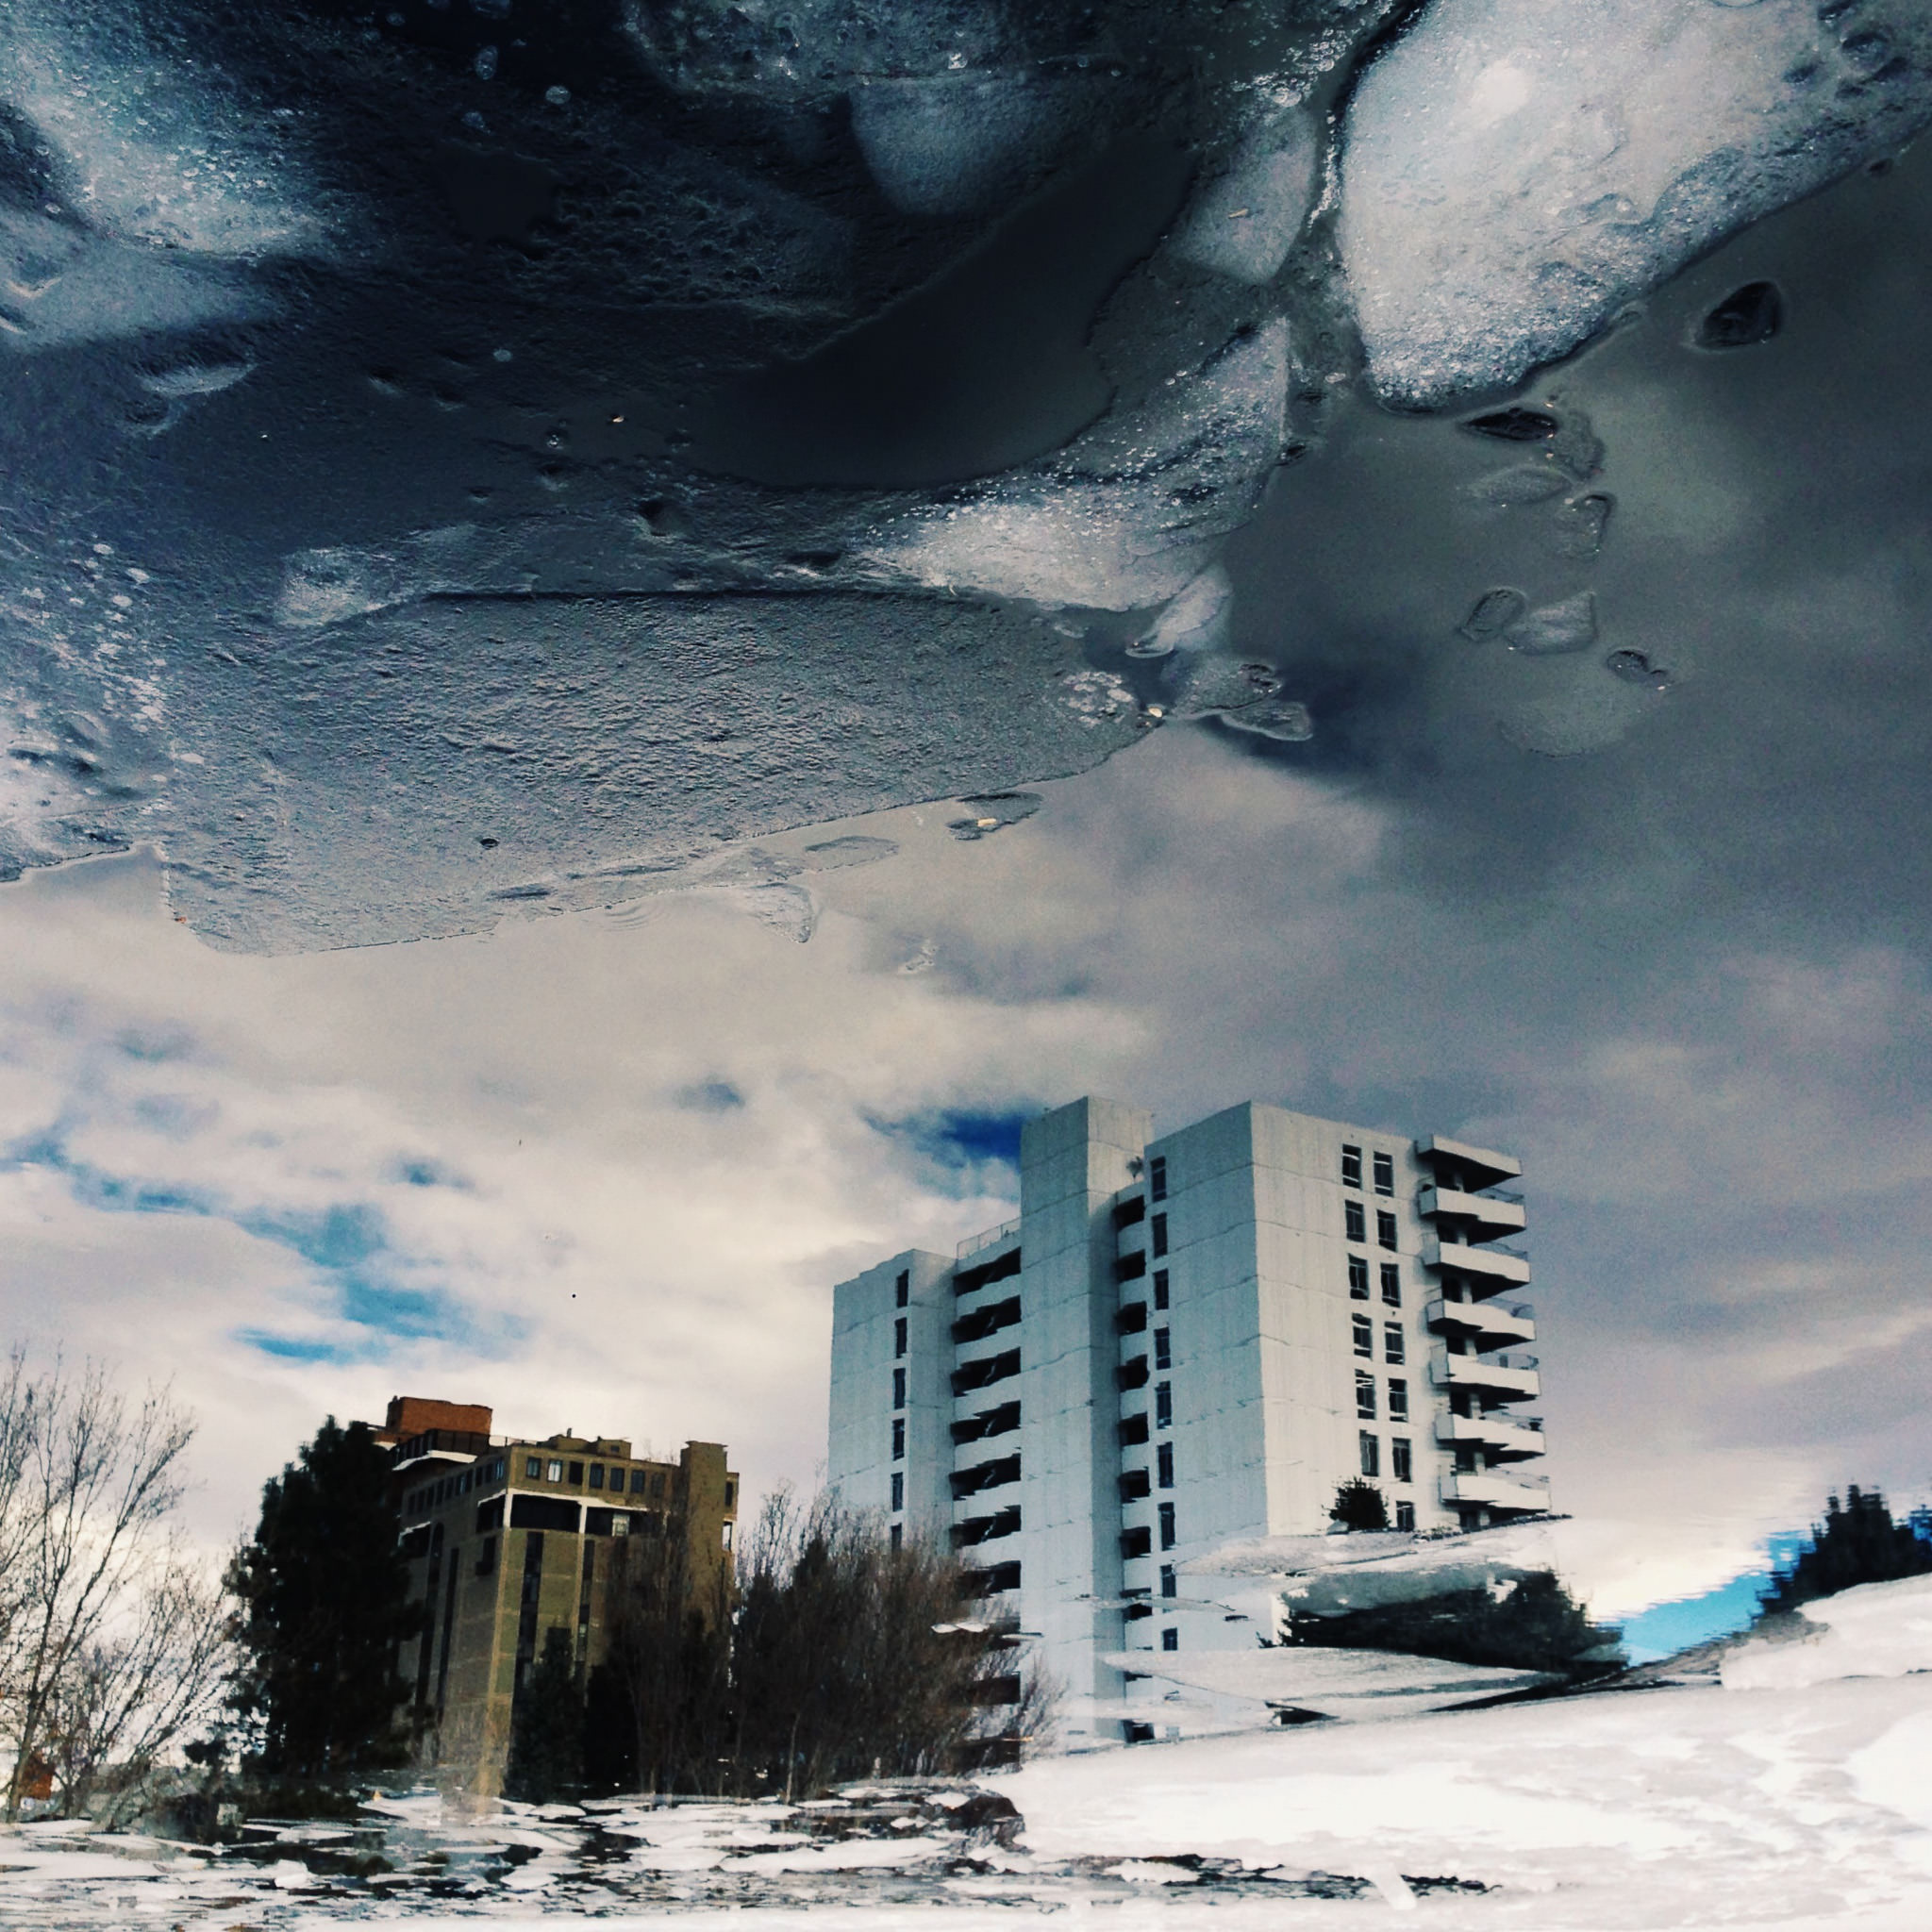
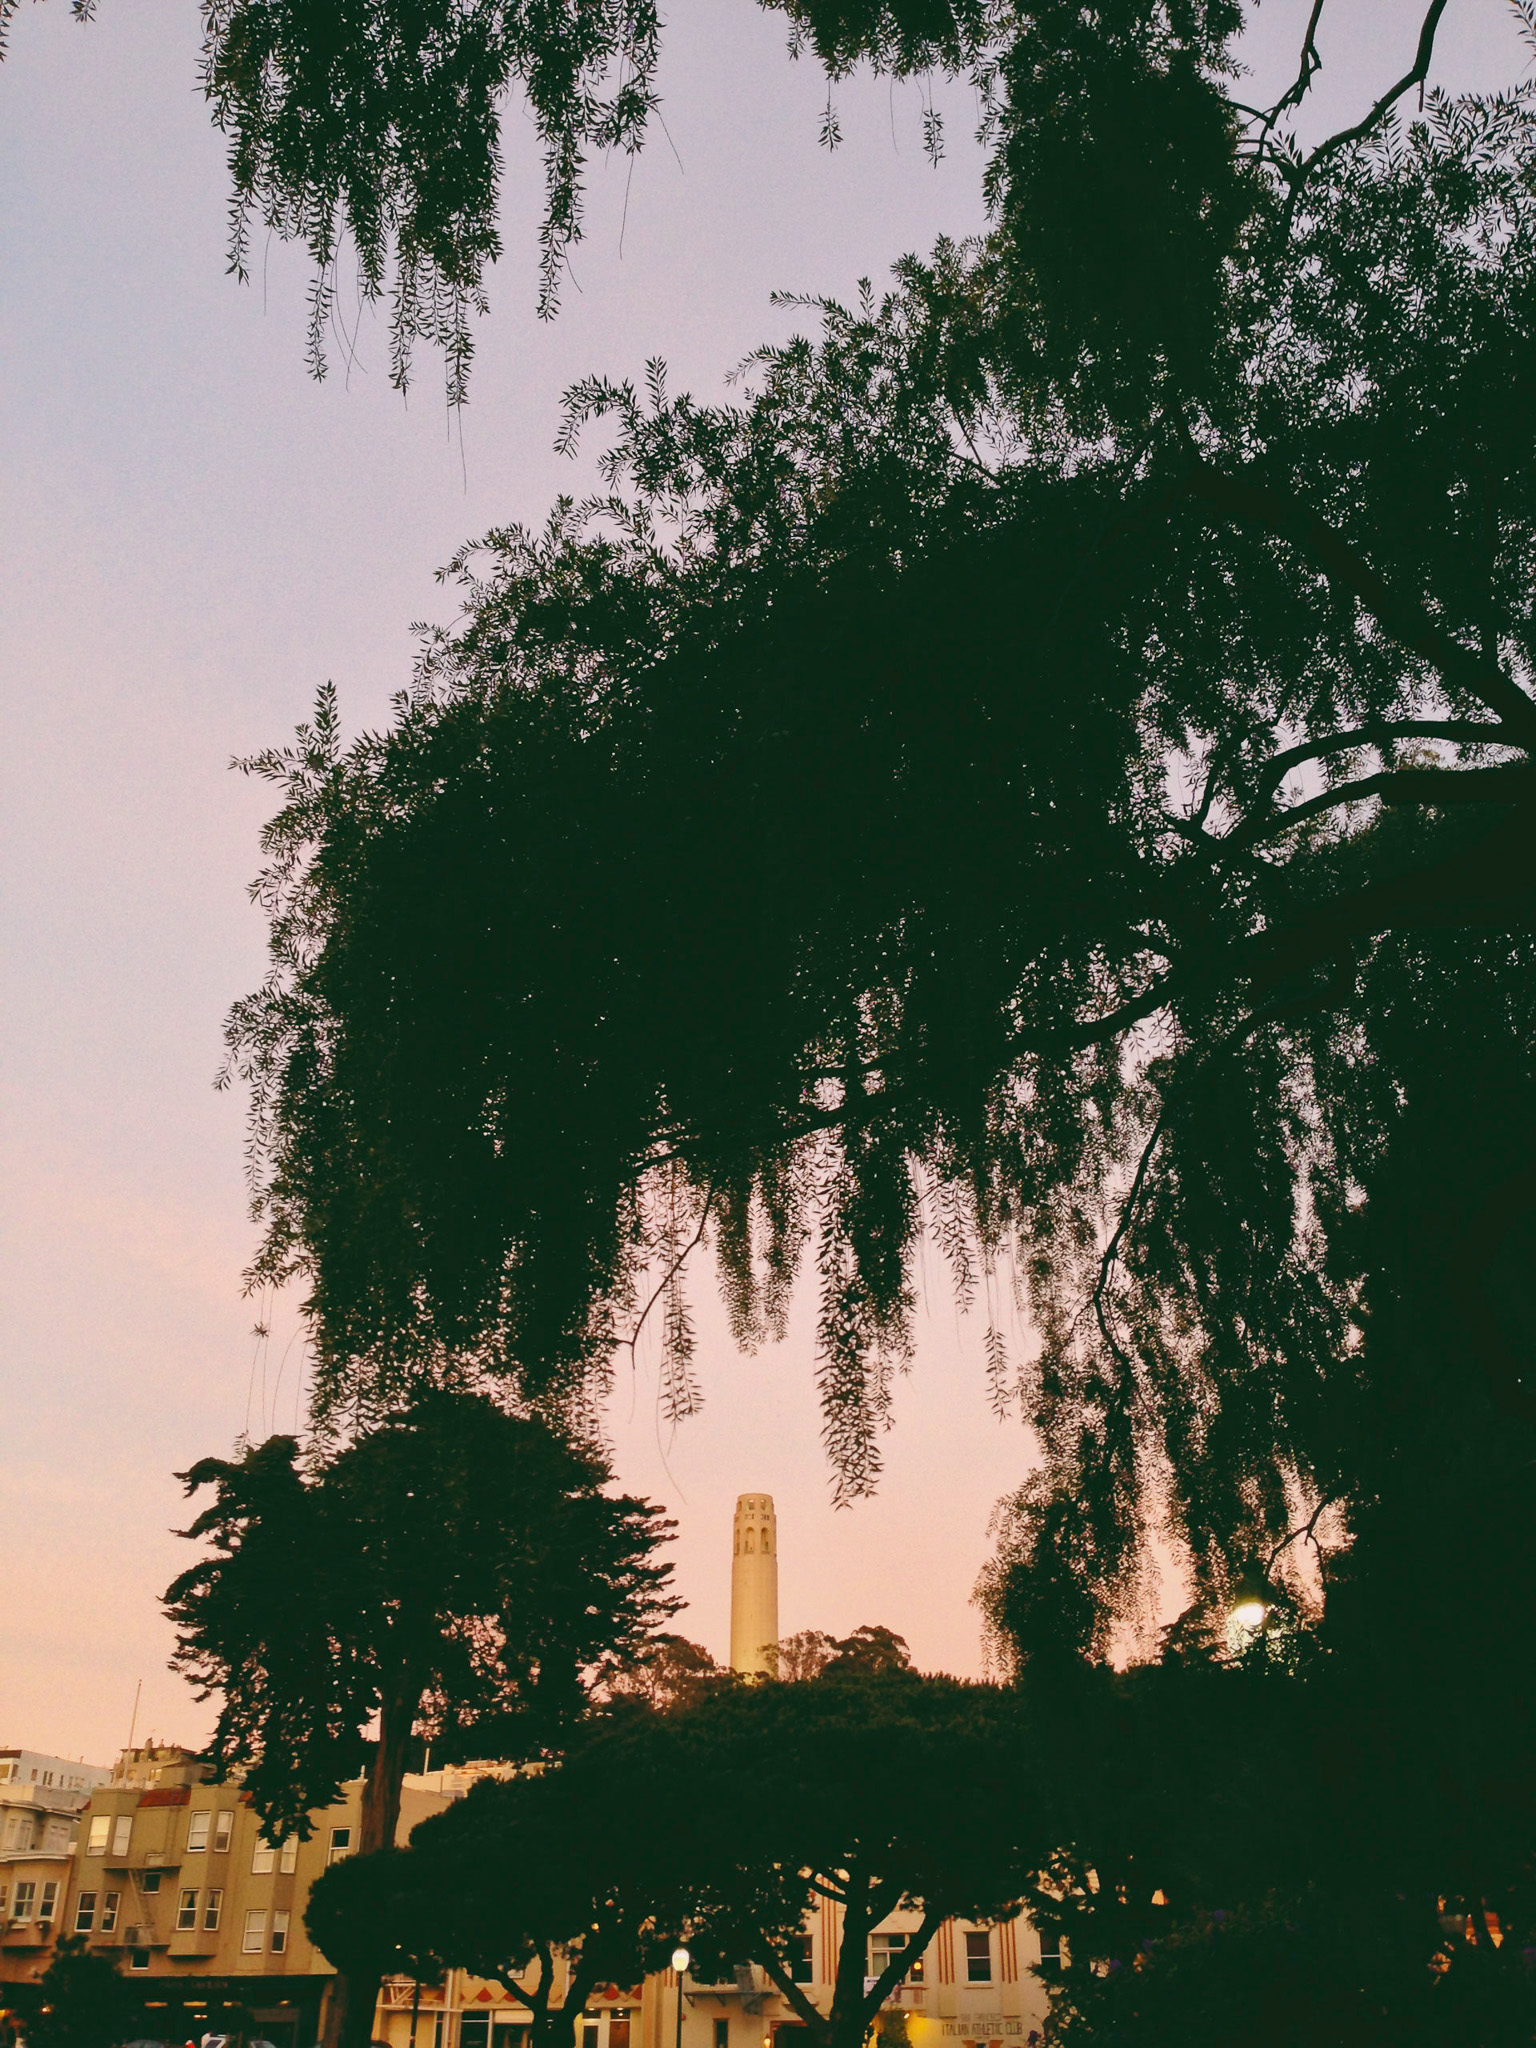
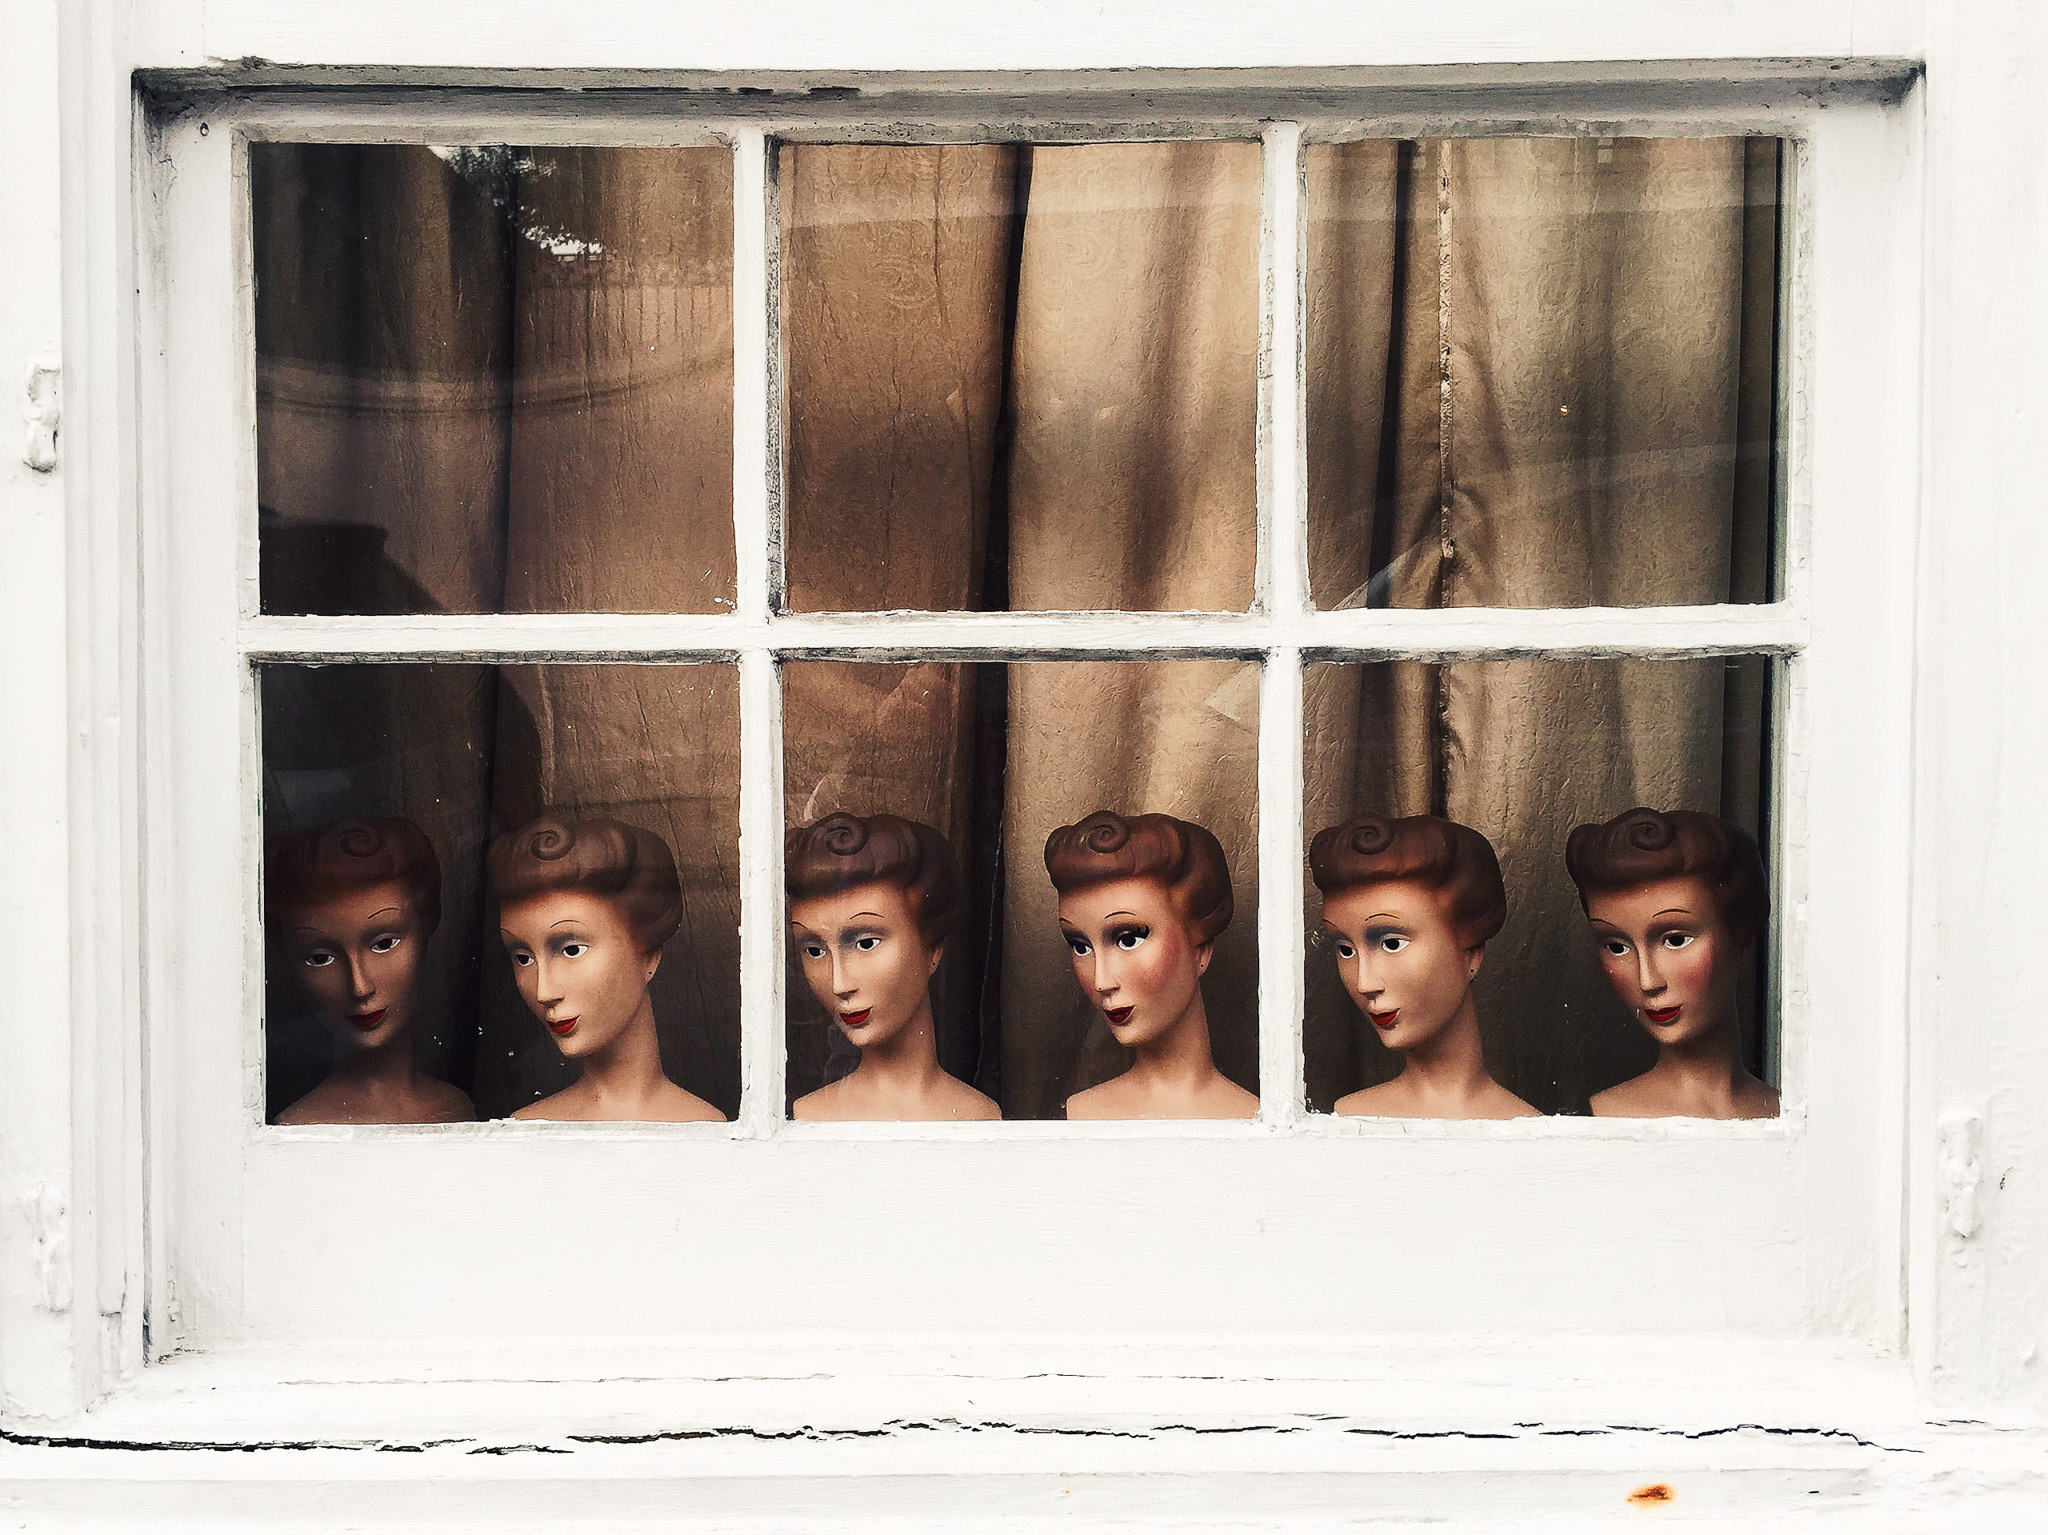
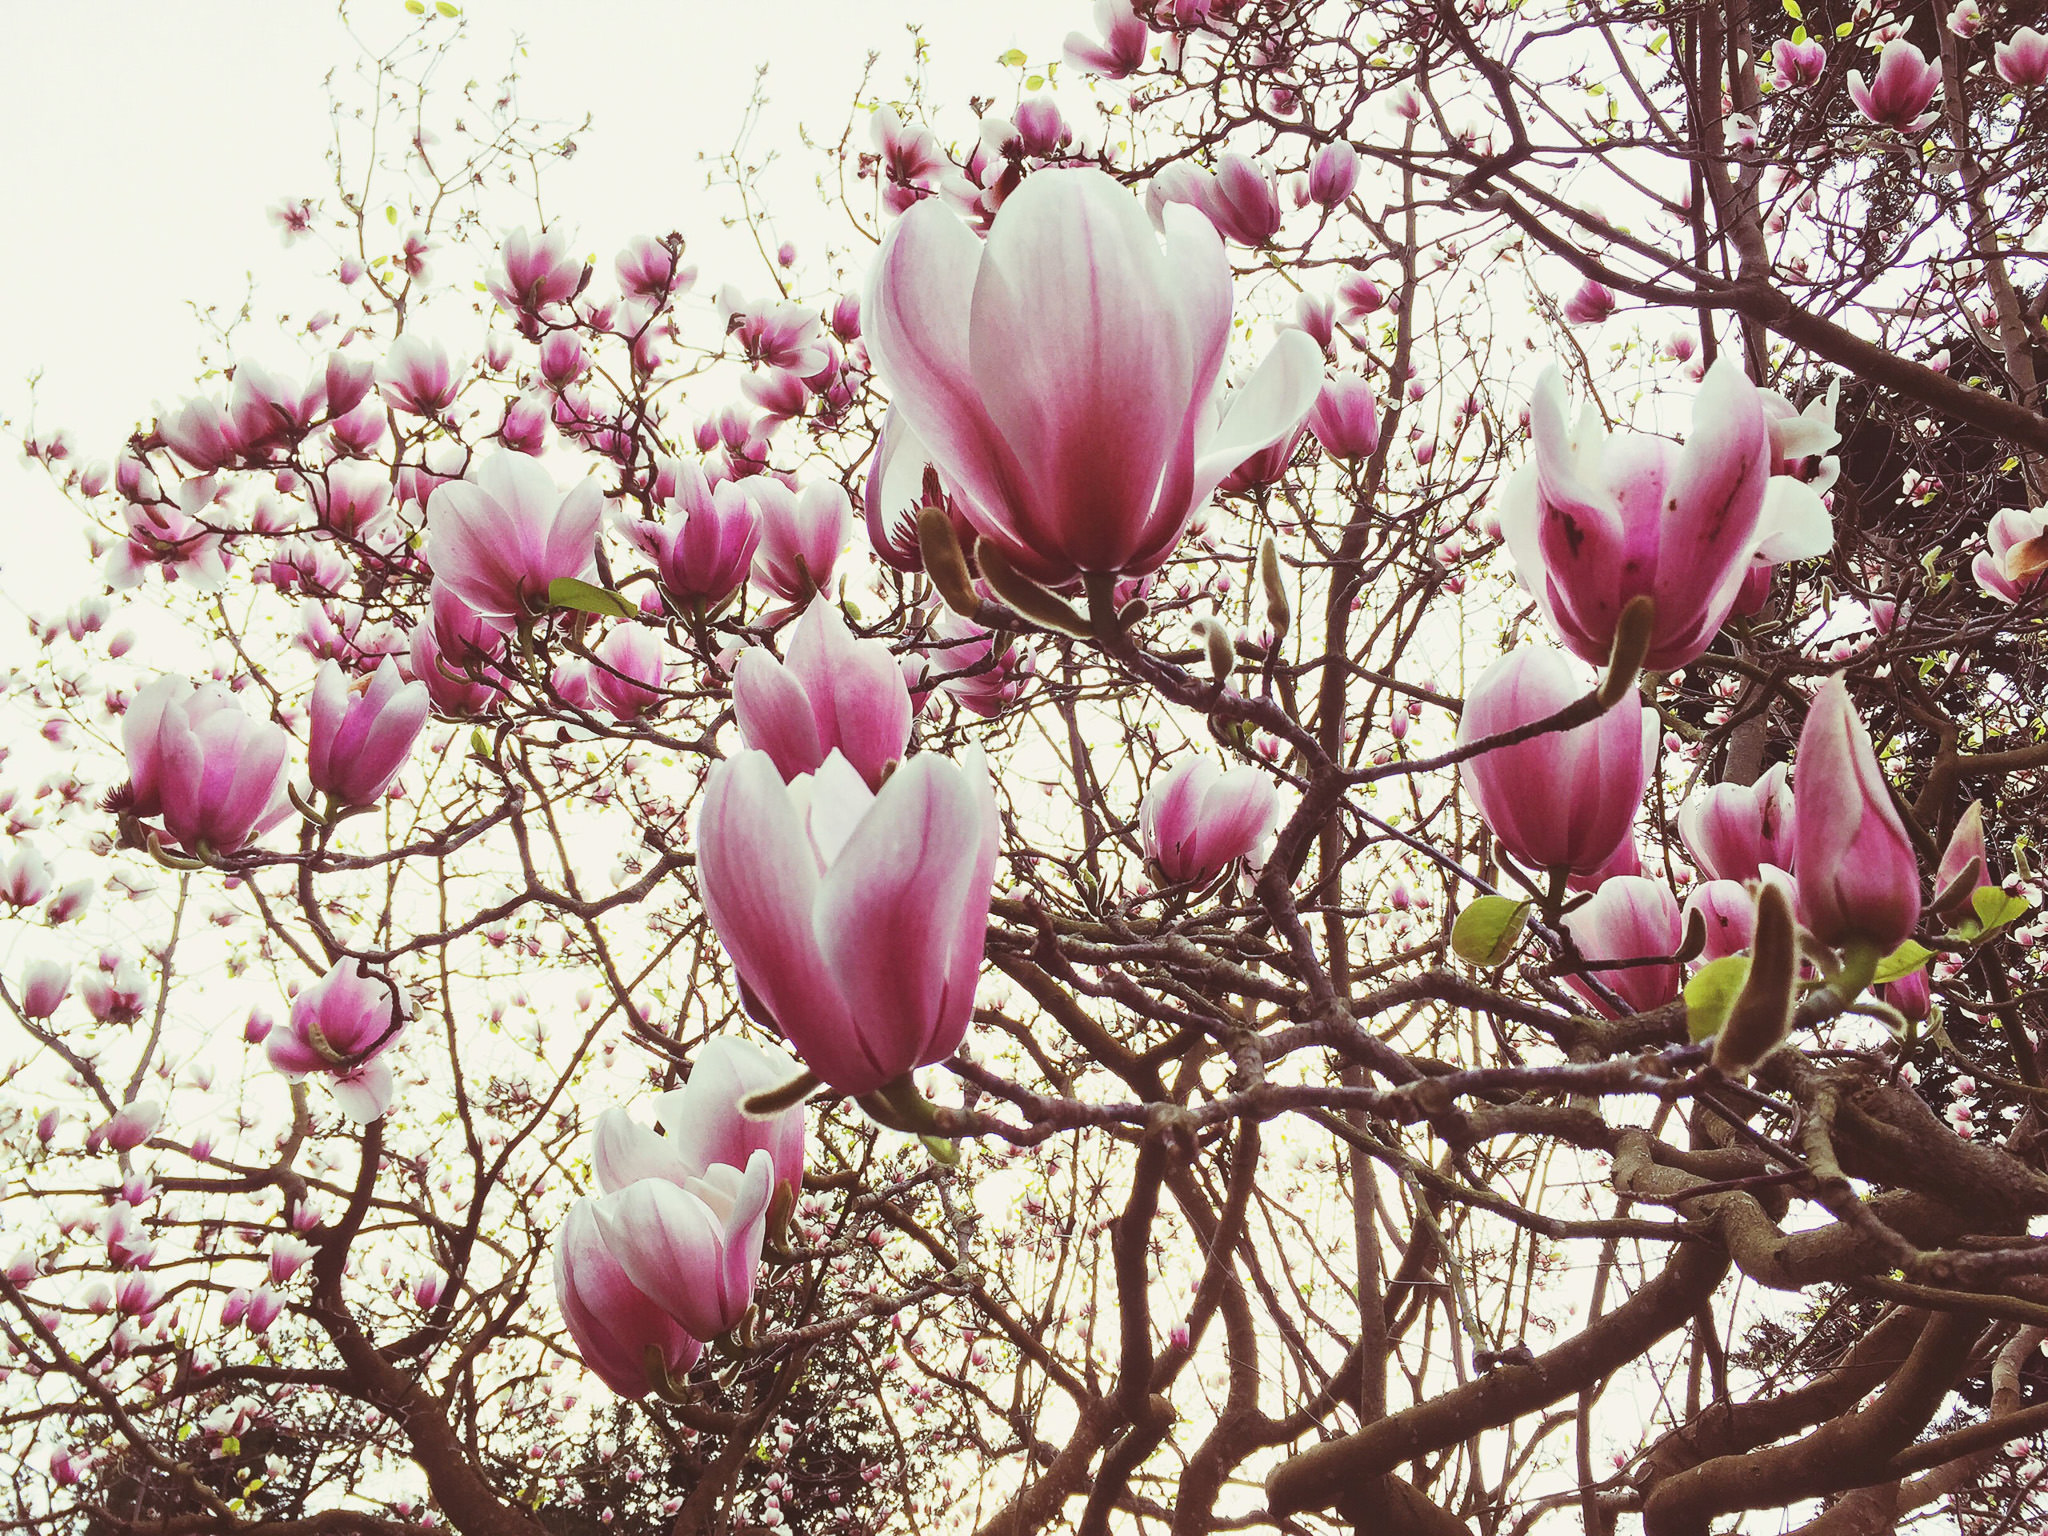
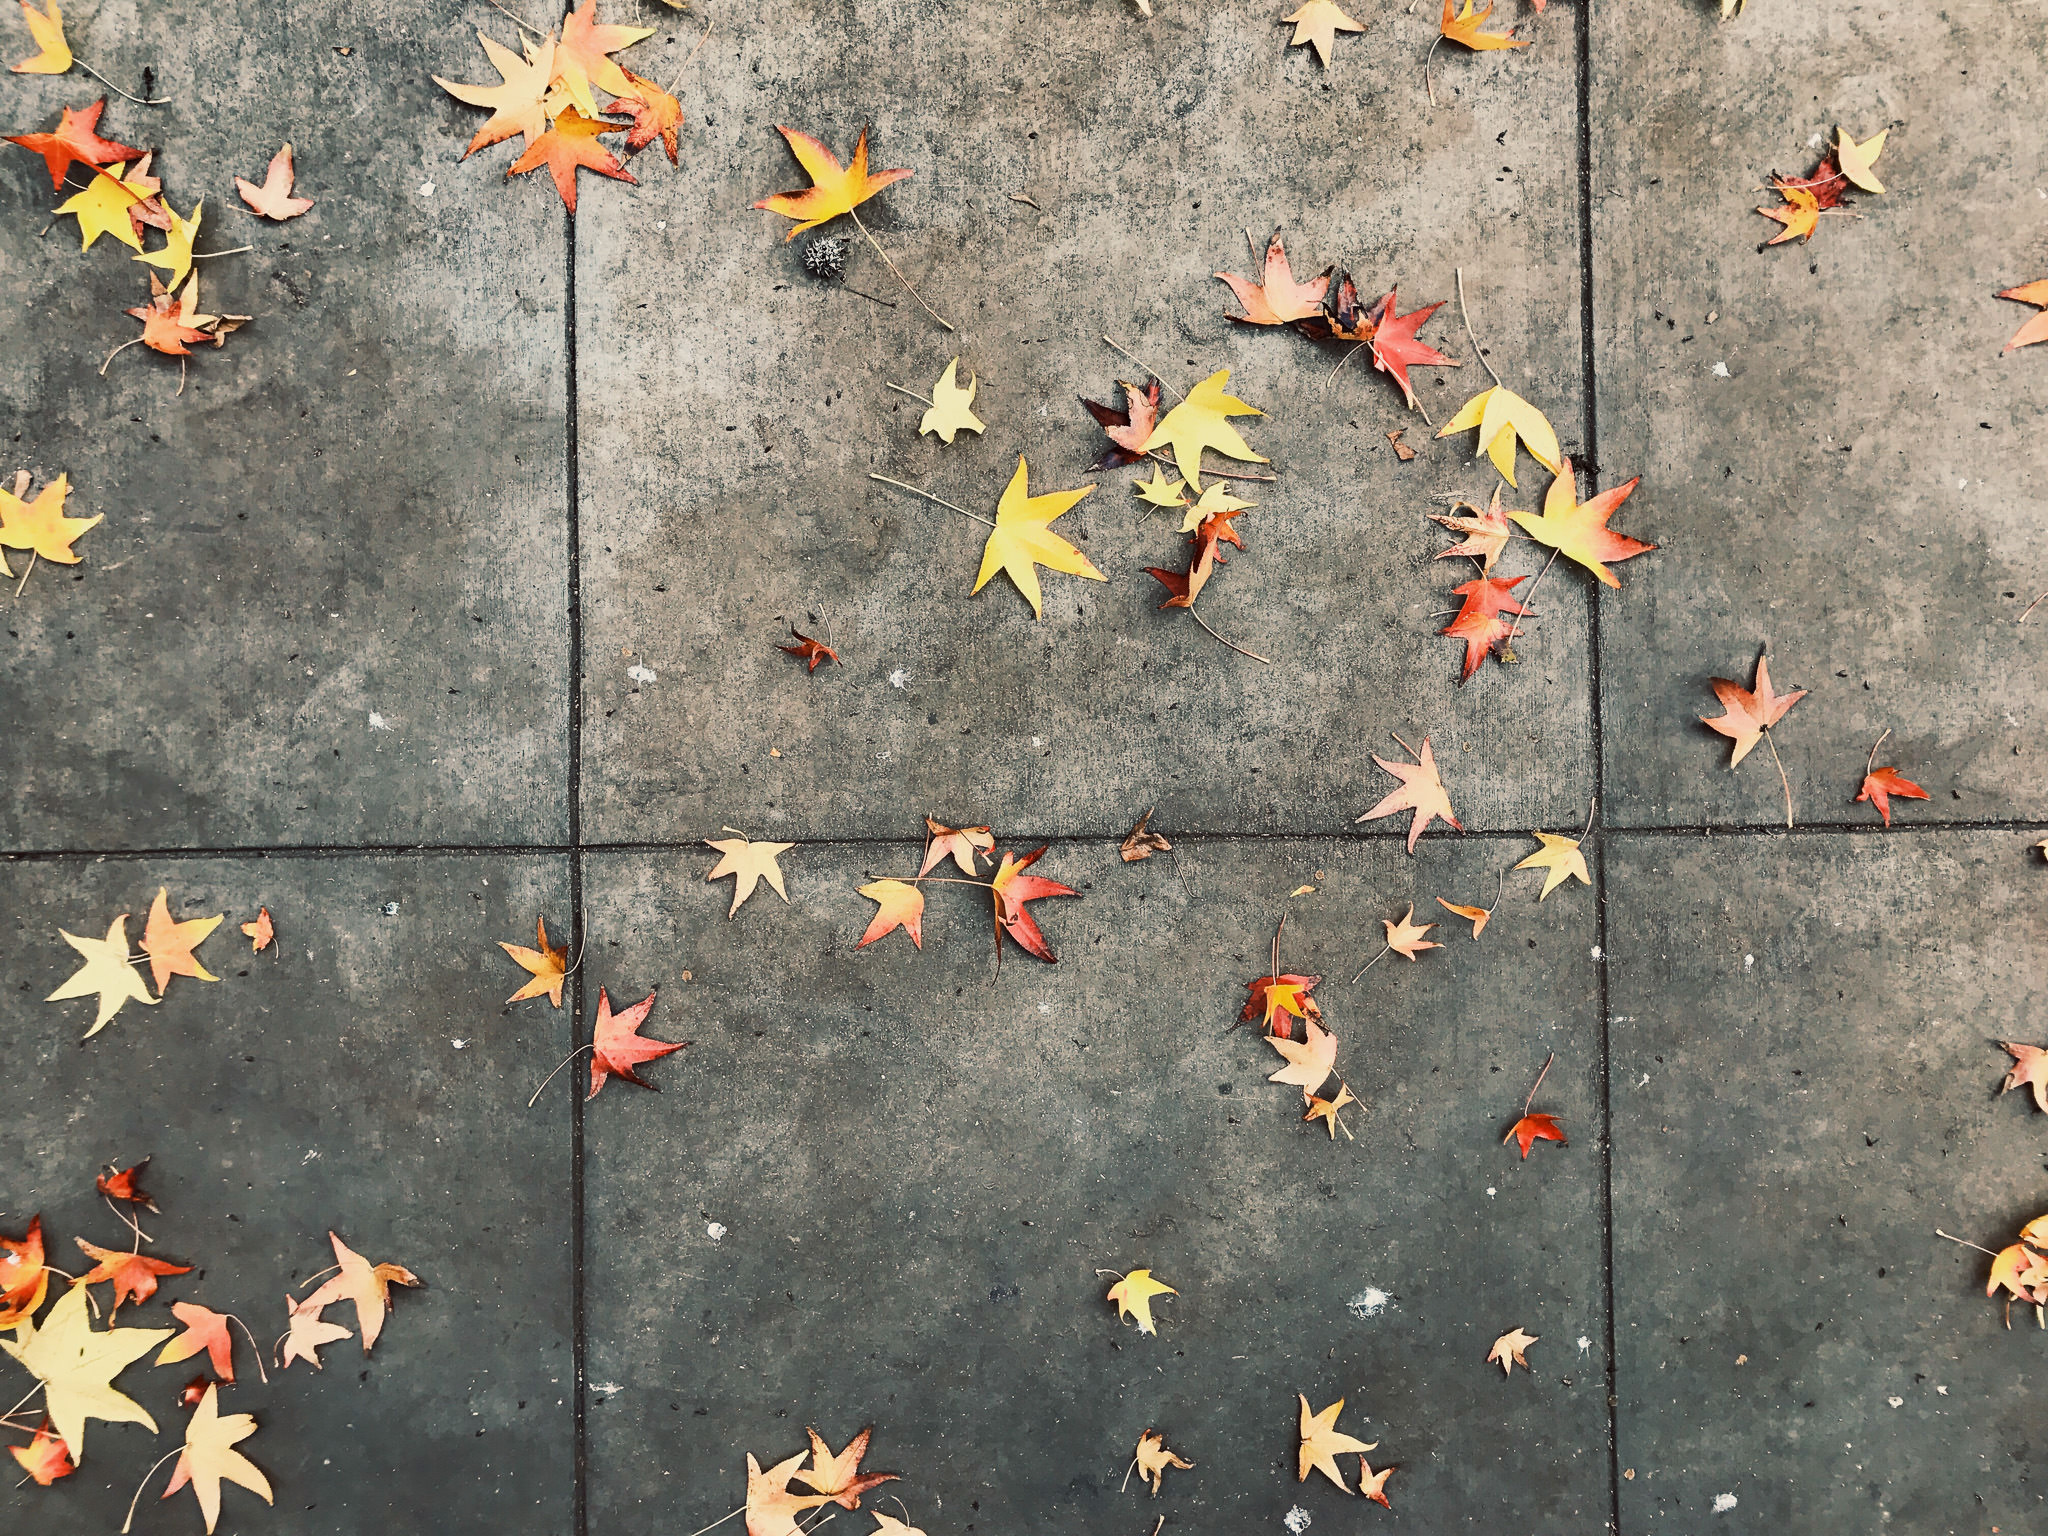
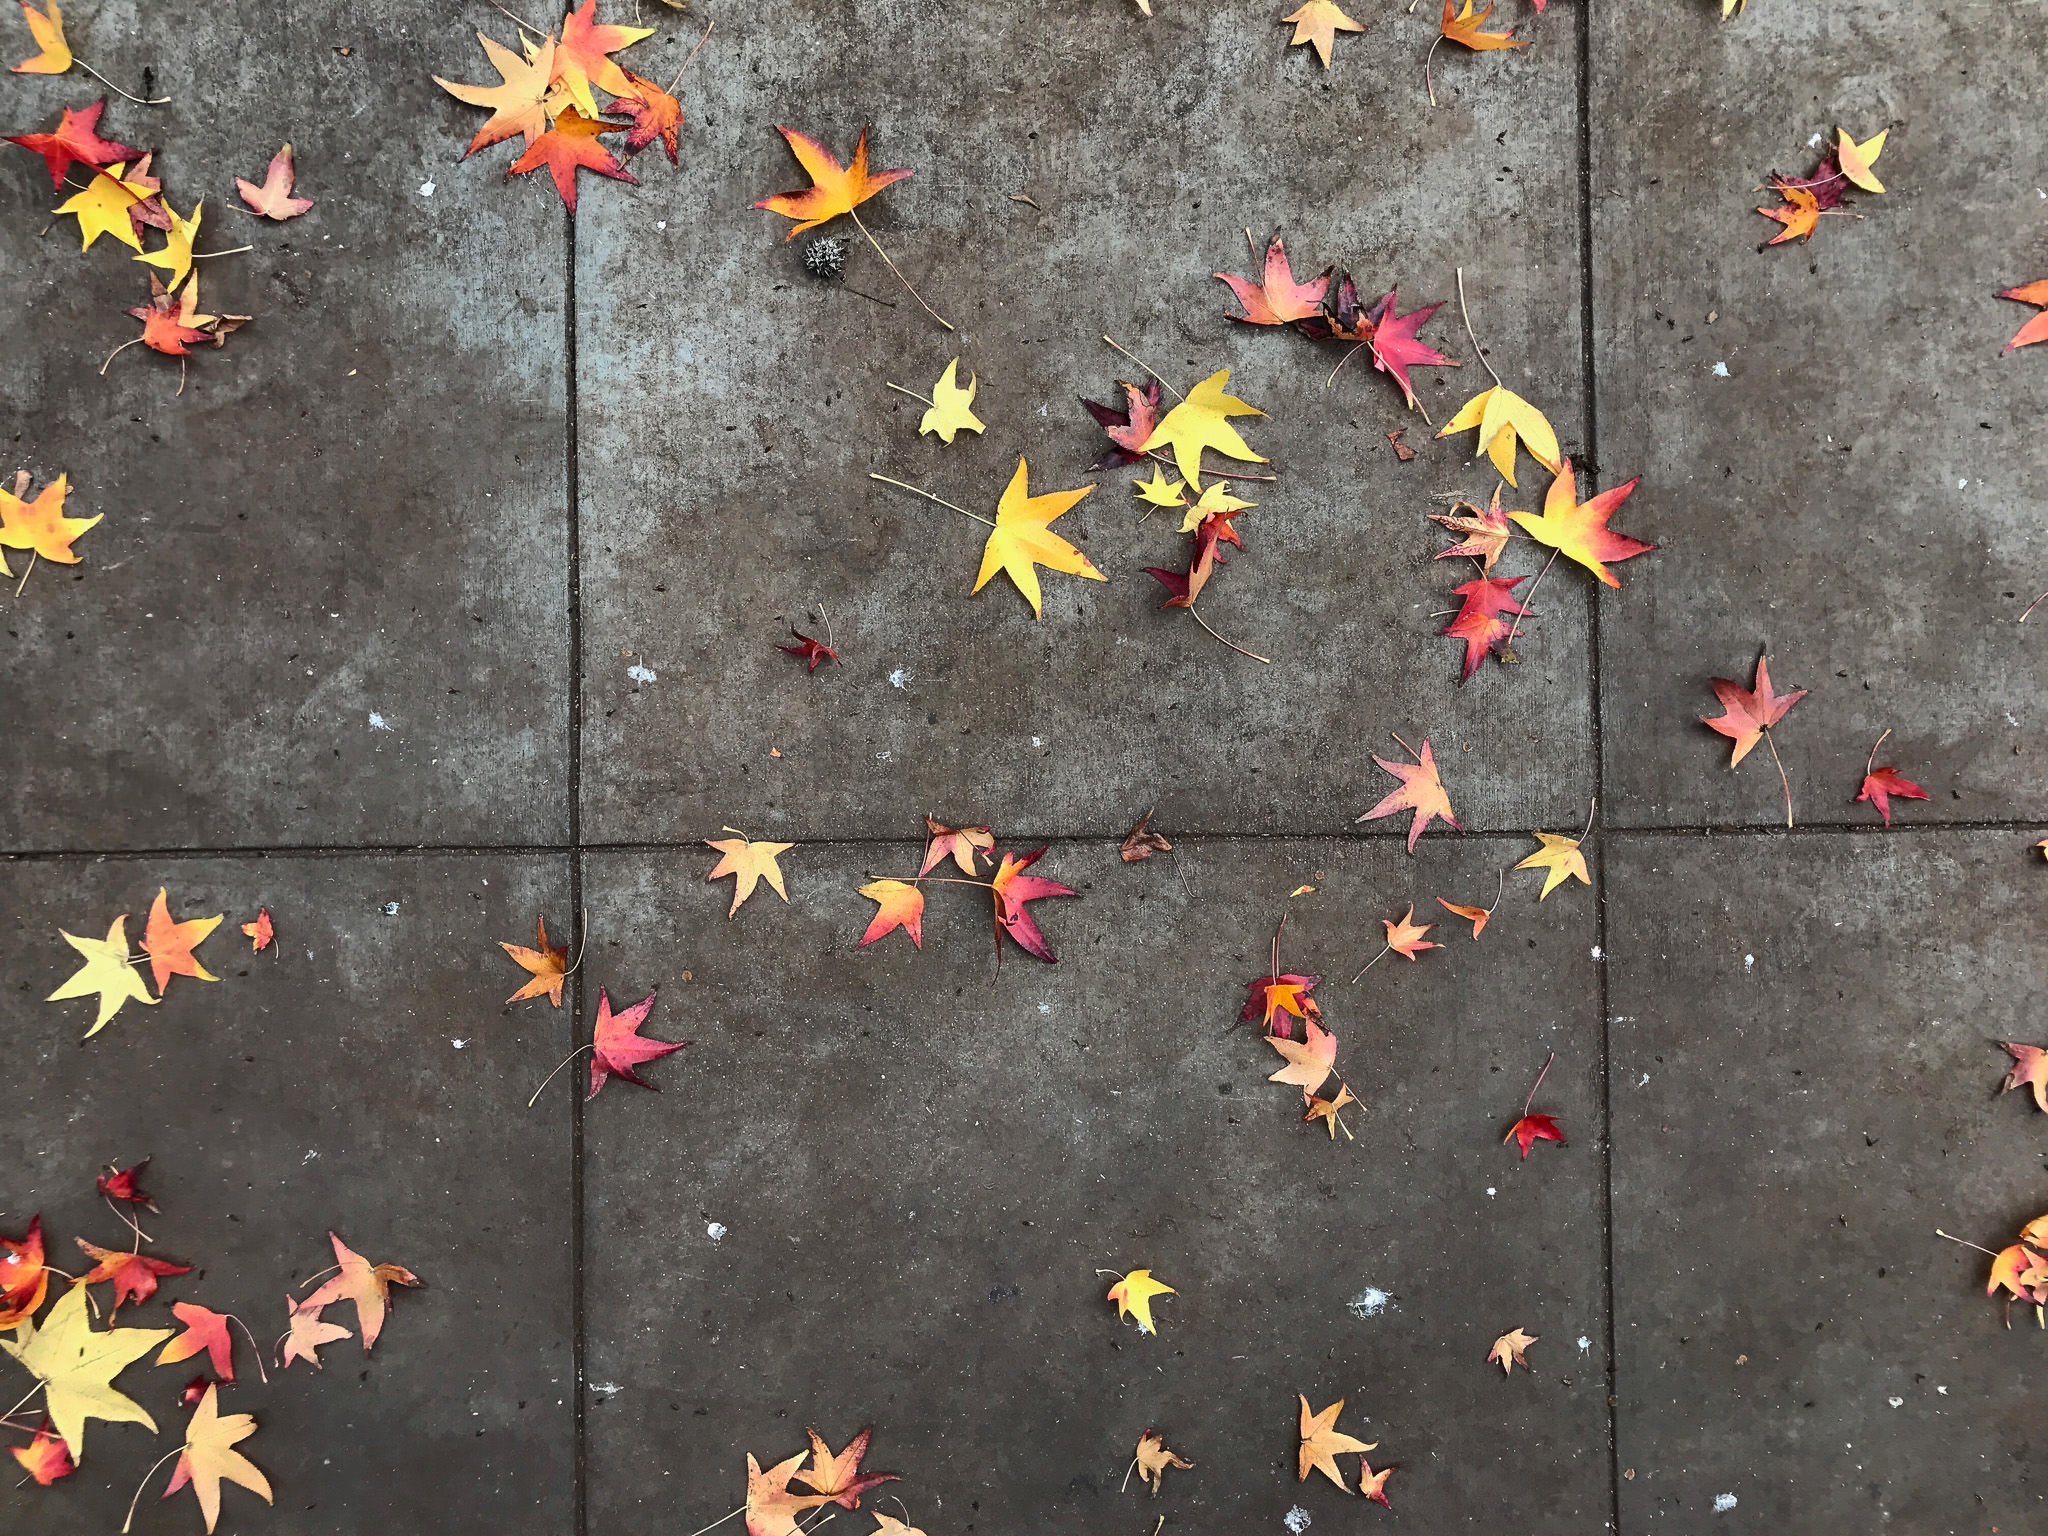
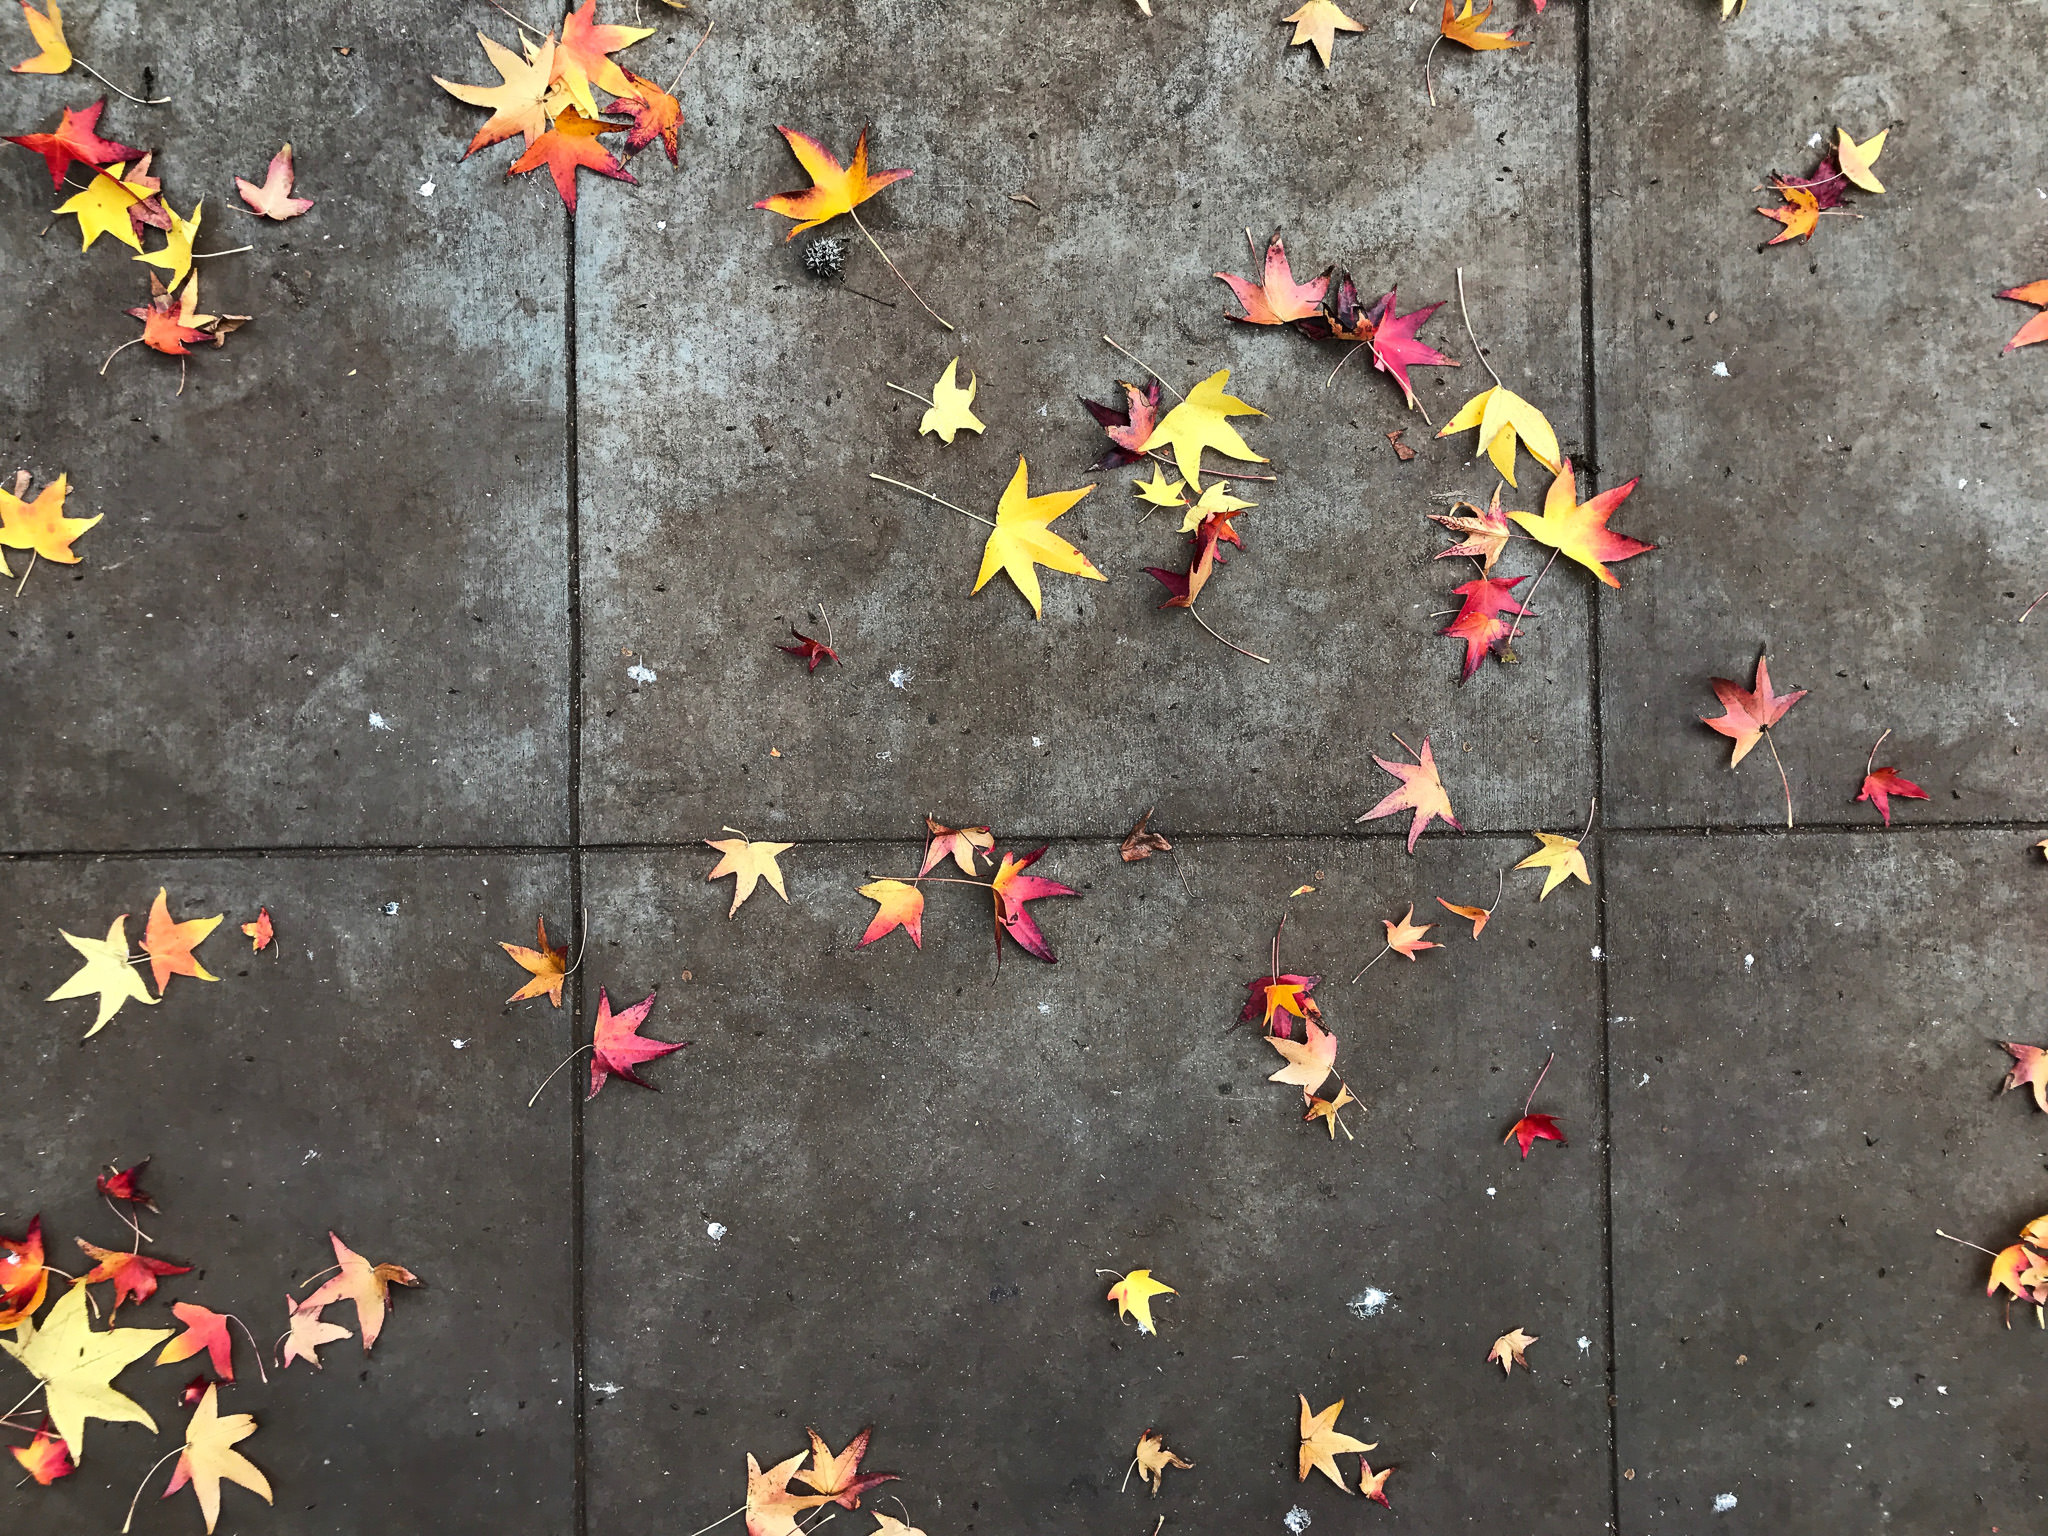
In the next section, I will cover a few of the different apps that are available for editing photos. For now, here are a few images that I’ve taken (and edited) with my cell phone. Hopefully they demonstrate that modern phones are indeed capable cameras that should not be dismissed as unusable for personal photography:


Editing Images on a Smartphone
In this section, I want to go over how you can edit photos with different apps on your phone. Of course, you can always import photos from your phone onto your computer and edit them with your software of choice, but if you plan to share images on social media and want to upload them directly from your phone, you can save a few steps by doing everything on your phone.
For the purposes of this section, I’m going to assume that you have experience editing photos on a computer. I’m not going to cover the basics of photo editing and what all of the different controls do (if you need more information on editing basics, this is a great place to start).
Why Edit Images?
If you’re used to using your DSLR or mirrorless camera for photography and typically shoot JPEG, the images probably come out of the camera looking pretty good. Of course, almost any image can benefit from a few adjustments in post-processing, but this is especially true with phone photos. The lenses on cell phones don’t have the same quality glass and special coatings as the lenses for your camera, so you’ll often find the images you capture with your phone need edited before you’re happy with them.
If you followed my advice in the last section, your images should be properly exposed, but there’s more to a good image than proper exposure. At the very least, almost every phone image can benefit from a boost in contrast and saturation. You might also need to adjust the tint and white balance a bit. Finally, editing images is an opportunity to put your personal touch on an image and make it your own.
Throughout this post, I’m going to use the same image and edit it in different apps. Hopefully, this will show that they’re all pretty similar in the results they can produce. Of course, the more editing options an app has, the more complicated your edit can be.
Image Editing App Choices
Once you start looking for an app that you can use to edit photos, the first thing you’ll notice is that there are a lot of them out there. How do you decide which to use? I’m going to go over a few of the most popular options out there, as well as offer up my personal opinions about each one. Most are free, so there’s really no reason not to try out a few different ones and see which you like best.
One thing to keep in mind is that you are editing JPEG images. Images that you’ve captured with your cell phone camera are always going to be JPEGs (unless you specifically used a phone and app that can shoot in DNG), so expect some limitations on how far you can push things.
There are going to be some differences in which apps are available for iOS and which are available for Android. All of the apps that I discuss in this post are available for both (with the exception of Camera+). Almost every default camera app will have some basic editing capabilities built-in. Since all different builds and brands of Android phones will have a different default camera app, I can’t promise that the one that you’re using will be able to edit photos. Also, they’re all going to have different options, so I suggest exploring the options within your phone’s camera app and deciding if it will work for you or if you need to download something that gives you more control over the final look of your image.
Default Camera App
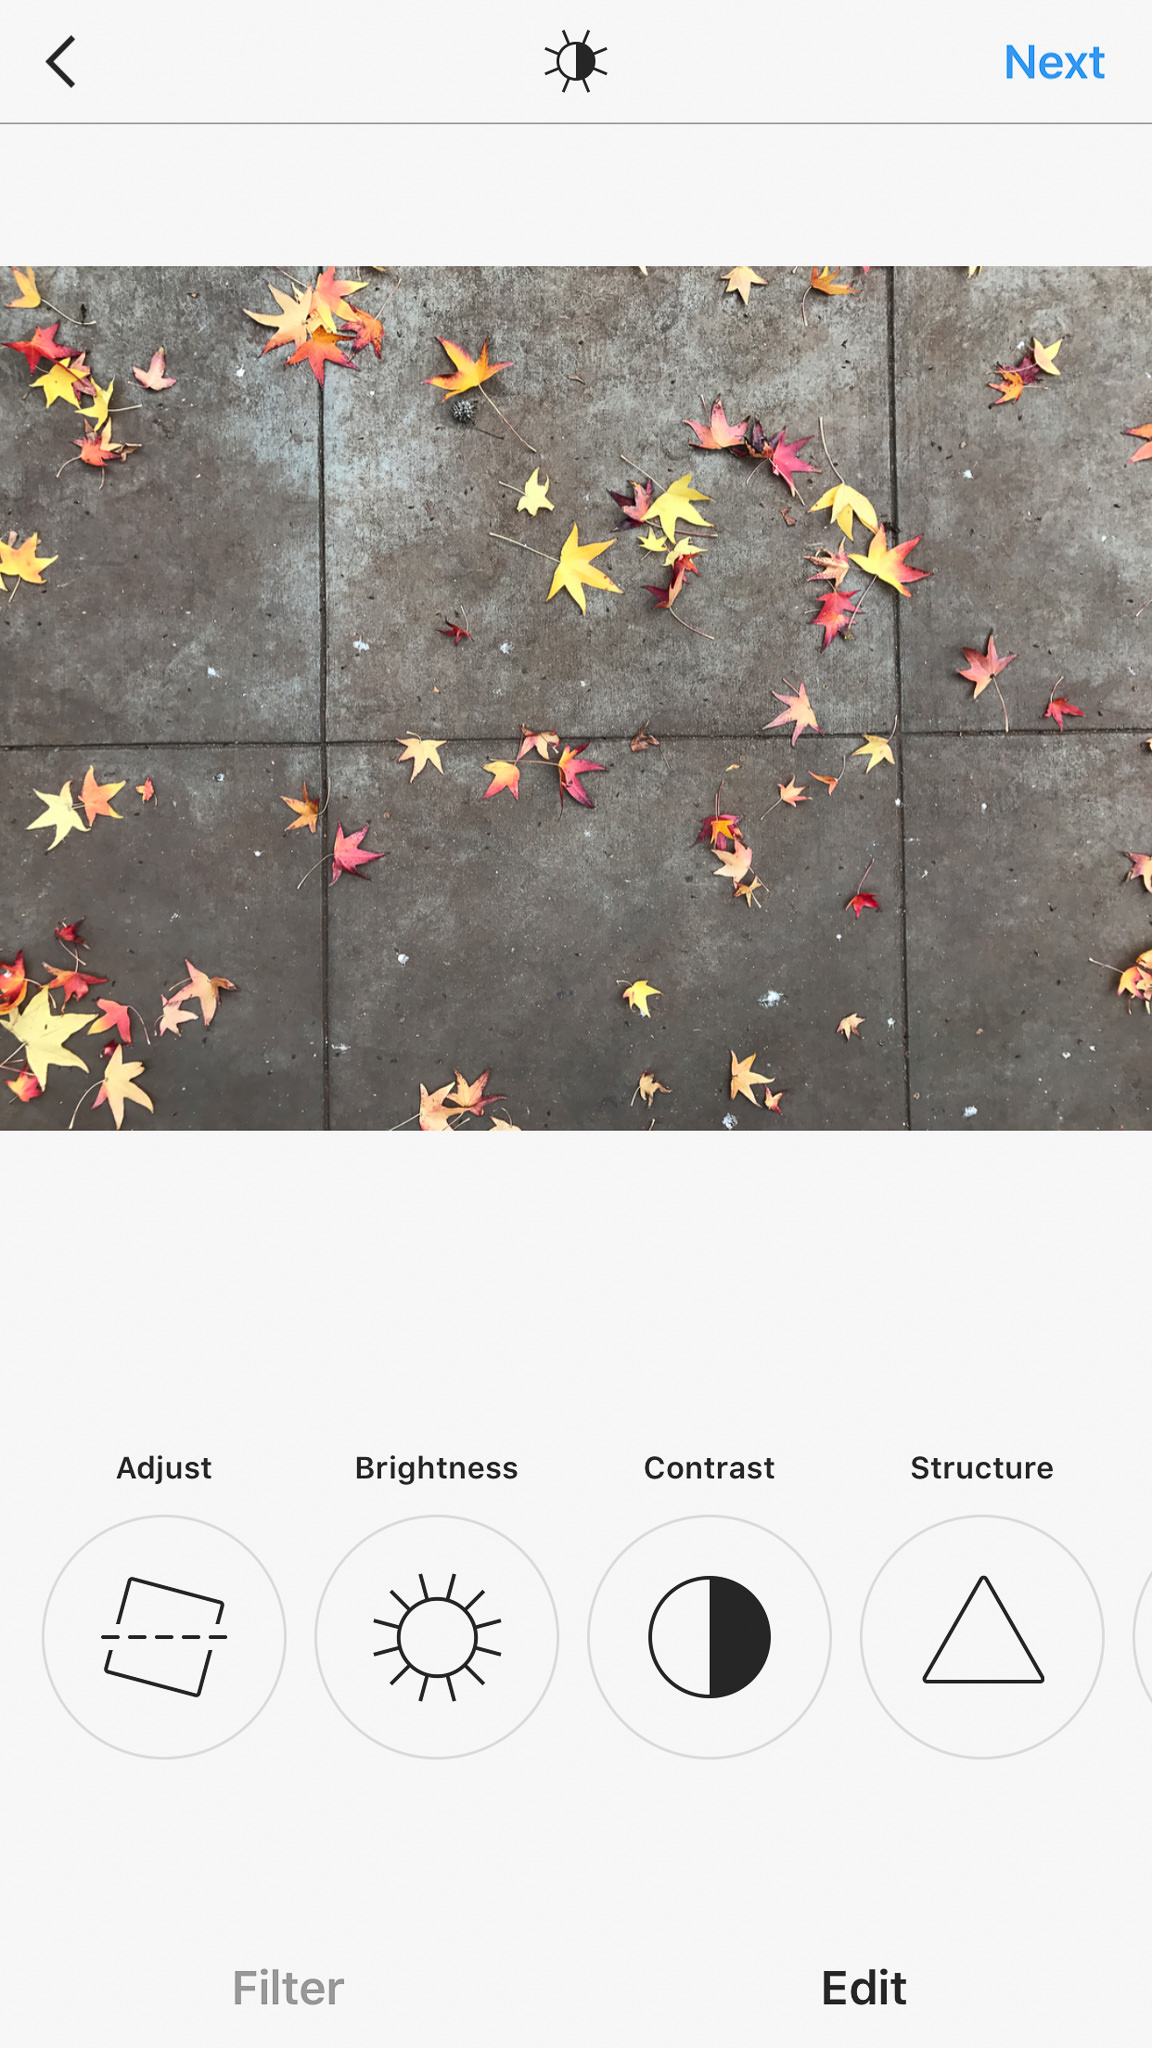
Let’s start out by covering the default editing capabilities that come with your phone. I shoot with an iPhone 7+ (running iOS 10.2), so that’s what I’m going to cover first. The editing options aren’t actually found inside the camera app, but can be found when you’re reviewing images. View an image that you took (either in the camera app or inside Photos) and at the bottom you’ll see three lines that look like sliders. This gives you access to the editing options.
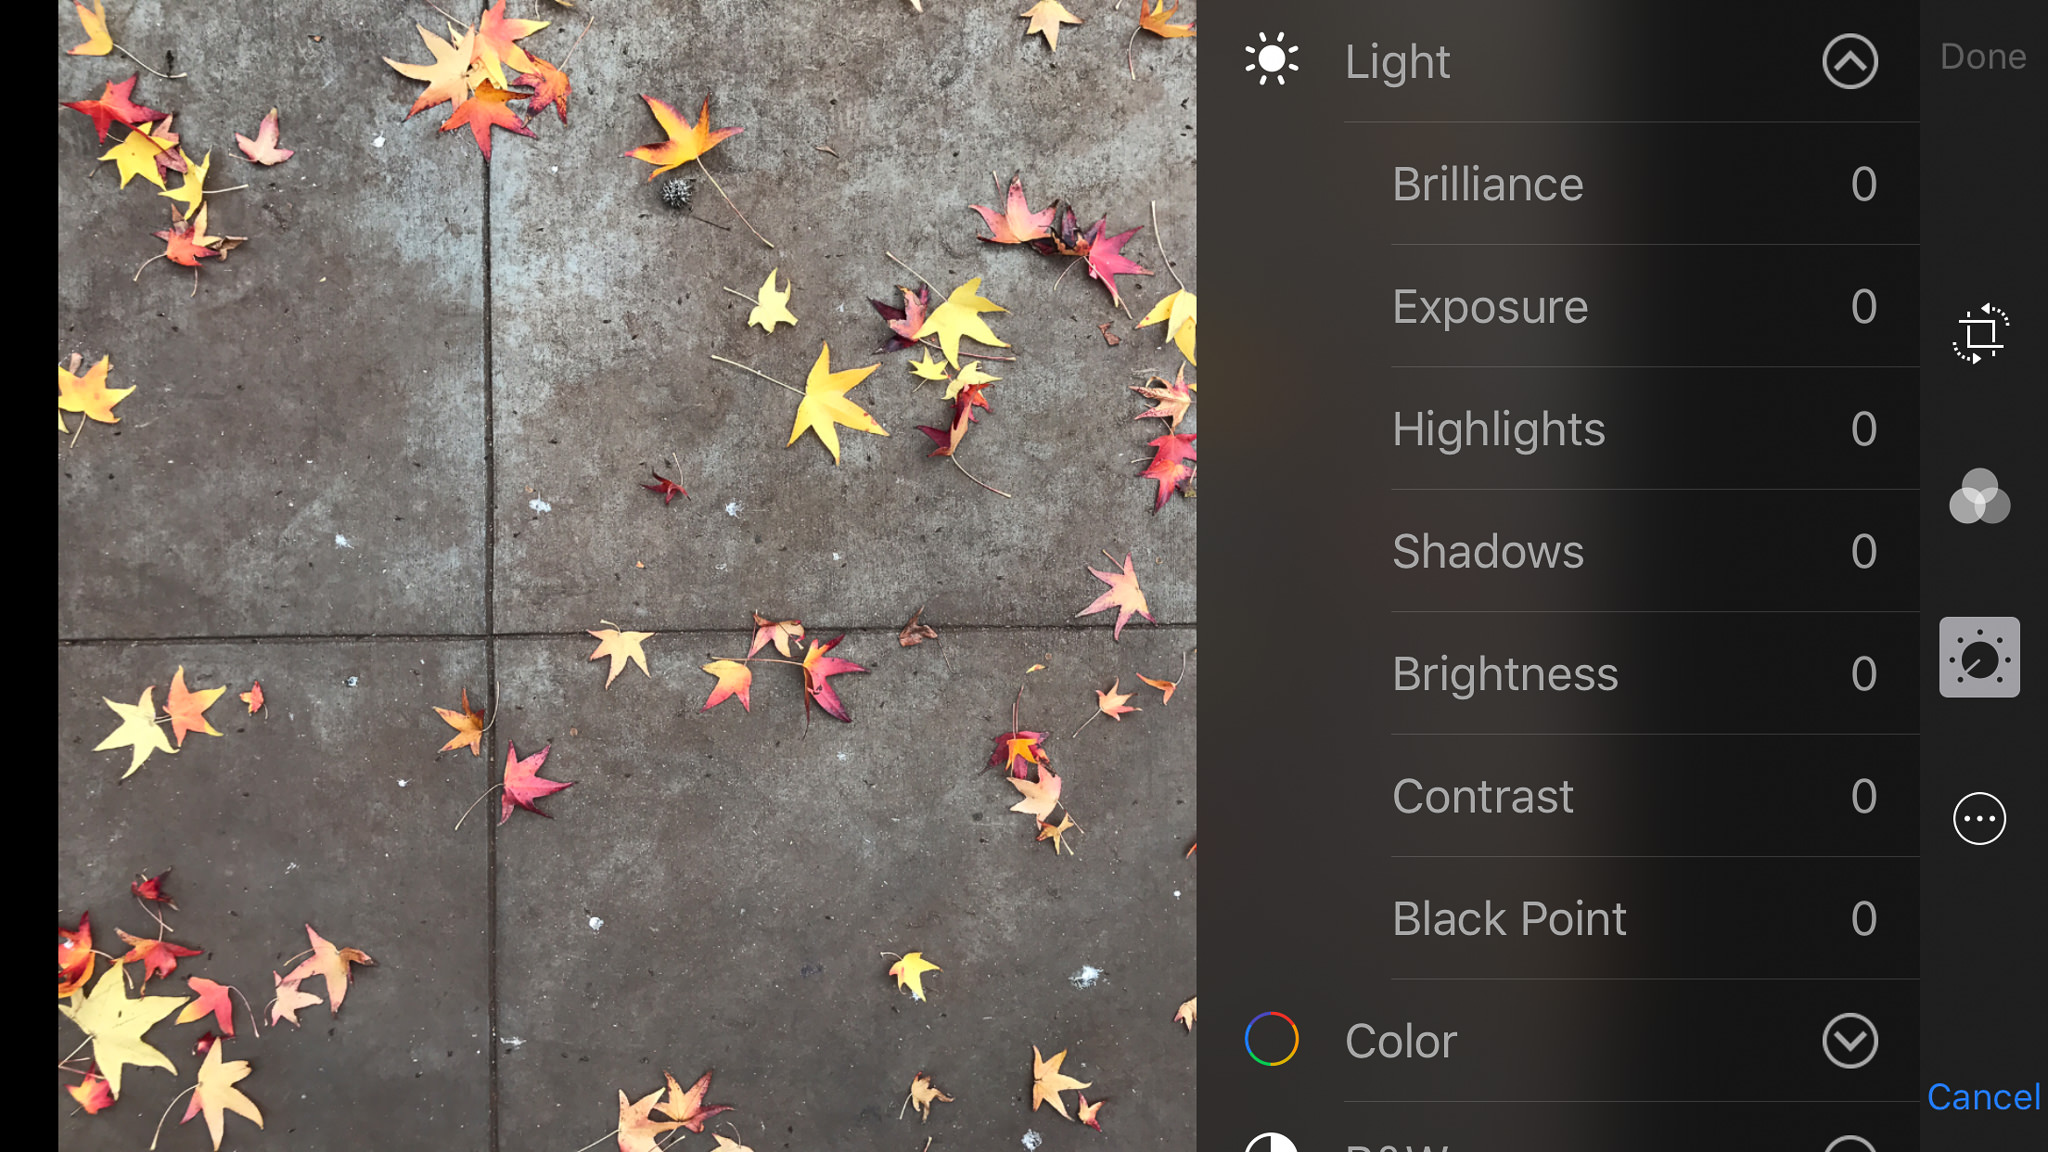
If you just want a quick fix, you can press the magic wand in the upper-right corner and some quick adjustments are made to the image. If you want more control, you’ll need to go through the icons on the edge of the screen. From here you can crop and straighten, add filters, adjust image properties like exposure, contrast, highlights/shadows, color and even have control over properties of B&W conversions like intensity and grain.

As for Android, the only example I have is my wife’s Samsung Galaxy Note5. I was not at all impressed with the editing options on her phone. They were very basic and had strange names that don’t really relate to most editing software. If you have a different phone or even a different version of the operating system, you might have different options, but I personally would not use the default editing app on her phone.
Regardless of what phone you’re using, the editing options that are part of the default camera app are basic and capable of some quick image corrections. If you have a little image editing experience, you should be able to take a photo from boring to polished without much trouble.
VSCO
One of the most popular photo editing apps around is VSCO (pronounced “vis-co”, stands for Visual Supply Company). One of the reasons for it’s popularity is that it has presets that can quickly and dramatically change the look of your images. If you apply a preset but want to personalize it, you can tweak it until you’re happy with the look of your image. Unfortunately, when you apply a preset you can’t see what changes were actually made to the image, so it’s tough to adjust one specific aspect of a preset. Sometimes you’re stuck with the changes that were made. For example, if the preset you like adds too much fade, you can’t reduce the amount of fade, you can only increase it. On the other hand, if it cools off the image too much, you can always warm it up by adjusting the white balance.

If you’re not a fan of presets, you can also edit your images with manual controls. You’ll notice the tools aren’t named, which means there is a bit of a learning curve as to what each one does. You’ll have to take my word for it that a lot of the adjustments in VSCO are the same ones that can be found in the default editing app. In addition to those, you also have options like perspective control, skin tone, vignetting, and even split toning. VSCO is my go-to app for photo editing. I’ve used it to create both clean, simply edited images and complex, moody images.
VSCO is free to download and comes with some basic presets. Additional presets are available, both for free and for purchase.
Many people who use their cell phones for photography also choose to share their images on Instagram. By default, Instagram comes with capable photo editing tools. If you want to share images on Instagram and don’t want the extra step of editing your photos in a different app, here’s what you can expect to find when you open it up.
Instagram’s first claim to photo-editing fame was the ability to add filters to images. When it was first released, it didn’t even have the option to edit images. The only way you could change the way a photo looked was to add a filter. Over time, Instagram became more sophisticated and eventually offered basic editing capabilities. All of the usual suspects are here (brightness, contrast, color, etc…), including one of the original tools that made Instagram unique: a simulated tilt-shift effect.
One word of warning about using Instagram to edit your photos. Once you edit an image using the Instagram app, you have to somehow share it within the app to get the edited image to appear with the rest of the images on your phone. You can not directly export it for personal use. For this reason, I would suggest only using Instagram for photos you plan to share with the app.
You can download Instagram here. You can also take a look at my Instagram page, which is strictly cell phone photography (although I mainly use VSCO for editing my images).
Lightroom Mobile
If you’re used to using Lightroom on your computer, Lightroom Mobile will be very familiar. Of all the different apps I’ve tried, this one is definitely the most professional and photographer-friendly. In addition to the expected filters and basic adjustments, there are lens correction and even curves adjustments available! Of course, the more advanced controls that are available to you in the computer version of Lightroom aren’t available on the mobile version, but it’s still one of the most feature-rich apps around.

If you have a phone that can shoot in DNG, this is a great app to use both for capturing and editing images. Keeping everything within one app definitely helps with photo organization. If you decide not to use the camera function of Lightroom Mobile, you can still use it to edit JPEGs you take in other apps (although you can’t use it to edit DNGs taken in other apps unless you’re an Adobe CC subscriber).
You can download Lightroom Mobile here.
Snapseed
One of the most well-rounded image editing apps around today is Snapseed. It includes a set of filters and just about every tool you could want, including curves adjustments, spot healing and even a brush tool. If the amount of options sounds overwhelming, you have no need to fear… Snapseed even includes tutorials on how to use it’s more advanced features! Here’s a look at the main editing screen.

One thing that I found to be different than other editing apps is the fact that once you make an edit to the image (say a +10 Contrast adjustment) and click the checkmark to apply the adjustment, if you go back to adjust the contrast again, the slider is reset to 0. The previous adjustment is still applied, but you can’t see what adjustments you’ve made to the image without going to a separate section to view edits. It’s a small thing that doesn’t really affect the performance of the app, but I find it slightly annoying that I can’t see if I’ve already adjusted something in an image while I’m editing.

Here are the links where you can download Snapseed for iPhone or Snapseed for Android.
Editing DNG Cell Phone Images
Is it worth it to use an app that can shoot DNG images on your cell phone? How much more dynamic range is available to you? Do all of the traditional reasons for shooting DNG apply? Do the images look better without the default camera’s JPEG compression? Let’s take a look.
Here are two images that I took at roughly the same time. The first is a JPEG that was taken and edited with the default camera app on my iPhone 7+, while the second is a DNG that was taken and edited with the Lightroom Mobile app. Please ignore the differences in color temperature, as I edited them separately and didn’t match them perfectly.


Is there a difference between the two images? Let’s zoom in to 100% in the same area and see how things look.


As you can see, there really isn’t much of a difference. You can’t see more detail in the DNG compared to the JPEG and it looks like there’s the same amount of shadow information.
I wanted to see if editing the DNG on a computer version of Lightroom made any difference. I figured the compression on export might be less noticeable and show a bit more detail. Unfortunately, before I ever got started I ran into a snag. Apparently, if you use Lightroom Mobile to shoot images in DNG, they are stuck within the Adobe ecosystem. It prevents you from exporting or downloading the DNG images from your phone (unless you sync Lightroom Mobile to Lightroom CC). Fortunately, you don’t have to use Lightroom Mobile to shoot in DNG.
To work around this restriction (since I’m not a Lightroom CC user), I had to go out and shoot some new images. This time I used Camera+, an app that’s only available for iPhone. With Camera+, I was able to shoot in DNG and then download the images to my computer to edit in Lightroom.

Here are the 100% crop side-by-side results of an edited DNG. One edit was done on my computer in Lightroom, the other on my phone using VSCO.
You can see that I was able to recover more of the highlight and shadow detail when I edited the same DNG file in Lightroom instead of VSCO. What really surprised me was how much noise is present in the image that was processed in Lightroom. Even though it says it was taken at ISO 20, there is a lot of noise in the shadow areas and even some in the sky. I guess this is why images processed in apps look so soft… it’s not the JPEG compression, but the noise reduction that gets applied.
Other Considerations
Non-Destructive Editing: One very important thing to note is that many apps like VSCO and Lightroom Mobile are non-destructive editing tools. The edits you make in them do not actually alter your original image. On the other hand, if you edit your image with the default editing app, chances are your original image will actually be altered. On my phone, the edits made with the default app are saved and can be reverted, but this might not be the case on all phone models. As a rule of thumb, if you have to import your image into the app, it should be non-destructive.
Spot/Blemish Removal: If you usually edit images on a computer, you’re probably used to having access to spot removal tools. Unfortunately, other than Snapseed, very few image editing apps have such tools. The only other app I’ve found that includes full editing capabilities, as well as a spot healing tool, is Photoshop Express. They are very limited capabilities, but in a pinch can be useful.
Other Apps: The apps I’ve mentioned are by no means the only ones out there, they are just the ones that I find myself using the most. Here are a few others I’ve used in the past that you might try out: Afterlight and Priime.
Editing Images on a Smartphone: Summary
There are a lot of different apps available for you to use to edit images on a cell phone. Your phone should include basic editing capabilities within the default camera app itself. If you want something a little more advanced, Lightroom Mobile is a great choice if you’re used to using Lightroom on your computer, or VSCO is a great choice if you like creating images with a bit more mood and toning to them. For a well-rounded editing app, you can’t go wrong with Snapseed.
If you plan to shoot in DNG, unless you’re a Lightroom CC subscriber, I’d highly suggest that you use an app besides Lightroom Mobile. To be honest, I don’t know if there’s even a need to shoot in DNG. I’m using the latest phone out there and there is so much noise in the images, even at ISO 20, you’ll need to add so much noise reduction your images will look about the same as if you’d just shot and edited a JPEG. While you might get better highlight and shadow recovery, I personally don’t think it’s worth it.
Regardless of whether you choose to shoot in JPEG or DNG, if you decide to edit images on your phone you’ll have a lot of different editing apps to choose from. Be sure to download a few different ones and try them out, as they all have something different to offer.
You forgot the most important tip of all: Turn the damn thing sideways! Nothing worse than a portrait mode picture that should have been landscape – which is 99% of all non actual portraits.
Interesting discussion. I’ve installed Snapseed for Android but generally use PC software for anything I want to share.
I was most interested in the discussion of DNG, which my phone doesn’t support but is of future interest. I don’t compare the phone with a DSLR but do with my Canon s110 and have found RAW/DNG dramatically improves low light performance for the small sensor models (and i really hate the default NR in recent consumer cameras.) With RAW/DNG on the compact I can hand hold and get usable results with low ISO by “underexposing” on overcast days or indoors, and can speed up the shutter for tolerable motion captures, not possible on my DNG-less smartphone. I noticed your DNG comparisons were of – optimal for small sensor cameras – naturally well-lit sunny day scenes, and wonder if you’ve tried the same in more difficult lighting.
Hi Albin,
I didn’t really do any testing with more difficult lighting. Now you’ve got me curious. I’ll have to give it a try one of these days and let you know what I find out.
Agree heartily with Marcus about Snapseed. I have used it since it came out a few years ago and find it terrific. They periodically update it with new features, like Tonal Contrast a while ago.
Anthony, see the above reply to Marcus’ comment. I added a section for Snapseed. Thanks!
You missed to talk about Snapseed (available for iOS and android). Crazy, amazing App for editing. You will never miss photoshop, believe me.
About iphone7 image quality. It looks strange but in my opinion the quality from iPhone 5 or 6s to iPhone 7 drops dramatically. I compared face to face the same shot that I took from iPhone 5, iPhone 6s and iphone7.
The iphone7 images look always like watercolour (especially if you shot in low light) and unnatural.
The best picture comes from iPhone 6s with great resolution, details and pleasing without strong NR that flat the image.
This is unbelievable how I was disappointed after I bought new iphone7 and discovered this issue. I tried several iphone7 from a friend of mine and all of them have the same bad quality. When I made the comparison between different iPhone no one of my friends can believe that the shot was took with iphone7.
Have you faced with this silimar issue?
Marcus, I just updated the article and added a section on Snapseed. I met with a non-photographer friend yesterday and she mentioned that she uses it. Once I heard that and saw the comments from you and Anthony, I knew I needed to include it.
I haven’t done any direct comparisons between iPhone models, but I might give it a shot. I still have the 5 and 6, so it might be worth looking into. I do notice what you refer to as a “watercolour” look that I assume is caused by noise reduction, but haven’t noticed that it’s stronger on images from my 7 than previous models.
Just another comment that I missed before…..
You said: “… once you make an edit to the image (say a +10 Contrast adjustment) and click the check mark to apply the adjustment, if you go back to adjust the contrast again, the slider is reset to 0.”
This is not exactly true. You can always view all the changes that you did, and you can also readjust that specific parameter and retain the changes that you did after.
If you click on “undo” button, and then to “see all changes” you have the possibility view changes and also to re-edit previous changes. This is pretty useful like adjustment layers in photoshop.
Hi John, before you give you old iPhones away, just try to compare them with last 7 model. I’m curious to read someone opinion.
Thanks
Thanks John for your reply. I’m really snapseed addicted and it’s a very powerful tool. It has all necessary to do a professional and artistic retouch.
Please try yourself to compare iphone7 and other models. Stood indoor with low light and you will see what I mean. Especially in portraits you will see watercolour effect and hairs and beard are totally destroyed. Also during landscape shot, grass leaves doesn’t have fine details. This is unbelievable how on the web this issue is poorly reported.
If you look at EXIF data the ISO rating is always very low compared to the same shot taken with other iPhone model. Somewhere I heard that iPhone 7 takes several shot and combine them in one RAW to produce better image resolution and quality. This can cause gosts in fast moving object.
Sorry for this OT.
Great article, very timely…please publish more articles on this type of mobile phone photography…its very educational. Topics like mobile phone apps that you find useful, post processing tips, accessories, etc…I do use Lightroom CC and hope to hone my skills using the mobile app for travel photography….thanks.
Thanks Willy! I’m currently working on an article that covers apps and post processing in general. Maybe if these are well-received, I can do some that go into more detail about specific apps.
Awesome article…
Thanks for reading RK!
There’s an app called pro cam for Iphone, it let’s you shoot raw, set ISO, white balance, shutter speed. it gives a lot of of control over your basic camera. I really haven’t had time to really use it yet but so far so good.
Thanks for the suggestion, Mike. I’m currently working on a post that covers a few different apps. This one sounds like a good one!
A lot of Android apps will set volume buttons for shutter release (or other handy purposes as well). Personally I’ve found setting a two-second countdown before shutter release helps steady the phone (same for any compact camera without a viewfinder) against both shutter release and the awkwardness of holding it in an unsteady pose. (I’ve had no success capturing action with handheld phones or compacts – if there’ are tips for that bring them on.)
Albin, setting a timer a great tip if you’re ending up with blurry images. I just added a section for capturing action. In short, it’s not easy, but by shooting a burst of images you increase your chances for getting the shot you want.
It’s just about one year ago that I began taking smartphone photography seriously and I was on my first vacation without taking my beloved Nikon D700 with me. At first, it felt like an experiment and I was really not used to both traveling light and being so fast when it came to taking a picture. But after a few shots I really began to enjoy my new freedom, realizing once again that not the camera is the tool everything depends on, but the photographer. I don’t want to sell my DSLR equipment – to me, smartphone photography is an extension, it is the possibility to take a photograph whenever I want to and to have the opportunity to just go somewhere without having to think what lenses I should take with me, what bag would suit them and so on. And finally, it just depends on what you want to shoot – just remember that (in most cases) it’s just a wide angle lens that you carry with you!
By the way, I started off with a Microsoft Lumia 640, which gave me a very decent image quality in daylight situations but, at least in my opinion, has three major drawbacks: it only offers JPEG files, it’s low light performance could be better, and finally, the front camera is a stub (yes, that selfie thing – but my wife and I enjoy having pictures of ourselves at places where we have been). So this fall I upgraded to a Lumia 950 and what should I say – it’s just a pleasure taking photos with that great camera. So finally I have DNG & JPEG files, an optical image stabilization and (also due to that) a good low light image quality. Ah, and a front camera that deserves the name “camera” – just to be complete ;-)
So, whatever smartphone you have – I think that nowadays there are some great cameras built into them and that we would miss something if we didn’t use them. Have fun!
Matthias, you’re so right in saying that it’s a freeing experience! I feel the same way every time I’m out without my DSLR. I often take photo walks and intentionally bring only my phone with me. It’s always a good exercise and often makes me feel much more creative for some reason.
Dear Matthias
My experience has been close to yours. Lumia 64 then iPhone 6+ and Huwai 9 for its B&W performances. But when it is low light or fast action it is back to d810 or Summilx.
The good thing is that your telephone is with you all the time.
Be well
Interesting.
What is the crop factor on a phone camera?
Richard, there is no consistent crop factor, as it varies from model to model. Even in the iPhone 7+, each lens has a dedicated sensor, which are each different sizes. But, to give you an idea, the sensors on an iPhone 7+ are approximately 7.21x for the main sensor and 8.6x for the telephoto sensor.