Often, in my lens reviews, I’m guilty of talking about a lens with “good bokeh” or “bad bokeh” without first providing a disclaimer: The quality of a photo’s background blur is only partly due to your lens’s rendering. Other factors matter more – and many of them are well within your control.
Factors Influencing Out-of-Focus Blur
In no particular order, here are some of the main factors that can help or harm the quality of a photo’s out-of-focus blur:
- Aperture
- Focal length
- Lens rendering qualities
- Camera-to-subject distance
- Tones and textures within the background (and foreground)
- Subject-to-background distance (and subject-to-foreground)
There are a few other factors beyond this. For example, using a slower shutter speed in combination with some camera movement can change the quality of the out-of-focus blur. And on some cameras/lenses, there may be slight differences in the bokeh when using image stabilization or the electronic shutter. But generally, the six factors above are the most important, or at least, the most discussed.
When Bokeh Can Be Improved by Your Lens
I’m not trying to suggest in this article that a better lens has no effect on bokeh. Here’s a pretty clear comparison – thanks Libor for sending me these photos! – between two photos where a different lens was the only good way to improve the background blur of a photo. First is an image with the Nikon Z 180-600mm f/5.6-6.3 at its maximum aperture of f/6.3, versus the Nikon Z 400mm f/2.8 TC VR S at its maximum aperture (at least when the TC is engaged) of f/4:
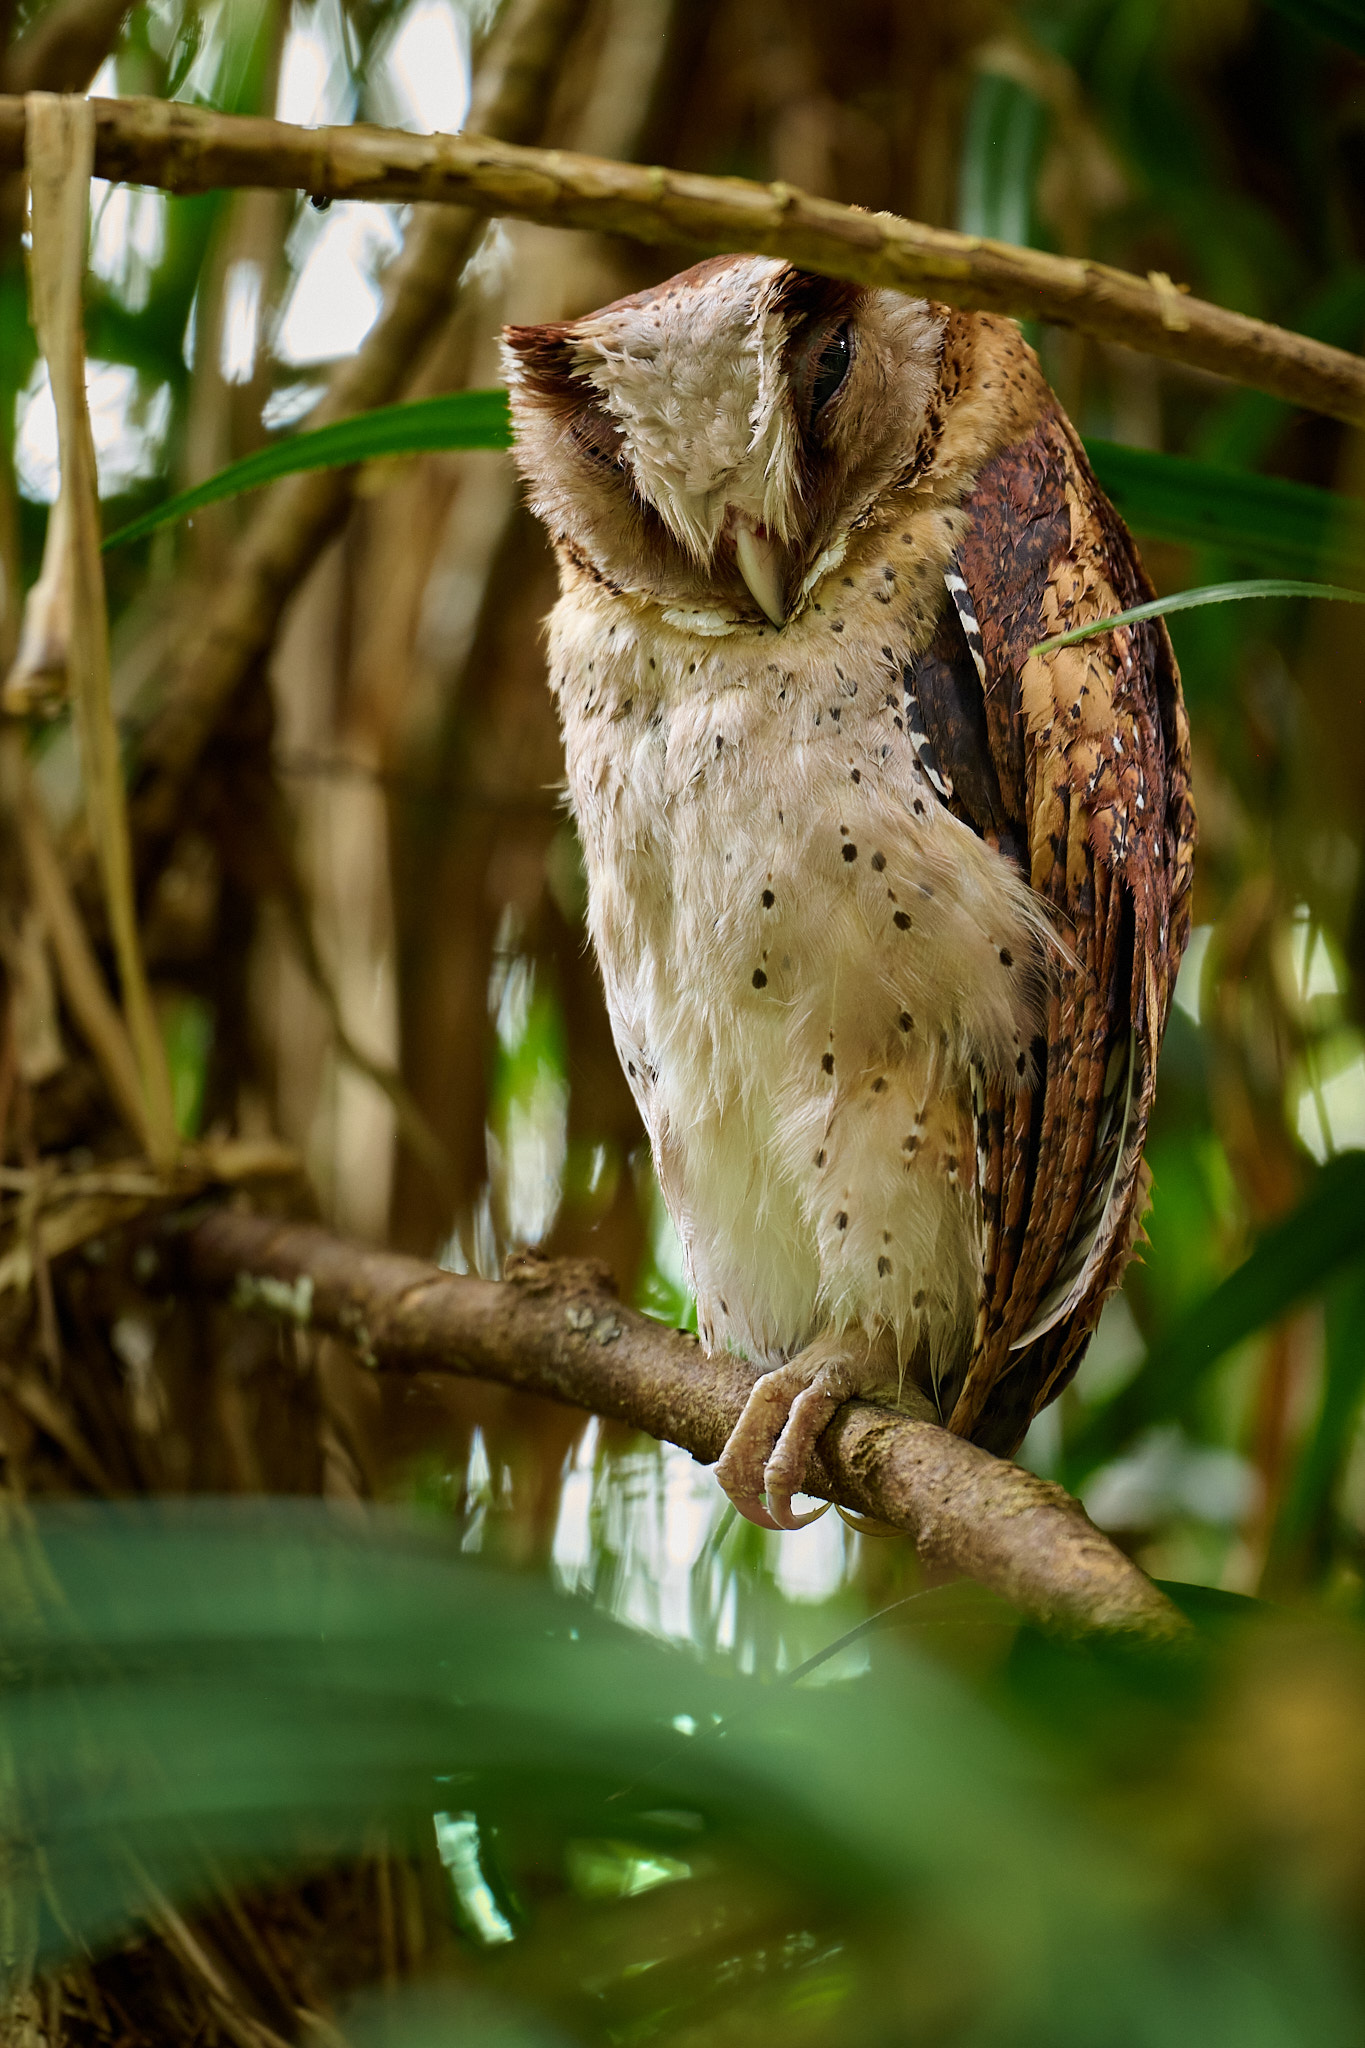
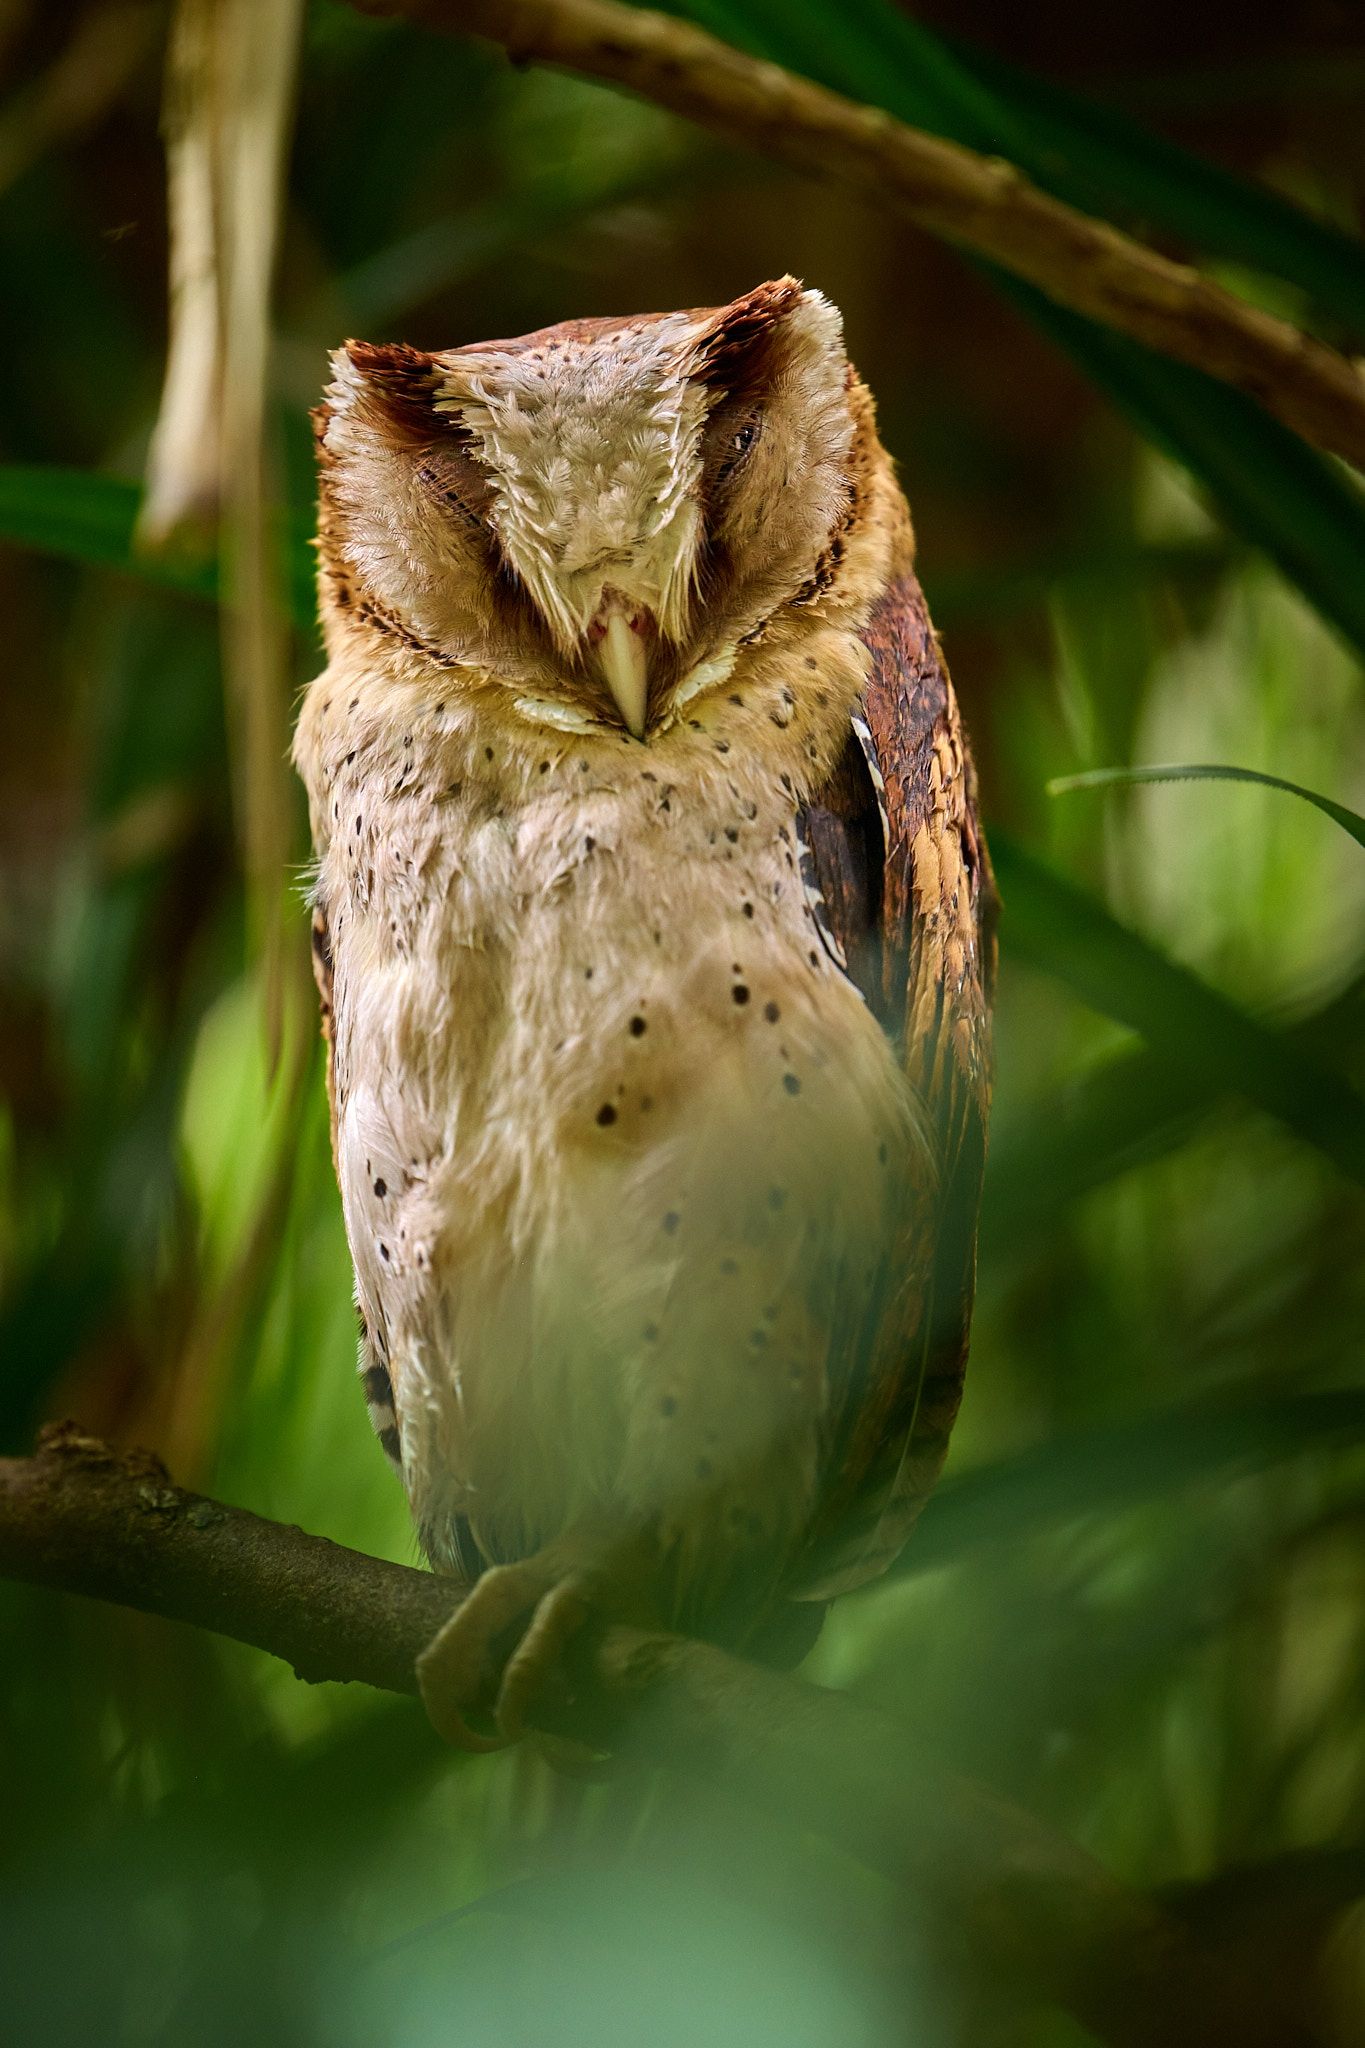
For this photo, it was impossible to change factors like the subject-to-background distance, the camera-to-subject distance, or even the choice of background in the first place. After all, Libor could only see this owl through a small window in the tree branches. It simply wasn’t possible to move around the camera too much, so the best way to improve the bokeh was to change lenses.
In this case, the 400mm f/2.8 (at 560mm and f/4) offered a bit more than one stop of additional background blur compared to the 180-600mm f/5.6-6.3 (at 600mm and f/6.3), which was a meaningful difference in this photo.
These situations definitely happen. However, the difference is usually going to be no more than one or two stops of improvement with the wider aperture lens. Even the biggest difference that I can think of in the Nikon lineup – the 400mm f/2.8 versus the 28-400mm f/4-8 when both are used at 400mm – is a difference of three stops (f/2.8 versus f/8). You can do much better than that.
Improving Bokeh by Getting Closer
There are three major ways to improve a photo’s bokeh without changing your lens. The first is to adjust camera-to-subject distance. In particular, as you get closer to your subject, depth of field gets shallower and shallower. It’s why you can take macro photos with dreamy, creamy backgrounds even at apertures like f/8 or f/16.
I don’t begrudge a wildlife photographer for cropping. Sometimes that’s the only way to get the shot. However, if you routinely have to crop your photos significantly, be aware that you aren’t just losing resolution. You’re also losing a significant amount of background blur compared to what you would achieve by getting closer to your subject in the first place.
Here’s a comparison between two photos taken at different apertures: f/1.4 and f/4.5. That difference is about 3.3 stops, which you’ll recall is a little greater than the difference between the Nikon 400mm f/2.8 and the Nikon 28-400mm f/4-8. Anyone would expect the f/1.4 photo to have more (and better) background blur, right? Well, see for yourself in this pair of photos that Jason sent me:
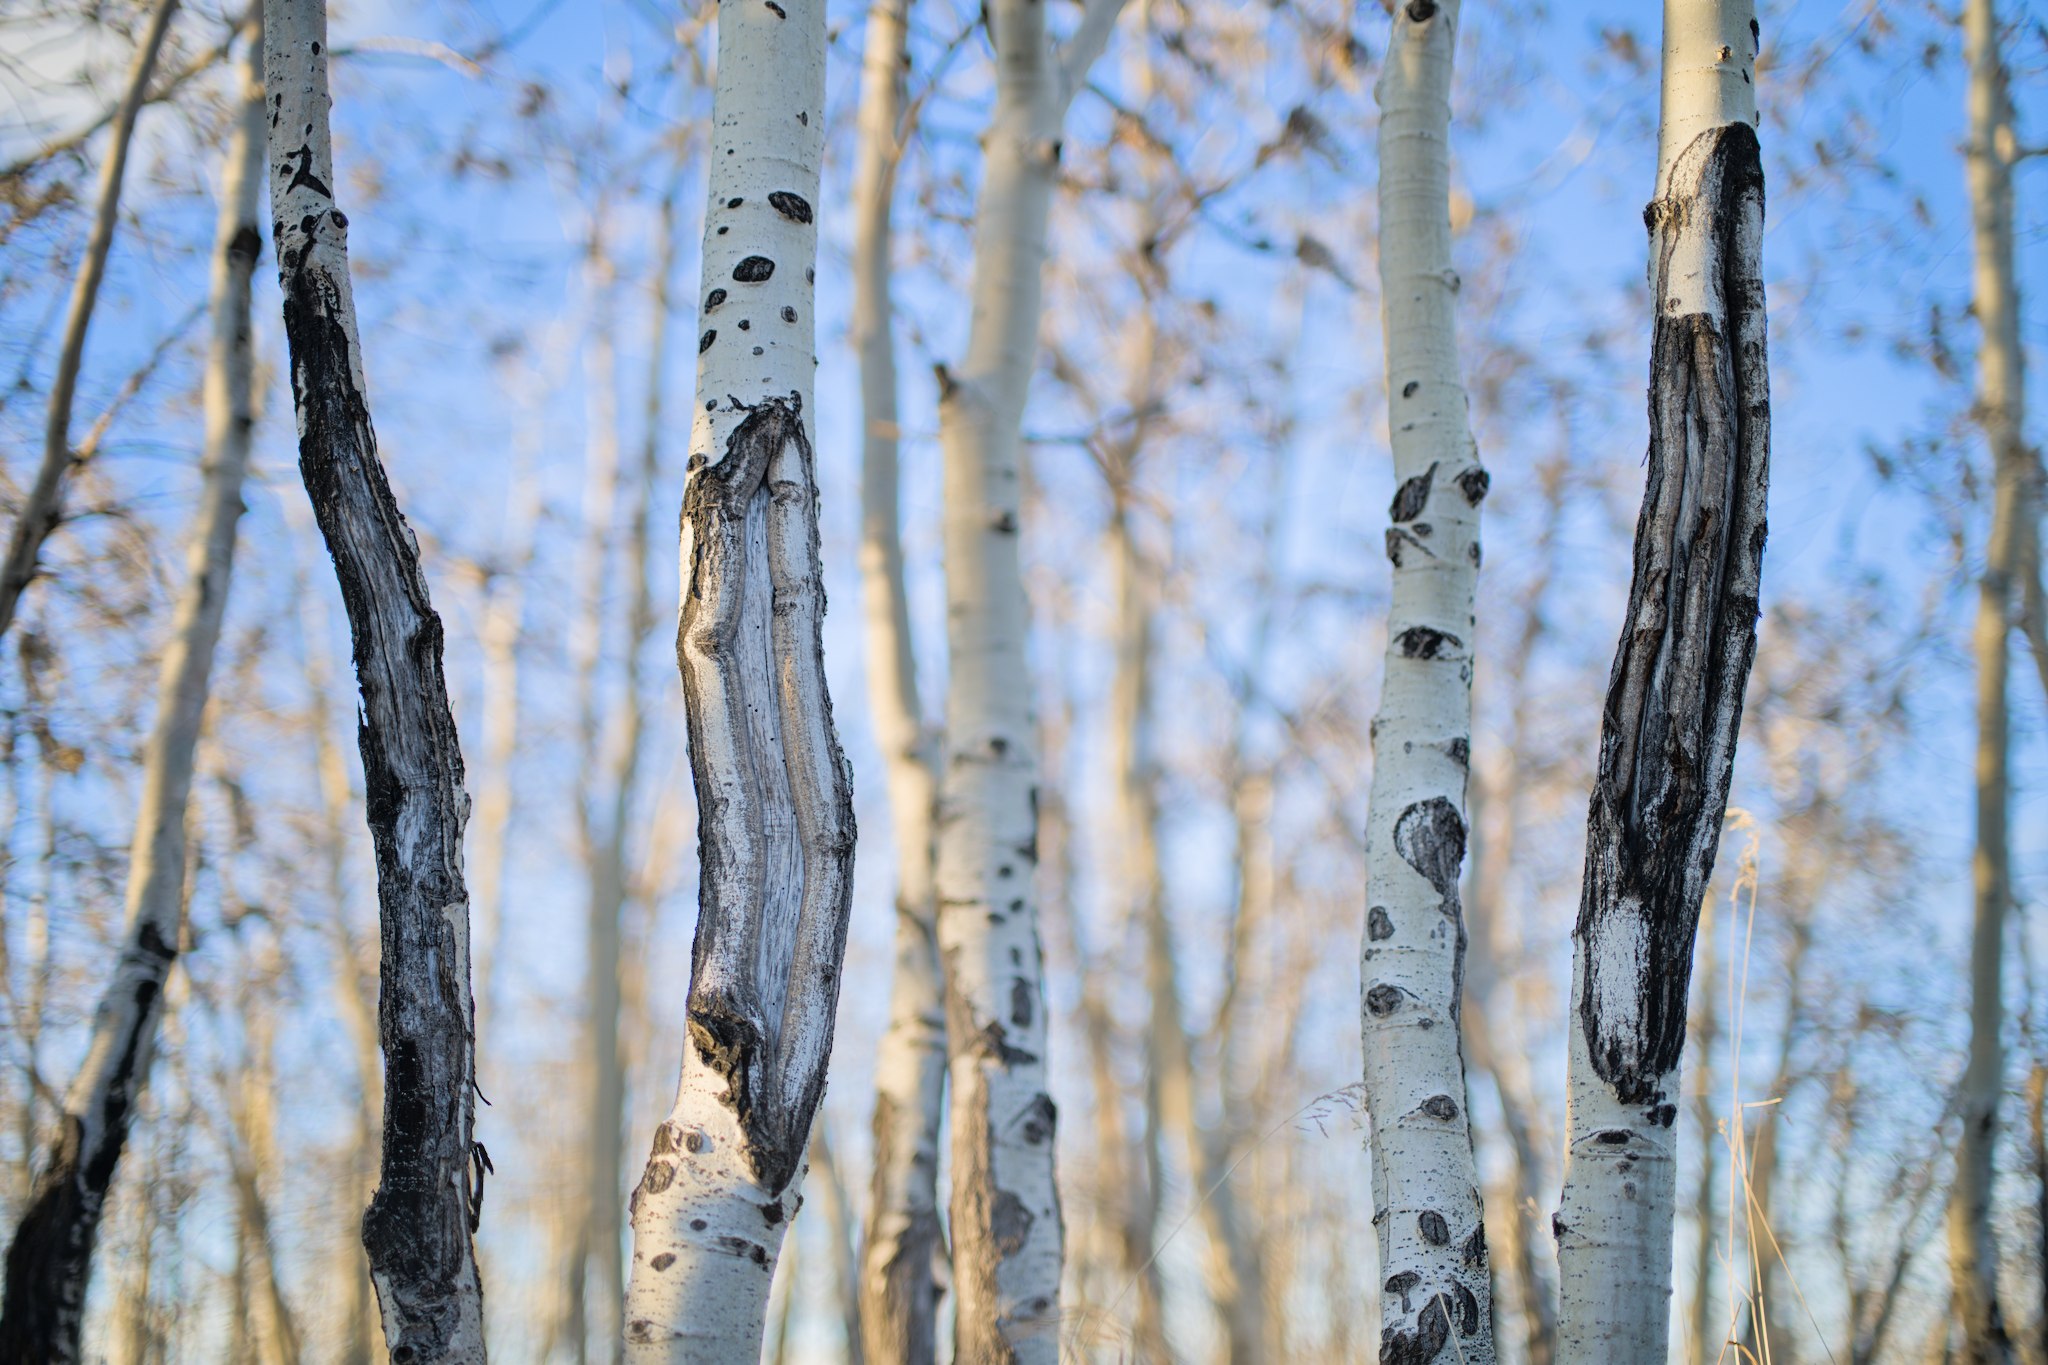
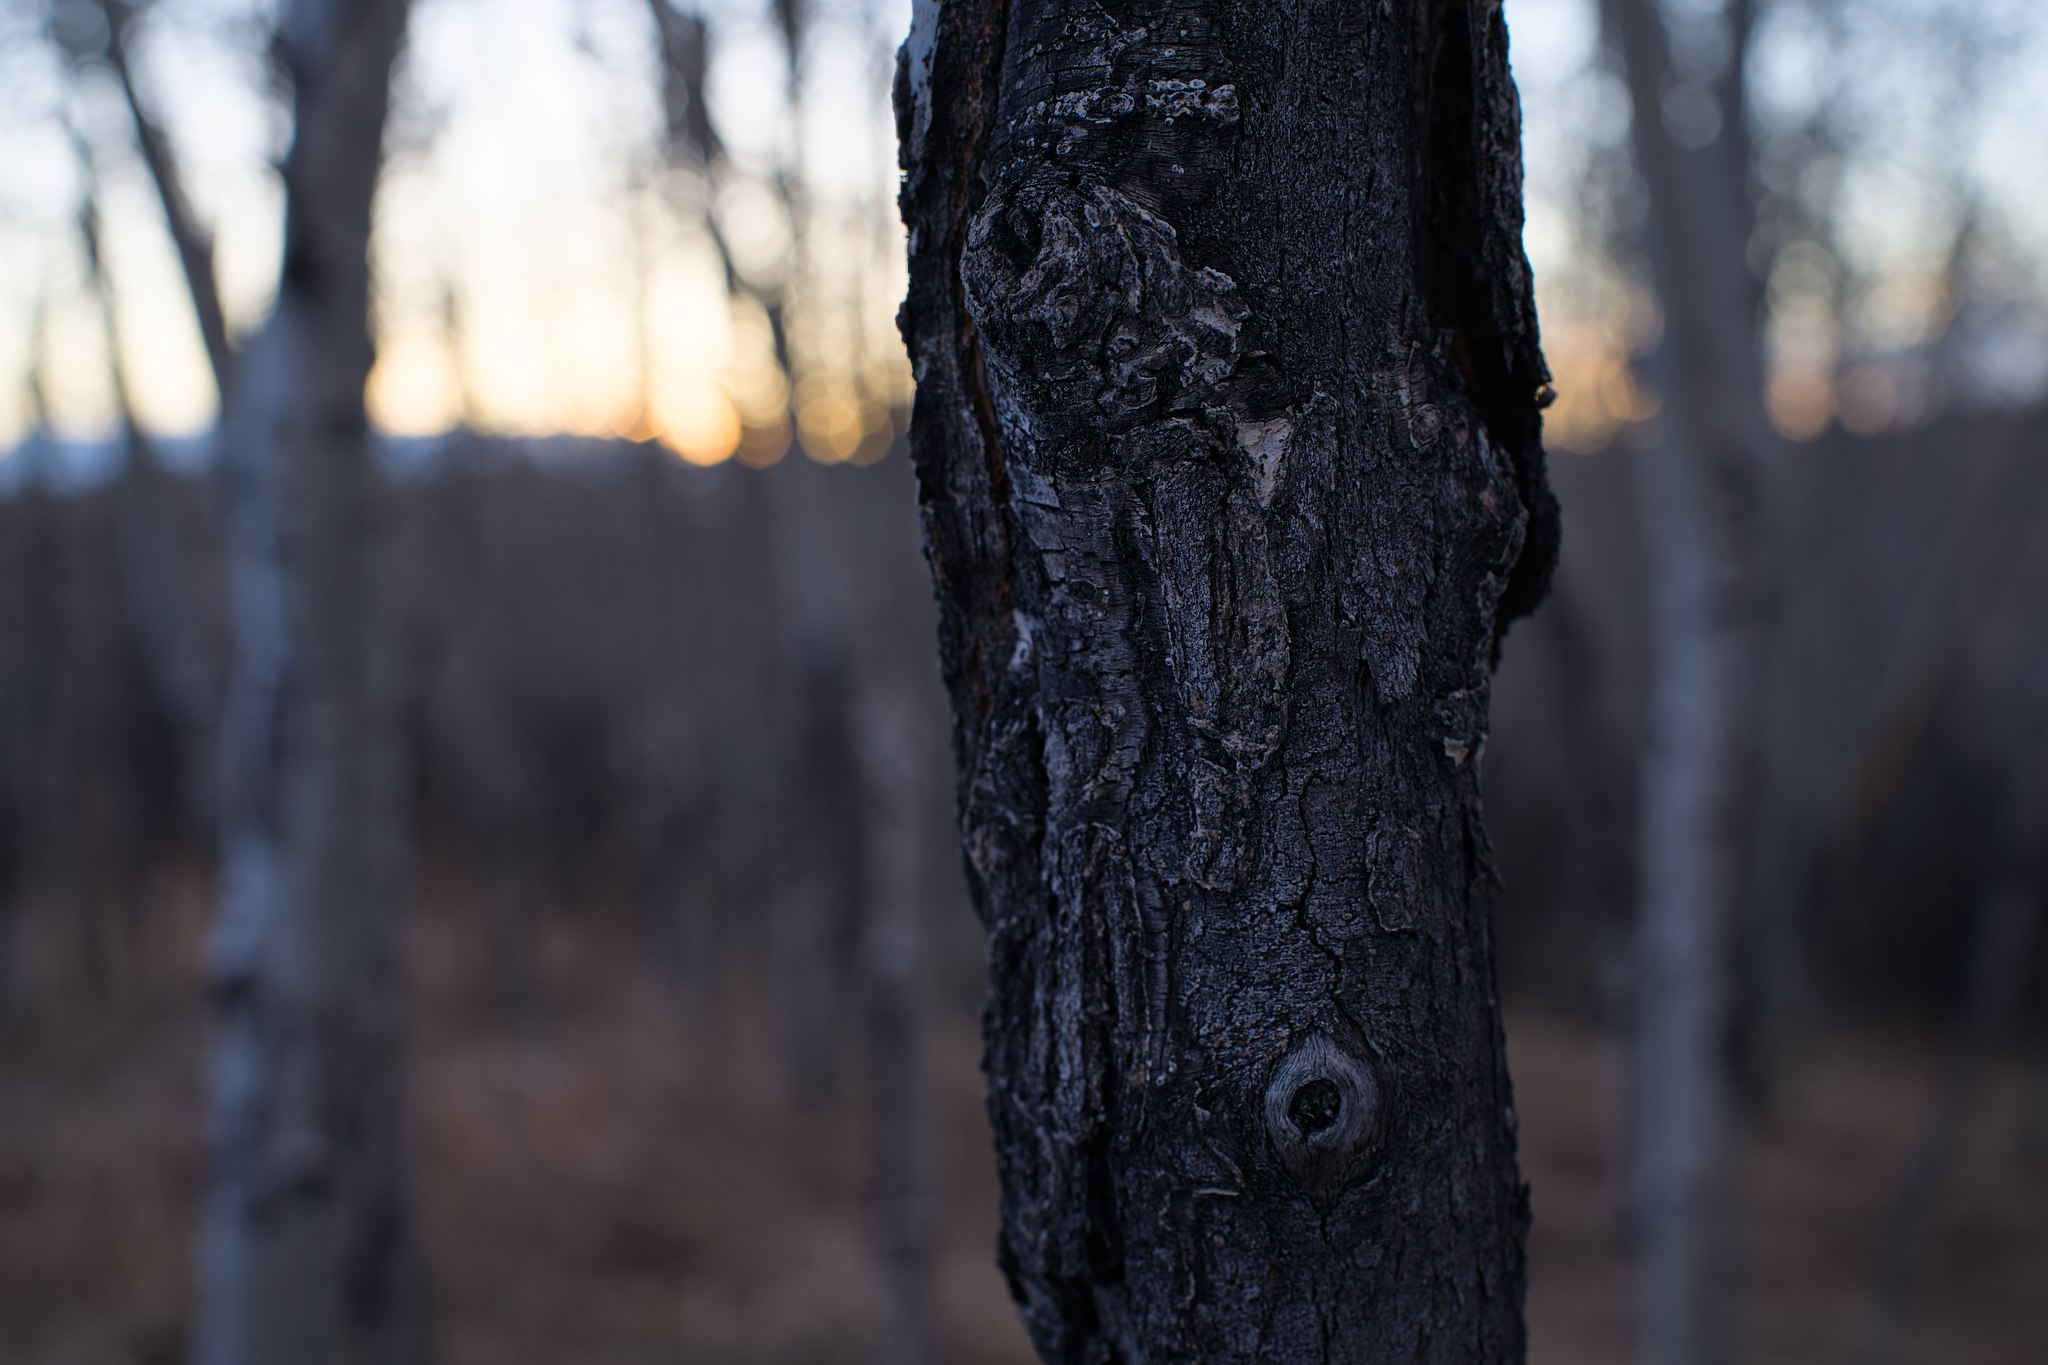
Actually, it’s the photo at f/4.5 that has a softer background! And the reason why is that Jason’s camera-to-subject distance was much shorter in the second photo. He probably gained five or six stops worth of background blur by moving closer, which more than counteracted the 3.3 stop difference in aperture.
In other words, if you want a one or two stop improvement in your background blur, you can spend thousands of dollars on a more expensive lens. If you want a five or six stop improvement in your background blur, get closer to your subject.
But what if you can’t get closer – maybe you don’t like the closer composition as much, or maybe it’s a distant bird and you’re already as close as you can get? Is it time to spend $14K on a 400mm f/2.8?
Well, before you use our website’s affiliate links and make us rich, stop and think if there’s something else you can do to improve the background blur just as much, if not more. Specifically: finding a better background in the first place.
Improving Bokeh by Finding a Better Background
If you thought camera-to-subject distance affected bokeh a lot, wait until you see what you can do with a better background!
Either by changing your camera position or waiting for your subject to move, you can dramatically change the quality of the background blur in the image.
Take these photos, for example. The subject is about the same size in both images – AKA, the camera-to-subject distance hadn’t changed much – but the bokeh is far nicer in the second shot!

What gives? Well, it wasn’t the lens or aperture. Jason used the Nikon AF-S 500mm f/5.6 PF for both photos and captured them both at f/5.6. However, the background in the second photo is much better. First, it’s a lot farther away – and subject-to-background distance is a major factor in background blur. And second, it is simply a lot less busy and distracting, with fewer nearby textures to mess up the out-of-focus areas.
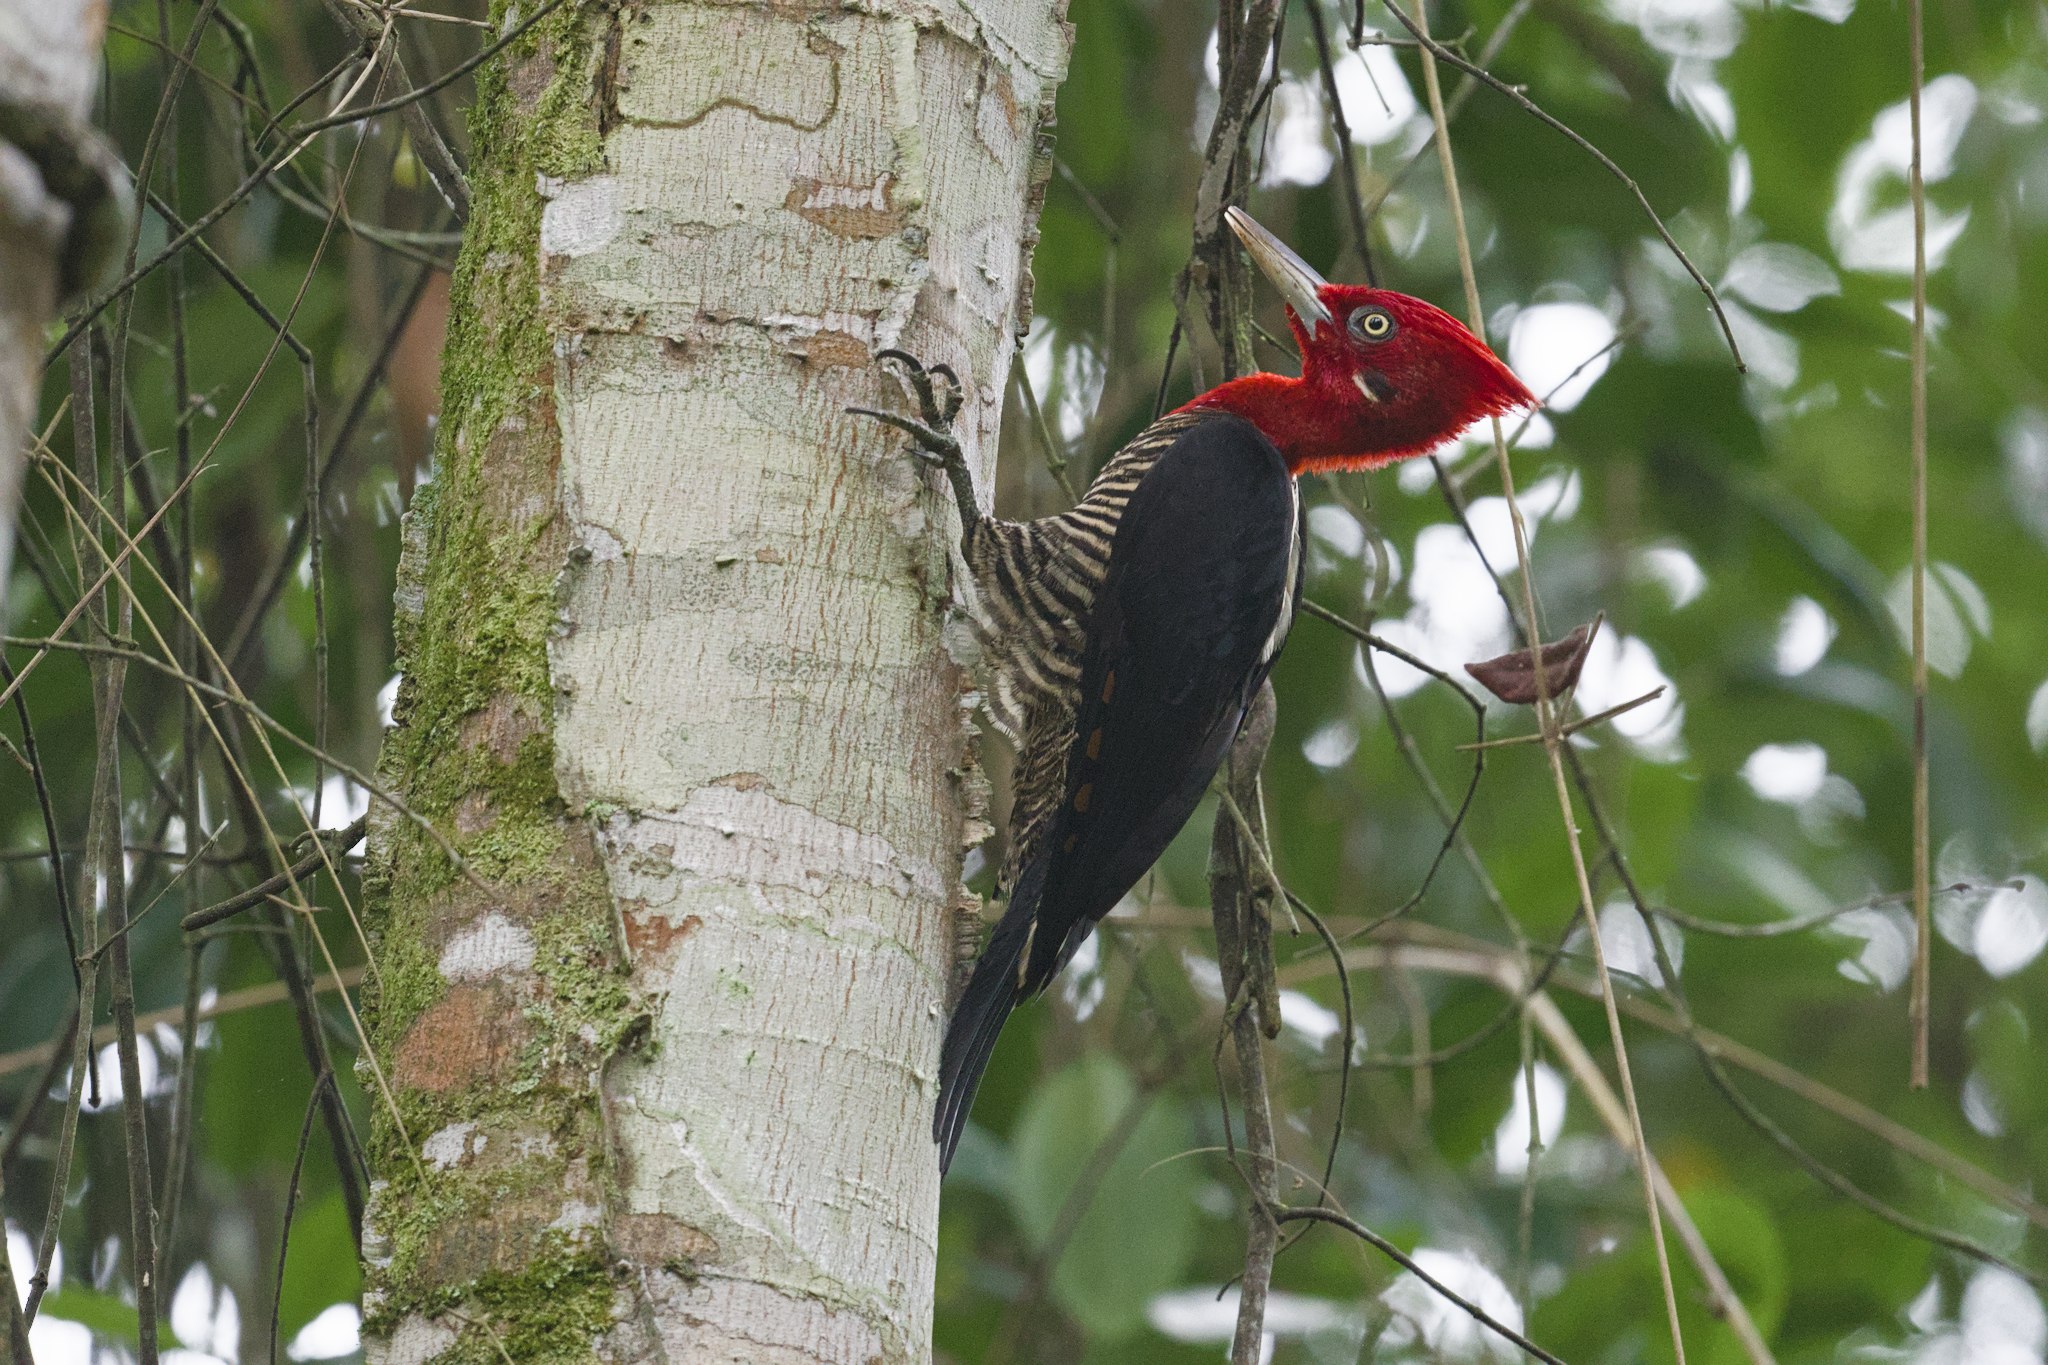
Here’s another, more subtle example of how a different background is enough to change the quality of a photo’s background blur:
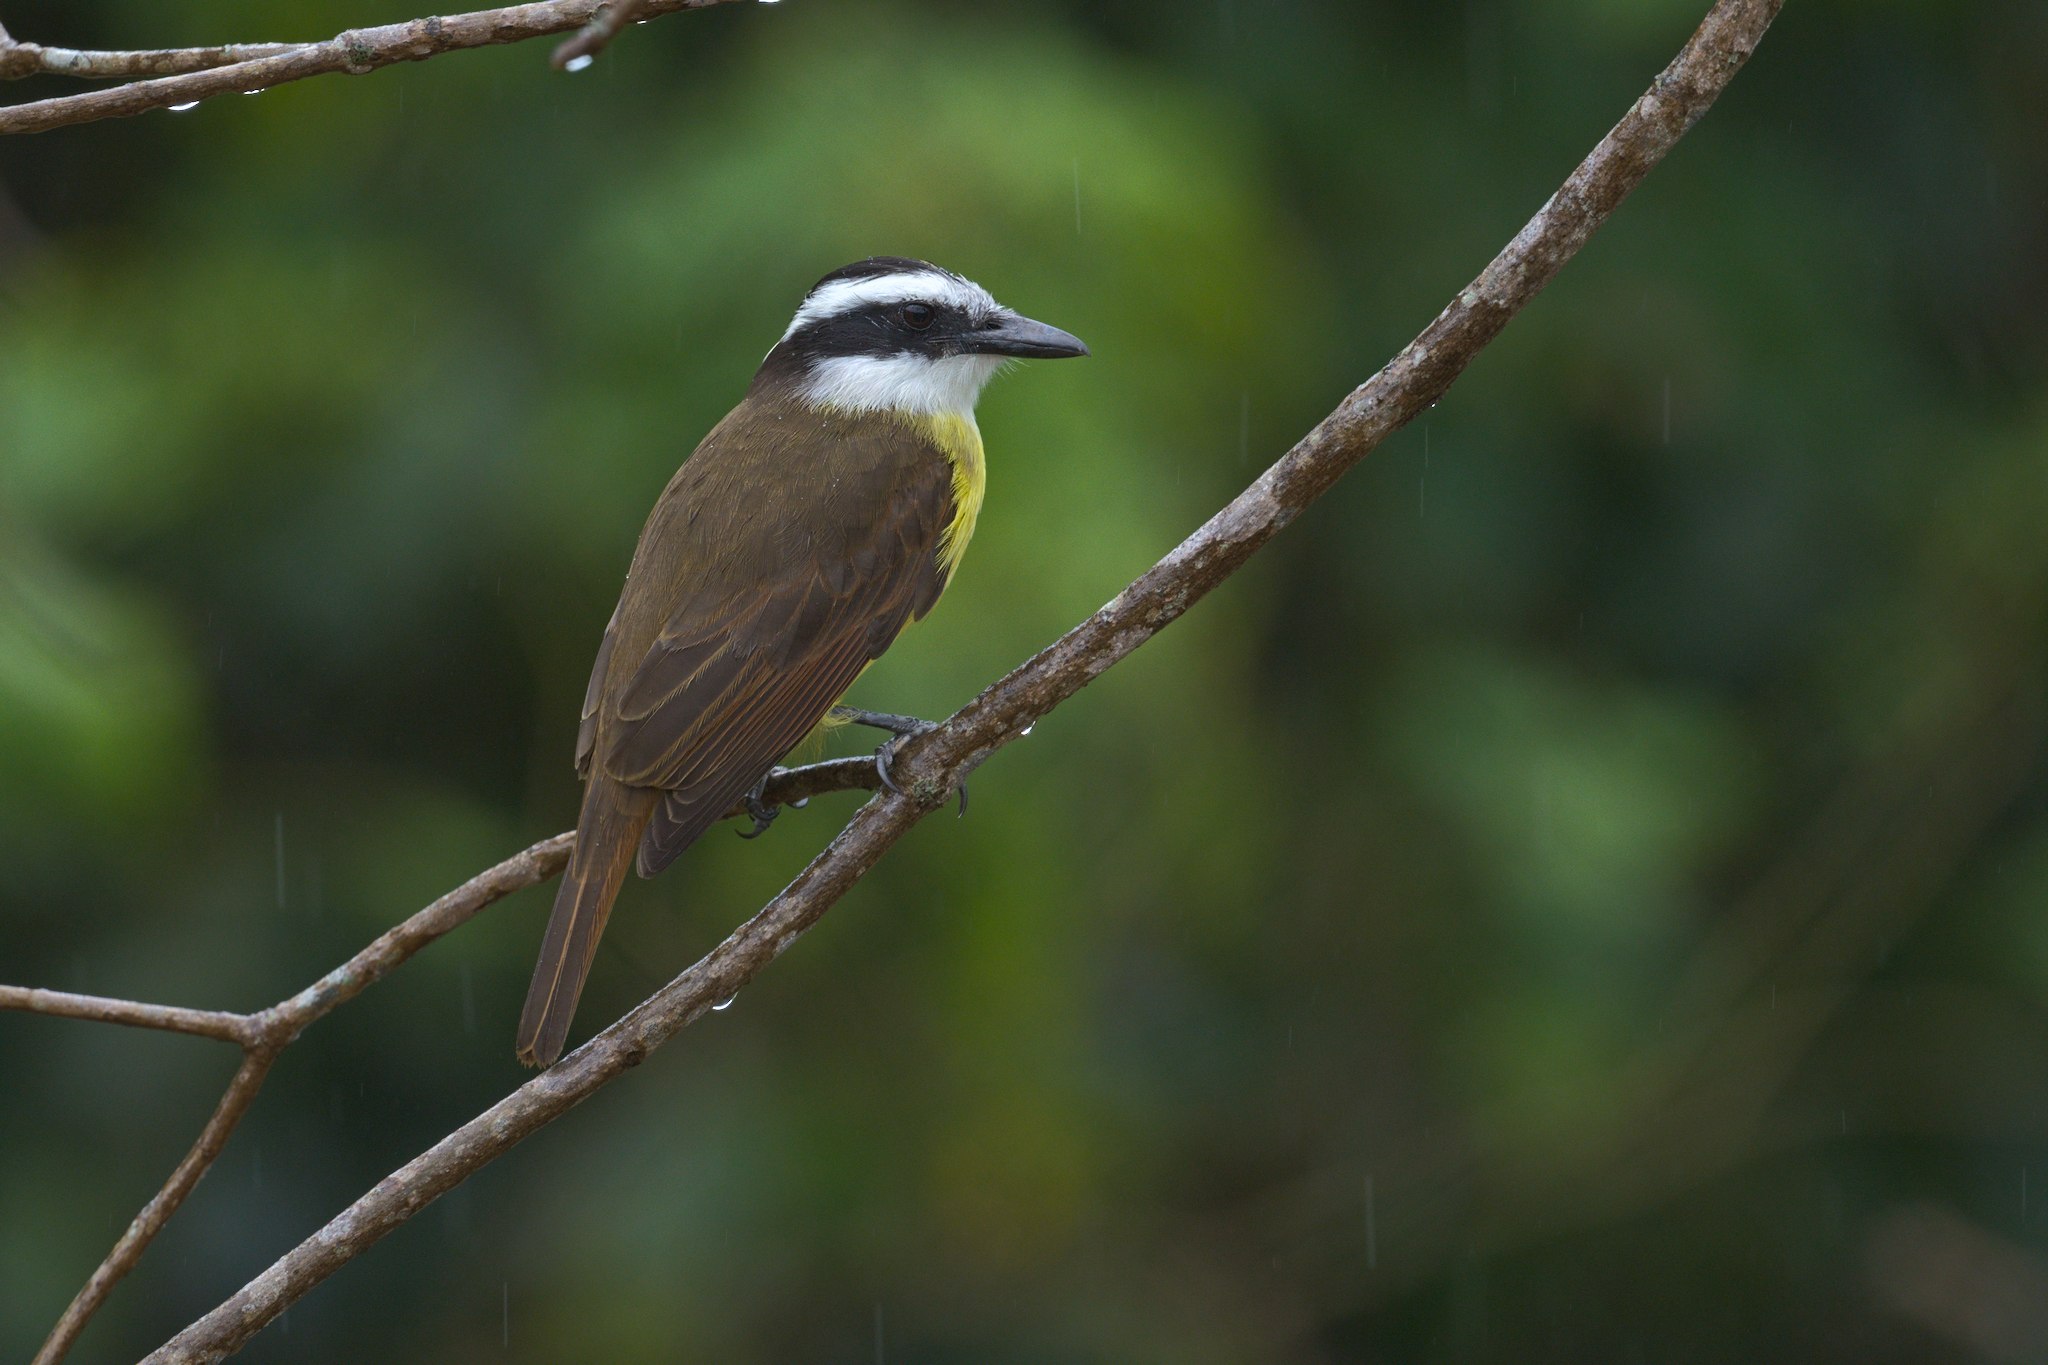
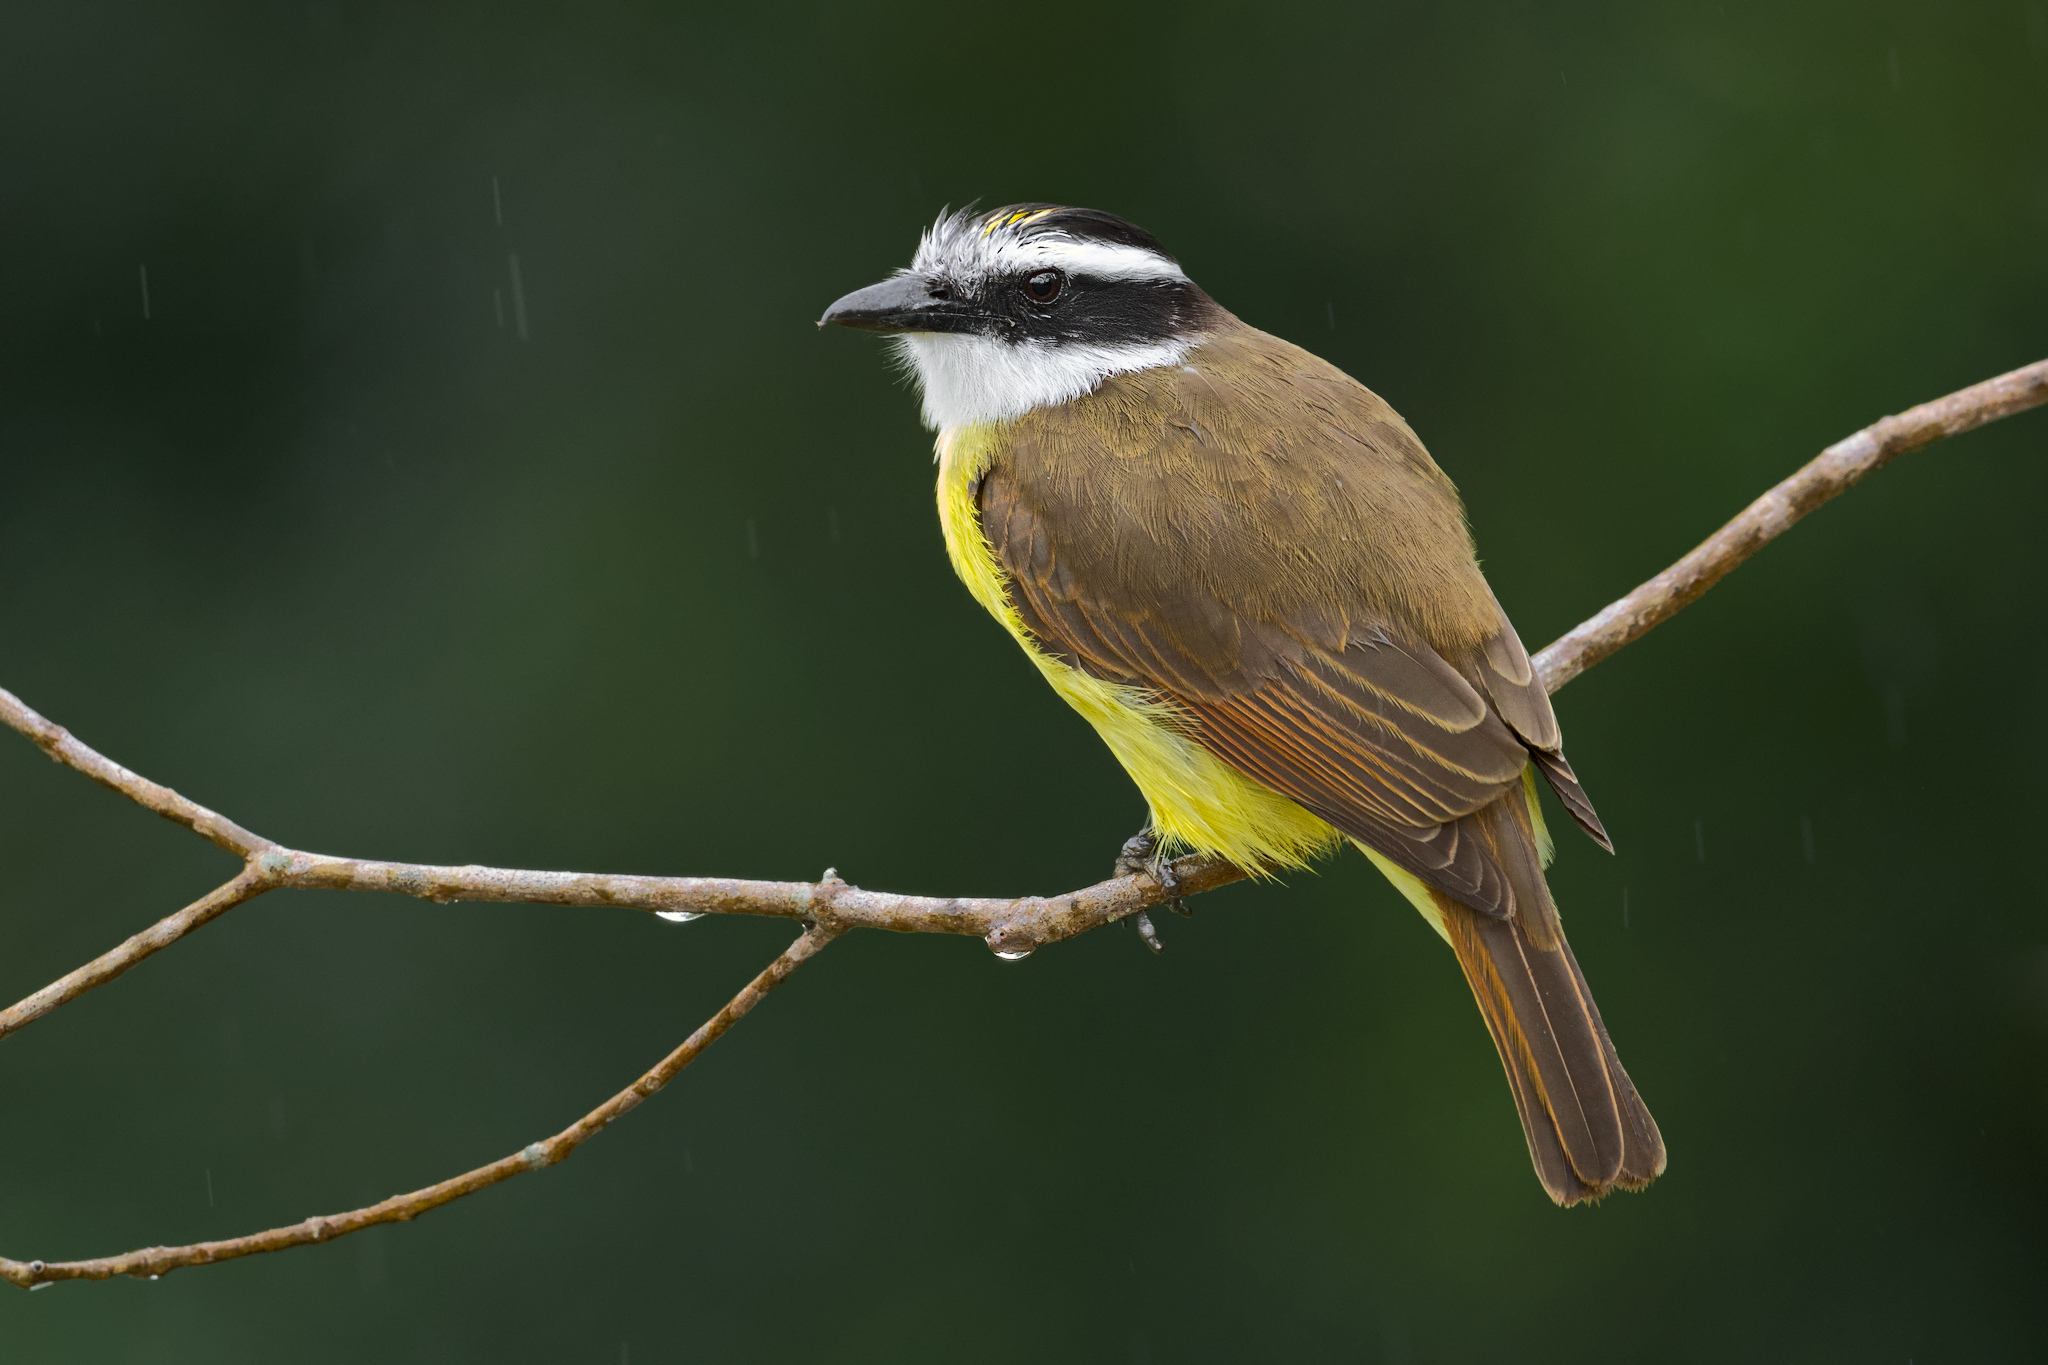
Here, the background has gone from being relatively pleasant – but a little distracting – into a nearly uniform wash of dark green. In this case, there are three factors at play:
- The Kiskadee moved to a slightly closer branch for the second photo. It shows again how camera-to-subject distance can matter.
- Not only was the second branch closer, but the background behind it was farther away. That made it appear even further out of focus.
- Finally, the second background also had more uniformly colored plants in the first place! All of the plants were dark green, whereas the plants in the first photo ranged from bright to dark. Even if the two backgrounds had been equally far away, the second photo would have had smoother background blur because of this uniformity.
So, if you want to improve the bokeh in your photo, pay attention to your choice of background in the first place. How far away is it? Is it uniform in tone, or does it have a lot of different light and dark textures? The answers to those questions almost always matter more than your choice of lens.
Improving Bokeh by Changing Your Angle
There’s one other major way to change the quality of your background blur, and it’s my personal favorite. What do you do if you can’t get closer to your subject, and there’s no way to switch to a different background? Is it finally time to max out the credit card?
Not yet! Even if you keep everything else the same, you can improve the bokeh in your photo dramatically by using a slightly different camera angle, usually by shooting lower to the ground. This changes the effective distance to the background so much that it can be like blurring the background 10 stops or more.
Here, for example, the camera-to-subject distance has not changed much, and the scene is the same – the background is some grass behind the Eared Dove. However, the second photo has a much nicer appearance to the bokeh:
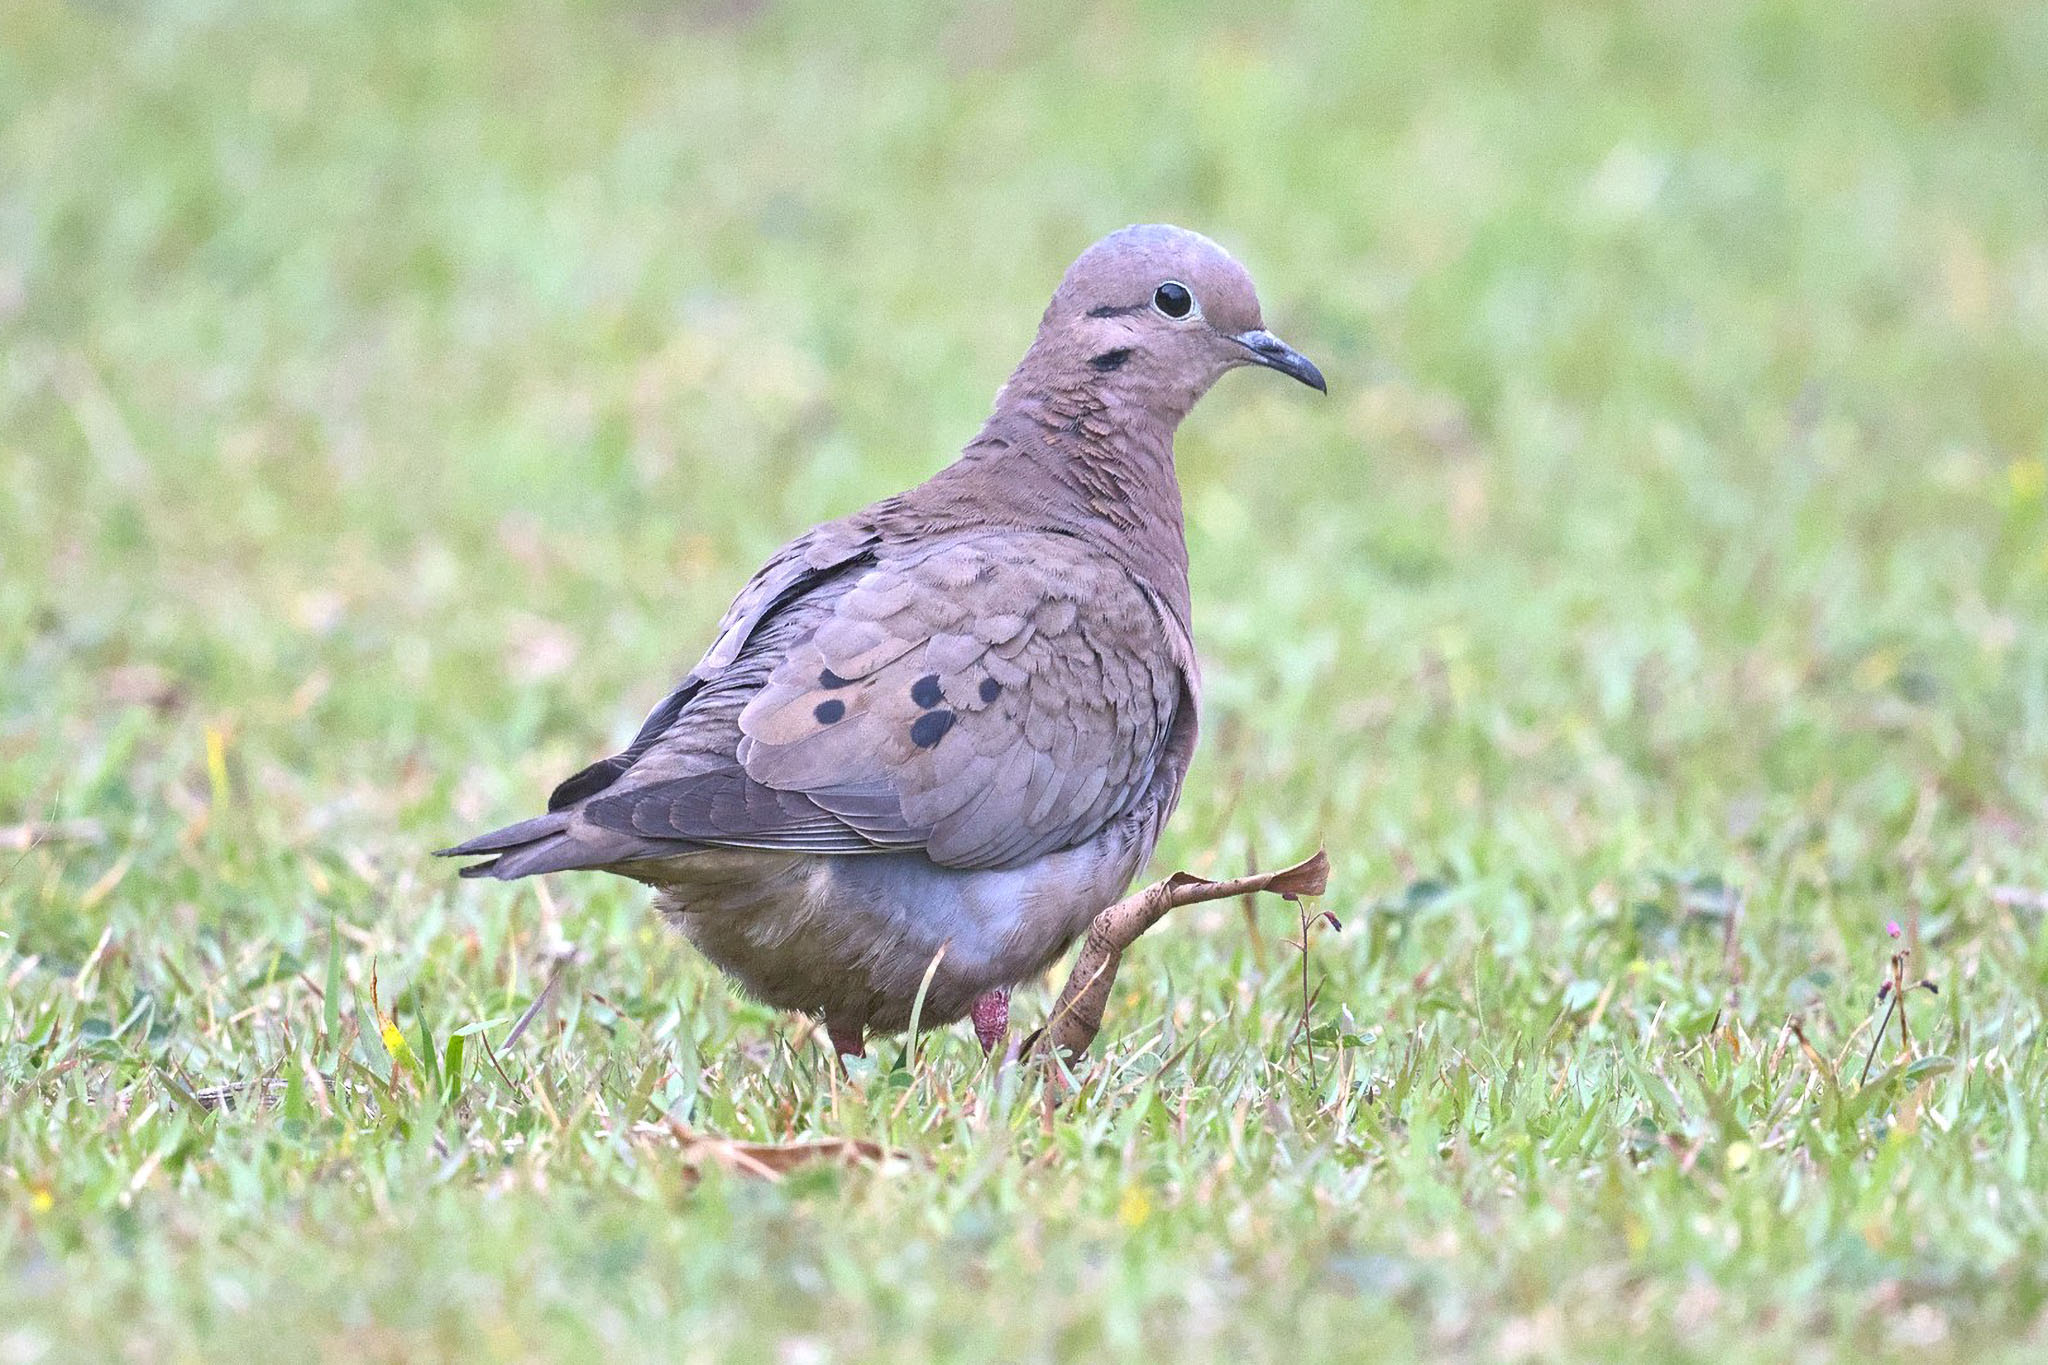
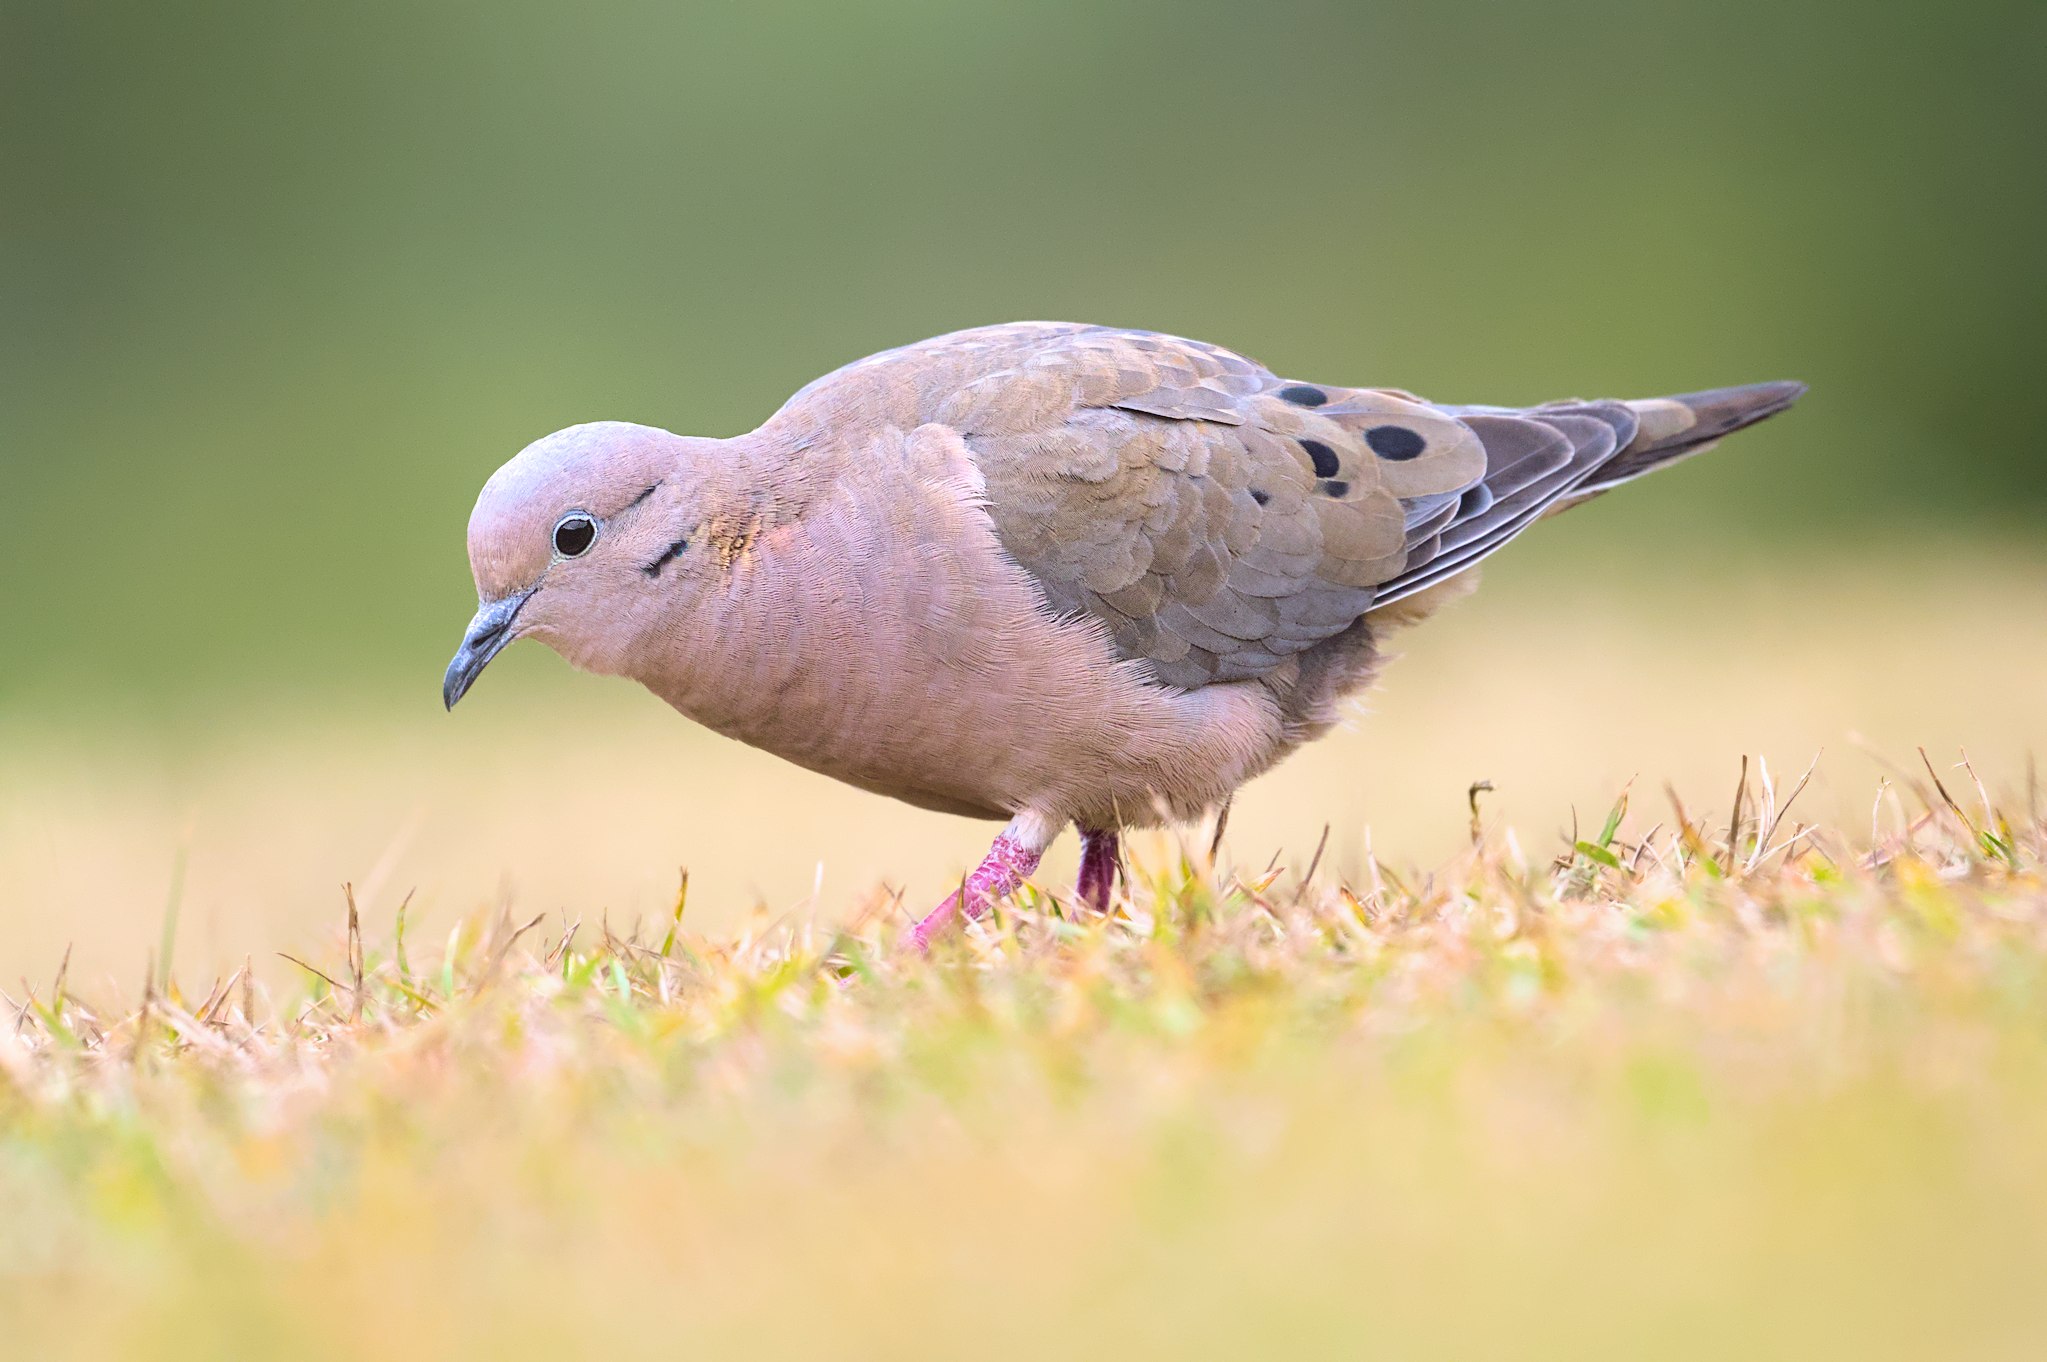
That’s what happens when you just change your shooting angle! All that Jason did differently here was use a lower camera position, effectively placing the background and foreground much farther away from the subject due to the camera’s new angle. The lens and aperture were identical. And no, Jason didn’t add any extra “lens blur” in post-processing :)
To me, this goes to show how much power you have over your photo’s background blur in a way that doesn’t depend upon the lens. It’s true that Jason could have spent several more grand on a 500mm f/4 and gotten a bit less depth of field in the first photo. But a lower camera position did all that and then some. I’d even argue that the light weight of the 500mm f/5.6 PF is what made it so easy to position handheld at ground level. In other words, the slower lens – with a PF lens element that has been accused of harming bokeh – directly led to better background blur!
Conclusion: One Last Example
I want to show you a final example that demonstrates the difference between my own (minimal) wildlife photography skills and Libor’s experienced approach.
First is a photo that I took with Nikon’s most expensive Z lens – the 600mm f/4 TC VR S, with the built-in teleconverter engaged. Second is a similar photo that Libor took with the F-mount 200-500mm f/5.6 with a 1.7x teleconverter. I shot my photo at f/5.6, and he shot his at f/8. Surely the wider aperture and the massive price difference between these two lenses means that my photo is better than his? LOL – no.
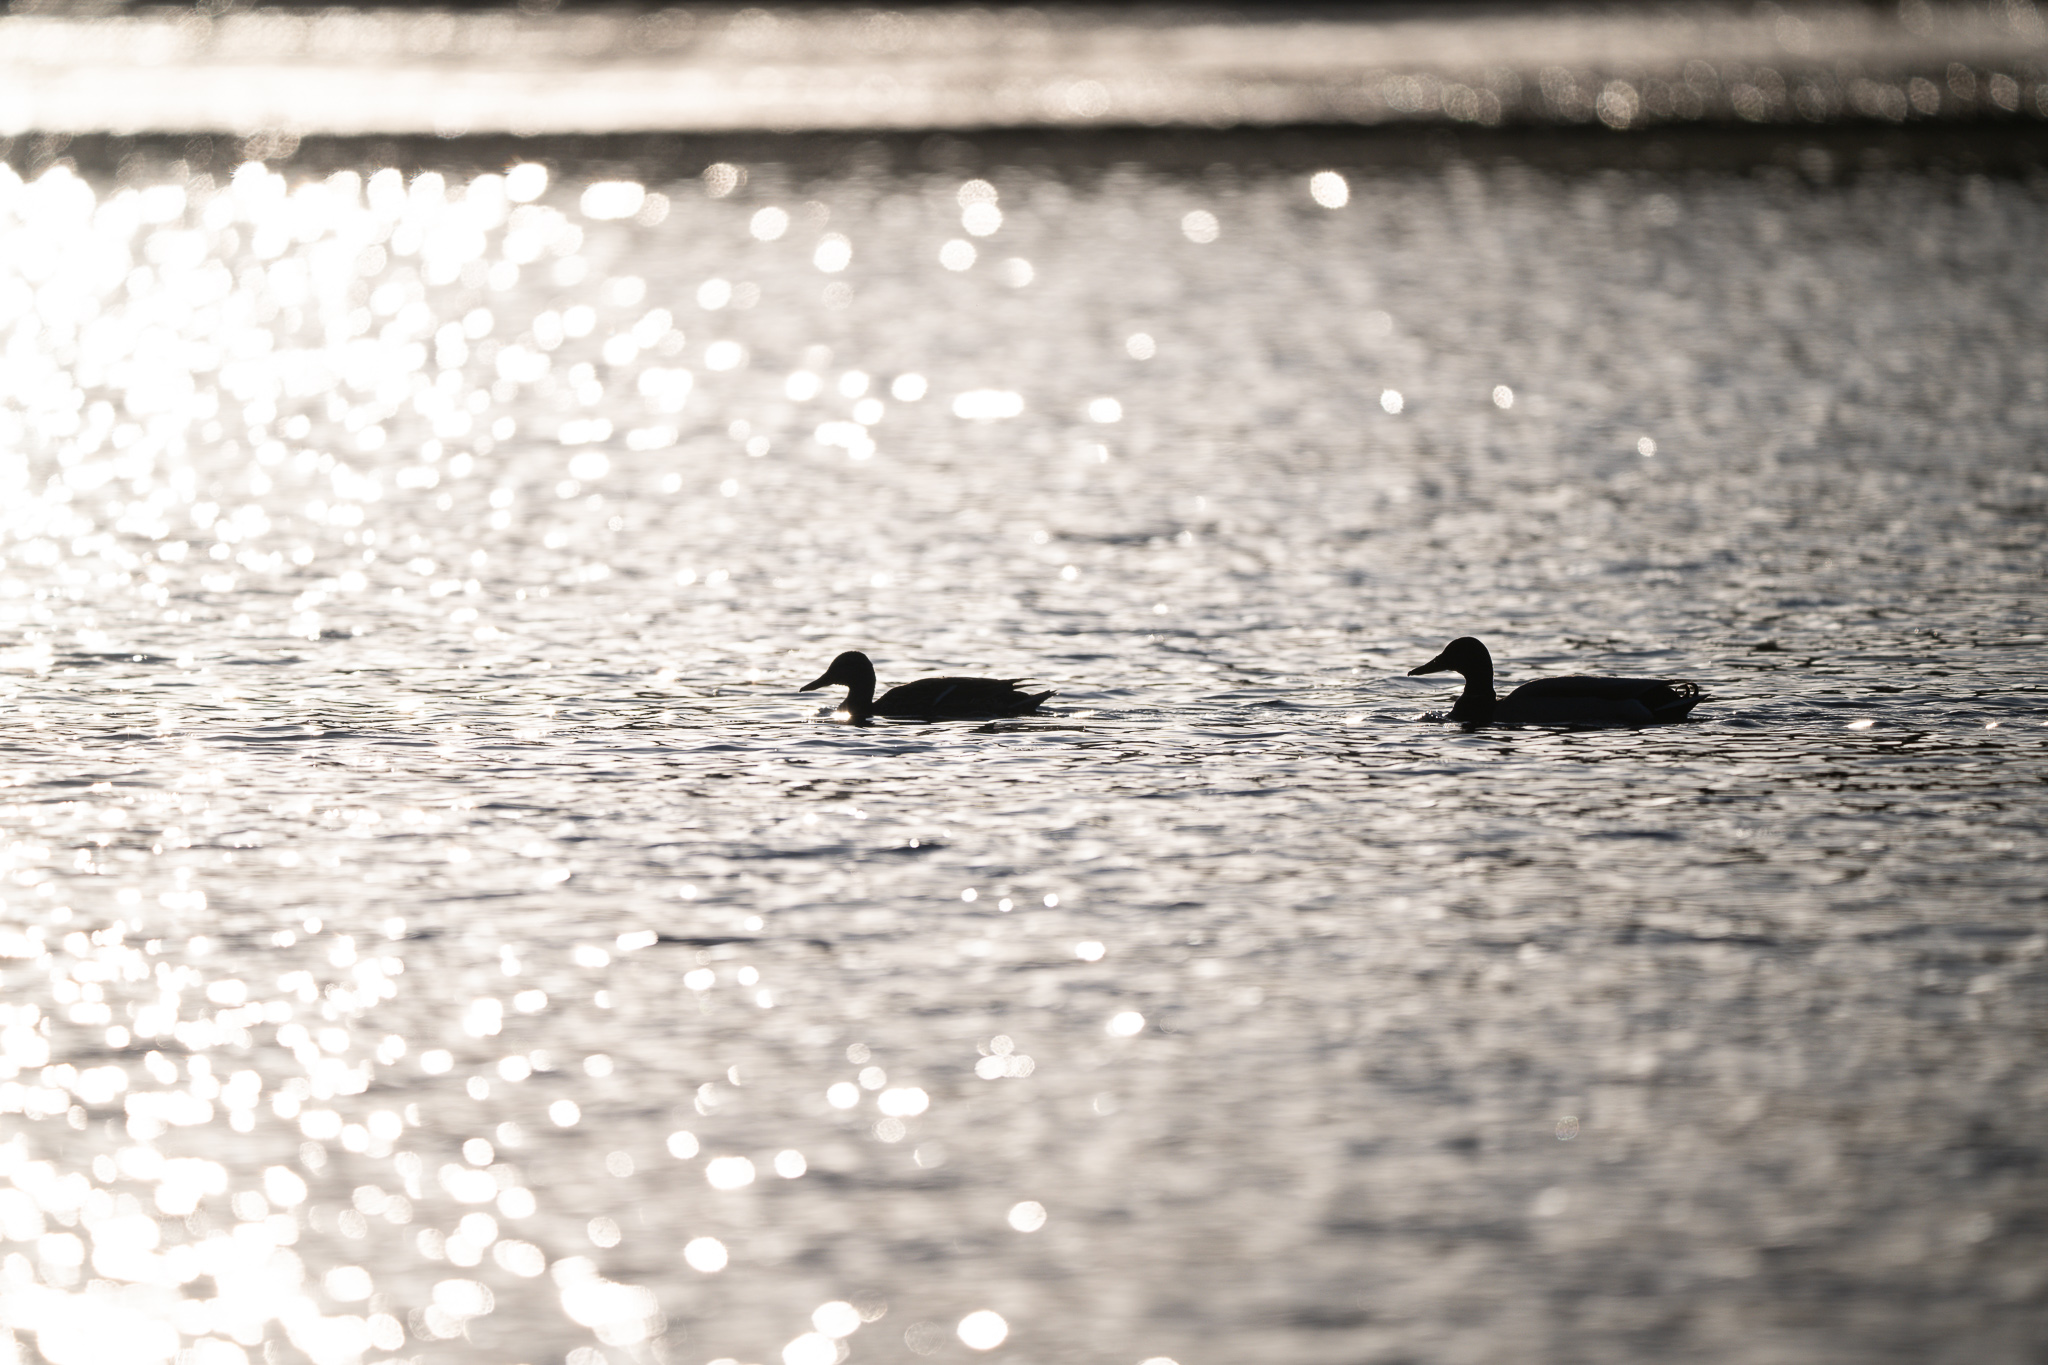
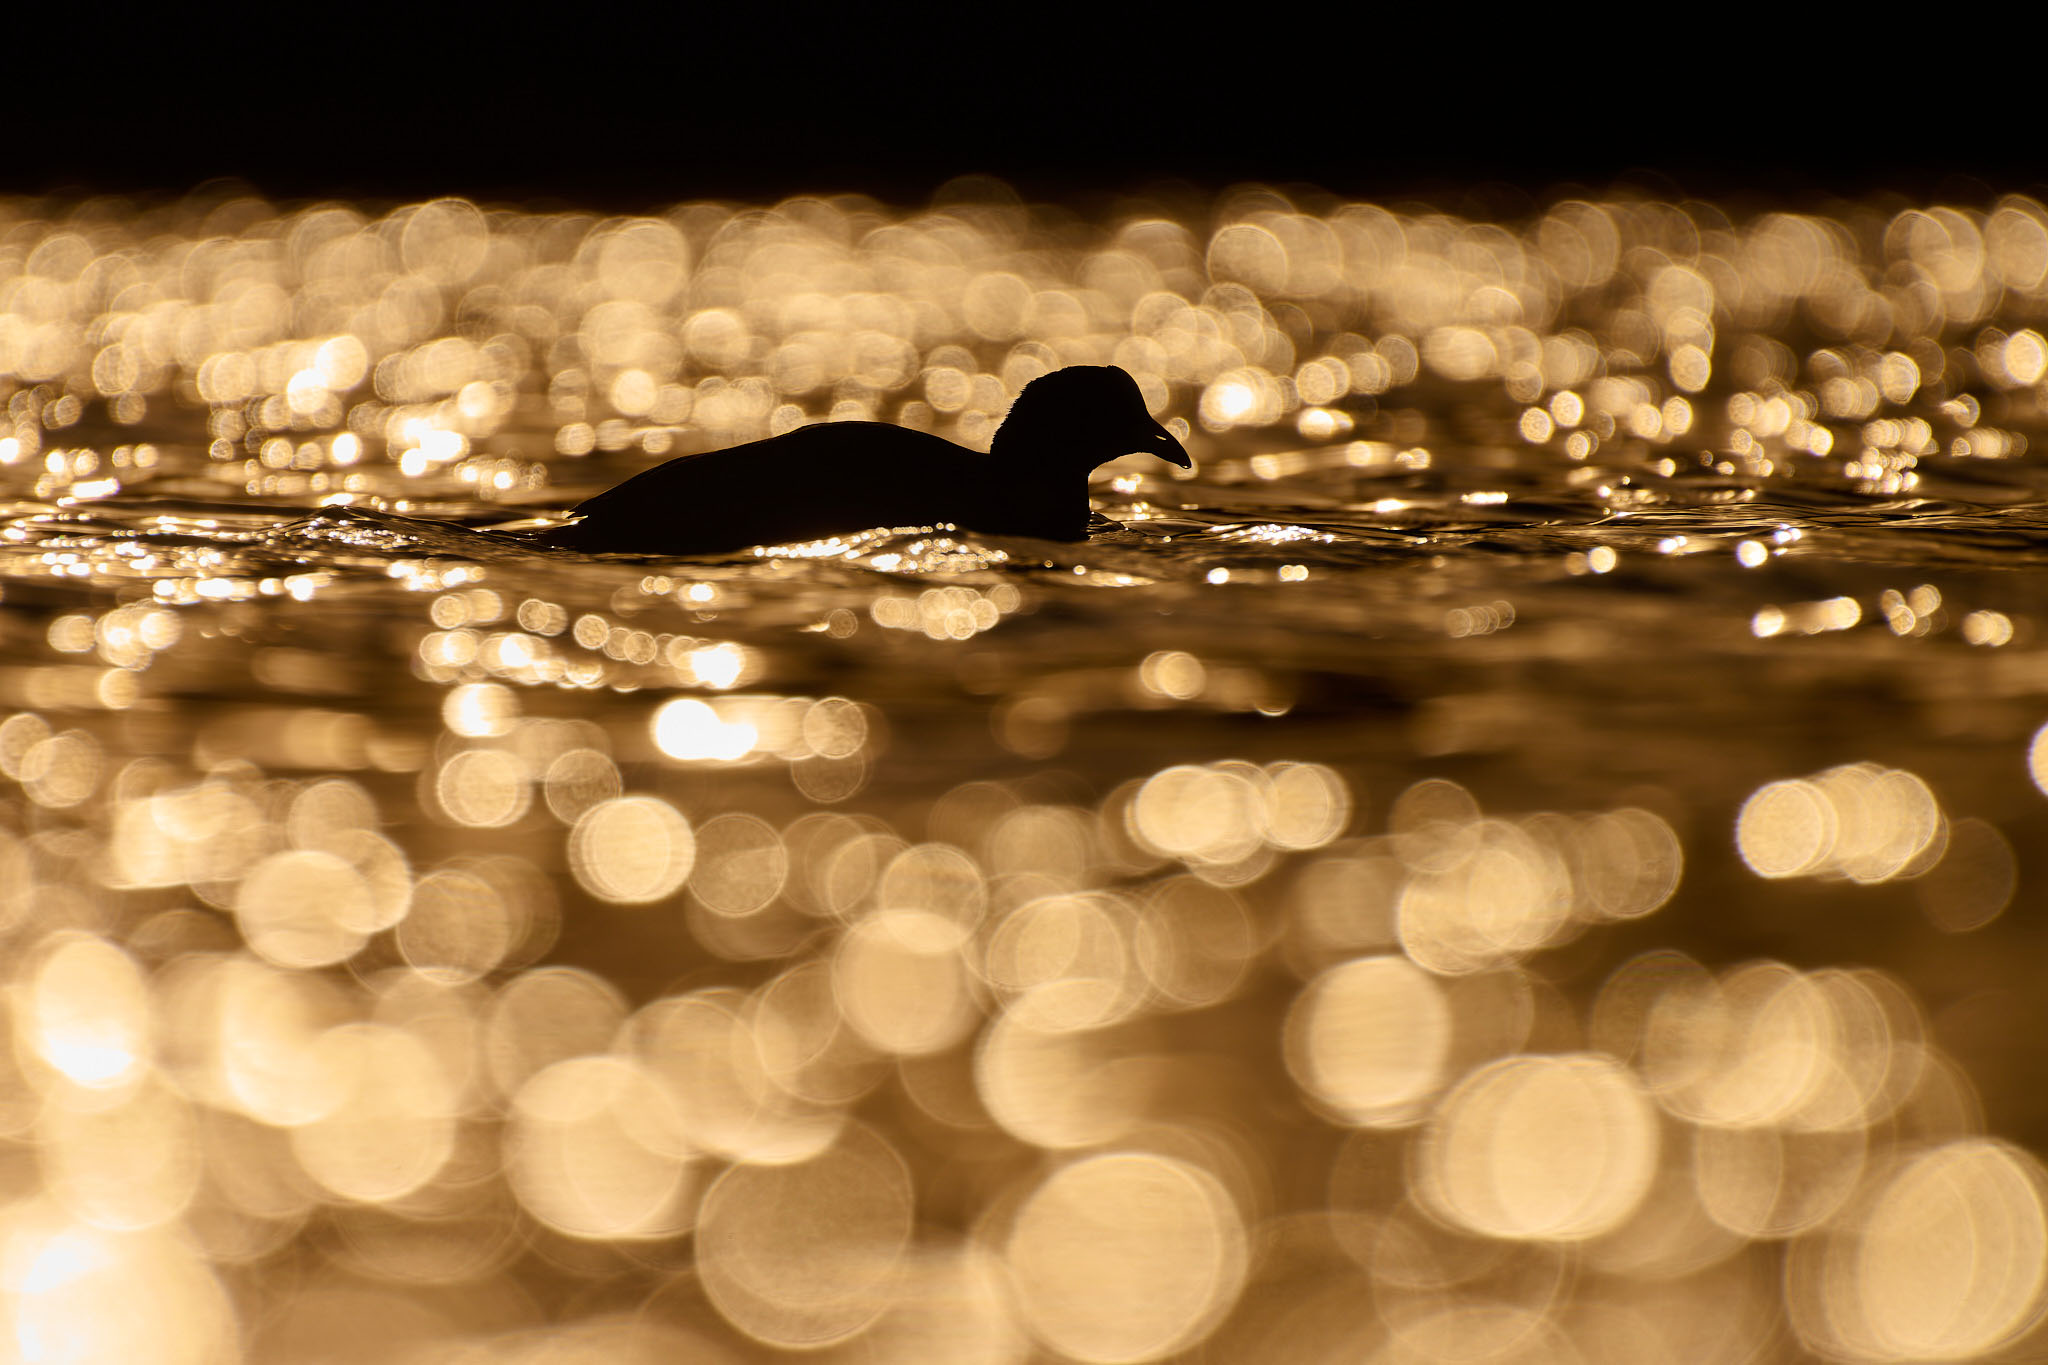
With this comparison, Libor proves that a $650 lens (roughly the 200-500mm’s price on the used market) can beat a $15,500 lens where out-of-focus blur is concerned, as long as the owner of the $650 lens uses the right techniques. Here, Libor achieved such an improvement simply by combining a closer camera-to-subject distance with a lower camera angle. The result was a far nicer photo and a much shallower depth of field than what I managed to achieve with the exotic 600mm f/4!
Hopefully these example photos, and the article as a whole, prove that a photo’s bokeh isn’t just about your lens. Often, the more important factors are the decisions you make as a photographer: your camera-to-subject distance, your choice of background, and your subject-to-background distance.
I won’t say that the lens is irrelevant. There are still many good reasons to go with a faster lens, and of course I’m going to continue showing bokeh tests in my lens reviews. But the next time that your finger hovers over the “buy” button, take a moment to think back on this article and decide whether the bokeh you’ve been seeking could be captured another way.
It might be a biased sample, but most discussions of bokeh that have come my way have focused pretty exclusively on the rendering of small highlights as circular blurs and treated this mainly as a property of the lens.
This has never been an important consideration for me, so it’s quite refreshing to read a discussion of out of focus areas from a technique point of view. I particularly like the pigeon shots at the end – I’ve seen plenty of similar shots and understood that lowering your camera would give you a different background – quite obvious really! But I never appreciated that it would also inevitably change the subject to background distance and therefore the degree of blur available. Next time I see a similar shot I’ll be looking through wiser eyes. Might even try one myself…
Good article!
I’ll be studying this one for a while.
Sometimes a little harder with Birds in flight
But maybe I can figure out a new angle.
Getting closer is hard with wildlife and I’m budgeted for both time and money for gear.
This is one of your technique articles that can enhance the options of a photographer. Enhance the composition.
Making a great photo easier to achieve and less by accident.
Thank you, David!
Excellent article, and timely for me personally. Excellent, as I have always been interested in bokeh, and have a small collection of M42 lenses specifically because if the different ways these older lenses render bokeh.
Timely because occasional attacks of GAS have flared up again with the release of the Viltrox 135mm 1.8 lab lens. (I would never be able to afford the Plena)
The rendering of these premium lenses give such a creamy smooth bokeh in some circumstances, and perfect circular bubbles in others.
Would love to see an independent comparison between those two “bokeh monsters”!
Or maybe, given this insightful article, I should just be content with my $120 Russian Jupier 37a 135mm 3.5 which has a beautiful character with a touch of vintage charm 😏
Some of those vintage lenses have an incredible look to the out-of-focus areas. I’m occasionally tempted to buy a real Petzval lens for my large format camera, but I keep having to remind myself that I don’t shoot portraits or anything that would really benefit from it! It’s just another case of GAS.
once again another great article from PL
this is a great example of why we as photographers should learn to maximize our equipment before succumbing to GAS! (plus our wallets will thank us)
Much appreciated, Ezzie! Absolutely, it’s easy to fall into GAS, but that’s not the best way to improve one’s photos.
Nice. As for the last example, if you would use the same technique as Libor, you probably have to swim closer to the ducks … which can be a subject for a whole new article …
Getting a little dirty and wet is one of the best techniques of wildlife photography!
By coincidence I just worked this week with the nikon 35mm f/1.2 and 85mm f/1.2 lens to find out how beautiful they can isolate people in an environment creating truly different kind of images.
I agree with the findings in this nice article, but lenses are very important to me.
Yes the ability to choose f/1.2 as an aperture makes a great difference and Nikon always takes effort to make beautiful out of focus areas. Because these lenses are expensive, they also shine in different other qualities concerning contrast, sharpness, flare resistance – already wide open. The new 35mmf/1.2 is extremely sharp and contrasty even at f/1.2 .
When making a portrait, the distance is within a small range, so for the DOF the aperture and focal length will make the difference. So to choose these lenses it is for these reasons, the ability to use faster shutter speeds and use AF in dark situations. I happen to need all, doing performance photography in almost complete darkness.
(PS When f2.8 is needed the cheap 40mm f2 lens does a very good job as well, the difference using these lenses will be seen mainly from f/1.2 – f2.8)
I agree with you! I think a good lens does make a huge differnence, only one needs to know how to apply their advantages to the right situation! And when you do, they will make a big difference compared to slower lenses. Like the 85mm f/1.2 you mentioned, which can definitely achieve results the f/1.8 version cannot. And there are definitely cases where a 500mm f/4 would have made a difference over my 500mm f/5.6, too!
Wow, here is all you need to know about bokeh and one more reference article in my bookmarks from Photography Life website.
I’m glad you liked it so much, thank you!
That is a wonderful educational article with beautiful photos As an example. I have another question which is also more or less related to this article: I really want to buy the Nikkor z 100-400mm, but for (small and shy) birds I do not have enough range on my Zf. If I would shoot in DX mode I have 150-600mm but it is then about 10mp and probably not good quality (sharpness and bokeh) Is it better to buy a DX body with it (nikon z50ll) we are going to Tanzania early next year for wildlife. We already have a very good guide, who knows the best locations. No tourists and a really beautiful natural habitat. Thanks in advance for your answer! Greetings, Danny
Hi Danny, sure thing! I think you have two good possibilities here. First would be to get the Z50 II, which would put more pixels on your distant subjects and be noticeably better than the 10 MP crop of the Zf (especially if you need to do further cropping later). The second possibility is to go with a longer lens in the first place, like the Nikon Z 180-600mm or the Tamron 150-500mm.
For small and shy birds, you usually won’t want to compromise on focal length. I may even consider combining one of the 500mm or 600mm options with the Z50 II. The 100-400mm is definitely a great lens, but I see it being more suited for landscapes, near-macro photography, closer birds, or larger mammals.
Thanks a lot Spencer! I can relate to that.
Hi Danny,
I own the 100-400 and shoot it on an FX body (the Z8); I greatly enjoy the 100-400 for the subjects Spencer described and use it frequently for such. But I quickly found the exact problem you’ve described when trying to use it on those subjects (esp. wildlife) where 400 is intrinsically too short. This, coupled with the fact that the 100-400 is least sharp at 400 (though still reasonably good; see, e.g., photographylife.com/revie…5-6-vr-s/2 ), left me unimpressed with many of my DX crops with this combo (esp. when I tried it with the 1.4 TC). So I looked for other options. Rather than going to a DX body (the Z50II wasn’t yet released) or choosing the long & too heavy (for me) 180-600, I chose to add one more lens to my kit: the Z 600 f/6.3 PF. Dramatic game changer! Now with the 600 available to complement the 100-400, I get a lot more flexibility — and sharp shots — from my kit!
That’s also a good tip and suggestion! I’m already starting to save……-:) Thank you very much.Kind regards, Danny
Great article – all of these are important points. Beyond that, I think it is important to separate the quality of the blur from the degree of blurriness. When you are able to throw the background completely out of focus (see e.g. the second Dove above), basically any lens can render that well (I have not seen one that does not). The lens matters more when there are in-focus to out-of-focus transitions or just-barely out of focus areas in the shot. For example, the 100-400 S will produce perfectly smooth blur when the background is far away, but it can produce ring-like bokeh in the transition areas (which sometimes looks “not so good”).
I agree with you completely, and would only add one thing – the solution to a lens with busy bokeh in transition areas isn’t always to buy a lens with better transitions. Often it’s possible to do what Jason did in that dove photo and minimize or eliminate the busy transition areas in the first place, typically by using a different camera position. The result is a photo with a gentler blur character / bokeh, even if the lens isn’t known for good background blur.
Fully agree!
Good tips and reminders, Spencer, especially the idea of getting a low angle.
Thanks!
Sure thing!