In this article, I’ll explain the concepts behind the “Blend If” setting in Photoshop and how to use it to blend layers together. Even though they have an unlimited array of uses, Blend Ifs are predominantly meant to be a simpler alternative to Luminosity masks. (We already have a detailed article about Luminosity masks here in Photography Life.)
Before going through this article, it is important to be familiar with the concepts of layers and masks in Photoshop.
Table of Contents
What is Blend If?
In a nutshell, Blend If does pretty much what Luminosity masks do: It masks out part of a layer based on the luminosity of pixels.
Even if you buy a special luminosity masking plugin for Photoshop, it still can be a tedious process to create different masks and check them individually to figure out which one fits the most. And I needn’t mention the fact that each additional layer increases the size of your image when working in Photoshop.
How great would it be if we had a one-step solution to those limitations? Well, we do! Blend If is the answer. Blend If takes a current layer and blends/masks it with respect to the underlying layer based on one or more conditions. And it’s all done in a single step.
How to Use Blend If
To understand how Blend If works, let’s start with a quick demonstration. Open any of your images in Photoshop and add a gradient fill layer on top of it. This is done by going to Layer > New Fill Layer > Gradient. You can see that the top layer (gradient fill) grades from black to white ie., from the darks on top to brights at the bottom.

Double click on the right-hand side of the upper layer to pop up the blending options dialog. The Blend If section at the bottom of this dialog is what we’re covering in this article (i.e. the blue box in the image below). Once you start adjusting these sliders, the Blend If icon will appear on the right-hand side of the layer (which I highlighted in green below).
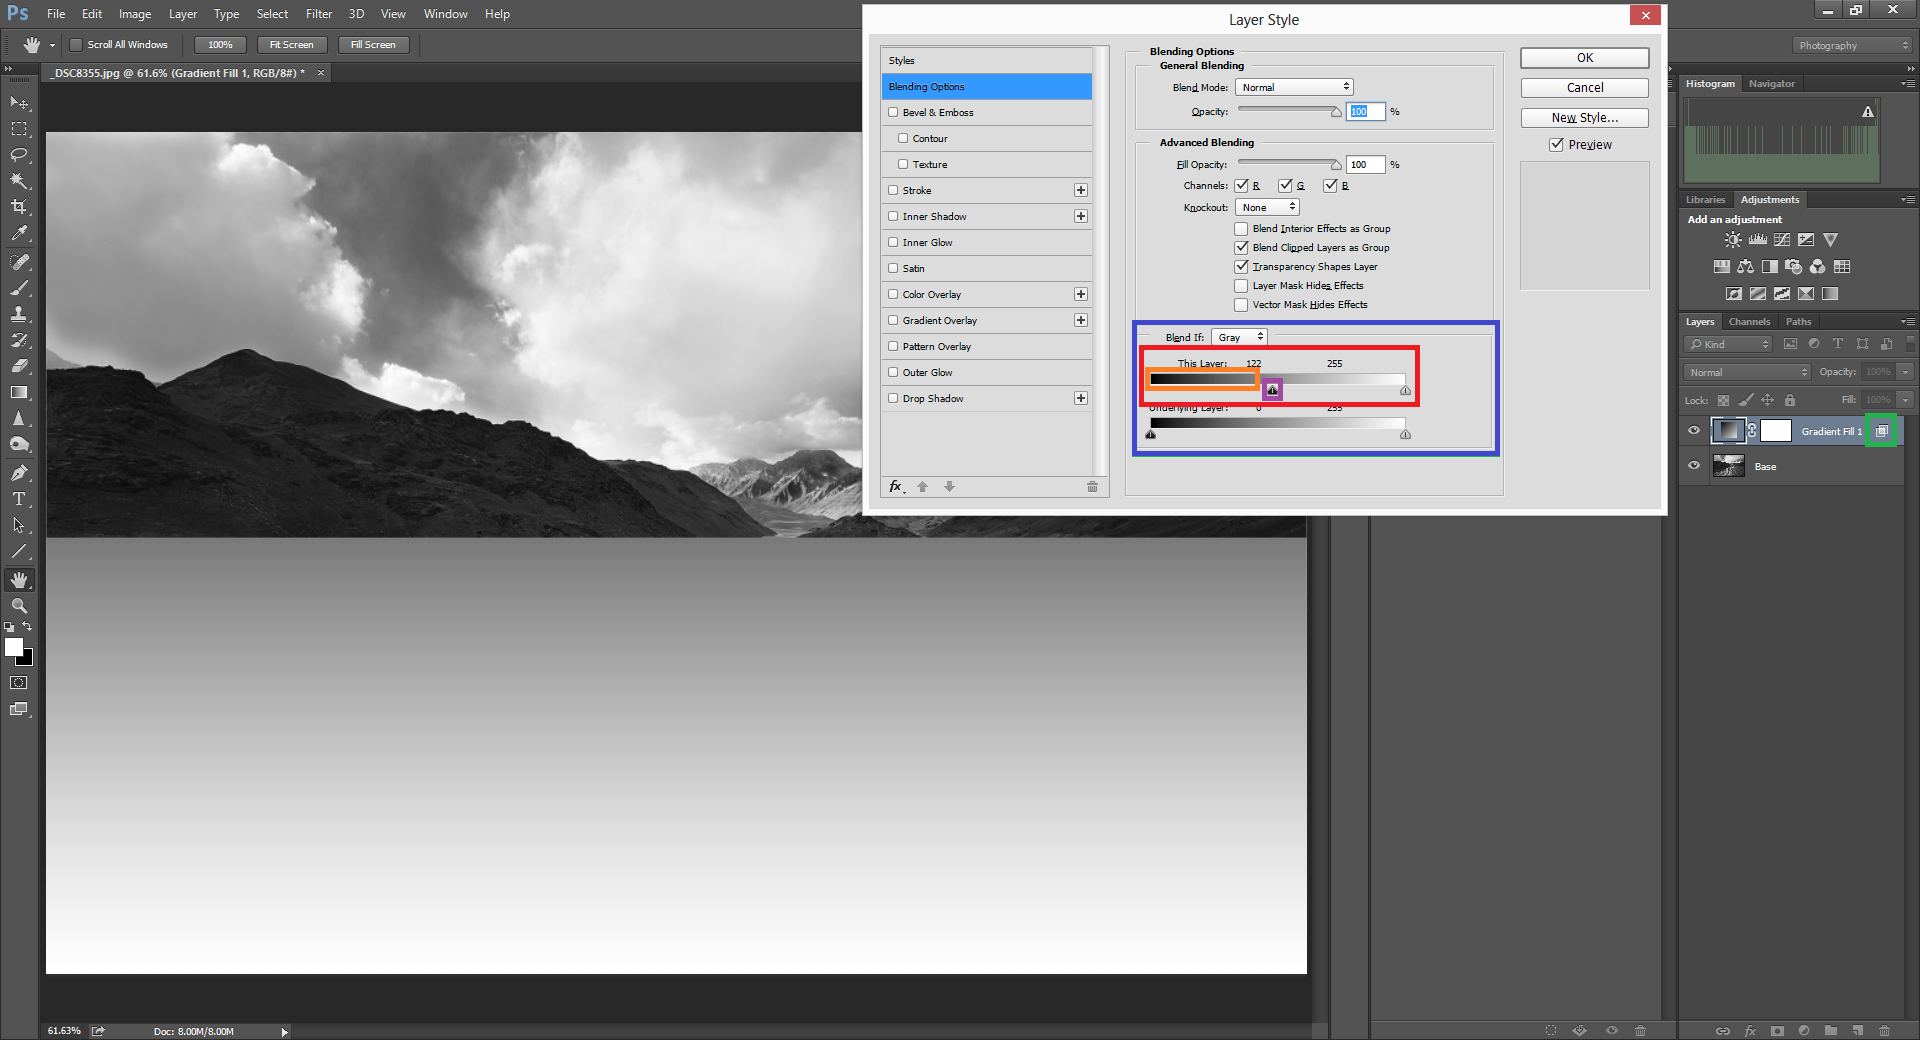
As you can see in the image above, the gradient harshly stops at a gray tone, beyond which point the underlying image is visible again. That’s because I adjusted the top slider (called “This Layer,” and highlighted in red in the image above) by clicking and dragging the black triangle (highlighted in purple) to a value of 122.
“This Layer”
The section of the slider called “This Layer” only looks at the tones in the layer that you’ve selected. In this case, that’s the gradient layer I just created.
In this case, any dark tones in my selected layer (specifically the tones I highlighted in orange in the screenshot above) become transparent. Thus, the image beneath is visible.
This is a nice benefit compared to luminosity masks, which generally don’t let you select the cutoff point at such a granular level. (Instead, they have broader blocks of selection, like Darks0 to Darks6.) Blend If, by comparison, lets you specify the exact cutoff of tones that will be masked out. Note that you could just as easily have masked out the bright pixels by moving the white triangle to the left.
However, the big issue with the illustrative picture above is that the selection is harsh. We seldom use harsh or sharp selections in photography, for they make the end result look “cut out” or artificial. To fix this, click the triangle while pressing the Alt (Windows) or Option (Mac) on your keyboard. Then, the slider splits in two, and you can drag the left and right halves independently. The illustration below shows them marked in blue:
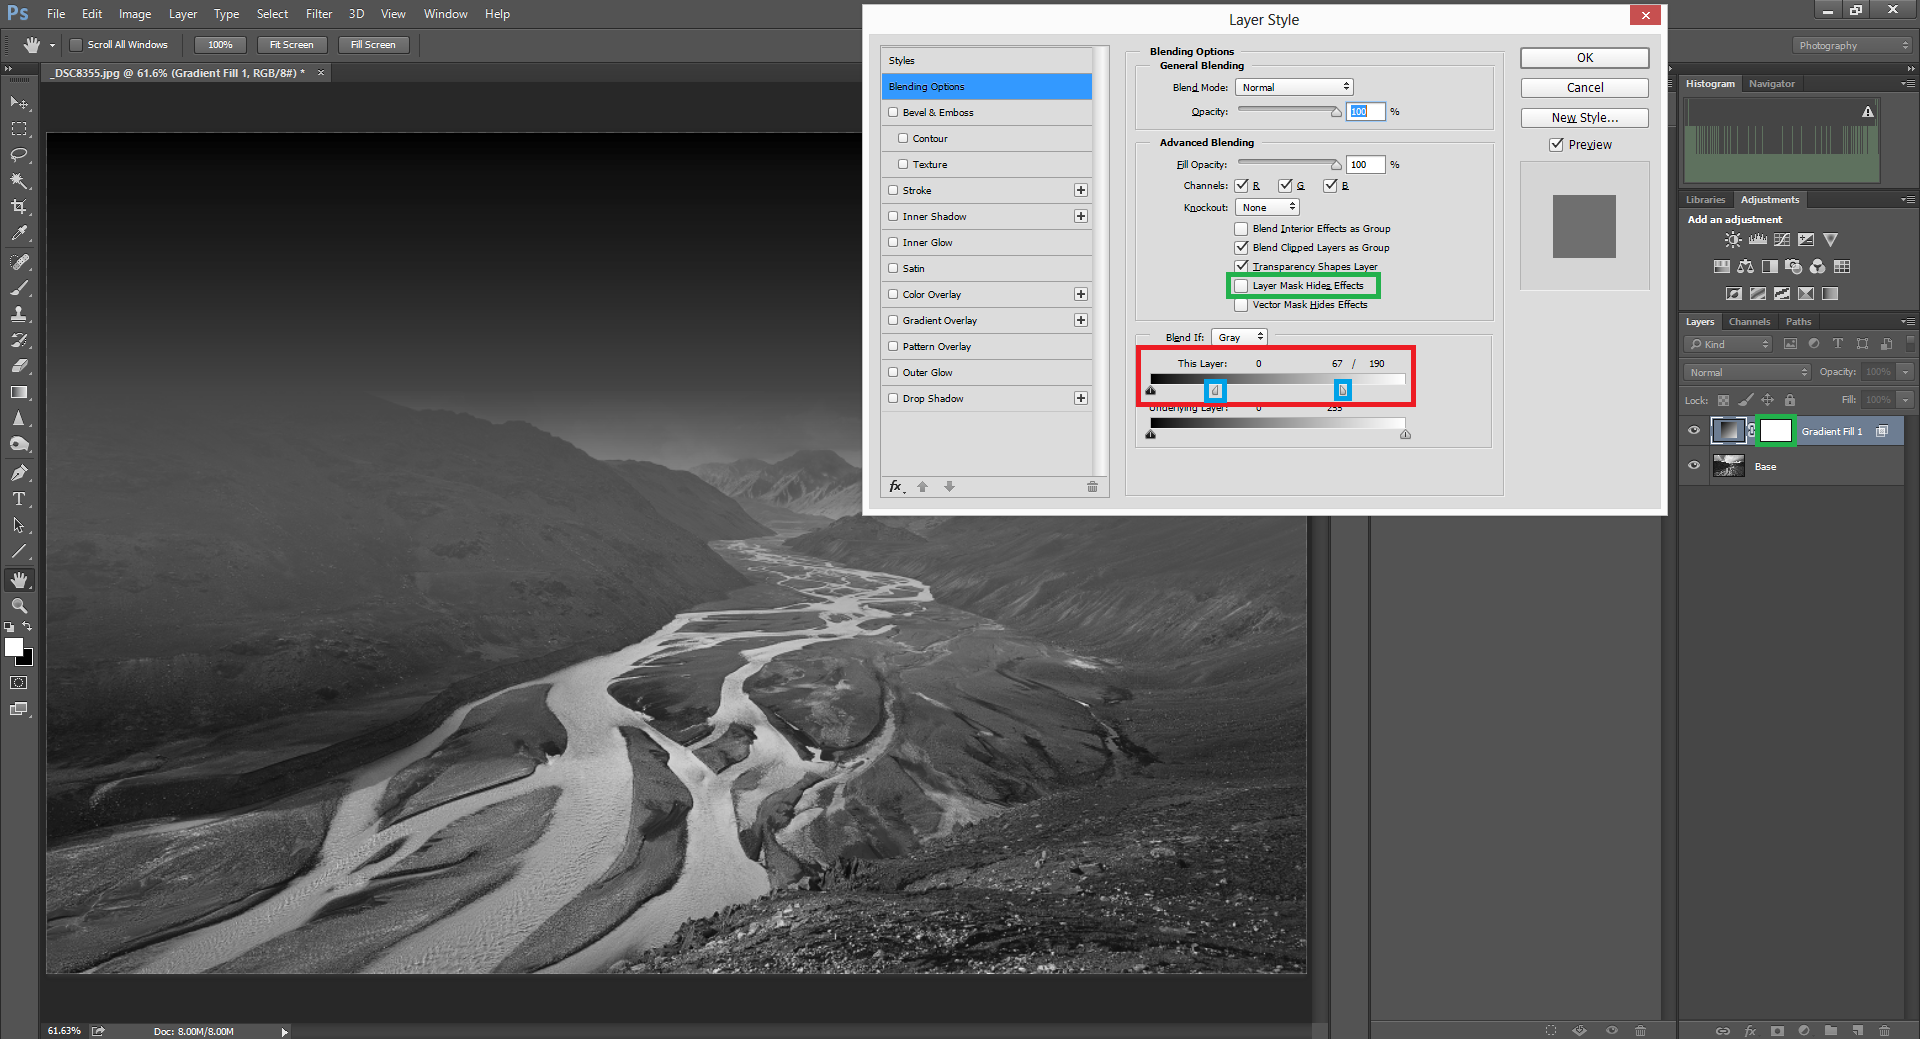
To be specific, the right half of the slider marks the start of the masked out area, and the left half of the slider makes the selection smooth, hence leaving out harsh boundaries.
“Underlying Layer”
This is where Blend If become all the more powerful and flexible. So far, the slider we’ve adjusted has been affecting the layer we selected (the gradient layer), but there’s another slider called Underlying Layer. Let’s understand it with a case study.
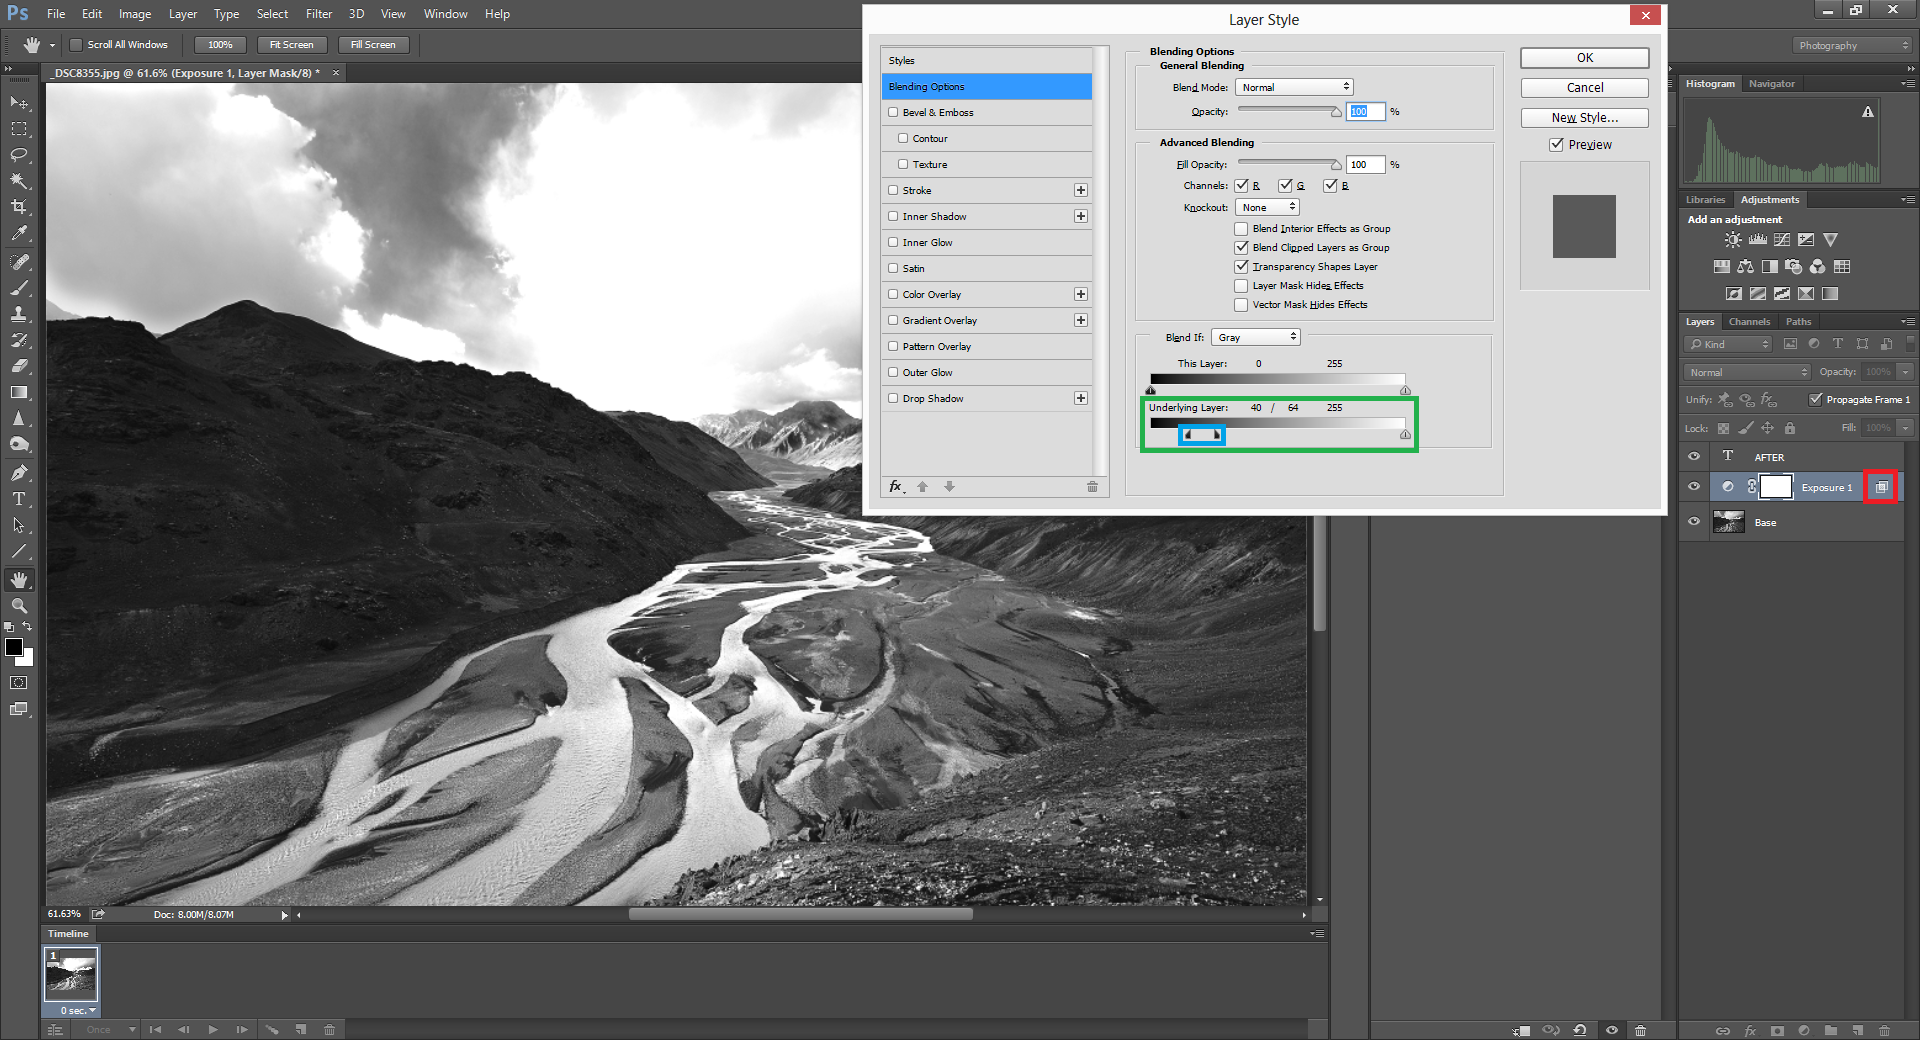
Let’s say that my goal with this image is to add some more contrast by brightening the river. So, I’ve added an Exposure adjustment layer with a value of +0.75 on top of the actual image. Instead of applying it to the entire image, I want the Exposure layer above to be applied only to the highlights. This is where Underlying layer comes to the rescue.
With my Exposure adjustment layer selected, I once again open the Layer Style dialog. Then, I will adjust the dark triangle of “underlying layer” to mask out the darker areas of the image (and thus not apply my +0.75 Exposure to those spots):
You can also notice that we also have smoothed it out by splitting the triangle in half with the Alt/Option key.
Now you can see that the exposure is applied only to the highlights leaving the darks out. Both the clouds and the river have gotten brighter, and the clouds are now overexposed. However, it is easy to mask out the sky area manually in the layer mask, making sure my adjustment only applies to the highlights in the water.
As we proceed deeper into Photoshop, we will clearly understand that it is never a one click approach that makes a good photograph. Rather, it is a combination of subtle changes that gives life to a photograph.
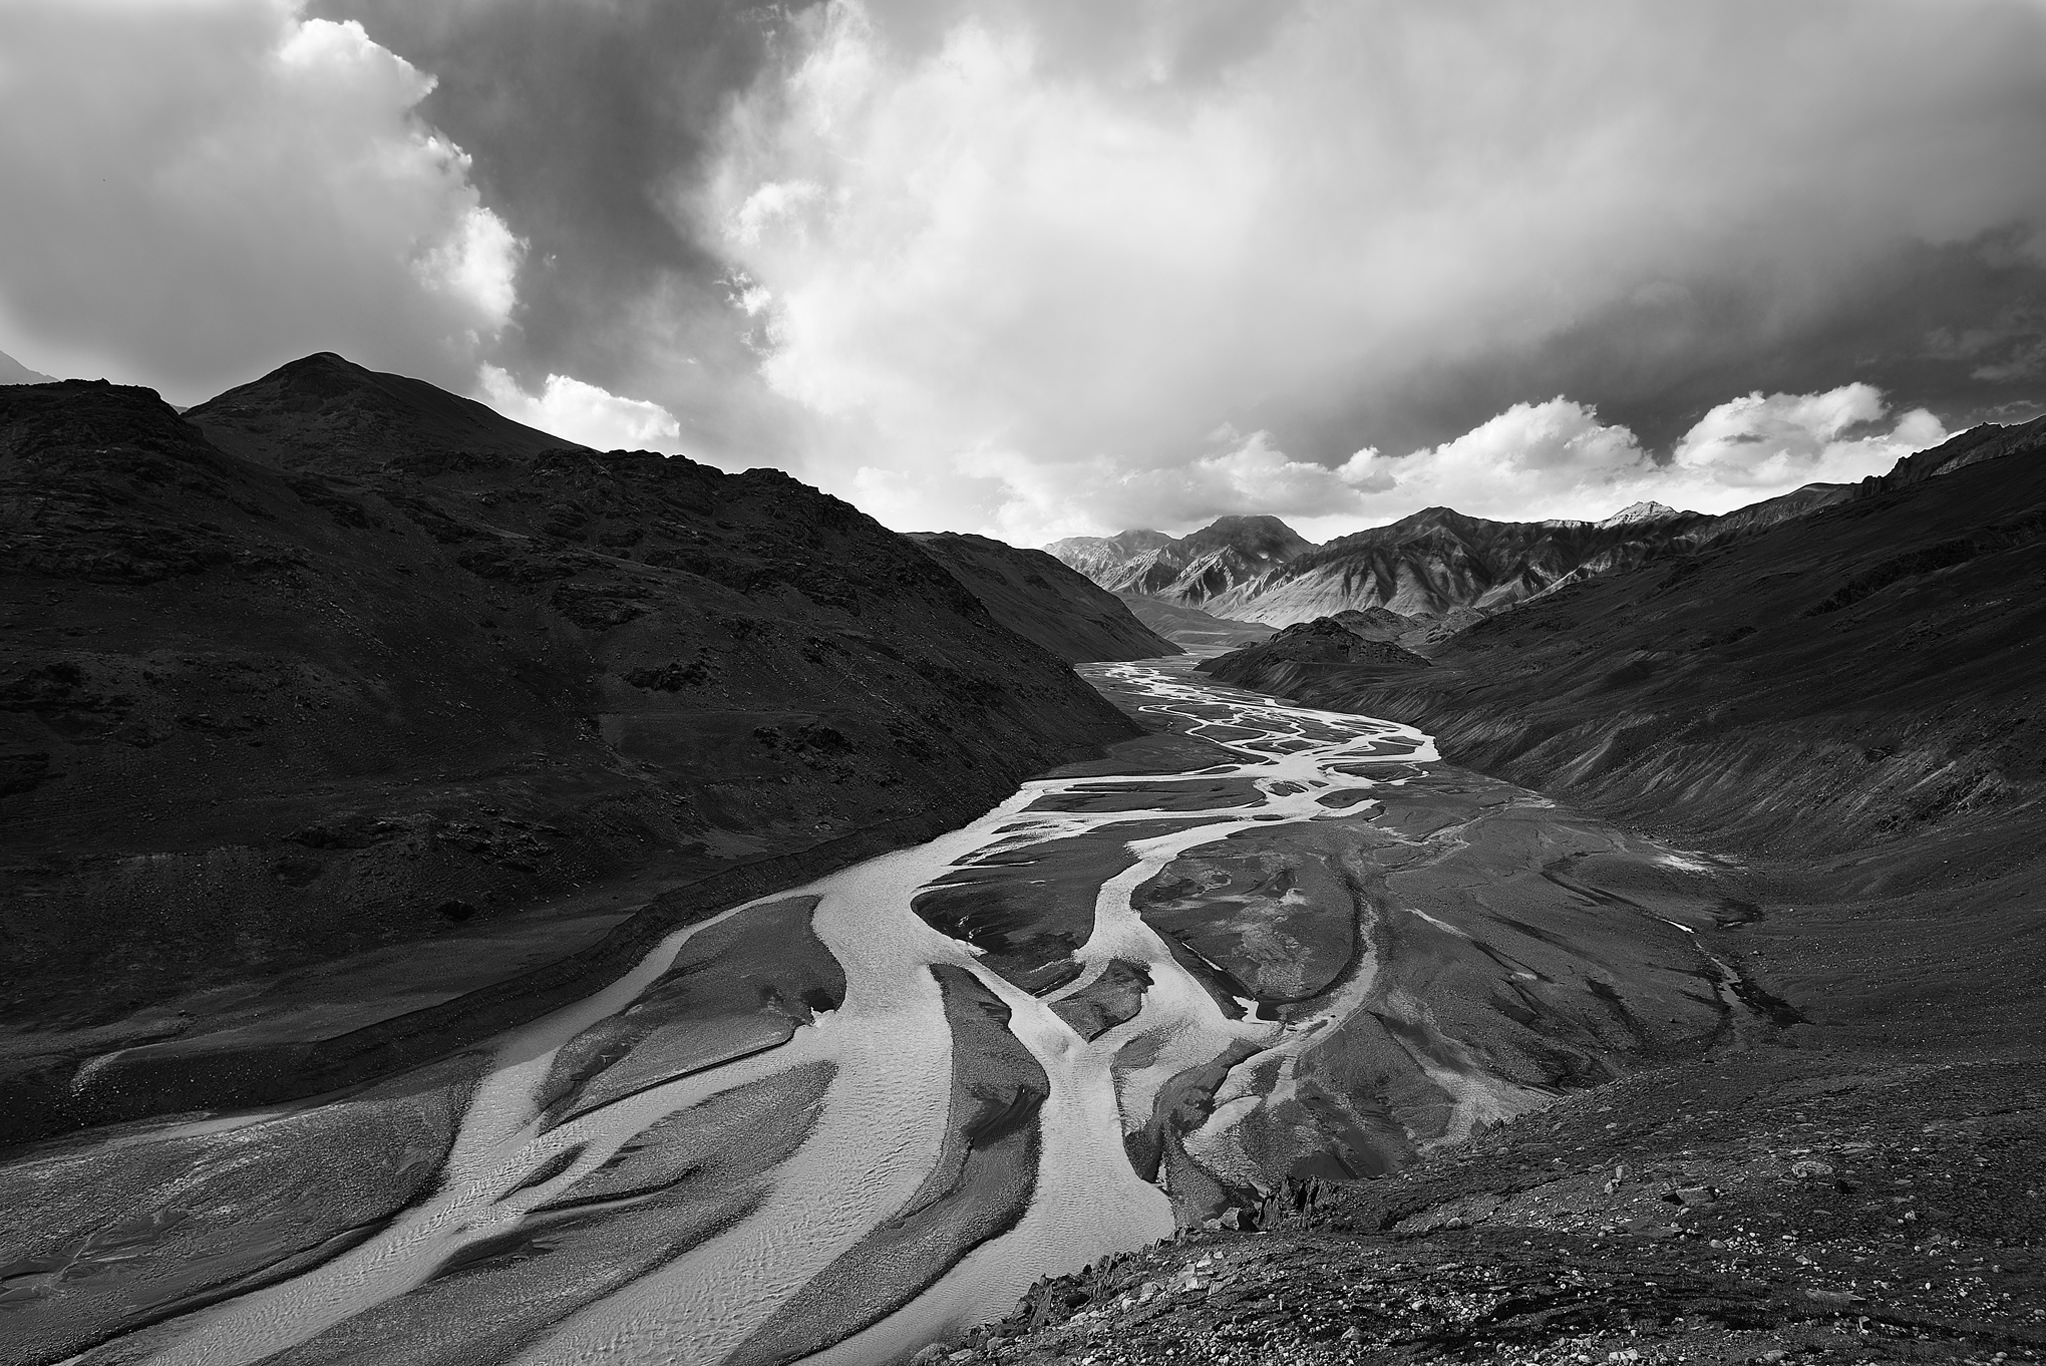
Let us consider another example where we can understand Blend If better. Take a look at the picture below:
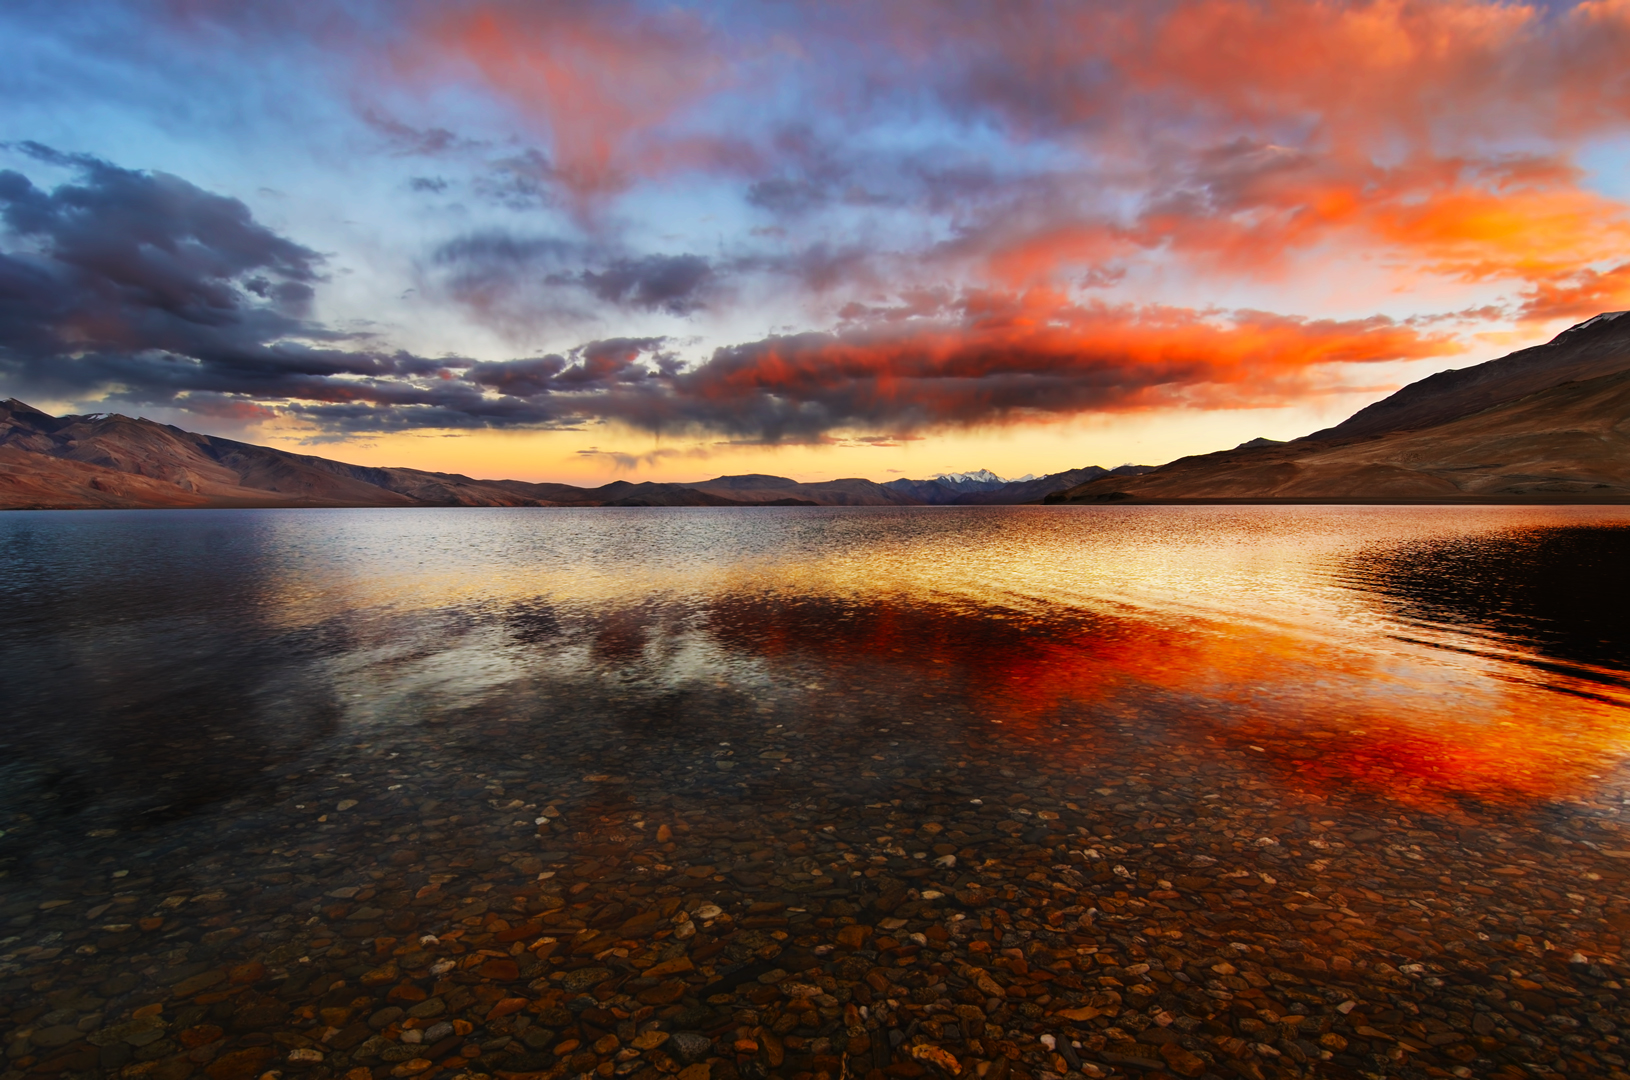
Let’s say we would like to add a little bit of purple to the picture without making it look artificial.
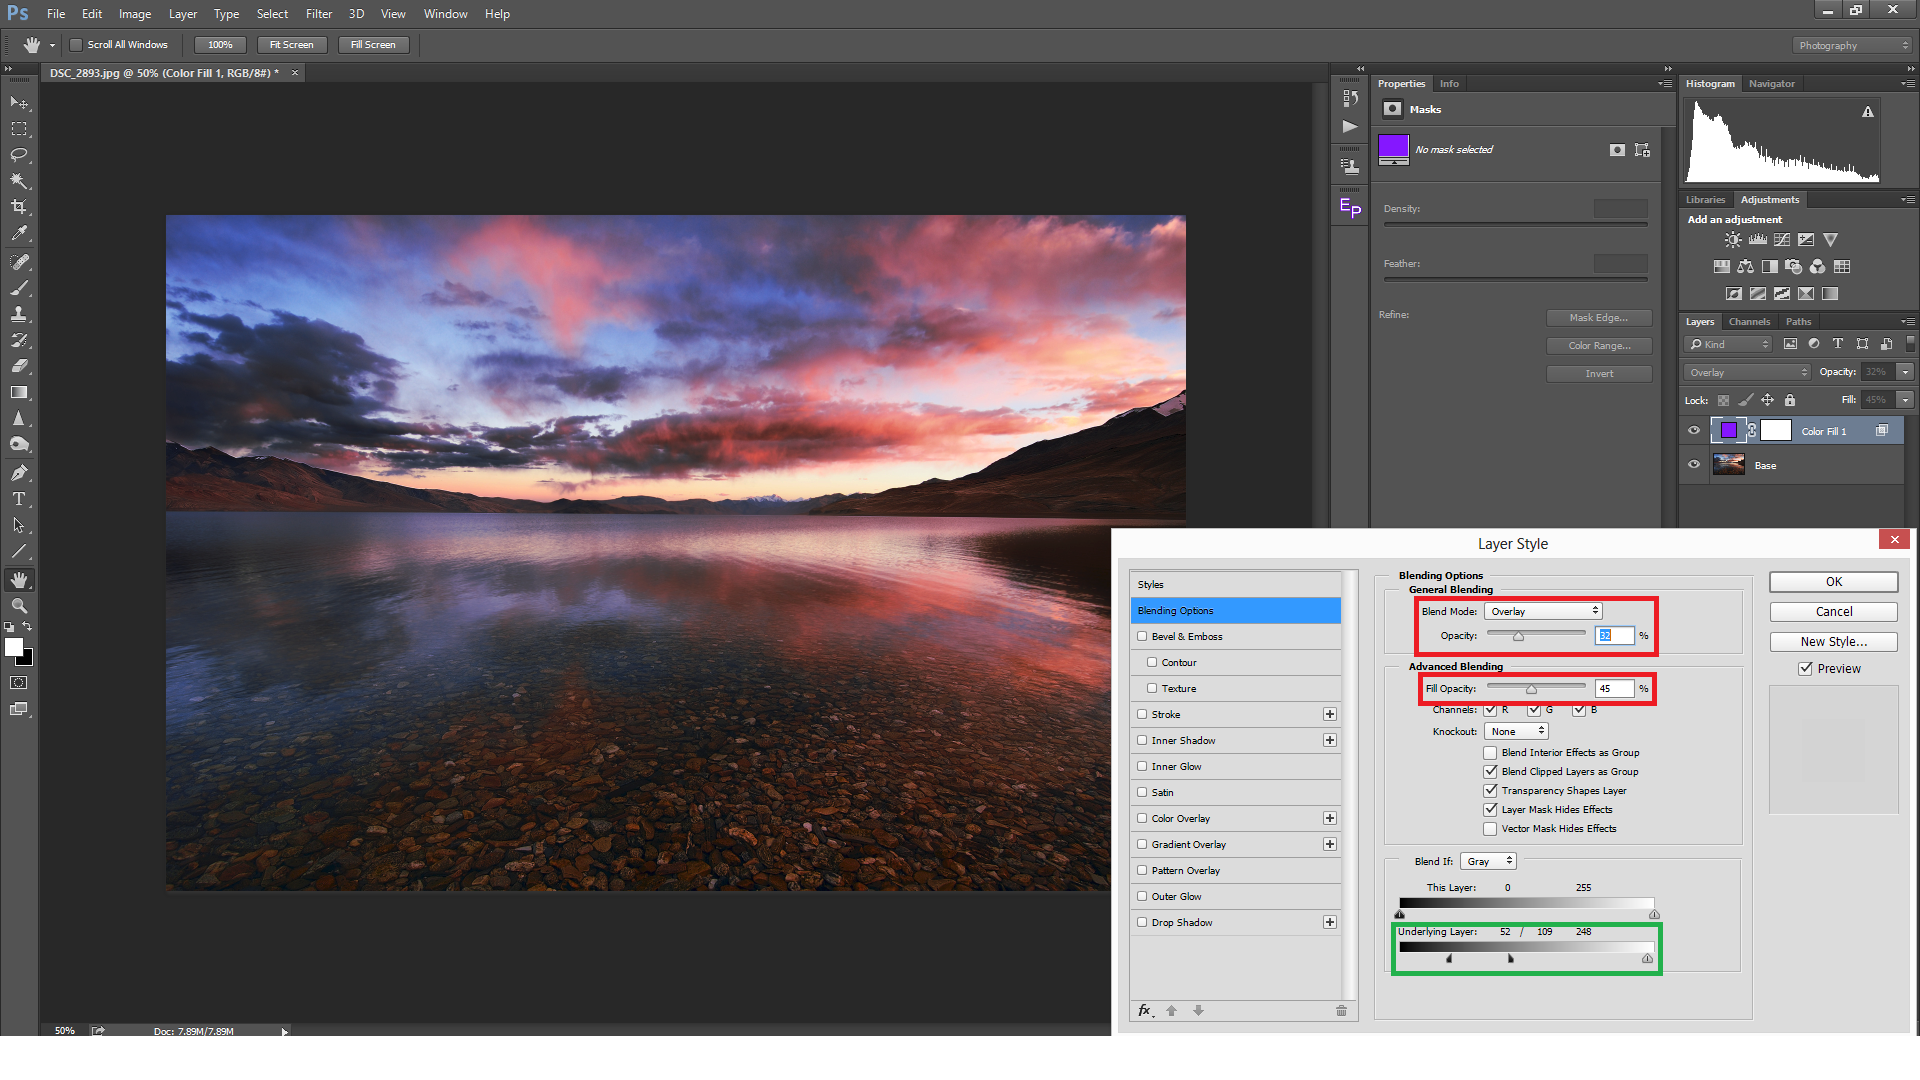
To do this, first open this picture in Photoshop and create a solid color layer above the original image.
Once again, double click on the right-hand portion of the layer to open up the Layer Style dialog. As it is, I only want to add the purple hue to the sky, bright clouds, and reflection, all of which are highlights. Thus, we can mask out the mid-tones and the shadows.
So, we will omit the shadows from the underlying layer, doing so smoothly by splitting the slider. To make it subtle, Overlay is selected as the blend mode, and Opacity and Fill-Opacity are brought down to make it realistic.
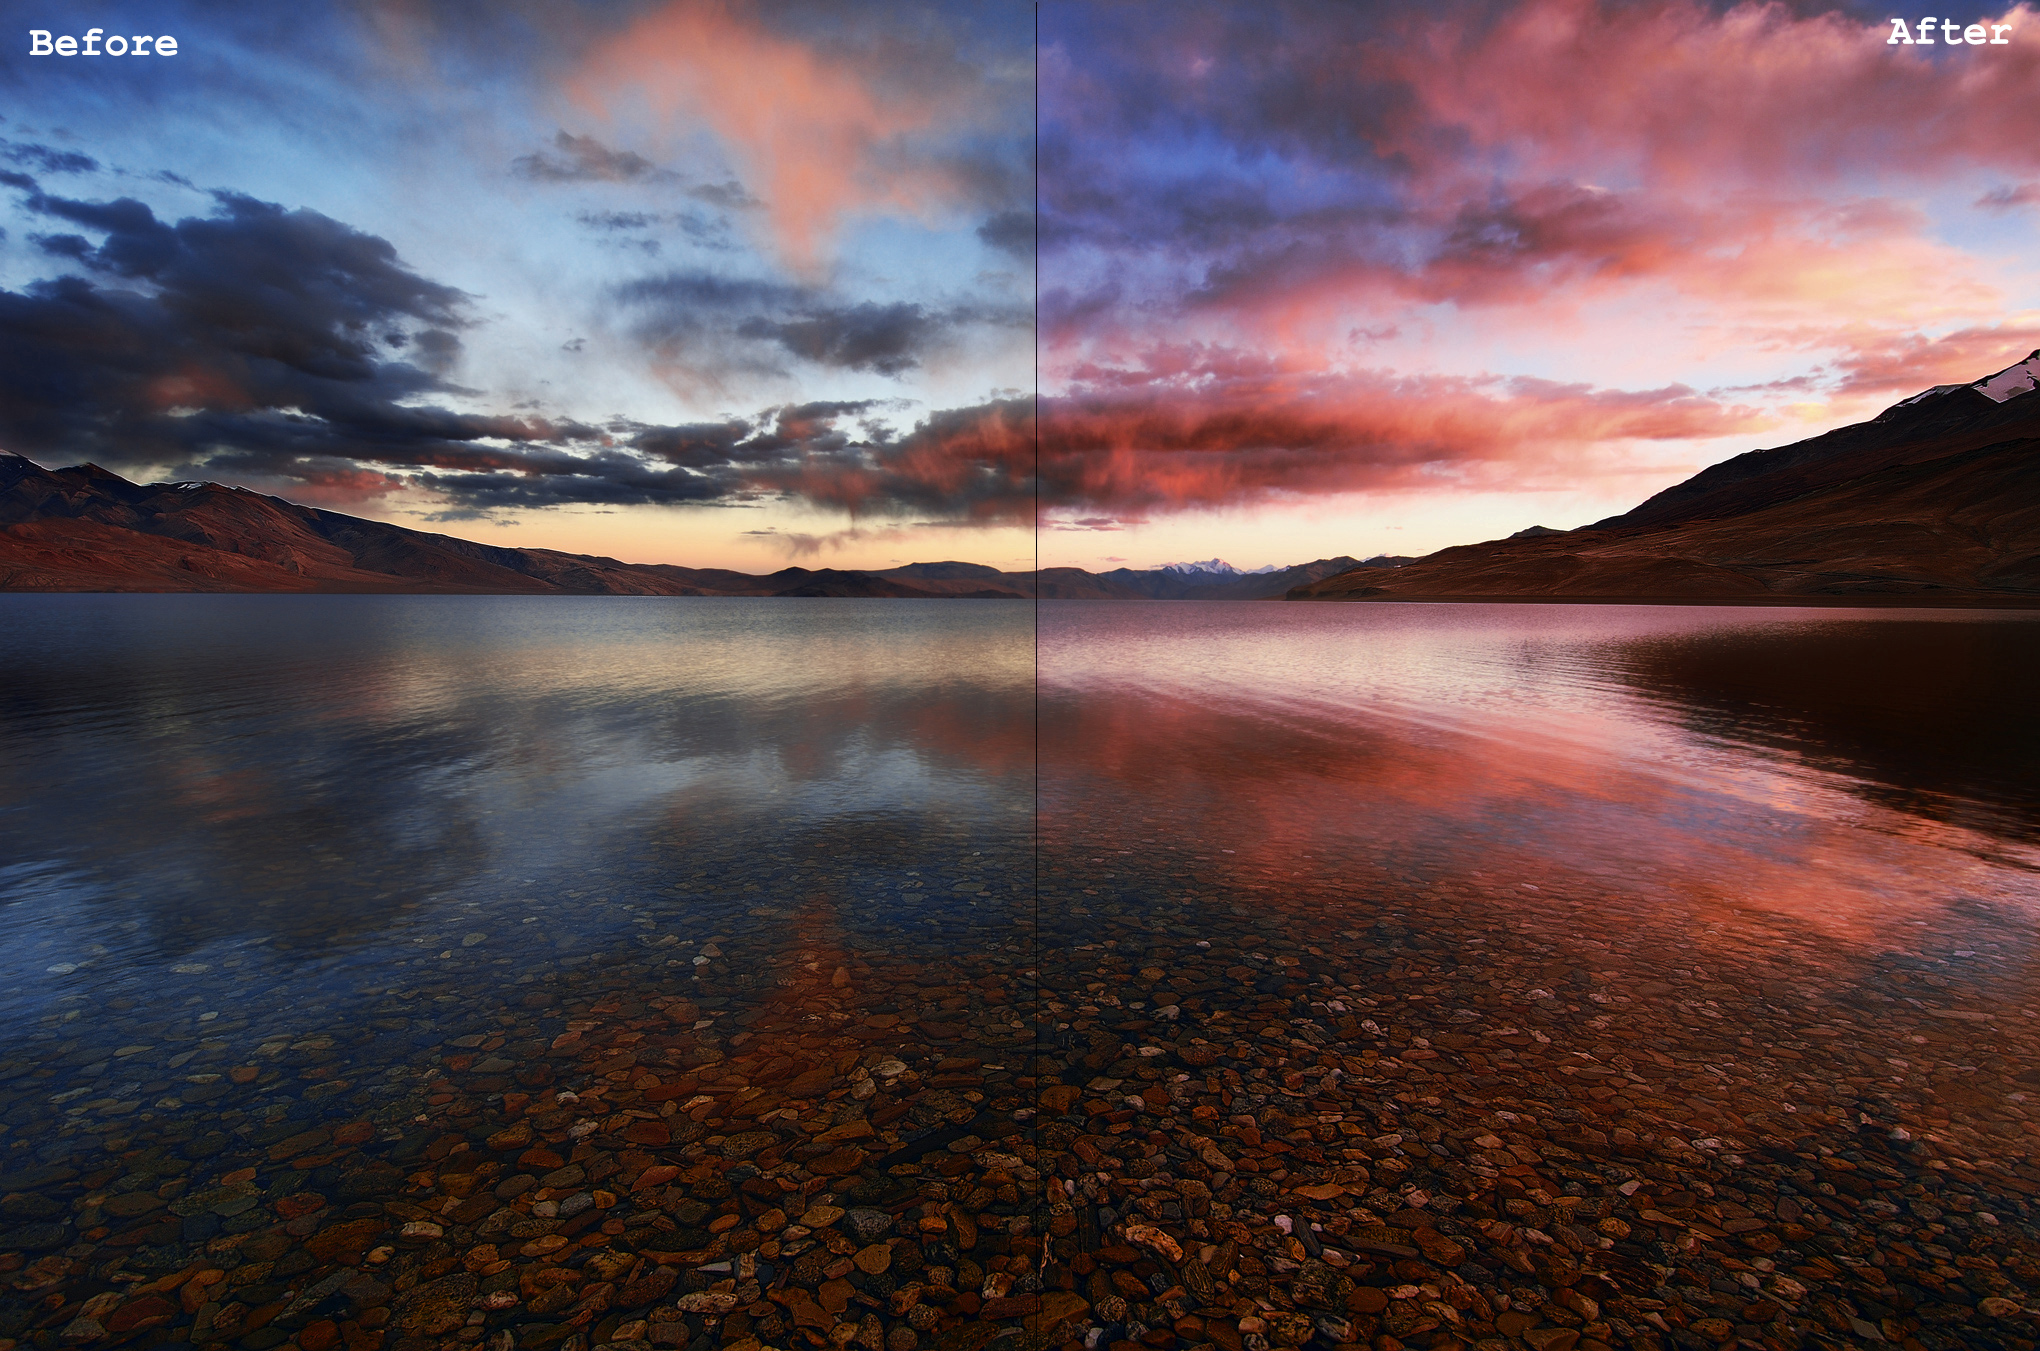
 Here is how the photo looks with that easy color adjustment:
Conclusion
As you can see from this article, Blend If is a very powerful and flexible tool. You can use it for exposure blending, quick adjustments, or creative composites. It might take some practice to master it, but now that we are through the learning curve, it can be used as a faster replacement to luminosity masks, among many other things.
If you have any more queries about the topic, please put it in the comments section. Stay home and stay safe.
Thank you for this very instructive lesson. No one on youtube could explain like you do. Appreciate your work very much. Cheers.
Thanks for sharing, and keep them coming please!
Great post — enlivened by great examples. Could you share the RGB or HSL values for the purple? Also, could you explain what the Fill Opacity slider is doing in this case. I’ve been searching for a good explanation for what this slider does (I use it with Color Dodge and Color Burn).
Thanks Alec. I’m glad you found the article useful.
The RGB for purple is 140,45,190.
The Fill option is pretty similar to Opacity. Fill differs from Opacity in the way in which the light is projected. In other words ‘fill’ gives a more refined and a subtle look.
Actually, Fill Opacity is not at all the same as Opacity. I use it all the time with seveal blends modes. It changes the nature of the blend. I’d like to know how.
If a zone scale is included in the slider panel, it would help beginners immensely.