On Father’s Day morning we had some very unsettled weather move through our area which brought with it some extremely strong winds. I couldn’t help but grab my camera and go out for a birds-in-flight practice session as I knew the very high winds would create ideal conditions for me. So, I headed out to Eastport Drive by Hamilton Harbour with my Nikon 1 V3 and 1 Nikon CX 70-300mm f/4.5-5.6 VR zoom lens to capture some practice images of birds-in-flight.
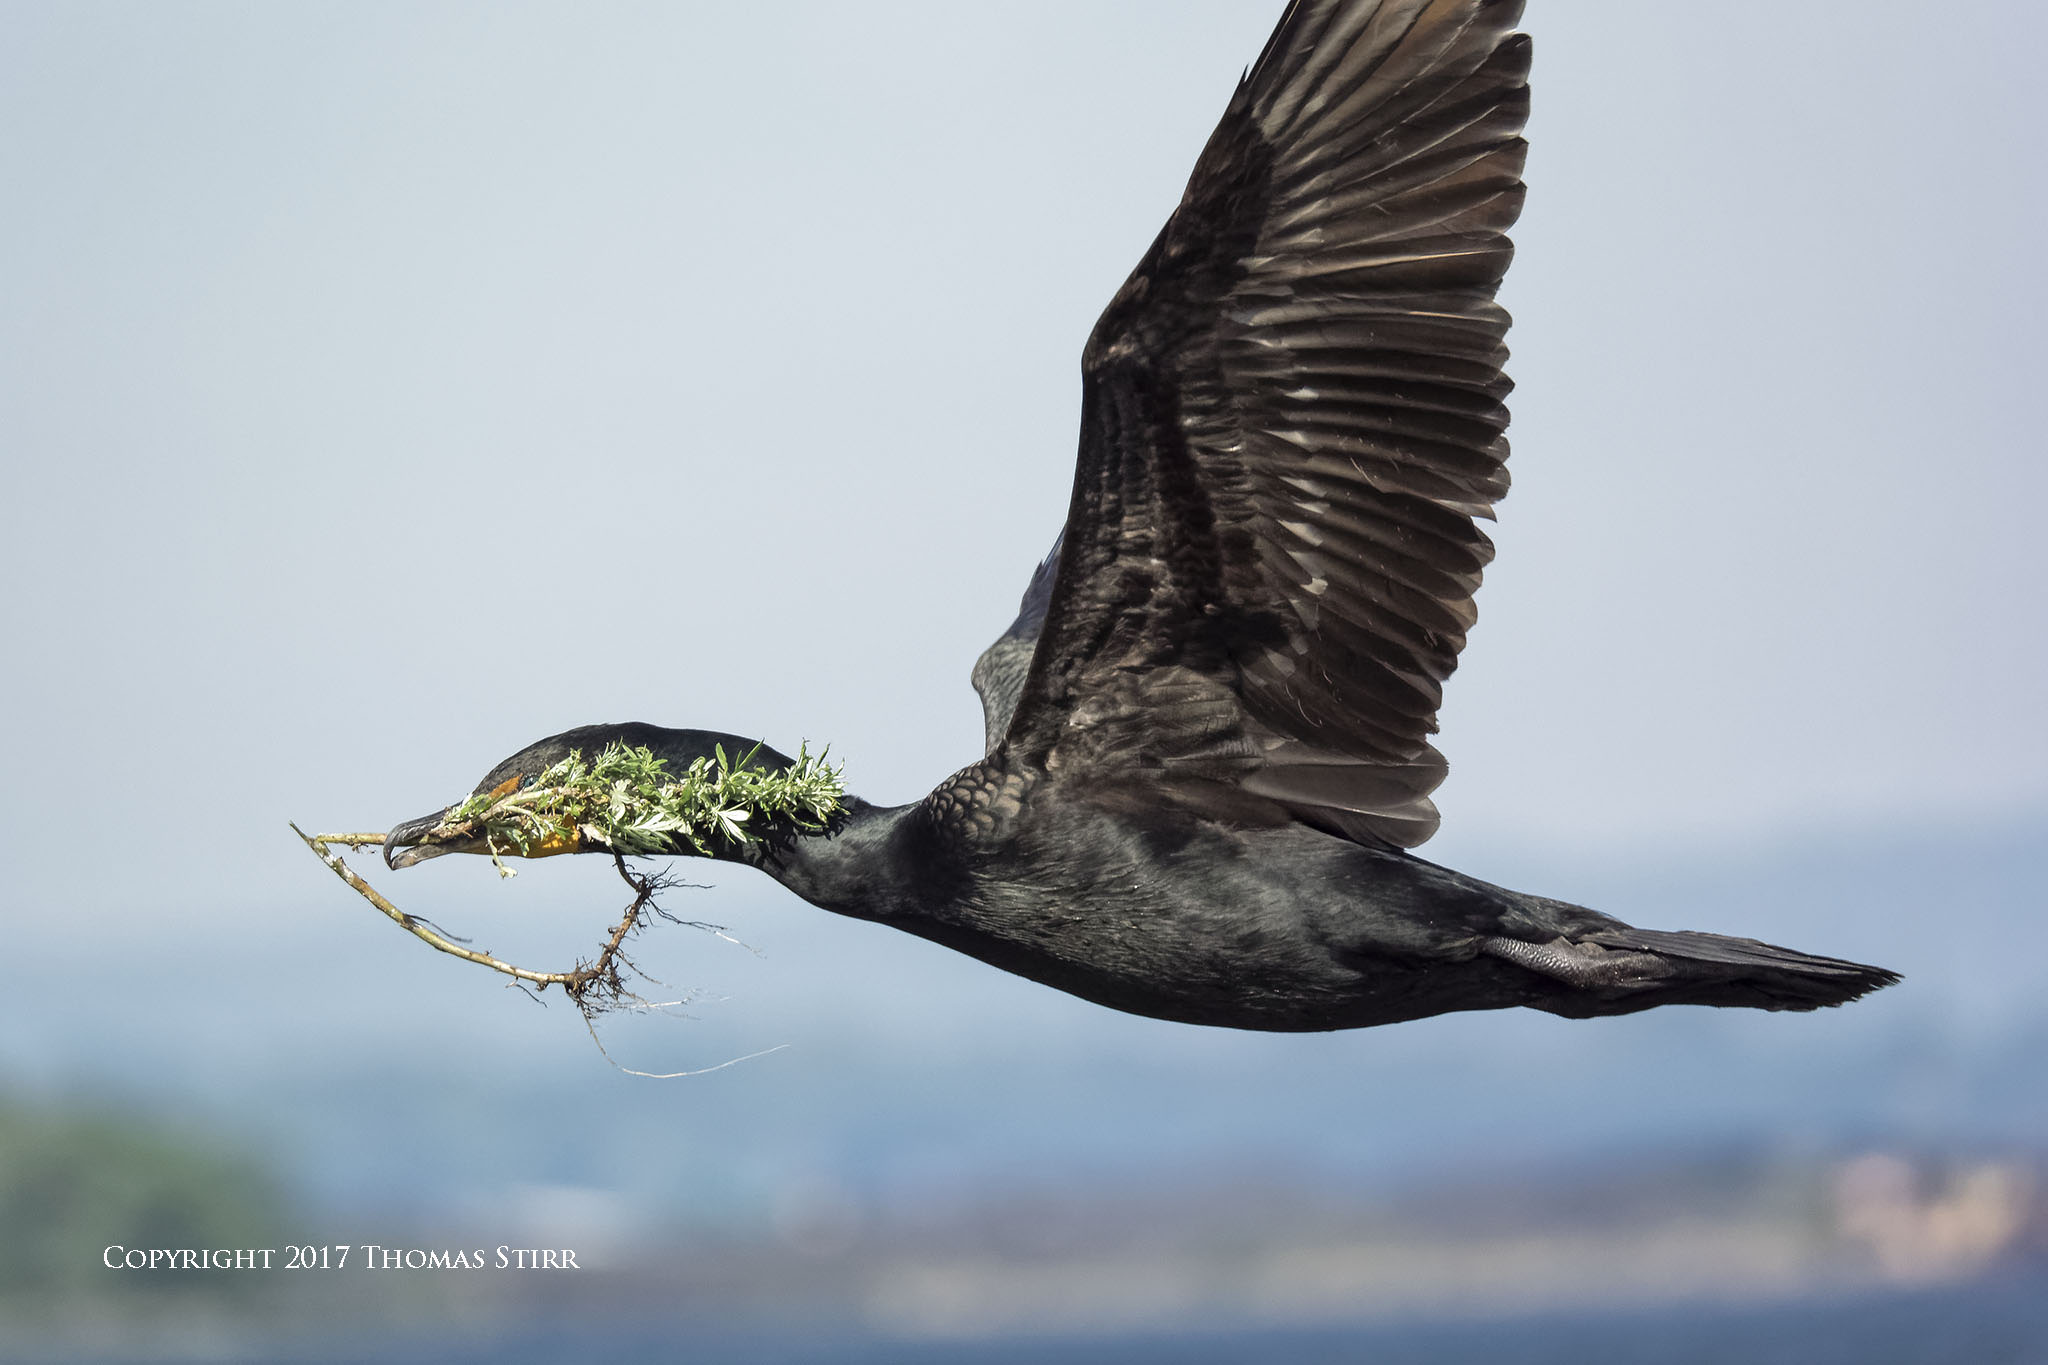
From early spring through to late June there is usually an abundance of cormorants and gulls nesting adjacent to Eastport Drive. I knew from previous experience that visiting in the morning would put the sun at my back, and the very strong winds would tend to consolidate the flight paths of the birds. This creates ideal conditions for one of my favourite birds-in-flight practice exercises that I call: Find – Frame – Fire! (i.e. find the BIF in your viewfinder, frame your image, fire the shutter).
The Number One Rule of my ‘Find – Frame – Fire’ exercise is that one cannot stop shooting for more than one minute. The goal is to keep continually photographing birds-in-flight.

I always start this exercise with an empty 32GB memory card and a fresh battery in my Nikon 1 V3. During this specific exercise I always shoot single frames only, capturing as many images as I can until I either fill up my card, or run my battery down to depletion. I started doing this practice exercise back in my DSLR days, when filling a 16GB or 32GB card signaled the end of the exercise.
By checking the EXIF data on my images I was able to calculate that I captured a total of 451 single frames during the 61 minutes that it took me to run my V3’s battery down to depletion, or an average of 7.4 single image captures per minute. Again, no AF-C fast frames per second runs were used…only individual, single image captures.
I like challenging myself with this exercise for a number of reasons. The first is that it forces me to use my lateral vision to quickly spot birds-in-flight and select target subjects very rapidly. Secondly, it helps to build eye-hand coordination. The third benefit is that it helps to train me to frame each image quickly, before pressing the shutter and moving on to the next photo opportunity.
Working quickly with my camera is something that became ingrained in me decades ago, during my newspaper days, when I worked as an advertising sales representative. It’s something that I’ve continued doing with my client video/photo assignments, as well as with my personal photography.
My objective when doing one of my ‘Find – Frame – Fire’ birds-in-flight exercises is to get the subject birds well framed in each image. Obviously due to the speed of the exercise I do have a number of missed shots. That is to be expected, and is not the least bit disappointing to me.
I typically use my Nikon 1 CX 70-300mm f/4.5-5.6 fully extended to 300mm (efov 810mm) for this exercise. When fully extended the CX 70-300mm has a minimum angle of view of 3-degrees which is almost identical to the Nikkor 800mm f/5.6 when shot with a full frame body. This adds to the challenge of the exercise. I will adjust the zoom focal length on my CX 70-300mm as needed to achieve desired framing.
Using the Eastport Drive nesting areas adjacent to Hamilton harbor during strong winds works well for a couple of reasons. In terms of the gulls, the winds force the gulls to attempt to hover in mid-air as they try to negotiate landing by their nests. While the winds tend to impede the forward motion of the gulls, it creates the need for them to make quite rapid and sizeable vertical movements to get down to their nests. Panning with a subject making rapid vertical movements is not something that I get to practice very often, which makes the gulls ideal subjects.

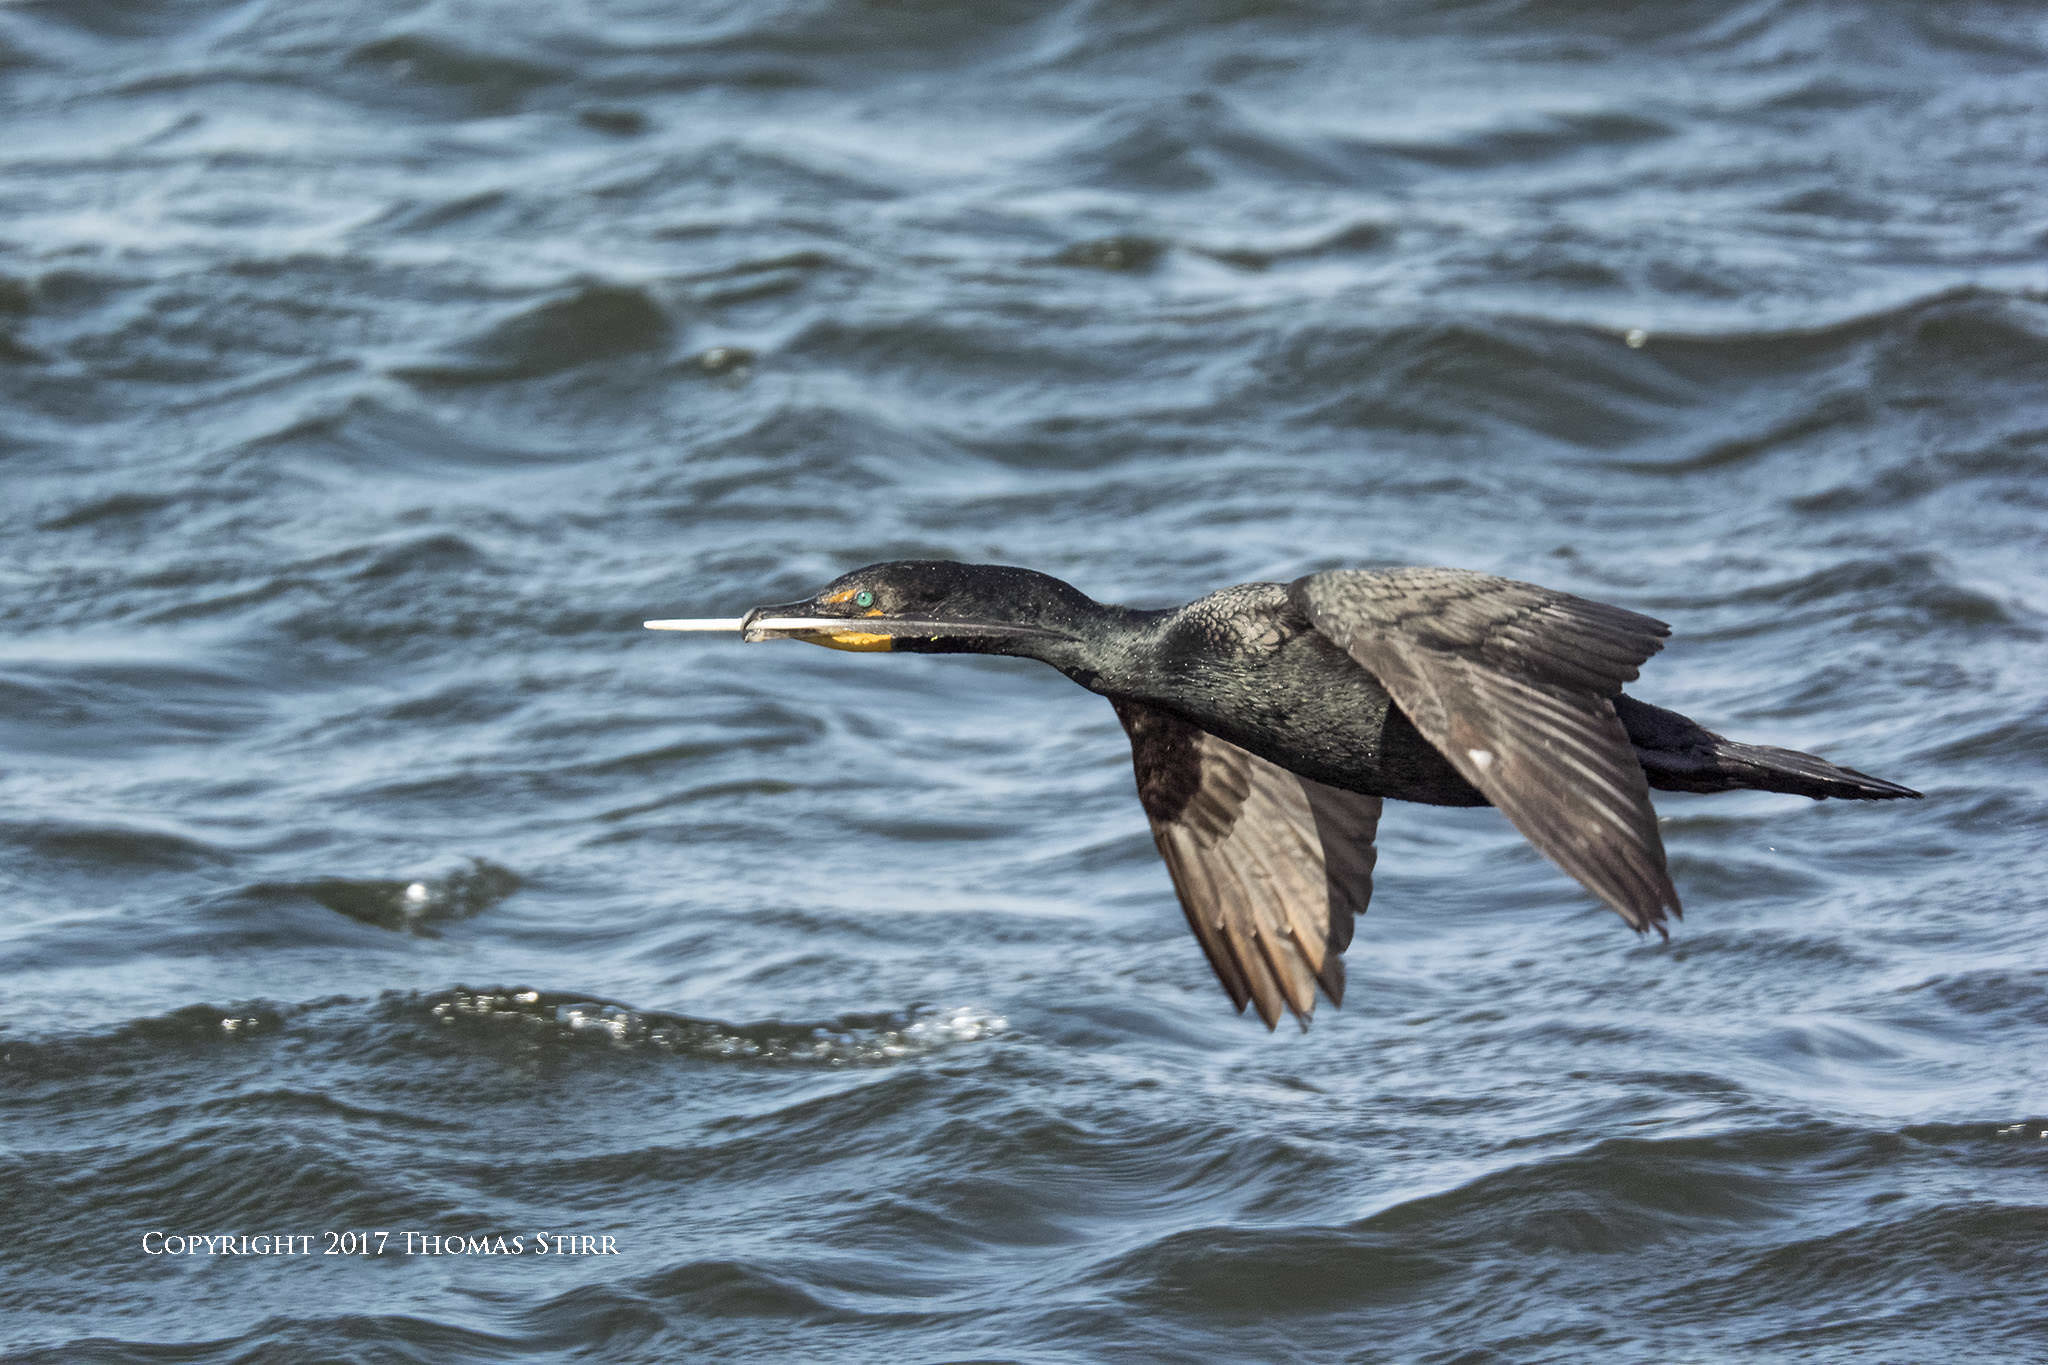
The strong winds also affects the flying behaviour of the cormorants. As they approach their nests from upwind, the winds make it impossible for them to land safely so they purposely overshoot their nests, then do a U-turn and fly back into the wind. When the wind is coming from the southwest (this is common when we get stormy weather) the cormorants will bank to the left and go further out over the harbour if they are nesting on the peninsula. These birds end up being too far away to make good subjects for my birds-in-flight exercise.
Birds that are nesting in the trees that are adjacent to Eastport Drive will bank to the right when they do their U-turn. They will then fly much closer into the shoreline, using the trees as a windbreak as they fly back towards their nests. This brings them much closer to shore than usual, making them ideal birds-in-flight practice subjects.
During the morning practice exercise I often I had three to seven birds approaching at the same time, using this close-to-shore flight path. Depending on the configuration of the approaching flight group I needed to quickly decide if I was going to take a series of single shots of the same bird as it approached, or photograph individual birds, picking them off one by one.
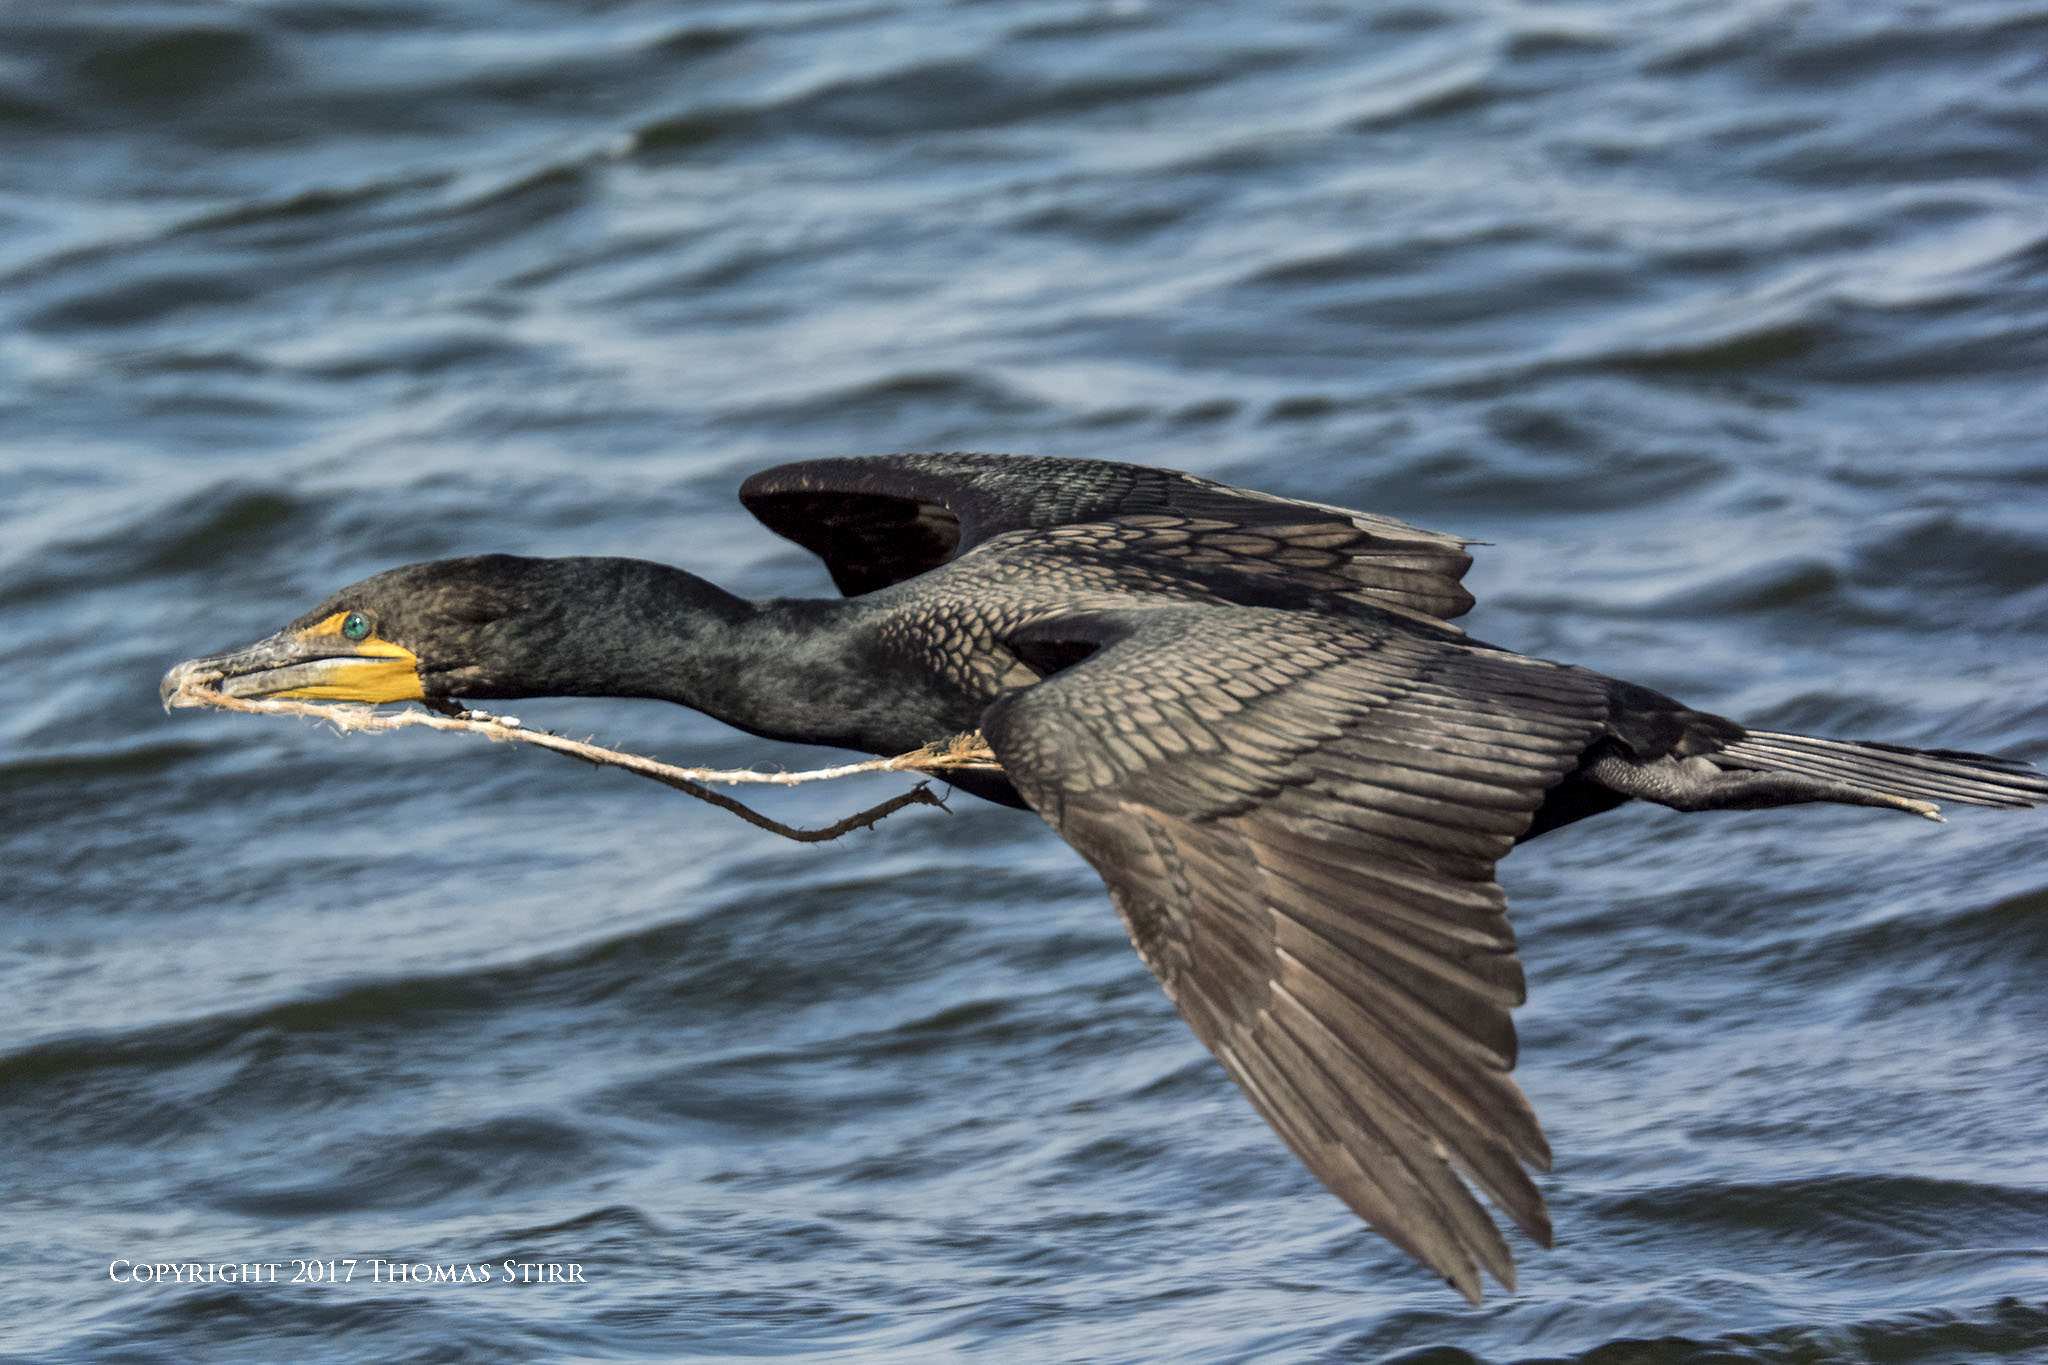
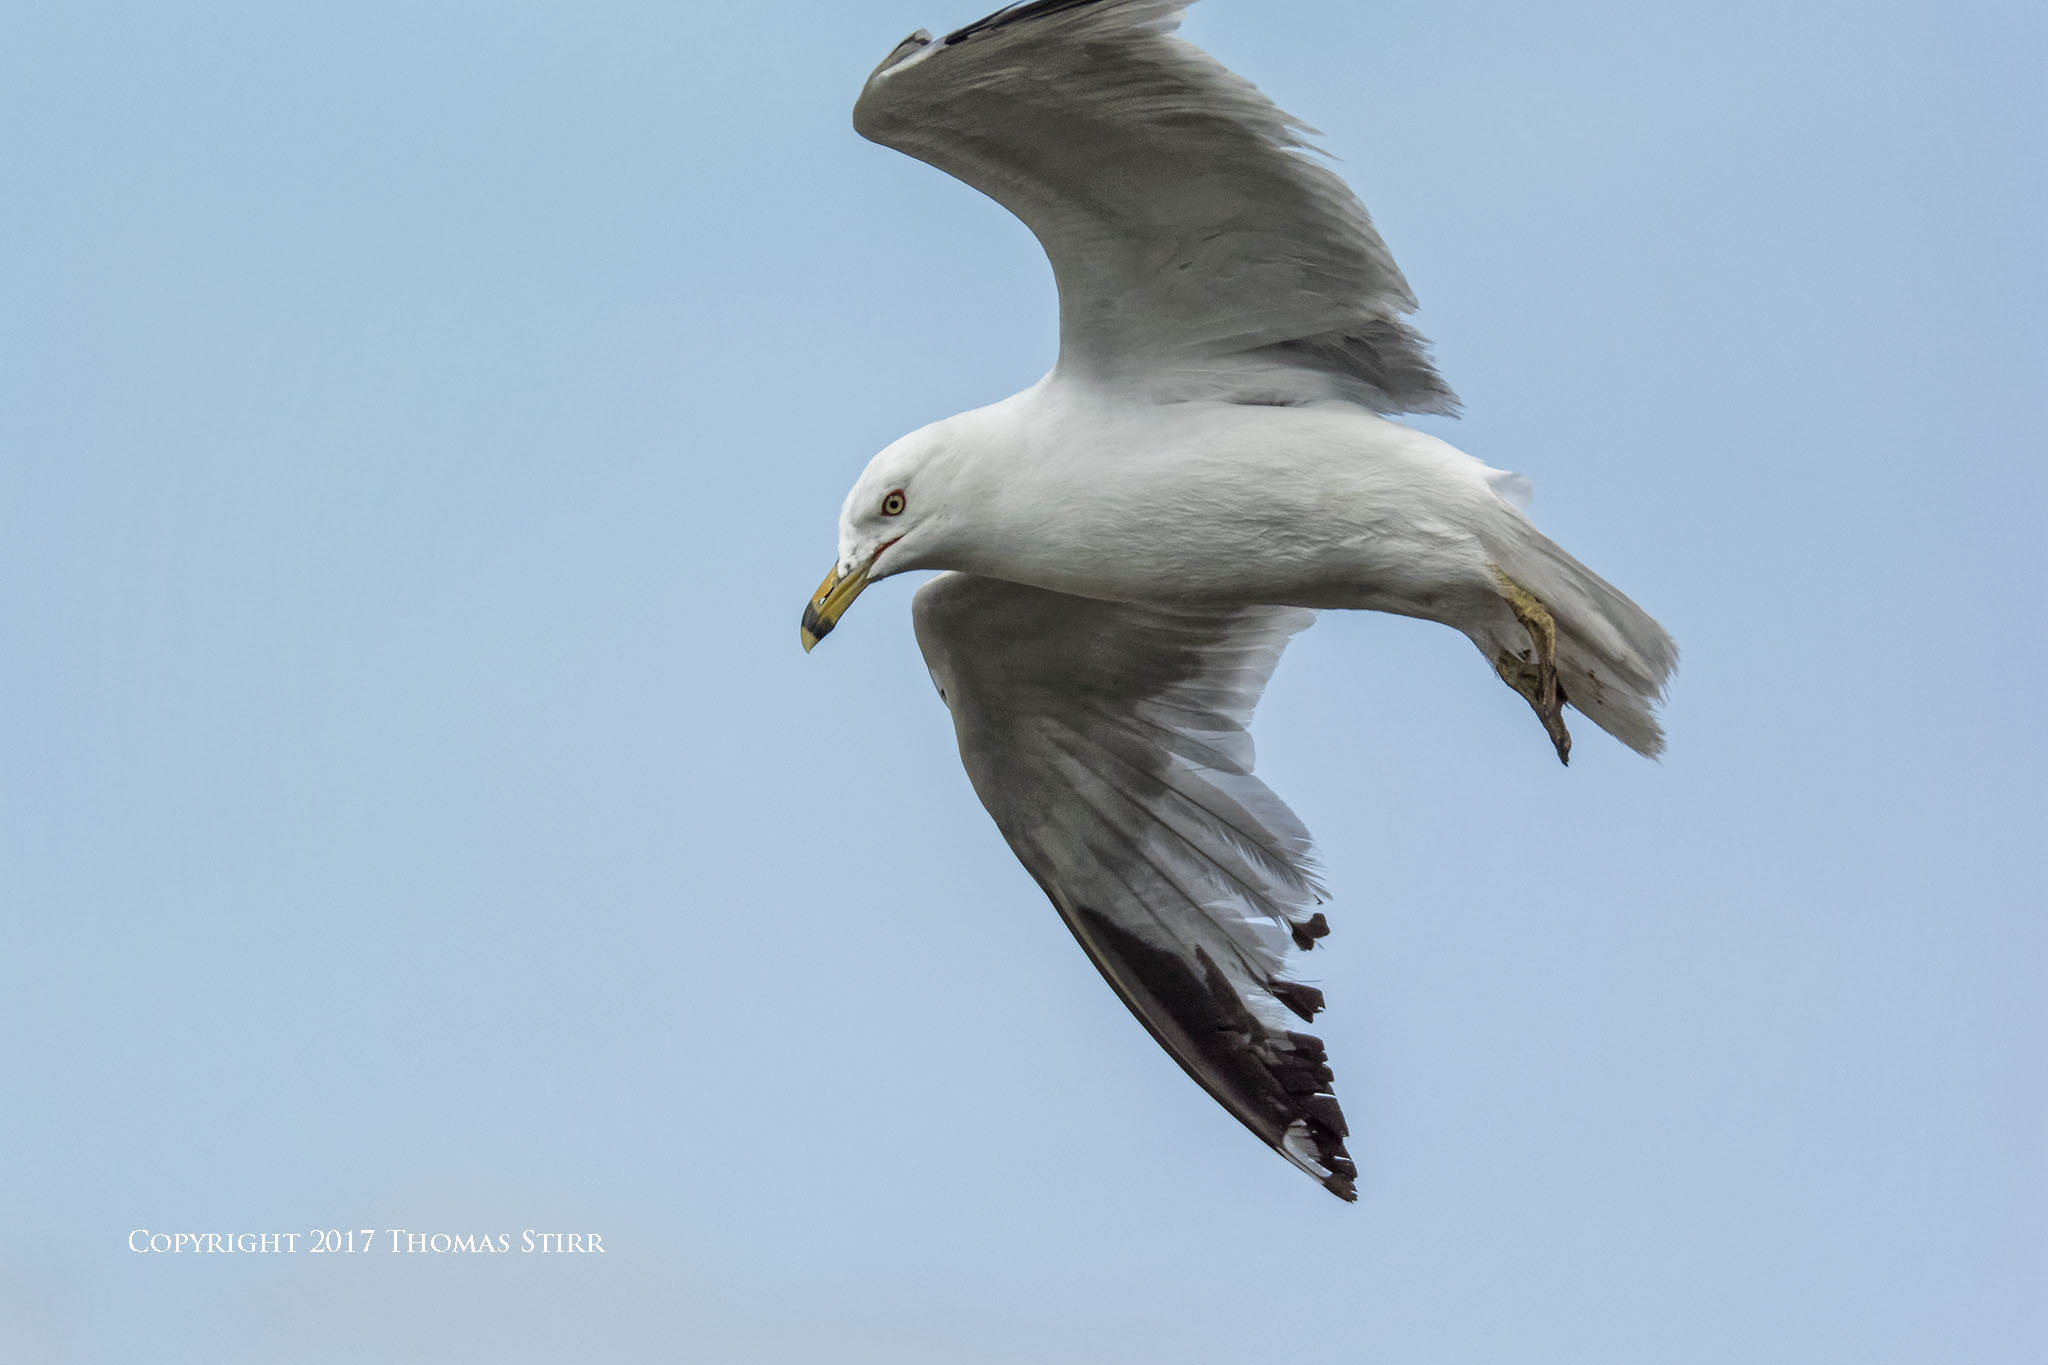
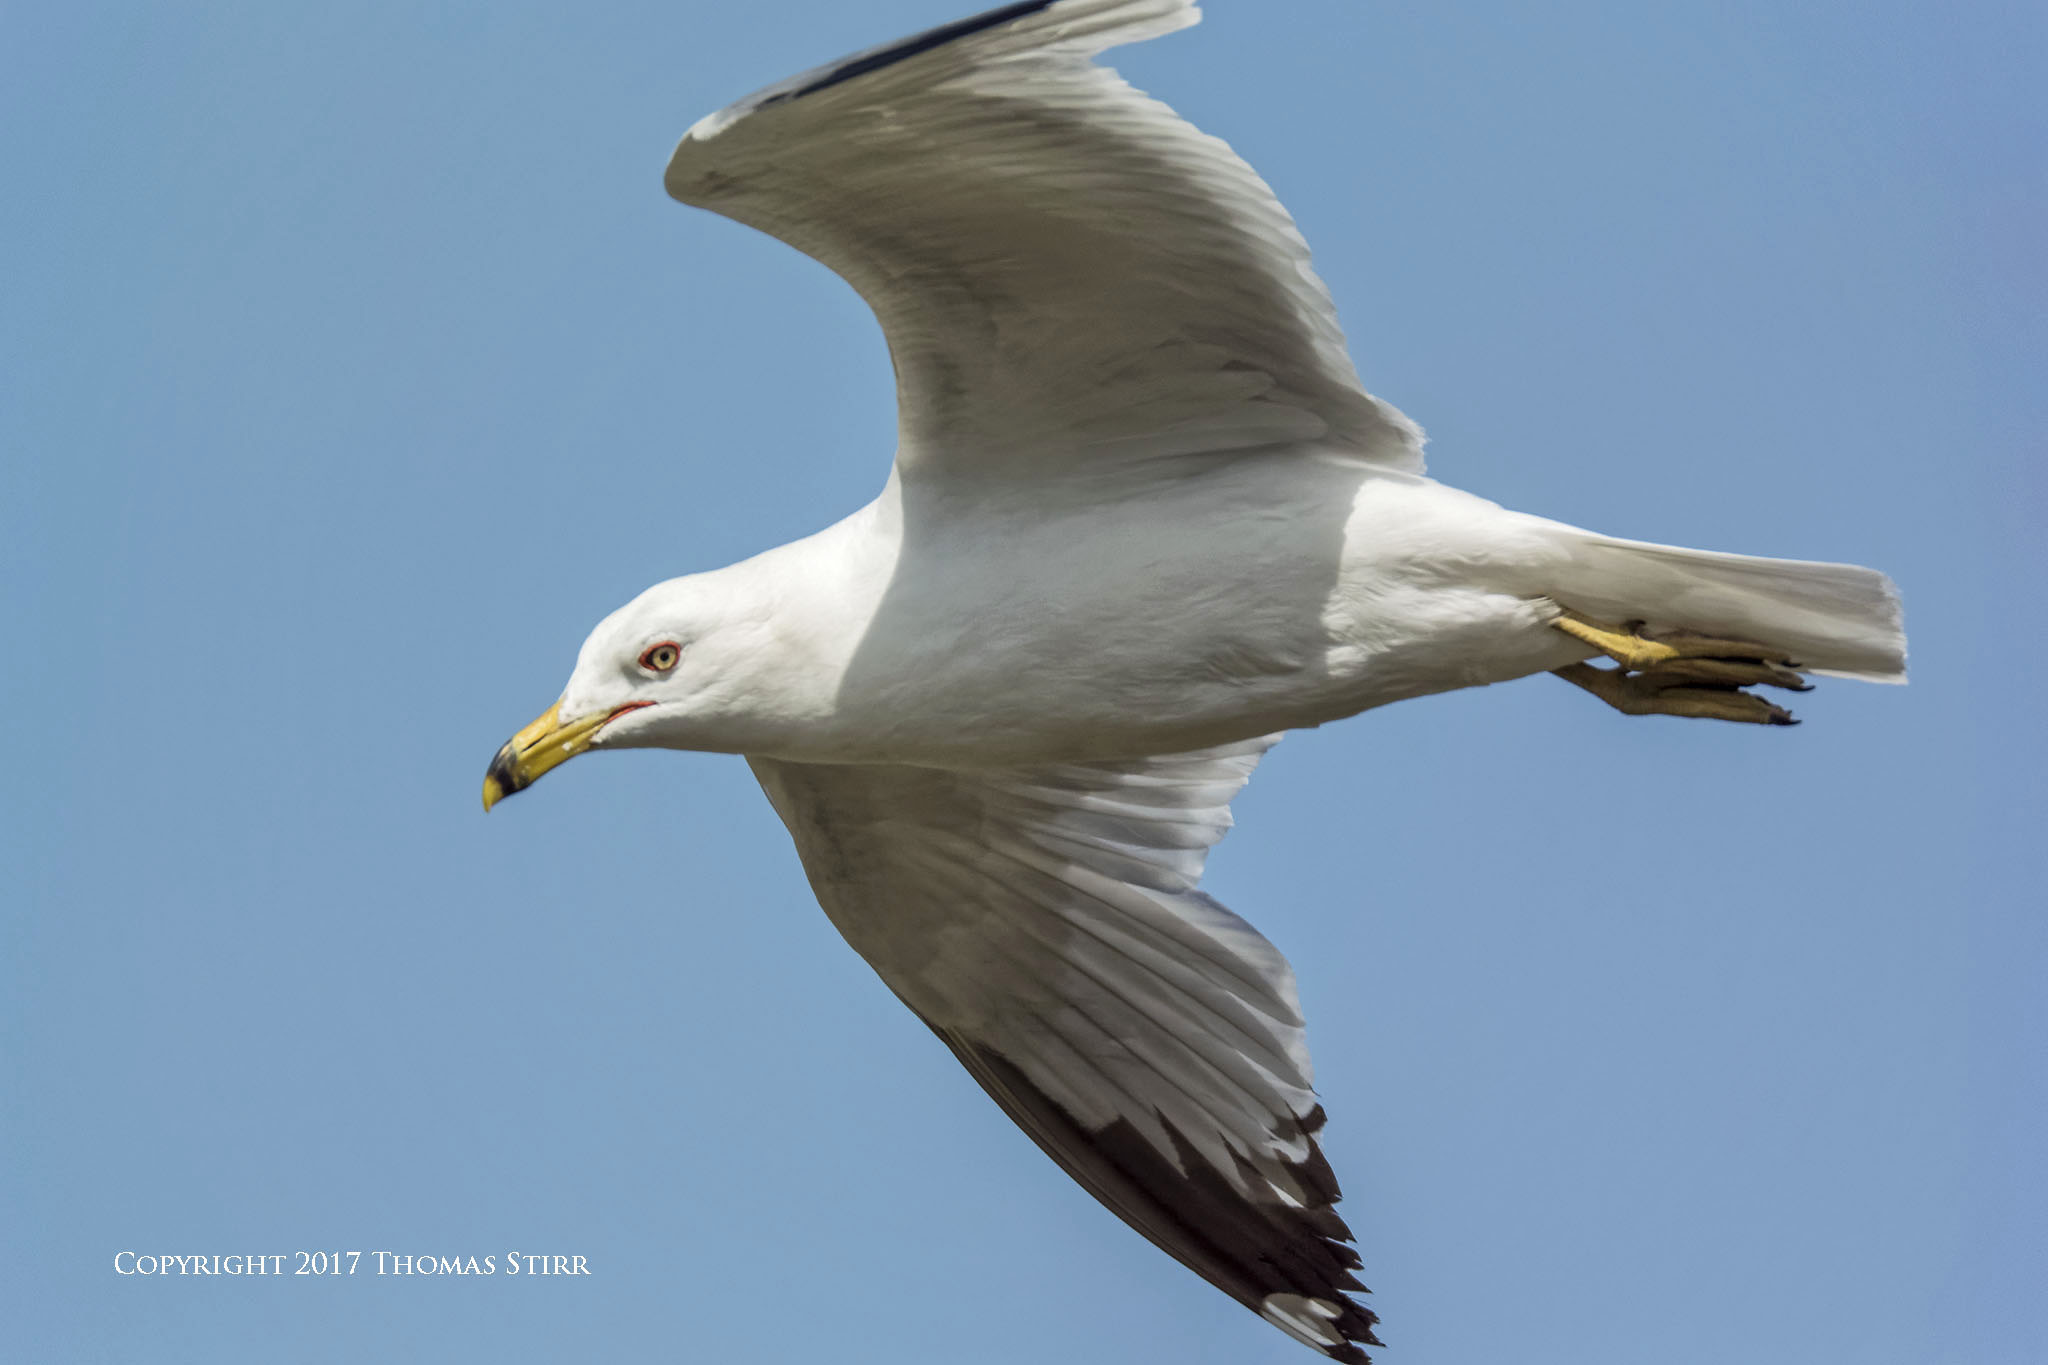
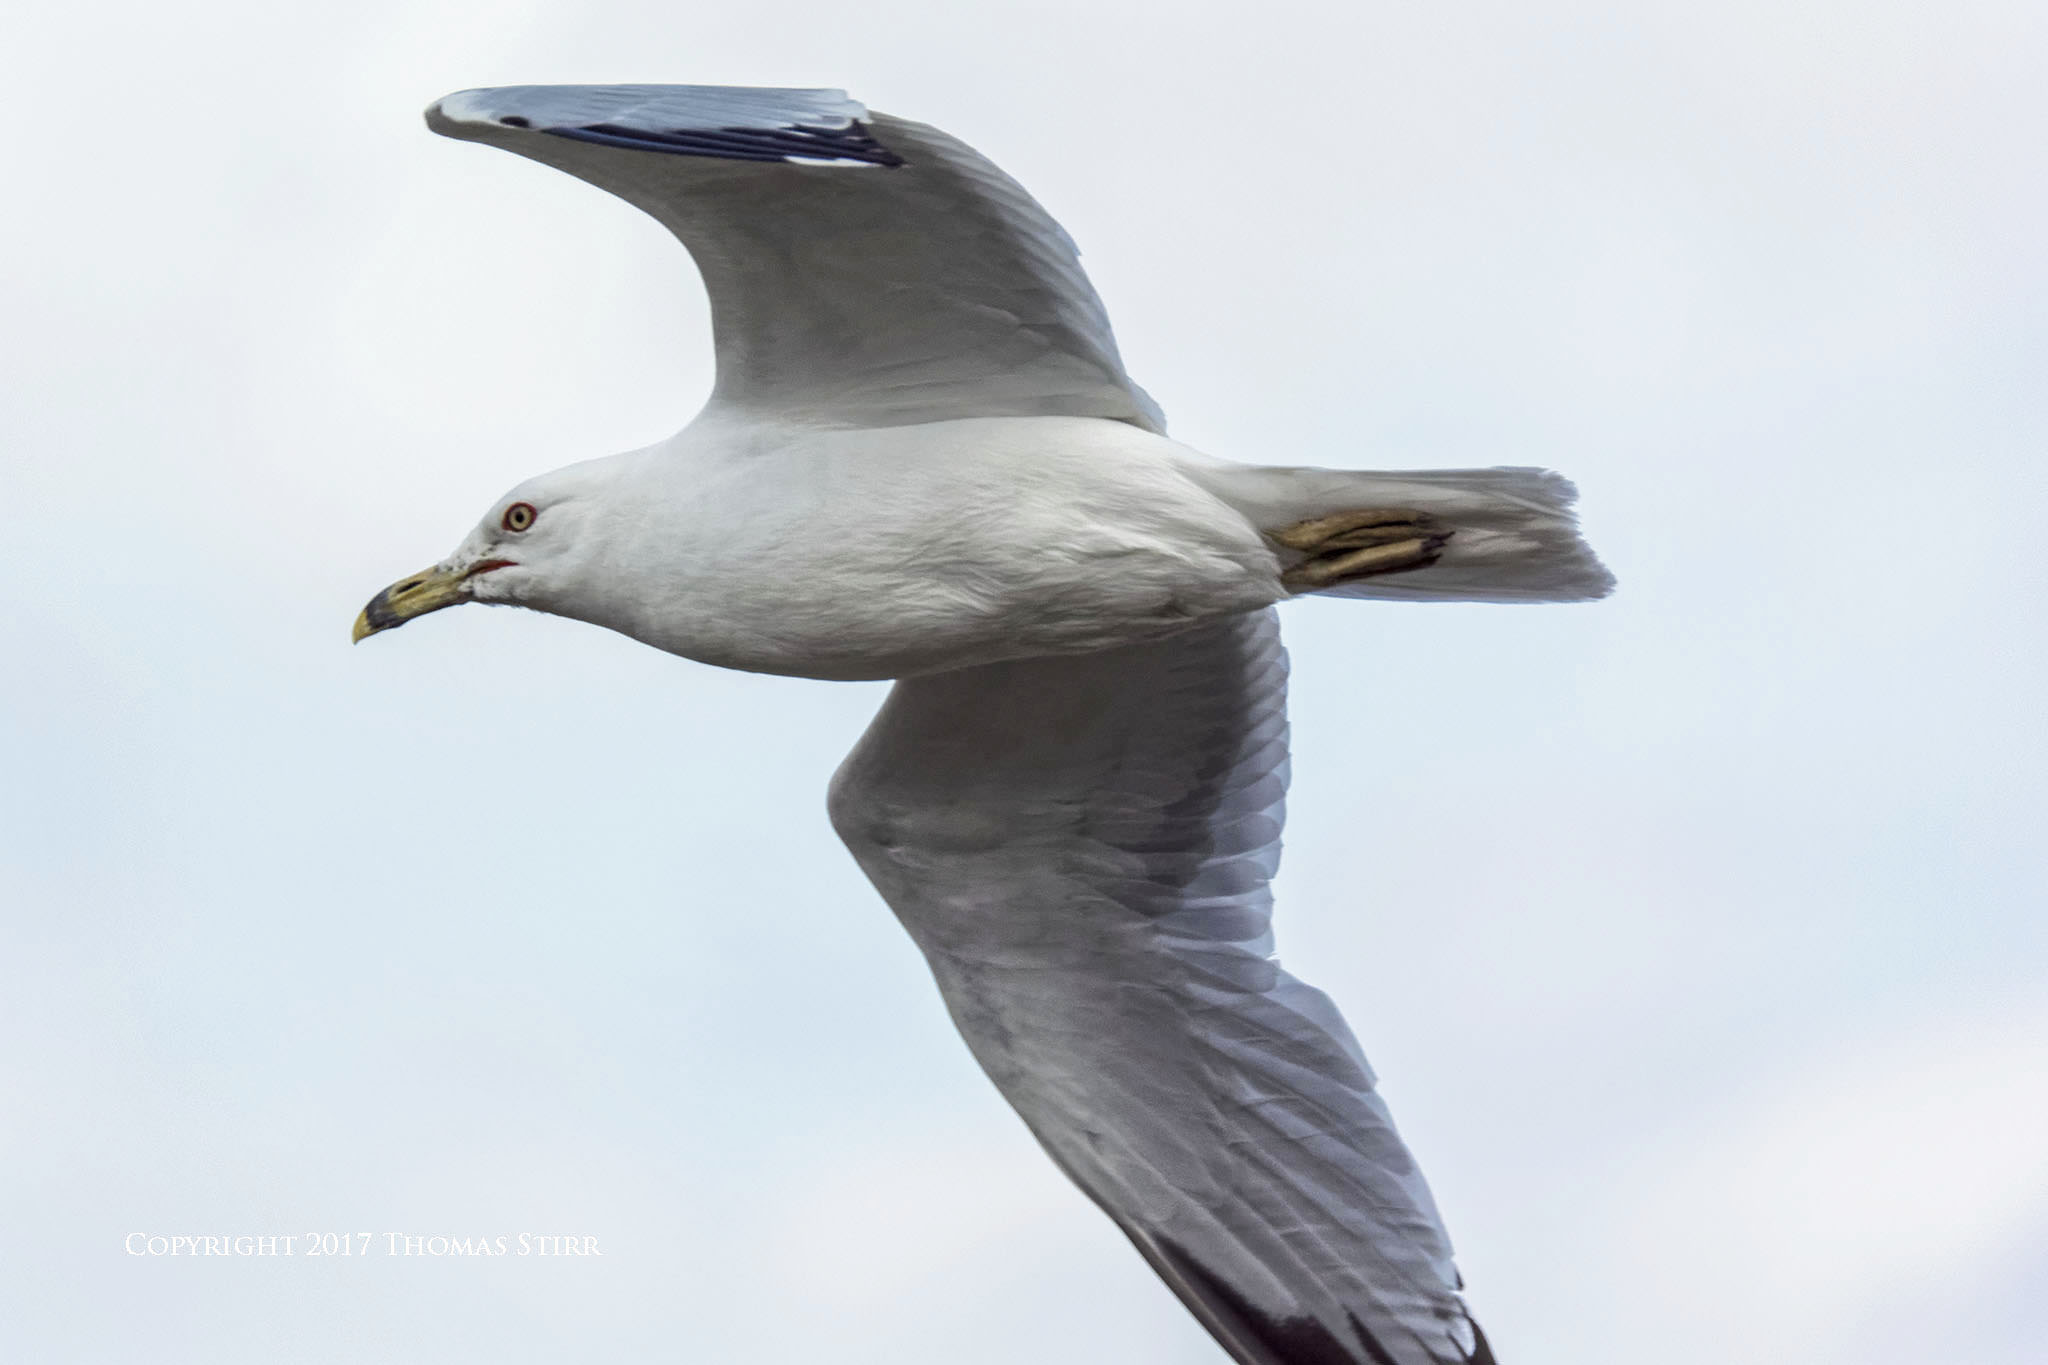
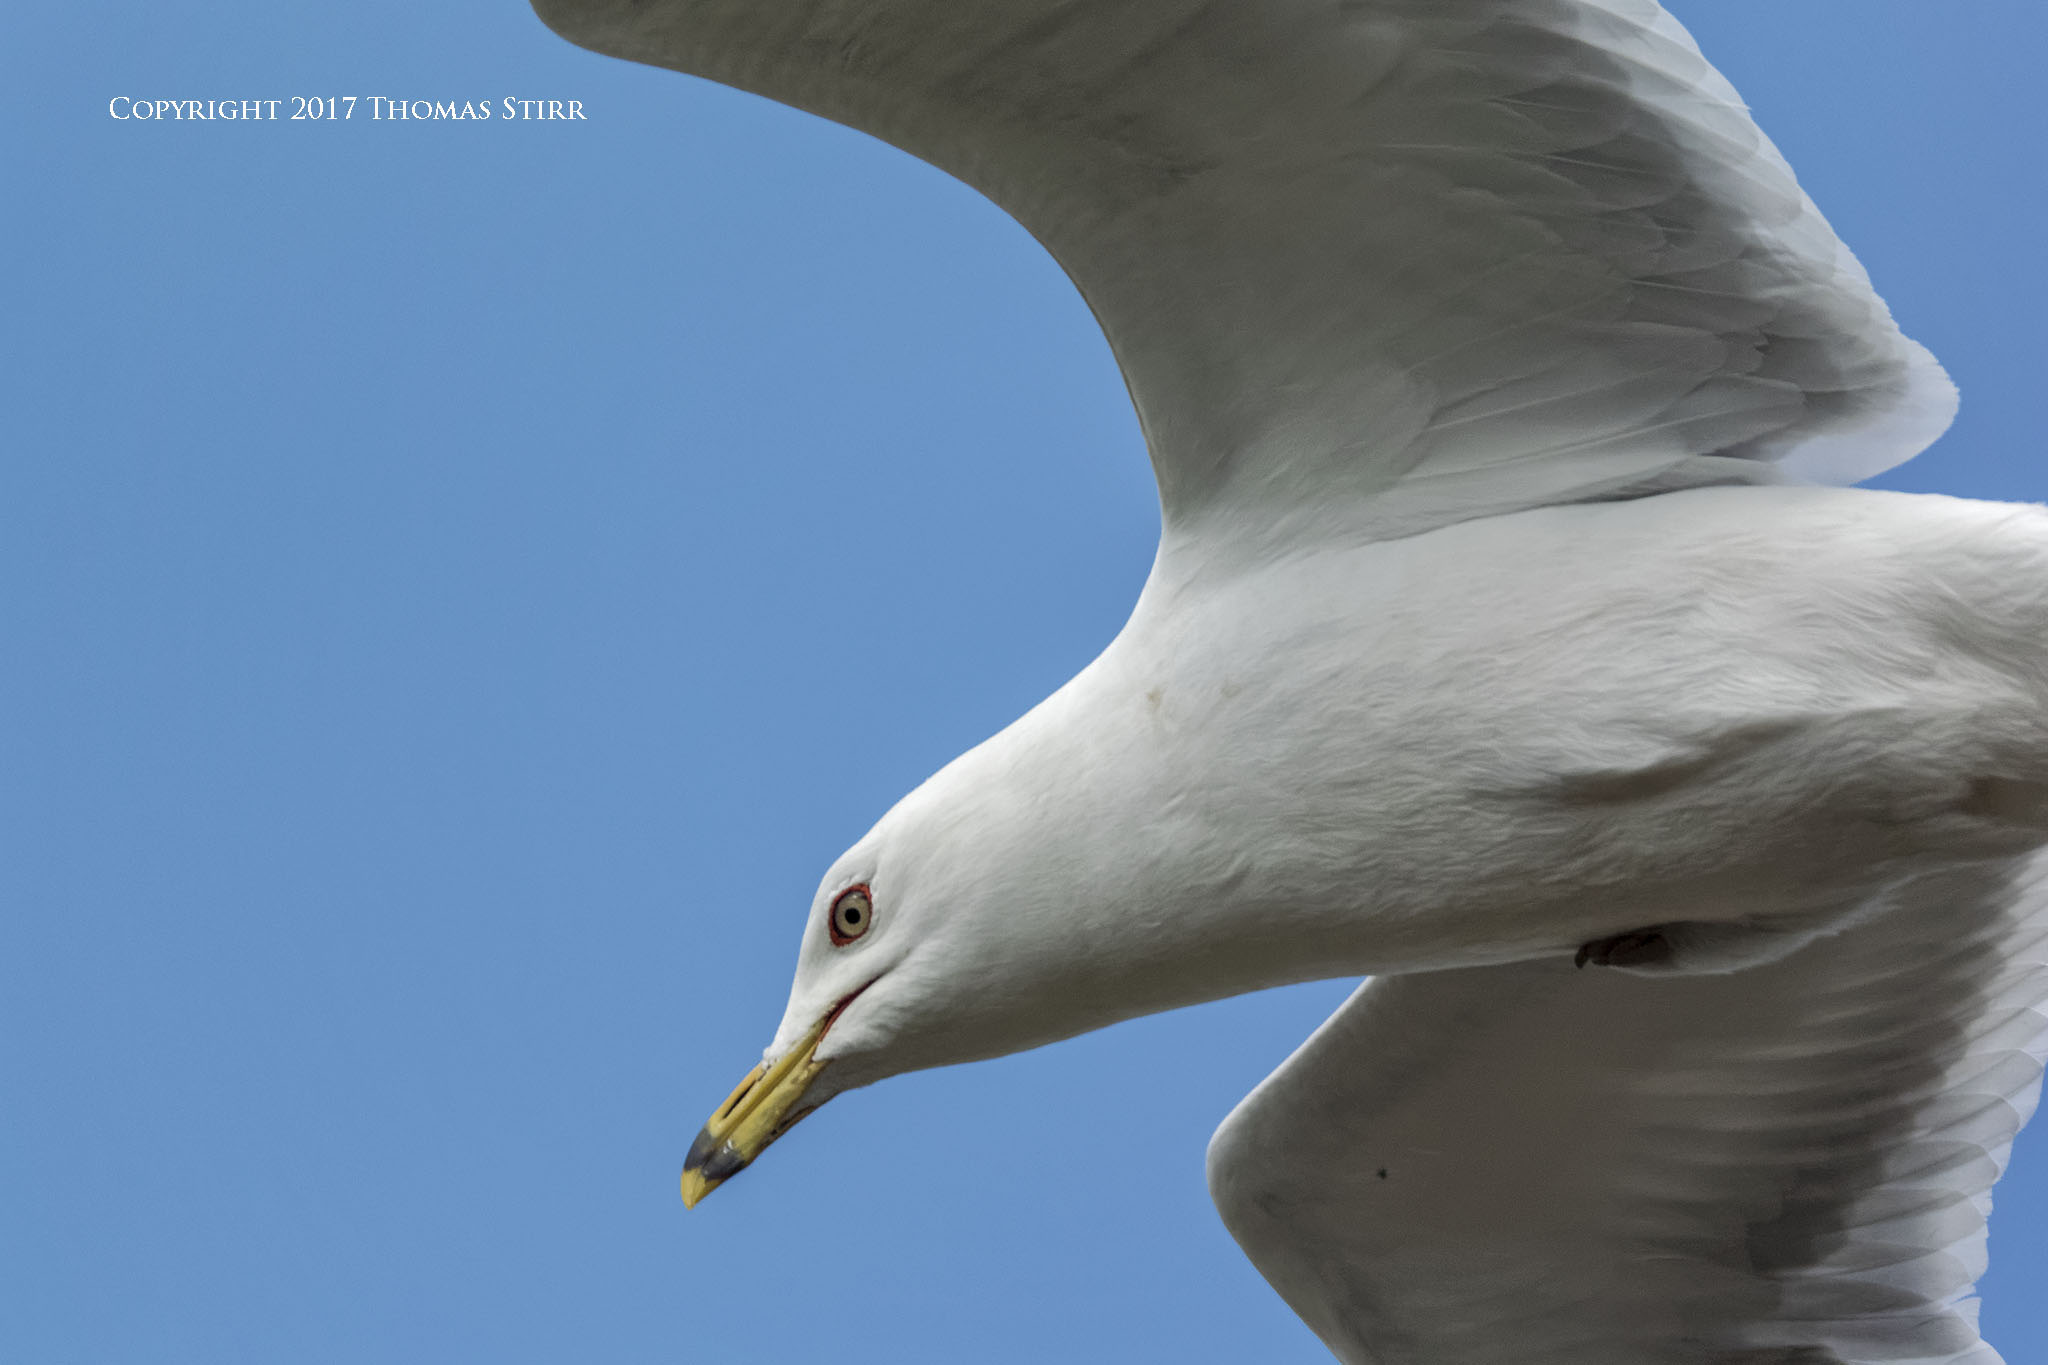
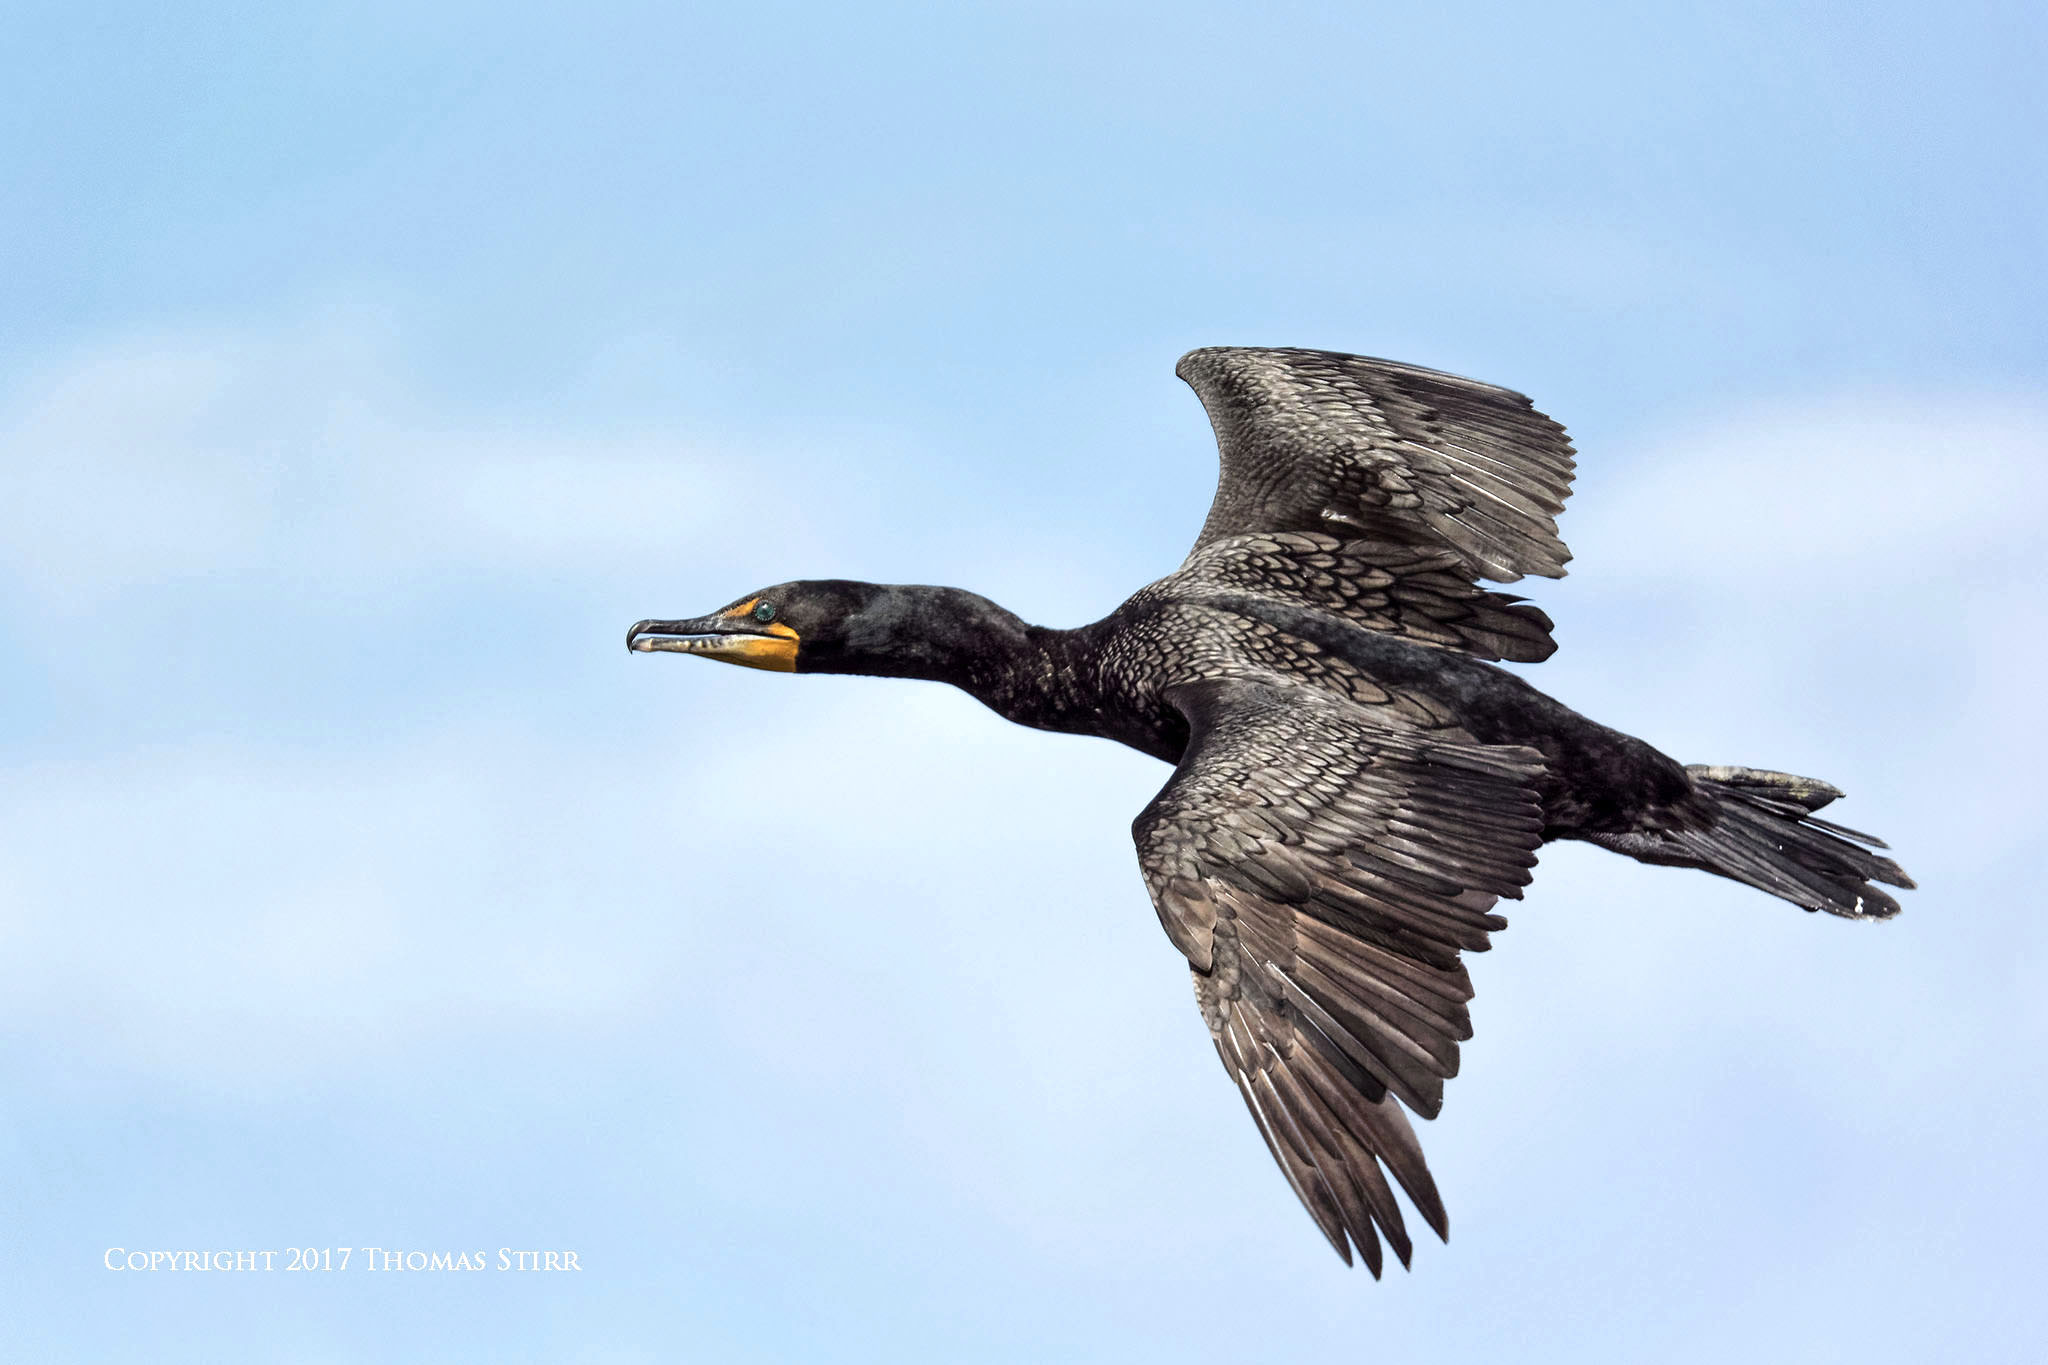
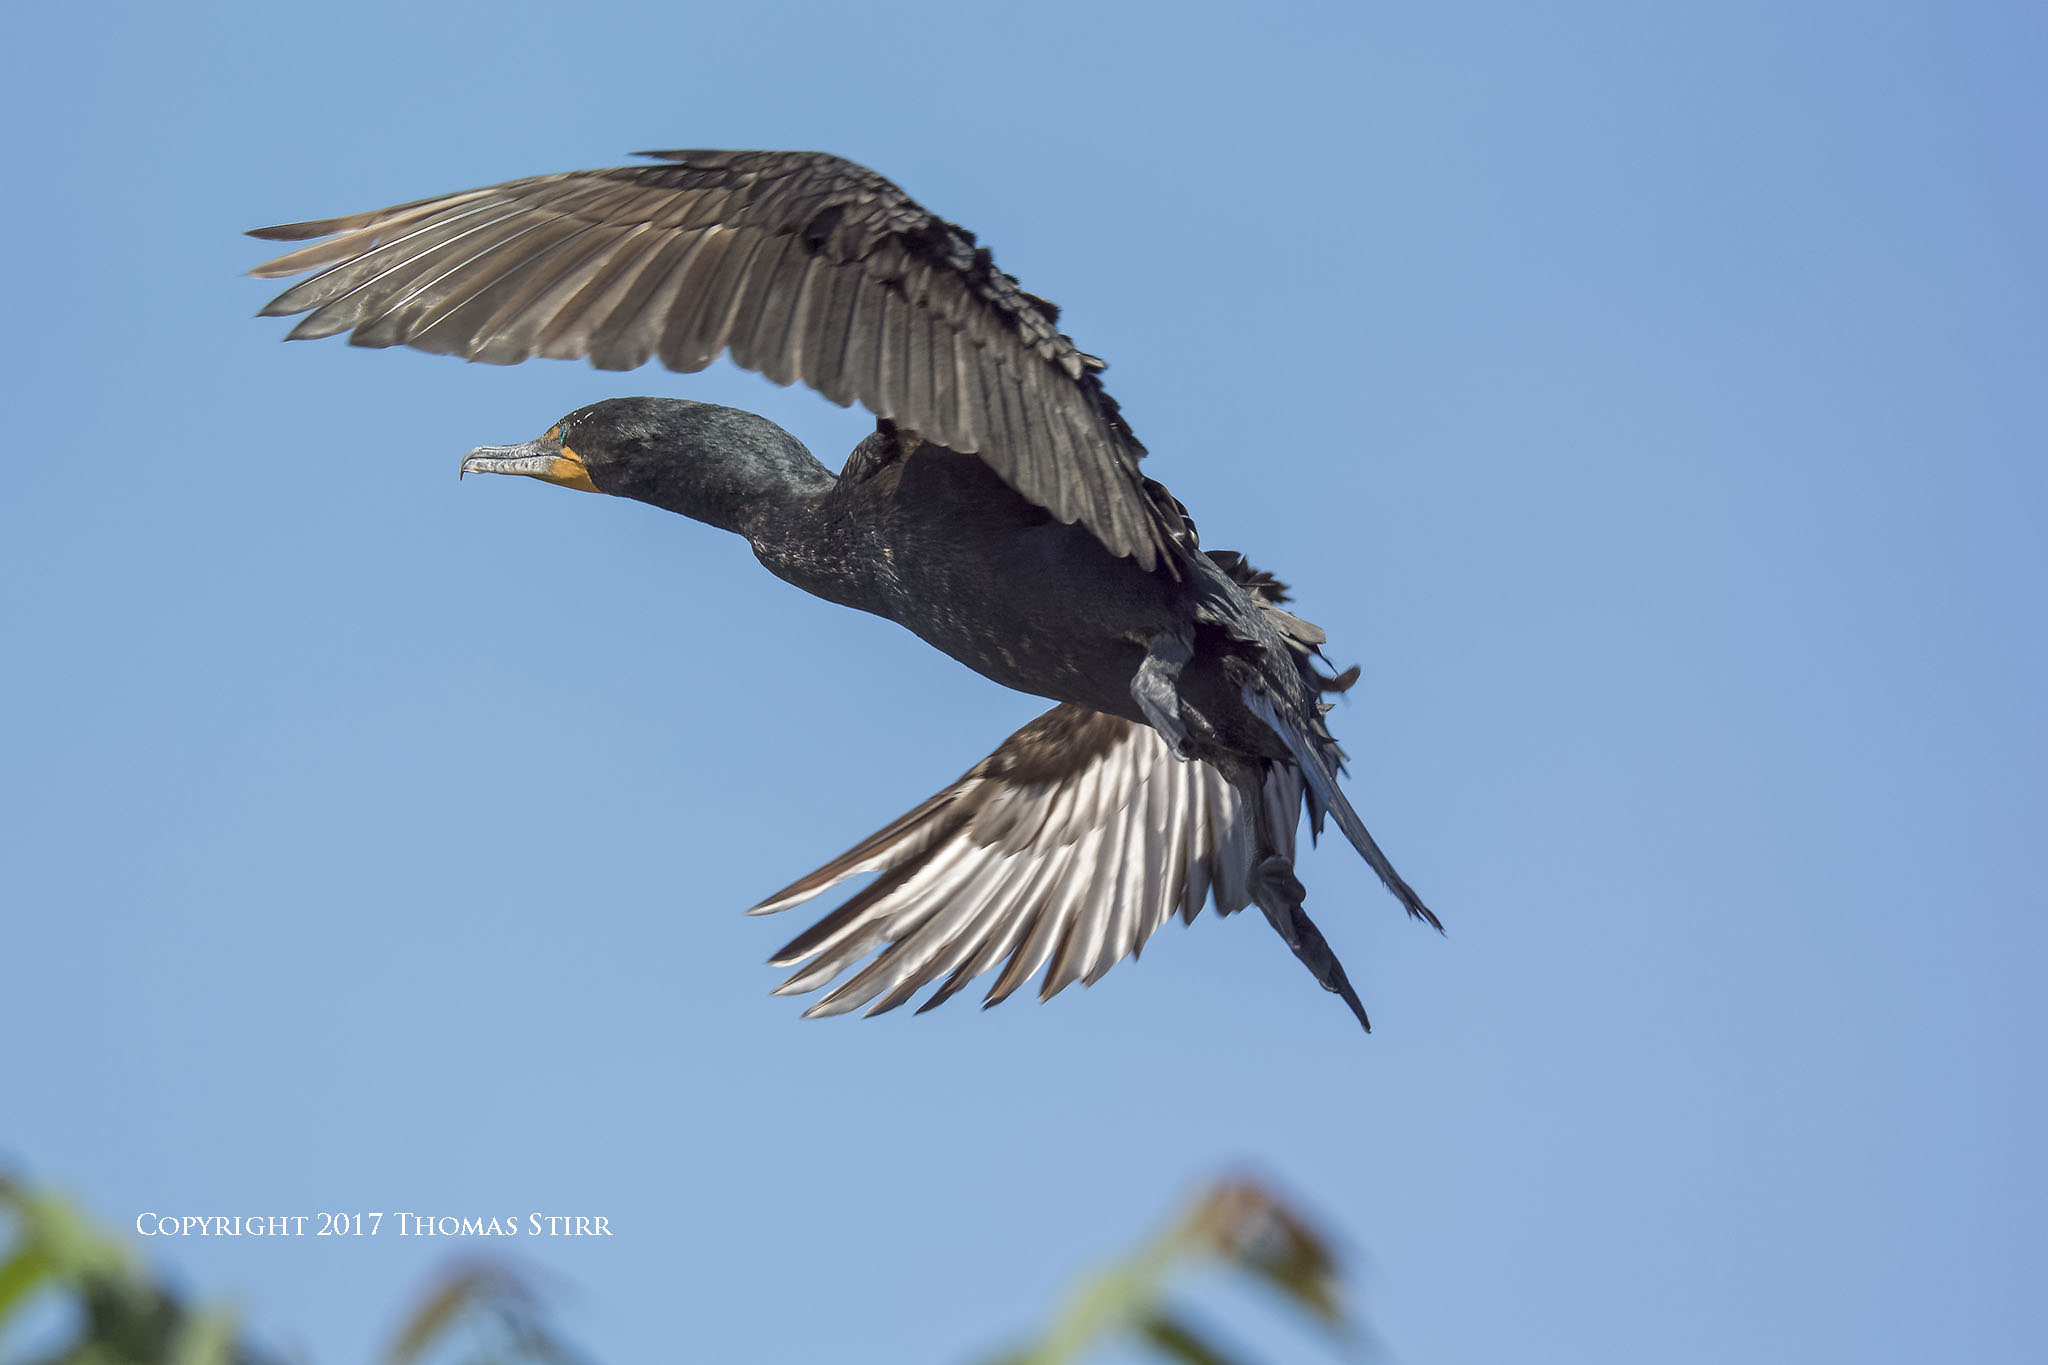
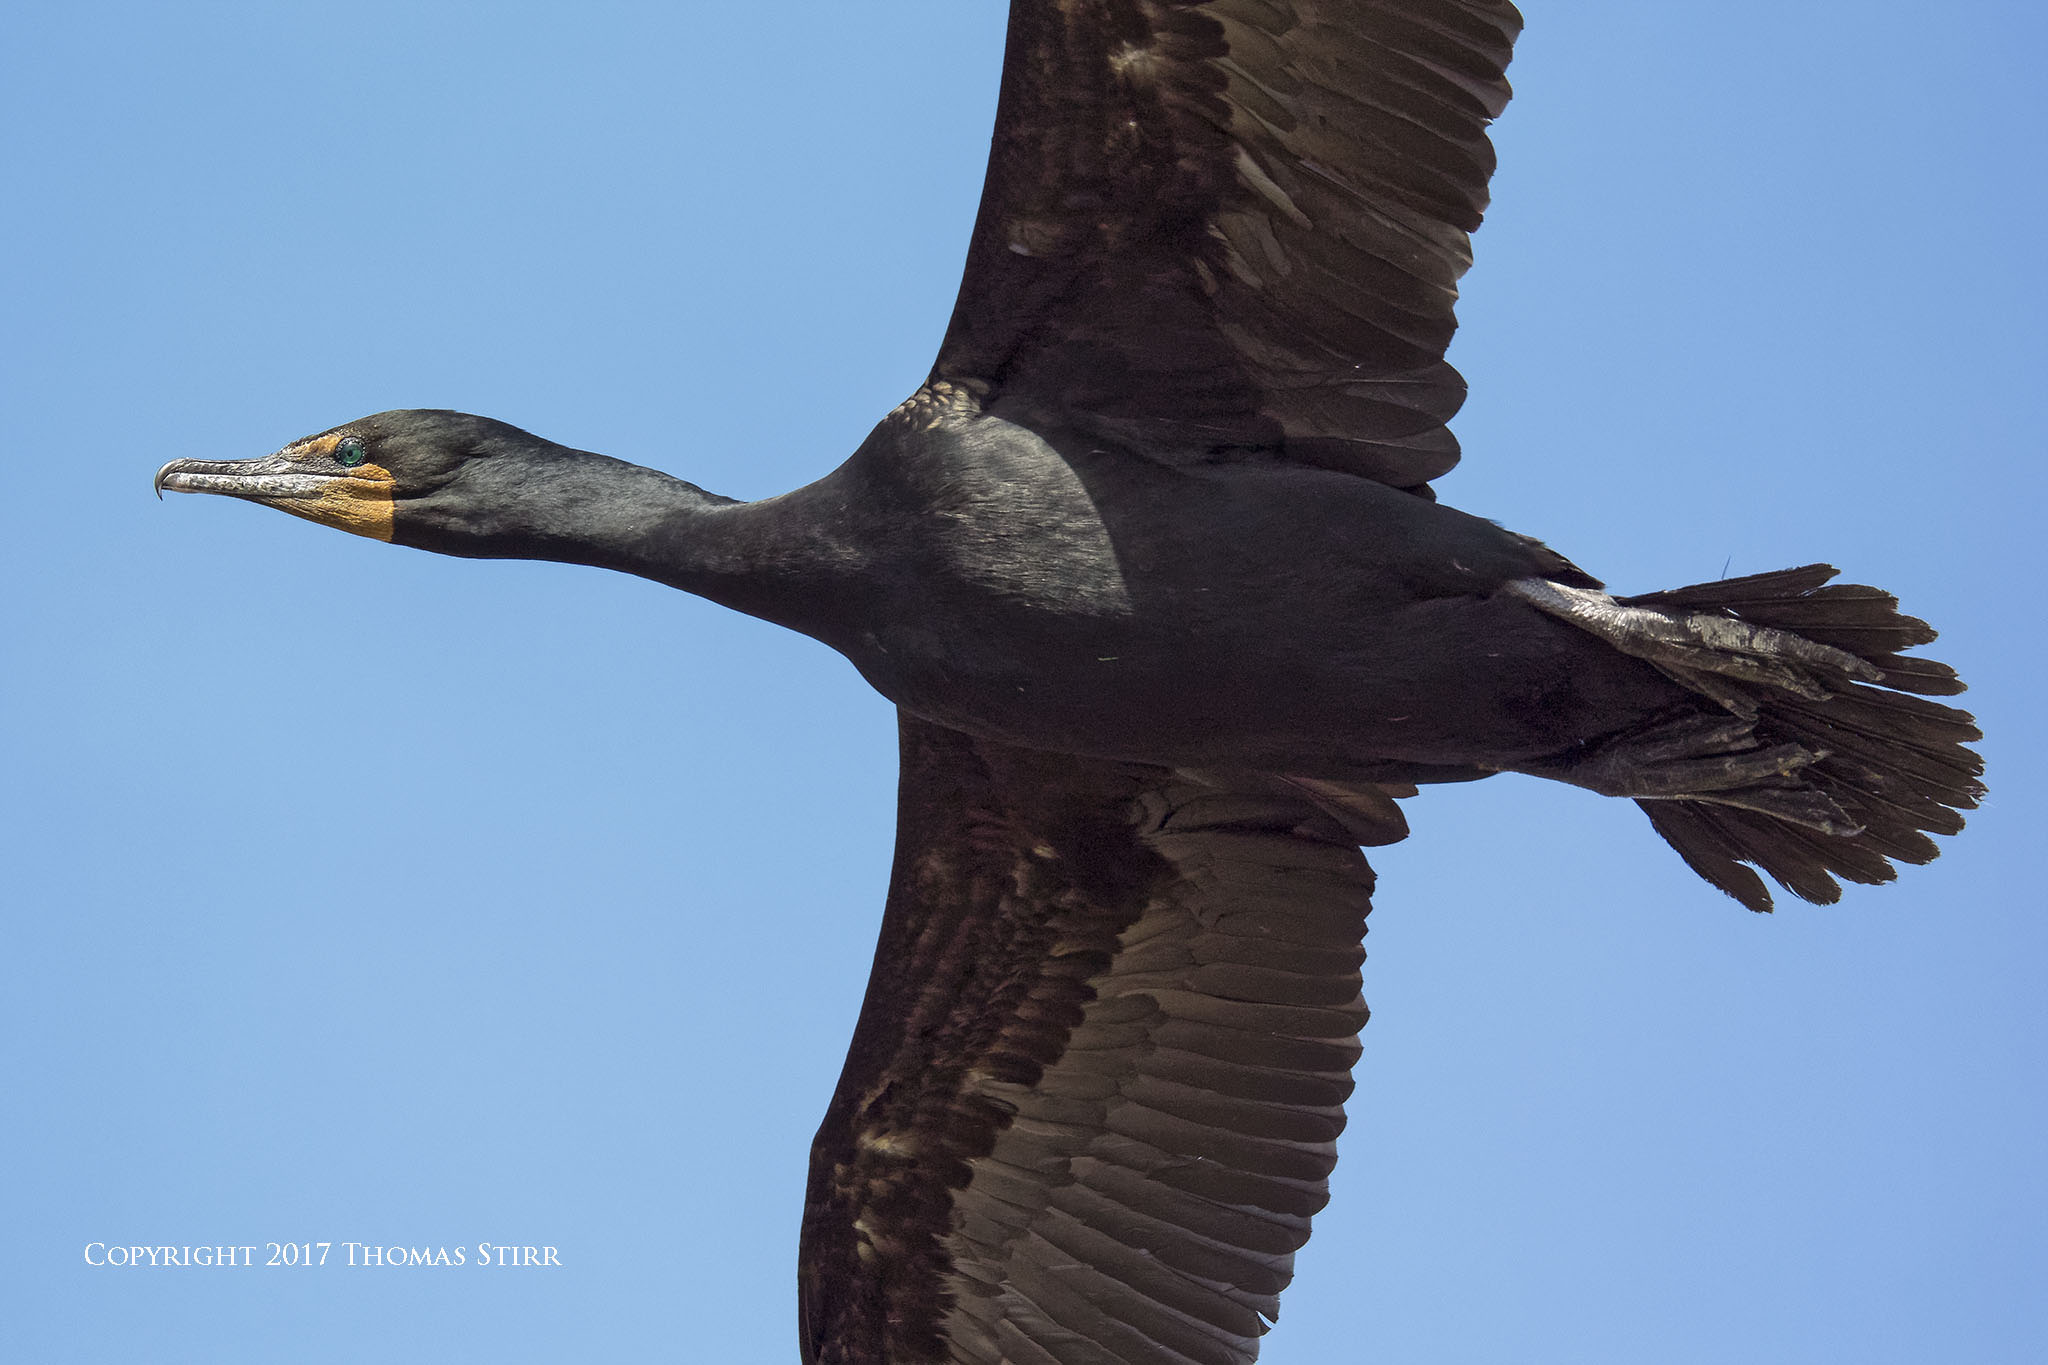
I would normally begin shooting when an individual cormorant filled about 35% to 40% of the width of the frame. My ultimate goal was to get the framing of the individual birds so tight that I could just get their length to fit inside the image frame as in the image above, and allow for a bit of breathing room at its beak and at its tail if possible. I also took a number of images where I purposely shot in very tight and had the image bleed off the edges of the photograph.

All of the photographs in this article are displayed 100% as captured without any cropping at all. All images were captured hand-held. I used Manual settings with my Nikon 1 V3, continuous auto-focus with subject tracking, and Auto ISO 160-3200. As is my standard practice when shooting at fast shutter speeds, VR was turned off.
If you enjoy photographing birds-in-flight and would like to improve your skills with a fun and challenging exercise, trying my ‘Find – Frame -Fire’ approach may be an interesting experiment.
Technical Note:
All images in this article were produced from RAW files using my standard process of DxO OpticsPro 11, CS6 and the Nik Collection.
Article and all images are Copyright 2017 Thomas Stirr. All rights reserved. No use, duplication or reproduction of any kind including electronic or digital is allowed without written permission. Photography Life is the only approved user of this article. If you see it reproduced anywhere else it is an unauthorized and illegal use. Readers who call out offending websites that steal intellectual property by posting comments on those offending websites are always appreciated!
Useful article and very good images. Very useful comments too.
Hi Mohan,
I’m glad the article and comments were helpful for you!
Tom
Thomas,
nice article and photos. I am new to BIF, but made about 1,000 shots of birds on the shore last week over a five day period.
I am using a Nikon D810 with a Nikon 200-500mm f/5.6 lens + 1.4 teleconverter. Turn feet to point where the bird is exiting. Twist your body 180 degrees to face bird.
I use Aperture Priority and leave the VR switch on. I do not use Auto ISO and set the ISO to a working level based on lighting conditions. I set the minimum shutter speed to 1/4000 to minimize blur from hand-holding and bird movement. I adopted the following camera setup (suggested by others). This setup has produced some excellent photos (references are to my camera manual):
peter
AF-C = (Autofocus – continuous mode): Select by pushing the AF button on the side of the camera (where the AF switch is)
and rotate the front wheel. Choose: GrP
Group Area AF (GrP) Will not work in manual focus mode (single point is defaulted) Use Aperture Priority Mode.
Focus Tracking with Lock-on Setup = Custom Settings Menu (a) autofocus – a3 focus tracking – change from 3 to AF5 (long)
Manual, p. 308 – how AF adjusts to sudden changes in distance (use longest time)
Focus tracking set at “erratic”
Metering set for [ (*) ] = Center-weighted. Manual, p. 114
Camera Manual:
p. 90 In AF-C focus mode, the camera will track subjects that leave the selected focus points and select new focus points as required.
Use to quickly compose pictures with subjects that are moving erratically from side to side (eg. tennis players). If the subject leaves the viewfinder, remove your finger from the shutter-release button and recompose the photo with the subject in the selected focus point.
p. 91 Group Area AF The camera uses a group of focus points. Reduces the risk of the camera focusing on the background and not the subject. Use for subjects that are difficult to photograph with a single focus point.
Hi Peter,
Thanks very much for sharing your experiences and camera settings! I’m sure these will be helpful for other photographers interested in birds-in-flight photography.
Tom
Good pictures as usual, the observations are very handy.
I’m glad the article was of benefit vinayak!
Tom
Boy, you can work fast and still get great images! Thanks for sharing your knowledge!
You’re welcome Joni – glad you enjoyed the article!
Tom
Wonderful article on the technical aspects less commonly shared. I follow your posts regularly and re-read them for better insight into your composition and overall techniques.
Thanks for the tips.
I’m glad that you found the article useful Ramesh!
Tom
Hello Tom,
Just a note to tell you how much I enjoy your writings on the Nikon 1 System, and to thank you for the time you put into it. I am also an early adopter of Nikon 1 for, perhaps, the same reasons as yourself: lightness and portability, and my experience and satisfaction with the V3 and CX 70-300 pretty much mirror yours. At 90 years of age, lugging my D500 and lenses is getting pretty much beyond me but I’m still OK with my Nikon 1. I particularly appreciated your tip about turning off the screen to get the most out of the battery life (it never occurred to me before, thanks). Keep up the great work. I’ll be reading.
Hi Ken,
Thanks for your supportive comment and sharing your experiences – both are appreciated! You are an inspiration to many of us Ken! I hope that I’m still out creating images when I’m 90 years young!
Tom
Hi Thomas, thank you for an excellent practice suggestion. I’m still very new to photography, love to photograph birds, but have struggled with getting them in flight. This is a wonderful technique I can add to my practice at our nearby Audubon Center on a regular basis, starting at their workshop this weekend!
I was fortunate to spend quite a bit of time watching two California Condors on the South Rim of the Grand Canyon a few weeks ago, they were relatively easy to snap in flight overhead ;)
photos.google.com/share…oxX0t5aXNR
Hi Gabe,
I’m glad that this approach may be helpful for you!
Tom
Thanks for the useful practice ideas.
Would you please explain how you exactly use the subject tracker you mentioned?
Raanan
Hi raaanan,
Focus tracking is a setting that helps a camera acquire focus on a moving subject. Other than turning the setting on there’s nothing special that I do.
Tom
Nice practice, sounds like a good Sunday and the results looks good!
One thing, either your memory cards size are in GB, or your Nikon 1 is really old ;-)
Thanks for catching the typo Mickael! I have changed it to GB as it should have been.
Tom
Thanks for the article and the effort you put in to get the images.
1) I am a birdwatcher and amateur photographer and although I understand your method of “image bleed” , to me it seems not to work when the birds wings and tail gets clipped. Unless its a real close up shot of just the head or beaks in which case it is appealing.
2) Are there any advantages of switching the VR/IS off even when shooting at high shutter speeds?
Cheers,
Abhijeet
Hi Abhijeet,
Whether a photographer likes to frame a bird in its entirety or with part of its body or wings clipped with image bleed is a personal preference. I use both approaches.
As far as switching off VR/IS when shooting at high shutter speeds, there is no reason to keep VR/IS on as the purpose of this type of function is to help eliminate potential image blur caused by a photographer’s potential body movement when shooting at slower shutter speeds. VR/IS can cause some minor shifting of the subject in an image. I’ve found that I’m able to more consistently frame BIF subjects in a photograph when VR is turned off.
Tom