If you’ve ever tried light painting for Milky Way photography, you may have run into some frustrating issues. Maybe your light’s color temperature didn’t match the scene, or the shadows and highlights somehow looked artificial. Or, perhaps you got a spotlight effect that didn’t cover a wide enough area.
I have to admit that I didn’t expect to be writing an article about light painting this year. My past attempts with it have always run into the issues I just mentioned – with the end result being photos that looked fake and artificial, distracting from the scene rather than adding to it. The only “light painting” that I would do with any regularity was to wait for the moon to rise and illuminate the landscape!
But seeing some amazing light-painted Milky Way photos from other photographers, it was clear that the issue was with my skills, not the technique of light painting in general. It’s been on my list for a while to improve those skills and add light painting to my repertoire. While I certainly haven’t mastered it yet, I did pick up a huge tip that improved the quality of my light painting tenfold. I’d like to share it with you today.
The problems that I kept running into – incorrect color temperature, harsh shadows, and a spotlight effect – were all things I knew I could fix with fancy lighting equipment like gels and a giant softbox. But I have no desire to lug kit like that into the field, especially when I’m doing Milky Way photography in the backcountry. Usually, I don’t carry any special lighting gear apart from my headlamp and the LED on my phone, which are hardly ideal for light painting.
The tip that I’ll share today changes that. All the photos taken in this article were painted using the basic flashlight on my phone, no light modifiers or other gear required. It’s simple: Don’t point your light directly at what you’re photographing. Instead, paint in the opposite direction, and allow the landscape to subtly reflect its colors onto your subject.
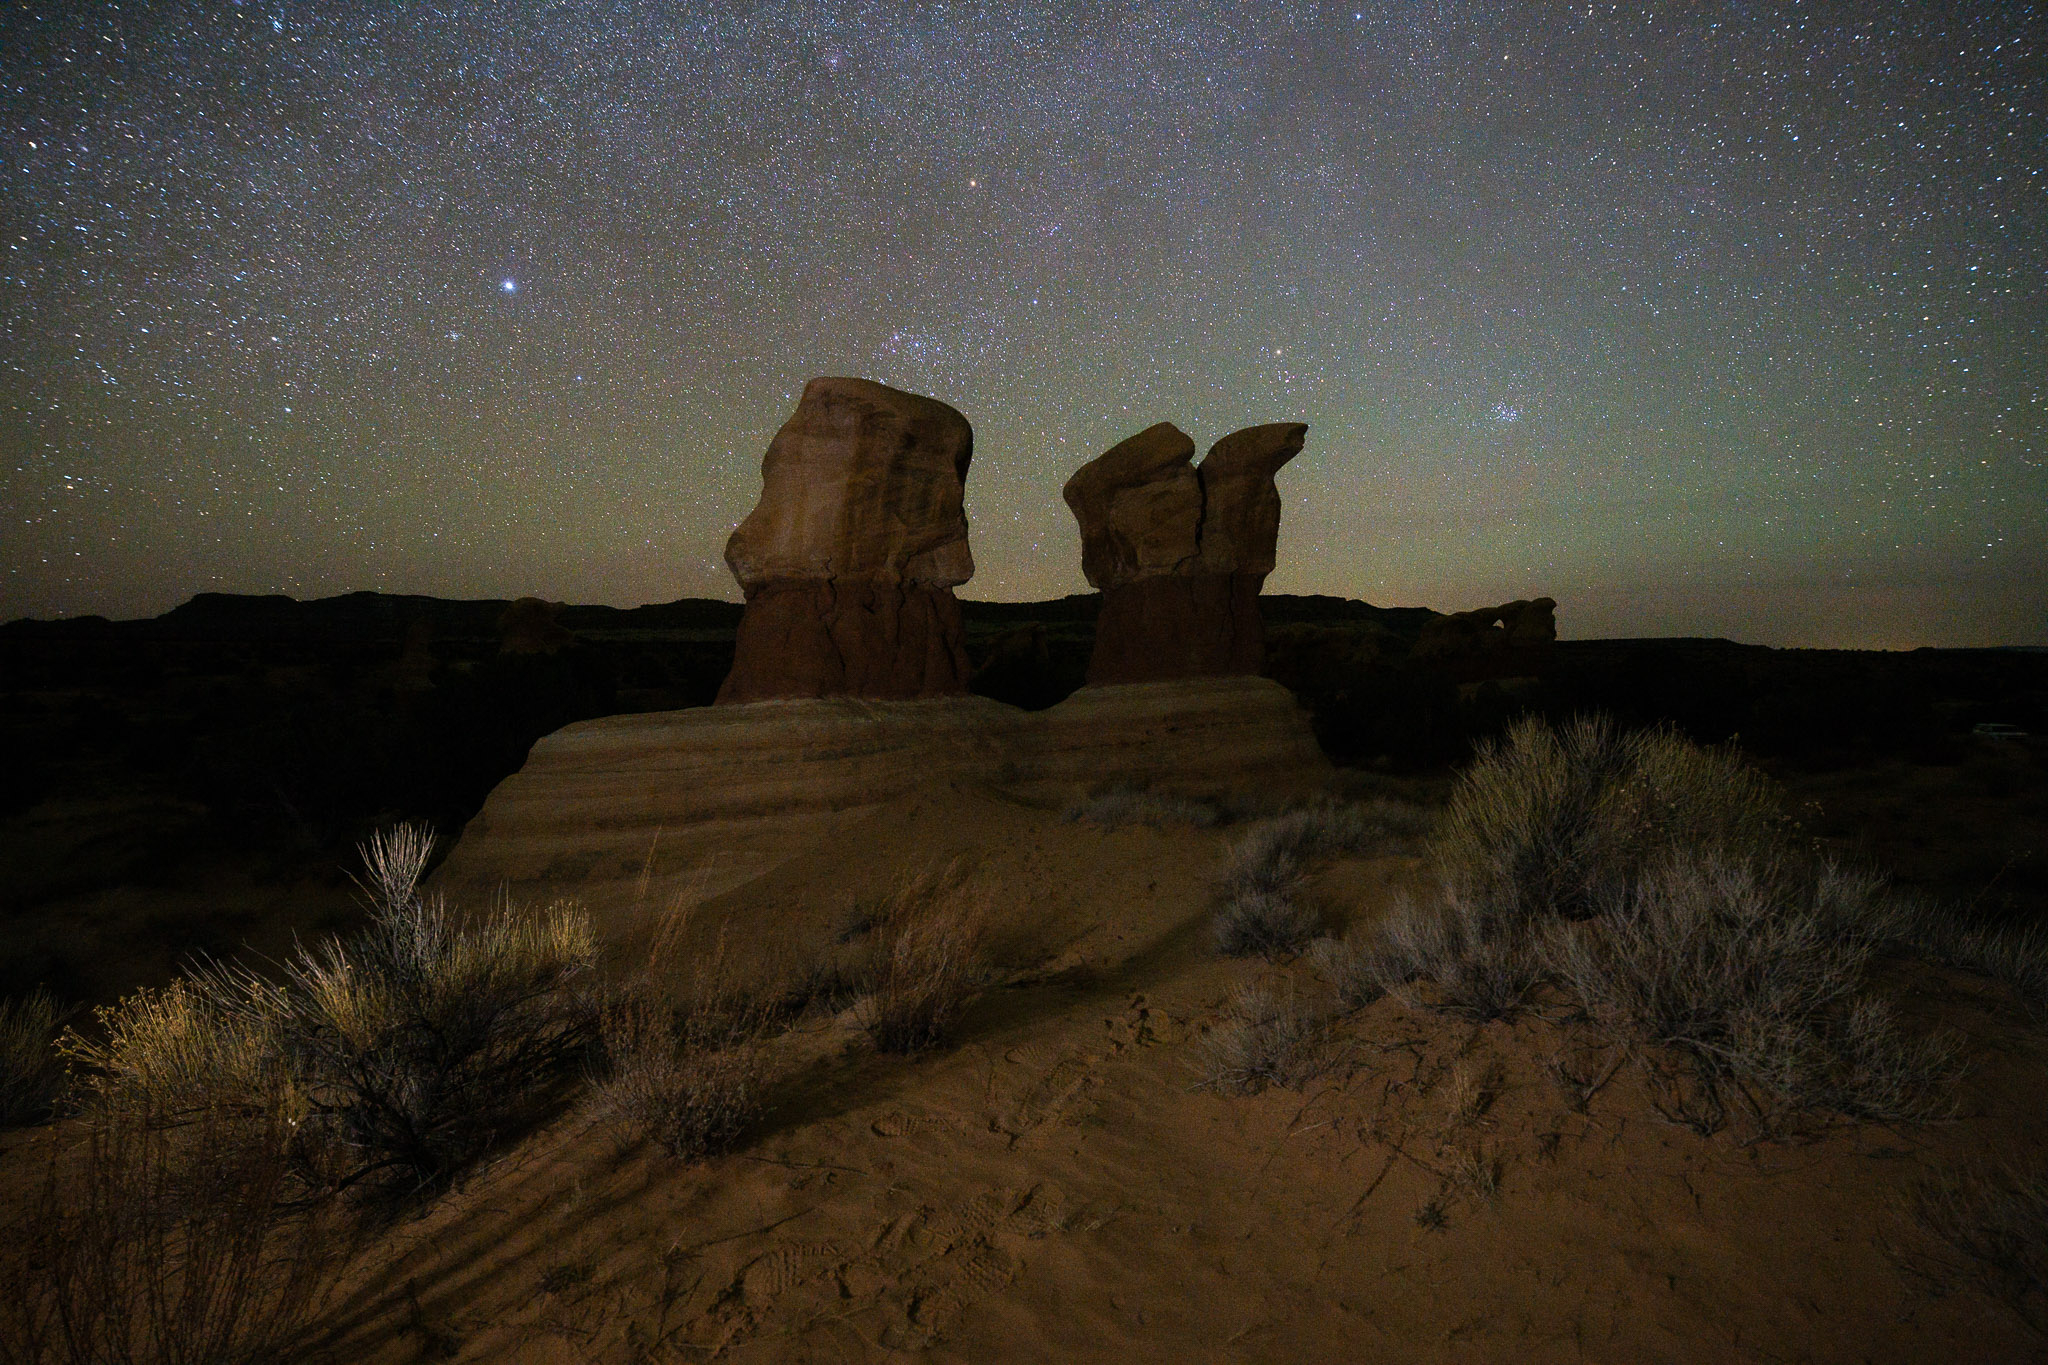
I’m sure that’s a very basic tip that veteran light painters already know, but it marked a major improvement for me. When I went to Escalante earlier this year to test a pair of Milky Way lenses (the Sony 14mm f/1.8 GM and the Sigma 14mm f/1.4 Art), I found that this tip let me take better light-painted photos than I had ever captured before.
The idea is simple. Rather than shining the low-quality light from your phone onto the subject, why not turn the entire landscape into a giant reflector? It improves the color temperature and softness of the light, while also illuminating a greater area.
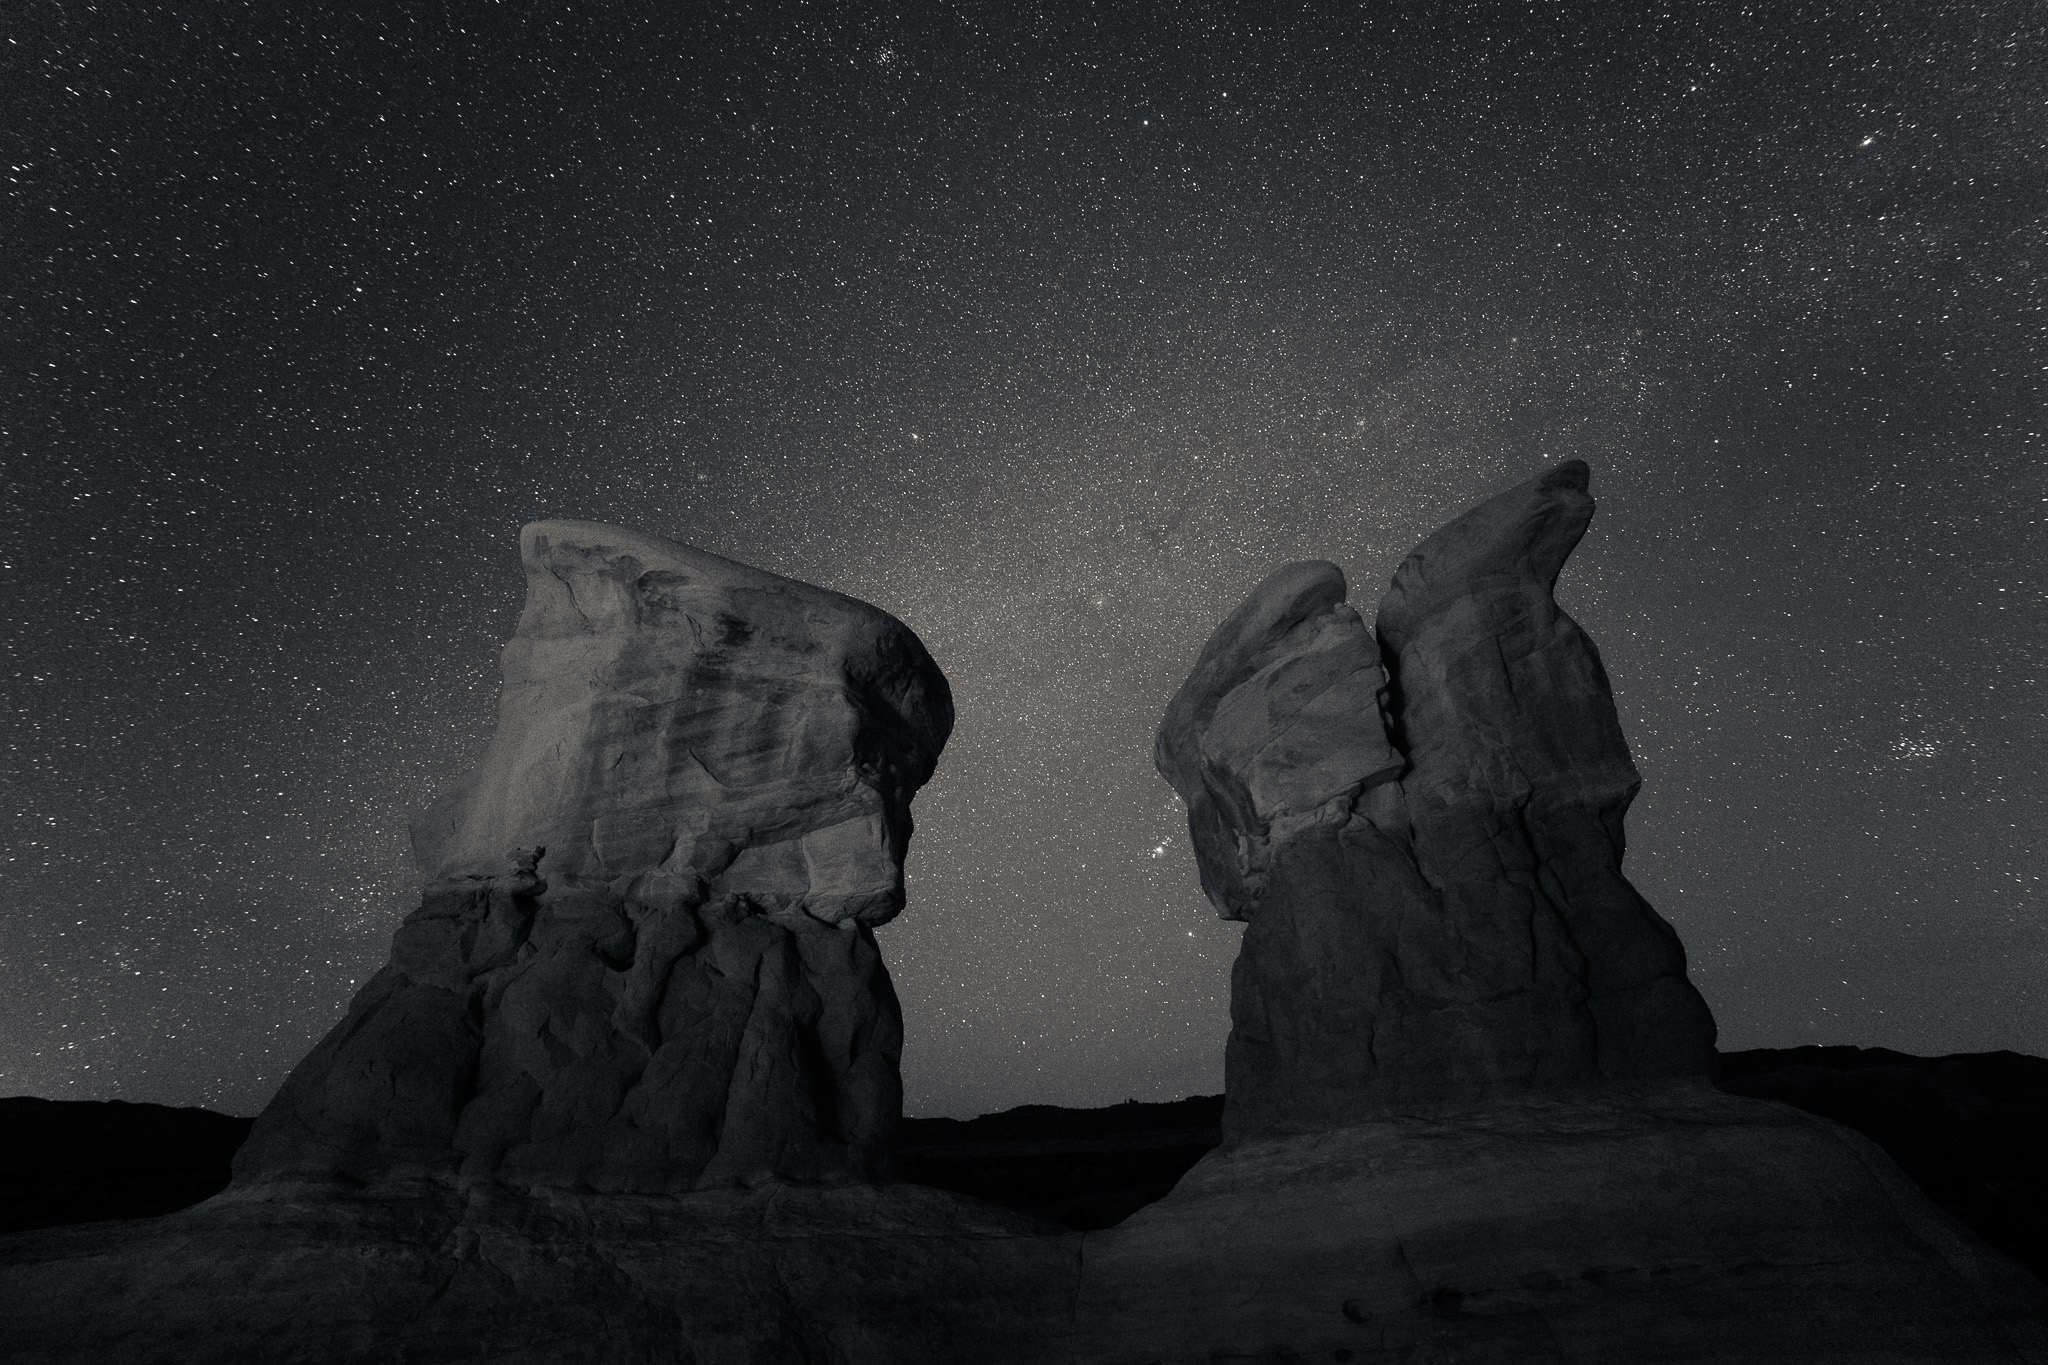
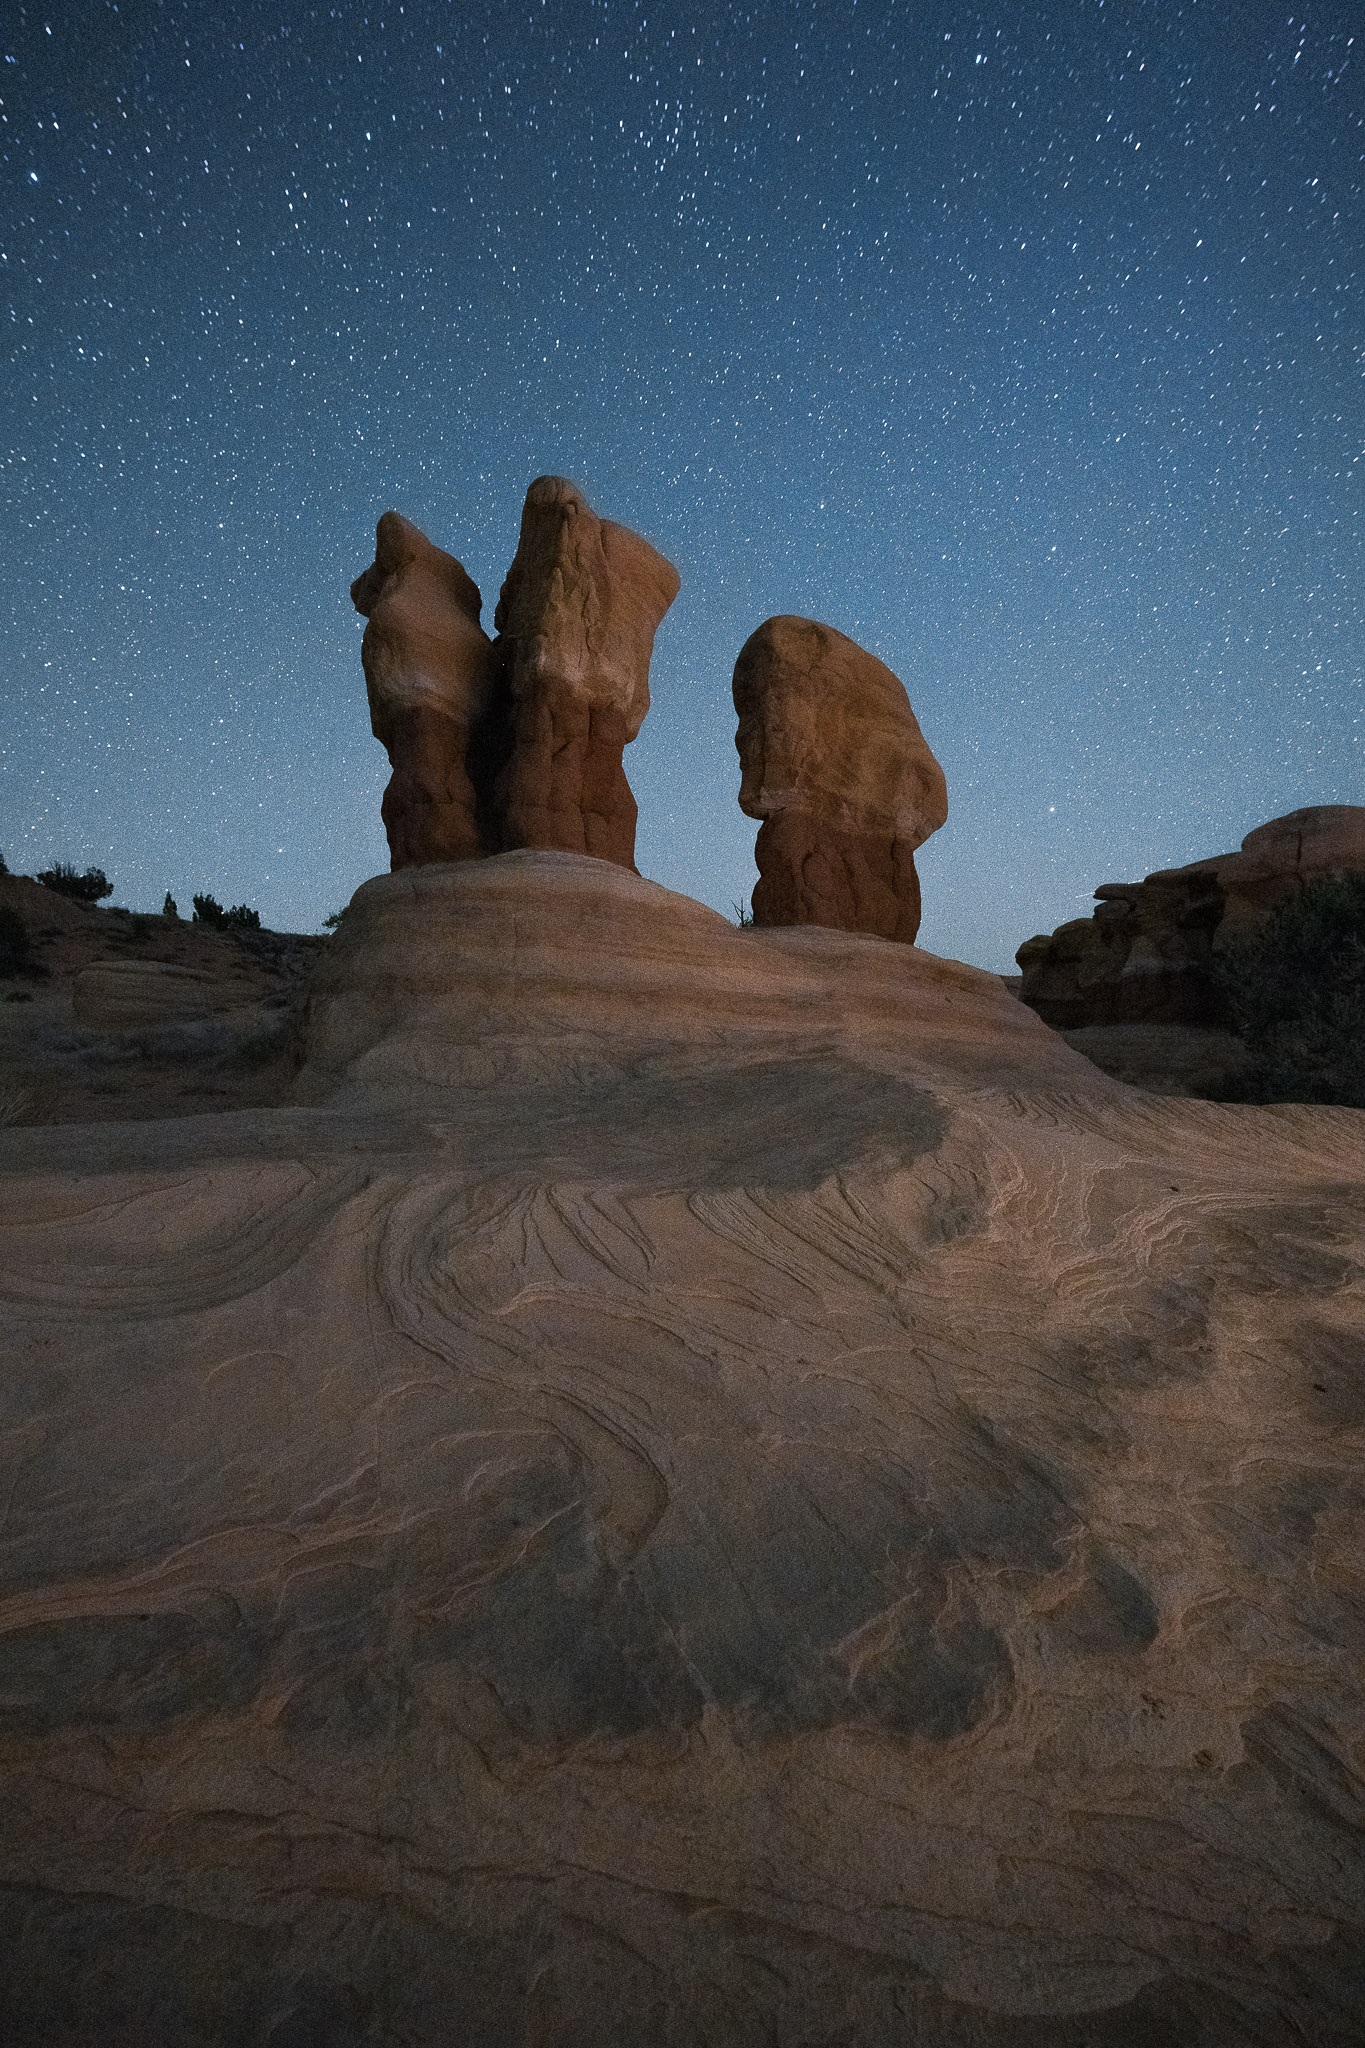
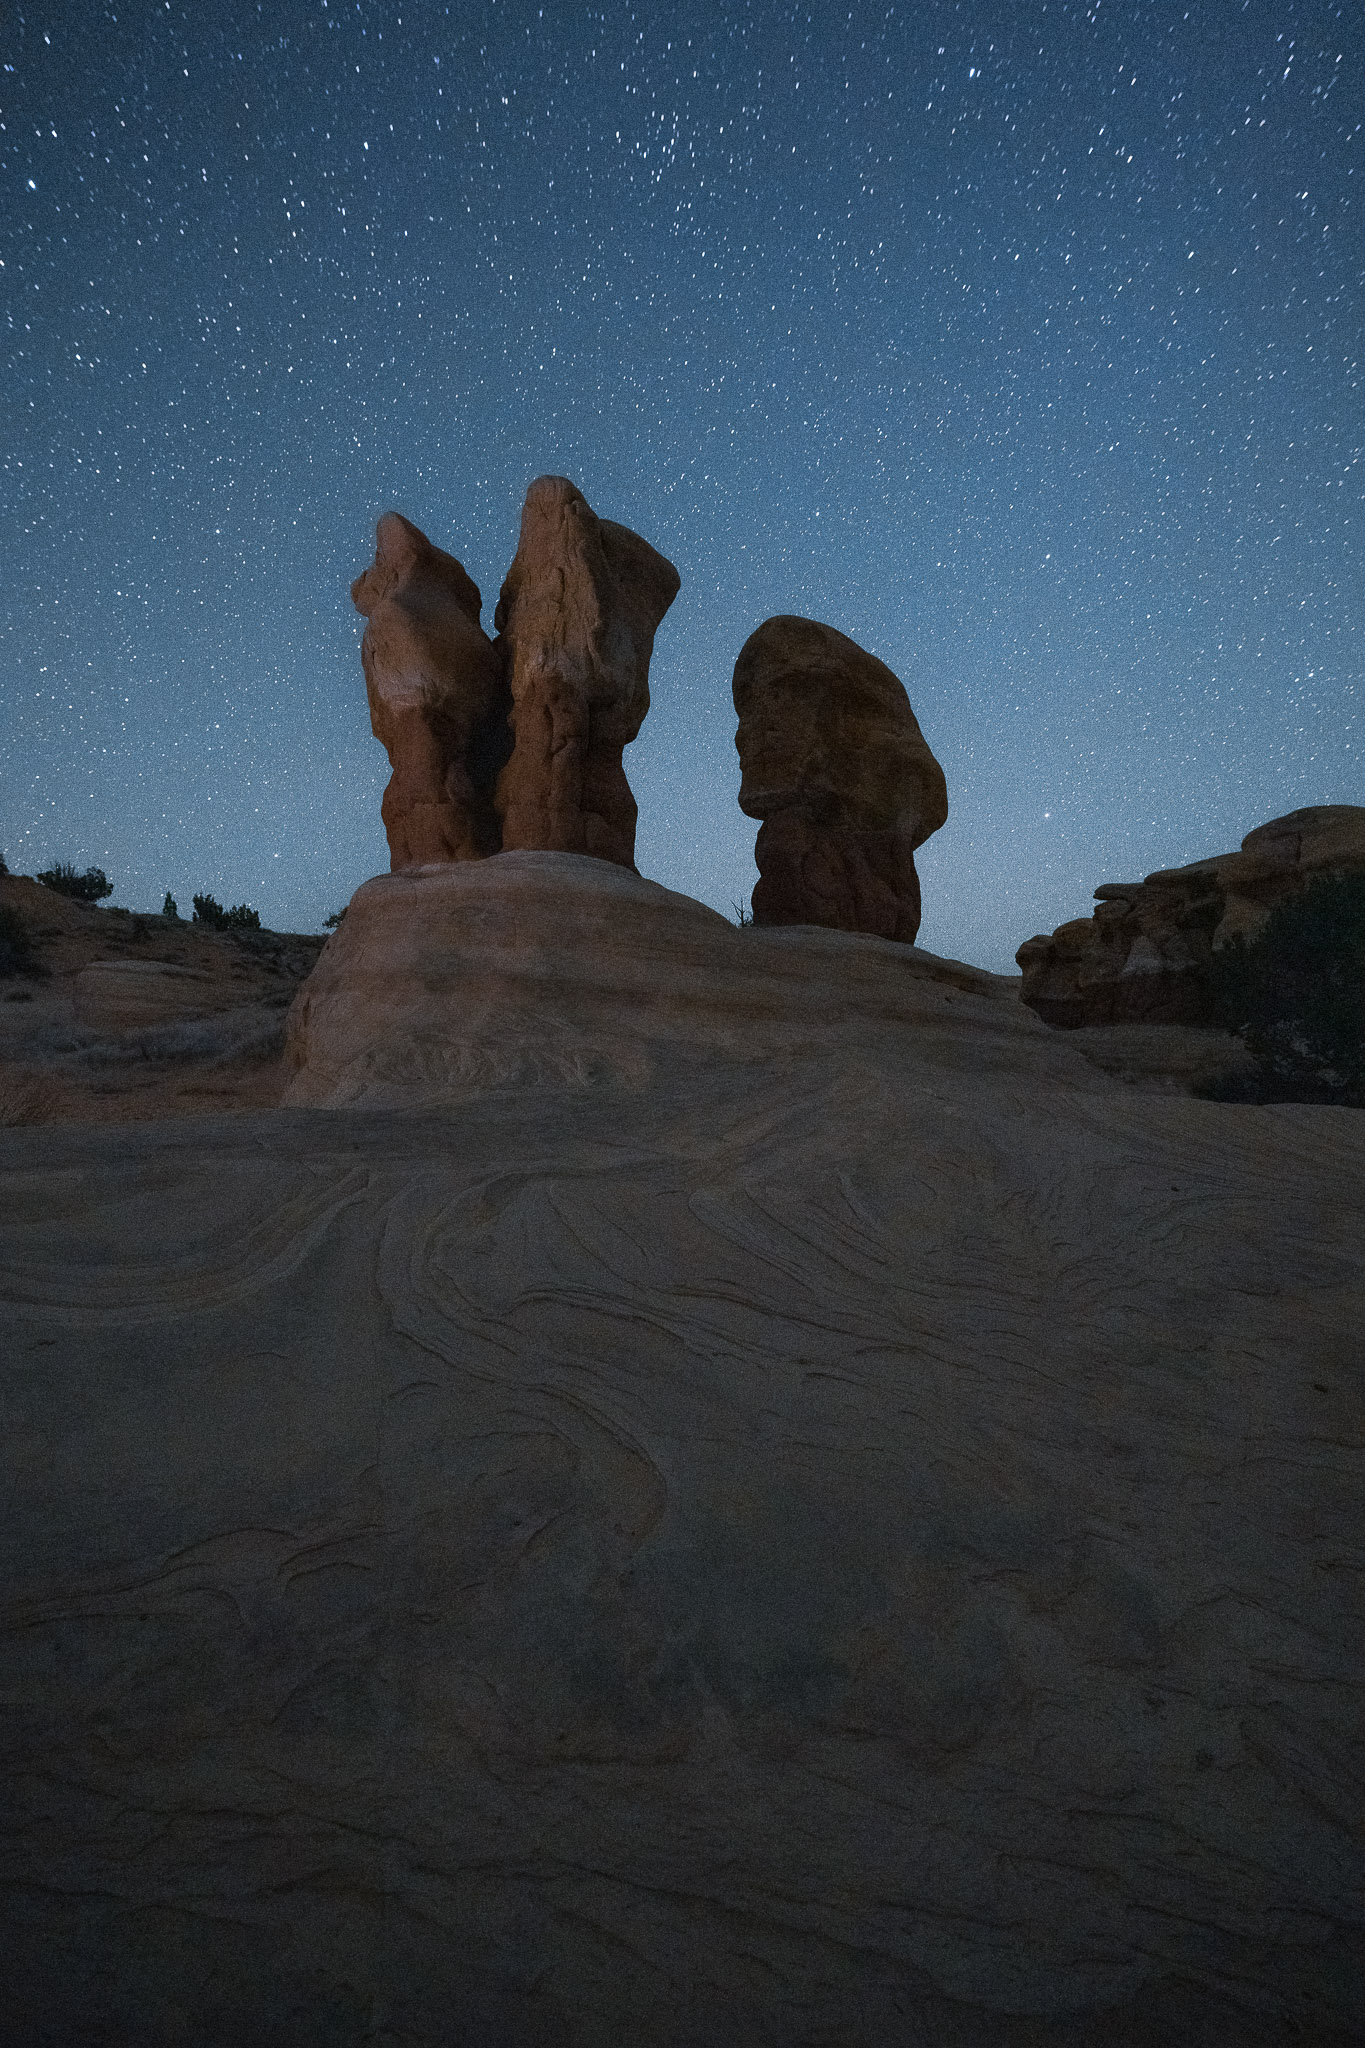
Here’s a comparison between shining my phone directly at the subject, versus shining it behind me to allow the landscape to provide a reflected source of light:
It’s a major difference! The colors, shadows, and overall quality of the light are substantially better in the second photo.
What’s more, this technique is very flexible and can give you different results depending upon where outside the frame you shine your flashlight. I found that when I aimed my flashlight at a large region behind me to the right, it acted like a giant softbox from that direction:
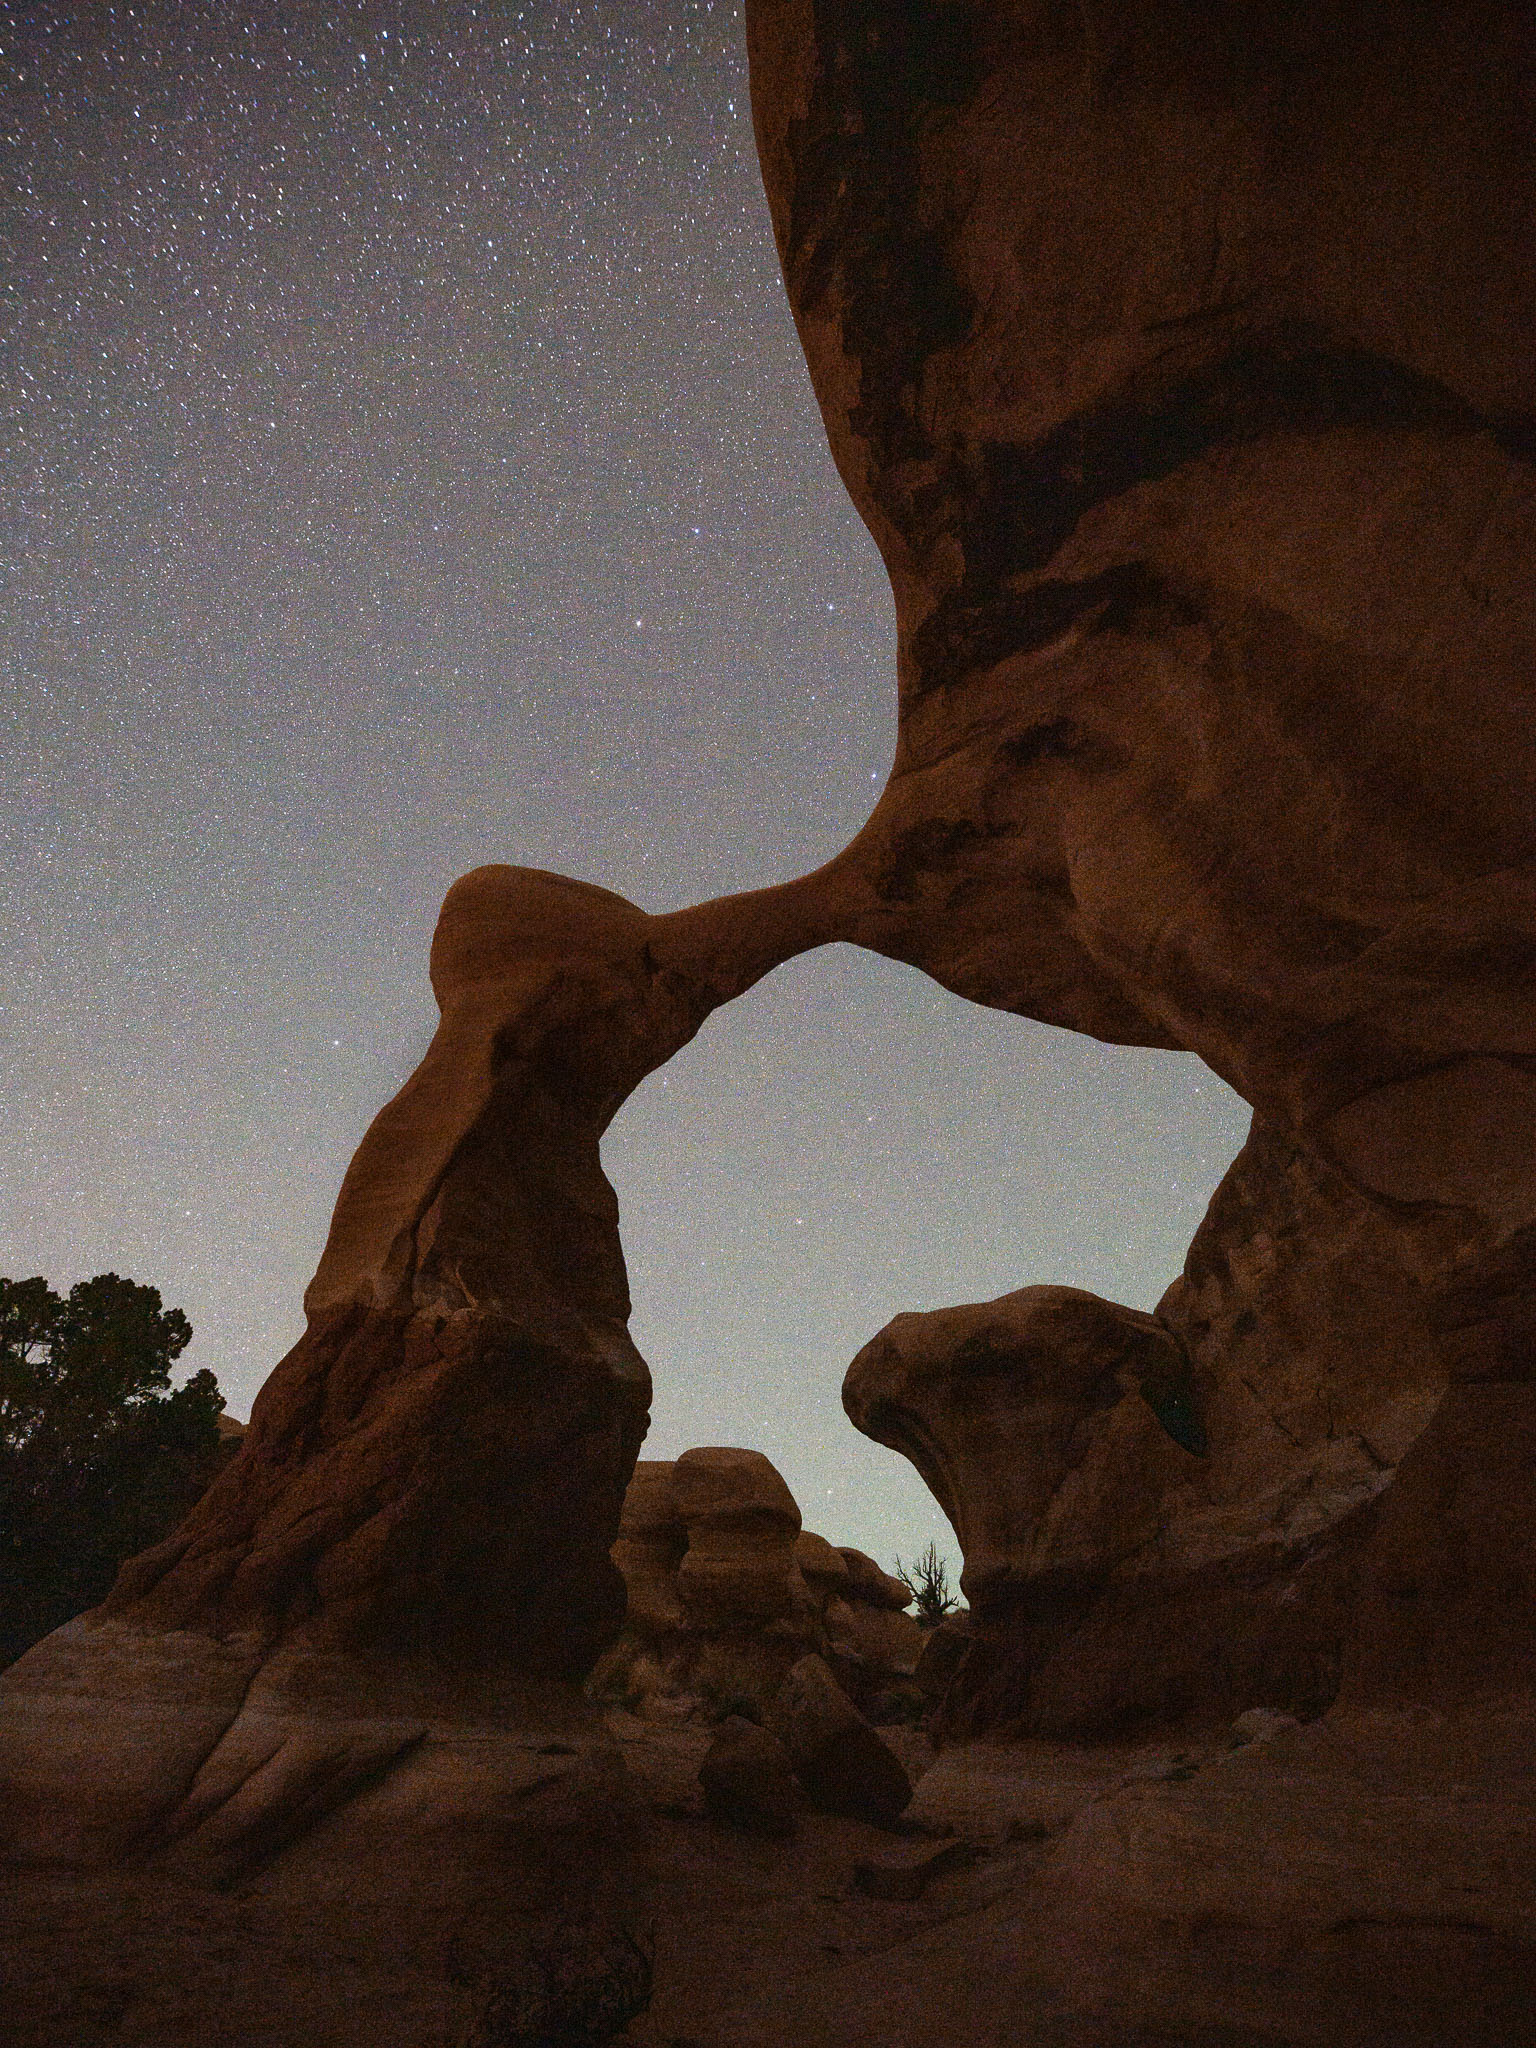
Alternatively, I could get a more focused effect by walking forward and pointing the phone’s flashlight at a smaller section of the landscape out of frame to the left of the subject:
It’s all down to the type of look that you’re trying to capture. The farther back you stand (and the bigger area of the landscape that you illuminate behind you), the larger and softer the light will appear in the final photo.
You could illuminate some pretty large scenes quite softly with this method. I can imagine shining a bright flashlight toward a tall hill or mountain behind your camera, allowing it to act as a massive reflector to illuminate the entire scene that you’re photographing. There are endless possibilities.
My ambitions at Escalante weren’t that grand, but I was happy to see a significant improvement over my previous light painting attempts. Granted, the landscape that I was photographing had the benefit of many different rocks, trees, and other features to act as reflectors. If you’re at a flat landscape with nothing behind the camera, I’m sure it would be less effective.
I hope that you find this tip useful for your own light painting endeavors!
Great tip, Spencer! I’ll remember this during the next two months, when I’m chasing the stars through the South West. Softening and color adjustment of added light, in one easy step.
You should’ve add some video of the process of at least single sample photo to clarify the logic
Unfortunately I didn’t film any videos at the time, but it’s really simple in practice. If the subject that you want to light paint is in front of you, shine the flashlight on anything directly behind you instead. Basically just think of any other element in the landscape (anything not in your photo) as a potential reflector. Trial and error takes care of the rest.
Several years ago I did a photo shoot with two other photographers using light painting. I thought the results were really awful. I returned the next day and shot the scene with the Moon still above the horizon. Then I waited for the Moon to set and shot a second image of the Milky Way. I combined the results and it was so much better than light painting.
I liked the result so much that it is now a metal print hanging on my wall.
I’ve used this technique several times because, sometimes, the object you want to light up is too far away.
Glad you got such a good photo! I love using the moon for “light painting” – hard to beat how natural it looks. Even so, definitely give the trick in this article a shot next time. I think you’ll find better results than what you got with regular light painting!
Thanks for that! A simple but (from the looks of it) very effective idea that I will want to try at some point.
I’d be interested to hear your thoughts once you try it!
Hi !
Not a good idea, use a huge heavy lens f1.4 (Sigma 14mm)
And close it f2,8 + Up ISO Level …
Better open values and backlighting, for example, with a phone screen.
I didn’t choose f/2.8 because the flashlight was too bright, but to achieve sufficient depth of field due to nearby subjects in the foreground. I’m still happy to have shot these photos on the Sigma 14mm f/1.4 because it has more good qualities than just the bright maximum aperture (detailed in my review: photographylife.com/revie…-dg-dn-art)
For the first photo in this article, I did actually shoot at f/1.4. Of the f/2.8 photos, I think I made the right compromise for most of them due to how close the subjects were (although if I had more time, shooting at f/5.6 and using image averaging would have been better). But I probably did have a little more leeway on the photo labeled “shining phone flashlight away from subject.” In hindsight, opening up to about f/2.2, maybe f/2, could have been acceptable and allowed a lower ISO. Although f/1.4 strikes me as too far – it would have put the nearest plants at the bottom of the photo too far out of focus for my tastes.
Anyway, that’s why I chose the apertures I did here.
Wait just a gosh darned second here. Those photos were taken with the *reflected* light from a phone’s flashlight?? I’m thinking now of the Milky Way photos I’ve taken where I could’ve pointed my phone’s flashlight anywhere but straight ahead and gotten much better photos. Sheesh! 🤦🏻♂️
Yes! I didn’t use any other lights here, just the crappy LED of my phone’s flashlight pointed in the “wrong” direction :)