With today’s ever-growing file sizes, it is more important than ever to know how to store your photos and videos cheaply, without sacrificing performance or reliability. There’s also a bigger gap between fast and slow storage than there has been in the past. In this guide, I’ll take a look at the best storage options for photographers looking to upgrade from their current setup.
Unlike some creative professionals, who either need a small amount of fast storage, or a big pool of slow, but inexpensive storage, many photographers need a bit of both. Even modest photography libraries and catalogs can be impractical to store on just an internal drive (not to mention this is a risky practice!). However, unlike bigger businesses, dedicated servers and complex storage solutions are overkill for all but the busiest studios and wedding photography operations.
Table of Contents
“Hot” vs “Cold” Storage
Realistically, if you have a large library of photos and videos, a good way to think about things is “hot” versus “cold” storage.
Hot storage involves data that you access frequently. Cold storage is the opposite – data that you rarely access. In photographic terms, maybe you have a large number of old photos taken before you were a dedicated photographer. You won’t need to access those photos very often, so they’re considered cold.
To be clear, hot and cold storage are relative terms. But in the world of photography, “hot” storage could be, for example, photos that you frequently access which are stored on a fast SSD. Meanwhile, “cold” storage would be the slower tier of storage you’re using, and could cover things like HDDs instead of SSDs.
The reason for making this division is to get you more value for your money. Yes, cold storage options are slower, but they’re also significantly less expensive. For a new, quality HDD, you’re looking at $15-20 per terabyte, based on the sales you find (and the size of hard drive that you buy). By comparison, even value NVME SSDs are around $50 per terabyte, with higher-performance SSDs correspondingly more expensive.
If you can separate out the files that you don’t access very often, then keep them on cold storage, you can make some huge upgrades as a photographer without spending very much money.
How Much Storage Do You Need?
The first step in deciding how to upgrade your storage is to analyze your photo and video needs. Ask yourself three questions: How many gigabytes are you creating a year, how much does performance matter to you, and how much of your work can go into cold storage?
Let me give you an example. Personally, taking my video requirements into account, I’m creating well over a terabyte per year, and I need some very fast storage to be able to edit 4K video (or higher) without any buffering issues. However, once I’m done with a particular project, I rarely need to access it again – so, I can easily dump it onto cold storage. This means I can divide my needs into a relatively small amount of hot storage (a few terabytes or so) that are extremely fast, while keeping a large amount of cold storage (20+ terabytes) that’s cheap and slow.
It’s easy to figure out your own storage needs:
- Check your folders from the past few years to see how much data you generated. Average that to find your rate per year.
- Not counting backups (I’ll get to that in a minute), you’ll want enough additional storage to last you five years, with ten years being preferable. Multiply your rate by 5 or 10 to get this figure.
- Then, figure out percentage that needs to be hot versus cold storage. For me, it’s about 15% hot, 85% cold, but every photographer’s situation is different. If you exclusively shoot personal work that you revisit constantly, and you don’t have mountains of work from old gigs, you may require 100% hot storage.
- Now you know how much storage you need, and what “temperature” – so it’s easy to figure out an upgrade path!
Step one in upgrading your storage is simply to meet these basic needs, if you aren’t already. After that, some possible upgrade paths are to add more backups, boost the speed of your hot storage, boost the size of either type of storage, or add some dedicated travel drives. I’ll go through those options below.
Storage Upgrade Options
1. Adding to Your Backups
Probably the first area that I would upgrade my storage for photography is to get a better backup system. Hopefully you’re already doing the bare minimum, which is to have two copies of every file, stored on different drives, at all times. But at the end of the day, you really ought to have three copies – with one of them being off-site, to avoid things like fires, floods, or other damage.
A basic option for this third copy is to get a large external drive and leave it at a friend or family member’s house. Bring it home occasionally to update with your latest work. While this does leave a gap between backups, it’s cheap and is much better than nothing.
You can go further by switching to a cloud-based backup system. This is usually more expensive and comes with a monthly fee, but it’s the most assured way to keep your photos safe. Treat cloud storage as extra-cold storage – you’re not trying to access it except in emergencies. If you need hot storage that is cloud-based, you’ll be paying exorbitant prices, which is only worthwhile for some businesses.
2. Speeding Up Your Hot Storage
One of the most noticeable ways to improve your experience as a photographer (or at least, as a post-processor) is to get faster storage! A lot of times, when people complain to me that their computer is slow, it’s their hard drive at fault.
In particular, if you are still using traditional HDD storage for editing your frequently-accessed photos, you are giving up a lot of speed. Step one is to switch your hot storage to an NVME SSD. Then, store your operating system, program files, frequently-accessed files, and (if applicable) Lightroom catalog on this NVME SSD. Most of all, if your boot drive is not currently on an NVME SSD, put it there as soon as possible! It’s one of the most impactful upgrades you can make to any computer.
Note
It’s important to mention that I’m referring to NVME SSDs, in contrast to the broader category of SSDs. I’m specifically excluding SATA SSDs because I just don’t feel they’re a meaningful upgrade over a regular hard drive, and their prices aren’t cheap enough compared to faster NVME products. The NVME standard can easily support 10x the throughput.
For product recommendations, I’ve had great experiences with SKHynix’s line. The P31, a slightly older Gen 3 model, is a great choice for the budget minded, or those with laptops, as the high efficiency helps extend battery life and keep things cool. If your computer supports Gen 4 drives, you can get more performance by going with the P41. Gen 5 drives are just now hitting the shelves, but between high prices and a lack of broad compatibility, they’re not worth it (as of mid-2023 when I’m publishing this article).
There are no mysteries here – the faster the SSD, the more expensive it will be. But even if you pick a slightly older generation model like the P31, it will be a huge improvement over using an HDD for your hot storage. If you still feel that your computer is too slow after getting a fast SSD, you may want to check out my full guide to assembling a computer for photography.
As a final note, for photographers whose PC doesn’t support NVME drives, you may want to look into a new computer. NVME drives have now been available for almost 10 years, and computers without support are generally nearing the end of their lifespan anyways.
3. Boosting the Size of Your Storage (Hot or Cold)
A lot of photographers will wait to upgrade the size of their drive until it’s almost too late – when the data is pushing up against the drive’s limits. But this can slow down your drive, and more importantly, cause you to make bad organization decisions with your files. You never want to ration hard drive space!
If you’re mainly trying to boost the size of your hot storage, the answer is straightforward (though potentially expensive). You’ll need to get a larger version of whatever SSD you decide upon – maybe 2 TB instead of 1 TB.
On the other hand, if you’re already working off a fast SSD, and just need more space for the older files, I would look into the world of HDDs. They’re far, far cheaper per gigabyte stored, and this advantage is only magnified when you consider needing double or triple your “actual” needs, to accommodate backups.
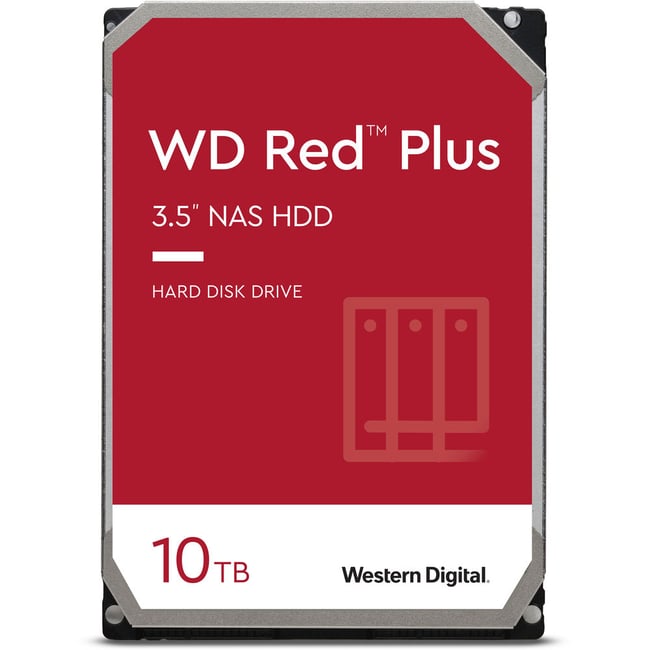
For drive recommendations, most models from Western Digital and Seagate are viable. I’d avoid the lines that may have SMR, versus CMR tech, however. SMR, or shingled magnetic recording, squeezes more data onto each platter, but can cause slowdowns. For Seagate, the good models are Exos, Ironwolf, and BarraCuda Pro, while WD’s line includes Red Plus, Red Pro, Blue, and Black. Drives around the $15/TB mark are a good value, although this may require buying larger capacity drives.
If your computer supports adding internal drives, I prefer that over adding externals. Cooling is typically better, pricing can be better, and there’s less risk from things like knocking a drive off the table. But depending upon how “cold” your cold storage is, you could also just store these drives in a closet or somewhere safe.
4. Improving Your Storage for Travel
As a final storage upgrade route, you should consider your storage situation while traveling. Working from a laptop, you’ll need something small and durable. My preferred solution is to use a pair of USB-C SSDs. They’re small, light, durable, and fast – though unfortunately, they’re also the most expensive storage option I’ve listed here yet. Depending on your type of travel, you can probably get away with 1 TB drives or even smaller, so long as you offload them each time you get back home.
Some photographers simplify things by using memory cards instead of a laptop-based backup system when traveling. Modern cards are less expensive than ever, and CFExpress cards in particular are extremely reliable. If your camera has dual memory card slots, you can write live backups during your trip, then simply load all your cards when you get home.
I still prefer the laptop-based system, personally. It seems less prone to losing your camera or having your things stolen, especially if you keep the two SSDs in different locations during your travels (say, one in your suitcase and one on your person). It’s also the case that modern, high frame rate cameras tend to need extremely fast and expensive memory cards; the Nikon Z9, for instance, had a depth of over 1,000 photos in our testing.
Durability and portability are more important than speed when you’re looking for a travel backup system. In terms of specific recommendations, I’ve had good experiences with this Crucial drive and this Samsung drive. I think it’s best to get drives from two different companies, since drives from the same batch sometimes fail at a very similar time.
Do You Need a NAS?
As a final note, if your storage needs are growing beyond what your computer supports, it may be time to look towards a NAS. A NAS is essentially a little server for your files, and it can also run apps to support things like a personal cloud. However, for the purpose of this guide, the main purpose of a NAS is to act as a box for hard drives!
I would consider moving to a NAS if your photo/video catalog of hot storage is bigger than you can fit on an SSD. Granted, a NAS is not the only answer here; if your computer can fit more drives, you can pool them using tools like the creatively-named DrivePool. But with modern case designs, this is less common.
Purely from a storage perspective, I’m not a huge fan of NAS appliances for the average user. Most computers and/or NAS units only support the Gigabit ethernet standard, so they may not be able to serve your files as quickly as you’d want (definitely not as fast as an internal or USB-C SSD). So, if you need high speed for photo editing, I would only go with a NAS if your computer and NAS both support beyond-Gigabit ethernet. You would probably have better luck with something like a USB-C DAS (direct attached storage) if you need large, fast, external storage.
Conclusion
It’s impressive just how fast storage mediums have gotten, as well as how affordable bulk storage has become. It’s a good time to be a photographer or videographer!
I hope this guide gave you a good sense of the upgrade paths available if you need better storage for your photography. Every photographer’s needs are different, but in general, it’s best to upgrade your backup system first, then hot storage speed, then cold storage size. Let me know in the comments if you have any questions, and I’ll be happy to answer!
I have eight external hard drives, each with a terabyte capacity, each with a different category, through a multi port USB stick, lots of photos and data in them, AND they are inexpensive, the prices have dropped significantly over the years, and can travel with one with my laptop. No, they do not work with Chrome Book, much to my embarrassment at an important meeting. If ultra high speed is not your thing, this solution works fine..
ssd versus hdd
There’s an image of a G-Data drive. After bad experiences with OWC RAID (constant noise, even when the Mac was put asleep) I tried to update the firmware. Bad luck. Same with G-Data RAID – devices older than 5 years apparently are no longer supported. If the drives are in sleep mode, it takes ages to wake them up. G-Data as well just sucks when it comes to firmware updates. Maybe I try LaCie next, but “obsolence as soon as possible” is obviously a main target of the developer’s lists.
An SSD drive needs power at least once a year to retain its data. So if you use an external SSD drive as an archive drive, and put it in the closet for years without connecting it, there is a real chance that data is no longer there.
In addition, if an SSD has a disk error, it is usually impossible to recover, unlike a classic hard disk.
More info:
www.easeus.com/resou…power.html
I wouldn’t suggest storing any drive cold for a year or more – spinning them up, verifying data, updating the backup, etc.
Unlike hard drives, SSDs can (but don’t always) fail gracefully, locking out writes, for instance. No medium is perfect, and backups are key.
I use a simple, inexpensive approach for backup. I subscribe to a cloud backup service which costs me $100/year for unlimited storage. As soon as I download from my memory card to my HDD, the cloud backup automatically kicks off. Backup speed obviously depends on the upload speed of your internet connection. I only pay for 10Mb/s. I do NOT delete any photos from my memory card until I know that my cloud backup is in sync with my internal drives. My boot drive, LR catalog, and LR cache are on an SSD.
I also backup all my drives once a week, automatically, to an external drive, with an extra backup manually taken immediately after I download an important batch of photos to my computer.
I have been storing raw and processed photos for almost 15 years and obviously the size is growing. I am now at 4 Tb.
I have always used NAS in combination with some cloud storage .
I think storing images, beyond the ones you are actually working on, on a computer is not a good strategy. Computer memory always runs short and changing computers also gets more complicated when your main storage is on the machine itself.
So as I said for my “Cold” storage I rely on NAS mainly.
For “Hot” storage I use 4 Tb Sandisk Extreme SSD (and a 2TB one for travel). Fast enough for me.
I use FreeFileSync to carefully keep everything in sync.
I use NAS also for other purposes. However for just images backup, it might be cheaper to just buy a couple of USB external disks and keep them in sync rather than buying a full NAS. Easier to upgrade to new technology also.
For NAS setup I use Raid-6, so 2 disk redundancy. I have in 15 years never had a disk problem (buy good quality disks). However I had two times NAS hardware problems which is much worse than a disk problem. First time I lost some data. Since that time I have 2 identical NAS which I keep in sync (and yes one failed again).
So a lot of options to chose from. I now have 4 copies of everything (2 NAS, one SSD and one cloud storage). Maybe overkill and not the cheapest, but I feel confident about not losing my data.
As for your cold storage I find it important to have a very cold storage in the meaning of an off-site storage too. What happens if your house burns down or some burglars break in. I know this happens rarely but still your valuables might not just be your jewellery but also your images taken over many years. A simple 3.5inch HDD with enough space for your existing and future load would be sufficient. Attach it to your computer e.g. via a HDD dock (they are cheap nowadays) via USB and backup your images onto the HDD. Store the HDD in a bank safe or another remote place.
As for my travel photography I rarely bring my laptop with me nowadays. But me iPad Pro is a great replacement. After a days work I attach my camera (luckily with the Z9 directly, but it could be my card reader as well) to my iPad and import my RAW images to the Photo app. This gives me my first backup and when I stay in a place with WiFi overnight my images get transferred to my iCloud for my off-site travel-backup till next morning. Back home after my travels I import my images from the card and delete them afterwards from the photos app and the iCloud. I can even attach a portable SSD drive like the Samsung T7 shield to my iPad and have another backup by putting that SSD drive into another bag while traveling. Better safe than sorry.
One thing I’d stress out as a suggestion to the author: bitrot. I’ve lost images to bitrot in the past – mostly photos I did 15-20 years ago and didn’t have enough storage capacity to keep the raw files.
I built a ZFS server using TrueNAS. It was very easy to set it up and also to backup to the cloud (it supports many providers).
Ars Technica has an excellent article on the matter:
arstechnica.com/infor…lesystems/
I am not sure if raw files are more resilient, but it is surely something to keep in mind.
I would expect them to be more resilient, as long as the header doesn’t get corrupted. Bit-rot is certainly something to be wary of. I’ve lost old jpgs due to bit-rot. I’m hoping between BTRFS scrubbing and SHR I’ll be relatively immune to it, but maybe I should also be thinking of some file level integrity check.
Nice and mostly good, but I do not agree about NAS. I use a SSD as cache as you explained, a single intenal HD as Mass storage and regulary I sinchronize everything with a NAS. Then sometimes I backup in a DAS so having a 3-2-1 backup strategy. In this way I can also access to my photos everywhere via VPN ( very slowly, really but I can do It)
Hi
I don’t immediately jump to NAS as the next step if the computer supports internal storage expansion – too many NAS products are still stuck on Gig ethernet, and that’s just a poor experience for photo/video workloads. It’s a good next step, like you mentioned.
I prefer using a NAS which backs up to USB-attached disks. If there were still consumer tape drives I would prefer using those for backups, but for now I’m living with a 2-1 (out of the 3-2-1) backup method.