Aside from blown-out highlights, noise is probably the most frightening thing for many photographers. Not a day goes by that I don’t see some post in a forum about removing noise, or some news about AI-powered noise reduction software. In this article, I’ll introduce the major noise removal tools today and give you some tips on what to use.
Table of Contents
What Is Noise, and Why Should You Remove It?
In photography, noise looks like this:
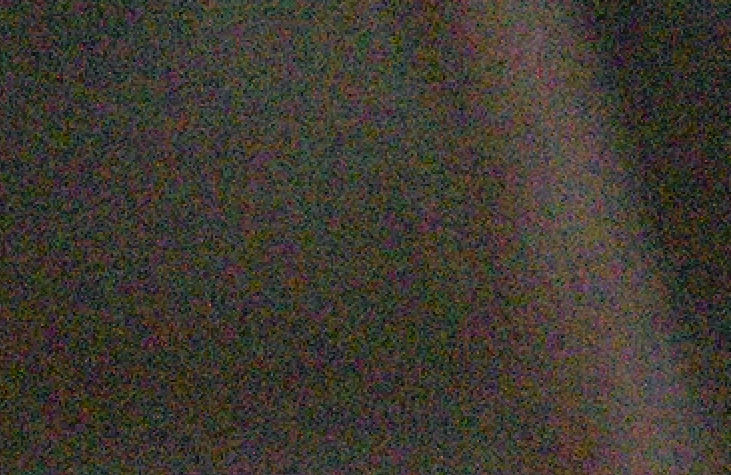
As you can see, noise looks like a random pattern of colors and brightness at the pixel level. It’s especially visible in uniform areas with little texture, such as out-of-focus backgrounds.
Noise is caused by the inherent randomness in measuring a signal, and the nature of light itself. In bright light, the signal to your camera is strong, and noise might be almost impossible to see. In dim light, though, noise is hard to avoid.
In some cases, noise can positively contribute to an image. Noise can give your photograph a certain kind of atmosphere, whether that’s the grittiness of high-contrast noise, or the film-like look of small grain across the image.

But in many cases, noise doesn’t add positively to the photo, and you’ll want to remove it. What can you do then? The answer is to use noise reduction software.
However, there are so many techniques of noise removal that it can be hard to pick which one to use. They range from the basic tools in your Raw developer to third-noise removal tools powered by AI. How can you choose the right method?
In this article, I’ll summarize popular noise reduction methods to help you transform ISO 40,000 shots into ISO 100 shots (okay, maybe that’s a stretch :)
Basic Noise Removal in Your Usual Editing Software
Every Raw developer has some sort of basic noise reduction option. Whether you use Adobe Lightroom, Capture One Pro, Nikon’s NX Studio, or anything else, you’ll find noise reduction options somewhere. I think it’s a good idea to try the noise reduction that comes with your Raw processing software before trying more exotic and expensive solutions.
If you find that your software is softening too many details in your main subject, you still may not need to buy a dedicated noise reduction software immediately. Instead, try using local adjustments to do manual, selective denoising.
Selective noise reduction is when you apply noise reduction more severely to areas where noise is more obvious, like blurred backgrounds. I use careful, selective denoising on virtually all of my noisy images.
Here’s a snapshot showing a photo with selective noise reduction (on the left) compared to the original file (on the right):
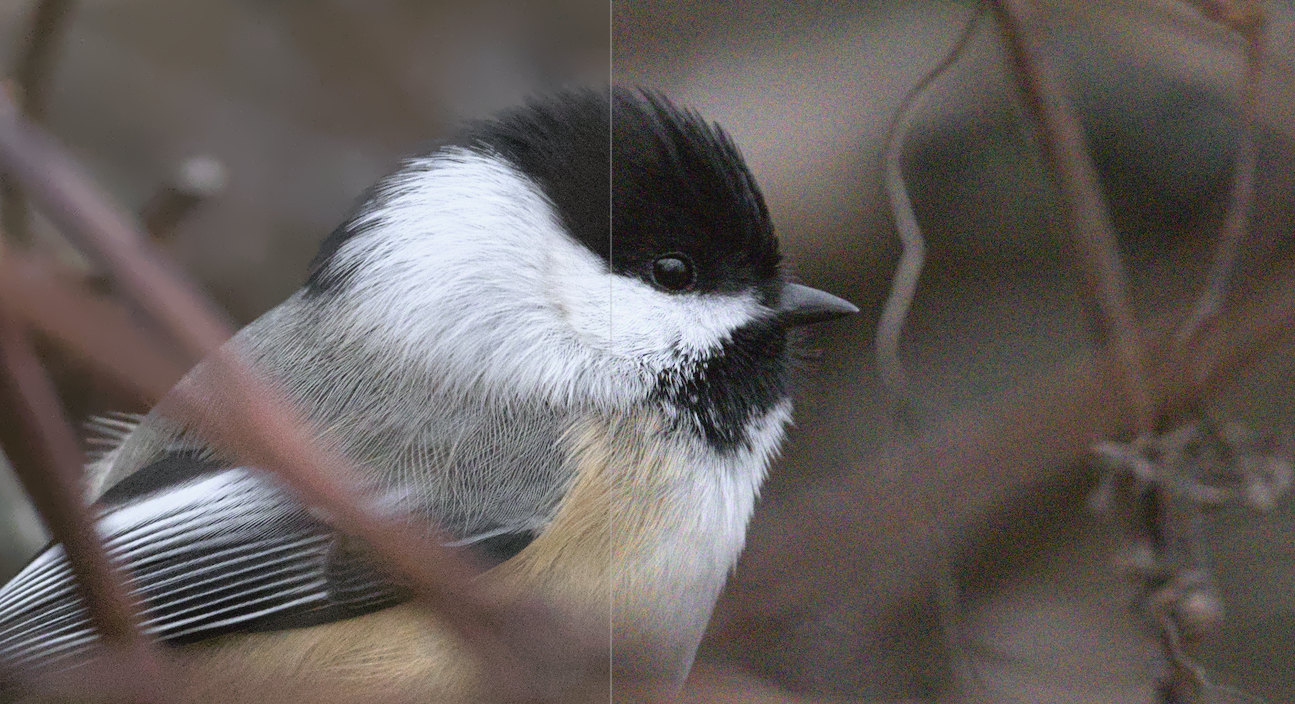
What software did I use in order to get a good result like this? Some $200 AI-powered tool? Nope! It was just the basic tools in the open-source software Darktable, which I applied selectively to areas with high noise.
There are a lot of editing software options on the market, and they’re not all at the same level when it comes to noise reduction. I’m not really happy with the quality of noise reduction in Lightroom, for example. Darktable is better even though it’s open-source, and others are even better than that. An example is DxO PhotoLab 6, which incorporates some of the machine learning noise reduction from DxO’s dedicated software.
Still, what if you’re not satisfied with your software’s noise reduction capabilities? Maybe it takes too long to do good, local noise reduction, or perhaps it doesn’t give satisfactory results even then. In that case, it may be time to try more advanced programs.
When to Use Specialized Noise Reduction Software
Specialized tools can do a better job, even though they’re usually not cheap. In most cases, they can equal or even slightly exceed local/manual denoising. At the very least, they certainly save time compared to selective noise reduction. Here’s how I see things:
- At lower ISO images with some noise – such as ISO 3200 situations typically encountered by birders – AI noise reduction doesn’t do any better than local, selective noise reduction even in software like Darktable or Lightroom. (It does do better than global noise reduction sliders in Lightroom/etc.)
- At higher ISO images with more noise, AI noise reduction is a little better than manual denoising most of the time.
- Regardless, AI noise reduction is much faster than manual denoising, so it saves you time.
AI noise reduction’s main strength is doing a very good job at noise reduction more quickly than it would take you to do it yourself with masks and local editing. Keep in mind that AI noise reduction is not perfect, no matter how good the promotional photos are on these companies’ websites. You won’t transform a grainy image taken at ISO 25,600 into a smooth, sharp photo.

Which Noise Reduction Software Is the Best?
There are quite a few dedicated noise reduction tools today. Many of them are built around subject recognition capabilities, where they will selectively apply noise reduction at different levels in different parts of the image.
But which one does the best job? That’s actually a tricky question, because it depends on your personal preferences as well as the types of photos you feed into the software. That said, I’ll go through some of the main noise reduction options below and share my thoughts on how good they are.
Topaz Denoise
Topaz Denoise AI by Topaz Labs is a well-known noise removal software. It’s $80 for the standalone noise reduction software, or $200 for Topaz Photo AI that has additional sharpening and upsampling tools.
An interesting feature in Topaz Denoise is the choice between multiple different AI models when you’re reducing noise. I find that some of them work great, while others can be way too aggressive. In any case, there are some limited sliders that allow you to fine-tune the output a bit more, so you’re not just stuck with the automatic AI output.
After playing with the algorithms and sliders in Denoise AI, I can usually get quite good results. However, keep in mind that the best noise reduction software depends on the specific image at hand, as well as your favorite balance between noise reduction and subject detail. I could easily bias this article to make one software look better than the other – even if they’re actually on the same level – based on the algorithm, sliders, and photos I showed.
With that in mind, I encourage you to try the trial versions of these different software options instead of blindly buying one over the other. My impression is that Topaz Denoise is slightly below DxO PureRaw in noise reduction prowess… but it could be my photos or my noise-vs-detail preferences that cause that impression.
DxO PureRaw 4 and DxO Photolab 8
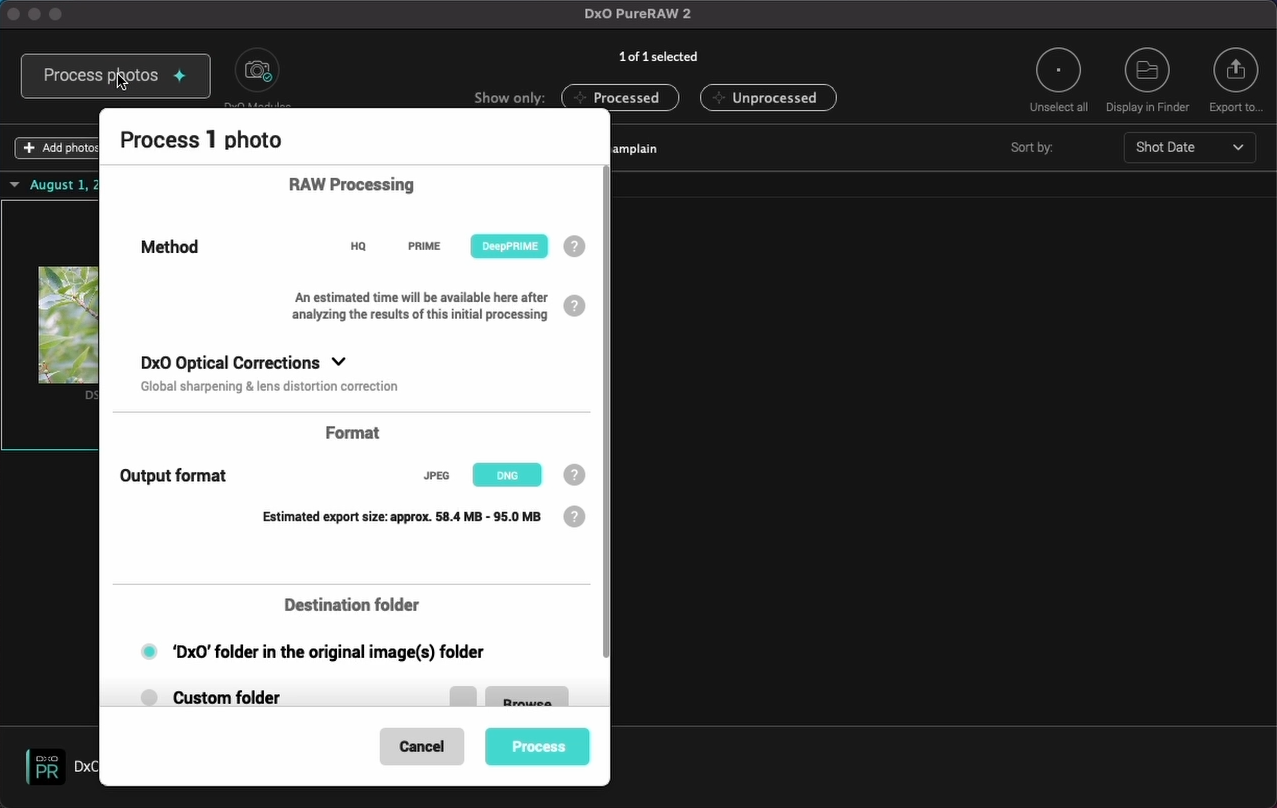
DxO PureRaw 4 is a popular AI noise reduction program, although a bit more expensive at $119. It’s also one of the easiest noise reduction tools to use, having almost no options. (Of course, this means you have less flexibility to change the output if you dislike the results for a particular photo.) My fellow writer Libor also uses it for his work and has written an extensive article about it, which includes a comparison between PureRaw and Topaz Denoise.
Personally, I’m impressed by PureRaw 4. Not only does it give very pleasant results without needing any tweaking, but it also outputs a Raw (DNG) file for further editing. I find this invaluable in such a program. There may be times when you want to reduce noise a few different times throughout the editing process, and using a DNG instead of a TIFF file saves a lot of storage space.
The downside of PureRaw 4 is that it only works with supported camera models. Admittedly, it includes most cameras, but if you shoot with anything unusual, you should pick a different software. On the other hand, this makes DxO’s noise reduction even more effective as it can tailor its noise reduction to the particulars of your camera’s sensor.
DxO also has a product called PhotoLab 8, which is a more general-purpose editing software package. It adds an additional noise reduction feature called DeepPrime XD. However, the PhotoLab 8 software is $229, so it’s not a cheap proposition if noise reduction is the only thing you’re after.
Either way, my impression – subject to my personal photos and preferences – is that DxO’s noise reduction is currently the best available as of 2025. The DeepPrime XD algorithm in DxO PhotoLab 8 is the best, while the algorithm in DxO PureRaw 4 is also very good. Topaz Denoise AI is close behind.

ON1 NoNoise AI 2024
ON1 NoNoise AI is yet another AI noise reduction program and it can operate as standalone or plugin for Affinity, Adobe Lightroom, or Capture One. To be honest, I was very disappointed in using ON1 NoNoise AI 2024 for a variety of reasons.
First, its chroma/color denoising is poor. Compare it against the open-source software Darktable, for example (which should be a good baseline considering that Darktable is free; you’d expect paid software to do better). Darktable uses a specific profile for each camera, and chroma noise disappears almost completely without any detail loss. Even in Lightroom, with subpar noise reduction capabilities, color noise reduction is very good. By comparison, ON1 NoNoise AI still leaves visible color even when the slider is at maximum.
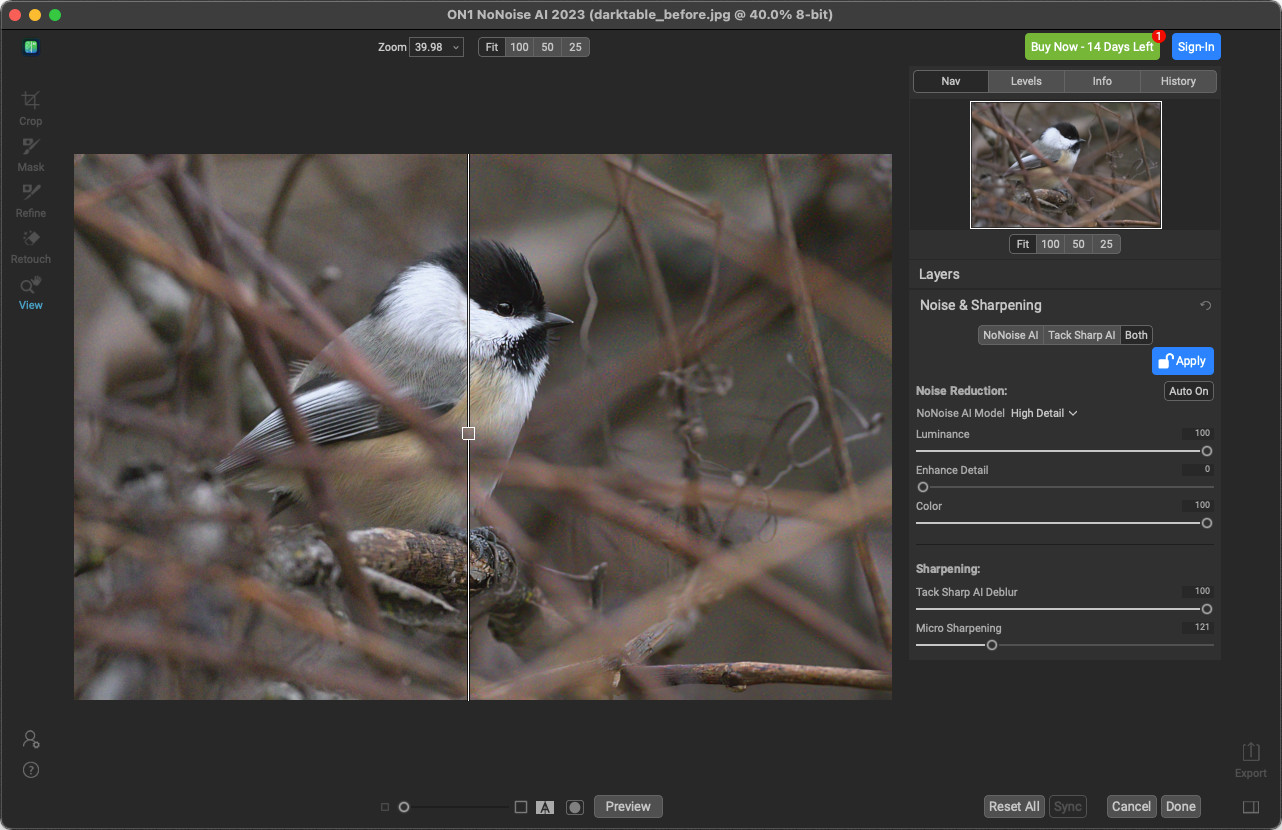
The luminance denoising (the kind of noise you see even in black and white) looks similar to Lightroom’s denoising, and at more extreme slider settings, it just seems to blur the image. NoNoise AI has an ‘Enhance Detail’ slider that looks unnatural, and its AI sharpening module starts adding more grain very quickly.
In summary, I found it hard to get a good result in ON1 NoNoise AI. Not only is getting the best result not intuitive, its noise reduction is not even that good. In my testing of Topaz Denoise and DxO’s software, I feel that ON1 NoNoise AI is miles behind, and I would not recommend it. That said, it also has a trial version, so you might as well download it too and confirm that your experience matches mine.
Other AI Noise Reduction Options
I recently found a website called AI Image Enlarger and they have a denoiser (found here) that apparently also uses an AI algorithm. I tried the same image of the Black-capped Chickadee, but its algorithm was pretty bad, with the final result having large amounts of chroma noise.
AI is a hot topic these days, and it’s not surprising that web-based AI image tools are coming out of the woodwork. From what I have seen of them, their results are not as good as the more well-known programs. If you’re looking for AI denoising programs, I would stick with the big names like DxO PureRaw 3 and Topaz Denoise.
Other Methods of Noise Reduction
There is a caveat to my recommendations for noise removal. Before throwing software at your noise problem, make sure you have other important aspects of your technique polished, such as:
- Are you shooting at the right shutter speed and aperture? I have seen countless bird shooters using shutter speeds like 1/1600 for perched birds, which is way too fast. Likewise, if you’re shooting at high ISOs while your aperture is narrow like f/16, you’re probably doing something wrong.
- Are you paying attention to your composition and filling the frame sufficiently so that you have to crop as little as possible? The more you crop, the more you will make noise visible.
- Are you shooting in the best light? Although you may not have control over the light you shoot in, if you do, you should learn to recognize good light and take advantage of it.
- Are you going to the right locations for wildlife? If you are shooting in your backyard or a dense forest, try something new.
Of course, gear can help too. If you can upgrade from an f/5.6 lens to an f/4 lens, you will save a stop of light. And portrait photographers are very lucky in this regard, because the best portrait focal lengths often have lenses with f/1.8 or even f/1.4 maximum apertures, which will surely make your portraits less noisy compared to an f/2.8 lens.
Should You Get Rid of Noise?
Despite having written an entire article about noise, I would recommend not becoming too obsessed with noise.
Sure, in some cases, noise can be very distracting. As a wildlife photographer, I often take shots of subjects against distant backgrounds, and noise distracts from the transition between a sharp subject and a smooth background. I do want smooth backgrounds in photos like this:

In other cases, though, noise might not be so distracting, and you might just want to remove the chroma noise and leave some luma noise for a grain effect. Even if you do remove noise, a very small amount may not be visible at normal viewing angles or in a print, where the texture of the paper can hide some noise.
Being too ambitious about noise removal can have problems, too. Even with careful denoising, the result can look like an oil painting with its “smudgy” look, and this only gets worse as you increase the strength of the effect. I would rather have a photo with some moderate noise than a picture that looks like plastic!
Finally, I would consider the following. In a world where photos are shared at an incredible rate, sometimes moderation is the best strategy. Should you be spending your time trying to transform a mediocre photo into a passable one? Sometimes it’s better to accept that a photo has too much noise, move on, and focus on taking something better next time.
Don’t get me wrong. I remove noise regularly, and I do think programs like Topaz Denoise AI or DxO’s options are great and I recommend them. All I am saying is, don’t get caught up too much on editing for volume.
Conclusion
Noise is a fact of photography as much as taxes are a fact of life. Even so, it’s not something to be scared of. I hope this article showed you that even basic editing software can give you good noise reduction results with local adjustments – and if you want something faster or a bit better, AI tools are there, too. The best noise reduction software is constantly changing and really depends on your requirements, but now you have context so you can make the right choice for your situation.
Do you have any special techniques for noise removal, or any software recommendations of your own? If so, let me know in the comments.
Hi Jason.
In your article, you conclude: “The DeepPrime XD algorithm in DxO PhotoLab 7 is the best …”.
I am a long-term DxO PhotoLab user – where PL includes both DeepPrime and DeepPrime XD algorithms … Based on my experience, and as reported in the DxO Forum by other PL users;
DeepPrime can be safely used on all images, and the algorithm will apply noise-reduction according to the needs of each specific image – without any artifacts or “fakeness”.
DeepPrime XD is best reserved for cases where an image contains very obvious noise (typically, as a result of high ISO settings) and/or where an image has been heavily cropped – – As you found, in both these cases, it does an amazing job … but, with possible risk of artifacts or “too-smooth” results (such as in skin) … Tho, this can be mitigated by tweaking the intensity-setting for the XD algorithm.
That is, it’s a case of horses-for-courses.
Regards, John – TKA
I’ve tried the demo version of Topaz Denoise on some old photos shot in jpg format and was very impressed. Dxo’s DeepPrime only works with raw files and nearly all of ny noisy images were shot jpg with old digital cameras so Dxo noise reduction won’t help ma much. My images shot with modern cameras have very little noise.
Thanks for the informative and balanced article, Jason.
I am very happy you appreciate it!
This is a great, but not quick, method for dealing with noise. Due to the time involved, I would only do it for a great photo. youtu.be/lT03APtzrdo
Scared of noise? Not really the issue. Most of us that have bought or invested in noise reduction software, is because we are up against a wall on what and how we photograph, and noise basically ruins the appearance.
When photographing wildlife, birds particularly, and the cropping is a necessity, fast shutter speeds are needed, and its usually the end or beginning of the day, hearing techniques such as “don’t shoot with fast shutter speeds” are useless. Believe me, we would do those techniques first if we could.
Given that I was considering much more expensive options of faster telephoto primes, or $5K plus camera bodies that handle low light better, etc. spending $120 was a much better option to improve what I do with what I have.
I agree with that. Everyone needs to have their priorities. It is worth noting that faster telephoto primes have other advantages besides reduced noise. They also AF in lower light, produce a shallower depth of field, and are often sharper and have better rendering and corners.
I agree DxO Deep Prime XD and Topaz Labs DeNoise AI are the best tools, but the best way is the correct exposure. I don not underexpose, because that’s means more noise in post-processing.
Sometimes you have to intentionally underexpose the shadows, which can be recovered albeit with some noise, to capture the highlights which aren’t as easily recovered, if at all, and with bigger problems than noise.
Noise? While I concur with this write up, I feel we, photographers, should not call “noise” most cases we call noise today. It’s just failed deBayerization and demosaicking of our primary raw processing app. As long as it is in zones of the image that are well within the camera’s dynamic range, it’s failed raw processing.
To be very direct: ACR does a bad noise, we think it is a force of nature or photons, and buy additional software to get a proper job done. Yes, I bought it too. But the issue really is ACR.
Noise is not a result of demosaicing, at least in the sense that noise comes from the inherent physics of reading a signal and the randomness of light. It is true that changing the demosaicing algorithm can change the noise pattern, but even a monochrome sensor without any color filter array will still exhibit noise.
JPdJ wrote: “As long as it [noise] is in zones of the image that are well within the camera’s dynamic range, it’s failed raw processing.”
No, it is not “failed raw processing”. Your comment demonstrates that you do not understand the nature of photon shot noise, which can be modelled by a Poisson point process whose signal-to-noise ratio is the square root of the expected number of photons.
The reason you don’t understand this is because you refuse to understand it, as evidenced by the following statement within your lengthy (and almost incoherent) comment on the article What Is Noise in Photography?:
JPdJ wrote: “Note. Please, no lecture about photons or quantum physics.”
photographylife.com/what-…ent-297342
EXPLANATION
Shot noise (aka Poisson noise) can be modelled by a Poisson point process, because it is the result of the discrete nature of photons. If N is the expected number of photons then:
* the variance of the actual number of photons → N;
* ∴ the standard deviation → √ N;
* the arithmetic mean of the actual number of photons is the least-squares-error estimator of N
hence, the signal-to-noise ratio
SNR = N ÷ √ N = √ N
If I print my photo noise seems to be less in the print than on the screen. Should the approach be different for photos to be printed rather than those to just be viewed on a monitor?
There are two factors there: the display size and printing itself. Even on a monitor, if the picture is displayed at a small size, it will exhibit less noise. And additionally with printing, noise does not show up as much because roughly, the inks average out a bit and you don’t get the pixel-level detail as you do on screen.
People have quoted about a 1-stop difference in noise visibility with prints, equalizing for display sizes and I think that’s roughly true based on my own printing. It also depends on the print. A canvas print will already have some texture from the canvas and obscure noise too.
My philosophy with prints is still to do the basic noise reduction methods that I always do, and if it’s meant for a print I just don’t go that “last mile” compared to screen display. But for the most part I think the approach is roughly the same.
Visit Jose Rodriguez Photo Printing on Youtube.
There is years of experience shared as a means to teaching practices to be successful.
in my opinion the best is to use your camera Raw editor to reduce noidse fand other specific raw edits then use lightroom or any other software to further enhance tour picture. In my case I nuse NX Studio from Nikon.
I totally agree. In fact, for all my shots I only use my Raw editor. I keep a close eye on noise reduction software because noise reduction interests me technically and because I sometimes want to know if I should get one. I definitely didn’t lie in the article in the sense that, while I feel I’ve gotten reasonably good at noise reduction in darktable, the output of DxO and Topaz in very high ISO cases looks a bit better at larger crops than what I can do.
Of course, most of the time I’m not at the extremely high ISOs, and in fact, what’s more, I find the light in such cases not as nice often as in better light. Nevertheless, I think these tools have their place.
It’s also worth noting that at one point, when I was just starting out as a photographer, darktable’s noise reduction facility was much poorer than it was today; it’s only when they perfected wavelet denoising with profiles that I felt I could be completely dependent on it, which also indicates that it’s the Raw editor as well.
I tried NX Studio and found DxO Pure Raw did a better job across every image. One of the advantages of Hi Res cameras (I love my D850) is the noise is smaller because the pixels are smaller.
What experiences do readers make with Nik Dfine?
I rarely use it. I wish it did a better job but wishing has never gotten me a pony either. ;-)
I find that Nik Dfine does a much better job than Lightroom or Photoshop. It seems to vary the amount of NR depending on the noise and detail in different areas of the image. It usually gives adequate results for me without resorting to selective application, although this is simple to do when required. I haven’t tried the Topaz or DXO AI offerings but assume they do an even better job.