It is crucial to set your camera properly if you want to take the highest quality landscape photos. However, with the large range of menu options and settings found in cameras today, it isn’t easy to find the optimal setup. This article covers the best camera settings to use for landscape photography, including many options that are “set it and forget it” parts of the menu that you rarely will need to adjust. Keep in mind that all of these are personal recommendations rather than absolute necessities, but they will be useful if you are trying to figure out where to start with your own camera in the field.
Before you read the detailed information later in this article, take a look below. This list outlines our recommended settings for landscape photography:
- Shoot RAW
- Set to 14-bit lossless compressed (if available)
- Turn off high ISO noise reduction
- Turn off lens corrections
- Turn off Active D-Lighting (or Dynamic Range Optimizer – goes by other names)
- Autofocus: Acceptable to use in good conditions
- Autofocus using the AF-ON button (or assign a button to that task)
- Select the autofocus point yourself
- Use single-servo autofocus in live view for nonmoving scenes
- Use continuous-servo autofocus for moving subjects (via the optical viewfinder if you have a DSLR)
- Manual focus: Use if autofocus is not giving you a sharp result
- Focus manually at 100% magnification in live view, with a tripod
- Picture Control: Set to its default style, or to the lowest possible contrast if you are a histogram maniac (though beware of underexposing)
- White balance and tint: Use whatever gives you a good preview (often just Auto), or find your camera’s UniWB if, again, you are a histogram maniac
- Turn on long exposure noise reduction, assuming that you are willing to wait twice as long for your camera to capture long exposure photos in exchange for fewer hot pixels
- Enable blinkies and the histogram
- Disable “rotate tall”
- Enable one-click zoom when you review a photo (if available)
Recommended exposure settings for landscape photography:
- Use manual or aperture-priority mode so that your camera doesn’t adjust the aperture automatically
- Set your aperture to balance depth of field and diffraction – typically, at a full-frame equivalent of f/8 to f/16 (but a larger aperture for nighttime photography, when you have no other choice)
- Keep your ISO at its base value. In most cases, turn off auto ISO
- Set your shutter speed to give you a properly exposed photo
- If your chosen shutter speed introduces too much motion blur, you’ll need to raise your ISO in order to use a faster shutter speed
- Use whatever metering mode you’re most comfortable with
- Adjust exposure compensation if your meter is recommending exposures that are too bright or too dark
The rest of the article covers all these options in more detail, including cases when you may want to use different settings than the ones outlined above.
Table of Contents
Detailed Video Tutorial
If you would like to skip this article and get straight to our detailed video tutorial, please check it out below:
1) File Type
First up is file type – one of the most important decisions you have to make while setting your camera. Here, the tradeoff is simple: Files with more detail also take up more space. For most landscape photographers, that’s a worthwhile tradeoff. Storage is cheap, and landscape photographers typically do not take an enormous volume of photos.
1.1) RAW vs JPEG
First off, for landscape photography, it is preferable to shoot RAW. It simply gives you the best possible image quality. When you shoot JPEG, you irreversibly harm the technical quality of every single photo you take, throwing away a significant amount of information which is a major why JPEG files take up less space to begin with). For a complete discussion on this issue – though, one that comes to the same conclusion – check our full RAW vs JPEG article.
1.2) RAW Compression
After deciding to shoot RAW files, you still have a couple other settings to optimize. The first is simply the compression level of your RAW photo. Here, cameras offer up to three options: uncompressed, losslessly compressed, and lossy compressed. Compressed files will be smaller, but lossy compression throws away some of the data you capture.
Are the differences noticeable in your photos? It depends upon your situation and the degree of post-processing you do. However, most landscape photographers will shoot losslessly compressed RAW files (assuming the camera allows it) or uncompressed (if the camera doesn’t have a lossless compression option). A large part of this is just psychological – knowing that you’re not sacrificing on image quality – because the differences will not be apparent to most photographers under normal conditions.
1.3) Bit Depth
Last is bit depth — an option, again, that you won’t find on every camera out there. However, if yours does let you select between different bit depths, you will get the best image quality if you pick the highest setting available. For example, many Nikon cameras let you pick between 12-bit and 14-bit RAW images, with 14-bit having more data. Though, again, the actual differences are smaller than you may think.
2) Focusing
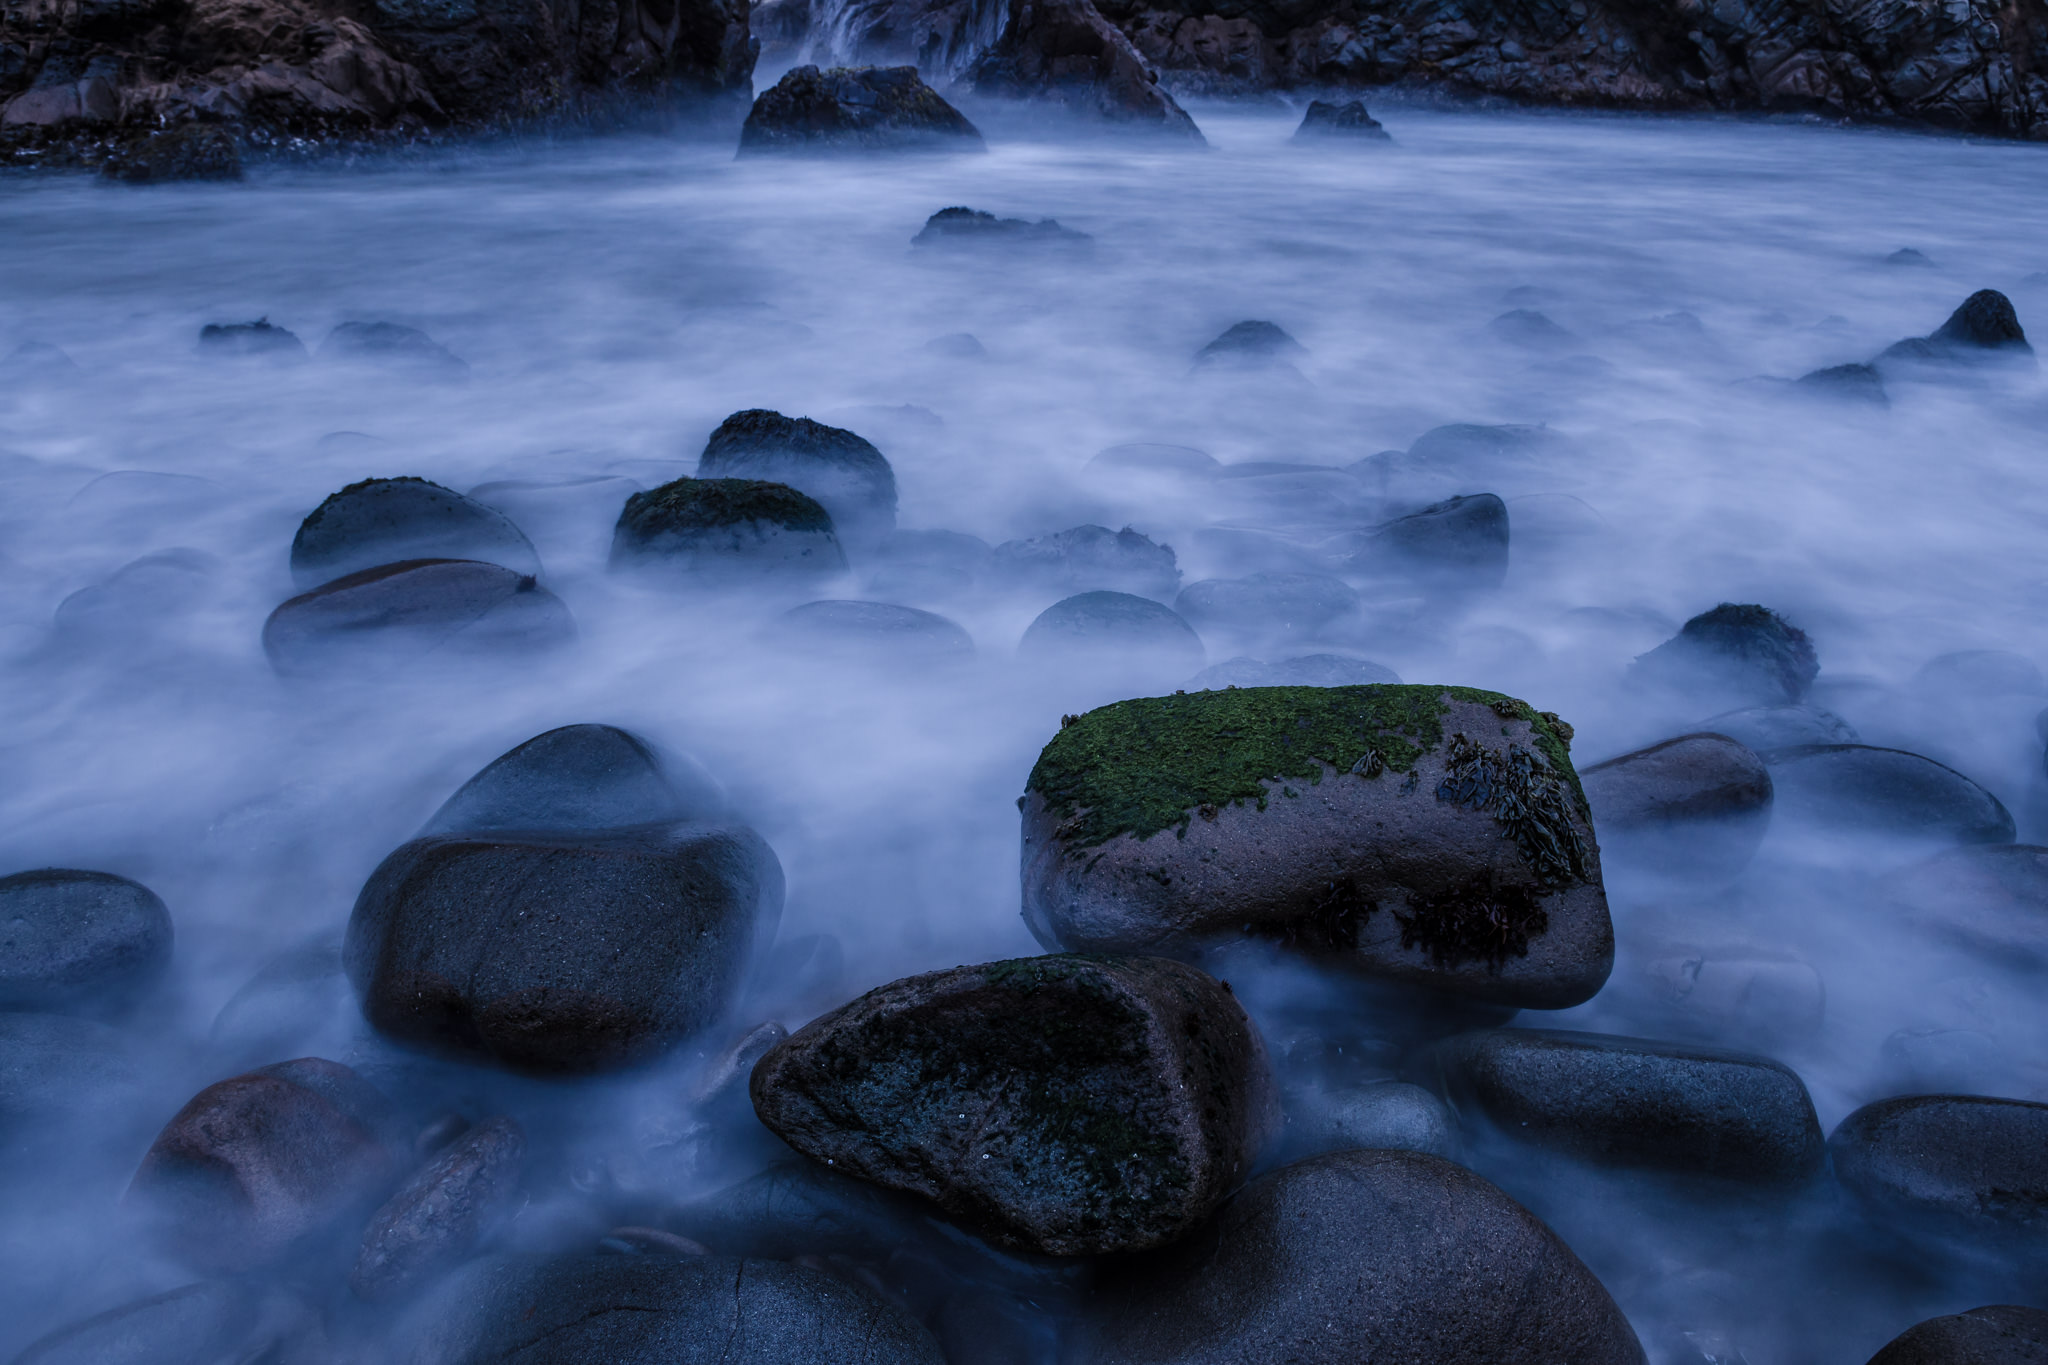
Focusing is a complex topic, but landscape photographers have it pretty easy. Although you may end up photographing some fast-moving scenes, such as ocean waves, the vast majority of landscapes you will encounter are stationary. That helps quite a bit. Still, you need to pay attention to your focusing settings if you want the optimal results. We have a complete article on focusing in landscape photography, but the information below should help as well:
2.1) Manual or Autofocus?
You can use either manual focus or autofocus for landscape photography and get good results. A lot of this is up to the personal preference of the photographer. If you don’t know where to start, our recommendation is to use autofocus unless it is starting to be inaccurate for your particular situation (for example, if it gets too dark outside).
If you do choose to focus manually, you should use a tripod and look at your LCD screen (live view or electronic viewfinder) at 100% magnification. Unless you have had a lot of practice with manual focus, you shouldn’t use a DSLR’s optical viewfinder for precision manual focus work.
As far as autofocus, you have more flexibility. Live view, optical viewfinders, and electronic viewfinders all work well for autofocus, and each has its own list of pros and cons. If you have time and battery life to spare, it typically is preferable to use live view (or an electronic viewfinder) to autofocus. It simply tends to be a bit more accurate on stationary subjects, though slower. However, the accuracy differences tend to be minor.
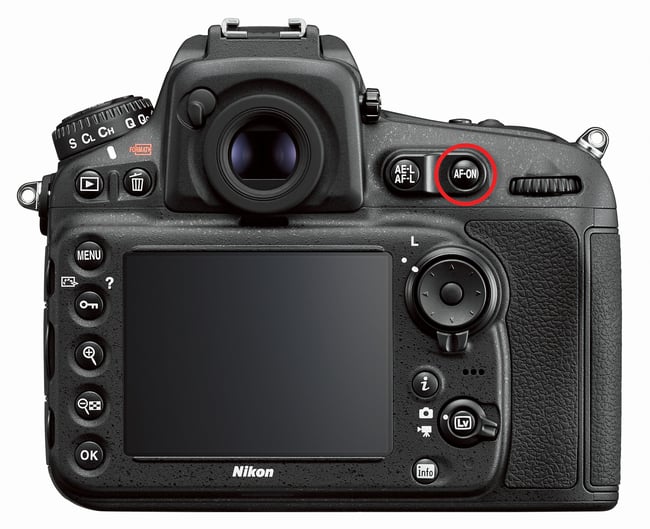
2.2) Assigning the Autofocus Button
By default, if you’re using autofocus, most cameras start to focus when you half-press the shutter release button. However, that is a flawed system.
The main issue is that this setup leaves you with a camera that tries to refocus every time you take a photo. You will need to turn off autofocus frequently on your lens in order to maintain the same focus over a period of time. Especially for landscape photography from a tripod, that can be quite frustrating! Once you pinpoint perfect focus point for a non-moving scene, you probably want to keep it there from shot to shot.
The fix is easy. Simply disable autofocus from the shutter release, and use a completely separate button to focus. On some cameras, this is the “AF-ON” button. If your camera doesn’t have it, don’t worry; you’ll almost always be able to program a custom button to do the exact same thing. (On Nikon, this typically involves assigning the AE-L/AF-L button, for example.)
2.3) Single-Servo or Continuous-Servo?
For landscape photography, you’ll typically be dealing with stationary subjects. So, you probably don’t want your autofocus system to focus constantly, adjusting itself moment-to-moment (as would be useful for something like sports photography). Instead, it typically is ideal to lock onto your subject accurately the first time, then stay unmoved.
For that reason, use single-servo focus for landscape photography by default. There is no benefit to a focusing system that might jitter unexpectedly as you focus on something that’s staying still.
However, be aware that some cameras will not let you take a photo in single-servo mode unless they think you’ve successfully nailed focus. The problem is that cameras are often wrong about whether or not you’ve nailed focus. So, unless you can disable this option (which – it’s important to note – most cameras allow you to do), you might end up shooting in continuous servo mode by necessity.
It is worth mentioning that some cameras have an “auto” option that judges whether the scene is stationary or moving, and it picks between single-servo or continuous-servo accordingly. This feature tends to be pretty accurate, but landscapes are usually stationary regardless, so there isn’t much reason to set this rather than just single-servo.
2.4) Focus Point Selection
Nearly all cameras on the market have a built-in option to predict your subject, then focus on it (what you might call “auto-autofocus”). It is not always accurate – nor even almost always accurate – and you should avoid it. Instead, pick your autofocus point for yourself. This applies whether you’re focusing through a viewfinder or via live view; don’t leave leave such an important decision to your camera.
If you are using single-servo autofocus, you only have the two options: selecting your focus point yourself, or letting your camera try to guess your subject.
If you are using continuous-servo autofocus, depending upon your camera, there may be many additional focus point selection settings available – too many to cover individually in this article (things like 3D tracking, dynamic area autofocus, and so on). Check out our article on autofocus modes if you want to learn more.
3) Color, Contrast, Sharpness, and Noise
Your camera has plenty of color and contrast settings that you can adjust. The good news is that most of them don’t affect your final photo if you shoot RAW. However, some may still have a tangential effect on your images, which makes them important to cover.
3.1) White Balance and Tint
With RAW files, you can set your white balance and tint however you want, and you can adjust them back easily in post-processing. In other words, don’t worry about shooting at the “wrong” white balance or tint in the field.
However, these settings still affect the preview when you review an image in the field. They also show up as the default values when you load the photo onto your computer. For this reason, you may want to pick the Auto setting if you want the photos to look normal when you review them, or a constant white balance setting if you want to notice changes in the light.
Side Note:
One advanced technique involves setting your camera to something called “unity white balance” or “UniWB” by adjusting white balance and tint to a specific point where the result appears quite green. You can find tutorials online on how to set UniWB for your particular camera. The benefit here is that your in-camera histogram will match your actual, RAW histogram more closely. However, if you do this, your photos will appear far too green when you review them in the field (unless you use a magenta color filter on your lens to compensate).
3.2) Picture Style Settings
This camera setting is known by many names: picture styles, creative styles, picture controls, and simulations, among others. On all cameras, though, the options within this setting affect the general “look” of an image, from contrast to sharpening. Some common picture styles you may find on your camera are “standard,” “faithful,” “portrait,” “landscape,” “flat,” “neutral,” and so on. Other cameras may have simulations that attempt to replicate the look of a particular type of film.
This setting has absolutely zero effect on a RAW photo. However, once again, it does affect the way a photo appears when you review it in-camera. That makes it important to set correctly.
One school of thought says to leave everything at the flattest possible settings: low contrast, low saturation, low sharpening, and neutral style. This will give you the most accurate histogram, but the photo you review can look quite dull (and, if you’re not careful, you’ll end up underexposing many of your photos, since the lack of contrast can fool you into thinking that a dark image is the proper brightness).
Another school of thought says to use this preview to mimic, to as much of a degree as you can, the way your final, edited photo will appear. This makes it easier to visualize your final result in the field, although you will sacrifice some accuracy in the histogram. Most photographers choose this route, or something close to it. However, neither approach is incorrect; just do whatever works best for you.
3.3) Active D-Lighting, or Dynamic Range Optimizer
Most cameras have a separate way to give your photos the appearance of a greater dynamic range. Its name varies from camera to camera, but it is commonly called something like Active D-Lighting or Dynamic Range Optimizer.
Turn this setting off. That is very important.
Unlike white balance, tint, and picture controls, this setting affects the way your camera meters a scene, at least with certain camera brands. Turned on, especially at a strong value, your camera may underexpose your photo up to a full stop beyond what you would want. That is not ideal, whether for landscape photography or any other genre, so you should leave it off.
3.4) Other Settings that Don’t Affect RAW Photos
There is no need to go into too much detail for every setting that only affects JPEG photos. However, there are a few others.
High ISO noise reduction makes no difference to a RAW photo. The same is true for in-camera lens corrections, such as distortion and vignetting profiles.
That also applies to your choice between sRGB and Adobe RGB. Despite what you may hear, this setting only affects the colors in your photo when you’re shooting JPEG. It has no impact on your RAW photos at all, except, once again, on the image you review in-camera. Since Adobe RGB has more total colors, I set it by default, but the only reason I do so is to potentially improve my histogram the slightest bit. The difference here is negligible.
3.5) Long Exposure Noise Reduction
Next up is long exposure noise reduction, and, surprisingly, this one does affect your RAW photos.
When you shoot long exposures, you will see more noise, in your images, and you also may notice more hot pixels. Long exposure noise reduction helps eliminate hot pixels and reduce noise to a degree. It works by taking two photos in succession – one normal, and one with your shutter closed – and subtracting the dark (noise-only) photo from the regular one. The benegit is a reduction in noise and hot pixels when your shutter speed is especially long.
Because long exposure noise reduction takes two photos in succession, it requires twice as long to capture every photo. If you have some time to spare, you might as well enable this option. On most cameras, the long exposure noise reduction does not activate unless your exposure is longer than one second.
Your camera’s playback (review) option is a valuable tool, and there are a few ways to optimize it and make your life as easy as possible. None of these settings directly affect the actual RAW data you capture, but they will improve your ability to judge an image when you review it in the field.
4.1) Blinkies and Histogram
If your camera doesn’t do so by default, I recommend enabling the “blinkies” in your review menu (called “highlights” on some cameras). With this feature turned on, overexposed areas in a photo will flash black and white to indicate that you have lost some detail. It is, essentially, a version of the histogram that is easier to visualize (although does not convey as much information; enable your histogram as well).
4.2) Rotate Tall
One frustrating option that most cameras have enabled by default is the “rotate tall” setting. Here, every time you take a vertical photo, the camera automatically rotates the image when you review it. That looks something like this:
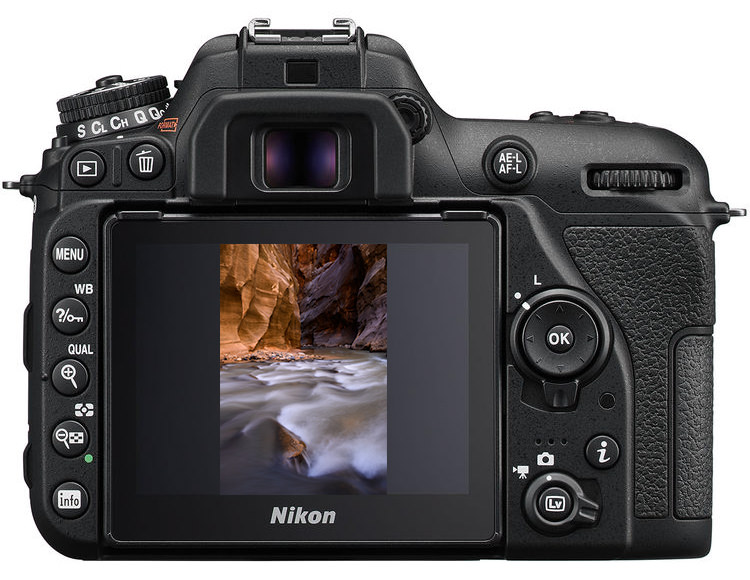
In theory, this may seem like a good idea. It lets you keep your camera horizontal and cycle through photos more quickly without rotating the camera in order to review vertical images. However, in practice, it is frustrating and slow to use.
The reason? If you have your camera on a tripod, and you’re taking a number of vertical photos, they’ll all flip anyway. When you review your photos, they’ll look like this:
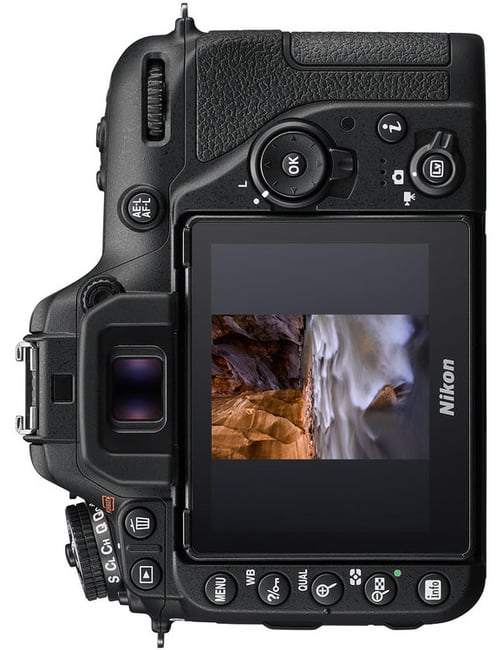
That is not ideal. On most cameras, the image doesn’t automatically turn to the proper direction. If you are taking a series of vertical photos (say, on a tripod), you would need to twist your head sideways to view the images properly. Instead, it is better just to disable the “rotate tall” option. Although this might seem like a small thing, it is worth changing if you have not done so already.
4.3) One-Click Zoom
When you review your photos in the field, you often will want to magnify them to inspect the pixel-level sharpness of the photo. Some cameras make this much quicker by offering a “one-click zoom” option. If yours has it, this is a fast way to evaluate photos that you just captured, speeding up your workflow in the field.
Arguably the most important settings on your camera are the ones related to exposure, and the brightness of your final image. This includes the obvious – shutter speed, aperture, and ISO – as well as things like metering and exposure compensation. While most of the settings covered so far are “set it and forget it” in nature, some exposure settings need to be adjusted constantly.
Side Note:
If you’re not yet familiar with aperture, shutter speed, or ISO, you may wish to read our introduction to exposure before anything else.
5.1) Aperture
Aperture is the most important setting in all of landscape photography, since it affects so many different parts of an image, including exposure and depth of field.
For landscape photography, most likely, your goal will be to get as much depth of field as possible, while also losing the least amount of detail due to diffraction. That’s a tricky balancing act, but the typical result is that you’ll use an f-stop of around f/8 to f/16 (full frame equivalent) for most landscapes, at least during the day. At night, you’ll probably need to use wider apertures simply to let in enough light, even using a tripod.
There is a mathematically precise way to balance depth of field and diffraction, as we have covered before. But this is a relatively advanced technique, and not one that beginners need to worry about just yet.
The bottom line is that your aperture will vary from landscape to landscape. If you need a lot of depth of field, use a smaller aperture like f/11 or f/16. If you are trying to capture every last bit of light for nighttime photography, you may want to use your lens’s largest aperture – something like f/1.8 or f/2.8.
5.2) Shutter Speed
Along with aperture, the other camera setting that affects how much light you capture is shutter speed. This is simply the amount of time that your camera sensor is exposed to the world when you take a picture. It is a big deal for every type of photography, not just landscapes.
Most of the time, it is preferable to choose your shutter speed after selecting your aperture, as, essentially, a way to compensate for whatever f-stop you are at. That’s because shutter speed does not affect nearly as many variables in a photo as aperture does. With a tripod, it usually does not matter whether you are at 1/4000 second exposure or 4 seconds, so long as the photo’s exposure looks good.
The one exception is if your landscape has a significant amount of motion in it, and you are worried about motion blur harming your image. In that case, you might be restricted to a certain range of shutter speeds in order to capture a sharp photo, resulting in a photo that is too dark. In that case, you will need to brighten your photo some other way. That is where ISO comes in.
5.3) ISO
After you’ve reached your aperture and shutter speed limits, the most obvious way to brighten a photo is to raise your ISO.
ISO is not a part of your luminous exposure, since it doesn’t impact the amount of light that reaches the camera sensor. But it does affect the brightness of your final photo – a similar result to brightening the photo later in post-processing (though typically with better quality).
So, what ISO should you use? Ideally, you should use your camera’s base ISO and capture more light via shutter speed. If that doesn’t work, though – such as with nighttime landscape photography – you may need to raise your ISO in order to capture a bright enough photo.
5.4) Metering
The way your camera measures the brightness of a scene (and then recommends various exposure settings) is through a process called metering.
You can alter the way that your meter evaluates a scene by changing your “metering mode.” The most common modes are evaluative/matrix, center-weighted, and spot metering. Broadly speaking, each of these options simply focuses on a smaller and more consistent area of your scene when deciding on a meter reading.
Everyone has different preferences for their metering system. Personally, I tend to leave mine in evaluative/matrix metering mode, since it considers the greatest amount of information before providing the reading. However, other photographers prefer center-weighted for its extra consistency (which makes it easier to predict). There also are plenty of photographers who use spot metering, since it is the most precise way to meter off of an individual element of your image – ideal when you know exactly how bright you want a certain part of the photo to be.
Most of the time, you will end up using the same metering mode from photo to photo, but the one you pick depends heavily on your personal preferences. All of them can work equally well.
5.5) Exposure Compensation
Exposure compensation is simply a way to tell your meter that its reading of the scene is resulting in too dark or too bright of an photograph. So, if you dial in +2.0 exposure compensation, you will change every meter reading to suggest an exposure that is two stops brighter than it would otherwise recommend.
This is very useful for landscape photography. Say that you are photographing a sunset, and your camera consistently tries to overexpose the scene (blowing out detail in your highlights). All you need to do is dial in a negative exposure compensation – something like -0.7 stops – and your new meter reading will suggest a more accurate exposure.
6) Camera Modes
Depending upon which settings you want the camera to automate – particualrly shutter speed, aperture, and ISO – you will need to switch between different camera modes (often via a mode dial on the top panel of your camera). For example, rather than picking your exposure settings manually, you can allow your camera to choose them for you. But should you? That is a trickier question.
6.1) The PASM Dial Options
To pick which settings are automated, and which you control manually, look for the “PASM” settings on your camera (again, frequently on the mode dial on the top of your camera). Specifically, this stands for Program mode, Aperture-priority, Shutter-priority, and Manual. This setting determines whether your camera automatically sets your aperture, shutter speed, both, or neither.
Again, perhaps the most important setting in photography is your aperture. In nearly every situation, you will care quite a bit about the specific aperture that you use for a photo, and you certainly don’t want your camera automatically adjusting it as the light changes.
For that reason, I recommend shooting in a mode where the camera never takes control of your aperture – either manual mode or aperture-priority. The next question, then, is if you’re fine with a camera that automatically controls your shutter speed to match the meter.
Some people are, and some people aren’t. Personally, I generally don’t have a problem with my camera controlling my shutter speed, so long as the result is no different from how I would set things manually. (Note that you can use exposure compensation to correct a photo that is too bright or dark, too.) If aperture-priority mode is quicker than manual, yet gives the same result, why not use it?
Manual mode still has many uses, though. For example, don’t use aperture priority if your camera meter is wildly inaccurate or inconsistent, such as for nighttime photography. Also, if you need the exact same exposure for several photos in a row, manual mode is a good way to keep things locked down.
Ultimately, though, this is a personal preference. Some photographers only shoot in manual mode, while others prefer aperture-priority as often as possible. Either way, the end result – at least for advanced photography – is that you don’t want your camera to throw any surprises your way. That is why it is best to avoid full auto mode and learn how to operate your camera semi-manually or manually.
6.2) Auto ISO
In every PASM shooting mode, including manual, you will be able to set your ISO to be manual or automatic. For tripod=based landscape photography, manual ISO (set to its base value) usually works. Although Auto ISO can be extremely useful, it is mainly for genres like sports and wildlife photography where you are at higher ISO values already.

Conclusion
If it is not clear by now, there are a huge number of camera settings and menu options available. The better you understand them, the easier it is to turn your vision into reality while taking landscape pictures in the field.
Of course, the nature of photography is that none of these suggestions will apply all the time, in every single case. There is a reason why cameras offer so many different options. Even settings like one-click zoom – which I recommend that you keep turned on by default – can be disabled, since some photographers simply don’t like it or need it.
You also will find many other ways to customize your particular camera to your shooting style. You can program individual buttons to put useful features at your fingertips, and even create custom menus to group together the settings you access most frequently. All of this changes so drastically from photographer to photographer (and camera to camera) that it is not possible to provide totally universal suggestions, but you should know that the options are almost limitless.
The important point is to change your settings for a reason and understand the adjustments you make. When your camera settings are optimal, you will see a direct improvement in the quality of landscape pictures you take, as well as the speed of using your camera in the field. That, certainly, is something worth getting right.
If you have any questions about our recommended settings for landscape photography, including menu options that are not covered above, please feel free to ask a question below.
Hi, I’m primarily a macro photographer, only a hobby, and when I’m out in the field looking for subjects I see stunning landscapes, I have taken photos of those landscapes but they come out like holiday snapshots. I have watched countless videos and read many online articles, yours is by far the most informative I have found by a long way, I now have a better understanding of how to take landscapes and now need to put it in to practice, thank you.
Dear Nasim.
Thx a lot for, I appreciate Your great amd helpful articles.
I’m just switching from D750 to Z6 ii and painfully miss two functions I have on D750 resp D600.
First, the ISO easy by configuring the front wheel simply for changing ISO without having to press the ISO button additionally.
Somehow I prefer this way over the auto ISO, though thats a great function.
Second, even more important for me is the missing lock for the single focus point on the Z6 ii. I almost always select the focus for my subject by pointing to it with the centered focus point and fixing it with AF-on.
Without the lock its easily displaced and one has to center it again.
Any ideas about an update by Nikon ?
Many thx, regards wicki
Thanks for sharing love the shots.
Great article thank you. I have just purchased a Sony 7riii and the menu options are vast and mesmerising. Your guidance helped cut through to the important settings. Regards. Mick. UK
Hi Spencer
Your tips are EXCELLENT!. Thank you for posting
Didn’t you produce a video on this? If so I cannot find it.
Bob
Thank you, Bob, much appreciated! I did work on a landscape photography video course that we launched on Photography Life last year
You may have seen the trailer and be thinking of that. So far, it’s the only video I’ve done on this topic.
Spencer I appreciate your time and effort in writing articles to educate. Thank You. I have a question that perplexes me. I like to shoot the Aurora when it’s possible, don’t travel to do it, just try to get what i can from where I live, in the northern part of the states. My thick head can’t understand why the wide open aperature works for a, basically, landscape shot. Can you explain?
Happy to hear it, thank you!
Good question. You are right to be puzzled as to why landscape photos are almost universally shot at small apertures, except for the sole case of night photos. The simple answer is that it still isn’t ideal to shoot night photos at wide apertures like f/2.8, and you’ll often deal with very tricky depth of field issues. (This is one reason why it helps to shoot at ultra-wide focal lengths and minimize nearby foreground elements at night.)
However, you just don’t have much of a choice. If you shoot at something like f/8, your photos will be extremely dark, nearly pitch black, even at high ISO values and long shutter speeds. I routinely shoot nighttime photos at f/2.8, ISO 3200, and 25 seconds, and the photos are still barely bright enough to see the frame properly. If you’re photographing something like stars or the Northern Lights, too, you can’t just use a longer shutter speed. It will cause star trails or a featureless blob for your aurora.
I hope this helps!
Excellent article. Thank you very much !
Glad you enjoyed it!
Nice article. I was curious about the impact these settings have on RAW files. I only find one mention (in this article) stating that a setting would impact a RAW file (Long Exposure Noise Reduction). From all I’ve read elsewhere, NONE of these settings should impact the RAW file itself. They would only impact the rasterized version of the RAW file (jpg, tiff, png, etc). Please correct if I’m wrong.
Thank you – that’s quite correct. They all impact your JPEG preview in-camera (the image you’ve reviewed), but only the long exposure noise reduction impacts the RAW file itself (and Active D-Lighting can impact your meter). We’ve covered the settings which affect RAW files in the past as well: photographylife.com/which…raw-photos
Hi Spencer, Regarding your advice to turn “off” Dynamic Range Optimisation (DRO) …
Your caution about the potential for this setting to impact the way the camera meters the scene does not apply to the DRO setting on Sony cameras. I gather, from your comment, that it does apply to the Nikon setting for Active D-Lighting.
In the case of Sony’s DRO setting, it applies an “adaptive tone curve … to expand the range of tones in an image beyond the ones that a standard tone curve would include.” More here: www.dpreview.com/artic…ge-capture
The reason one might prefer to leave the Sony-DRO setting in its Auto setting is that it doesn’t actually affect the RAW file – but it does make the (JPG-based) histogram and preview image look more “realistic”, esp. for a high-contrast scene … and, in its Auto setting, it will be applied only if the camera decides it might be useful (whilst imparting no harm to the RAW file if, in fact, it wasn’t !)
Regards, John M
Yes indeed, and I think we might have talked about this before. If this option on your camera doesn’t affect the camera’s meter, you can leave it on or off as desired – it only impacts the JPEG preview and in-camera histogram. Turning it on in that scenario would give you a good idea of which highlights you’ve preserved successfully. Thank you for adding this!
Nice article.
I teach a free “Landscape for Beginners” seminar for fellow residents at a snowbird RV resort in Arizona.
I’d like your permission to provide attendees with a copy of this article (with full credit, of course) as “further reading” at the end of my seminar.
If you are referring to a printed copy, that is not a problem! If you’re planning to republish online, we request that you do not, since it is harmful from Google’s perspective. Thank you for asking.