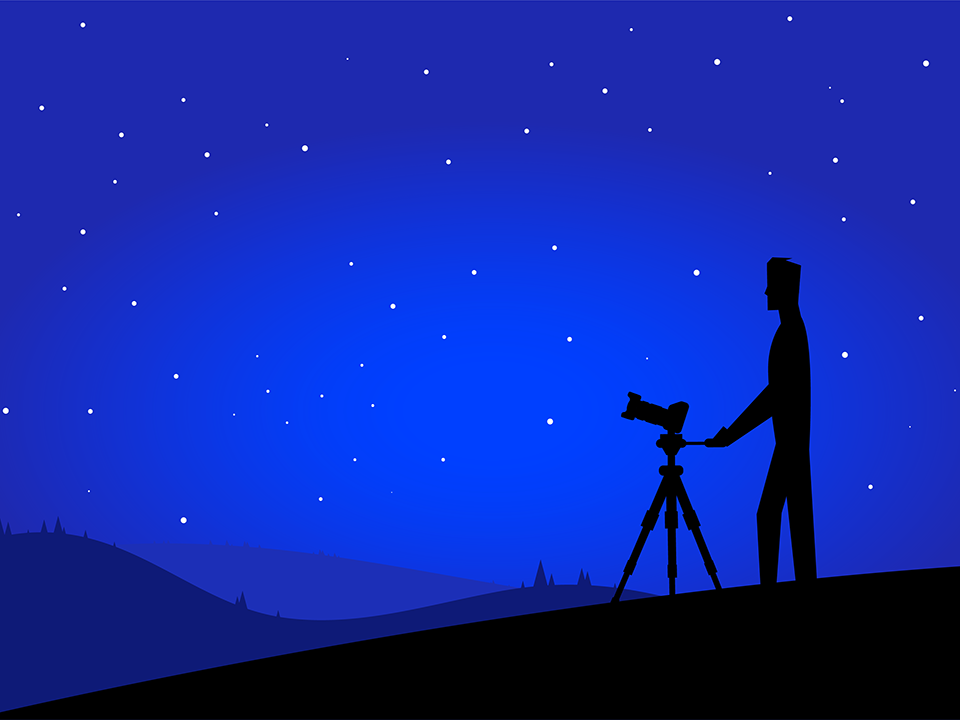
Anyone who has ever tried to take pictures of the night sky knows that it can be a challenge. If your camera settings aren’t optimal, you may end up with a dark photo, motion blur, or unsharp corners. Things get even more difficult if you want a sharp foreground, or if you try to capture deep-sky pictures of distant interstellar objects. Hopefully, this article will give you a good idea of how to set your camera properly for astrophotography.
Before getting too deep into specific recommendations, keep in mind that the techniques in this article are ideal for capturing sharp stars from a landscape photography perspective (where stars aren’t the only thing in your photo). If you’re interested in astrophotography with a telescope, or something like star trails in a landscape photo, you may want to seek more specialized information than the camera settings below.
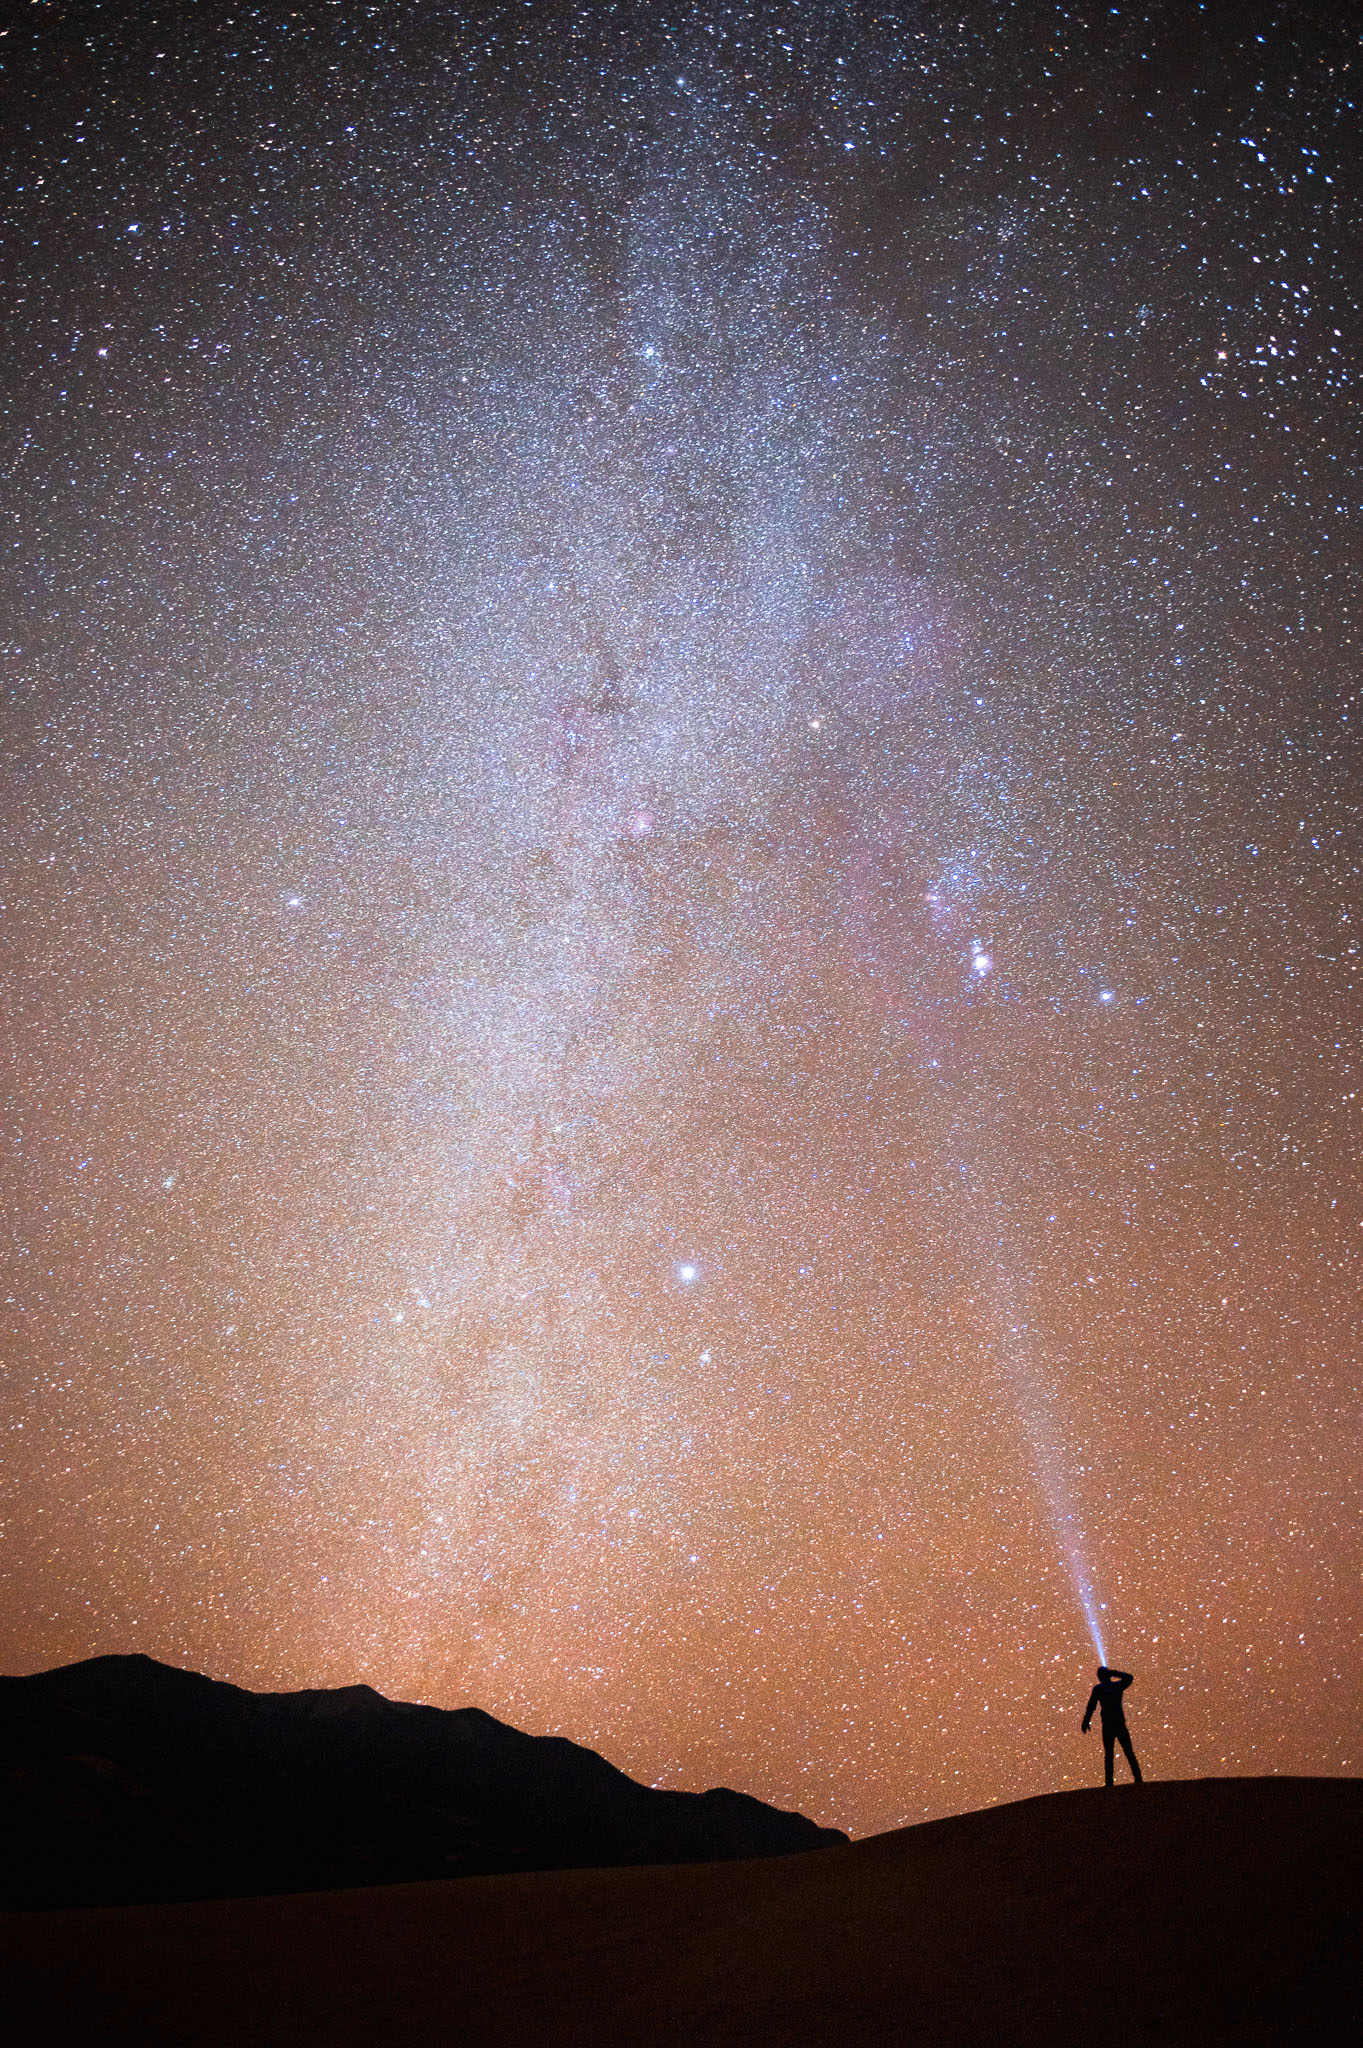
Table of Contents
Focal Length
You can shoot nighttime photos at any focal length, but it depends upon the type of image you want to take.
If your goal is a classic landscape with the Milky Way overhead, and you want everything to be as sharp as possible, the best plan is to use your widest possible lens. Ultra-wide lenses offer a few major advantages for photographing the night sky. First, since they’re so wide, you’ll be able to include more of the Milky Way in your images. Second, because wide lenses have more depth of field, you’ll have an easier time getting the foreground to appear sharp. And third, wide lenses let you use longer exposures before you see any blur from star movement, letting you capture more total light.
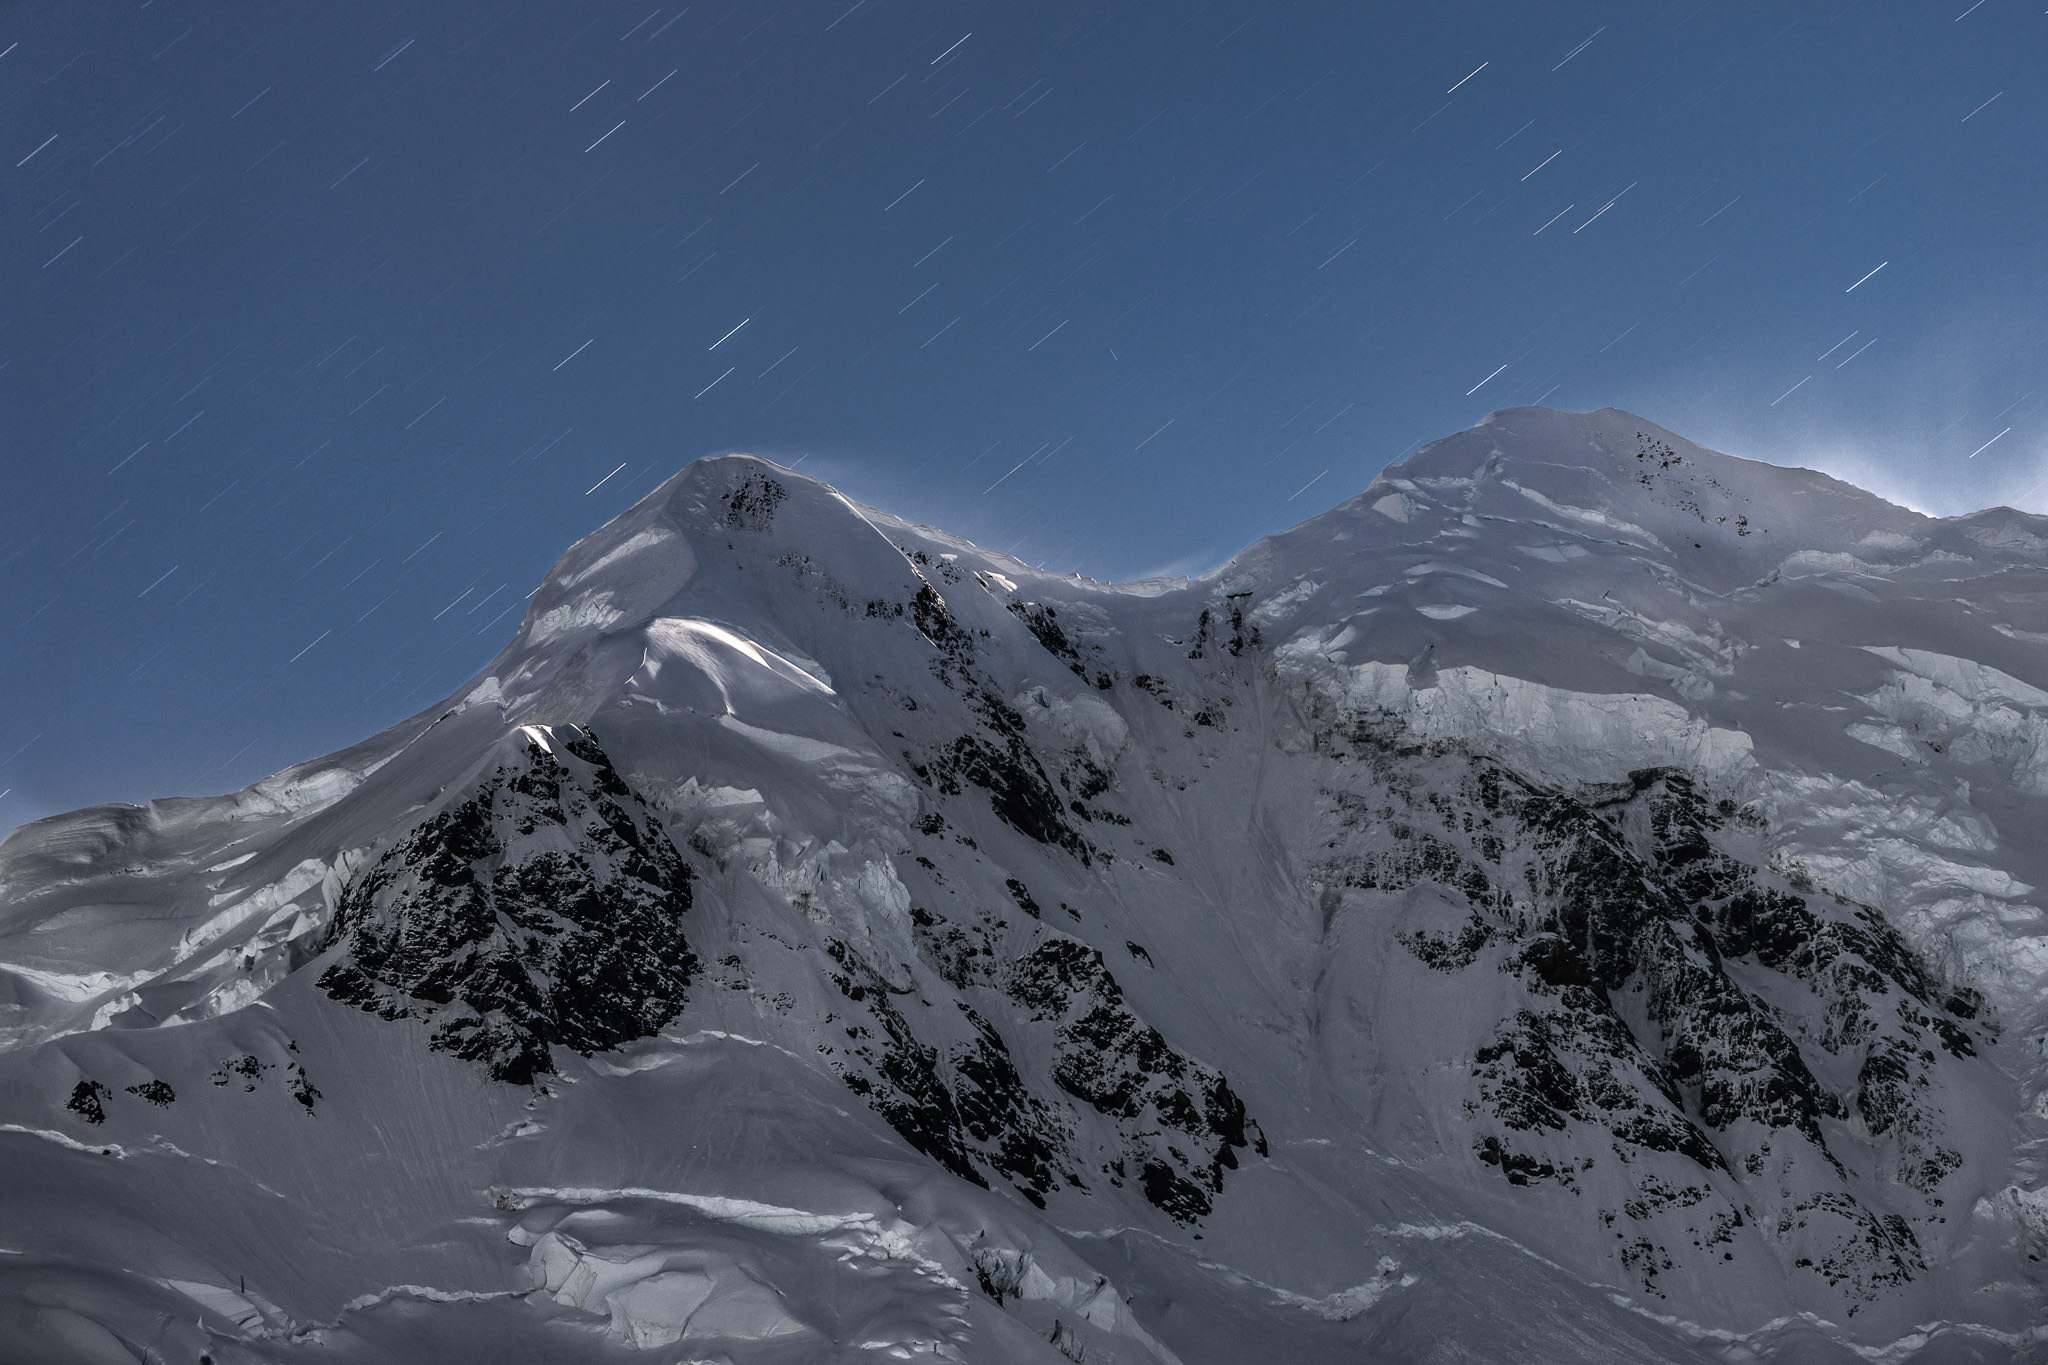
Personally, my favorite focal length for this type of photography is anything 20mm and wider, but longer lenses can work, too. And if you don’t mind blurry stars – or you’re intentionally trying to capture that effect – you may prefer a longer focal length instead. For example, I took the image below at 86mm (and used a particularly long exposure) to get motion in the stars:
And if you are doing deep-sky astrophotography instead, trying to capture distant objects in the sky, a long lens is obviously the way to go.
Takeaway:
- Use a wide angle lens in order to capture as much of the sky as possible, increase your depth of field, and use longer shutter speeds.
- If you’re trying to capture motion blur in the stars, or you have an equatorial mount (to compensate for Earth’s rotation), use whatever focal length works best for your composition.
Aperture
Normally, aperture is one of the settings you have to worry about the most in photography, at least when it comes to landscapes. With astrophotography, though, it’s a bit easier, since you will almost always want the widest aperture on your lens (or close to it).
The stars are simply so dim that you need to do everything possible in order to capture them as bright as possible. Ideally, your aperture would be f/2.8 or wider, although lenses with a maximum aperture of f/4 can work in a pinch.
Unfortunately, using your lens’s widest aperture comes with a couple issues. Most of all is that your image quality won’t be quite as good, especially in the corners of the photo. And, if you’re including a foreground in your image, the thinner depth of field is not ideal.
So, if your lens’s maximum aperture is something like f/1.4 or f/1.8, you may want to test and see how well it performs at those apertures. Pay close attention to vignetting (dark corners) and coma (smeared stars in the corners). If either of these issues is especially bad, you may want to use an aperture that is about 1/3 stop or 2/3 stop smaller. But if your lens’s maximum aperture is something like f/2.8 or f/4 instead, it usually is not a good idea to stop down any further – 1/3 stop at most – because you’re already pretty short on light.
You’re balancing two goals here: capturing sharper corners versus gathering more light. There is no right answer, and it depends quite a bit upon your lens and personal preferences. If you’re unsure, you might want to take pictures at a few different aperture settings in the field.
Personally, since my main wide-angle lens has a maximum aperture of f/2.8, that’s my typical aperture for astrophotography. But when I shoot Milky Way pictures with my Nikon 20mm f/1.8 lens instead, I’ll use anything from f/1.8 to f/2.2, depending upon the tradeoff I’m willing to make on a given day.
Lastly, if you are doing deep-sky astrophotography, you have more leeway. However, wider apertures are still preferable, since they can cut down your exposure times dramatically. Depending upon the sharpness of your lens and the dimness of your subject, use an aperture around f/2.8 to f/5.6. This one depends very strongly upon your subject, though.
Takeaway:
- Shoot at the widest aperture setting possible, especially if your lens’s maximum aperture is in the range of f/2.8 to f/4.
- If your lens’s maximum aperture is in the range of f/1.4 to f/2, that advice still holds – but make sure you are comfortable with the amount of coma and vignetting in your images. To get slightly sharper corners at the expense of capturing maximum light, use an aperture that is 1/3 to 2/3 stop smaller.
Shutter Speed
The next of the “big three” settings is shutter speed, which is crucial for determining the brightness of your nighttime photo and the amount of motion blur in the stars.
Stars move faster across the sky than you’d think. Although it would be nice to use multi-minute exposures of the Milky Way to capture as much light as possible, you are realistically confined to much shorter shutter speeds if you want sharp stars (and if you’re not using an equatorial mount).
So, how long of a shutter speed can you use before capturing motion blur? It depends upon a number of factors.
First, as mentioned earlier, is your focal length. Wider lenses allow you to use longer shutter speeds before you start to see movement in the stars. A second factor is the direction you’re facing, since stars rotate more slowly around Celestial North and Celestial South (essentially the North Star if you’re in the Northern Hemisphere).
Another factor affecting your shutter speed is your personal willingness to allow motion blur in your photos. I know some photographers who can’t stand any movement at all. Their shutter speeds at night may be no more than five or ten seconds. Other photographers don’t mind star movement as much, and they’re more willing to push the shutter speed in the 20-30 second range for the same shot.
However, there is a point of diminishing returns. Once the star has moved completely away from its original position, a longer shutter speed won’t make it any brighter (aside from the illusion of brightness due to its larger, blurred size). Since many astrophotographers want to capture as many dim stars as possible, it’s important to know that an ultra-long shutter speed is not really the answer (again, assuming you’re not using an equatorial mount). Instead, it might just brighten background light pollution, harming the visibility of the stars.
Ultimately, your shutter speed will be in the range of 10-25 seconds for most nighttime work, with potentially longer or shorter shutter speeds depending upon your situation. Personally, with my 14-24mm f/2.8, I tend to use a shutter speed of 20 or 25 seconds, but it does depend upon the image.
Perhaps the best solution is just to do trial and error in the field. Just take a couple test photos to make sure you’re comfortable with the level of blur in the stars, then move to the creative side of things instead. Although there are some calculations to help you find the optimal shutter speed – some of which are quite accurate, taking the direction you’re photographing into account – it’s often faster just to guess and check. (Though this can get complicated if you’re changing directions frequently or creating a panorama across a wide swath of sky.)
Takeaway:
- Depending upon factors like focal length and composition, you’ll usually be in the range from 10 to 25 seconds if you want all the stars to be sharp.
- You can use in-depth calculators to find the optimal shutter speed, but it’s often quicker just to guess and check.
ISO
It’s often complex to pick the perfect ISO for image quality in photography, and that’s true with the Milky Way as well. There are two schools of thought here:
- Shoot at the ISO that gives you a photo of the right brightness – usually in the range of 1600 to 6400, since it is so dark at night
- Shoot at the ISO that prevents as many stars as possible from “blowing out” – usually in the range of 100 to 400
It’s usually best to do exactly what you would expect and shoot at a high ISO for nighttime photography. However, although it sounds crazy, there are some cases in which you may want to shoot Milky Way photos at base ISO (resulting in a very dark photo) and brightening it in post-production instead.
The following explanation is more technical than many photographers need to worry about. However, I’m including it here because some readers may be interested in knowing how to capture stars with as much color detail as possible.
Specifically, some cameras are close to ISO invariant at low ISOs. This means you see no difference between brightening the photo in-camera with a higher ISO versus brightening in post-processing software like Lightroom or Photoshop. The idea is that higher ISOs in-camera will blow out some detail in the stars, so you might as well shoot at a lower ISO and brighten it later if you have the option. Again, if your camera is ISO invariant, there’s no image quality penalty when you do so. (It’s worth pointing out that most cameras are not ISO invariant to such an extreme degree, but some are close.)
Personally, my Nikon D800e is close to ISO invariant, so this is something I occasionally do. However, it’s not totally invariant at lower ISOs, so I typically don’t bother with this technique. I just shoot at higher ISO values instead, like ISO 1600 (the highest “real” ISO on my camera, as I explained in the ISO invariance article).
That is probably the route you should go as well – just using a high ISO and not worrying about it further – unless you know the nitty-gritty details of your camera sensor and want to gain that extra ounce of detail in your stars.
Takeaway:
- Most photographers should just shoot at whatever ISO value results in bright nighttime photos, typically in the range of ISO 1600 to 6400.
- However, if you know that your camera sensor is ISO invariant through part of its range, it can be preferable to shoot at the lowest ISO that is invariant (the highest “real” ISO) on your camera instead, then brighten the photo in post-production.
Other Settings
Although those are the most important camera settings to keep in mind for astrophotography, they aren’t the only ones that matter. The most major is to shoot RAW rather than JPEG, of course. If you aren’t already doing that – especially for difficult nighttime work – read our RAW vs JPEG article.
It’s worth mentioning that many camera settings don’t affect RAW photos in the same way as JPEGs – they aren’t baked into the file, so your choice won’t impact your ultimate image quality. This is true of things like high ISO noise reduction, white balance, and Picture Control/Style. So, assuming you are shooting RAW, you have far fewer details to worry about in the field.

However, some behind-the-scenes settings do still affect RAW images, including one which is practically made for astrophotography: long exposure noise reduction. This option takes two photos in sequence – the first of the scene in front of you, and the second a “dark frame” with nothing in it. This dark frame may appear empty, but it has noise and hot pixels which are similar to those in the first photo. Your camera subtracts the dark frame from the first image, resulting in a cleaner image.
Long exposure noise reduction does impact RAW images, which makes it an important setting to keep in mind. However, because it takes two images in sequence, it also doubles the amount of time spent capturing each image. This might not sound too bad, but it can add up over time to be quite annoying. Instead, some photographers capture dark frames themselves and subtract it in their post-processing software later. Others just leave it turned off. But no matter what you choose, it helps to know that long exposure noise reduction is an option.
And that wraps up the most important camera settings. So long as you’ve focused properly and you’re shooting RAW, all you really need to worry about are aperture, shutter speed, and ISO – not too different from everyday photography. Now, you just need a good composition.
Takeaway:
- Shoot RAW, not JPEG, for maximum image quality.
- Use long exposure noise reduction if you’re willing to wait twice as long per photo in order to reduce noise and hot pixels.
Conclusion
Nighttime photography is a complicated task, and this article only scratches the surface of what you can do. (That should be obvious given the existence of the Hubble Telescope!)
However, my hope is that the recommended settings above give you a good idea of where to start for your own astrophotography. These considerations will change depending upon the shot you want, of course – such as a wide-angle landscape versus a deep-sky image – but everything in the end is about capturing light.
If you have any questions or tips to help fellow photographers capture high-quality star and Milky Way pictures, please feel free to leave a comment below.
Spencer, thank you for again clearly and simply detailing your advice on astrophotography, advice I’ve put to good use.
You will recognize where this was taken, and if you’ve yet to visit Iceberg Lagoon at Jokulsarlon in winter this should be on your list. Open link: photos.app.goo.gl/dSiZxLXrXVQvs7NS8 (Nex-7 w/ Samyang 12mm f2 @f2, 30″, ISO 800). This aurora was bare visible to naked eye but well detected by camera.
My thought:
“Photons from stars have traveled hundreds of thousands of lightyears but photons from aurora were spawned only nanoseconds before capture in camera, mind boggling difference in age. Photons of hugely different ages simultaneously struck sensor triggering release of electrons which were amplified then conducted to memory card. I have selectively amplified and de-amplified groups of pixels to create image viewed.”
Great tips! Very useful information for astro and landscape photography at night.
I do quite a bit of serious astrophotography with high end (for an amateur) equatorial mounts, scopes and purpose built cooled astro cameras. My best mount can easily run 30 minute unguided subs at 1000mm with round stars and can probably do an hour. However for the past year circumstances have kept me and my serious astro gear over a thousand miles apart. To satisfy my passion, I bought a small portable star tracker. I wanted to add a few comments to Spenser’s excellent article about using a tracker as an alternative to using the best fast glass.
I have spent a pretty penny over the years on fast glass from Nikon, Zeiss, Voigtländer, Sigma, etc. I am always a sucker for the next lens that might be useful for AP. Last week I bought the Sigma 14mm f1.8, shot it once and packed it up and returned it for poor coma performance. But I have several keeper astro lenses and it is nice to shot at fast apertures. But, almost always there is a penalty to be paid in vignetting or coma performance so often you end up stopping down your expensive, heavy, fast glass to get a better balance of performance and time.
I recently decided to buy a portable tracker to get my AP fix while away from my primary astro gear. These little guys sit between your tripod and camera and track in Right Ascension only, no Declination motor. I selected an iOptron StarGuiderPro based on a not too extensive search as it seemed well reviewed, was not very expensive and is very portable. On my first day out I got round stars on 8 minutes base ISO exposures at 105mm. I had not expected that!!!! A few days ago I was shooting the Samyang 135f2 wide open (highly recommended for AP) at 90 seconds with near perfect stars. So, here is a pitch for an alternative way to allocate your dollars if you are seeking pictures of the stars.
Buy something like the the SkyGuiderPro and use a high quality lens at a smaller aperture for better coma and vignetting performance. My 8 minute tested used a Sony 24-105mm f/4 at f/4. The oft quote rule of 500 (not a very good rule since it ignores where you are pointing!) says divide your focal length into 500 to get the maximum number of seconds you can expose before you get annoying trailing (subjective). So, a typical situation might be something like 20mm lens at f2.8, 25 seconds, ISO 1600. If you pop your camera on a tracker, you could shot ISO 200 for 3m20 or increase your aperture to f4 and shot iso320 for 4m10. The reality is you could easily shot at base ISO with longer subs. The result is much lower noise (which you drive even lower by stacking multiple subs) and if you use a higher aperture lower vignetting, probably better coma performance.
So, if you can spend the same or less on a descent tracker + slower but good lens v.s. a very fast lens, what is the down side. 1) fast glass certainly has other uses like nice bokeh or shooting auroras, 2) you have to polar align your tracker every time you set it up — if polaris is not hidden by a cloud this is straightforward, but it takes a bit of practice to do it quickly, 3) it is harder to focus with slower glass You can alway use a Bahtinov mask, but I never do. I find that even at f4, focusing, at least on the Sonys I am now using, it pretty easy. But I used to use Nikon and don’t recall any big problems focusing with LiveView, 4) you will almost certainly spend more time on each image. Rather than taking a few 30 second shots you are more likely to take dozens of multi minute shots, 5) you must take separate exposures for your foreground and stack them and blend them with the sky if you include any terrestrial features since the motion of the tracker will blur the landscape.
Anyway, both methods work and have their own strengths. I just thought based on my recent experiences I’d suggest star trackers as an alternative or adjunct to consider. I certainly use both tracker and tracker less imaging for my night images.
The proof is in the pudding. Check out www.astrobin.com/360553/?nc=user This image is of the Deneb,Sadr Region which contains many interesting objects. It is 62 images stacked taken with the Samyang 135/f2 wide open, 90s, ISO100 using the iOptron tracker carrying a Sony a7Riii sitting on a relatively inexpensive Benro tripod. I do not hold this out as a wonderful image, but it is decent and made with a pretty inexpensive lens and tracker. This www.astrobin.com/359340/ is of the same region taken a few days earlier with the same tracker and a 65mm f/2 Voigtländer APO Lanthar. 20 x 2minute IIRC
Now that’s what I call cool! Nice shots.
Interesting viewpoint Richard
If I may ask, how easy or difficult is it to align the tracker when shooting in the Southern hemisphere, where there is no obvious object to align on directly?
You can ask, but I have no experience there. But, lots of folks image down under. Sigma Octantis aka Polaris Australis is used. It is only magnitude 5.47 as opposed to Polaris which is magnitude 1.97 (smaller is brighter) so it is barely visible to the naked eye and is further from the SCP than Polaris is from the NCP making alignment a harder task downunder, but possible. You can also use the highly visible southern cross (magnitude 2.8) I’m told. So, I know many people do polar alignment in the southern hemisphere but is is clearly more challenging. Here in Maine where I am ATM on a clear night it only takes me a few minutes to get a good enough polar alignment to shoot subs of many minutes duration with 200mm and under focal length lenses. There are many free apps to show where to put stars in the polar scope’s reticle to achieve alignment. I happen to use Polar Scope Align Pro on an iPhone. I just switched it to Adelaide Australia and it automatically switched to Sigma Octantis as the alignment star and showed where to put it on the StarGuiderPro’s reticle (which of course changes constantly)
Hi Spencer
Thanks for a fine overview. In other articles I have found a rule of thumb regarding maximum shutter speed, which works good for me: The 500 rule.
The focal length (Full frame equivalent) * shutter speed in seconds has to be less than 500 to avoid star trails.
I forgot it once when I was shooting a total lunar eclipse with a 600 mm. Shutter speed 1 second led to a bunch of “shaken” pictures, even though I used a stable tripod, exposure delay, no wind etc. :-(
Lesson learned
Hi Gert,
Many folks who are less tolerant of trails than average (guilty) use the rule of 400 if they must approximate, but tend to use tools like the one in PhotoPills that takes declination and sensor pixel density into account. This gives a much more accurate answer. If you think about it stars, near the North Celestial Pole (close to declination 90˚) move very little per unit time compared to those on the galactic equator (declination 0). To make this more concrete if you were shooting a 42Mpix camera with a 16mm lens at f/4 pointed at declination 85˚, you could expose for 216sec before you lost your pinpoint stars where the rule of 500 would tell you your limit was 31 sec.
Richard
Thank you for a quick guide to astrophotography. I think you could have included/emphasized the importance of getting a good manual focus and not just turning it to a setting of infinity.
Thank you, Valmik! You make a good point – I should have linked to our article on how to focus properly at night: photographylife.com/how-t…hotography
Hi Spencer, Thank you for sharing such interesting details. I have a question. How to take photographs of moon? Are the badics still going to remain the same (wide angle lense, widest appurture, 10-20 sec shutter speed and 1600 ISO? or will it be different? What about shooting Lunar Eclipse?
Thank you in advance.
Regards
Arindam
It depends upon whether you are doing wide-angle photography with the moon as an element in your sky, or if you are trying to photograph the moon itself and make it as large as possible. In the first case, yes, the settings in this article hold true (as in the last image above, which has the moon in it). If you’re trying to photograph the moon itself as large as possible, you will want to use a much longer lens, and your settings will change significantly.
Luckily, we have an article on photographing the moon by itself: photographylife.com/how-t…graph-moon
And we even have a specific article on photographing the lunar eclipse: photographylife.com/how-t…ar-eclipse
Hello Spencer
Thanks for the tips. I need test them out on my Nikon camera. It was a very enlighten article.
Much appreciation
Thank you, Ziggy, happy to hear it – I think you’ll find these settings to be a good place to start.
Just for clarification, this is wide-wide field astrophotography. Once you step into wide field (focal length ~50mm to ~135mm) you enter a totally different realm. Same with ~135mm-300mm, 300mm-800mm, and 800mm+.
In Astro-landscape (which is what this really is), Pentax has a natural advantage in that the sensor can track the stars for up to 30s using the IBIS system. Rather ingenious, really, though I haven’t tried it. Finding really dark skies is essential to get a really good image as light pollution creates light domes and reduces the contrast of the skies. Even if used at half speed, something like a Vixen Polarie or iOptron SkyTracker Pro will greatly help with getting stars and then you can expose one last pic for the landscape.
One really stellar lens for more wide-field Astro is the Samyang/Rokinon 135mm f2. It’s very sharp wide open, has no coma, and is fast enough to gather a great deal of light in a short time. Even for an astrolandscape it would be of great help.
Yes, the settings above are mainly for wide-angle landscapes – getting into the realm of telephotos and equatorial mounts will require a more specialized article.
Pentax does have that advantage, although, as you alluded to, its star-tracking ability will cause the foreground landscape to blur a proportional amount. So, you’ll likely want to take two photos – one with sharp stars and one with sharp foreground – to blend together, unless your shutter speed is right on the edge and not adding much blur to the foreground anyway.
Thanks for the heads up about the Samyang 135mm f/2! I’ve used their 14mm f/2.8 and 14mm f/2.4 for nighttime landscapes. I loved the f/2.4 version, while the f/2.8 version was passable (certainly a good value).
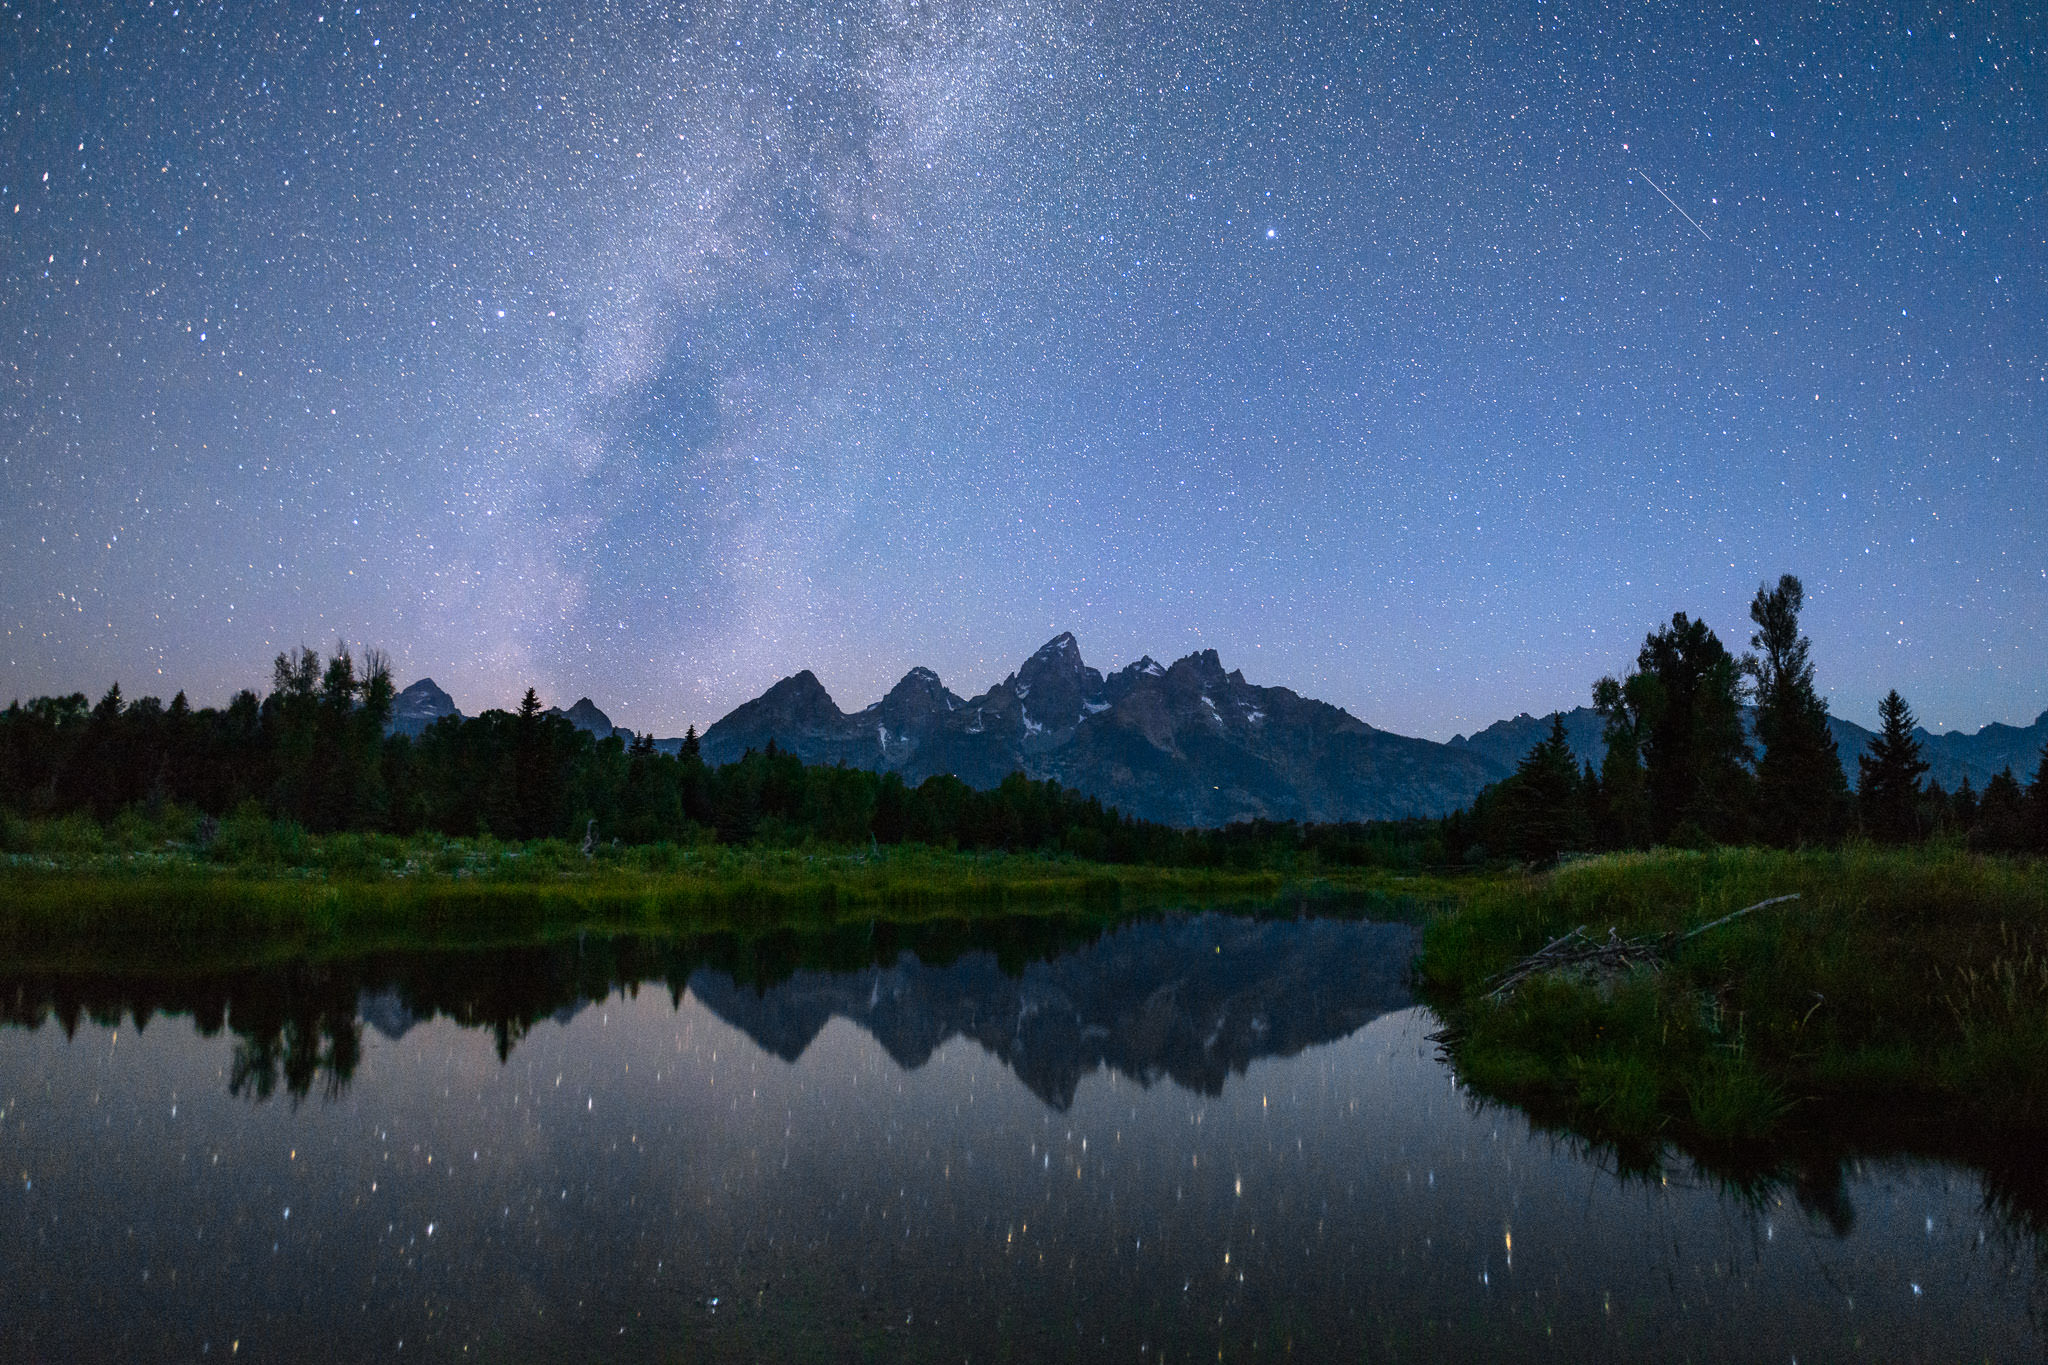
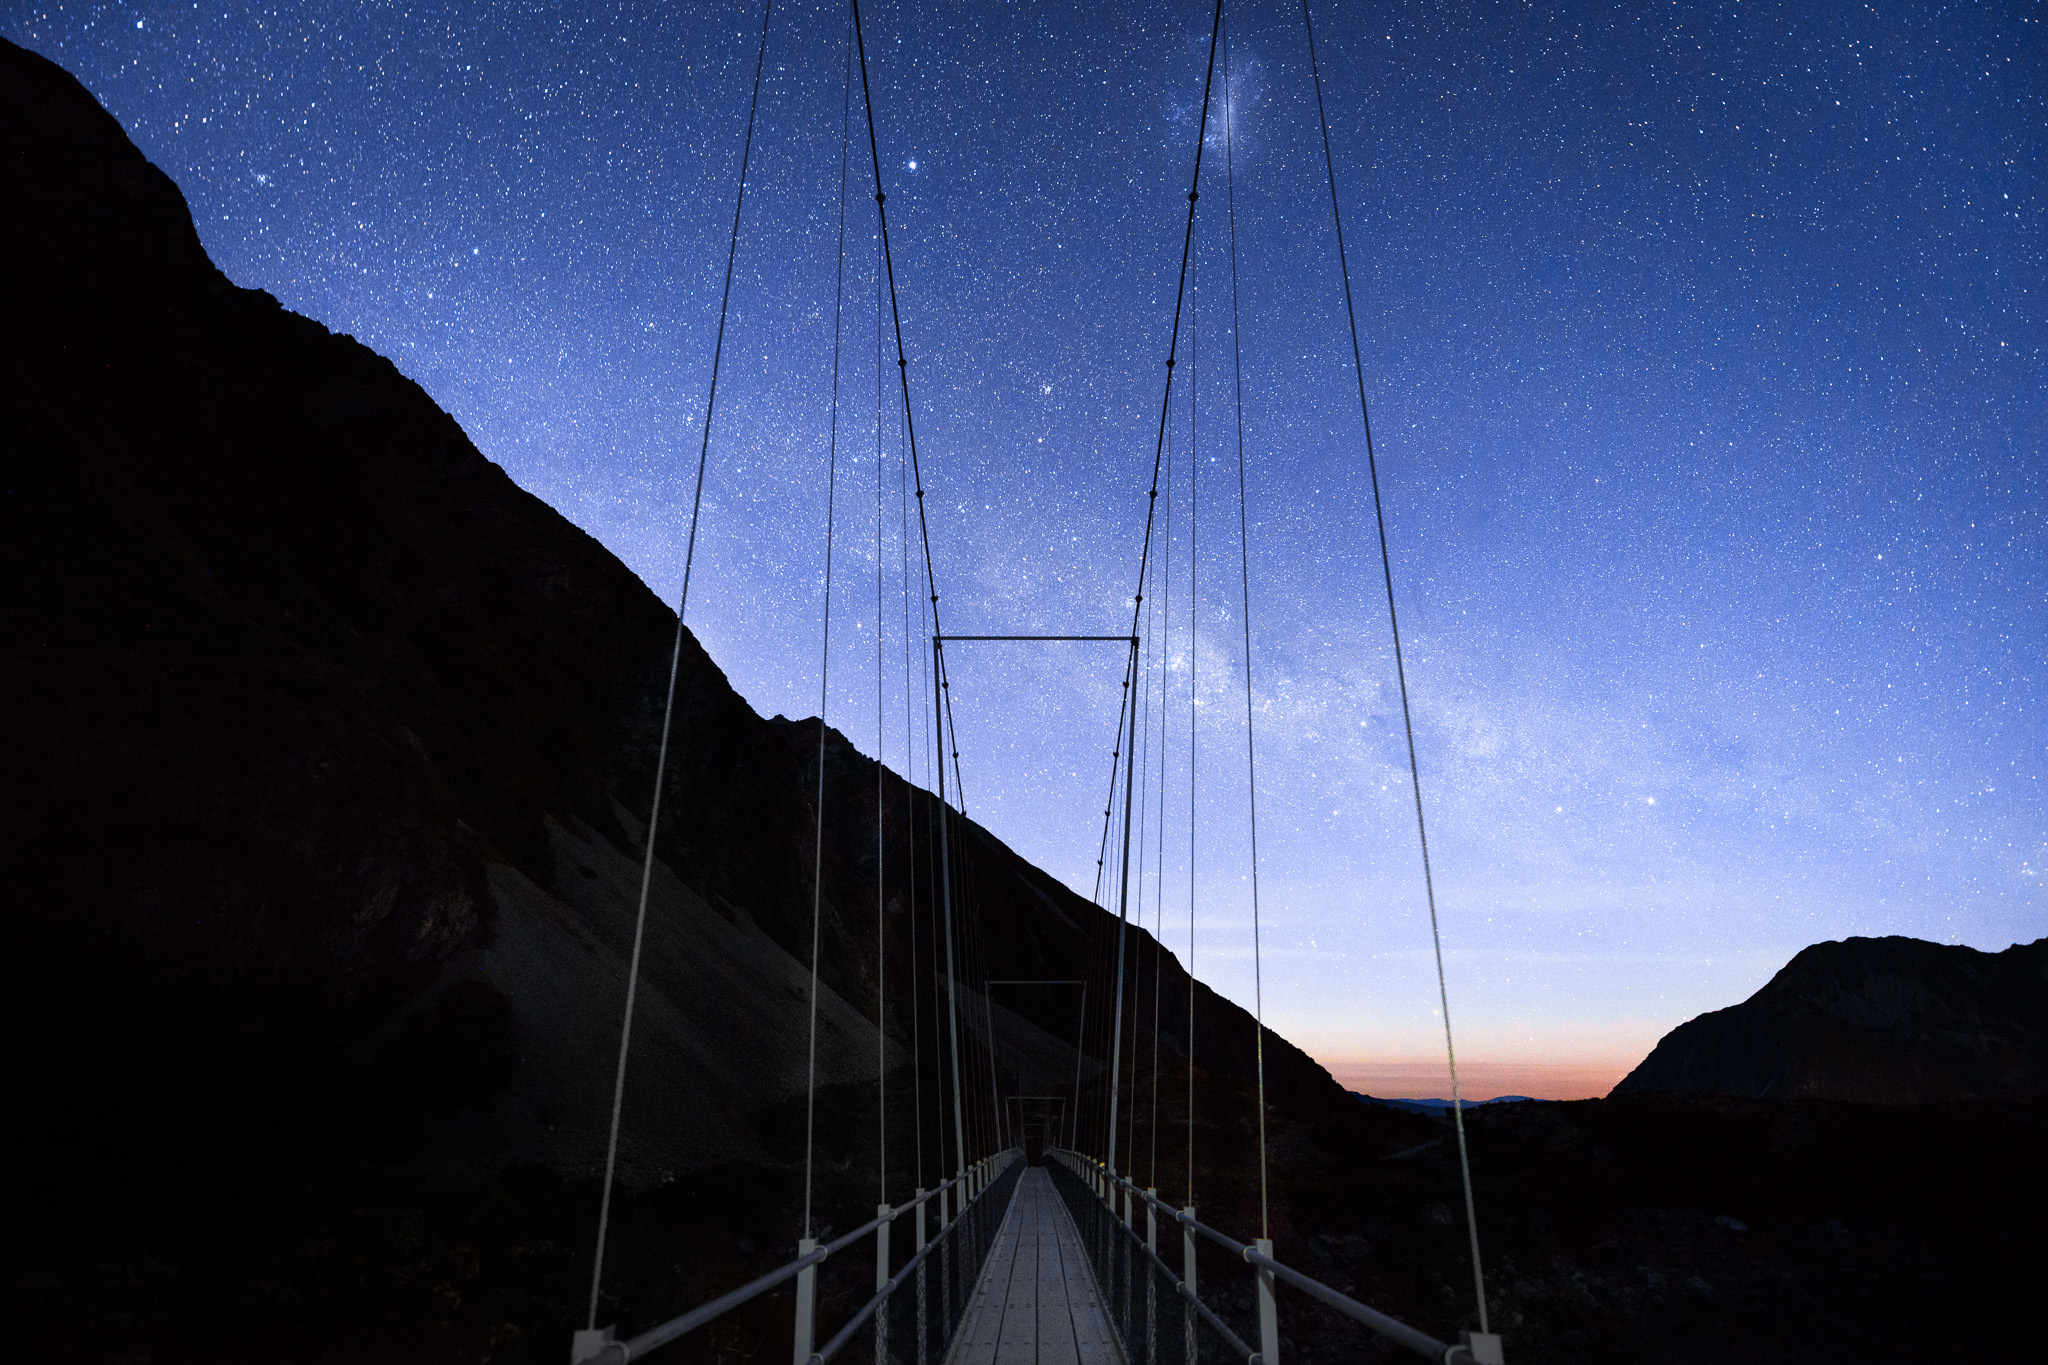
Interesting article, thanks for sharing it here. Just one question, if I were to use my 24mm lens at f2.8 for these types of images where exactly should I be focussing, on the landscape, the stars or the nearest area to me in the image? Thanks for any response.Regards tony(UK).
Thank you, Tony, glad you liked it. For regular landscape photography, I usually recommend focusing at “double the distance” in a scene (meaning twice as far as the nearest object in your photo, since that equalizes foreground and background sharpness). However, nighttime work is different. In most cases, the stars take priority.
When you have crisp stars, even a somewhat out-of-focus landscape is surprisingly acceptable. In the bridge image above, for example, the bridge itself isn’t especially sharp – but the sharp stars make the overall photo appear quite detailed.
And if you want perfectly sharp stars, you might find it useful to read our article on how to focus at night: photographylife.com/how-t…hotography
I hope this helps!