Even though I’m usually a mountain person, I’ve always found it fun to photograph beach scenes, too. But I’ve also wondered why a beach scene can look terrific to my eyes while failing to translate into a photo. It took years of trial and error before I took pictures of beaches and seashores that I was happy with. In this article, I’ll go through the tips that I found the most helpful along the way.
Table of Contents
1. Wait for Clouds
A bright, beautiful day on the beach without a cloud in the sky might sound nice, but it often won’t look very exciting in a photo. The more interesting your clouds, the more interesting your beach photos. For example, take a look at the picture below.
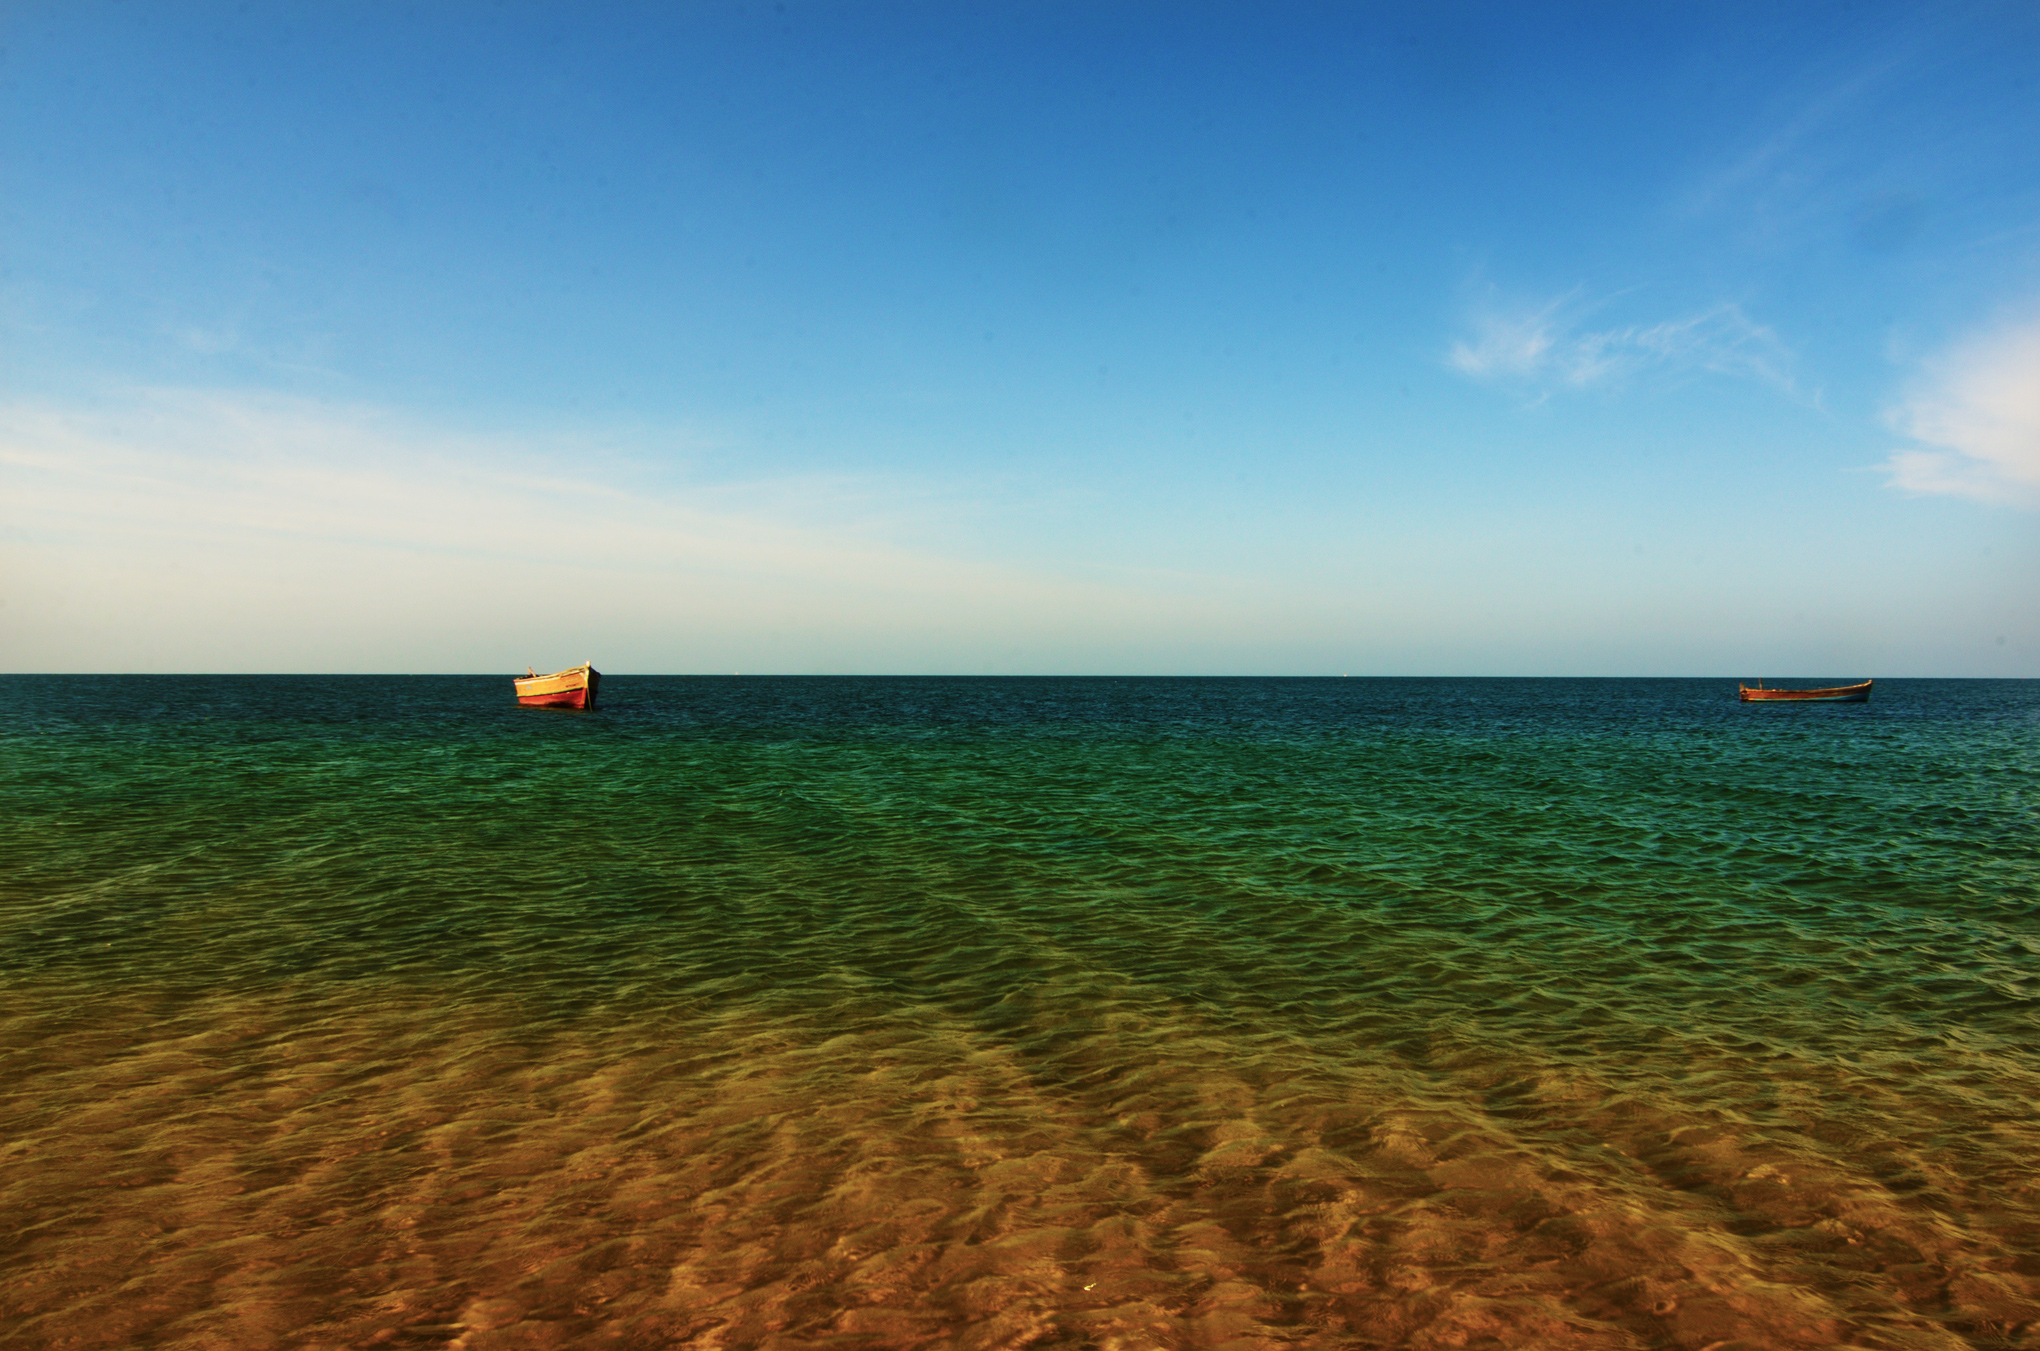
The composition has enough details in the foreground, and the subject (the boat on the left) stands out with another boat (one on the right), balancing it. But the picture would have been better with some more interesting clouds in the sky.
Compared it to the image below, which has clouds that complement the subject and add to the overall appeal of the picture:
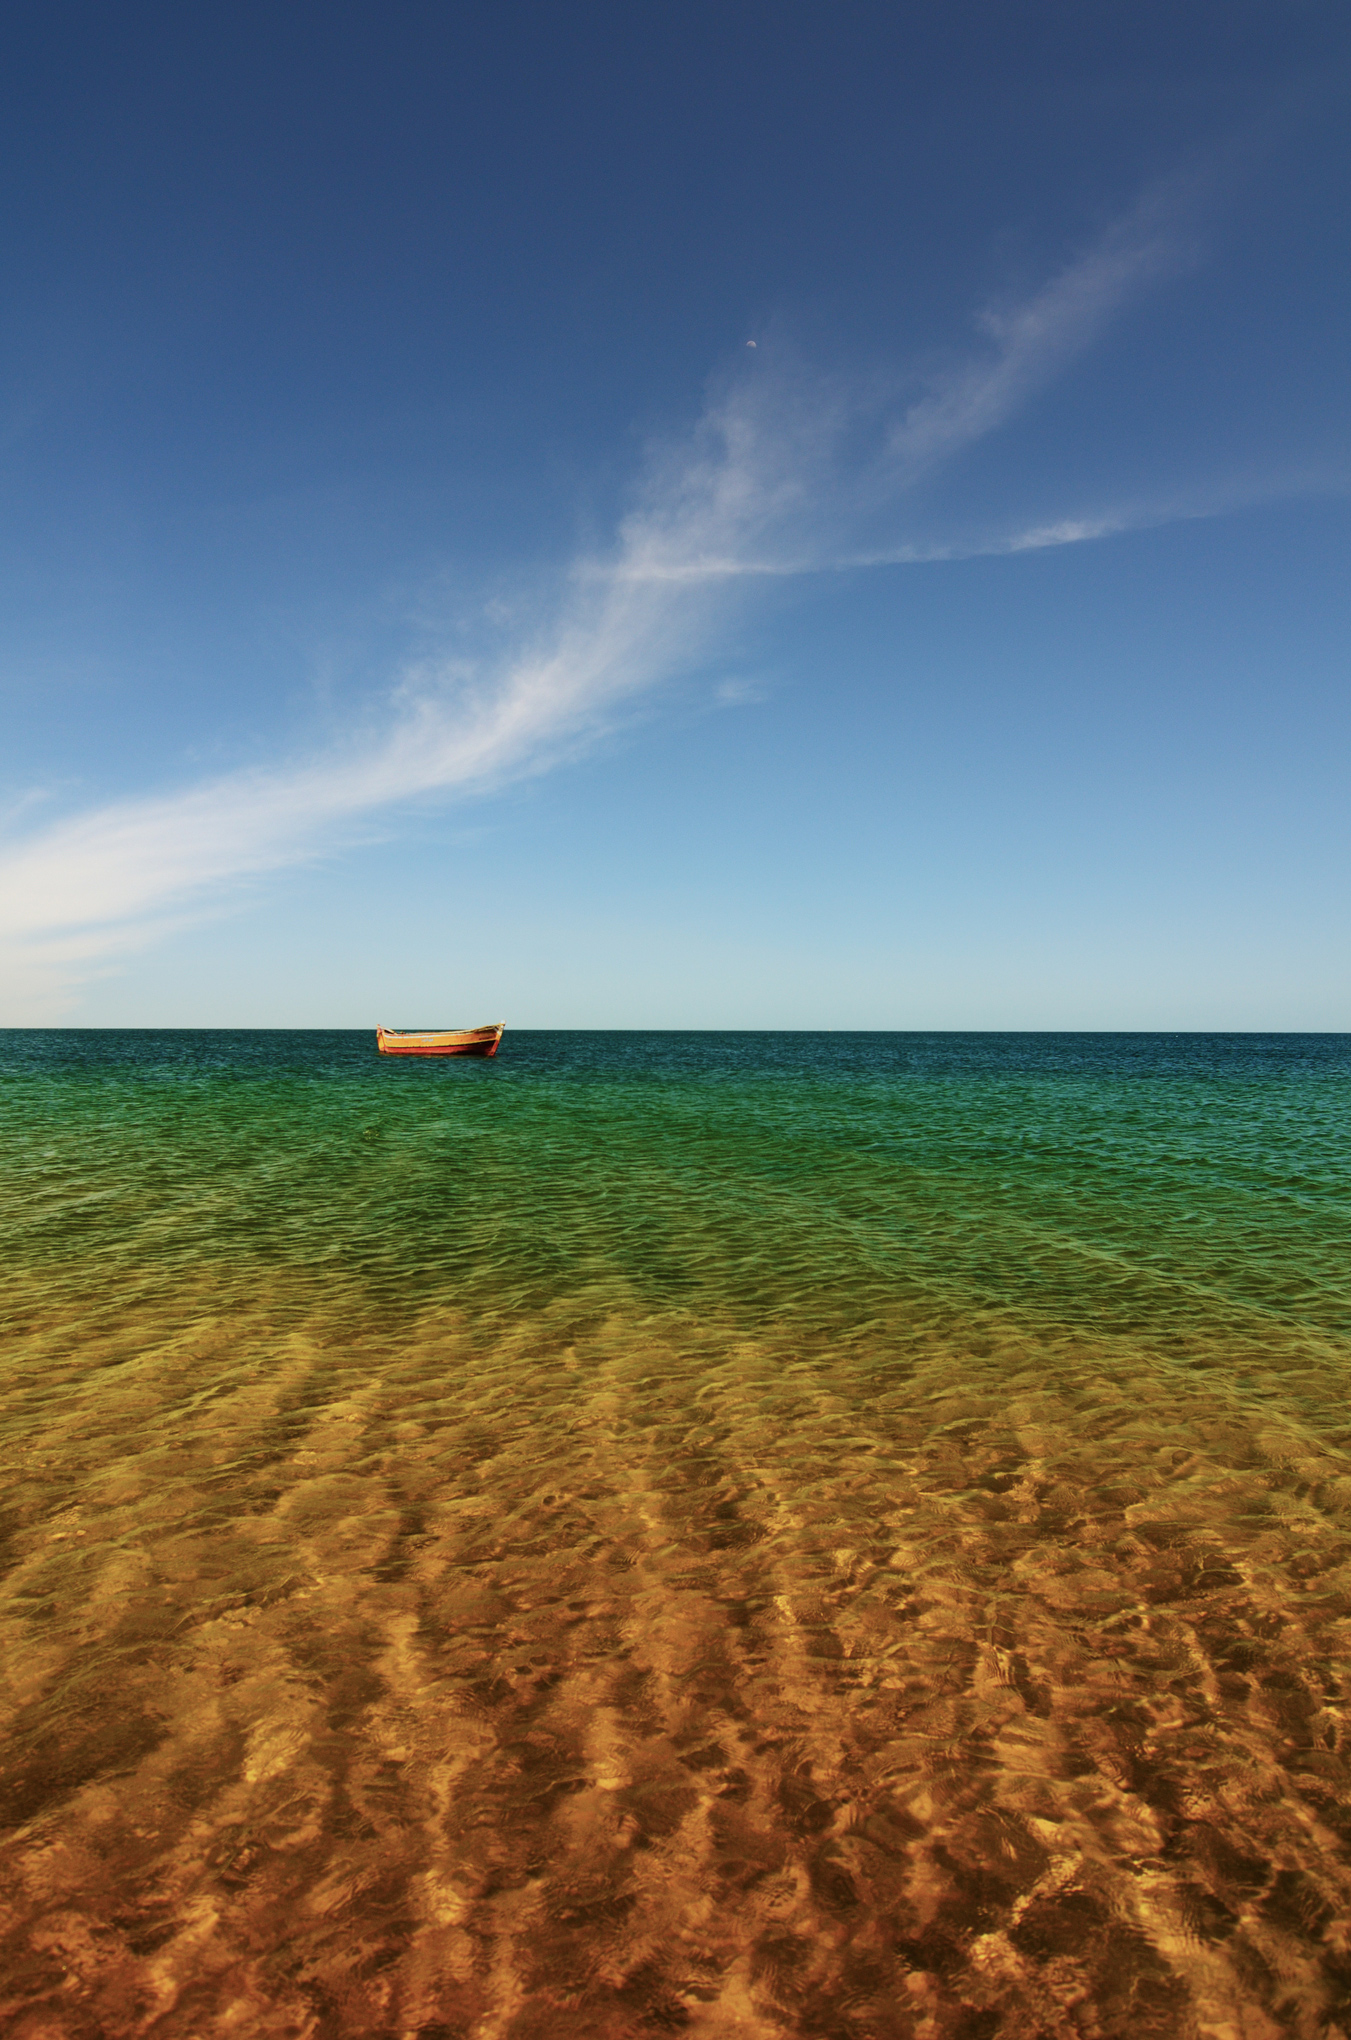
If a small cloud patch can make a difference, imagine a sky filled with clouds with tons of details.
The sky very often plays a vital role in any kind of landscape photography, but the effect is accentuated with beaches, where there aren’t usually thick forests or tall mountains to block a lot of the sky. That’s why a plain blue sky can be particularly overwhelming in a beach photo; it’s a big area of negative space. Clouds play a vital role in such scenarios by reducing negative space in our composition without requiring unusual (though not necessarily bad) compositions that only have a tiny sliver of the sky.
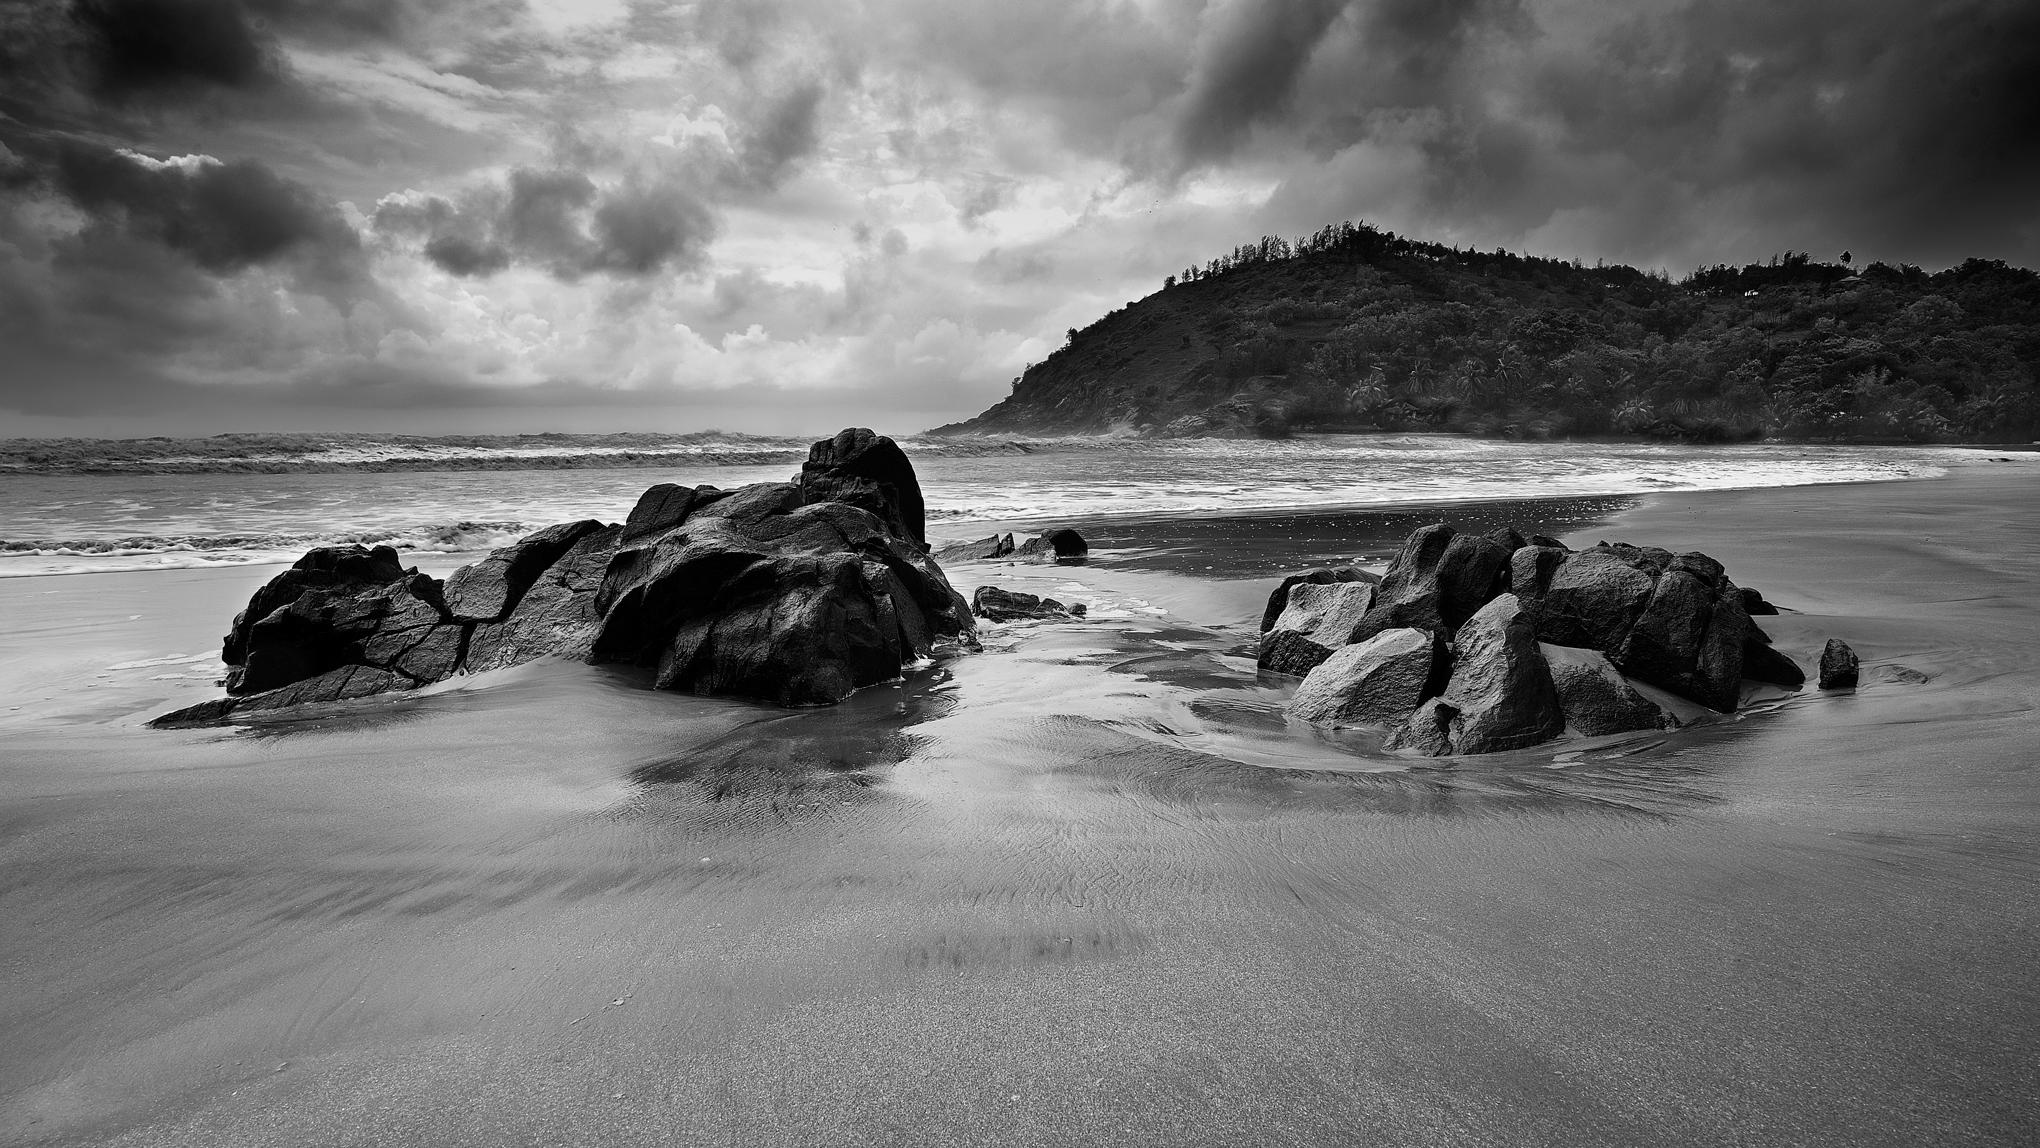
2. Find a Foreground
Unless there is something highly unusual in the sky like a bolt of lightning or a massive, menacing cloud, the sky is unlikely to be your primary subject in a photo. If you try to make it into one, you may just end up disappointed. Instead, it is usually better if the sky complements your subject rather than being your subject.
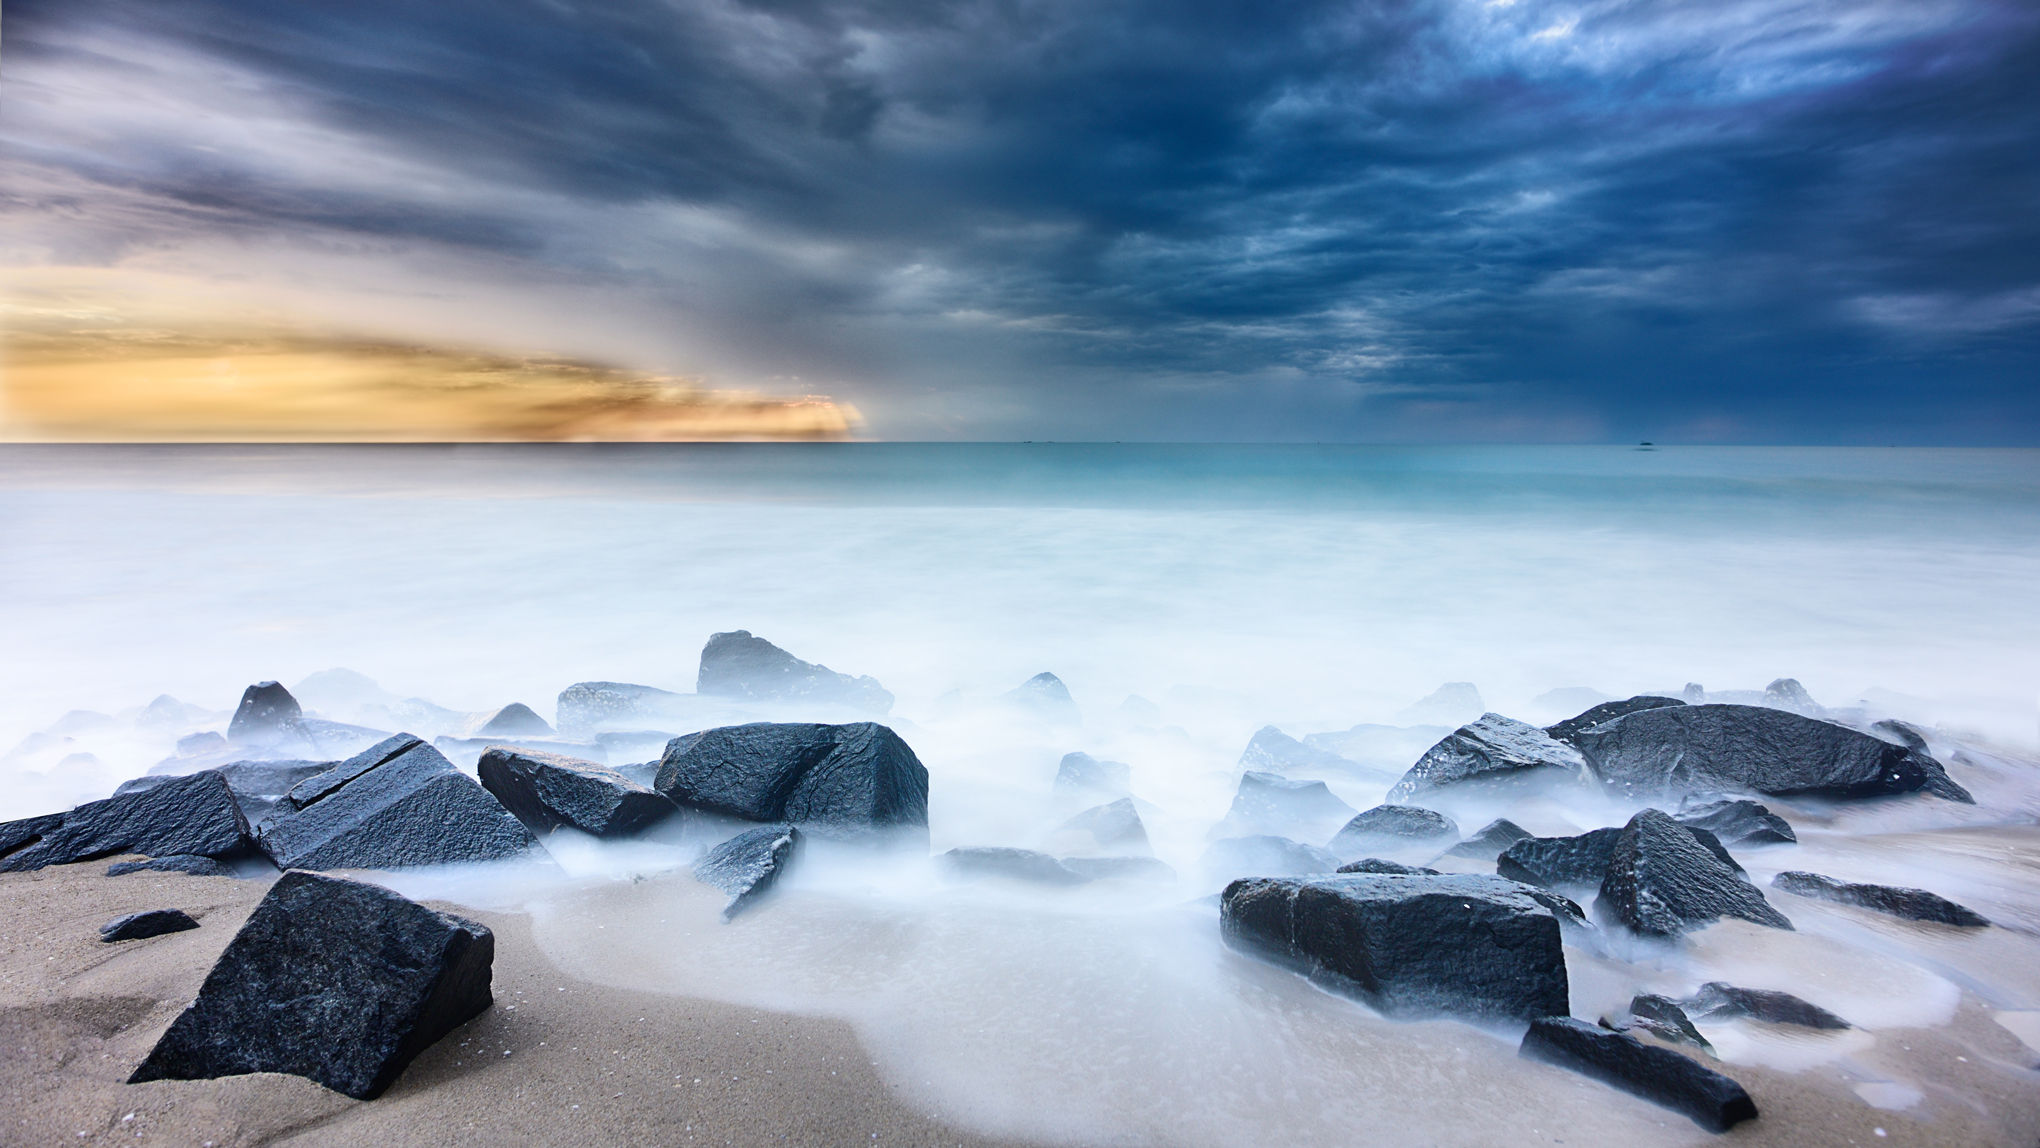
That’s where the foreground comes into play. At the beach, the most common foregrounds you’ll find are rocks, patterns in the sand, and patterns in the water. But unless the patterns in the sand and water have some especially interesting details, they may not be enough to make a strong subject. So, don’t just point and shoot in the direction of the sea, but actively look for the most interesting possible foregrounds.
Imagine the above image without the rocks in the foreground. There would be practically nothing in the photo, which would only work if you were going for an overwhelmingly minimalist view. Since that wasn’t my goal, I would have needed to move to a different area in search of a more substantial foreground subject.
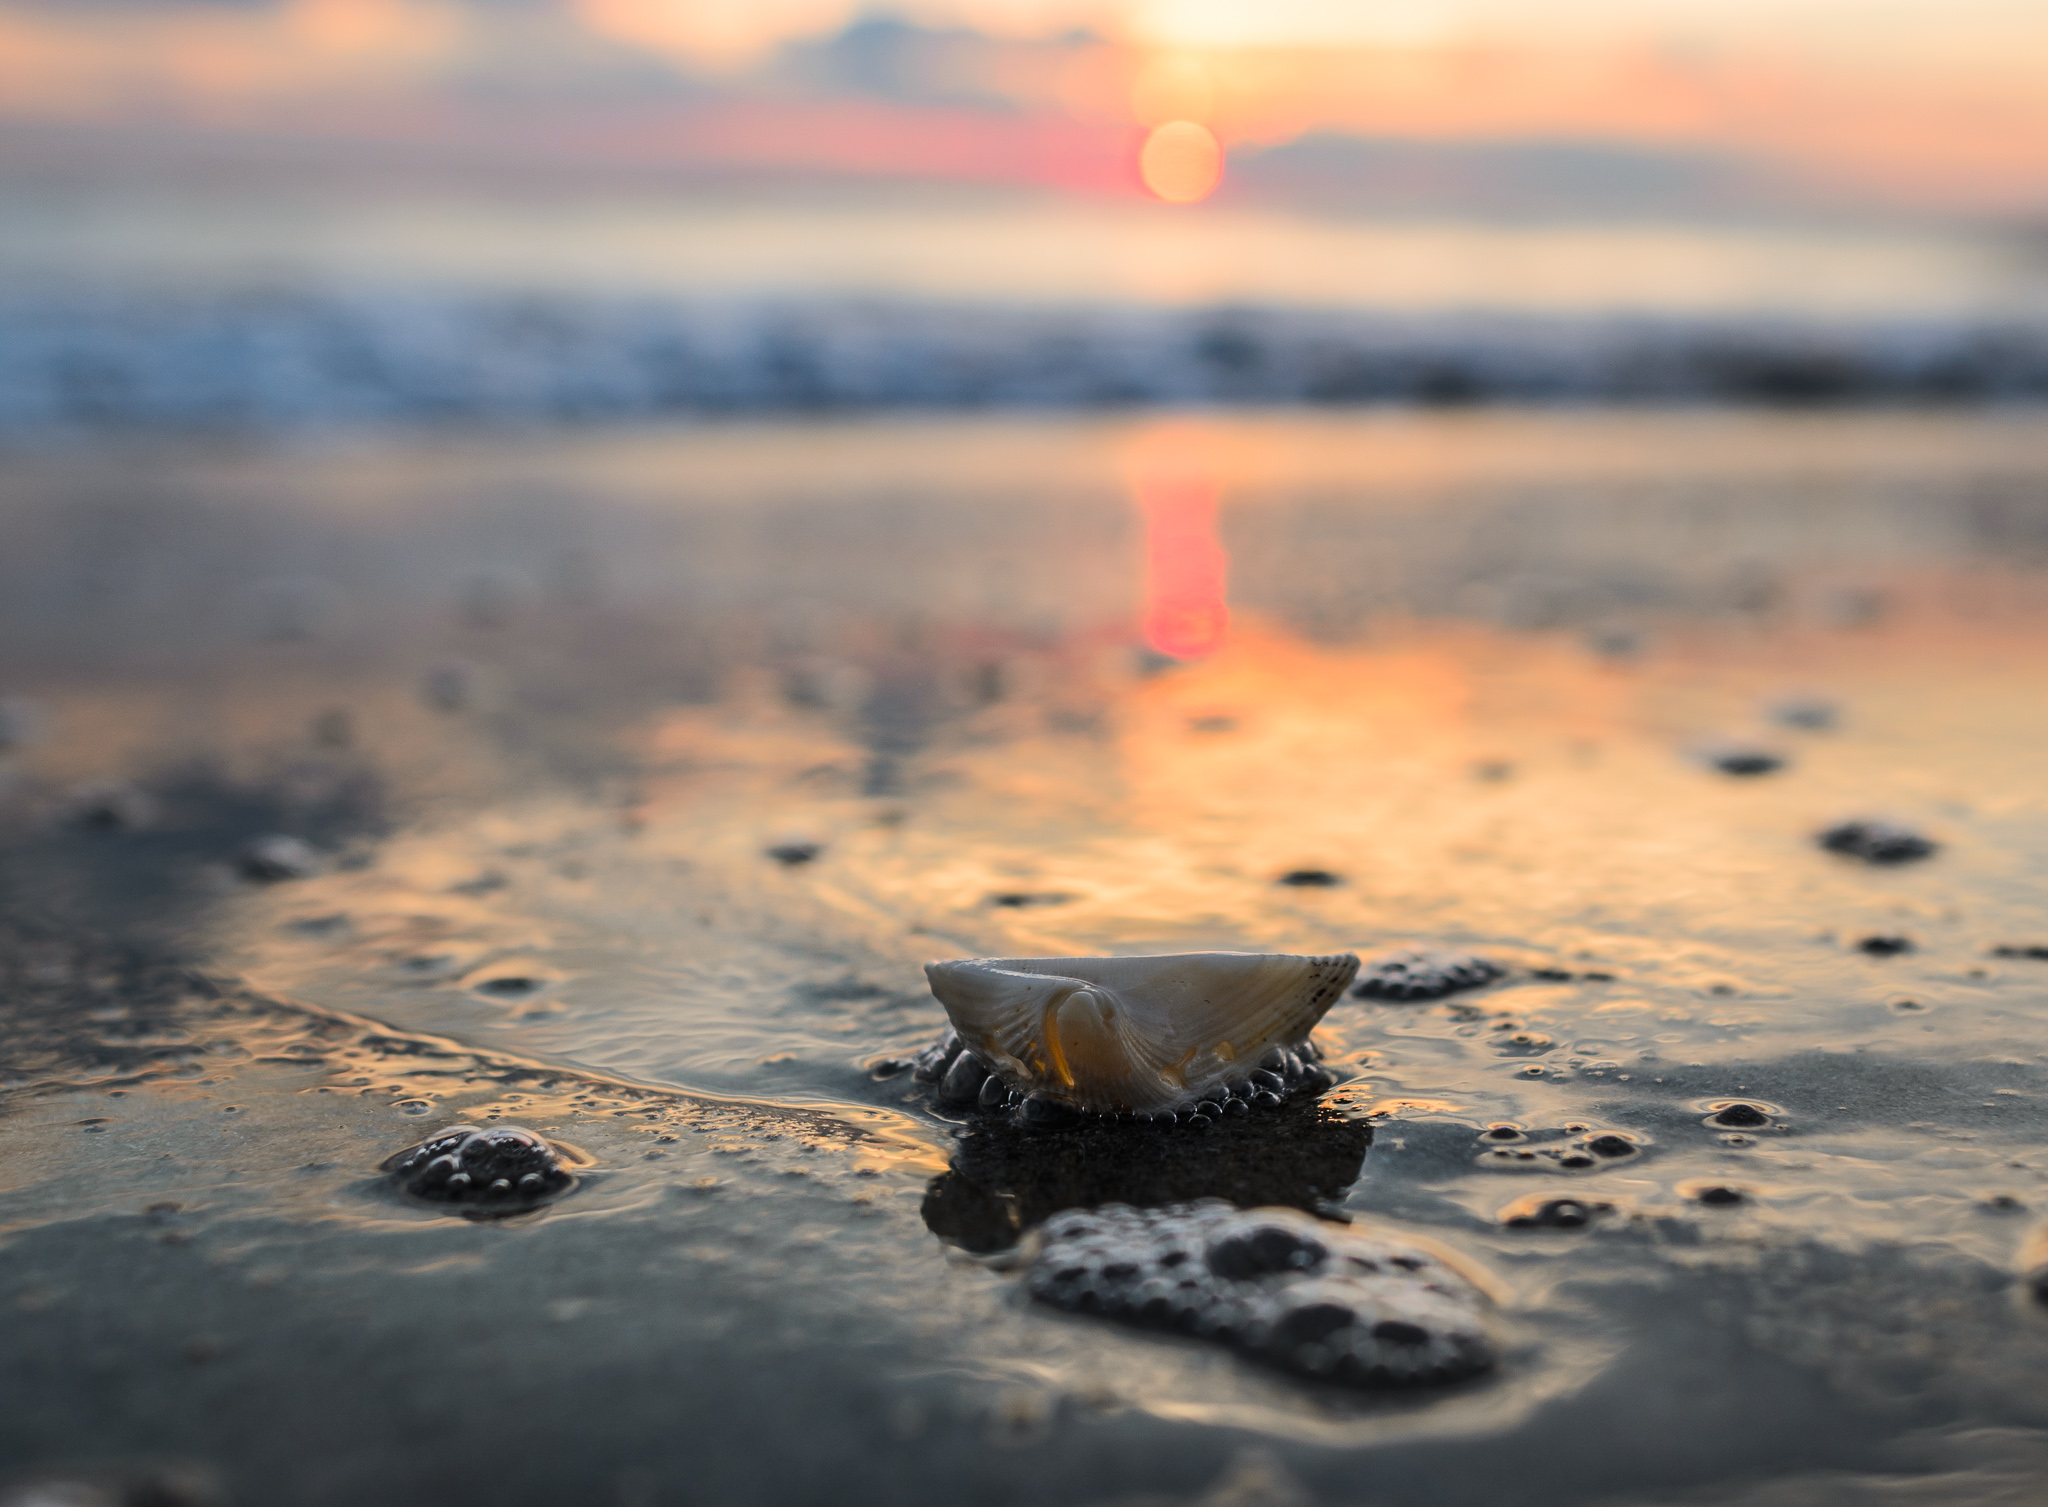
3. Go Wide
I’ve found that one of the easiest ways to deal with a challenging foreground subject in beach photography is to use a wider lens than usual. If your foreground is something small like just a few seashells or a little pattern in the sand, an ultra-wide lens (about 20mm or wider, full-frame equivalent) can make it look more prominent.
These days, I tend to stick with lenses 24mm or wider for my own beach photography. Every photographer has a different style so don’t be afraid to go against that recommendation, but at least try it out so that you can make the foreground more prominent. For example, for the image in the prior section, I used a 20mm lens and stood very close to my subject to get perspective distortion and make them look larger in the photo than they did in person. My go-to lens is Nikon’s brilliant 20mm f/1.8 G for landscapes, but if you have a 24-70mm zoom or similar, that will work very well, too.
4. Go Manual
I am not a person who always says to shoot in manual exposure mode. In fact, I shoot in aperture priority with Auto ISO for 99% of my wildlife photography, and most wildlife pros I know do something similar.
But landscapes at the beach are a different game altogether. I turn off Auto ISO and set my ISO manually to the base value, which is ISO 100 on my camera. And quite often, I find myself using either a polarizing filter or an ND filter – sometimes both stacked together – to cut the light and achieve long exposures. Those situations can easily fool the camera’s meter, so manual mode is the way to go.
My general workflow is as follows. After setting base ISO 100, I compose the image and manually focus on whatever object (usually just a patch of sand) is double the distance from the very bottom of my photo. I then take a couple test shots to figure out what aperture I need in order to get enough depth of field – usually f/8, f/11, or f/16. Once that looks good, I figure out the shutter speed I need in order to get the right motion blur in the water. If I need a longer exposure than what my camera’s meter is recommending, I will use a polarizer, ND filter, or both in order to achieve my desired shutter speed.
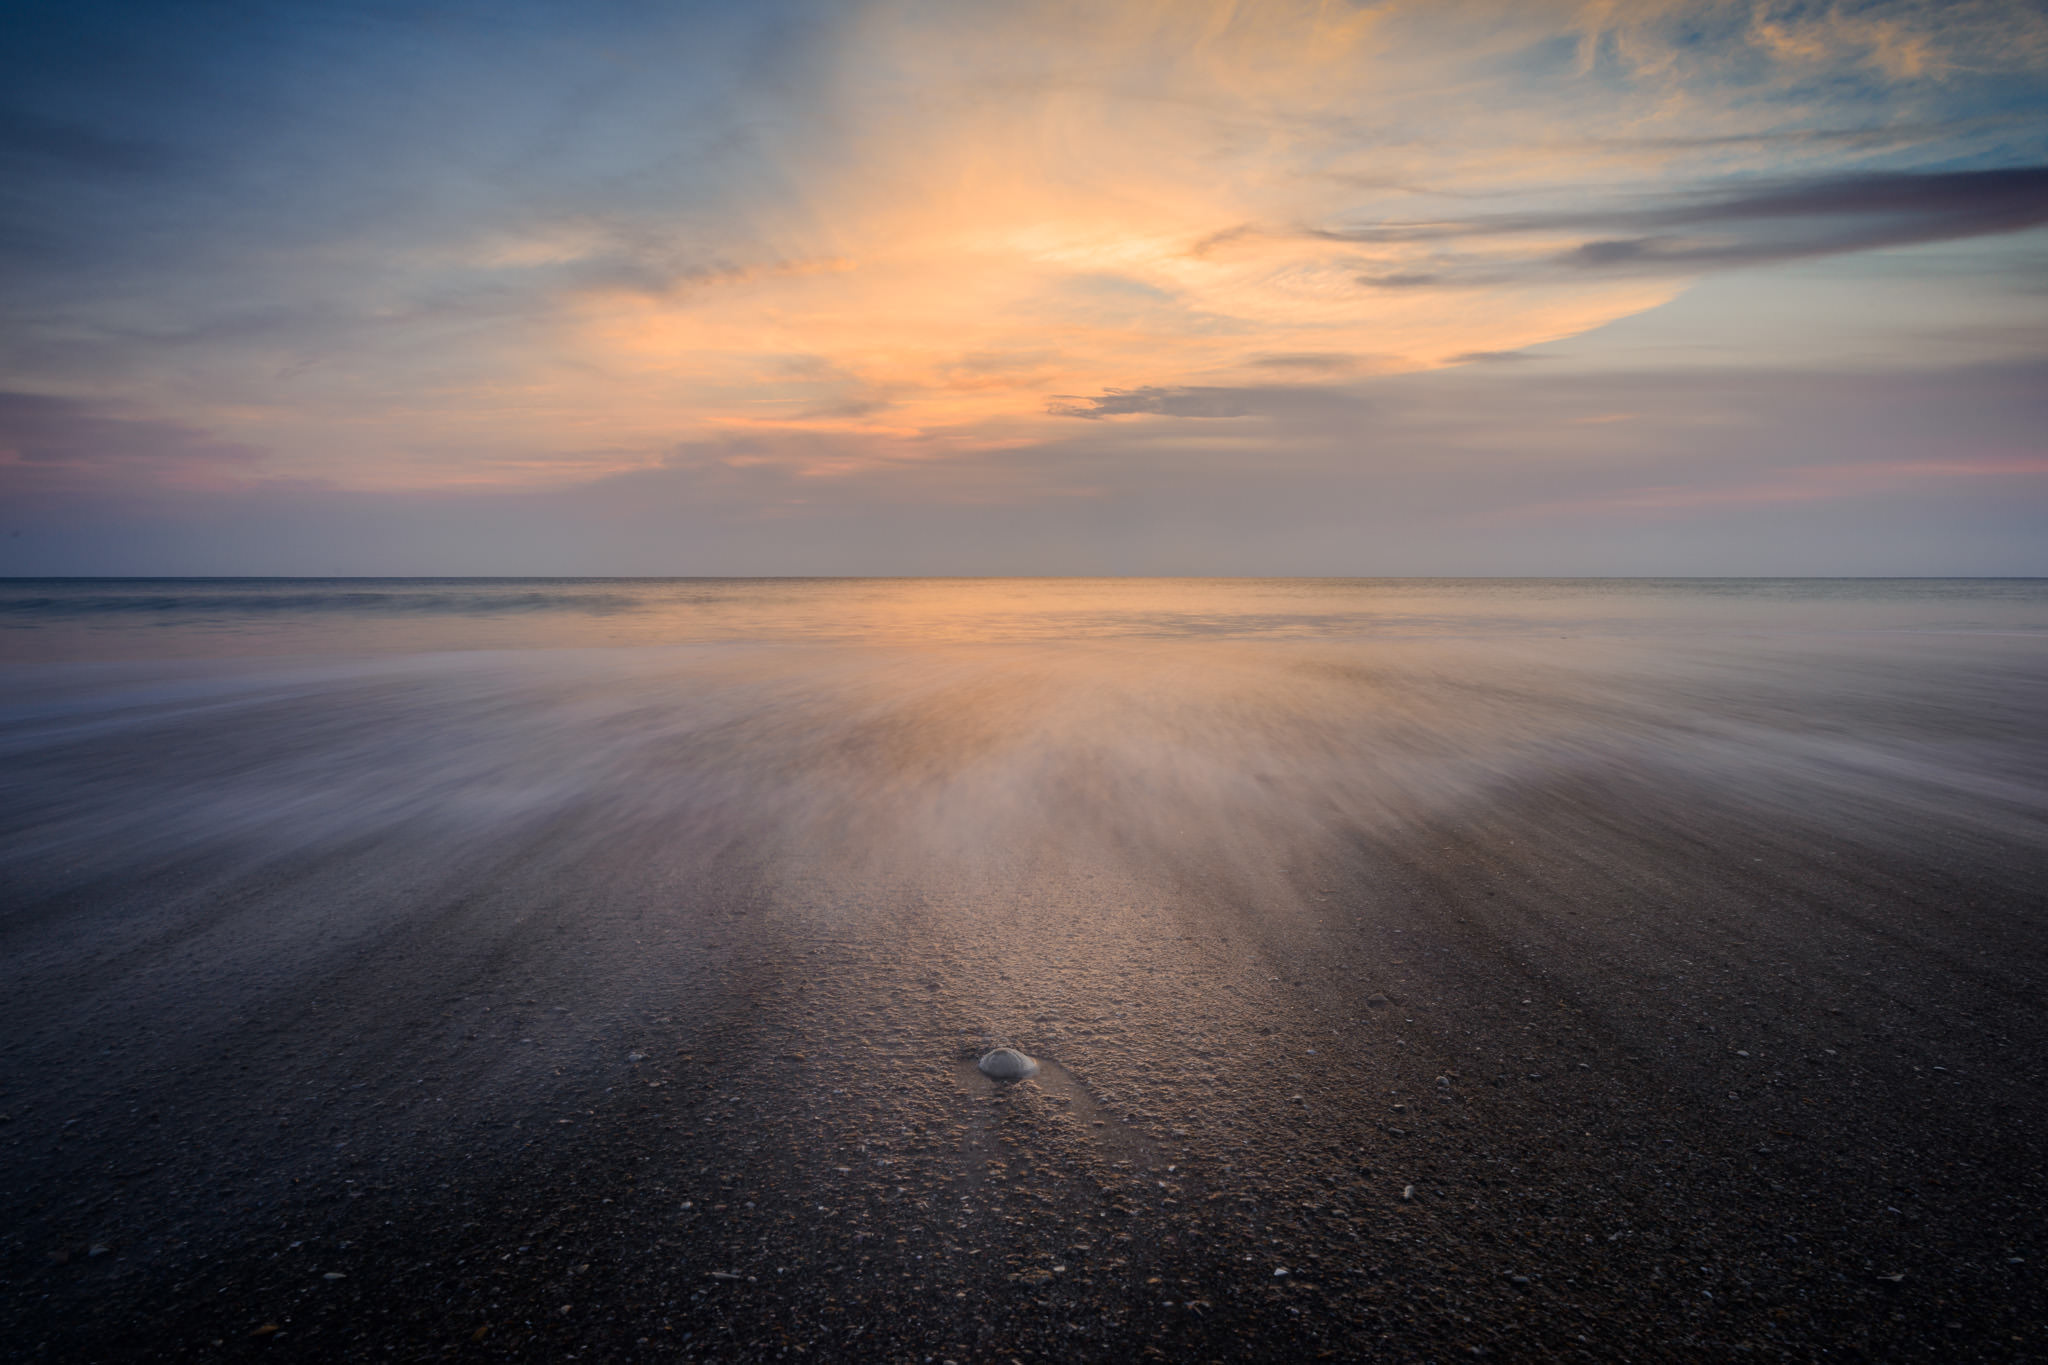
5. Get Low
Let me explain why the camera needs to be placed lower than you may expect. Here’s the example I’m thinking of:
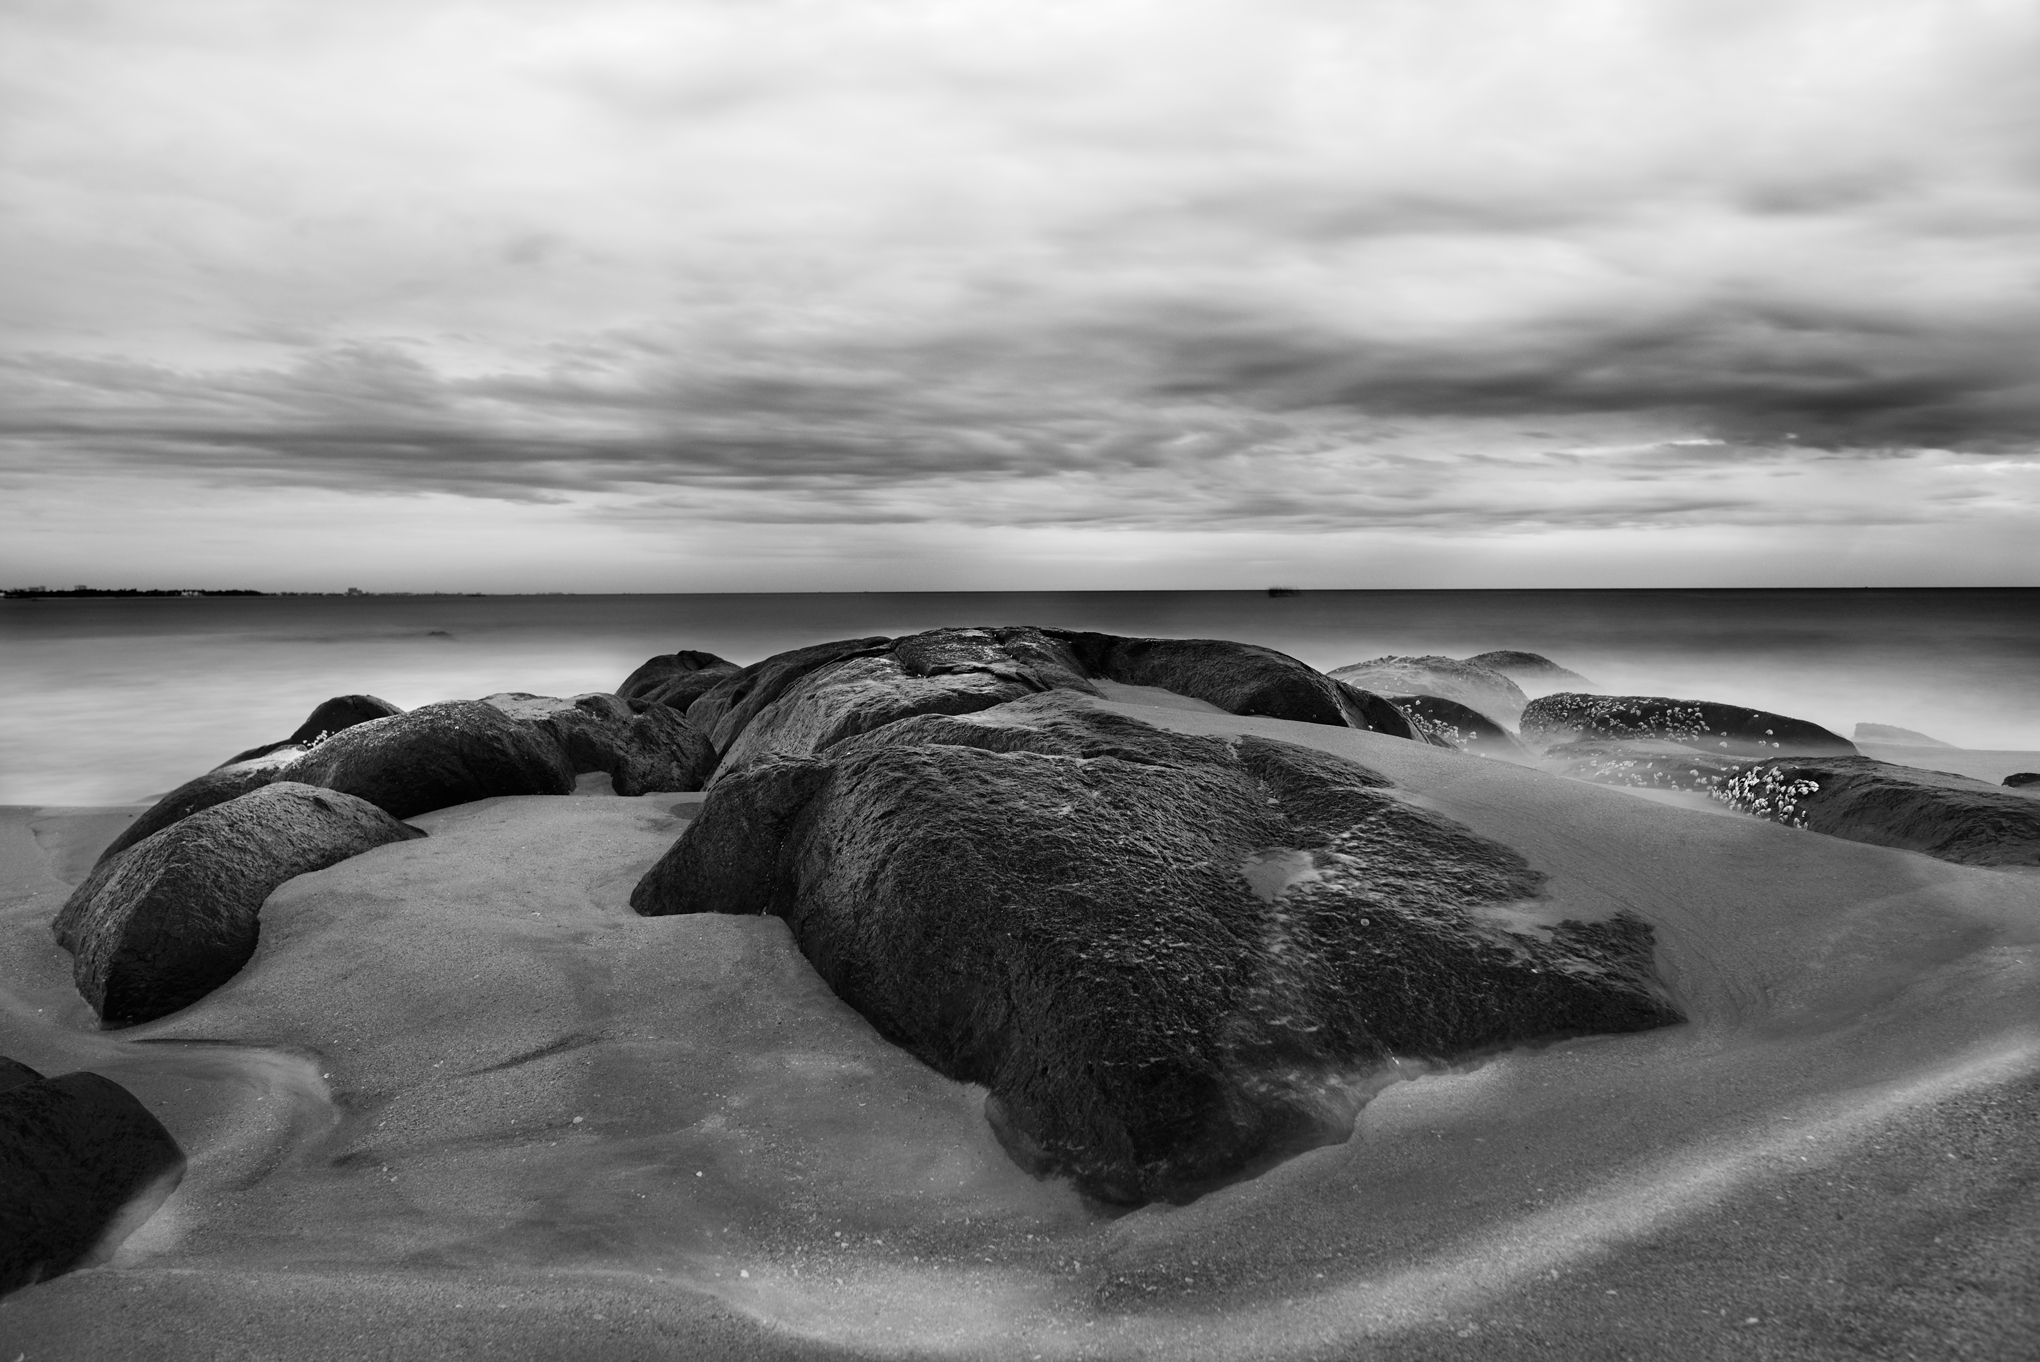
It is almost a rule of the thumb in wildlife photography to get to the eye level or lower with the subject. This holds for landscapes as well. In the above image, I placed the camera down to the height of the foreground to get “eye level” with the rocks on the left.
Setting the camera that low has two advantages. First, it emphasizes the foreground. You can imagine that in the photo above, the rocks would look smaller and be at a more awkward angle if I had the camera on a tall tripod instead of a low angle. Second, a low angle allows for adequate background and sky in the composition (since the alternative is a tall tripod pointed further downward to capture the foreground).
The problem here is that you risk a rogue wave overturning your gear or soaking it with saltwater. I generally cover the camera with an empty plastic container when a wave splashes. Then as it recedes, I remove the container and go for the shot. In most cases, my shutter speed is about 3-5 seconds to shoot the motion blur of the waves, as you can see in the above picture. I’ve taken more than a few photos where I needed to move the camera halfway through an exposure in order to avoid a huge wave!
6. Watch the Sun
The moment the sun gets in your frame, balancing the exposure gets much trickier. You’ll either end up with a patch of blown-out highlights around the sun, or a completely underexposed image elsewhere. This is especially a problem in beach photography where the harsh sun can reflect countless times on the ocean and make your photo too chaotic.
This doesn’t mean you should avoid the sun in your beach photos, but you need to be careful about it. Either wait until the sun goes at least partly behind a cloud, or wait until the sun is so low on the horizon that atmospheric haze turns it a softer shade of red or orange.
Alternatively, you can try shooting at a different time of day when the sun is at your back. I’ve found that even mid-morning and mid-afternoon light at the beach can be very pleasing if you point away from the sun. You’ll get better dynamic range and smoother highlights on the water if you follow that approach.
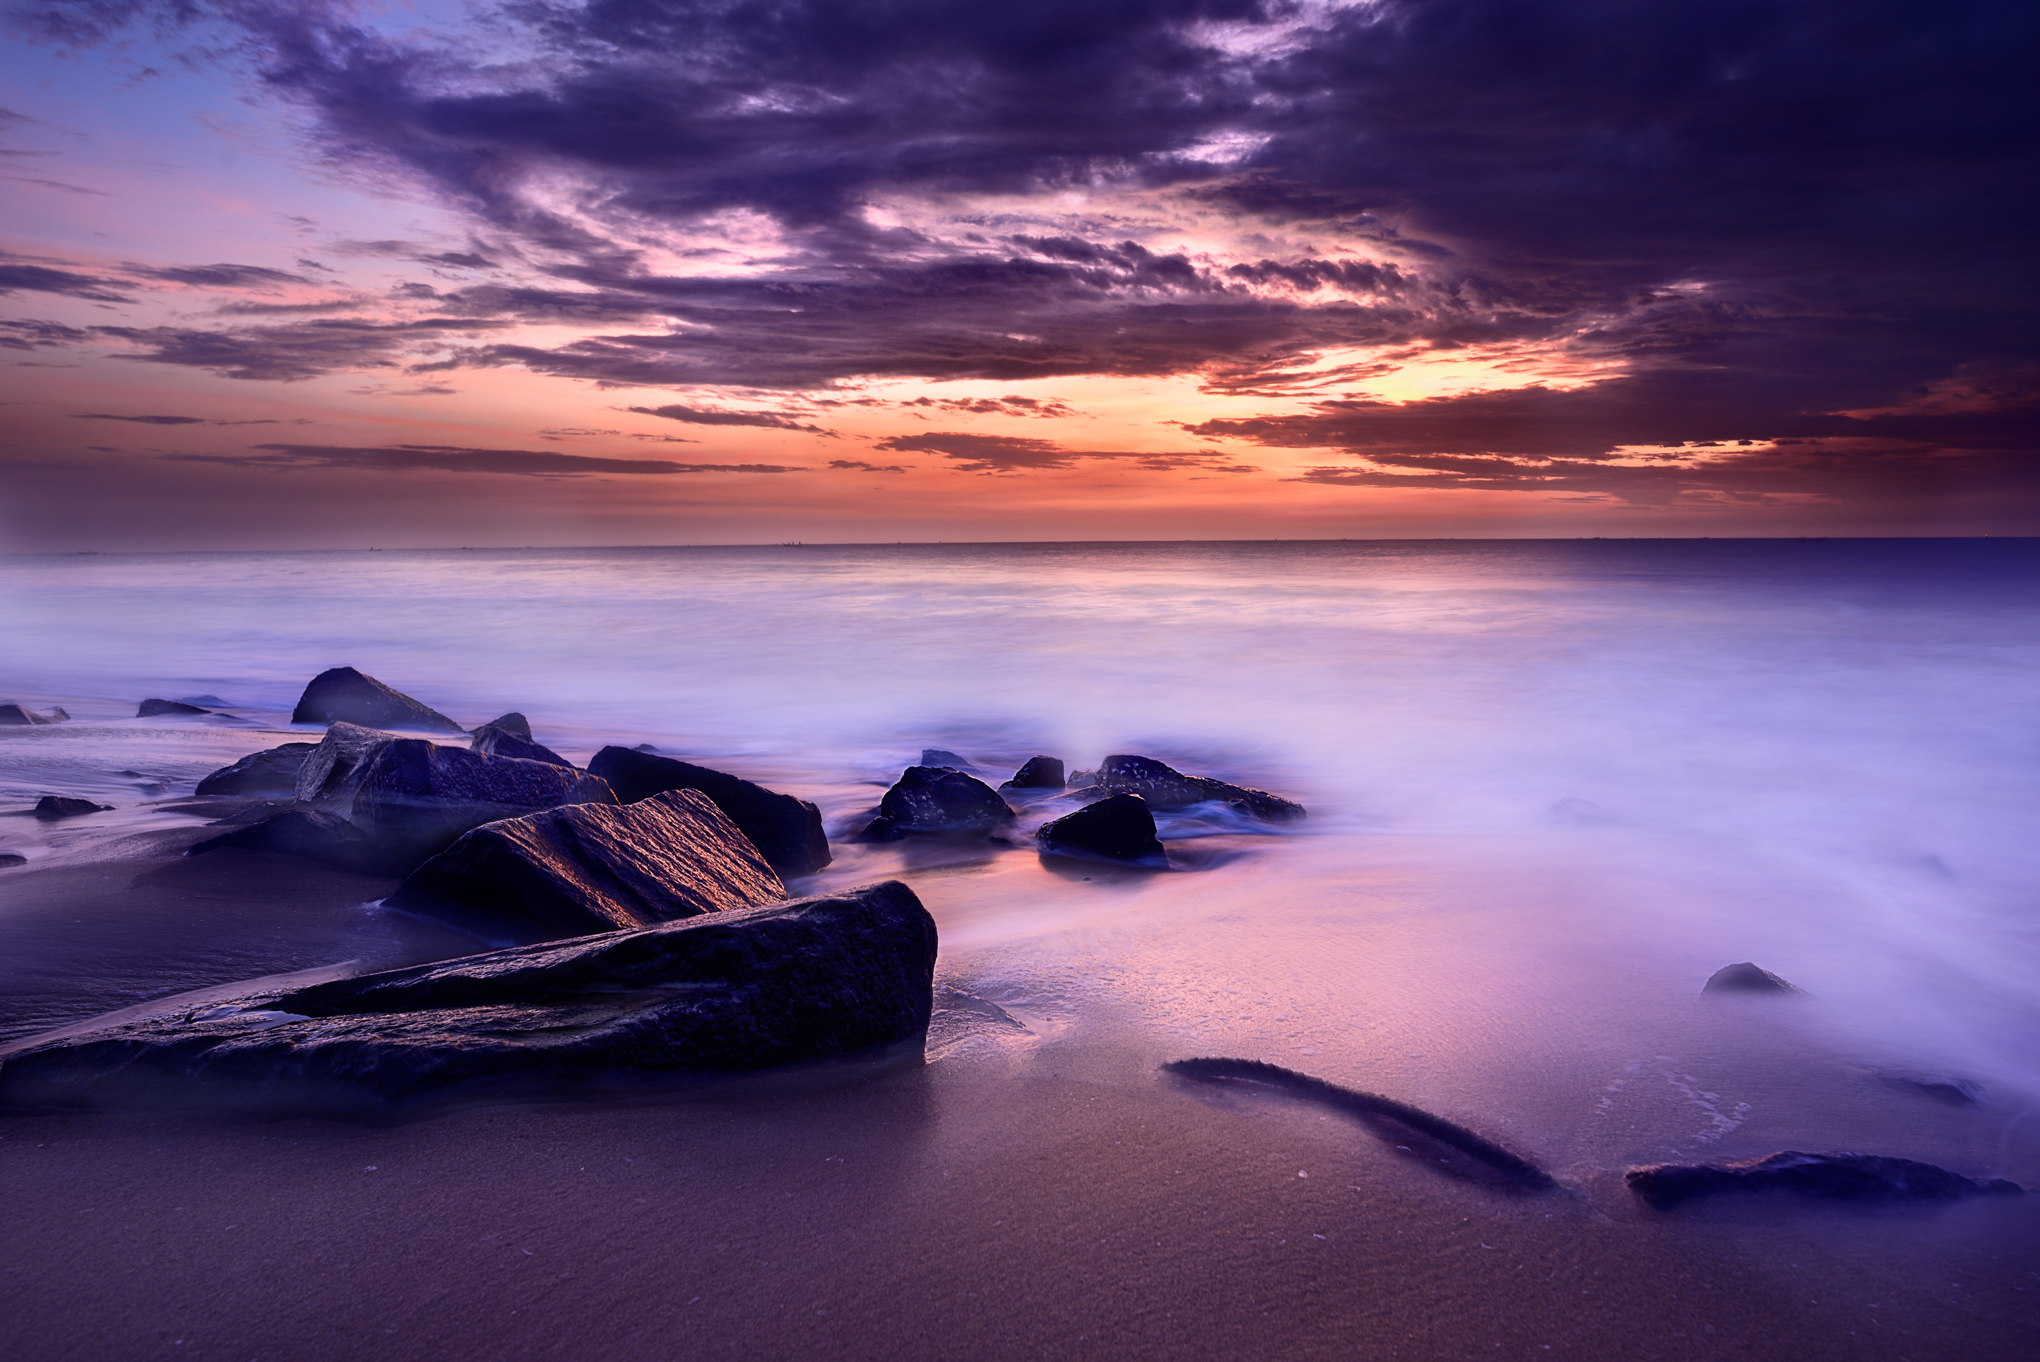
7. Use Long Exposures
Why do wildlife photographers seek creamy bokeh? In large part, it’s because the blur removes distractions in the background and makes the subject stand out more.
This can work in landscapes as well, and I’m not just talking about shallow depth of field photos like Spencer’s image in the prior section. Instead, at the beach, you can use motion blur to fill a similar role.
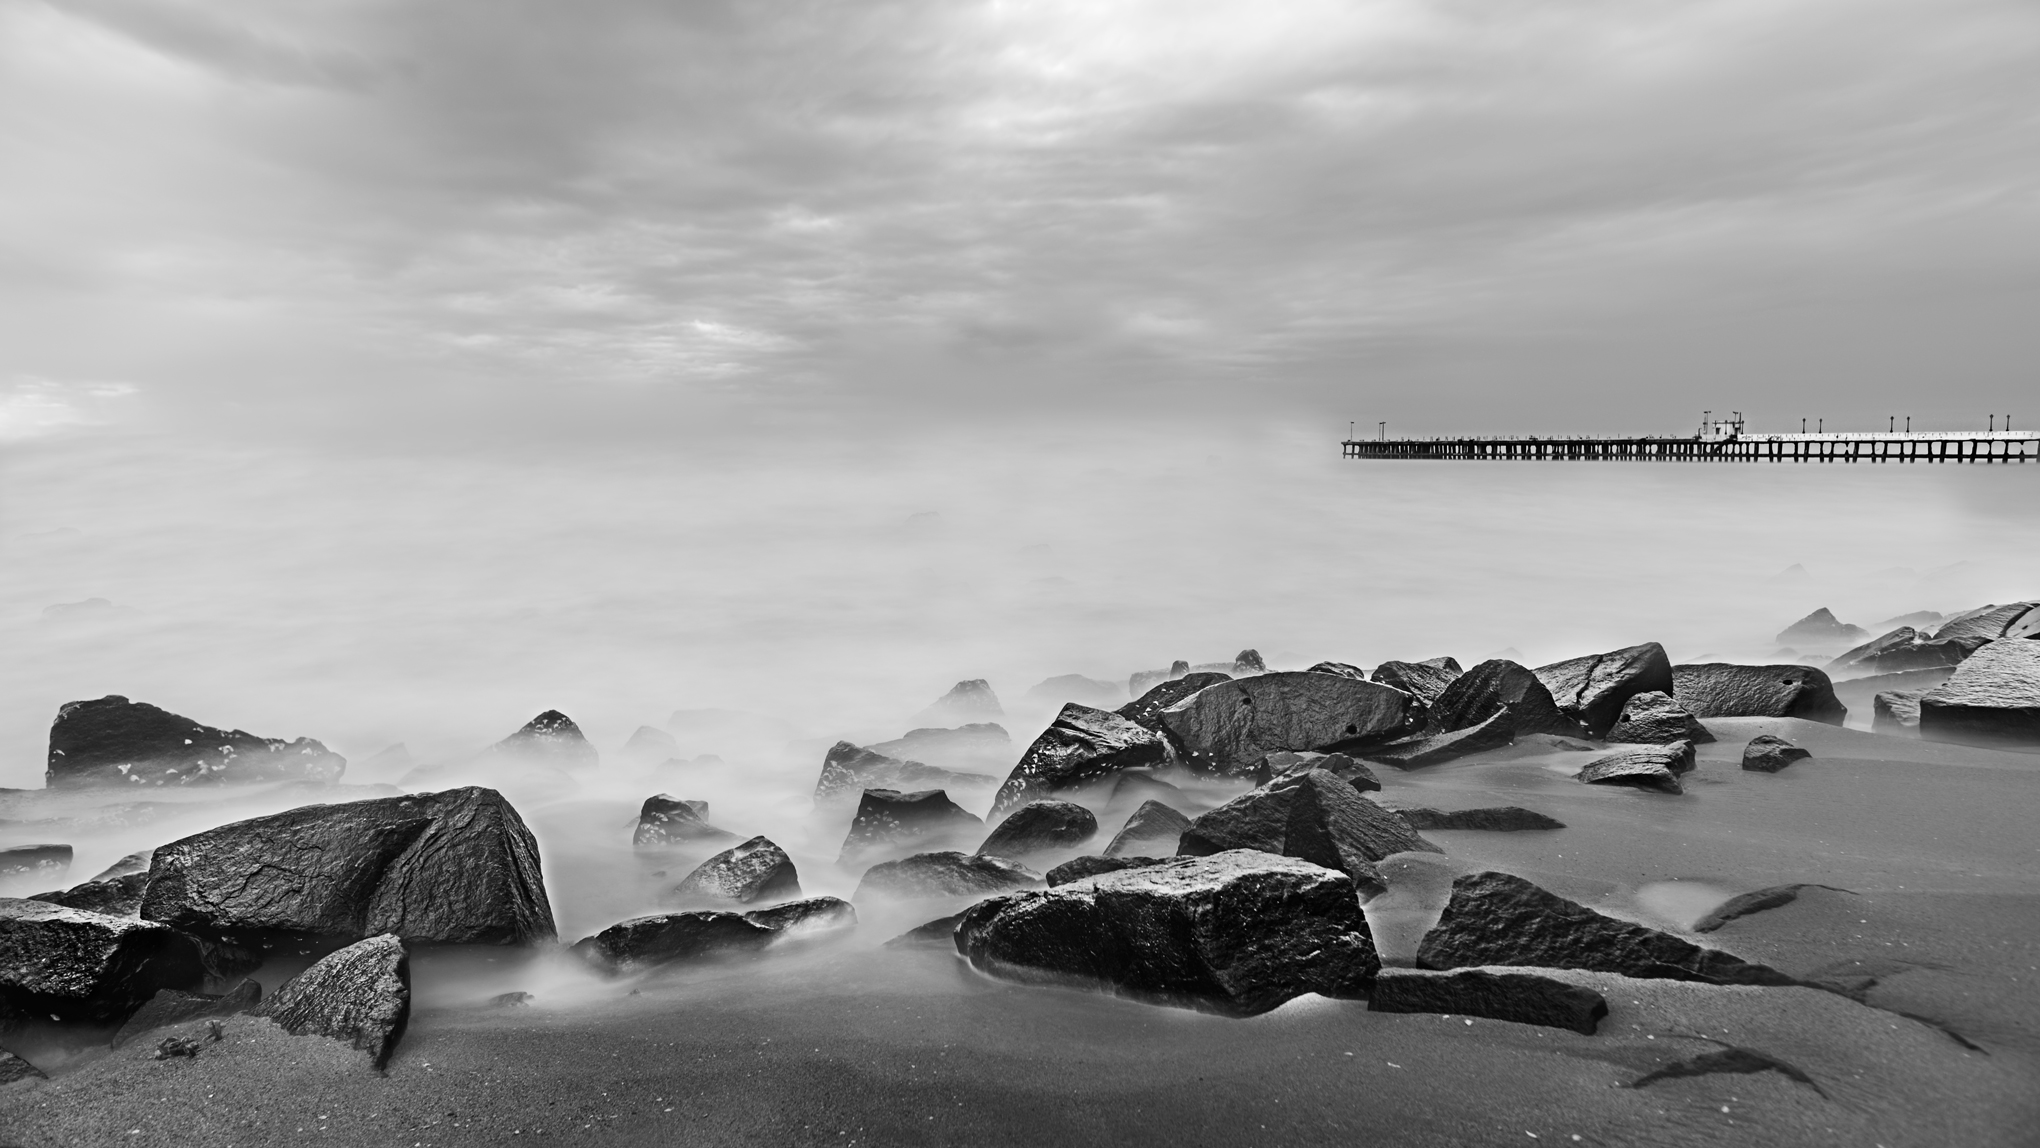
To get motion blur at the beach, you just need to point at moving water and use a long enough exposure. A few seconds will usually give you at least a bit of movement, whereas exposures like 15 seconds, 30 seconds, and beyond can turn the entire ocean into a foggy blur. That’s the effect in the image above.
Usually, you will only be able to get this effect after sunset/before sunrise, or by using a neutral density filter to cut down on the amount of light that reaches your camera sensor. (You can also simulate it digitally via image averaging if you don’t have a filter with you.)
That said, I often see photographers go further than they need. They’ll attach a very dim 10-stop neutral density filter to their lens and shoot a bulb exposure of more than a minute long. That’s essentially how I shot the photo above, and while I like the fog effect here, you can probably see how it could grow overdone eventually.
If you stick with shutter speeds in the 1-10 second range, you’re more likely to get interesting patterns in the water rather than just blowing out everything to fog. And you’ll still get better subject isolation and fewer distractions compared to shooting at a more “typical” shutter speed. So, I’d go with a 5-stop or 6-stop ND filter before a 10-stop filter if you can only pick one. A 10-stop filter is hardly bad, but it brings out a different mood when shooting the same scene and is definitely more niche.
8. Use a Tripod and Keep It Clean
Isn’t this tip quite obvious? I’ve talked all about long exposures and neutral density filters, so hopefully it goes without saying that you will need a tripod. Shooting handheld is one of the most common mistakes a beginner landscape photographer makes (especially with beach scenes).
How can you do that without getting grit in your tripod legs? In all the times I’ve spent photographing beaches, I have never caused any permanent damage to my tripod. That’s not because I use big plastic bags or anything else to prevent sand and saltwater from reaching the tripod joints – actually a lot still does. Instead, I make a commitment to take apart and clean my tripod with warm water every time I get back from the beach. It’s not the immediate sand or salt in the tripod that damages it, but rather spending months at a time with grit in the joints wearing them down. If you don’t know how to dismantle and clean your tripod, you should be able to find some tutorials for the model you use online.
Conclusion
In this article, I’ve covered the tips that I found the most useful when I was starting out beach photography. It’s certainly not the easiest subject in the world, but the tips here should start you down the right path. If you have any questions or suggestions, as always, please write them in the comments section below. Happy clicking!
Tripod type for the beach:
I started with an aluminium screw lock tripod. To stop the threads getting chewed up by the much harder sand particle I had to strip each twist lock down, clean the threads, grease and reassemble. An hours work. I did this twice then started looking for a better tripod for use on the beach.
Enter Berlebach. Wooden tripod, big basic clamps that I literally hose down in the shower then dry with a towel. I replaced some of the screws with stainless steel versions, but otherwise the tripod has not rusted in any way. I regularly immerse it in a foot of seawater without worries. No fine tolerance in the sliding/clamping mechanism. plus its weight helps settle it in the sand better than a lighter support. It now takes 5 minutes to clean and dry and the tripod has not deteriorated from this treatment in over 10 years usage.
In my part of the coast a “partly cloudy” forecast generally means fog!
Great tips, Madhu!
Any advice on White Balance? I frequently get the sand looking gray and using exposure compensation to brighten it doesn’t preserve the sand color.
Generally during twilight a daylight setting of somewhere between 5600-6000 works for me SSM. But as always, if you are shooting RAW you should be able to correct it in post. If you want to be sure of accurate colors, having a shot with white/grey/black card on the scene before or just after the shoot helps.
Great article and tips!
Thoughtful and insightful tutorial on beach landscape photography!
Great tips!
I like the way of you explaining in detail. It is very useful.
Thank you.
Thanks Shaik. I am glad you found it useful