This is a short essay for photographers who like to use manual mode. Beaches present some unique challenges for getting good quality photos, but they are also very rewarding subjects. Here’s what you should know if you want to photograph the beach using manual mode.
The two main challenges to beach photography are that beaches are often drenched and saturated with light, and that horizons must be straight. The first one makes exposure quite a challenge. Light reflects off of the water and sand, and if not handled correctly, it can give you overly contrasty photos. Meanwhile, tilted horizons can make your photo look very bad and amateurish.
The horizon issue is the easy one. Just turn on the grid in your camera menu and then line up the water horizon with the grid lines. If you don’t have a grid in your menu, then try to line up your horizon with anything inside your viewfinder that can indicate a straight line. You then should check your horizon with your post processing software after you have converted to jpeg and straighten it when necessary (some straightening is almost always necessary).
You must also look at your horizon line for the barrel/pincushion effect that comes from lens distortion. This is when your picture seems to bulge or get concave at the horizon line. Every photo software has tools to correct distortion. I recommend correcting distortion first, then straightening the horizon second in post processing.
Exposure is a more complex issue. The two biggest challenges to exposure are excessive contrast, and over/under exposing your sky or water. Quite often, if you have a properly exposed sky, the rest of your photo could look really dark, nearly black in many cases. If you properly expose the water, your sky can be underexposed. But there is a solution. Read on.
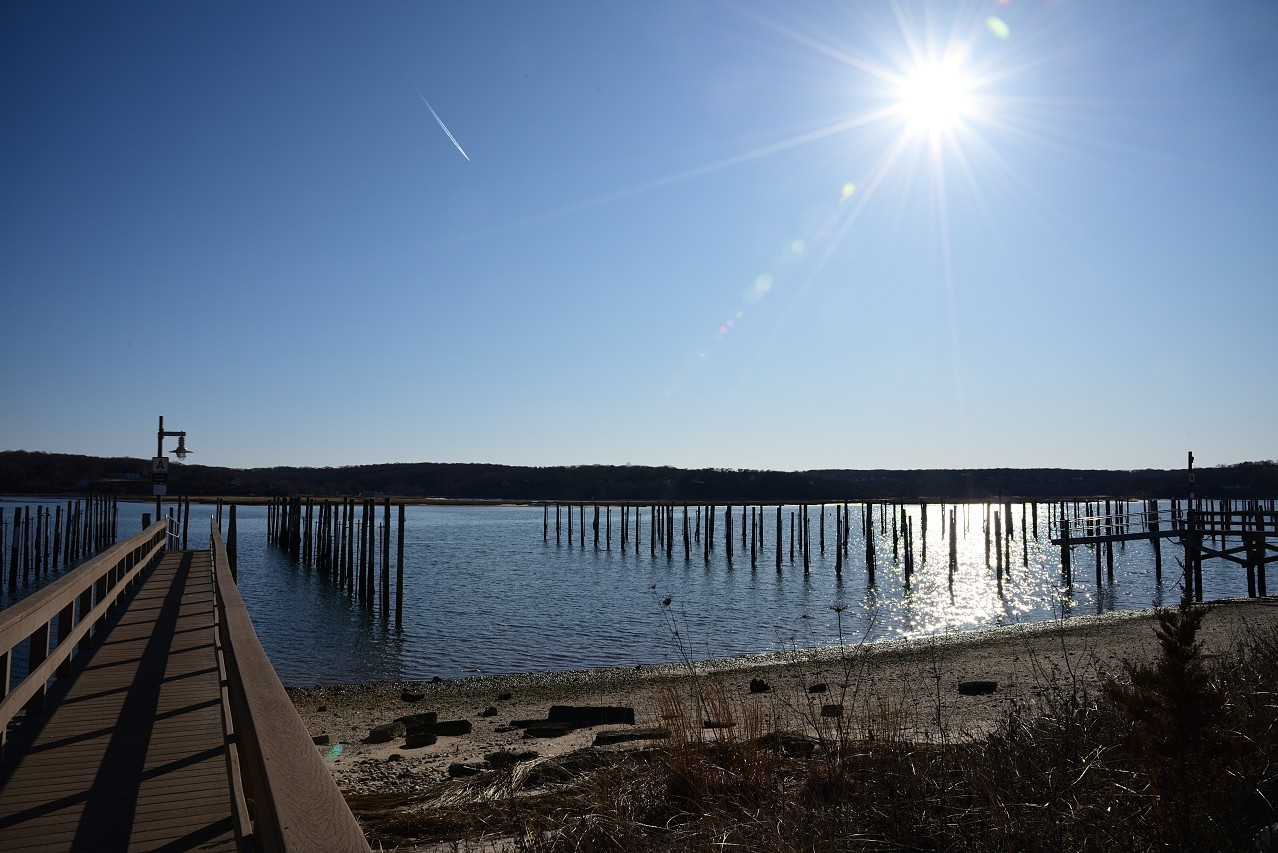
Let’s look at aperture first. I find that the range from f/5.6 through f/16 all make good apertures for beach photography. If you want all aspects of your photo to be sharp, then you would choose f/8 or f/11. If you want sunstars in your photo, choose f/16. But beware. When you want a sunstar, you can end up with a pretty dark photo to accommodate that bright sun.
Meanwhile, if you want to put some background bokeh in your photo or slightly blur the far horizon, then you would go to the wider end of your aperture range and choose f/5.6 through f/6.3. You may even choose very wide apertures like f/1.8 if you want the entire beach to be out of focus, with just your subject in focus.
One important thing to note about photographing the sun is that it can be quite dangerous to the eye if you are looking through an optical viewfinder. It is important not to look directly at the sun. Instead, consider using the camera’s rear LCD if the sun is in your photo.
Next let’s look at shutter speed. On sunny days there is so much light that your camera’s meter will tell you to use a shutter speed of 1/1000th of a second or even faster, such as 1/2000th of a second. However, if you follow this recommendation, you will often end up with a very dark photo. Over my years as a beach photographer, I learned that on a sunny day you don’t need a shutter speed faster than 1/500th or 1/800th of a second, no matter what the meter tells you at the aperture that you have selected. You will keep your same aperture and simply reduce your shutter speed to the above settings and you will get a properly exposed photograph.
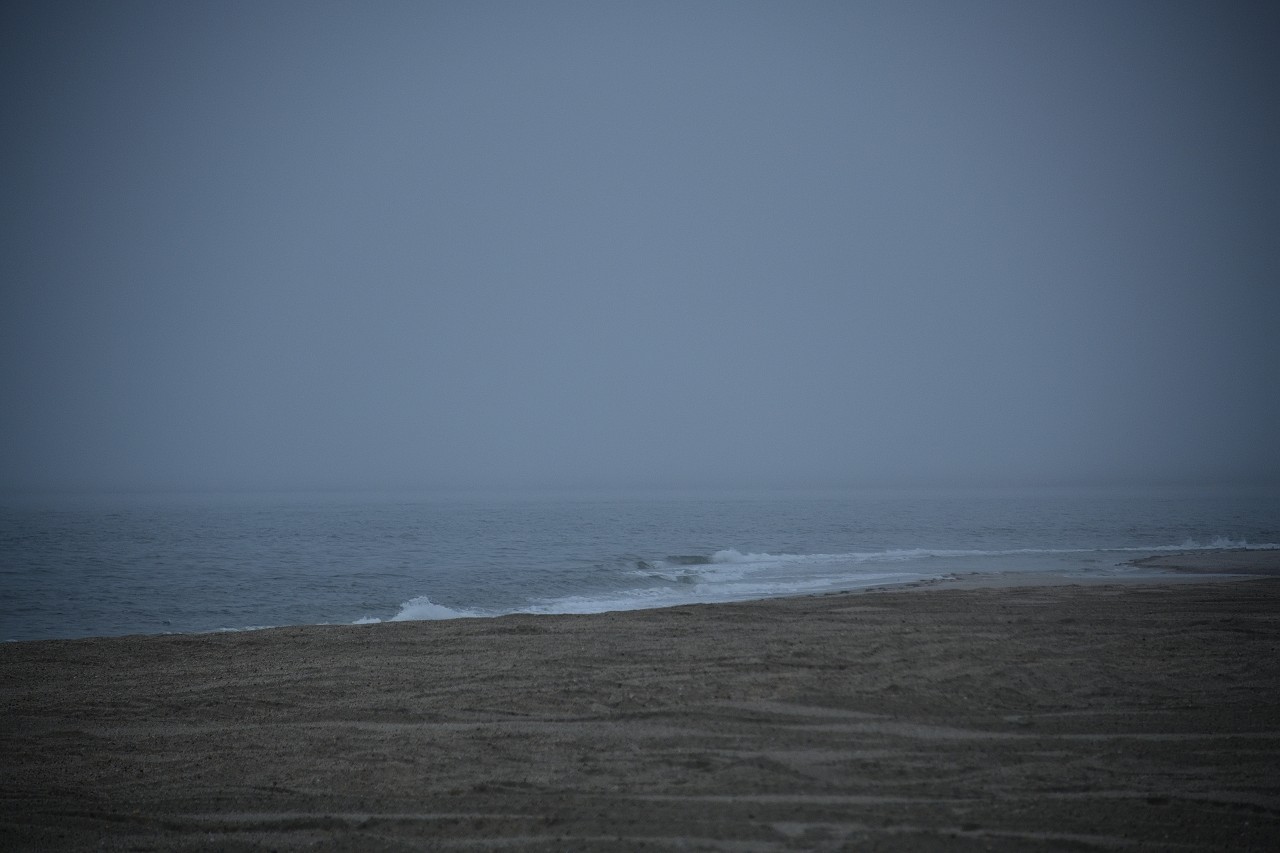
On overcast days, it is ok to follow your meter, because without all that direct sunlight it will recommend more reasonable shutter speeds. It’s also the case that on foggy or overcast days, you don’t want the beach photos to look especially bright anyway.
As for ISO, on a sunny day you will want to keep it at base ISO because the light is so bright. On most cameras, this is ISO 100. You will only need to raise ISO on a day tht is not particularly sunny because of the lower light. More on that in a bit.
The next step in getting a correct exposure is to deal with the sky and the water. Because your camera meters to your focus box, whichever one you aim your camera at, you will expose that one correctly and underexpose the other. That is, if your focus point is on the water, the sky will be too dark. If your focus point is on the sky, the water will be too dark. The exception to that is, of course, if the water and the ocean are the exact same color, which would mean that either night has fallen or you are probably in the middle of a very bad storm. We will stick to discussing daylight conditions where the sky and the water are not the same color.
What I always do in that case, and it works really well, is to aim my little focus box at the exact point between sky and water. That is, you aim your focus point at the horizon line, making sure that both the sky and the water are in the box and metered simultaneously. This will give you a much better meter reading, and you will get a properly exposed sea photo.
A word here about metering and focusing methods. My favorite metering method happens to be center-weight metering with a 12mm circle. However, at the beach, I often will change to matrix metering because it takes into account a much wider area of view. This can help with the variety of light conditions and contrast that can occur in a single image. Any metering method will work well at the beach if you understand all your other settings, and it is really just a matter of preference.
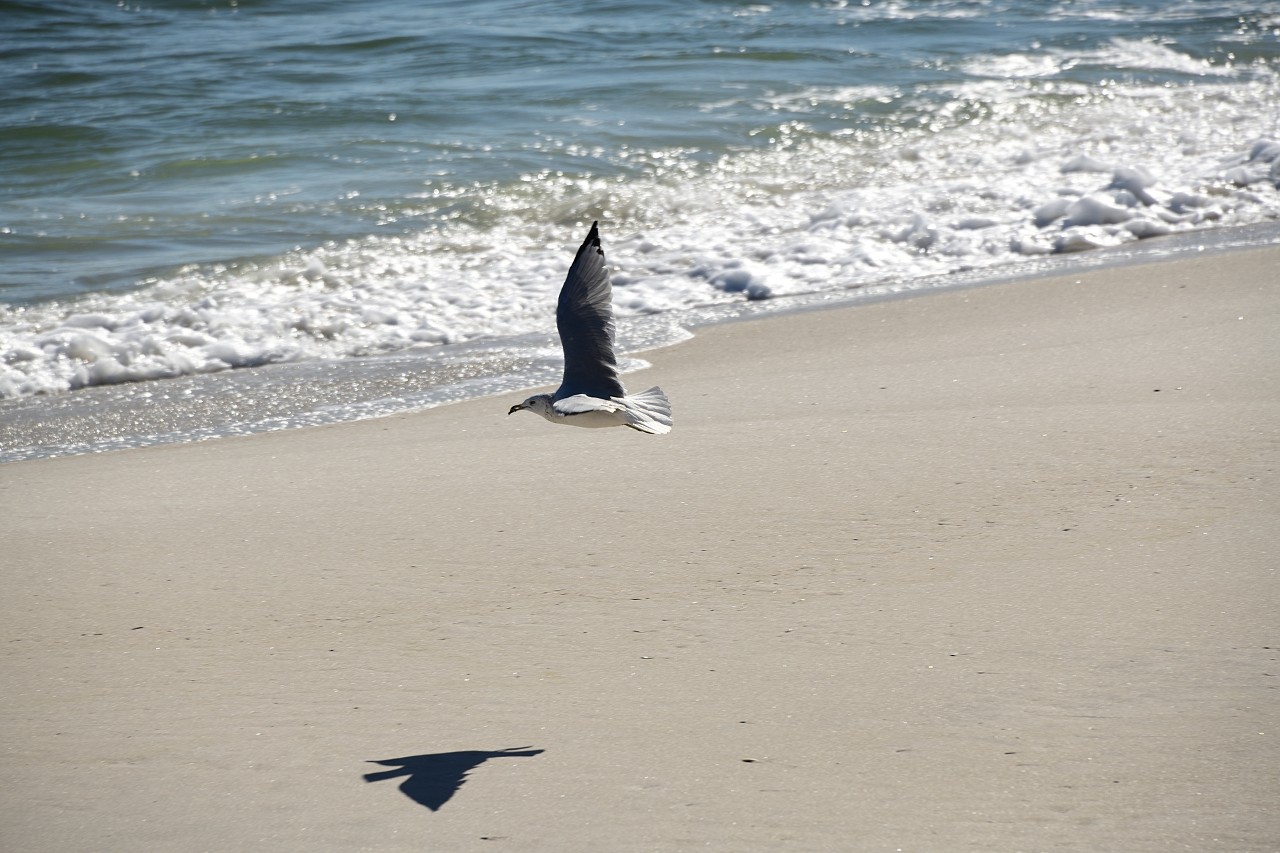
As for autofocus method, I generally shoot in single servo, but I change to continuous servo at the beach because of all the rapid motion that goes on there. When shooting gulls, moving boats or moving people, continuous servo can ensure that you don’t miss out on anything. Any of the focus modes that you prefer will work in that context. I tend to use either single point AF or group area AF, and both work equally well.
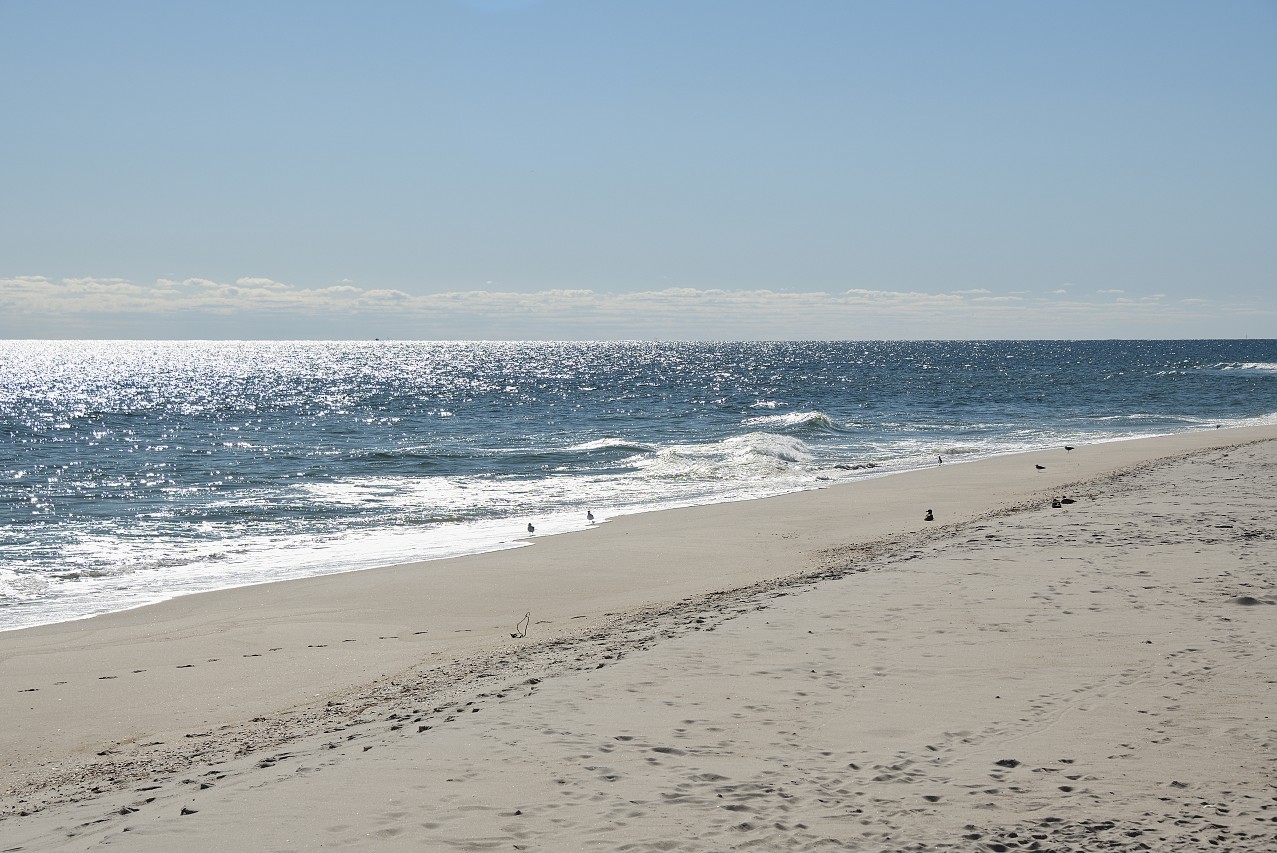
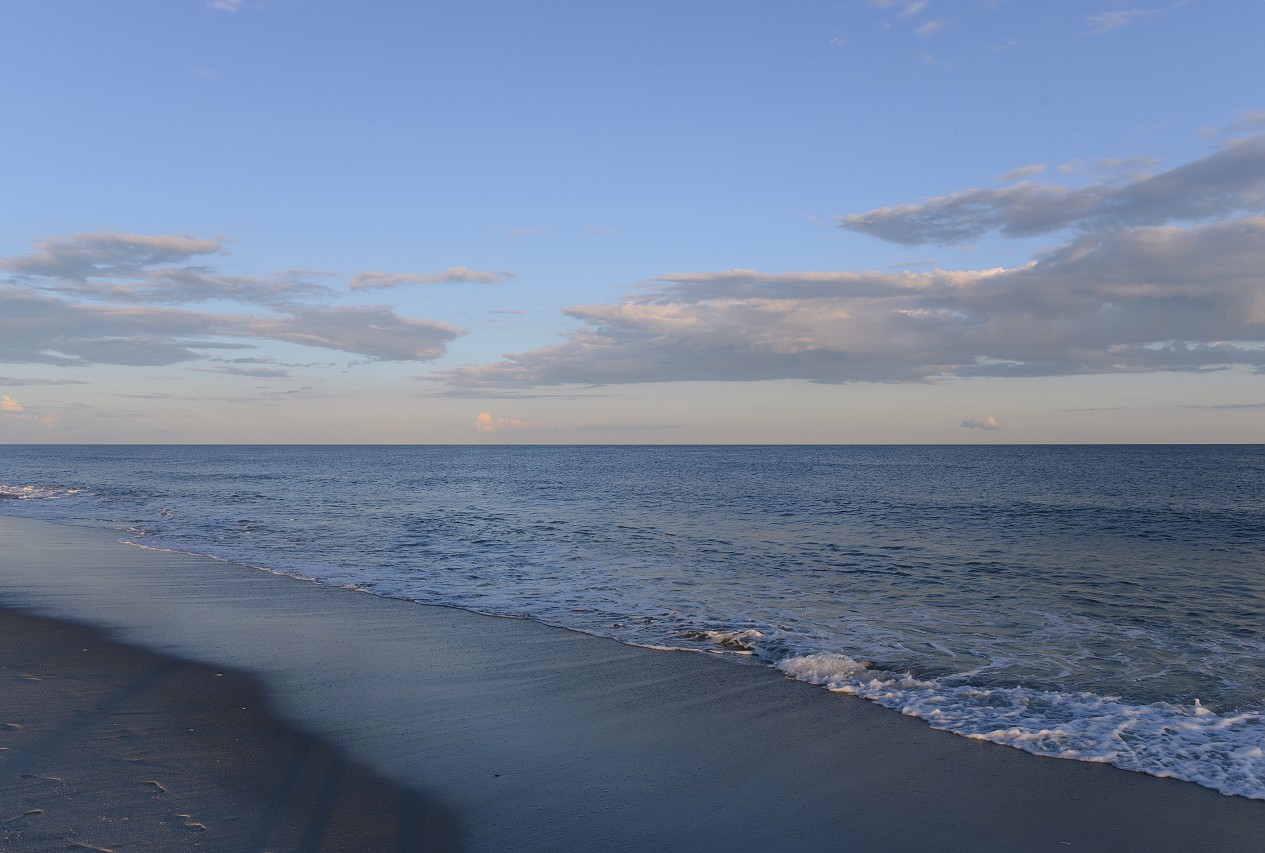
Another thing to watch out for in beach photography is composition. Too much water or too much sky? I have many photos where too much of the composition was taken up by water, with just a small strip of sky at the top. When I see one of those, I ask myself “what was I thinking when I composed that shot?”
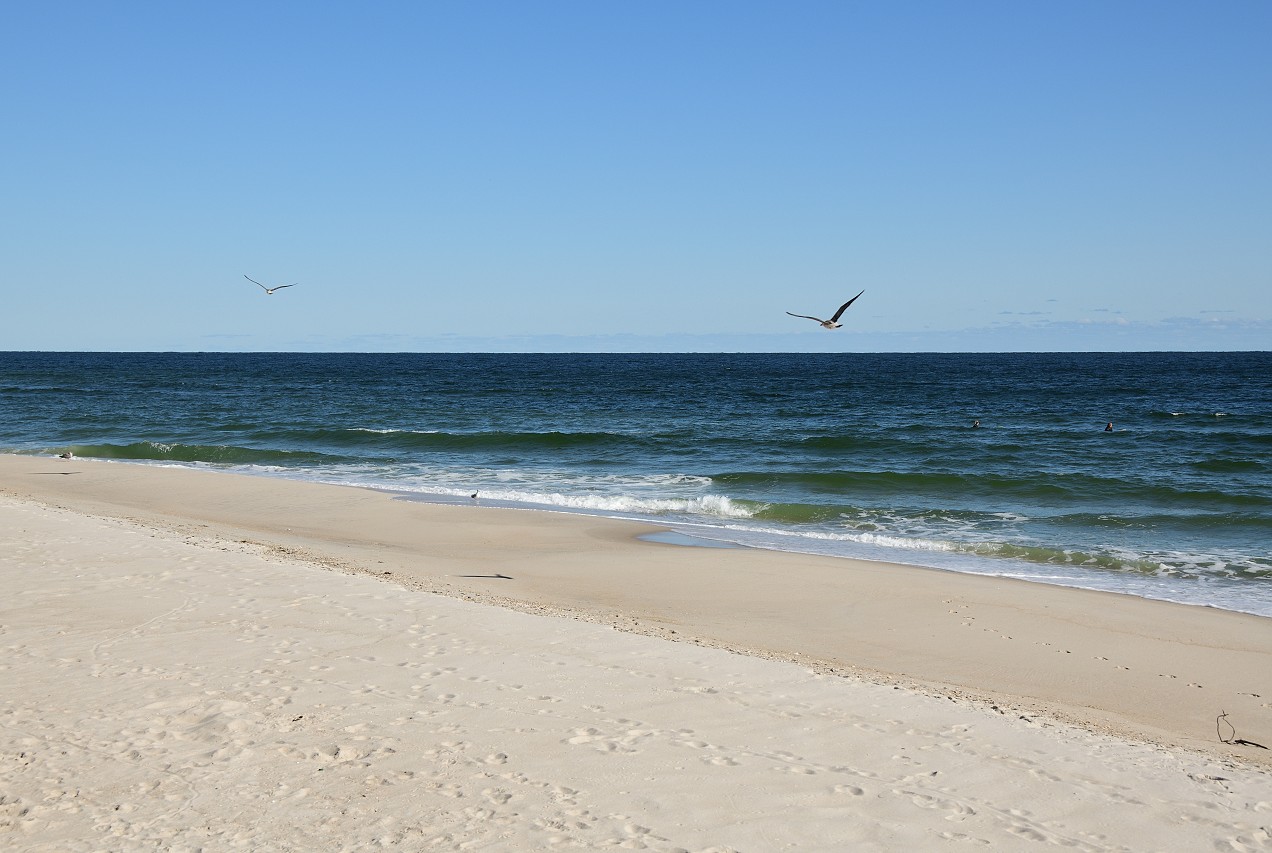
The opposite can be true, too. When you have clear blue skies with nothing in them (like interesting clouds), and you somehow made that sky the biggest portion of your photo, that can bring on another “what was I thinking” moment. And yet you often don’t want to have an exact 50/50 sky and water ratio, which can look contrived and boring. Instead, try to compose your photo in a more interesting manner.
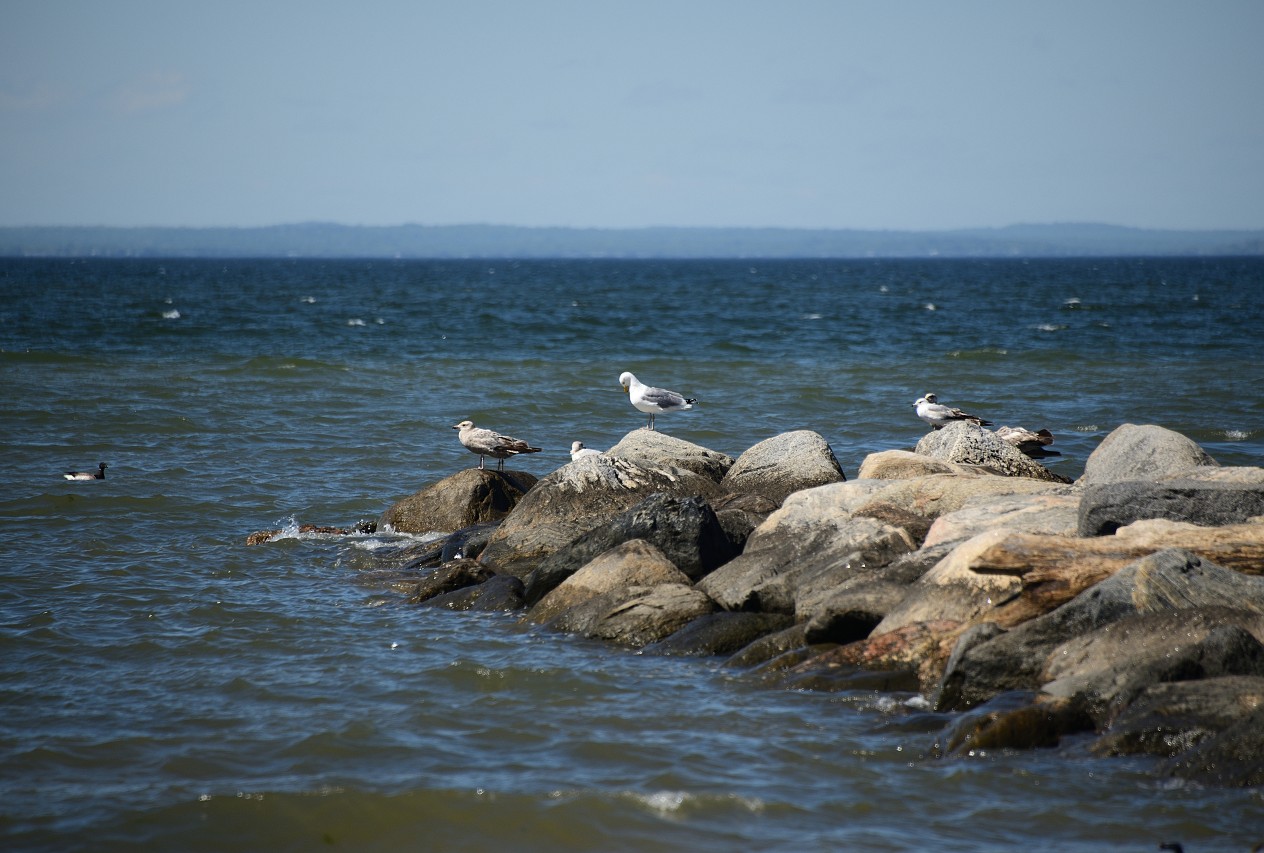
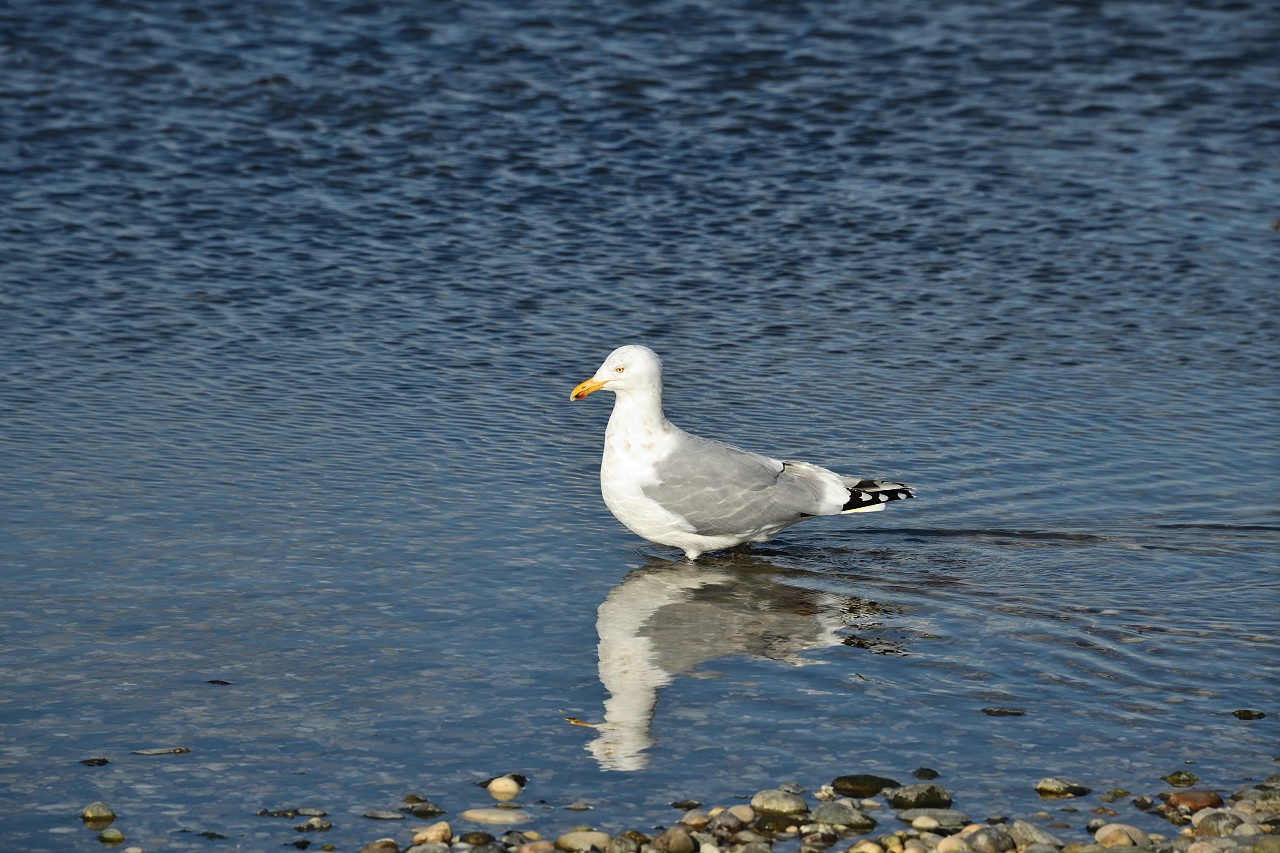
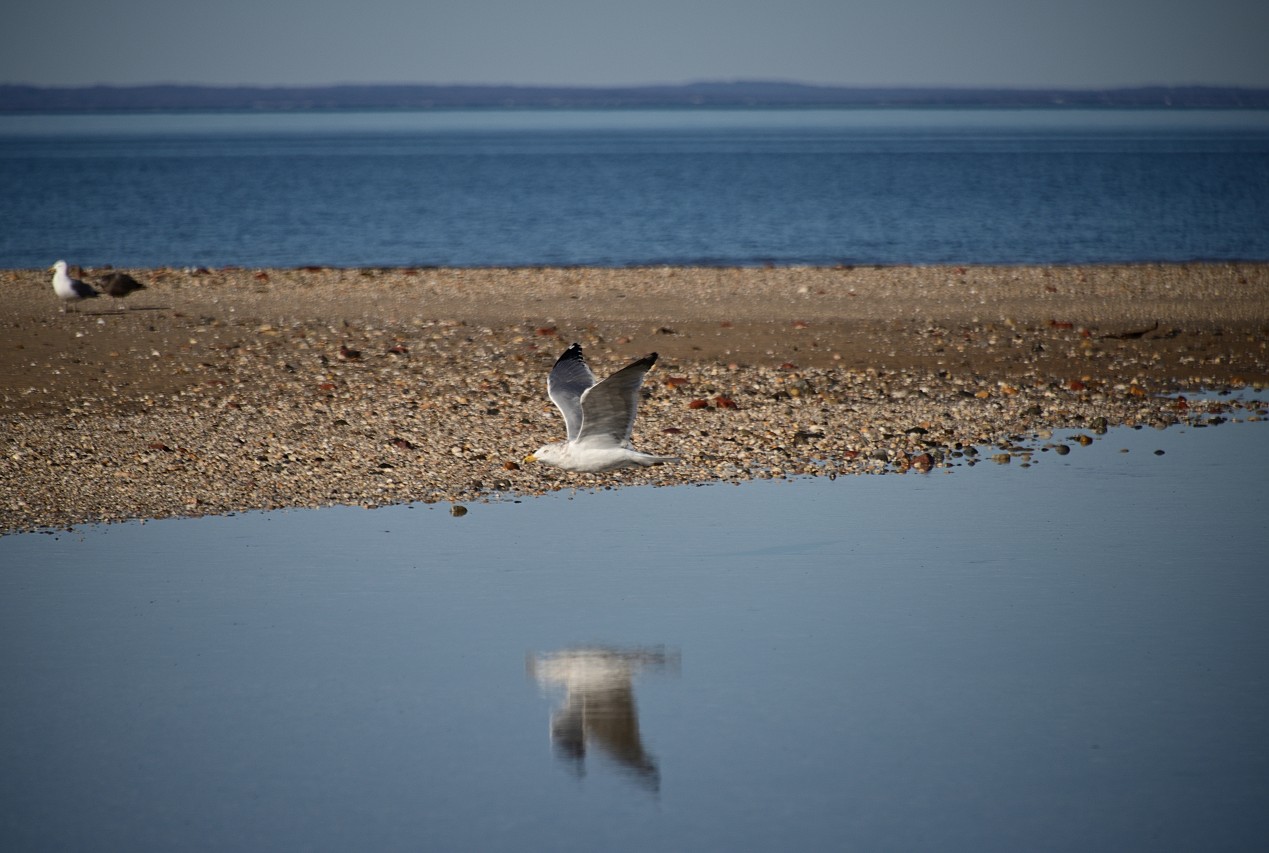
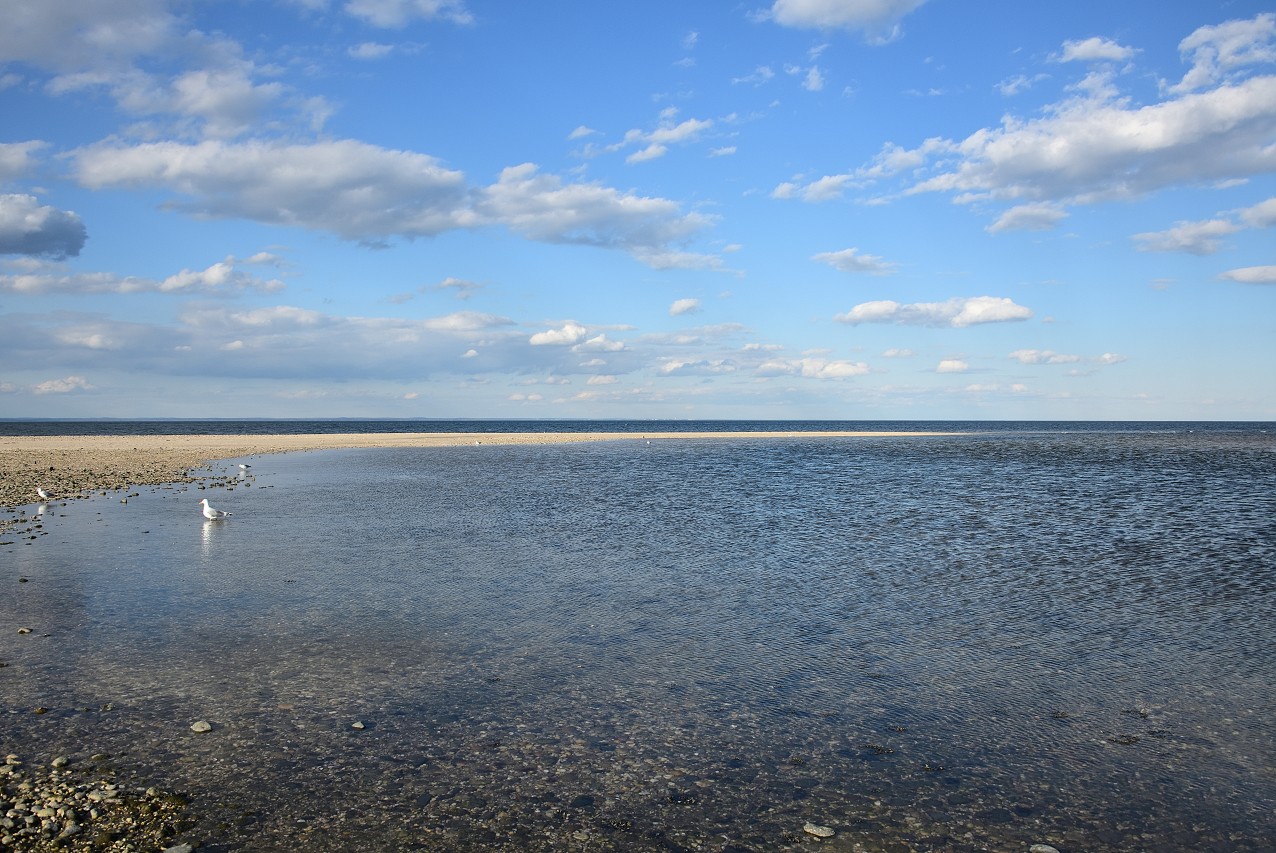
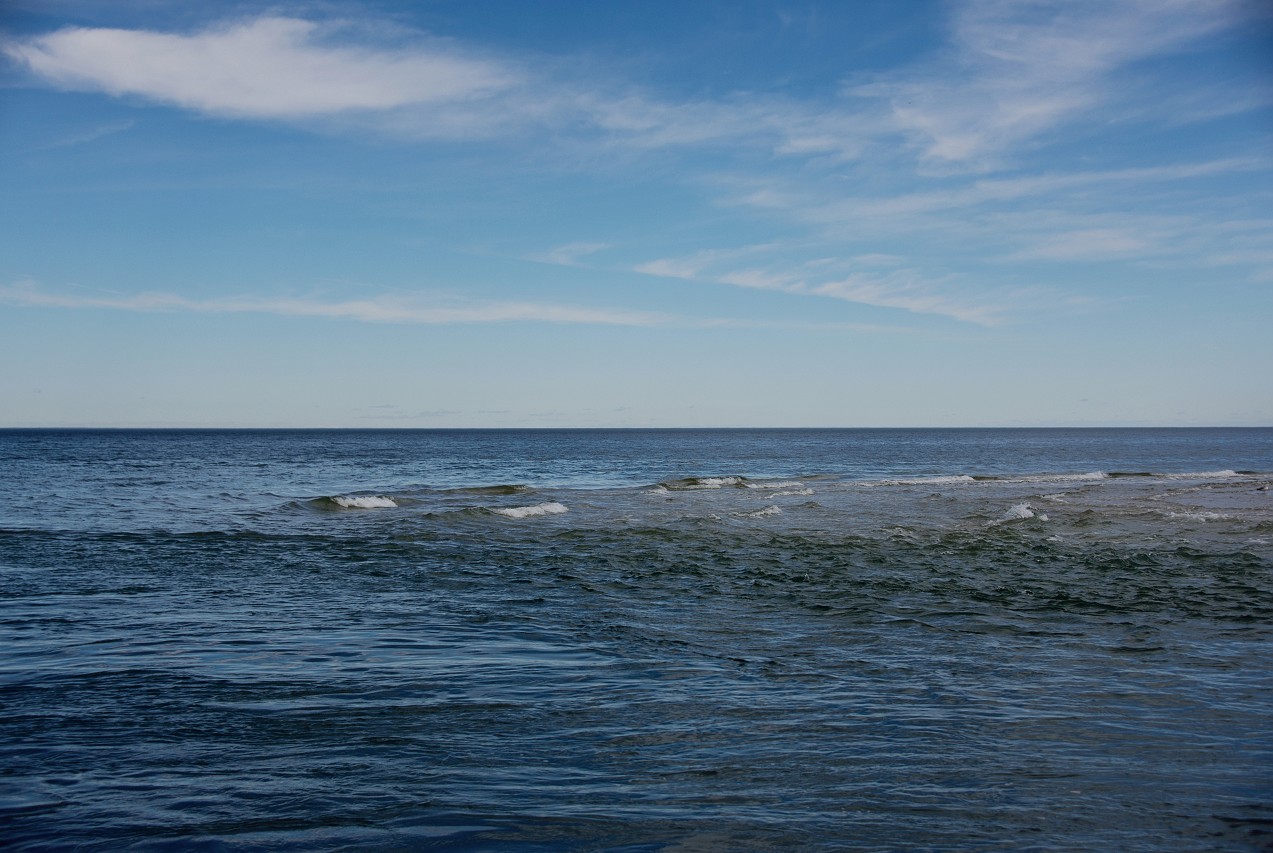
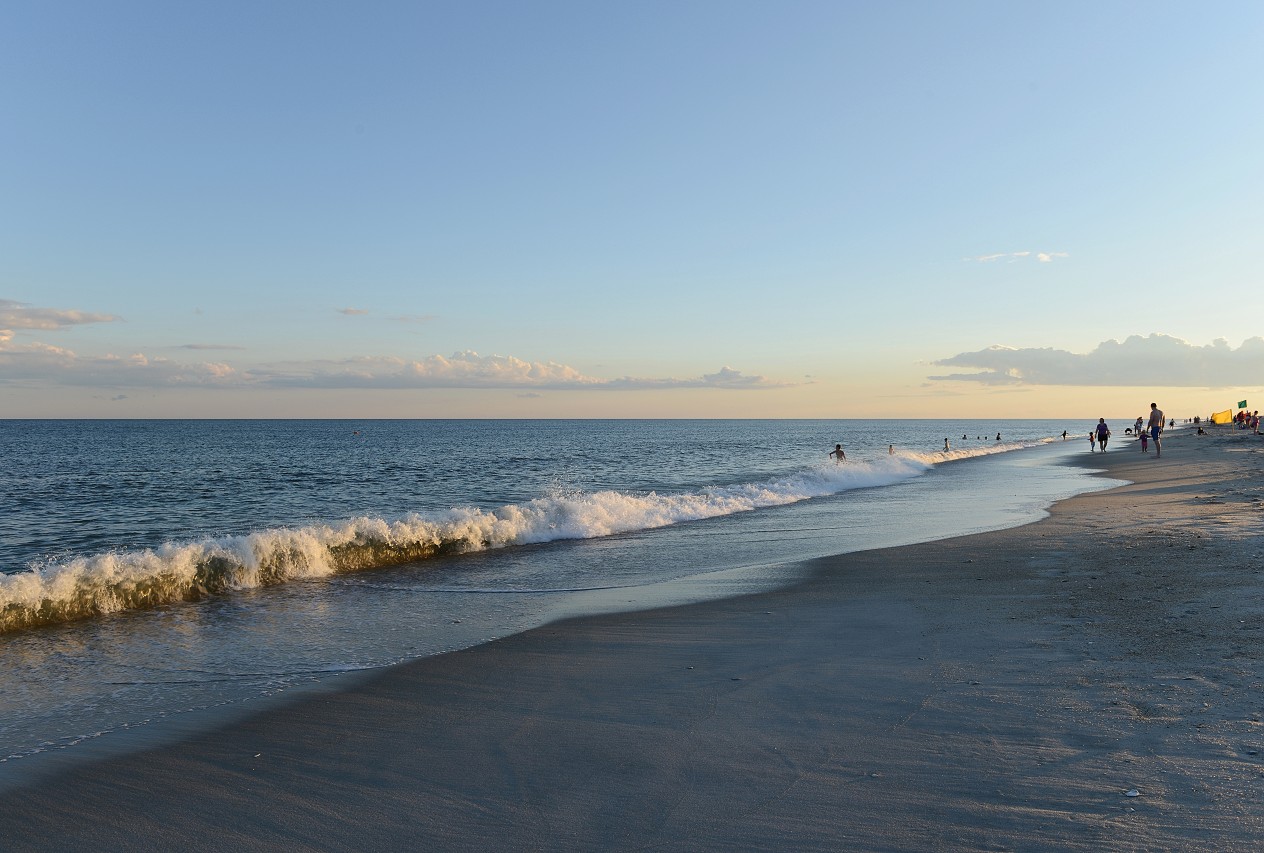
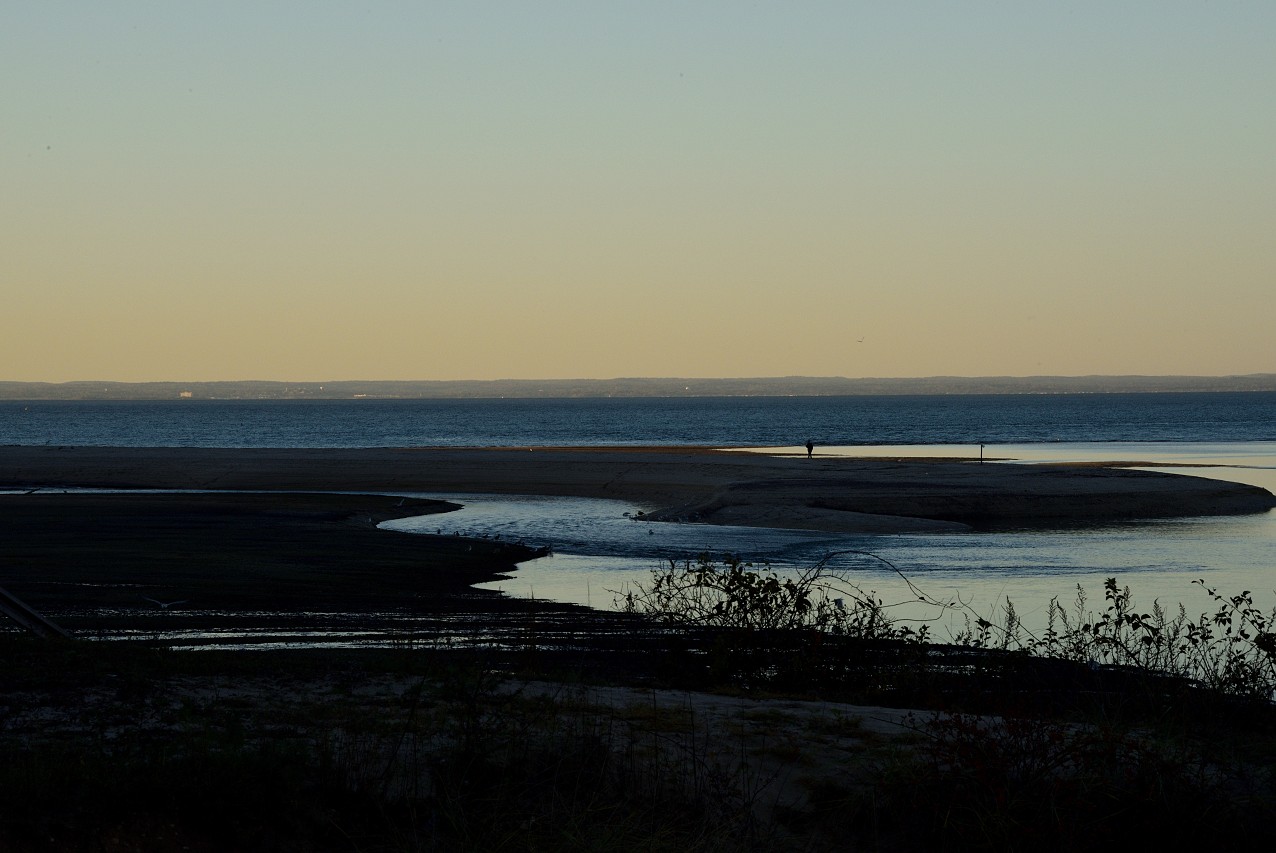
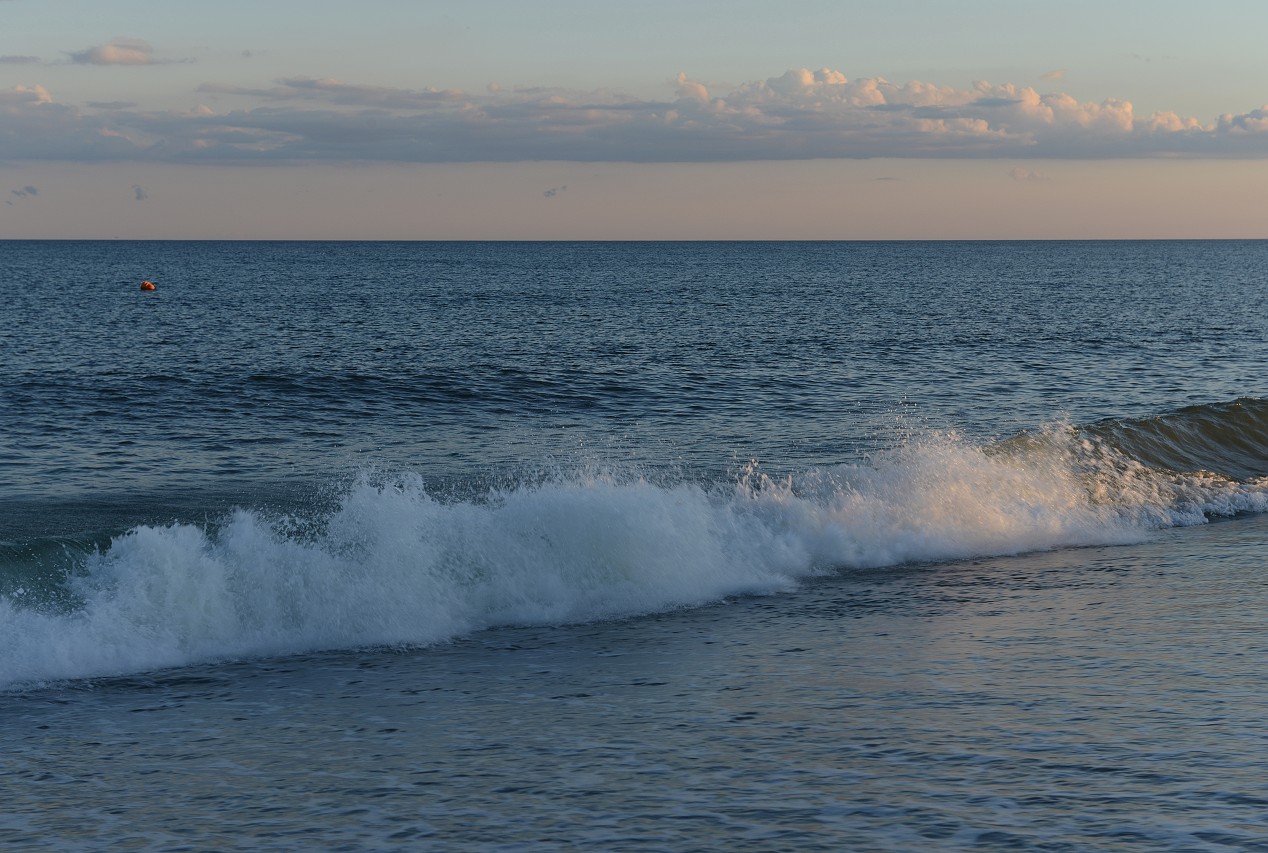
Another important part of good composition in beach photography is to have something in your seascape shots besides just water and blue sky. The water/sky part is a sort of empty blue canvas that is best used as a background. Your subject can be a boat, a beautiful cloud structure, unusual waves, a gull flying by, some land at the bottom, or sometimes even a swan slowly swimming by. Gulls playing in the surf, or flocks of birds, are endlessly fascinating. More unusual can be a person swimming in the water, a hang glider, or a wind surfer. A genre all to itself is surfing, which requires a whole skillset of its own to photograph.
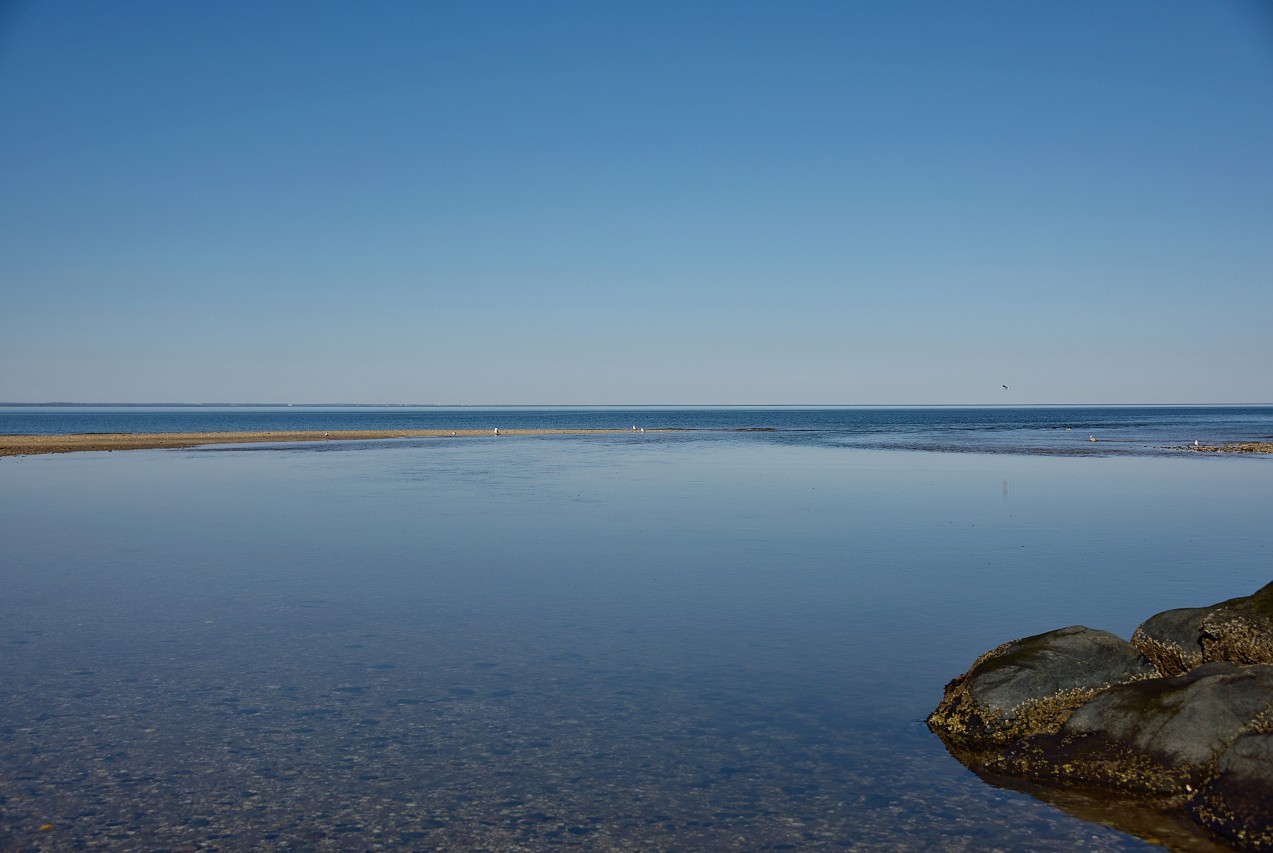
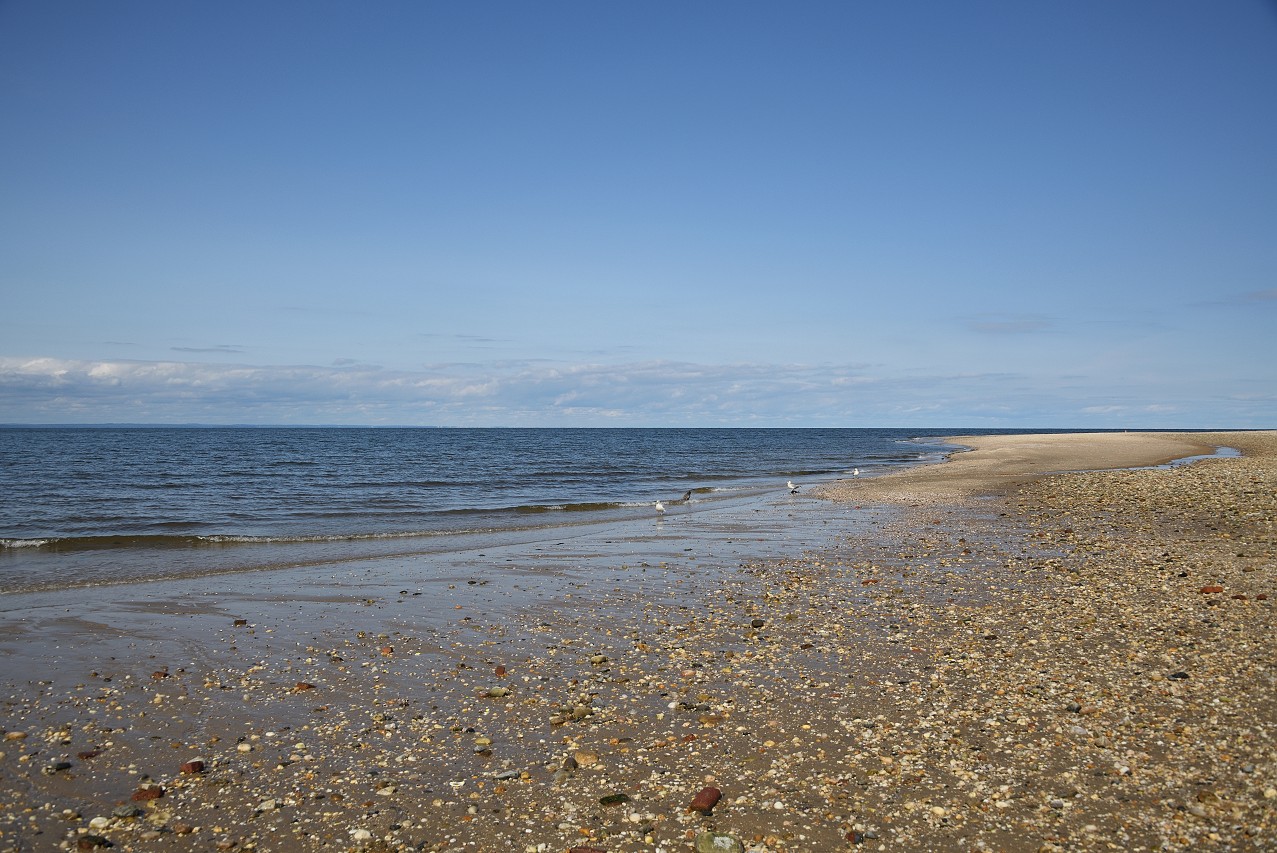
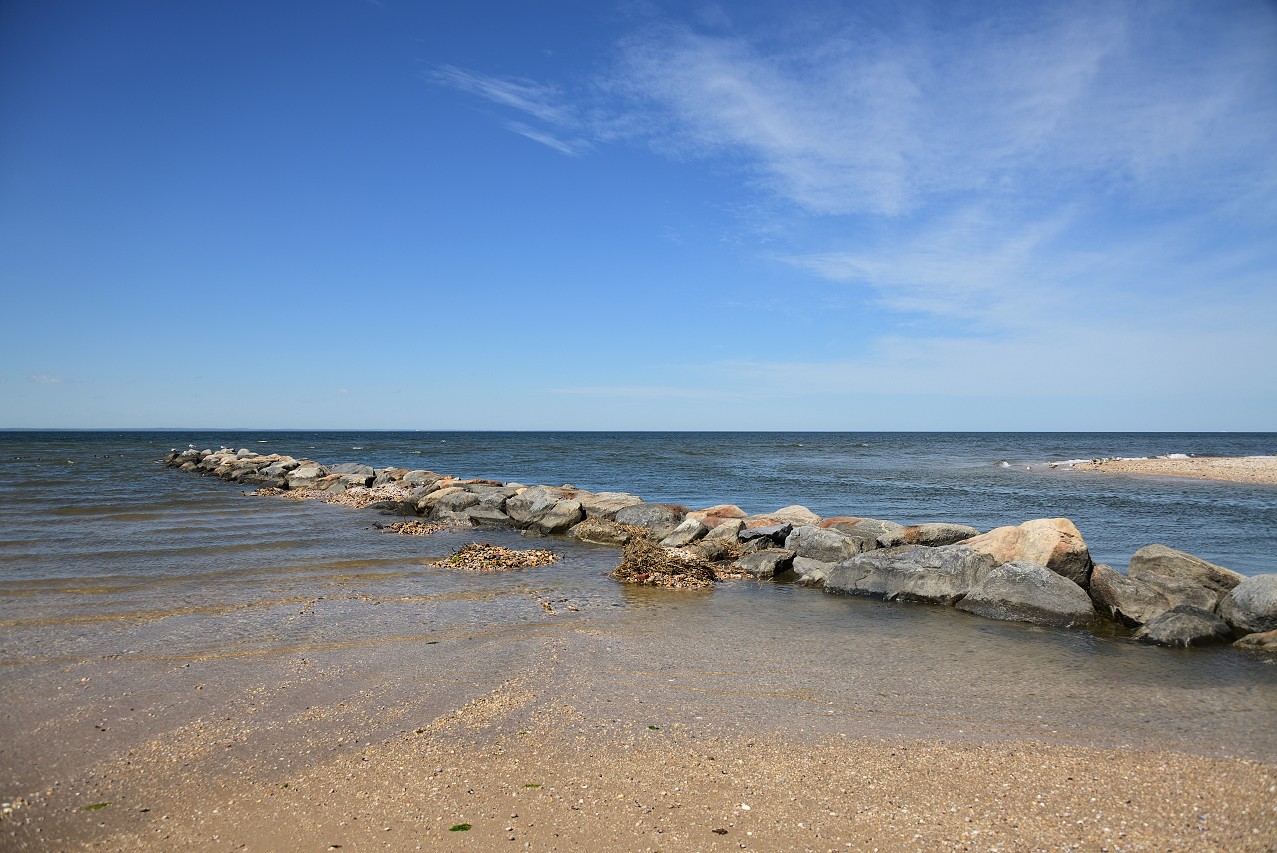
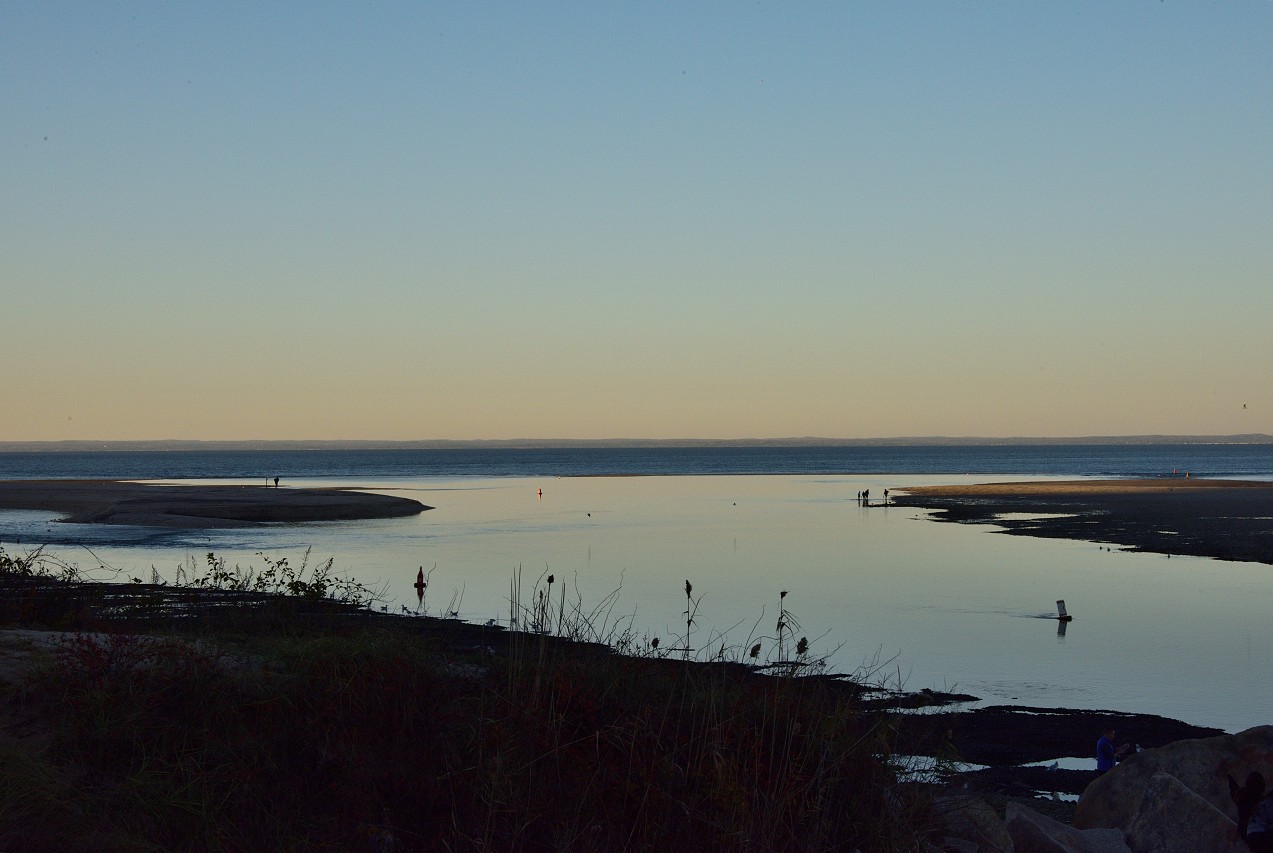
If you want shore photos, shells and seaweed can provide material for a good composition. I love shooting waves lapping at the shore. Rocks and pebbles can make a good foreground for shoreline shots, too. A nice sandbar can be a great part of beach photography. Dunes are always fascinating. A curvature in the shore line also provides interest, as can a jetty or a rock jetty sticking out into the water. If you combine any of these things with beautiful cloud structures, your picture is bound to be a winner.
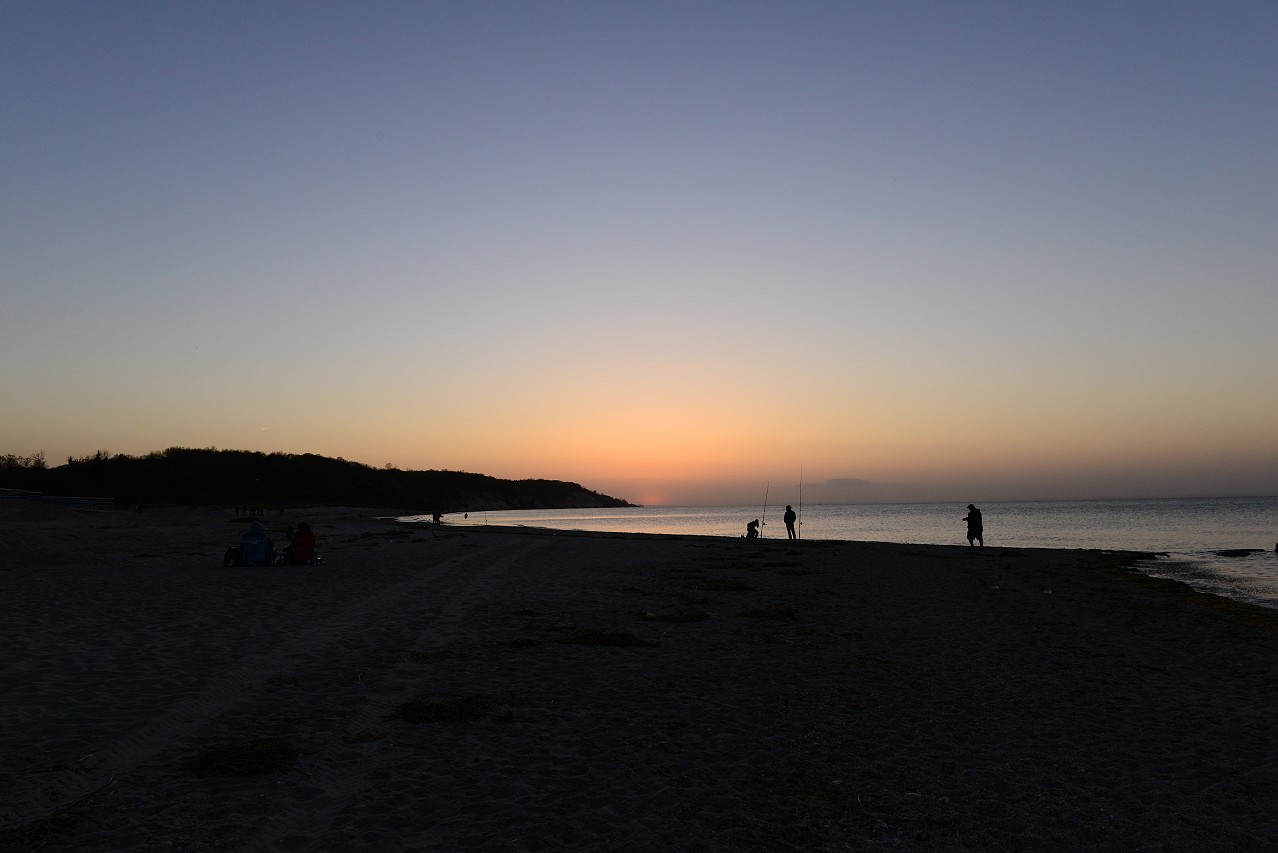
If it is a hot summer day, you are likely to find people at your beach. You can do all sorts of things with people photography. I tend to like my seascapes without people, so I seldom go when people are around, or if there is anyone around, I avoid putting them in my photo. I have one exception to that. If the people are very far away and small in my scene, I leave them in, as they can enhance the image quite a bit.
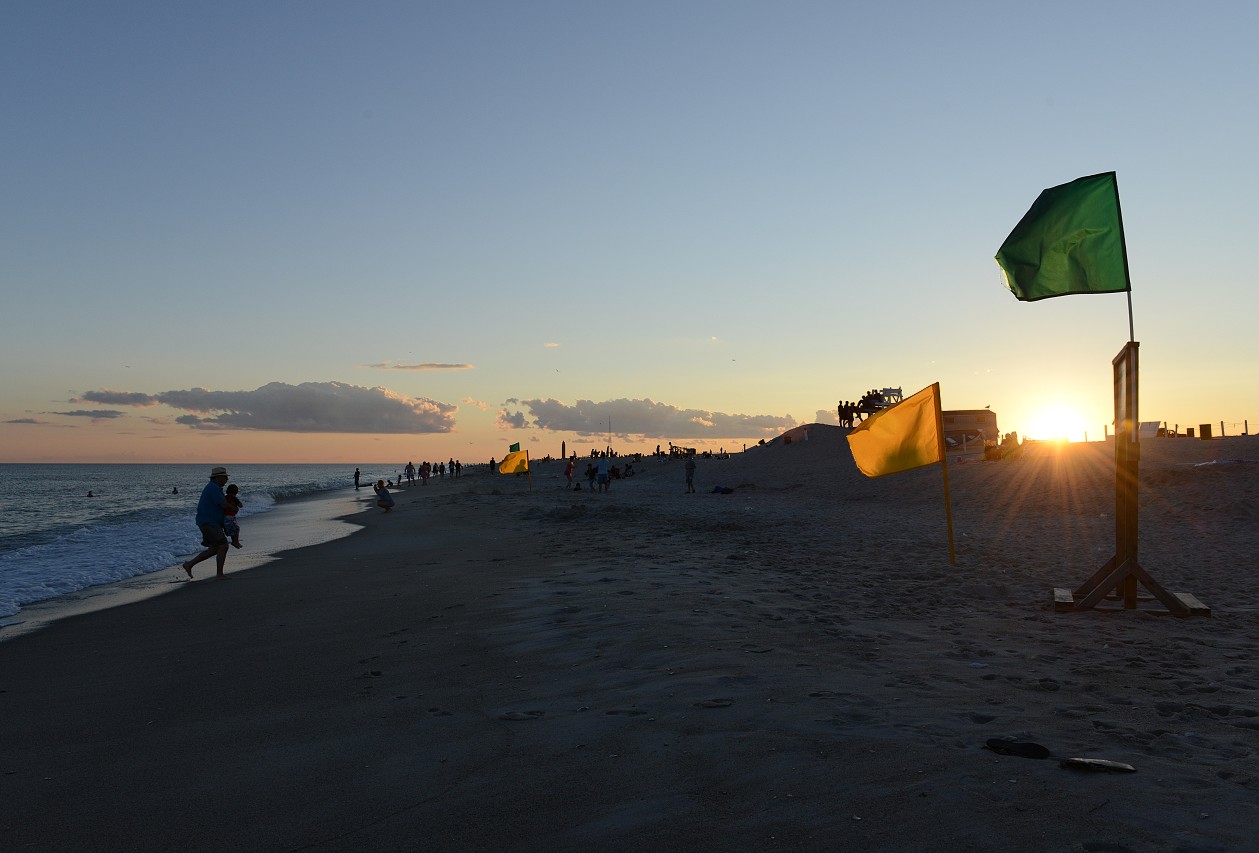
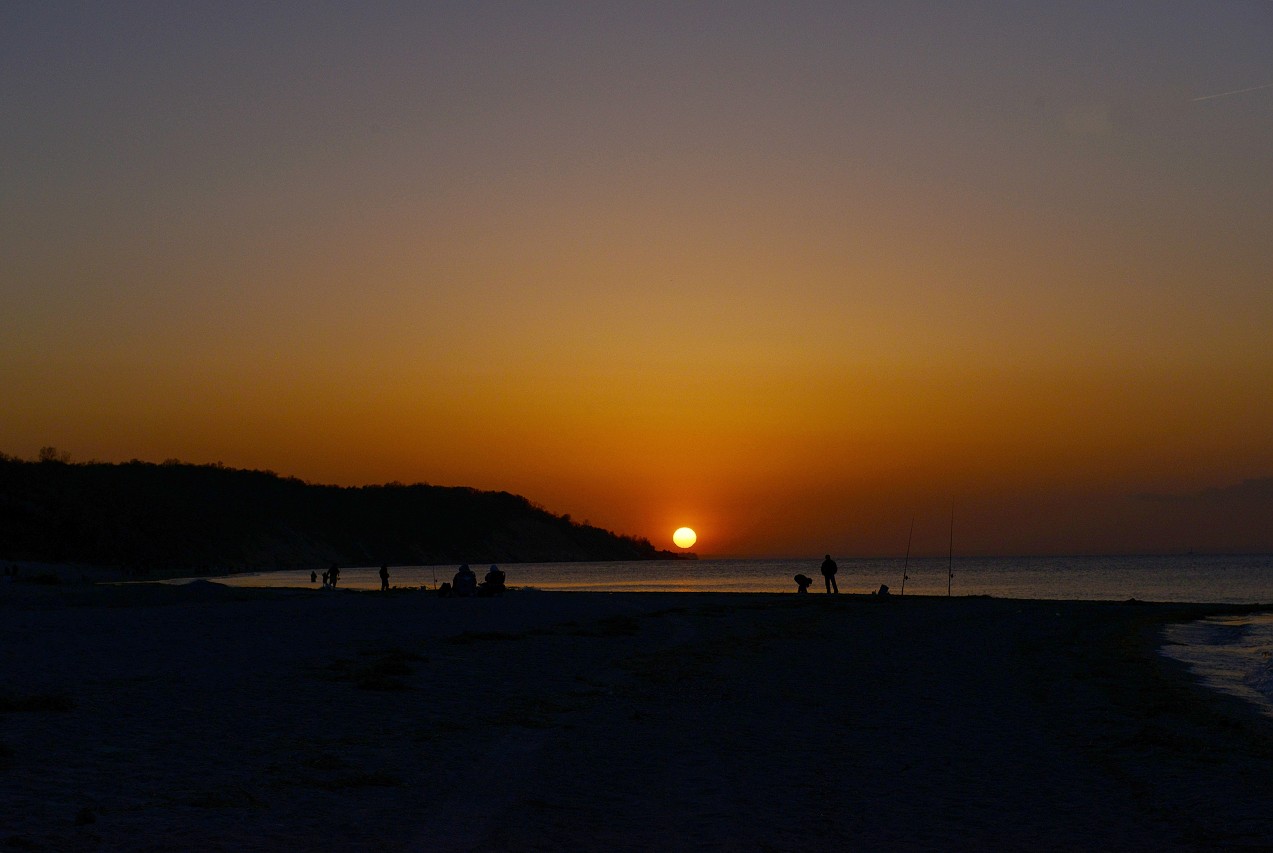
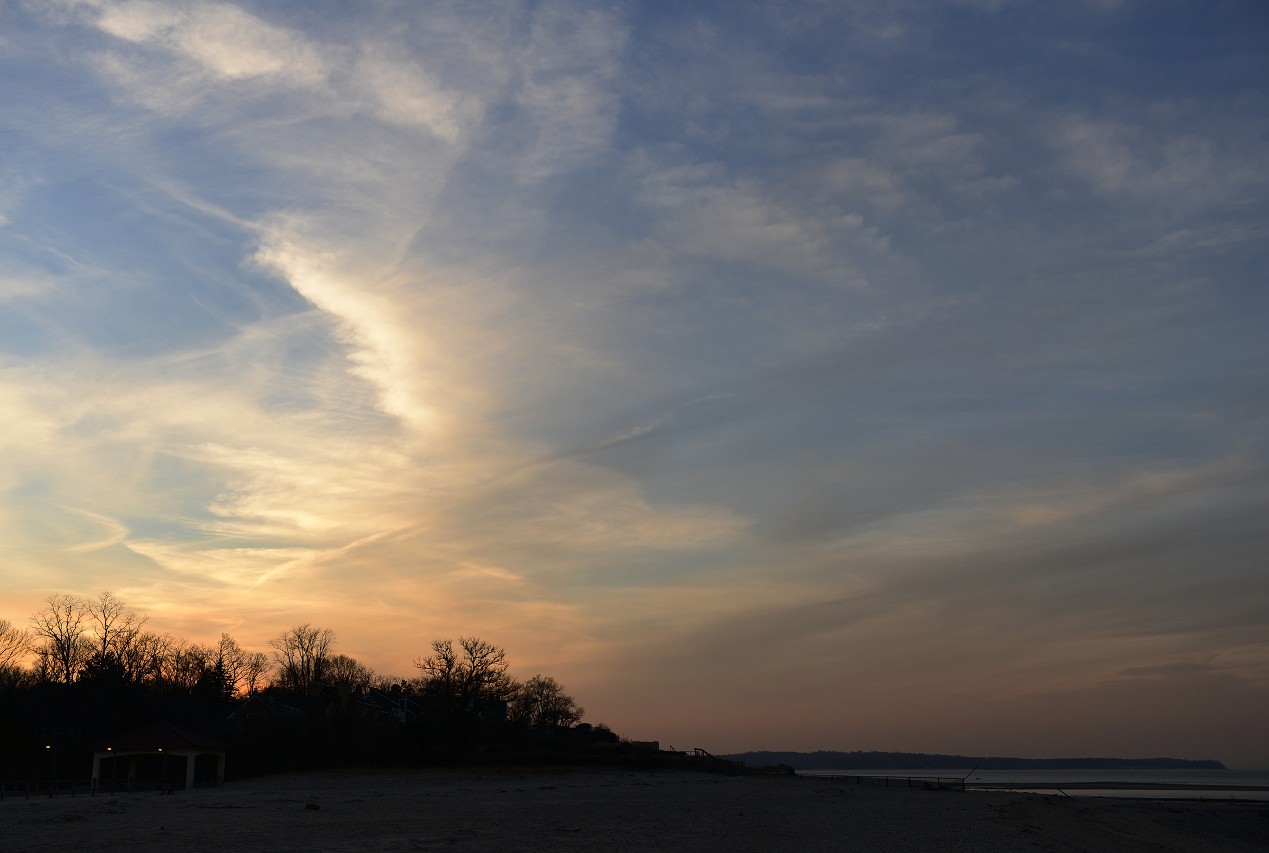
Sunset at the beach is simply amazing. You can go to town with your creativity, and all of it is satisfying. I love shooting sunsets at the beach. If you wait a while, you can have a whole other look with the sun’s afterglow. Dusk can be another creative moment. When dusk falls, silhouettes make an appearance and give a very special look to your photos.
As for sunset settings, you will need to change your camera settings as the light fades. You won’t want to make things look like daylight, so you will often want to take darker photos than what the meter recommends. I use longer shutter speeds to compensate for the diminishing light, and I will slightly increase my ISO if the scene gets too dark. I also sharpen my aperture a bit because things become very indistinct as the light fades.

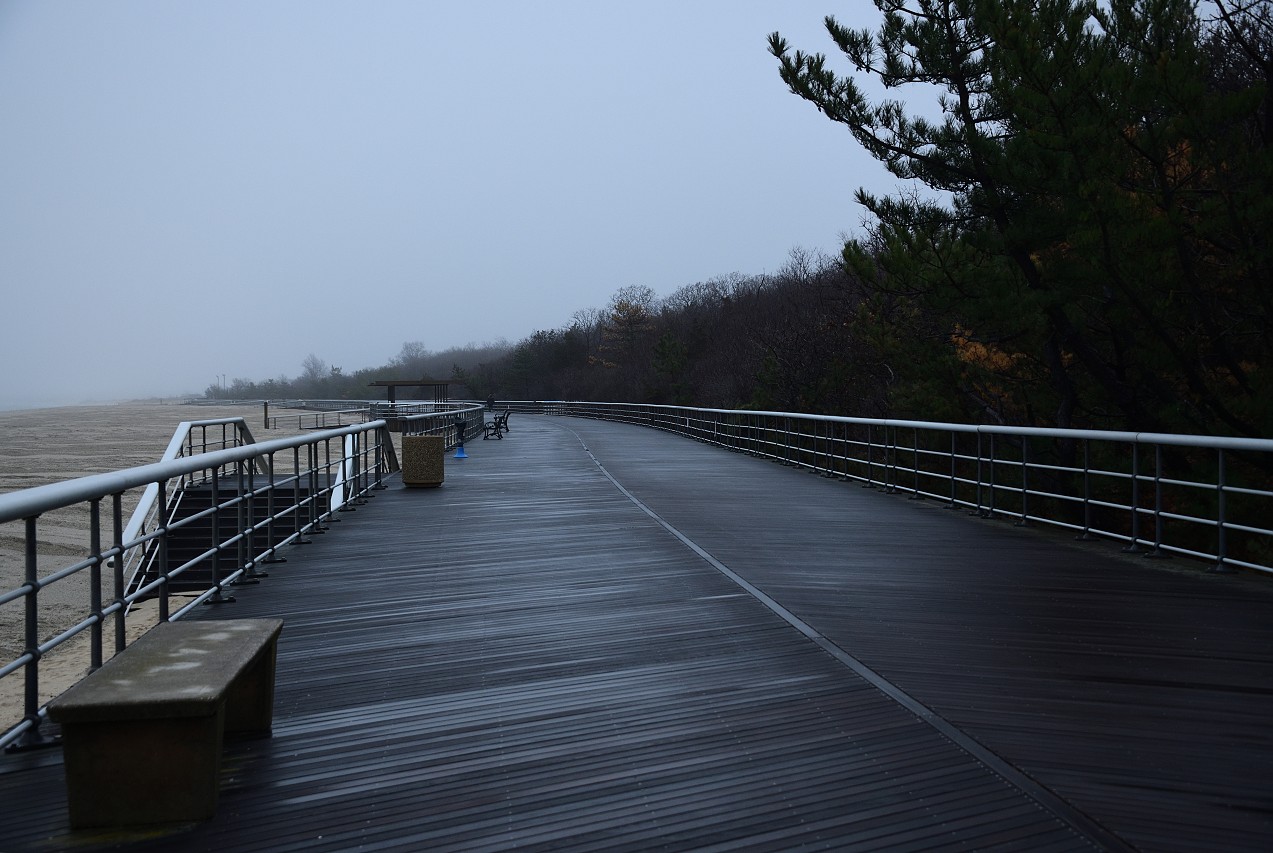
Another element of the weather that can make beach photos special is fog. Of course, it cannot be too dense a fog, or you wouldn’t be able to capture much of anything in your photo. When you have a foggy day, everything at the beach looks different and mysterious. It can be a great experience for photography.
For camera settings, you will be working with a restriction in light. You may need to hike up your ISO to the 400 to 800 range, depending on the availability of the light. You would want a fairly open aperture, say f/5.6 or wider. (An aperture like f/11 to get more depth of field is unnecessary, since the fog will obscure the background anyway.) Meanwhile, your shutter speeds will meter on the long side because of the lower level of light. If shutter speed drops too much, you will need to increase your ISO further. See the reciprocal rule in photography for more details about which shutter speeds are safe. It can be a lot of fun to experiment with shooting in the fog.
One thing I never ever do at the beach is blur the water. Photographers get a little crazy with their tripods and long exposures (I don’t ever even bring a tripod to the beach). It has become a total cliché to blur water anywhere and in every scene, like waterfalls. When I see blurred water photos, I move on. Of course, this is a question of taste. If you like blurred water, go for it. Set up your tripod near or in the shallows, compose your picture, set your shutter speed to anywhere from 3 to 20 seconds, and you’ll get the blurred water that you want. With experience, you can manipulate your settings to let your creativity go to town and get different degrees of blur. But I prefer the beauty of simple water.
I hope this essay has been a help to those who want to shoot beach photography in manual mode. It is fun and creative to shoot in manual, and it is especially useful at a beach, where light conditions can be extreme and varied. Beaches provide endless opportunities to express your creativity as a photographer. Best of all, it is lots of fun shooting at the beach!
Man I see water motion and think, “that picture probably took more effort than a similar one without it”.
It’s an artistic effect sure, but it’s really cool. Black and white with 2+3 minutes *chef’s kiss*
Hi Tyler, I don’t quite understand what you are saying in your comment. If you are saying that you like the blurred water effect, well, everybody has their own taste. I happen to like natural water better. But what is ‘chef’s kiss’?
“The chef’s kiss is a sign that means ‘perfection’ in the context of food. It is a hand gesture from the mouth, sometimes with the thumb and forefingers.”
en.m.wikipedia.org/wiki/…039;s_kiss
chef’s kiss [noun]:
• a gesture in which a person kisses the tips of their pinched-together fingers and thumb and then waves the hand with the fingers splayed, in order to indicate that something is excellent.
• used in reference to someone or something outstanding.
— Oxford Dictionary of English
Hi Pete, I’ve used that gesture many times in the course of my life, but I never knew it had a name. I had no idea that it was called a chef’s kiss. Thanks for filling me in.
Thanks for the thoughful article and some lovely photo’s Elaine. What is it about mountains and water that draws us to them? I can sit and watch them for hours as the light changes.
My additional tips to cope with the contrast at the beach
1 – keep the sensor to its lowest iso possible; for as sensitivity goes up, so the dynamic range falls. DXO has good charts to show this for many lens and sensor combinations and 1 stop of dynamic range can be lost for every doubled iso.
2 – this can be the place where direct or “pop-up” flash can be helpful to overcome squinting faces – turning your subject’s back to the sun and using a burst of fill in can rescue a portrait on the beach. In hot countries I travel with a white umbrella agaist the sun – that also doubles as a “scrim” to diffuse light on the face.
3 – polariser filters can be a problem with wide-angle lenses as they darken only 90 degrees of arc and show uneven sky with >90 degree lenses – but they can restore the blue-green colour in the sea or rockpools and take reflection of certain types of sand – as well as give great contrast between blue sky and fluffy white clouds.
4 – here in the West Country of England on stormy days we get lots of salt spray. That can be a good time for a UV filter, a long lens hood and a cover for the lens and camera. Even a poly-bag and some elastic bands can make a difference to keeping salt away from precious kit! Also – change lenses out of the wind, salt spray and sand in the shelter INSIDE your rucksack.
5 – The “slow exposure” beach photo has been overdone recently. Don’t get me wrong, it is a wonderful technique – just some days as I browse photo’s it seems to be the only”beach photo” technique in town! if you are looking for some more inspiration for days at the beach, can I suggest a few minutes reading ” 50 Tips For Photographing Wonderful Waves, Published by 500px Blog ” at iso.500px.com/wave-…aphy-tips/ that sholud wet your appetite for another day on the seashore!
Best wishes to you all – Paul C
Hi Paul, Thank you for the thoughtful tips. They are all very good ones. Water is endlessly fascinating to me. Beaches are where my soul flies free. I can just imagine the beautiful seascapes you can get there in the West Country. I’m glad that you enjoyed my article and I hope you find it useful in your beach photography.
I’m not sure I agree with your recommendations for exposure in beach photography. Exposure for beach photography is no different to exposure for snow photography or any other high-contrast photography.
Rather than relying on the meter which is just a dumb tool, we might do better by relying on our brains and the histogram.
In a very high dynamic range situation, there is often no way to get everything in the scene optimally exposed. We need to decide which part of the scene is more important (beach subject or sky?) and expose accordingly taking note to push the histogram as far to the right as it will go short of clipping any important highlight. This is doubly important as on contrasty days the meter tends to overexpose regardless.
In dull, low-contrast conditions exposure is easier as the whole dynamic range can more easily be accommodated, although there is a tendency to under-expose if relying too much on the meter.
Manual metering is not a magic panacea if the meter is pointed at an inappropriate target although a willingness to do so does show a willingness to think about exposure and be selective about which tones are to be metered and what compensation should be applied if necessary. But then again, the same goal can be achieved with auto metering if having chosen what to meter and applied compensation if needed, the exposure is locked at that value.
Sometimes there is no way to expose everything correctly so one either has to choose which tones are to be sacrificed or at least two exposures will be required (one for the highlights and another for the shadows). These can then be combined using HDR software or selective masking to get the best of both worlds.
Betty, I agree in general, when one is talking about reflected light metering. But I’d suggest that, at least for more casual beach photography (meaning not taking time for setups, shooting scenes and people without pause) an alternative way of doing this is to find as close an approximation as you can get to an incident light reading, and then go manual. Of course it’s not always possible to do this correctly, but with a little experimentation you can come close enough, and once you get a good setting, you don’t have to think about the subject or its location. It also, of course, requires that the ambient light be consistent.
I experimented a bit with this recently on Myrtle Beach, following my five year old granddaughter, and found it worked pretty well when one does not want to worry about the size or location of the presumed subject.
I found a similar advantage some years ago on a safari in Africa, where the daylight was quite consistent, but the subjects were all over the spectrum, with little time to adjust. One might pan from a zebra in the middle of the field to a wart hog in the shadows, with little time to adjust, but the right meter setting for the ambient light would get them both.
Most of my photography is done traveling and with little time to set up and adjust things, so I like to find ways to get at least close to the right exposure quickly. It helps to be really familiar with the camera. I’ve been using the same camera for years, and can find most of the buttons in the dark (which is good since the paint has worn off most of them anyway), so when in my usual starting setup in aperture priority and matrix metering, I can compensate without much fuss. Similarly, I have “easy ISO” chosen, so I can change ISO on the fly without looking at the menus. In really difficult situations, where metering tends to go wrong, I like to use either manual with an estimated incident light setting, or spot metering.
I use back button focusing and have the meter hold set at the shutter button half press. This way, I can focus on one thing, let go of the focus button, spot meter on a chosen gray point, hold that, recompose and shoot, all quite quickly.
Hi Betty, I find it a bit odd that you would rag on me about being a slave to the meter when in my article I described how ignoring the meter’s very high reading and choosing shutter speeds much lower will get you a perfectly exposed picture. The meter responds to the extreme amounts of sunlight you will find at the beach, which by the way, is not the same as shooting snow scenes, as the whiteness of snow would require other considerations to cope with it, and in sunny conditions at the beach, the meter never overexposes. You have the exact opposite problem. The meter wants to severely underexpose. But perhaps you didn’t really read my article? As for shooting to the histogram, you can have it. I don’t shoot that way. I also find it odd that anybody would recommend auto metering or any other auto settings for an article about manual shooting. How would that serve a person wanting to learn to shoot manually? What would it teach them? One big advantage of manual exposure is that you don’t have to bother with exposure compensation, which is surely very limiting in its scope. As I pointed out, using my method does expose beach pictures correctly. And all without HDR software or selective masking. But each to his own, Betty. You enjoy beach photography your way, and I’ll enjoy it mine. And feel free to write an article of your own explaining your own to my mind very peculiar methods. I’m sure that there are other people out there who like to complicate things that are really very straightforward.
My one quibble with the above would be that in snow in general, automatic metering will also underexpose, not over. In this situation it’s quite similar to beach photography, though a very snowy scene will tend to underexpose even more. It is also true that color temperature will be a problem on snow, but the exposure situation is not that different. Silhouettes against dark brown sand or silhouettes against blue-gray snow end up about the same.
e.t.a. But I forgot to add, I entirely agree about milky blurred water. I can see putting a little action blur into a waterfall at times, but it’s too often taken to the extreme, and become a terrible cliche.
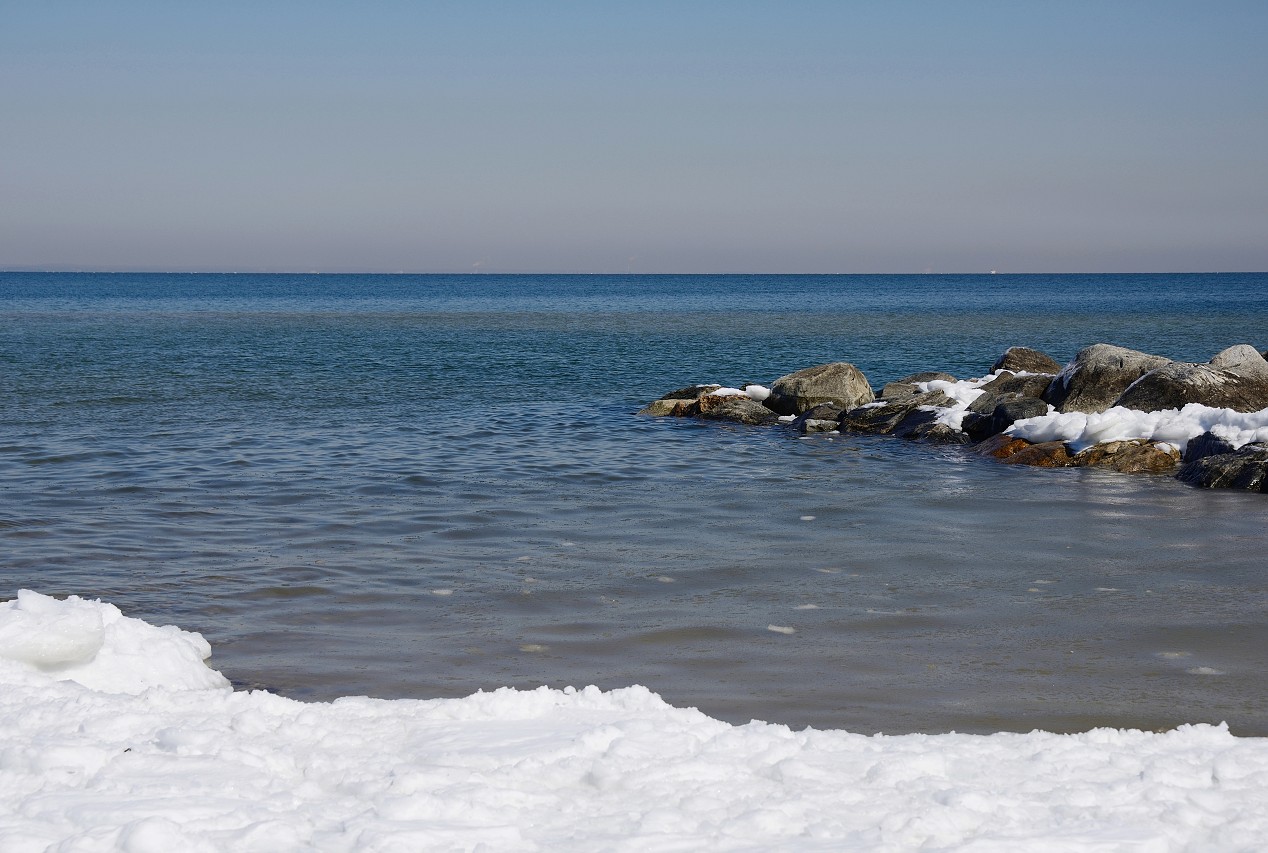
The thing is, formerly bruto, that at the beach you seldom come into contact with shadow. The exception is if you have, say, a rock jetty where you may get shadow among the rocks. The usual issue at the beach is the incredible amout of light. But I agree that you can treat the beach and snow similarly on a sunny day, which is to intentionally overexpose your subject rather than follow the meter. I find that to be true of anything white. I shoot flowers a lot, and when I shoot a white flower, I slightly overexpose, and the result is quite pleasing. But I still think that you have to account for things differently between the two types of scene. But then sometimes, you have snow ON the beach. I’ve done that quite a bit, too. For the ineperienced shooters who read this, it is possible to become quite skilled at either one.
Hi Elaine,
I’ve found some nice shore pix here in California at Santa Barbara and San Luis Obispo County (Montana de Oro State Park). Have the same feeling as yours about blurring water motion. I like winter for interesting lighting and sunset colors.
Hi Art, I’ve only seen California beaches on tv, but they always look amazing to me. They remind me of some of our south shore beaches here on Long Island. I always think how lucky I am to live near so many beautiful beaches. Enjoy your beach photography!
Hi Elaine, Your beach photos are stunning.
I felt transported. Conveys the beauty in that moment. Thank you for sharing.
Thank you so much Marcia! I am always transported when I’m at the beach. I’m glad that that comes through in my pictures. I am so happy that you enjoyed them.
Thank you Elaine for the informative essay. In my study of various tips for beginners on PL I have noted that the use of a Neutral Density filter can help with beach photography. What is your opinion?
Also fully agree to picture water in its natural state, not blurry! Pictures with blurry water remind me of the “felt” “paintings” of the 70’s, not a good thought!
Hi andyfrog, You are very welcome. I’ve never used neutral density filters on my lenses. I just use UV filters. I’m not sure that I would want to reduce the intensity of light at the beach, which is what I understand that ND filters do. I find that I have good control of contrast and other issues with my manual settings. I’m glad to hear that you like natural water. That makes at least two of us!
Three of us now, never liked the spilled milk look
Beautiful shots. Which lenses are these shot with?
Hi CAT. Eight of my shots were taken with the Nikkor 24-70 f/2.8, one was taken with the Nikkor 24-120 f/4, and 16 were taken with the Nikkor 28-300 f/3.5-5.6, all f mount, by the way. This last one happens to be my favorite go-to lens for almost everything I shoot. If the 24-70 (the original one) wasn’t so heavy, I’d probably use it more. It is an extraordinary lens. However, I love the range and minimum focus distance of the 28-300 best.
Hi David, Thank you very much! I hope the tips are of use to you when you get to the beach. I love my D850. I am an optical viewfinder person, to get that out of the way. It was a big step up from the D810, another camera I really love. It took a lot of training to handle that very large 45 mp sensor, which at the time was unique and a big step up from 36 mp. But the photos you get are amazing and give you so much room to work with cropping and editing. They have a certain clarity to them that you easily fall in love with. If you decide to go for it, I think you will get much enjoyment out of using it.