Astrophotography is a hobby rapidly gaining popularity thanks to the fast advancing CMOS sensor technology. Over a decade ago, the light recording material employed in astrophotography was primarily chemical emulsion. Its low sensitivity makes it very hard to record the weak signal from deep space. In addition, the lack of real-time feedback is a huge source of frustration for beginners. Operational errors such as out-of-focus can only be realized after several nights of hard work after the film is developed. In the mid 90s, the advent of cooled CCD cameras provided solutions to both the sensitivity and real-time feedback problems. However, their high prices and miserably small sensor areas limited their uses to only a few kinds of astrophotography and to very enthusiastic astrophotographers. While CCDs revolutionized astronomical research, this technology has never really changed the landscape of amateur astrophotography. The true turning point took place in 2002. After Fujifilm announced its FinePix S2Pro DSLR and showcased amazing astronomical pictures taken by this camera, people started to seriously explore DSLRs for astrophotography. DSLRs can provide real-time feedback, which is very important for beginners. They have sensitivities not much worse than CCDs, and DSLRs with large sensors (APS-C) are quite affordable nowadays. Today’s landscape in astrophotography is shaped by a series of CMOS-based DSLRs from Canon, but DSLRs and mirrorless cameras based on Sony sensors are gaining popularity very quickly.
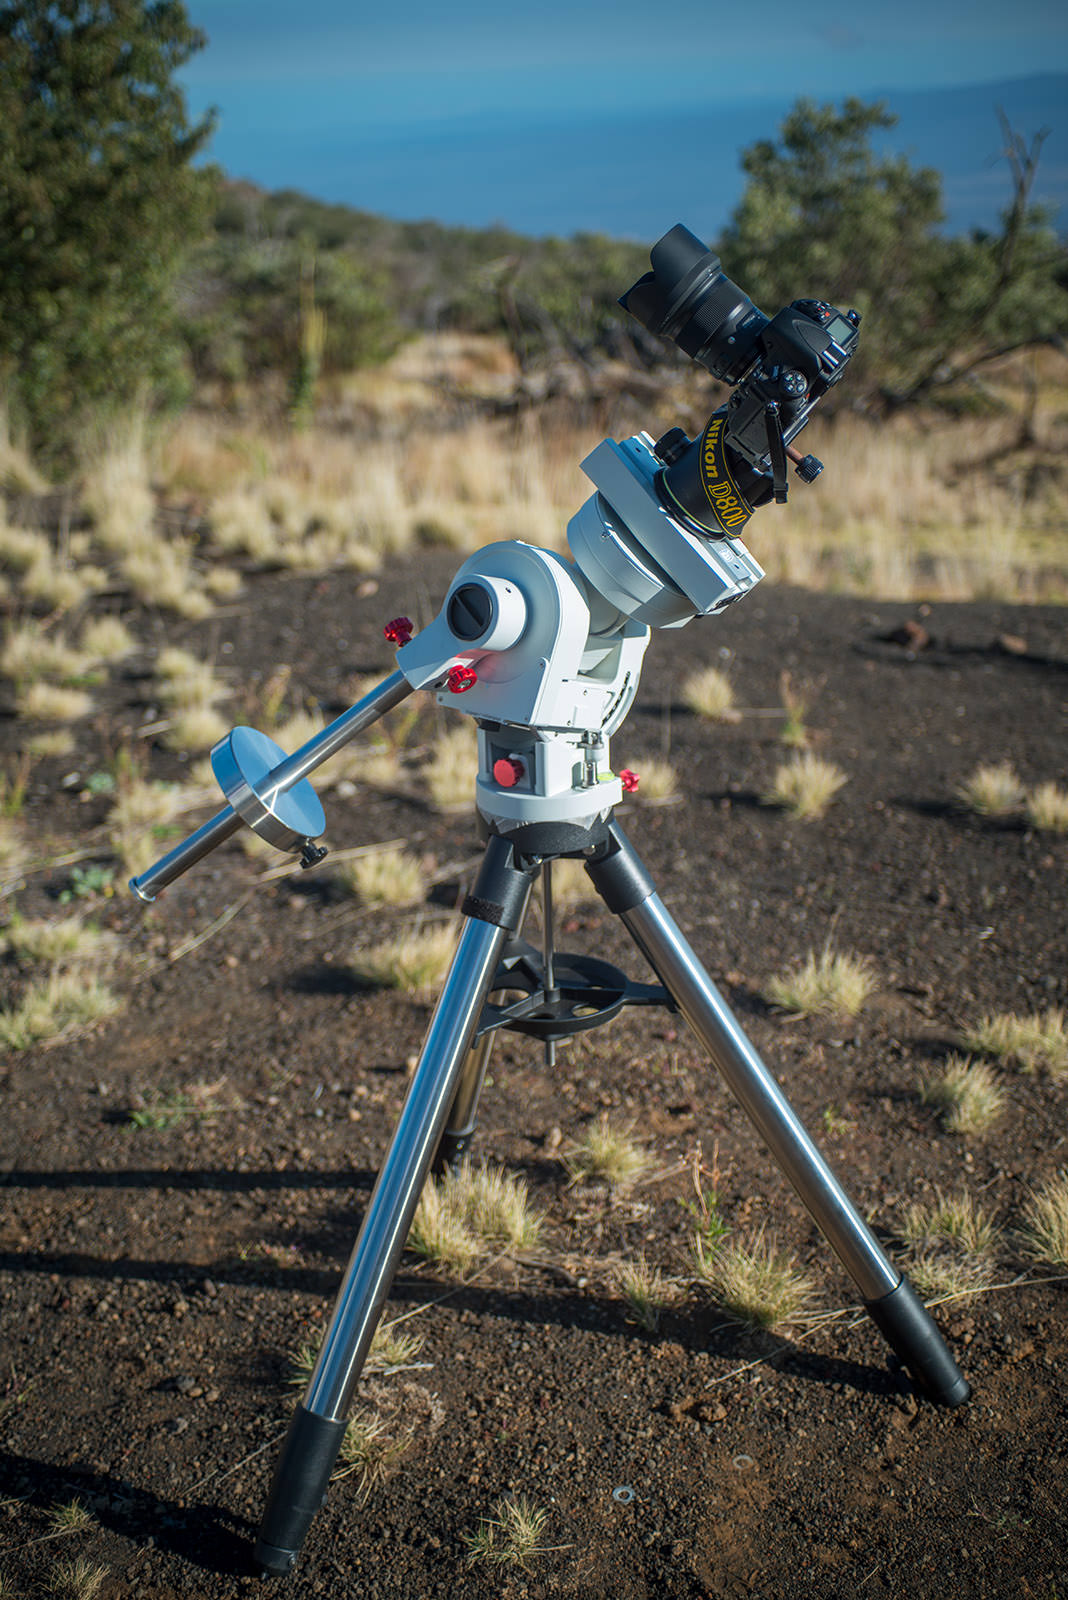
Because of my job, I have opportunities to use a broad range of imaging instruments, from multi-million dollar CCD cameras on large professional telescopes to amateur CCD cameras and DSLRs. My training in astronomical research also provides me toolsets to quantitatively evaluate the performance of sensors and to know their true limits. This helps not only my research, but also my lifetime hobby, astrophotography. On the hobby side, I mostly use DSLRs (Canon 5D Mark II and Nikon D800) for their high performance and affordable prices. To get the best astrophoto results, the DSLRs’ internal filters are modified to have higher throughput in the deep red, so they can be more efficient in recording the red light from ionized hydrogen gas in the universe. Other than this filter modification, DSLRs used for astrophotography are no different from DSLRs we use daily.
One very common worry about using DSLRs on astrophoto is the thermal noise generated by the sensors. CCD cameras cooled to -20 or even -40 degrees C do not have such problems. However, CMOS sensors produced in recent five years all have very low thermal noise. Under the same sensor temperature, their thermal noise is actually much lower than common CCDs in astronomical cameras. Another important factor that many people overlook is noise sources other than heat in the sensor, one of which is the photon noise generated by the sky itself. With latest DLSRs under many circumstances, the sky photon noise often overwhelms the thermal noise, making cooling unnecessary. Only in places that are both hot and dark (such as the deserts in the south-west US), cooling is needed to fully exploit the dark sky.

General Procedure
The workflow in astrophotography is quite different from that in daylight photography. Because our targets are very faint, we need to expose for a few minutes or even a few hours, to collect enough photo-signal from our targets. However, the sky background is usually so high that it will saturate the image when exposure is longer than 10 minutes or so (this is especially true under a light-polluted sky). Therefore, what we do is to break the long exposure into many shorter (a few to 10 minutes) ones to avoid saturation, and then stack (average) the short-exposure images in post-processing to combine their signal. This gives a result that is equivalent to a very long exposure.
On the telescope, once the equatorial mount is set up and aligned to the Polaris, what we usually do is to first use a bright star to focus. This used to be a very challenging task, but now it is very easy with DSLR’s live view function. Then we move our telescope/lens to point at our target. We can usually very easily see our target constellation through the camera’s viewfinder if we use a wide-angle or short telephoto lens. On the other hand, if we use a long telephoto lens or a telescope to shoot deep-sky objects, the targets are usually too faint to be seen directly. Some test short exposures with very high ISO can help to verify our framing. Once this is done, we just fire away many long bulb exposures through a computer or a timer shutter release. As mentioned above, typical exposure times range from a few to 10 minutes, depending on how fast our lens is and how dark the sky is. A very commonly used ISO is 1600. However, with recent DSLRs with Sony sensors, it is possible to use ISO 800 or even 400 and still get very good results after post processing. The advantage of lower ISOs is of course their higher dynamical range. It goes without saying that we always shoot RAW.
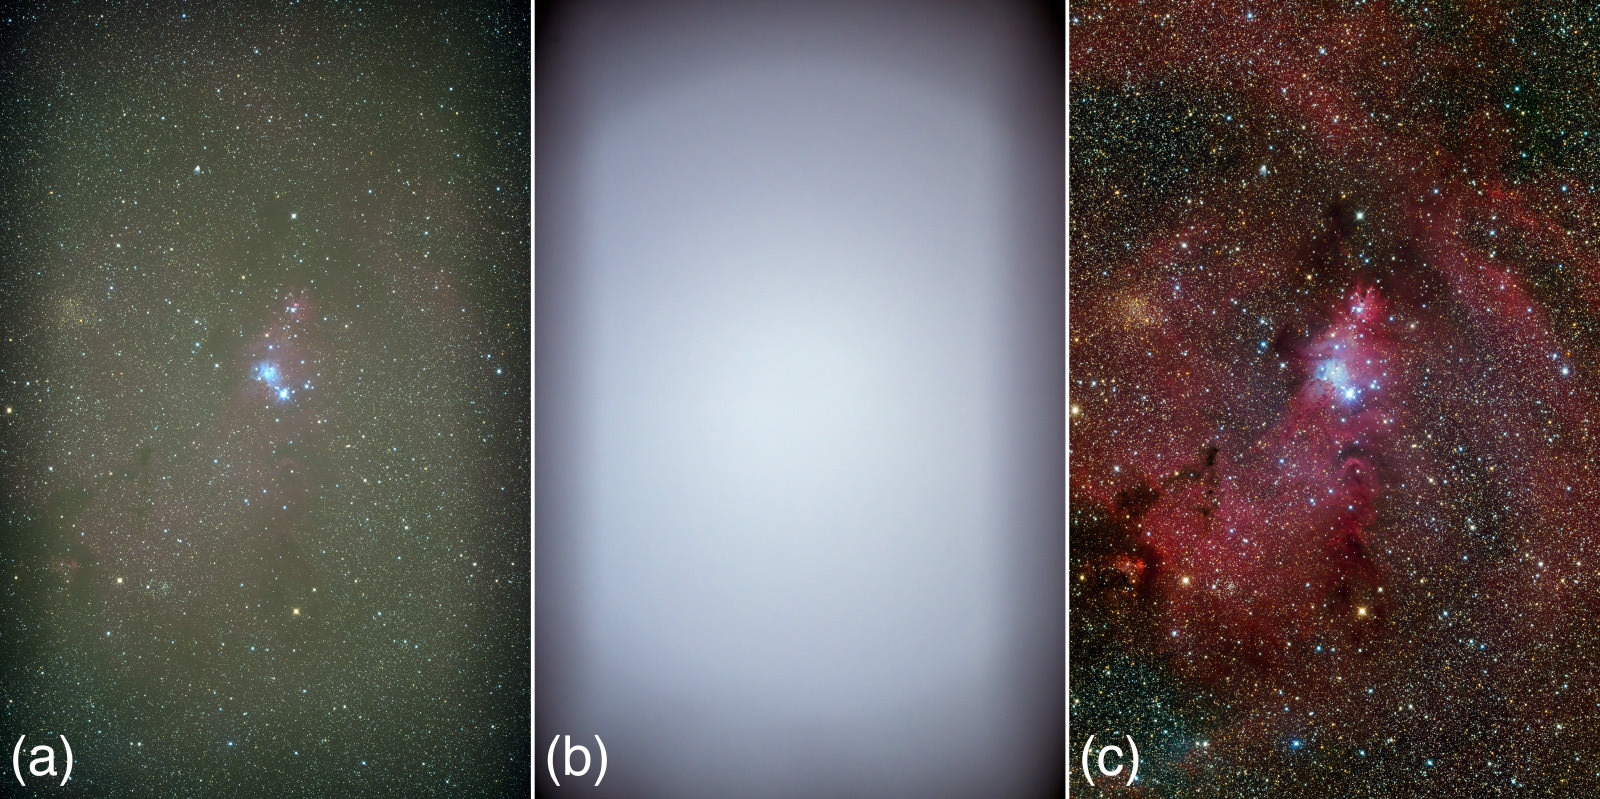
In addition to the on-sky exposures, we also take many “calibration” images to remove the unwanted signal from the sky, the optics, and the camera. For example, we take exposures on objects with uniform brightness (such as a cloudless day-time or twilight sky, or a large LED panel) afterward. Such images (called “flat field”) can be used to correct for the vignetting caused by the lens/telescope in the on-sky images, to restore the uniform background brightness. In the beginning or the end of the night, we fully cover the lens/telescope and take “dark” exposures when the camera is under the same temperature as the on-sky shots. Such dark images can be used to remove the thermal signal in the on-sky images. This is essentially the same as most DSLRs’ in-camera long-exposure noise reduction, but we do this manually to avoid wasting the precious night time. We also take extremely short (1/8000 sec) exposures (called “bias”) when the lens is fully covered, to account for whatever signal the camera generates when there is no light and also no time for thermal signal to accumulate. Like the on-sky exposures, we take multiple (from a few to several tens) flat, dark, and bias exposures and average them to beat down any random noise in the images to improve the signal quality. There are many software packages (such as DeepSkyStacker, which is free) that can process the on-sky, flat-field, dark, and bias images, and stack the calibrated on-sky images to form a very deep, clean, and high dynamical range image. All these have to be done from RAW files, as JPEG images are not linear and do not allow for accurate removal of those unwanted signal.
After the basic calibration and image stacking, we use software such as Photoshop to further process the stacked images. It usually takes very strong curve and saturation stretch to bring up the faint details in a stacked astronomical image. It also requires a lot of skills and experience to achieve this while still maintaining accurate color and a natural look of an image. It is essentially like manually processing a RAW image from scratch, without relying on any raw processing engines. It is not uncommon for us to spend more time on processing an image than its exposure time, and post-processing is often what separates a top-notch astrophotophotographers from average ones.
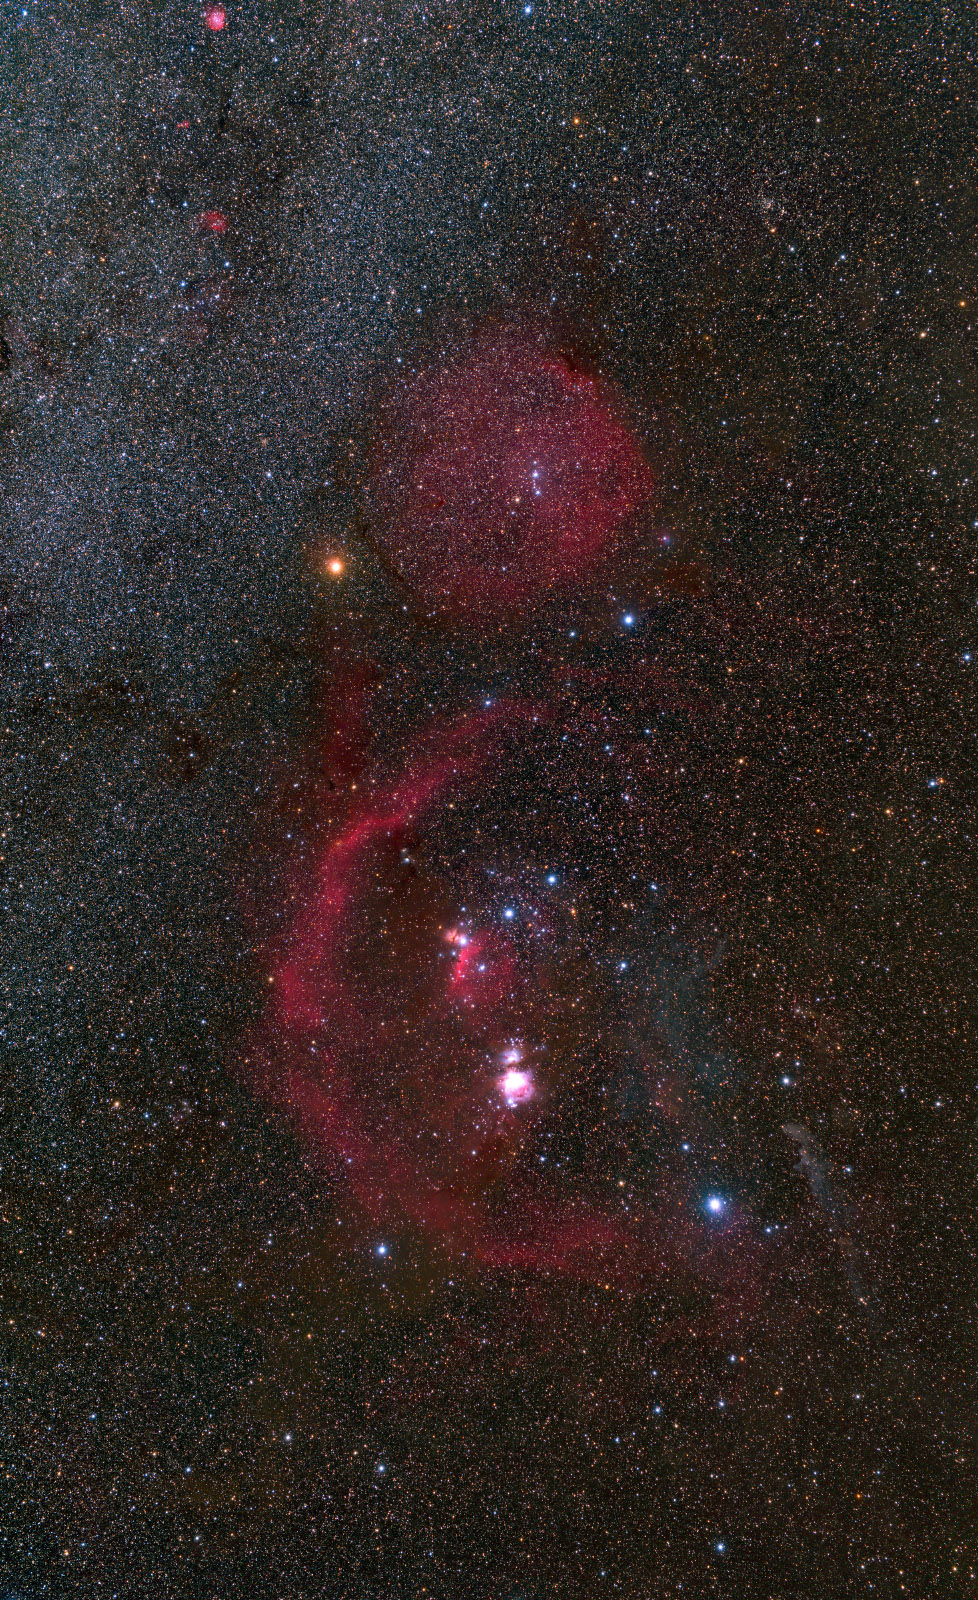
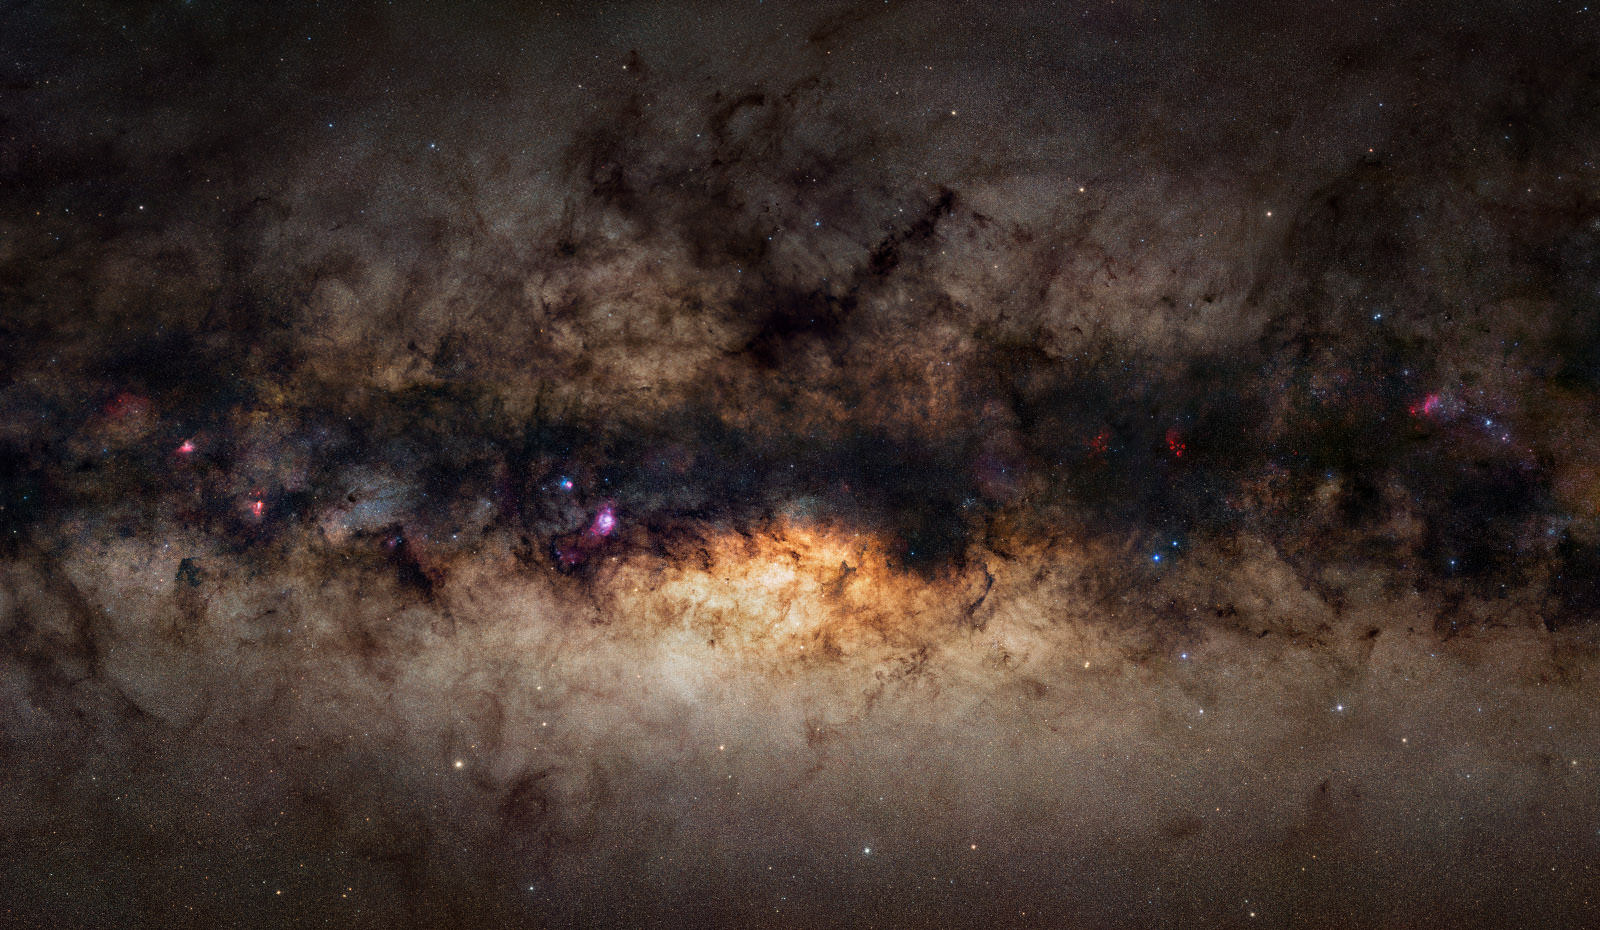
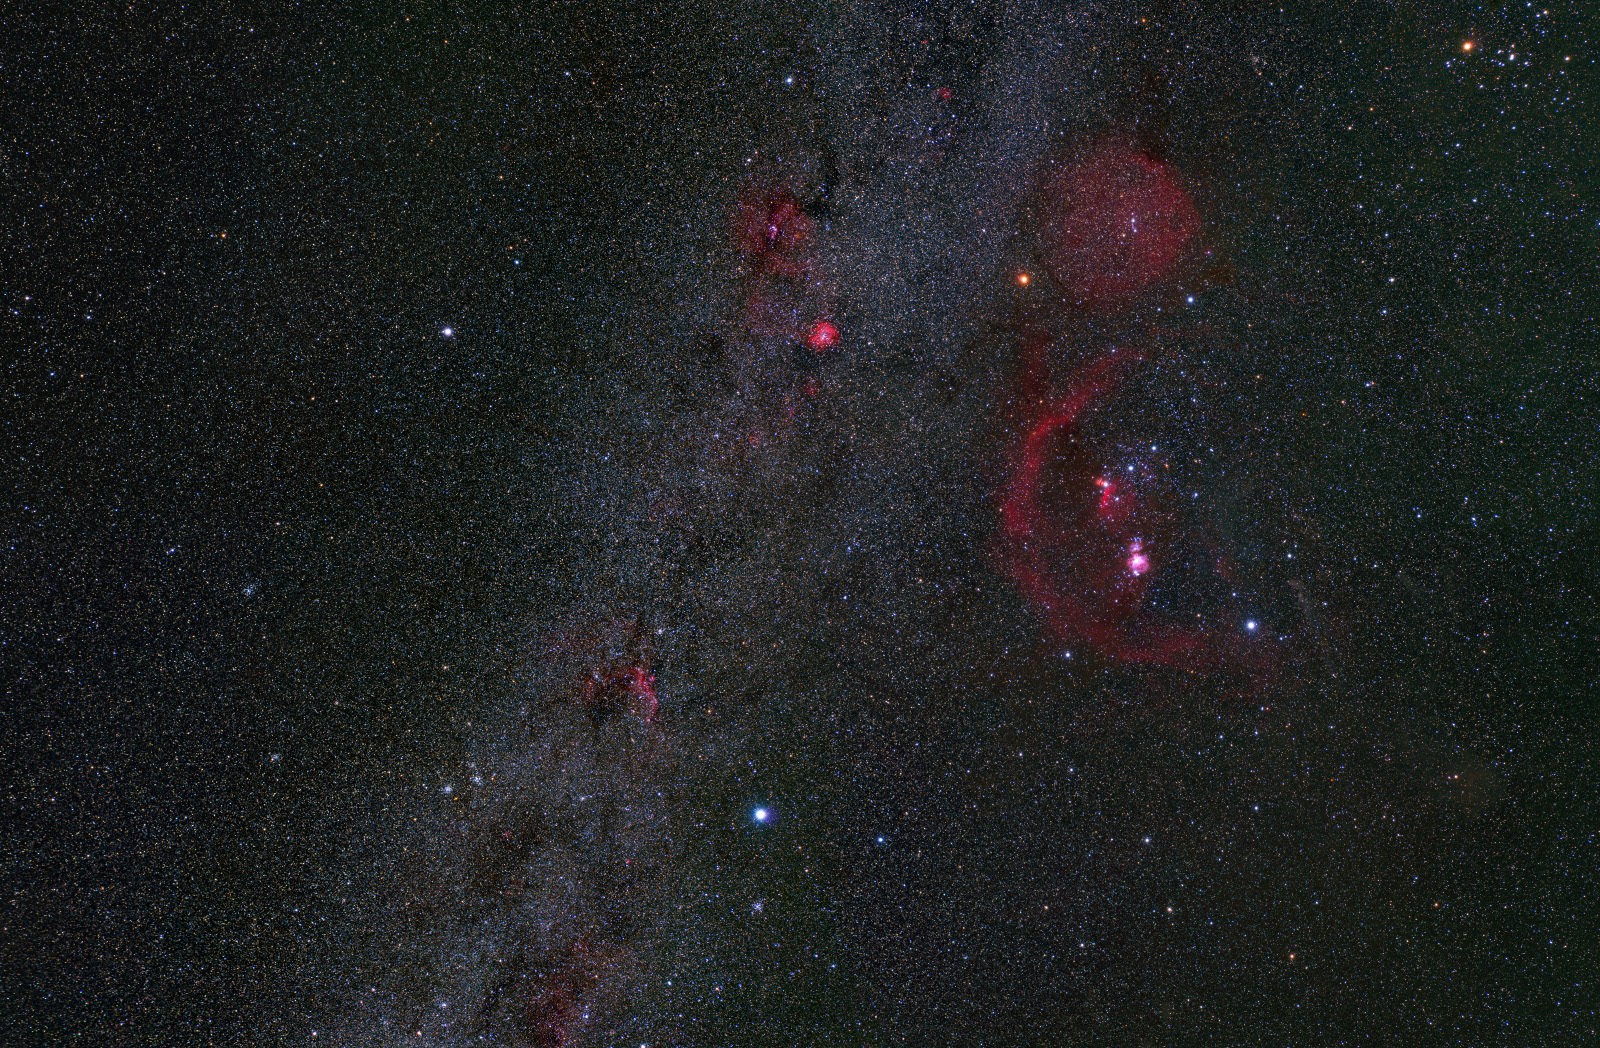
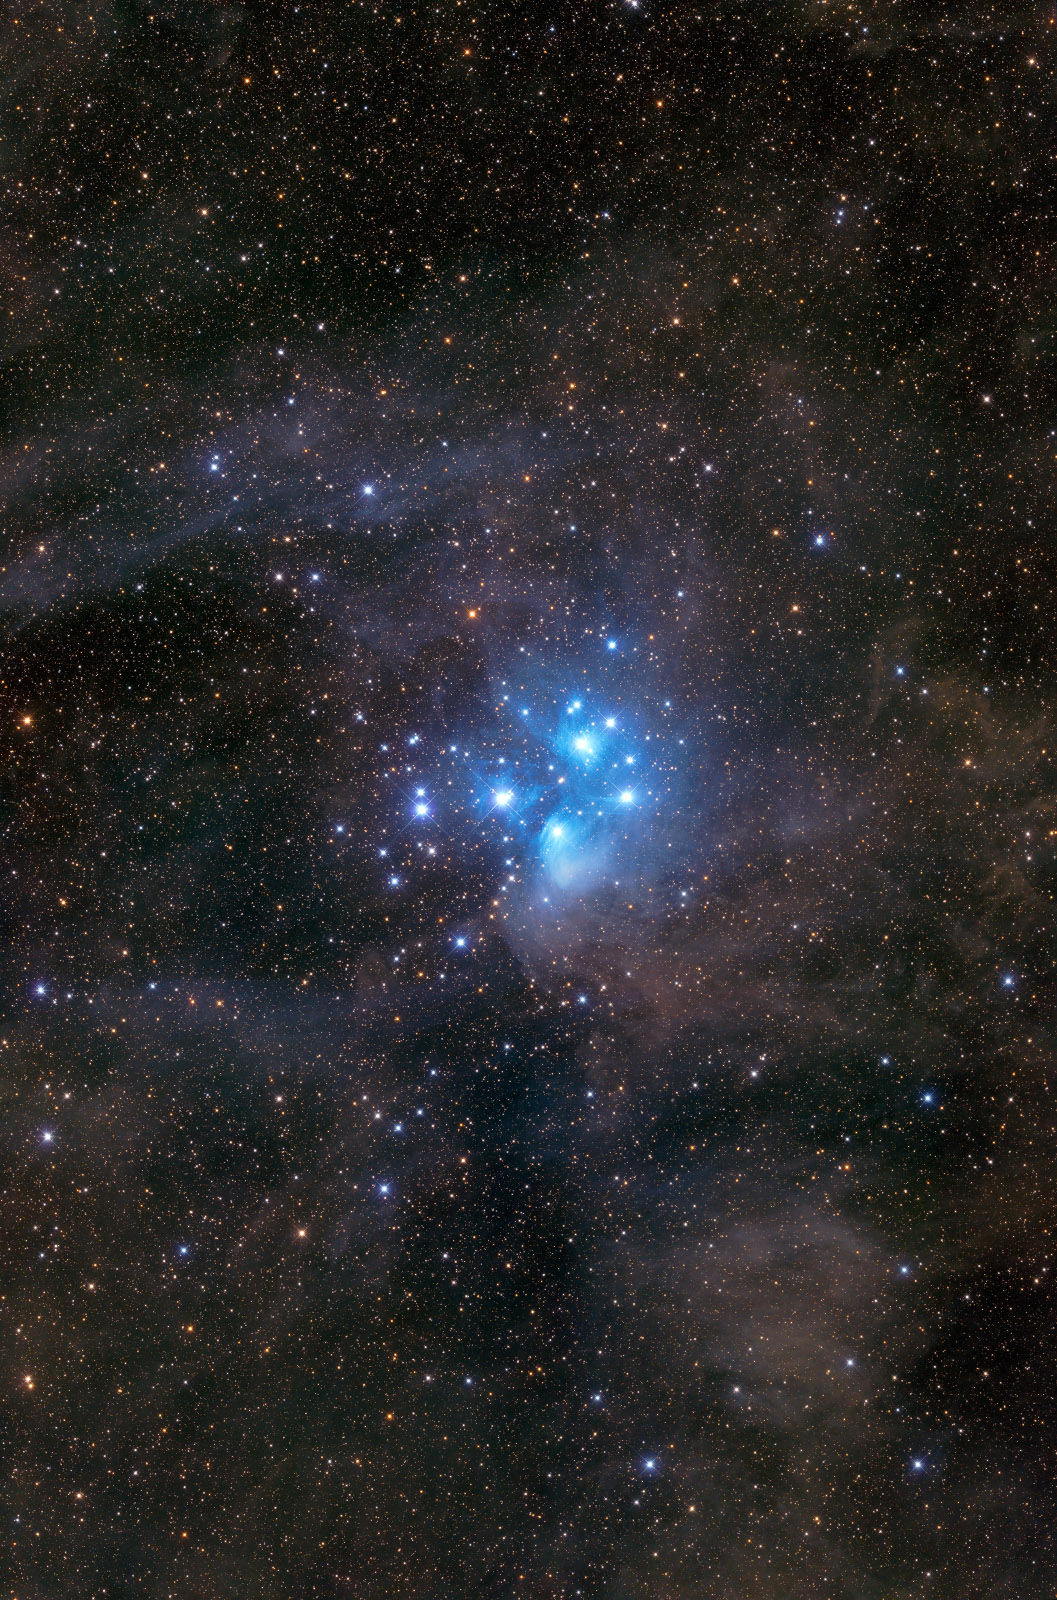
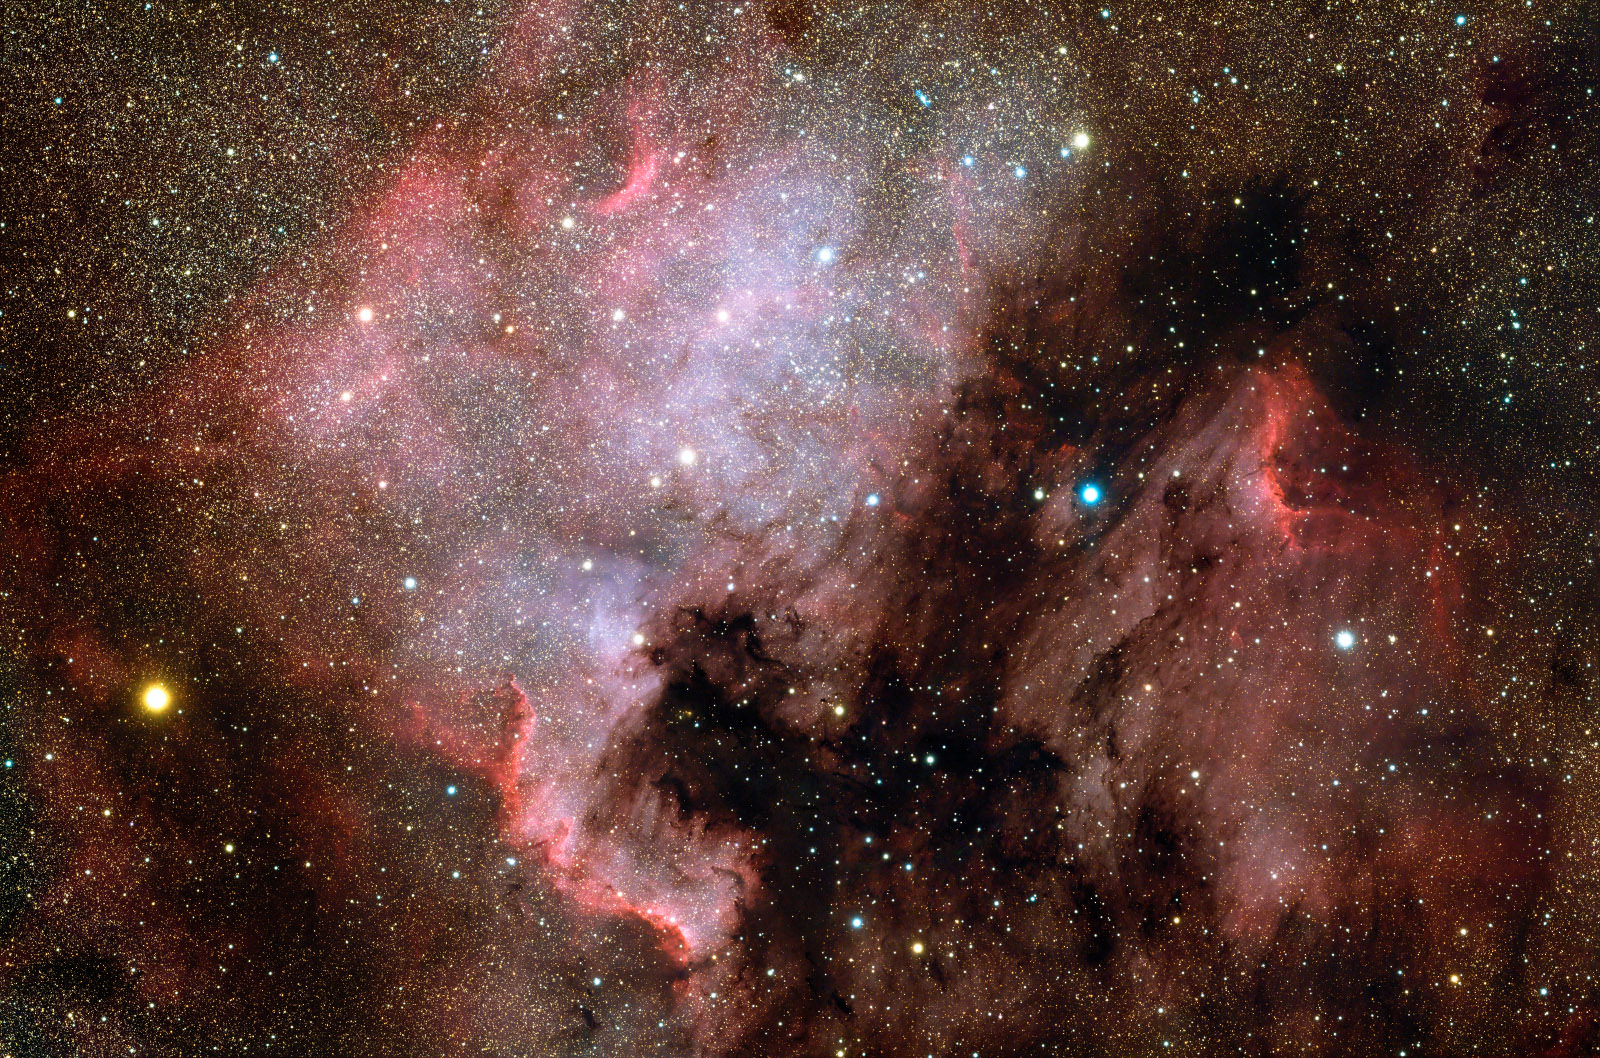
Wide-Field Examples

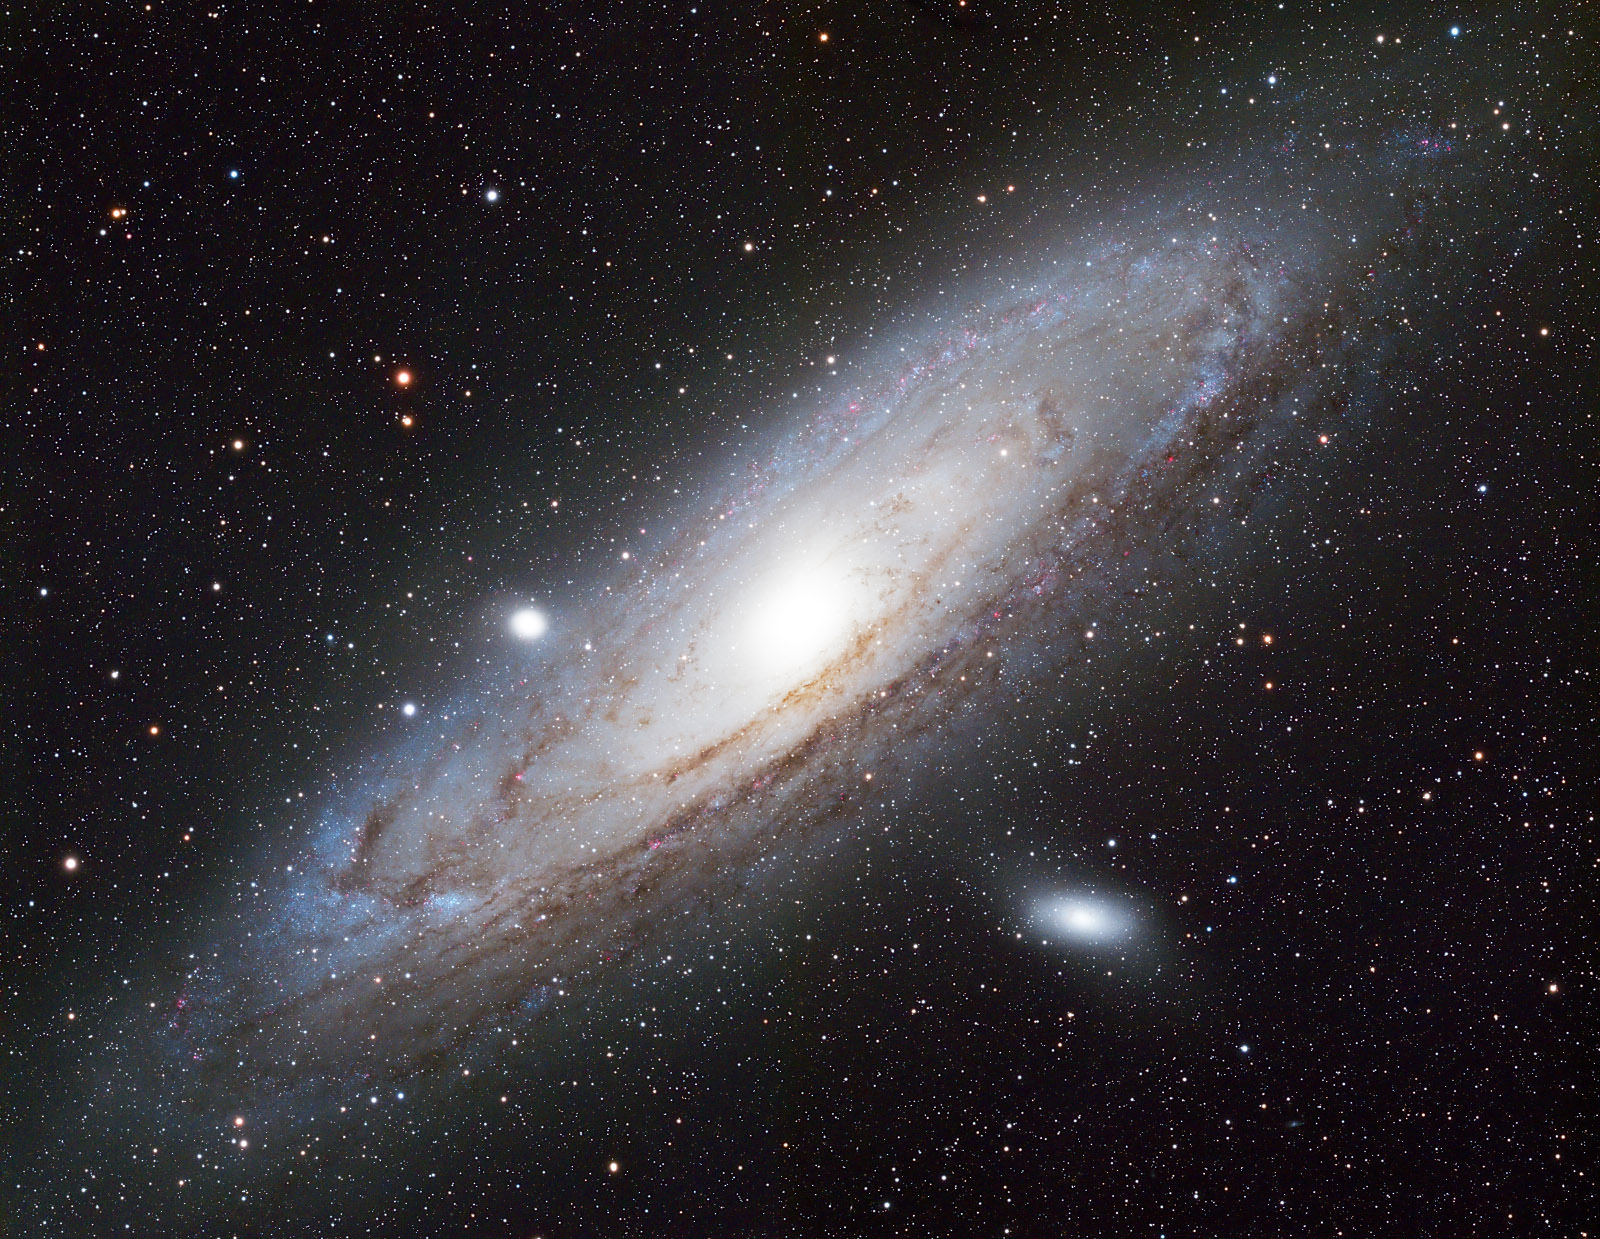
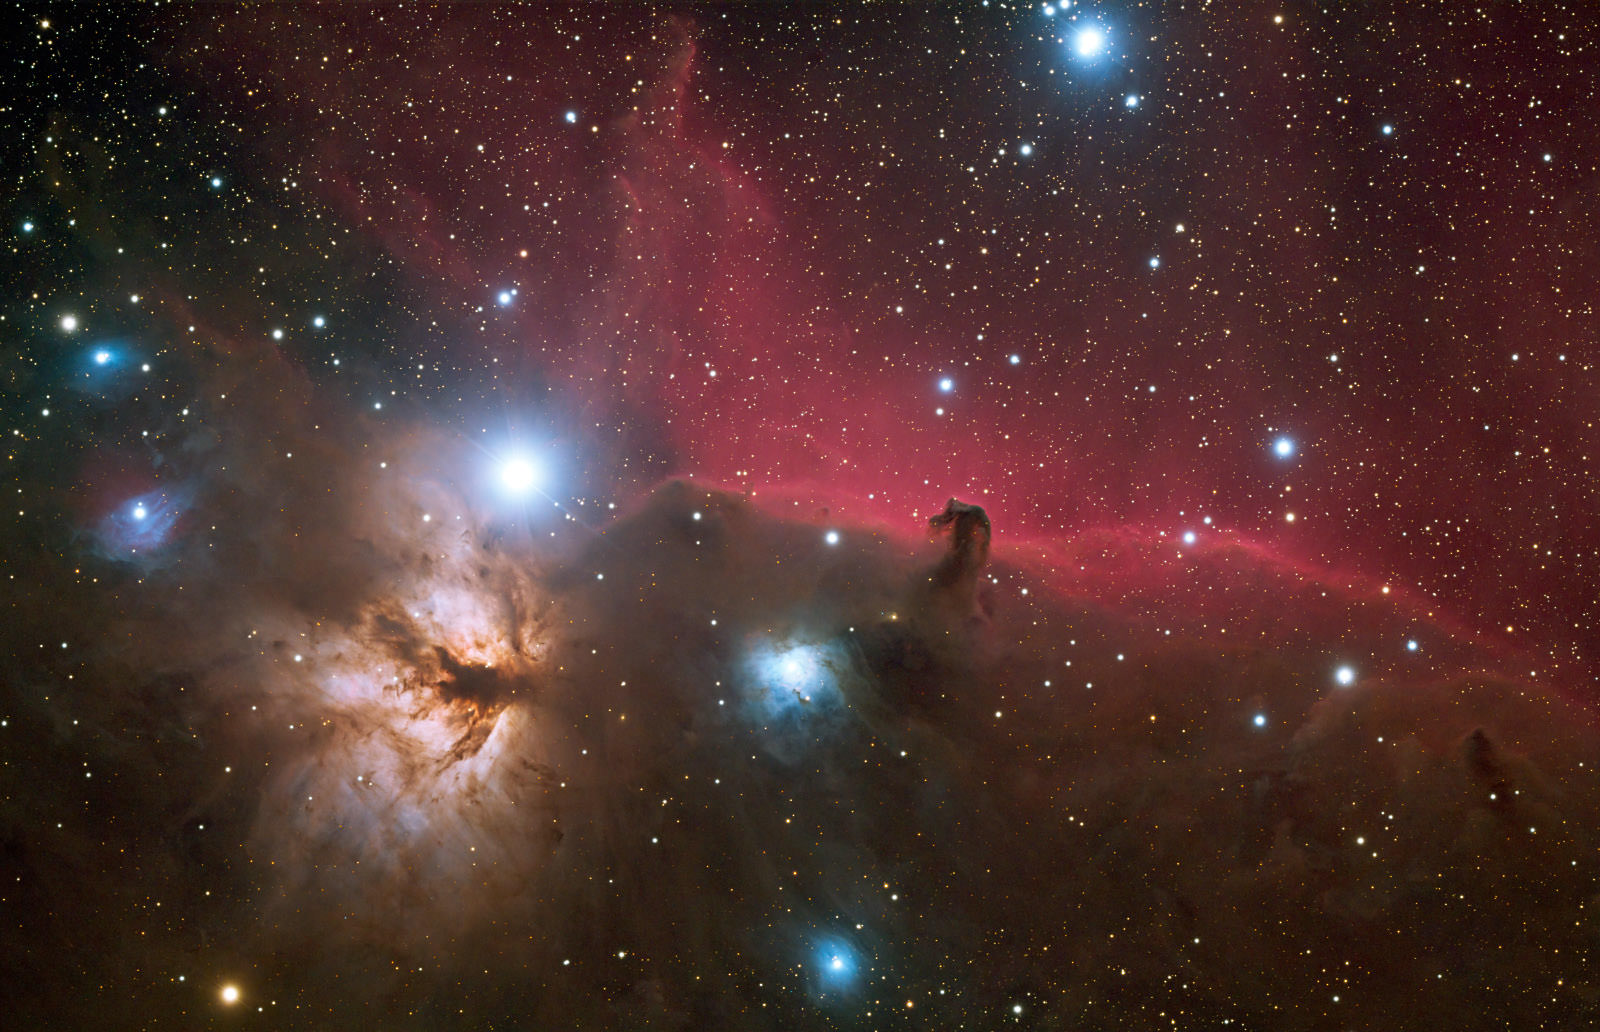
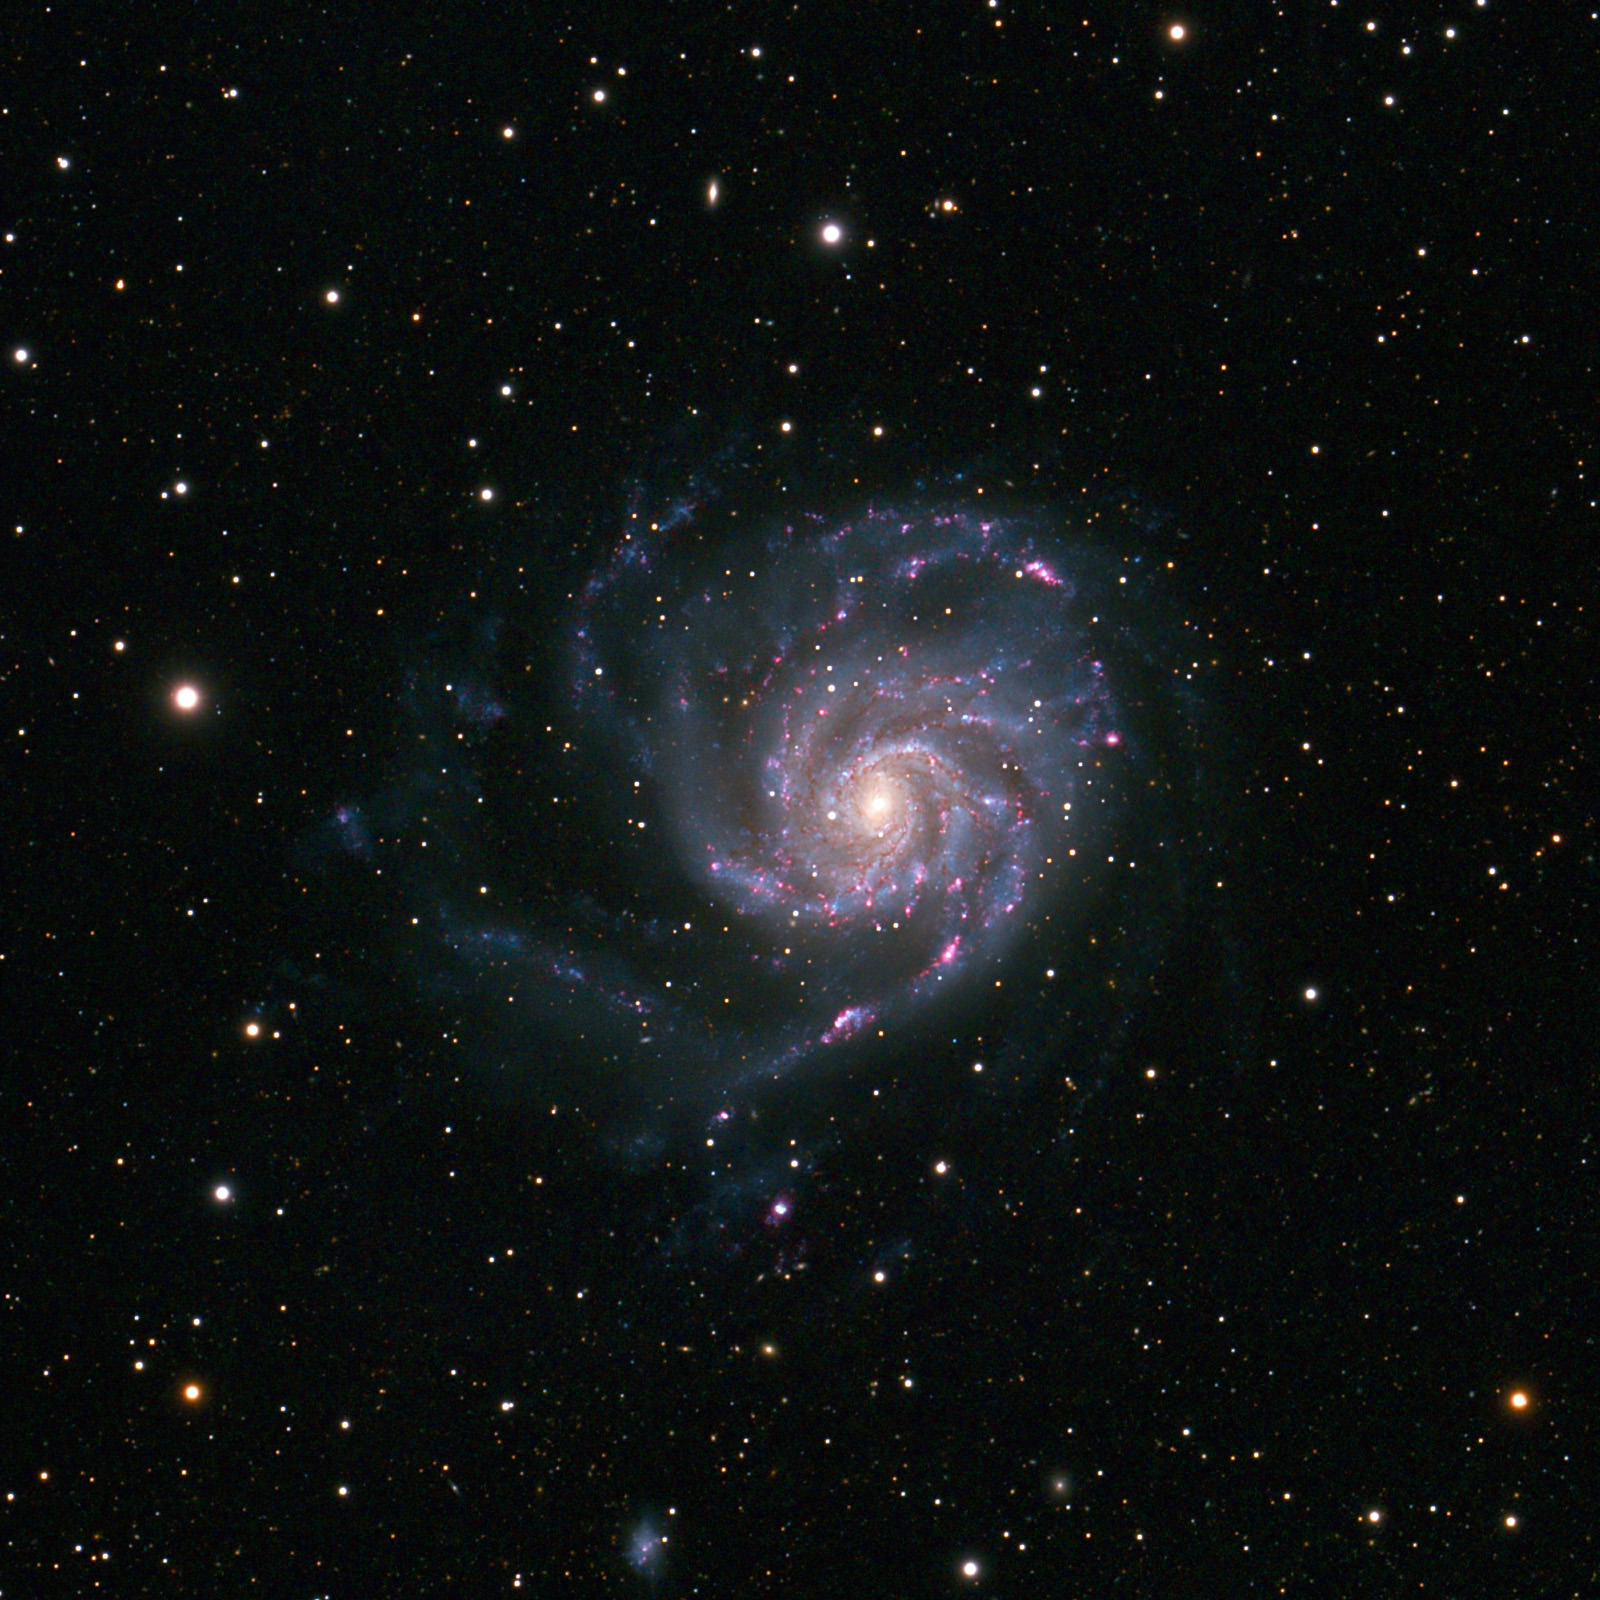
Deep-Sky Examples

This guest post was contributed by Wei-Hao Wang, an astronomer working in a national research institute of Taiwan, and is currently visiting the Canada-France-Hawaii Telescope on the Big Island of Hawaii. He is also an astrophotographer and started this hobby in 1990. A collection of his recent astrophotos can be found right here.
Wei-Hao Wang represents the height of excellence in astrophotography. In more ways than one. Not only are his images unsurpassed, but his generous willingness to help the rest of us gain some proficiency, both with the public in general and one on one–as he has more than once with me–is astonishing and gratifying. The man is an asset to the planet.
How does the Sigma 24 1.4 Art work with Astro? I have found a few reviews but it has been mostly people speaking from test sites’ charts from 2 years ago and not much real world experience.
Hi,
I was wondering what is the difference to say taken one 5 minute exposure and copying that image 40 times and stacking it versus taking 40 5 minutes exposures and stacking those? Surely they would be the same or are you averaging out the random noise through the pixels? I dabble in astrophotography but there is so much to learn. It is a whole new universe pardon the pun..
Hi how are you I want to learn how to do astrophotography and time lapse photography can you help me I have a Canon t3 model camera I have 2 lenses 18-55 mm and a 55-250 mm a personal tripod, it works nice I have a remote control, I tried to do it myself I don’t think I got anything. I am a student at Fresno City College from Fresno, CA my classes don’t teach astrophotography or time lapse so I’m trying to teach myself how to do this tell me what to do please. Astrophotography and Time lapse is it only good to do at night I mean I want to try and get the day well just a little do you know what I’m asking
“This looks more like what a beginner may use.”
Really?
Very excited to read this after work! Thank you for your work, Wei-Hao Wang!
Nice article, but should not more images in a stack (shorter exposure images) provide even better final image due to more averaging and thus more noise reduction? Why doing a few minute exposures rather than hundreds of second exposures? Short exposures would also eliminate possible movement problems…
Looks like you removed your comment while I was writing — but since I went to the trouble, here is an answer ;-)
You need long enough exposures to get your extremely weak signal comfortably above the noise floor and short enough that sky flux and light pollution do not saturate your images. It depends on the particulars of your target, gear, seeing, sky flux at your imaging site, etc. For me with a camera I can cool to -25C in my location 5 minute exposures seem right for LRGB imaging and 15 minute exposures for narrow band. I’m still new at this so these numbers might not be exactly right, but they are clearly in the ball park. And in fact when you do this right, which I am not yet doing, you feed all the relevant data: sky flux, read noise, brightness of your target, aperture, etc. into a formula and it will tell you the best exposure time. You stack images to get more signal and to improve SNR which is a function of SQRT(# images). So, go from 1 to 4 exposures and you double your SNR. In theory you would keep taking images but that is very expensive in time and you start hitting very diminishing returns. 20 seems to be a common point where most folks judge the improvement in signal is not worth the extra time. Realize that committing to another 5 frames might cost you 15 minutes * 4 filters * 5 frames > 5 hours since you need time to periodically adjust focus, dither, handle meridian flip, etc. The other reason is that if you are using a computer to control your mount and guide it by the stars, you can easily dither your frames. So, between each shot the mount is instructed to move the image randomly by an adjustable amount in right ascension and declination — say +/-10-20 pixels. That way defects in the sensor will not always sit over the same spot in the image and the process of integrating the images can basically make small scale defects disappear — its like magic ;-)
Richard, thanks for your extensive explanation. I removed my comment just after I wrote it because I realized you deal weak signal to start off so exposing for too short times would create even more noise.
Hi. As you said, shorter exposures help to avoid tracking issues. However, this is probably the only advantage of short exposures. This is related to the “readout noise” of the sensor. Every time the camera reads the photo-electrons out from the pixels to produce a digitized image, there is a noise added onto the image. The more we read out, the more such a noise will accumulate in the final image. For example, suppose we need 1 hr to accumulate certain amount of photons, making 6 10-minute exposures will be better than making 60 1-minute exposures, as reading out 60 times produces more noise than just reading out 6 times.
More precisely speaking, what we try to do is to wash out readout noise using photons in each exposure. When the number of photo-electons is much higher than the readout noise, the effect of readout noise become negligible. Once this criterion is met, readout noise no longer appears in the final image. This is why we need to make each exposure long enough. In a reasonably dark place, with an F4 optics and recent DSLRs under ISO 1600, we can achieve this with roughly 5 to 10 minutes of exposures. In a bright place, the required exposure time for readout noise to be negligible can be much shorter, but at the same time it will be much harder to overcome photon noise. In most daylight photography or short exposure nighttime photography under very high ISOs, we are in the regime that readout noise is the primary source of noise. We want to avoid this in deep-sky astrophotography.
If you are interested in knowing how large the readout noise is for each camera, you can check www.sensorgen.info. There you can click into each camera and see how its readout noise changes with ISO. It’s quite interesting.
Thank you Wei-Hao, quickly after I wrote this comment I realized that shorter exposures at higher iso would only make sense for getting rid of the noise through averaging when your signal is strong enough, but yours is very week.
I got sidetracked on the great prime lenses article by a young math whiz but wanted to come back and post a note here. Well done! Your write up was suggested by a professor friend and while I think most fanatics eventually migrate to CCDs (and most of the rest give up because of processing), this is a great primer to open the door to the possibilities of astrophotography.
As I said in my comment to the prime lenses article, kudos to this very impressive website for its high level of quality. Good luck to the author on his Hawaii endeavors (and to the prime lenses youngster on his Iceland project).
just by reading this and some good comments i think i will need to retire early and divorce my wife to have time for it.
As someone who recently was bitten, rather badly I must say, by the AP bug, I’d like to counter one comment that suggested that you need tons of dollars to achieve these kinds of results. While the OP showed a picture of some fairly pricey stuff, you do not need that to get some excellent images. If you have a fairly modern DLSR capable of clean high ISO shots and a few good lenses, you are halfway there. The well known formula (and its several variations) is that you must limit your exposures on a tripod to 500/FL seconds to avoid star trailing. So, your talking <30 seconds which will let you get some nice images but not as nice as the OP showed us. But for <$500 you can get a Polarie or SkyTracker that will rotate your camera in sidereal time. If you carefully polar align it you can now move from the <30sec range to minutes for your exposures — how many minutes depends on how good a job you do with your polar alignment. You can move up from there to a nice portable rig called an AstroTrac (IIRC) for about $750 that does the same job but a bit more precisely and will hold a bit more weight. I've heard that 5 minute exposures are practical with the AstroTrac. But if you think you might want to go all the way some day you can get something like the iOptron ZEQ25 for under $1000 — less than we pay for many of our lenses. This is a full motorized, goto, equatorial mount capable of tracking in both RA and DEC and capable of fairly precise tracking with the eventual addition of a guide scope and camera (these watch a star and tell the mount how to correct its position if the the star drifts due to errors in tracking — which on any consumer affordable mount will happen). This mount only weighs a bit over 10# and will carry a 27# payload (although the general rule for AP is to stick under 1/2 the rated capacity, even so, at 13.5# we can put most of our camera gear on the mount without wondering if we are overloading it.)
My point is: you can get out under the stars and start tonight with your tripod and your DSLR. If you have fun and like what you get you can spend something like $350 and get basic tracking in place and move from half a minute to several minute exposures. If you spend $1000 you can make images that start to get close to what Mr. Wang posted — after, of course, you spend countless hours learning how to process all the images you capture ;-) I'm sure Mr. Wang has spend many hundreds of hours learning how to make the fantastic images he presented. Astrophotography is a very different beast. I go to an air show and might come out with 1600 frames — maybe 400 pictures and hour of which I might like 20/hr (need a bunch of shots to catch the Blue Angels doing a cross pass ). The ones I really like I might spend 10 minute processing, each. I just finished my first real astrophotograph. An image of the Rosette Nebula. I took 20 exposures through each of 3 narrow band filters last 15 minutes each. I took 60 flat frames. I took 200 bias frames. I took 60 dark frames. I never added it up but there is probably 20 hours of imaging there. I bet I spend 8 hours processing the data (this was not computer limited, this was lots of newbie not sure what to do time). So, including set up/tear down, and polar aligning the mount I probably invested 32 hours in one stinking image — 0.03 images/hour, just a tad less than 400/hr — and you know what — I loved it and I’m very happy with the result. It is sure not in Mr. Wang’s league, but it is not too shabby either. If you like being outside, if you like math, if you like working for your results this might the be hobby for you — and did I mention the heavens are beautiful?
I can’t show you what you can do with just a DSLR since I decided to go the scope/cooled CCD route since, after doing a bunch of research, I decided I wanted to do narrow band imaging (I use filters that are between 7 and 9nm wide around the hydrogen alpha, oxygen III and the sulfur II spectral lines), but I can tell you that I’ve seen many outstanding astrophotographs made with consumer DSLR or DSLRs modified to allow better response to the hydrogen-alpha spectral line (a mod that costs around $300).
Here is a link to my 1st attempt.
This was made with about a $10K investment in equipment. With a different set of choices I probably could have come very close with about half that. With more skill who knows?