“There’s such a thing as ornamental shrimp?” This is the typical response of family and friends when I speak to them about my recent hobby of keeping ornamental shrimp. Believe it or not, there is growing interest around the world about breeding and keeping these little freshwater critters as pets. In some countries, their popularity even rival traditional fish keeping! What once used to be considered another algae eater in tanks has quickly become an object of interest for aquarium enthusiasts, given their behavior, varieties, and breeding possibilities. They are marvelous to look at, and as such are wonderful subjects to photograph.
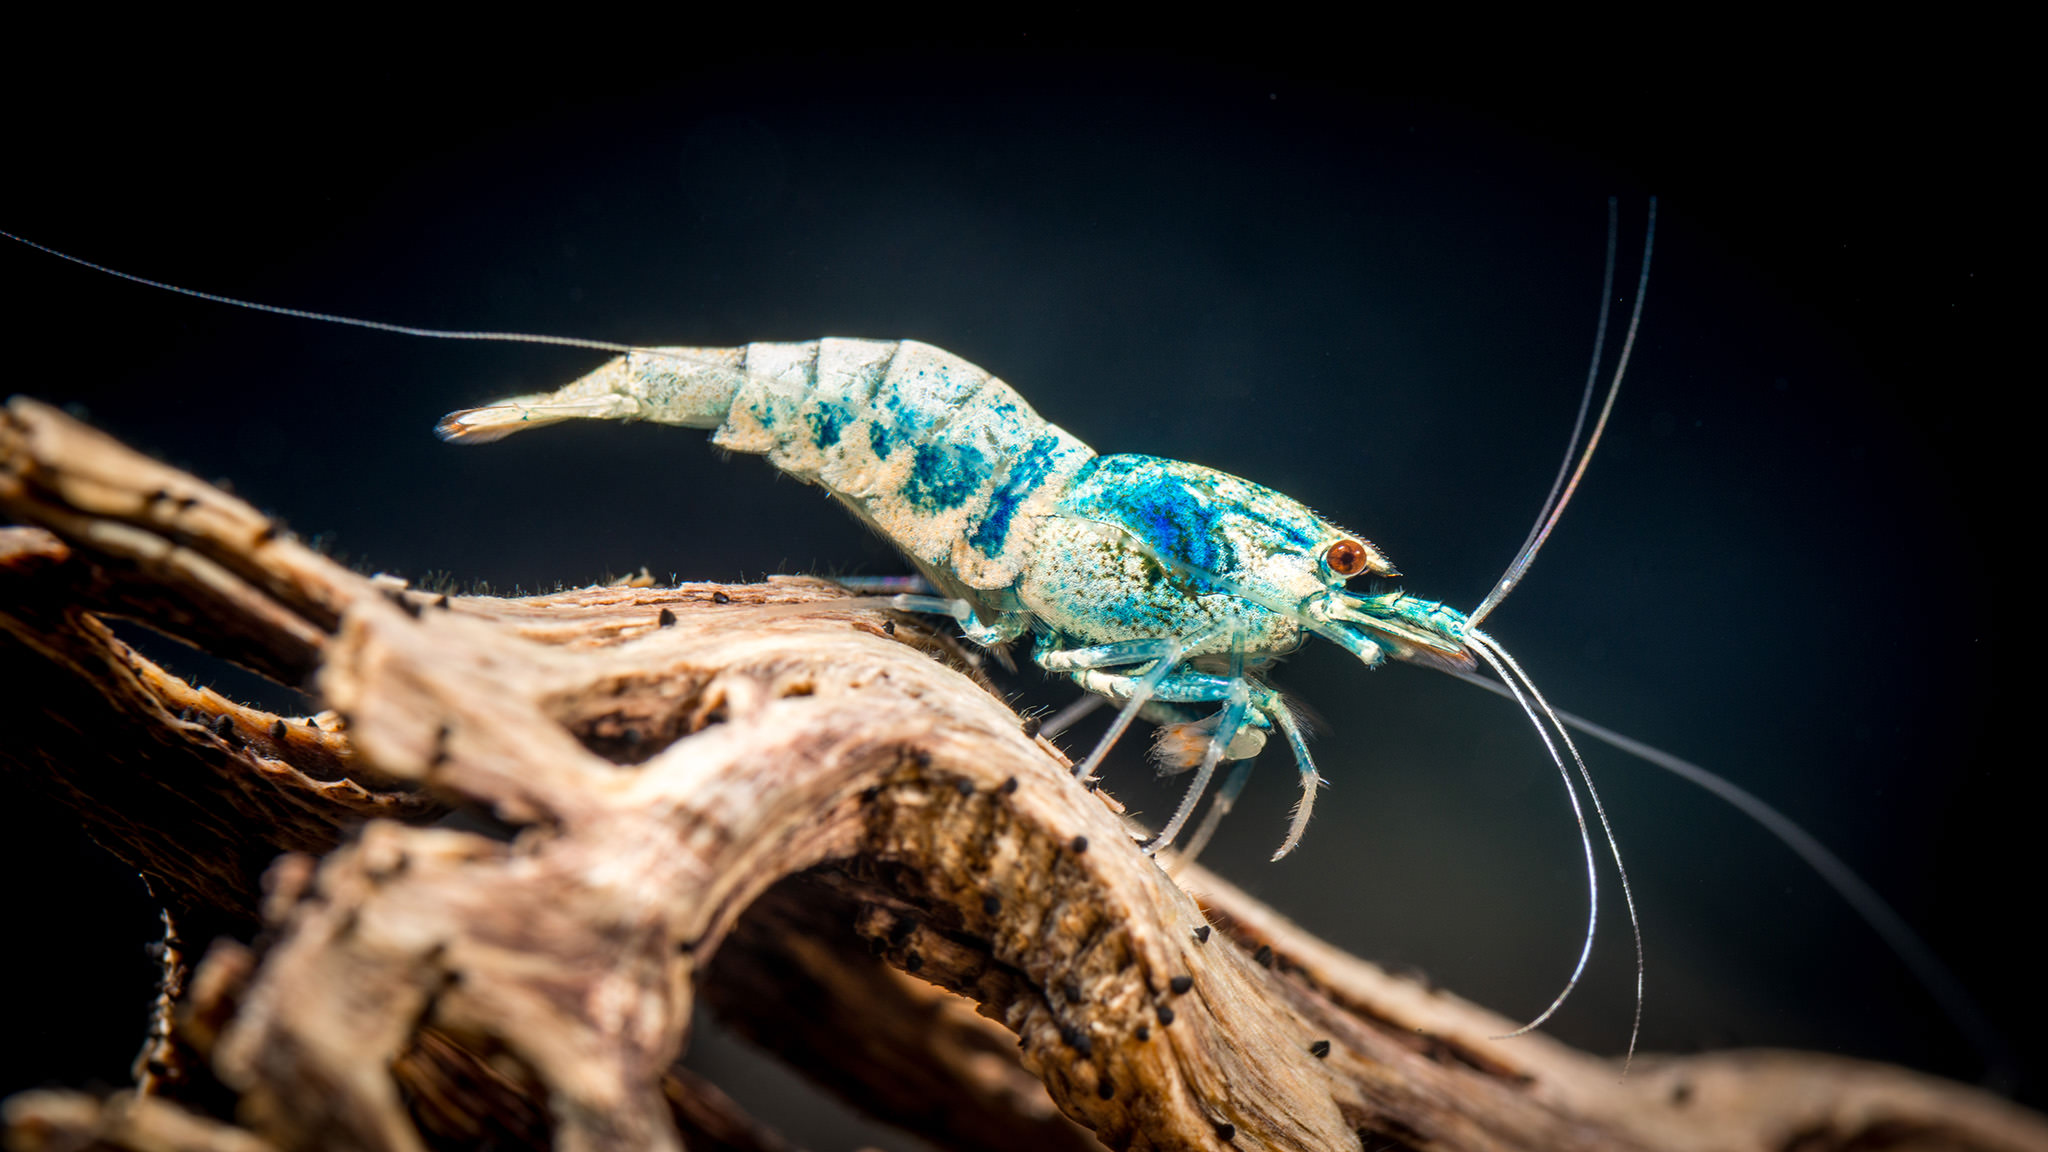
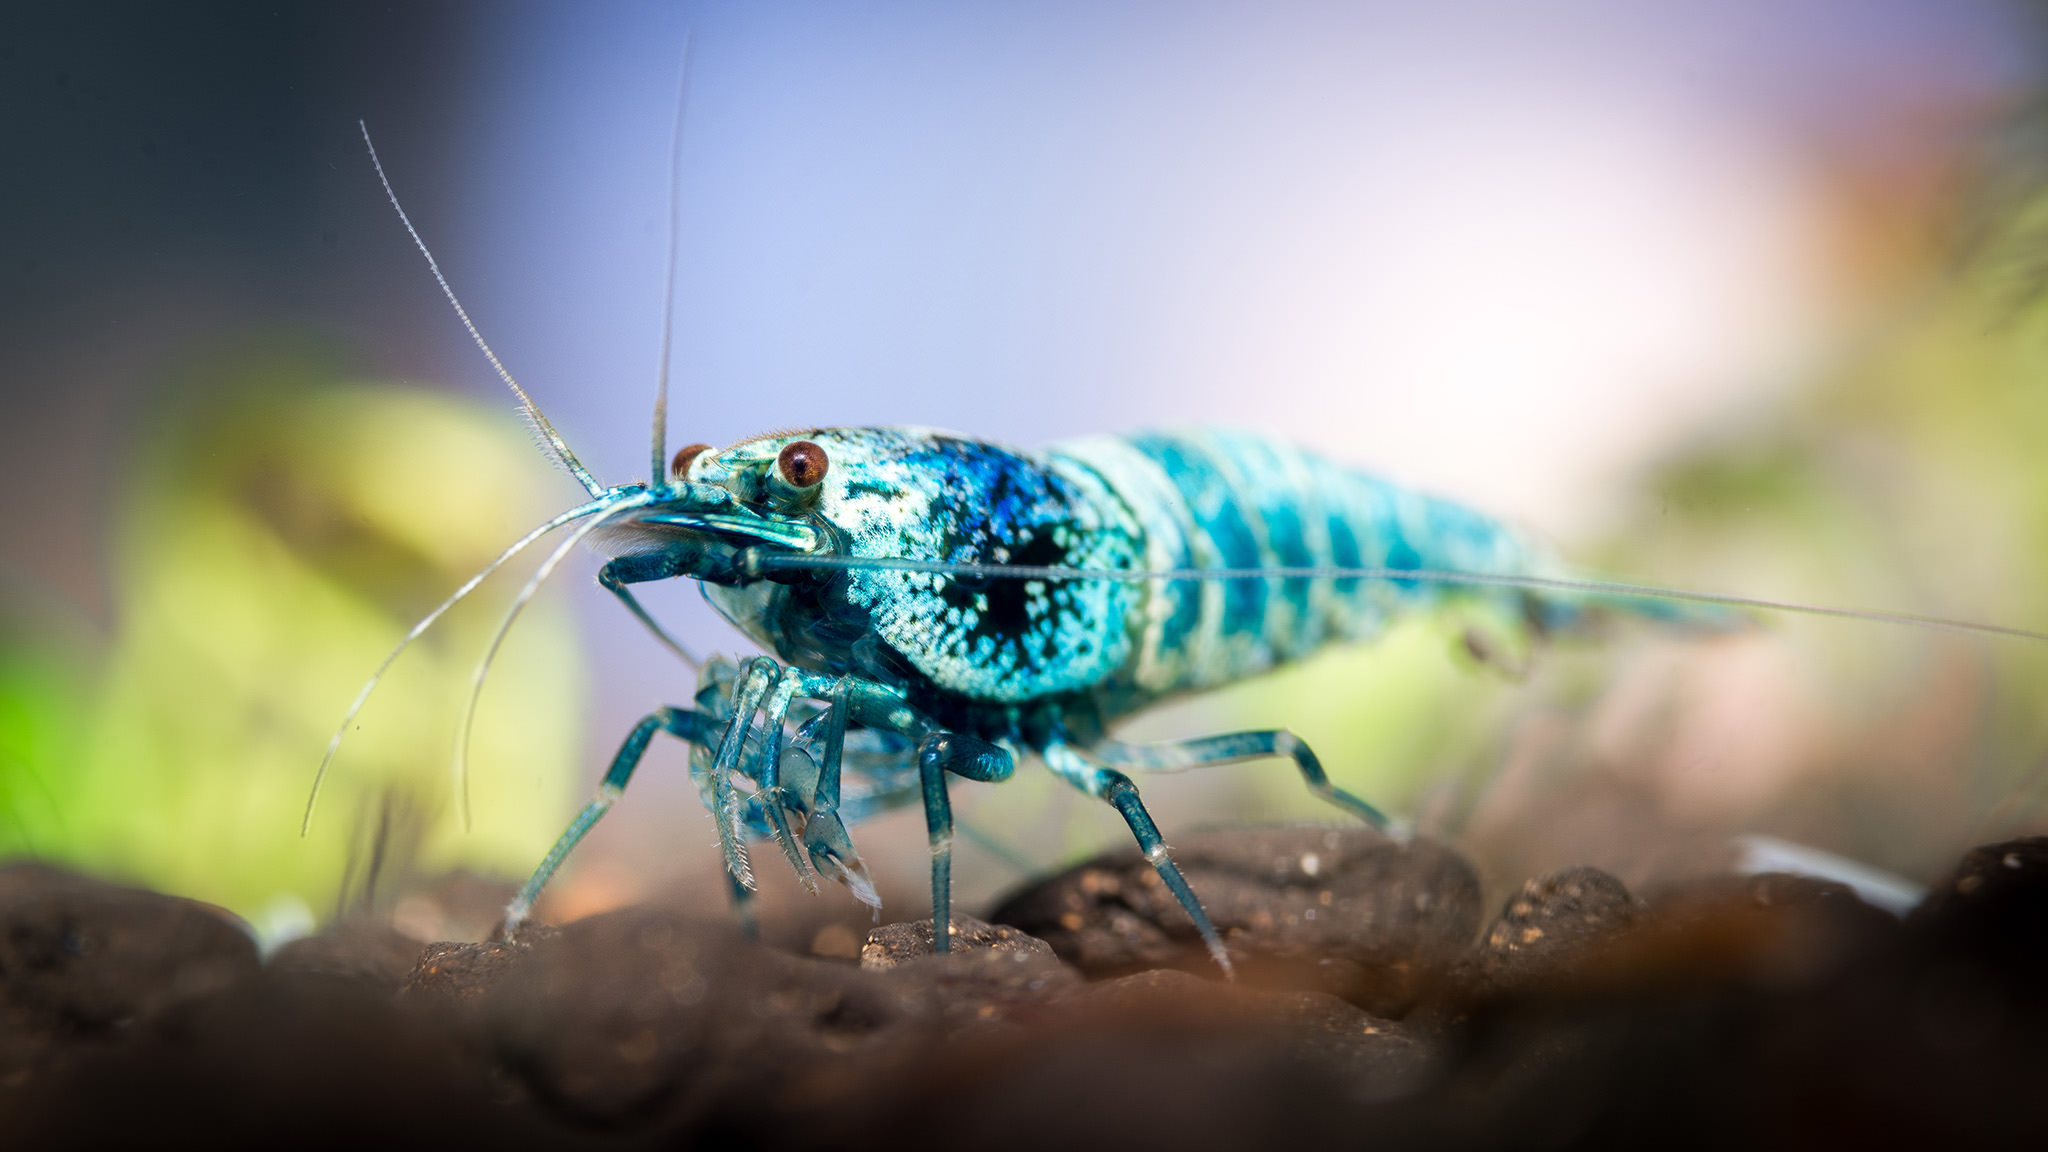
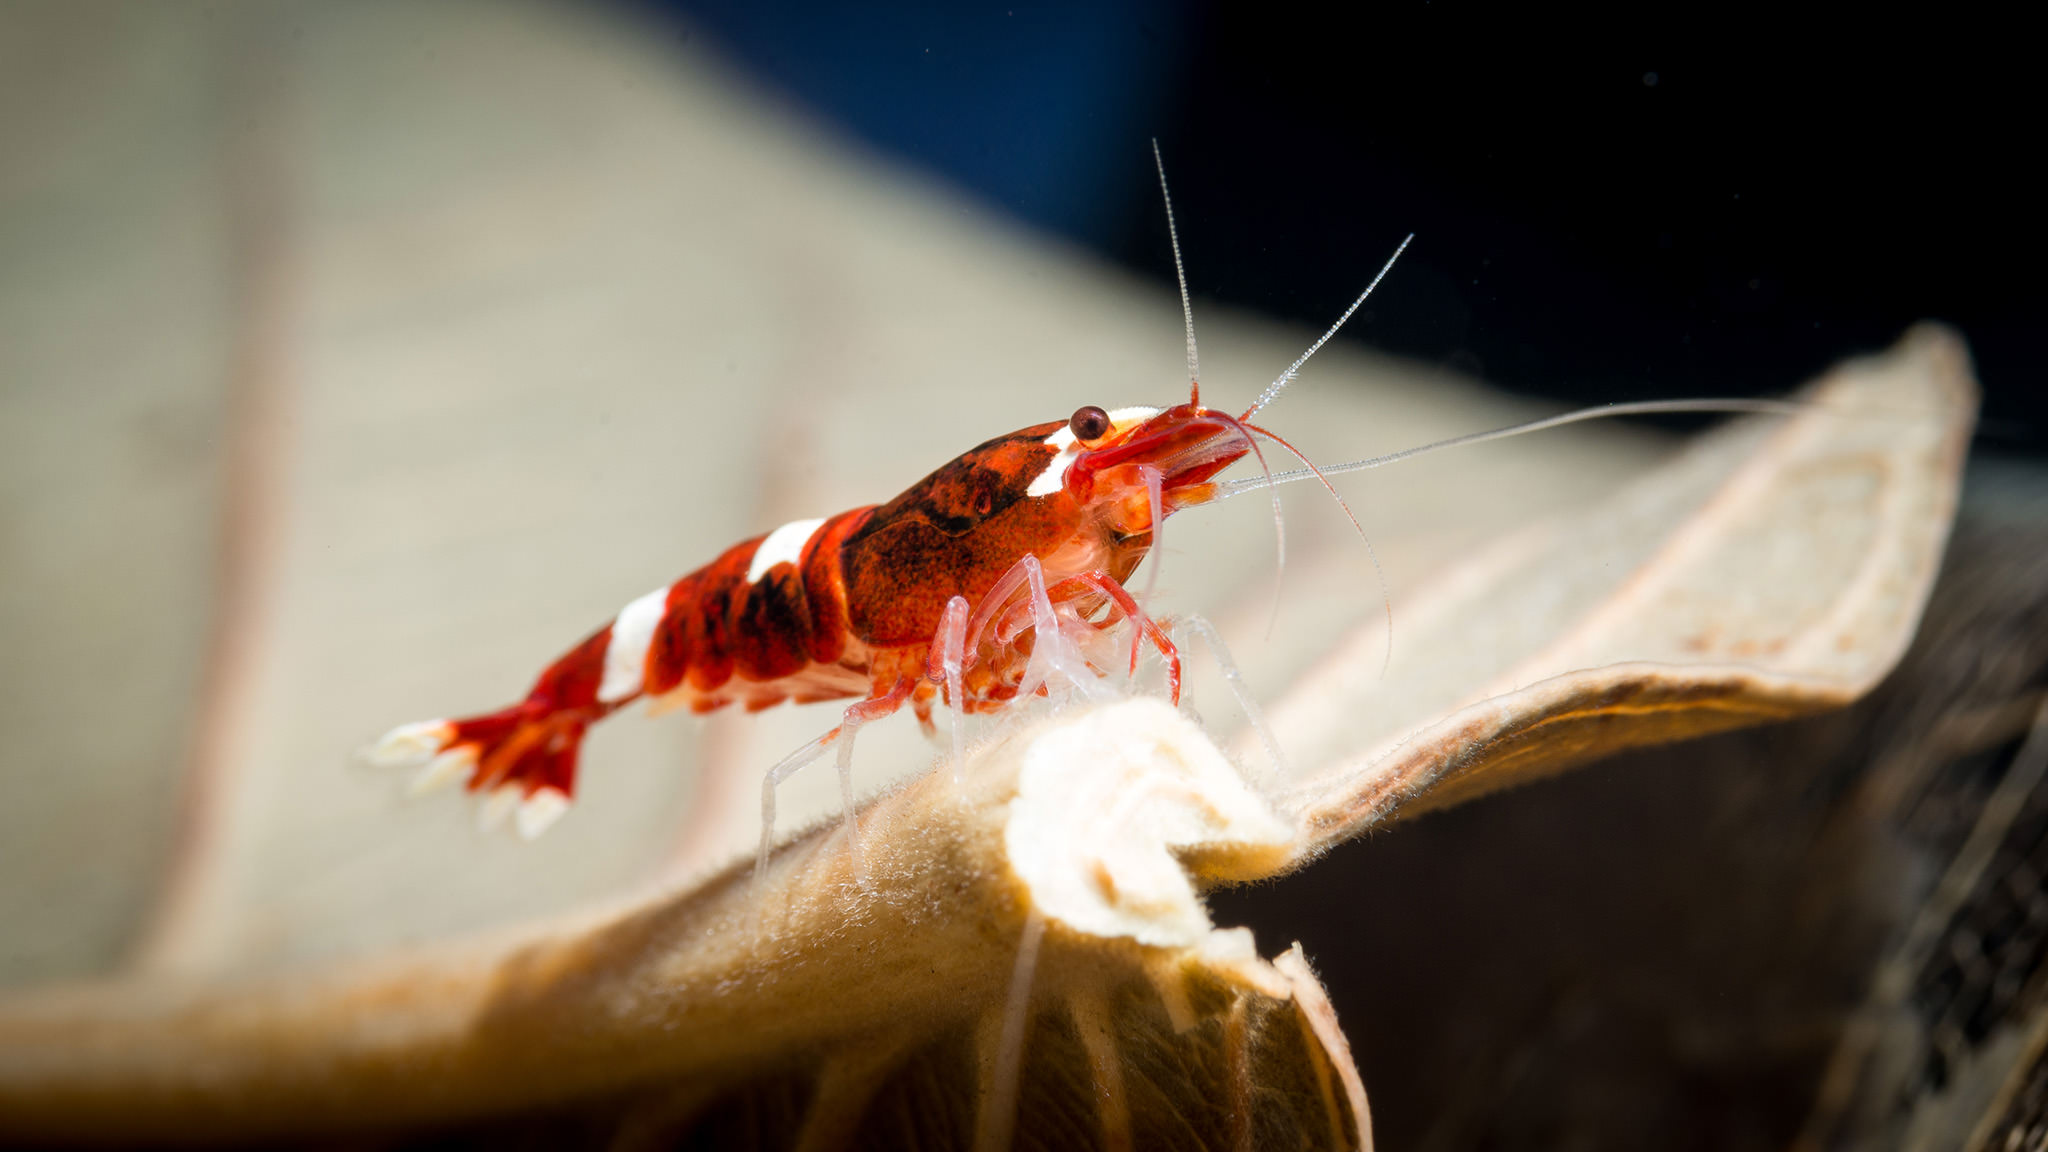
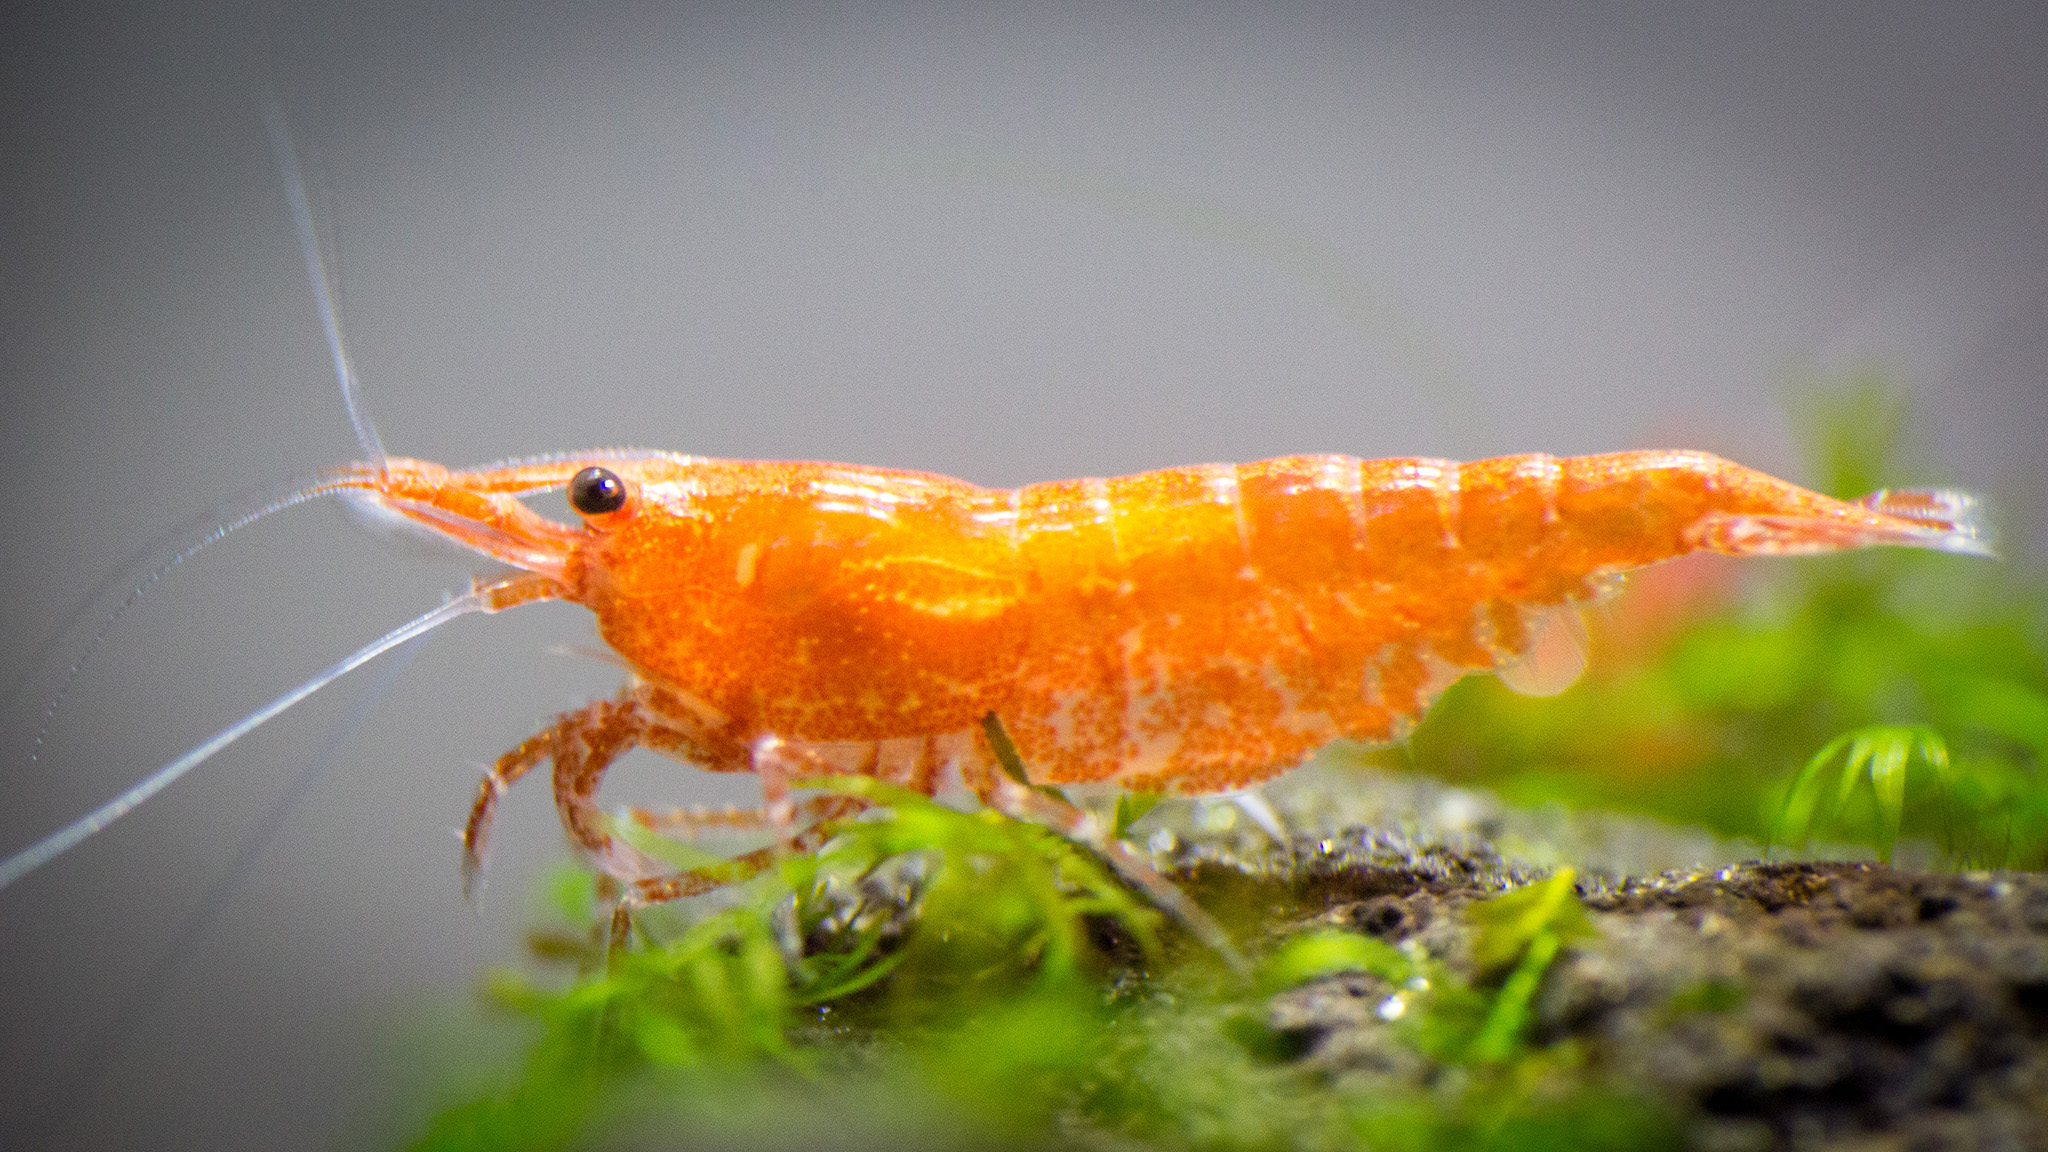
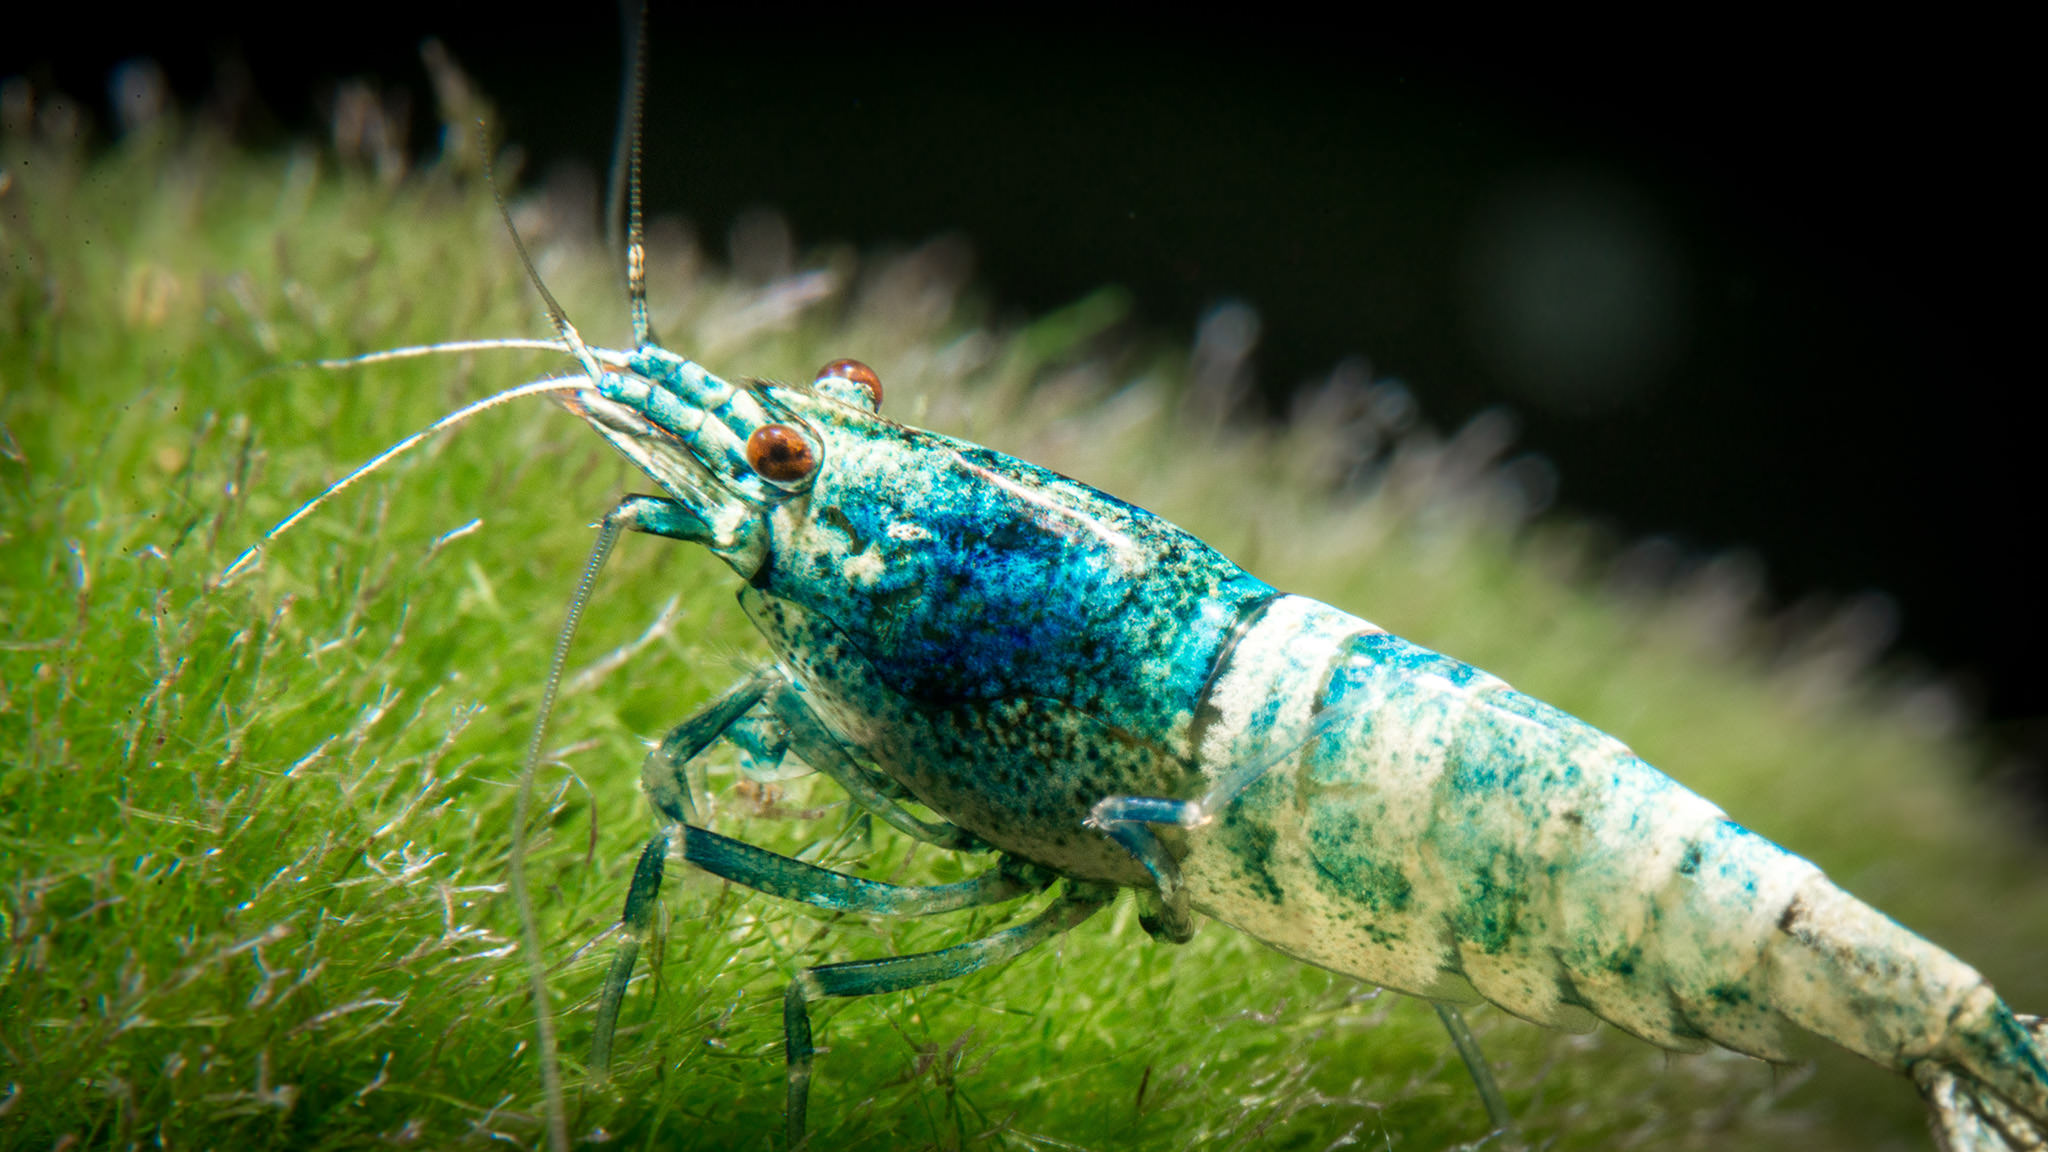
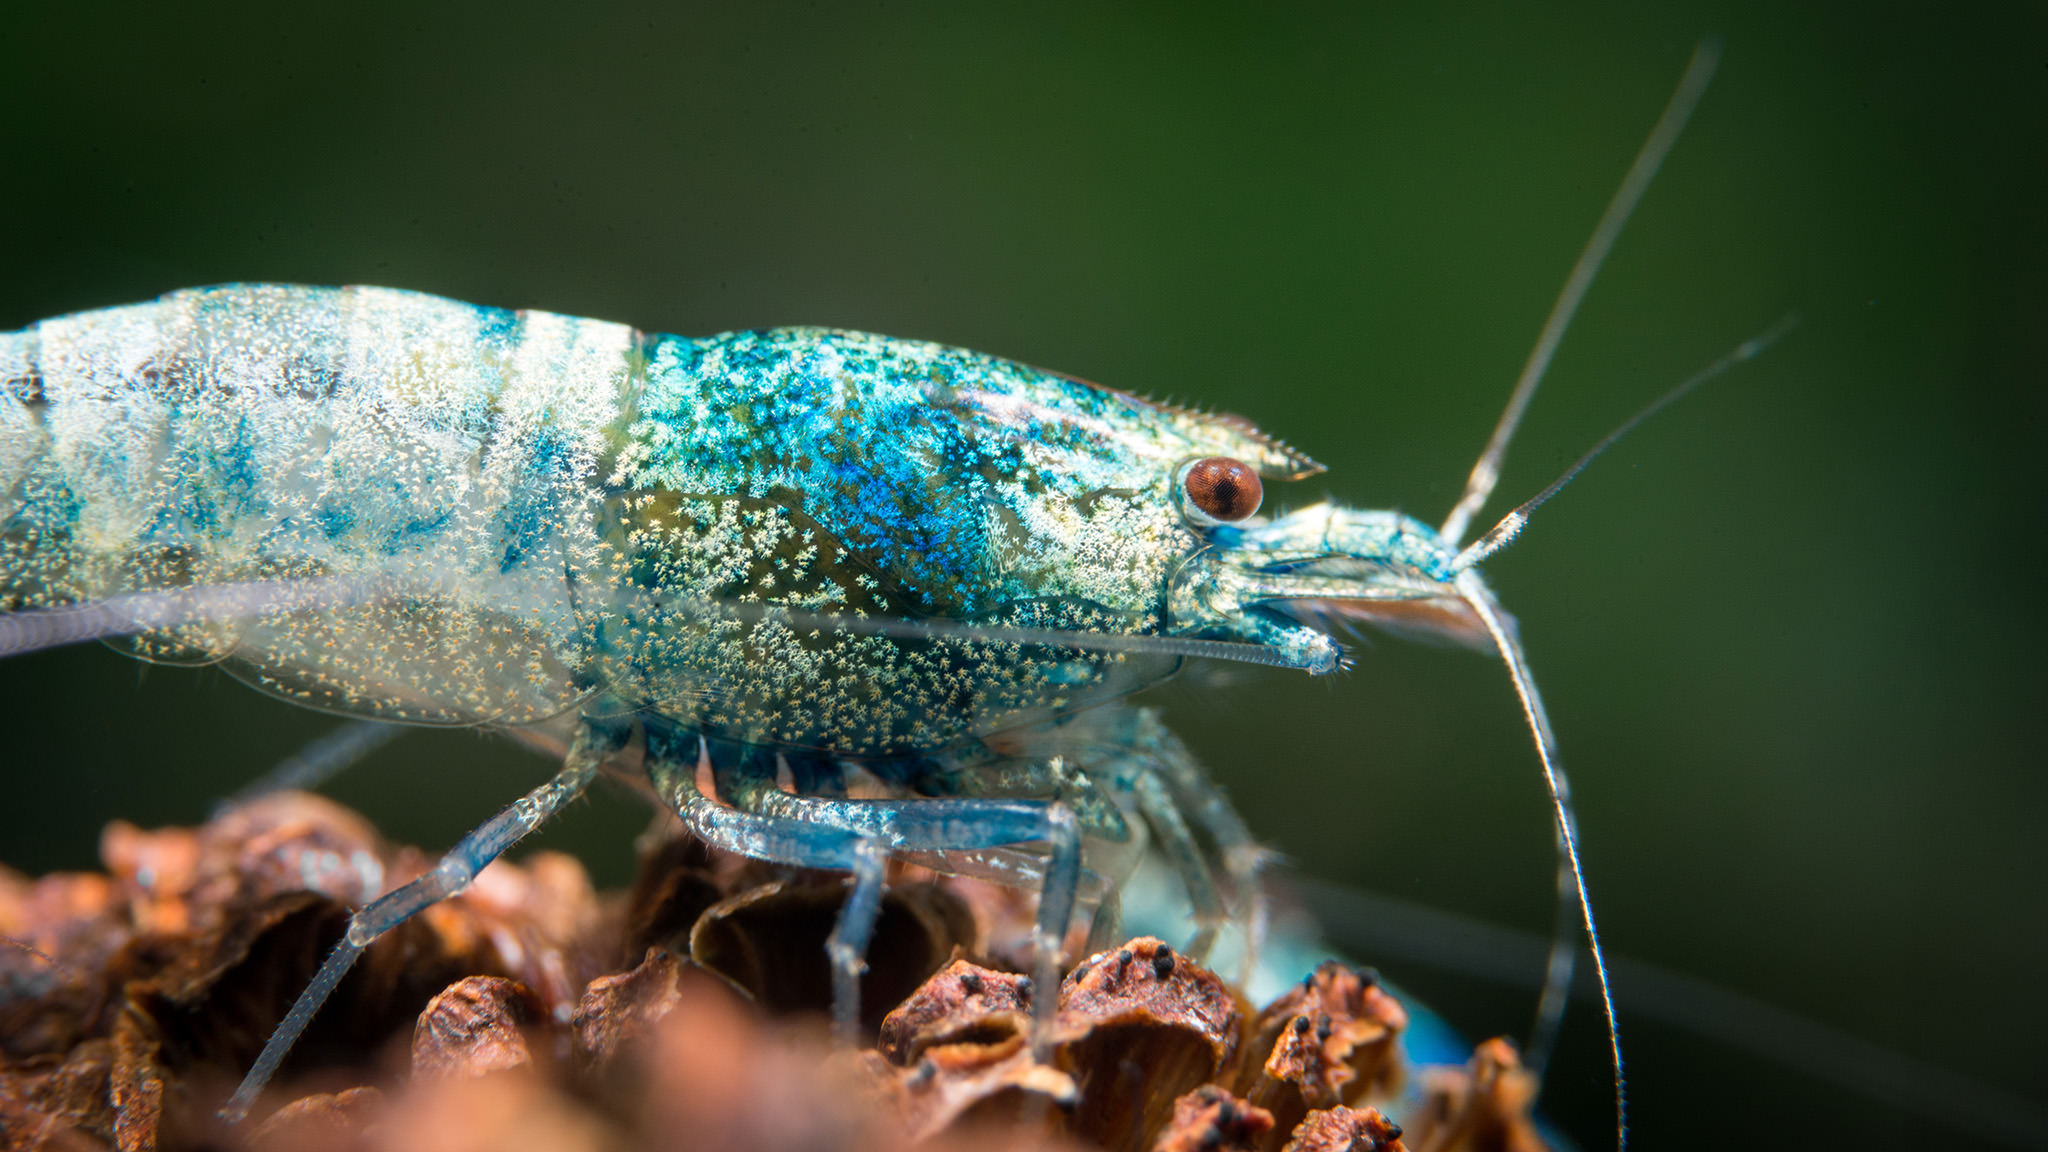
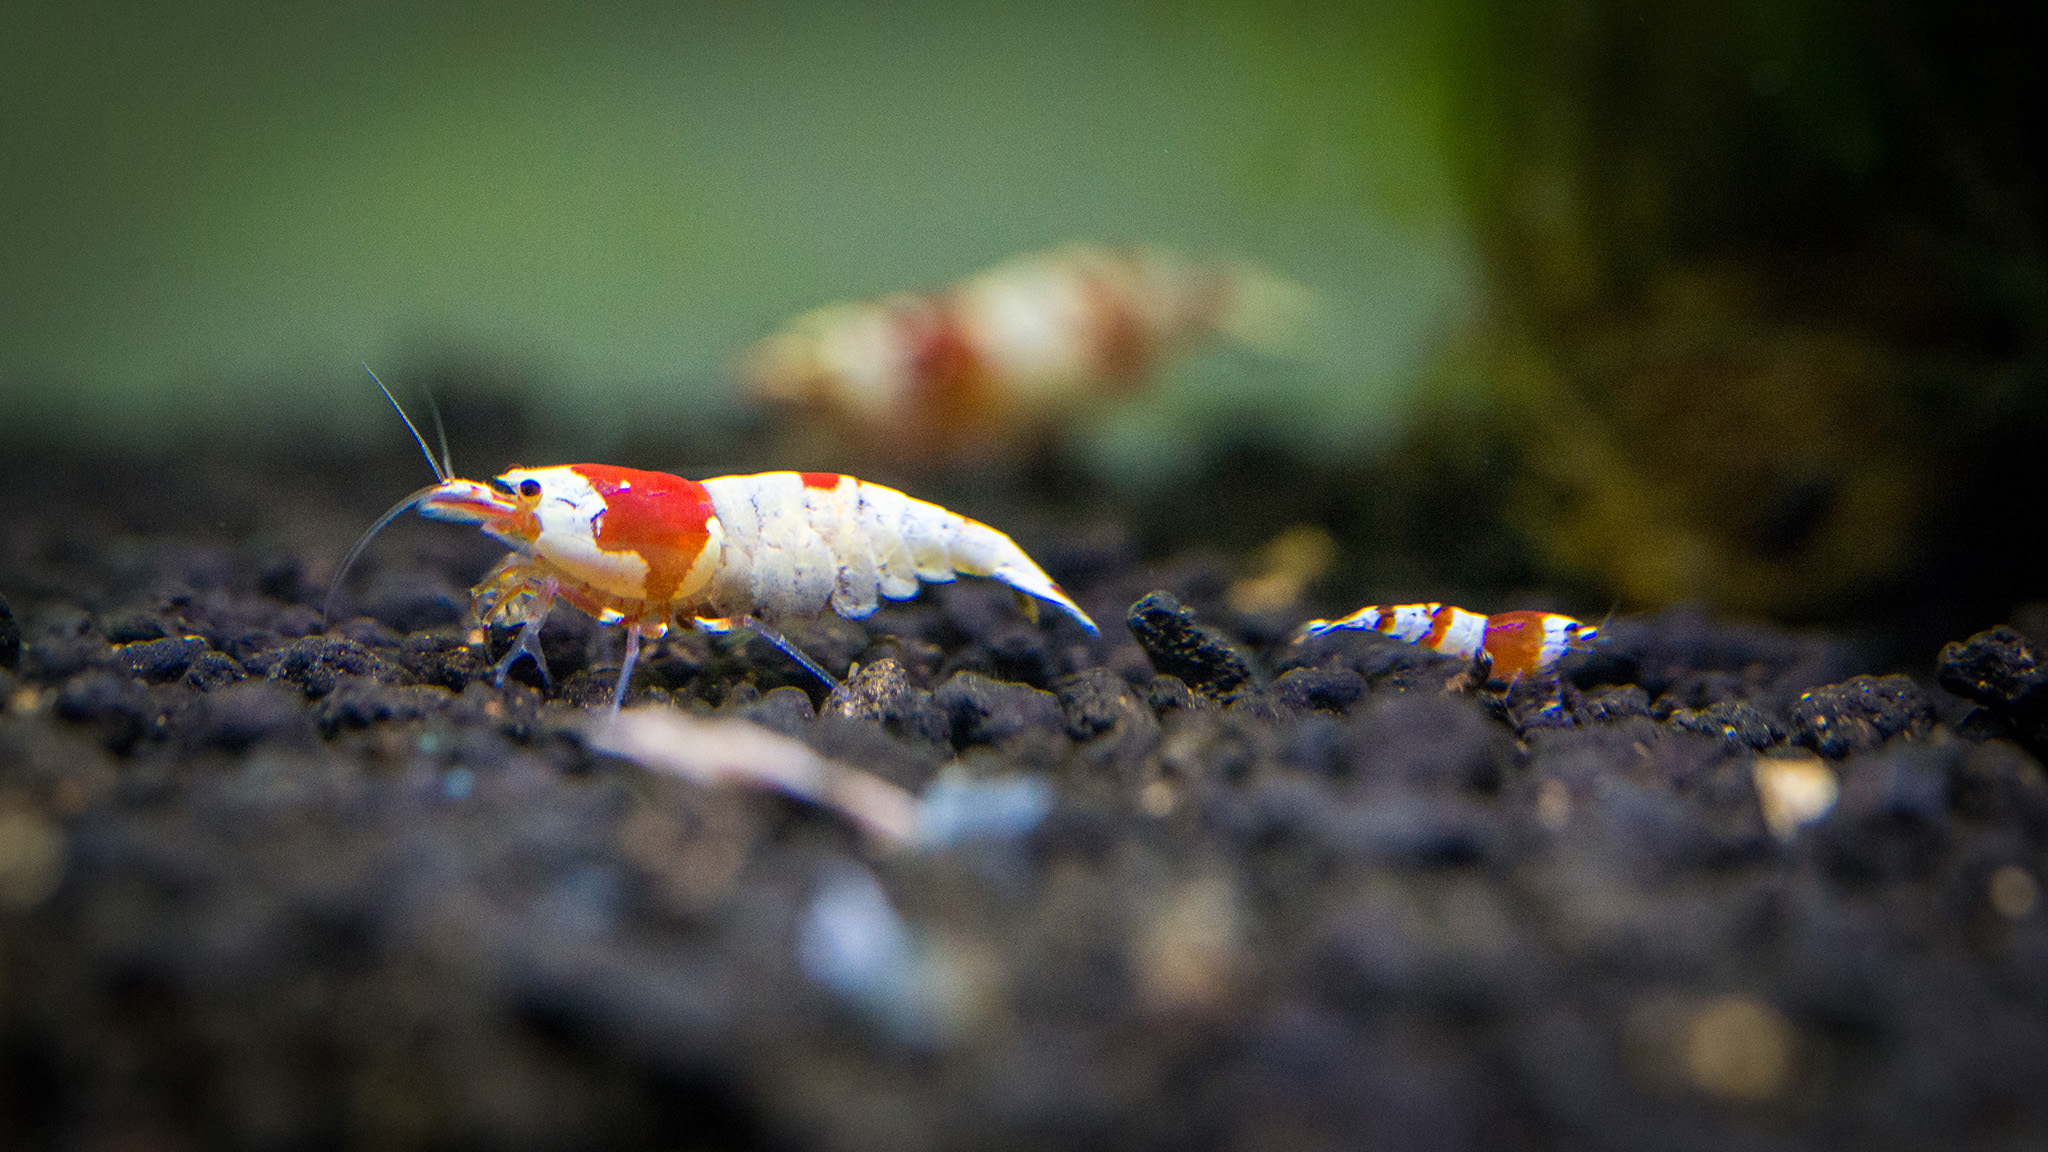
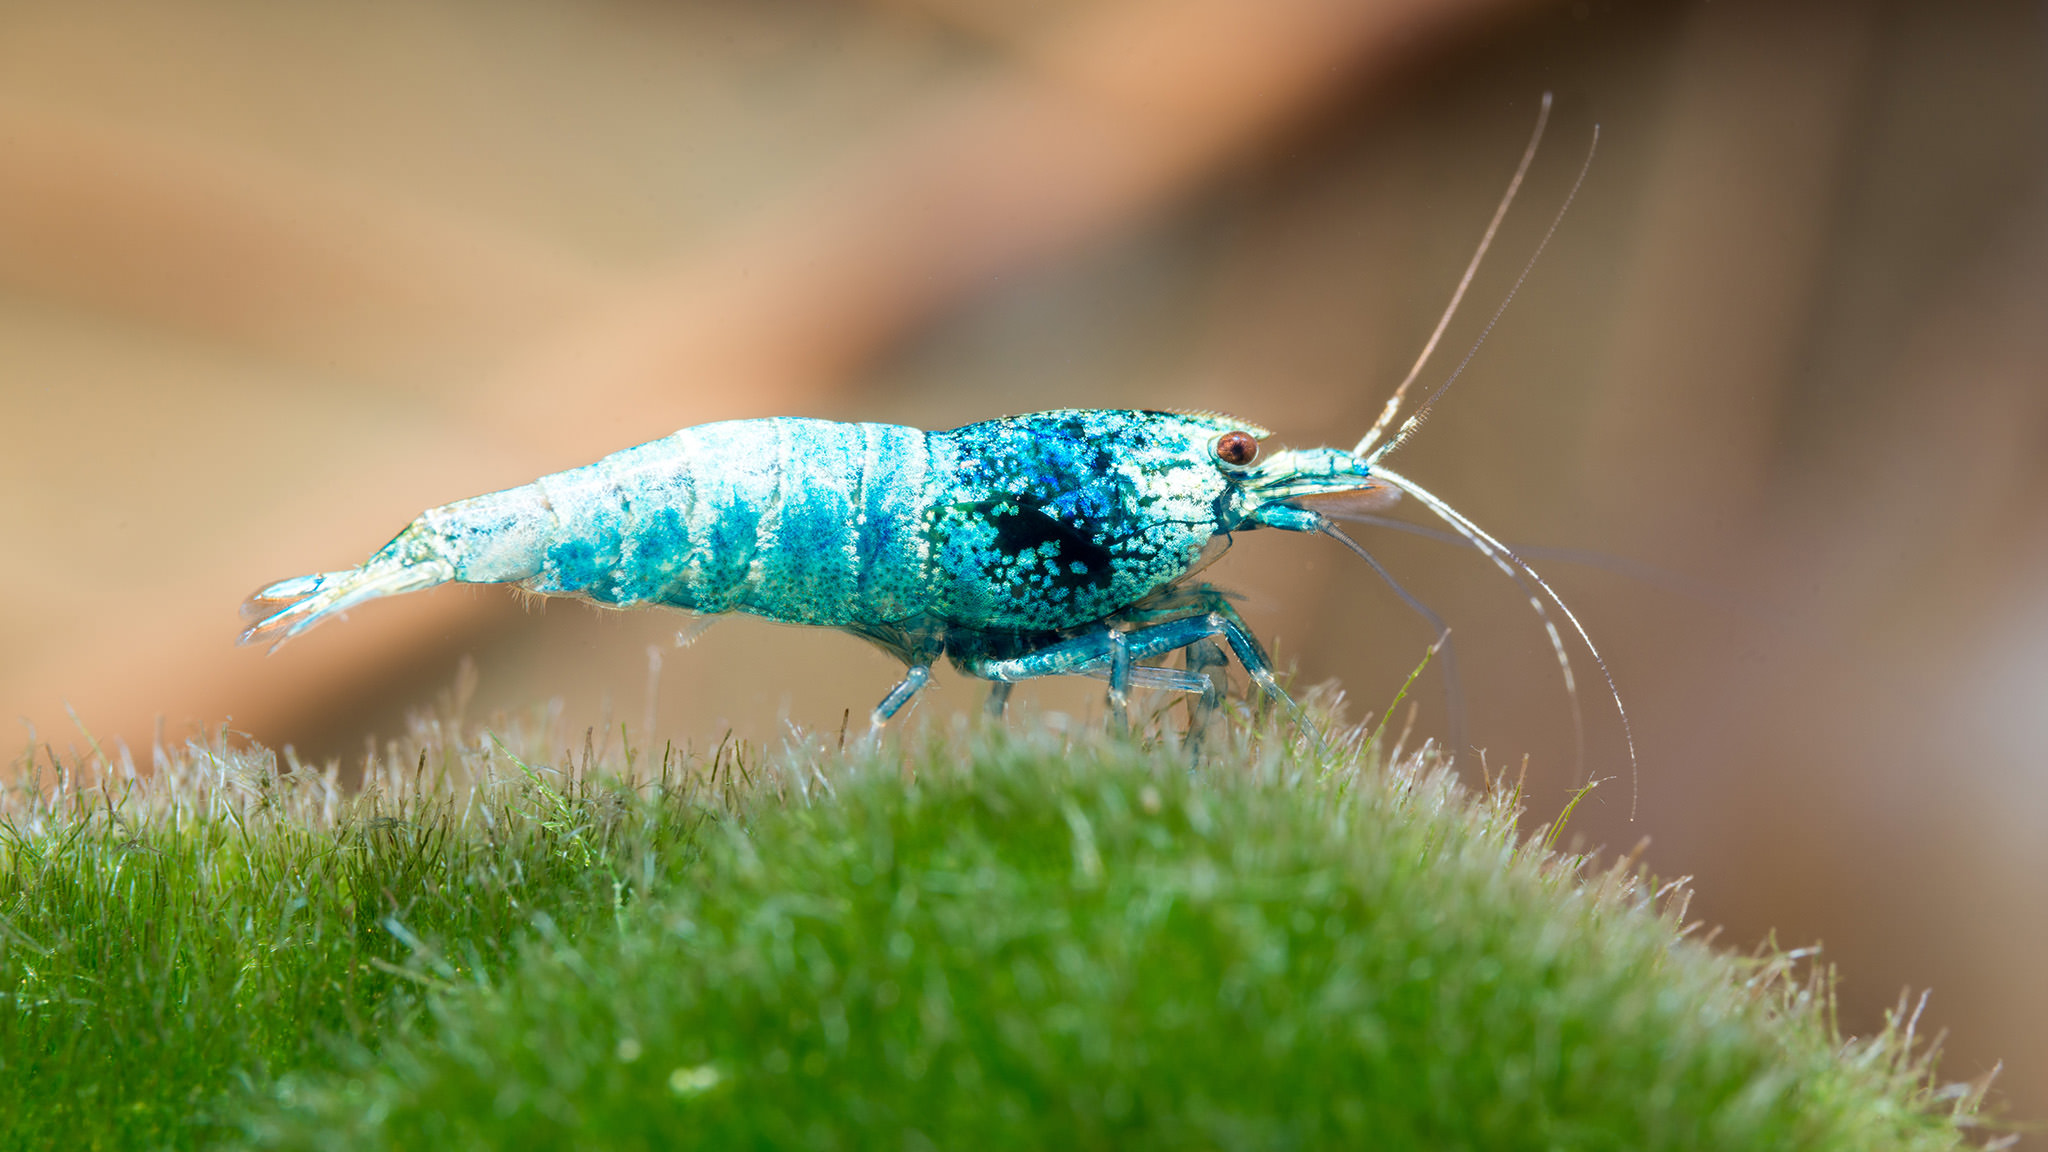
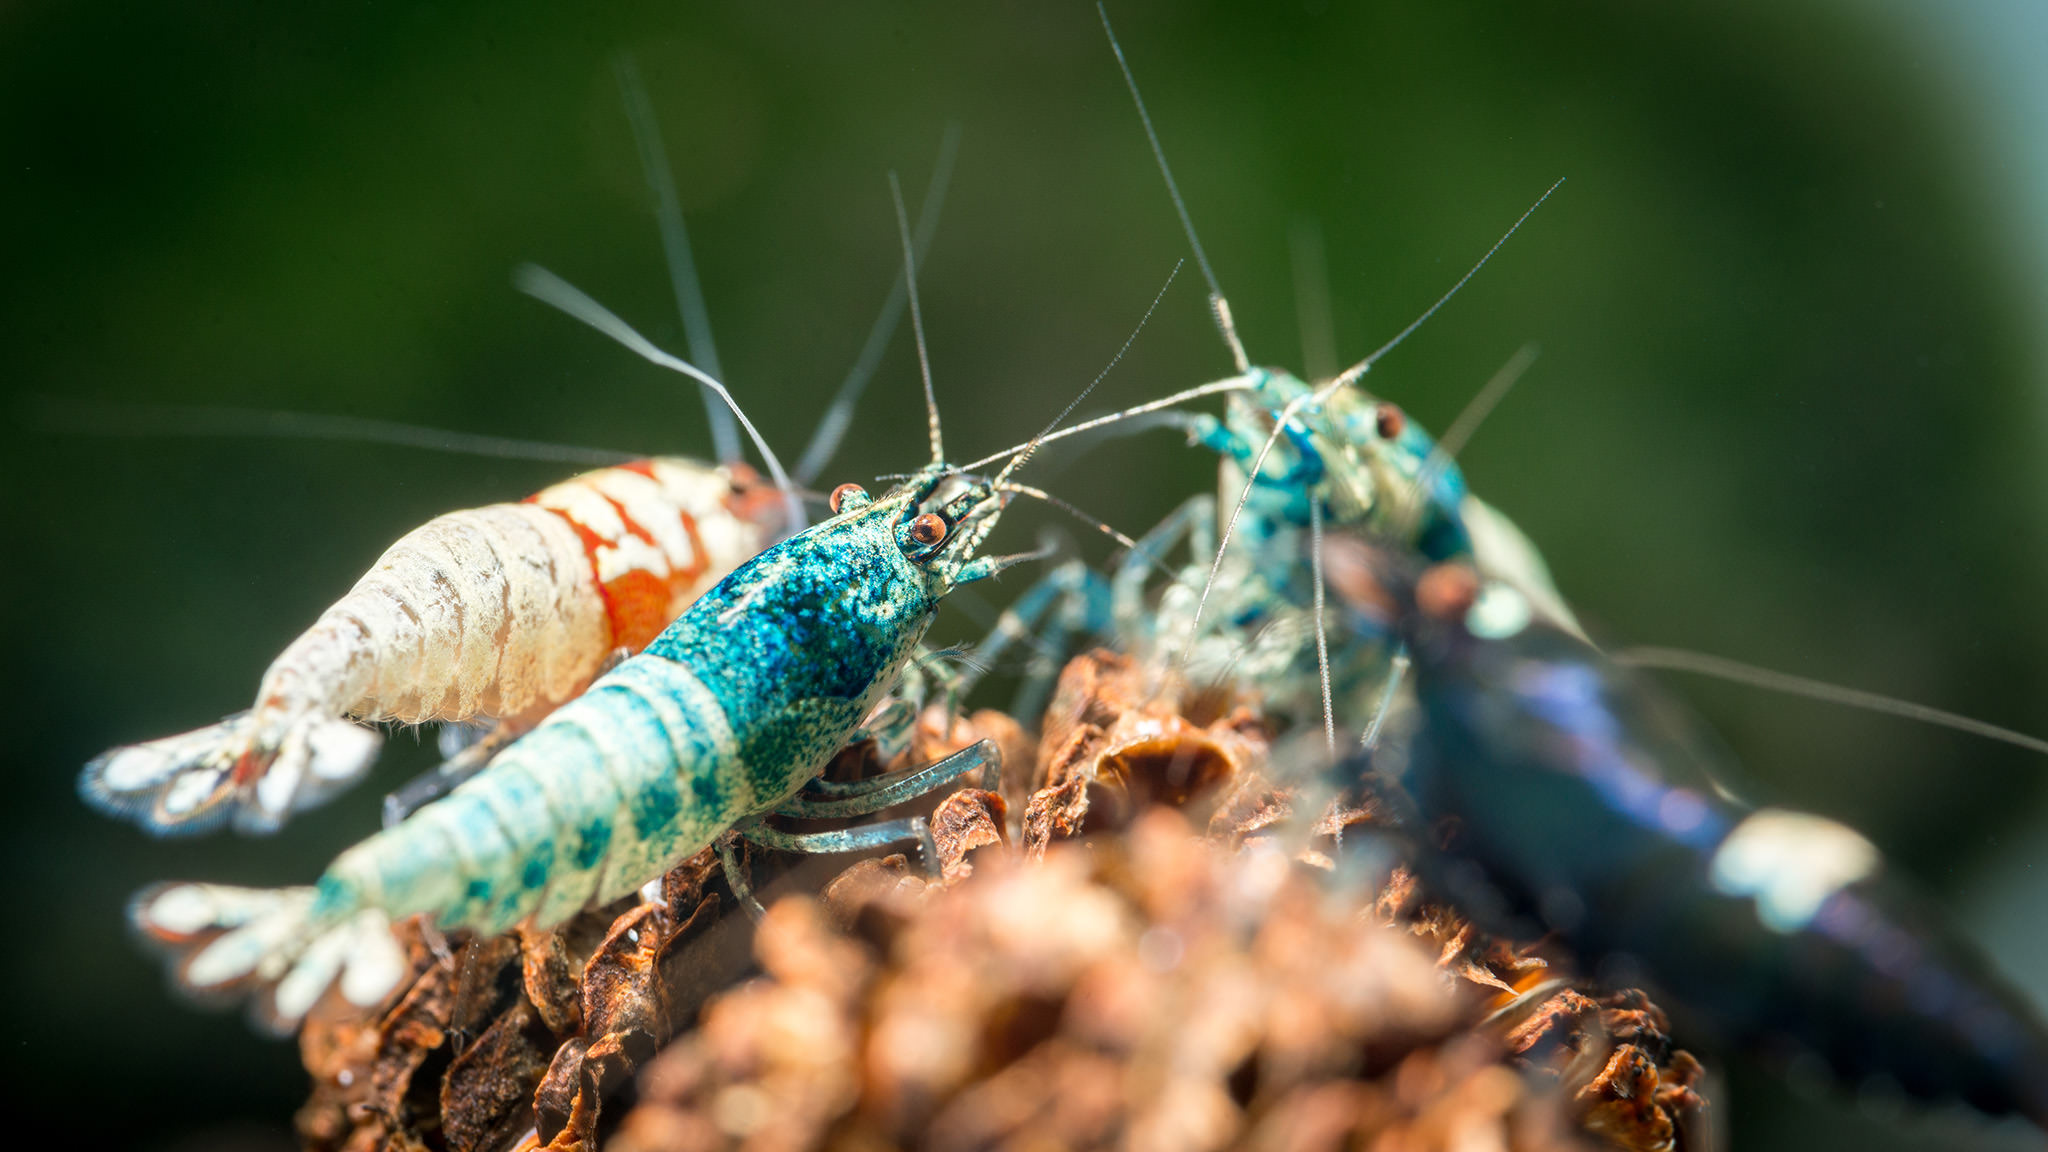
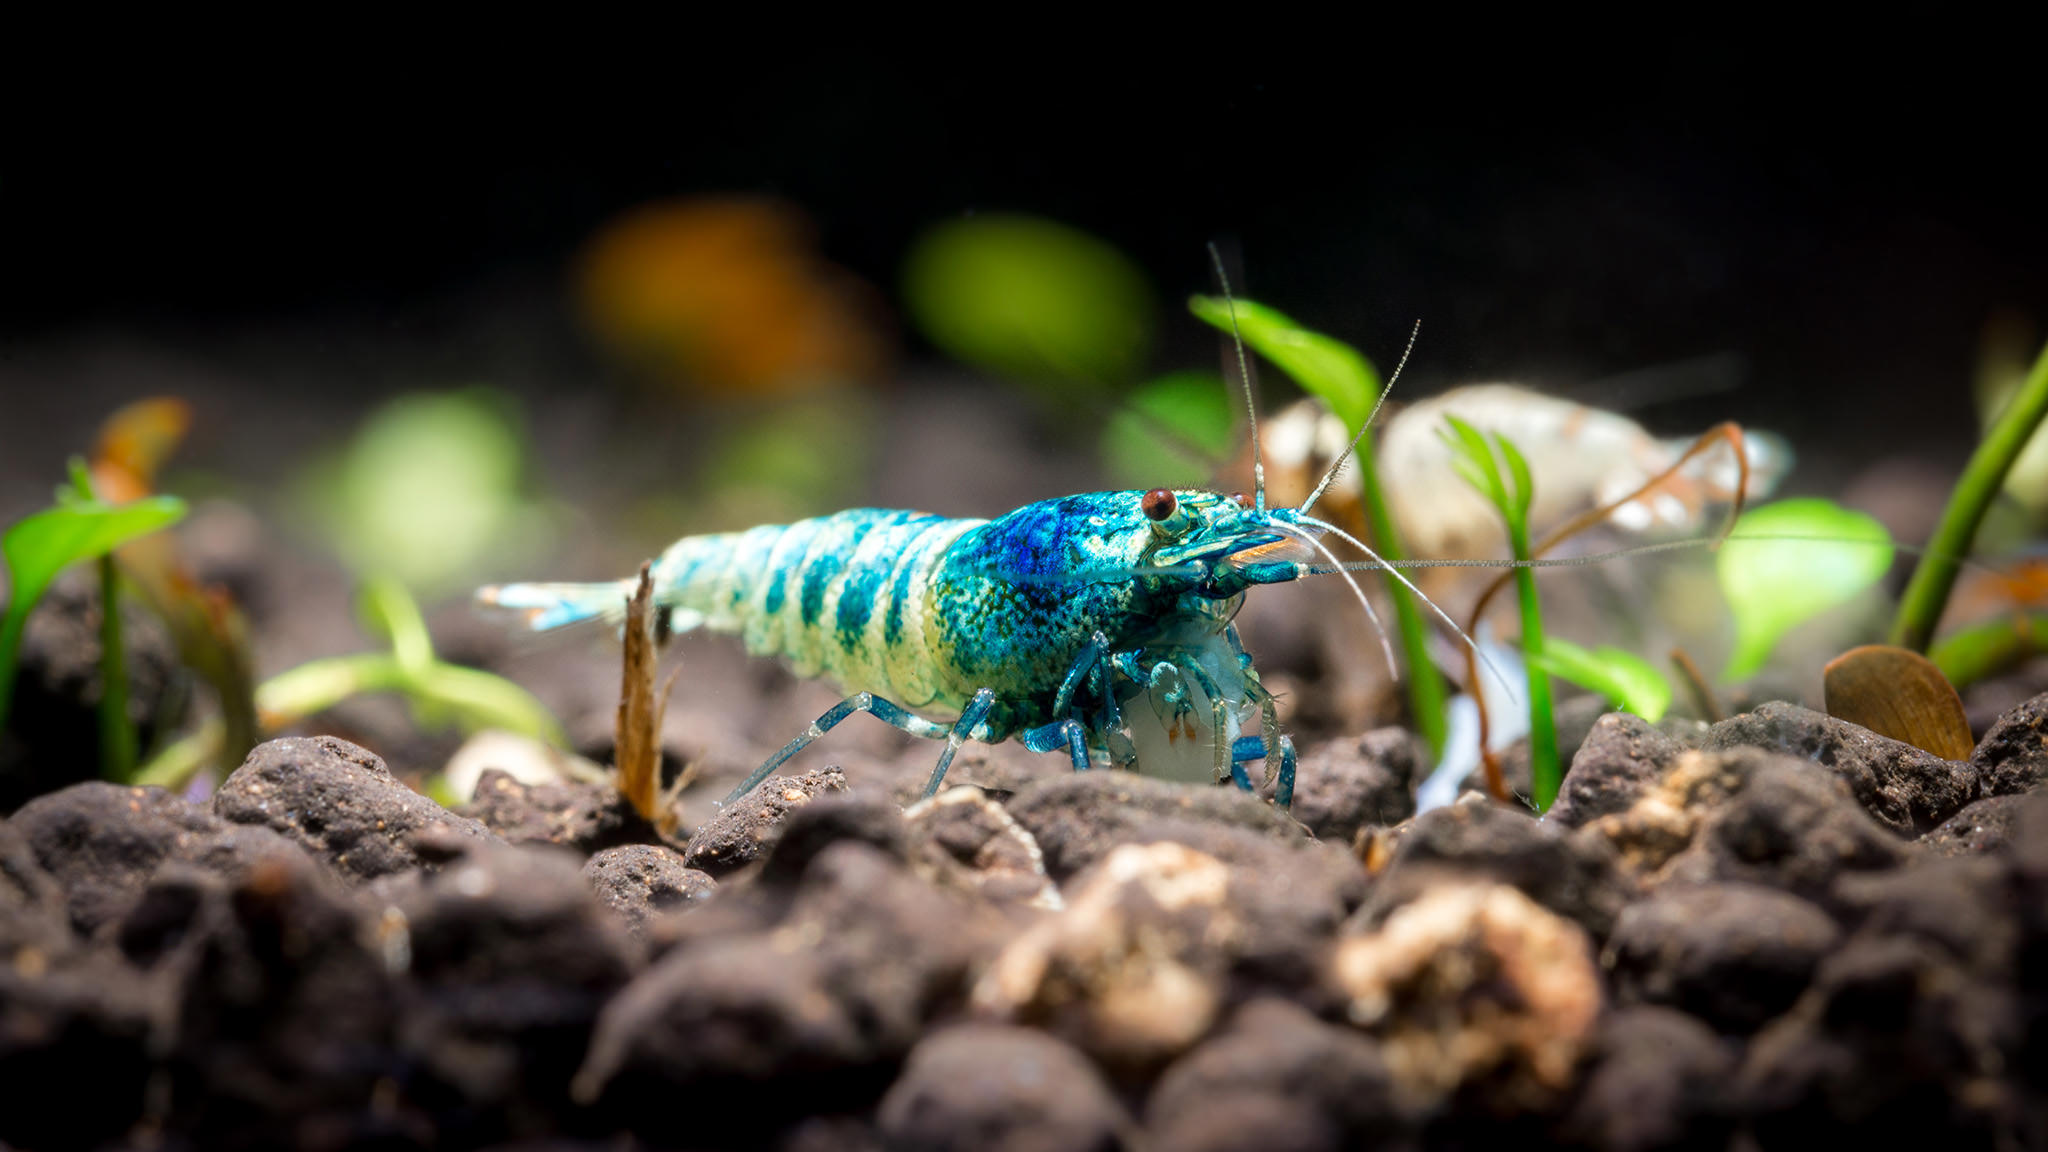
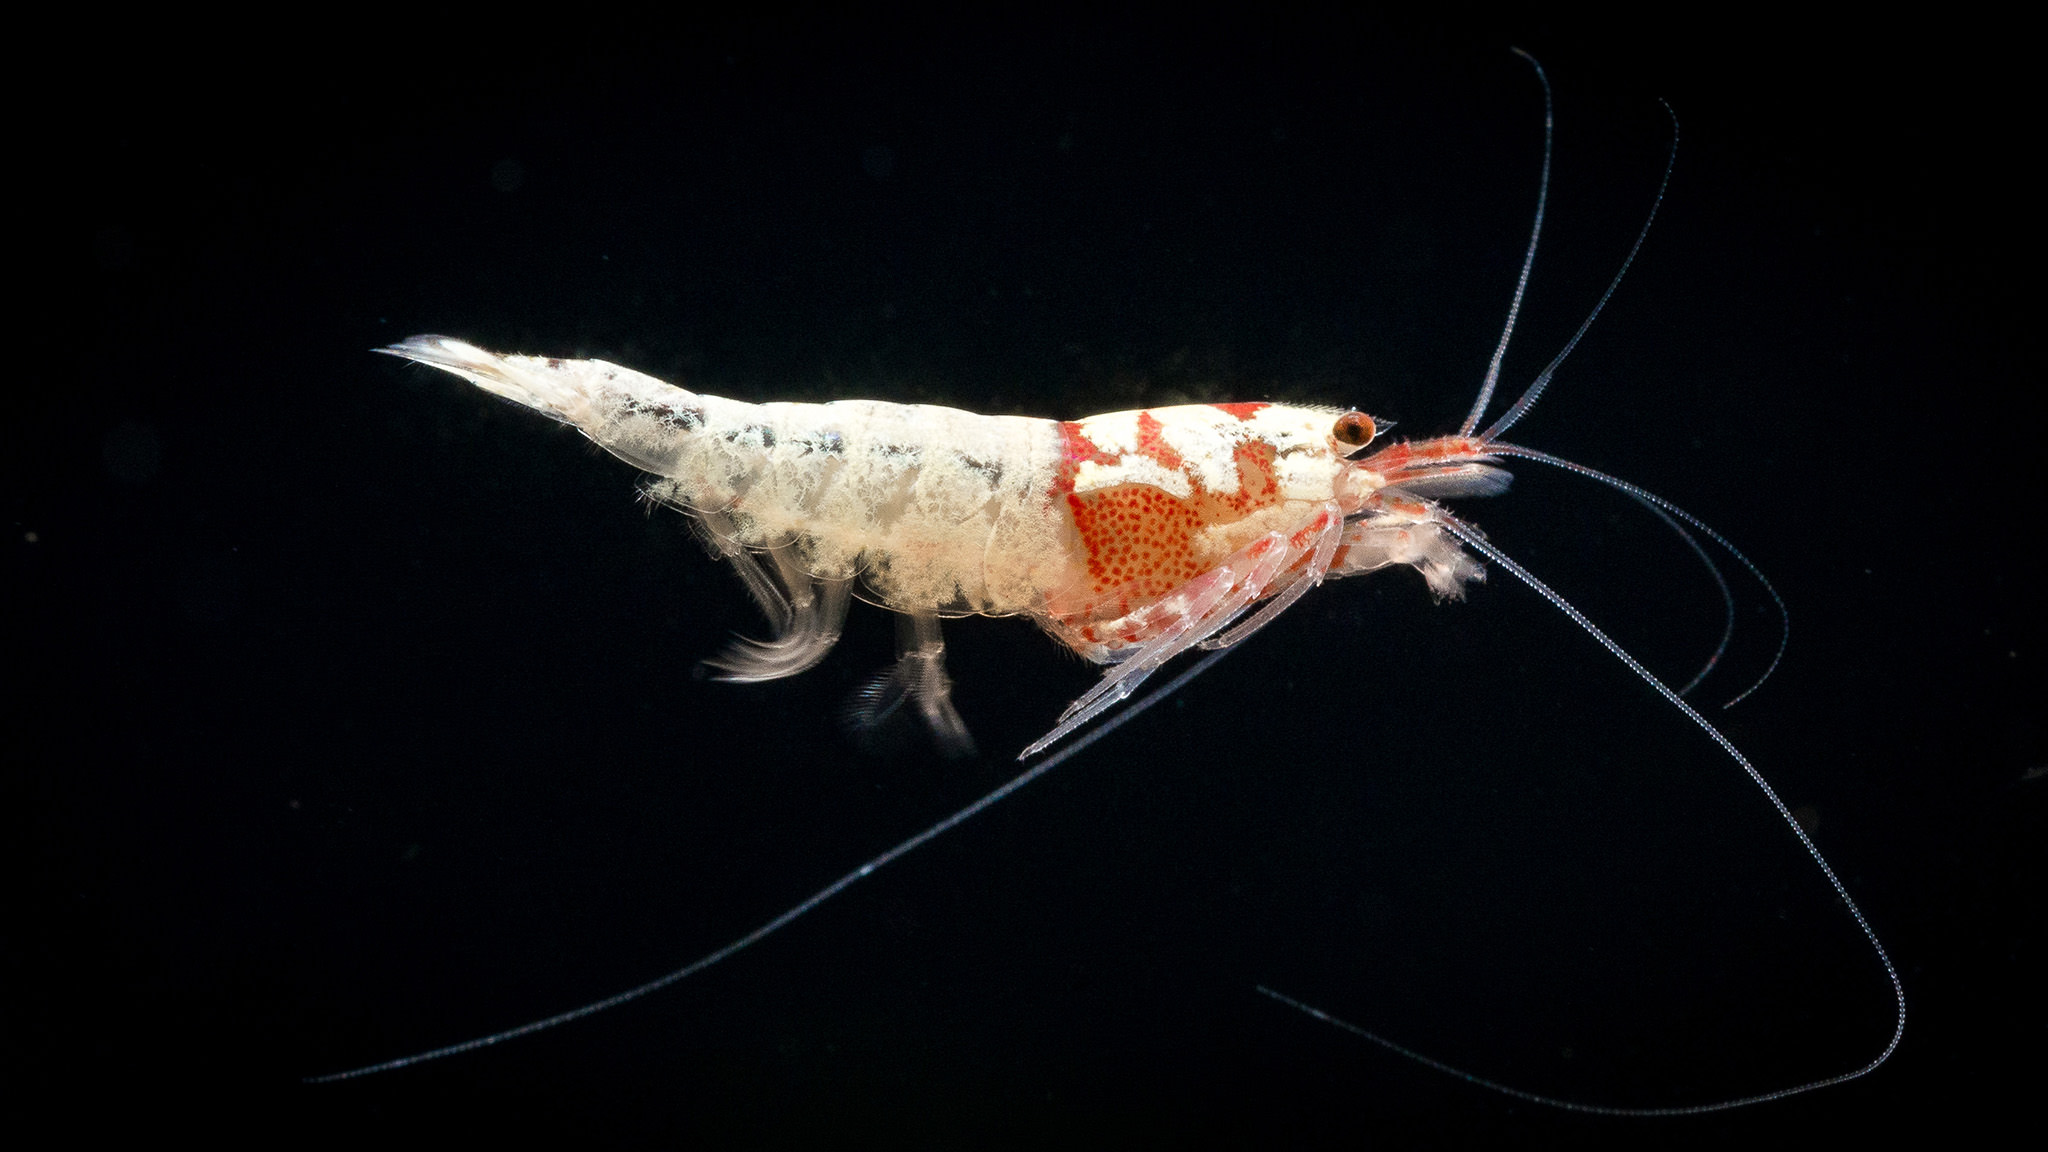
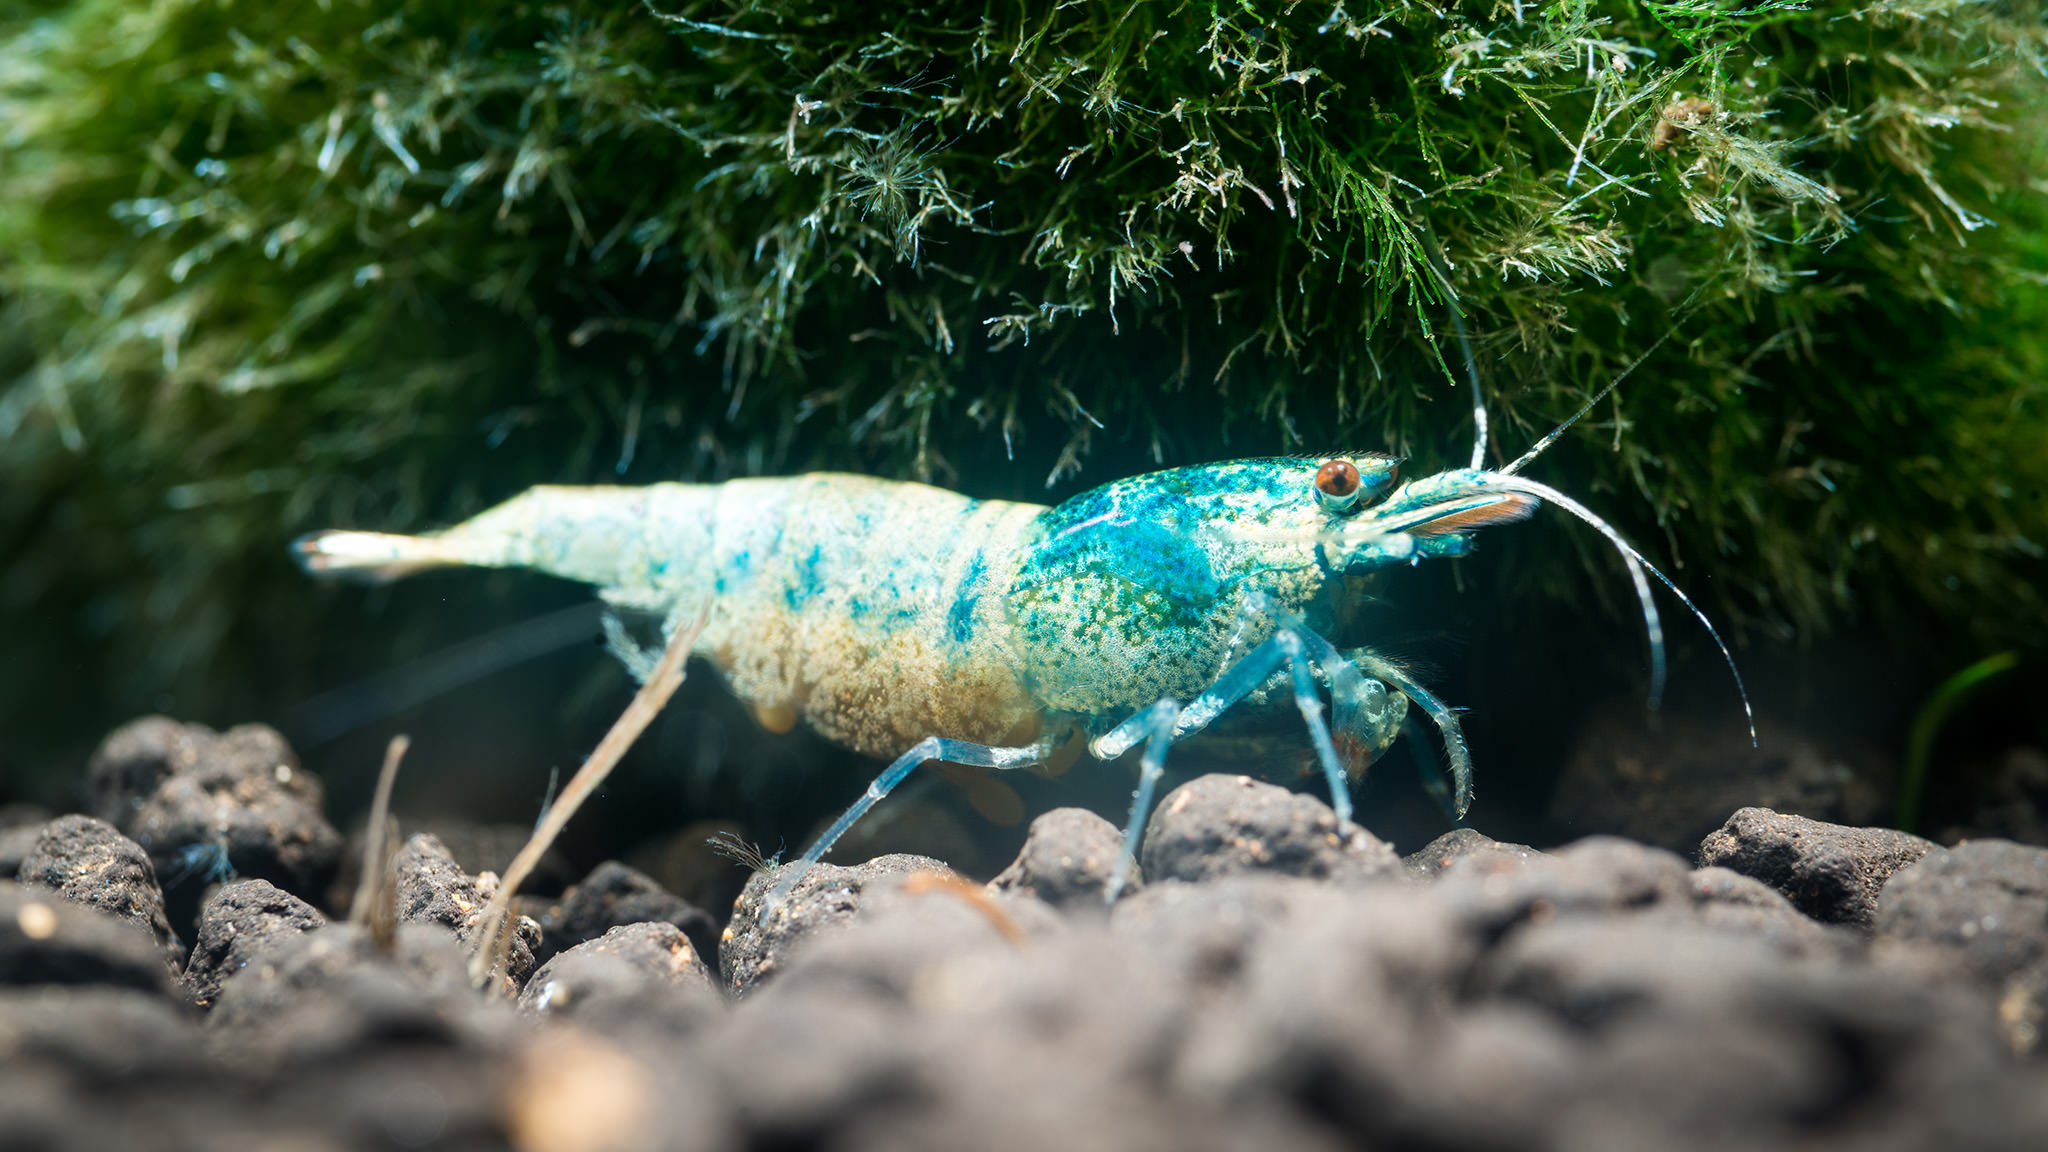
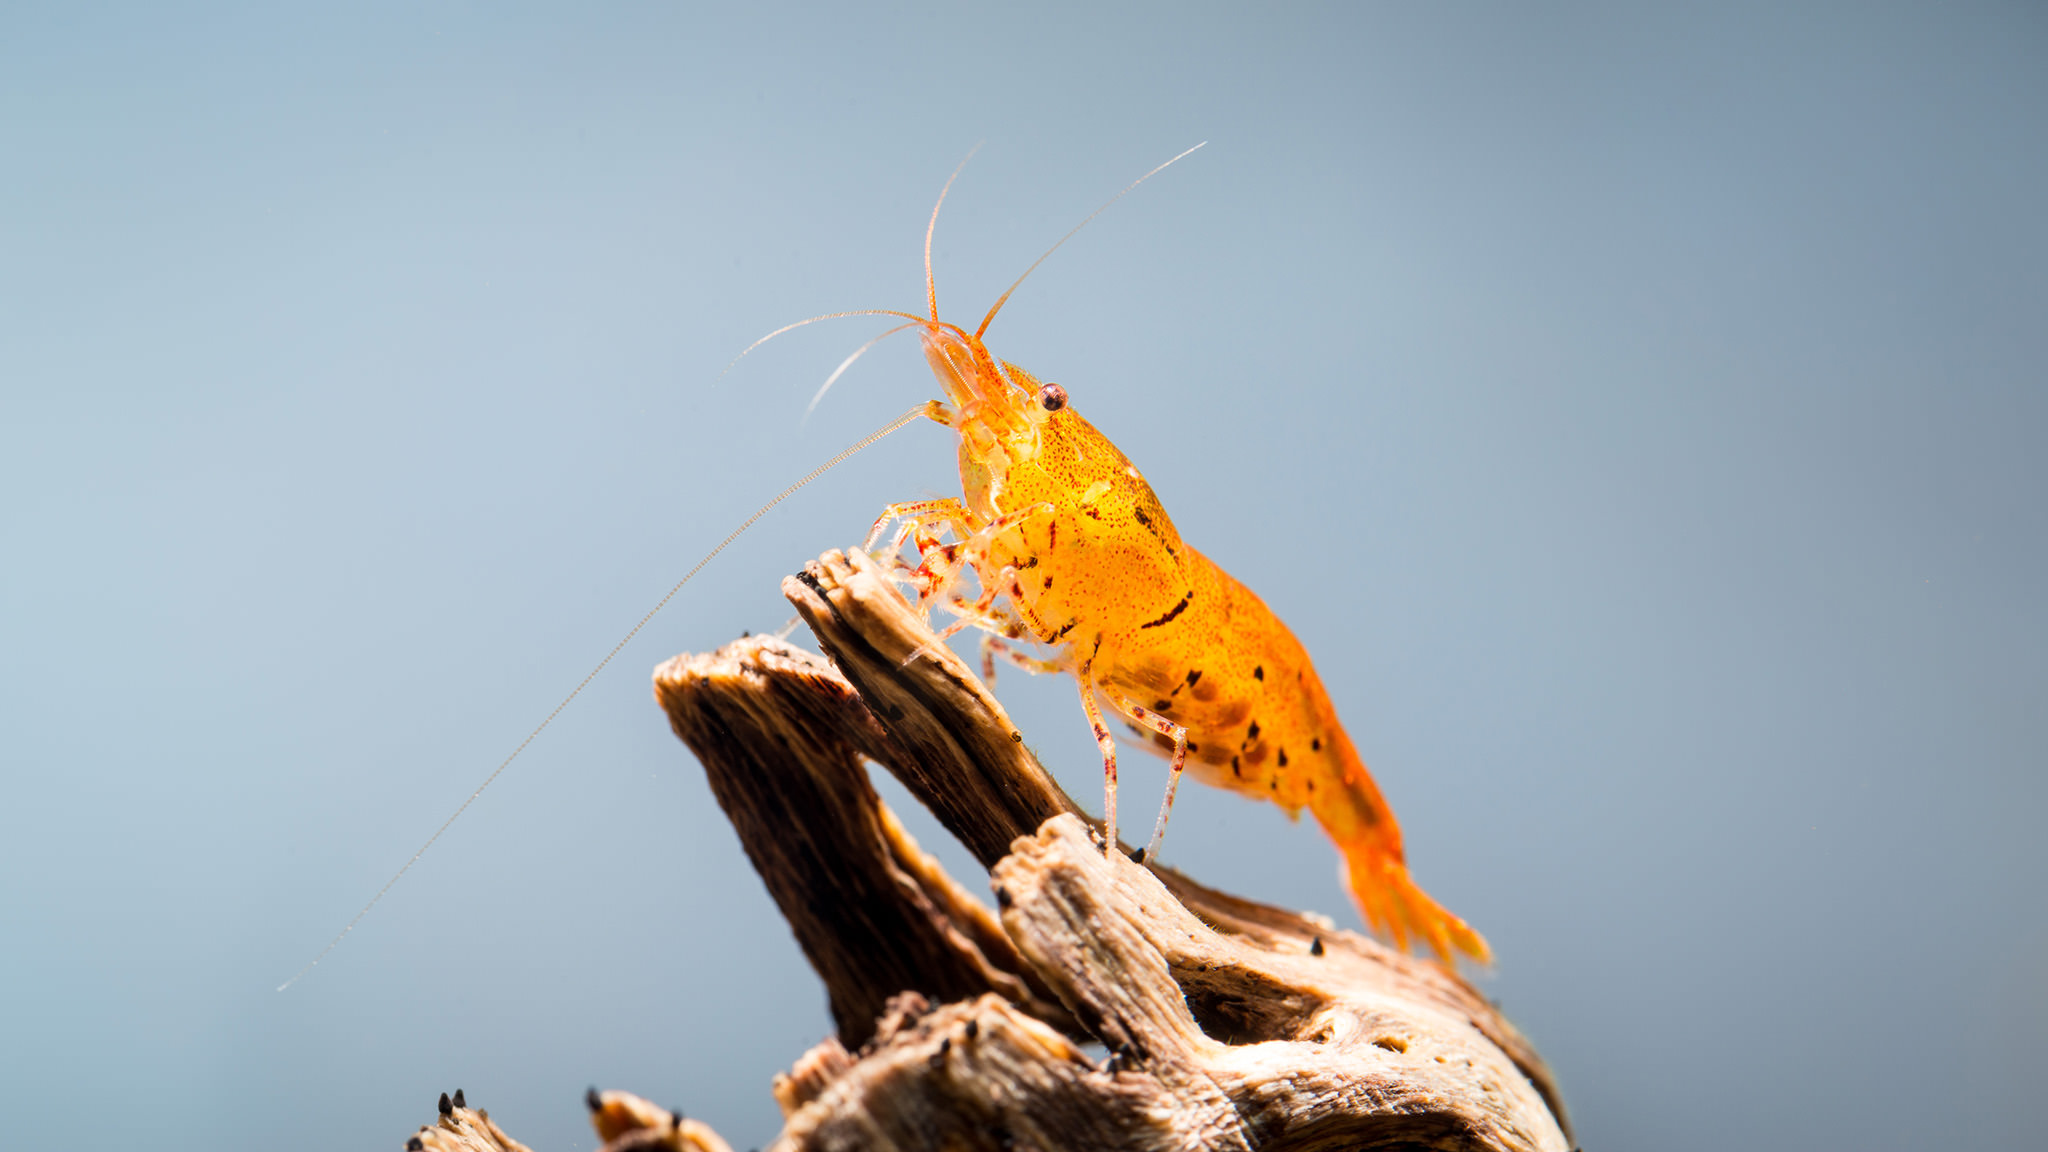
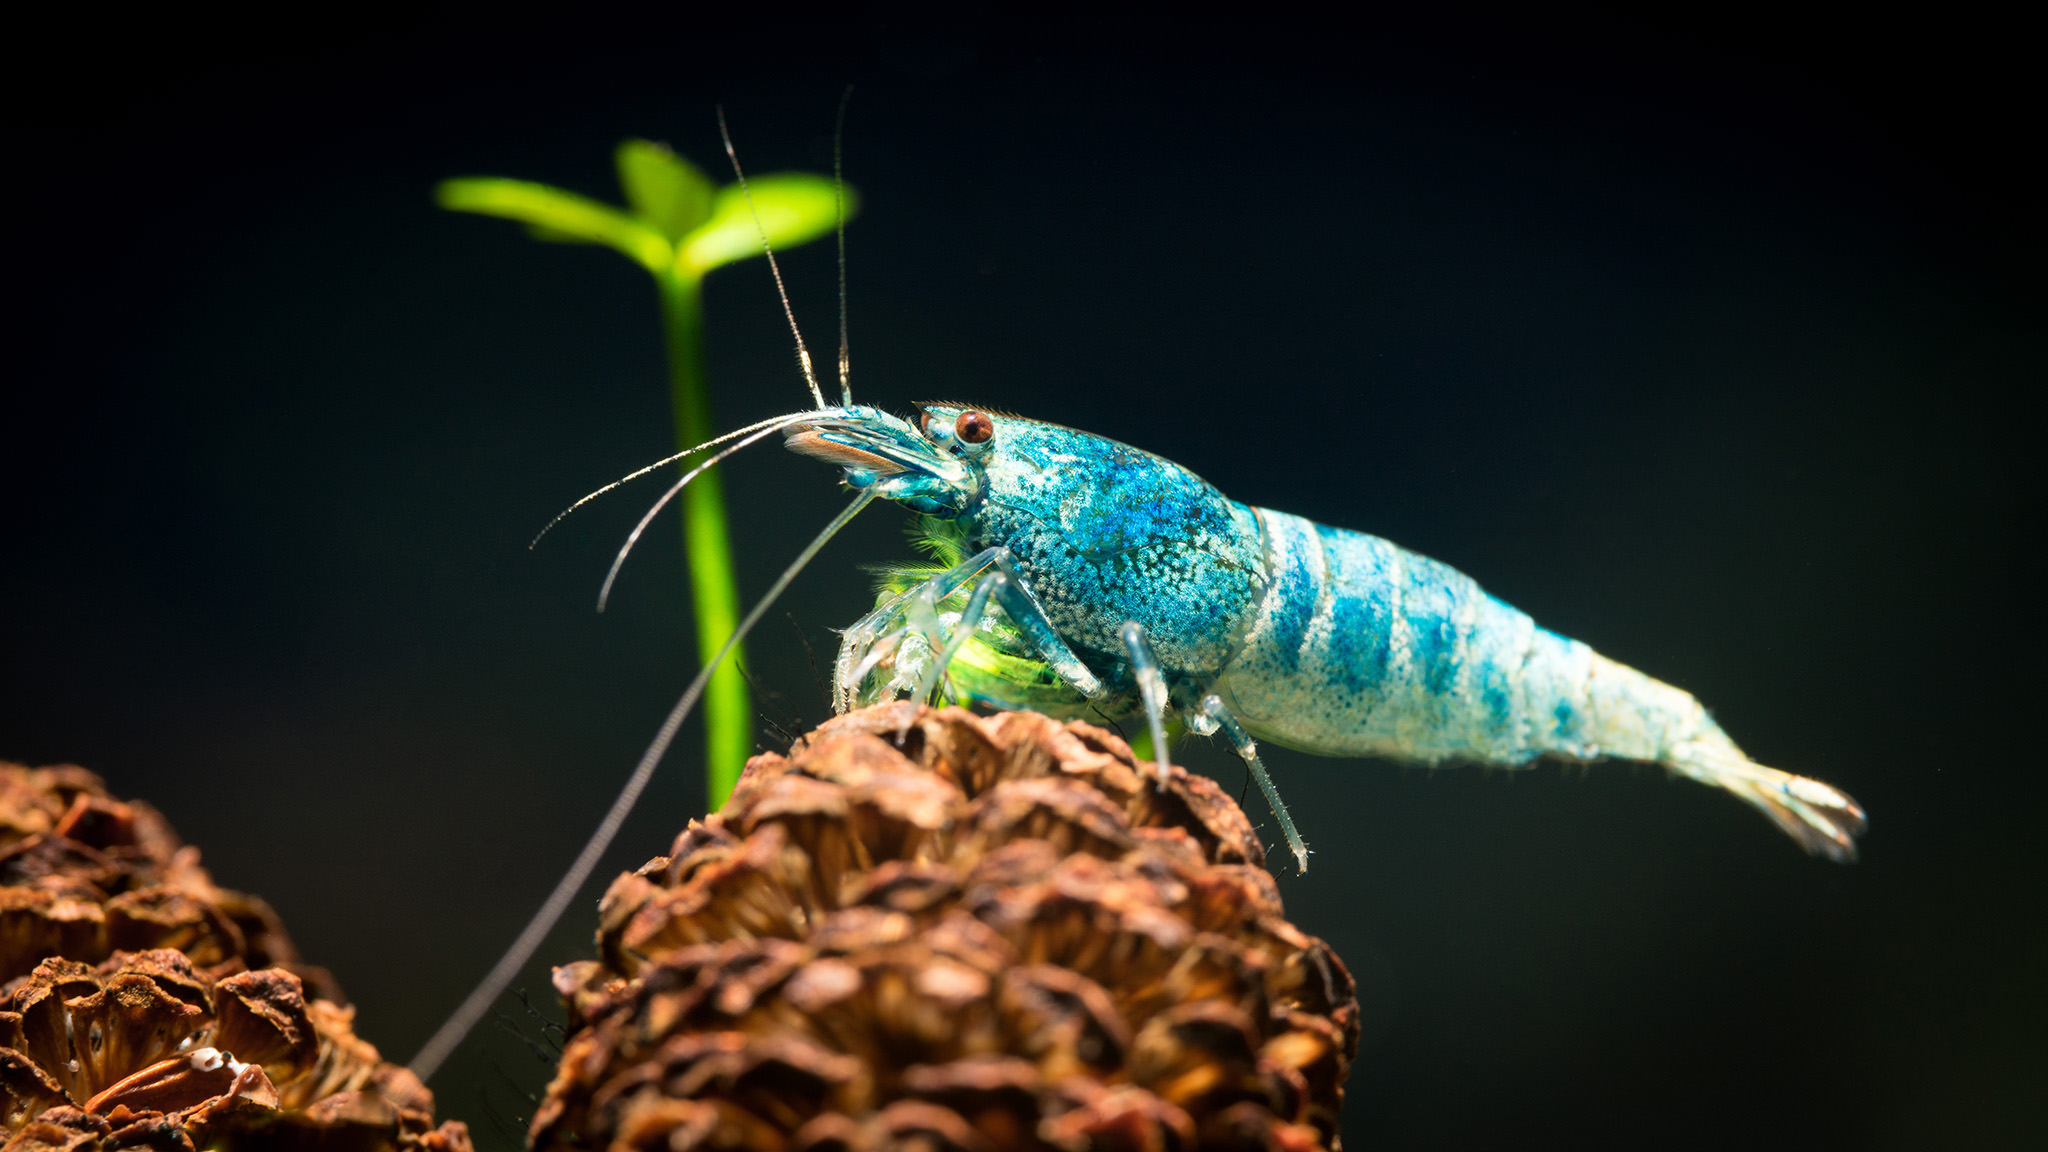
The hobby itself is primarily based upon varieties of Neocardina davidi (cherry shrimp) or Caridina cantonensis, which has recently been further categorized as Caridina logemanni (crystal shrimp), mariae and serrata (tiger shrimp). There’s also a popular variety called Taiwan Bees, which originate from a crystal x tiger shrimp crossing, and come in a large range of colors and patterns. They grow no larger than 2 to 3 cm in length (hence the macro realm of photography), reach reproductive maturity in 3 to 5 months, and have a lifespan that can reach about two years. My own shrimp collection is comprised of blue bolts, pinto mischlings, pandas, king kongs, and tangerine tigers; I hope you enjoy looking at them as much as I do!
My inspiration to pursue shrimp photography comes from Chris Lukhaup, a famous aquascaper, professional photographer, and one of the world’s leading shrimp specialists. Search for any of his images and you will quickly see why he is always brought out to aquatic conferences and expeditions to document the discovery of new freshwater life. Learning how to capture breath taking images of ornamental shrimp like him has certainly pushed my knowledge and skills in both shrimp keeping and photography.
There is the added bonus of being able to do this sort of photography in the comfort of your own home. Photographing your own aquarium means you have all the control in lighting, staging, and specimens. As a father of a young family, nap time for the kids becomes shrimp admiring and macro photography time for me!

Table of Contents
1) Macro Equipment and Technique Considerations
Like most specialty areas of photography, macro work will require a specific set of equipment to help you achieve the images you want. There are a variety of tools that can help you achieve greater image magnification, such as diopters, extension tubes, and macro lenses. When my brother-in-law first introduced me to his collection of shrimp, I started with a Canon 60D and a 55-250mm STM lens with a Raynox DCR-250 diopter to capture images of his shrimp. This combination allowed me to get up to 0.725x magnification, but the images were grainy since I had shot them at a high ISO with a crop sensor camera.
Not to say that a crop sensor camera is inadequate! Quite the contrary, Chris Lukhaup himself shoots with a Canon 7D, and many other crop sensor shooters have fantastic shrimp images. Adequate lighting is more important to getting good quality shots after all, but more on that later!
When I started photographing my own shrimp, I had made a jump (from crop to full frame) to a Nikon D600, and now a D800E with a Tamron 90mm VC Macro lens. I also purchased Kenko AF extension tubes to go beyond 1:1 magnification. Given that the size of an adult shrimp is no more than 2 to 3 cm, using a macro lens alone at minimum focus distance (MFD) on a full frame camera generally allows an image of the entire shrimp to be captured, with room to compose the shot as well. Adding on extension tubes can get you closer shots of smaller shrimplets, or various parts of interest on the shrimp.
Macro photography provides a significant set of challenges in terms of lighting and focus. Shrimp are constantly moving, so focus stacking is generally out of the question. You need a narrow aperture to get enough of the shrimp’s eyes and body in focus, as well as a fast enough shutter speed to capture the image if the shrimp is moving. Most aquarium lights are not bright enough for such aperture and shutter speed combinations, so this means that your images will be shot at a higher ISO rating (1600 or higher). I found that the graininess of the image at such high ISO levels degrade the detail you’d be hoping to capture.
To get the best image quality, shooting at ISO 100 to 400 will most likely require you to use a flash setup to provide additional lighting. This is where your specific aquarium location and setup may lead to some challenges. If you’re like Chris Lukhaup, he uses a soft box above a photoshoot tank to achieve his images. This would require you to have a glass lid or no lid on top of your aquarium. As my own tank is on the top of a tall shelf (I didn’t want my kids to feed my shrimp a coin or candy by accident), I was unable to place a soft box over it. Thankfully, the design of my tank lid allows me to perch one or two flashes with diffusers at various angles just above the water. These flashes are triggered with radio controllers.
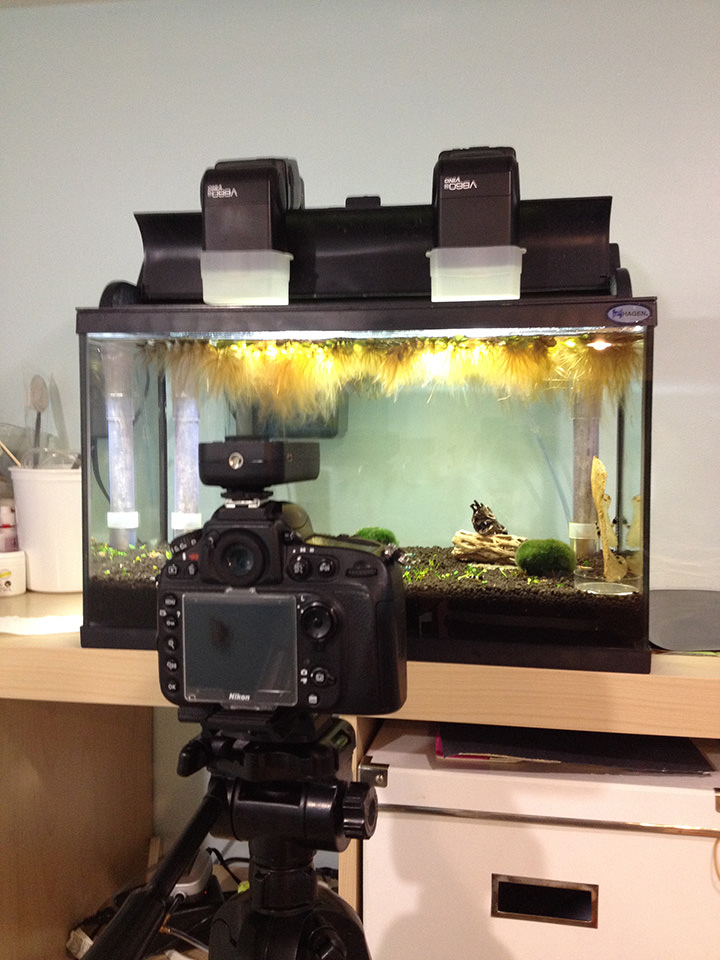
Unless your lens is right up against the glass, placing the flash at an angle in front of the aquarium may result in glare in your photo. For those of us lucky enough to have a beautiful rimless tank with no tank lid, you may want to consider investing in a boom, clamps, or clips that can be attached to the top edge of your tanks to mount your flashes. The last thing we’d want is for a flash to fall into the water…
In my earlier days of shooting shrimp, I struggled to get good captures since the depth of field was so narrow, even at an aperture of F16. To gain some confidence, I set my aperture to be as narrow as F32 to F40 to try and get more of the shrimp in focus! At these aperture levels, I noticed the effects of diffraction made the images less sharp. After a little research, I found out that my lens and camera body combination allows for sharp images to be taken up to F22 before diffraction sets in. As such, I’ve kept most of my images at F18 to F22 to get the best of image sharpness and depth of field, depending on the angle of the shot. Speaking of angles, you’ll get the least amount of distortion from the aquarium glass in your shots if you are as perpendicular and level to the subject as possible!

I have also tried a macro focusing rail for my tripod to stabilize my shots. Essentially, you leave the focus of the lens at MFD and use the dials on the macro rail to take care of focusing, much like using a microscope to focus on a glass slide. This combination did help get sharper images, but it is more cumbersome to work with. The moment you see a shrimp striking a good pose on the other side of the tank, shifting things over and getting things in focus often meant the shrimp has already gone off to graze somewhere else!
I have since resorted back to hand holding my shots, and doing my best to stabilize the camera with good technique (such as bracing in your elbows, holding your breath to steady the camera). I would move forward or backward to focus on the shrimp’s eyes while the lens is at MFD. Using my hands on the edge of the shelf and holding onto the hood also helped stabilize my shots. I did try doing the same with the camera on live view, but the image on the screen would be so dark (given the narrow aperture) that it was still a bit hit and miss, and it also drained the battery life quickly. I believe my number of keepers have improved since I purchased a DK-17M magnifying eyepiece to help see when the shrimp’s eyes are in focus. If all this doesn’t help you get sharp macro images, consider getting your lens calibrated too.
2) Aquarium Layout and Setup Considerations
For those of us who are unaware, aquariums can be purchased with different types of glass. Regular aquarium glass contains more iron, and thus naturally has a greenish tint to it. Starphire (sometimes called Starfire) glass contains less iron, and thus has a bluish tint to it. Many hobbyists will tout that looking at subjects in a more expensive starphire tank makes for a better viewing experience, but it is known to be a softer glass that may get scratches more easily. From a photography point of view, I would assume that any color changes from the aquarium glass can be easily fixed in post-processing. Thicker glass tanks can also lead to greater image distortion if you are not shooting square on the subject.
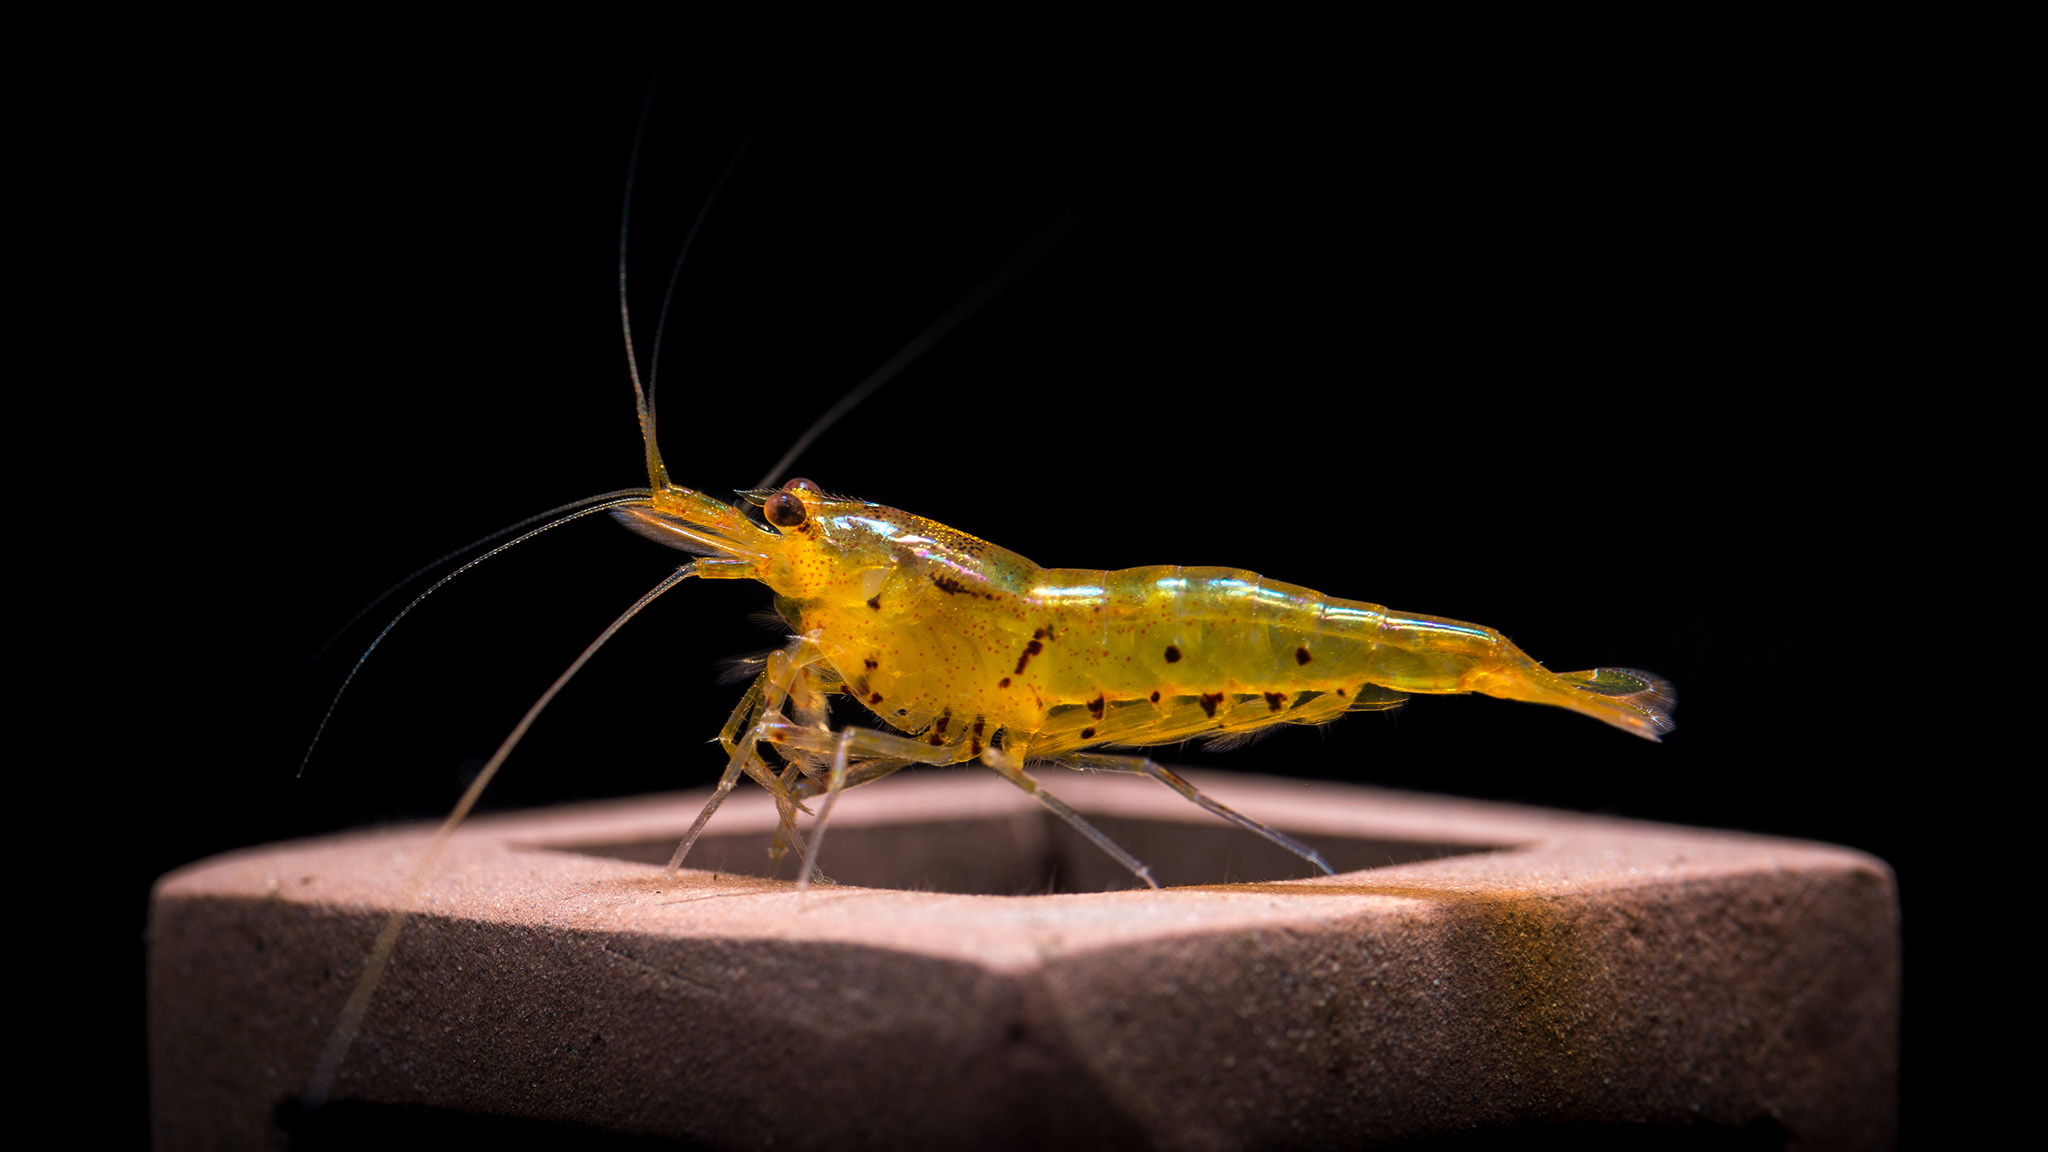
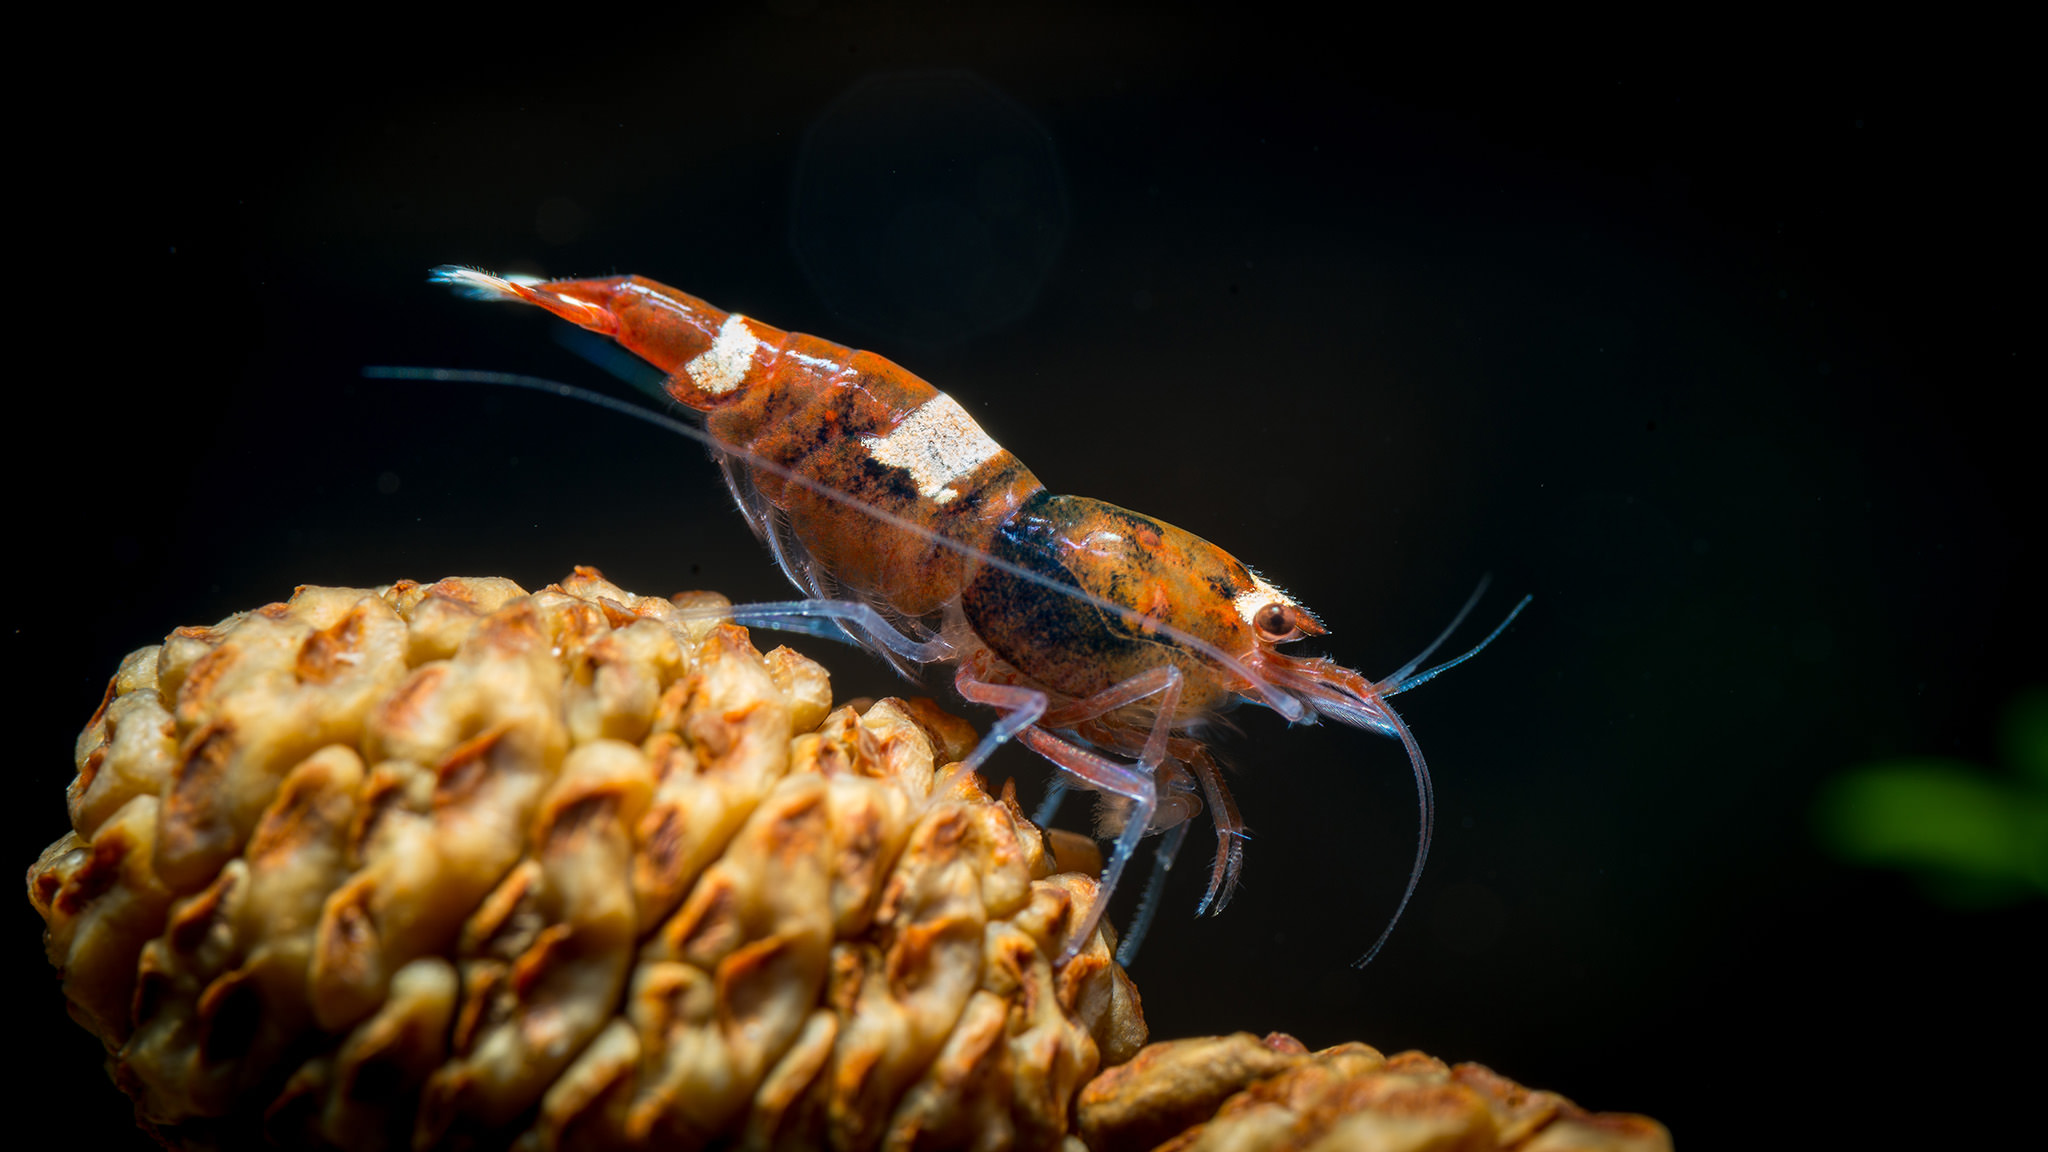
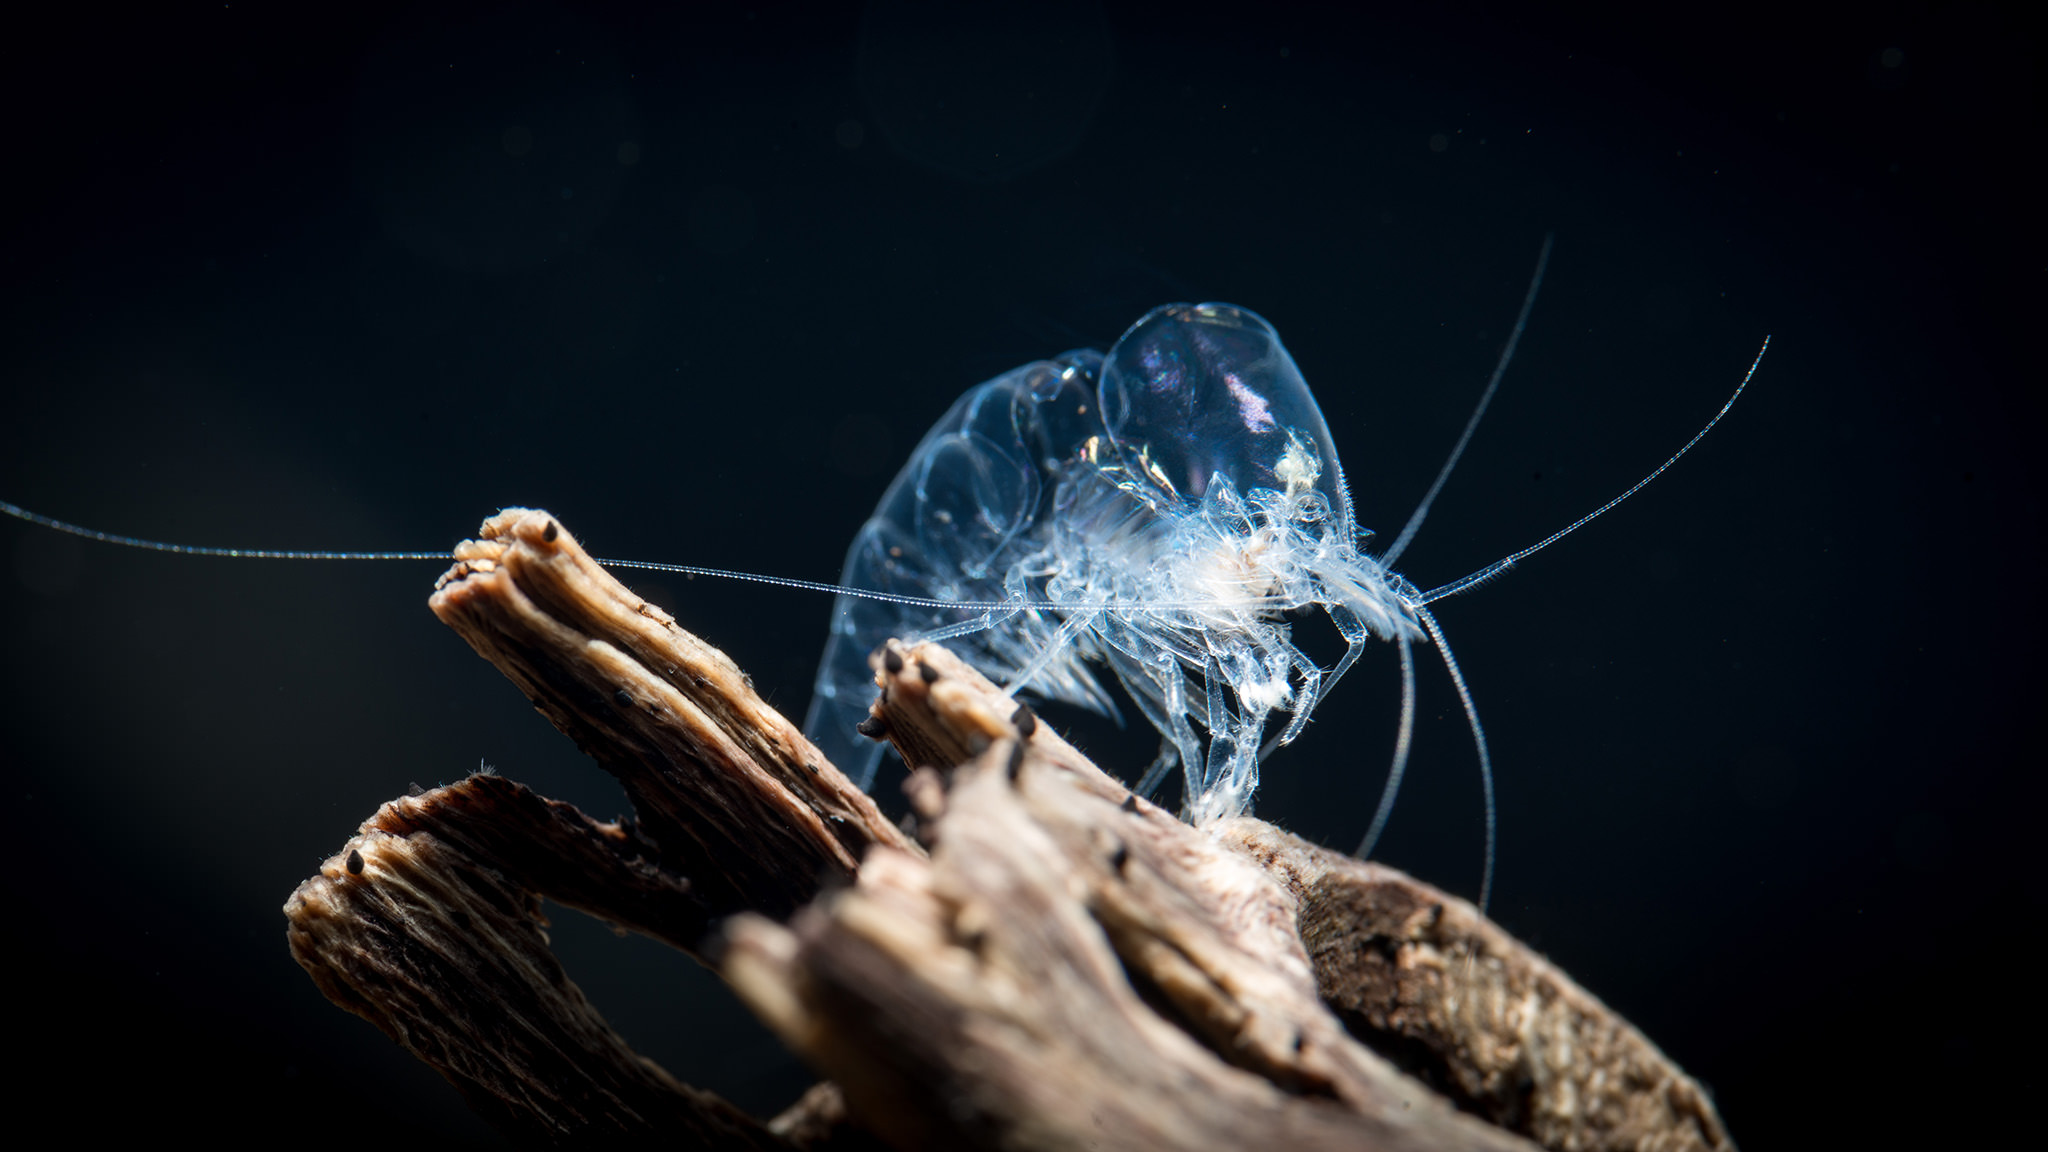
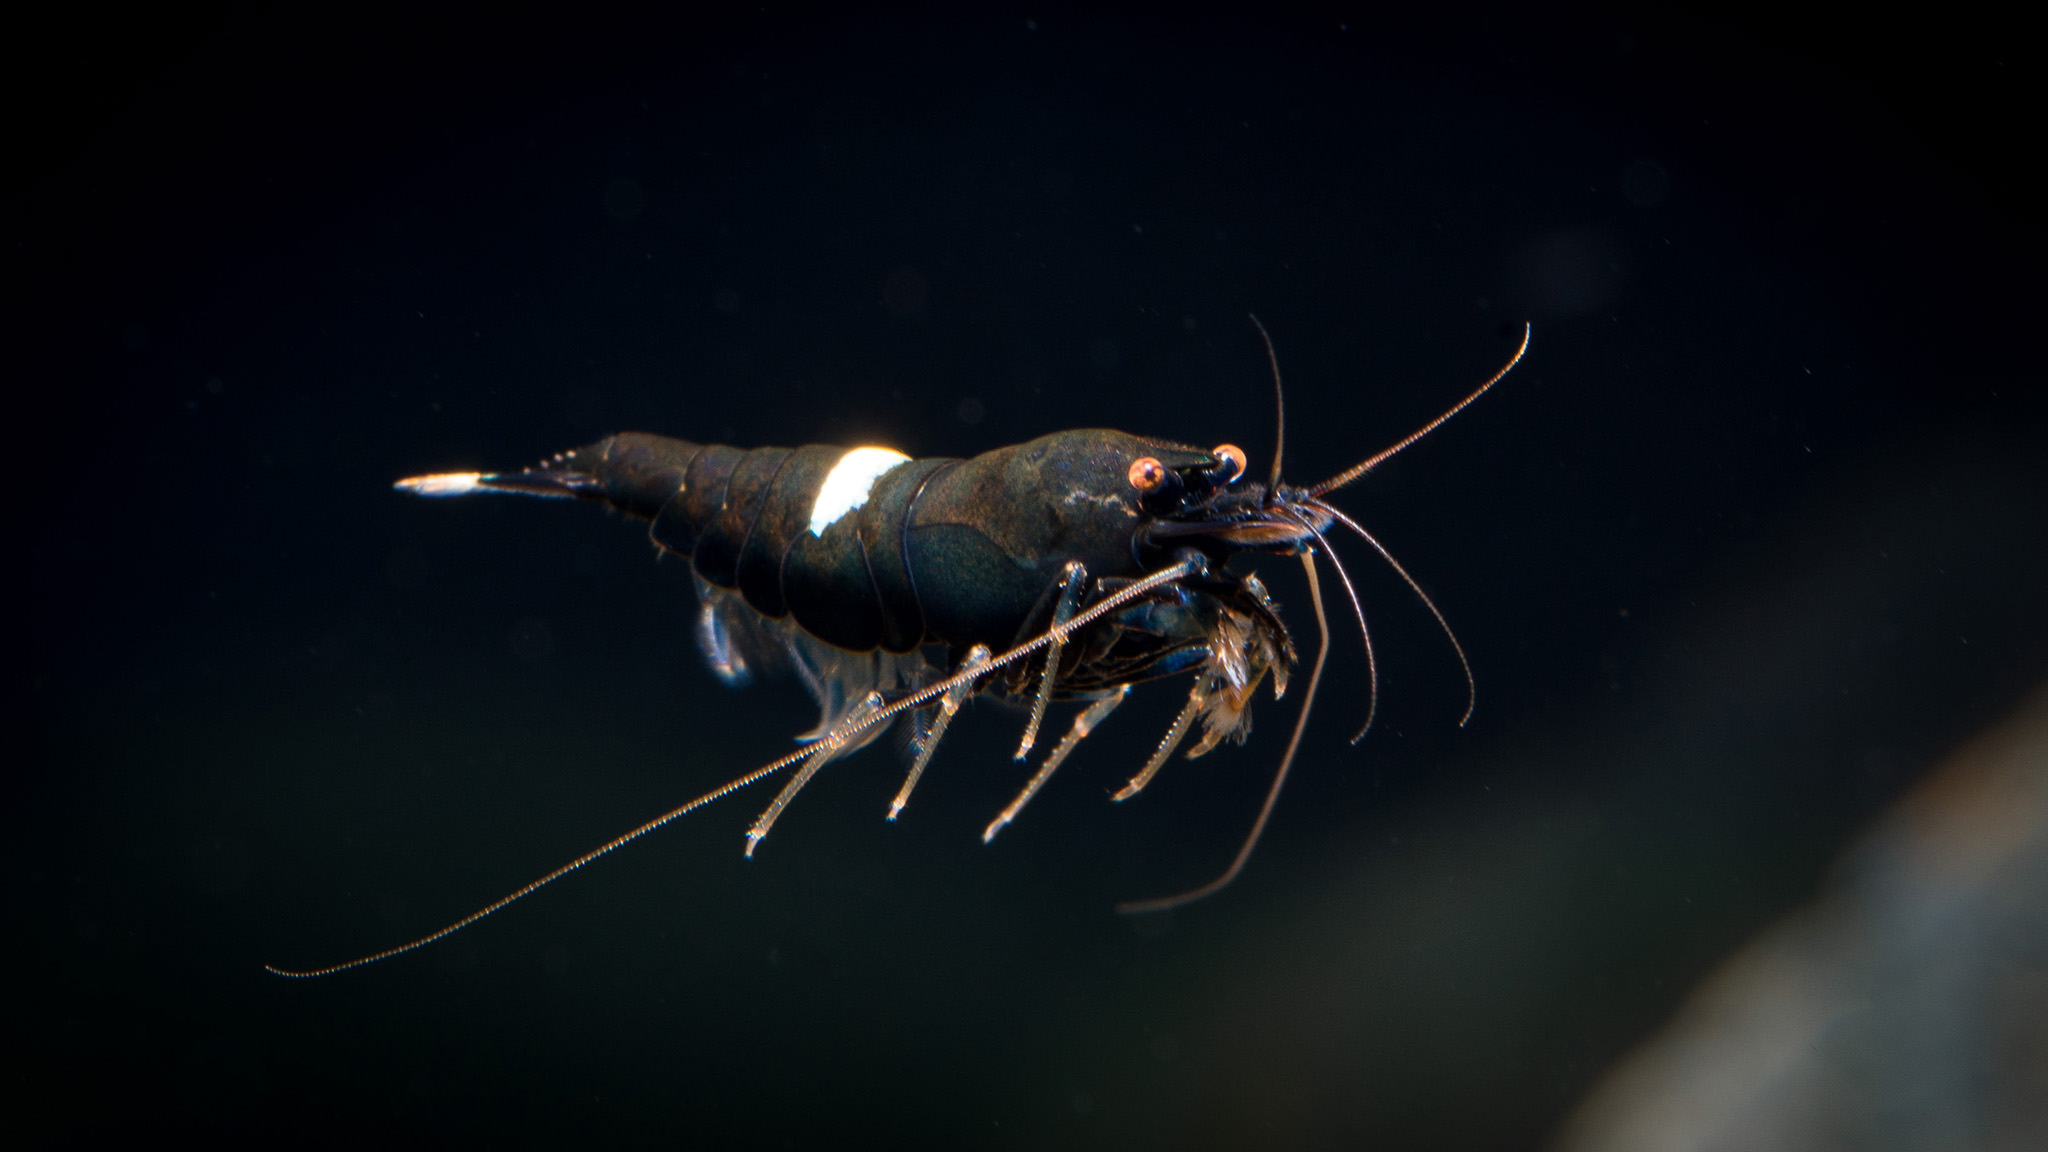
There are many interesting props that can be used for the shrimp to perch and pose on. There are a large variety of plants, leaves, cones, wood, rocks, and ceramic structures that can serve as the main stage or background for your shots. Different backgrounds for the aquarium itself can be purchased to provide the right backdrop. Shooting at a narrow aperture also means the background will appear darker, so you may consider using a backlight to fill the background. Personally, I like the low key style shots with most shrimp as it provides a nice contrast to the shrimp, and so I have a black aquarium background. Much like taking a picture of a person with dark hair with a dark background, darker shrimp may benefit from getting a kicker light or a lighter background for contrast.
For my particular lens and camera combination, the MFD is 30 cm from the sensor (as indicated with a symbol that has a line going through a circle near your eye piece). This means that I have about another 5 cm of room to work with beyond my lens with a hood (about 10 cm without the hood). When my moss balls, alder cones, and cholla wood pieces were initially placed too far from the front of the tank, I was unable to focus on a shrimp at 1:1 magnification if they were perched on these objects. I can’t recall how many times I’ve bumped into the tank as I was trying to get a shrimp in focus! As such, I moved these objects closer to the front of the tank to give me more room to work with and get 1:1 magnification. Be careful about taking images of the shrimp that are too close to your aquarium glass though, as the image will pick up scratches and imperfections in the aquarium glass if it isn’t clean.
3) Shrimp Moments: Behavior and Physiology Considerations
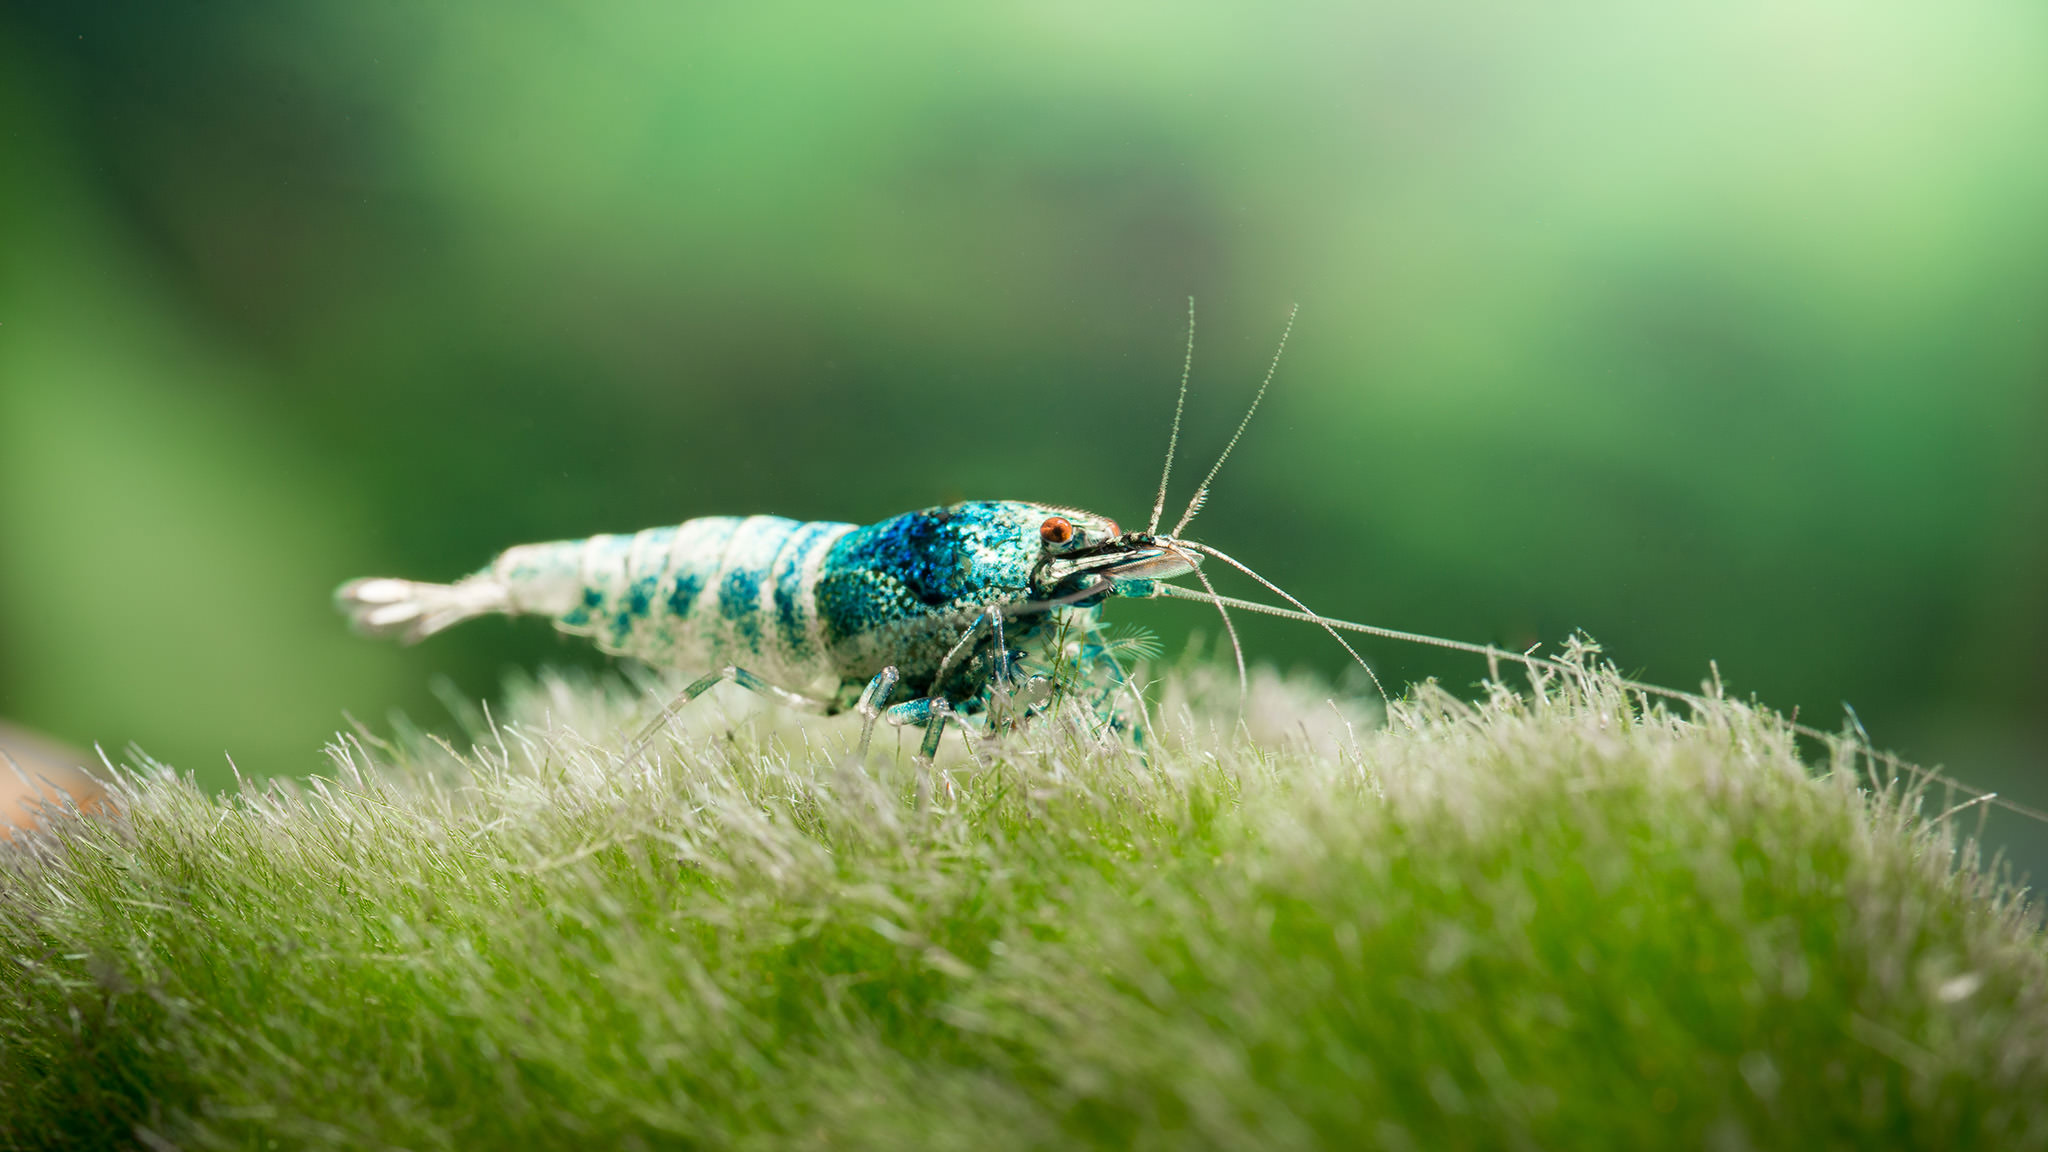
Ornamental shrimp are bottom feeders and scavengers with limited storage in their digestive system. As such, they are constantly moving around feeding off of algae and bacterial biofilm on the surfaces of aquarium. They can certainly be lured to new foods that you drop in, and some food are made so that each shrimp can run off with a nugget of food in their claws. This will allow you to get the shrimp to be more stationary for your shots, but it also means you’ll be getting food debris in your shot and a less natural looking image.
I recall how frustrated I was waiting for a shrimp to perch itself on a marimo ball one evening. I decided to take a pair of tongs and flipped the marimo ball over to expose a portion of it that had untouched biofilm on it. This prompted a few shrimp to come over to investigate and graze, which allowed me to get some nice shots of them on the ball of moss. Editing out the food debris was tedious in post processing, but not impossible. Speaking of foods, various foods alter the hormonal control of pigment cells in the shells of the shrimp. Healthy shrimp will give off very vibrant colors in their shells! Discoloration may indicate that the shrimp is stressed or unhealthy.
Watching shrimp molt out of their old shell is an interesting event to witness. When they have grown larger, they will burst out of their shell and leave behind a ghostly outline of their prior shape. Molting can often be witnessed after water changes are done to the aquarium, or after a low pressure weather system such as rain passes by. Don’t remove the molts though, as they provide good nutrition for other shrimp in the tank!
When a female is ready to mate, they also molt and release chemicals that attract males in the water. Females are quite timid after completing a molt that gives her tail the right shape to carry eggs, and so she tries her best to hide from males. The males swim actively all over the tank in search for the female, and many breeders call this movement of swimming “the dance”. This is a great time to get shots of “shrimp in flight”, as they actively seek all corners of the tank for the ready female.
When female shrimp are carrying eggs, or are “berried”, they tend to be shy and hide more early on. Startling them too much with flash photography may stress them out, which may subsequently cause them to drop their eggs. Being “berried” does lead to hormonal changes that make their shells more colorful though. After carrying the eggs for about 4-5 weeks, the shrimplets hatch from below the female and get ready to brave a whole new world.
4) Conclusion
Aquarium photography at home provides a convenient opportunity to capture images of our water based pets and learn about their behavior. Many of the ideas and techniques shared here can be applied for taking pictures of crabs, snails, and fishes too. Factoring in the macro component brings an additional layer of challenges, but the rewards are in the details that are missed by the naked eye. If you want to see the best of your ornamental shrimp in a photo, consider doing the following:
- Clean your aquarium glass before shooting (such as algae scrubbers)
- Do a water change to get cleaner water in the tank
- Temporarily turn off filters to avoid getting too many air bubbles in the shots
- Feed ahead of time to boost their shell coloration and to avoid getting food particles in the shots
- Shoot as perpendicular and as level to the shrimp as possible
- Have ample lighting to allow you to use a lower ISO, faster shutter speed, and suitable aperture
- Post-processing with adequate sharpening, removal of sensor dust, and tank debris
I hope that taking and sharing inspiring photos of your aquatic pets will promote further understanding and growth in those hobbyist areas. If you are interested in shrimp keeping and breeding, I highly recommend searching for and connecting with international and local communities online to learn more about the hobby.
This guest post was submitted by Steven Chan, a father, science teacher, and photographer from Toronto, Canada. Besides taking photographs of his family, he loves shooting pictures of wildlife and macros of his shrimp. You can see some of his work here. He also thanks Nasim, Thomas, and Spencer for their informative articles and gear reviews that were referenced. They have been instrumental in his learning and purchases, and they have taught him how to be a better and more mindful photographer overall. Thank you!
I’ve been trying to capture Cardinal Tetra dorsal fin pathogen or fluffy disease, whatever it is, with a mobile camera to no avail. As the fish moves it gets a lot out of focus. The I tried this brand new Panasonic 4K camera and didn’t get clear shots, same as the mobile camera, blurry. A waste of money at $650.00. I was searching for cameras that would snap crystal clear images of such fish diseases at close up so to see and analyse them, including 4K cameras, and came across this site and couldn’t believe the relatively closeness of the images of shrimps. If a shrimp could be seen at this close-up, can you imagine seeing white spots on fish, or white fluff attached at the base of the dorsal fin and pectoral fins that start like what looks kike a cocoon and a few days later a tiny white work comes out of it and still remains attached somewhere near the dorsal or pectoral fins (have 3 such affected fish). Without a powerful cameras that snaps at high speed because moving fish tend to be captured in a fuzzy manner. Does anyone have any idea what cameras are there that can do this clear shooting of aquarium fishes, etc.? I don’t want to ask the camera store because I have already been told lies and been ripped off $650 for a 4K camera that is hard to understand how to use it. Too many unnecessary features that aren’t really needed. Any help would be appreciated. Thanks.
It seems that misspelling cannot be repaired here. I wonder why. So, I’ve left this other comment to say that I intend to fix the misspelled words here.
In my comment, I wrote: “…a few days later a tiny white ‘work’ comes out of it and still remains attached somewhere near the dorsal or pectoral fins…”.
It should have been written: “…a few days later a tiny white ‘worm’ comes out of it and still remains attached somewhere near the dorsal or pectoral fins…”.
WORM, not WORK. Sorry about the misspelling. I was in a hurry.
I find with fish taking video of the fish and then taking individual frames from the videos creates the best pictures.
What an excellent article. I particularly enjoyed the stunning photography but the engaging story-line made it a compelling read. EXCELLENT job, Steven.
Thank you, Willi! I’m glad you enjoyed it :)
Great photos and good clear explanation. Well done!
Thank you! I’m really appreciative of the kind feedback :)
I really enjoyed this interesting macro article and excellent close-ups; it brought back memories of my 1960’s aquarium, long before I owned a camera. I kept a North American crayfish until it ate the tail of my Shubunkin. Thanks for the lighting information, very important.
Thank you! Crayfish keeping has picked up on popularity recently too, as shrimp keepers are looking to diversify the type of inhabitants in their tanks. My local shrimp store has them, and they are really interesting to look at!
i bet those shrimp are delicious when roasted in thousands
There are actually lots of traditional dishes that use dried small shrimp in Chinese cuisine! I’m personally not a fan of getting them stuck in my teeth, but they’re out there. Usually in sticky rice dishes!
What about shrimp scampi?
Mmmm, shrimp scampi… it is funny that you mention that, as a Google search of “shrimp photos” usually are all about the food dishes we eat! And lots of friends and family ask about that too when I told them about the hobby… “Are you gonna raise them to eat them?” lol
Fascinating! I’ve never heard of pet shrimps before. What a fantastic idea, they are cool pets with the added benefit of being great photo models :)
The shedded shell looks amazing (as the rest)… Makes me wonder, have you ever considereddoing a timelapse of their shedding? How long does the shedding take?
Thank you! I actually did have a photo of the shrimp mid-molt in that photo sequence, but I was so enthusiastic about zooming in on it to look on camera I accidentally hit delete twice (instead of magnify twice). Despite Nasim’s helpful article on recovering images, I was unable to recover that one image! :( Lesson learned the hard way… I find that my shrimp molt very quickly, within a few seconds! I’m better at noticing when they’re about to molt now, as they are a bit still and inactive before it happens. Unfortunately, they also like to do it where they won’t be bothered much by others, so it is hard to capture! Here’s a video of what it looks like: www.youtube.com/watch…YQOf_RZXzA
Very good and educating! Important information as more and more people get in to photography of tank inhabitants.
Thank you Peder, it means a lot coming from an expert on shrimp and photography like you :)
I love the shot of the clear shrimp (shrimp-macro 19, the cover shot). Amazing specimen, great lighting. I should consider shooting my pacu. Thanks for the article.
Thank you! I agree, their molts are very interesting to look at! Clean molts and thick shells are a good indicator of shrimp health :)
i have been doing similar work but with only one specie for some time now. stunning photos
Thank you! I found that I still have way too many pictures of blue bolts as they are more prominent in my tank and are pretty nice to look at. I’m gradually getting more varieties in my tank, just so that I can photograph them! lol