
One of the most useful camera modes is called aperture priority. To use this mode, all you need to do on most cameras is spin your camera’s PASM dial to the “A” or “Av” setting.
Table of Contents
What Is Aperture Priority?
Aperture priority is a camera mode in which you manually set your aperture, while the camera automatically selects a shutter speed.
That’s all there is to it. So, what makes aperture priority mode so valuable?
First, it gives you full control over the single most important setting in all of photography – aperture. (Manual mode is the only other way to get full control over aperture.) Get aperture right, and everything else follows.
Second, aperture priority mode is fast to use. That’s especially true compared to manual mode, which takes more time to set properly when the light is changing.
In short, if used right, aperture priority mode lets you pick the optimal camera settings – just like in manual mode – but more quickly.
How to Use Aperture Priority Mode Optimally
Aperture priority is not hard to use, so long as you understand aperture, ISO, and shutter speed.
First, enter aperture priority mode by turning your PSAM dial to “A” (or “Av” on Canon cameras). With some Fuji and Leica cameras that don’t have a PSAM dial, you get the same effect by turning the Shutter Speed dial to Auto.
Second, you must select your aperture manually – the f-stop you plan to use. In aperture priority mode, the camera will never change the aperture you select. So, it’s very important to pick the right one for your desired depth of field (and other factors).
Third, select the proper exposure compensation. Be sure not to overexpose any important highlights in your image. Often, this will necessitate -0.3 or -0.7 exposure compensation. (This setting works by altering which shutter speed your camera selects, shifting the exposure in your desired direction.)
Fourth, pick the right ISO value. If your subject isn’t moving, and you’re shooting from a tripod, stick to base ISO. This is ISO 100 on most cameras.
I’ll cover handheld photography in a moment, but hopefully you can see why aperture priority mode is so quick to use. For something like landscape photography, you can pick a good aperture (maybe f/8), a reasonable exposure compensation (say, -0.3 EC), and base ISO – and then you’re done.
No matter how the light changes, your camera is now, essentially, set-it-and-forget-it. Yet your settings are optimal.

Shooting Handheld
For tripod-based photography, aperture priority mode is clearly useful and easy to set. But when you’re shooting handheld or your subject is moving quickly, things are a bit different.
As you know, aperture priority mode requires your camera to select a shutter speed automatically. But in dark conditions, it’s going to select a long shutter speed – say, 2 seconds – which you won’t be able to handhold sharply.
The solution is to increase ISO. As you leave base ISO and jump to ISO 400, 800, 1600, and so on, your camera will use a faster shutter speed to compensate. And you’ll get back into handholding territory.
Although you can increase ISO manually, a quicker way is often to use Auto ISO.
Auto ISO
The genius of Auto ISO is that it has a built-in shutter speed limiter. Rather than worrying about your camera selecting a 2-second shutter speed in aperture priority mode, you can manually limit shutter speed to a safer value. Maybe 1/100 second for regular handholding, or 1/500 if you’re photographing sports.
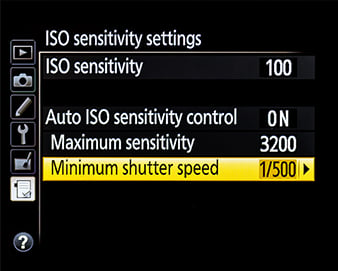
In fact, you can even limit shutter speed to change as you zoom in and out. (That’s found by changing “Minimum Shutter Speed” to “Auto.”)
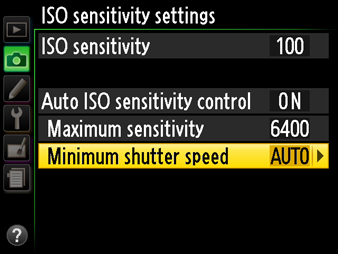
By default on most cameras, this lines up with the “1/focal length” rule. With a 24-120mm zoom, the camera would stick to 1/25 second or faster at the wide end, and 1/125 second or faster at the telephoto end. (Many cameras today let you adjust this default behavior to be faster – i.e., 1/50 and 1/250 instead – or slower, if you so choose.)
My final recommendation:
- If you’re shooting handheld, use aperture priority mode with Auto ISO and Auto Minimum Shutter Speed. If you want to be safe, prioritize Auto Minimum Shutter Speed one click “faster” than default.
- If you’re shooting sports, use aperture priority mode with Auto ISO. Use a manual minimum shutter speed of 1/500, 1/1000, or whatever you feel will comfortably eliminate motion blur.
- If you’re shooting from a tripod and capturing something like a landscape, use aperture priority mode without Auto ISO. Your shutter speed may end up being multiple seconds long, but there’s nothing wrong with that if your tripod is stable.
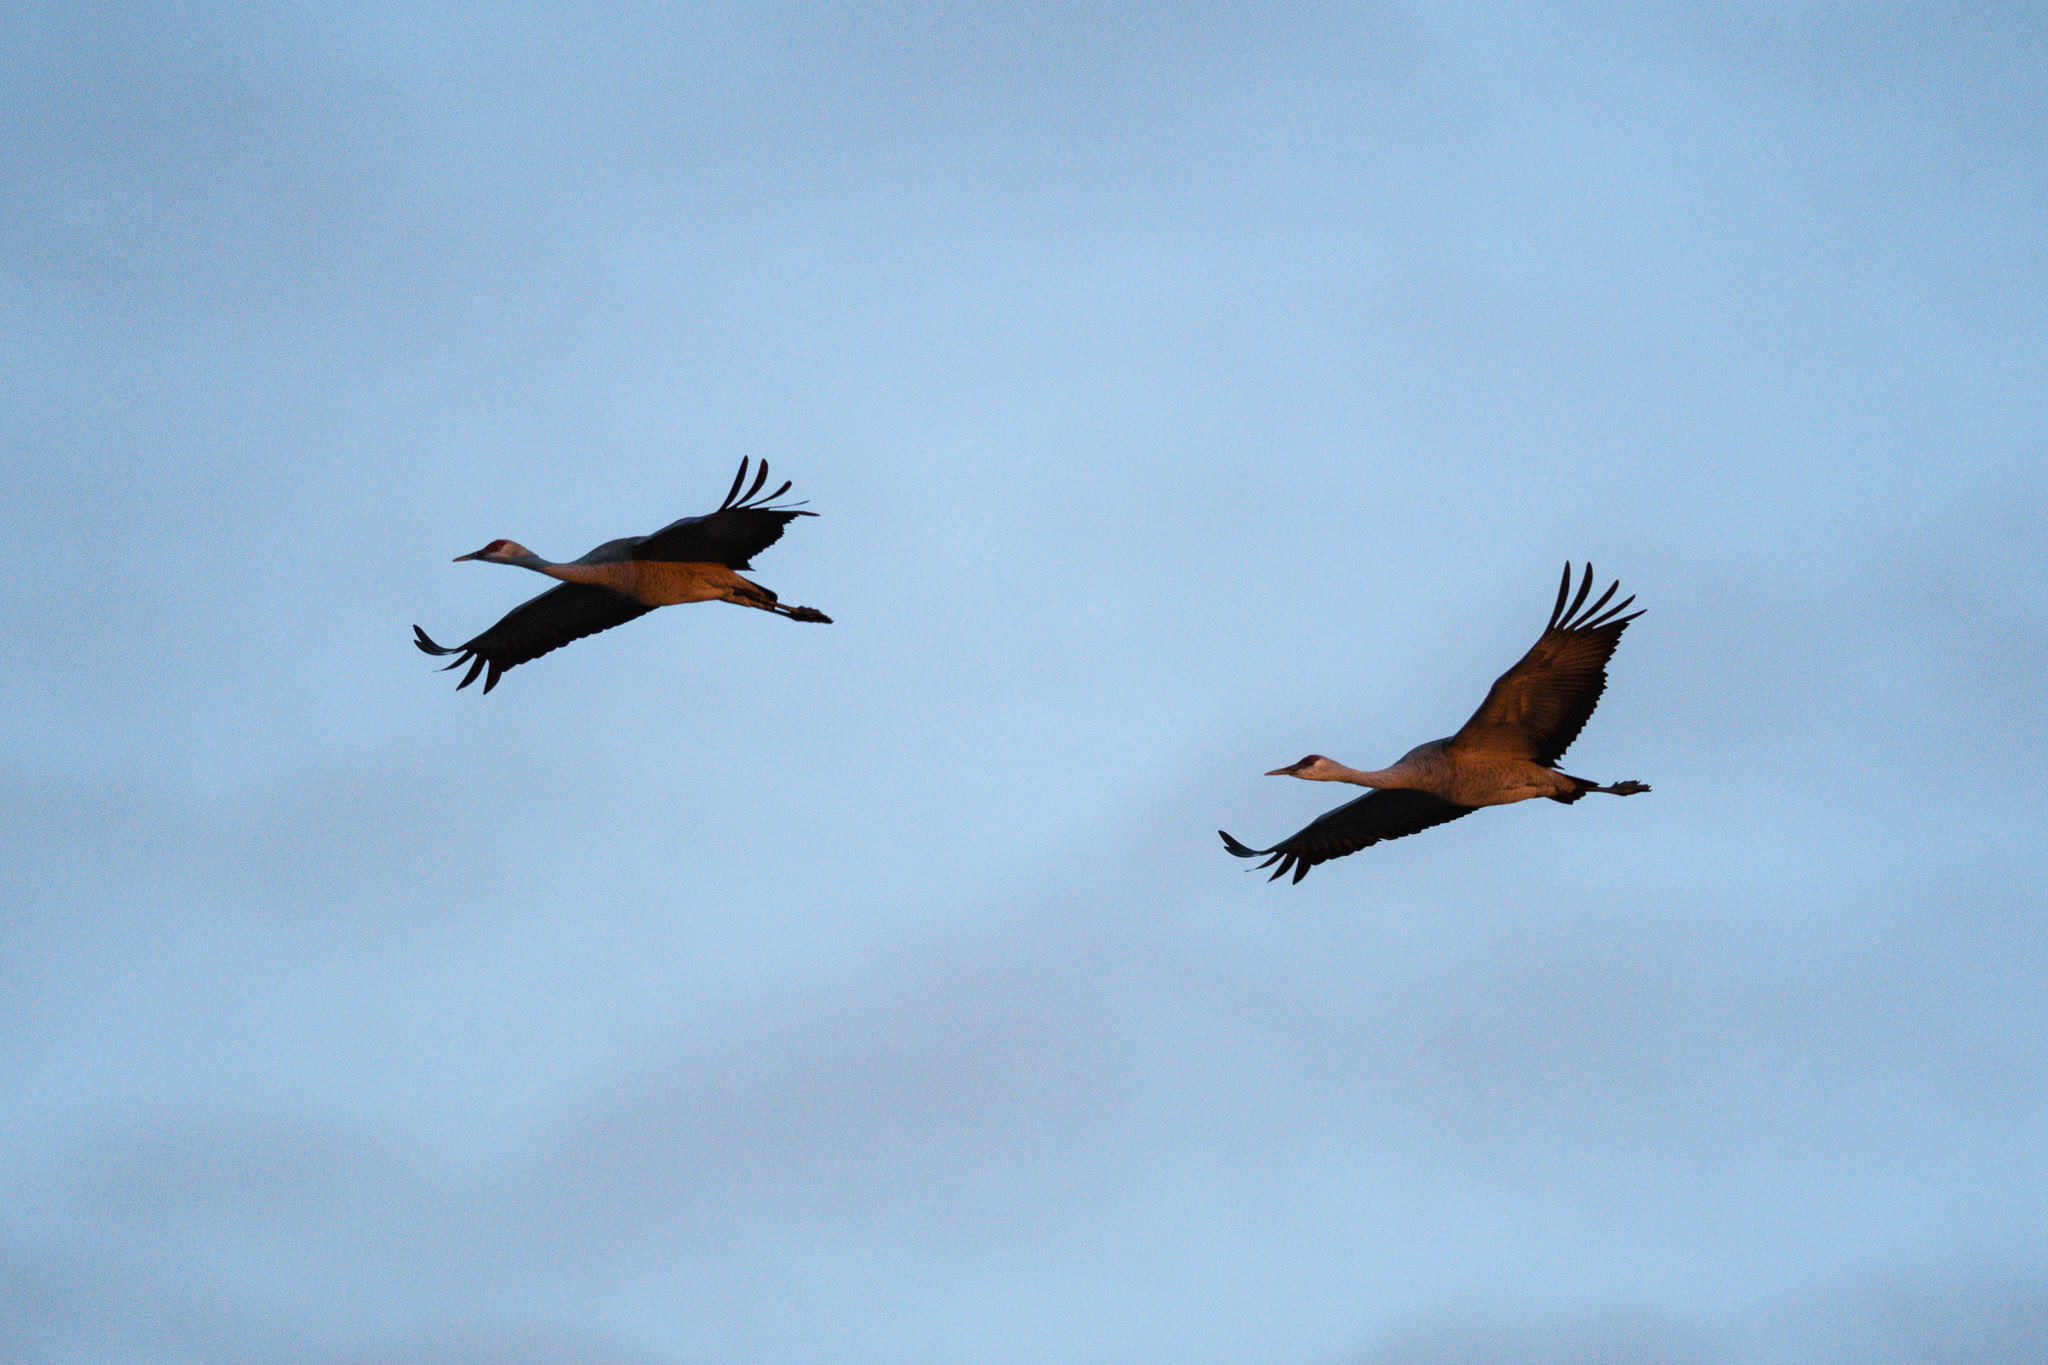
The settings here are optimal, yet it took no extra effort in the field beyond setting f/4. (1/800 was my “Minimum Shutter Speed.”)
This is only a brief explanation of how useful Auto ISO can be. If you want a good primer on Auto ISO, take a look at our complete guide on the subject.
When to Avoid “A” Mode
I use aperture priority about 95% of the time for my own photography – regardless of the genre I’m shooting and whether I’m using a tripod. It’s just that flexible.
But sometimes, aperture priority mode is not ideal. That’s especially true when you need to use the same camera settings across a series of photos. For example, with panoramas or focus stacking, I almost always use Manual mode.
The same is true in conditions when automatic exposure gives you poor results. For example, with Milky Way photography, cameras rarely meter your scene correctly. Even with exposure compensation, you will often get images that are too dark or inconsistently exposed in aperture priority mode. I always use Manual for taking star photos, or other images in very dark conditions.

Aperture priority mode also restricts you to shutter speeds of 30 seconds (on most cameras) or shorter. If you want to use your camera’s bulb or time mode, you will need to be in Manual.
On top of that, I recommend using manual mode if you do flash photography. Otherwise, you won’t have total control over the balance between flash and ambient light. All of my flash-lit macro photography is done in manual mode, for example.
Lastly, some photographers like using manual mode in combination with Auto ISO for shooting sports and wildlife. The reason why this method is often easier to use is because with wildlife for example, you will often suddenly encounter situations where you will need a much higher shutter speed to freeze action. But then the next moment could be a stationary subject where a very high shutter speed like 1/2000th of a second will result in far too much noise and hence reduced image quality.
That is why the minimum shutter speed technique in wildlife and sports doesn’t always work: because you often need very high shutter speeds but you don’t want those to define the minimum. Not to mention that you might want to go lower than the minimum shutter speed if you have time with very still subjects, because you can often handhold very low shutter speeds with today’s lastest IBIS systems.
The only downside to not using aperture priority mode is that in bright conditions, you’ll be in danger of overexposure (because the camera will hit base ISO and not be able to go any darker).
There are two solutions to this: the first is to flip back and forth between aperture priority and manual with auto ISO if your camera has a very quick way to do so, such as programming a button for it.
The second is to learn to recognize the bright light scenarios that require a higher shutter speed and set a higher shutter speed accordingly. For wildlife, it’s not too much of a serious problem because you’ll rarely be shooting in bright light, and also, today’s mirrorless cameras make it easy to see when overexposure may be a problem. Of course, aperture priority is easier to work with if you never encounter fast-moving subjects.
There are a few other cases in which manual mode could be the better choice, but those are the main situations. When you learn how to use it properly, aperture priority is surprisingly flexible.
Aperture Priority FAQs
A few reasons. First, aperture priority mode is faster to use than manual mode. Second, it reacts to changing light automatically, so you are less likely to get a bad exposure. Third, it maintains almost all your control over the camera, so you can still select the optimal settings for almost any shot – as if you had done things manually.
On most cameras, setting aperture priority is as simple as turning the PASM dial to the “A” setting (or “Av” on Canon cameras). Some cameras, like the Nikon D850, have a Mode button instead of a PASM dial, with the identical function. On a few cameras with retro designs – mainly Fuji and Leica – you get the same result by rotating the shutter speed dial to Auto, then selecting your aperture manually on the camera lens.
All the time! However, professional photographers are not a monolith. Some (like me) are big fans of aperture priority mode, while others prefer to stick with manual. Of the four PASM camera modes, aperture priority and manual are by far the most common for professional photographers to use.
Conclusion
Aperture priority mode is a lifesaver for many types of photography. It’s not a crutch for photographers who don’t understand manual mode; it’s a faster way to set optimal manual settings in changing conditions, with less risk of over- or under-exposure.
Of course, aperture priority mode is not always ideal. In cases like panorama and flash photography, manual is almost certainly the way to go. But overall, the benefits of aperture priority are pretty impressive. If you know your stuff, you’ll end up with more keepers and better exposures – with half the time to get there.
I hope you found this article on aperture priority mode to be useful! If you have any questions or recommendations on using aperture priority mode, please let me know in the comments section below.
Nice article!
Figured out the value of Aperture priority mode quite early, but i would have loved to find an article like this in the early stages.
Also, i’ve listened to it with the embedded voice assistant / narrator set to “Microsoft Yan Online (Natural) – English (Hongkong)” (probably available only under Edge), wend down smoothly.
I really enjoyed your article on Aperature Priority as you explain this in very plain, simple terms…thanks!
for some reason I could never wrap my brain around Aperture priority. I used Manual for years and always struggled with blurry images, over or underexposure. this is the best explanation I have ever read. thank you so much. I understand the importance of setting iso to auto and minimum shutter speed to avoid camera shake. thank you so much!
This is the best article explaining aperature priority I have read. Thank you so much !
This is the best solution so far to the answers of my research
Very glad to hear it!
Thank you so much. I am using Fuji H1 shooting birds. So far manually. Will try aperture priority now.
So accessible and informative – explanations and examples were really good, thanks.
Ty so much for going through the aperture priority mode. I have a Canon 90D. I have a question if you could talk about the TV mode on the little spindle on camera ?
TV mode is just shutter priority mode, which functions similarly to aperture priority, except you’re manually selecting the shutter speed, and the camera is automatically selecting the aperture. It’s not a mode I recommend using, because there is usually only a small range of ideal aperture values that work best for a photo. I don’t want the camera choosing my aperture for me, since it will often pick something outside that range.
What happens to the aperture when using a Zoom lens in aperture priority mode if the Aperture is set to wide open and the zoom is fully extended?
you probably found out since 2020, but for anyone else :
The aperture will go down; Aperture wise, the camera accounts for that as you manually changing the aperture.
(at least in general, i am not aware of exceptions)
Aperture Priority has sped up my ability to grab sports shots during partly cloudy days when the sun intermittently illuminates the fields from play to play. However, my rate of keepers still didn’t improve until I mastered the usage of the various metering modes. White uniforms against a dark background, or skin tone lighter or darker than backgrounds and uniforms still require the user to have a full understanding of how your camera’s metering mode works, which helps you choose, for example when to use spot vs center metering mode.