When I read the recent Wildlife Photography on a Budget guest post, it resonated with me. You don’t need the latest and most expensive gear to enjoy shooting wild life. Although it doesn’t stop you dreaming and thinking “if only” … particularly, when you sit in front of the computer and inspect the results from the latest trip. If only … better sharpness, contrast, out of focus rendering, reach … the enjoyment of a good photo is often tinged with a slight regret, that “if only” – the second chance with better kit, improved technique, slightly different settings, more time and patience. Amateur wildlife shooting is unforgiving and the opportunities are not always there to go back and have a second go. Particularly, if you live in a big city like myself.
I put down my Minolta 700si film SLR and A-mount lenses in the early nineties when kids appeared in quick succession. There was little time and money to indulge in film photography passion. Digital compacts were convenient and easy to use for kiddie pics. This period coincided with the emergence of DSLRs. When the new Sony Alpha 100 appeared I bought it as a relatively cheap entry into the digital world allowing me to continue to use my Minolta lenses.
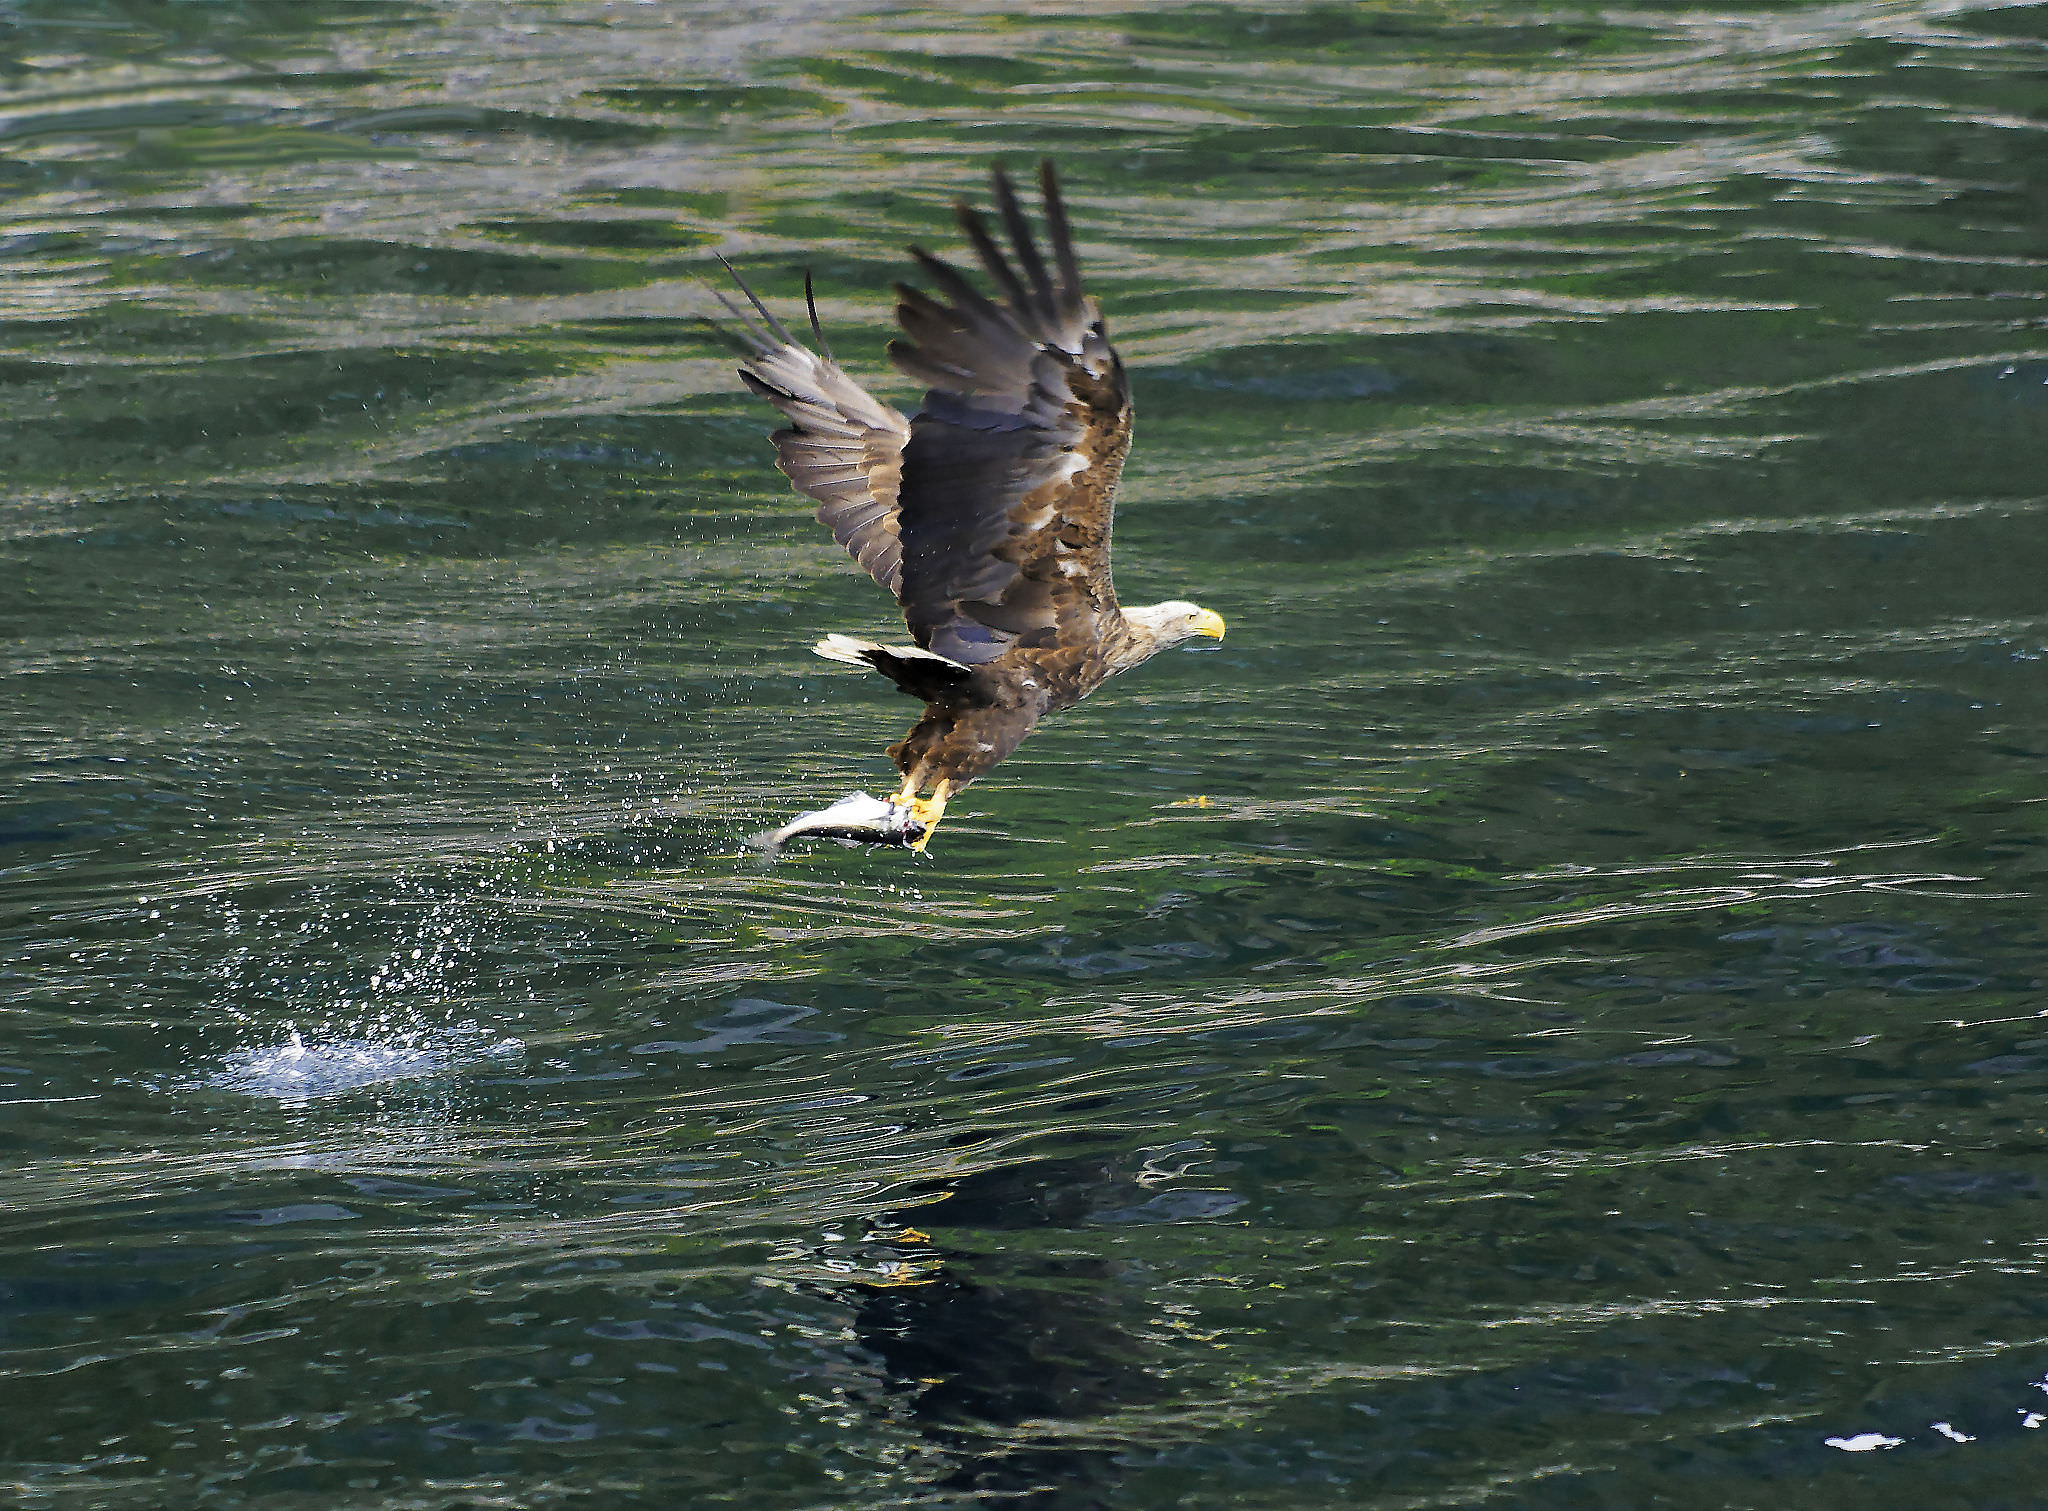
The Atlantic Eagle above was shot in jpg with the Alpha 100 and an early 1990’s 100-300mm Minolta APO f/4.5-5.6. This was shot on a trip to the polar circle in Norway in 2011, and it invokes the “if only” in me … if only I had a better lens, if only I had better fps capability. Blown out highlights could have been controlled if I’d shot in RAW. The Alpha could do 3 fps, not great for BIF so I used single shot mode and panning to catch it. Imagining a faster camera, better sensor, a much faster AF and a better lens – this could have been a great shot … if only. Still, I am proud of this shot – the timing was good and it caused me a level of excitement when I first saw in on the PC. It required a degree TLC in post to improve it.
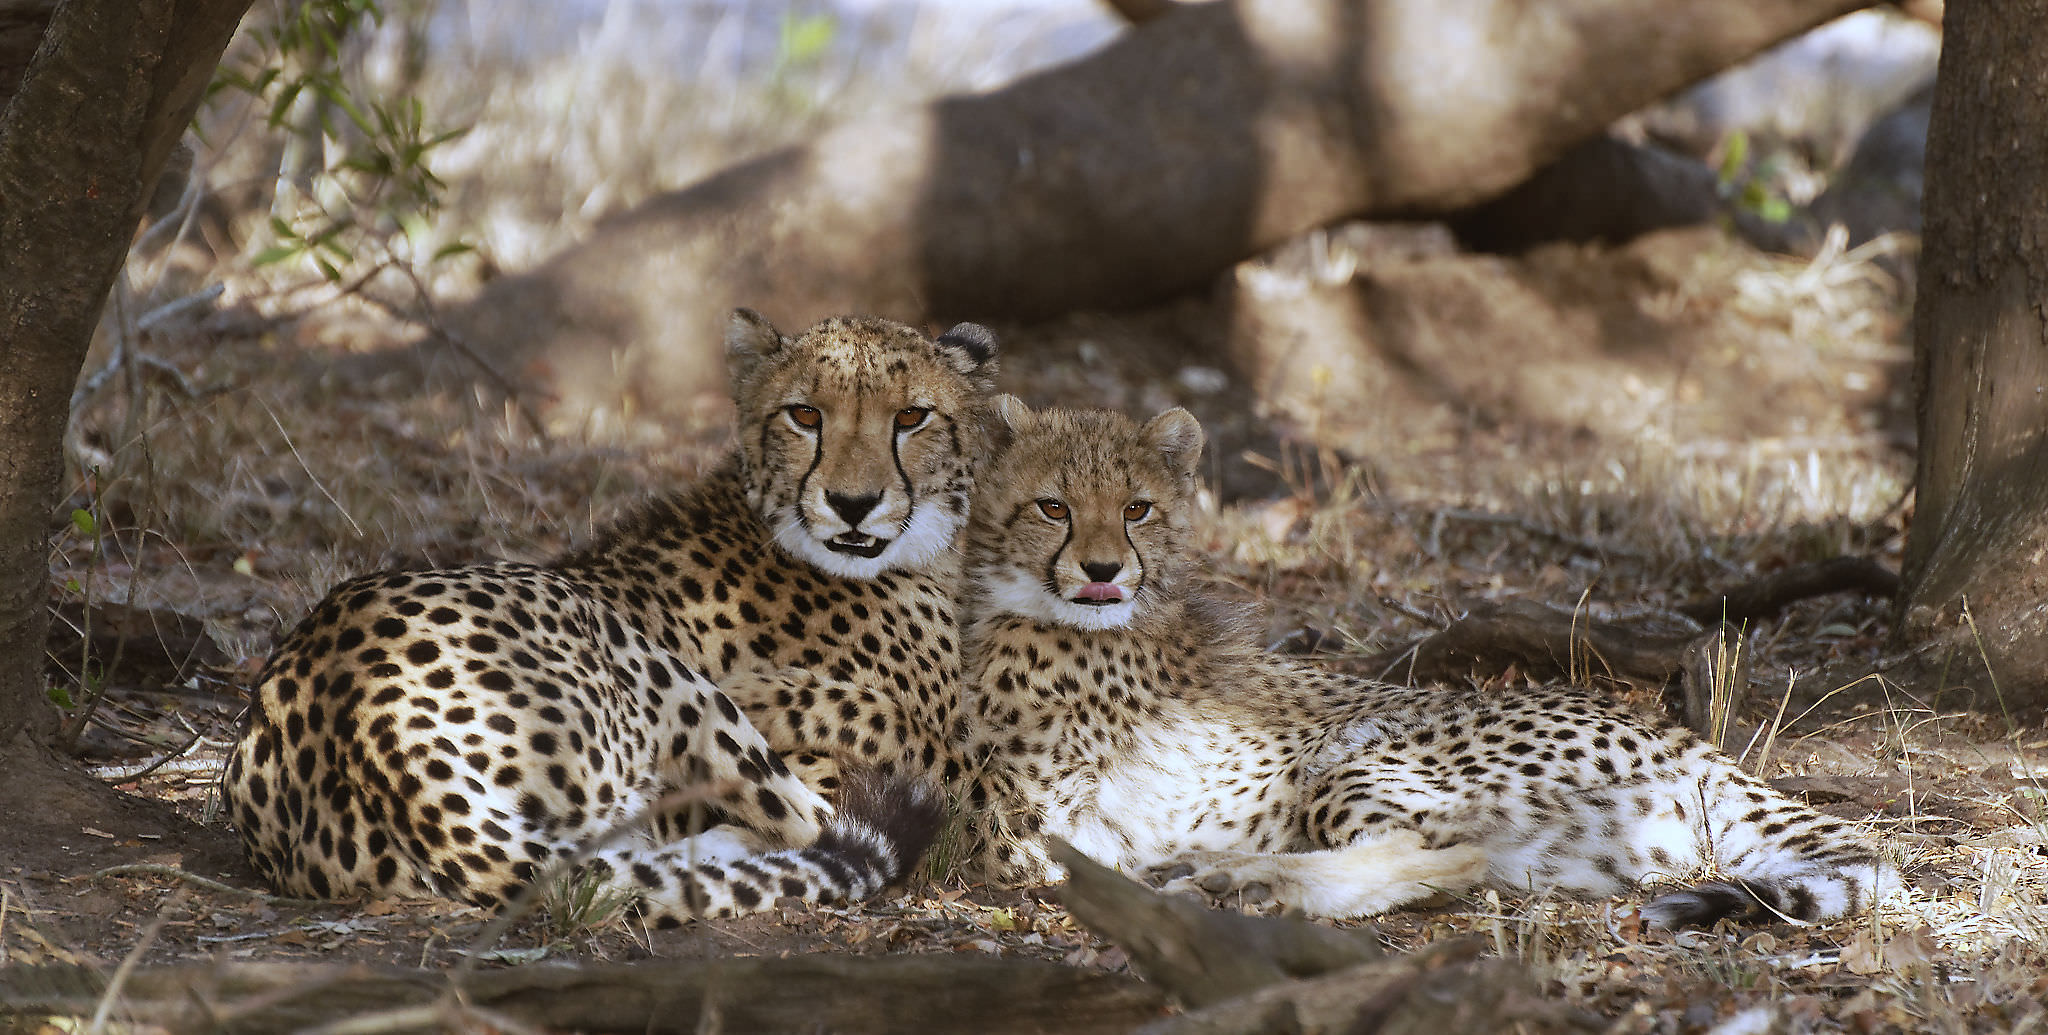
The Eagle shot prompted me to save for an upgrade. Nikon was arguably the leading DSLR maker in those days and I opted for a D7000 and the 70-300mm AF-S f/4.5-5.6G VR. This combo got its first wildlife outing in Africa in 2012 – a fantastic trip with the opportunity to observe nature at its wildest and greatest. It was totally unforgettable. But still with some “if only” regrets … particularly as you know you may never get a second chance of a trip like that.
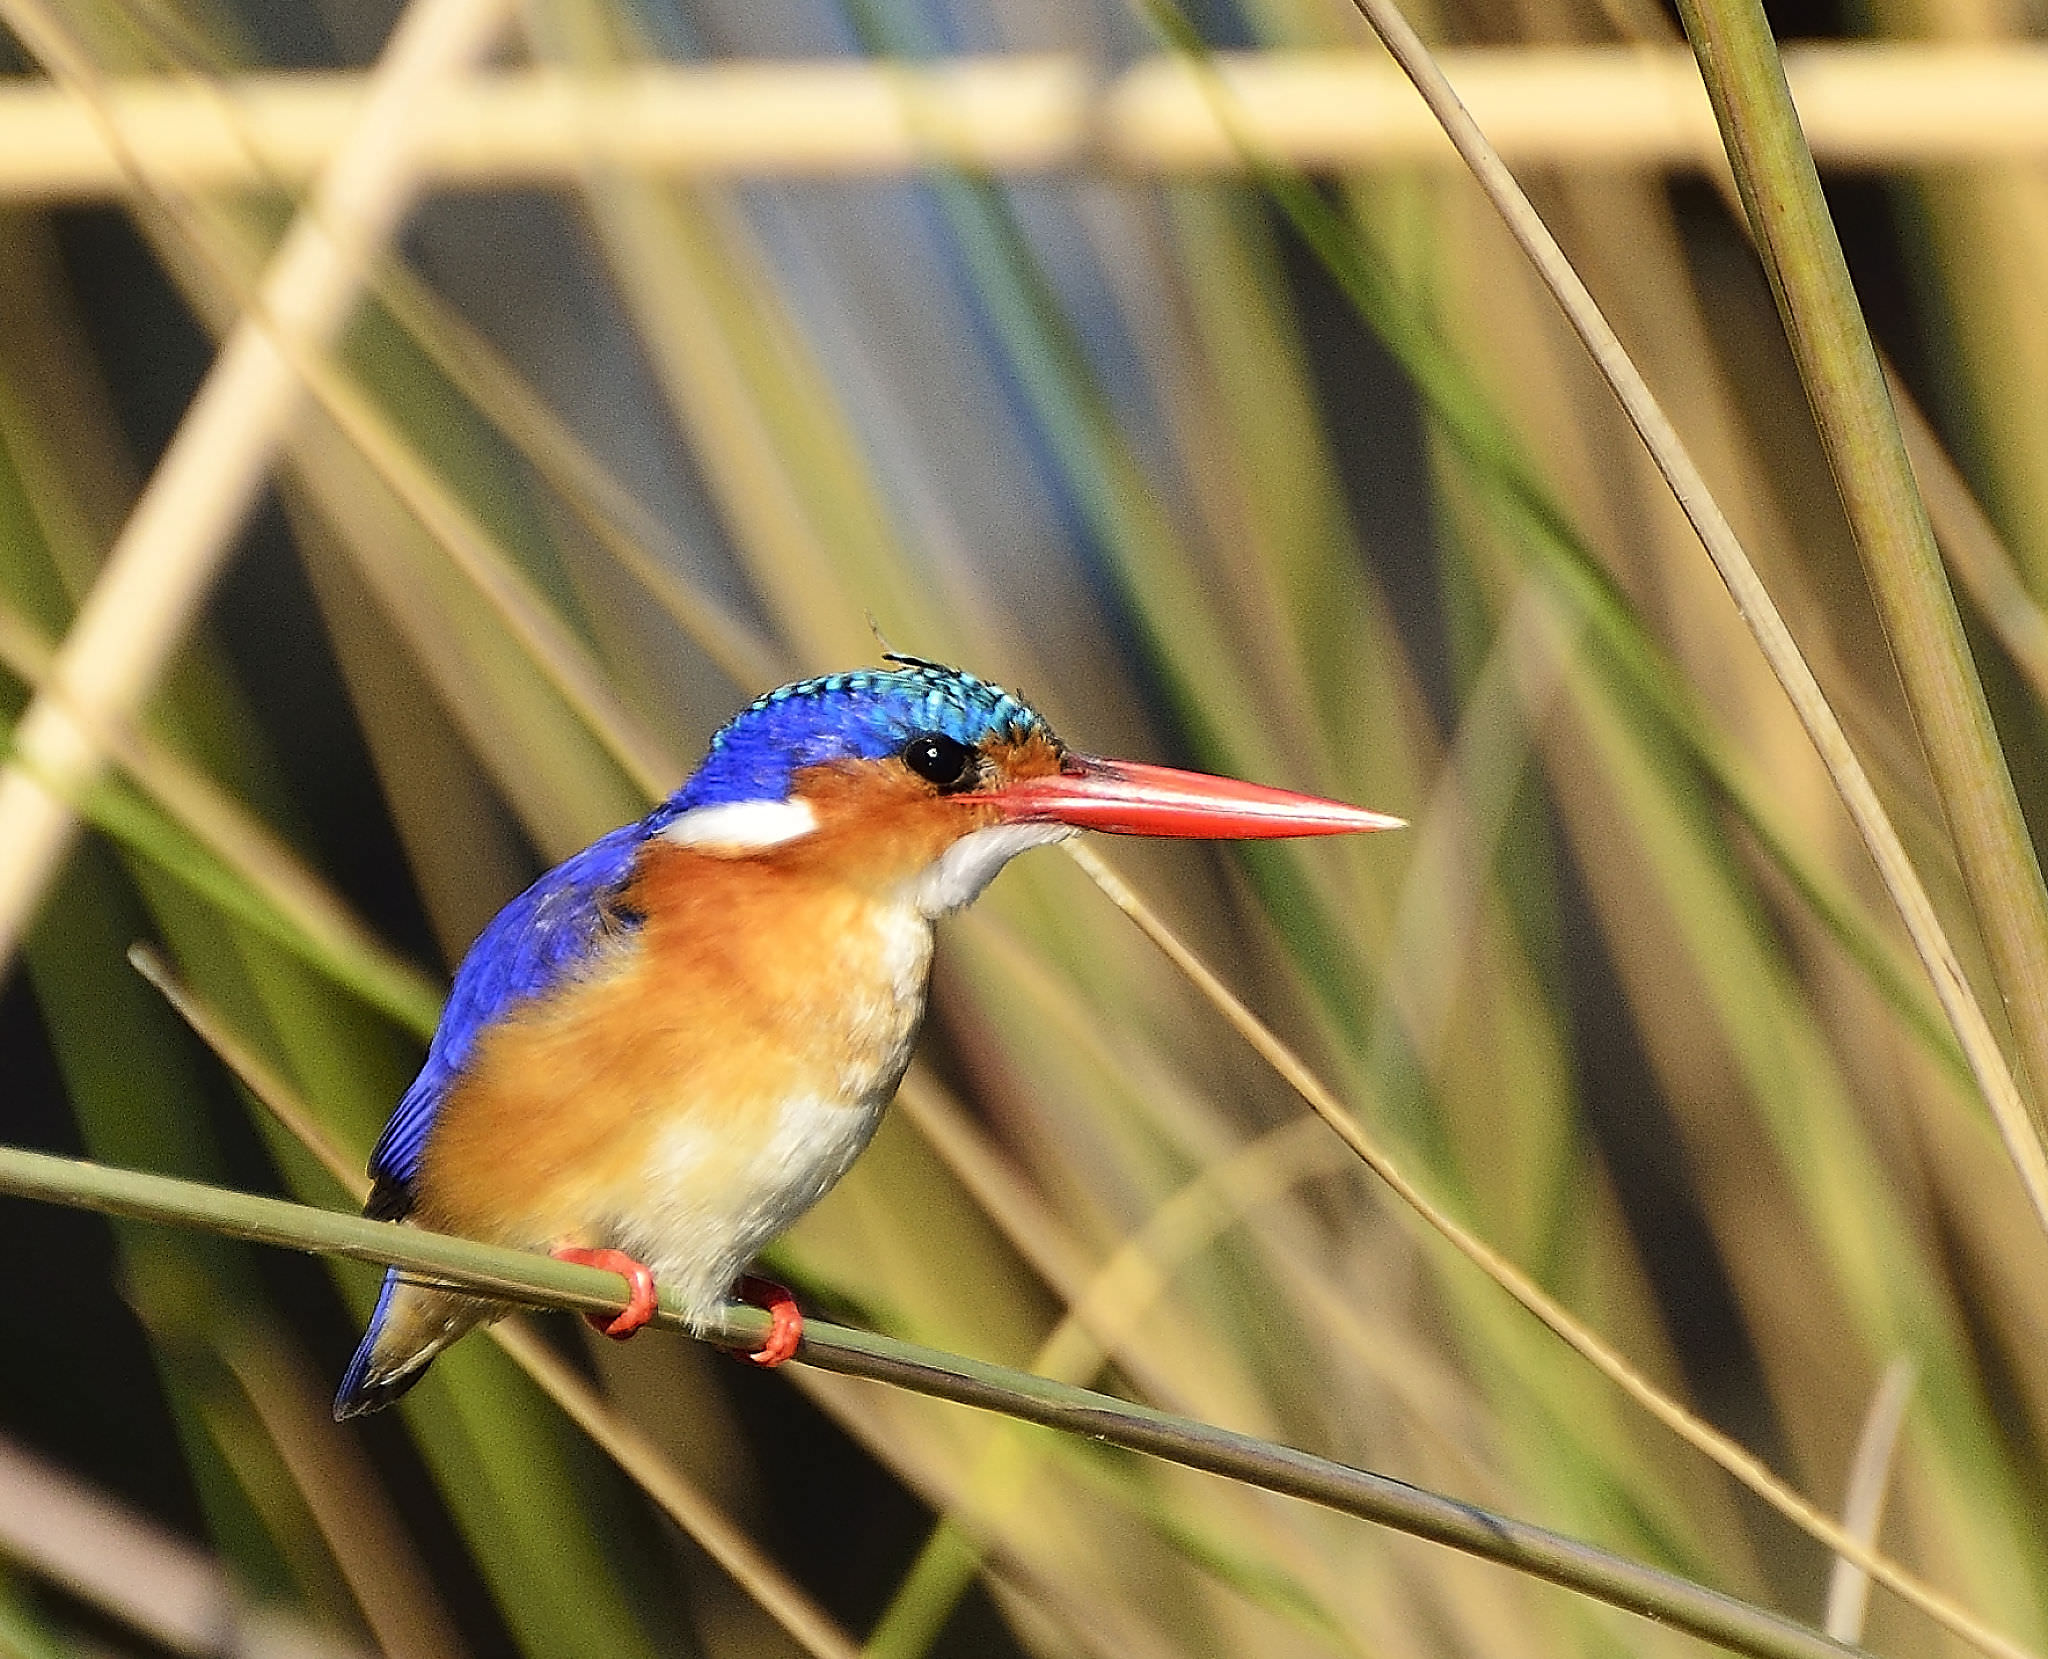
With better gear reach was the biggest ‘if only’. 300mm is a stretch, particularly for smaller more shy animals and birds. The Kingfisher in the Okavango Delta required a fair bit of cropping in post.
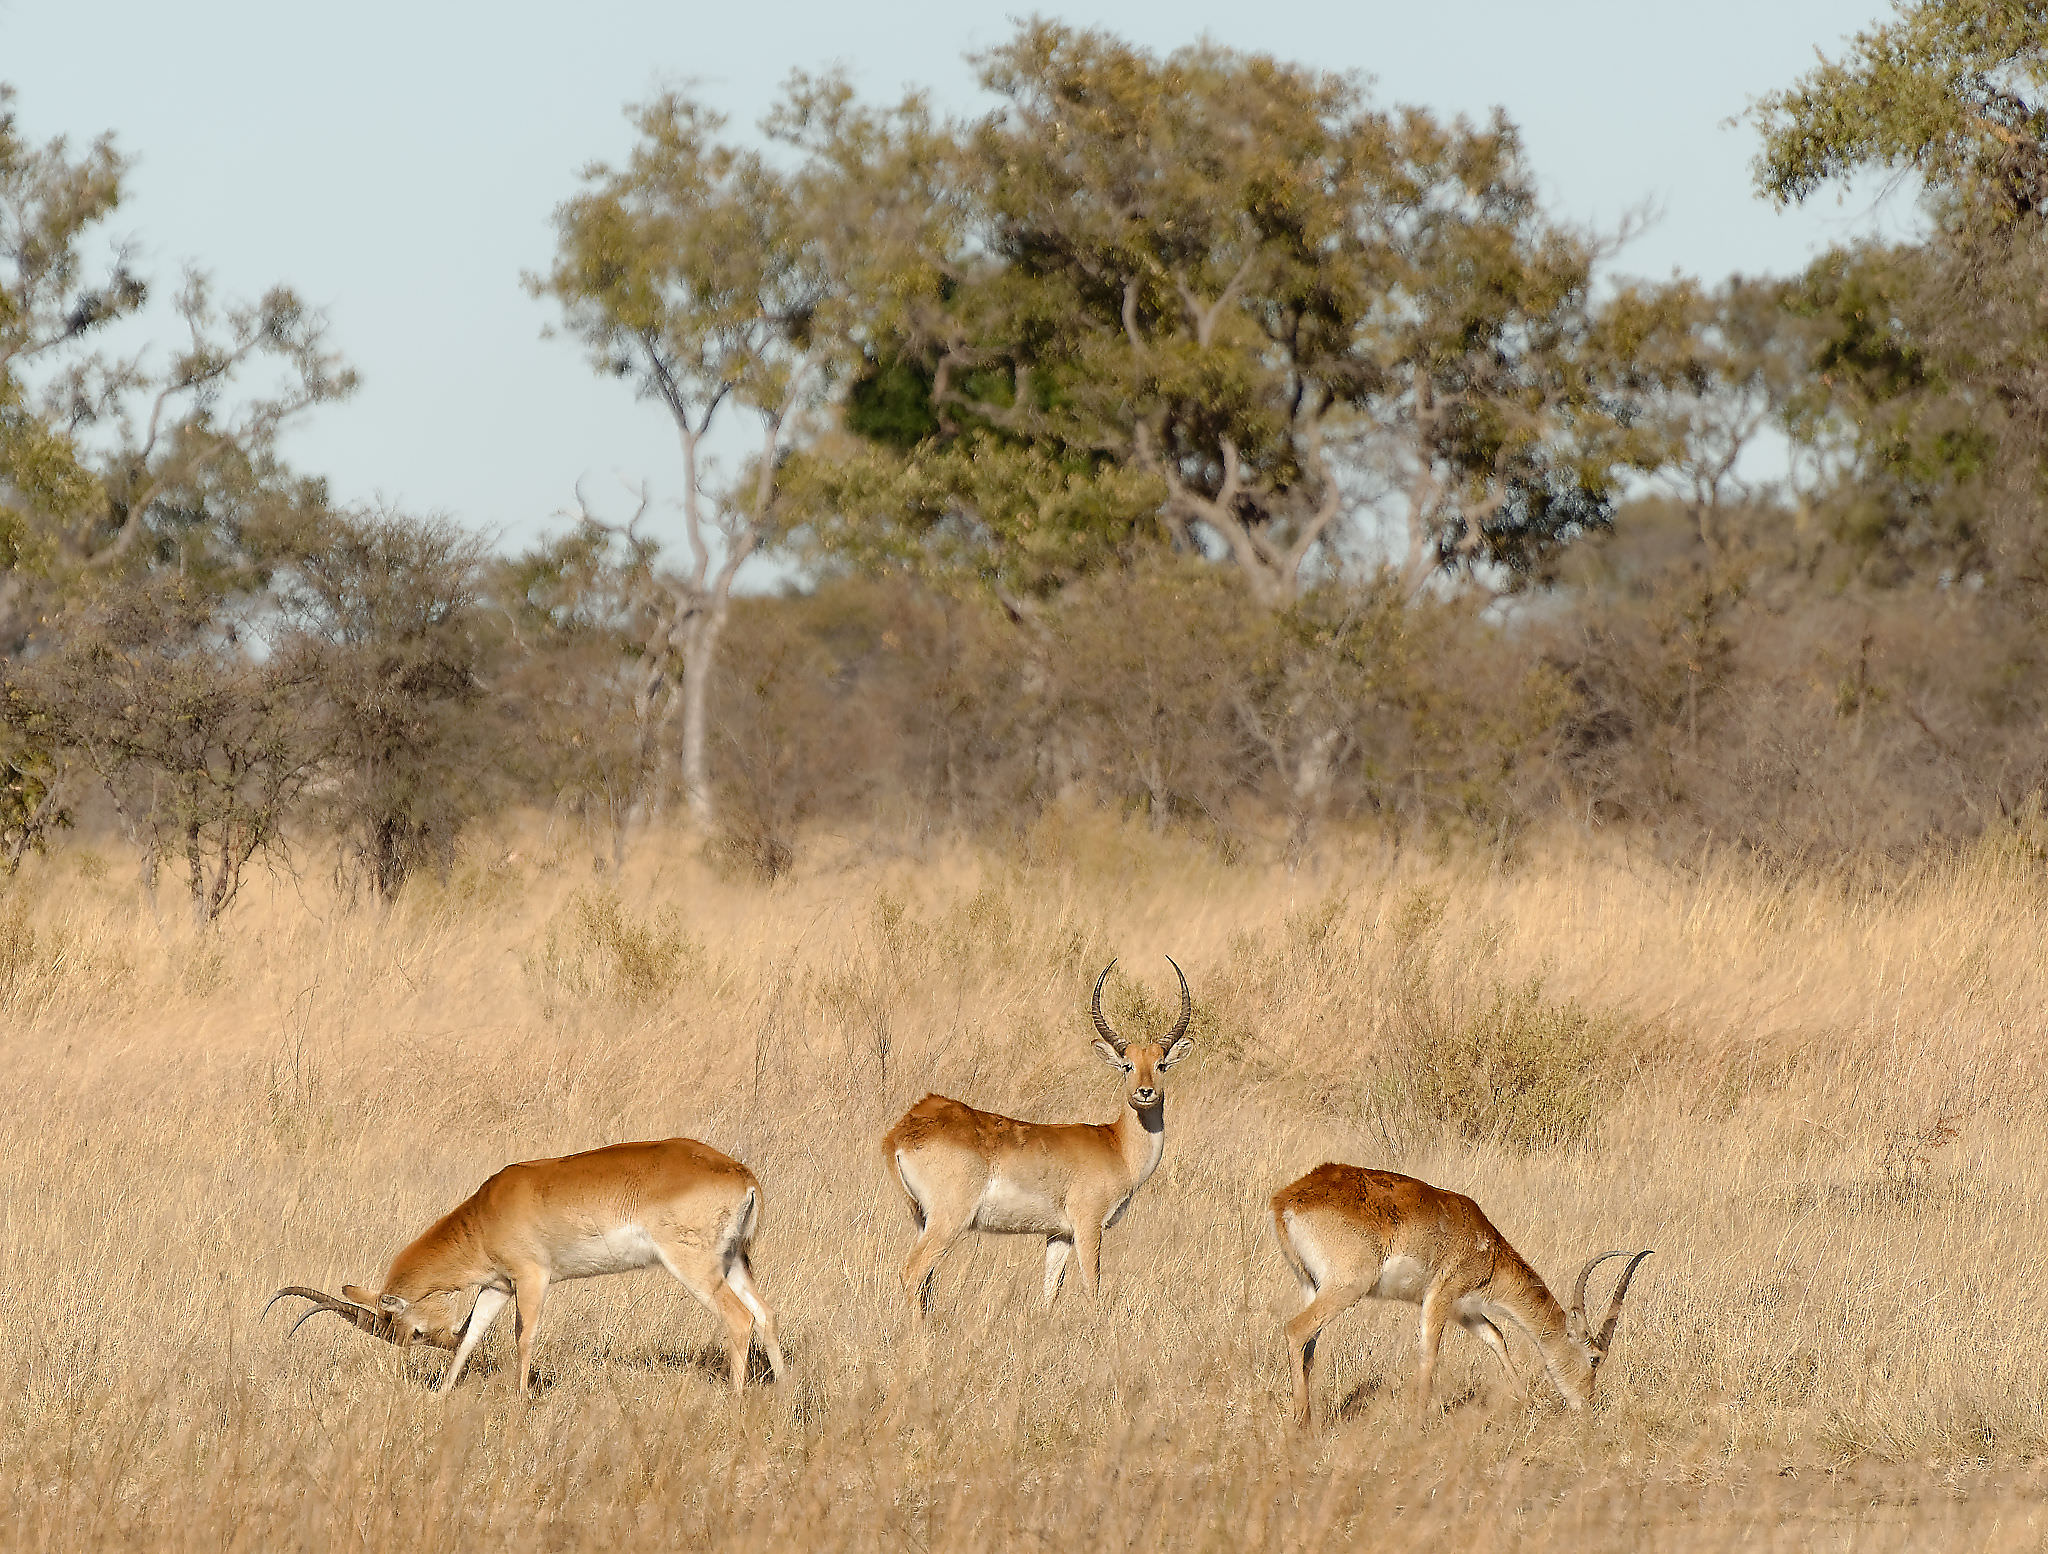

The Impalas also exposed this lens’s limitations at its longest in terms of sharpness and bokeh. The yawning Hippo was taken in low light and here a combination of technique (I moved to catch the moment) and pushing the shutter speed makes the shot less than pin sharp. I should have pushed ISO to 800 … “If only” …
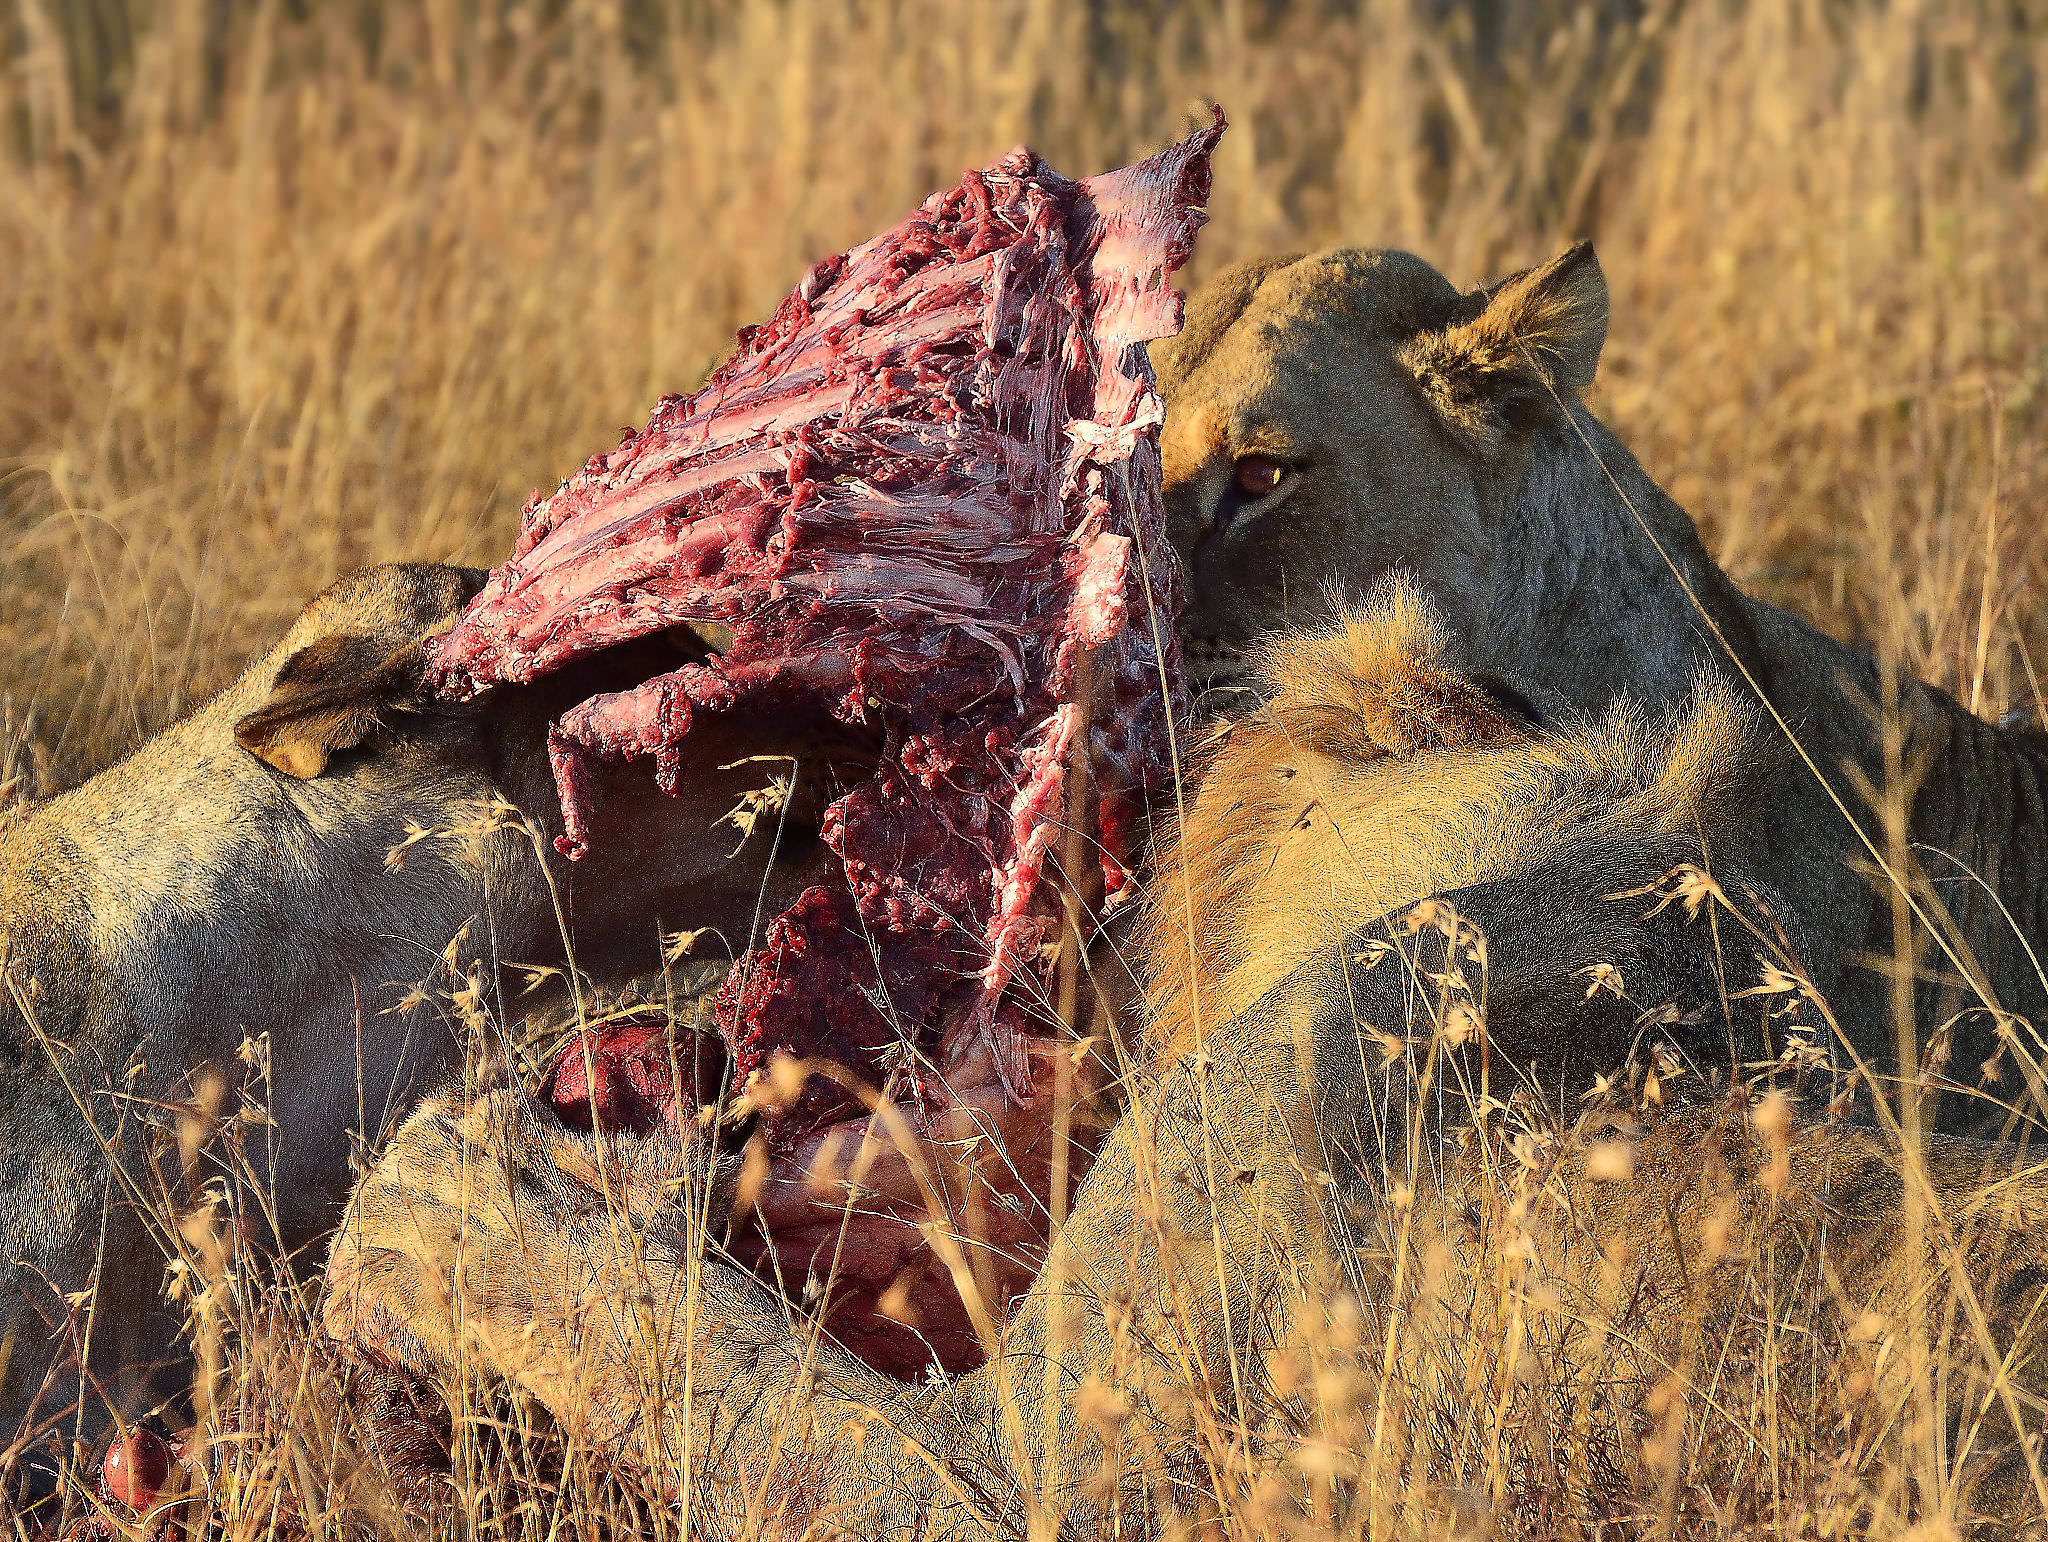
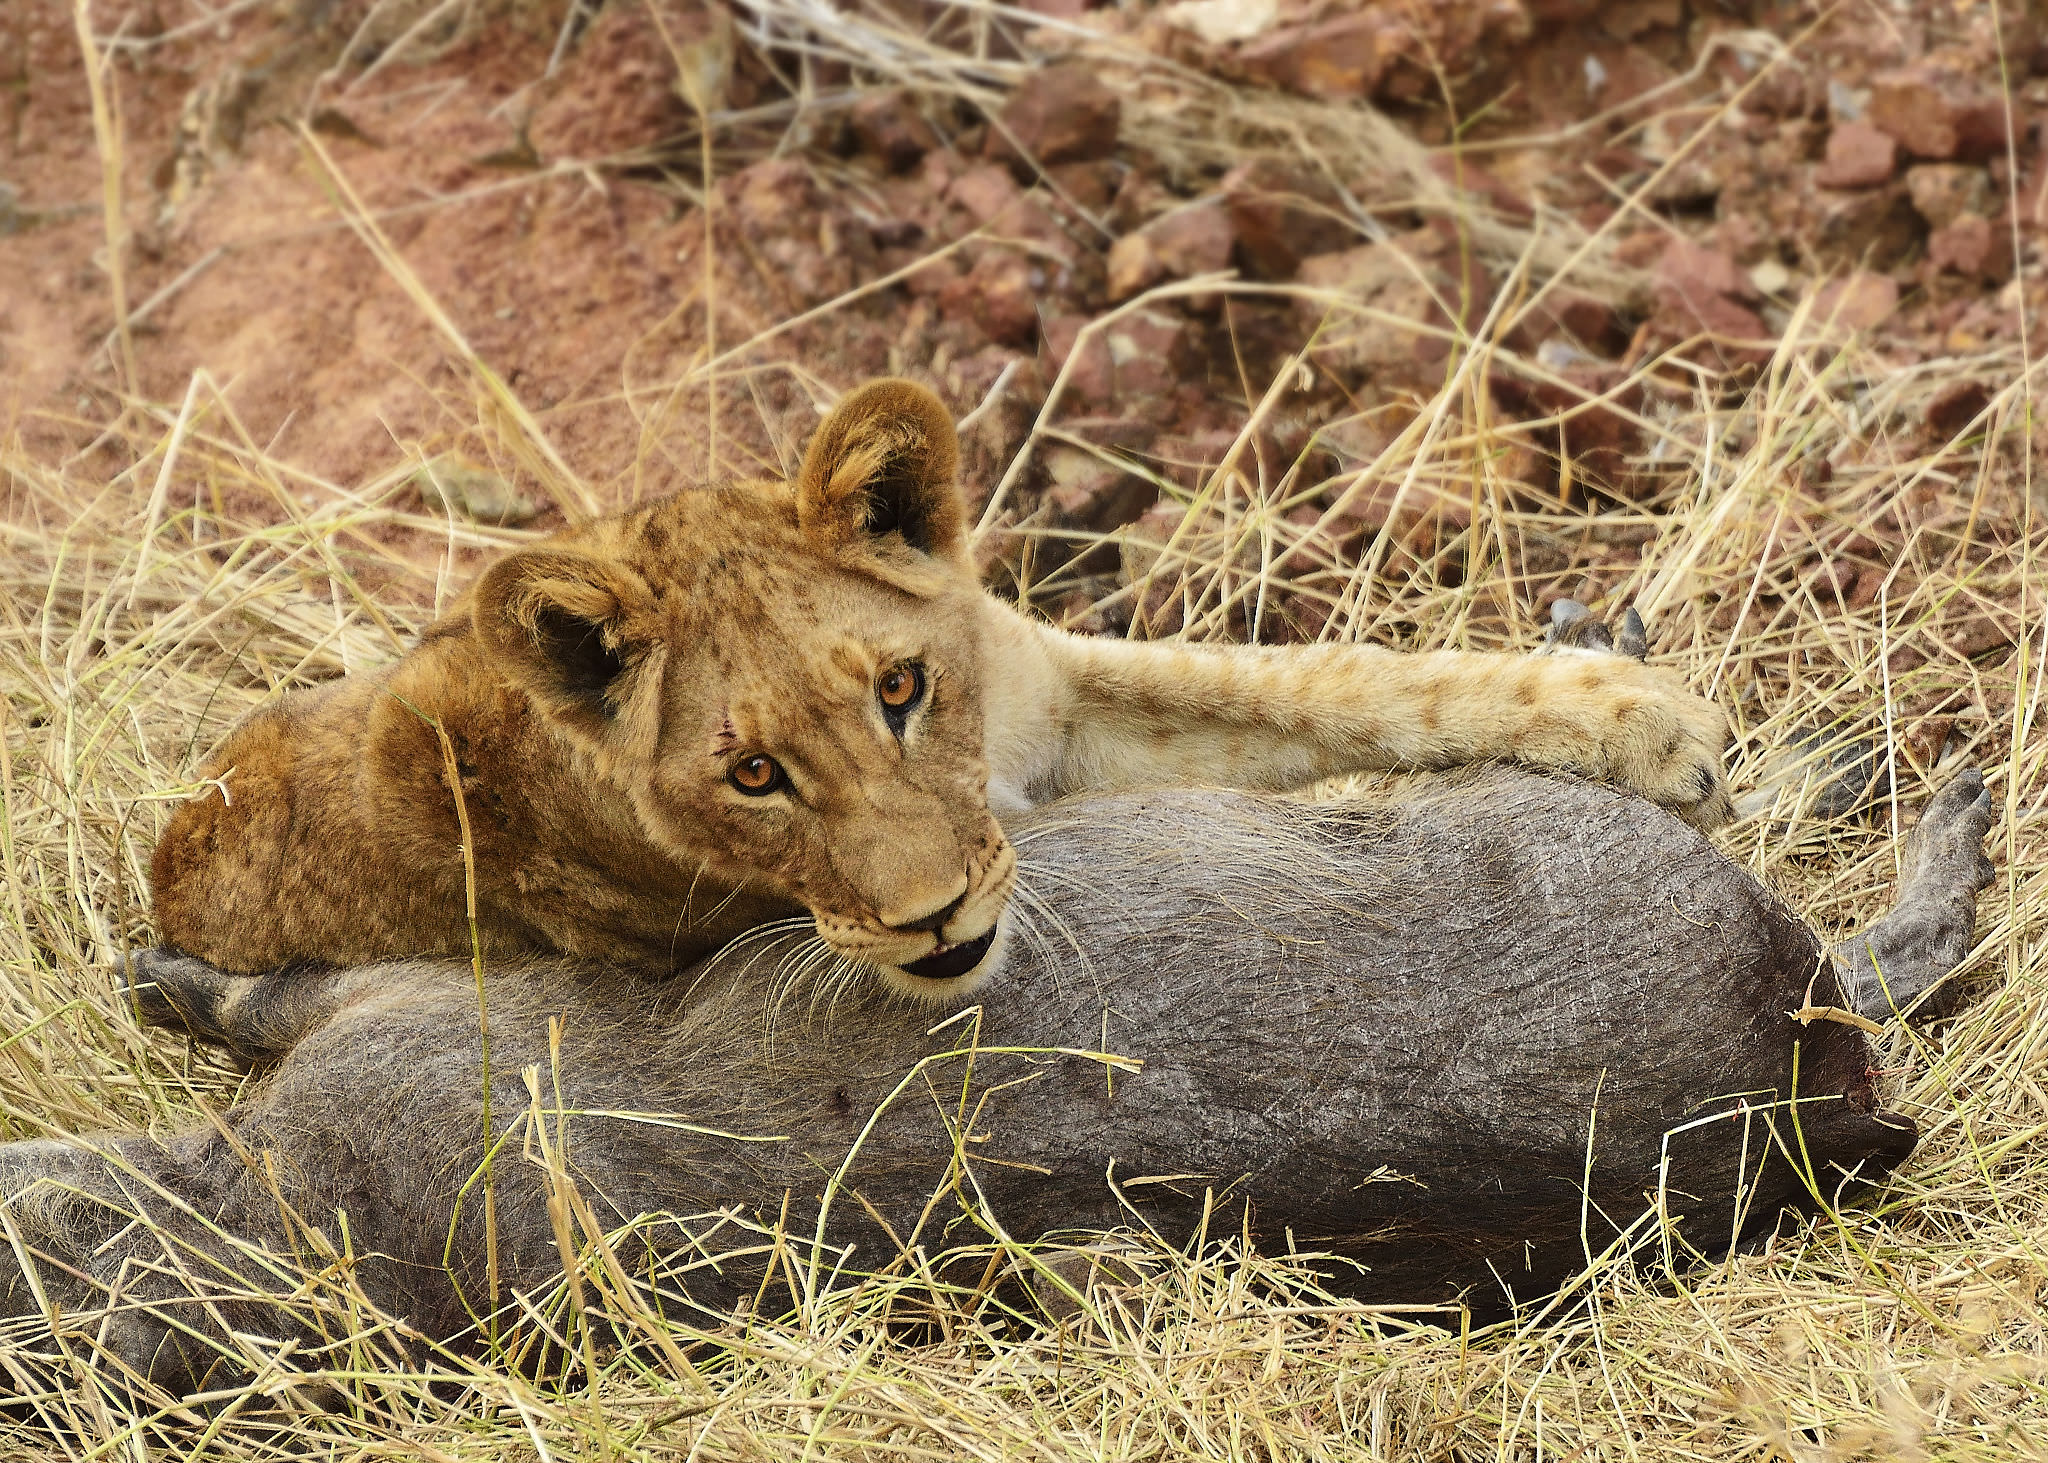
The “lions dining on ribs” was the best of a few shots where I tried patiently to get the angle right for a good picture of both the carcass and the munching carnivores. If only, I had a better position or more time – this is what makes wildlife shooting so exciting and frustrating at the same time. You’re often almost there – but not quite – to get a great shot. It is not easy to ask the subject to turn its head or just move a little bit to the left. As an amateur, you don’t have the opportunity to come back and try again and explore in depth – you got those few hours or days and that’s it.

I upgraded my DSLRs and have ended up with a D7200 via a D600 (that is another story of accidents and dust). I sold my 70-300mm and bought the Nikon 70-200mm f/4G VR instead. Clearly this lens has less reach, but it is a much sharper and faster lens – which I have enjoyed enormously as a very versatile and relatively lightweight lens perfect for travels and good at shooting sports.
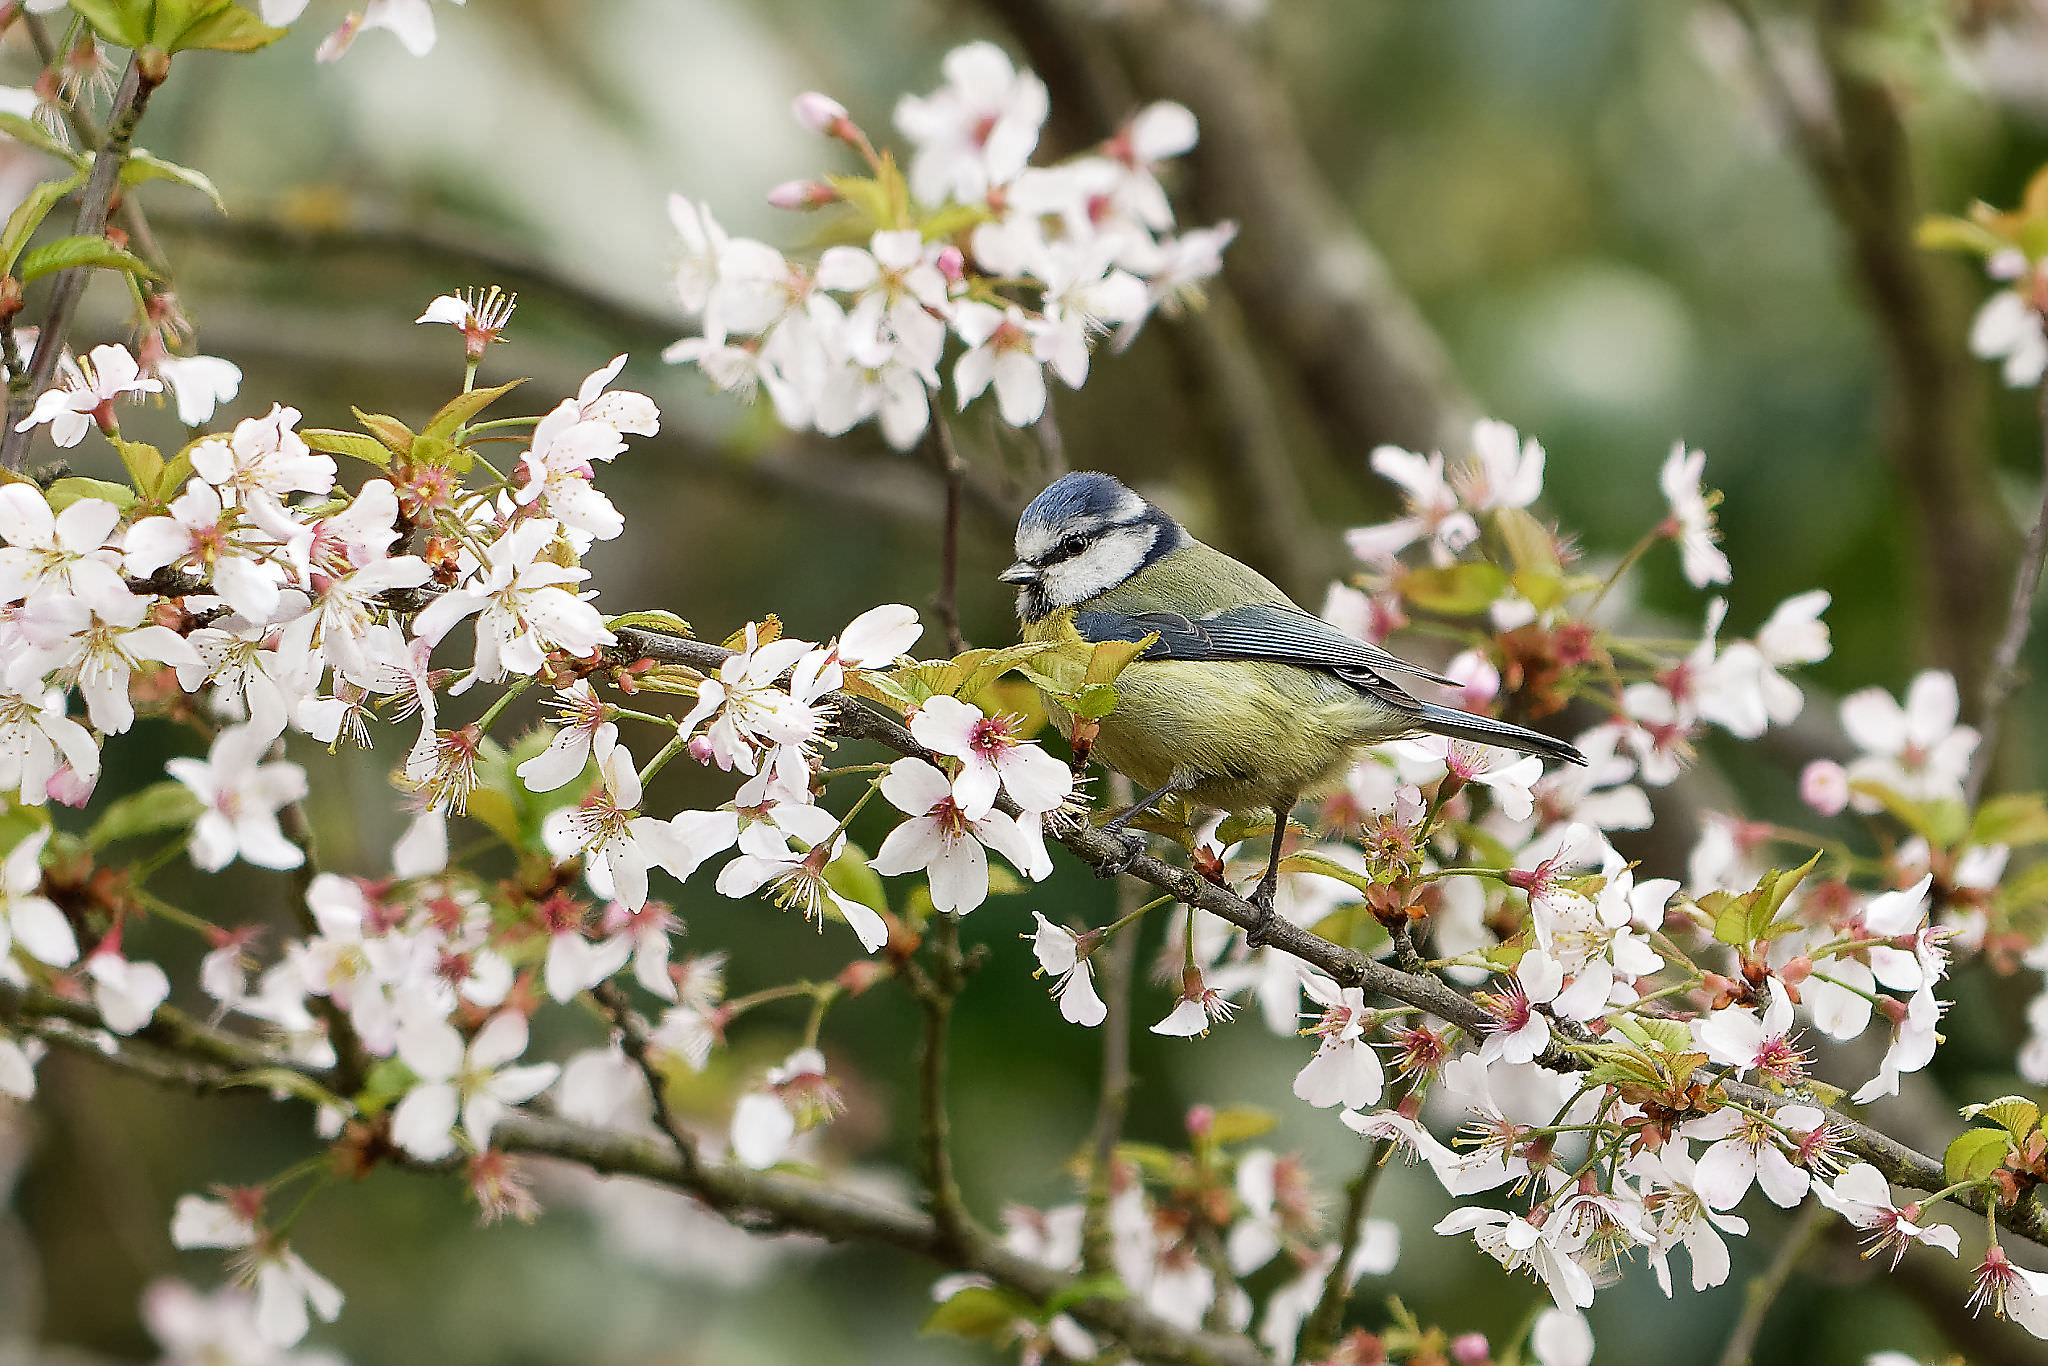
As a wildlife lens it is not so ideal and it often requires the 1.4x teleconverter, but even then, its results outshine the older 70-300mm in so many ways. Cropping is a key tool, as with the Blue Tit I sat patiently waiting to catch it in my back yard in the cherry blossom. I haven’t been able to justify acquiring a longer telephoto lens. It is as always a cost and weight trade-off, so the reach issue is still with me … if only. But maybe there is an answer as Nikon has released some interesting options recently, such as the Nikon 300mm f/4E PF VR (see Nasim’s detailed review).

Through some friends of friends, I may have the opportunity to travel to Zambia next year, which has already got me excited, and it would be almost unthinkable not to bring a lens with reach beyond 200mm. It would be a shame to visit this beautiful part of the world with its abundance of wildlife without a long telephoto. The “exotics” are out of the question on cost and weight grounds (the trip will be expensive enough!) but I got my eyes on the above-mentioned 300mm f/4E PF VR or the new 200-500mm f/5.6 VR. The 300mm is currently on the top of the list, as it is lightweight and apparently works well with tele converters. What if Nikon released a new 400mm f/5.6 PF VR lens this year – that could be ideal? In any case I’ve started saving … and hopefully ;-)
Regardless of the kit I can afford, I will continue to enjoy wildlife shooting: the experience, the challenge, the learning – improving with each outing – assisted by better kit and improved understanding of how to maximize the capabilities of the gear.
The reward for planning, patience and perseverance makes it so enjoyable. In many ways, it is the journey which is rewarding – the journey through travel, nature and wildlife experience, and the photography learnings – that is the key. There will always be the “if only” even with plenty of post-processing and better tools. But that is OK! That is in some ways what it is all about!


This guest post has been submitted by John Erik Ellingsen, an amateur wildlife photographer from the UK.
Here are simple steps to Get a stimulus check from the cash app. First you need to open your Cash app on your device and then tap on the “banking” option, you need to choose direct deposit then, the Cash app will require you to activate your Cash app card after that you will find and choose account and routing number, make sure you click on the link here to see the entire procedure.
www.cashapp-helps.com/blog/…-cash-app/
IAS conducts ISO Food Safety Management System certification in Singapore. The strategic auditing methods of IAS reduces the risks and identify opportunities with improves customers satisfaction and public confidence. ISO 22000 certification in Singapore is also known as Food Safety Management System (FSMS), ISO 22000:2018 certification. For certification +6531591803
I had pretty good success with my D7100 on safari. I divided the trip pretty equally between my own kit lens (70-300mm f/4.5-5.6G ED-IF AF-S VR) and an 80-400mm f/4.5-5.6 ED VR that I was able to rent from one of the resorts. While I enjoyed the extra reach of the rented lens, I have to say I was pretty happy with the results of the kit lens, and the nice low weight was pretty nice on a rover without much to lean on. When I look through the 3000+ images I took on that trip, I probably have just as many keepers from the cheap lens as I do from the $2000 one.
I’m hoping to go back in a couple of years, this time hopefully with a D850 on my hip, but I’ll absolutely be taking the D7100 along for the ride.
My “if only ..” path into wildlife photography was very much as the OP: D60 -> D90 -> D7100 all with AF-S 70-300 VR. Then it was time for first visit to Africa, and a proper telephoto lens – AF-S 300 f/4 IF ED. Plus a TC14, as there is never enough reach, and at least in Namibia light is not a problem.
What is a problem on game drives like those in Zambia is that you might come closer to the larger animals, like mammals and cats; changing your lens should not be an option. After trying the 70-200 f/4 + 300 f/4 combo of lenses on D7200, and loosing some photos while in process of changing lenses, it was time to get the 200-500 f/5.6. This one proved to be an excellent all-rounder for wildlife, anything from elephants in Sri Lanka to small birds in Slovenia. Its weight is just light enough to be easily hand-holdable, even for my wife. We must be lucky as our example does not need and AF Fine tune..
However, my safari experinces were all self-driving ones, where animals will decide how close or how far they will be … and mostly they were at the longer side of the zoom. Where off road game drives are executed by lodge vehicle you will come much closer to animals, and 70 mm will be often used. For such I would opt for 70-200 + 300 with TC14 permanently attached to the body, to prevent dust entering the camera while changing lenses on the field.
An experienced “What IF”….Not a Pro just a hobbyist from film days to the DSLR now Mirrorless. I went from Canon T2i to Sony A7s due mostly to it doing bracketed shots of 5 @ 3 ev for HDR but then found it to be the boss at Astro Milky Way. But like you on a budget had to use Canon Film Lenses and my T2i lenses using adapters for the few years it took to get some Sony lenses (and for Sony to make them). But then in camera stabilization with the Mark 2’s and the 42 MP craze. But if I had a trip like your taking the new Sony A7M3 and three lenses SEL1224G, SEL24240 and the Sigma 150-600 C. For all wide stuff including Astro the SEL1224 (dark sky there) and the SEL24240 can get you close and if you switch to APS-C mode you got 360mm. But the Sigma, yes a big bazooka, but with the included adapter to Sony you get AF (all kinds) (even above f/8) and also again if you switch to APS-C you also get more than a 1.4 teleconverter you get 225mm to 900mm and still get AF. Why do I bring AF into the subject because Canon and Nikon have a problem when going above f/8 with a lens and you will want to put that teleconverter on that 300mm or 500mm which will force MF. Also the more reach you will need more f/# say f/16 because DOF gets narrower and you want a whole animal or bird in focus. Ok some help using the Sigma, get a very strong binocular harness and hook to the lens mount and carry a shooting pole that has a trigger extender from a gun store or Wally World. Also they make Photographer vests with a pocket just for the lens. Also when changing lenses out in the field use a clear plastic kitchen garbage bag put several in the back pocket of your vest. You can use the 2x teleconverter with the Sigma but you lose AF. I learned all this from trying to capture Hummingbirds. Last you may have some great Nikon glass an inexpensive adapter and you can use them all. I used a 2x teleconverter with a Canon FD 100-300mm f/5.6 l for sometime (would have collected dust if not for Sony and the M2 camera made it even better) before the Sigma for birds and other things.
But you alway have to look at the best bang for your buck and that you have done for sometime but Patience pays off while we hone our skills.
Using a TC with a zoom lens rarely yields a sharp image. Nikon, Canon, and others have provided AF Fine Tune (or similar named feature) to address the sample variety that is standard among all camera equipment. But, it is a single adjustment. And, this single adjustment is impacted by focal length and distance to subject, to a lesser degree – which means the adjustment is worthless for zoom lenses as you can make one end slightly better (at one distance) but the other end will be completely useless. AF Fine Tune is great for dialing in a camera + prime, or camera + prime + TC, when needed. In my experience, with many top tier primes, and all three of the most current Nikon TCs, the combos with TCs always benefit from AF Fine Tune.
Thanks for your article — in regard to gaining more reach for a reasonable price, don’t overlook the Nikkor 80-400. It’s very sharp for a zoom — less than 11 inches fully extended — and with your crop sensor a virtual 600mm without the huge size & expense.
I didn’t find the 80-400 all that sharp. The 70-200 f/2.8 or f/4 is sharp for a zoom. The more recent 200-500 isn’t as sharp as the 70-200s, but is, at least mine is, sharper and more useable than I found the 80-400 to be. YMMV.
Good Article!
Hi John Erik,
I look forward to working with you on planning your trip to Zambia next year.
This is a very interesting discussion on the merits of the costs, versatility and portability of camera gear. You are wrestling with the same decisions that many photographers do. It is certainly true that a baseline level of camera kit is required to achieve certain photographic goals; wildlife photography is one of the more challenging, often requiring long reach, fast apertures and high megapixel sensors. However, once that baseline level of kit has been reached, it is often the case that getting out there and using the kit, day after day, and in as many situations as you can will yield the best results. Once you have decent kit, I would definitely say that an extra 2 days on safari with “current kit” is more valuable than cutting short your trip in order to afford a better lens! Time in the bush is valuable on safari.
But where does the line of “baseline requirement” lie? That is very hard to say and depends on each person’s hopes and expectations. Based on what you talk about above, and using the Nikon range for examples, I would suggest that the D7XXX range offers excellent results for a manageable investment. You get good reach, from the 1.5x crop factor, excellent megapixel count and good frame rate. Nikon’s AF system in modern cameras is outstanding. So, with your D7200, you are on the right track!
With respect to lenses, I strongly recommend both the 300mm f4 and the 200-500mm f5.6 for wildlife photography. The prime will be sharper – of course – and much lighter (in fact, the new version is incredibly light), but lacks the reach of the zoom. With a cropped-sensor body (such as your D7200) you will get 450mm effective reach with the 300mm f4. This is good but you will always be glad to have more! Add to this the fact that if you choose to buy a full-frame camera in the future, you may find the 300mm f4 too short for wildlife photography. For this reason, I would suggest that the 200-500mm is the best bet for wildlife of these two lenses. Certainly I would recommend it more than relying on a 1.4x teleconverter with a 300mm f4 which requires lens changes and dust problems.
The only negatives of the 200-500mm are the f5.6 widest aperture, and the zoom ring which requires two or three hand turns to go from 200-500mm. (Not 2 or 3 full turns of the ring, but you have to remove your hand and twist again.) These are small issues in my opinion and I would still recommend the lens highly.
Other options to consider are Sigma’s 150-500mm range and also the new Tamron 150-600mm lenses. They are neither as sharp as the Nikon’s but the results are good in real-world use.
All the best,
Edward
I think there are many comments here that my own experience bears out.
I’ll add one more – the dirty secret that few want to own. The need for good support and developing the skills to maximize what you have.
Without question, in my experience, good support and developing proper long lens technique was the key to maximizing what my gear was capable of. The D7200 is a solid camera and until you are hitting it’s edges I wouldn’t worry about upgrading it. In my three trips to Africa, most shooting was done on a tripod (my choice) with a gimbal head, or on a bean bag. I’m very comfortable shooting with either.
Saving for the ideal tripod and choosing wisely will save you in the long run, but doing well in this area isn’t cheap. A good tripod setup will last and serve well if you take care of it. I’m fortunate to have been able to learn from my early tripod mistake choices, although the very first real tripod I got still serves me well – an old Bogen 3036 aluminum tripod. It is big, heavy, very adjustable, and it’s best feature can be very tall – ideal for shooting birds even with them. That said, this is not a tripod I travel with, but it works great from a vehicle, or in my backyard. Best $150 I ever invested in a tripod. I used it this past weekend to capture a Starling parent feeding a juvenile, capturing the moment just before the parent shoved it’s beak full of grubs and spider into the yawning gape of the baby bird. I was up on a ladder, and had the tripod at full height, allowing me to be even with the birds.
Develop the skill, at home, to maximize what your gear is capable of, so when you are in a more exotic place, you can focus your attention on the critters, not fight the gear.
There was a point where I wondered where you were going with this article, but I whole heartedly agree with your closing remarks. There will probably always be an “if only…”, and while there’s nothing wrong with attempting to reach for it, the secret of enjoying your photography is to make the best of the kit that comes to hand. You have certainly shown us that good results can be had with equipment that might not be the latest and best, something that is too often forgotten!
Thank you David – I will certainly continue to enjoy it – whilst always dreaming of better gear ;-)
What a great article packed with good photographs and with an intelligent, ‘real world’ discussion about equipment and the associated dilemmas.
Thank you David