Mention the phrase “HDR photography,” and you will definitely get some cringes. HDR is one technique that you either love or hate. Fortunately for me, I have been using this technique to create many of my images ever since I picked up a DSLR, and it is a tool I definitely have grown to appreciate. Personally, I love taking photos during sunset and sunrise, which means most of the scenes I encounter are of extreme contrast and therefore high dynamic range. Depending upon the shot, it can be nearly impossible to create a tonally balanced image without doing HDR photography of some kind, although there are many different methods of blending exposures with different results, some more natural than others.
When learning how to create HDR images, most of us probably started off using HDR software. Combining multiple exposures and tone-mapping take only a few minutes and we are often impressed by the result because the image simply pops. While this is all good, it is also the reason why HDR photography has a bad reputation. HDR software merges multiple exposures automatically and the tone-mapping algorithm often creates a visual effect that seems “out of the world.” Even though we have control over how much adjustment to apply, it is easy to go overboard and end up with an image that looks distastefully unnatural.
If you enjoy HDR photography as I do, then you should know that tone-mapping is not the only way to create HDR images. Instead of relying on mathematical equations to do the work, you can create HDR images manually. That process is known by the more general term of exposure blending. Don’t be put off by the word “manual”; it simply means you take control of how you like your exposures to be merged and image processed. Blending exposures manually also help to train your mind to think how you can create your image more creatively. In this article, I’m going to show you how to blend exposures in 7 different ways. It is useful to know all your options because not every photo should be post-processed the same way; this way, you have the tools to deal with any high dynamic range scene mother nature may throw at you. Some of these blending techniques may also be used in composite photography. I have listed them below from the easiest to the most technically challenging.
Table of Contents
What You Need For Exposure Blending
- Multiple exposures of the same scene, preferably shot using a tripod.
- Image editing software that supports the use of layer masks (e.g. Adobe Photoshop).
- Computer mouse.
You may wonder if you need a tablet such as a Wacom tablet. Personally, I think it is not essential. It is useful to have one because you can make use of the pressure sensitive stylus for blending. Having said that, you can certainly do without it. Apart from that, you should know how layer masks work. All the blending techniques I’m going to explain here are basically layer masking. The difference with each technique is how to create the selection to mask.
Assumptions
I’m using Adobe Photoshop CC 2018 for the purpose of this tutorial. Not to worry if you are not using the same software. All the steps I’m going to demonstrate here are generic. This means if you have a software that supports layer masking, you should be able to follow the principles to replicate the result.
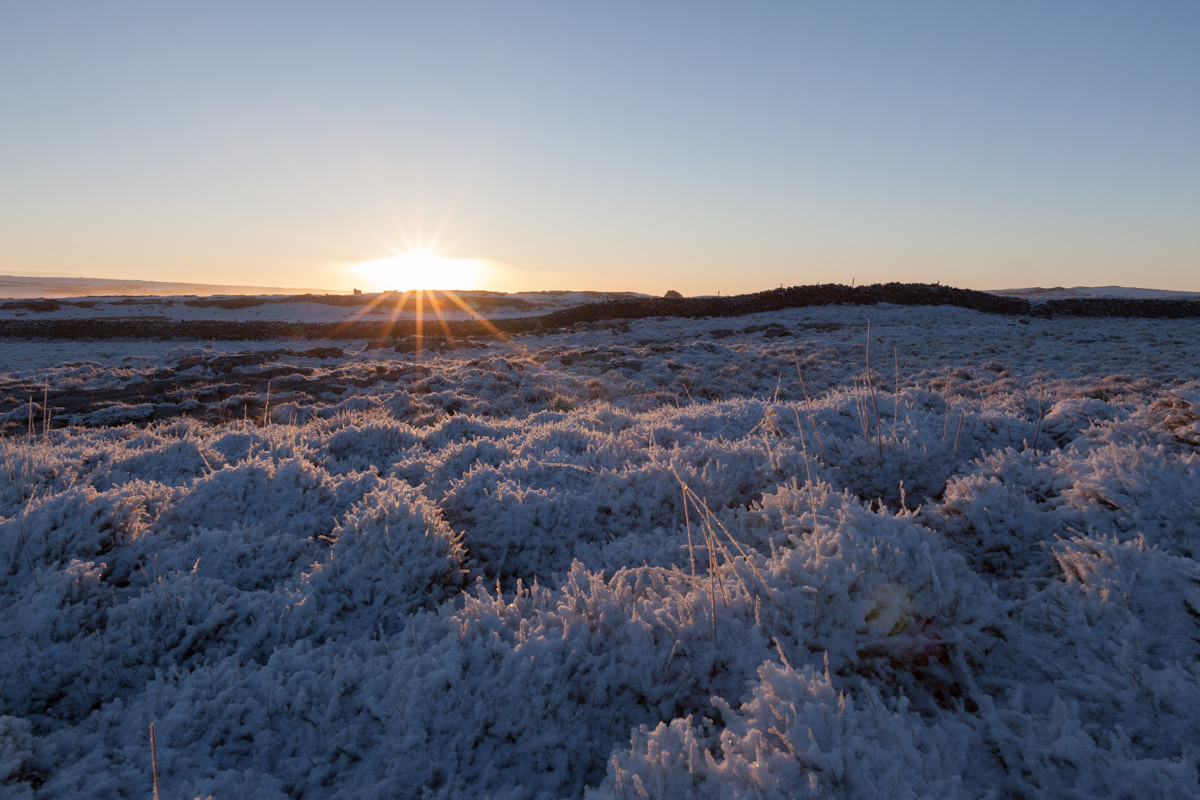
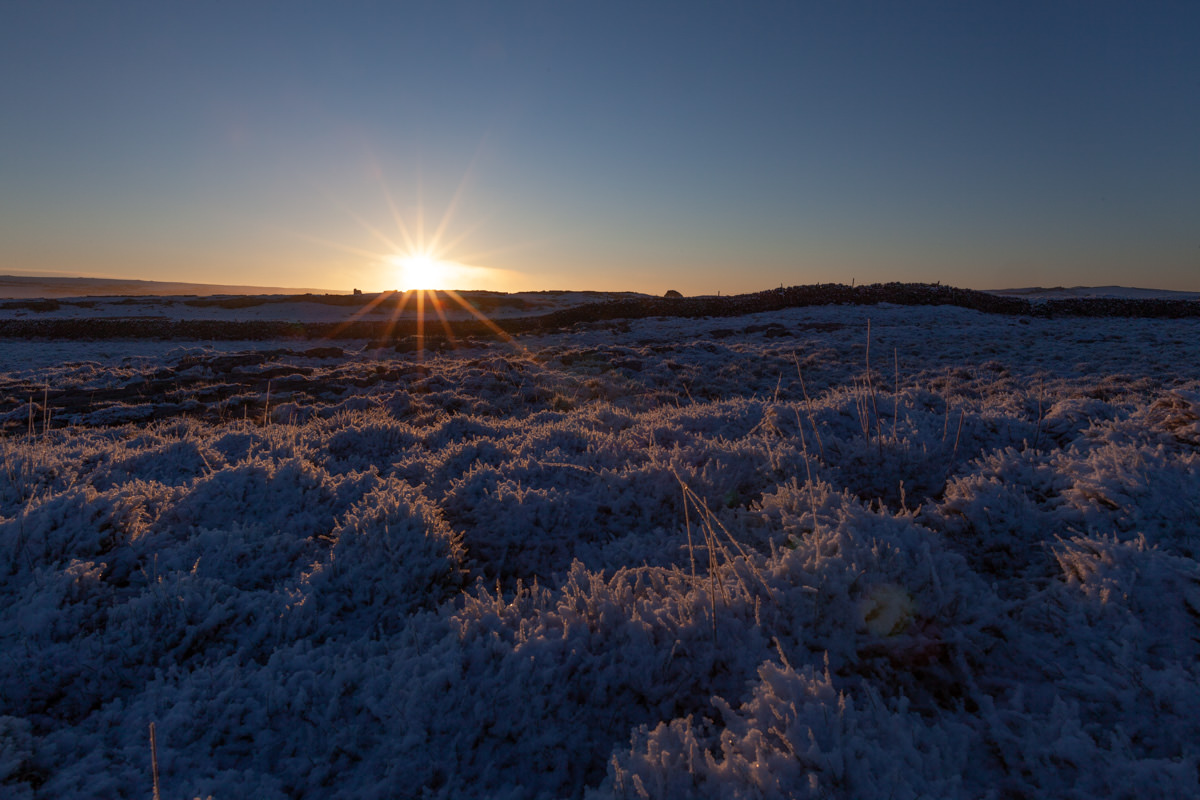
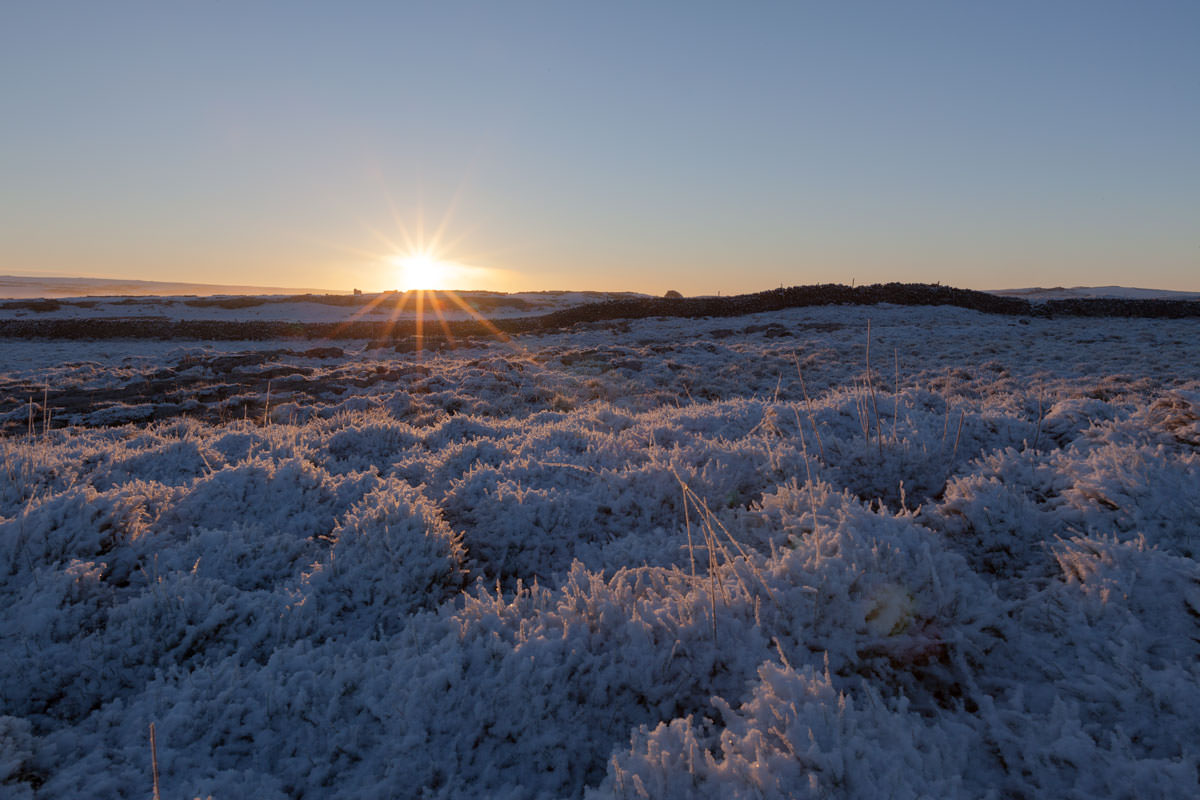
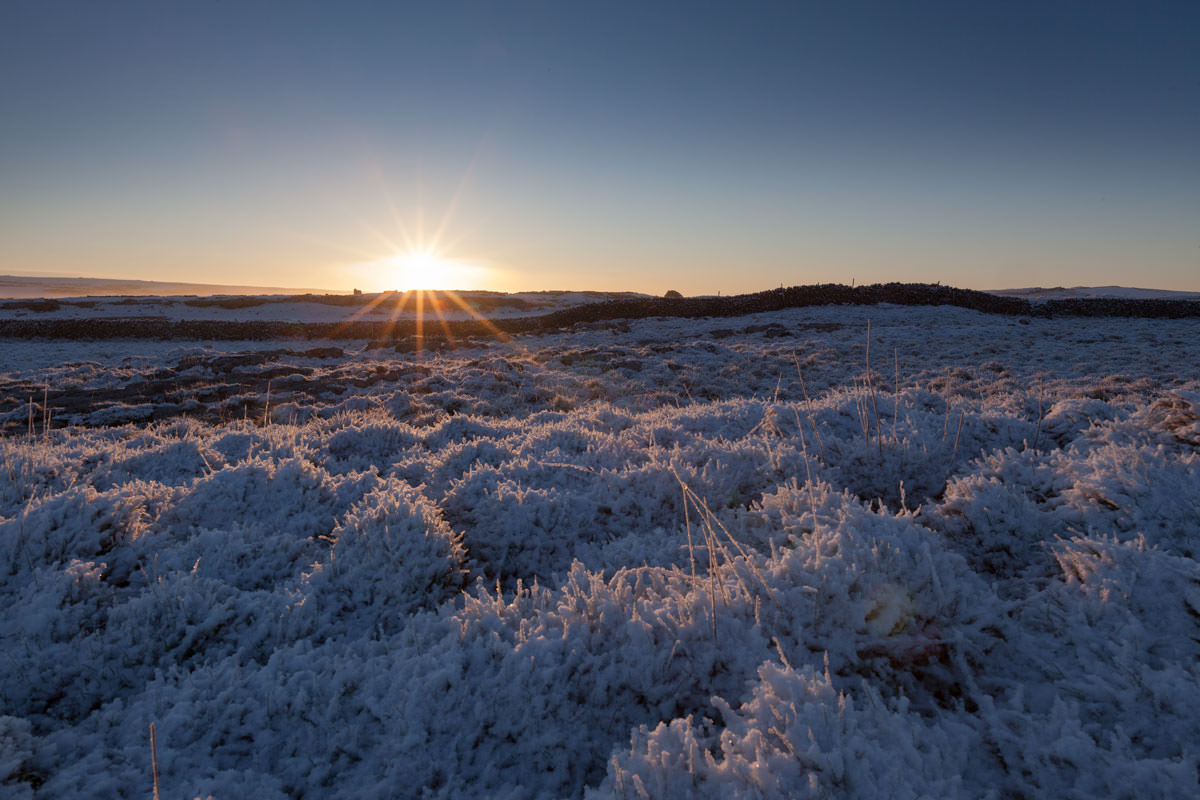
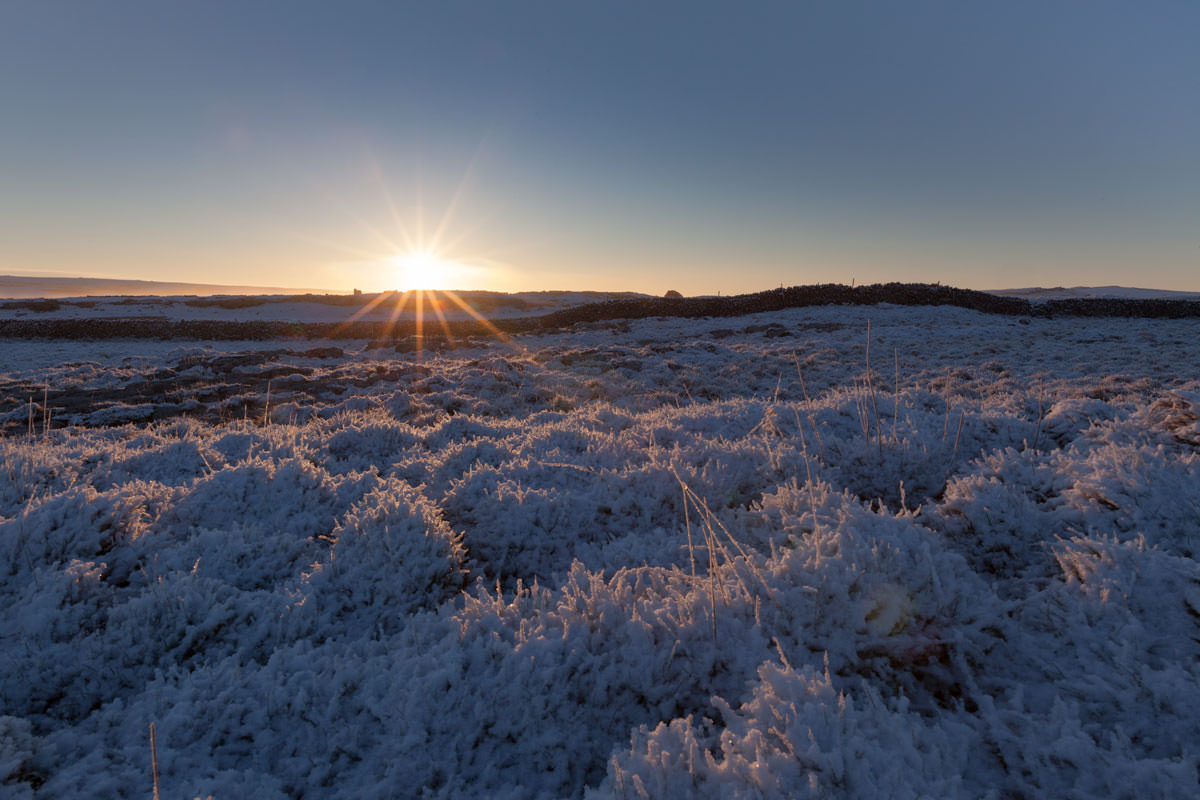
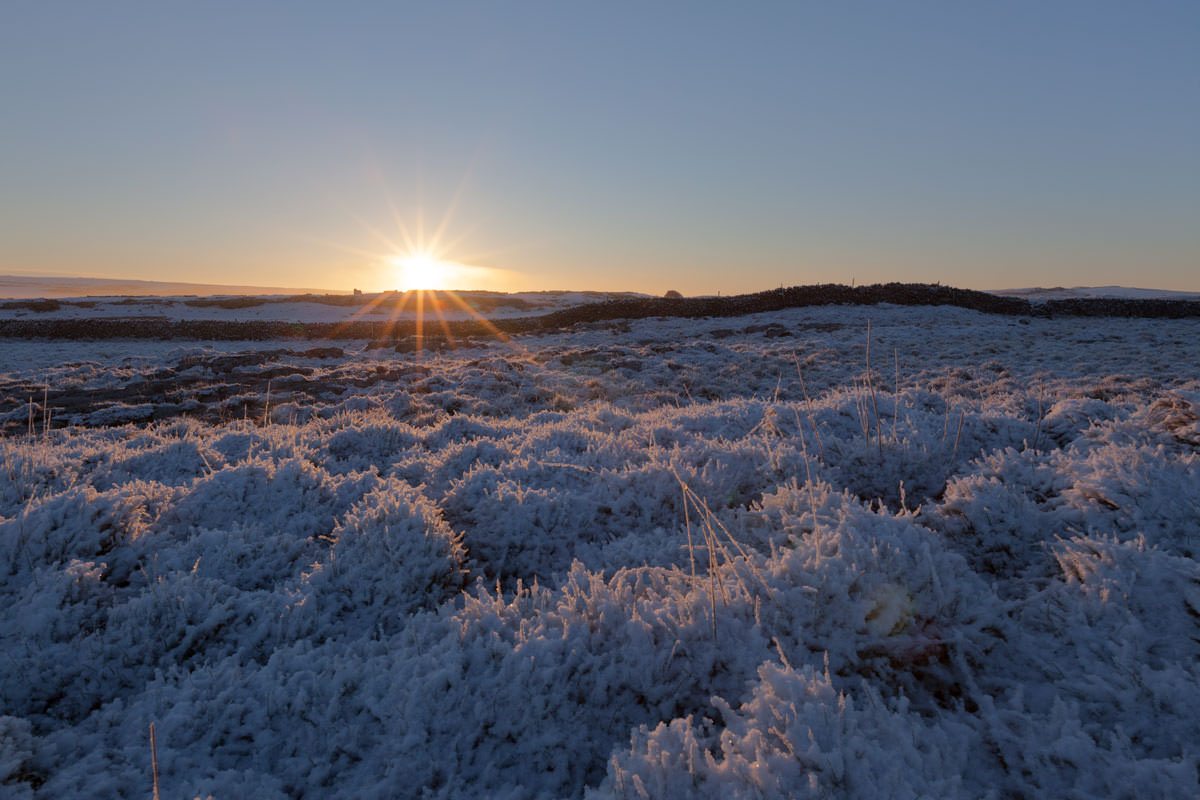
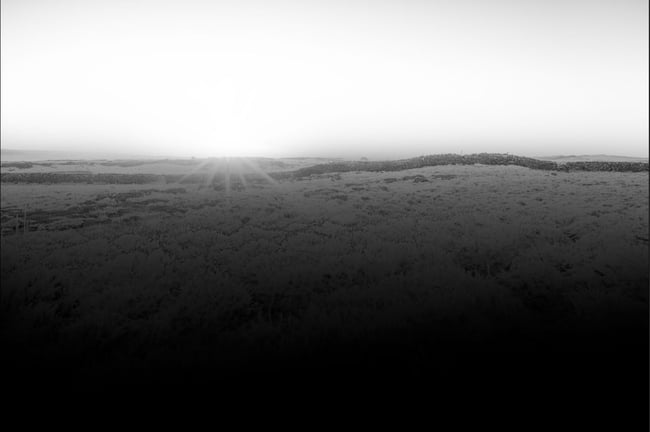
As all the blending techniques are based on different ways of masking layers, I’m going to assume you already have a sound knowledge of basic layer masking. Finally, to ensure we are on the same page for all the examples given below, assume there are 2 exposures of a sunrise image with the darker exposure on top of the brighter exposure.
1. Instant Blend
I came across this one in the Luminous Landscape and I have to say it is the easiest of all techniques explained here. It essentially involves copying the bottom layer and paste it on the layer mask of the top layer. You can use this to blend any kind of images. Although it is quick and simple, it may not always deliver good results.
To blend your images instantly, first, add a white layer mask to the top layer. Next, Cmd/Ctrl click the bottom layer to select the whole image. Then, Cmd/Ctrl C to copy the selection. Pay attention to the next step because it doesn’t work if you don’t follow exactly what I’m about to tell you. Now, Opt/Alt click on the layer mask of the top layer and Cmd/Ctrl V to paste the selection on to the layer mask. You should now see your images blended already!

2. Apply Image
On first sight, it may look similar to instant blend but the method behind is actually more sophisticated. Similar to the technique above, the blending is all done for you by the software but with more promising results than Instant Blend.
After applying a layer mask to the top layer, ensure the layer mask is clicked to select it. Go to the main menu and select Image and choose Apply Image. The images blended instantly and a new panel pops out with several drop-down menus for you to choose. By default, Layer is Merged, Channel is RGB and Blending is Multiply. I recommend keeping the first and the third as it is. In Channel, you can experiment with the individual RGB channels to see if the image blends better. In this example, I chose Blue because blue is the predominant color in the image and it does make the blend looks slightly better. Click OK once you are done.
3. Gradient Mask
Gradient Mask works in a similar way as a graduated neutral density filter. The ideal image to use with this technique is one where the horizon is in a relatively straight line. If there are objects such as mountains or trees crossing the horizon into the sky, then it may not be blended properly.
First, select the Gradient tool from the tools panel. In the options menu above, ensure you select the Linear Gradient with foreground set to white. Now add a white layer mask to the top image. You are going to use the gradient tool to draw a vertical line on the layer mask. Do so by click, hold and drag the line down to where you want it to end. The length of the vertical line is the transition. Above the line will be all white and below the line will be all black. Personally, I would start the line from halfway into the sky and draw it halfway into the foreground. This creates a long and smooth transition to allow the images to blend more naturally. Experiment with the length of transition to see what you like. A useful tip is to hold down Shift to make sure you draw a straight vertical line.


4. Free Hand
The name itself is pretty self-explanatory. There is no selection to make here. All you do is paint on the layer mask of the top layer with either a black or a white brush, depending on whether you have added a white layer mask or a black layer mask. This technique is suitable if the images you want to blend have a relatively straight, non-complex horizon. Comparing this to the Gradient Mask, it is more tolerant of objects crossing the horizon as you can paint around it. This is also the case where it helps the most to have a tablet rather than a mouse, although you can do it successfully either way with enough care.
After adding a white layer mask to the top layer, select the Brush tool, set 100% opacity to begin with, 0% hardness, color to black and size to fairly large. You want to make sure the layer mask of the top layer is selected. Now paint black on the foreground and halfway into the sky. Switch the brush color to white and opacity to 50%. Now paint white from the sky to halfway down the foreground. Switch the brush to black again and opacity to 40%, paint from foreground to halfway into the sky. Repeat this process by switch the color of the brush while reducing opacity by 10% each time until you get to 10% opacity. By now, the transition from sky to the foreground should look beautifully smooth.

5. Color Range
This is a pretty neat technique to use if the areas you want to create a selection are in similar color. Unlike the blending techniques explained above, the transition in the image can be complex as long as the colors are relatively uniform.
As you are going to use color range to create the selection, you don’t have to add a layer mask first in this instance. From the top menu, go to Select and choose Color Range. A new panel pops out at this point and by default, your image turns into grayscale for you to visualize the selection. In the drop-down menu at the top of the panel, choose Sampled Colors. Use the eyedropper tool to click on a color in the image you want to create a selection on. Once you have clicked, the grayscale image will change to reflect the new selection based on the color you have chosen. You can repeat this as many times as you like until you are happy with the selection. Use Fuzziness to change the feathering of the selection and Range to change the intensity of the selection. Hit OK when you are done and you will see marching ants. Click on the top layer in the layers panel and add a layer mask. This will create a mask based on the selection.
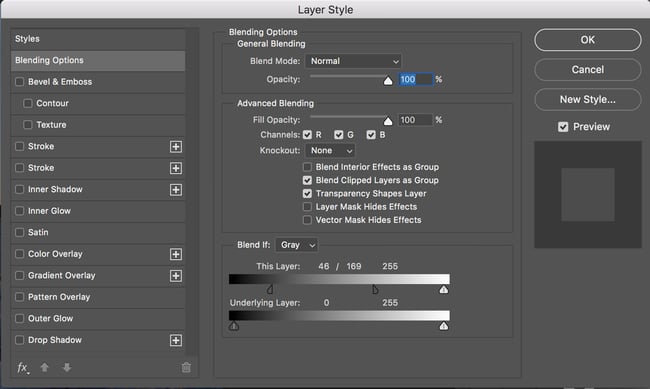
6. Blend If
This method is a bit more technical and can take some time to understand how it works. But don’t be put off by the learning curve because it is one of the quickest ways to blend images and it allows you to fine-tune the blend. You can use this technique in images with any kind of horizon. However, it works best if there is good tonal separation. This means when you look at the histogram, you can see a good distribution of pixels in the shadows and highlights instead of all in the midtones.
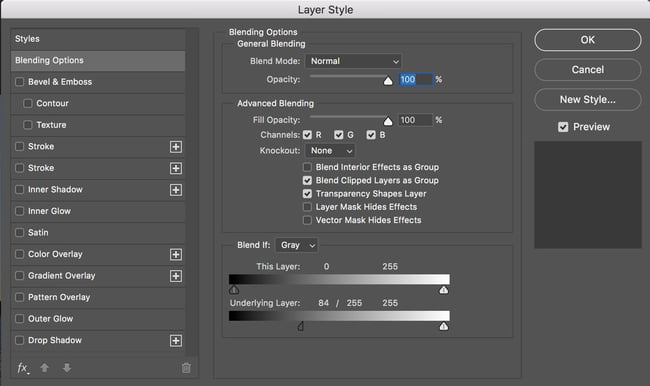
To blend with Blend If, you must always work on the top layer. To begin, double-click on the top layer. Make sure you click on the empty space instead of the words or the icon. You should now see the Layer Style panel. By default, the Blending Options is selected with its menu displayed in the panel. At the bottom, you will see Blend If. Immediate to the right, there is a scroll down menu with Gray selected – keep that as it is. Below it, there are 2 sliding adjustments, one for This Layer and one for Underlying Layer. Let us start with This Layer.
This Layer affects the top layer, the layer you are working on. Note there is an arrow on each end. The left arrow is for the blacks and the right arrow is for whites. If you move the arrow for blacks to the right, the blackest blacks will start to disappear from the top layer. In other words, pixels to the left of the black arrow will be transparent and pixels to the RIGHT of the black arrow will be visible. If you move the arrow for whites to the left, the whitest white will start to disappear from the top layer. Pixels to the right of the white arrow will be transparent and pixels to the left of the white arrow will be visible.
The Underlying Layer adjustment affects only the layer underneath without affecting the top layer. If you move the black arrow to the right, the blacks in the layer underneath will be revealed. Conversely, if you move the white arrow to the left, the whites in the layer underneath will be revealed.
If you feel the changes are too drastic when moving any of the arrows, you can split each arrow into 2 for more subtle and finer blend. By holding down Opt/Alt and left click on one side of the arrow, you are able to move only half of it. You can first move this half towards the direction you want before moving the other half to complete the blend.
Image blended with Color Range. The contrast in the sky looks slightly imbalanced because the color in the sky is not entirely uniform. I could have added more color by holding down Shift while sampling color with the eyedropper tool. But doing so includes part of the foreground into the selection which I didn’t want.

7. Luminosity Masks
For those who are not familiar with luminosity masks, it creates selections based on the brightness value of the pixels. It is impossible to explain everything about luminosity masks in a few paragraphs so I will deliver the key points only. If you have never heard of luminosity masks, I hope this sparks an interest in you to explore the topic further. As simple as it may look from the outside, luminosity masks can do a lot more than just selecting bright pixels. You can customize the mask to select pixels of different brightness, reverse it to select dark pixels and even do cross selection to create a highly targeted mask. Luminosity masks is my go-to method when other methods don’t work. You can use this technique to blend literally all kind of images.
Instead of explaining each step of the process, I shall walk you through the workflow of blending with luminosity masks instead. To blend the example images given here, I first select the bottom layer because I want to create the masks based on the brightness of this image. Looking through the luminosity masks, I know I’m going to select one of the bright masks because I want to blend the sky in. I routinely use painting a mask technique, which means I first add a black layer mask to the top layer, select a bright luminosity mask and load the selection on to the black layer mask. Then, I use a white soft brush to paint the sky back in from the darker exposure. Sometimes the blend can look a bit awkward when there is a big gap in exposure value between the 2 images. When that happens, I use the painting method explained in Instant Blend to create a smooth transition.

Conclusion
Naturally, when we are given multiple choices we tend to want to stick to the best option possible. My aim is always to blend images in the most efficient way possible, and I use any technique that can achieve my goal. After creating HDR with exposure blending for several years now, I know which techniques work best for me I often go straight into it. Having said that, sometimes I do have to experiment with a few methods before I’m satisfied with the result. So, I think the key to blend images successfully is to know all your options, experiment with them, and take your time to find the ones that you prefer.
Usually, I do not read article on blogs, but I wish to say that this write-up very pressured me to try and do so! Your writing style has been surprised me. Thank you, very nice article to learn how to shoot.
This is informative post.
Thankyou for sharing this via point to point.
We are QuickBooks certified Proadvisors and provides best technical support for QuickBooks Pro & QuickBooks Premier. Feel free to contact us at QuickBooks Premier Support Number +1-800-9697370.
Am I right the dynamic range of “the camera” is enhanced by 2 stops (1/25, 1/100)? At least in the same way a gradient ND filter 1:4 would enhance “the camera”. You see I circumnavigate the term “sensor dynamic range” here :)
And am I right you don’t need said gradient filter any more, if you took always 2 – or three, or five – exposures? … Huh, and it works with jpg (quite) as well!
Do correct me if I’m misinterpreting your question. The dynamic range of the camera/sensor is fixed. With an ND filter, what you’re doing is actually compressing the dynamic range of the scene to fit that of your camera.
I wouldn’t say you don’t need GND anymore. Personally, I think it all depends on your shooting style. Some like to get it right in camera by using filters, some (like me) prefer to bracket exposures. Each has its pros and cons, and there is no right or wrong either way.
You omitted the most quick and dirty blend. Drag the dark layer on to the light layer. Select the bottom layer and do a luminance selection ( cmd-opt-2 on a MAC). Select the top layer and click the layer mask icon and all the good highlights from the dark image are instantly blended into the lighter image. From there you can paint with a black or white brush to adjust the blend as you wish. One option is with the luminance selection. You can select cmd-opt-2 0r 3 or 4 or 5. Each number will produce a different highlight selection and you can use the one that best suits your image.
From your description, it sounds like a combination of Instant Blend + Luminosity Mask? Do correct me if I’m wrong.
Hey thanks for the article! Are you able to give any suggestions as to how one can best blend an image when there isn’t a nice clean horizon? For example, I took a picture under a pier (bracketing of 5 different exposures). Ideally, I want to use one image for the sky (vibrant colours) and another for under the pier which required a longer exposure that make the sky to lose colour and waves to be too long of an exposure. Thanks!
Hey Andrew, it’s difficult to make any suggestion without seeing the images. From what you have just described, you could potentially use blend if, apply image or luminosity mask. Personally, I go for luminosity mask and the only reason is because I use it regularly and I know it will definitely work.
Thank you for the instructive article…
I have my ways of blending and will have a look how these fit in…
Must say the dynamic range of sensors have improved in a sense that i need exposure belnding a lot less than 10 years ago…
regards..
Pieter Kers
The dynamic range of sensors are definitely better but I feel blending still has its own place. I would be intersted if you could share your blending methods!
Thank you for explaining the steps. I would be interested in seeing a comparison to a quick and dirty one exposure (for the highlights) with lifted shadows.
That’t a great idea for a new post! I think it depends on how much shadows/highlights you have in the image and how far towards the left/right are these on the histogram.
It could just be my personal experience, but most of the HDR images I encounter on the web are horrible.
Personally I like using Nik Creations from Google.
Cheers,
Nik is a great software. Viveza is the first software that I came across with the ability to apply local adjustments via radial filters.
I’ll confess, I cheat. My first real camera was an a6000 that’s ISO-invariant and with terrific dynamic range, and then I moved to a D750 and now a D850 (not really ISO-invariant, but stunning anyway). I use CaptureOne and its super easy HDR sliders (one for highlights, one for shadows) and I’ve been pleased with the simplicity for my own purposes, and my few clients haven’t minded the simple method either.
For example: D750 – www.flickr.com/photo…409386016/
a6000 – www.flickr.com/photo…563012968/
Same–since upgrading from a D70s to a D7200 last year I find myself still taking 3-photo brackets on location, but invariably once I’m home I end up with the best results from just boosting the shadows in Adobe Camera Raw. The dynamic range of modern sensors is just staggering, and produces a far more natural looking result than any blend I attempt in Photoshop/Nik Collection for far less effort.
Good Matt, I’m glad I’m not the only one! Sure, I could do better, but I’m an enthusiast, not a professional, and I’m pleased with what I get. I read a recap of a tour with Marc Adamus and the reporter was using a D800 and Adamus a D810, and Adamus was convinced that ND Grads or bracket blending wasn’t necessary anymore. I rather like the simplicity of that approach!
“I’m an enthusiast, not a professional”–exactly the same. If I’m out with the camera I’m probably out with the kids, and so haven’t got time to set up the ND filters or tripod, and if I’m home post-processing, I’ve probably only just got said kids to bed, so haven’t got time to spend hours fine tuning one image. I’m not selling prints, I’m doing it for my own satisfaction, so 90% of the result for 10% of the time is a good deal as far as I’m concerned!
I absolutely agree that cameras these days have much better dynamic range. But in my experience, I think blending still has its place. I find myself merging less bracketed exposure these days and as you said, Matt, I use a single exposure whenever I can. But when the dynamic range of the scene only just fits into the usable dynamic range of my camera, I find image noise in brightened shadows. Blending, in this instance, would create a clean and better quality result. Another thing I realized is that, the result from recovering details in highlights with Highlights adjustment is very different from blending in a correctly exposed highlights. The latter has far better tones and details. Also, for those who have a camera that doesn’t have quite the superior dynamic range, blending remains an option to overcome the limitation of the camera.
I agree Yaopey, I’m sure there’s a place. I just haven’t had to find that place for myself yet. We live in wonderful times for photography.
It is not the best sample image to illustrate all pros/cons of all methods
Ideally I like to have other images to illustrate each methods. But my aim here is to compare the result of each method and using a single image allows the comparison to be consistent.