Our perception of any piece of technology is greatly influenced by it’s ease of use and overall user experience. For example, when I bought my first DSLR, my decision came down to Canon vs Nikon. I tried Sony, Pentax and Olympus and didn’t like them for one reason or another, but I knew that I could be happy shooting with either Canon or Nikon. How did I finally end up making my decision? The menu system. I preferred Nikon’s menus and navigation over Canon’s, so I bought a D40. Now, eight years and tens of thousands of dollars later, I’m still a Nikon guy, all because of the difference in menu design.
In this article, I’m going to share a few simple tricks that I’ve picked up over the years that make using my Nikon a little bit easier. To some of you, these might be completely obvious and old news, but to others they might very well change the way you view and use your camera!
All images shown are from the D800 menu. Your menu may look a little different.
Table of Contents
1) Formatting Memory Cards
If your camera has two memory card slots, you’ll usually want to format both memory cards before you start shooting. Back in the days before I learned this trick, here’s how I used to format my memory cards: format my primary memory card, turn off the camera, take it out, turn the camera back on, format my secondary memory card, turn off the camera, put my primary back in, turn the camera on and then start shooting. Do you format your memory cards this way, too? Well, time to stop it! Here’s a much faster and easier way to format both memory cards without ever having to turn your camera off:
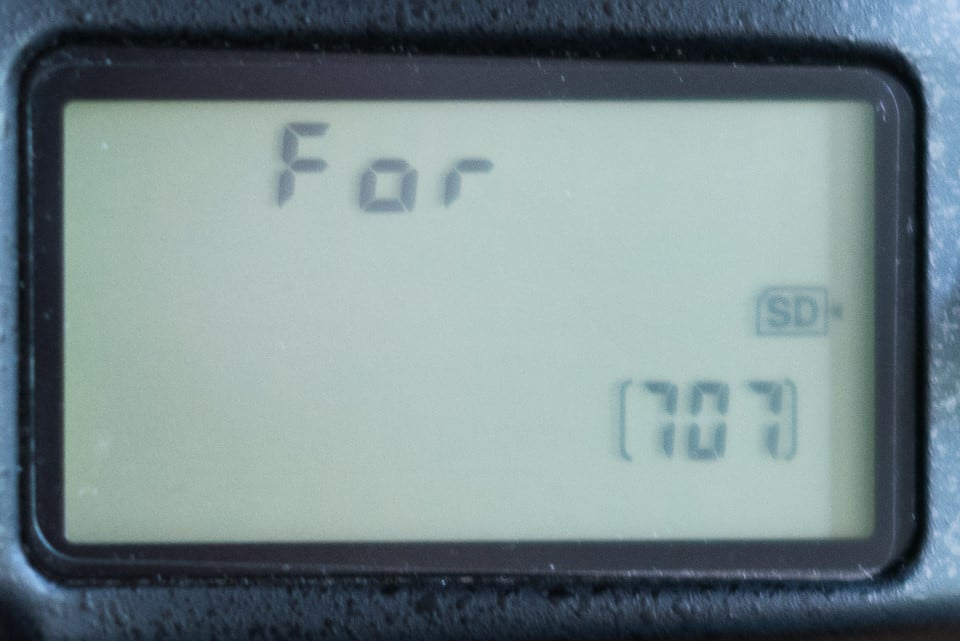
- Hold down the two buttons marked as “Format” in red to format your card.
- Notice that on the control panel (top screen), one card is flashing. This is the card that you are about to format.
- Go ahead and format that card by pressing the two buttons again.
- Now, hold down the two buttons to format your card. Notice the same (primary) card is still flashing.
- Turn the command dial (rear wheel) one click. Notice that the card that’s flashing has changed to your secondary card?
- Go ahead and format that card.
- That’s it! Now both of your cards have been formatted in about half the time as the old way.
Why you should care: Saves time and decreases how often you have to remove/insert memory cards
Should work on: any Nikon DSLR with two memory card slots
2) Quick Image Scrolling
Have you ever looked on with envy as Canon users quickly scrolled through 10 images at a time while reviewing their shots from the day on the back of their camera? I have too. Although it’s not as elegant, I found a solution for quick image scrolling on Nikons:
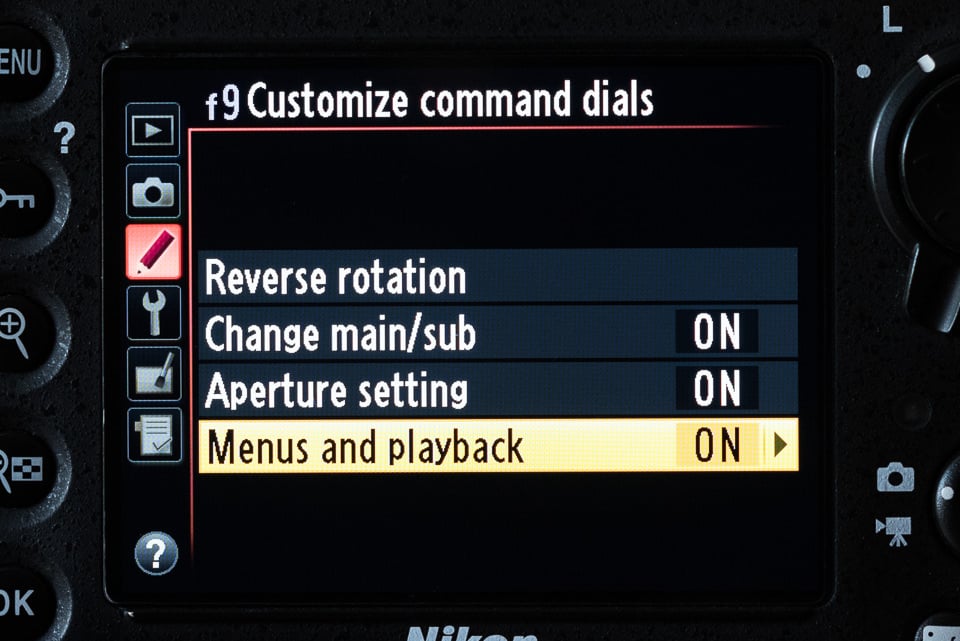
- Go into Custom Setting Menu > Controls > Customize Command Dials > Menus and Playback
- Choose On
Now when you’re reviewing images, you can zoom out to the thumbnail view and quickly scroll through using the sub-command dial (front wheel).
Why you should care: Saves time when reviewing images in-camera
Should work on: Any body
3) Buffer Indicator
This one is super simple and is just an act of observation. No need to change any settings at all!
Have you ever noticed the number in the lower-right corner of your viewfinder and in the lower-right corner of your control panel (top screen) that looks like this: [r16]? If you don’t know what I’m talking about, grab your camera, make sure there’s a memory card in it, and press the shutter button halfway down like you’re focusing. Look in your viewfinder or on the top screen and you’ll see it appear when you press the button. Your number will probably be different, but you get the idea.
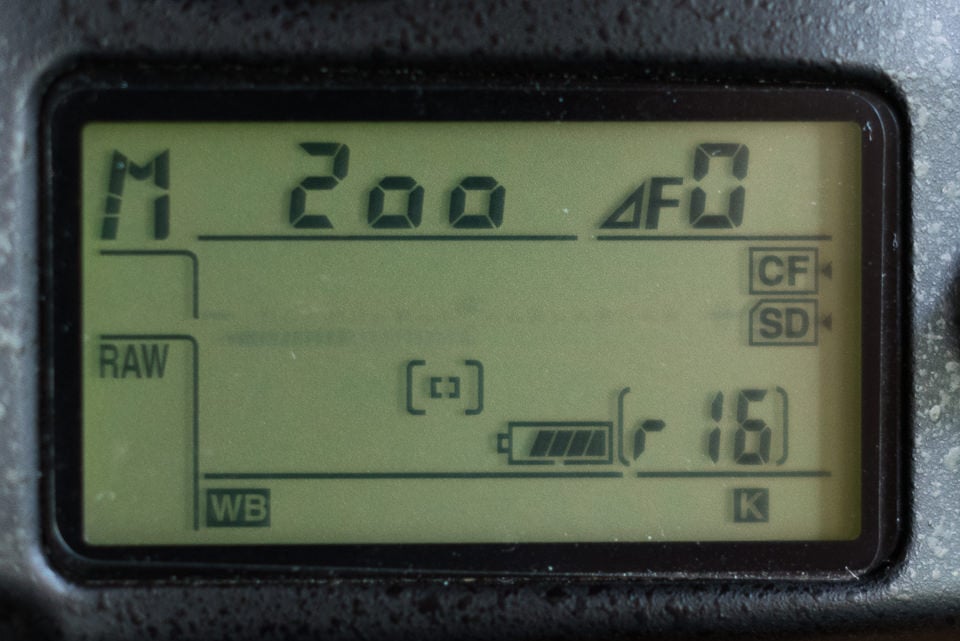
Do you know what that indicates? It’s the number of shots remaining in your buffer. For the longest time I had no idea and couldn’t anticipate when my buffer was going to fill up. Now, when I’m shooting bursts of images I keep an eye on that number and know when I’m about to fill my buffer. If I happen to fill it up, I also can see when it starts to empty so that I can start shooting again.
Why you should care: Decreases likelihood of missing shots due to a full buffer
Should work on: Any body
4) Quick Button
One of my favorite features of all Nikon DLSRs I’ve owned is the My Menu feature. If you’ve never used it, here’s a quick summary of what it is. Basically, you can create your own custom list of options from the different menus available in the camera, up to 20 items. I add a few of the top things that I frequently use and don’t want to have to search through menus for (Battery Info, Self-Timer Settings, Virtual Horizon, Time Zone, Auto ISO and Date).
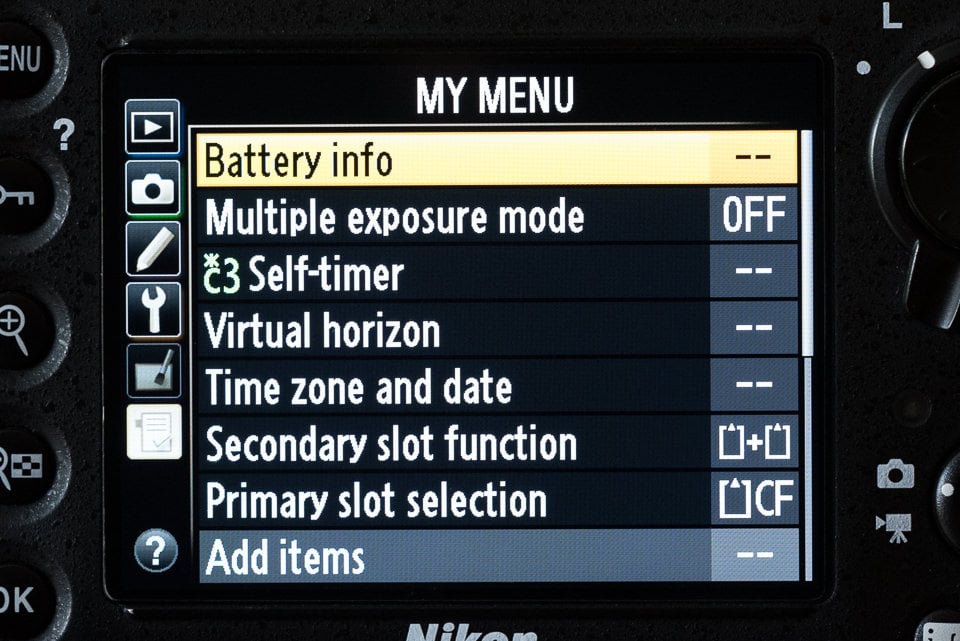
To set up your “My Menu”, just go into the Menu screen and scroll through the menus on the left until you get to “My Menu”. From there you can add items and organize it.
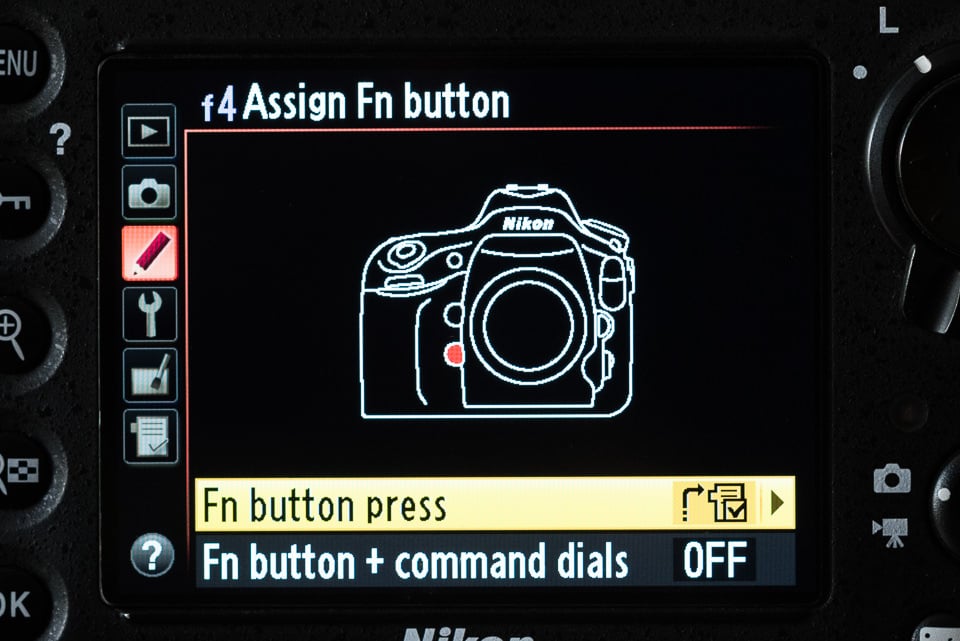
Now, once you have your My Menu set up, here’s the real trick for quick access. You can set up the Preview or Fn button on the front of the camera to access My Menu. Now all of your most frequently used menu features are available at any time with the push of a button! Here’s how to make this happen:
- Go into Menu > Custom Setting Menu > Controls > Assign Fn (or preview) Button > Fn (or preview) Button Press
- Some cameras may have the option for >MY MENU while others may only have > Access top item in MY MENU.
That’s it! Just choose which button you prefer to access My Menu and your most used menu items are at your fingertips.
If you only have the option to access the top item in My Menu, not a problem. When you access the top item by pushing your chosen button, simply arrow to the left and you’ll be in My Menu and will have access to all of your other My Menu options.
Why you should care: Immediate access to your most-used menu options
Should work on: Most high-end Nikon DLSR bodies
This is one trick I wish I had learned about years ago. Sometimes when I second shoot weddings with other photographers, they want me to use different camera settings than I typically use for myself. I’d find myself changing settings like white balance, image quality and which card was my primary before the wedding and then have to remember what I changed and change everything back before I started shooting for myself again.
Once I discovered Shooting Menu Banks, my life changed for the better. What are Shooting Menu Banks? Basically, you can save the settings for your camera in a Bank (you can even name it so that you remember what it’s for). For example, here are the changes my body makes when I select my “2nd shoot” Bank: changes to Auto White Balance, records images as M-Fine JPEG to the primary card and RAW to the secondary card and changes my primary slot to my SD card.
As the name suggests, the Shooting Menu Bank lets you create different banks for anything in your Shooting Menu, while the Custom Settings Bank lets you create different banks for anything in your Custom Settings. You can create up to 4 banks in each.
If you don’t shoot weddings, you’ll definitely still be able to find a use for this trick. For example, you might want to have different Shooting Menu Banks for shooting in different lighting conditions. Or perhaps you could set up one bank for landscape photography, while setting up another for portraiture. You might have different Custom Settings Banks if multiple people use the same camera body and have different preferences for settings.
Here’s how you set up your own Shooting Menu and Custom Settings Banks:
Let’s assume you want to set up a new Shooting Menu Bank…
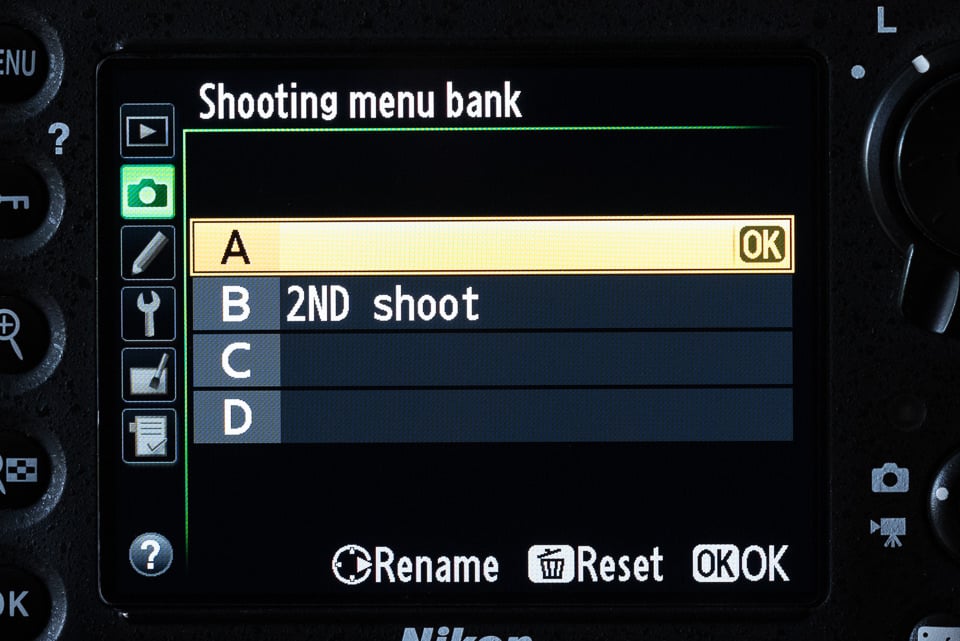
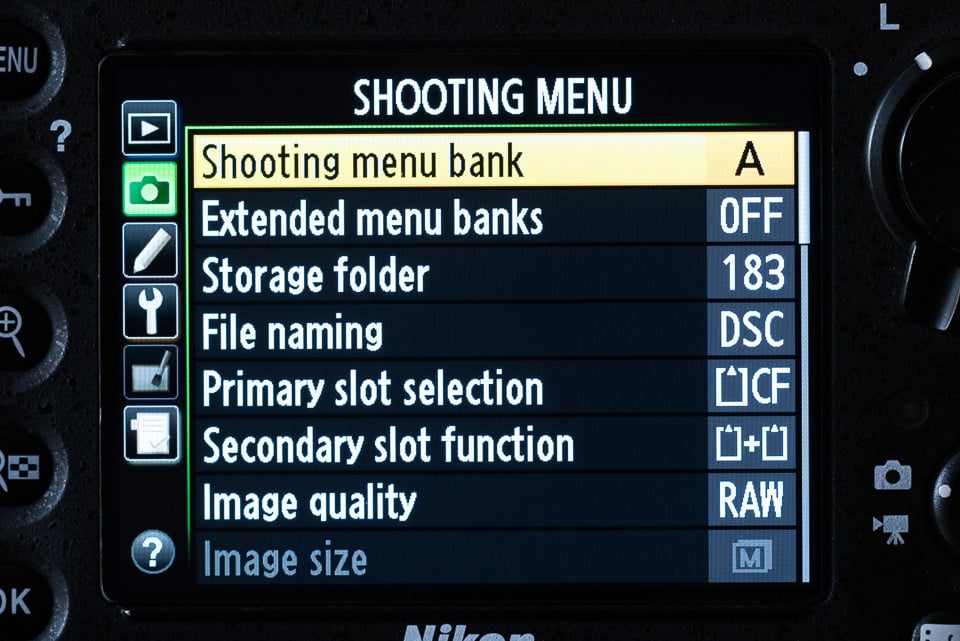
- Go into Menu > Shooting Menu > Shooting Menu Bank
- You should currently be in Bank A, which means your current camera settings are saved as Bank A.
- To set Bank B, navigate down to B and press OK. You should now be back in the Shooting Menu and the first item, Shooting Menu Bank, should read B.
- Now, any changes you make to your shooting menu will be saved as the default for Shooting Menu Bank B.
- If you want to give Bank B a description, simply right arrow in the Shooting Menu Bank when B is highlighted.
- To switch back to Bank A and your original camera settings, just navigate up to A and press OK.
It’s the exact same process for Custom Settings, only you’ll go into Menu > Custom Settings Menu > Custom Settings Bank
Why you should care: Less time spent changing camera settings
Should work on: Most pro-level bodies (Dxxx, Dx) as well as most newer D7xxx bodies
If you own a Nikon D600 / D610 or D7000 / D7100 series cameras, you have even more user-friendly U1 / U2 settings that can be permanently saved, then accessed via the top dial of the camera.
6) Instant Zoom During Playback
Another really neat feature that comes in really handy is the ability to instantly zoom in to a specified magnification level when viewing a photo. Instead of having to press the Zoom In / Zoom Out buttons many times, you can configure the center button of your multi-selector on the back of the camera. When reviewing a photo that you have just captured, pressing this button will zoom in and pressing it again will zoom out back to the full image. The neat thing about this feature, is that it zooms in to where your focus point was!
Here is how you configure it:
- Go to Menu -> Custom Setting Menu -> Controls -> Multi selector center button -> Playback mode -> Zoom on/off
- From here, you need to pick the magnification level. Personally, I like “Medium magnification” or “1:1” on the Nikon D810, which displays the image at pixel level
- Once set, press the playback button to display a captured image, then press the multi selector center button. You will see the image get instantly zoomed in
- Pressing the button one more time will zoom out to the full image
Why you should care: Saves a lot of time when reviewing images and allows to check sharpness immediately after capture
Should work on: High-end / professional Nikon DLSR bodies (does not work on the D600 and D610, but does work on the D7100)
Conclusion
That’s only six tricks, but I know there are many more out there that can save us all a bit of time and make our time spent shooting a little bit easier. These are my favorites, but I’ve got plenty more that I use. In the comments, please feel free to leave any tips that you think others might find helpful. Maybe we could do a second article with the best reader tips! Happy shooting!
Really enjoyed your tips John but unfortunately I can not do most of them on my D90 as it does not feature ,’My menu’. Especially would like to instantly zoom to check last shot. Is it possible with D90?
I am aware that the 6 Tips you presented here is just the tip of the proverbial iceberg.
I have no idea regarding your target audience, but am guessing it is beginners to intermediate, not pros of highly dedicated hobbyist.
That said, Items 3 – Buffer (status) Indicator seems not appropriate. Moreover, the logic of “waiting for the buffer to clear” to ensure NOT MISSING shots is ridiculous. Is the event going to stop while people wait for you to clear your camera buffer? Most, if not all, competent pros I know carry two bodies. While I do not make my living in photography, I carry two D800 when I am asked to cover an event.
5) Shooting Menu/Custom Setting Banks is definitely a useful tool/feature for me, BUT this feature is NOT for the general Nikon DSLR users because these BANKS are exclusive to Nikon D8XX. But since you brought it up all four Custom Bank have identical Factory Default and all Shooting banks have identical Factory Default. Moreover, it would have been better if you stated (1) 4 Shooting Banks can be created, (2) 4 Custom Banks can be created (3) Each Shooting Bank maybe distinct from the other 3 Shooting Banks (4) Each Custom Bank maybe distinct from the other 3 Custom Banks (4) Any shooting bank can be used with any Custom Bank and conversely (5) Any changes to the camera will replace the saved settings on the ACTIVE appropriate Bank; i.e Shooting bank or Custom bank (6) The INFO button offers quick access to change either ACTIVE Banks (7) The Banks settings can be saved in the CF or SD or both cards, which can also be stored in a computer (8) The “saved” Banks settings can be restored or loaded from the memory card. (9) To restore Factory Default, simultaneously press and hold FORMAT and DELETE for about 3 seconds.
PERHAPS, more appropriate than BUFFER STATUS and CUSTOM SETTING & SHOOTING BANKS is the (1) BACK BUTTON focusing and (2) Auto-ISO because these two are universal to every Nikon DSLR as well many, if not all brands of DSLRs.
I do make a couple copies on import with Lightroom. First I import into Lightroom, then immediately export to a NAS (RAID 5 ). The NAS is backed up nightly to a second NAS. Finally every two weeks I backup to the web. As a final precaution. I rotate memory cards so a copy is normally on the card for a few days after import in case something goes wrong. It’s simple and mostly automated. I haven’t lost pictures yet, but you never know. ..an SD card could easily fail!
Sorry I’m a little late in catching up on this great item.
I have used the zoom on playback for some years now (way-back on my D200) but I never knew that it zoomed onto the focus point. I do now!!
With regard to formatting, I had to send back to Nikon a fouled up D300 because (inadvertently) I made some shots on a card I had some D200 shots on. On the next power up of the D300, the poor camera didn’t know what camera it was because of the two types of files. It threw a wobbly and decided not to boot up. Out of habit, and experience, I will ALWAYS, IMMEDIATELY, format a card I have just placed in a camera.
Yes, as the Nikon manual states, you should format all new cards, and any cards that were used in other devices before using it in your camera. If you are not sure – then format it anyway – but I would never format a card that had photos on it (as I described earlier).
If you are going to reformat a Card with photo’s on it, save the photos first to your Computer, then Reformat.
If and I mean IF, the photos came from the same model camera, or possibly same model series you can always:
1). Remove card from Camera.
2). plug into computer when Mounts copy the entire folder to computer.
(On a Mac hold down option key and drag to the desktop.)
3). Now dismount the card.
(On a Mac hold down control key while clicking on the Card’s Icon appears as an external Drive)
4). A Context menu appears.
5). Choose Eject Name of card (whatever card’s name is). Icon will disappear from screen.
6). Now remove from Card slot.
7.) Insert back into camera and Reformat.
If you want to add pictures Back Open the backup folder you just created.
A). Insert card (or replacement card) you formatted back in computer.
B). Open up each sub folder within the Folder Created to find the picture files
(will be jpeg or NEF or Raw or whatever your files format is.)
C). Now locate the same folder on Formatted card.
D). Select all Files (on Mac use ⌘ – A / Select All) and drag to the same folder on Card.
E). Once files have completed downloading, Eject SD card again and insert in Camera.
f). When you turn on Camera you should see your pictures on the newly formatted card.
——-
Don’t do this if your going from say a D3200 Nikon to a D5200 or D7100.
But if going to another D3200, or possibly a 3300, or from a D5100 to a D5200, or D5300 (have to be same Series 3000,5000,7000) then its Okay.
I have done this myself with no ill effects. I moved some pictures from my D3000 which I sold (and reformatted card afterwards before selling) to my D32000.
If this doesn’t Work out for you simply reformat the card again before using.
There are lots of people who do that exact thing, and then lose photos because they don’t notice the copy failed, or they miss an entire folder on the card, and they choose to only take one copy as your steps seem to indicate.
So my workflow as I listed above:
1 – I drag and drop (copy) all the photos onto my C: drive into a new folder.
2 – I do the same to a Network external drive
3 – I do a third drag and drop to a USB external drive only this time I hold down the shift key and it becomes a MOVE instead of a copy.
When the move takes place, for every file on the card, it does a copy, then verifies that file is on the destination drive, and then it deletes that file from the card. It does that file by file. You can never accidentally photos this way, and you always have at least 3 copies on different drives at all times for every photo. When your move is done, your card is empty and ready for the next shoot.
The key is not to do just one copy or move.
If your card is not empty – then you didn’t move it properly and you know something is wrong. Otherwise, on a copy you would have no way of knowing, unless you compare file by file – size by size – that everything is there. If you have time to kill you can do that but you are still subject to mistakes and lost photos.
So if you put your card back in the camera and it shows photos – then you know that a process failed and your photos are not backed up the way you think they are. A good way to find out you are about to lose photos you thought you had.
Thus, if you get in the habit of never formatting cards with photos on them – you will never run the risk of this happening. And from the postings I see – it happens quite a lot.
I don’t know about that mount and unmount stuff – that’s what we used to have to do in the old days when computers were made of wood. :)
Mac and PC have different terms for doing the same thing.
You turn off your camera before ejecting your SD card.
When you insert into SD Slot of your Computer or card reader, you are Mounting the card as if it is another Hard drive. After you have finished copying the Card of Files on the Card. You choose eject (which is dismounting the card. Mac do that for safety. When a Eject command is given it tells the computer to make sure all files are copied and no activity on card before dismounting or ejecting.)
You can duplicate the Copy as many times as many places as you want. When You open an SD Card on a Mac you see two Folders on Nikon Formatted cards. One has no Picture/Graphics Files. The other if opened up may show several sub folders of Photos depending upon how you use your camera. Or there may be just a series of picture Files.
One way to Make Sure you get everything is Click on th SD Cards Icon to Highlight. Hold down the Option Key (Mac computer and keyboard) while dragging the Icon of the SD Card to another folder. You’ll notice as your Dragging the image will show a + symbol next to it. It is moving, this indicates copying. Once you have reached your destination folder, release to drop in that folder. When you go to to destination folder and open your copy of the SD Card files everything is Copied that is on the SD card. (I am using SD Card as an example because most Nikons – not all- use SD Cards I think the Mirror-less cameras use something else, and some of the full Frames use a combination and of course other Companies may use something different.
The General Premise is the same.
Can a Novice or someone that’s never tried this before miss some pictures. Sure if they are not careful. They need to look into every folder on the card and see where all the Photos are, and make sure they copy all the photos.
What they can do is practice on a card with pictures that are of no value. Or that you have several backups of.
Another point to bring up Software Programs such as LightRoom and similar can read photo’s from these file copies as well. So you can use this to place in Photo software and upload through them to your Photo Services such as Flikr , Picasa, ShutterFly or whatever you use.
Thanks for the tips – as an I.T. Consultant for more than 30 years I do know how computers function.
A safe workflow is not just for novices. Novices and Pros can all make mistakes. The whole point of my workflow is that it is foolproof. It works for every kind of card … CF, SD, Micro SD … The process is the same, and you are assured of not losing photos on any kind of card. There is no manual checking of files, file sizes, file dates, or comparing folders. It is simple, fast, and foolproof.
This is so simple – yet so many people are asking how to recover from a mistaken format and lost photos. The problem is not their mistaken checking of the files, the problem is that the checking was not even necessary in the first place.
Yes, you can do all kinds of time consuming checking and comparing but I would rather not have to do that since it is not necessary. With each manual check there is a possibility of error and thus the chance for disaster. A workflow that has eliminated risks is better even if it is more complex. This is not only less risky, but simpler and faster. It is a win, win – but you are all free to do whatever you like.
I don’t have time to check over thousands of files every time I am done a shoot to see if I “got them all” when the computer can do it perfectly for me. It is time wasted simply for not following a risk free workflow process. The less time I waste checking over files the more time I can be out shooting. We use computers to do the mundane things like this exact example – for accuracy and safety. So I let it. But hey – I am lazy.
What tips do you have for us D3200 users?
NUMBER 1:
You may be one of the lucky ones who gets away with not reformatting your cards, but the day those links break because you haven’t taken care of them will be the last day you think you got away with it. Backing up is not going to help a bad card, ever. Not reformatting after each use or at least a couple uses is the worst advice I have ever heard. I suggest you do some heavy polling of professionals and engineers before you give this bad advice. Why you even formatted your cards in the manner you started out with is time consuming, wasteful and completely unnecessary. Which Nikon Camera Manual did you find that in???
As an engineer in the digital age for over 40 years I will give this advice: Reformat your cards, no matter what John Bosley says. It is better to know your have a failed card before you shoot than after you think you have photos to recover. Oh, yeah, and it doesn’t matter how expensive your cards are, DO IT ANYWAY.
oops forgot: Try reading the D800 Manual on page 32 and 326.
If you haven’t read Thom Hogan’s ‘Complete Guide to the Nikon D800/800E, version 1.05″, I suggest you buy it, as a D800 owner, and I suggest you look at page 144, “Card Troubleshooting” LOST CLUSTERS — copyright Thom Hogan, which prevents me legally from cutting and pasting here.
Thom has been around the digital world a long long time also, and not just in cameras. His words for thousands of Nikon photographers is that of complete and total trust.
Edit: Should be directed to “Steve” for not formatting
To John for the strange way he formatted his cards.
Sorry guys way too early in the morning for me I guess.
Wow John, you need to take a breath and think before posting so many errors.
You posted a comment accusing the wrong person of giving bad advice.
You accused someone of giving bad advice about formatting when I simply said that “I” would never format cards WITH PHOTOS ON THEM … and I certainly stand by that. That is not advice, that is stating what I do. That is not advice.
You actually give advice which contradicts what the D800 manual states (which is fine but I would not do that)
You replied outside of the thread you were commenting on.
I quoted the D800 manual – stating when to format – which is what I have been following and all that I had stated. Everyone is free to follow whatever advice they want. I follow the Nikon manuals. I have never lost a photo nor had a bad card in shooting hundreds of thousands of photos. I advised people to never format cards WITH PHOTOS ON THEM. I didn’t ever state not to ever format cards. I stated what I did – not what other people should do – as your post did.
My comments were about workflow because of so many posts where people have lost photos because they don’t have a proper workflow for how to get their photos transferred to their computers. And they formatted cards with photos on them. Had they followed my workflow (whether they format the cards or not) they would never have lost a photo when they did perform their formats. It wasn’t about the formatting – it was that they were formatting with photos on the cards as a way to clear the photos off the cards. If they were formatting for another reason I didn’t even address that.
You totally missed the point, and accused someone of something they didn’t do, and even accused the wrong person. I did not advise people not to format, and I certainly didn’t give advice in ALL CAPS as you did. I merely stated my personal workflow, what I do, and the reasons behind why I do it that way. I didn’t tell anyone to follow what I did – as you did in your post.
Please chill out and read the posts carefully before commenting, and you likely won’t end up falsely accusing two different people.
John, wow it must have been early in the morning, but I’m glad you caught your mistakes and corrected them. :)
I never found my way of formatting in a manual, it’s just how I used to do it. Just like you tie your shoes a certain way or cook spaghetti… you do it how you do it and get a result that works for you. It might not be how everyone else does it, there might be a better way of doing it, but it for you it works.
I’d suggest in the future you re-read your posts and make sure you’re clear on what you’re saying and who you’re saying it to before hitting that “post comment” button. I don’t have a problem with criticism, but when you criticize the wrong person for things they never said things get confusing.
I surely owe everyone a big apology. I clearly had my head up where the sun doesn’t shine and there is no excuse for me bing a jerk. I am very sorry. I promise, John and Steve, that will not happen again.
I have always enjoyed this forum/blog and I can not believe I sullied it.
Please accept my apology. None of you deserved to talked(typed) to like that.
John
No worries, John. Apology accepted.
It’s way too easy to blast off a comment without thinking about what you’re saying and I’m sure we’ve all done it before. Thanks for being active on the blog posts and being a part of the community!
No problem John, … I’m glad you have such a good sense of humour about it!
You made me laugh!
Nice tips; thank you for the column, John. The buffer one will be particularly useful.
One feature I’ve been using on my D800 (& also works on D810) comes from Moose Peterson’s D800 settings from 2012. Go to Custom Setting Menu d7, item B & activate Show ISO/Easy ISO. With this feature in A (or S) priority, your command dial will allow you to control ISO! In other words, with your shooting hand you can control ISO, aperture (or shutter speed) and exposure value.
It is surprising that Nikon doesn’t advertise or play-up this feature (or that other photographers don’t mention it). I suppose the name “Easy ISO” makes one leery of using it (or everyone is shooting Auto ISO). Anyways, I find it incredibly powerful for my shooting.
Cheers,
Martin Strban
That’s a great tip, Martin! I always shoot in manual, so I never would have discovered this one on my own, but it will be valuable to a lot of people. Thanks for sharing!
Hi Martin
This is a great one and also works on the D7100 (custom D3)
Thank you for this article, yes the instant zoom is great.
Every tip helps. I also was told about back button auto focus which I am getting used too.
You’re welcome, Judy. The back button focus is great, but it does take a bit of getting used to.
love the instant zoom!
A camera button configuration that I have found to be very useful, is to set the function button to disable the flash. f Controls – Assign FUNC. button (D700). This means that while using the flash, rather than turning it off to take a non flash photo, you can just press and hold the function button for that particular photo, then release it to resume with the flash. A very quick method.
Bernard, that’s an awesome tip! I’ve always found it very cumbersome to turn off the SB-800 in the middle of shooting, especially if it’s only for a few photos. For me, this is an extremely useful tip! Thank you!