I am a professional wedding photographer and I end up editing thousands of images for my clients. While there are lots of wedding photographers who outsource their post-processing to free up their time, I am a believer in editing my own photos. In order to make my job easier, I tend to look for shortcuts and tools in Lightroom itself, which I use extensively. I’d rather do everything in one program than switch back and forth between Lightroom and Photoshop. You do not have to be a wedding photographer in order to take advantage of these tools in Lightroom. You can use these techniques wherever they are applicable. Below are some of the tools you may not be using to edit your photos.
Table of Contents
1) Straightening Tool – Perspective Correction
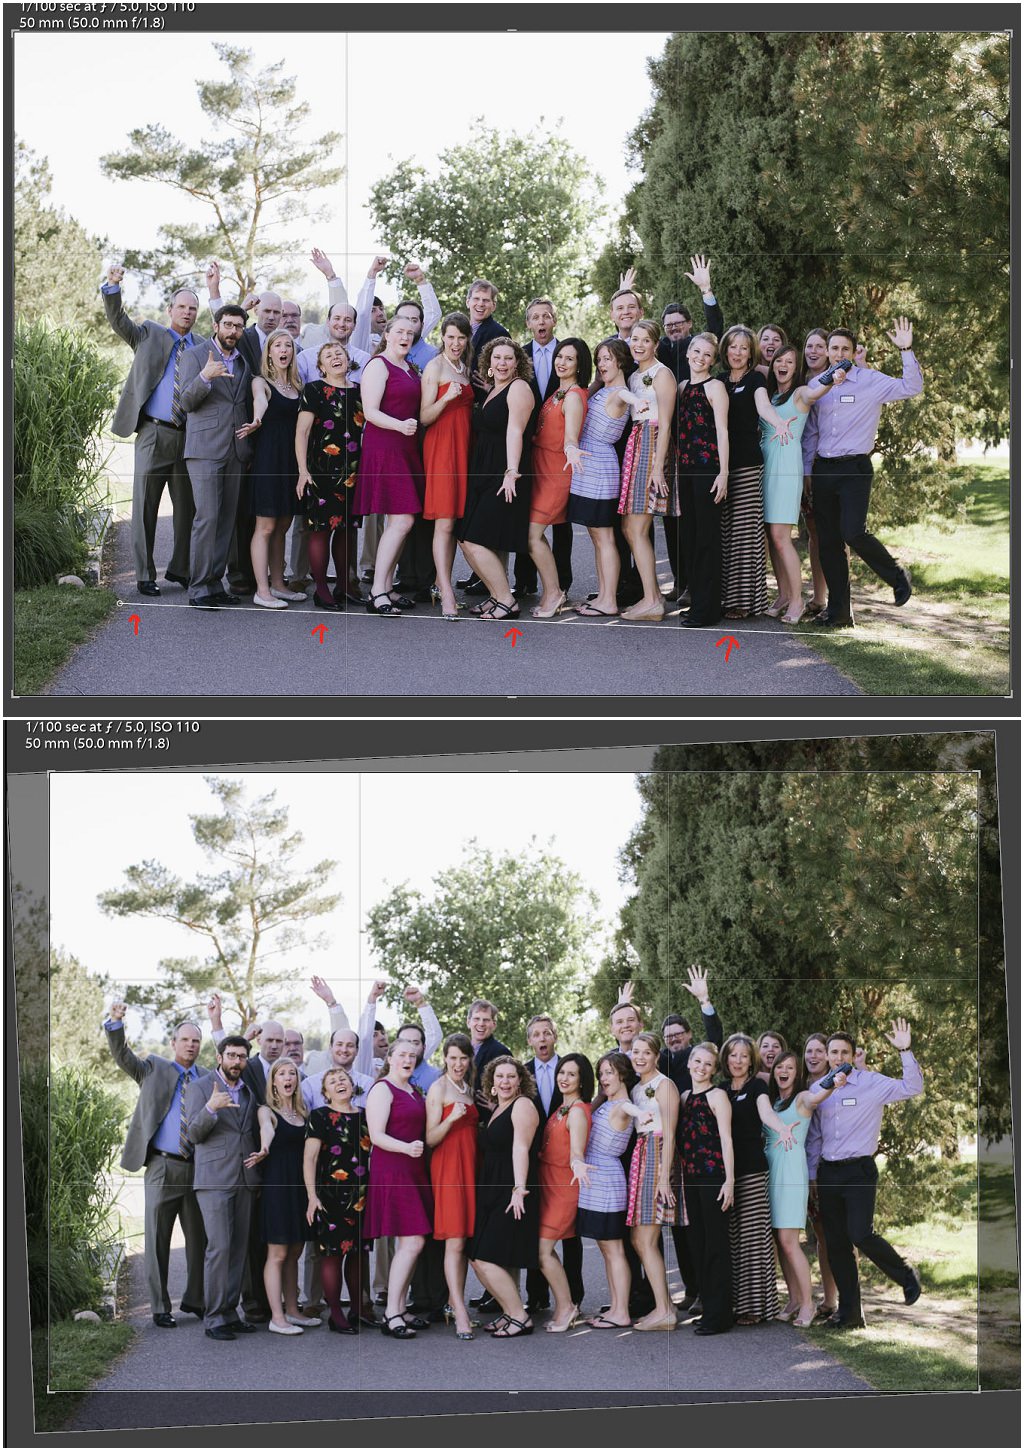
There will be times when you come back with photos that have a tilted horizon, making the composition look awkward. Perhaps you held the camera wrong or simply did not pay attention to framing at the time of taking the picture. Either way, you can fix this issue in Lightroom by using the straightening tool, which is located under the Histogram and looks like a perforated rectangle. Or you can simply press the “R” button on your keyboard to activate the Crop Overlay Menu in the Develop Mode. When you activate the Crop Overlay, the image you are working on will be framed with a cropped edge. While you can hold the corners of the photo and twist and turn it as much as you want, fixing the horizon can be much more calculated and easier than that.

Check the Straighten Tool and draw a line against a linear surface in the photo. The longer and the straighter the line is, the easier it will be to level it. In the example photo below, I didn’t have a distinctive line to help me determine where to exactly draw the line. So, I used their shoe line as a deciding factor. This worked out quite well in this instance and I pressed enter to accept the changes. One thing to keep in mind while using this tool is that it might clip quite a bit from the edge of the photo, making the shot look a little tight. If you have tight shots to fix, you may need to be a little more careful while using this tool.
2) HSL Panel (Hue, Saturation, Luminance) – Targeted Adjustment Tool
Targeted Adjustment Tool was a much welcomed find for me. It lets Lightroom determine the HSL for you, while you are free to follow the changes and stop when your artistic vision deems enough was done. I use this tool quite a bit since all of my color correction of photos and additional elements like skin color is changed in Lightroom. While this tool may not be ideal for high-end fashion retouching, this tool will give a lot of flexibility for wedding, family and landscape photographers without resorting to Photoshop.
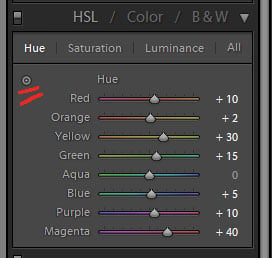
To activate the droplet all you have to do is click on it and touch anywhere in the photo that you want to make selective changes on. In this particular photo, I decided to bring out the color of the sky and add a little blue just to the spot I thought needed a boost. You simply drag up the tool to increase the HSL and drag down to decrease in order to mute the particular color of your choice. Keep in mind that the Targeted Adjustment Tool needs to be on the area where the changes are expected to take place.
Aside from using a regular white balance tool to fix skin colors, you can utilize the Targeted Adjustment Tool to do the job. I have to warn you though, the changes will affect other areas of the color you are manipulating, if it is prominent in other parts of the photo. So, don’t overdo it.

3) Spot Removal Tool
Spot Removal is another splendid tool that you can use to your advantage. This tool has come a long way from being limited to only a circular shape to a function similar to the Healing Brush in Photoshop. Though it is not as flexible as the one in Photoshop. Its limitations aside, here is what you can do with it.

You can either choose the Spot Removal Brush by clicking on the icon or you can simply press the “Q” key to activate the menu. There, you will come across two functions for removing spots: Clone and Heal. Basically, this tool is used to replace your target area with the sample area of your choice. If you are familiar with Photoshop, Clone is an identical twin of the Healing Brush in Replace Mode. I do not use it very often, unless I have a distinct task for it. But I use the Healing tool quite a bit, and in functionality, it resembles the Healing Brush tool in Photoshop. It creates a much softer and feathered texture to blend well with the rest of the pixels in the photo.
In the below photo, I found the tree leaves in the upper left corner to be distracting and I certainly did not want to include them as part of the original image. Here is how I was able to use the Spot Removal Brush to get rid of them:
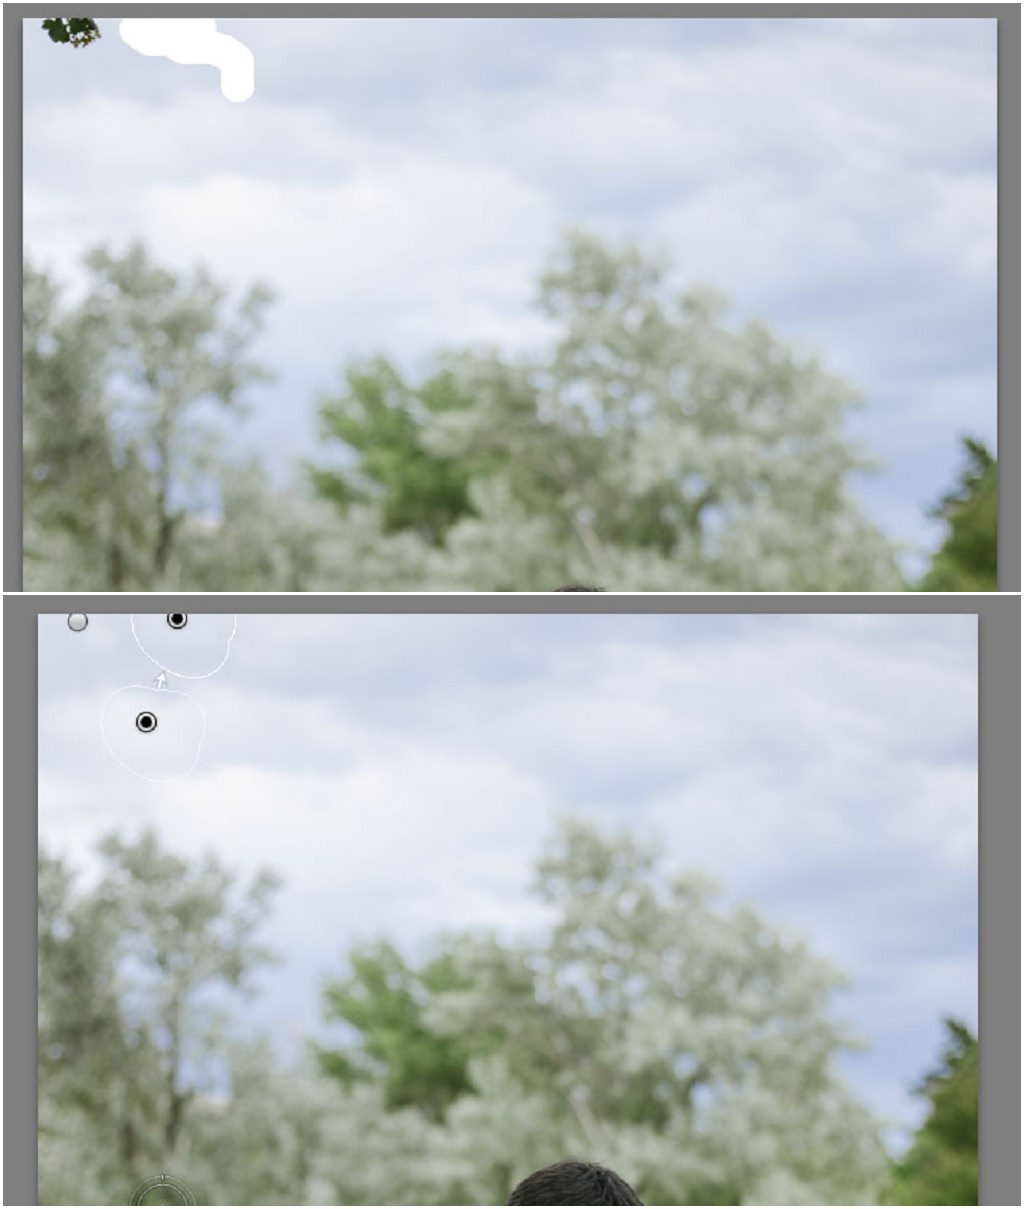
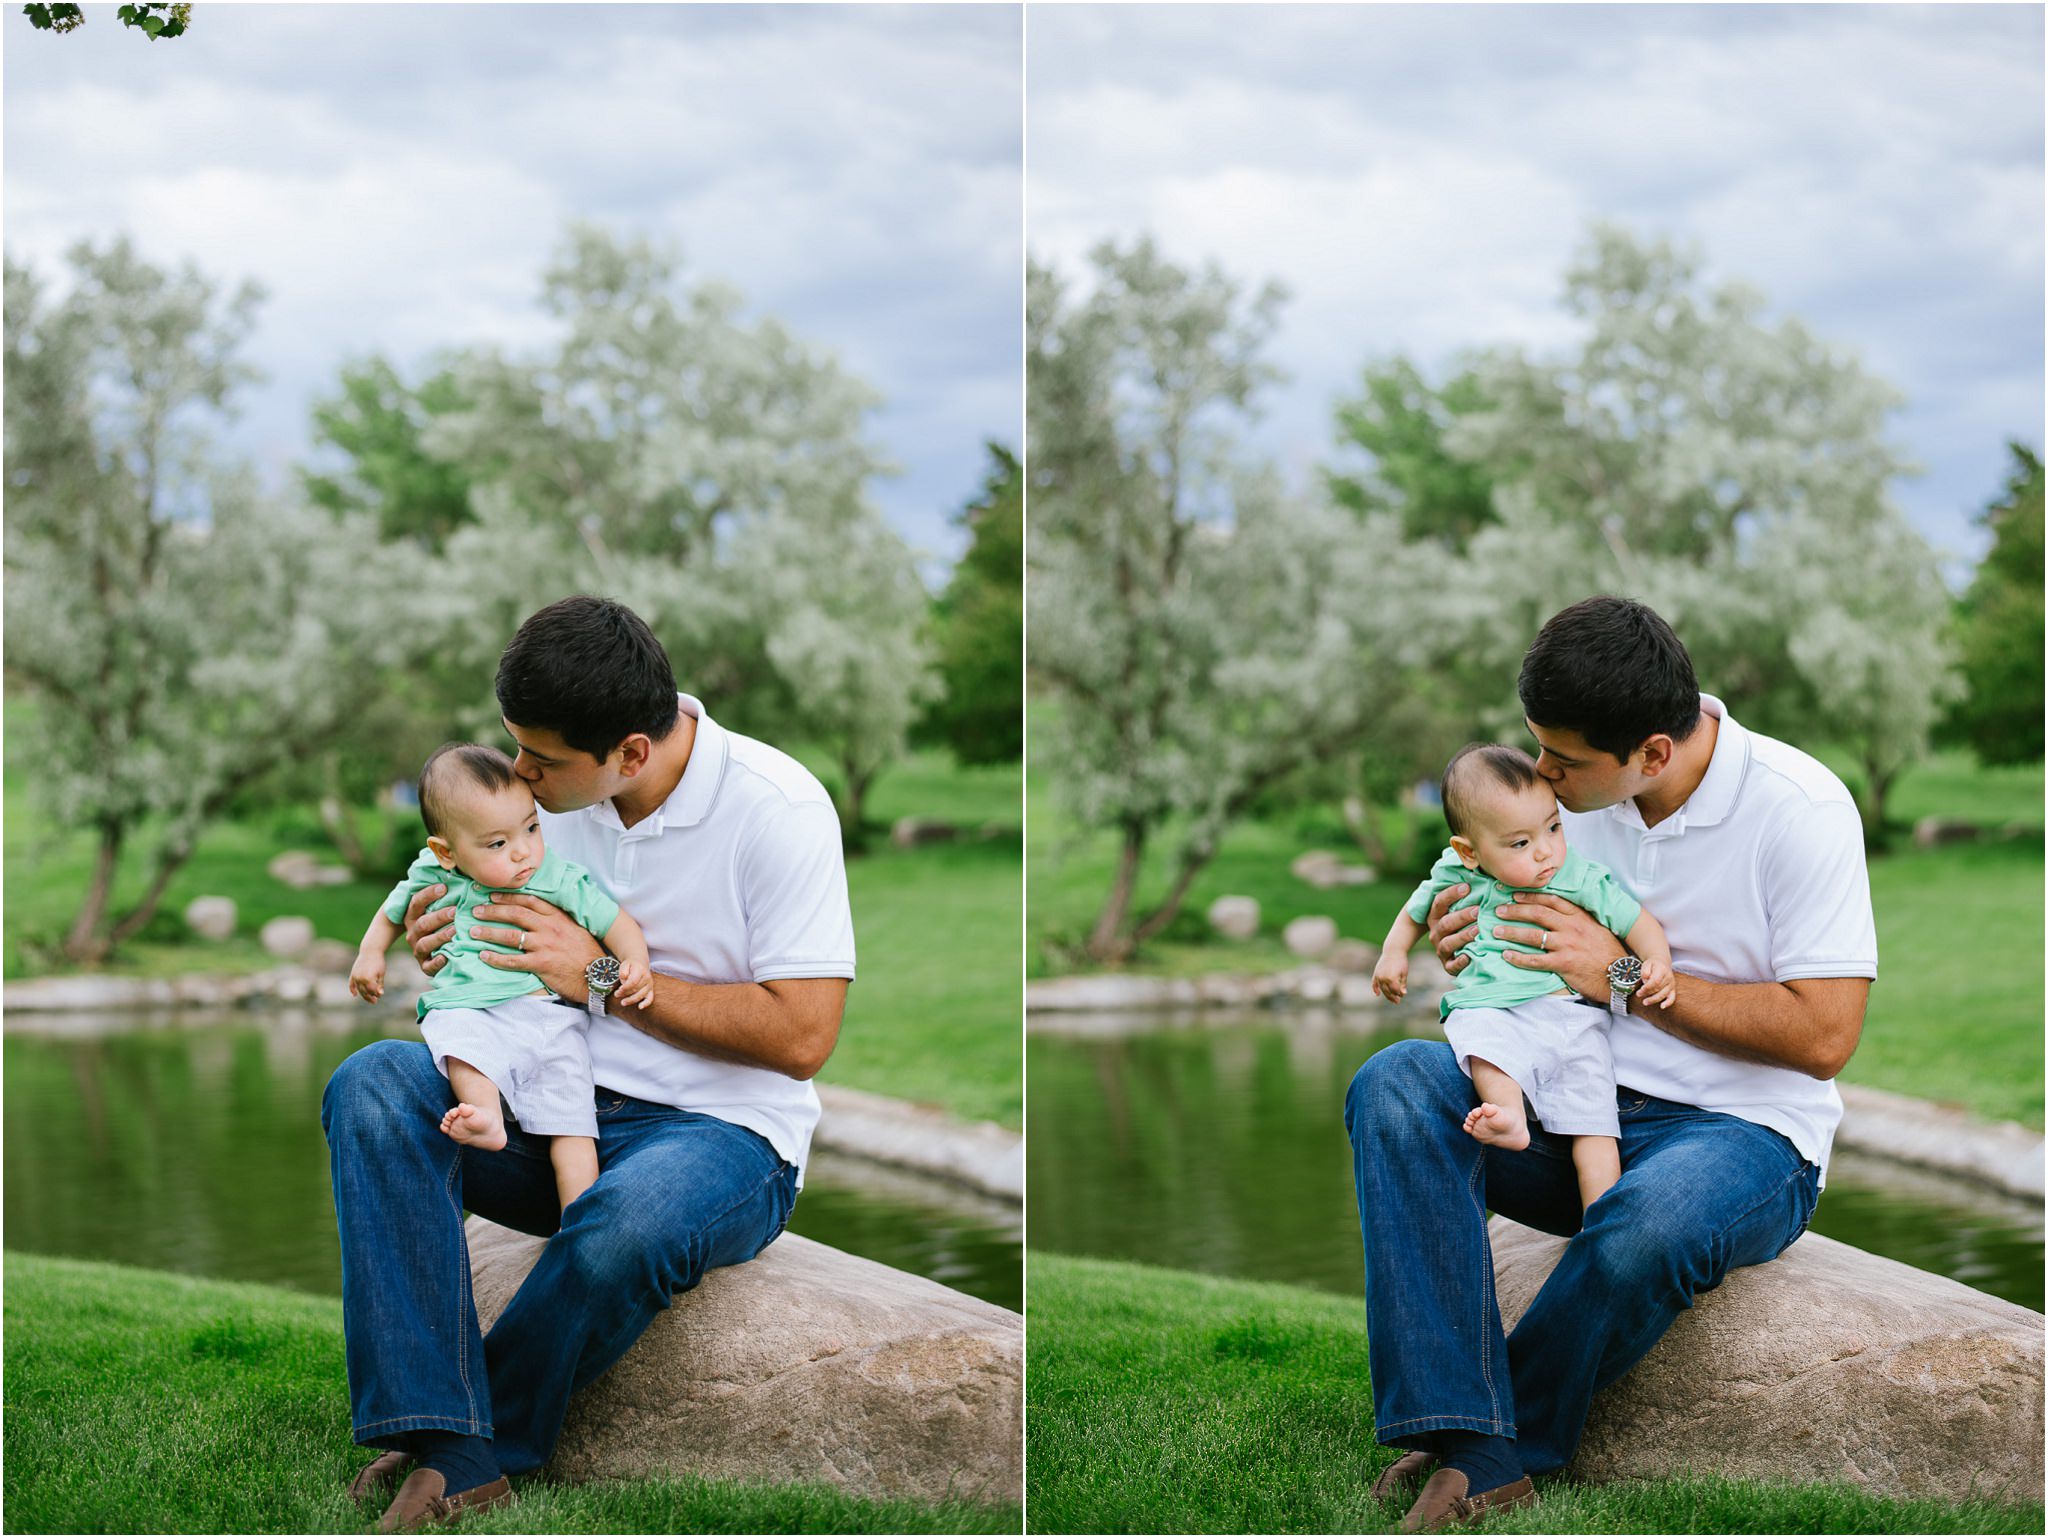
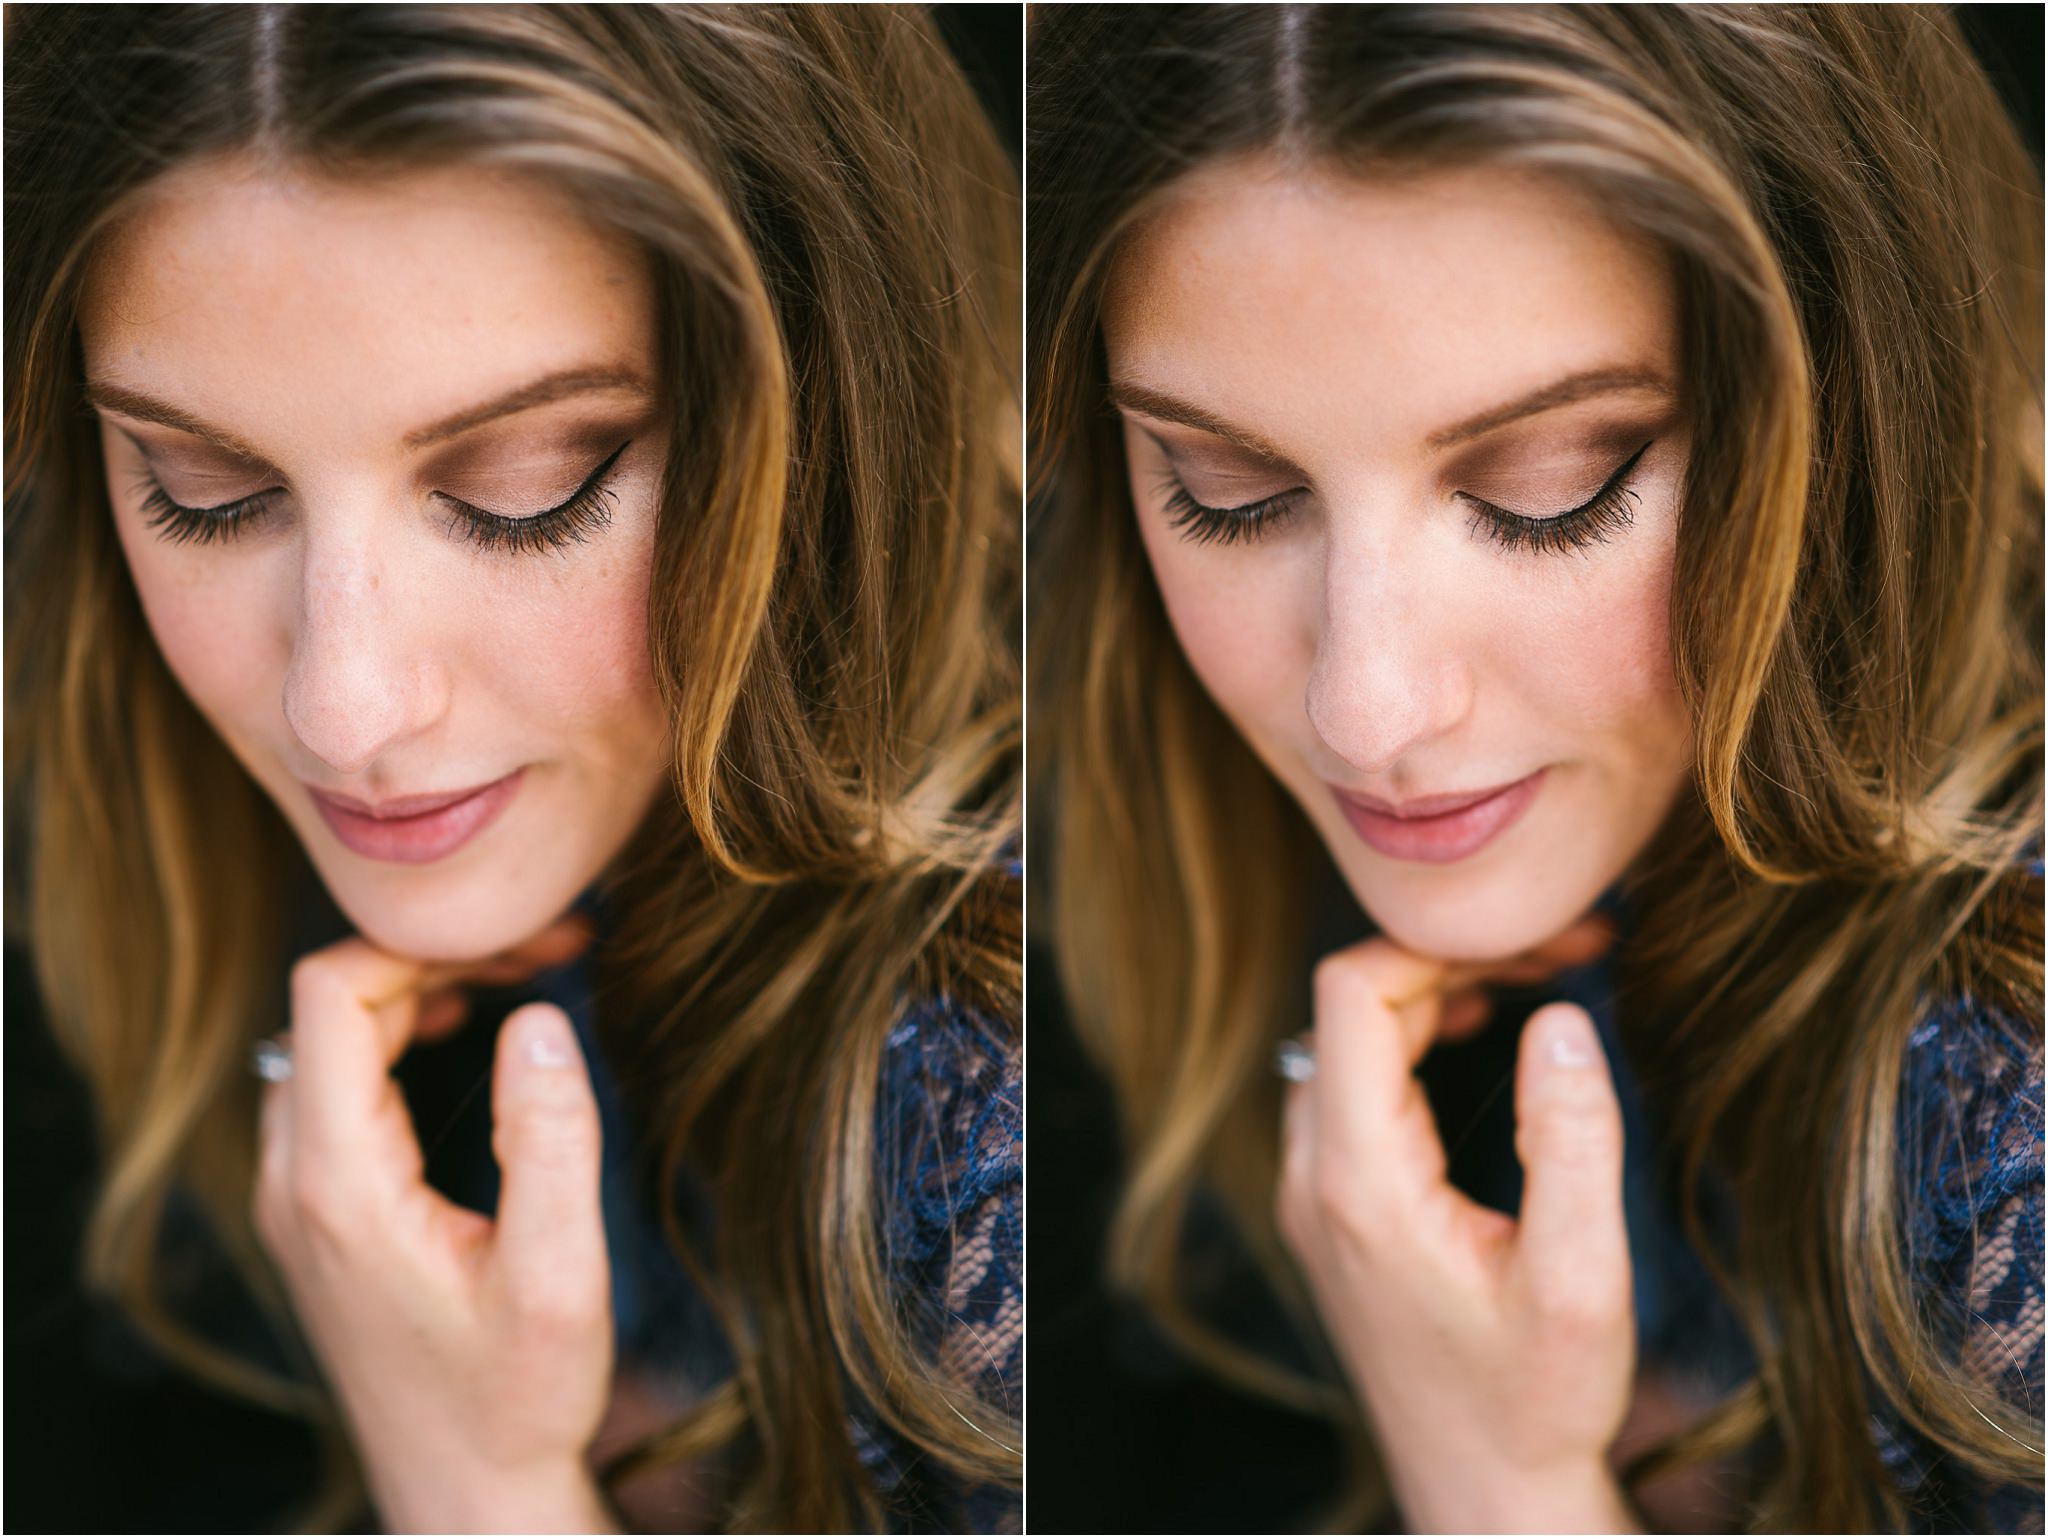
And here is a before and after:
You can use this tool to remove stray hair, minor imperfections, and distracting objects that are not too complicated to remove and are not against a very busy backdrop. I use it quite a bit to remove blemishes and dust spots in photos. Keep in mind that this tool is not ideal if you have a larger area to work with.
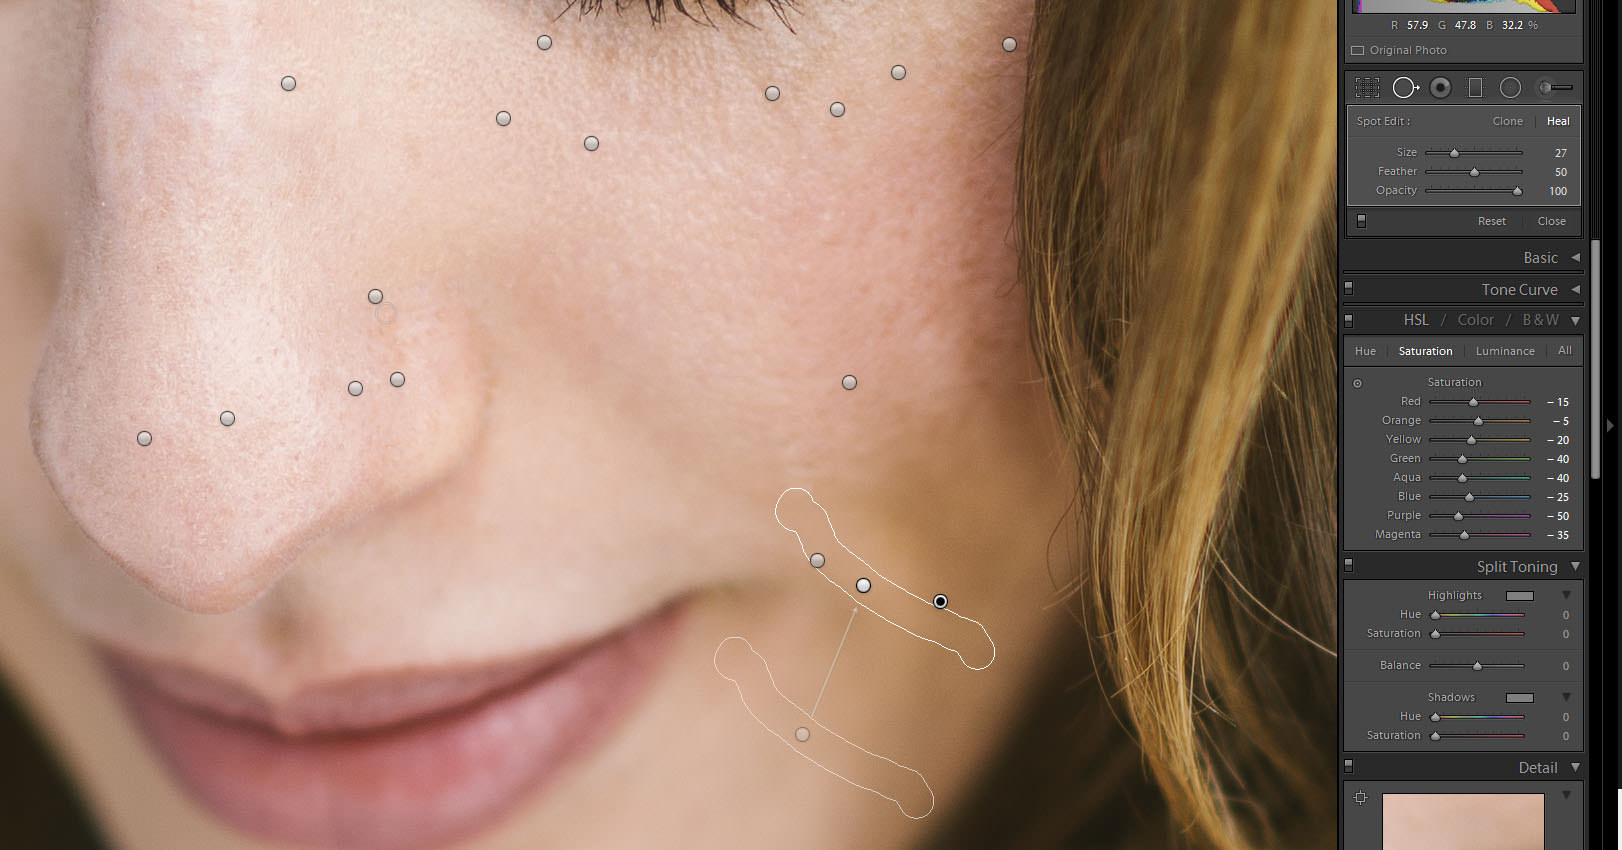
Simply draw over the area that needs attention and instantaneously see the tool heal out the area and show you where the sample pixels came from. You can move the sample area and manipulate the tool to your liking. See the areas that are being picked up with the spot healing tool while working on a portrait retouching.
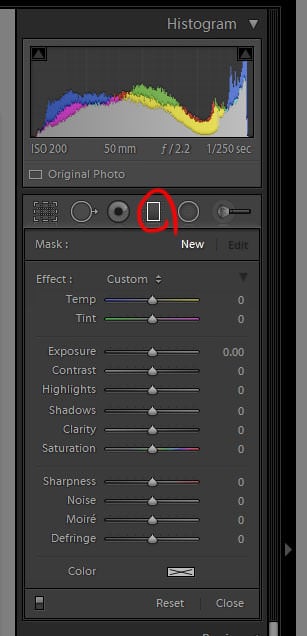
4) Adjustment Brush for Brightening, Burning or Manipulating Color
I use the Adjustment Brush quite a bit and it helps me with all sorts of things. I can bring out the shadows in particular areas of the photo, without effecting the shadows on the other parts of a photograph. I can selectively saturate colors that I want and sharpen the areas that I want without moving to Photoshop. Here are some examples of how you can toy with it.
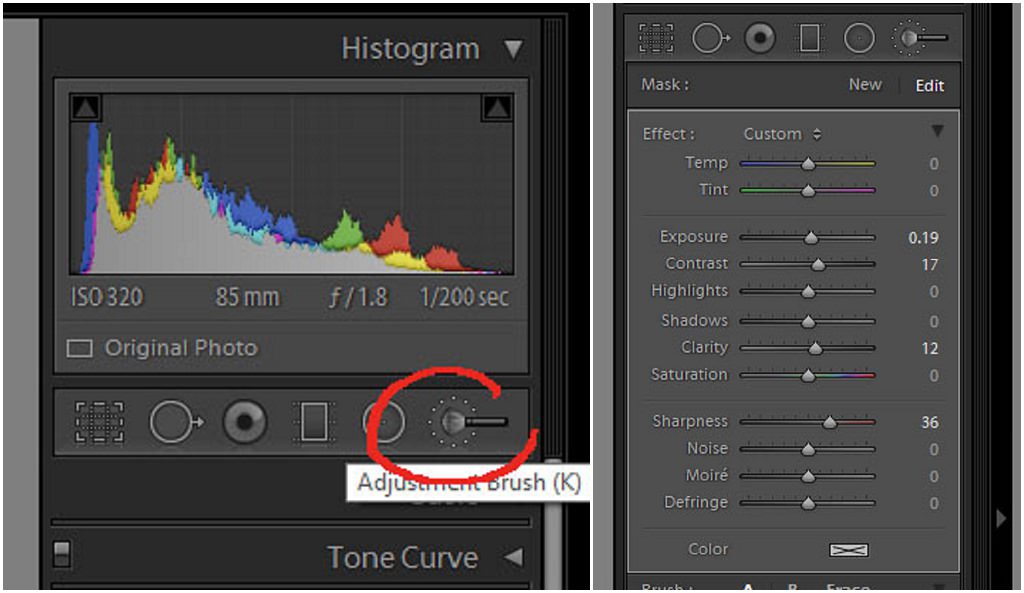
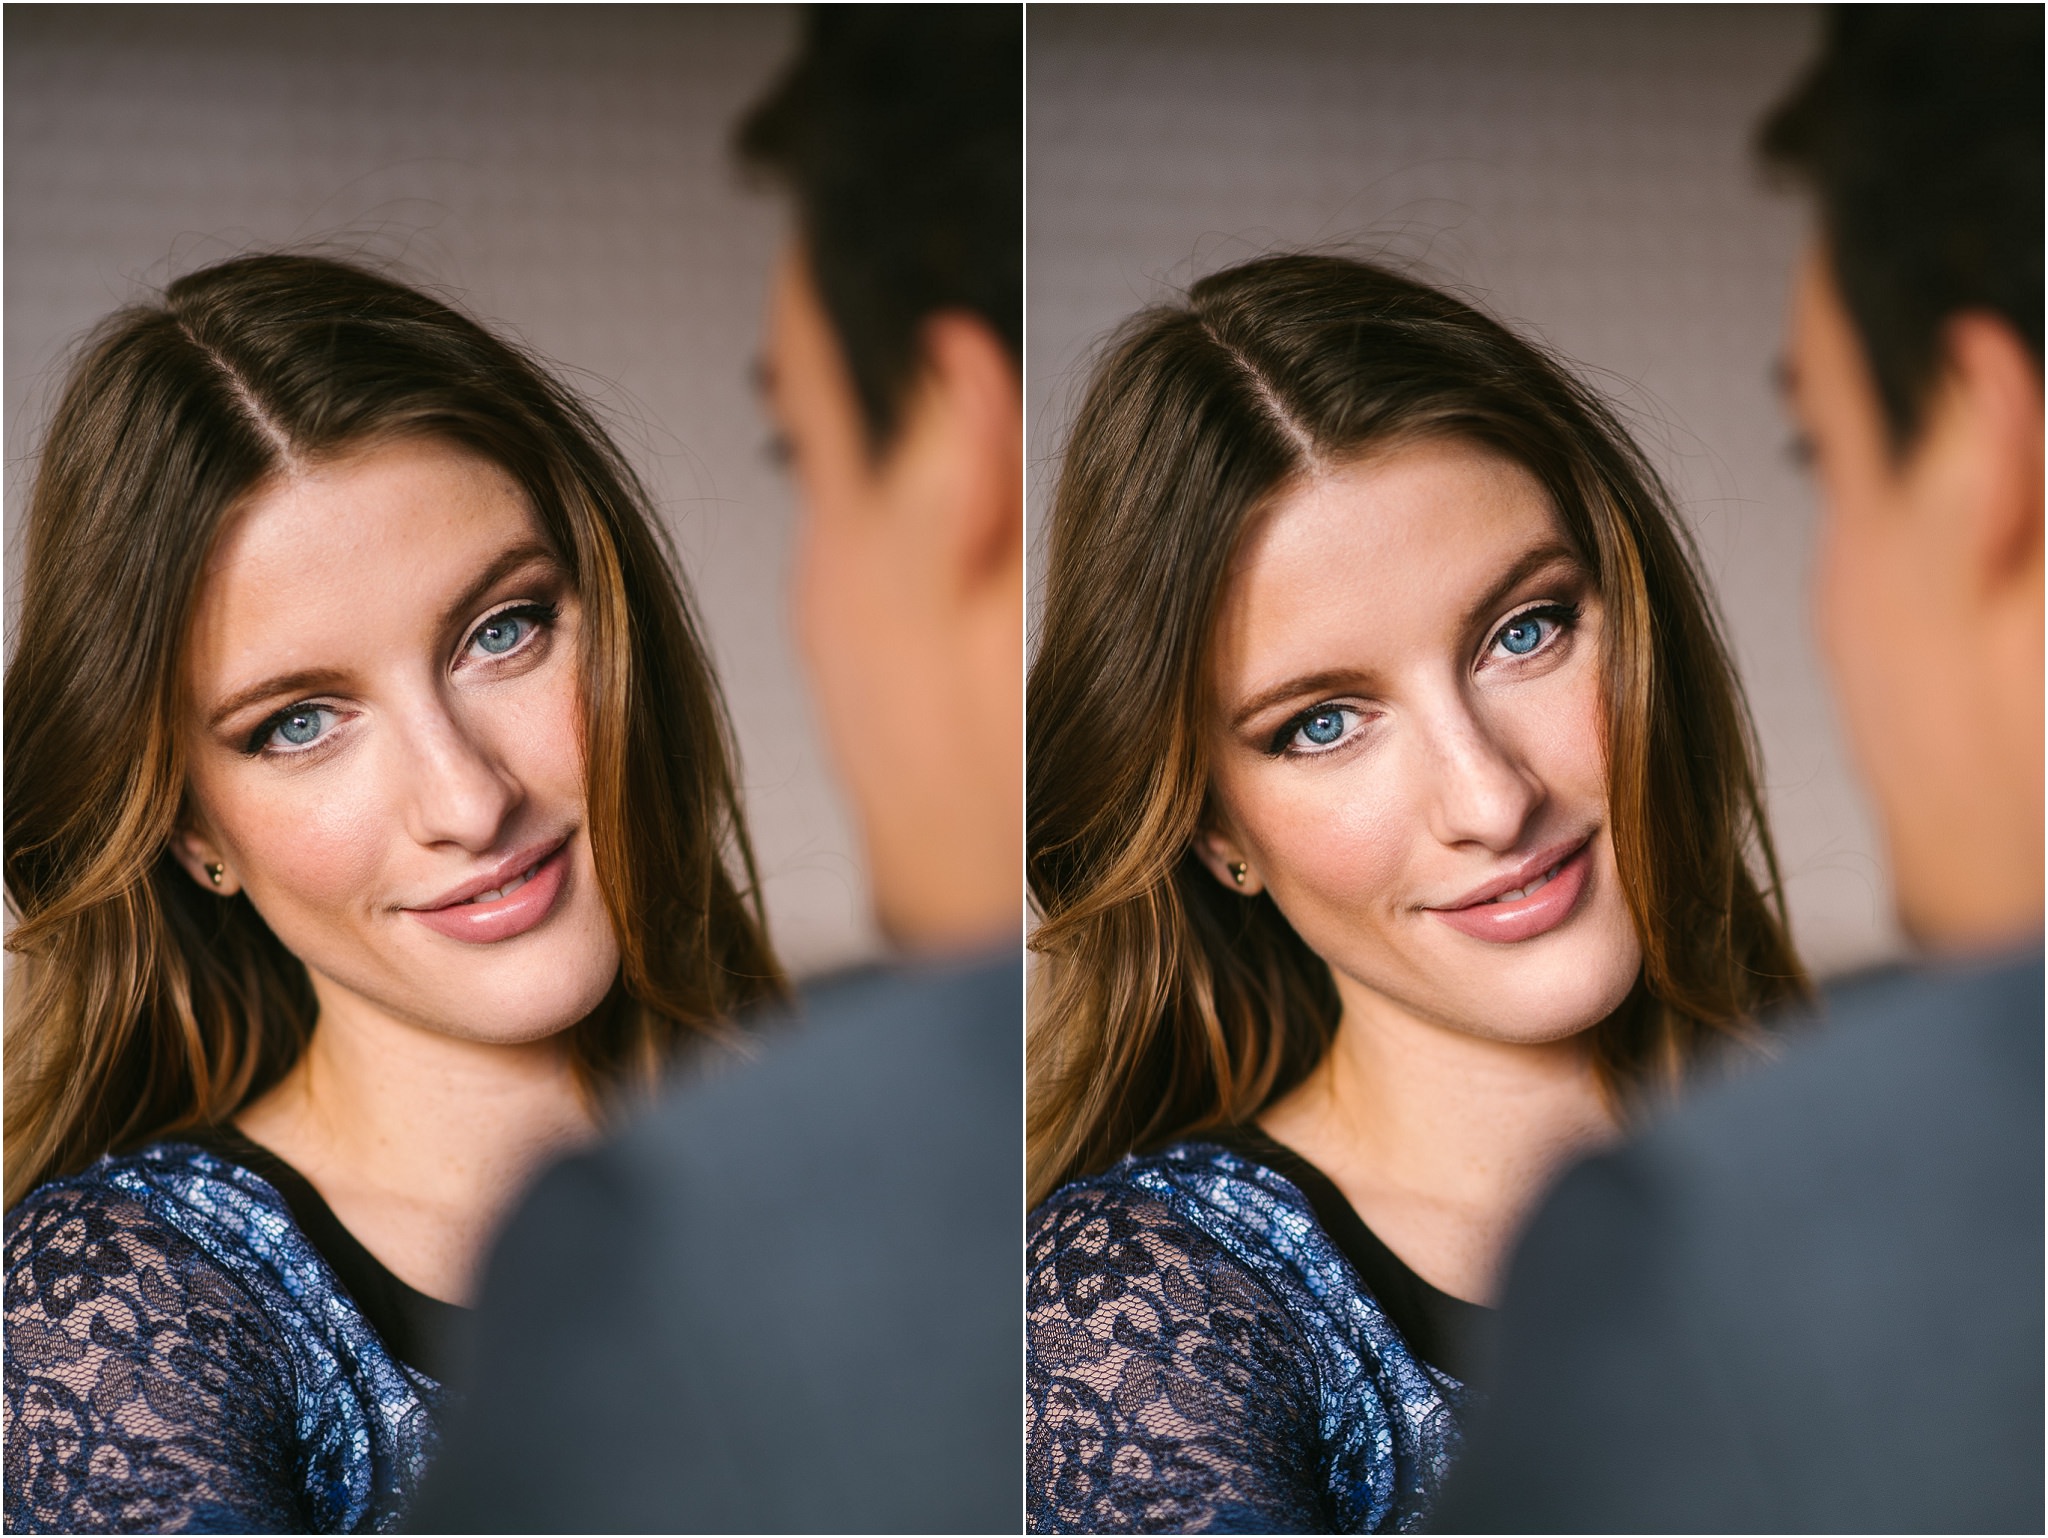
Select the Adjustment Brush from the Menu or simply press the “K” key to bring out the Adjustment Brush Menu. Select the area of your interest by drawing on it. In this case, I decided to sharpen, brighten and intensify the color of the eyes.
You cannot make every single change with the same brush stroke. You may need to make several attempts to achieve the desired result.
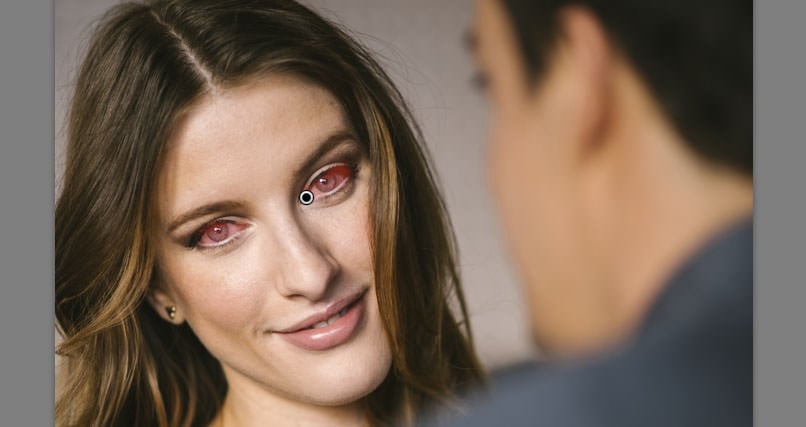
Here is a little example of how you can change the color of the eyes:
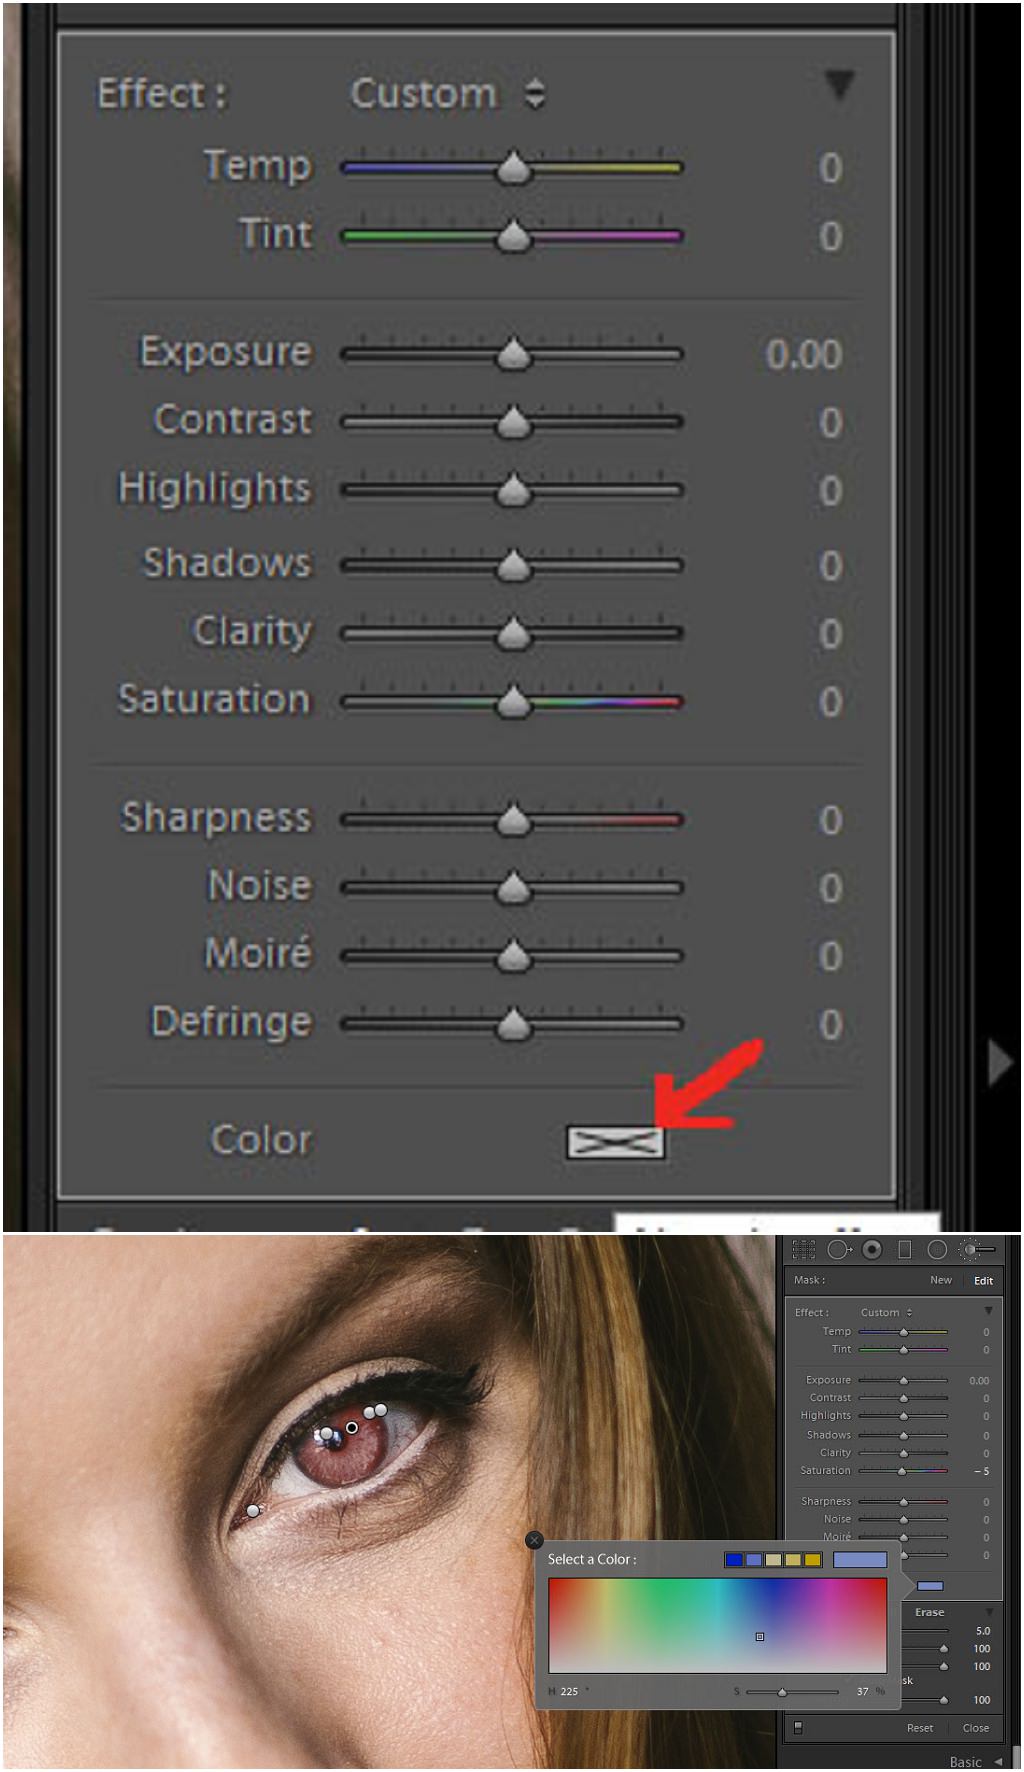
Select the area of interest by painting on it. Click on Color mode in the Menu box of the Adjustment Brush Tool. Select the color you desire and play with opacity and saturation until you have what you want. Press Enter to accept the changes.
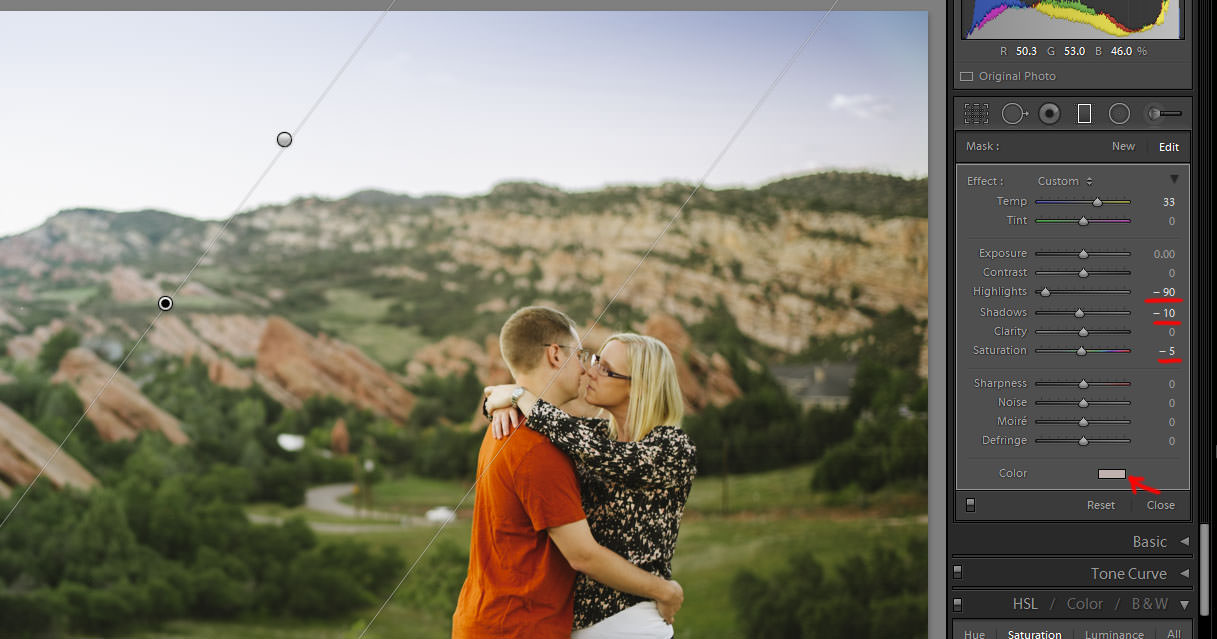
5) Graduated Filter
Generally, the Gradient Tool is used to balance out or fix the exposure of a larger area that cannot be efficiently fixed by using the Adjustment Brush. But you can also use the Gradient Tool to add special mood to your photos. You can successfully emulate a colorful reflective surface that can happen when you shoot through certain objects.
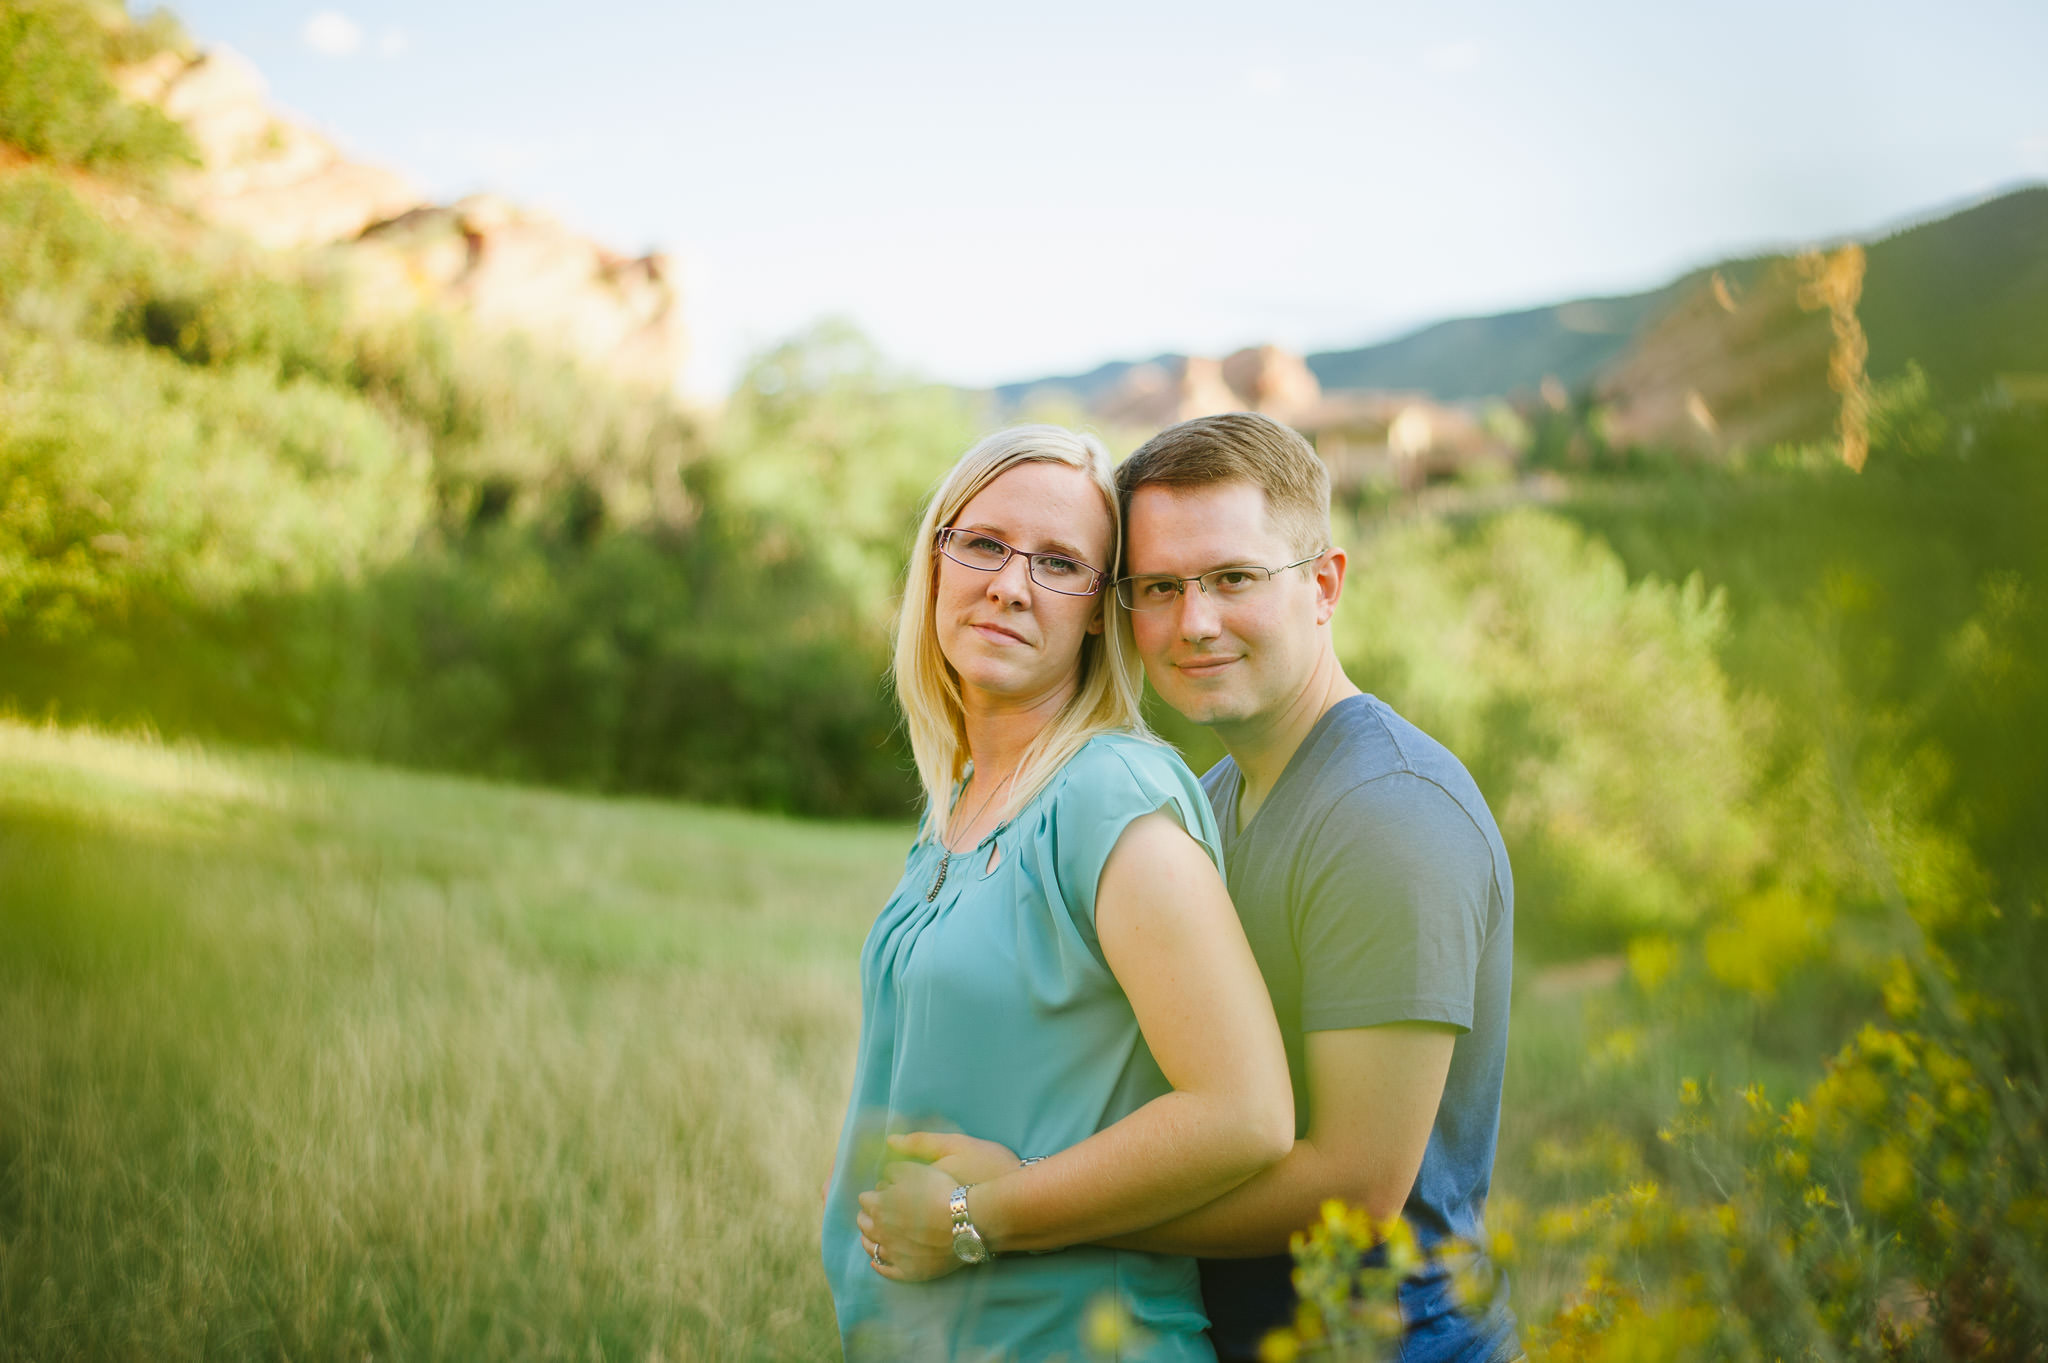
Below is an example of a planned shot, which in my opinion gives the photo a feel of summer and warmth. The photo was made shooting through a bush of yellow flowers.
Below is an example of how you can create the same effect in Lightroom on a photo that has not been shot through anything. Click on the edge of the photo and drag down the graduated filter to the point where you like the effect it creates. Once the filter is in place, you can choose the color for the effect and use the sliders to change saturation and other effects.
The good thing about the Graduated Filter, is that you can make changes to it anytime and the program will remember what you have applied before. So you can reuse the effect if you would like, or start over with new settings. In addition, you can still copy-paste any of the applied settings between different photos.

Here is another example of the creative use of Graduated Filter:

The above processes may not be as flexible as what you can achieve in Photoshop, but if you are dealing with a lot of photos and you need quick shortcuts, these tips will do wonders. You can use the above methods practically for any type of photography!
If you have any other tips to share with us, please feel free to leave feedback and recommendations below.
Great advice once again.
Hmmm, :-) I’m glad that I use them all!
These are some really good photo editing tips for Lightroom. Very useful. Thanks!
Nice article. I used to use dropbox for photo sharing but switched to Binfer recently. Makes sending pictures to my clients much easier. The site is www.binfer.com/
Entry level tutorials are probably a good idea.
Great tips. The one I didn’t know about was about how to make HSL corrections specific. Thank you!
Hi,
It would be nice if there was some attention for other raw converters on this site. Although Lightroom is a great product he results I get with Capture One are in general simly better and more pleasing. It delivers also more sharpness and better contast. By default also the noise reduction is better. Lightroom is for sure more pleasant to use and you need to invest time to get the best out of Capture One but to upgrade your raw converter is much cheaper than upgrading equipment. Is this site sponsored by Adobe? I presume.
I don’t think there is any sponsorship involved: LR is just the most popular by far.
And IMO, DXO is the best for NR and sharpness, but LR is by far the best for workflow… so I run DXO as a plugin for LR, round-tripping as .DNG so it stays as RAW. That’s probably a workflow tip in itself :)
Are DXO’s edits retained in the DNG file, inside Lightroom or does LR send those edits back out to DXO during output?
Hi Patrick
Here’s my full workflow:
1. Import into LR.
2. From LR, select File > Plug-in extras > Transfer to DxO Optics Pro 9. That will export the RAW files to DxO (I make no edits in LR before this point as those edits would not go to DxO as we are exporting RAW).
In DxO, I apply all the Lens distortion corrections (Distrtion, vignetting, CA and DxO lens softness), color rendering and DxO Prime Noise reduction. DxO is FAR superior to LR in distortion and NR because (a) its lens correction is based on camera+lens combinations and not just the lens and (b) the DxO Prime NR really does make a difference – it gives you a good stop and a half less noise with no detail loss straight out, which is about the same as the next sensor family up! The downside on the NR is that it is very computationally expensive: a typical shoot of 60 24MP files takes about 1 hour, and I am using a very fast 12 core i7 (and that goes to 100% usage).
3. Once done, the files come back into LR automatically as .DNG with all the DxO edits. the files are still effectlively RAW, so there is no loss of RAW latitude.
4. If everything has gone well (and it always has so far) I now delete the orginal RAWs from LR, so I now only have the .DNGs
5. I then start working on the DNGs as per normal LR workflow.
I cant recommend DxO enough: DxO Prime NR absolutely kills everything else out there, and the DxO color rendition and distortion correction is far better than LR
HTH
Thanks for taking the time to write such a thorough description. I’ll try it out!
bought a single dxo product a few years ago .. the onslaught of email messages from them has turned me off the company .. always look for alternatives, and discount its quality
Most photography sites are sponsored but they will not tell you. It is the best “selling machine” for camera facturers. I think on a site where there is often a lot of discussion about the best lenses and camera’s there should be more attention to the very different results that raw converters deliver. The differences in the final result are often more obvious than those because of equipment. I do like Lightroom a lot because of convenience but if you want the best quality there is more and better on the market. Just on a specialised site like this there should be more attention for that imo.
p.s. in my experience the results with DXOlook very sharp indeed but as far as I can see that is more the result of intelligent sharpening technique and not the result of resolving power. I have not yet tried the very last version of DXO so I will see. It depends also on the camera you use. One converter can be better for this camera while the other can be better for the other. Even the word better is subjective because it also has to do with taste.
Max, I’d strongly recommend you try DxO Prime NR. Its certainly doing more than LR NR, as it takes a full 5 minutes to clean a typical 24MP image (Im using a 12 core i7 980X with 24GB fast Ram, 2 SSDs, so this is a lighting fast system, so it taking that long is really something, especially knowing it uses all 12 cores for that 5 minutes!). In comparison, LR takes seconds, and not unexpectedly, there’s a few orders of difference in the output!
You can get a trial of DxO so you can certainly try it for yourself.
Hello Shamb
Thanks for your tips. I have compared DXO 9 with C1 and as far as my eyes tell me I like the results from C1 bay far (and the interface as well). It was only a short test of course further tweaking is possible. Although I don’t care too much about noise (to be honest often I like pictures with some noise better than a clean and image, but I am from the film area where we bought high iso films just to get móre grain). Out of curiosity I will compare the noise reduction from DXO with C1. For convenience I prefer LR, for the ultimate results C1, maybe I should put DXO on my list for the best noise reduction. I will see.
Thanksfor sharing.
shamb, thank you for explaining your workflow.
I’m a heavy user of LR myself, have tried the others (DxO and C1) but sticked to and purchased LR. I’m an advanced user and upon importing from my camera to LR, I do the conversion to .DNG (and discard the original RAW files).
So, with those DNG files, I’m thinking if I could open these in DxO to do only the lens correction/NR work, then close DxO and run LR to keep working on. Is that possible or I should do the import/export thing anyway?
My point is that I want only a single .DNG file for each image instead of duplicates in LR and DxO.
Thanks!
On the subject: thanks for the article, Lola. These tips are very useful!
Hi Lola,
I am currently using CS6 but am considering LR5 as a standalone. It seems that I am not able to download it although the Adobe website leads to a BUY option for it. By clicking, I get redirected to the Taiwanese website, displayed in Chinese.
I have read of Adobe’s commitment to keep LR as a standalone product. Have I missed some new developments?
Thanks for your useful tips!
Roberto
Thanks for the article, Lola. I always like articles like this, even if they simply reinforce things I already know.
Few comments:
I’ve used LR ever since it came out. I really like it not only for its photo editing capabilities, but also for it organizational techniques. I add TAGs to photos like crazy! I currently use vers. 4.4 still on my desktop since ver 5 doesn’t work with Vista, which is what I have on my desktop. I do have version 5.x on my laptop, but I haven’t used it much since most of my work is done my my desktop (at least the permanent stuff).
1. I use the straightening tool fairly often. I try to get things right in the camera, but this tool certainly helps a lot when needed.
2. I don’t use the HSL tool too often because feel that that fundamentally changes the colors. As far as white balance, I use the WB tool which seems to work most of the time. One time when I use the HSL tool a lot is when I went to get more blue in the sky. I’ve been able to pull out quite a bit of blue some times when the sky seemingly is very cloudy and white. Another area I used it a lot is in a recent graduation I shot. The caps and gowns actually were a deep purple, but the pictures showed up as a dark blue. While this could be a calibration problem when my monitor, I was concerned that if I calibrated my desktop monitor that while it might look to be the right color on that monitor, it would not look to be the right color on other monitors, notably on my friends’ monitors whom I was taking these pictures for. As on my monitor (and my laptop), the original colors on his computer also showed a similar dark blue, compared to the true color. I found it interesting that the video at the graduation on the big screen also showed that dark blue and not the true purple color. So when I used the HSL sliders to make the colors purple on my monitor, my friends’ monitor also showed them to be purple.
3. I like using the spot removal tool, especially to take out dust spots, remove airplanes, small birds which are a distraction, etc. As mentioned, I still have v4.4 on my desktop, and I know the spot removal tool is better with v5.x Once I get a new PC, I’ll upgrade to V5.x on it.
4. I use the adjustment brush a lot for burning and dodging. I have an image I took maybe in 2006 of the Eastern Sierra Mountains, taken from the White Mountains across the Owens Valley, up from where the Ancient Bristlecone Pines are. The original shot is nice, but because of the bright sunset, the middle part of the picture, along a ridgeline, is a bit too dark. I used the adjustment brush to bright that, and I think it looks much better. I also use the adjustment brush to make other selective changes…..it’s very helpful.
5. I also use the graduated filter a lot to tone down, or even brighten, usually part of the sky, much as you would with an actual neutral density graduated filter in the field.
6. Lastly, I do like adding vignetting often to my images. Not a lot lot, but a little can help. And, I also usually add a little bit of sharpening to all pictures.
There is so much you can do with LR….I’m still learning every day, and can’t wait until I use v5.x more often. Thanks again for the article, Lola.
Great article, short and to the point. I tried all 5 tools, but had a little trouble with number 4. It did not work for me, or maybe I did not understand it. Will try again until I get it. Thanks again.