Why do some photos leave our jaws on the floor, while others are not even worth looking at? In bird photography, this is doubly true. I estimate that well over 90% of the bird photos that appear on my memory card are bad. It’s like gold mining. For every ton of rock, there are a few grains of precious metal. What are some of the common mistakes that lead to more bad photos than good ones? I’ll go through five of the big ones today.
Table of Contents
1. Unwanted Blur
This is probably the most common issue every bird photographer faces when capturing these usually small and devilishly fast creatures.
Lack of sharpness generally has three causes: incorrect focus, motion blur, and atmospheric distortion.
In terms of focus, that is always a combination of the photographer’s skill (practice makes perfect) and the camera’s capabilities. Even though modern mirrorless cameras can find the subject’s eye automatically and do a lot of the work for you, practice is still key. There is no one single autofocus mode that always works best – and I would bet on a seasoned photographer with an old camera over a newbie with a Nikon Z9 or Sony a1 any day.
Dealing with motion blur is easier. Just think about what you’re photographing. As a general rule, the smaller the bird, the faster the shutter speed. My baseline for birds in flight is to use 1/1000 second, and usually I go faster. But if the bird is perched and staying completely still, you may be able to get as slow as 1/15 second, so long as you’re using a tripod. To know what shutter speed to use, the answer again is to practice. (When in doubt, go for a faster speed than you expect, because you can handle noise in post-processing more easily than dealing with blurriness.)
Finally, are you sure you focused correctly and used a fast shutter speed, but your photos still aren’t sharp? Don’t go blaming your equipment just yet. Instead, take a look at the thermometer. If it’s hot outside, the air shimmers, making it almost impossible to capture a sharp photo. What’s the solution? Take photos early in the morning and late in the afternoon, when atmospheric distortion is usually less. Also, use shorter lenses, like a 400mm instead of an 800mm, and get closer to your subject – thereby reducing the atmosphere between you and the bird.
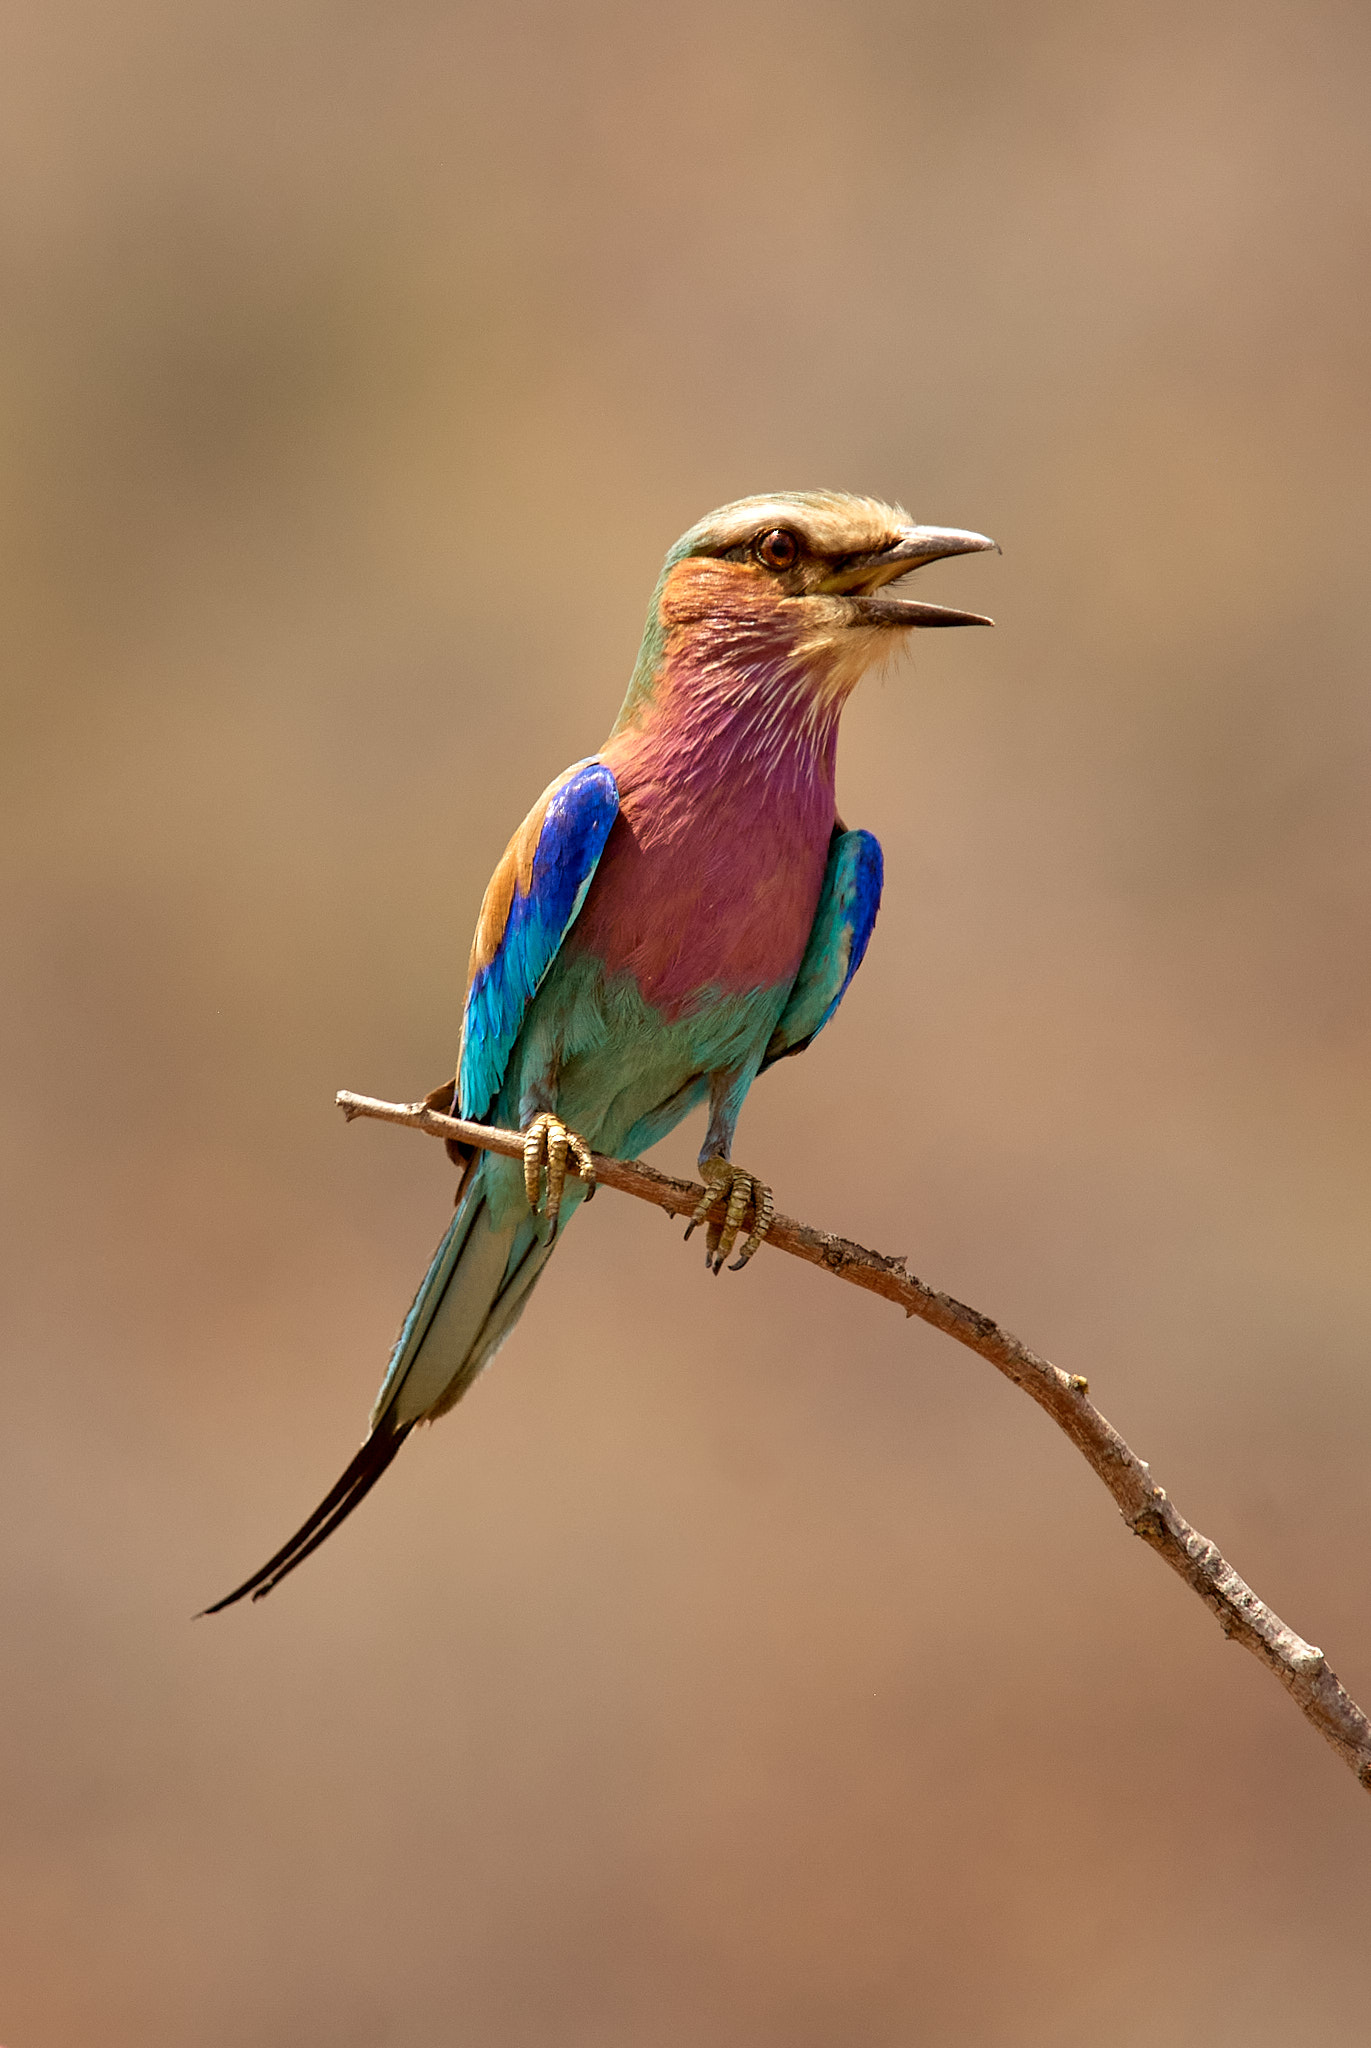
2. Wrong Posture and Wing Positions
When you photograph your family or a model in a studio, posing is one of the most important things. Why would it be any different with birds? Birds may not be able to smile or frown like a person does (although if your parrot can produce a wide grin from ear to ear, please capture it for me). But they do have different postures, gestures, body language, and wing positions.
Every bird, or at least every group of birds, has a typical posture and flying style. If you have a bird atlas with drawn illustrations, focus on this aspect in its images. Experts in the field can capture typical poses very accurately. An excellent example is Birds of Europe with illustrations by Killian Mullarney and Dan Zetterström. Try to capture the characteristic poses in your bird photographs.
Capturing the right wing position is another challenge. Not every wing position is aesthetically pleasing. Sometimes the wings cover the head, and sometimes they’re at such an angle to the camera that they’re barely visible. Other times, the position is just awkward, making even the healthiest bird look like it is in distress. This is where the camera’s burst mode comes in handy, allowing you to choose the variant that suits your taste.
However, even the 20 FPS on my Nikon Z9 is not a universal remedy. I often encounter difficulties when photographing hummingbirds in flight. Sometimes the frequency of their wing flaps coincides with the frequency of my frame rate. The result is a series of photos with almost identical (often incorrect) wing positions! If you are noticing this, you may want to change the frame rate slightly – say from 20 FPS to 15 FPS. Normally, however, the simple remedy is a combination of the delete key and patience.

3. Bad Backgrounds
Most novice bird photographers get too carried away with their feathered subjects and forget about the rest of the frame. What’s around and behind the bird is actually so important that it can make the difference between a great shot and a “deleteable” waste. Always perceive the photo as a whole. Keep in mind that when using a telephoto lens, even a slight change in your shooting position can dramatically affect the quality of the background. Sometimes shifting just a few inches can do the trick.
Do you want a nice, “clean” photo? By that, I mean a totally blurred background that makes the bird pop. This is definitely a classic look. You’ll increase this effect if: you’re closer to the bird, you’re using a longer lens, you’re using a wider aperture, and the background is far away behind the bird. That last factor is really overlooked – even a cheaper telephoto lens like Canon’s 600mm f/11 can give wildly blurred backgrounds as long as the background is far away.
However, contrary to popular belief, the background doesn’t have to be uniform! In fact, a totally blurred background can become quite boring over time if that’s all you ever shoot. Interesting effects can be achieved with light patches, color gradients, or the surrounding landscape, especially when using shorter lenses. If the goal of bird photography is to tell the story of your subject, the background can often play an important role.

4. Poor Perch
You might think I’m going overboard here. Is this article about birds or about sticks?! Well, it’s about everything. Just like the previous point where I focused on the background.
A few weeks ago, I came across an extremely tolerant hawk on the island of Corsica. It wasn’t afraid of me at all, so I was able to get within five meters of it. The background was distant, and the whole scene was illuminated by the last rays of the setting sun. Simply breathtaking! But in the end, I didn’t take a picture. Why not? Mainly because the hawk was perched on ugly power lines. (Well, okay, also because I left my telephoto lens at home in Prague, but that’s another story.)
I will often point my lens at the ideal perch and then wait and hope for the bird to land on it – sometimes without luck for several hours. It’s like a street photographer who stands in front of an interesting wall waiting for someone to walk by. Maybe no one will. But that’s better than taking a picture on an unappealing perch. If you happen to be shooting near a manmade bird feeder, you may have more control over the direction and perch that the bird lands on – if so, make use of it!

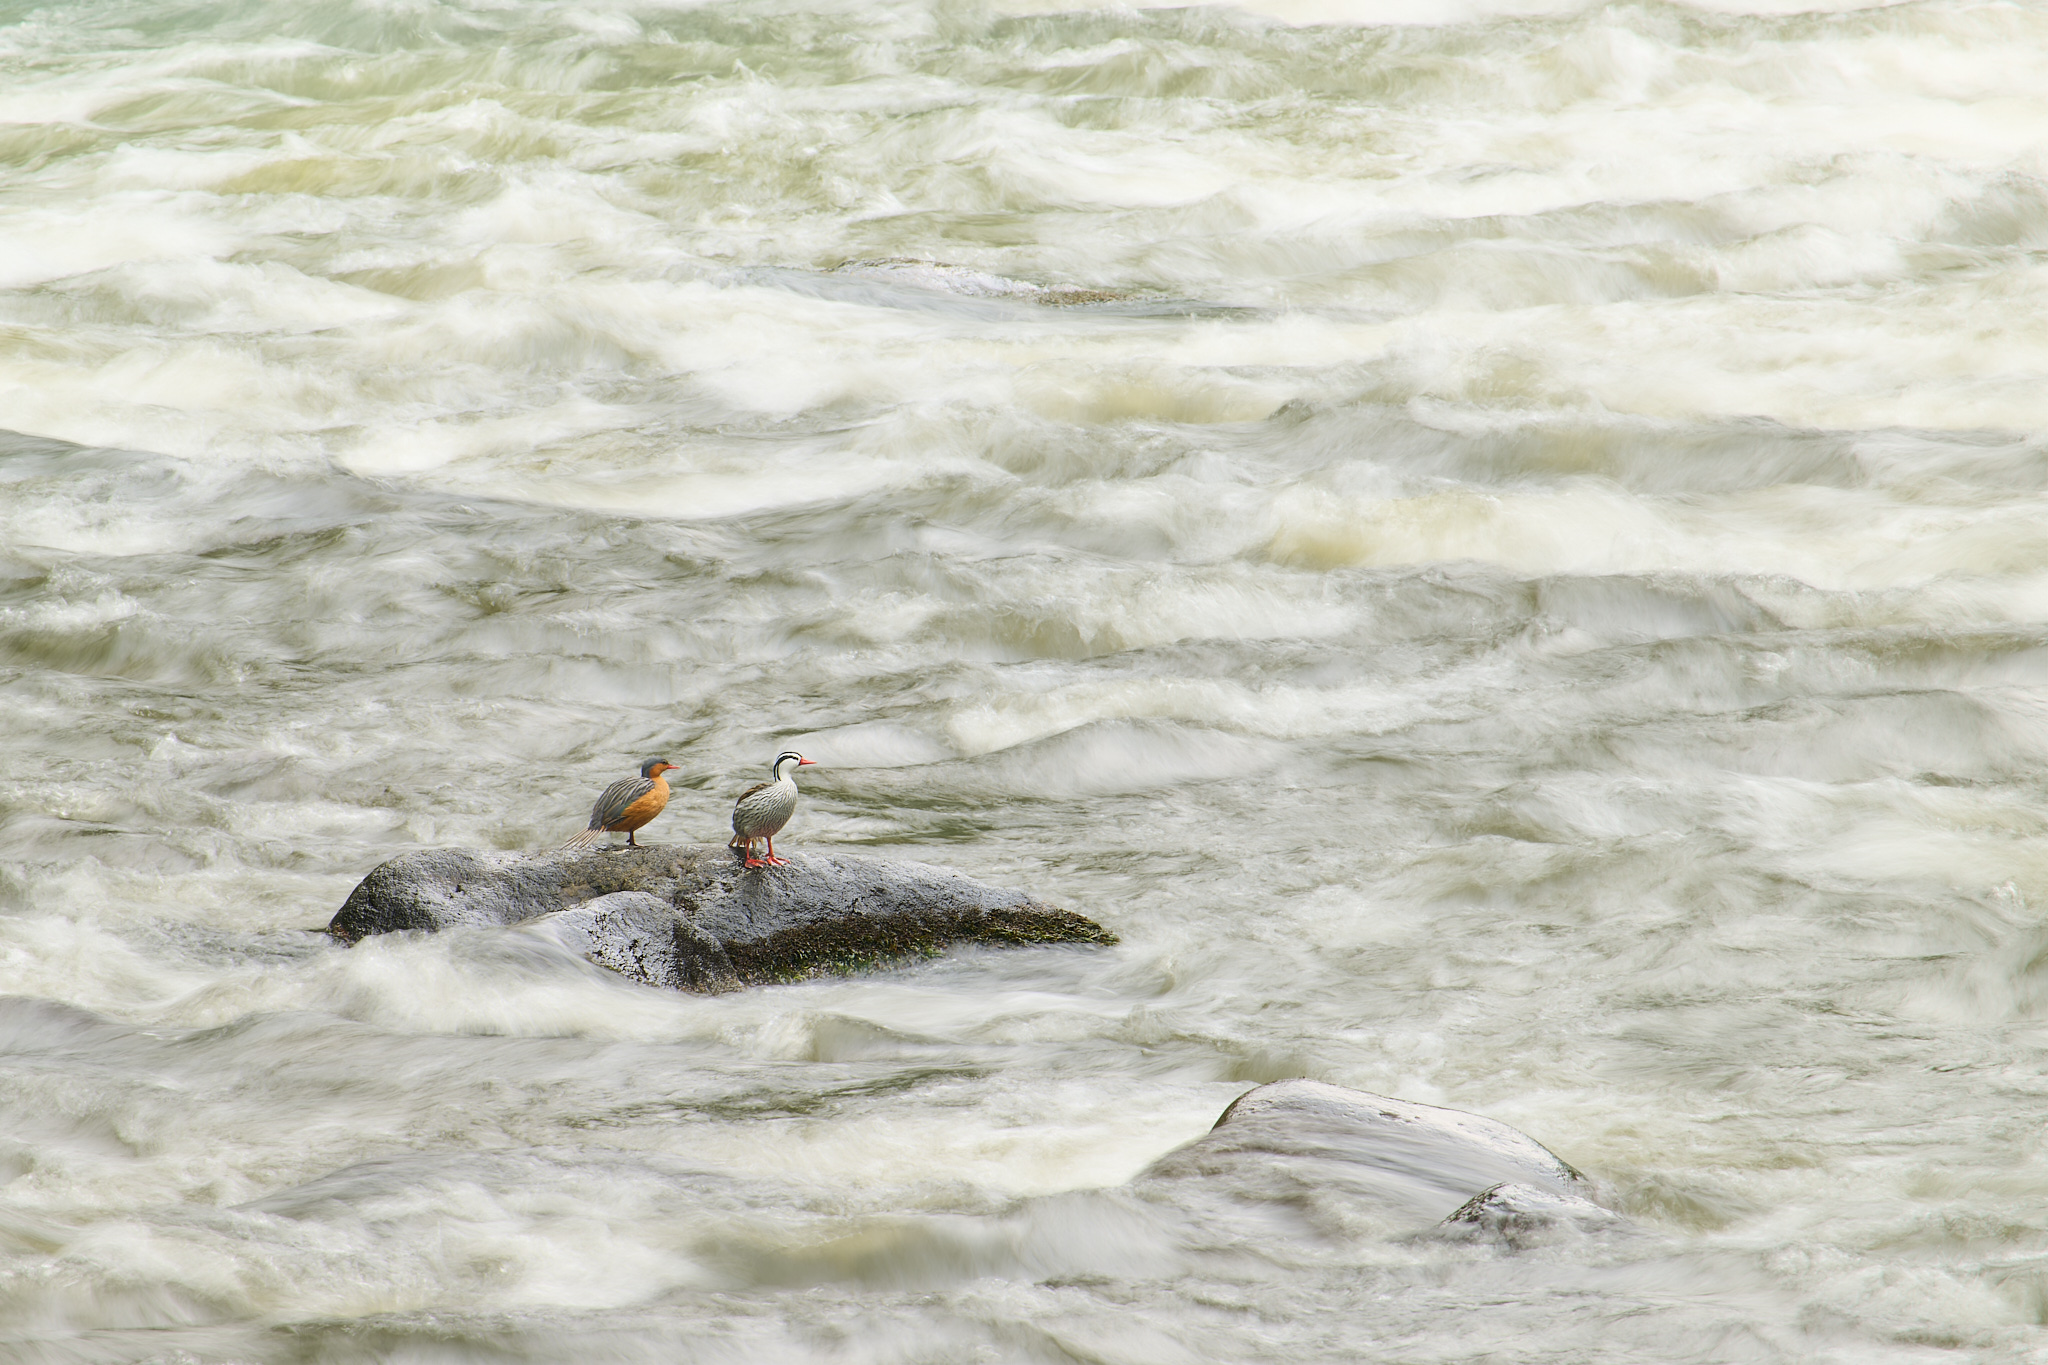
5. Excessive Distance to the Bird
Even in bird photography, Capa’s well-worn saying holds true: if your photos aren’t good enough, you’re not close enough. Of course, it’s not always necessary for the bird to fill the entire frame. But when it doesn’t, we need to give the viewer something else to contemplate – some other eye-catching element that justifies the millions of pixels in which the bird isn’t present. Placing the bird in the context of the surrounding landscape is one option, and another is “hiding” it in the frame if it is well-camouflaged.
Let’s get back to those compositions where the bird fills the frame. During my workshops, I’ve noticed an interesting phenomenon. Most novice photographers tend to shoot from too far away, even when there’s no objective reason to do so. The human brain and eye have an extraordinary ability to filter out the irrelevant. It’s like when you see a loved one in a crowd. Everyone around them seems to cease to exist. But the other people haven’t disappeared; you’ve just stopped noticing them.
In bird photography, that manifests as a tiny bird in your frame, which didn’t bother you when shooting, but now needs tons of cropping in post-production. That’s why I go back to what I said earlier: When composing your shot, look at the entire frame and consider what belongs in the photo and what’s unnecessary.
After you’ve taken the obligatory “first photo” when you notice a bird, start to approach closer if it allows you to do so. The bonus for a few extra feet of crawling through dust and mud is a better-composed photo. And that’s worth it, don’t you think?
What about you, what is your keeper rate as a bird photographer? Do any of these mistakes play an outsized role in your “bad” photos? Let me know your feedback in the comments below!
Libor,
I always enjoy your “Photography Life” reviews. I have a Nikon Z8 (firmware 2.0) and use “AF-C” back button focusing. I recently purchased Nikon Z 600mm f/6.3 S telephoto, and while bird subject detection (using 3D area mode and Auto-ISO) and say, a 10 FPS frame rate appears to track larger birds in-flight (e.g. Red-tailed and Cooper hawks), bird subject detection is confused by “small” birds (e.g., songbirds, sparrows, finches…) in “busy” backgrounds and is unable to track small birds that “instantly” take flight from say, a perched tree branch. With “small” birds, I have better (but small) success rate capturing flight from a stationary position (e.g., perched tree branch) using “wide-area Large mode (C1 or C2 and Auto-ISO)” coupled with say, 10 FPS – 20 FPS frame rate. I also have a Nikon Z 400mm f/4.5 S but purchased the Z 600mm f/6.3 to avoid using the TC-1.4x and Z 400mm exclusively, to get the longer reach of 560mm. In summary, capturing “small” birds in-flight is frustrating and (very) difficult for me as they take flight “instantly” and go in “any” direction from a perched position. Can you offer any recommendations (camera settings, etc…) and / or advise any BIF books / BIF guides on Nikon Z8 that would help me with “small” birds in-flight? I hope you will respond to my “frustration” as I was blaming my Z8’s bird subject detection and above cited telephoto lenses for not being able to track “small” BIF. Thank you, Respectfully, Steve M.
I’d rate bad backgrounds as the single worst – by the time I ever see any of them, the blurry ones have been culled anyway, but modern cameras are increasingly besting “blur”
A good background is really one of the cornerstones. I often find myself walking through the woods and thinking “this place has great branch and a beautiful background, something should be perched here…”.
Libor, this is another thoughtful read! Especially, I like how you make the compelling argument that bird photography is more than just “fill the frame.” You illustrate that nicely through your Puffin pic. Anyways, keep on sharing your knowledge and beautiful nature photographs. By the way, I also love exploring Colombia. Best, Max
Thank you Max for your kind comment. I wish you many adventures in your exploration of (not only) Colombia. By the way, would you share with me your top three places in Colombia? Thanks and have a nice day.
Nice article and thank you for the thoughtful presentation. I would, however, prefer to call these items factors or issues that will impact your photos.
I too like to photograph birds. However, I can only photograph them where they are and that does not always give the best backgrounds, etc. At many locations, it is not possible to zoom with your feet because the birds are across the water, or on private or restricted access property.
You may also be shooting from a blind or other fixed location, and that is all you have to work with (Sandhill Cranes from a blind in Kearney Nebraska, for example). Additionally, I have mobility and stamina limitations that mean I cannot alwys zoom with my feet.
So, what do I do? I look for the best opportunities when and where I am able to photograph. Sometimes the pieces come together and sometimes they do not. It also means that the overwhelming majority of my shots go to the trash bin. This year I captured over 9,000 shots in Kearney and kept fewer than 200. Given the situation, the light, the subjects and location constraints, I am ok with that ratio. I had an amazing experience.
Keep the articles coming.
“I had an amazing experience. And that’s the point, Joe. We’re not really bird photographers (that’s just a cover), we’re experience hunters. Enjoy your “hunts”. I wish you good light, good birds, good backgrounds and all the other things that make for good photos.
Taking a first shot and approaching closer has been my strategy pretty much from day one. And in all instances where I am successful and approaching closer, the closer shot is the better one. Of course, I am not counting instances where I like the environmental perspective or I think it will make the shot worse somehow.
Exactly Jason, this is my standard procedure unless I’m shooting from the hide. It’s a bit like a Napoleonic battle. Aim, fire, reload…move forward a few steps and aim, fire, reload again…and then just watch the silhouette of the bird disappear over the horizon.
Haha, nice analogy Libor!
Excellent article! In many situations, if you’re not scrapping 90% of your bird shots, you might not be challenging yourself enough.
Here are a few more lessons that I learned the hard way:
1. Forgetting to use continuous AF. The combination of shooting hand-held and long lenses equal a narrow and shifting focal plane that can result in out of focus images of even stationary small birds. If you have an older SLR, be sure to use your best focus point, the central one.
2. Fear of high ISO. Bird activity is often higher in poor lighting- around sunrise and sunset (not to mention during heavy overcast). Calibrate yourself ahead of time and then don’t be afraid to shoot very high ISOs when needed. Modern sensors, like the ones in the D500, Z9, and D850, can tolerate ISO 6400 surprisingly well when used in conjunction with excellent RAW noise reduction software, while the D5 still looks good at 25600.
3. Max out your frame rate and keep shooting. Never a popular choice with the purists. However, you never know what pose you might lose if you let off the shutter too soon. I lost a few certain keepers along the way until I stopped worrying about shutter count. Sure you might (or in my case did) end up with 120k frames after 3 days of shooting, but how much is the best possible ‘life’ shot worth to you?
4. Aiming the camera too high or too low. If a bird is directly above you, the best you’re likely to get is a documentary shot that proves you saw the bird and nothing more. Strive to get as close to eye level with the bird whenever you can, safely. Same rule applies for birds on the ground or in the water. The lower you can get, even if it’s just kneeling, the higher your likelihood of success.
That’s right, Lars. It’s like riding a bike: if you don’t fall off, you don’t get better. In the end, the delete button is a photographer’s best friend next to the shutter button.
1. If I had to switch between AF-S and AF-C, this would definitely be at the top of my list. Fortunately, the back button technique solves this problem 100%. As long as I hold AF-ON, I’m focusing. When I need AF-S, I just press it once.
2. I totally agree. High ISO is definitely nothing to panic about these days. Back in the days of the Nikon D300, I almost felt physical pain when I had to push the ISO down to 3200. Today, I set my limit at ISO 16000 and go even higher if necessary. I wasn’t too happy with the high ISO on the Nikon D5. I know it sounds strange, but I might have liked my D500 better in this respect.
3. I do the same thing. I just often use a lower frame rate than the maximum on my Z9. I usually shoot at 10 fps. Of course, if I’m shooting birds in flight, I’ll bump it up to 20 fps.
4. I like to shoot animals and people at eye level. This often results in me lying on the ground. But that’s part of the job and I’m not complaining. After all, how many people can do their job lying down? Well, I can think of a few professions…